February 2013Occasionally Crafty: February 2013

Thursday, February 28

Giveaway! St. Patrick's Day Goodie Box


THIS GIVEAWAY IS NOW CLOSED!  THANKS FOR ENTERING!

We have a lot to celebrate around here these days!  We have more people visiting our blog and interacting with us on social media than ever before, and it's a lot of fun!  So, we're taking a minute to thank you by offering you the chance to win a fun St. Patrick's Day Gift Basket from Holiday Gifts and Baskets!

There are going to be TWO lucky winners!  Each winner will get to choose their favorite gift basket from the four options below.  Each gift basket is valued at $50, so that's a great gift for a friend or a treat for yourself!

St. Patrick's Day Gift Baskets

The descriptions of the baskets are below, pictured vertically left to right

St. Patty's Day Snack Basket:  
  • This basket features sweet and savory snacks such as bagel chips, honey sweet peanuts, chocolate mints, pretzel sticks, lemon cookies, and Orchard Fruit bon bons, 20 flavors Jelly Belly Jelly Beans, and a tropical ice tea mix.   This cute wicker basket is topped off with a festive shamrock ribbon.
Irish Goodies Gourmet Basket
  • This gold and green-themed basket is perfect for St. Patrick's Day.  Included are lots of treats like Irish Cream Coffee, two Ghirardelli chocolate bars, Gourmet Snack Mix, Chocolate covered shortberad cookies, roasted almonds, and crunchy caramel corn.  Yum!
St. Patrick's Day Pot of Gold Basket:
  • Inside a black plastic bucket, you'll find a St. Patrick's Day plush teddy bear, chocolate chip cookies, snickerdoodle cookies, two packets of Twinning's Irish tea, Mocha Roca butter-crunch toffee, mild chocolate clairs, two St. Patrick's Day candy fun packs, and green milk chocolate coins!  I'd almost rather find this than a pot of gold at the end of a rainbow.  Almost :)
St. Patrick's Day Gourmet Gift
  • This gift is a little bit sweet, a little bit savory, and perfect for St. Patrick's Day.  The green wicker basket holds chocolate chip cookies, three pepper blend water crackers, Mediterranean sun dried apricots, brie cheese spread, cheese knife, and a beef salami stick as well as a candy fun pack and some green chocolate coins.
So, how can you win one of these yummy baskets?  You can enter using any of the Rafflecopter entries below.  Any of the options are acceptable entries, and entries per person are limited to the number indicated in the contest form.  Entries will be reviewed and duplicates will be removed.

There is only one mandatory entry:  leave a comment telling me your favorite basket from Holiday Gifts and Baskets.  Once you do that, choose which optional entries you'd like to complete.  Remember- the more you do, the more chances you have to win.  And we are partnering with some fun bloggers to bring this giveaway to you, so maybe you'll find some great new blogs to read!

Now for the legal stuff:
NOTE - You must complete the specified entry task in order to be eligible to win the contest.  If you hit the green entry button without completing the task, your entry will be thrown out (disqualified from winning the prize).
Contest is open to all residents of the 48 Contiguous States and only to those 18 or older!
Winners will be chosen randomly.  The two winners will receive their choice of a St. Patrick's Day gift basket valued at up to $50 from the 4 options shown above.
If you are chosen, you will be notified via the e-mail. Winners must respond within three days of being contacted. If you do not respond within that period, another winner will be chosen.
The full list of rules can be found here .
Sweepstakes ends at midnight EST on March 10, 2013. The sweepstakes winners will be announced by March 17, 2013.
a Rafflecopter giveaway

Connect with us! You can find us here:
Image Map

Wednesday, February 27

Make It Work #2

Hey everyone! It's the end of the month, which means it's time for another Make it Work moment here at Occasionally Crafty. If you missed it last month, the idea is to upcycle, recycle or craft using those leftovers that are building up in your house. Make sure you are following us on Facebook, and you can join in the fun. Head over to our page and share a link to a make it work craft of yours and we'll share them all throughout the day!

Laura:  
The craft I decided to share with you today is something all of us with young kids could use. Do your kids have a hard time holding playing cards? Well all you need is a chip clip: 

Some cardstock, which all came from my scraps, and I used a little white paper to make a template.


Something to adhere the paper to the chip clip- I used my trusty dusty Xyron sticker maker, I love that thing.

And something to put their names on it-- I used sticker letters.


Add some playing cards and you have the perfect tool to help your kids hold those slippery cards while you play Go Fish, Old Maid, or whatever you love to play!


Valerie:
I decided to use this opportunity to finish one of those projects in my half-finished sewing pile.  See, last summer, we bought our daughter this cute denim skirt from Old Navy.   As soon as we got it home, I realized that it was a bit shorter on my long-legged daughter than I was comfortable with.  Modesty is important to me, both for myself and my family, so we decided to keep the skirt and pair it with some cute leggings.
Well, this year- it still fits great (with room to grow) around the waist, but is, of course, even shorter!  I decided to "make it work" by adding a sweet little ruffle to the bottom of the skirt.  By doing this, I've given us at least another year of use out of this skirt.
And yeah, I'm kind of a cheapskate when it comes to clothes.  I can't help it....
By the way- this would also be a cute way to upcycle a pair of too-short jeans....
This post is already getting long, so I'm not going to give a full tutorial.  I think I'll save that for another day.  But I promise it's really easy to do.  I used leftover fabric (that my sister mailed me from Korea!), a skirt that obviously we already had, and that's it.  It was also quick- about 30 minutes from start to finish.  Just in case you're dying to try it right now- a few quick steps in summary:
1.  Cut your fabric 1 1/2 times the circumference of the skirt bottom, with the width as long as you want it to go.  Mine was about 7 inches wide.
2.  Hem the long sides.
3.  Sew it into a tube, right sides together.
4.  Turn it right side out and sew a basting stitch at the top to gather the fabric into a ruffle.  Pull gathers until it fits around the outside of the skirt.
5. Pin the ruffled tube of the fabric on the outside of the skirt, then sew in place.
I kind of want one for myself.  Would that be weird? :)
Now, head on over to Facebook and show us what you've got!
Connect with us! You can find us here:
Image Map

Monday, February 25

Making My Own- Fruit Snacks

I really hope you've been enjoying (and trying) the recipes from the Making My Own series, because I've loved doing it. I keep finding more and more things to share with you! Today is one I found over at the Six Sisters blog, which if you've never visited, you must.
One thing my kids go through like water is fruit snacks. I feel like they have no nutritional value, cost a lot of money, and still leave them hungry. Unfortunately for my wallet, of all the things I've weaned them off of, fruit snacks has never lasted long. So when I found this recipe for making your own fruit snacks using Jell-O, over at the Six Sisters blog, I had to give it a try.
So here are the ingredients + water. Follow the link above for specific directions.


I poured the finished liquid into these silicone ice cube trays I found in the dollar section at Target.

One packet of jello filled up 19 of these shapes, but here's a scale picture to show you  just how large these were.

The verdict? The kids liked them, and I thought they were pretty good. I like how you could pick any flavor and turn it into a snack. It was also very easy and they set up really quickly. They are a little sticky so I just dusted them with a little corn starch and stuck them in a plastic bag for storage.


However... I'm not sure how cost effective they are. Knox is a bit spendy. You can find Jell-o on sale or buy a generic brand, but I still think I can buy the ready made brand for less. And since these aren't really any healthier than those, I'm not sure I'll make them again. Maybe if I can find a mold that make smaller portions too. You can also buy sugar-free jell-o and make it the exact same way.
I'm still so glad I tried this, and I'll be keeping my eye out for another recipe that keeps the cost down!
Photobucket
Connect with us! You can find us here:
Image Map

Friday, February 22

Coin display- Cherishing Your Memories


Most of you know that our family spent two years in Seoul, South Korea for our assignment with the military. It certainly was an interesting few years for us with some very high highs and very low lows. We've been back in the states for nearly 7 months now and some of those lows are fading from memory, and the awesome things we experienced are staying.

Before we left we exchanged our Korean money for American money, but I held onto a cup of Korean coins. I've always loved looking at foreign coins, and these were some that we actually used and became familiar with. I had to find a way to preserve and display them since my cup wasn't very pretty :)

I saw on pinterest someone who put their coins in a picture frame. I thought it was a great starting point, but i didn't want to just stick them in a frame and be done with it. So instead I took all of these:
I saved brochures and maps from everything we did in Korea

And this picture frame (that's been following me from house to house):

And carefully picked out logos, titles, tickets, pictures, memories-- and arranged it around the edge of the frame. I used glue stick to hold it all in place and then put a few layers of Mod Podge (matte) to seal it all together.  (This was the longest step by the way, but my favorite part is the map on the left, because it shows where we lived!)

Now it was time to add the coins. I used some leftover map for the background and hot glued the coins to it. Since there were only a few varieties of coins, I had to set my OCD at bay and let some of the same coins touch :)


I LOVE how it turned out. The kids love looking at all the pictures and remembering all the places they went and the adventures they had. Now it sits on top of my piano where I display quite a few of my Korean treasures.


I could see something like this working for those smashed pennies you can get at all the tourist traps around America, and even from a vacation you took! Don't forget to do something with all those memories you create :)


Photobucket
Connect with us! You can find us here:


Image Map

Wednesday, February 20

Washi Tape Button Storage- Crafternize It!

Every crafter needs a good supply of buttons.  And while I'm no button hoarder, I do have myself a good supply.  Before I started on this project, I had three plastic containers and two plastic baggies full of buttons. Those take up a lot of space- and space is at a premium in  my office/craft room/guest room.  So, I knew it was time to Crafternize!


I bought this craft storage container at the dollar store. 


 But I couldn't just throw buttons in there and call it good.  Of course, I had to make it cute.  So I broke out the washi tape, picked a few colors I liked and got to work.


It couldn't be easier.  Simply tear strips to fit and press them firmly down on the outside of the box.  I wrapped the ends around the sides of the lid and even a little onto the back side.

I finished with a little label cut out with my Silhouette.


Now, my buttons are all in one place and easy to grab when I need a specific color.


If you're looking for some fun projects to do with buttons, try this cute Shamrock Button Shirt for St. Patrick's Day


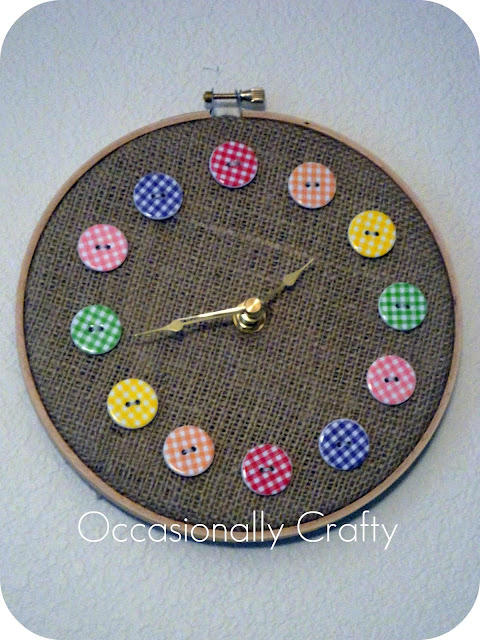
This easy Button Clock


Or even this Pleated Headband


They are also great for embellishing any project, like my Burlap Plaque or my 4th of July Blocks


I'm linking this up to some parties this week!  Check them out here


Connect with us! You can find us here:
Image Map

Monday, February 18

Making My Own- Microwave Popcorn


This is one of those, why didn't I think of that? sort of posts. My mom mentioned an article she saw saying how you could do microwave popcorn out of a paper bag instead using the store-bought stuff. *ding* Did she say it was something I could make on my own? I had to try it!

I got home and pulled out my ingredients.


Then I stuck a half cup of popcorn kernels in a paper bag, folded the top over a few times and stuck it in my microwave. A few bad things happened:  One- it burned, and Two- the bag burst open at the bottom! Ack!


So I tried again. This time I put 1/4 cup of kernels in the bag, folded it over a few times, and when I put the bag in the microwave I stood it up, instead of laying it down. Turned out perfect this time! Just remember to pull the popcorn out when there's about 1 second between pops.


This is so much cheaper and healthier than buying the store bought popcorn bags. No added dyes, preservatives, oil, milk ingredients. Just popcorn kernels and your bag! Now once it is popped you can add some melted butter, salt, parmesan, garlic, cinnamon, sugar, whatever floats your boat!  When you're done eating, it can still be recycled, so it's green for your wallet and the environment!

  Photobucket
Connect with us! You can find us here:
Image Map

Friday, February 15

Easy Glitter Clutch


Photobucket
I'm still catching up on my SYTYC posts.  Thanks for voting- I made it into week 7!  Come back Monday to vote on our new projects!
This is the project I made for the Glitter/Metallic/Shine theme-- my "Mom's Night Out" Glitter Clutch.


I wanted something I would really use, with just a touch of extra glitz and glamour.


Let's be honest, when you're a mom of young children, you don't get to carry around cute little bags very often.  So, when I'm out with friends or with my husband, I just want the bare necessities and that's it!  This envelop clutch has just enough room for what every woman needs:  her phone, a credit/debit card, and some extra lip gloss.  You could throw in some gum or mints and still have plenty of space.


This clutch is fully lined and made out of a sturdy canvas.  The glitz and glitter is added with glitter tape and fabric glue, plus some sequin trim to match the lining of the clutch.
Her's a quick tutorial on how to make one of your own.  I promise it's super easy!  Adding little pockets is optional- but I am just going to give you the very basics here.

Supplies needed:
1/4 yard sturdy outer fabric
14 yard inner lining
Thread/Scissors/etc.
Sequin Trim- about 1 foot
1 roll glitter tape

I have to apologize in advance for some of my photos- I was on a time crunch to finish my project, so I took pictures in the terrible light of my office/craft room at night.

**To draft your pattern- determine how long you want your clutch to be when completed.  Multiply that by two, and add four inches for your flap, then another half inch for seam allowance.  Width should be about the size of a standard piece of paper, so around 11 inches.

To cut the flap, measure in one inch from each long side and mark a dot, then draw a straight line from where your flap begins (remember- it was 4 inches from the top of your paper!) on the edge to the dot.  Trim your paper pattern along the line.**

If that sounds confusing, just look at my paper for an example!  Sometimes it's easier to see than explain.

1.  Use the pattern to cut out 1 piece of your outer fabric and one piece of your lining fabric.


2.  Use a 1/2 inch seam.  Place fabric right sides together and sew, leaving about 4 inches open for turning.  Make sure to backstitch at the beginning and the end.


3.  Turn right side out, trim seams, and press flat.


4.  Topstitch close to the edge of the fabric for a finished look, making sure to catch the fabric around the hole you left for turning.


5.  Fold your fabric piece up about a half inch under where the flap section begins, and press in place.

6.  Secure sides by sewing two parallel seams from the bottom to the edge of the fabric on each side of the clutch.

7.  Fold the flap down in place and press.


8.  Now, I guess I didn't take pictures of this, but you can add a closure by following directions for a snap, magnetic snap, or even velcro.  I used velcro, then added a cute decorative button on the top of the flap.

9.  To embellish, simply spread fabric glue where you want to add your sequin trim.  The glitter tape has a nice strong adhesive, so you can just tape it to your fabric.  It's a cheap and easy way to add a little bling and comes in all different colors!  You can find it a Michael's or Hobby Lobby in the scrapbook section, or even buy it online!

 Enjoy your clutch! If you make one, share it on our Facebook page- we'd love to see!


 I am linking these up this week- come party with me!

Visit thecsiproject.com
Connect with us! You can find us here:
Image Map