December 2013Occasionally Crafty: December 2013

Monday, December 30

Top Ten of 2013

2013 was a great year for us, both personally and as blog authors.  We've really enjoyed creating for our homes and families and sharing these projects with you.  So, just in case you missed anything, or if you are curious, we're here to share our Top Ten posts of 2013!  Counting down, just like New Year's Eve.....


This was one of my entries for So You Think You're Crafty- and my little boy still loves it!  (Although the chair was broken when my other son decided it would be a great thing to jump off of.  Boo.)


I used a printable to create these helpful chore charts on clipboards- and we're still using them, half a school year later!


Laura has several of her "Making my Own" series posts in this end-of-year roundup.  We're obviously all in need of a little thriftiness in our lives.


7.  HOME Stenciled Plaque
This is another SYTYC entry, and it still hangs proudly in my home, almost a year later.  I love it and get lots of comments on it.


I put together this frugal, yet super fun party for my 6 year old.  This was definitely one of our most popular parties to date!


I love that Melissa from Melly Sews asked me to be a part of this series, as I am no great seamstress.  I reviewed a popular pattern and made a really cute dress for my daughter along the way!


Another thrifty entry from Laura was not only one of our most viewed, but one of our most pinned posts!


A cute addition to any playroom, bedroom, or even classroom, this project was also featured over at the Silhouette blog!  That made our year!


Ruler Growth Charts are all the rage, but Laura's extra-large vinyl and cute phrase on the side adds her own twist to this easy-to-make project.


And the most-viewed post is...... (drumroll, please!)


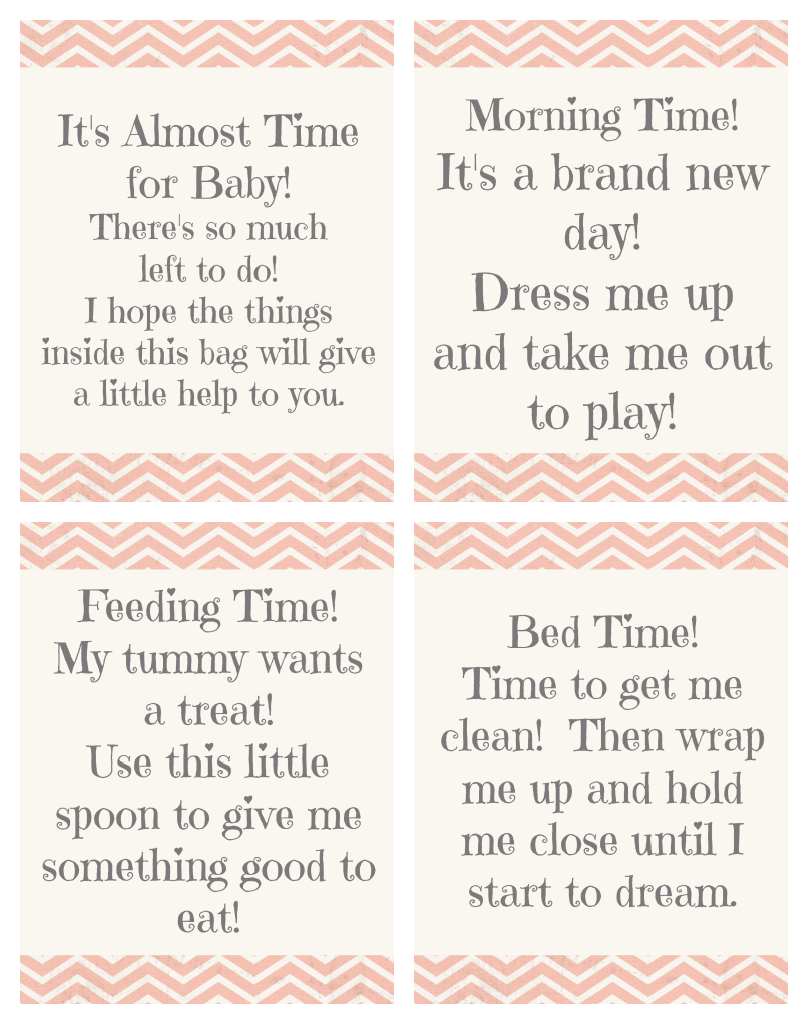
I put my own spin on a gift idea I found, and made up some printable tags for you to use for any baby's shower (boy and girl version).  This gift has always been a huge hit!


Well, there you have it!  Thank you so much for reading our blog this year.  We made a tough decision this year to take a blogging break and spend time with our families to refocus and rebalance.  We were worried no one would be here when we came back- but we were wrong!  More people than ever our reading our little blog, and we thank you, THANK YOU, so much!
See you in the New Year!

Connect with us! You can find us here:
Image Map

Monday, December 23

DIY Christmas Mickey or Minnie Mouse Ears!

Something you may not know about Valerie and I, is that each Christmas we trade doing a 12 days of Christmas for our kids. This year it was my turn to do the 12 days for her kids. I put together a fun nativity themed collection for them, and then at the end I wanted to have a present for each of her kids. Since they are going to Disneyland the few days before Christmas, Valerie suggested maybe finding something they could use on the vacation. I thought about shirts, autograph books, and all kinds of fun things. 

Then, I stumbled across this great tutorial from Suburban Mom, on how to make your own Mickey Mouse ears. It seemed easy enough, and I thought the kids would love to have a Christmas version of ears to wear at the park! Be sure to watch her tutorial for full instructions, but I wanted to show you the changes I made to make them all Christmas-y!

First change was to use green felt instead of black. Easy!


 Then I added a little trim around the ears to bring in some shimmer and shine.
I used a red and white polka dot bow instead of pink.


Lastly I added some jingle bells! It's not Christmas without a little jingle!

They turned out so cute! I hope her kids enjoy them and get to wear them while having a blast in Disneyland!
Quick note- we'll be away from the blog for the next little while so we can enjoy the holidays with our families.  We hope you all have a Merry Christmas and/or a Happy New Year!

Planning a Disneyland trip?  We recommend booking through Get Away Today!  We've used them several times and it's been smooth sailing every time!  Plus they usually have a great sale going on- really hard to find on Disneyland tickets!  Use code OCRAFTY to save an extra $10 off any 2-night or longer Southern California package (hotel and 2 ticket minimum).  
Connect with us! You can find us here:
Image Map

Friday, December 20

How to Survive Disneyland During the Busiest Times

This post contains affiliate links for Get Away Today.  I've booked with them twice now and had a perfect, hassle-free experience both times.  If you're headed to Disneyland or anywhere else in Southern California, check out their latest deals first!


As you're reading this, we're headed to Disneyland, the Happiest Place on Earth!  It's our second time going at Christmas time, and our kids are all finally old enough to ride most of the rides!
This is our last trip a few years ago.  No more stroller this year!
You might be thinking- why in the world would you go to Disneyland on Christmas Break?  Isn't it insanely busy?  Well, YES, it is!  Here's why we're going now:

My daughter missed a week of second grade when she broke her arm and had surgery, and when I got her make-up work, she had (no joke!) almost 100 pages of work to complete!  Her school gives credit for every dinky little worksheet and practice exercise they do during school as well as homework.  It was a nightmare trying to get that done- so we don't pull our kids out of school.  It's just not worth it.

So if you're like me and can't pull your kids out of school for whatever reason, you need some help surviving the crush at Disneyland- so read on to find what I hope are some helpful tips!

1.  Plan, Plan, Plan

     Maybe you're not the planning type.  But if you're visiting the Parks during peak times, you have to be or you'll only ride a fraction of the rides you want.  Sit down with your family and decide what you want to do each day.  Then make a plan.  Note which rides have Fastpasses so you can get those throughout the day.  Some people like to move from land to land, riding all the rides in each land first.  Others, like us, zig zag all over the park to take advantage of lower wait times.  Decide how you want to move and try to stick to it.  If you need help making a plan, check out TouringPlans.com or some of the other helpful sites out there.
Here's what we rode/saw over a three day stretch- just for an example:

Day One: 
Star Tours
Toy Story Astro Blasters
Astro Orbiters
Matterhorn
Peter Pan
Splash Mountain
Winnie the Pooh
Haunted Mansion
Big Thunder Mountain
Jedi Training Academy
Autopia
Finding Nemo Submarine
Pirates of the Caribbean

Day Two:
Space Mountain (DL)
It's a Small World (Holiday edition) (DL)
Soarin' Over California
King Triton's Carousel
Ariel's Undersea Adventure
Grizzly River Run
Jumpin' Jellyfish
Silly Symphony Swings
Golden Zephyr
California Screamin'
Tower of Terror
Heimlich's Chew Chew Train
Flik's Flyers
Francis' Ladybug Boogie
Tuck and Roll's Drive 'Em Buggies
Redwood Creek Challenge Trail
Disney Jr. Live on Stage
Goofy's Sky School
Indiana Jones
World of Color Show

Day Three:
Star Tours (again)
Toy Story Astro Blasters (again)
Astro Orbiters (again)
The Carousel
Dumbo
Casey Jr. Train
The Teacups
Storybook Boat
Snow White's Scary Adventures
Sleeping Beauty Castle Walkthrough
Pinocchio's Daring Journey
Toy Storia Mania (CA)
Ferris Wheel (CA)
Monsters Inc- Mike and Sully to the Rescue (CA)
Toontown- Goofy's House, Donald's Boat, Chip and Dale's Treehouse
Roger Rabbit's Car-Toon Spin
Gadget's Go Coaster
Jungle Cruise
Tarzan's Treehouse
Enchanted Tiki Room
The Magic, The Memories, and You Parade


 2.  Buy a Park-hopper

     We think it's worth the extra money to be able to go back and forth between parks.  We usually do spend most of the first two days at a single park, and then on the third day we do favorite rides again, ride some of the smaller rides like the Carousel, and meet characters.  But, with a Park-hopper, you can take advantage of low wait times at both parks!  Last time we went, we ran back to Disneyland in the evening to ride Indiana Jones during a low-wait time, then went back to California Adventure for the World of Color show. 

3.  Get there Early

     If you're picking up tickets at Disneyland, try to get there the night before and get your tickets at the windows.  There is usually no line, and then you won't have to navigate that extra line early in the morning.  You can just show up and be ready when the park opens.

      Also, they let you in to the park up Main Street before the actual opening time.  So if you get there early enough, you can be all the way at the front of the line by the ropes, so you can be one of the first in line when they officially open the rides.  We did Space Mountain this way, and got Fastpasses for the busy rides like Cars and Toy Story Mania this way as well.  So, for an 8:00 start time, we got to the park by 7:20.

4.  Use Fastpasses as much as possible


     As noted earlier, some rides have Fastpasses.  Take your ticket to the Fastpass Kiosk, and when you scan it you'll receive a pass to come back during a specific, later, time.  Then when you come back, you get to go through a much shorter line.  Some tips for using the Fastpass effectively:
     * You can only have one Fastpass at a time- you can't get a new one until you redeem the one you have, or the start time on your Fastpass.
     * Send one person with everybody's tickets to get the Fastpass.  That way Grandma and/or your little kids don't have to run to the Kiosk every time.
     * You absolutely MUST get a Fastpass for Radiator Springs Racers immediately- and you'll still probably have a return time in the afternoon.  One Fastpasses are out, and they do run out, you'll be stuck waiting in the regular line.  Boo.

5.  Be Ready to Entertain the Kids In Line

    Disneyland really does a great job of providing distractions for you as you're waiting.  Older kids should easily be entertained as you go through the lines.  But your younger children might not have the patience they will need.  Some ideas to help:
     * Pack a little bag with snacks that they can eat- things like trail mix, cereal, etc. that they have to eat a little at a time.  (Yes, you can bring your own snacks in as long as you're not packing in a huge cooler)
     *  Visit a Disney Store or outlet before coming to the parks and pick up a few of those light-up/ spinning toys.  It's much cheaper to buy outside of the parks, and you might be surprised how much it can entertain your child!
     *  Play "I Spy"- there are so many fun things to look at in line, so why not draw your children's attention to them with a game?  My (then) three year old loved this game!
     *  If you have a smartphone, there are some great Disney apps you can use to entertain your child!  Or you could just stick a giant lollipop in their mouths! ;)


5.  If You want to Watch the Shows......

     My husband has little patience for sitting in a park that we paid a lot of money for and watching shows.  So we don't do it too often.  But if you do want to see the fireworks or any other big show that draws a crowd, the best time to show up for seats is right as the crowd from the previous show is leaving.  Just fight the crowd coming out and and grab their seats.  You'll have to wait longer, but you'll have a great seat!  This works great for the Jedi Academy too.

6.  Get Better Reactions from Characters by Interacting With Them

      During busy times, more characters are out and about, but of course there are way more people waiting to see them!  Everyone wants to take pictures with or hug the characters.  But, if you really want a great experience, then remind your child to ask them questions about the characters or their story.  My kids are really hoping to find Captain Hook so they can tease him about Tick Tock Crock.  (Though, contrary to Internet information, the Toy Story toys will not fall to the ground if you shout "Andy's coming!"   Apparently they used to, but can't anymore.)

A good way to meet a bunch of characters without waiting in line is by shelling out extra money for a character dining experience.  We usually do it for breakfast on the day we go home, so we're not using up park time.  It's awesome and the kids love seeing their favorites all in one place!

7.  Be Patient and Have Fun

     Remember, you came here to have an amazing experience with your loved ones.  At least 75% of that is dependent upon your attitude.  So, resist the urge to grumble and fuss about how busy it is- you knew it would be.  So, try to be patient, treat others with respect, and enjoy the magic of Disneyland that is all around you.  
I'm probably standing in a busy line somewhere right now, so this is a great reminder for me too!  Merry Christmas and Happy Holidays to all of you!
Updated:  Use Promo Code "OCRAFTY" to get an extra $10 off any 2 night Southern California Package (hotel and 2-ticket minimum) from Get Away Today!
Connect with us! You can find us here:
Image Map

Wednesday, December 18

Christmas Specimen Art

I hope you are all having a wonderful Holiday season. I've had so much fun making specimen art all year long. After Christmas I'll have one last one to do, but that's for another day. 
Today I present my favorite specimen art so far, Christmas!

This one sits atop my piano and wide array of Santa decorations. It's a perfect fit! Ho Ho Ho!

Connect with us! You can find us here:
Image Map

Tuesday, December 17

Relief Society Christmas Dinner

Affiliate links may follow

In my church, we have an amazing group of women called the Relief Society.  We meet together on Sundays for spiritual instruction, and throughout the week we help members of our congregation and community through service projects, bringing meals to new moms and those who are recovering from illness, and the like.  We also get to do fun monthly activities to help us get to know each other and learn new things.

Every year we have a Christmas dinner and program.  This is the first year I've been in charge of the program, though I had a great committee of women to help me carry it out. We decided our theme would be "The Best Gifts". So, all our decor centered around presents.

We used Christmas-themed patterned paper for the place settings, and a gift tower was the centerpiece for each table.


At the front of the room, we had a few Christmas trees, along with some gaily wrapped presents (wrapping paper here).


I put together this fun oversized print, which is now displayed in my home.  It's simple to make:
I downloaded this printable from Tips from a Typical Mom and had it printed at 16x20.

Then I used glitter wrapping paper from Walmart, cut it to size, and taped it to a foam display board.


Finally, I attached the photo print with thumbtacks in the corner.  It was a great display for the dinner, and now it looks awesome in front of my fireplace!

For dinner, we had soup bowls with soups provided by some of the women in the ward, delicious tossed salad, and Chocolate Pudding Parfaits for dessert (layers of crushed oreo, cubed pound cake, peppermint marshmallows and white or milk chocolate pudding, topped with whipped cream!) 

Here's how we decorated the food table (obviously before the food was added!)


For our program, we showed three short videos reminding us that Jesus Christ is the best gift we have been given.  Since we have been given such an amazing gift, we need to give the best gifts we can in return, and we do that through serving others, and by giving our hearts over to God.  You can check out the videos here, here, and here.  They may bring a tear to your eye!

We finished with a musical number- four women sang "In the Bleak Midwinter" and it was just beautiful!

We sent the sisters home with a tile with vinyl reminding them that Christ is "The Best Gift of All".  


This is a really frugal gift if you're on a tight budget- the tiles only cost about 15 cents each and I cut all the vinyl on my Silhouette.  We had leftover black vinyl from our Craft Night, so this was super cheap!

I came away from the night with a desire to be more Christ-centered this Christmas, and to try not to let the hustle and bustle of the holidays weigh me down.  I'm thankful for the opportunity I had to put this night together, and I hope everyone had a great time!


Image Map

Thursday, December 12

Three Things Thursday #14- Some of my Christmas Favorites


Three of my Favorite Christmas Pinspirations!

1. Cookie Cutter Fudge gifts- Still wondering what to do for teacher gifts? We did these last year for the kid's teachers. They were easy, the kids had fun making them, and the teachers loved them! (I sampled the fudge and it was delicious!) Head over to Tip Junkie to get all the details!


2. Cinnamon Applesauce Ornaments- We had a few of these on our tree growing up. I love how they smell, and they are a great craft to do with the kids. This tutorial from Martha Stewart suggests a bird shape, but pull out your cookie cutters and shape away!


3. Paper Strip Christmas Tree- If you're anything like me, you have tons of scrap paper, and kids who ask you to do crafts every day. I love giving them a craft that will give them room to be creative, but will still look awesome pretty much however they do it. These paper strip Christmastrees from Whatever are easy and fun to create! You could even just do a bunch of strips on a piece of paper, glue them down, and then cut out your shape, creating a mosiac and clean look! 


Gotta find ways to keep busy once the kids are out of school!


Connect with us! You can find us here:
Image Map

Wednesday, December 11

Make Your Party Rock with Supplies from One Way Novelties

* When we write a sponsored post, it's because we think a product or company
would interest YOU.  Today's post is about one of those companies.
If you are Canadian, you'll especially want to check out this local company!  So you know, we have
been compensated for writing a post reviewing the company, but our opinions are entirely our own.
It's Holiday Party season, and I don't know about you, but my calendar is booked!  I have parties at church, parties at the kids' school, parties with friends, etc.  
You know I don't like to go overboard with super-expensive, over the top parties for my kids and friends, but I do like things to be fun and memorable.  One place that has a great variety of toys and props for your events is One Way Novelties.
Let me show you some of the great deals I've found there:
If you have a princess party coming up, these flashing tiaras will be a hit!  And at only $14.85/dozen, they fit my qualification for a thrifty find.
Flashing Tiara
Have a Pirate-themed party coming up?  One Way Novelties has bandannas in all different colors, including these cute pirate ones! They're $9 for a dozen, so again- this is budget-friendly.
Pirate Bandana
We're going to Disneyland soon, and I know at night they sell all these cool glowing products.  Well, I think I'll stave off the "gimmes" by ordering some of these awesome Flashing Ball Necklaces.  These are so much cheaper than buying glow stuff at the park!


Flashing Star Ball Necklace


You can see the full catalog of novelties here

Now for a word of caution: this is a Canadian company, so if you live in the U.S. your shipping will be more than you're probably used to paying.  So, make sure you load up your cart before you checkout to make the shipping worth the extra cost!  

If you have a fundraiser, party, or other event coming up, I hope you'll check out One Way Novelties.  They have so much to offer and the price is right.  I'll certainly be using them for my family.  And- good luck with all of YOUR Holiday Parties!


Connect with us! You can find us here:
Image Map

Tuesday, December 10

Paper Christmas Banner

A few months ago I went to a craft fair in Denver with my Mom. There were a lot of cute ornaments, lawn decorations, wreaths, jewelry, you name it. One of the booths had some Christmas wall decorations, and a few banners with different sayings like Merry Christmas, Jingle Bells, etc.  They were completely made out of scrapbook paper and embellishments, and I knew I could easily make one of my own for my mom (with my own style!)  
That was the challenge, and here's the result! (sorry the pictures aren't the best. How on earth do you take a picture of something so big?)
Here's some close up pictures...


And the final product!


My mom loves it and even suggested I started selling them at craft fairs next year. Not sure I'm ready for that! Would you buy it?
Connect with us! You can find us here:
Image Map