2016Occasionally Crafty: 2016

Monday, December 5

Rudolph Nose Treats and Printable Gift Tags

*Hey all- I'm not back from my blogging break yet, but wanted to share some old posts I shared on other blogs last year.  I hope you're enjoying them!*

Make some easy and delicious treats for your holiday gifts this year.  These are the perfect easy treats for friends, family, teachers, neighbors, and more!


My little treat idea is nothing new. You’ve probably made a version of it yourself.  But if you haven’t, you are seriously missing out.  These are the EASIEST treats to make, and almost everyone loves them!
I call my version Rudolph Nose Treats, and that’s because the finished product looks a little like a snout with a red nose on it.  It’s perfect for the holidays.
You will need the following:
  • Square Pretzels (I use Snyder’s)- although regular ones will work too.
  • 1 bag of Rolos®
  • Red M&M’s® ( I buy the holiday mix and pick the red ones out)
To make these, preheat your oven to 250 degrees and simply place your pretzels on a cookie sheet.  I use my Silpat to line the sheet, but parchment paper works too.
Place an unwrapped Rolo® on top of each pretzel.  Try to center it.  One bag of Rolos® makes between 45-55 treats.
Put your pretzels into the oven for 3-4 minutes, until the caramel has begin to soften and sink.
While still warm, press a red M&M®, “M” side down, into the center of your Rolo®.  Push it down slightly so the caramel squishes into the pretzel.
Let cool in the fridge until firm.
Now- package these up for your friends or neighbors using a a cute bowl or cup, some plastic wrap, and my free printable Reindeer Treat Tags.

You’ve got an easy gift that took very little time, and looks great.  Whoever gets these will think they’re won-deer-ful (sorry, couldn’t help myself!)
Thanks for stopping by today.  I’d love to see you over on my blog, where I’m getting ready for Christmas with some fun Christmas Decor ideas for your Kitchen


Merry Christmas, all!


Note: This post may contain affiliate links. By clicking on them and purchasing products through my links, I receive a small commission. That's what helps fund this blog so I can keep bringing you fun new craft projects to try at home!
 photo New Signature.png

Wednesday, November 30

Printed Burlap Christmas Tree Sign

*Hey all- I'm not back from my blogging break yet, but I'm sharing some old posts I shared on other blogs last year.  I hope you enjoy them!*


Print your favorite printable sign on Burlap for a whole new look!


I just discovered the most brilliant invention of my crafting life.  I was at the store, and I saw LAMINATED BURLAP!

(Okay so I might be overstating it a little by calling it the most brilliant invention).  But seriously folks, I love printing on burlap, but I rarely do it.

Why?  Because you have to cut the burlap, then iron the burlap.  You have to clean up the frayed ends, then iron on freezer paper.  Only then can you print on the burlap.

But now- I can just throw one of these sheets into the photo tray of my printer, laminated side down, and voila!  I have printed burlap.

To showcase this brilliant invention, I took a shape from the Silhouette design store (which you can purchase here) and made it into a printable.


Note- you do NOT have to own a Silhouette to download and use their software, Silhouette Studio.  I use it a lot just to make printable art- no cutting needed.  If you love to make your own printables, why not give it a try?

I filled my words and shapes with colors, and made the cut lines transparent.   You can either save it as a PDF or just print it right from Studio.  

If you're not comfortable making your own, I have made it into a PDF for you to download for a short time.  Download and print yours here.


To print: follow directions for your printer for photo printing.  I loaded mine into the rear photo tray, and in the print menu, selected paper size as 8x10 and paper as "Glossy Photo Paper".  Then I clicked print and the laminate burlap worked perfectly!

To finish it off, you can either back it in a frame with Christmas scrapbook paper, or you can use a mat to give it a more formal look.  


I kind of love them both, so I'm not sure which way I'll go.


This is a super way to display your favorite printable and give it a more rustic feel!

What will you use laminated burlap for?
 photo New Signature.png

Wednesday, November 16

Christmas Carol Wood Slice Plaque

*Hey all, I'm not back from my blogging break yet, but I am sharing old posts from last year that I shared on other websites.  I hope you'll find them and enjoy them!* 


Bring some antiqued Christmas sheet music into your decor with this beautiful Christmas Wood Slice Plaque!

Use Christmas Carols in your Christmas Decor with this Christmas Sheet Music Wood Slice Plaque!

Hi everyone!  

I am a musician when I'm not blogging, and I have a special place in my heart for Christmas Carols!  There are so many fun ways to use them in your Christmas decor, too.
For this project, you'll need the following supplies:

  • Wood Slice (I got mine at Michael's with a 40% off coupon- making it under $4)
  • Printable Sheet Music or old sheet music from a book
  • Mod Podge/Brush
  • Merry and Bright Laser Wood Cutout (also from Michael's)
  • Gold Paint/Brush
  • Gold Glitter
  • Hot Glue/Glue Gun

Make a Wood Slice Christmas Carol Plaque

1.  Cut your Christmas sheet music into strips and trim to fit on your wood slice.  It took a little playing around with mine to get it how I would like it.


2.  Apply a thin coat of Mod Podge onto the wood slice, then carefully smooth your sheet music strips on top.  Don't worry if it bubbles.  You can use a credit card or scraper to smooth them down as it dries.  The wrinkles give it character :)

3.  Apply another coat of Mod Podge on top of your sheet music.  Since I printed mine with an inkjet printer, the Mod Podge kind of smeared some of the ink and made it look old and worn- which I loved!


4.  Paint your wood cutout with gold paint.  Mine took two coats.  After painting your LAST coat, IMMEDIATELY apply glitter all over the design before the paint dries.  I literally dumped and spread a whole tube of glitter on this! Make sure you do this on newspaper or something to catch the excess glitter to reuse.  By doing it this way, most of the glitter will stay locked in as the paint dries.


5.  Let dry, then shake to remove excess glitter.  If desired, spray your cutout with a sealer to help keep the glitter in place even more.
6.  Hot glue your wood cutout onto your wood slice.
7.  Display your creation on a small easel or prop up on a shelf.  This adds a fun sparkly touch to your Christmas decor!


I hope you loved this project as much as I do!  Click to see some of my other glittery Christmas projects, like my Glittered Reindeer Sled


and this Wooden "Just BeClaus" Sign!


Happy Holidays!
 photo New Signature.png

Wednesday, November 2

Fall Printable with Mini Banner

*Hey all- I'm not back from my blogging break, but I am sharing some posts I didn't publish on my blog last year, hoping you'll find them somehow and check them out!  I hope you're doing awesome!

Fall Printable Mini Banner

I think banners and buntings are pretty much the cutest thing ever, so I’ve created a fun one for fall just for you!
Download your free fall printable here.
Download your mini banners here (with “Fall” and blank)
Print your fall printable and trim to fit your frame.


Fall Mini Banner PrintableInsert it into the frame and secure the back.
Print out your mini banner, then cut each shape out.
Fall Mini Bunting

Use hot glue to adhere your banner to baker’s twine, yarn, or even thread.  Drape your banner across the top of your frame.  I like to put mine just to the side a bit.
Fall Printable and Mini Banner

That’s it!  Now you have a cute decoration for fall.  Use this idea to dress up any plain framed quote or picture.
Thanks for stopping by today! 


Note: This post may contain affiliate links. By clicking on them and purchasing products through my links, I receive a small commission. That's what helps fund this blog so I can keep bringing you fun new craft projects to try at home!
 photo New Signature.png

Friday, June 24

When It's Time To Move On: Saying Goodbye to Blogging


Have you ever felt something drifting away from you?

I consider it a blessing to experience this feeling often in my life.

Once in college, my boyfriend told me that he loved me (over the phone, but that's beside the point).
I knew when he said it that I didn't feel the same way, but I was scared to let go of the one real relationship I had ever had.  But then, things started changing.  Being with him just didn't "feel right" any more.  

It's hard to explain- but I knew it was time to move on.

When I graduated college, I became a high school band teacher.  It was sincerely fulfilling a dream!  For five years I taught high school and loved it.  Shortly after I began teaching, I met my future husband, and we were married.  After he finished school, we decided the time was right for us to start our family.  As I became pregnant, I began to look forward to being a mom the same way I had dreamed of being a teacher.  I knew it was time to move on to the next phase of my life and become a stay-at-home mom.  

It's hard to define- but it was time to move on.

I could name many such experiences throughout my life.  I am a religious person, so I believe that it is a little bit of personal inspiration, or feeling the Holy Spirit guide me along my path in life to what I'm supposed to be doing.  Call it that or women's intuition or what have you, I know each of us can feel something that guides us to where we need to be.

All that to say- I'm starting to feel blogging drifting away from me.  I started this blog six years ago, and I've enjoyed doing it.  I put in many hours to create, photograph, edit, and promote blog posts for you.

I thought that this last year, now that all of my kids were in school, I would dedicate myself full time to the blog and bring about some serious growth and great projects.  Instead, I felt drawn to do other things, like work on family history, beautify my home (without having to take pictures of it), and volunteer at the school with my kids.  

We have also decided to move.  We are moving out of our home in a week, renting a vacation home for a few weeks, then moving across the country to Iowa.   We have been so, so busy getting ready that I've hardly had time to do anything else.

I feel myself pulled in another direction.  I'm not sure what that direction is.  Perhaps I will renew my teaching certificate and go back to the classroom.  Maybe I will spend more time volunteering in the school and community.  I just know that blogging is not where I need to be spending my time right now.

I don't know if this is a permanent break, or a temporary one.  So, I will be keeping my blog up for you to find inspiration from.  I want you to be able to find my old projects and recipes again.  But I won't be posting for awhile.  Or longer. 

 It's hard to explain why.  It's just time.  It just feels right. 

Thank you for being my loyal readers over the years, however long you've been with me.  Check out my very first project here!  (So fun and yikes! I've learned a lot since then!)

Everything I've made here has been not only for me and my family, but for you and yours.  

Keep making beautiful things!  

Wednesday, June 15

Dr. Seuss Kids Craft: Paper Plate Fish Bowl


Hi everyone!

I'm thrilled to be a guest today for the Mother Hen Series over on Crafting Chicks, featuring Dr. Seuss books this week!

My kids love to paint, and honestly, I usually don't want them to because it makes a big mess.  Summer is the perfect time to do things I otherwise wouldn't let them do, so we put together a fun idea for the book One Fish, Two Fish, Red Fish, Blue Fish.

Click over to Crafting Chicks for the full tutorial.

Have a great week!

 photo New Signature.png

Friday, June 10

When Life Gives You Lemonade Wooden Sign

Fun Summer Sign - When Life Gives You Lemons, Make Lemonade!! Its a perfect Silhouette Project! | The Love Nerds Contributor
I love these three-dimensional wood plaques you see at stores everywhere with cute designs on them.  I’ve asked around a ton of times where to get blank ones to make.  Everyone would tell me they just buy them from stores on clearance and paint over them.  But finally, I found what I was looking for at Hobby Lobby.  They have “wood painting plaques” and “gesso boards” – both of which will serve for this purpose nicely.  
I painted my background with chalk paint, then let it dry over night.
I made the design for my sign in Silhouette Studio – I love all things Silhouette! – and then just cut my vinyl with my Cameo.

Fun Summer Sign - When Life Gives You Lemons, Make Lemonade!! Its a perfect Silhouette Project! | The Love Nerds Contributor In case you’ve never worked with vinyl before, it’s really easy.  I wrote a tutorial using a charger here– check it out if you need some help.

Having a multicolored design means you either have to apply your design a section at a time, or you can layer your vinyl for application using the method I learned here.

Fun Summer Sign - When Life Gives You Lemons, Make Lemonade!! Its a perfect Silhouette Project! | The Love Nerds Contributor I finished it off with a cute lemon.  I bought a blank wooden circle and cut another lemon shape from my design to cover it.  Then I just hot glued it onto a wooden skewer.  You could either glue it to the back of your sign, or do what I did and drill a hole through the top of the board.
I thought it kind of made the sign look like a glass…..of lemonade of course :)
I love the bright and fun colors for summer!  Thanks for stopping by today and happy summer!
Note: This post may contain affiliate links. By clicking on them and purchasing products through my links, I receive a small commission. That's what helps fund this blog so I can keep bringing you fun new craft projects to try at home!
 photo New Signature.png

Thursday, June 2

New Home Comparison Printable Worksheet

Moving? Searching for a new home?  You need this Home Comparison Worksheet to take with house shopping with you!


Well, it's time to let the cat out of the bag.

We're moving!  We are leaving Phoenix and heading across the country to......Iowa!  Any of my readers live in Iowa?

Most people who hear where we are going think we are crazy.  "Iowa- what is in Iowa?  Corn?!"

"Why would you leave PHOENIX for IOWA?"

The truth is, I was raised in the Midwest, and it kind of feels like coming home!  As much as I have enjoyed living here (except in July and August), it's never felt like "home" to me.  I'm excited but also apprehensive to make such a big change!
We sold our house in record time and are on the lookout for a home in Iowa.  Recently we took a trip out to tour some houses.  I made a sheet for each house on our list to keep track of the things I liked and didn't like about each home and area.

I even filled in the box with a picture of each home we were considering.

Then..... I forgot to bring it with me.

Well, I thought maybe you could use it the next time you are shopping for a home.  When you walk through 12 homes in a day or two, they all start to blur together.  Write down some notes about each one so you'll be able to make a better decision.

Download yours here:

So, who wants to give me moving tips???  I need help!


 photo New Signature.png

Tuesday, May 31

Ice Cream Cookie Sandwiches with No-Churn Vanilla Chocolate Chip Ice Cream

This shop has been compensated by Collective Bias, Inc. and its advertiser. All opinions are mine alone. #BiteSizedBitsOfJoy #CollectiveBias


My parents never met a sale they didn't like.  Their motto was basically "Why pay full price when you can buy it on sale, used, or secondhand?"


Brand names weren't a thing in my house.  We grew up on generics for everything, from our shoes to our potato chips.


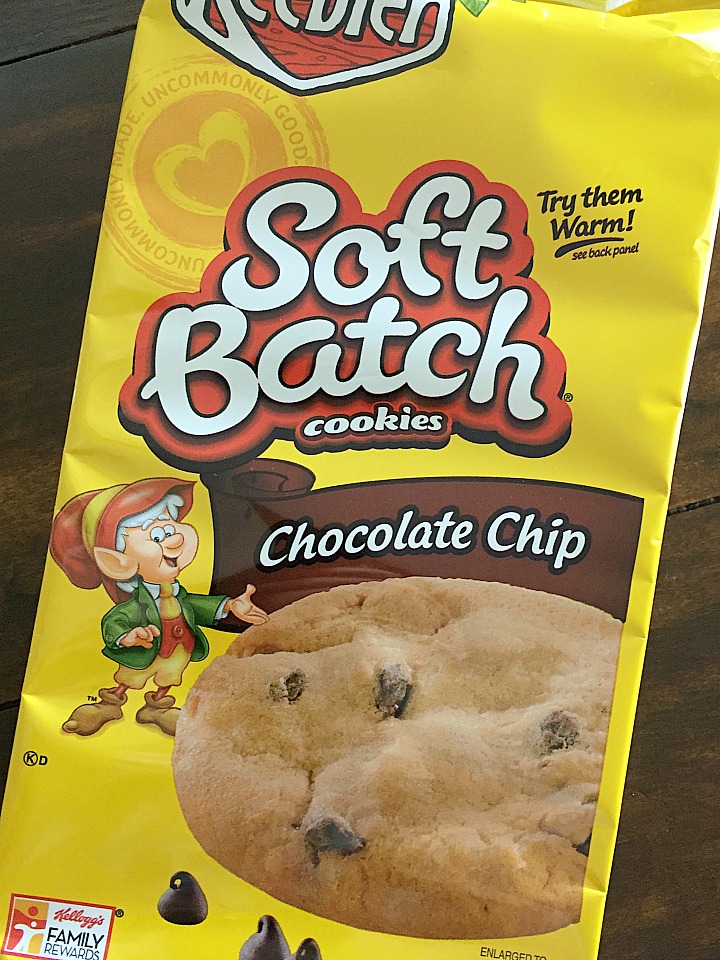
There were two things my mom splurged on, however-- Oberweis Dairy milk and Keebler Soft Batch Chocolate Chip Cookies.


It was always a thrill when you were the one unloading the grocery bags in the kitchen, when you saw that red package peeking out of one of the paper bags.  "SOFT BATCH COOKIES!"  we would yell to the other kids.  


They rarely lasted more than a day.


Well, what's old is cool again, and for the first time in my adult life, I picked up a package of Keebler Soft Batch Chocolate Chip Cookies from Fry's Food and Drug (a Kroger banner store) for MY kids,


this time in a cool yellow package.  


My kids are way more spoiled than I was.  Packaged cookies and treats are no big deal to my kids.  So I don't think they were all that excited.  But once I told them my plan to make them into delicious ice cream sandwiches, we were all suddenly starving for cookies!


First up, you need to make your no-churn vanilla chocolate chip ice cream.  This is super easy to do, but it takes a bit of time to freeze up.


Mix 2 cups heavy whipping cream in a stand mixer or with beaters until stiff peaks form.


Carefully stir in 1 tbsp vanilla extract, a 14 oz can of sweetened, condensed milk, and 2 cups of mini chocolate chips.  (Regular or chunk chocolate works too!)


Put into a loaf pan or other container and cover tightly.  I save old plastic ice cream tubs so I put mine in those.


Freeze for at least 2 hours or overnight for firmer ice cream.


Once your ice cream is ready, open your Soft Batch cookies.  Place a small scoop of ice cream on the flat side of one cookie,


then place another cookie on top and flatten slightly.


Place cookie sandwiches on a tray in the freezer and freeze for about an hour.  Then enjoy your sandwiches and wrap any leftover in cling wrap.


This is the perfect way to enjoy an old favorite in a new way- and perfect for the summer heat!


Keebler Cookies at Kroger: Summer 2016  Enter this fun contest for a chance to win Kroger gift cards up to $1000.  That's a lot of cookies :)


Printable Recipe here:

Chocolate Chip Cookie Ice Cream Sandwiches


2 cups heavy whipping cream

1 14 oz can sweetened condensed milk
1 tbsp vanilla extract
2 cups mini chocolate chips
Keebler Soft-Batch Chocolate Chip Cookies

1.  Beat heavy whipping cream on high until stiff peaks form.

2.  Gently stir in sweetened condensed milk, vanilla extract, and chocolate chips.
3.  Mix until a soft batter forms.
4.  Transfer batter to loaf pan or other container and cover tightly.
5.  Freeze for 2-6 hours depending on firmness desired.
6.  Place small scoop of ice cream on a chocolate chip cookie.
7.  Place another cookie on top of ice cream and flatten slightly.
8.  Place sandwiches on cookie sheet in freezer for 30 min-1 hour.
9.  Wrap sandwiches in cling wrap until ready to eat.

What was your favorite treat as a kid?  Have your kids tried it?


You can find tons more great Keebler Cookie inspiration here!

 photo New Signature.png

Wednesday, May 25

Bloom Where You are Planted Activity Days Recognition Night

One of my responsibilities at church is to plan activities for girls ages 8-11, which are called Activity Days girls.

Twice a year, we plan a Recognition night to showcase the girls, their talents, and what they have achieved over the last six months.

This was my first one and I was excited to plan around the theme "Bloom Where You Are Planted".

We have a small but strong group of girls.  I sent out invitations I made on PicMonkey.

Bloom Where You are Planted Activity Days Recognition Night!

The day of the activity, I set up a little table in the front with some chalkboard art (not that I'm very talented at that, but it worked!), some cupcakes and fruit, and pictures of the girls at some of our activities.

Bloom Where You are Planted Activity Days Recognition Night!

I kicked it off with a short talk talking about the things flowers need to bloom- good soil, water, and plenty of sunshine.  I asked what would happen if the flowers didn't get enough about even one of those things (they wouldn't bloom and could possibly even die).

I compared that to our testimonies.  I had the girls name things we need to bloom spiritually.  They named prayer, scripture study, church attendance, good friends.  I told them that most of all we need the "Son"- just like flowers need the sun.  And if we are missing just one of those things, then we won't bloom to our fullest and our testimonies can die away.  I challenged them to "Bloom where they are planted" and to surround themselves with the things they need to thrive.

Then, wee had each girl share their favorite activity we had done together, and then share something they had achieved, whether at church in the Faith in God program, or on their own in a sport, hobby, or in school.  It is such a great way to get to know the girls and their interests outside of church!

Then we played some fun games.  First we did a version of Pictionary, with the girls going against their parents.  (They smoked us!)

Then we did a Parent/Child version of The Dating Game.  We asked each pair a question about each other, and they had to write down the answer on the board.  If their answers matched, they got a point.  It brought a lot of laughs into the room.

Bloom Where You are Planted Activity Days Recognition Night!

We finished up with refreshments and time to chat.  Two things I've learned about girls this age- they love to eat all my food and they love to talk!

It was a really fun evening!  I hope it gives you some ideas for your next recognition night!


 photo New Signature.png