
You’ve seen those tiny wool animals and thought there’s no way you could make something that cute.
I used to think the same thing. Turns out, needle felting doesn’t ask for much beyond a barbed needle, some wool, and a little patience while you poke away at a shapeless clump.
Your first attempt won’t look perfect, and that’s okay because easy art projects like this are surprisingly forgiving.
If you’re wondering how to needle felt without any prior experience, what’s below will walk you through it step by step.
What is Needle Felting?
Needle felting is a dry craft that uses a barbed needle to tangle loose wool fibers together until they hold a firm shape, with no water, glue, or stitching required.
Each poke catches fibers with tiny barbs and pulls them tighter, so poked spots shrink and firm up while other areas stay soft, perfect for figures, ornaments, and flat designs.
No water, soap, or rubbing is involved, so your kitchen table works just as well as a workshop. Wet felting is the cousin you may know, using water and soap instead of a needle.
Tools and Materials You’ll Need
You don’t need a huge supply closet to try your first project. A small bag from a craft store is honestly all it takes. Grab a few of these basics, and you’re already halfway to your first shape:
| Tool or Material | What It Does | Beginner Note |
|---|---|---|
| Wool roving | Forms the main felted shape | Start with medium or coarse wool |
| Felting needles | Tangle and compact the fibers | Keep a few spares since needles can break |
| Felting mat | Protects the needle and your work surface | Foam, brush, or wool mats all work |
| Finger guards | Help protect your fingertips | Useful while you’re still learning |
| Fine felting needle | Handles small details and finishing | Bring this out once the main shape is firm |
| Multi-needle tool | Felts larger sections faster | Optional for your first few projects |
| Small scissors | Trim stray fibers | Only use when a fiber won’t felt back in |
| Colored wool | Adds patterns and small details | A little goes a long way |
I recommend picking up a small variety pack of needles rather than just one size. Coarser needles handle the early shaping, and a fine one saves you a second trip to the store later.
How to Needle Felt Step-by-Step
Learning how to needle felt is easier when you break the process into small, manageable steps. Start with the basic shaping techniques, then gradually add details as your wool begins to take form.
Step 1: Pull Off and Prepare the Wool
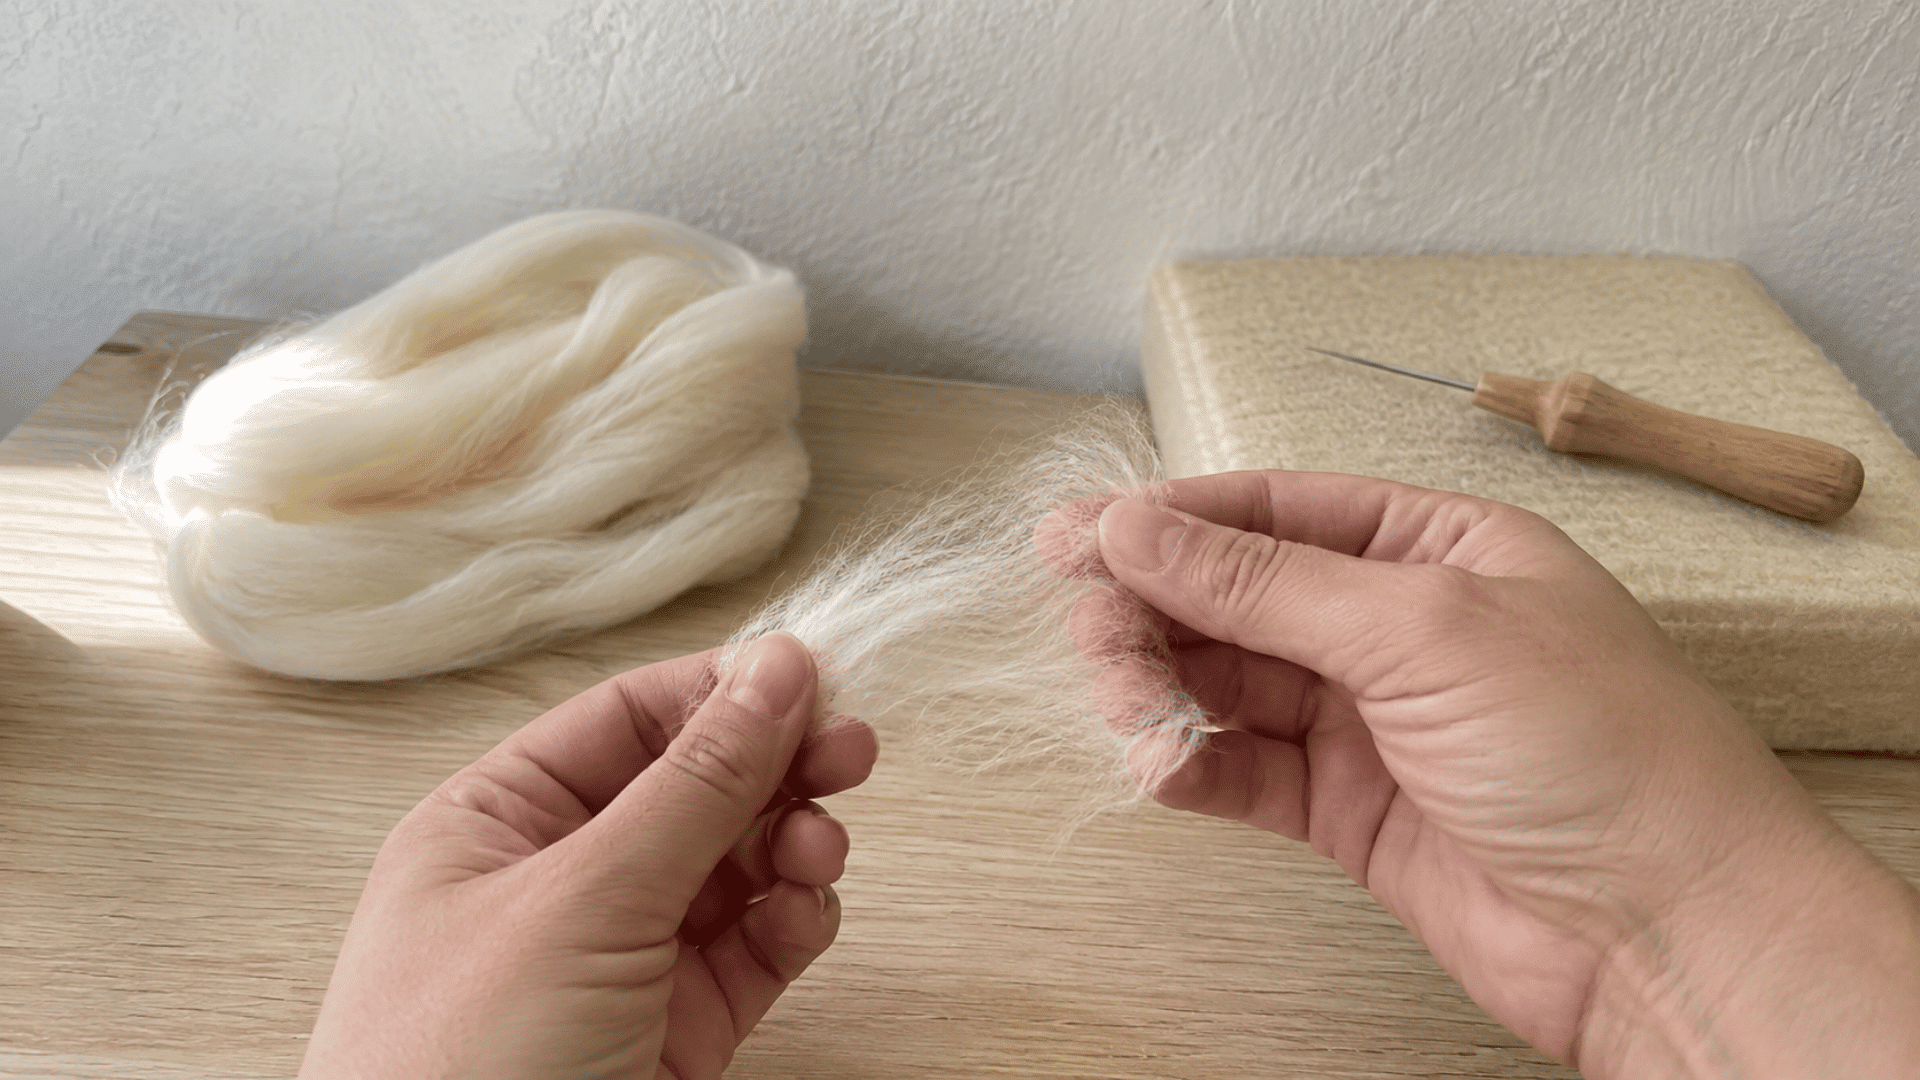
Gently pull a section of wool away from the roving instead of cutting it; this leaves loose, feathery edges that join together more easily once you start felting.
- Pull off a small, manageable piece of wool.
- Gently loosen any compressed sections.
- Pick out thick knots or clumps.
- Set extra wool aside for later steps.
- Avoid twisting the wool into a tight cord.
I would rather start with slightly more wool than I think I need. Trimming a shape down later is simpler than adding felted wool back onto a piece that’s already too small.
Step 2: Roll the Wool Into a Basic Shape
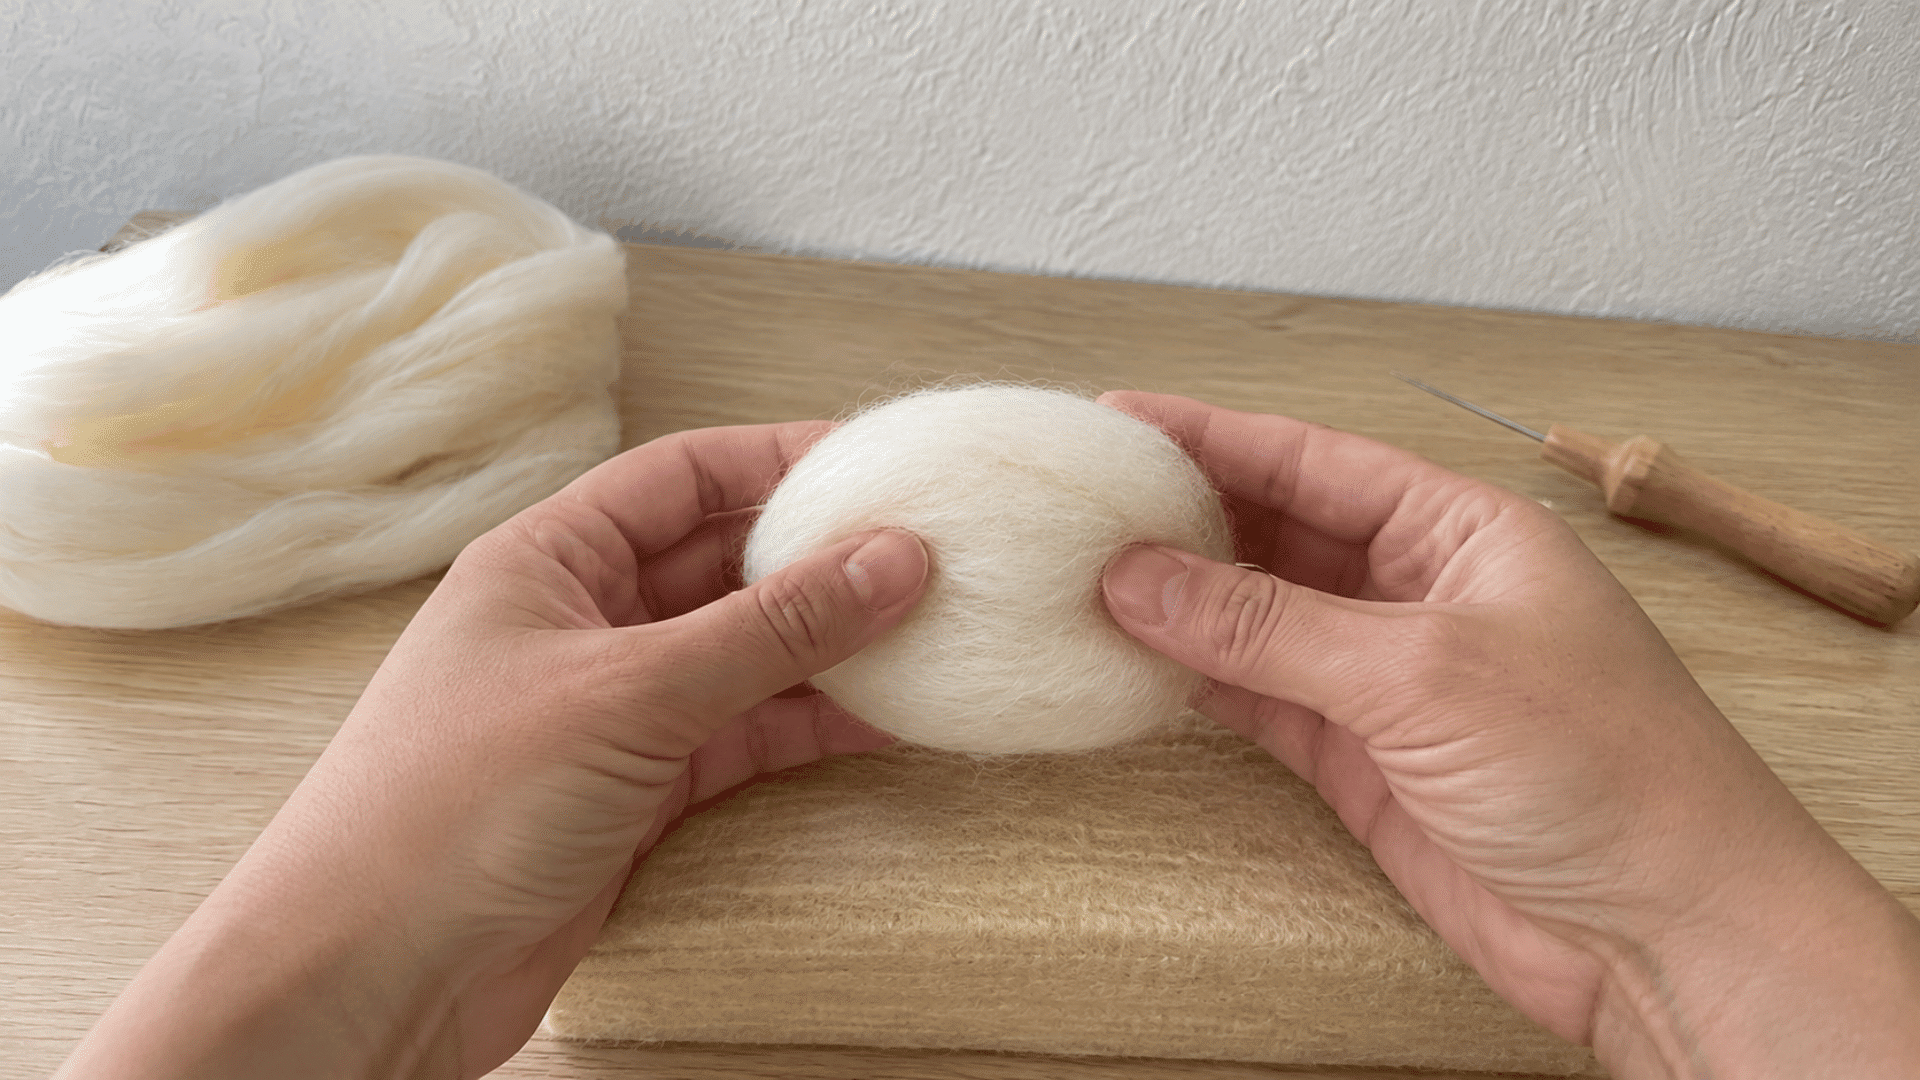
Use your hands to roll, fold, or wrap the wool into a rough version of the shape you want. It doesn’t need to look neat at this stage, since the needle does the real shaping.
- Roll the wool into a ball for round shapes.
- Fold it lengthwise for an oval shape.
- Tuck any loose edges toward the middle.
- Keep the bundle firm enough to hold together.
- Leave it soft enough to still adjust by hand.
Step 3: Start Felting the Wool
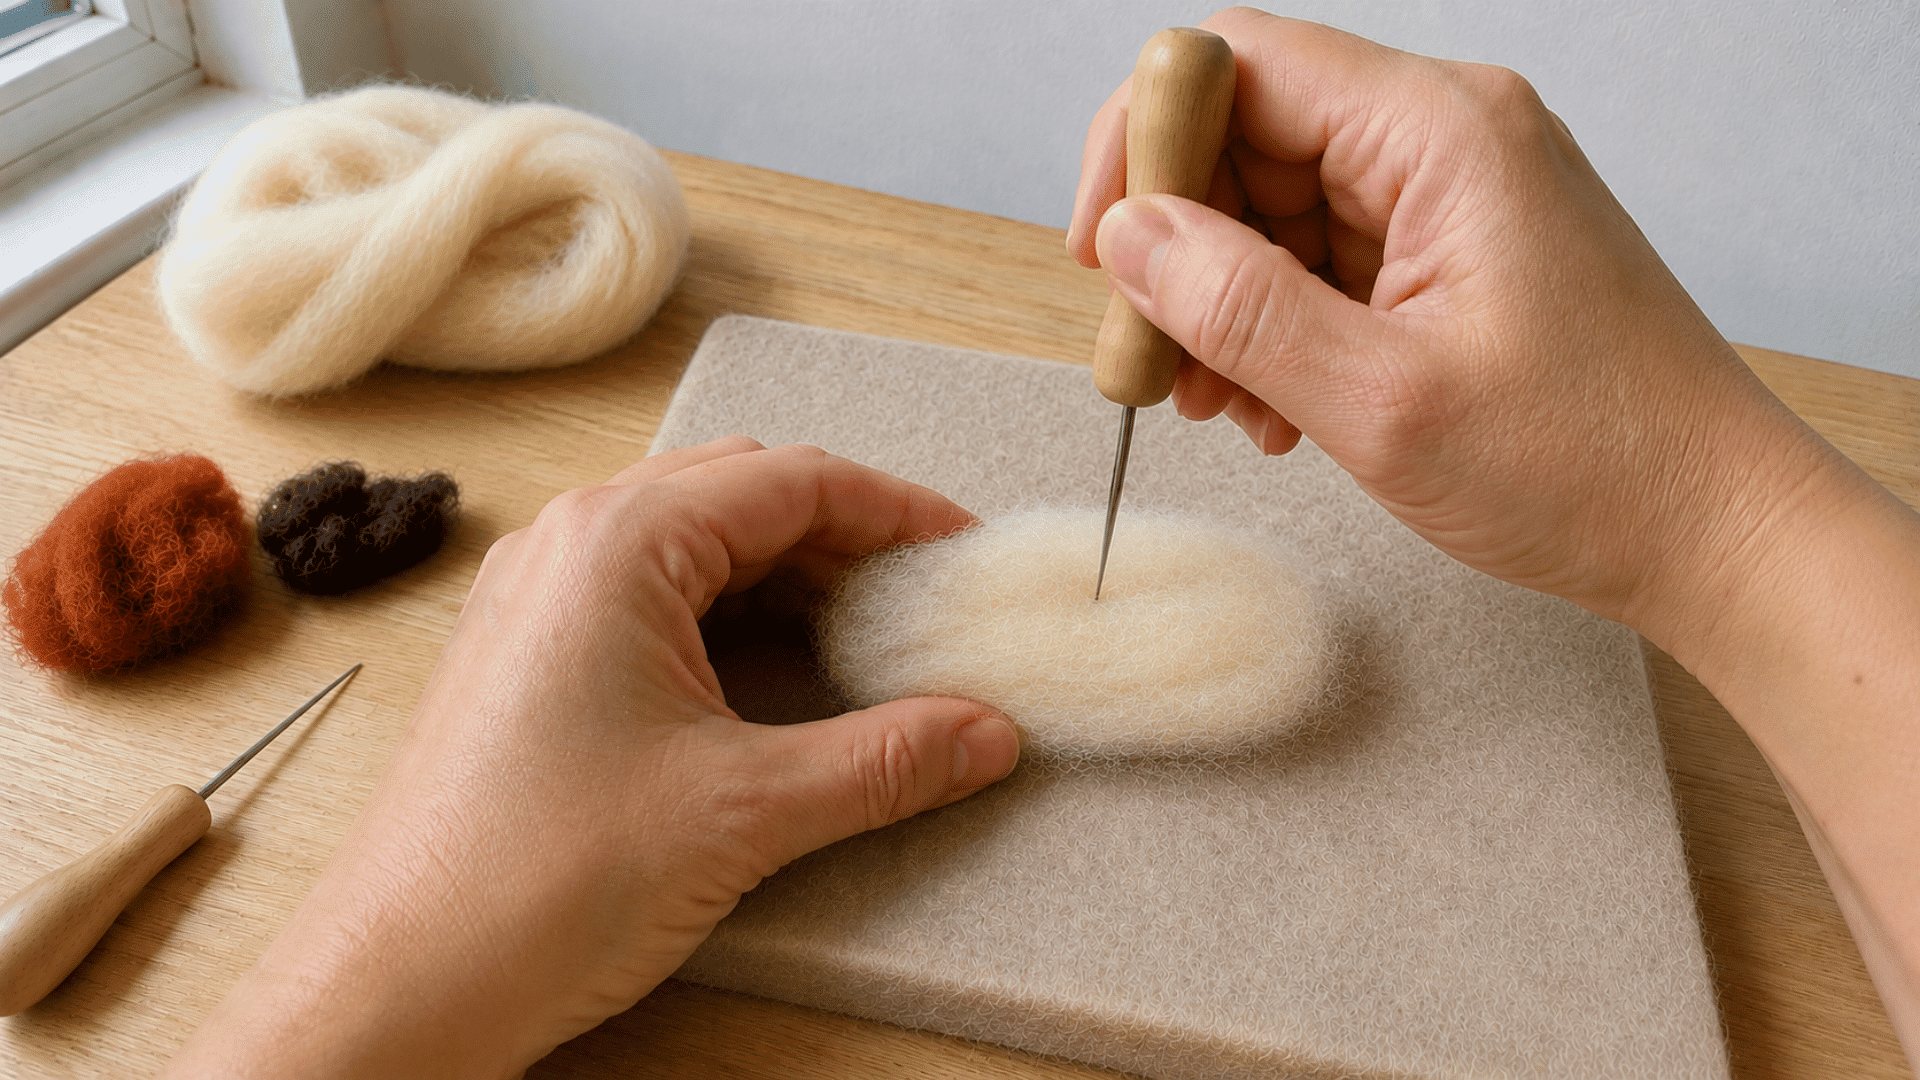
Set the wool on your felting mat and begin poking it with your needle. Each straight poke catches fibers and pulls them further into the shape.
- Push the needle straight down into the wool.
- Pull it back out along the same path.
- Turn the piece often as you work.
- Poke evenly around every side.
- Keep your fingers well away from the needle’s path.
Step 4: Shape and Firm the Form
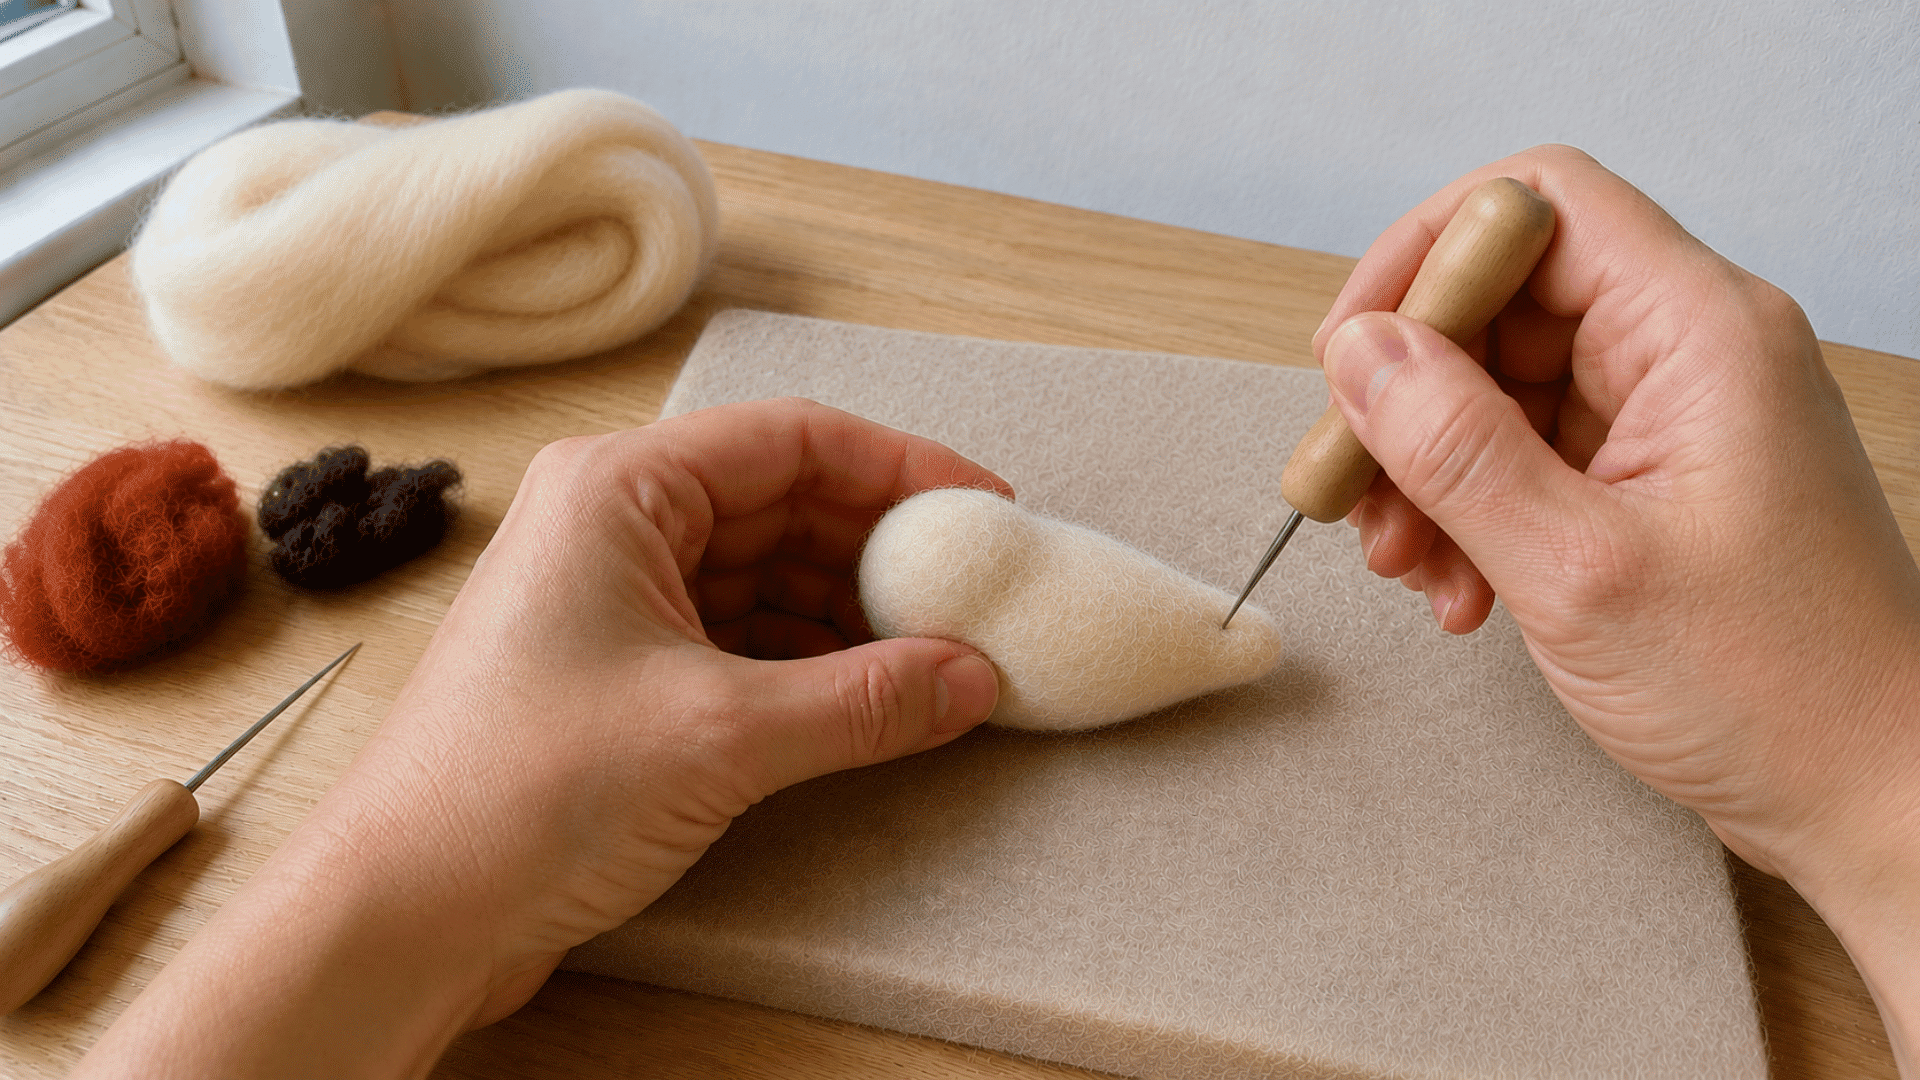
Once the fibers start holding together, shift your focus to size and proportion. Spots that get more pokes will naturally shrink and firm up faster than the rest.
- Add extra pokes anywhere you want the shape to narrow.
- Rotate the piece every few pokes.
- Firm up any soft or loose spots.
- Use shallow pokes for small, careful adjustments.
- Check the shape from several angles as you go.
I leave a bit of softness in areas where you still plan to attach other pieces.
Step 5: Add Wool and Build Raised Areas
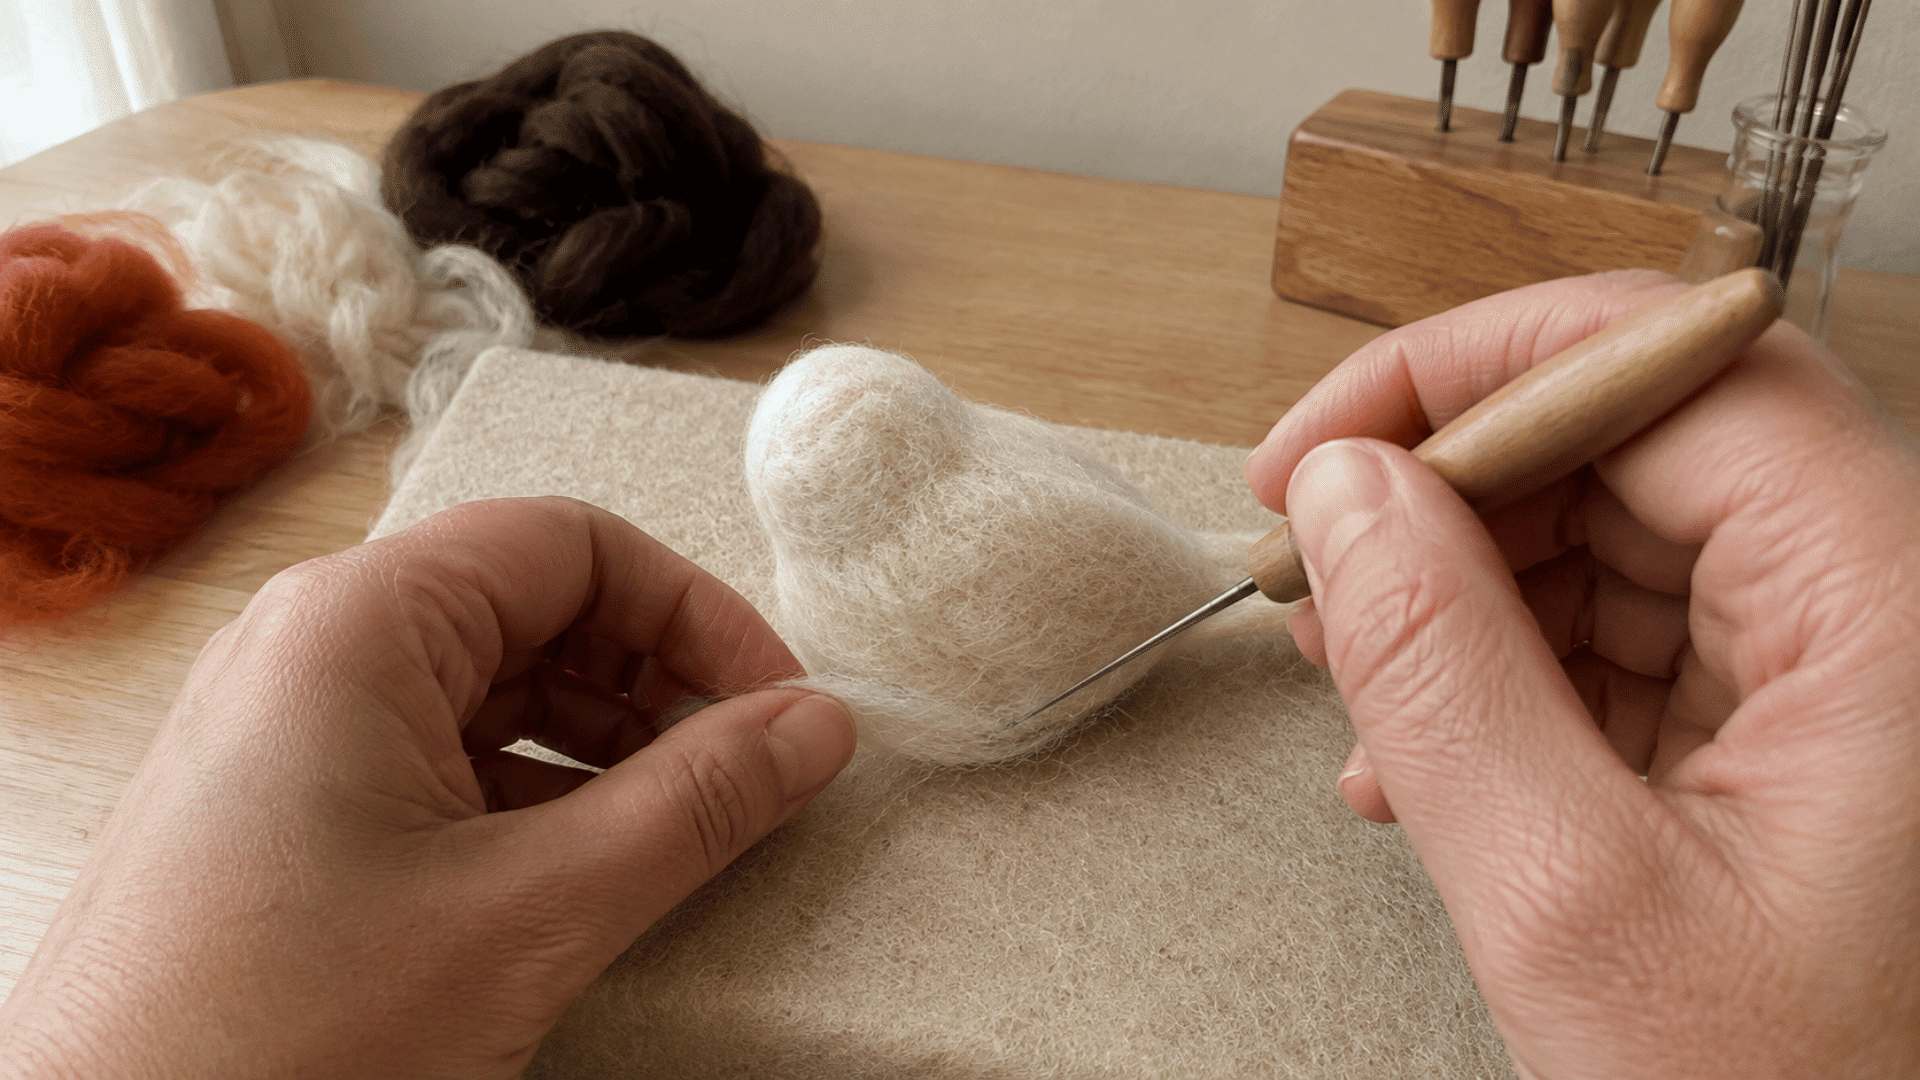
Small wisps of fresh wool can fill in dents, add size, or build raised details like a nose, cheeks, or paws. Building up several thin layers gives you more control than piling on one thick clump at once.
- Lay a small wisp of wool over the area.
- Leave the outer edges loose and unfelted.
- Felt the edges into the base first.
- Work your way toward the center.
- Add more wool only after checking how it looks.
Step 6: Attach Separate Felted Pieces
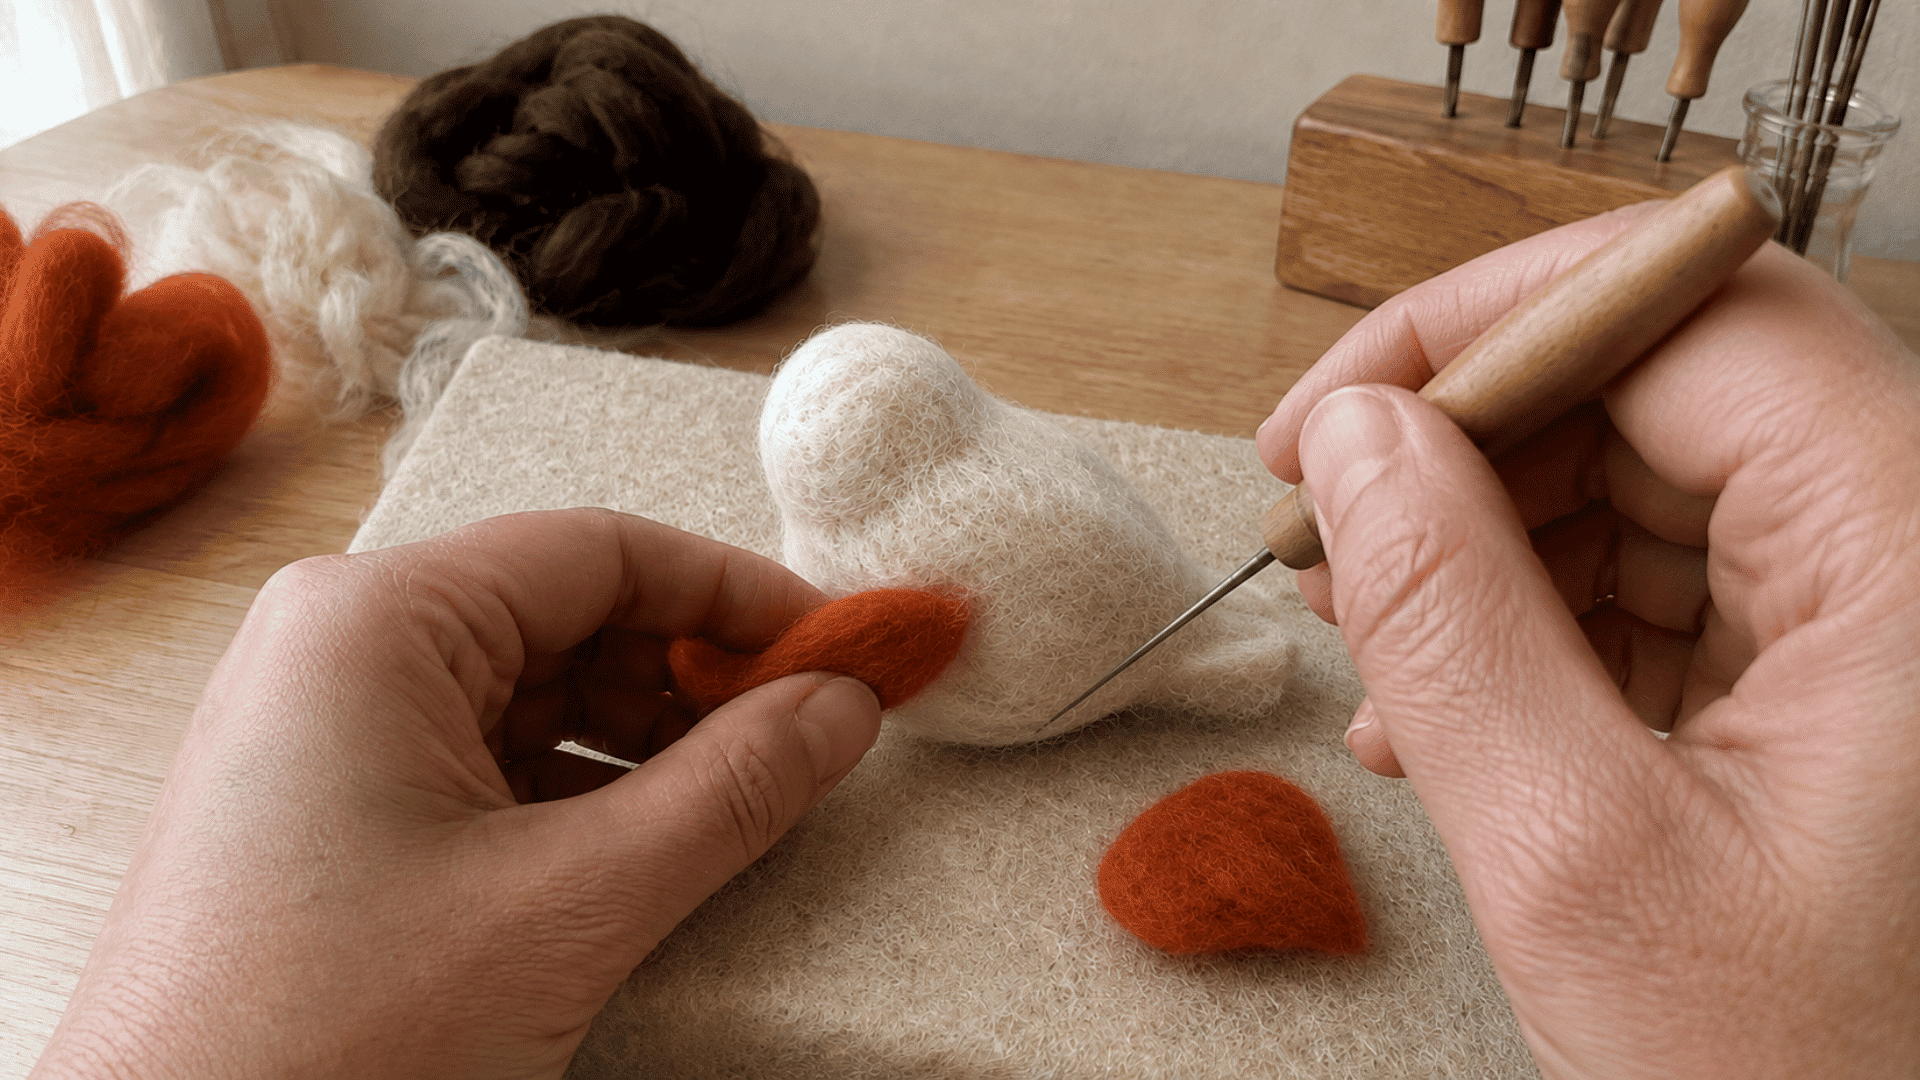
Ears, legs, tails, and other small parts are often easier to felt separately and attach afterward. Don’t fully felt the attaching end before you join it. Loose fibers are what make the connection strong.
- Leave loose fibers at the end you plan to attach.
- Hold the piece against the main shape.
- Spread the loose fibers out around the joint.
- Feel the connection from a few different directions.
- Add a thin wisp of wool if the joint still feels weak.
Step 7: Add Details and Finish the Surface
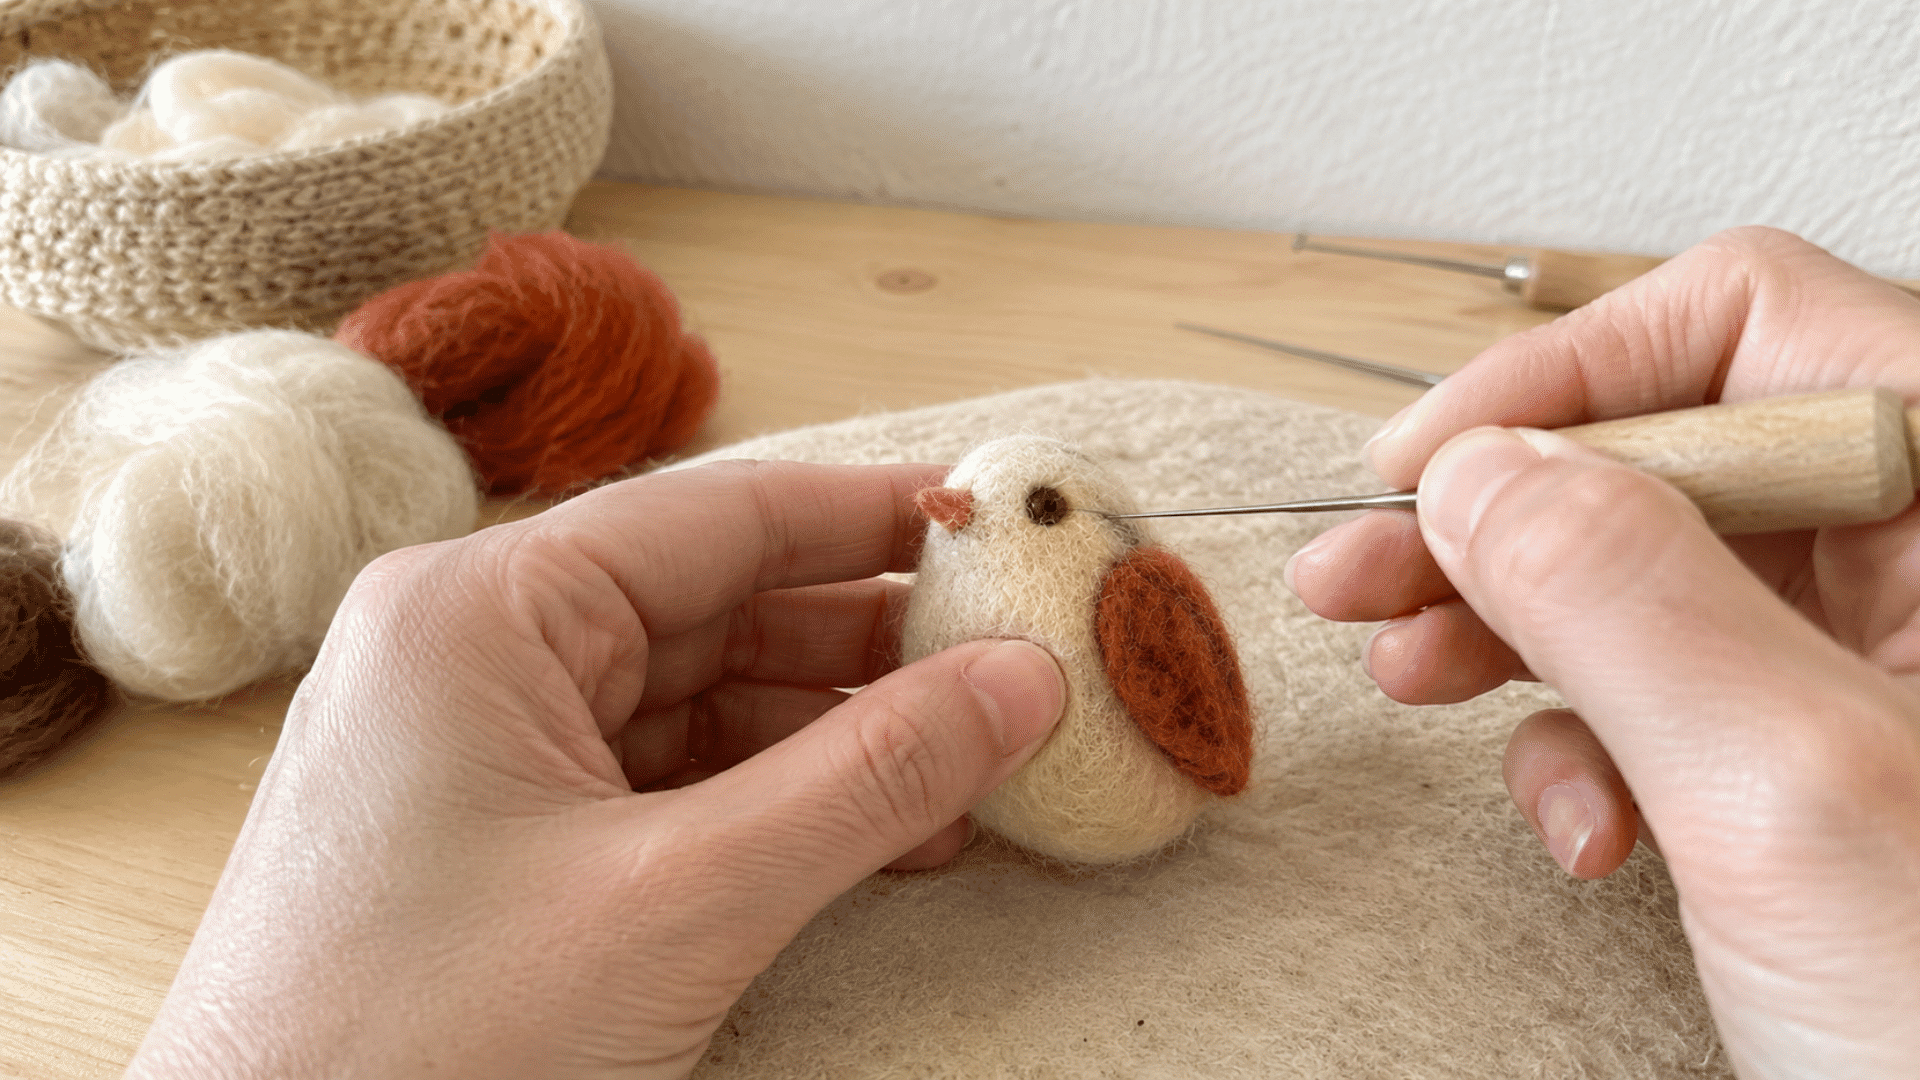
Once your main shape feels solid, add small features and smooth out any uneven spots. A finer needle gives you more control during this final stage.
Some visible wool texture is completely normal on a handmade piece. You don’t need every surface to look perfectly smooth.
- Add eyes, markings, or small patterns using tiny bits of wool.
- Use shallow pokes for fine details.
- Smooth fuzzy spots with a finer needle.
- Fill in any small dents with matching wool.
- Blend the seams where separate pieces meet.
- Trim only the fibers that won’t felt back into place.
How to Make Needle Felting Look Neater?
A cleaner finished piece usually comes from small changes throughout your project rather than one big fix at the end.
Building up wool in thin layers and rotating your piece often both help keep the shape even as you go.
Comparing matching parts from the front and both sides catches uneven spots early. Good lighting helps too, since stray fibers are much easier to spot in bright light than in a dim room.
Finish with a fine needle, smoothing fuzzy spots and filling any small dents until every angle looks balanced. Handmade pieces still keep a bit of texture, and that’s part of the charm.
How Firm Should Needle Felted Wool Feel?
The texture of your project changes as you work, so knowing when to stop can be tricky at first. Your goal also depends on what you are making.
I use this quick comparison to judge where my piece is in the process:
| Stage | What You’ll Notice | What to Do Next |
|---|---|---|
| Starting out | Fibers move easily, and the form looks uneven | Continue working across all sides |
| Taking shape | The form stays together but still needs definition | Refine curves, edges, and proportions |
| Nearly done | Details are clearer, and the overall form looks consistent | Focus on areas that need correction |
| Finished | The piece keeps its intended form during normal handling | Make final adjustments and stop |
| Too far | The piece becomes difficult to alter or reshape | Avoid further needling unless necessary |
Easy Needle Felting Projects for You to Try Next
Once you feel comfortable with the basics, making something new becomes much more exciting. You can gradually challenge yourself without taking on anything overwhelming.
1. Felted Heart
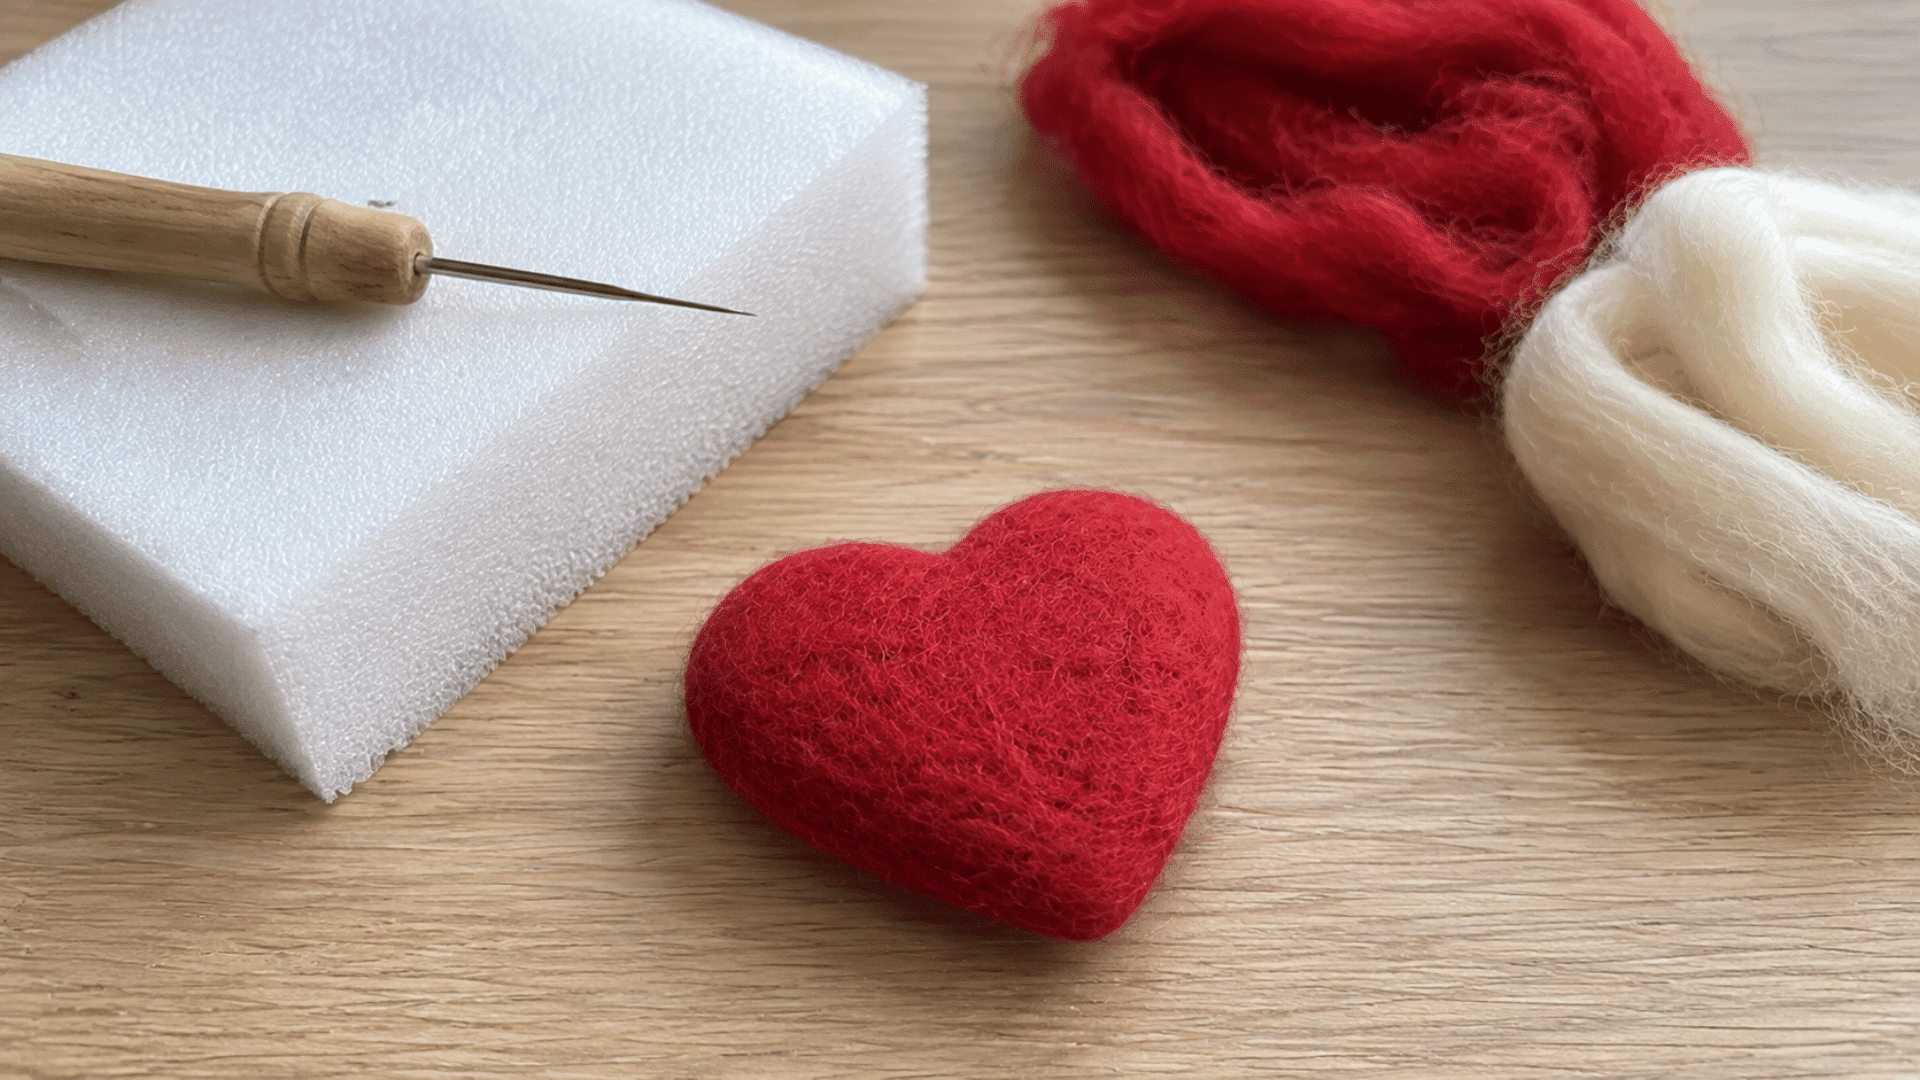
Think of this as your victory lap. A felted heart is really just your practice ball pinched into a new outline while you poke, so almost everything you already know carries straight over.
No attaching, no fuss, just a chance to get comfortable with even pokes and steady shaping. It also doubles as a tiny handmade gift the moment you’re happy with it.
2. Round Ornament
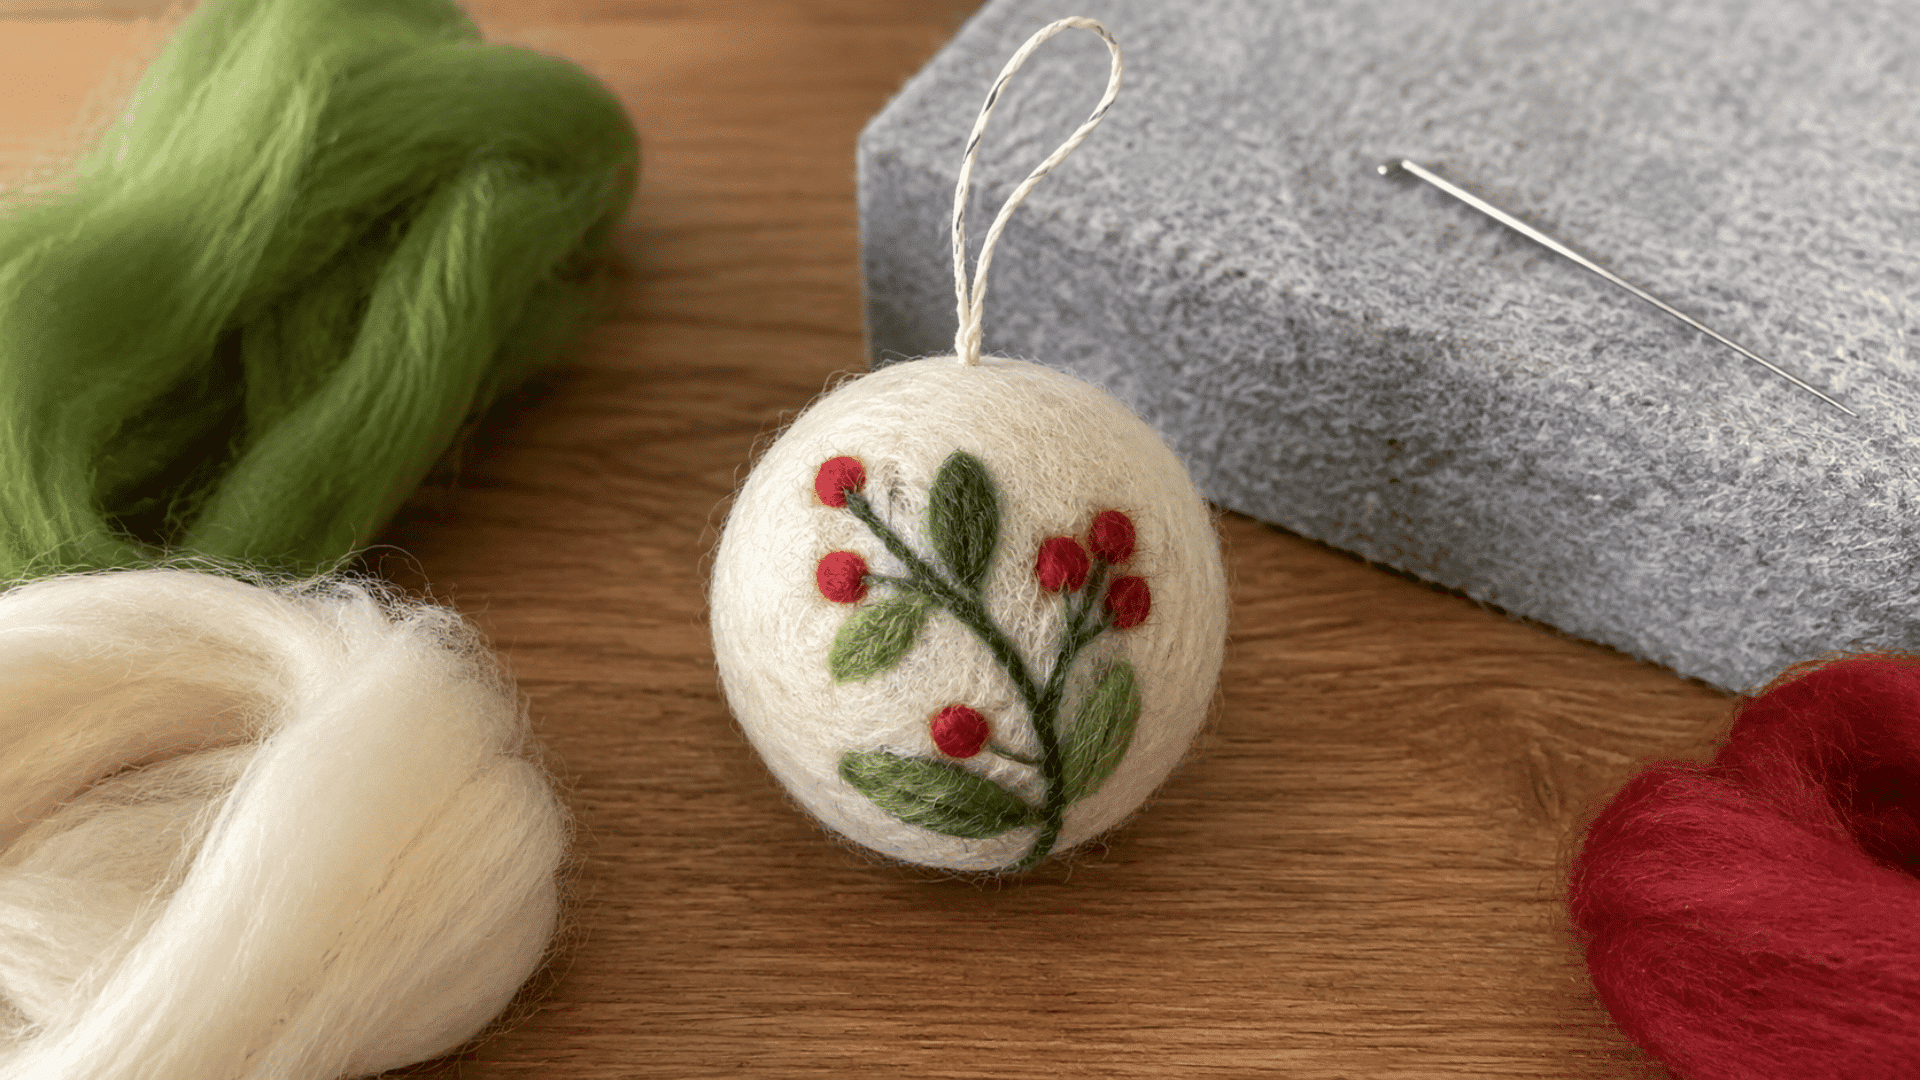
This one barely feels like a new project at all. Start the same way you did with your very first ball, then keep felting until it’s just a touch firmer than before.
The only twist is tucking in a small loop of thread before you finish, so leave that one spot a little looser while everything else tightens up around it.
3. Mini Mushroom
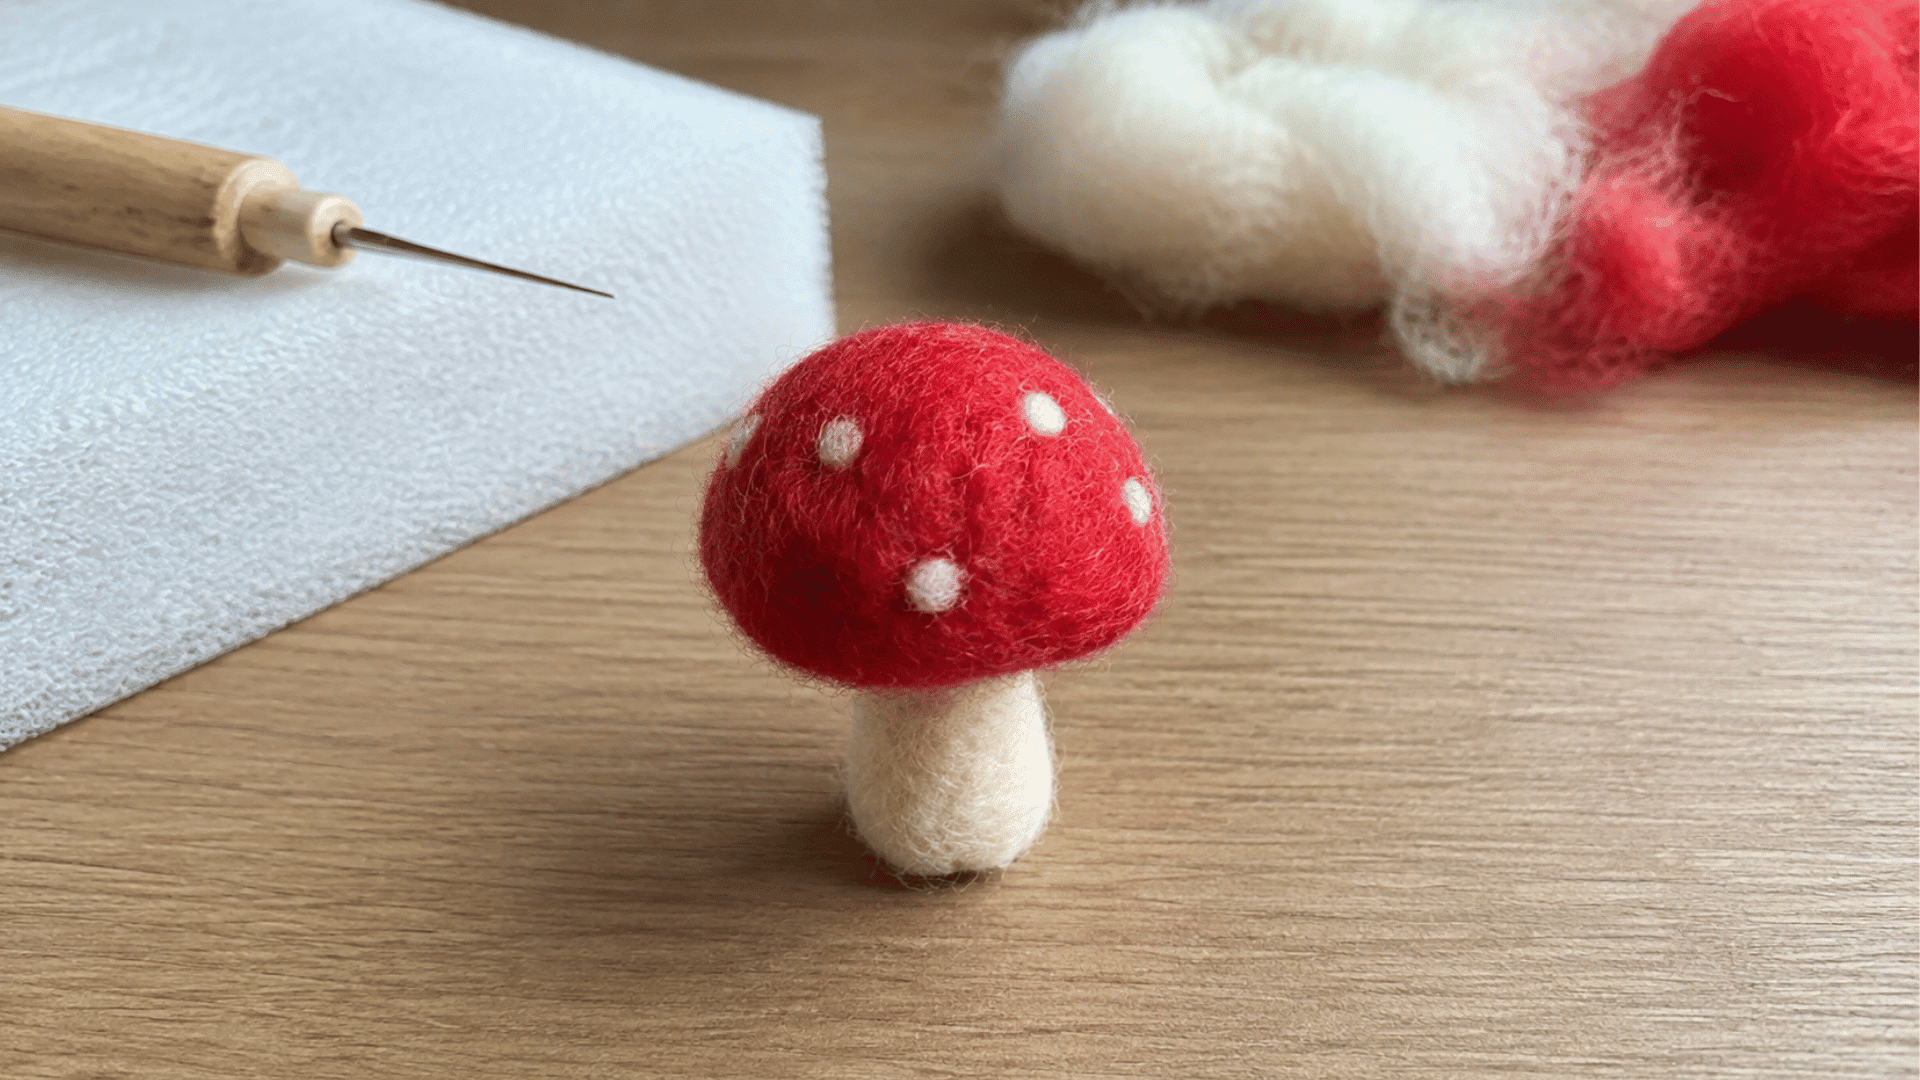
Here’s where things get interesting: two separate pieces meeting for the first time. A rounded cap sits on a short stem, and suddenly your project has some real personality.
Keep the stem noticeably narrower than the cap, then work the seam until it disappears. That blend is the actual skill you’re building here.
4. Simple Fruit
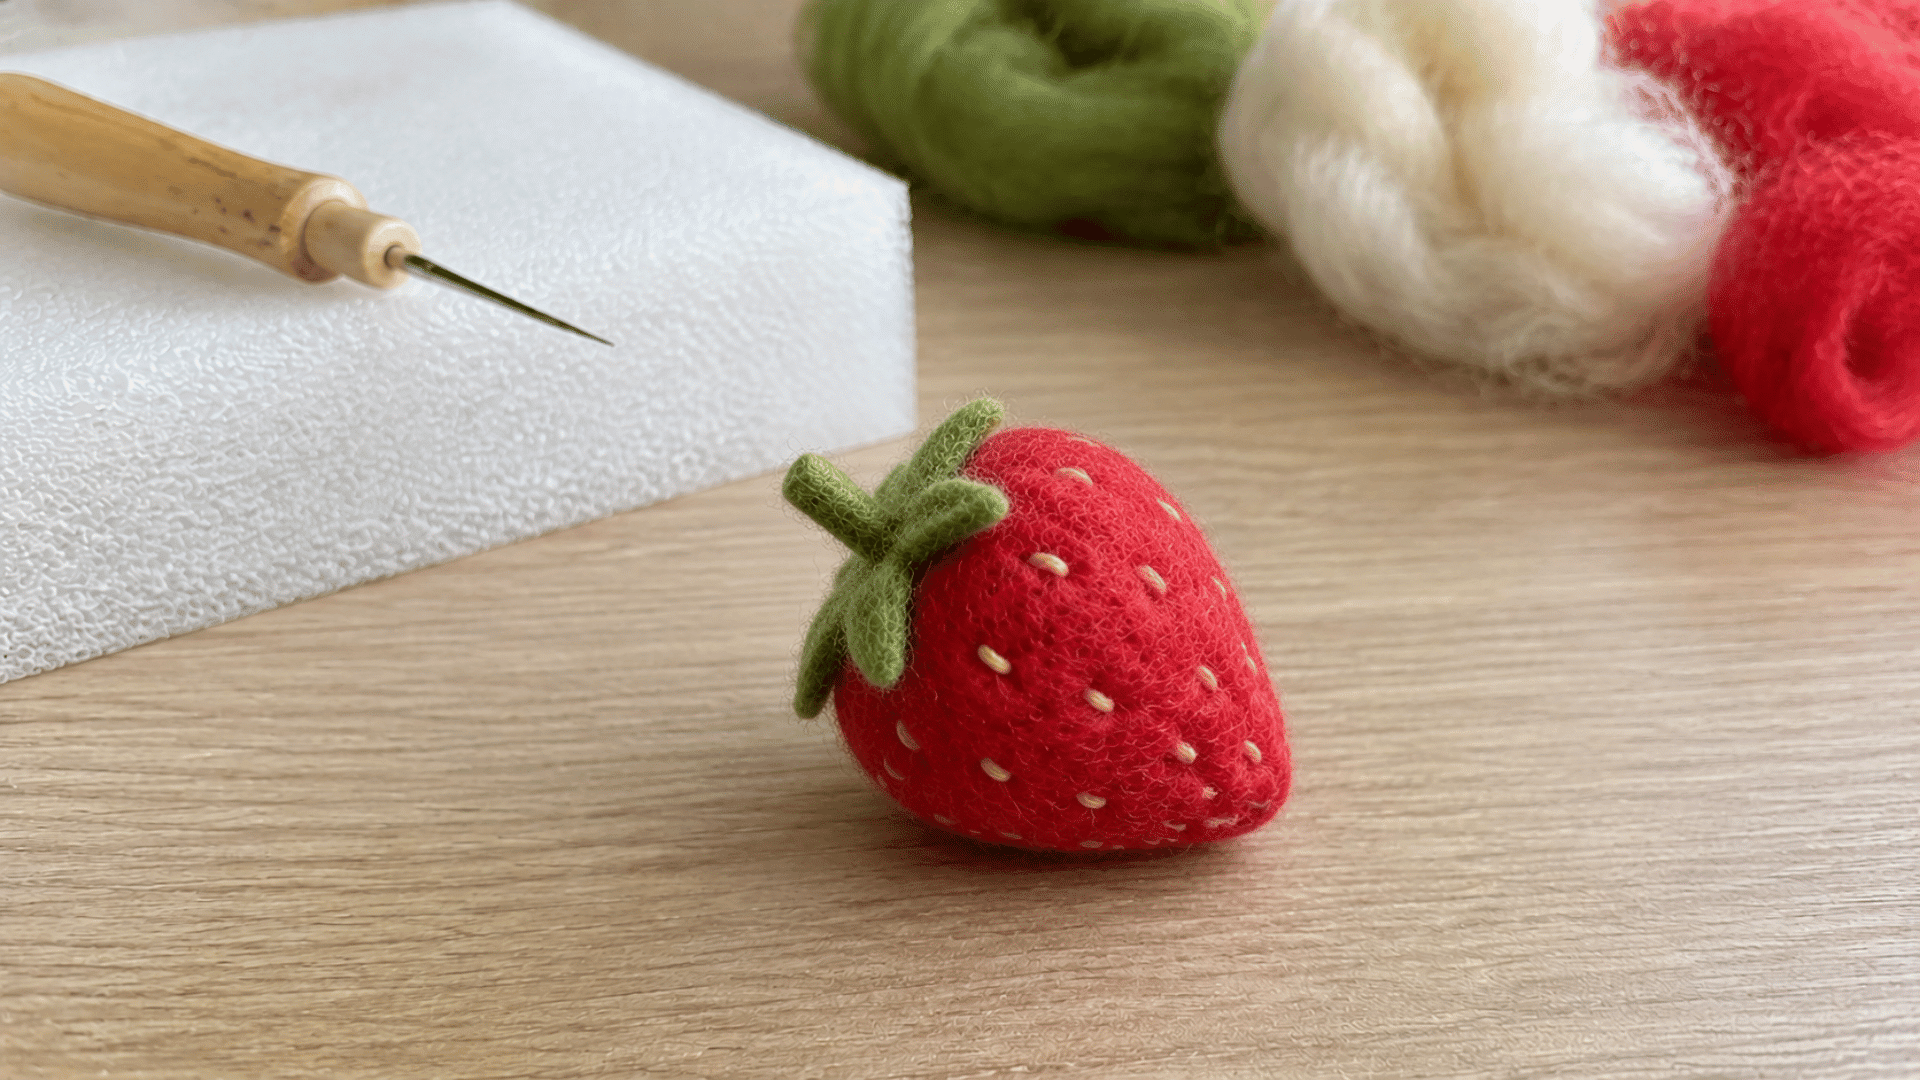
An apple or a strawberry is basically your familiar ball wearing a costume. Swap in the right color, add a tiny stem, and the resemblance shows up almost instantly.
Try a few seeds or a small leaf for extra charm. Tiny fruit forgives tiny mistakes, so it’s a low-pressure place to practice fine detail work.
5. Felted Star
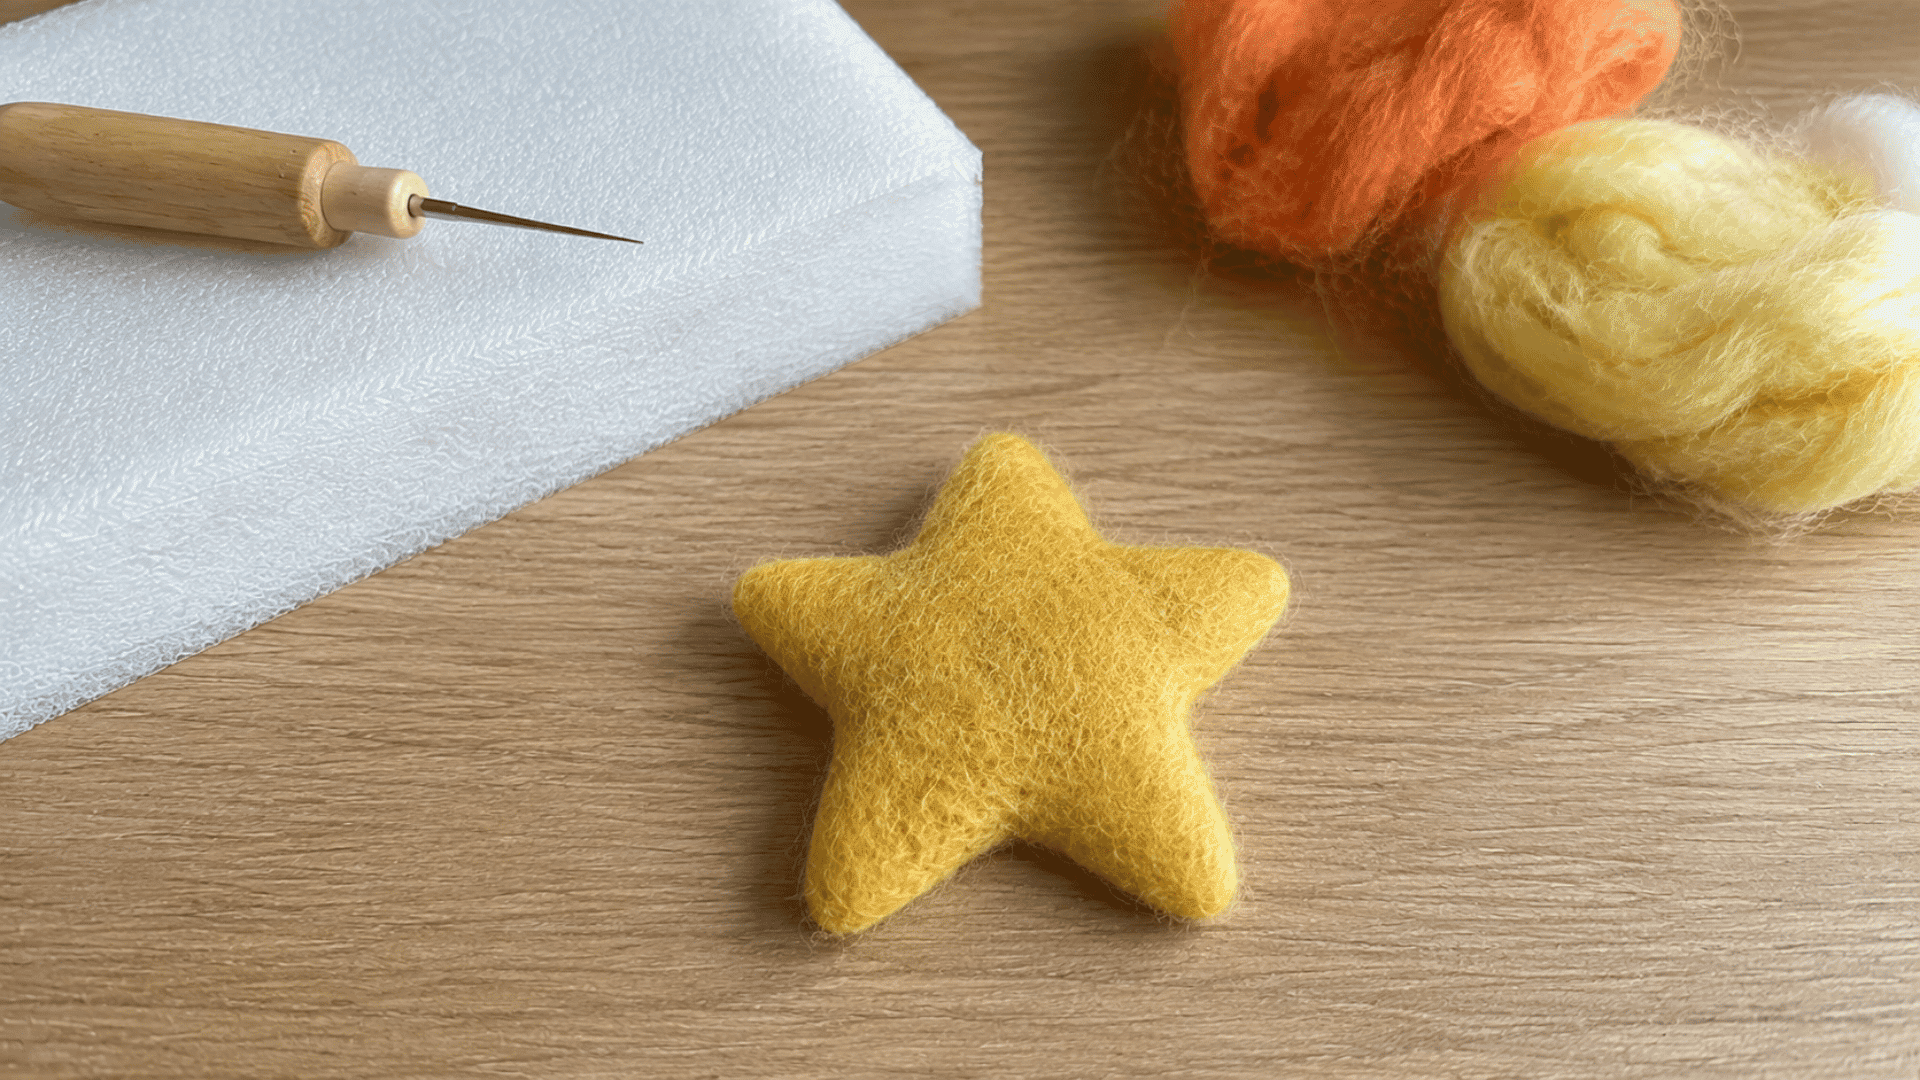
Now the real shaping begins. A star means several pointed sections instead of one smooth curve, and getting them to match takes a bit more patience than usual.
Work one point at a time and rotate constantly. Uneven points are the classic beginner giveaway, so this project is your chance to outsmart it.
6. Small Animal Head
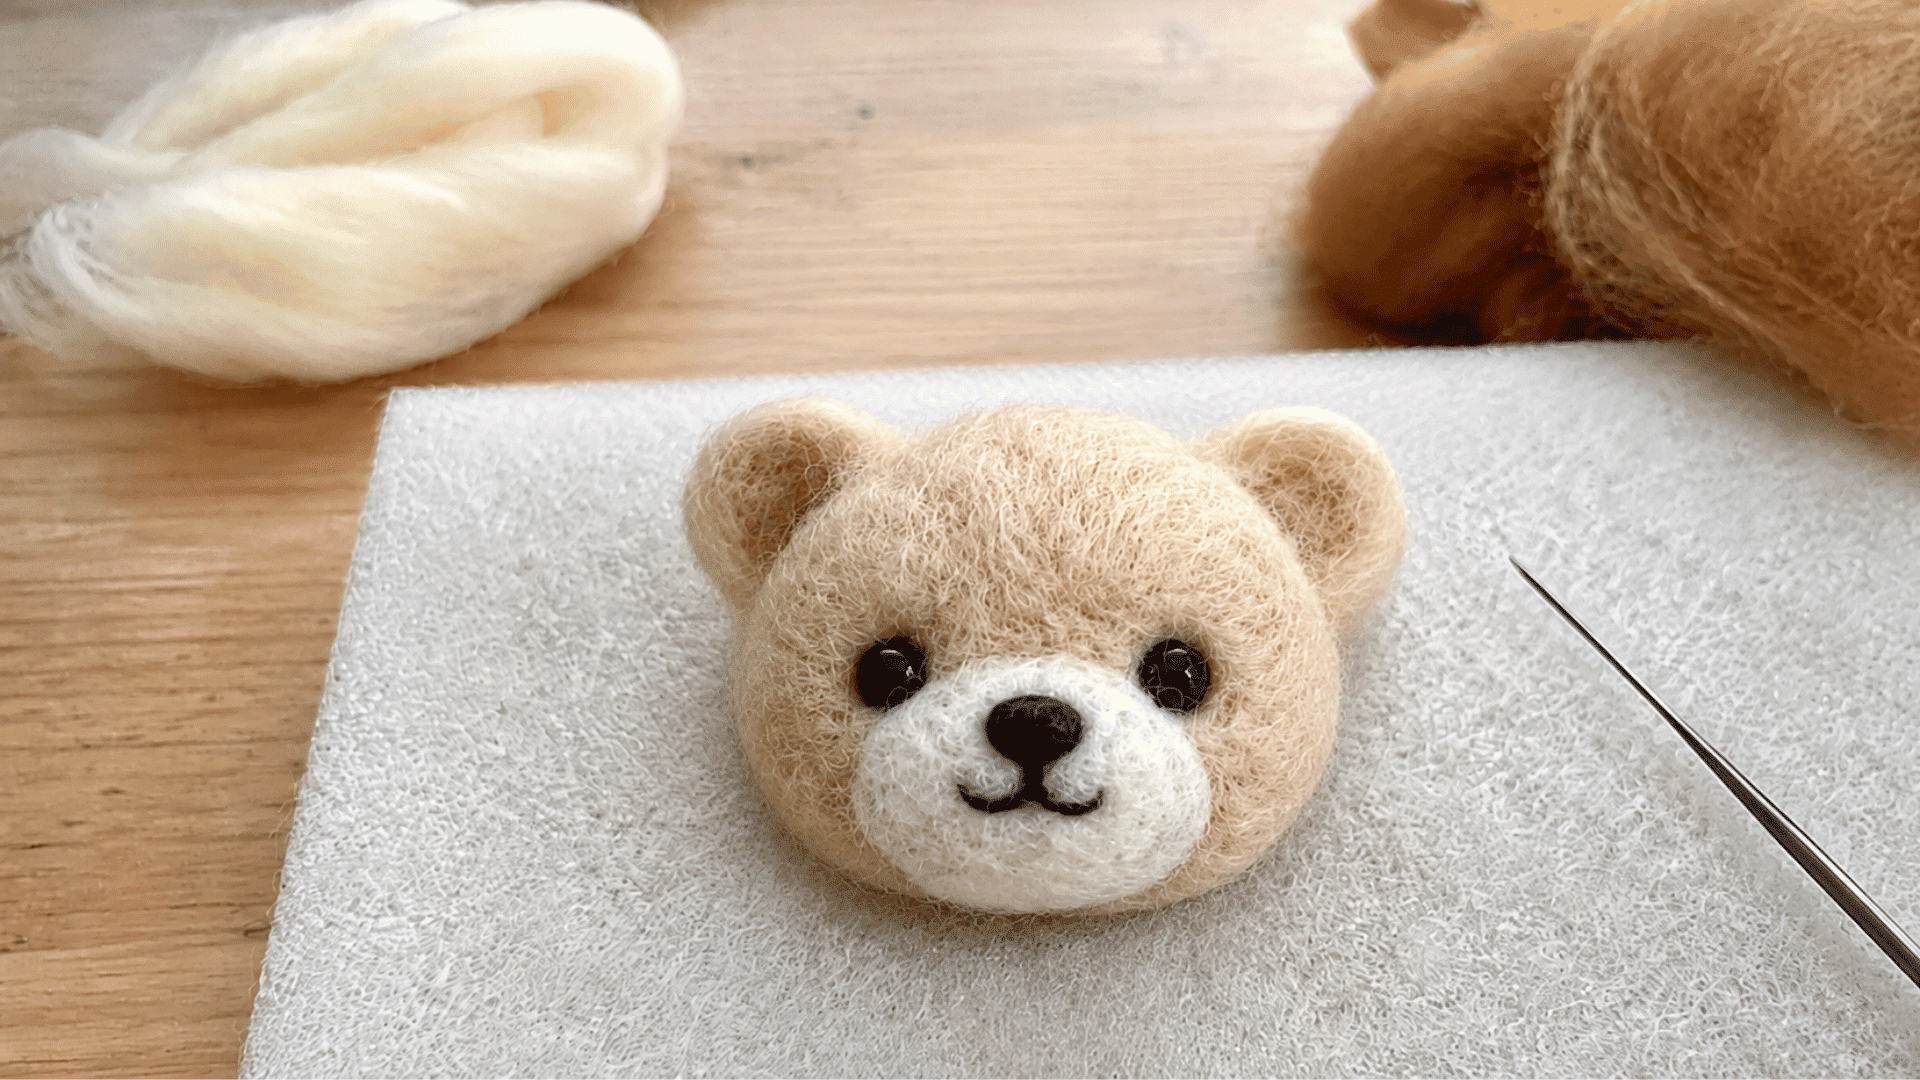
This is the project where your ball finally gets a face. Two small ears and a simple expression turn a plain shape into something with real character.
Keep the ears soft until you’re ready to attach them, and use the tiniest dots of dark wool for eyes. Less detail here looks better than you’d expect.
7. Tiny Cactus
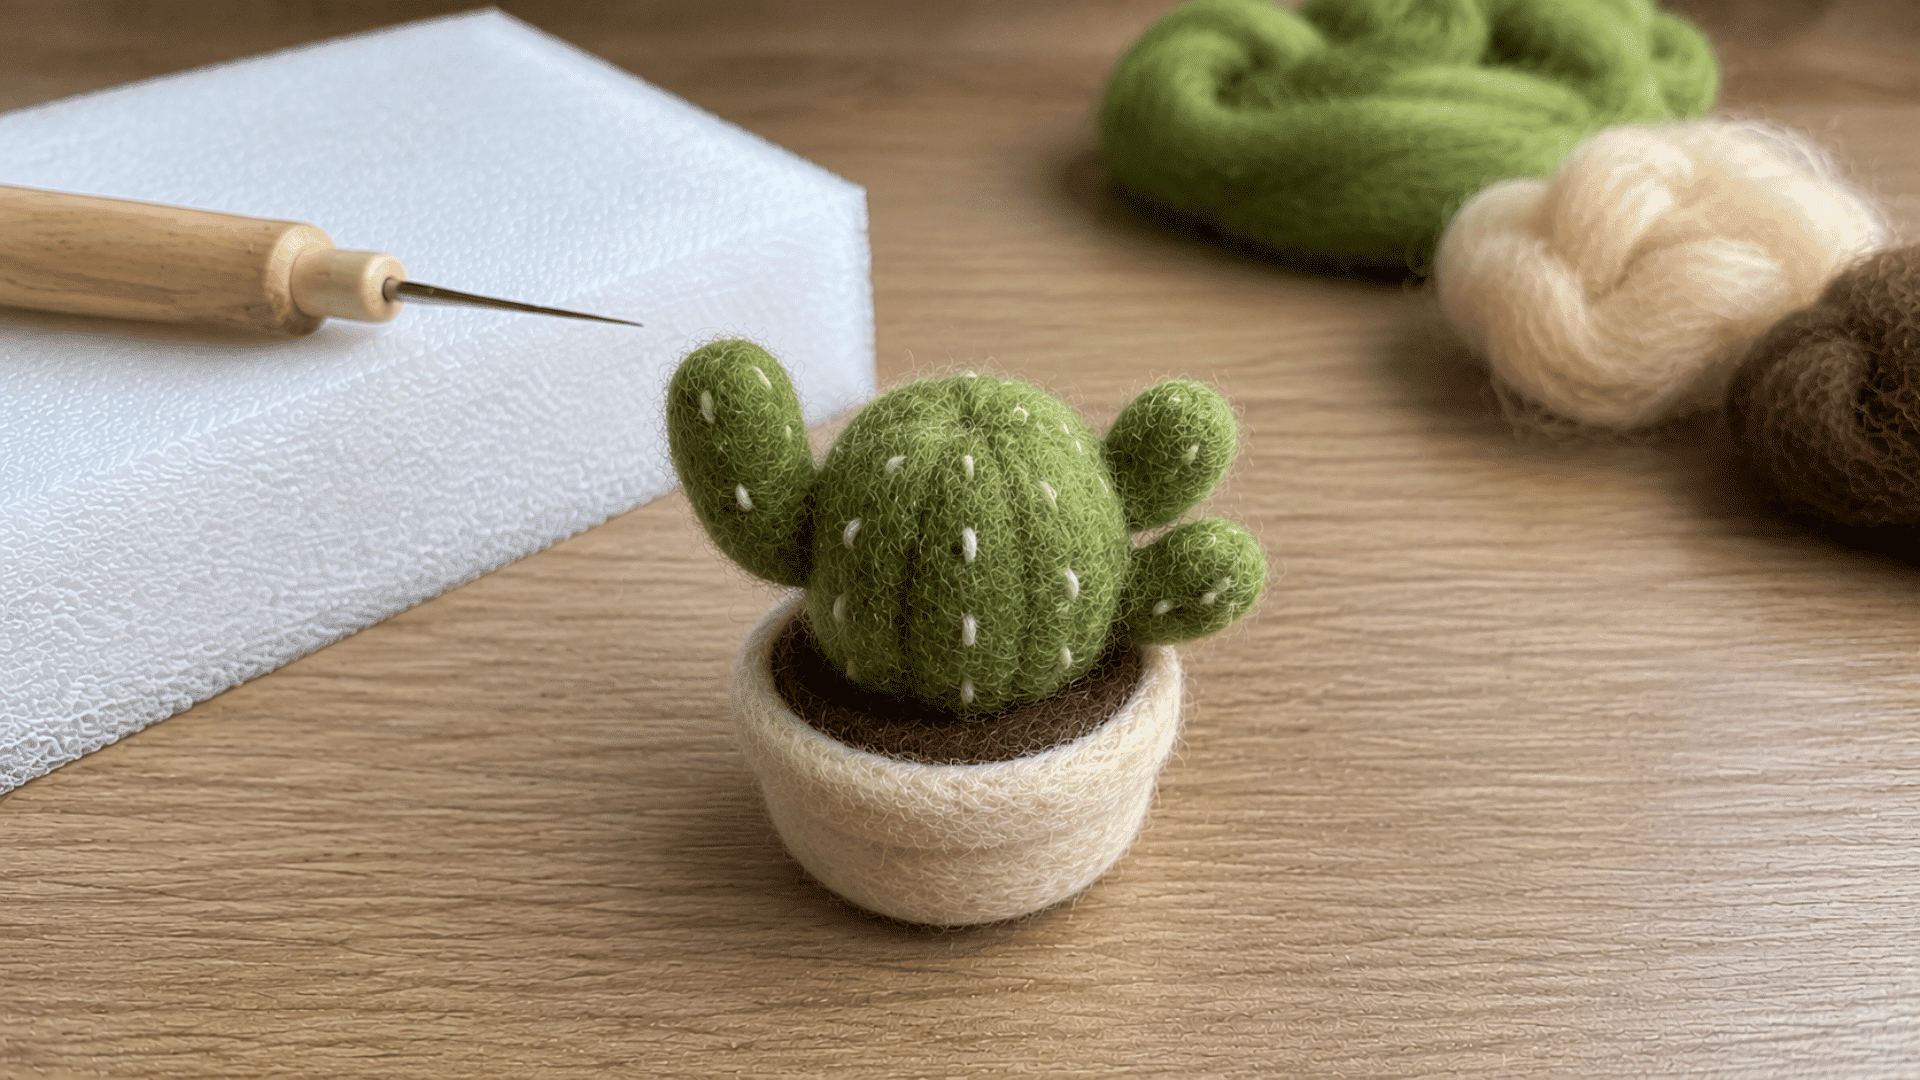
Time to practice attaching more than one small piece at once. A rounded base gets a handful of little arms, each felted on separately, much like ears or wings.
Make the arms slightly different sizes so the shape looks grown rather than manufactured, and keep the joining ends a touch loose so they blend right in.
Small Habits That Make Needle Felting Much Easier
Getting comfortable with needle felting takes a little patience, especially when you are still learning how the material responds. A few smart habits can make each session feel less frustrating.
- Use a felting mat: Protects your table and supports the wool while you work.
- Keep fingers clear: Hold the wool away from the needle path, especially on small pieces.
- Poke straight down: Angled pokes can bend or snap the needle.
- Start with less wool: Build the shape gradually instead of using one large bundle.
- Rotate the piece often: Helps keep the shape firm and even on all sides.
- Avoid pushing too hard: Slow, controlled pokes give you better shaping control.
- Add details later: Form the main shape first, then work on eyes, markings, and smaller features.
- Use different needle sizes: Coarse needles shape faster, while fine needles help with finishing.
- Replace damaged needles: Bent or weak needles are more likely to break.
- Store needles safely: Keep them covered and away from children and pets.
I recommend slowing down around small details, since learning to improve art skills often starts with better control.
How Long Does Needle Felting Take?
Project time depends on the size of your piece, how much detail you’re adding, the type of wool, and how firm you want the final shape.
A simple ball or heart usually takes around 20 to 40 minutes, since it’s mostly just shaping and firming one basic form.
A small character with a couple of attached pieces, like a bird or a mini animal, often takes closer to 1 to 2 hours spread across one or two sittings.
More detailed figures with fine features, multiple colors, or several attached parts can take several hours total, often split over a few sessions as your needle control improves.
Final Thoughts
You’ve reached the end, and needle felting probably feels a lot less intimidating than when you started reading. I still remember how unsure I was before my first poke turned a clump of wool into something recognizable.
Your early attempts won’t be perfect, and that’s honestly fine, since this craft forgives lopsided ears and wonky shapes. No rushing required, just needle, wool, and patience doing their thing together.
Now it’s your turn to pick up that needle. Go on, poke that fluff into something only you could’ve made.
Frequently Asked Questions
What Type of Wool is Best for Needle Felting?
Coarser wool felts faster and holds firmer shapes, making it the easiest choice for beginners.
Can Needle-Felted Items Be Washed?
Stick to gentle spot cleaning. Soaking, rubbing, or twisting can pull the piece out of shape.
Can You Needle Felt Over a Wire Frame?
Yes, wire frames support larger figures well, but always cover exposed wire ends first.