

A few pipe cleaners can become flowers, animals, jewelry, decorations, and even small DIY room decor with nothing more than bending, twisting, looping, and coiling. That is what makes pipe cleaner art so easy to start at home.
The material is flexible enough for beginners but sturdy enough to hold detailed shapes once formed.
Most ideas also allow plenty of color and shape changes. Below, you will find easy pipe cleaner art projects with supplies, clear instructions, and practical tips for each one.
What is Pipe Cleaner Art?
Pipe cleaners are thin, flexible wires wrapped in soft fibers, originally designed decades ago to clean tobacco pipes. Today, they’re sold in craft stores for creative use, with almost no connection to their original purpose.
Pipe cleaner art refers to shaping these wires by hand into recognizable forms, from simple loops to detailed figures. Because the wire holds its shape once bent, no glue or heat is required to keep a design intact.
This makes it different from most other craft materials, which often need cutting, folding, or adhesives to take shape. A pipe cleaner can be reshaped repeatedly, undone, and reused, giving it a flexibility most art supplies don’t offer.
Pipe Cleaner Art Ideas for Easy Craft Time at Home
A relaxed craft session at home can turn a few spare minutes into something creative. You can keep the setup simple while still making projects that feel personal and enjoyable.
Pipe cleaner projects fit naturally alongside other creative activities at home because they need little setup and can be adapted to different ages and skill levels.
1. Pipe Cleaner Rose
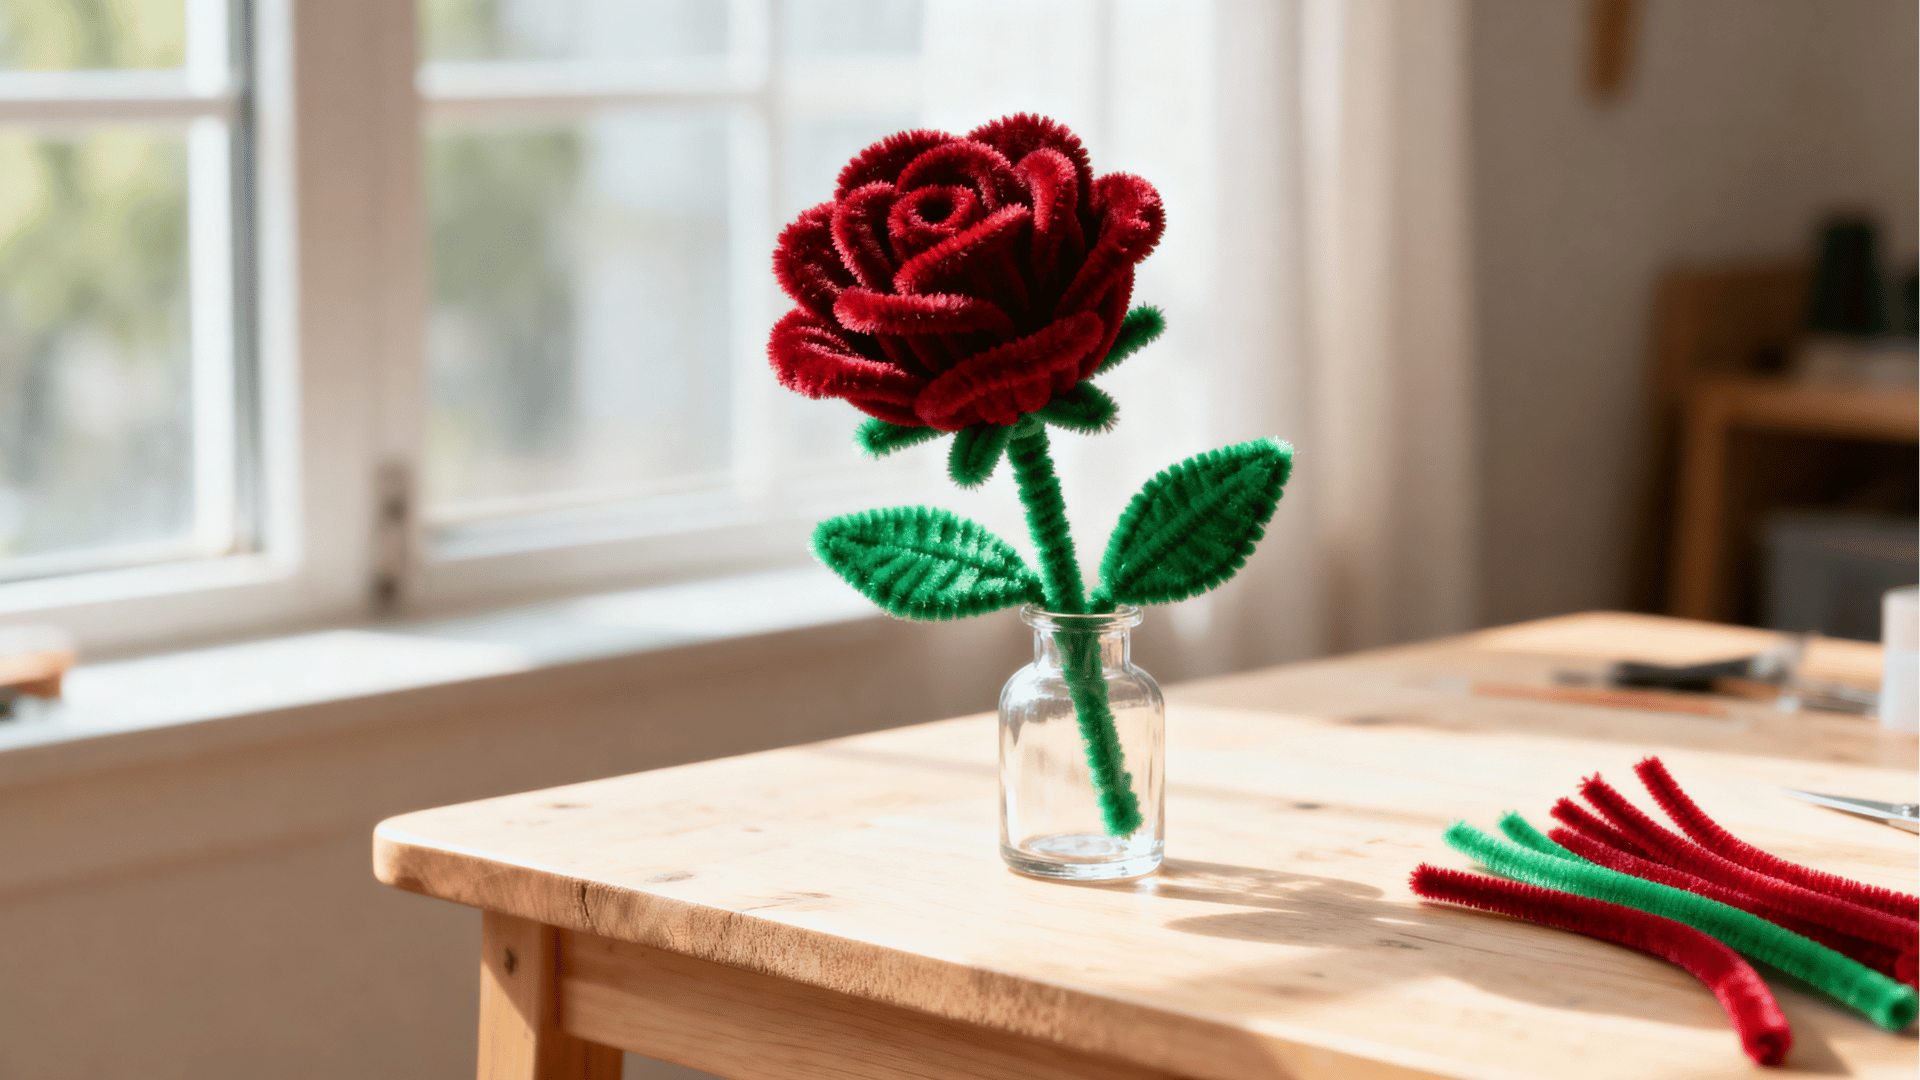
A pipe cleaner rose uses coiled stems to form a flower with a tight center and wider outer petals. It can be added to bouquets, gifts, or small floral displays.
Craft Supplies Needed: Colored pipe cleaners (2 to 3), Green pipe cleaner (1), Scissors, Craft glue, Pencil (optional)
Steps to Follow:
- Coil one colored pipe cleaner tightly to form the flower center.
- Wrap another stem around it to create larger outer petals.
- Bend the outer edges slightly to shape each petal.
- Twist a green pipe cleaner around the base as the stem.
- Add a small green loop along the stem for a leaf.
Tip: Work in small sections and check the shape often,rushing tends to flatten the whole design.
2. Pipe Cleaner Daisy
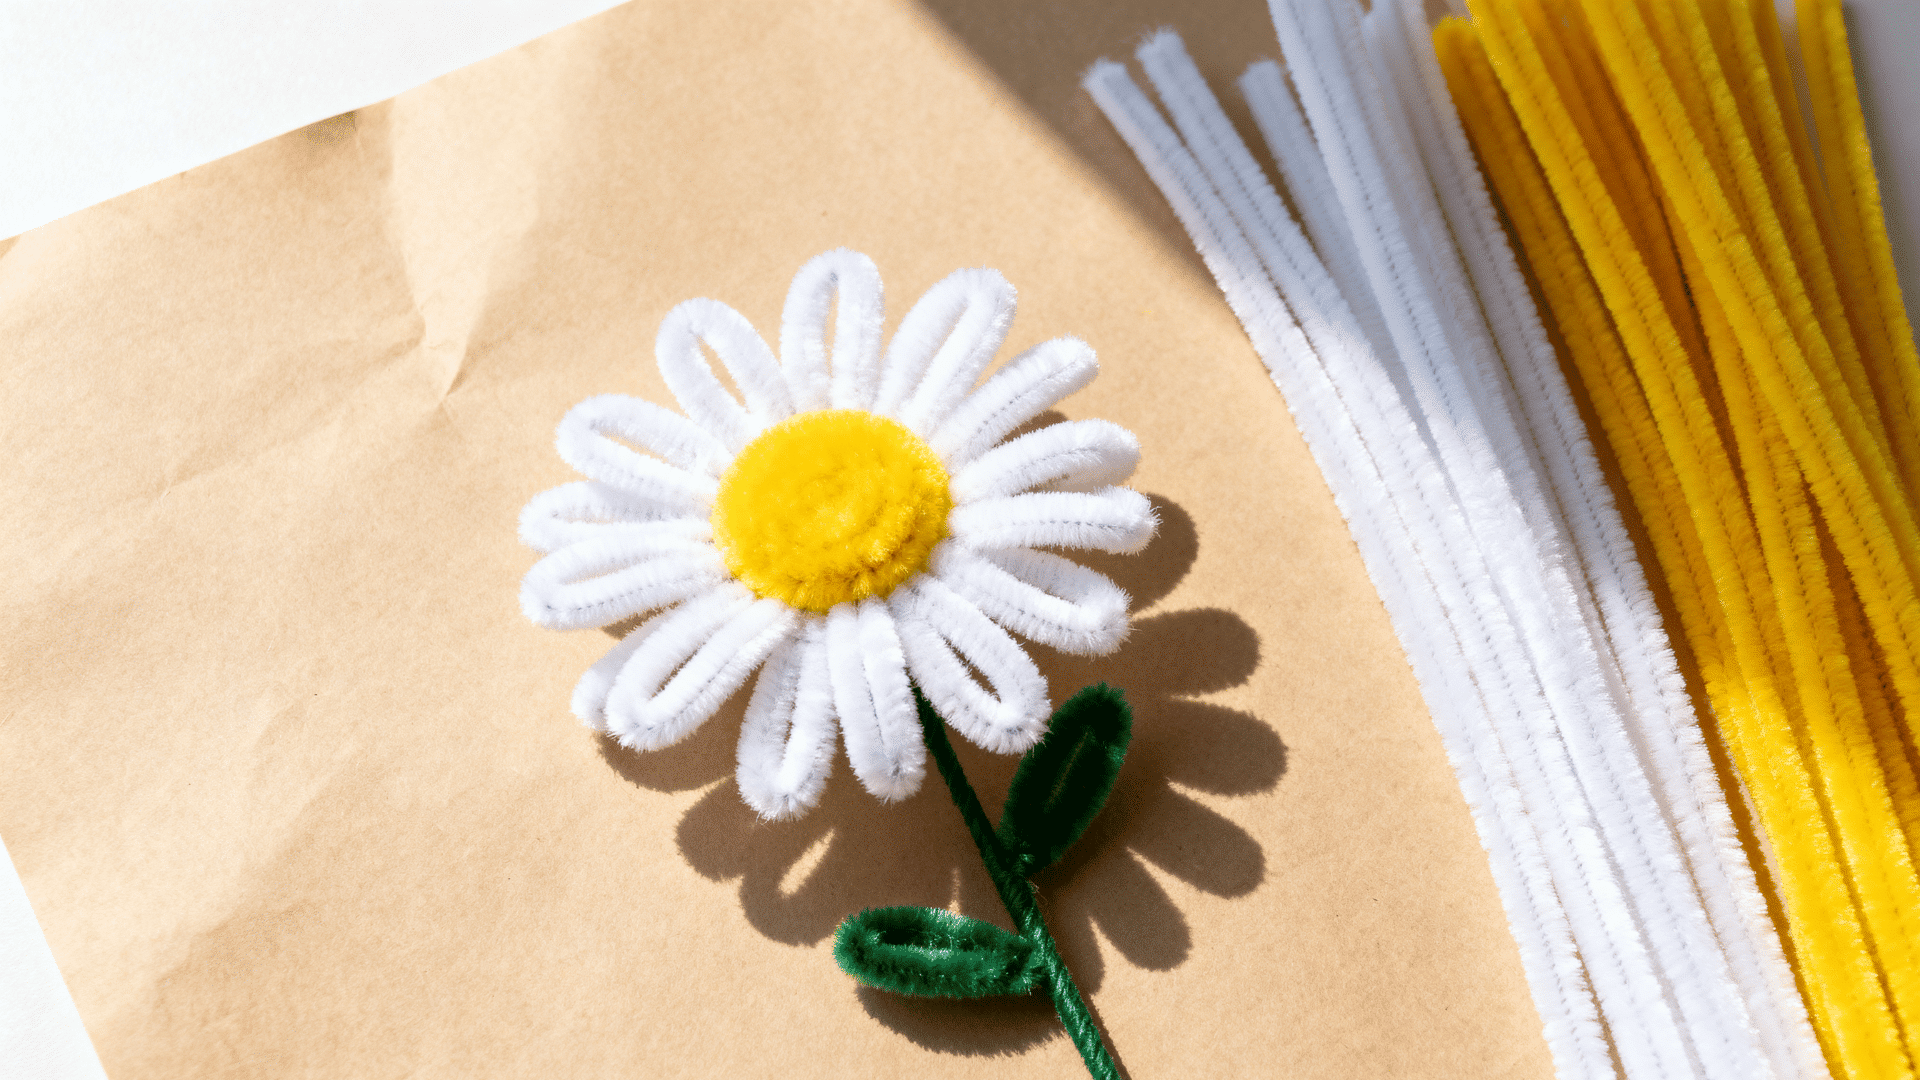
A pipe cleaner daisy uses repeated loops to form rounded petals around a small center. It is a good pipe cleaner art project for practicing even folds and twists.
Craft Supplies Needed: White pipe cleaners (2), Yellow pipe cleaner (1), Green pipe cleaner (1), Scissors, Craft glue
Steps to Follow:
- Fold the white stems into several loops of similar size.
- Twist the loops together firmly at the center.
- Coil the yellow pipe cleaner into a small round center.
- Attach the yellow coil over the joined petal section.
- Twist the green pipe cleaner onto the back as a stem.
Tip: Space the folds evenly first,fixing gaps after joining is trickier than preventing them.
3. Pipe Cleaner Tulip
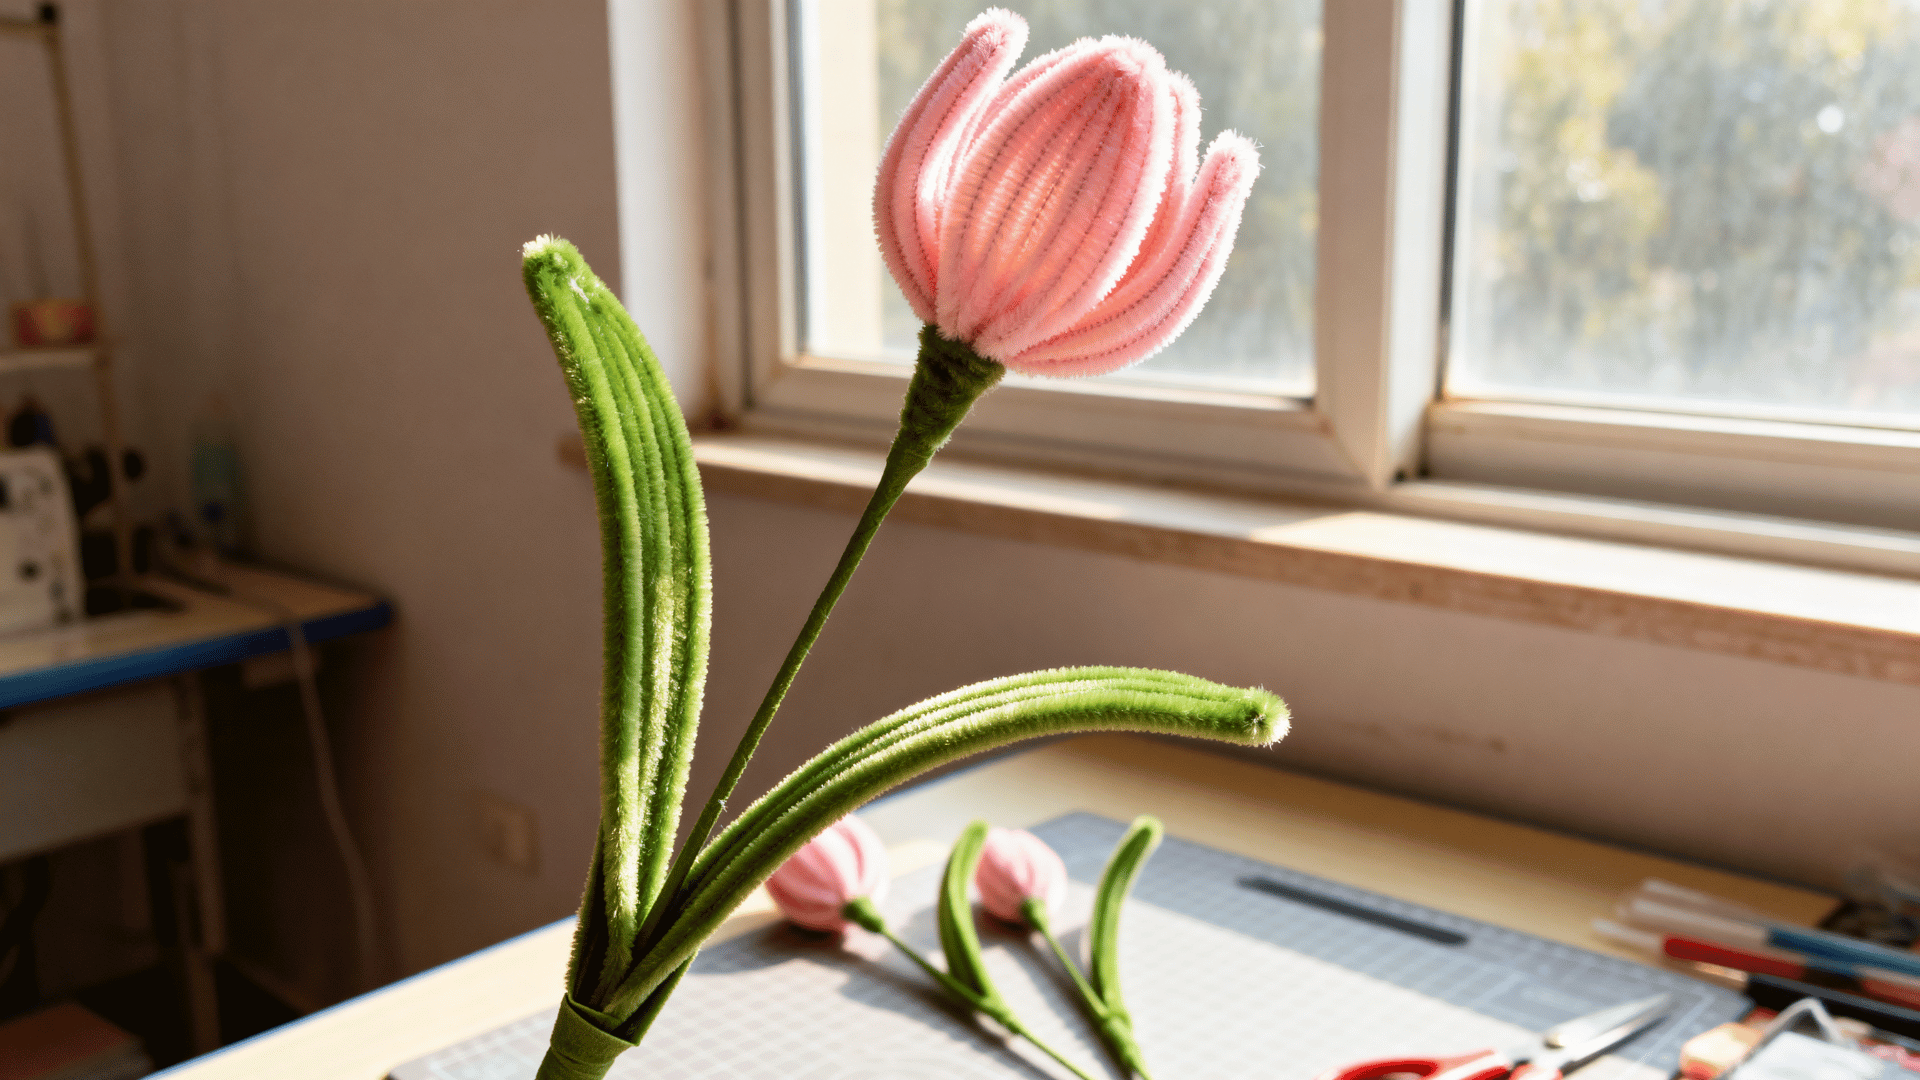
A pipe cleaner tulip uses rounded folds instead of several separate petals. A pipe cleaner tulip uses rounded folds instead of several separate petals, while its tall green stem also works well in small tulip vase arrangements.
Craft Supplies Needed: Colored pipe cleaners (2), Green pipe cleaners (2), Scissors, Craft glue, Small container (optional)
Steps to Follow:
- Fold the colored stem into three rounded petal sections.
- Bring the lower ends together and twist them at the base.
- Attach a green pipe cleaner beneath the flower head.
- Fold another green stem into one long leaf.
- Wrap the leaf around the lower part of the stem.
Tip: Press gently rather than flattening the top,keeping some curve gives it a truer flower silhouette.
4. Pipe Cleaner Sunflower
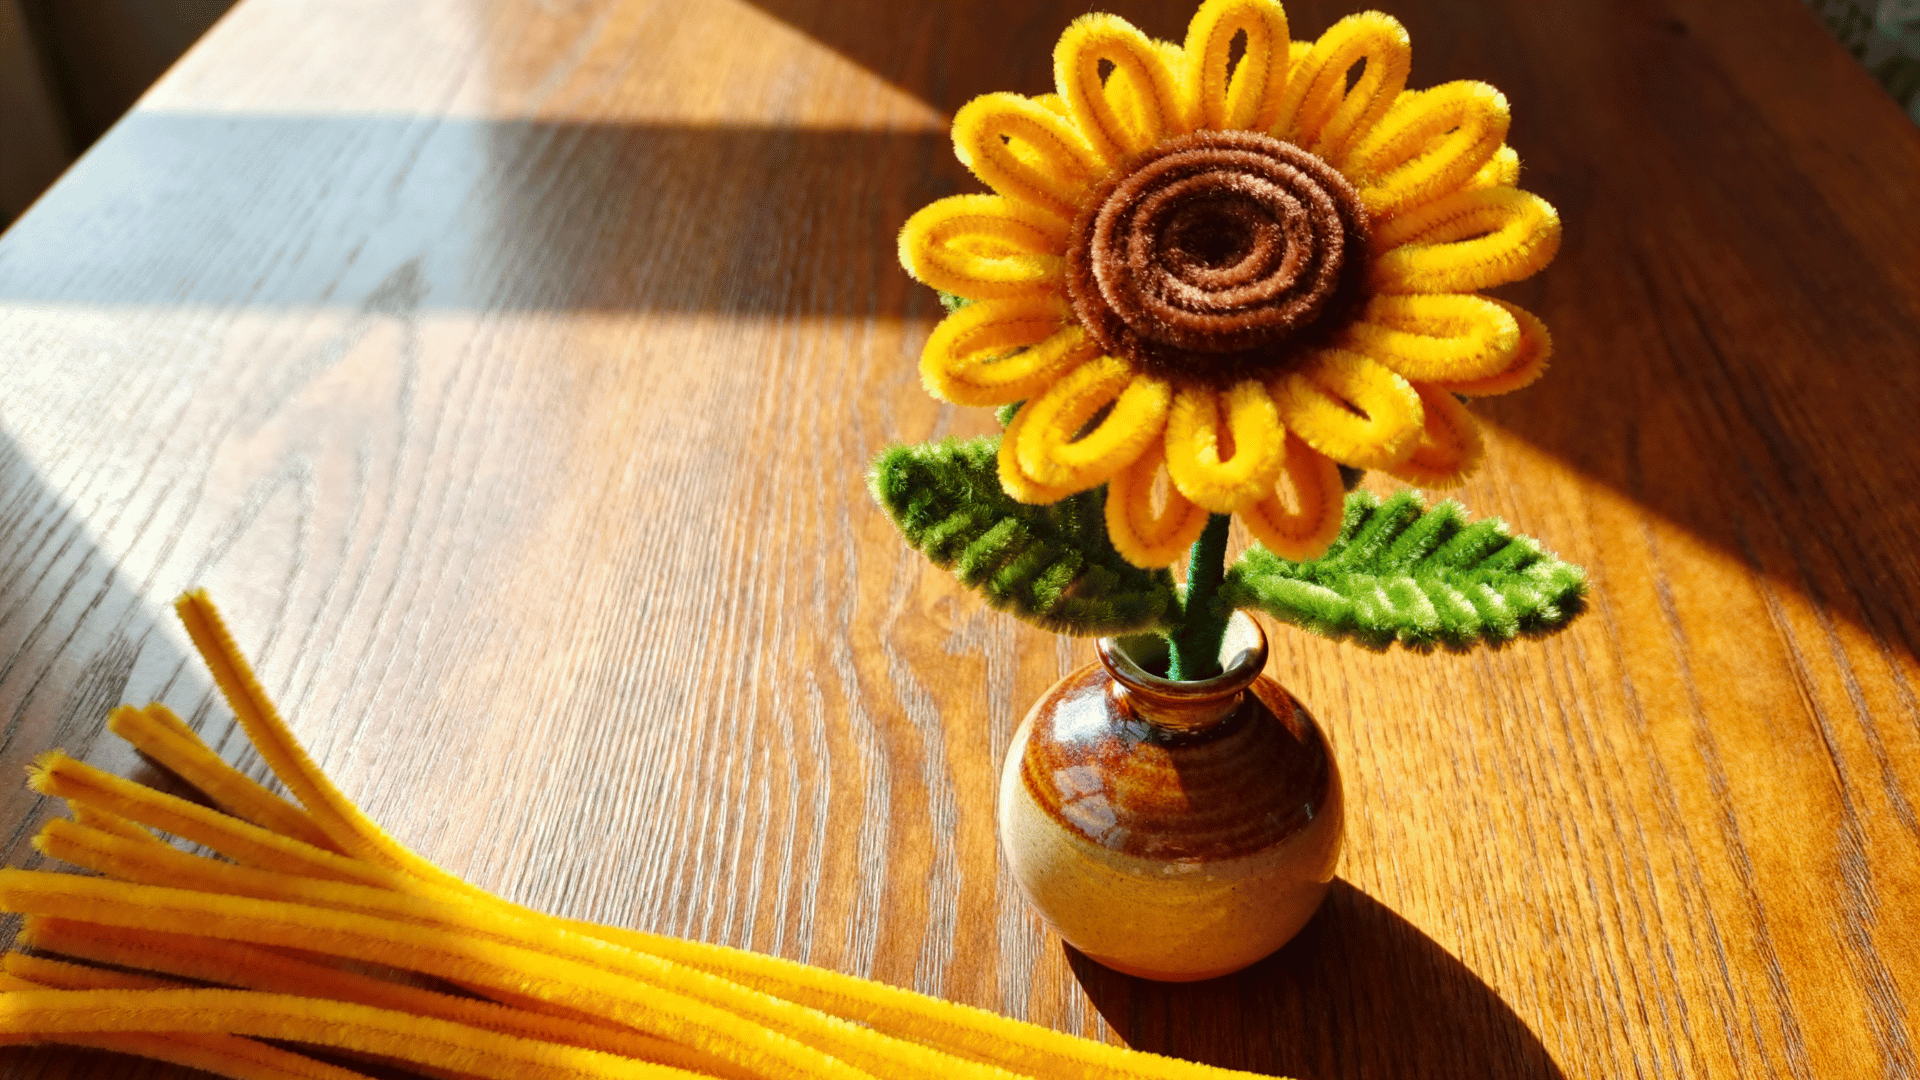
A pipe cleaner sunflower uses narrow yellow loops around a darker center. The repeated petal pattern also makes it easy to make flowers in several sizes.
Craft Supplies Needed: Yellow pipe cleaners (3), Brown pipe cleaner (1), Green pipe cleaners (2), Scissors, Craft glue
Steps to Follow:
- Fold the yellow stems into several narrow petal loops.
- Twist the lower ends together to form a round flower head.
- Coil the brown pipe cleaner and place it over the center.
- Attach a green stem behind the flower head.
- Bend another green pipe cleaner into one or two leaves.
Tip: Lay every piece out before securing anything permanently,adjustments are far easier at that stage.
5. Mini Pipe Cleaner Cactus
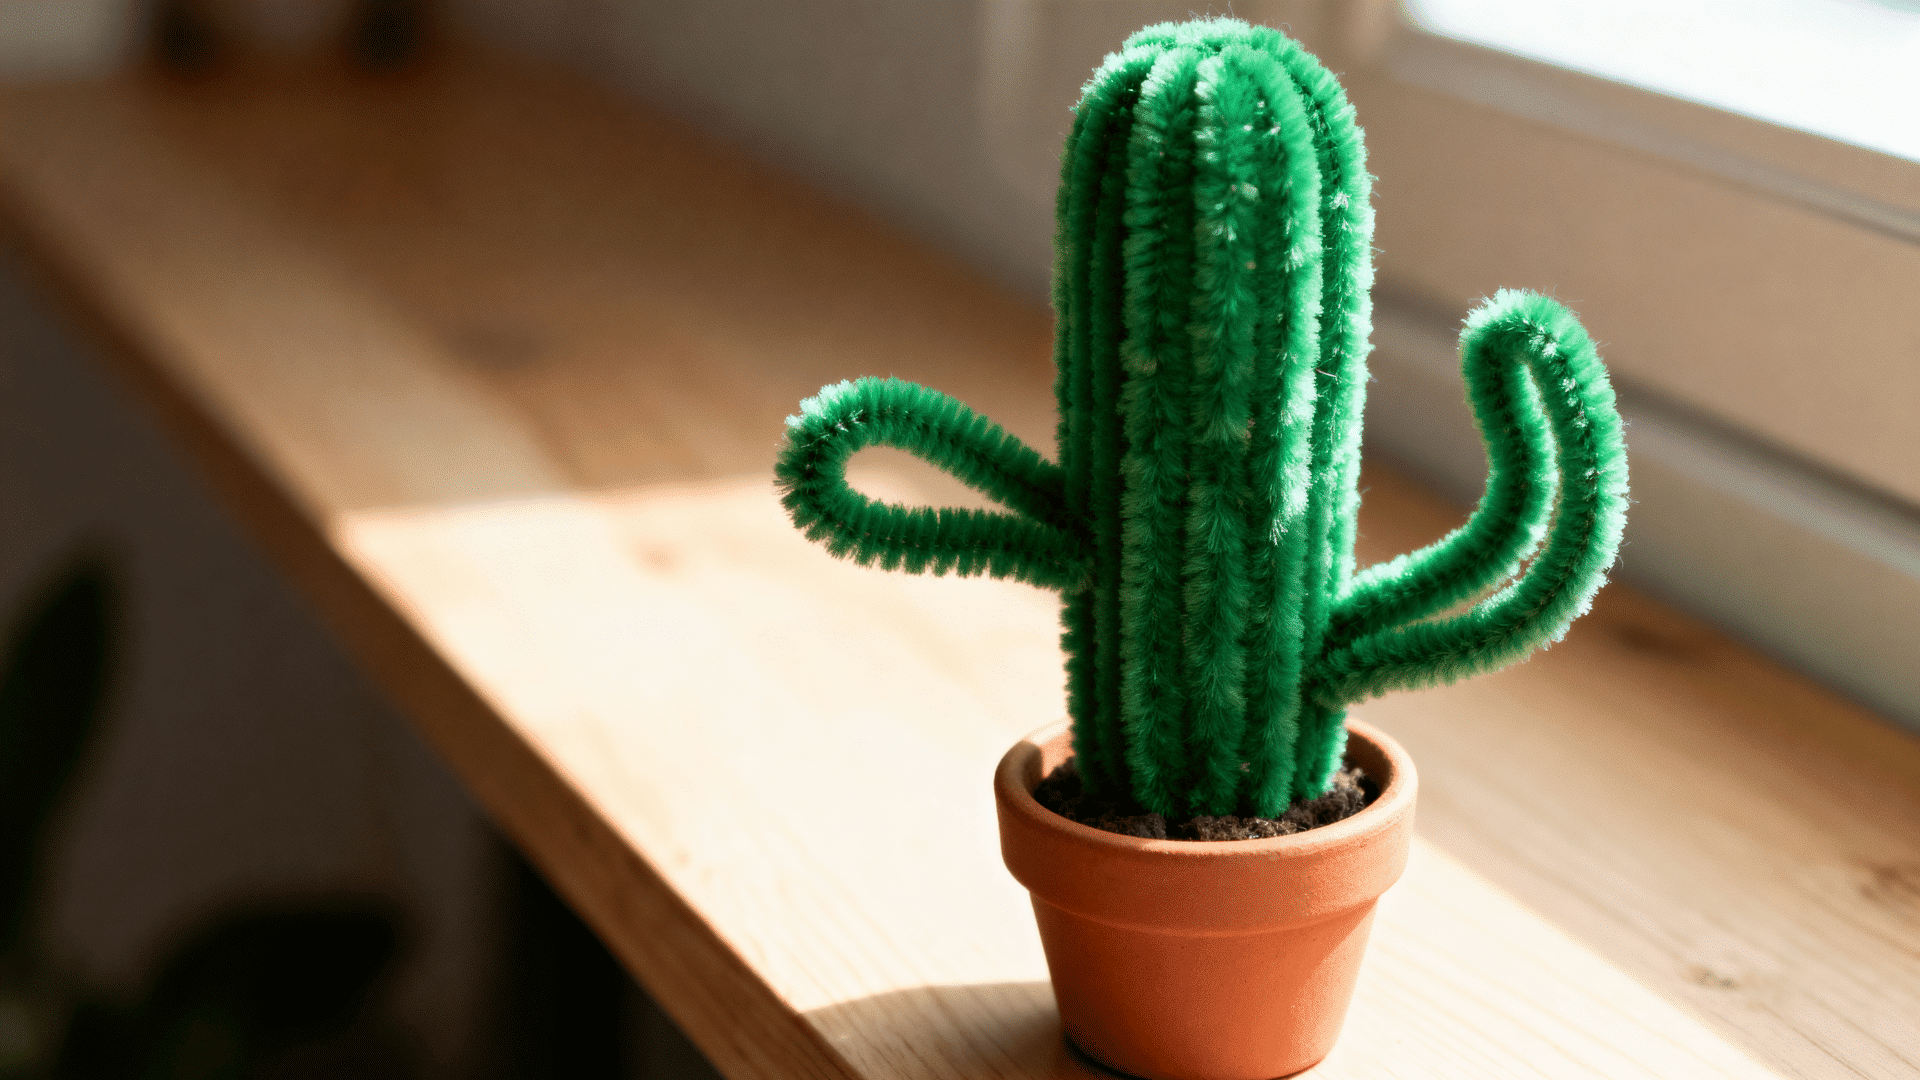
A mini cactus uses green stems shaped into a central body with short side arms. It can sit inside a paper cup, small pot, or clay base.
Craft Supplies Needed: Green pipe cleaners (3 to 4), Colored pipe cleaner (1), Small paper cup (1), Craft glue, Scissors
Steps to Follow:
- Twist two green pipe cleaners together for the main body.
- Bend shorter green pieces outward to form cactus arms.
- Fold the bottom section so the cactus can stand upright.
- Add tiny colored coils near the top as small flowers.
- Secure the cactus inside the paper cup with glue.
Tip: Test the balance before gluing anything down,a wobbly base is easier to fix early.
6. Pipe Cleaner Butterfly
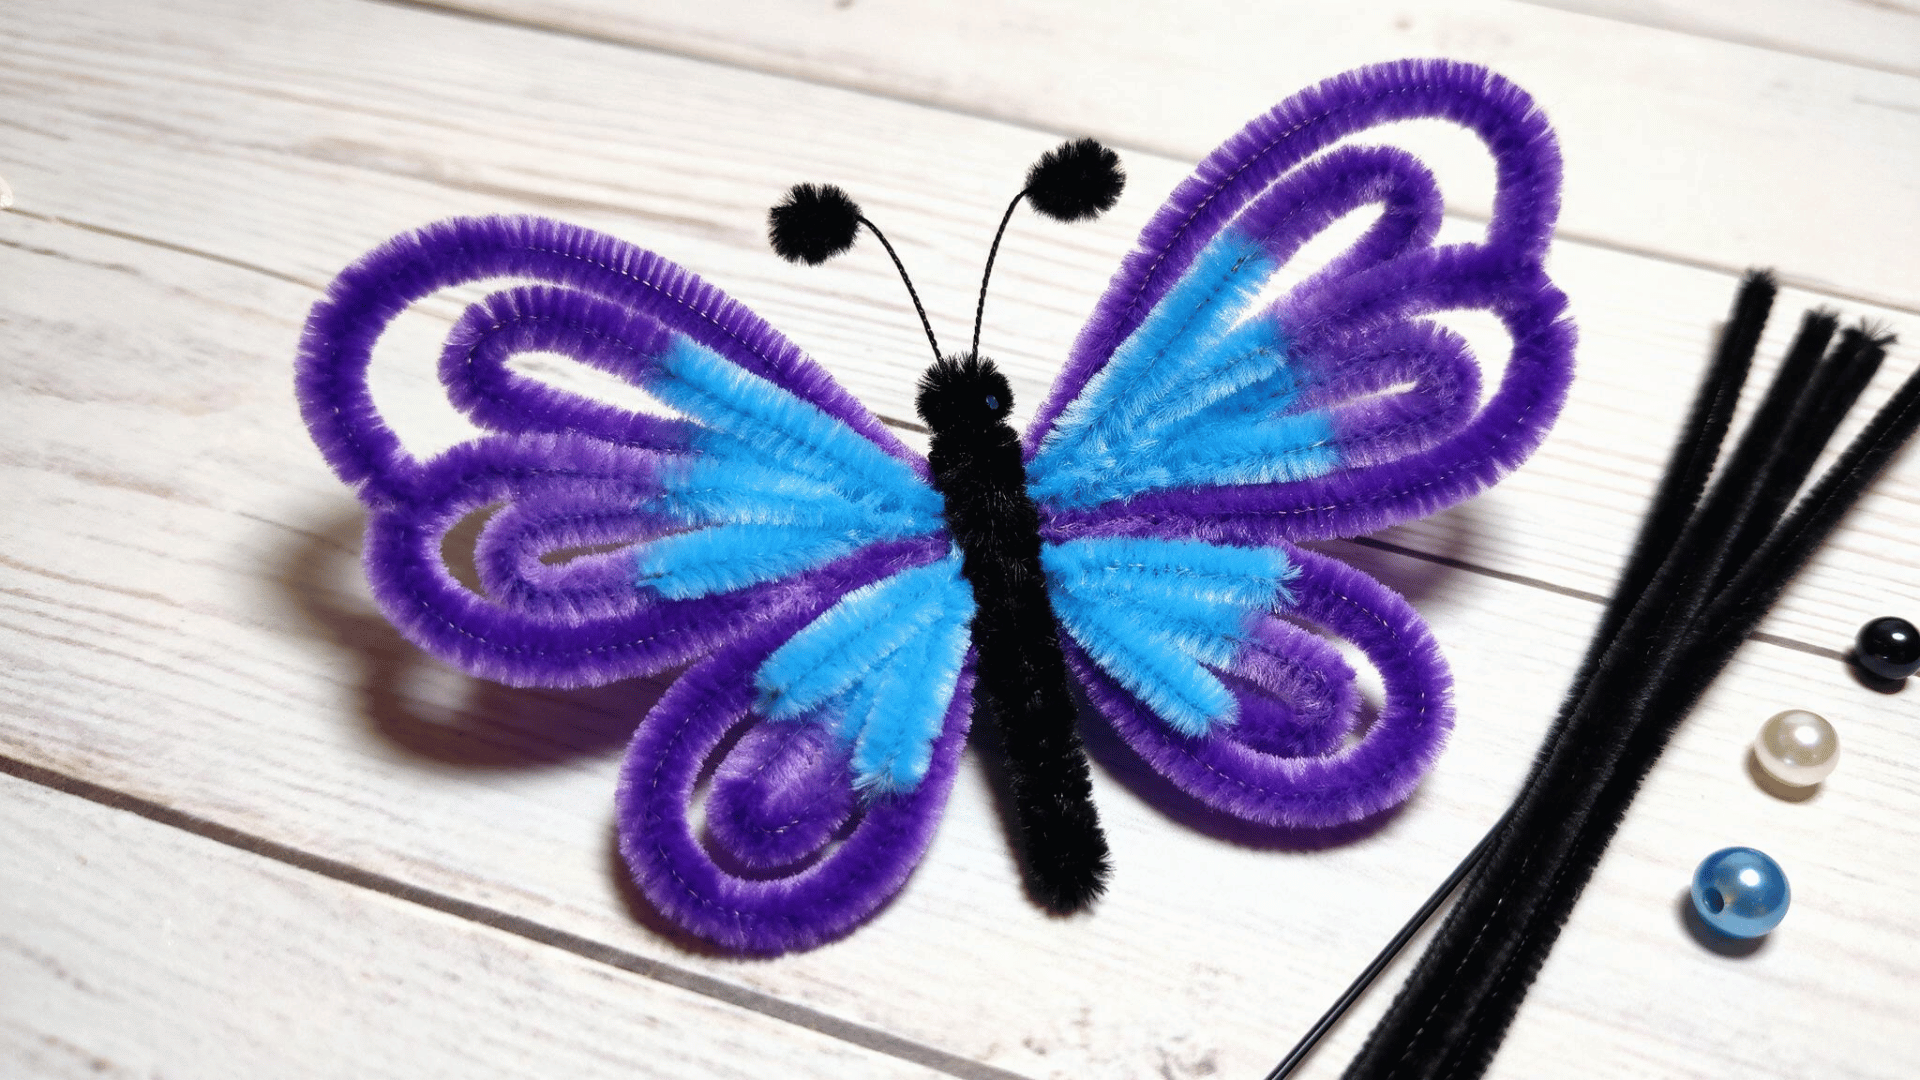
A pipe cleaner butterfly uses four looped wings joined around a narrow body. Mixing different stem colors can add more detail to the wings.
Craft Supplies Needed: Colored pipe cleaners (3), Black pipe cleaner (1), Scissors, Craft glue, Small beads (optional)
Steps to Follow:
- Form two large loops for the upper wings.
- Make two smaller loops underneath for the lower wings.
- Twist all four loops together at the center.
- Wrap a darker stem around the middle for the body.
- Curl the upper ends outward to form antennae.
Tip: Hold both sides up to the light together,uneven wings show up more clearly that way.
7. Pipe Cleaner Bumblebee
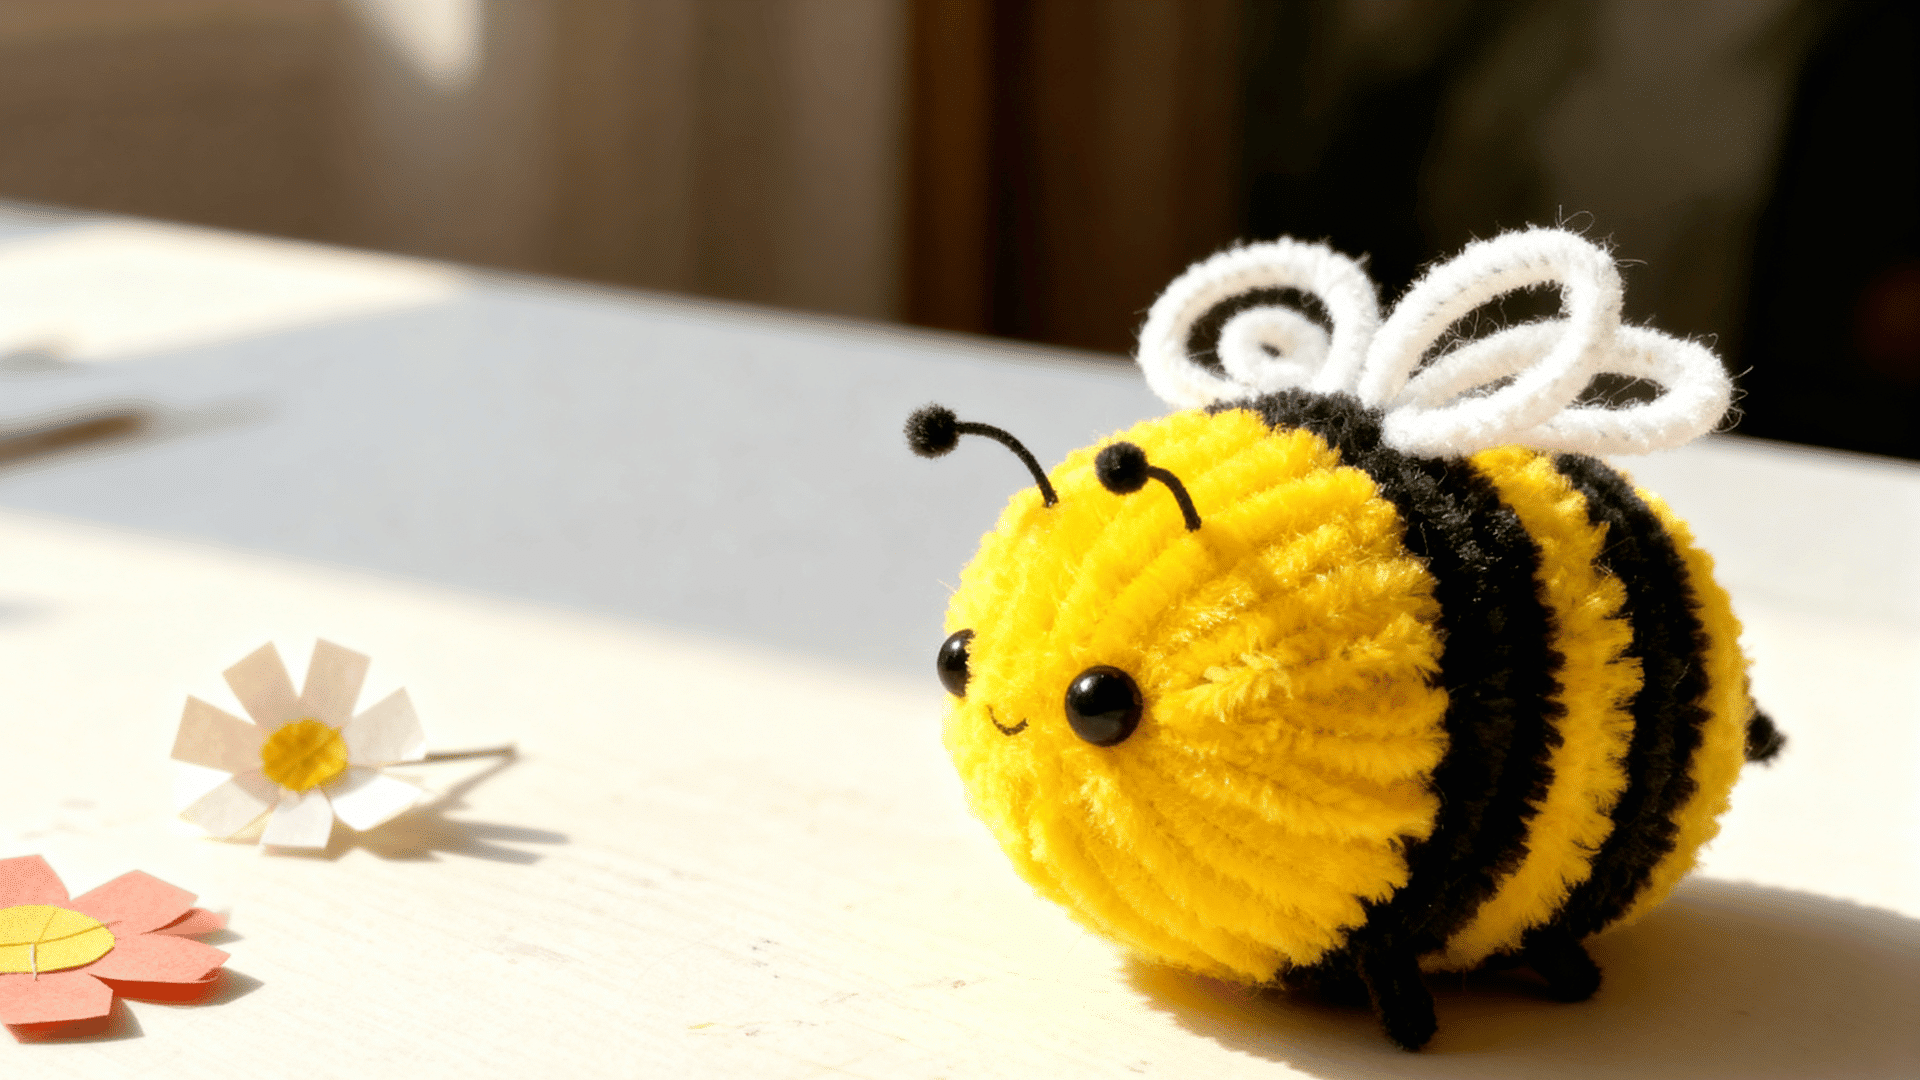
A pipe cleaner bumblebee combines a coiled body with wrapped stripes and small wings. It adds several shaping methods to one small pipe cleaner art project.
Craft Supplies Needed: Yellow pipe cleaner (1), Black pipe cleaner (1), White pipe cleaner (1), Googly eyes (2), Craft glue
Steps to Follow:
- Coil the yellow pipe cleaner into a short oval body.
- Wrap black stem sections around it to create stripes.
- Bend the white pipe cleaner into two small wing loops.
- Twist the wings onto the upper part of the body.
- Glue two eyes near the front of the bee.
Tip: Press the spiral firmly before attaching it,loose coils tend to shift out of place later.
8. Pipe Cleaner Snail
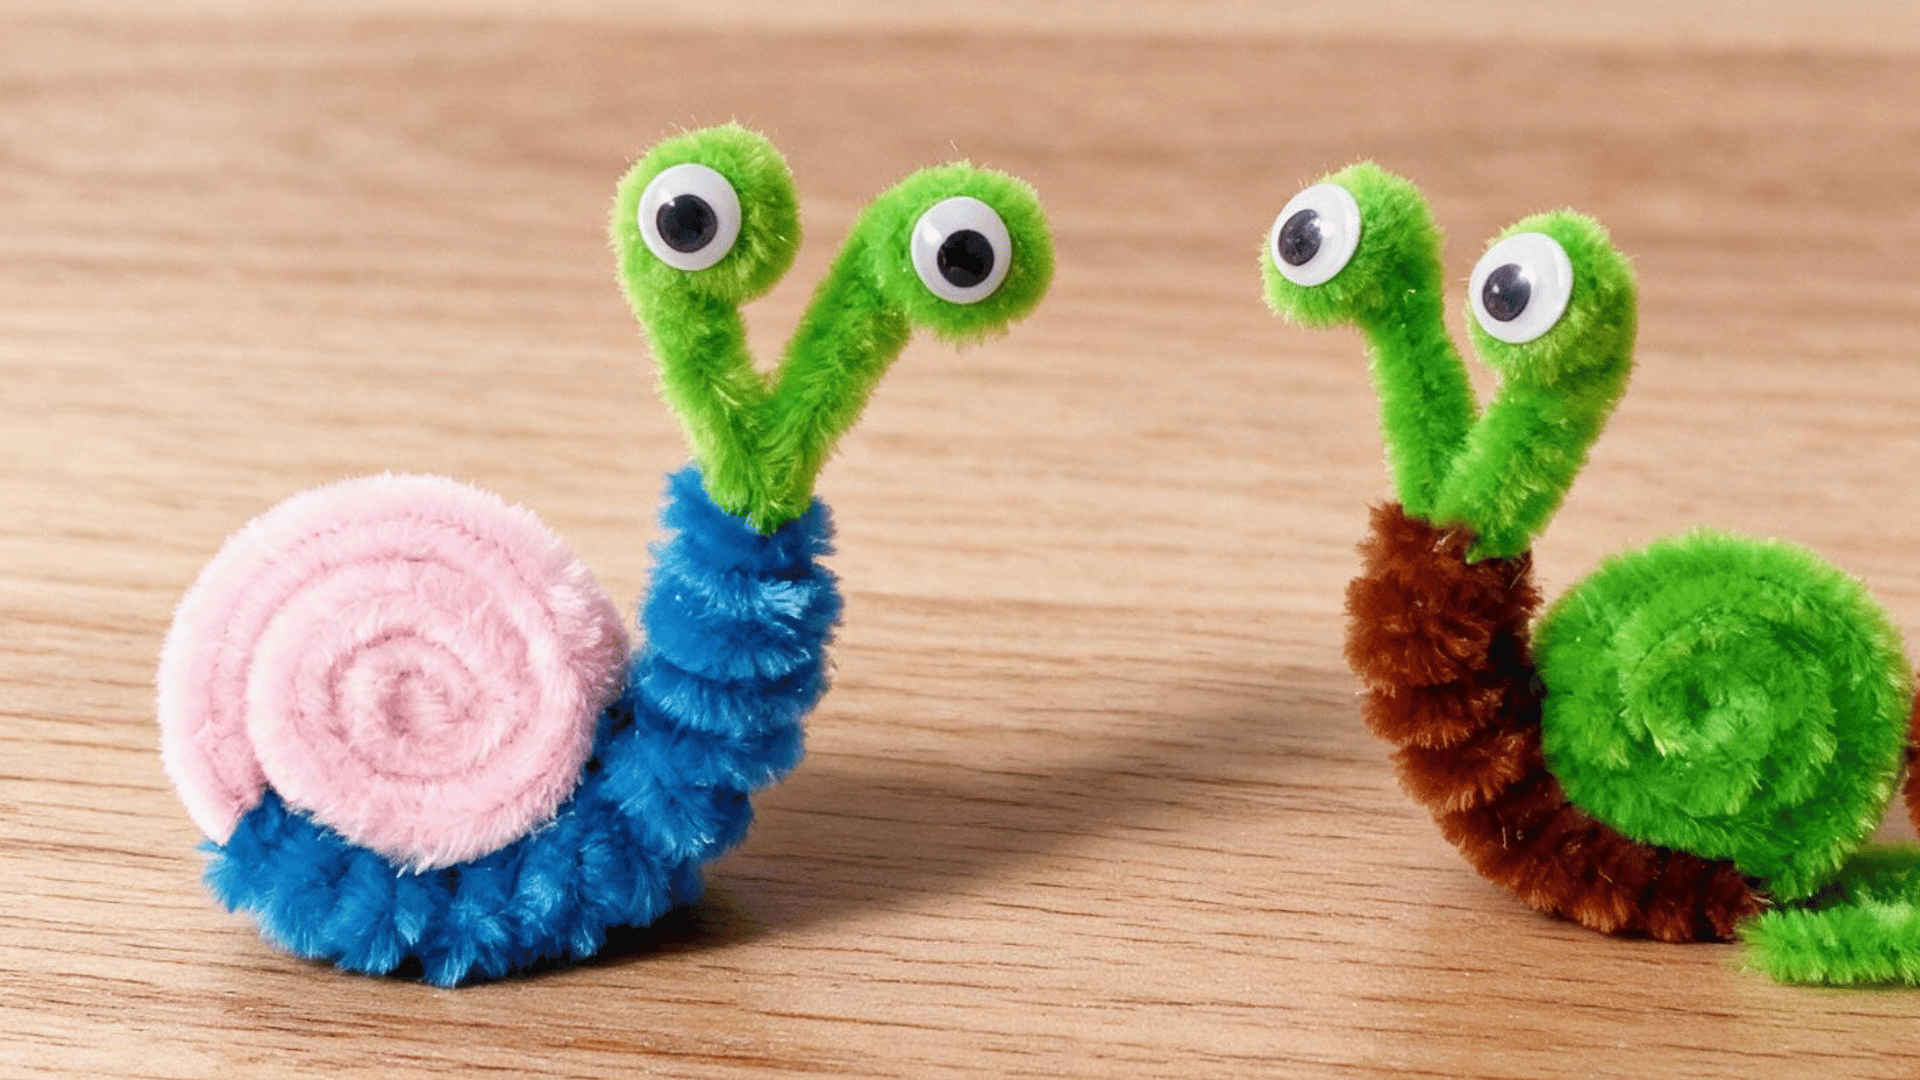
I always forget how few materials this one actually needs until I’m halfway done. It looks more elaborate than the steps behind it really are.
Craft Supplies Needed: Colored pipe cleaner (1), Second pipe cleaner (1), Googly eyes (2), Craft glue, Scissors
Steps to Follow:
- Coil one pipe cleaner into a flat spiral for the shell.
- Bend the second pipe cleaner into a long body shape.
- Curve the front section upward to form the head.
- Bend two short ends upward as eye stalks.
- Attach the shell firmly to the middle of the body.
Tip: Bend the legs after everything is joined, not before,matching angles gets messier the other way around.
9. Pipe Cleaner Spider
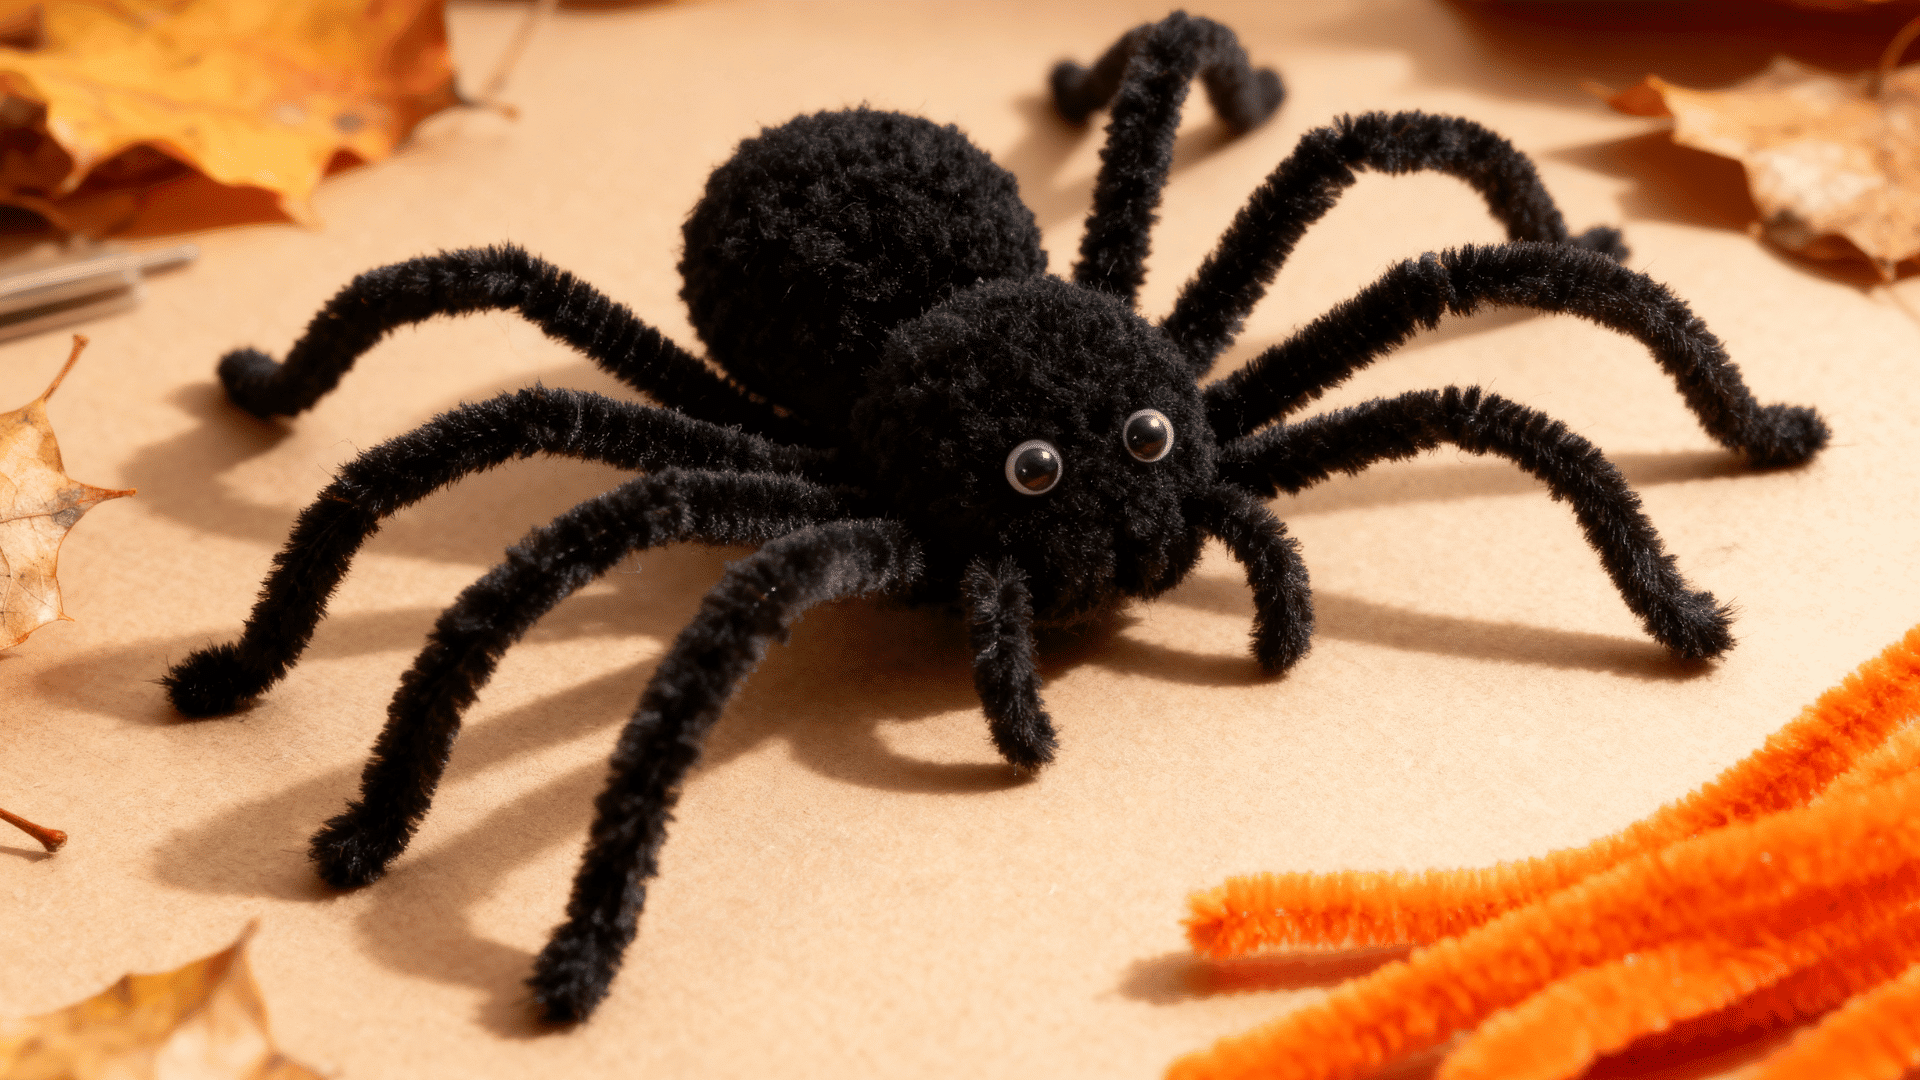
A pipe cleaner spider uses four stems joined at the center to create eight legs. It works well for animal projects and seasonal craft activities.
Craft Supplies Needed: Black pipe cleaners (4), Black pom-pom (1), Googly eyes (2), Craft glue, Scissors
Steps to Follow:
- Place four pipe cleaners across one another at the center.
- Twist them together so eight leg sections spread outward.
- Bend each leg downward and outward at two points.
- Glue a pom-pom over the middle section as the body.
- Attach two eyes to the front of the pom-pom.
Tip: I shape the legs after joining them so their lengths are easier to compare.
10. Pipe Cleaner Turtle
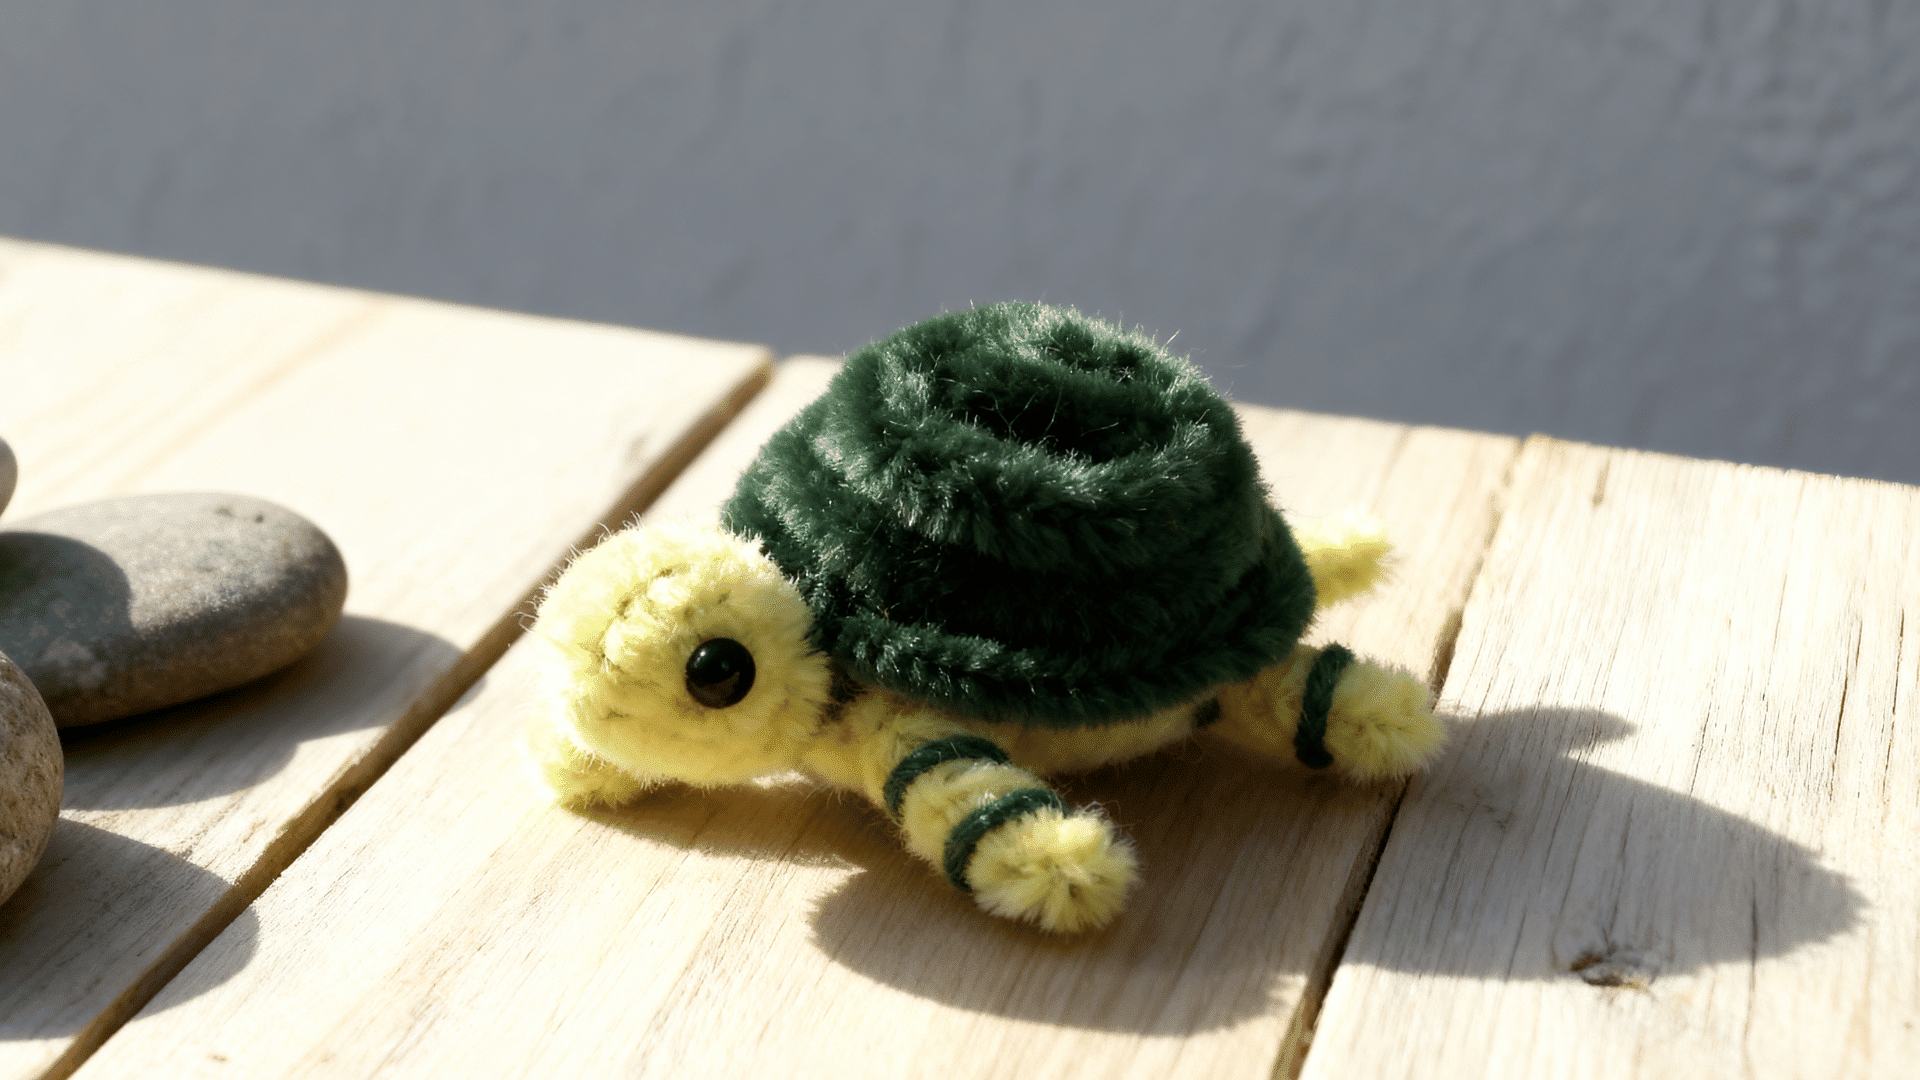
A pipe cleaner turtle combines a flat shell with short legs, a small head, and a tail. It uses several shaping methods and requires few supplies.
Craft Supplies Needed: Green pipe cleaners (3), Dark green pipe cleaner (1), Googly eyes (2), Craft glue, Scissors
Steps to Follow:
- Coil the dark green pipe cleaner into a flat round shell.
- Cut a green stem into four short sections for the legs.
- Attach each leg beneath the shell with small twists.
- Add a rounded head at the front and a tail behind.
- Glue two small eyes onto the turtle’s head.
Tip: Keep the legs fairly short so the shell stays close to the surface.
11. Pipe Cleaner Frog
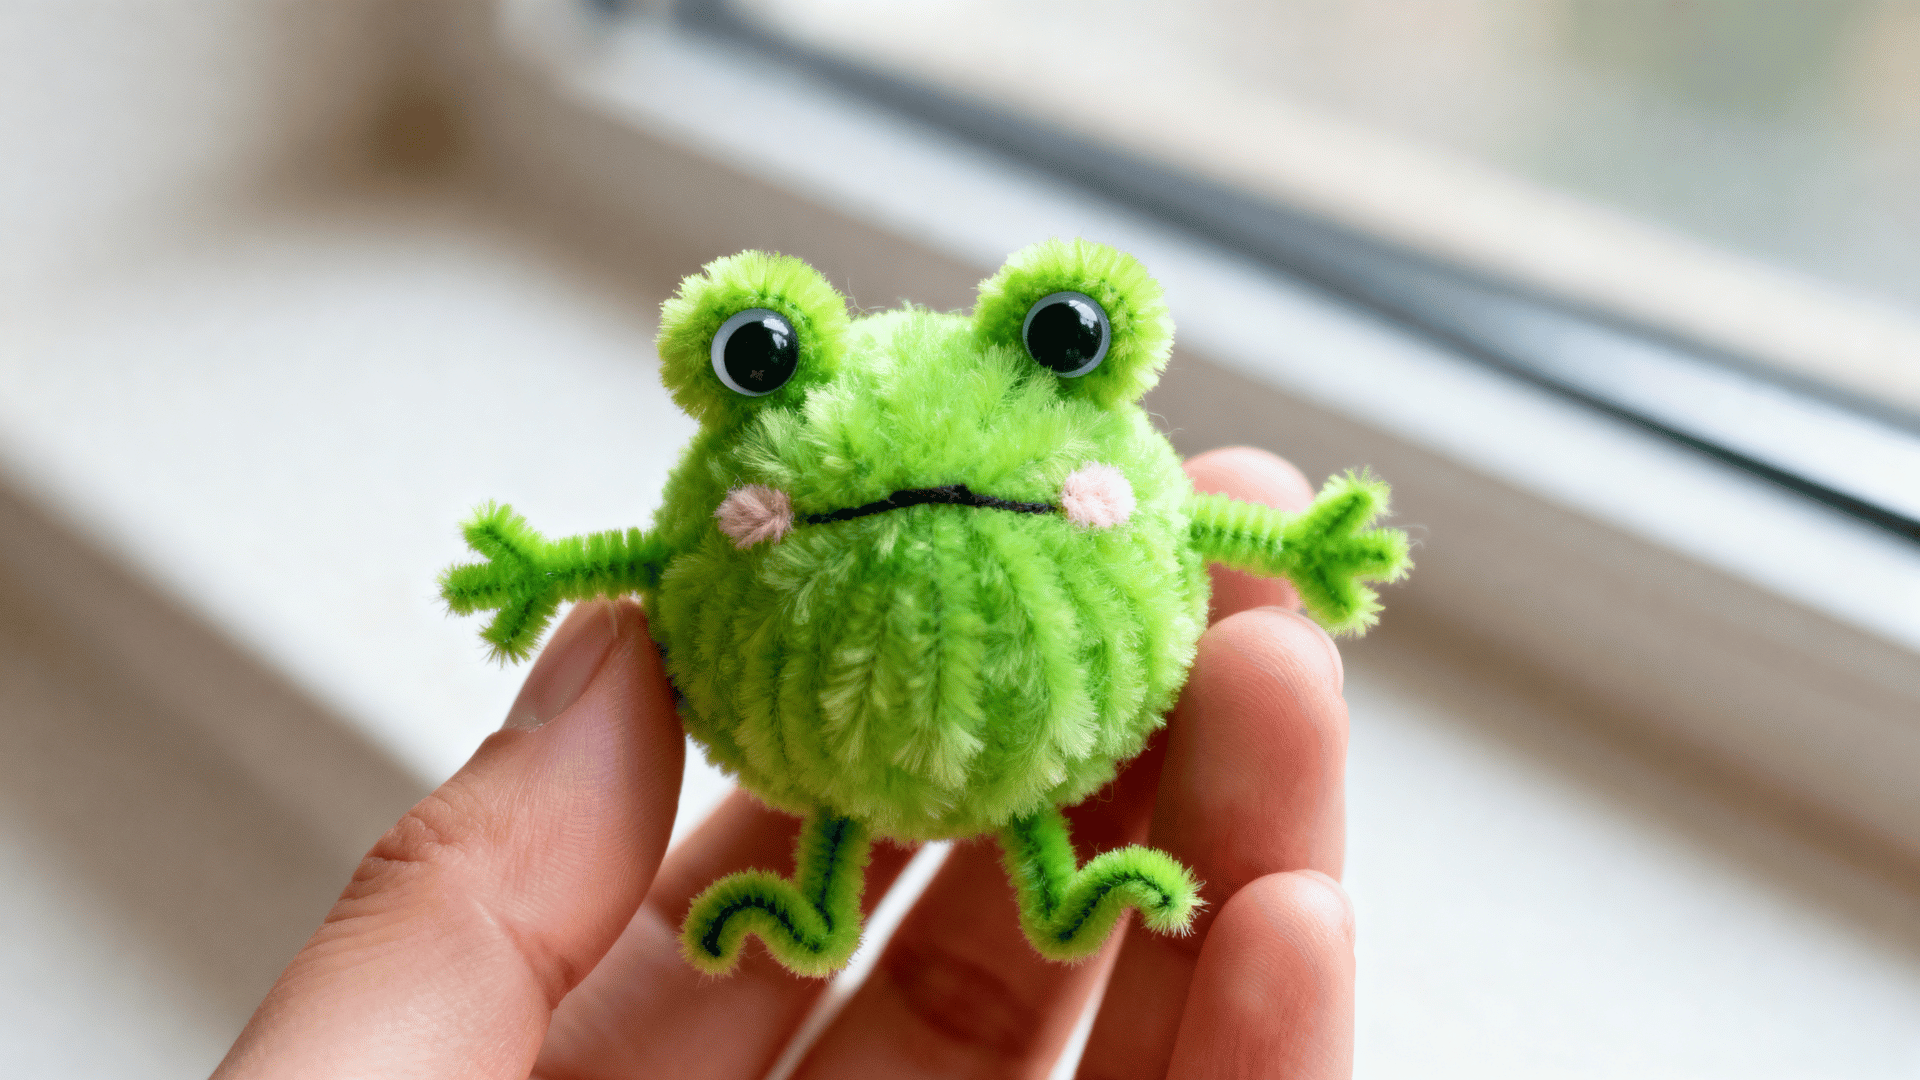
A pipe cleaner frog uses a rounded body with bent front and back legs. This project is useful for practicing coils and angled folds.
Craft Supplies Needed: Green pipe cleaners (3), Light green pipe cleaner (1), Googly eyes (2), Craft glue, Scissors
Steps to Follow:
- Coil one green pipe cleaner into a rounded body.
- Make a smaller coil and attach it as the head.
- Bend two green sections into wide back legs.
- Add two shorter front legs beneath the body.
- Glue two eyes close to the top of the head.
Tip: Flatten the lower leg bends slightly so the frog sits more steadily.
12. Pipe Cleaner Caterpillar
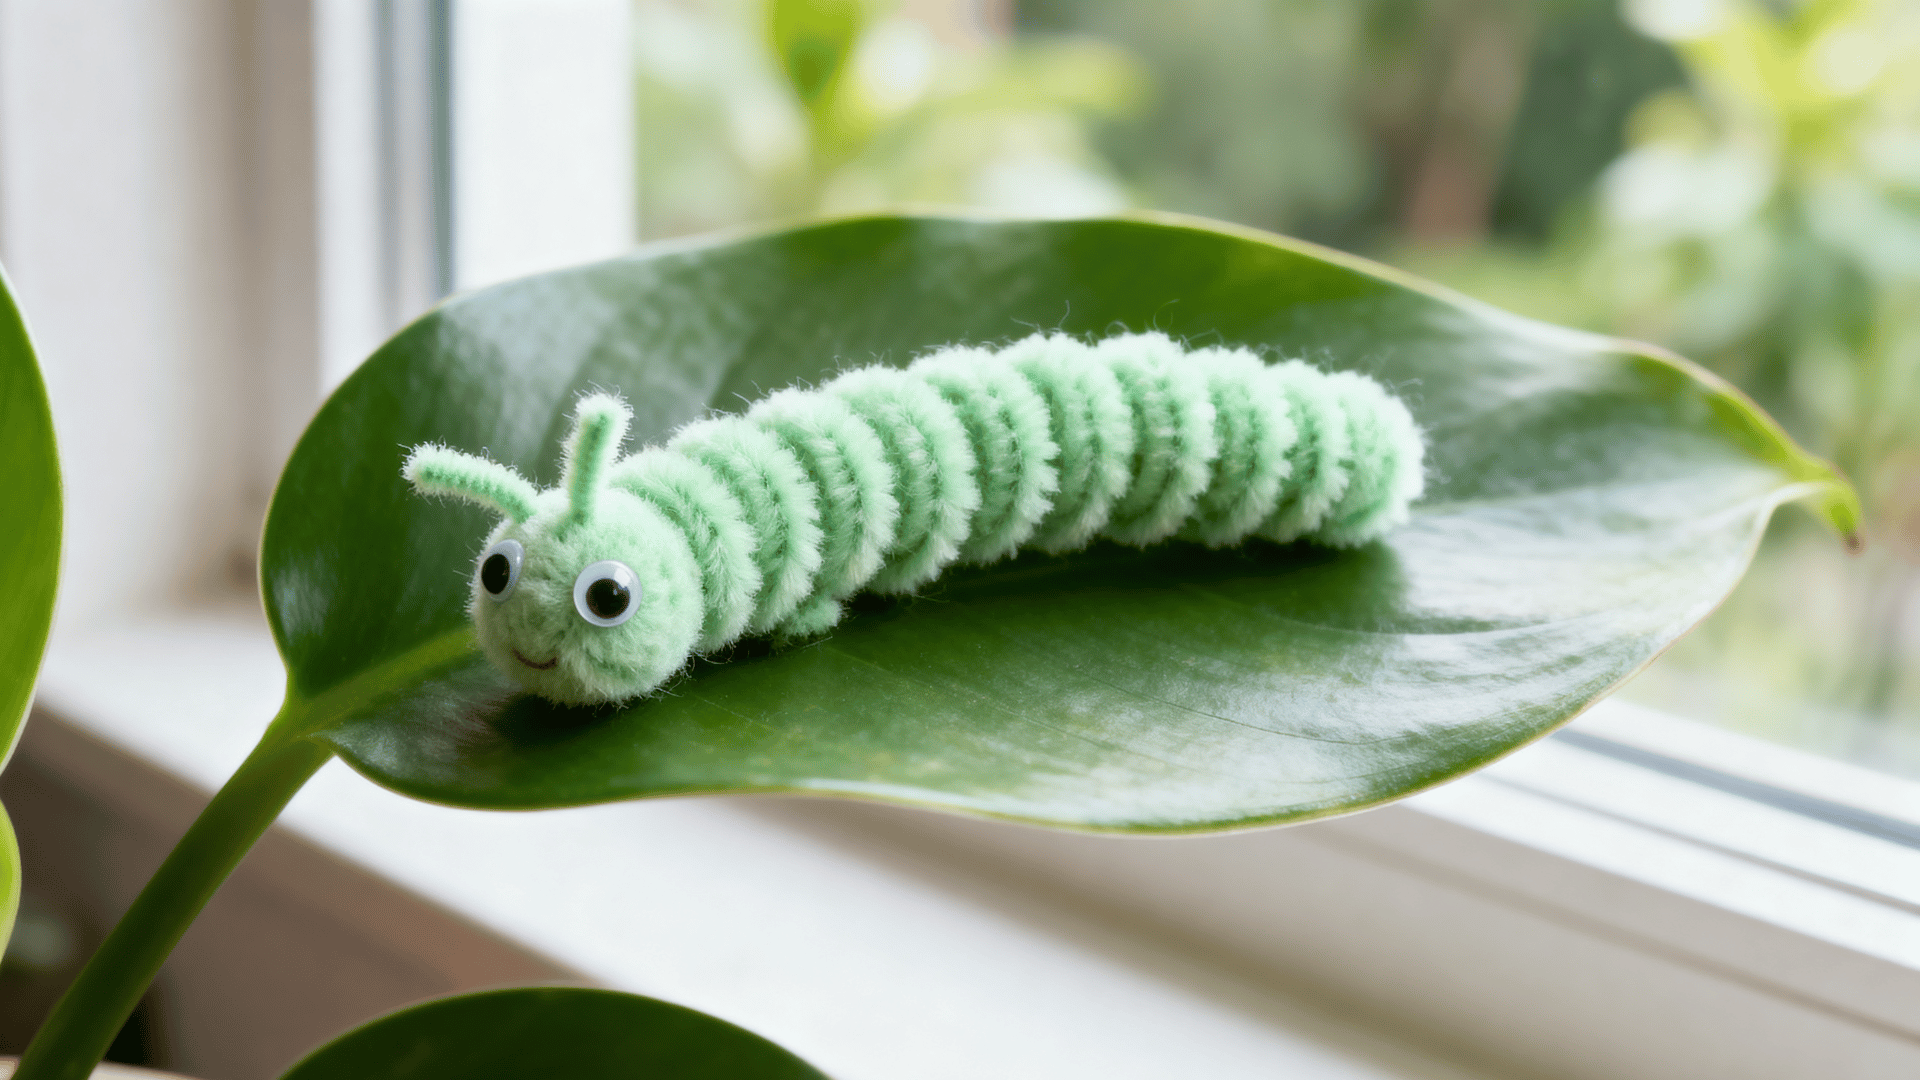
A pipe cleaner caterpillar uses one long coil with a raised head and two antennae. It is one of the easy art projects for kids because the main body comes together from a single wrapped coil.
Craft Supplies Needed: Colored pipe cleaner (1), Pencil (1), Googly eyes (2), Craft glue, Short pipe cleaner piece (1)
Steps to Follow:
- Wrap the long pipe cleaner evenly around a pencil.
- Slide the coil off without stretching the rounded sections.
- Bend one end upward to form the caterpillar’s head.
- Attach two short sections at the top as antennae.
- Glue two eyes onto the raised front section.
Tip: Keep the spacing even while wrapping so the body coils look similar.
13. Pipe Cleaner Flamingo
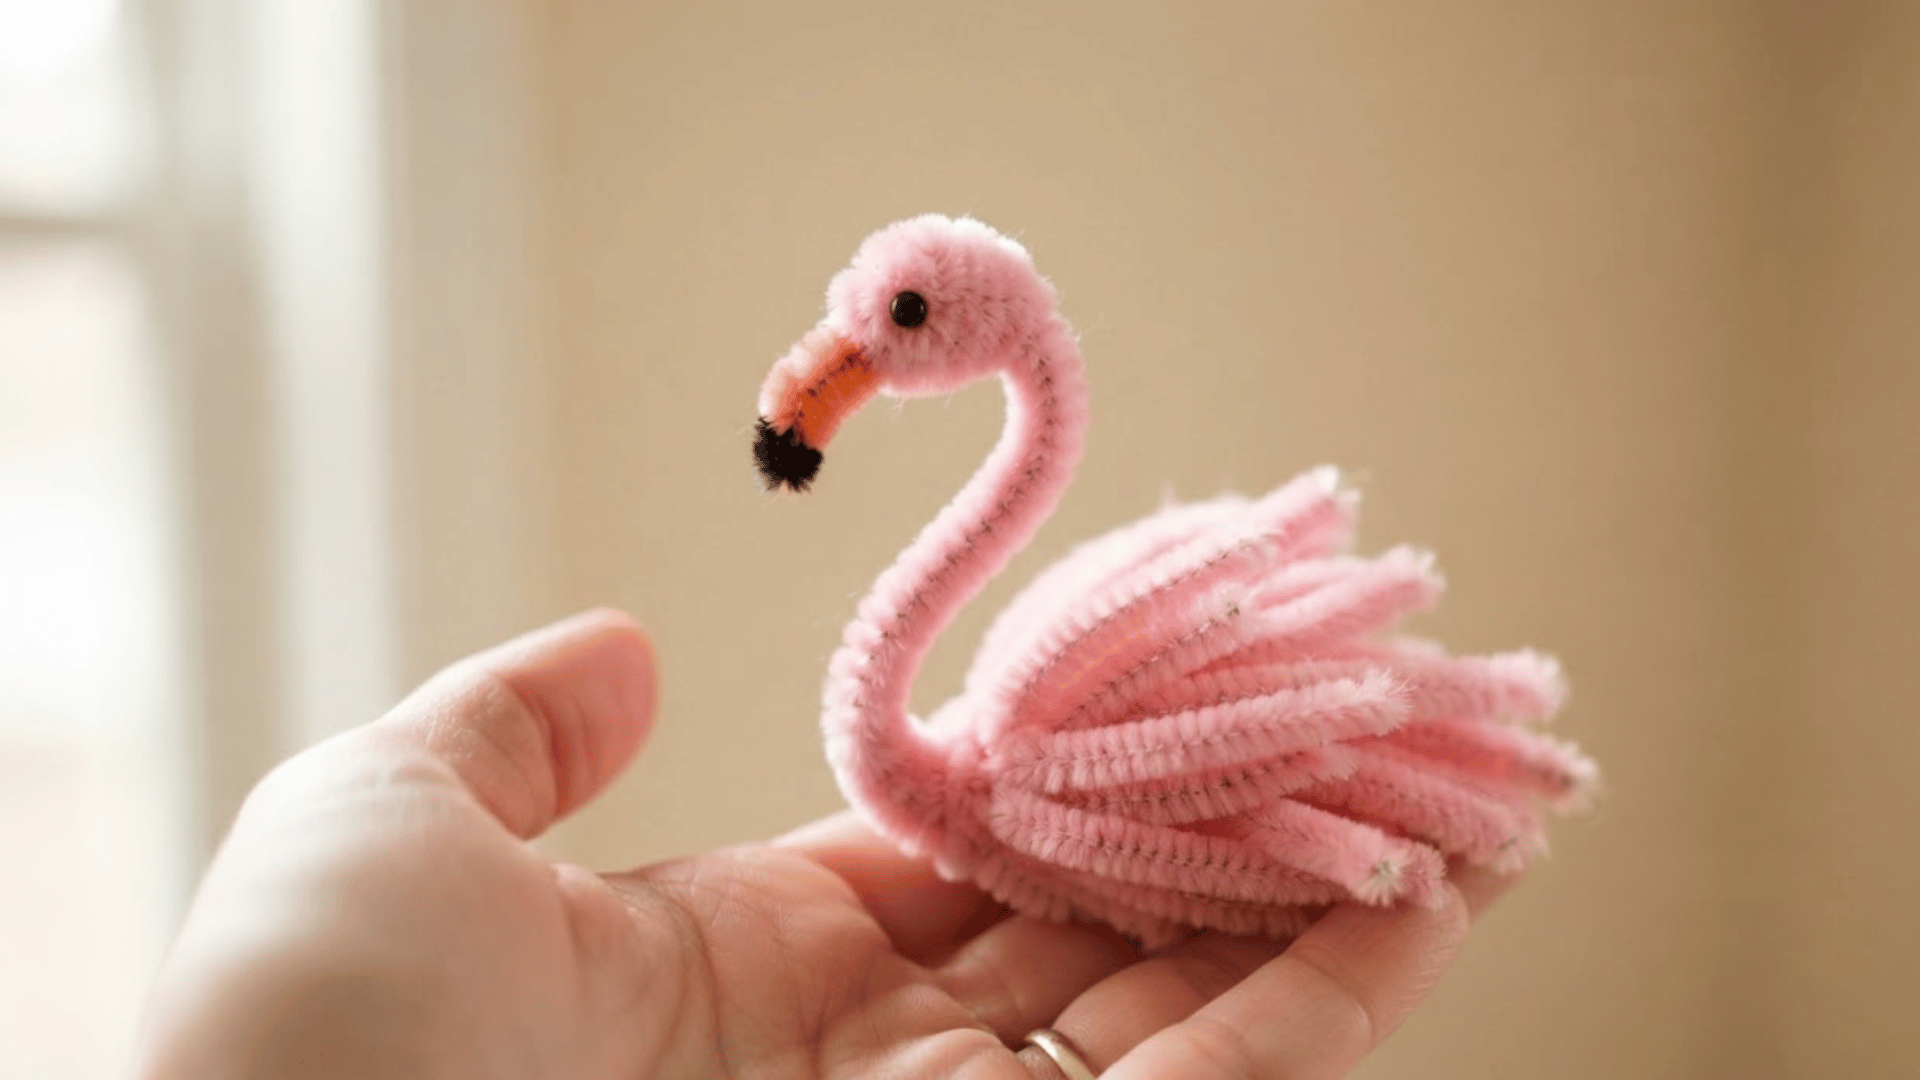
A pipe cleaner flamingo uses a rounded body, curved neck, and two thin legs. Its tall shape requires a different construction method.
Craft Supplies Needed: Pink pipe cleaners (3), Black pipe cleaner (1 small piece), Googly eye (1), Craft glue, Scissors
Steps to Follow:
- Coil one pink pipe cleaner loosely to form the body.
- Bend another stem into a long curved neck.
- Form a small rounded head at the upper end.
- Attach two thin legs beneath the body.
- Add a black beak tip and one small eye.
Tip: Shape the neck before attaching it to the body for better control.
14. Pipe Cleaner Fish
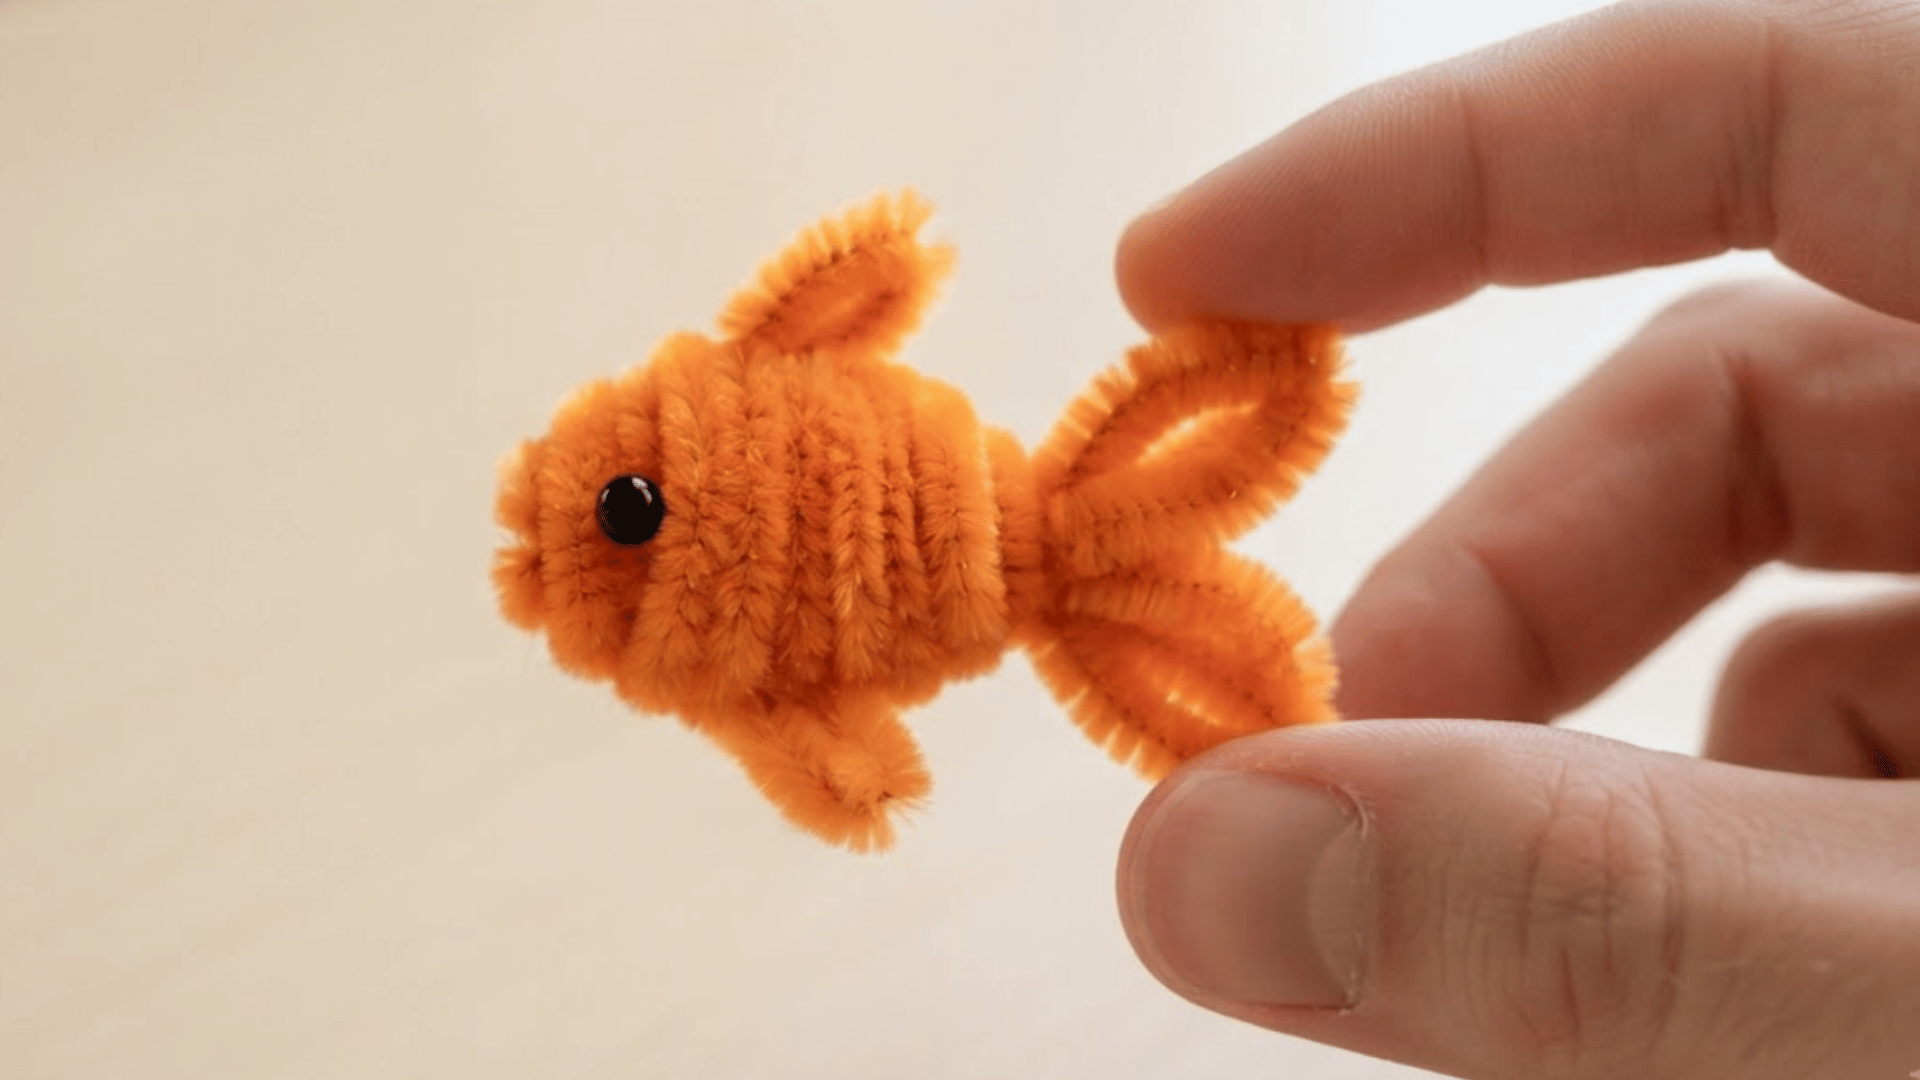
A pipe cleaner fish uses an oval body with a folded tail and small side fin. You can also place several finished fish together on cardstock.
Craft Supplies Needed: Colored pipe cleaners (2), Googly eye (1), Craft glue, Scissors, Cardstock (optional)
Steps to Follow:
- Bend one pipe cleaner into a rounded oval body.
- Twist the two ends together near the back.
- Spread the loose ends outward to form the tail.
- Add a small side loop to create a fin.
- Glue one eye near the front of the fish.
Tip: I make the tail wide enough so it stays clearly separate from the body.
15. Pipe Cleaner Rainbow
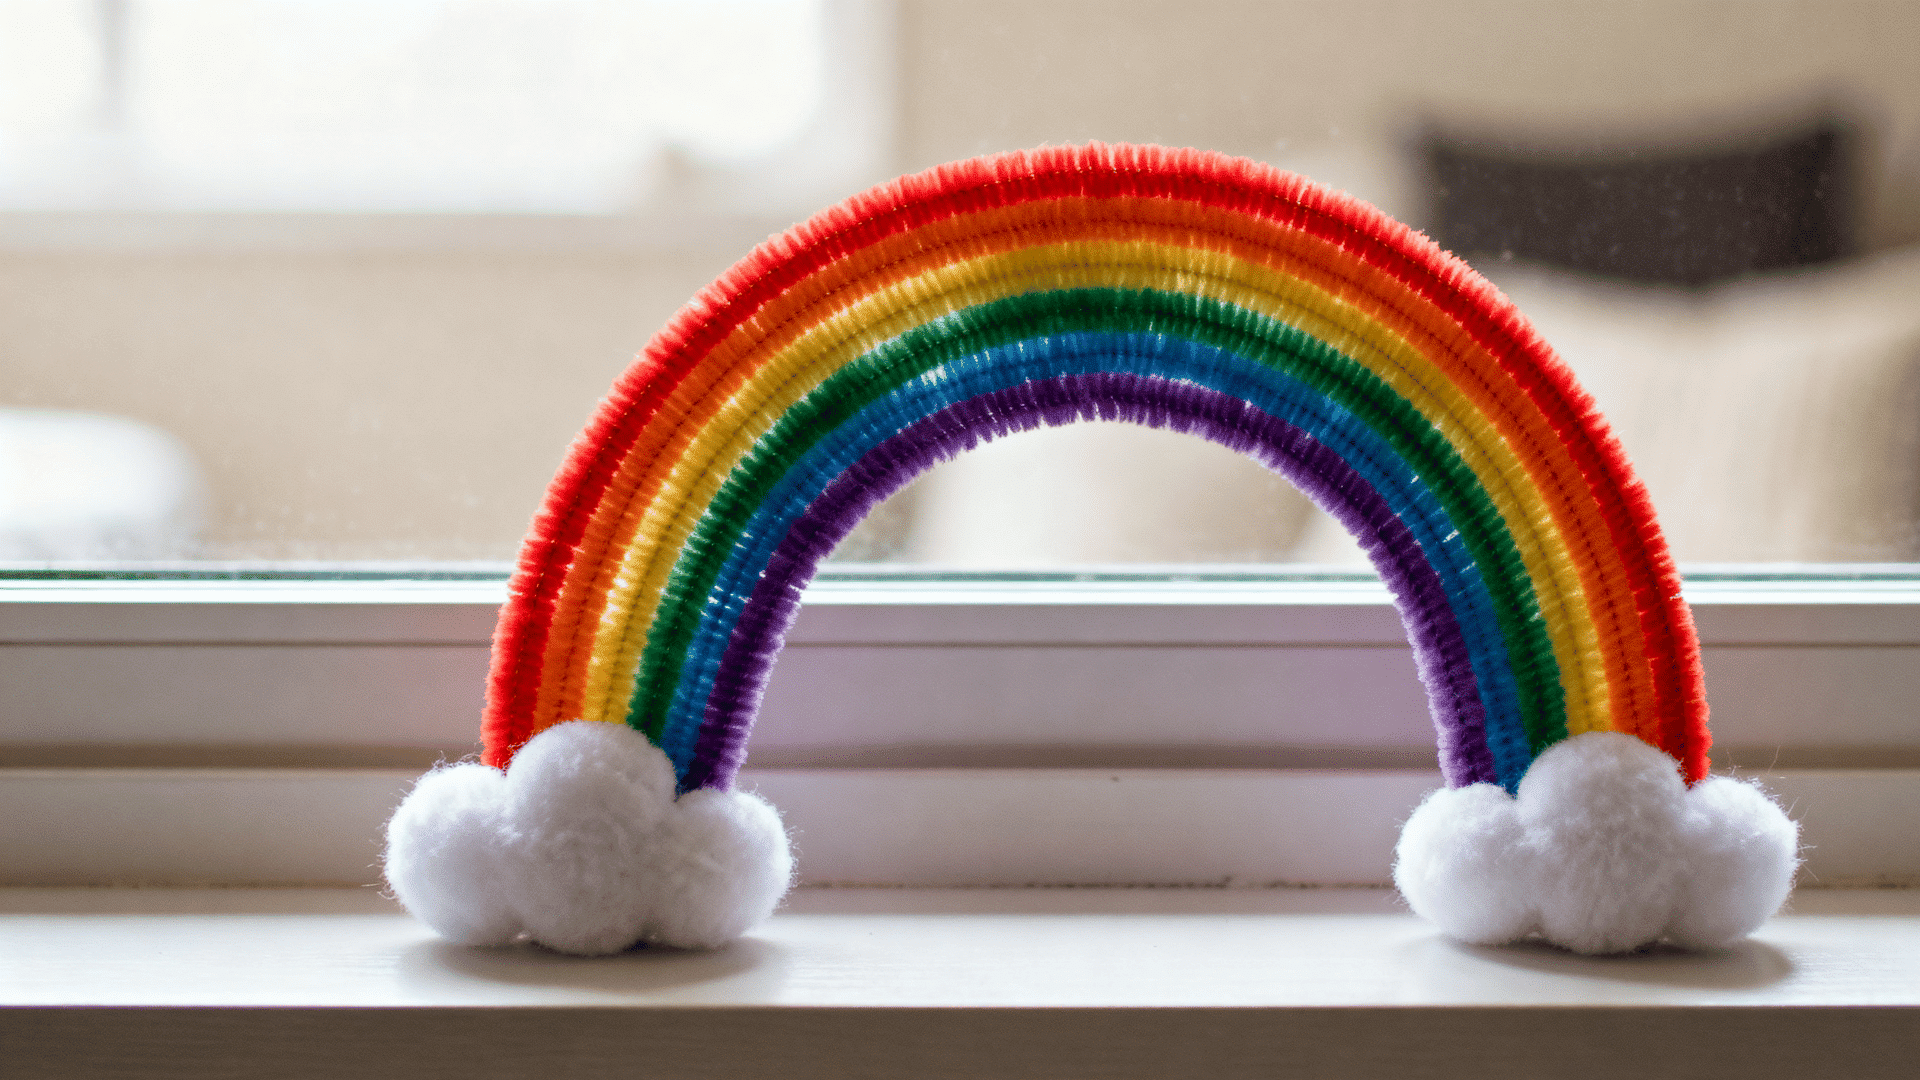
A pipe cleaner rainbow uses several colored stems curved into matching arches. It can be attached to cardstock or used as a small hanging decoration.
Craft Supplies Needed: Colored pipe cleaners (5 to 7), White pom-poms (4 to 6), Cardstock (1 sheet), Craft glue, Scissors
Steps to Follow:
- Arrange the colored pipe cleaners in the chosen order.
- Bend each pipe cleaner into an arch with a similar curve.
- Place the arches close together on the cardstock.
- Glue each stem down along its curved shape.
- Add white pom-poms at both ends as clouds.
Tip: Form all the arches before gluing so you can adjust the spacing.
16. Pipe Cleaner Crown
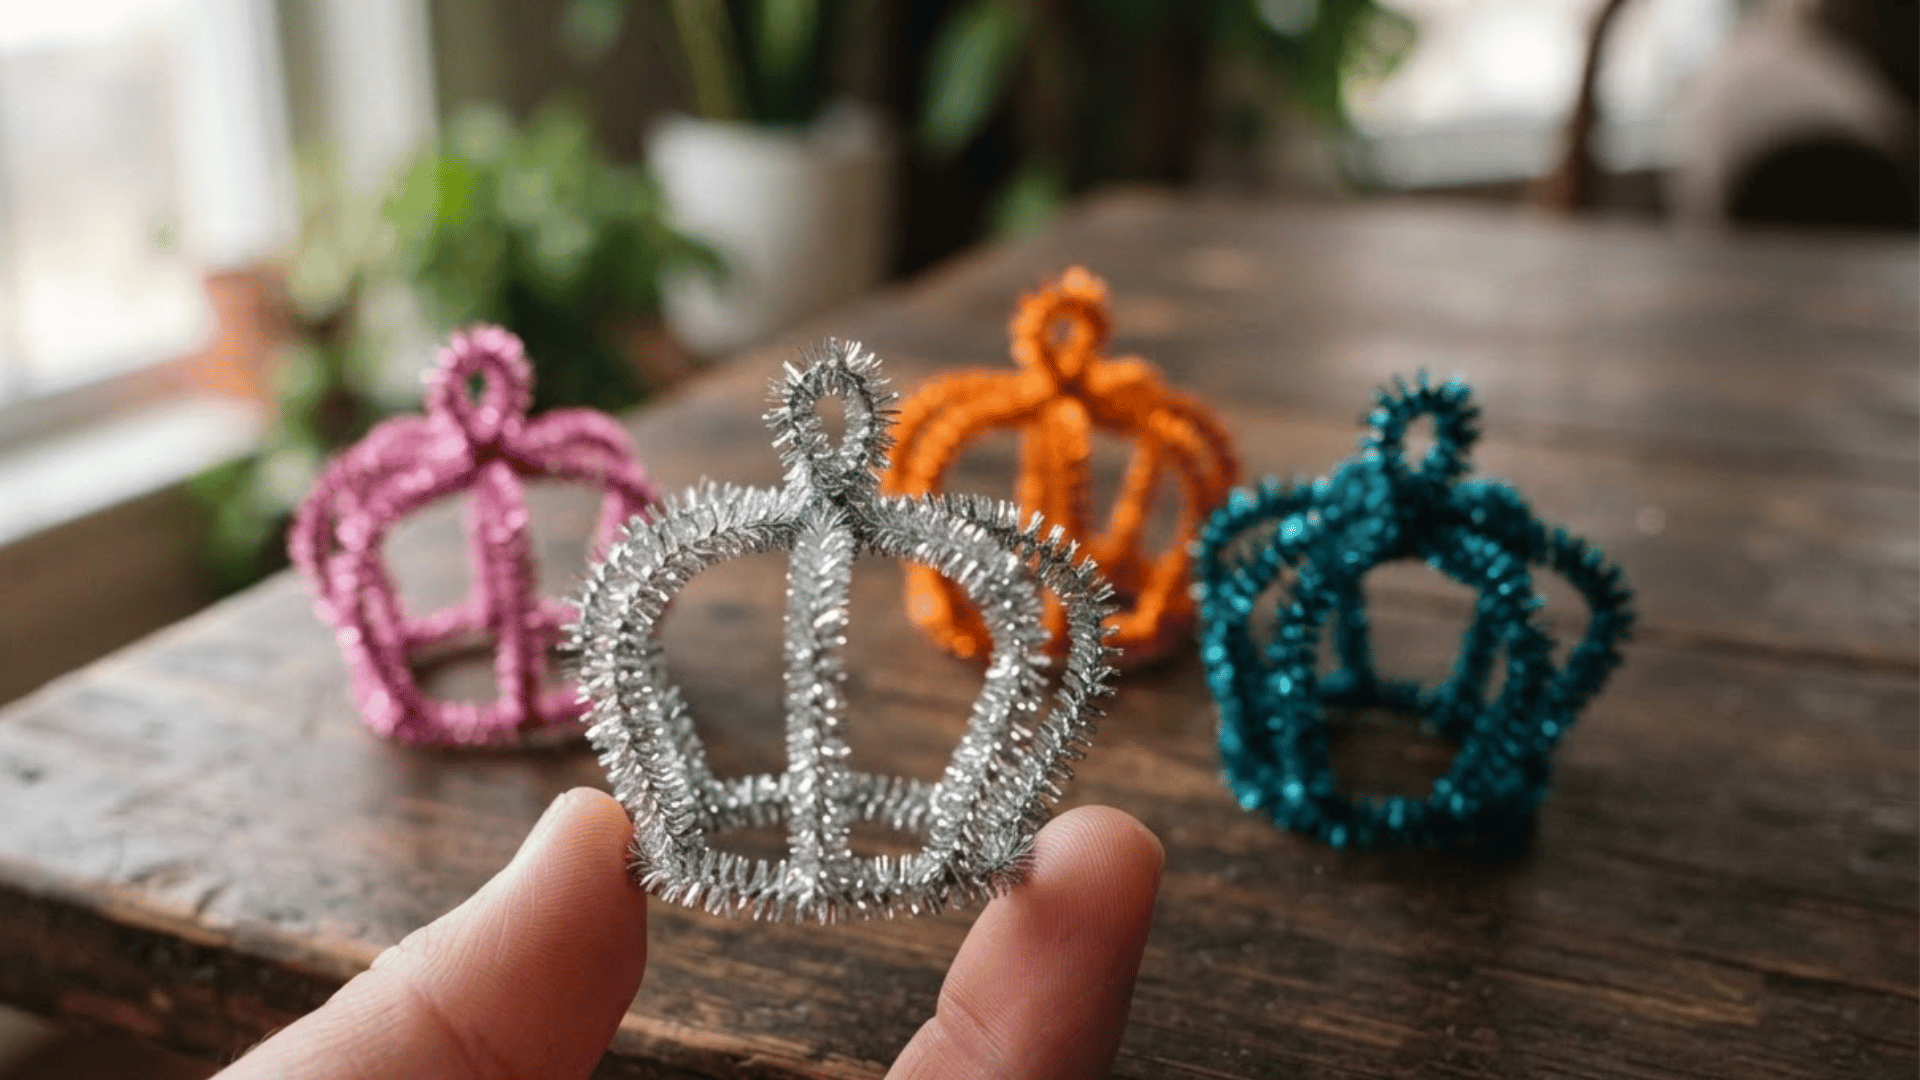
A pipe cleaner crown uses a circular base with raised points across the top. It can be sized for dolls, toys, or children’s pretend play.
Craft Supplies Needed: Metallic pipe cleaners (4 to 6), Pony beads (5 to 8), Scissors, Ruler (optional), Craft glue
Steps to Follow:
- Join several pipe cleaners to create a circular base.
- Bend another pipe cleaner into a row of pointed peaks.
- Twist the pointed section around the upper edge.
- Slide beads onto selected points before closing them.
- Fold all loose pipe cleaner ends safely inward.
Tip: Check the base size before adding the upper points.
17. Beaded Pipe Cleaner Bracelet
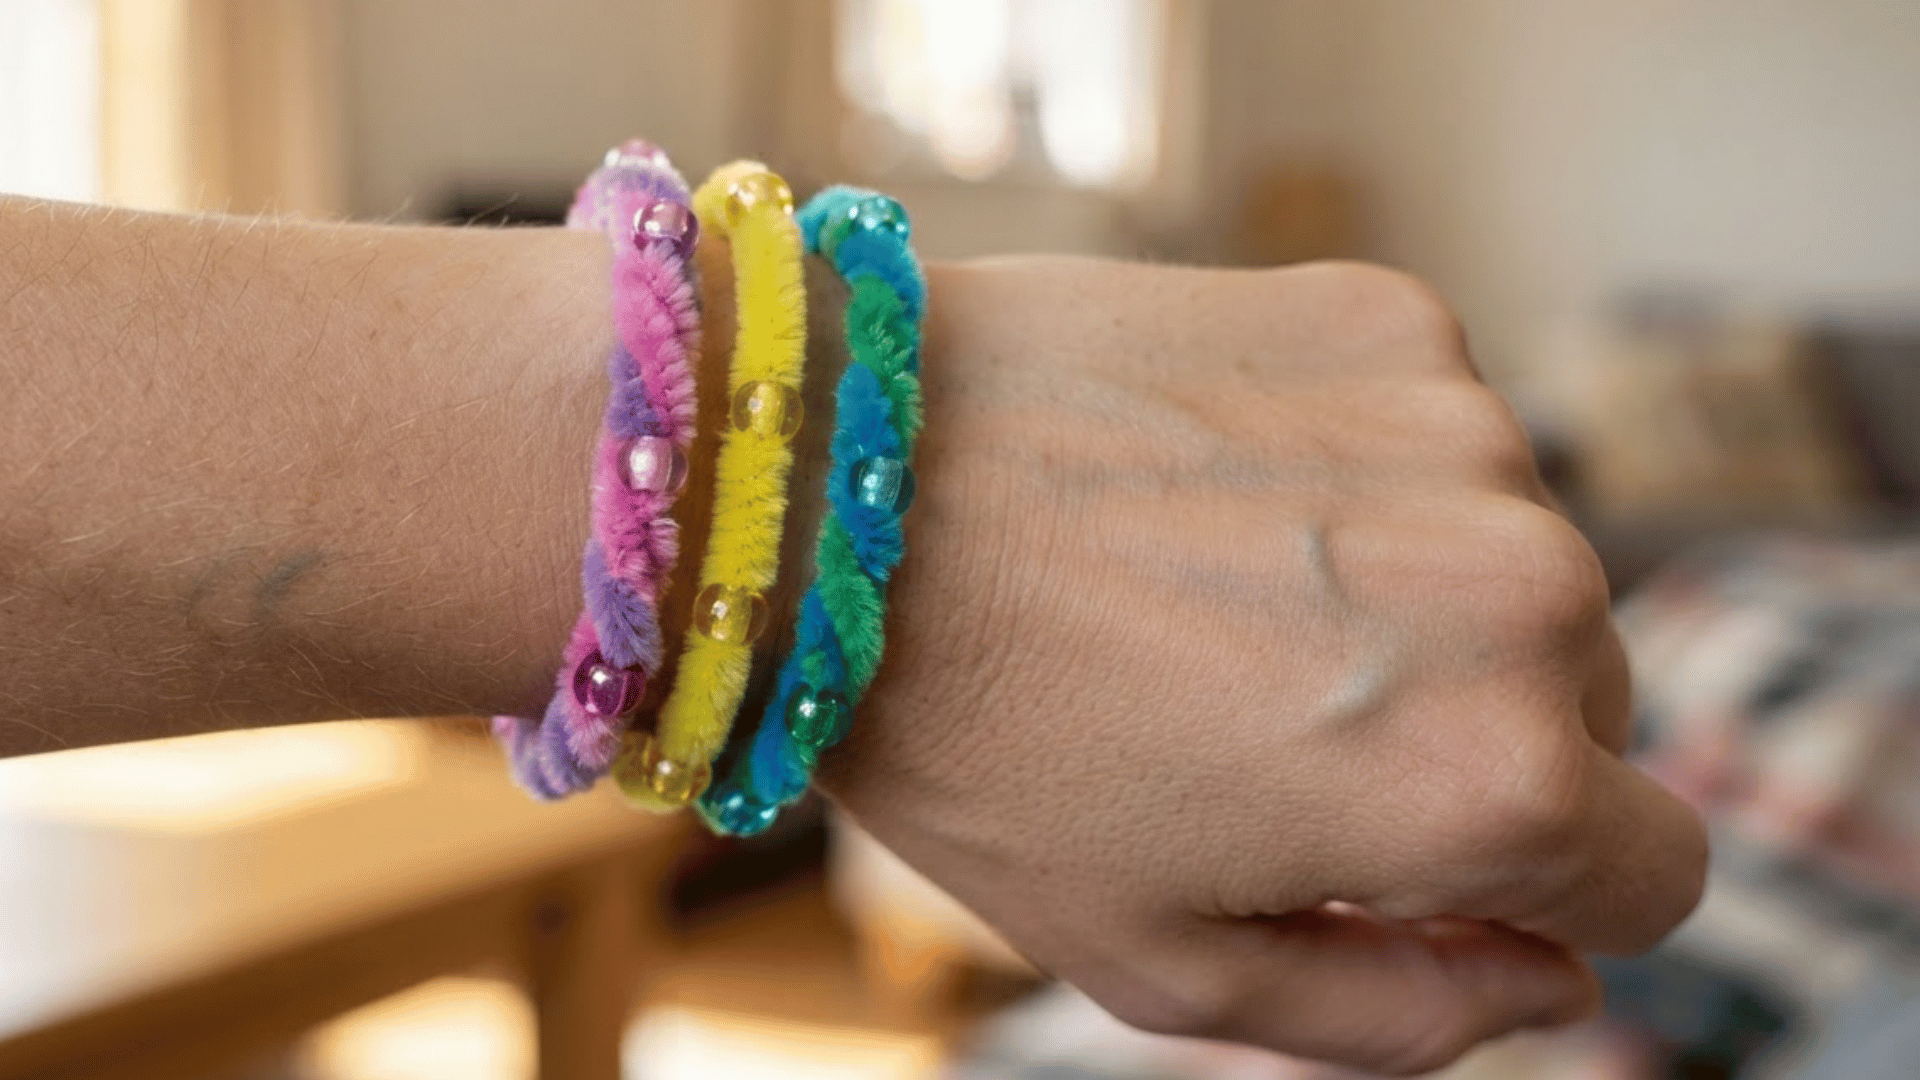
A beaded bracelet combines large beads with a flexible pipe cleaner base. The beads can be placed by color, size, or a repeating pattern.
Craft Supplies Needed: Pipe cleaners (1 to 2), Pony beads (8 to 15), Scissors, Small bowl (1), Ruler (optional)
Steps to Follow:
- Choose the beads and arrange them in the desired order.
- Slide each bead onto the pipe cleaner one at a time.
- Leave a short open section at both ends.
- Curve the pipe cleaner loosely around the wrist.
- Twist the two ends together and fold them inward.
Tip: I leave enough empty stem at both ends so the bracelet can close properly.
18. Pipe Cleaner Ring
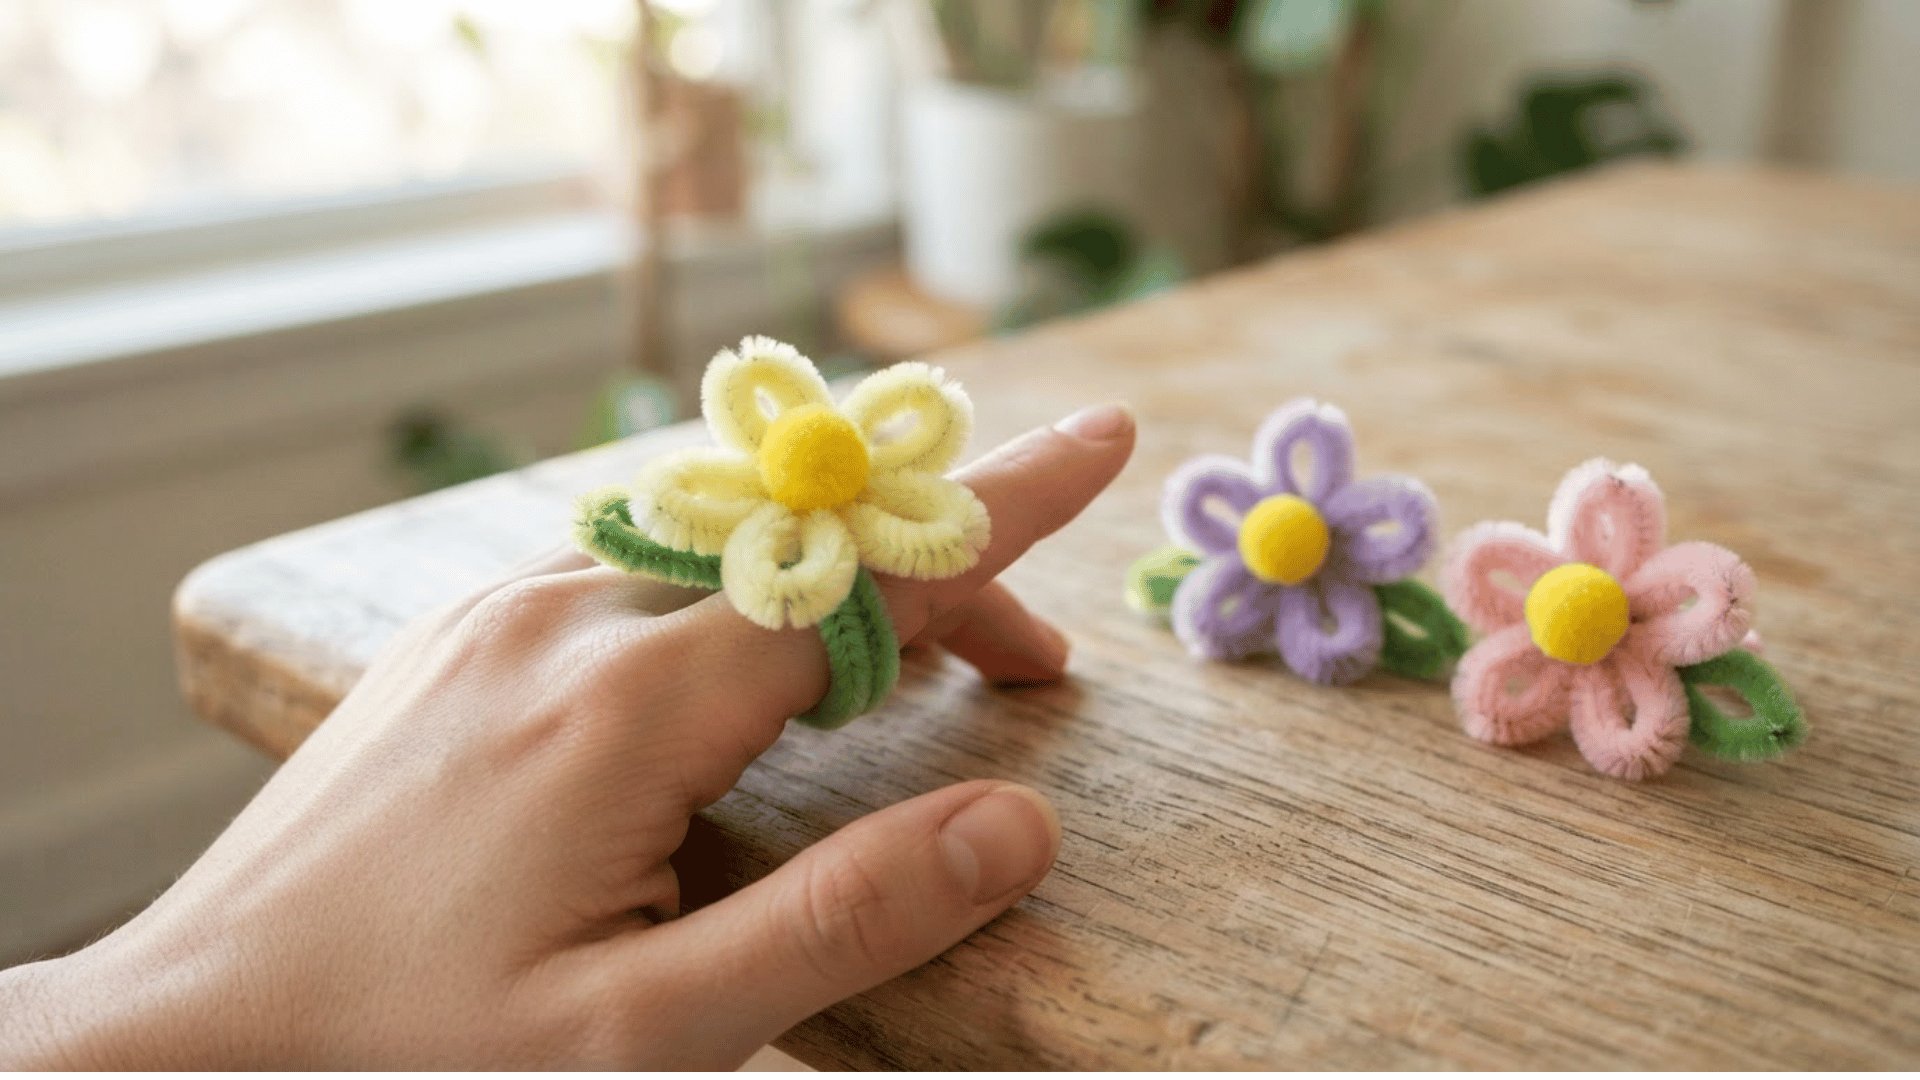
A pipe cleaner ring uses one stem wrapped around the finger with a small shape formed above it. Flowers, hearts, and coils work well for the top.
Craft Supplies Needed: Pipe cleaner (1), Scissors, Pencil (optional), Small bead (optional), Craft glue
Steps to Follow:
- Wrap the pipe cleaner loosely around one finger.
- Twist the two ends together above the ring band.
- Shape the remaining stem into a flower or heart.
- Add a small bead in the center if desired.
- Fold the final pipe cleaner end beneath the upper shape.
Tip: Keep the band slightly loose because twisting can make the ring smaller.
19. Pipe Cleaner Pencil Topper
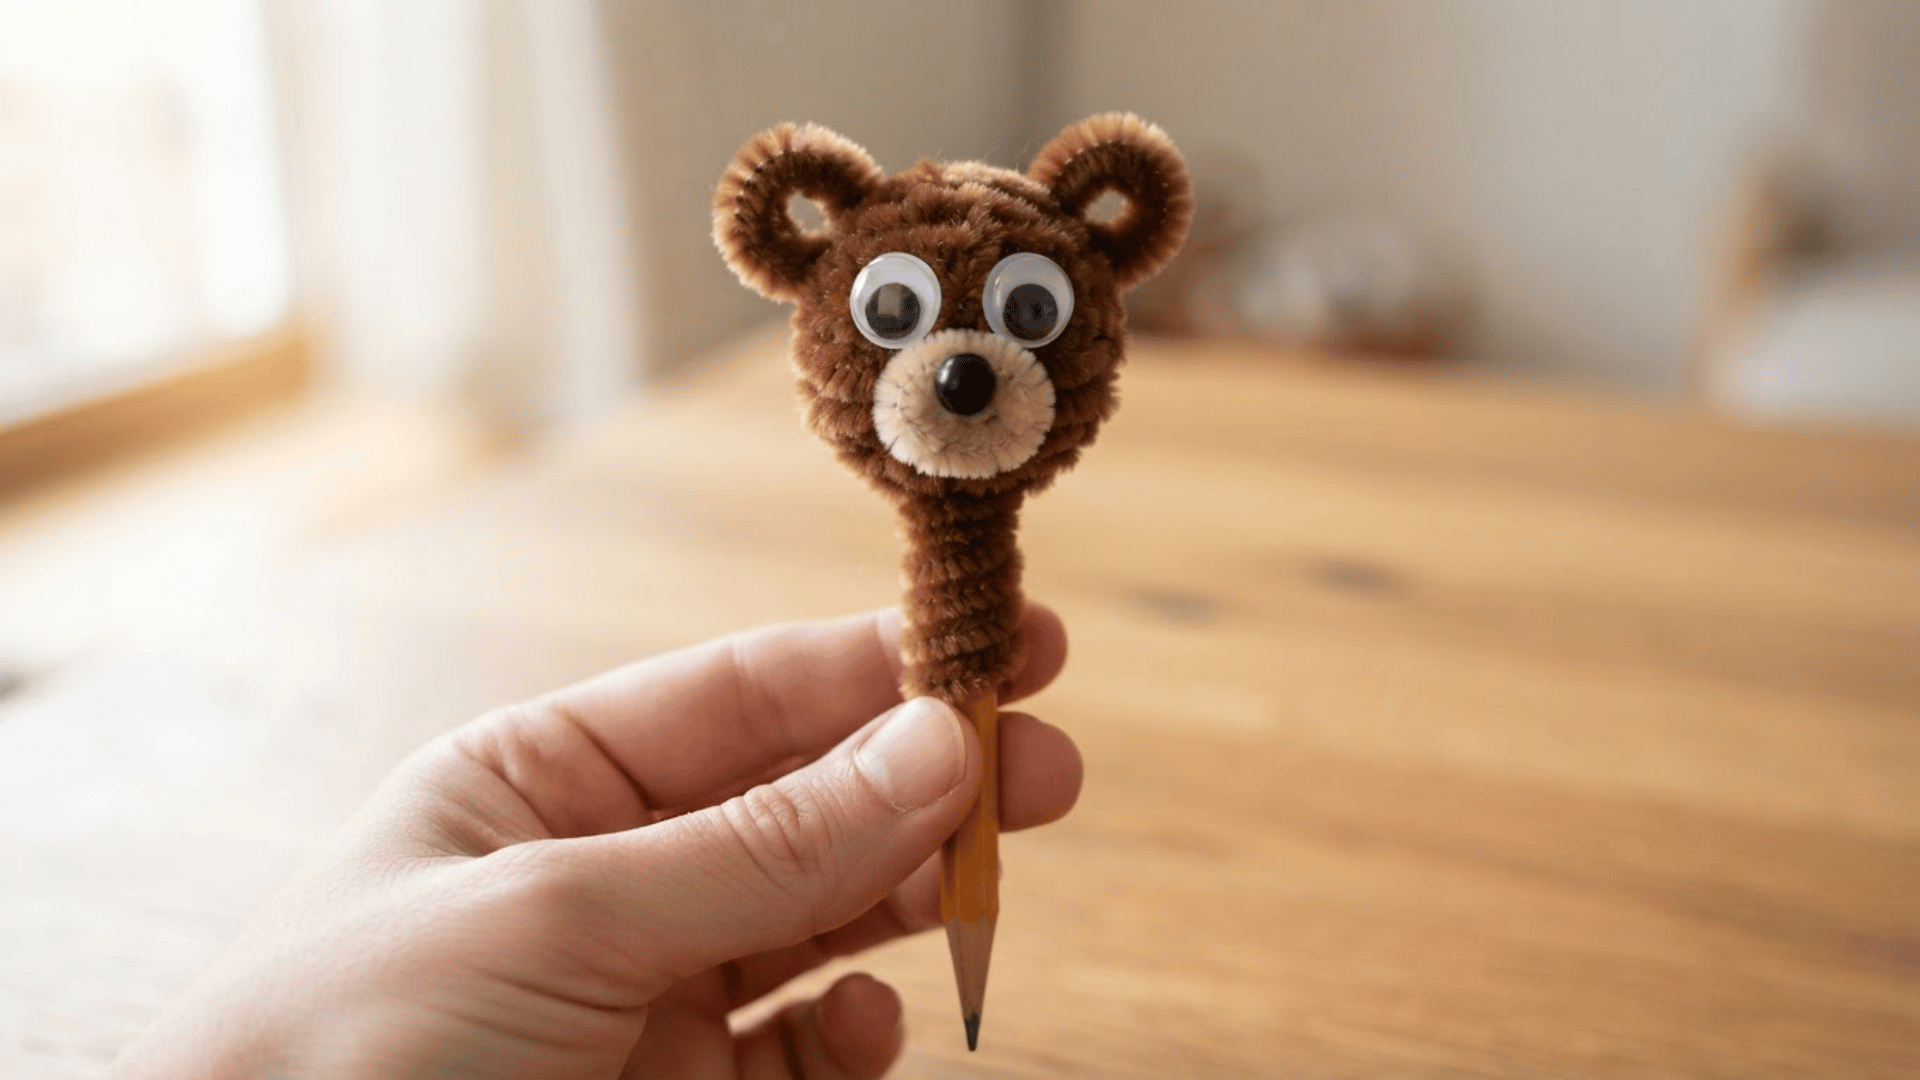
A pencil topper uses a coiled pipe cleaner that fits over the upper end of a pencil. The top can be shaped into an animal, flower, heart, or spiral.
Craft Supplies Needed: Pipe cleaners (1 to 2), Pencil (1), Small pom-pom (optional), Googly eyes (optional), Craft glue
Steps to Follow:
- Wrap the lower half of a pipe cleaner around the pencil.
- Keep the coil snug enough to remain in place.
- Shape the upper section into the chosen design.
- Add a pom-pom or eyes when making an animal.
- Slide the topper off gently when it is not in use.
Tip: Form the upper shape while the coil remains on the pencil.
20. Pipe Cleaner Glasses
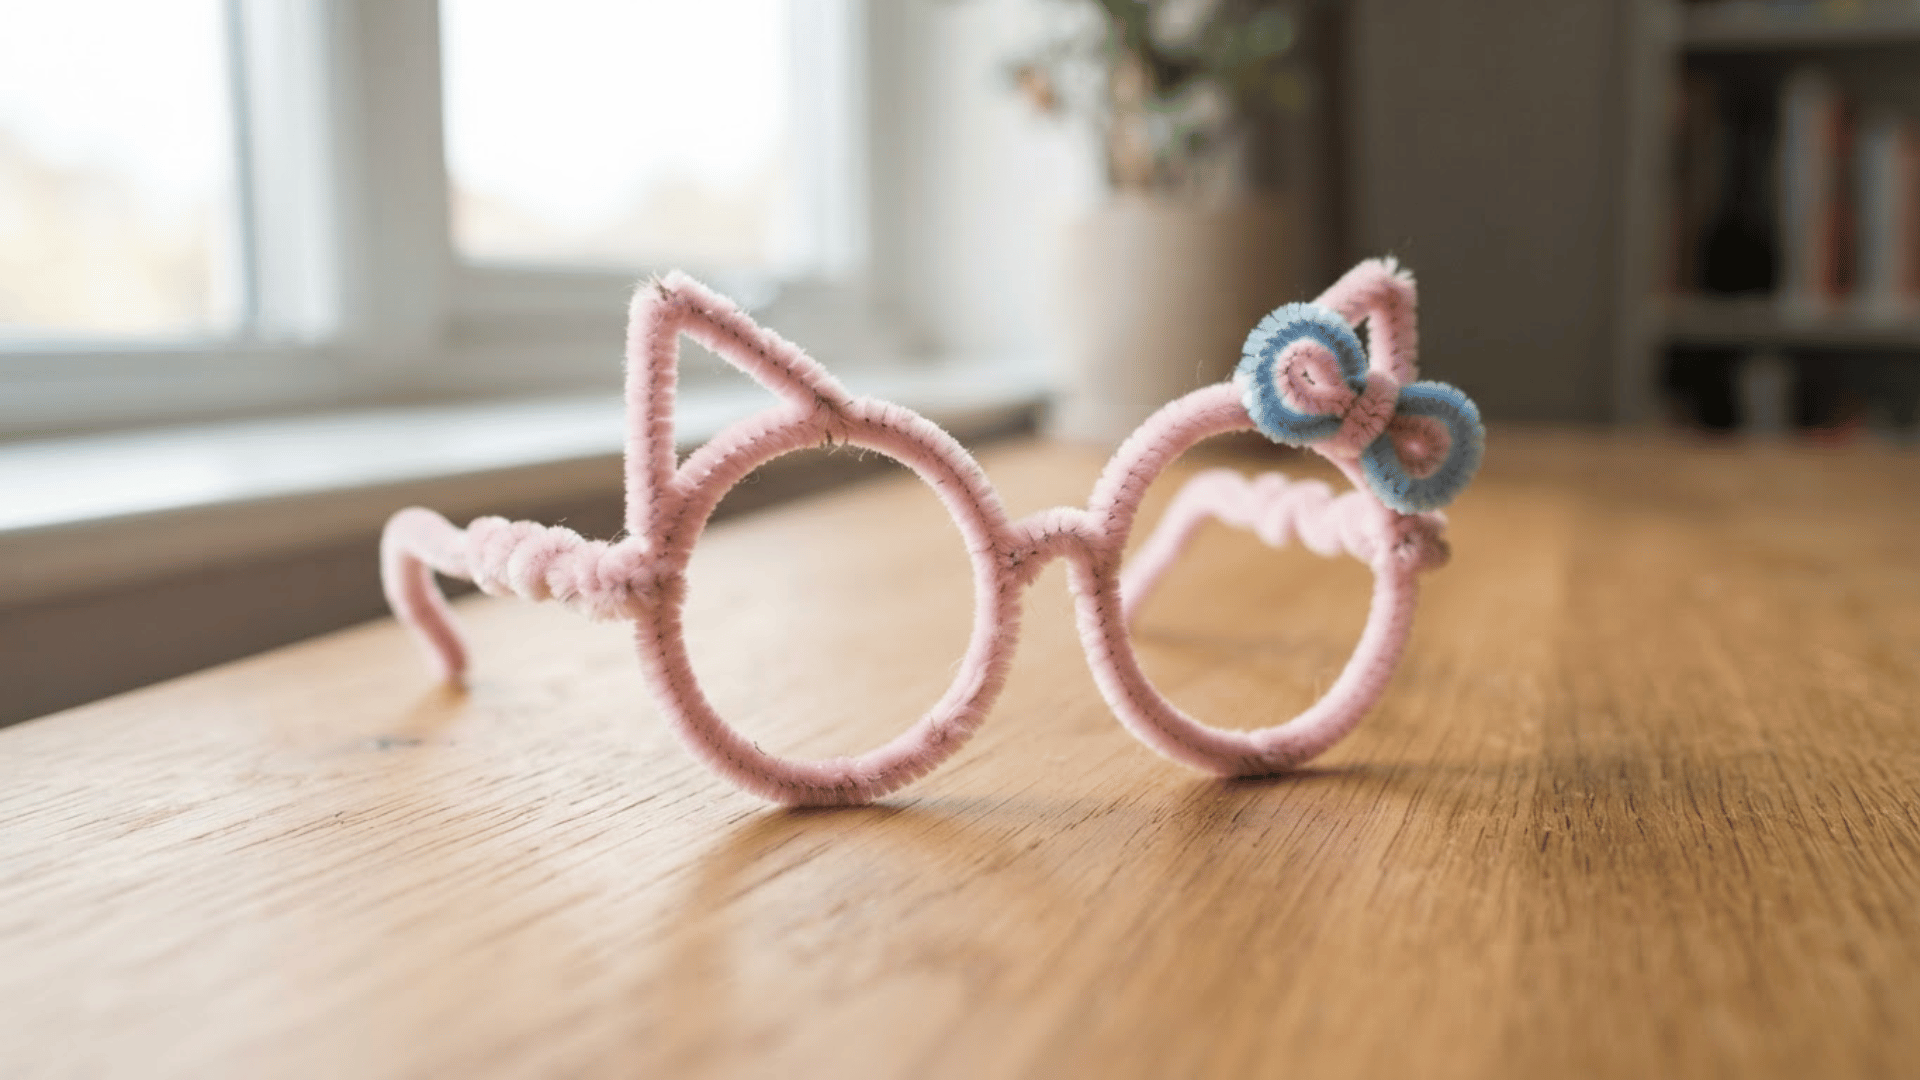
Pipe cleaner glasses are made for dress-up and craft play. The frame uses two round sections connected by a short middle bridge.
Craft Supplies Needed: Pipe cleaners (4), Scissors, Ruler (optional), Small beads (optional), Craft glue
Steps to Follow:
- Form two pipe cleaners into matching round frames.
- Twist the inner edges together to create the bridge.
- Attach one long pipe cleaner to each outer side.
- Bend both side pieces backward to form ear arms.
- Fold every loose pipe cleaner end inward before use.
Tip: Compare both frames before joining them so they sit at a similar height.
21. Pipe Cleaner Heart
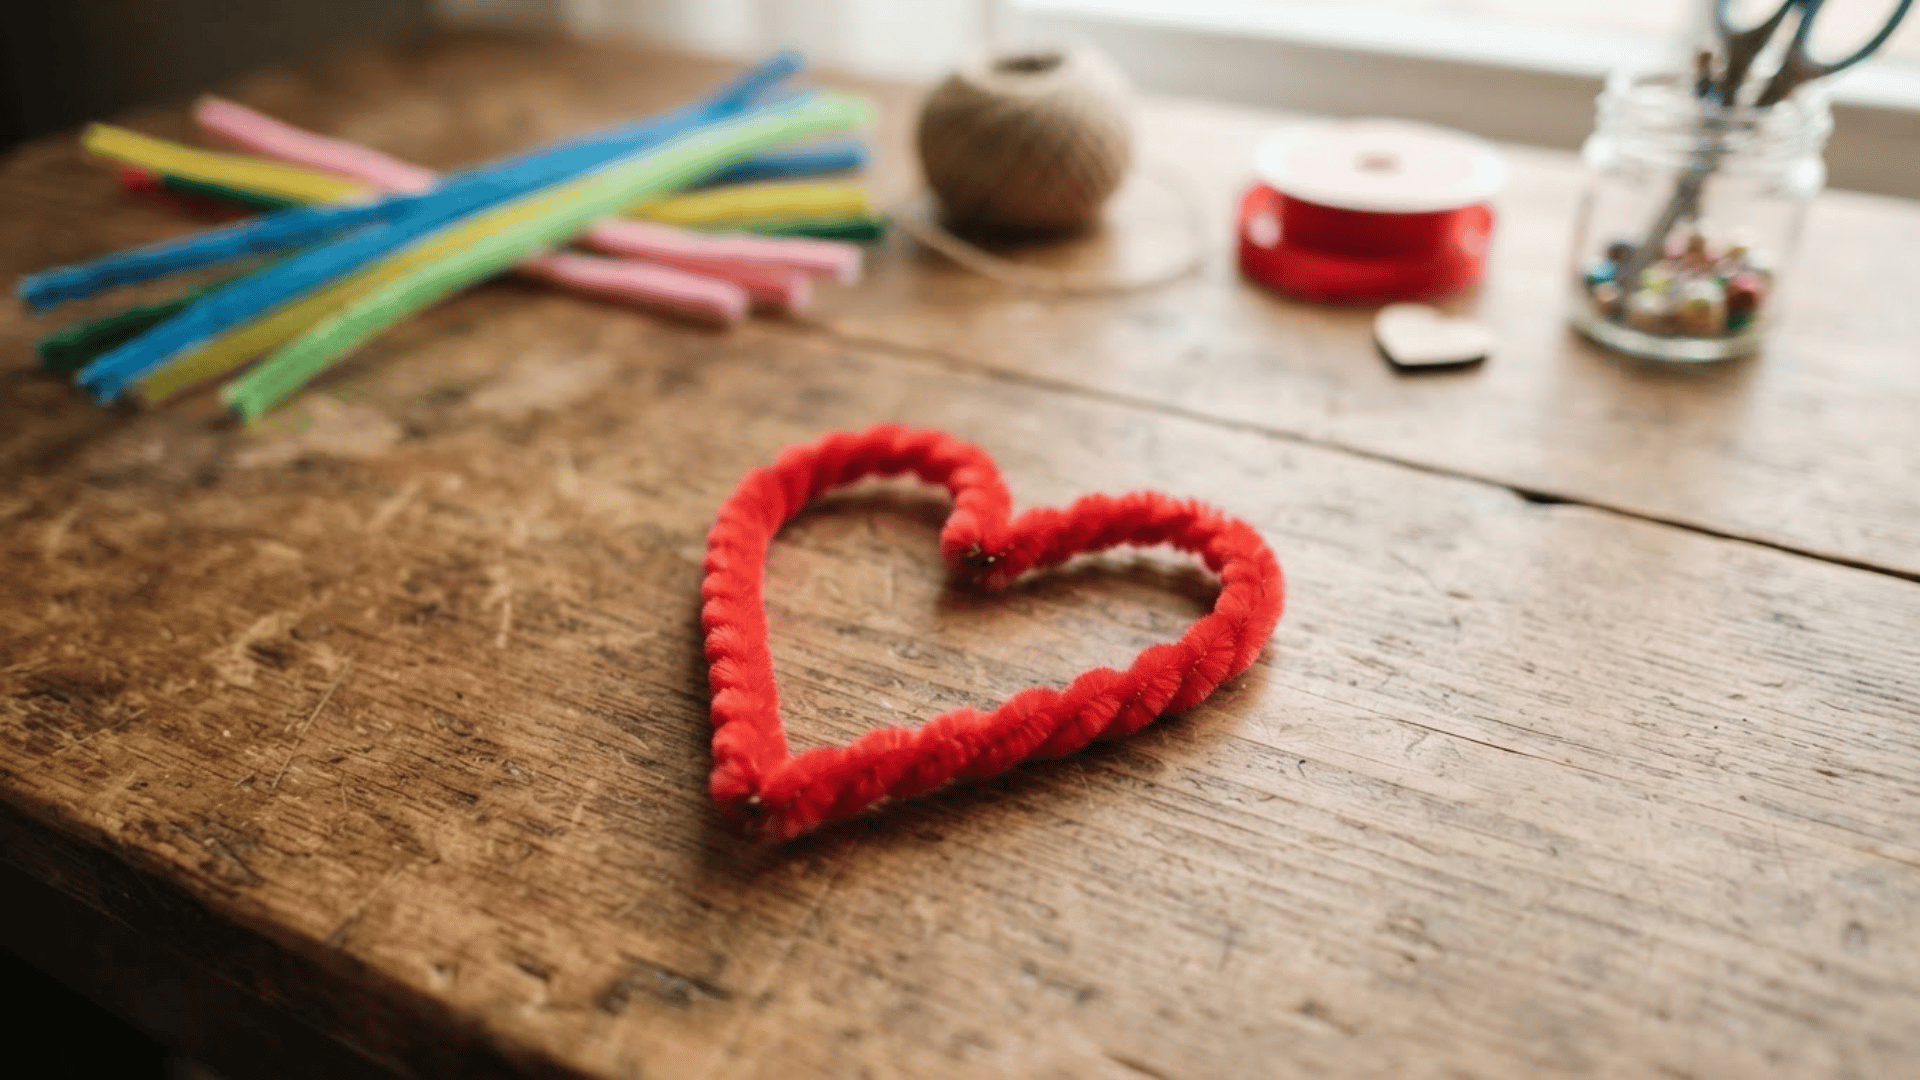
A pipe cleaner heart needs only a few curves and one lower twist. It can be added to cards, garlands, gifts, or wall crafts.
Craft Supplies Needed: Pipe cleaner (1), Scissors, Craft glue, Ribbon (optional), Cardstock (optional)
Steps to Follow:
- Fold one pipe cleaner in half to mark its center.
- Curve both upper sections outward into rounded sides.
- Bring the loose ends downward toward the bottom point.
- Twist the two ends together at the base.
- Adjust both sides until they look similar in size.
Tip: I start with wider upper curves because you can narrow them later.
22. Pipe Cleaner Star
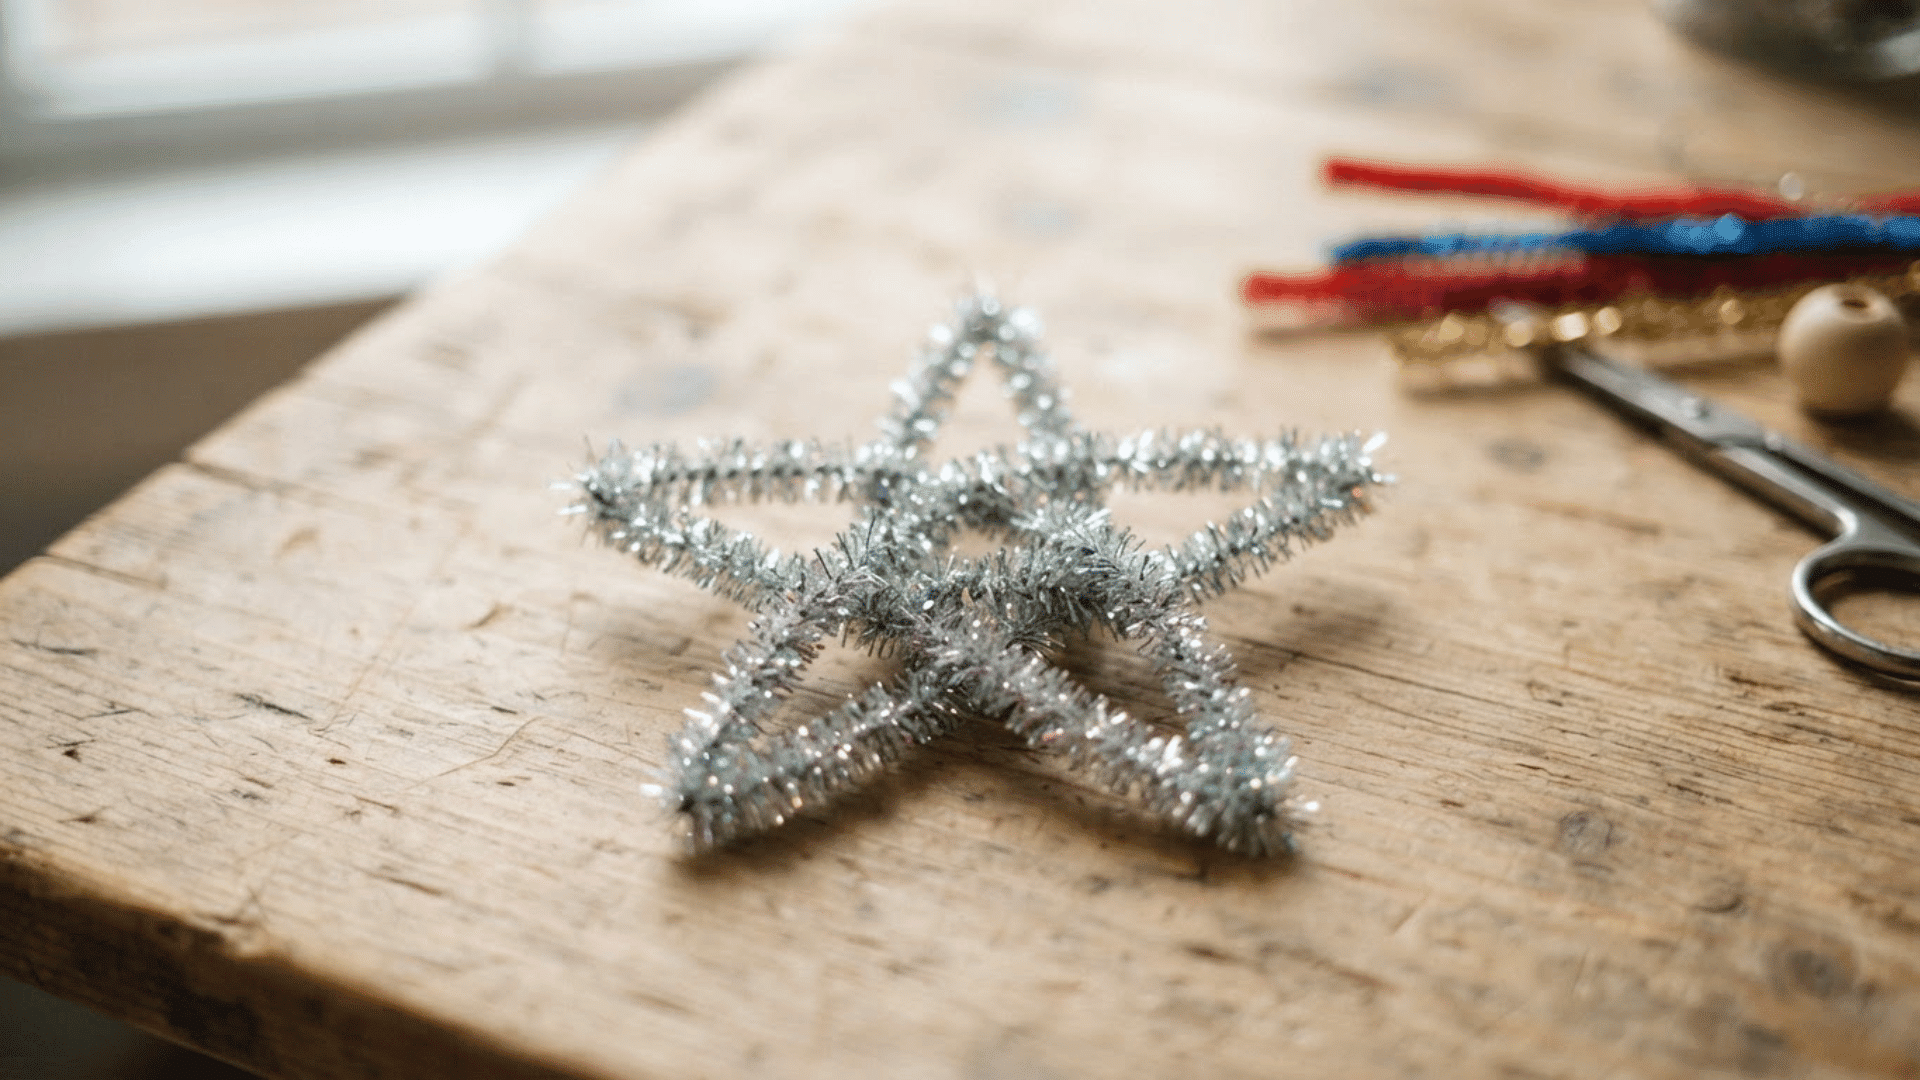
A pipe cleaner star uses several firm bends to form five points. It can be added to cards, gift packages, or hanging decorations.
Craft Supplies Needed: Pipe cleaners (1 to 2), Scissors, Ruler (optional), Ribbon (1 short piece), Craft glue
Steps to Follow:
- Bend the pipe cleaner into five evenly spaced points.
- Press each corner firmly to keep the angles clear.
- Bring the two loose ends together at the bottom.
- Twist the ends once or twice to close the shape.
- Add a short ribbon loop if the star will hang.
Tip: Mark similar stem sections before bending to keep the points even.
23. Pipe Cleaner Flower Garland
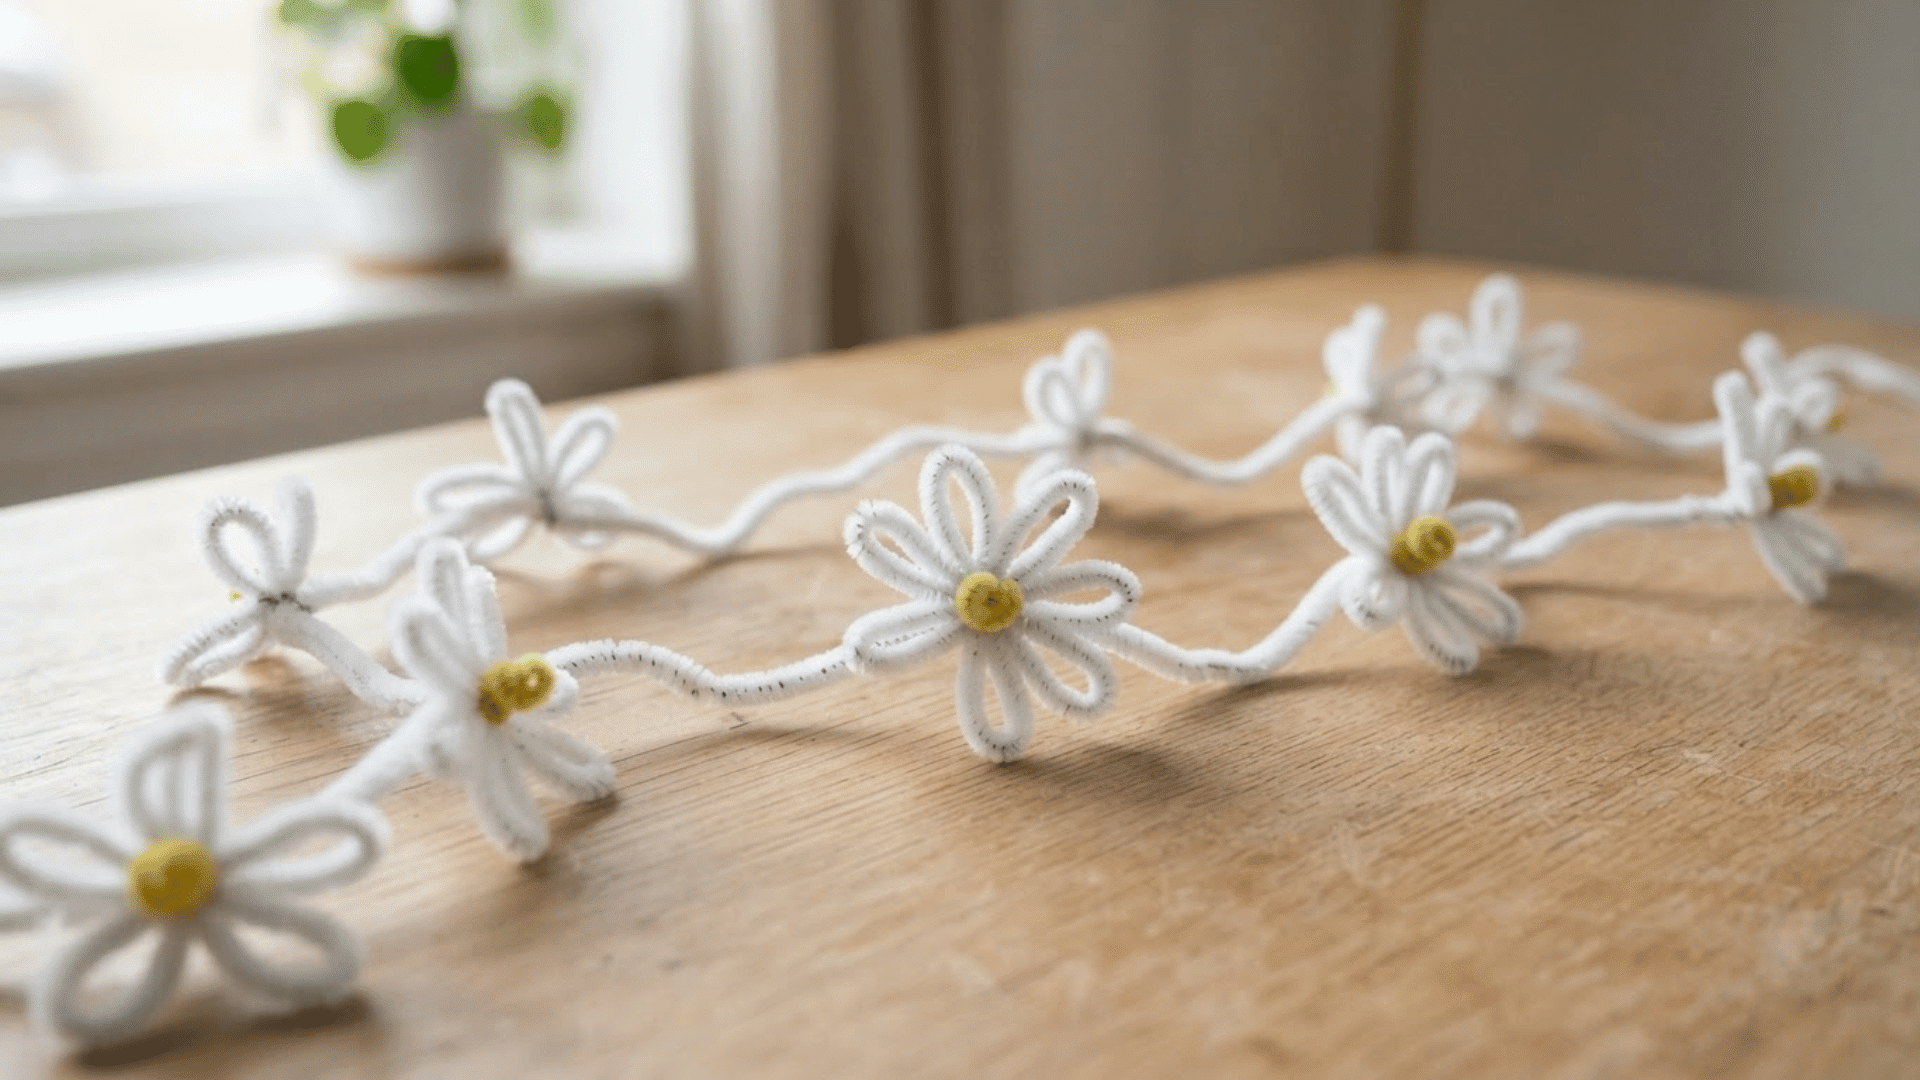
A flower garland joins several small flowers along one cord. This pipe cleaner art idea works well across a shelf, craft table, or small display space.
Craft Supplies Needed: Colored pipe cleaners (8 to 12), Green pipe cleaners (3 to 4), Cord or string (1 length), Scissors, Craft glue
Steps to Follow:
- Make several small flowers using loops or coils.
- Leave a short green stem beneath each flower.
- Place the flowers along the cord at even spaces.
- Twist each short stem securely around the cord.
- Turn the flowers forward and adjust their positions.
Tip: Place the flowers beside the cord first so you can check the spacing.
24. Mini Pipe Cleaner Wreath
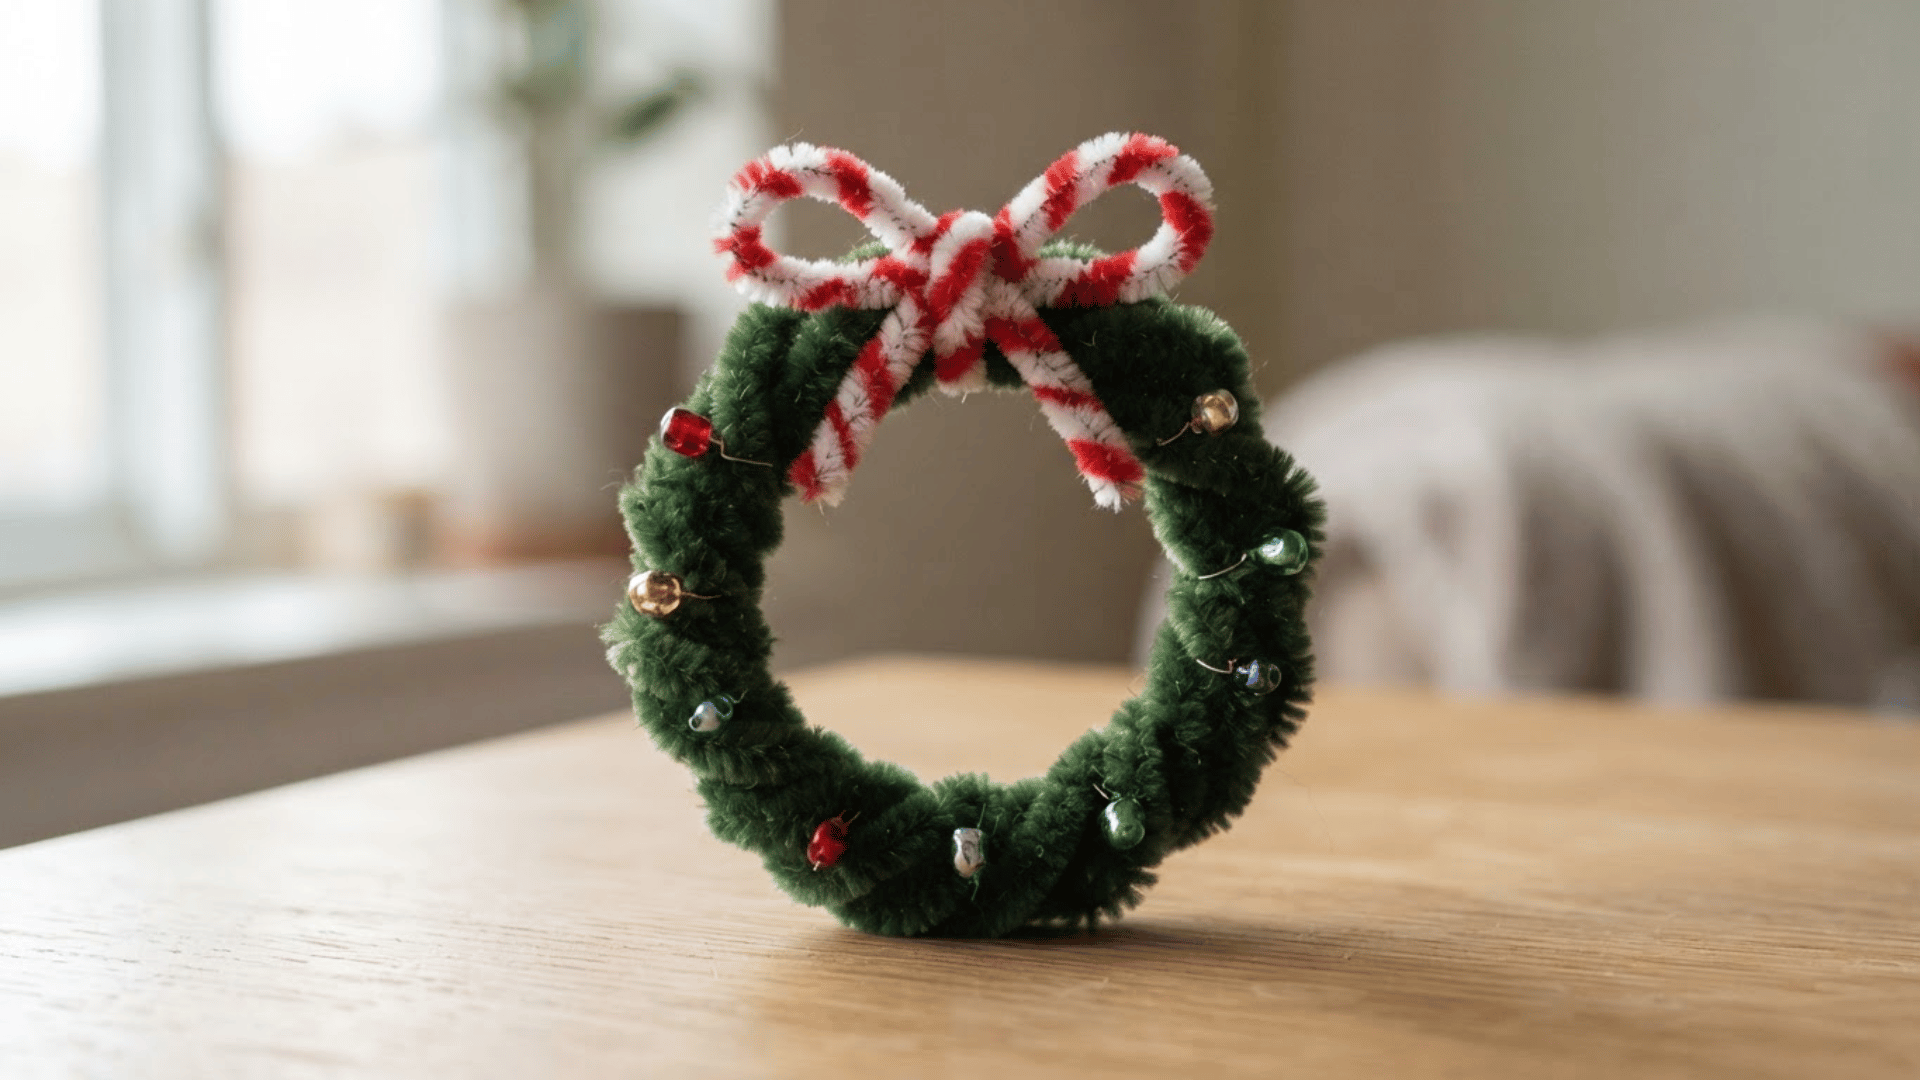
A mini wreath uses twisted green pipe cleaners to create a circular base. Small flowers, leaves, bows, or beads can then be added around it.
Craft Supplies Needed: Green pipe cleaners (3 to 4), Colored pipe cleaners (2 to 3), Small beads (optional), Ribbon (1 short piece), Scissors
Steps to Follow:
- Twist two or three green pipe cleaners together.
- Curve the joined stems into a round wreath shape.
- Secure both ends with a firm twist.
- Add small flowers, leaves, or bows around the circle.
- Tie a short ribbon loop at the top for hanging.
Tip: Leave a little space between decorations so the round base remains visible.
25. Pipe Cleaner Wall Hanging
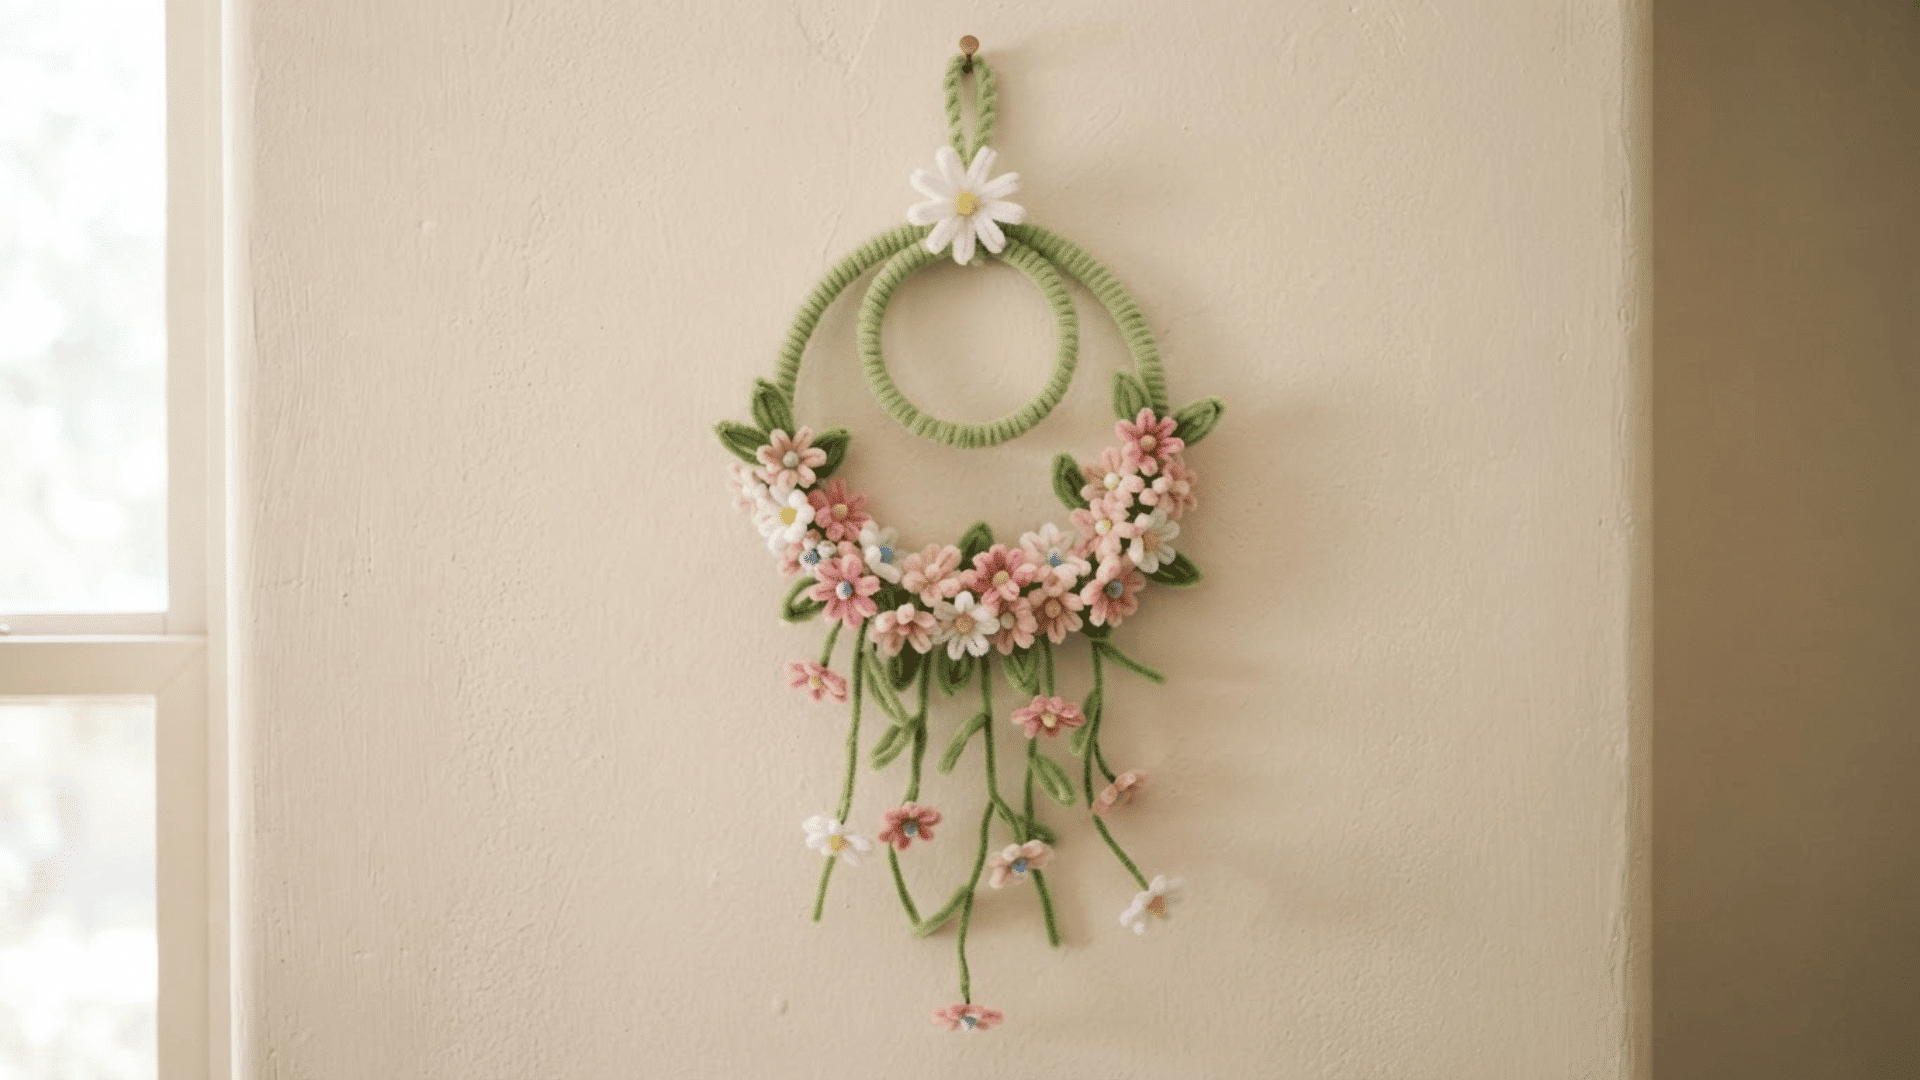
A pipe cleaner wall hanging combines several small shapes below one upper support. You can include hearts, flowers, stars, and coils.
Craft Supplies Needed: Pipe cleaners (8 to 12), Craft stick (1), String (1 length), Craft glue, Scissors
Steps to Follow:
- Attach several pipe cleaners along the craft stick.
- Bend each hanging stem into a different small shape.
- Add extra stars, flowers, or coils along the strands.
- Keep heavier pieces closer to the upper support.
- Tie string to both ends of the stick for hanging.
Tip: Arrange all hanging strands flat before lifting the finished piece.
26. Framed Pipe Cleaner Art
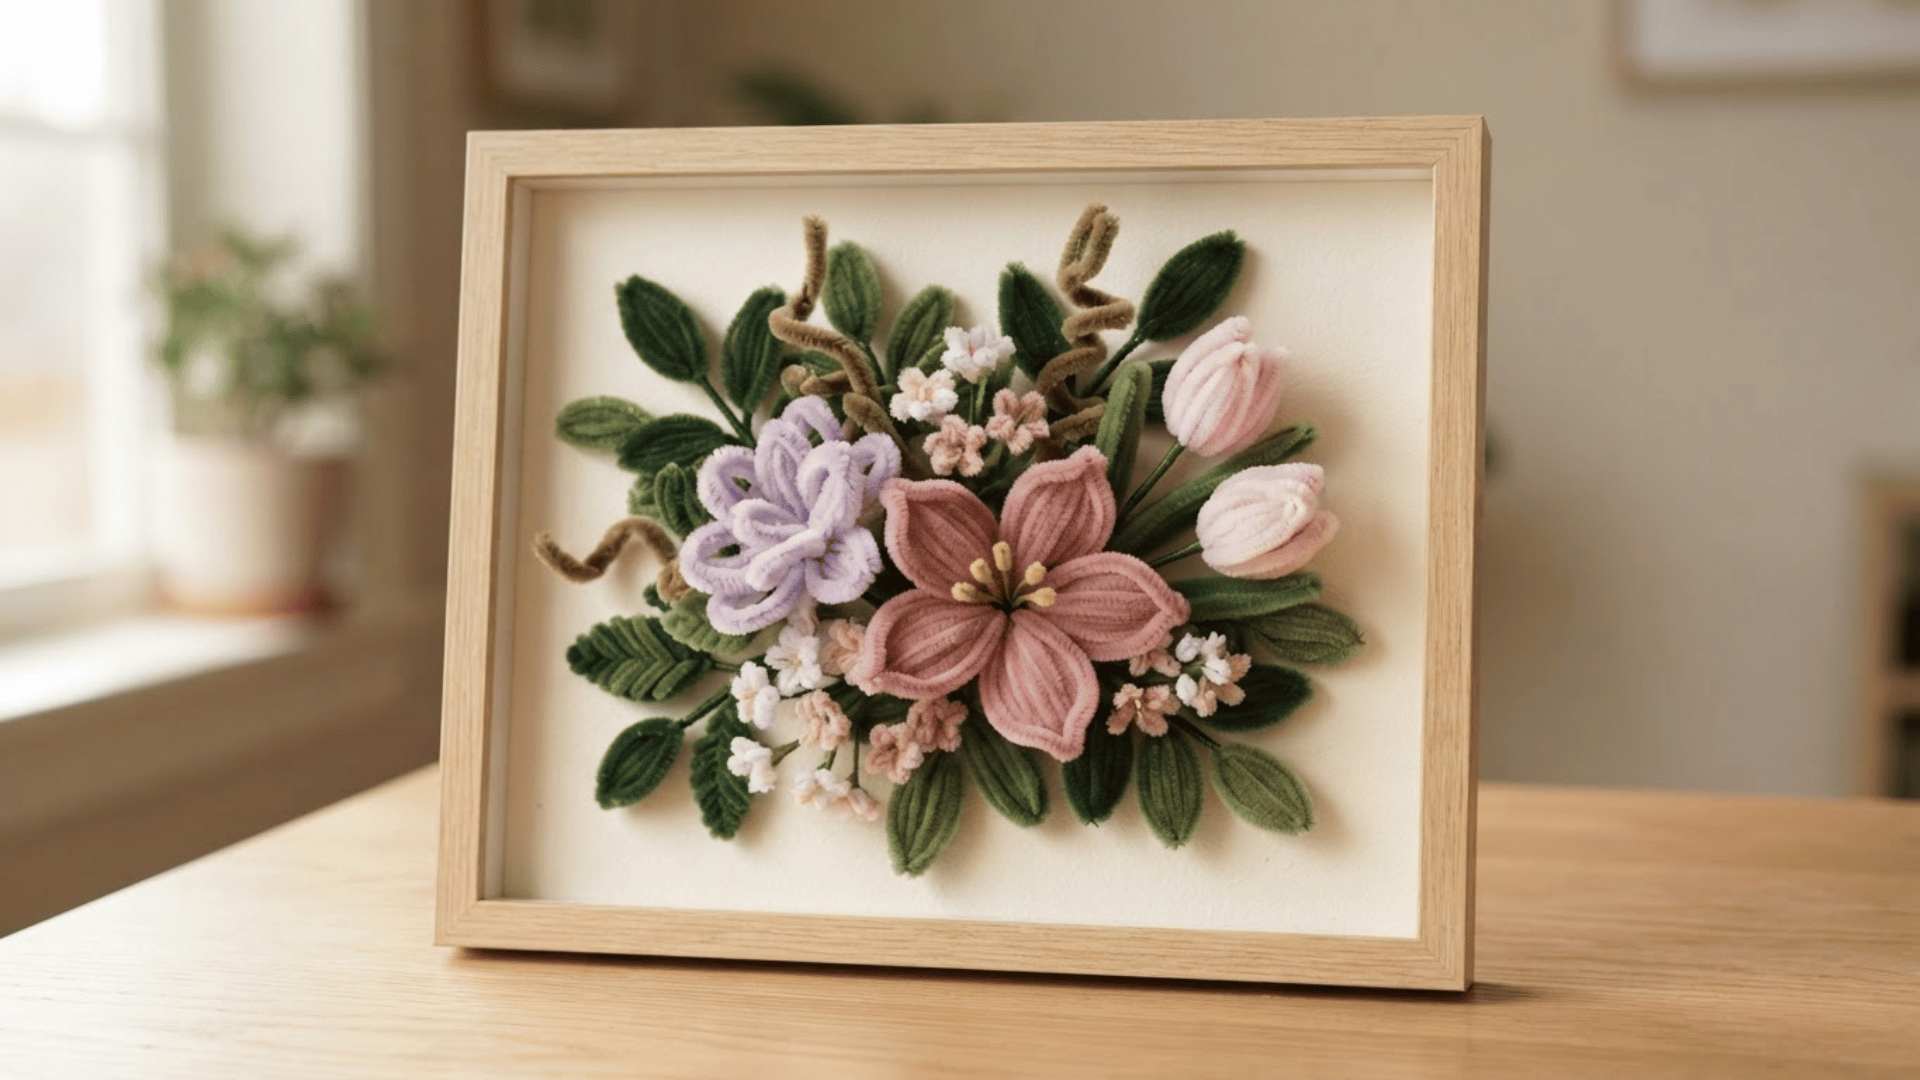
Framed pipe cleaner art uses bent stems attached to a cardstock background. Flowers, letters, lines, and geometric forms can all work with this method.
Craft Supplies Needed: Pipe cleaners (5 to 8), Cardstock (1 sheet), Frame (1), Craft glue, Scissors
Steps to Follow:
- Place the cardstock on a clean, flat work surface.
- Bend the pipe cleaners into the planned shapes first.
- Arrange each section on the sheet and check the spacing.
- Glue the stems down using small amounts of adhesive.
- Let the piece dry flat before placing it in the frame.
Tip: Arrange the full design before adding glue so you can still move pieces.
27. Pipe Cleaner Mini Bouquet
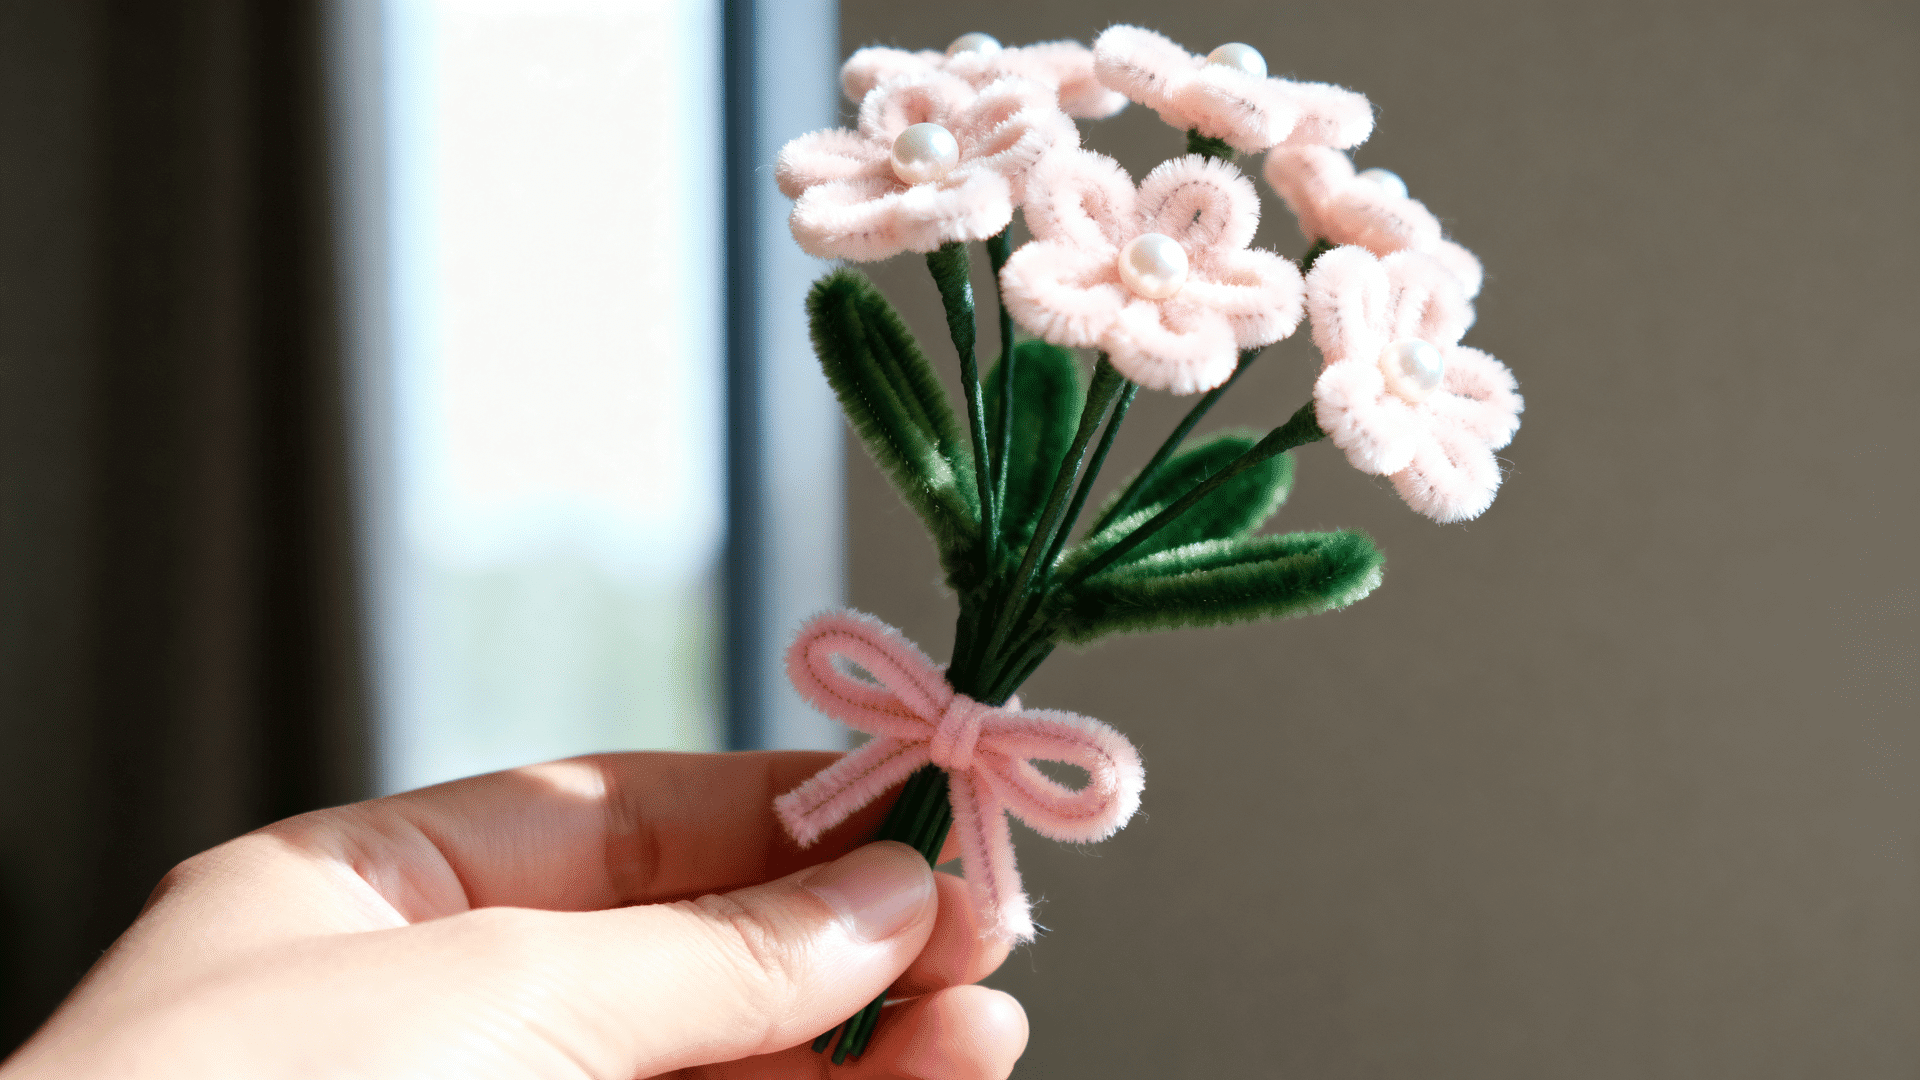
A mini bouquet combines several flower types into one pipe cleaner art project. I groupd together roses, daisies, tulips, and other small flowers.
Craft Supplies Needed: Colored pipe cleaners (6 to 10), Green pipe cleaners (5 to 7), Scissors, Ribbon (1 short piece), Small jar or cup (1)
Steps to Follow:
- Make three to five flowers using different shaping methods.
- Attach one green pipe-cleaner stem to each flower.
- Add a few folded green leaves between the flower stems.
- Gather all the finished flowers into one small bunch.
- Wrap ribbon or another pipe cleaner around the lower stems.
Tip: Use two or three stem heights so each flower remains visible in the bouquet.
Final Thoughts
Pipe cleaner art proves that simple materials can lead to plenty of creative possibilities. From flowers and animals to bracelets, wreaths, and small decorations, each project gives you a different way to practice bending, twisting, looping, and shaping.
Start with an easier idea, then try more detailed designs as you get comfortable. Pick your favorite project, gather a few pipe cleaners, and turn your next craft session into something hands-on and creative.
Frequently Asked Questions
Do Pipe Cleaner Colors Fade in Direct Sunlight?
Some Colors Can Gradually Fade with Prolonged Sun Exposure, Especially when Crafts Are Displayed Beside a Bright Window.
Can Pipe Cleaners Be Painted a Different Color?
They Can, but Paint May Stiffen the Fuzzy Surface. Starting with The Needed Color Usually Gives a Cleaner Result.
Are Metallic Pipe Cleaners Harder to Shape than Regular Ones?
Some metallic stems feel slightly firmer, so tight coils and small curves may require a little more hand pressure.