
You wanted to turn a plain piece of paper into something special like a paper craft, without buying a single craft supply? An origami heart lets you do exactly that.
I still remember making my first one, crooked, a little lopsided, but somehow still charming. That’s the beauty of paper folding: even your imperfect ones will look sweet.
Just grab a square of paper, add a few careful folds, and suddenly you’ve got a little handmade heart perfect for your cards, gifts, or notes. If you are ready to fold your own, I have covered exactly how you can do it, step by step.
What is an Origami Heart?
An origami heart is an easy folded-paper design that turns a simple sheet into a heart shape. It can become a small keepsake, note, or handmade decoration.
Depending on the folding style, the finished heart can be flat, puffy, tiny, or large. Different paper colors and prints can also change its overall look.
These folded hearts work well on greeting cards, wrapped gifts, or scrapbook pages. You can also use smaller versions as page markers or little personal notes.
Because the design works in many sizes and styles, it can suit different occasions. A few simple changes can make each finished heart feel more personal.
How to Make an Origami Heart?
Paper folding can turn a simple sheet into a thoughtful handmade creation. This craft is beginner-friendly and works well for decorations, gifts, or a fun creative break.
Follow the instructions below to shape your paper into a heart design from start to finish:
Step 1: Start with a Square Sheet of Paper
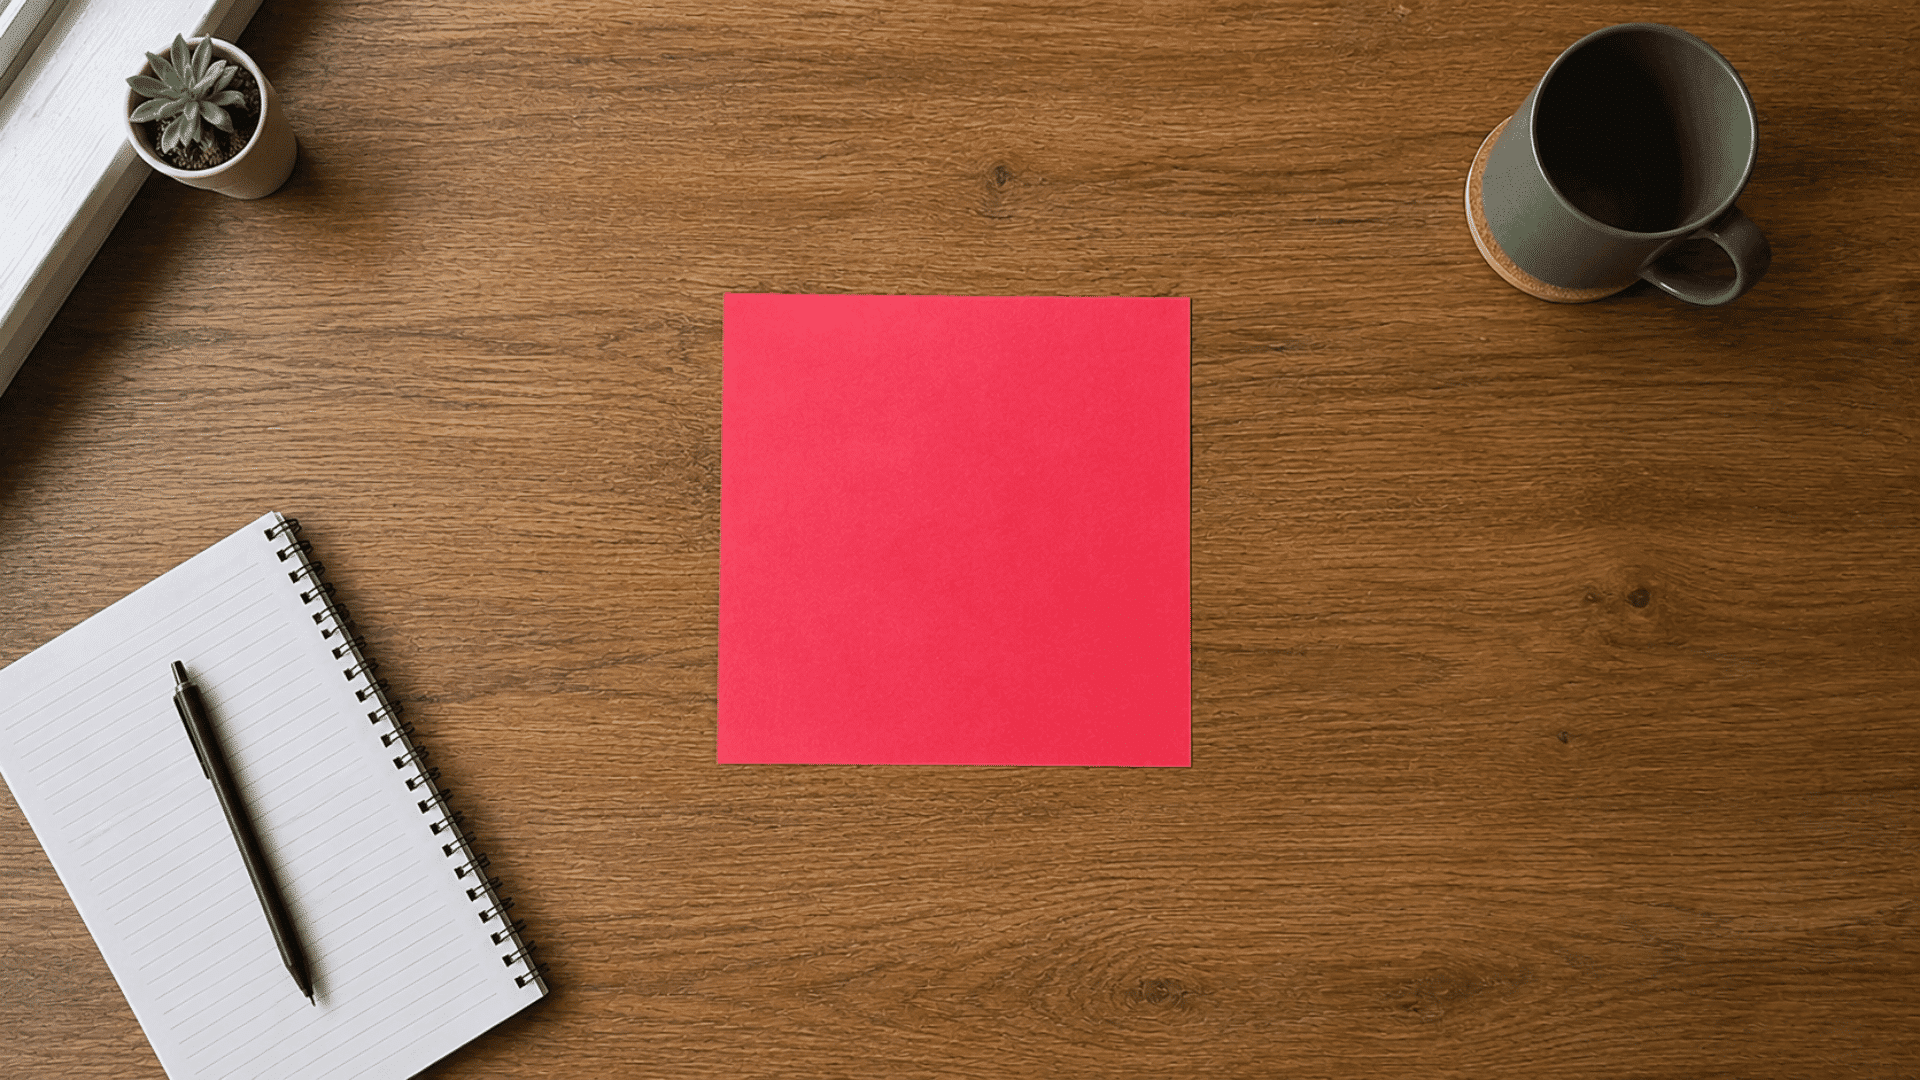
Begin with a clean square sheet that folds easily without being too thick. A well-cut square helps keep the final shape balanced and neat.
Before making the first main folds, get the paper ready with these simple checks:
- Choose lightweight paper that bends easily and holds a crease without springing back.
- Check that all four sides are equal before starting the folding process.
- Place the paper on a clean, flat surface with enough room for folding.
- Smooth out any existing bends or wrinkles that could affect later crease lines.
- Position the colored or patterned side according to how you want the heart finished.
My Tip: Practice with a larger paper square first, since extra space makes corners easier to align and small folds easier to control.
Step 2: Make the First Creases
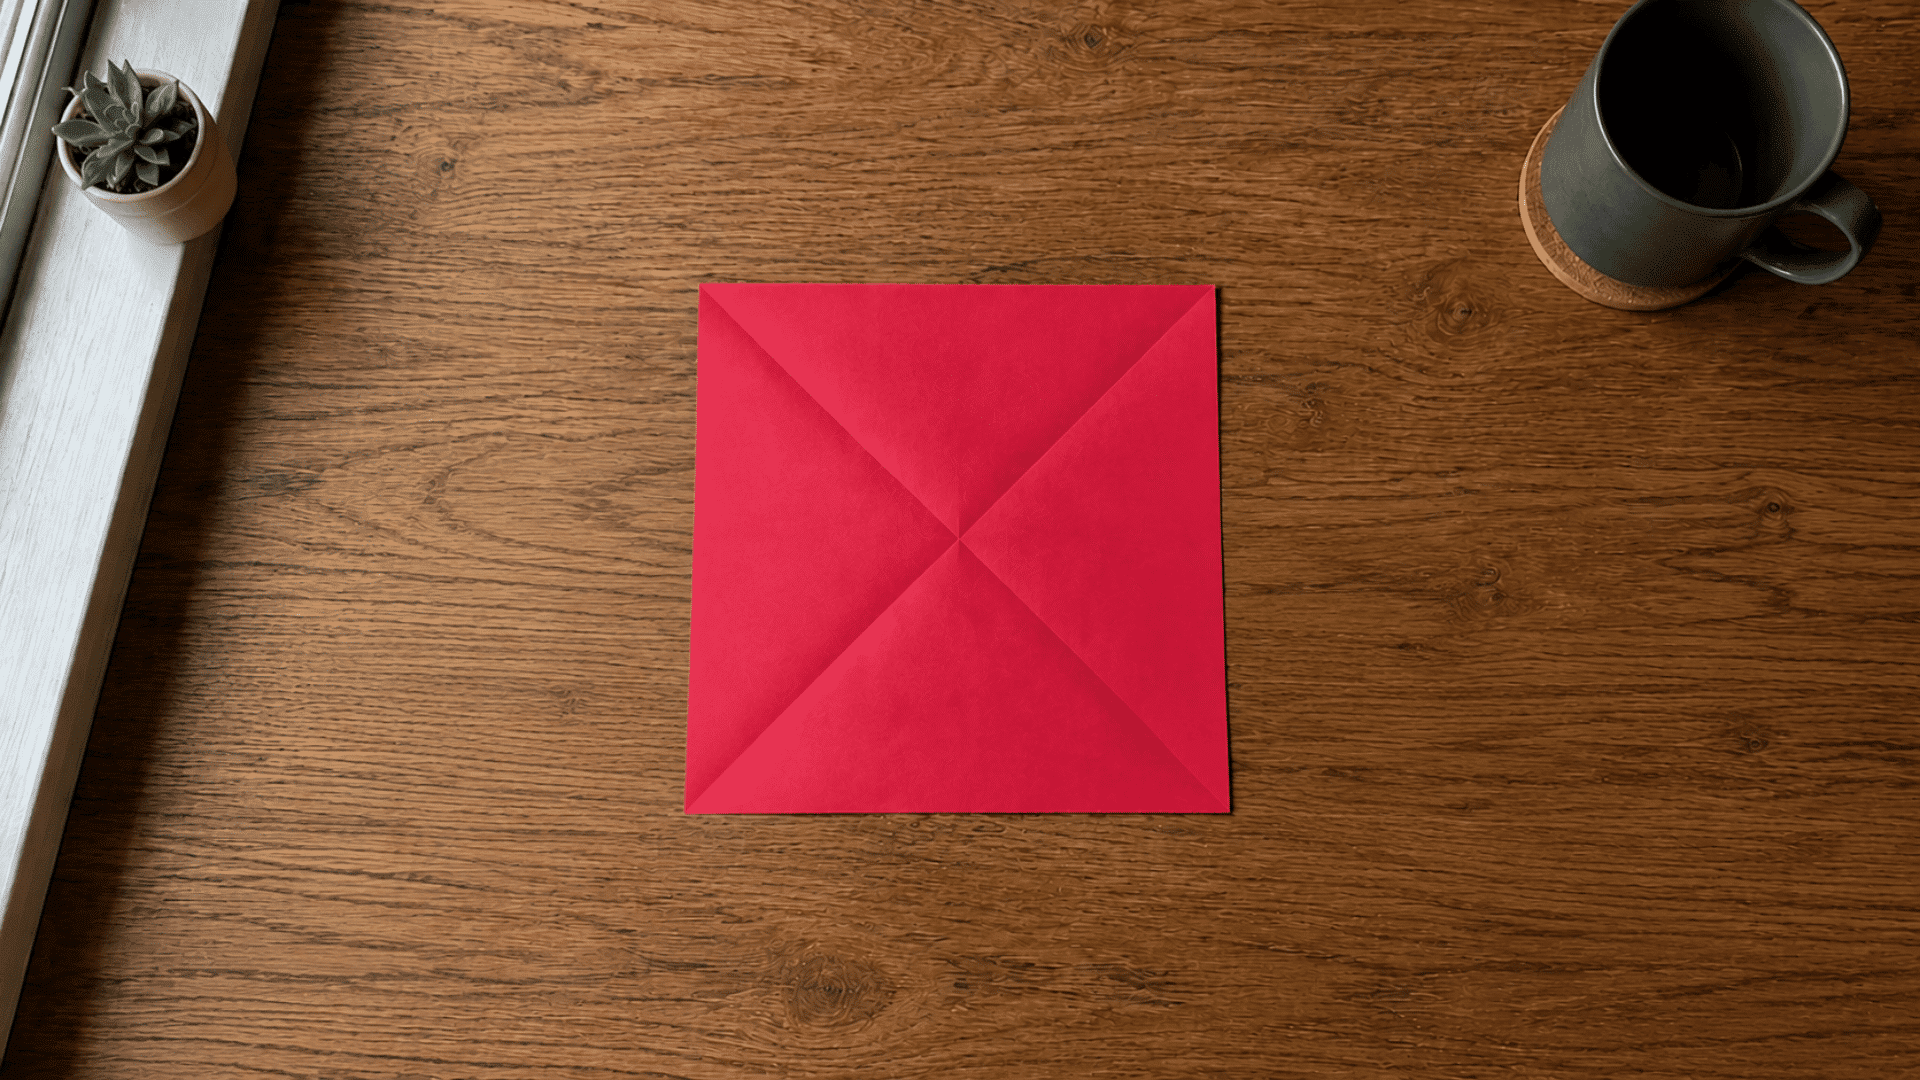
Now it is time to create the crease lines that will help with the folds ahead. Keep the corners aligned so the paper stays even.
- Bring the top corner down until it meets the bottom corner exactly.
- Press firmly along the folded edge, moving from the center toward both ends.
- Open the paper again and return it to its original flat position.
- Bring the left corner across until it lines up neatly with the right corner.
- Crease the second fold firmly, then open the paper to reveal crossed lines.
My Tip: Press each crease with a fingertip or fingernail, but avoid pressing so hard that thin paper tears.
Step 3: Fold the Top and Bottom Corners
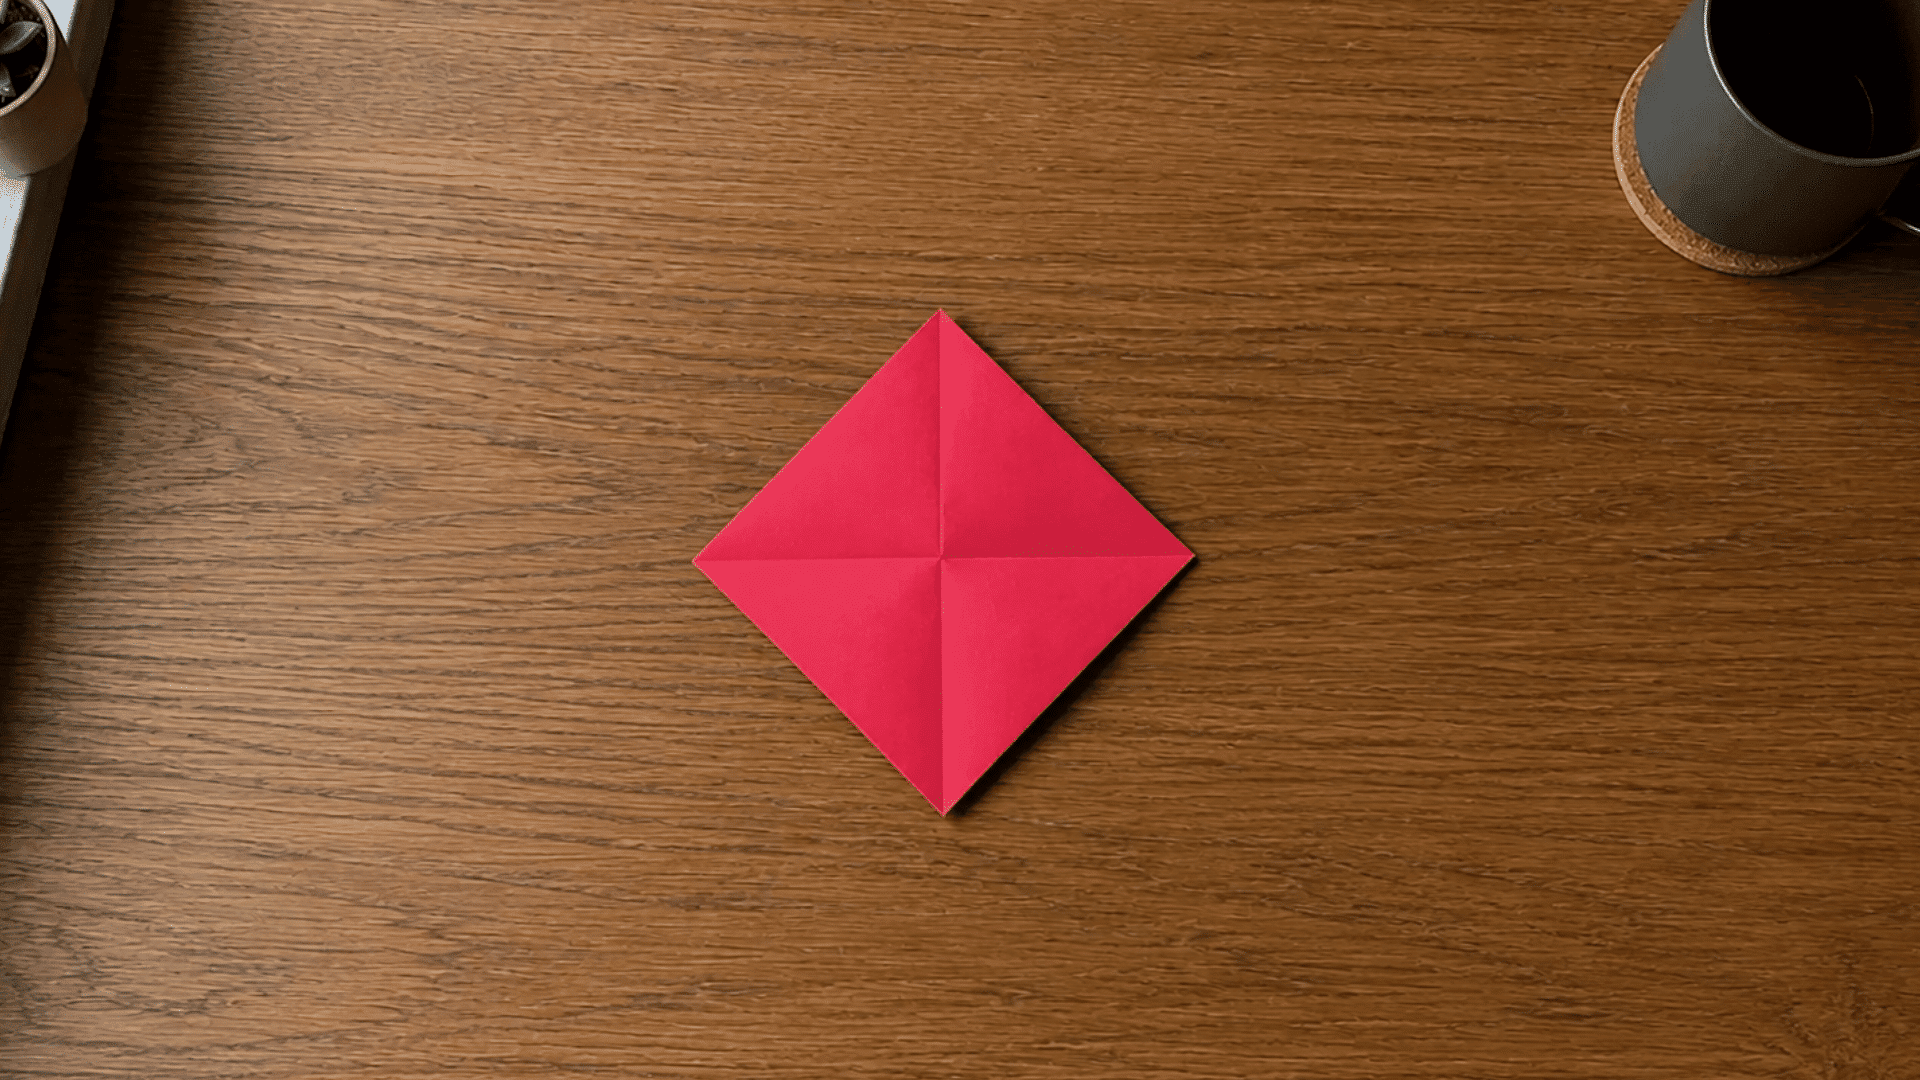
The crossed lines now give you a clear center point to work with. These next folds begin changing the square into a more defined shape.
Use the center mark as your reference while working through these folds:
- Bring the top corner downward until its tip meets the center point neatly.
- Check that the corner sits directly where the two crease lines cross.
- Press the new fold from the middle outward to keep the edge smooth.
- Bring the bottom corner upward until its tip reaches the top folded edge.
- Hold both layers steady, then press firmly across the bottom fold to secure it.
My Tip: Check the corner placement before making a firm crease, since small alignment errors can affect the final heart shape.
Step 4: Fold Both Sides Upward
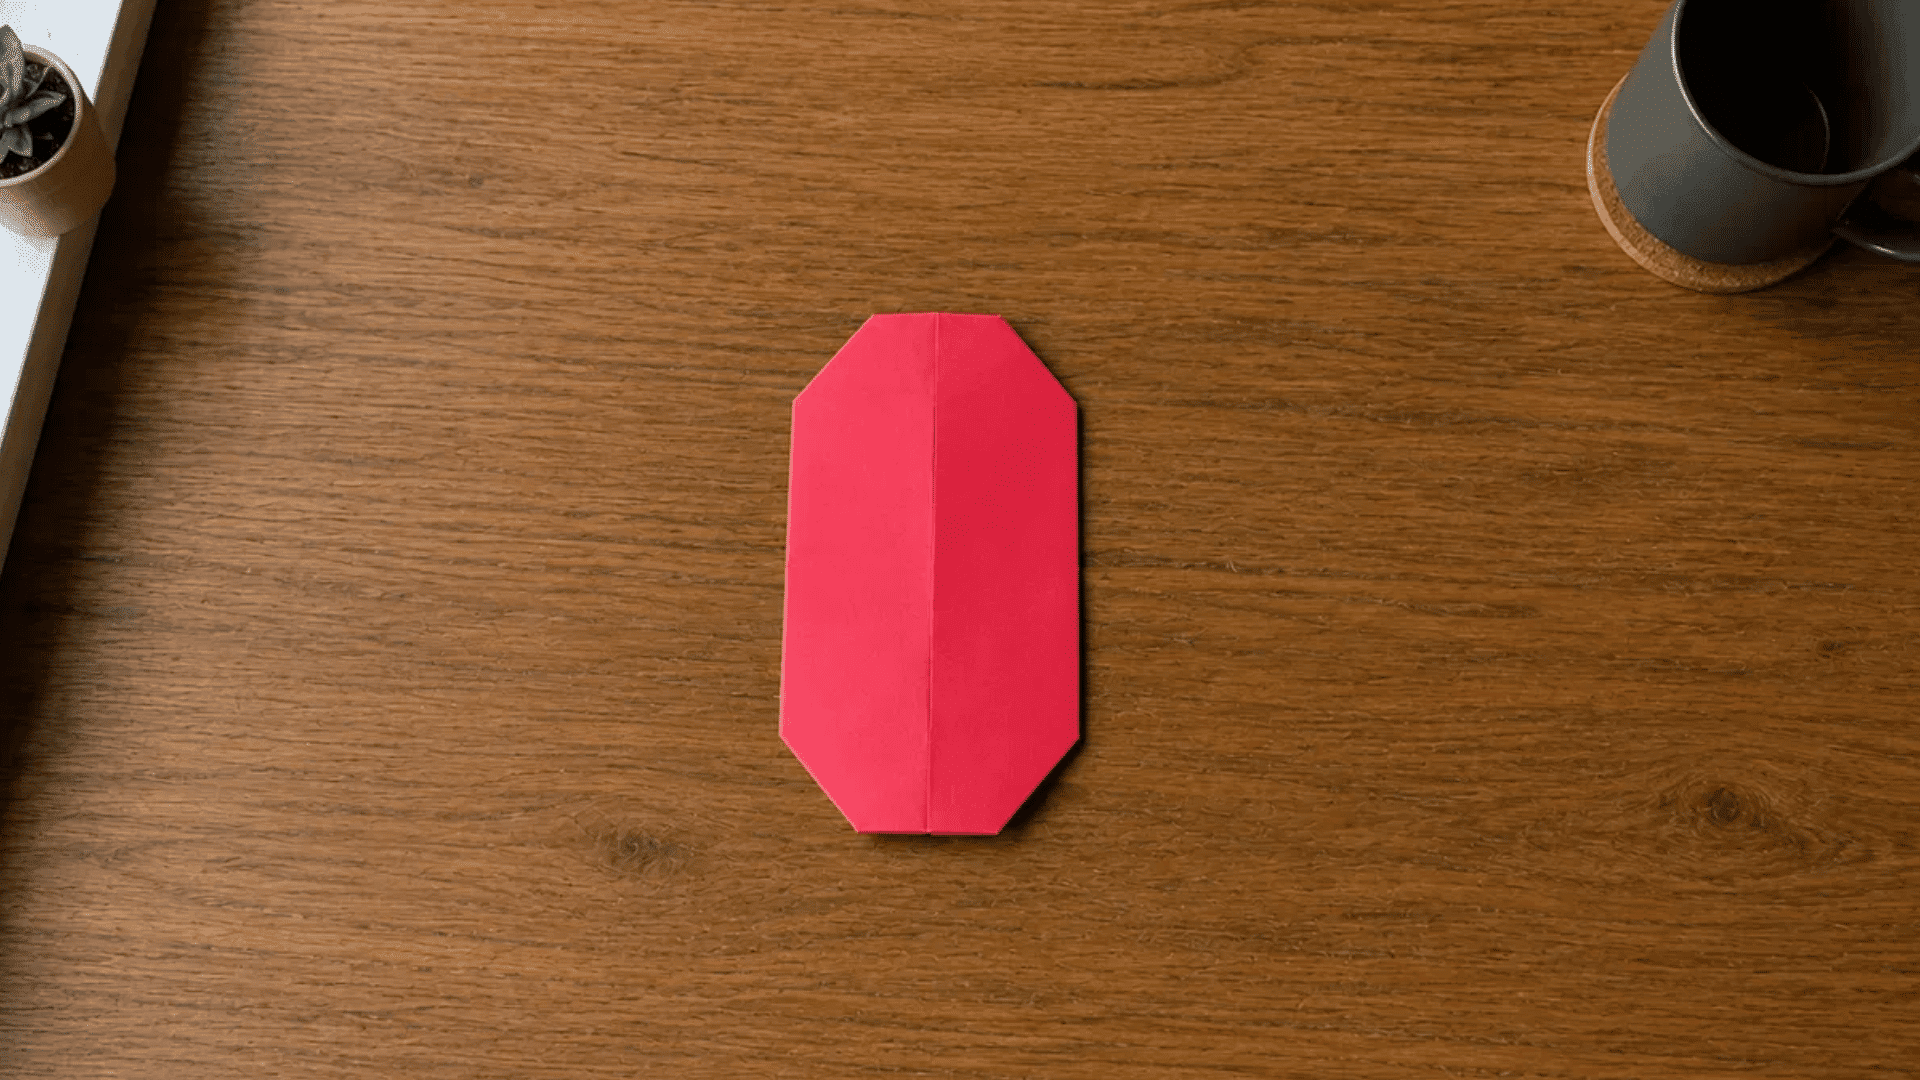
With the top and bottom sections in place, the paper is ready for its side folds. This part starts bringing the familiar heart shape into view. Work from the center outward to keep both sides as even as possible.
- Take the lower-right section and bring it upward toward the vertical center crease.
- Carefully line up its inner edge with the center before pressing it down.
- Repeat the same upward fold with the lower-left section of the paper.
- Compare both sides and adjust them gently if one sits higher than the other.
- Press along both new folds firmly once the two sides look evenly positioned.
My Tip: I Line up each fold with the center crease before pressing firmly, as this helps the sides meet cleanly.
Step 5: Shape the Top of the Heart

The main form is now in place, but the upper section still has pointed edges. A few smaller folds will give it a softer heart shape.
For this part, make small adjustments rather than large folds.
- Turn the paper over carefully while keeping all the previous folds firmly in place.
- Fold the two top points downward slightly to form the heart’s rounded upper sections.
- Keep both top folds similar in size so the center dip remains clearly defined.
- Fold the outer left and right corners inward to soften the sharp side edges.
- Press each small fold gently, checking the front after every adjustment you make.
My Tip: Make these finishing folds small at first, since folding too much can make the upper sections look flat or uneven.
Step 6: Secure the Small Finishing Folds

Those smaller folds around the top and sides need a little attention now. Securing them properly helps the paper hold its form before the final reveal.
- Gently press both folded top corners so they stay flat against the paper.
- Run your fingertip along each small crease to help it stay firmly closed.
- Check the folded side corners and press down any edges that start to lift.
- Match the left and right finishing folds so neither corner extends beyond the outer edge.
- Avoid opening earlier sections while pressing these smaller folds into place.
My Tip: Use gentle pressure on smaller corners, as pressing too firmly can leave unwanted marks or weaken lightweight paper.
Step 7: Turn It Over and Check the Final Shape

Your folded heart is ready for its final check. Turning it over shows how everything came together and gives you one last chance to fix uneven areas. I give the finished side one last check before setting your paper heart aside.
- Turn the paper over carefully so the finished heart is facing upward again.
- Compare both sides to check that they look even from top to bottom.
- Gently adjust the upper curves if one side appears larger than the other.
- Smooth any raised edges with your fingertip without opening the completed folds underneath.
- Press the center and outer edges lightly to help the finished shape stay flat.
My Tip: Make only small adjustments at this stage, since reopening firm creases can make the finished shape look less neat.
Paper Heart Sizes and Their Best Uses
The size of your starting paper can change how the finished piece looks and where it works best. This table makes choosing a suitable size much easier:
| Paper Size | Approximate Result | Best Use |
|---|---|---|
| 7.5 × 7.5 cm | Small | Gift tags and tiny notes |
| 10 × 10 cm | Small to medium | Greeting cards and page markers |
| 15 × 15 cm | Medium | Beginner practice and small decorations |
| 20 × 20 cm | Large | Party displays and wall decorations |
| 25 × 25 cm | Extra large | Larger displays and craft projects |
How to Make a 3D Inflatable Origami Heart
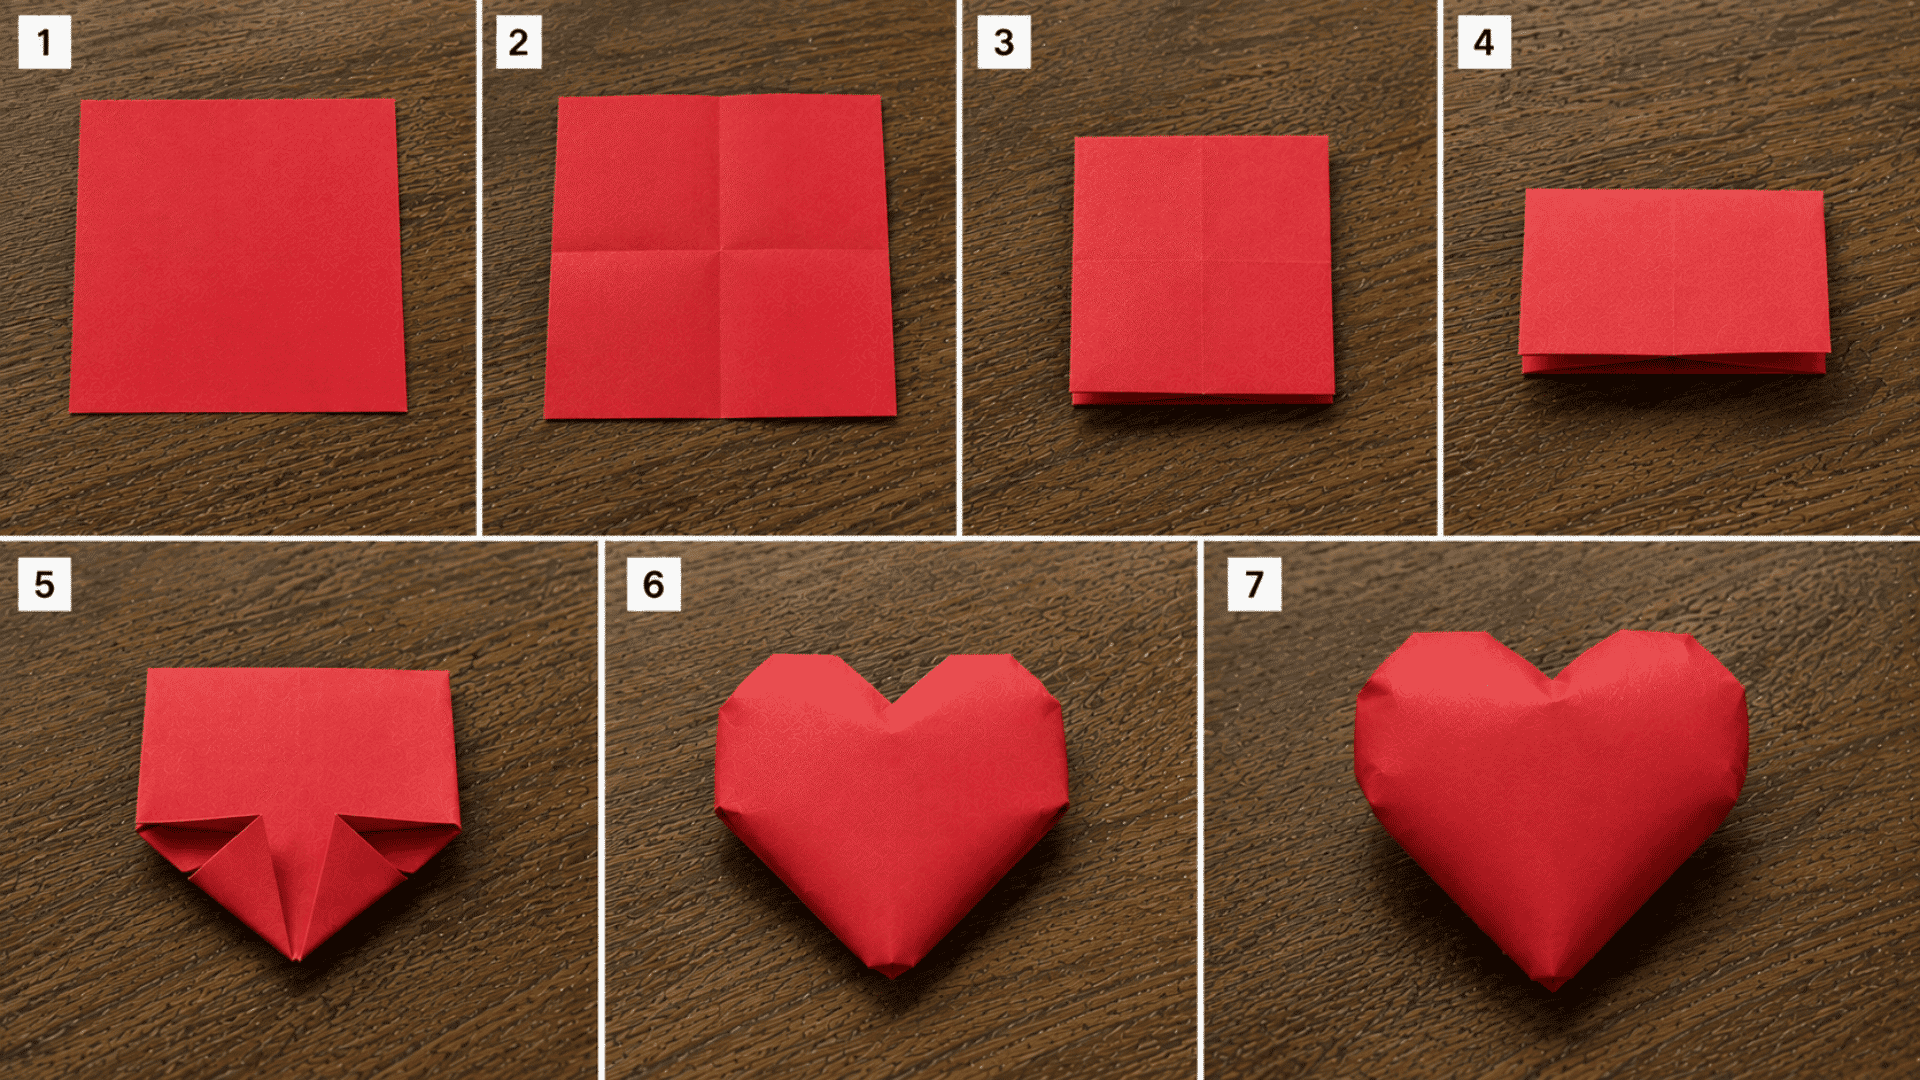
This puffy version takes a bit more patience than the flat one, but the folding process is still easy to follow. Follow these seven steps to create the puffy shape:
- Prepare the paper: Place a lightweight square sheet flat with the visible side facing down.
- Make the center creases: Fold the paper in both directions, then unfold it to create guide lines.
- Build the base shape: Push the sides inward along the creases and flatten the folded sections.
- Fold the lower corners: Bring both bottom corners upward while keeping the shape even.
- Create the inner pockets: Open the folded areas, flatten them, and tuck the pointed sections inside.
- Round the top edges: Fold the upper corners inward slightly to create softer heart curves.
- Puff up the heart: Blow gently into the bottom opening and adjust the sides until it looks balanced.
Easy and Creative Paper Heart Ideas You Can Create
Once you are comfortable with the basic folds, changing the style can keep the craft interesting. These simple variations offer different shapes, bring out kids’ creativity, and offer uses without feeling repetitive:
1. Hidden-Message Heart
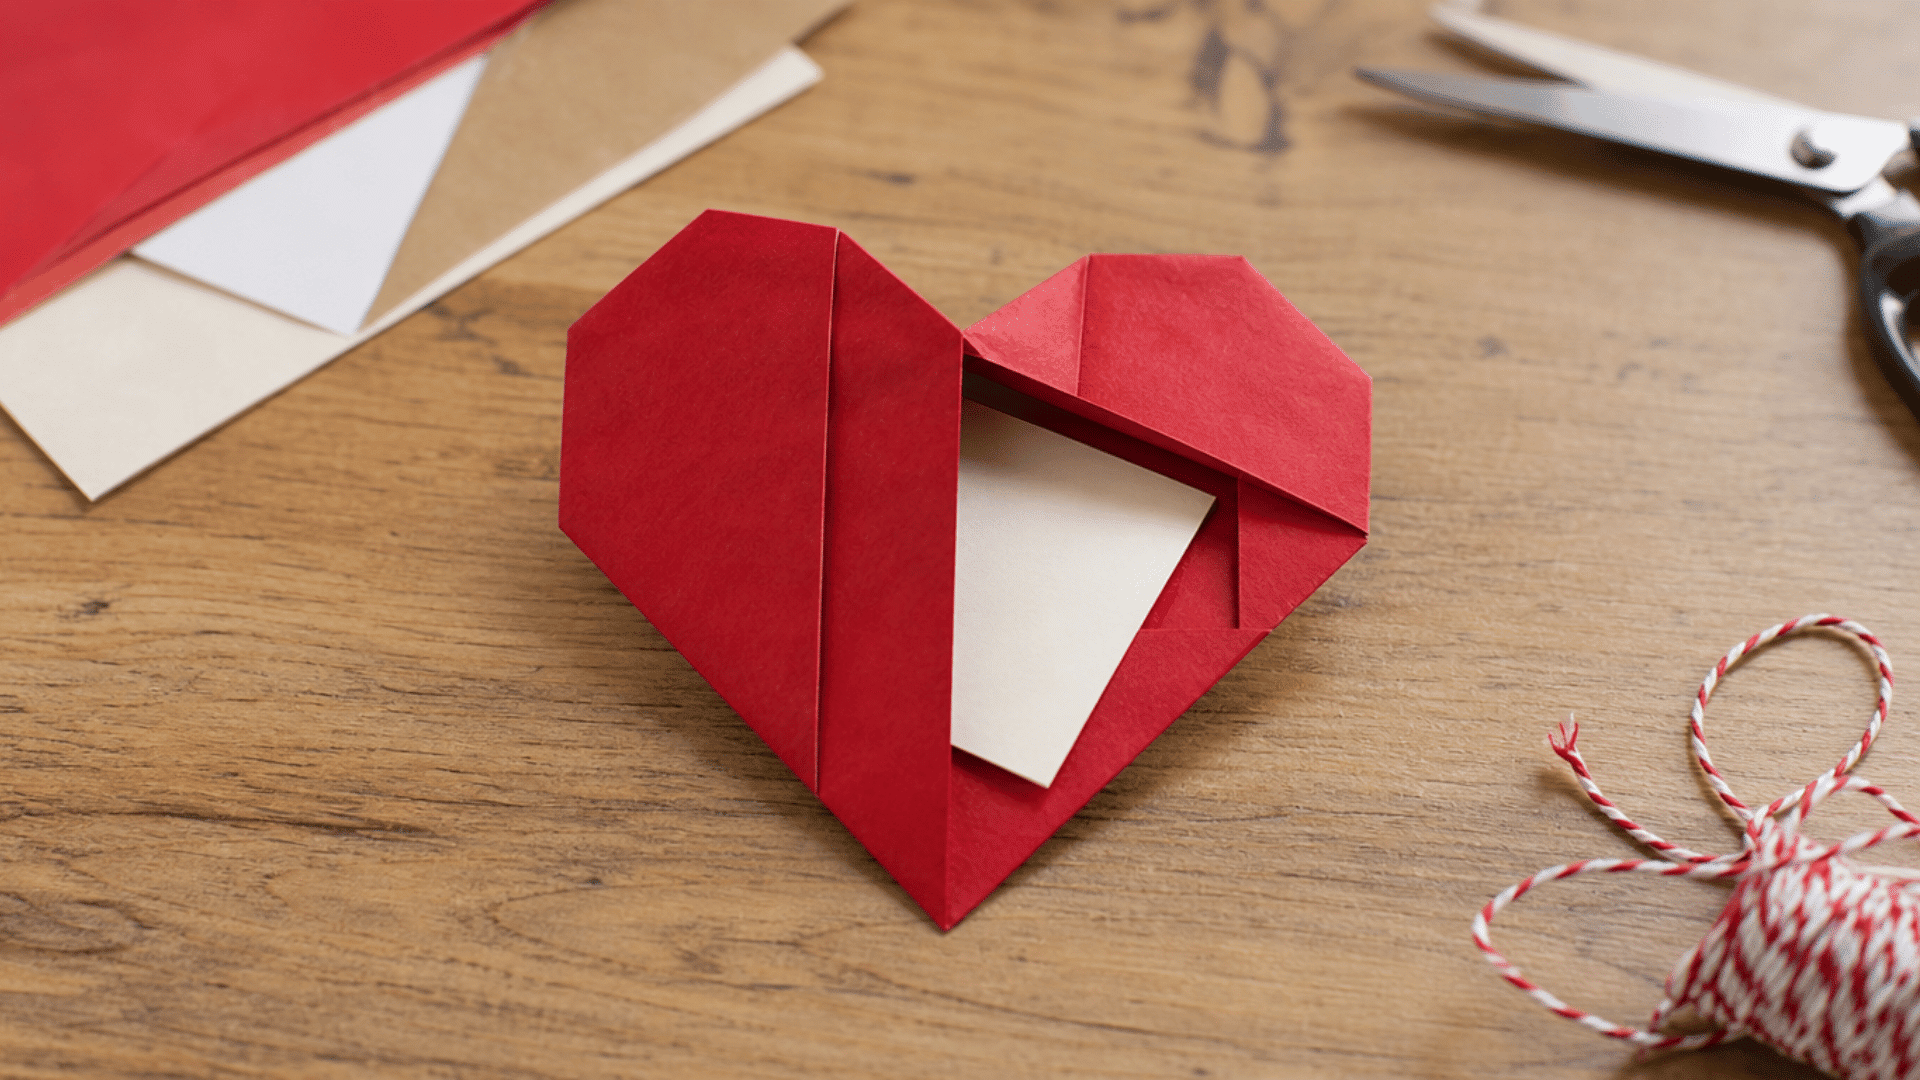
A hidden-message heart is a folded paper heart with a small space inside where you can add a personal note, surprise message, or sweet little reminder.
How to make it:
- Choose a square piece of paper and fold it into a basic heart shape.
- Create a small pocket area while folding the heart layers.
- Write a short message on a separate piece of paper.
- Carefully place the note inside the hidden section.
- Close the folds and adjust the heart edges neatly.
This design works well for invitations, handwritten notes, and small surprises. Decorate the outside with stickers, drawings, or patterns to match the occasion.
2. Heart Corner Bookmark
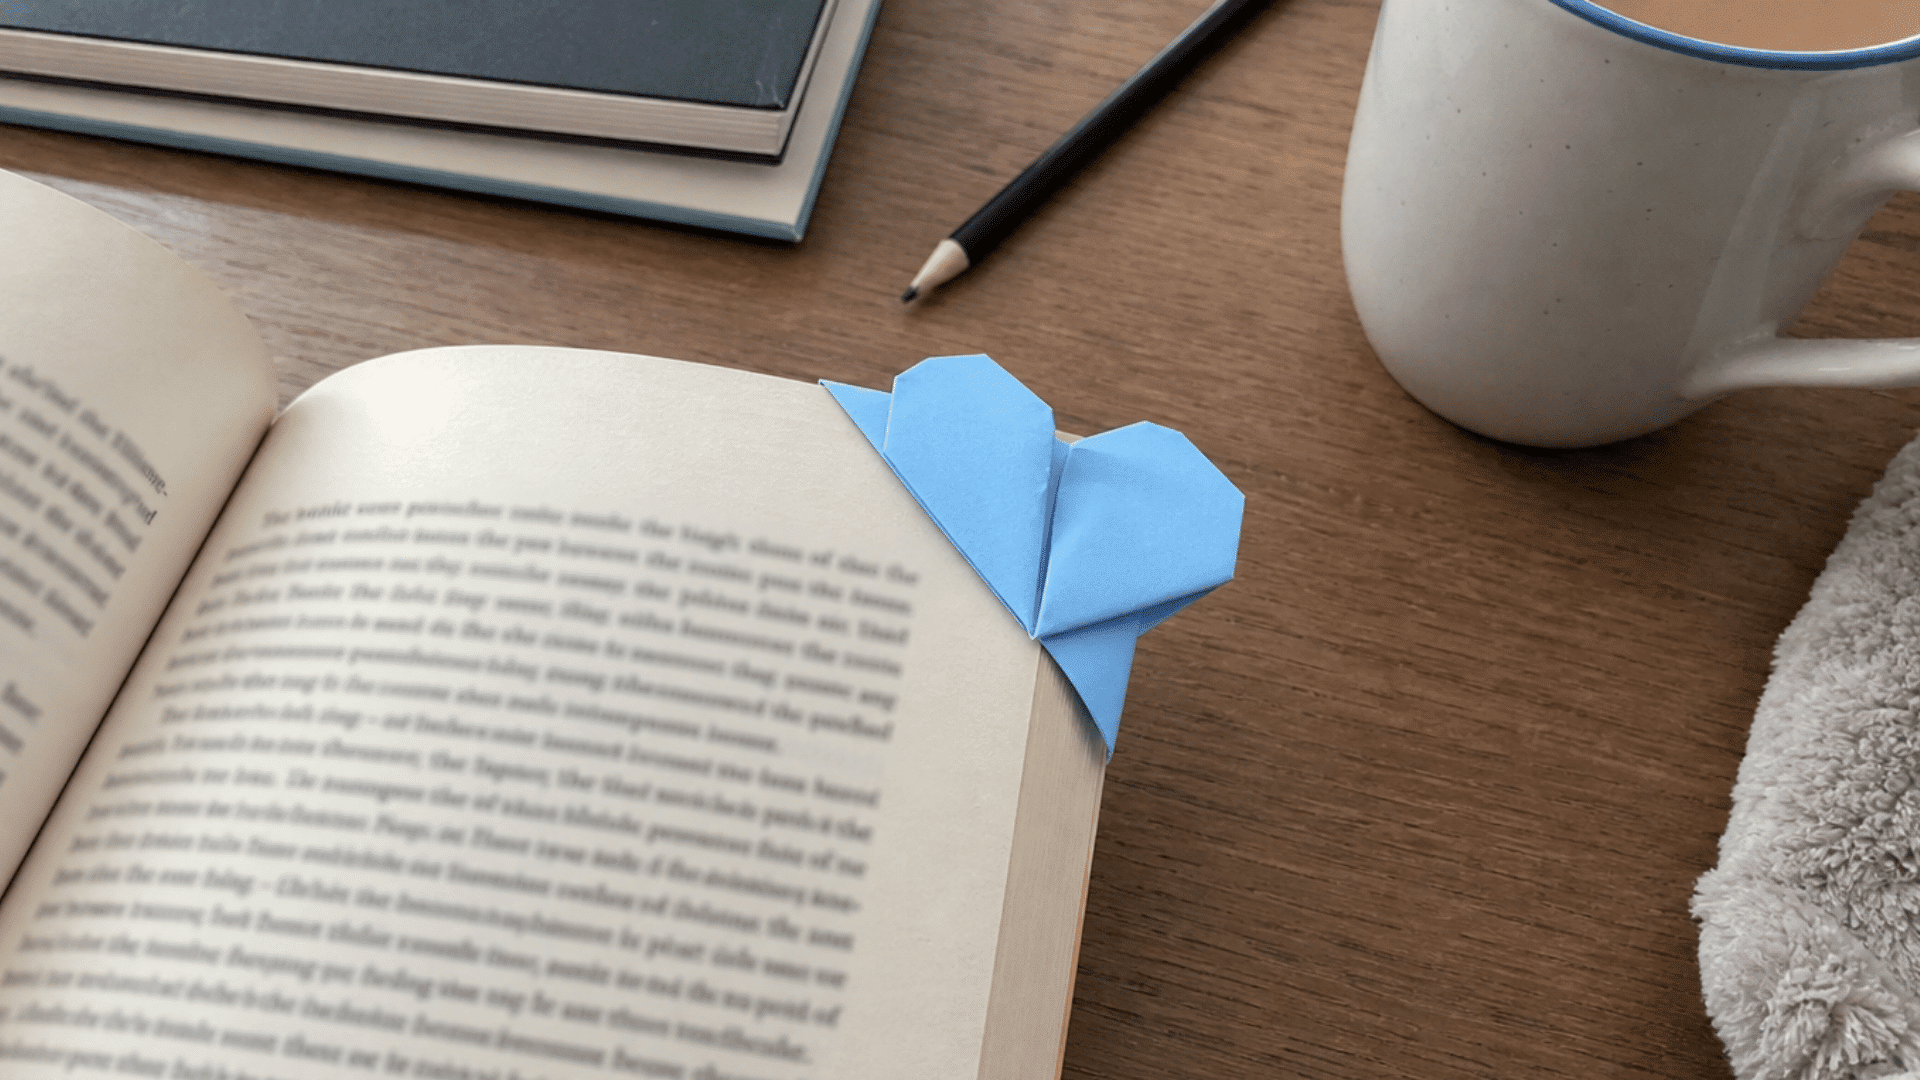
A heart corner bookmark is a folded paper heart that slides onto page corners, combining a cute decoration with a useful reading accessory.
How to make it:
- Choose a square piece of paper and fold it into a corner pocket shape.
- Create the heart design by adjusting the top folded sections.
- Press the creases firmly to help the bookmark hold its shape.
- Trim or decorate the edges for a cleaner finished look.
- Place the bookmark over a book page corner to test it.
This bookmark adds a handmade touch to reading time, school projects, or book gifts. You can decorate it with patterns, stickers, or colors.
3. Heart with Wings
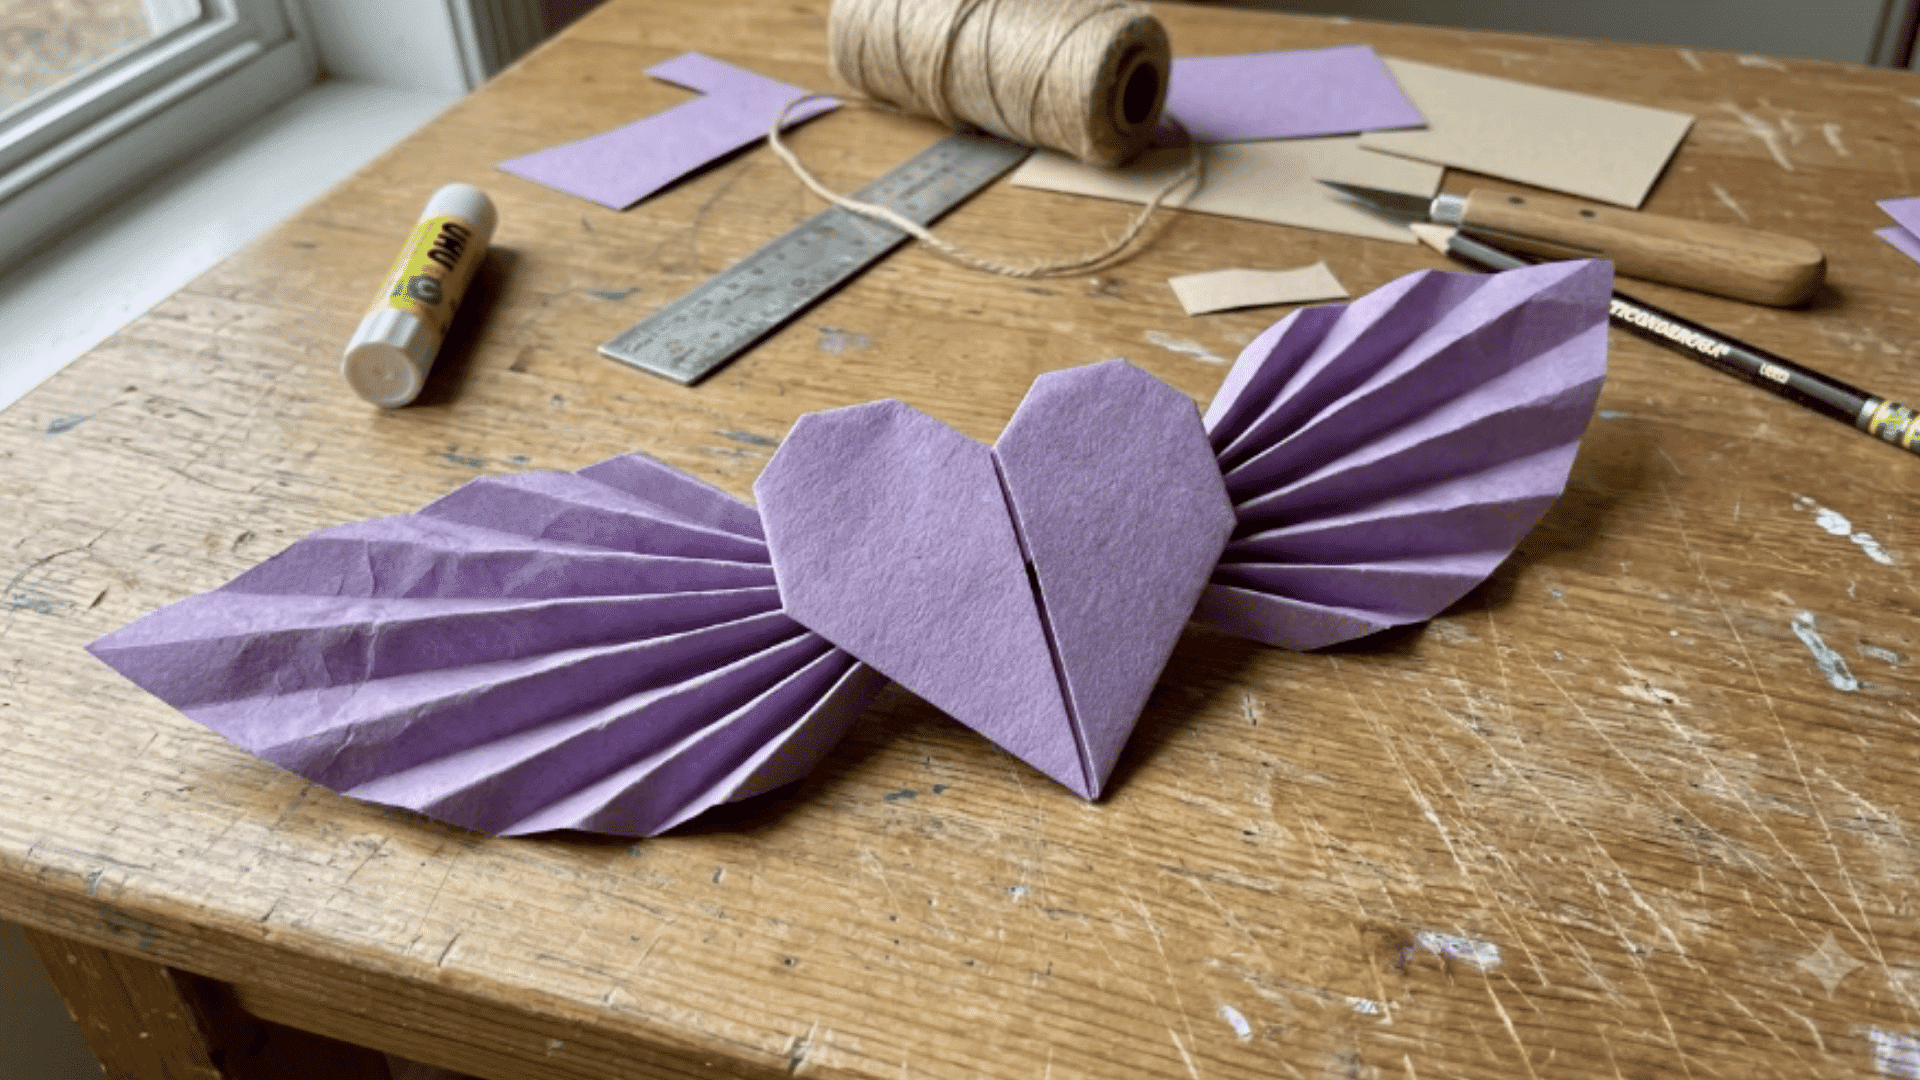
A heart with wings is a decorative paper heart featuring folded side sections that create a playful winged design for crafts and displays.
How to make it:
- Choose a square piece of paper and fold it into a basic heart shape.
- Create folded side sections that extend outward like small wings.
- Adjust both wings to make the heart shape look balanced.
- Press the folds firmly to keep the wing details in place.
- Decorate the wings or heart surface to personalize the finished design.
This design works well for greeting cards, wall decorations, and seasonal craft projects. You can experiment with different paper colors or patterns to create unique wing shapes and styles.
4. Double Paper Heart
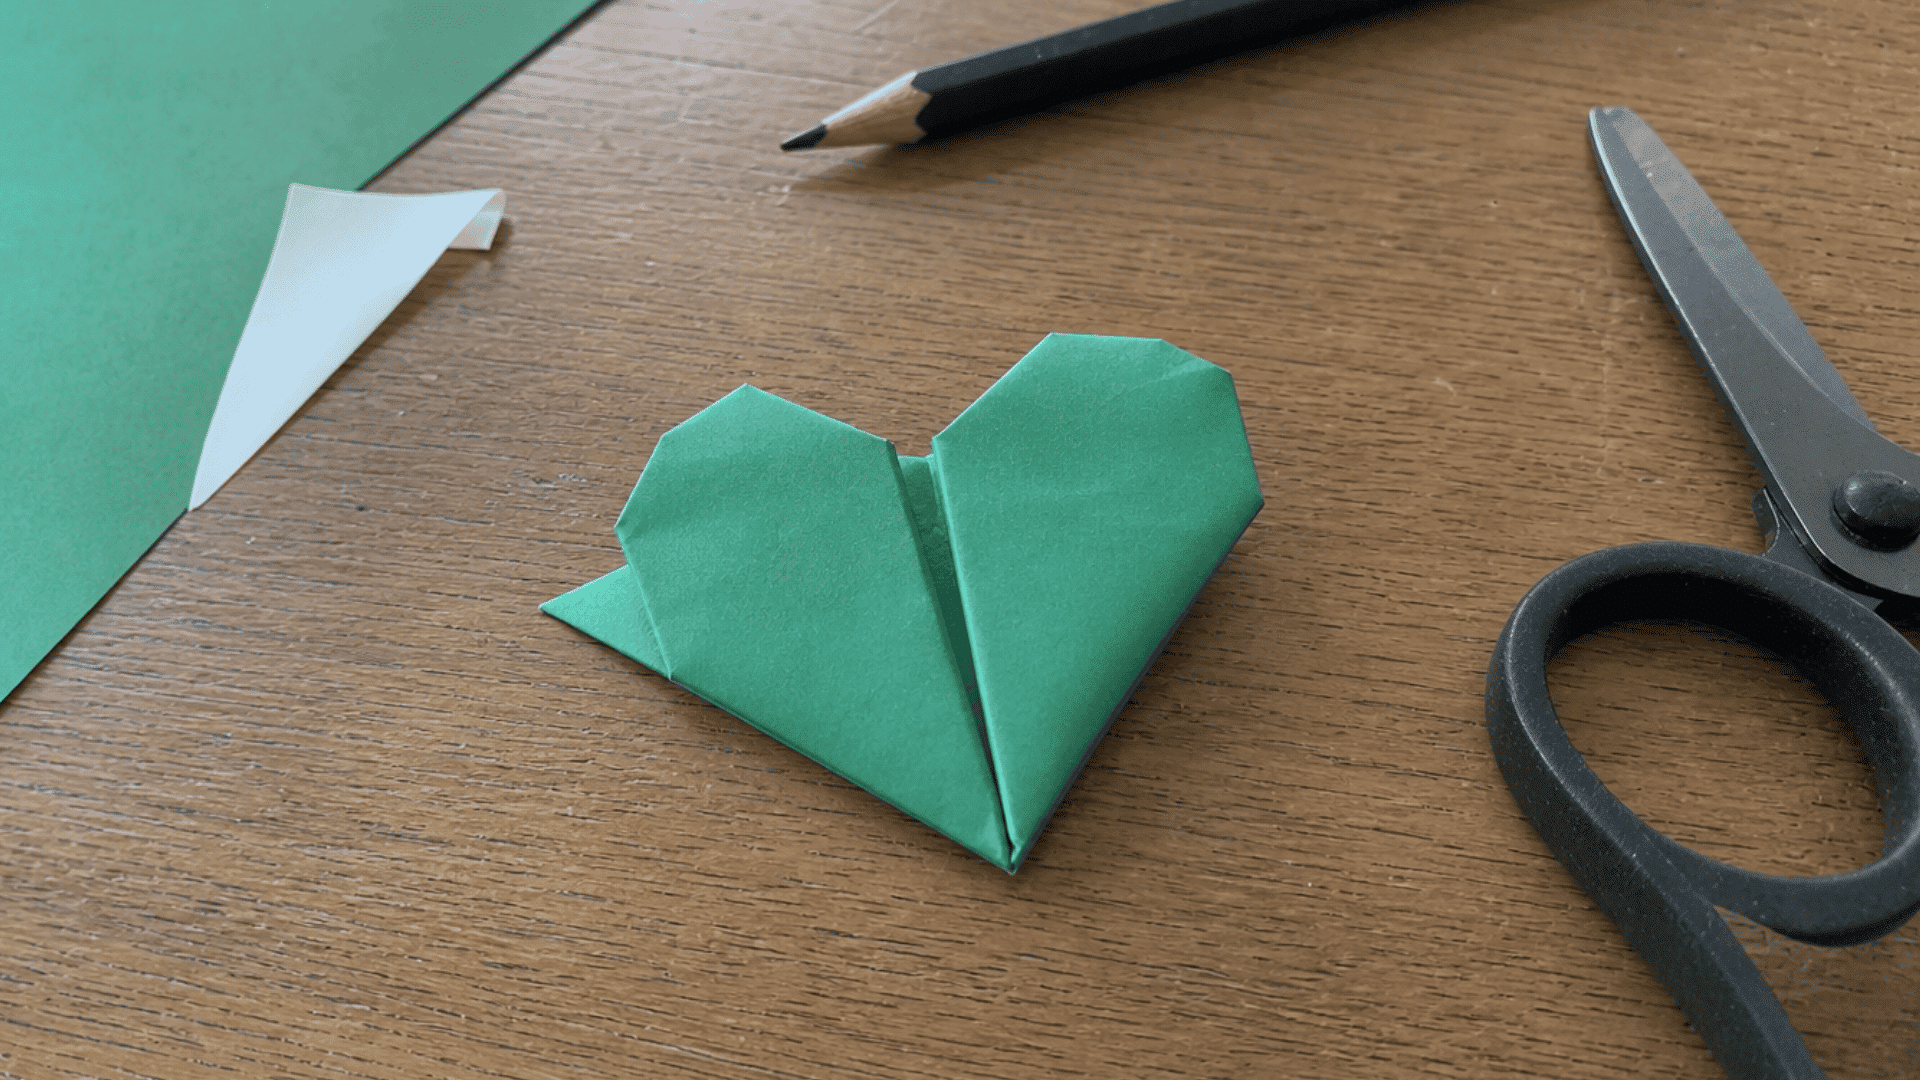
A double paper heart is a folded design that creates two connected heart shapes, adding extra detail while keeping the craft simple.
How to make it:
- Choose a larger square sheet of paper for creating two heart sections.
- Fold the paper carefully to create two connected heart sections.
- Create matching creases so both hearts look balanced and even.
- Adjust the folds to clearly separate the two heart sections.
- Smooth the edges and decorate the finished double heart design.
This design works well for special cards, layered decorations, and paper displays. Each heart section can hold a separate message or decoration.
5. Mini Paper Heart
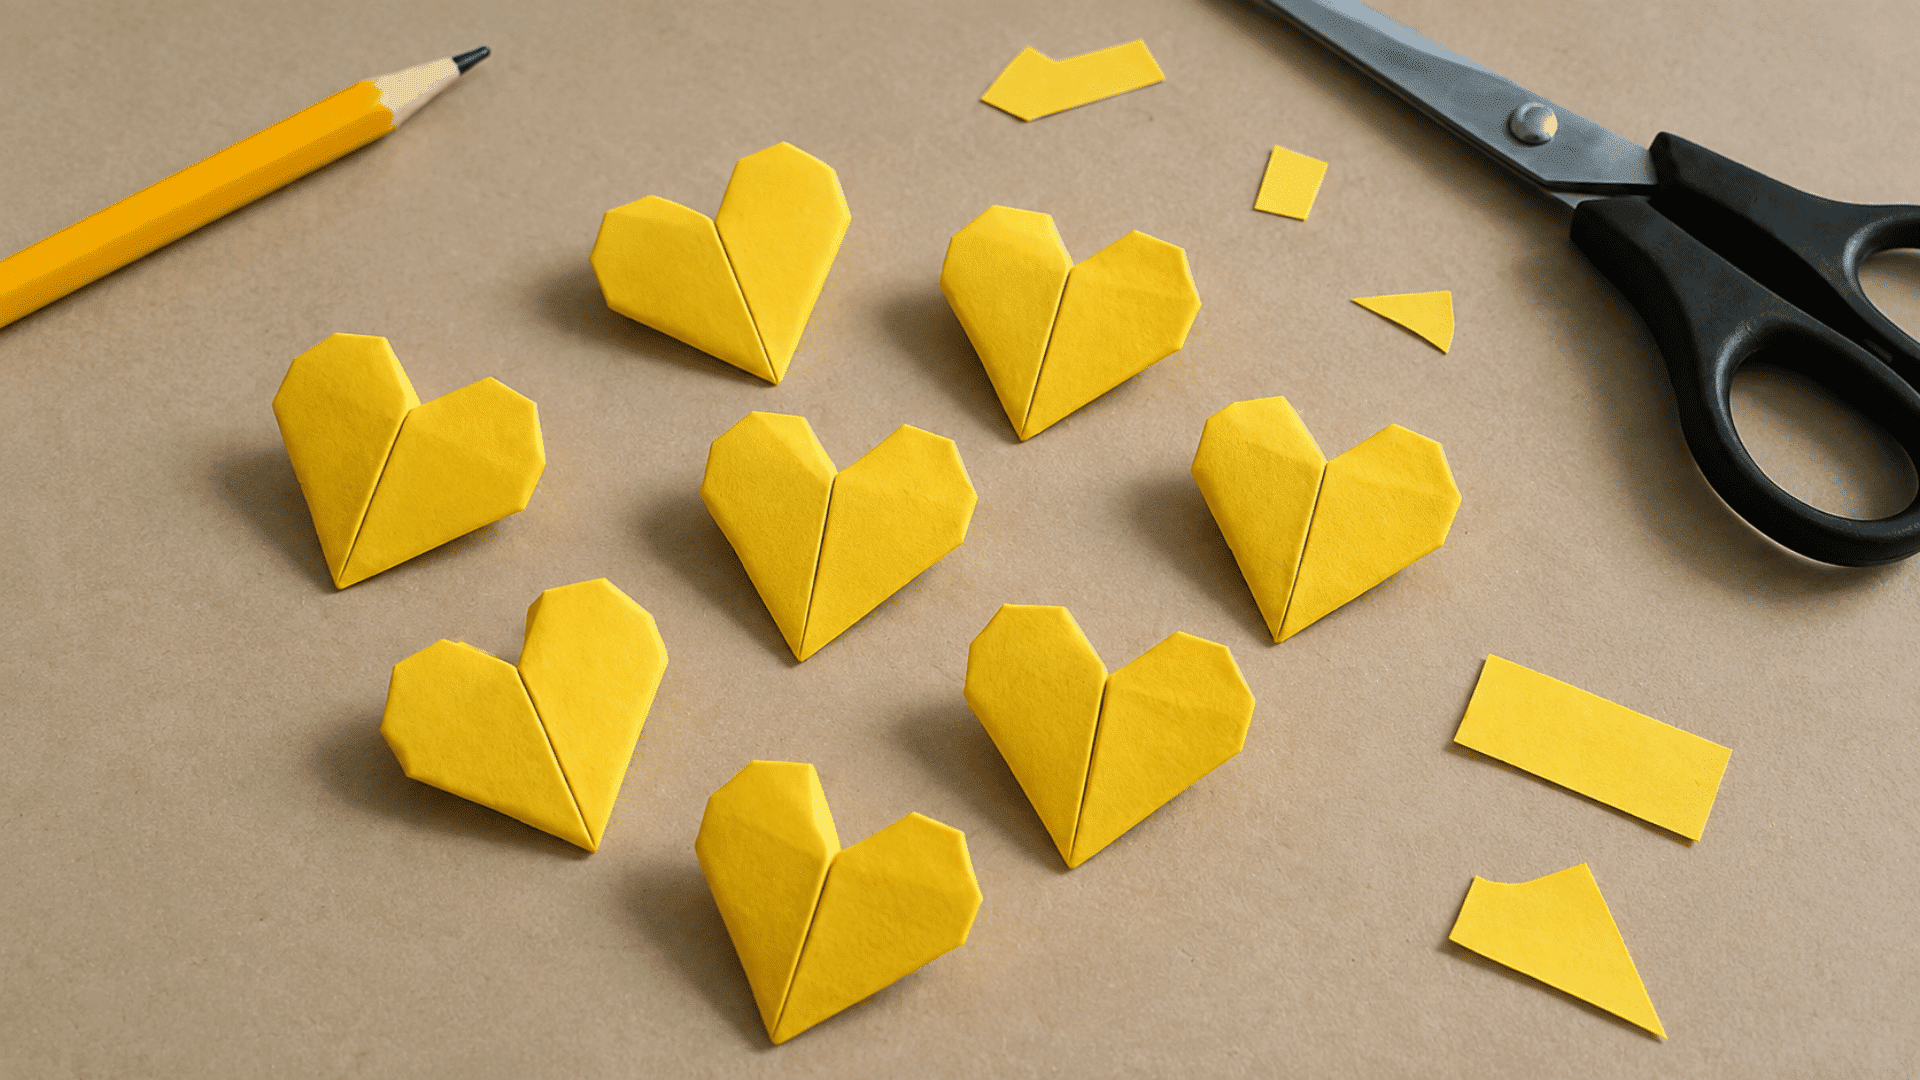
A mini paper heart is a smaller version of a folded paper heart, perfect for tiny decorations, gift tags, and craft projects.
How to make it:
- Choose a small square piece of paper for the heart design.
- Fold the paper carefully to create the basic heart shape.
- Make smaller creases to define the top and side sections.
- Adjust the edges until the tiny heart looks balanced.
- Add the finished mini heart to your chosen craft project.
These tiny hearts are useful for scrapbook details, gift wrapping, and party decorations. Create multiple designs using different colors and patterns.
6. Heart Envelope
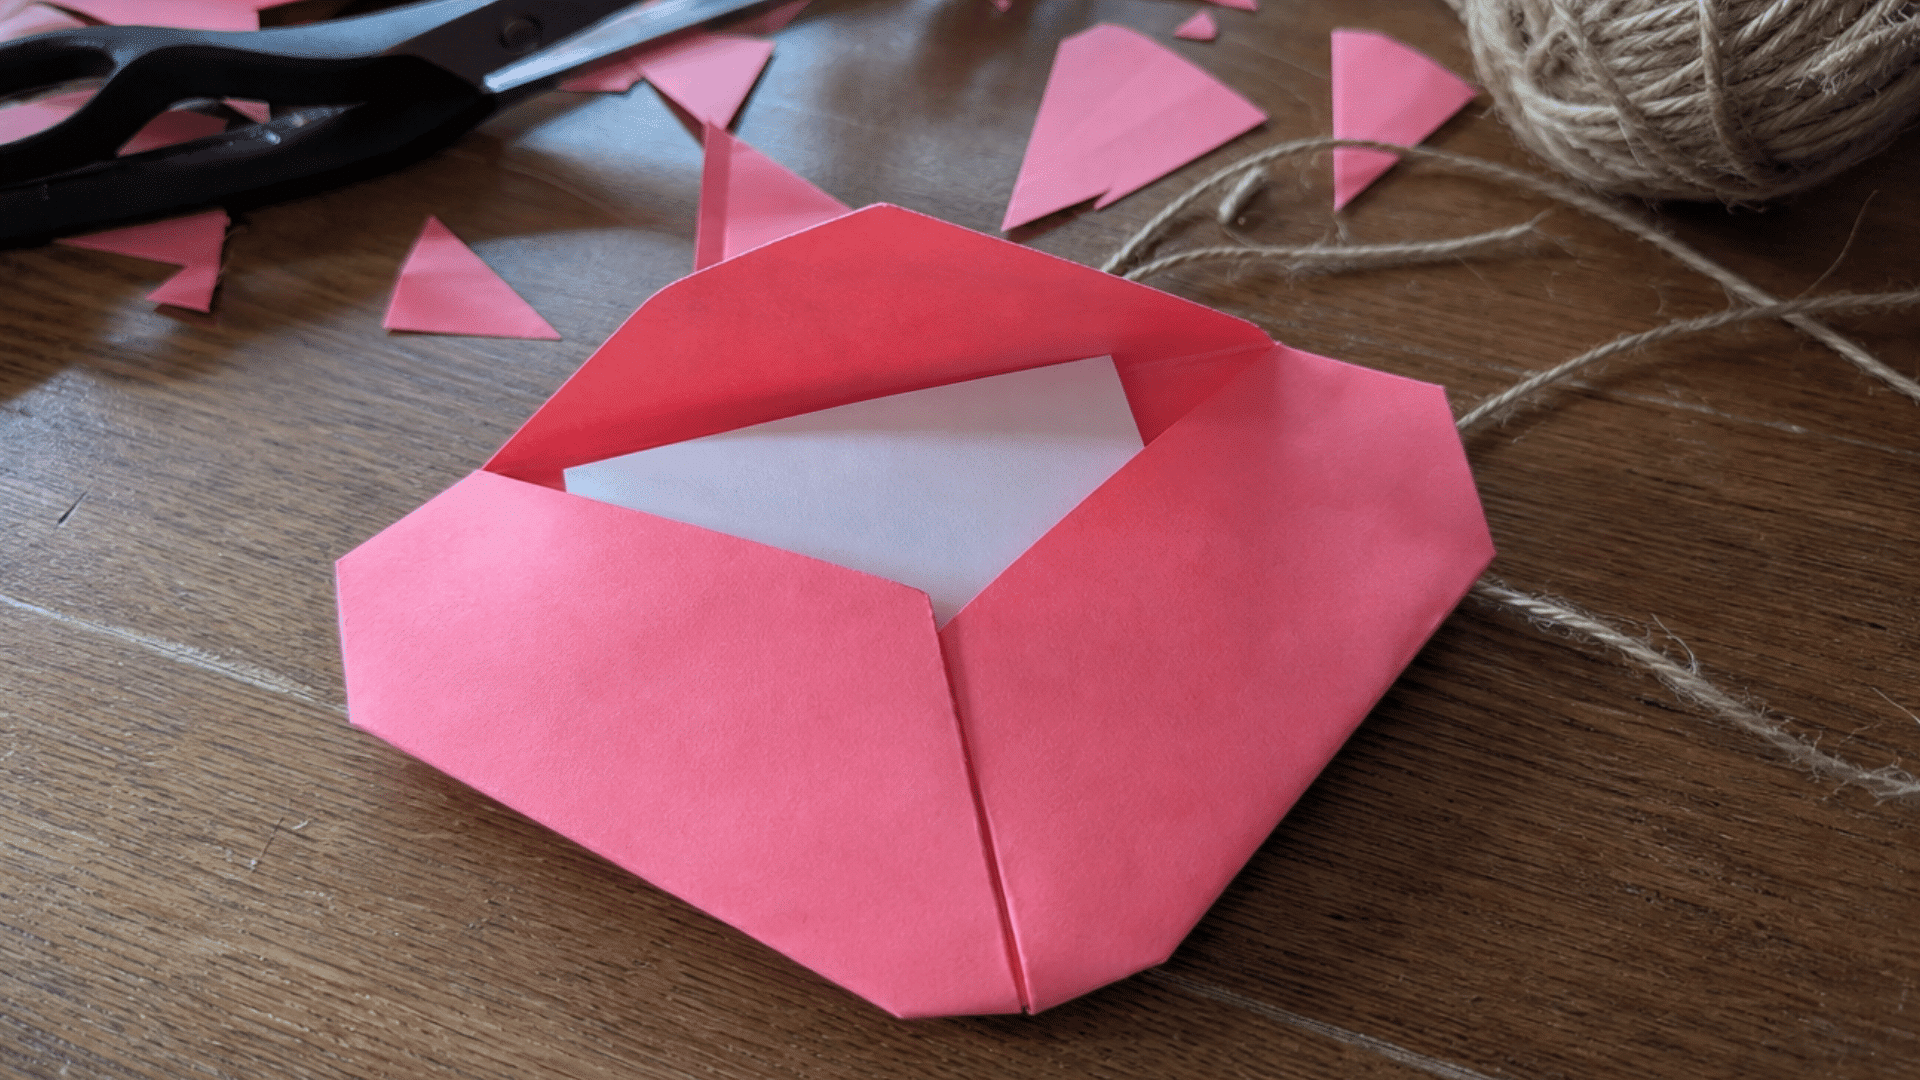
A heart envelope is a folded paper heart with a pocket-like design that holds small notes, messages, or tiny surprises inside.
How to make it:
- Choose a square piece of paper and fold it into a heart shape.
- Create overlapping folds to form a small envelope pocket.
- Write a short note that fits inside the heart opening.
- Carefully slide the message into the pocket section.
- Fold the heart closed and adjust the edges neatly.
This craft is useful for invitations, handwritten notes, and small surprises. You can decorate the outside with stickers, drawings, or patterns for a personal touch.
7. Two-Color Heart
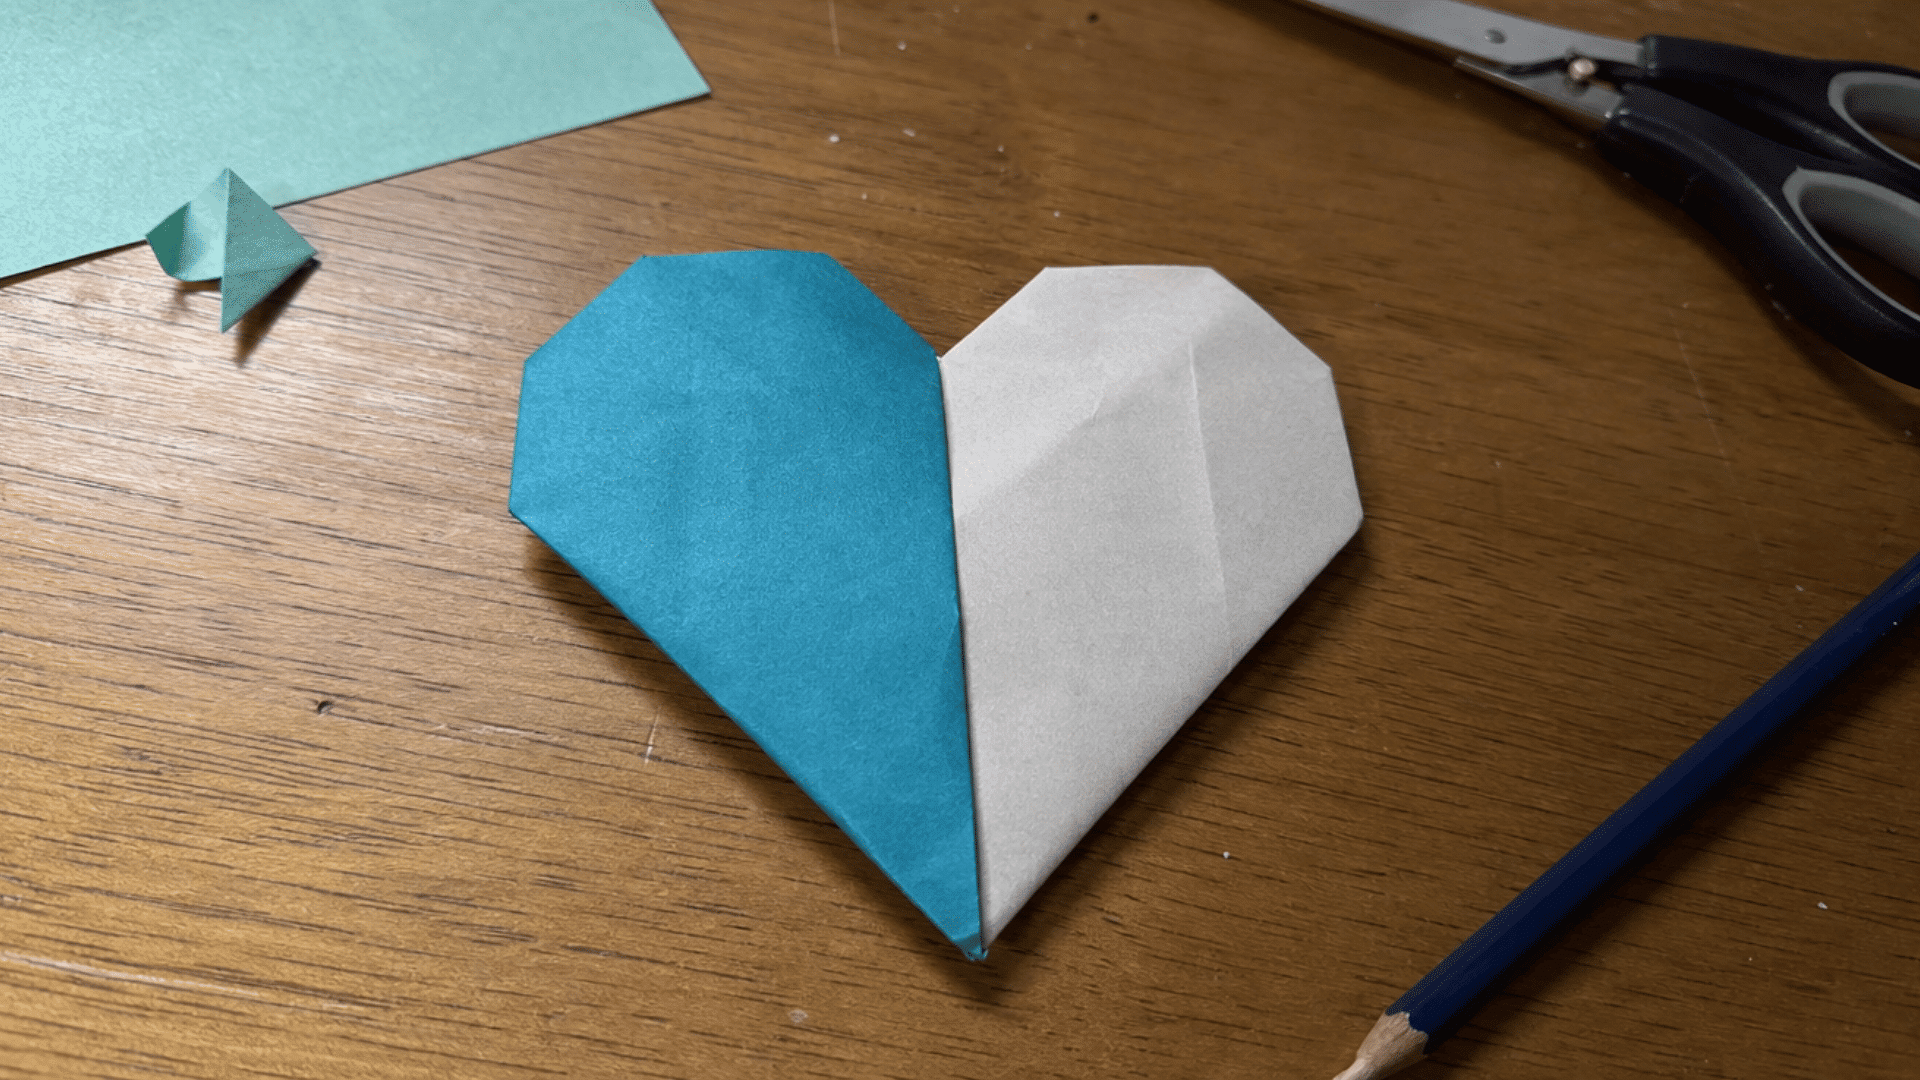
A two-color heart is a folded paper heart that combines two shades of paper to create a layered and eye-catching design.
How to make it:
- Choose two matching paper colors for your heart design.
- Fold the paper layers together to create the two-color heart shape.
- Position the layers so both colors appear evenly across the heart.
- Press the folds firmly to keep both colors visible.
- Adjust the shape and smooth the final heart edges.
This design is great for colorful paper projects, seasonal crafts, and handmade cards. You can mix different shades to match celebrations, themes, or personal preferences.
Can You Make an Origami Heart with Regular Paper?
Yes, you can use regular paper as long as it folds easily. Standard printer paper works well for practicing, especially when you are still learning the folds.
If your method requires a square sheet, trim the paper evenly before folding. Accurate sides help the corners line up properly and keep folds balanced.
Avoid paper that feels very thick, stiff, or slippery, since smaller folds may become harder to control. Lightweight paper is usually easier for beginners to handle.
Wrapping It Up
And just like that, you’ve turned a plain square of paper into your very own origami heart, no glue, no scissors, no fuss. I still get a little rush of satisfaction every time this fold comes together.
Maybe yours is crisp and neat, or maybe it’s a bit crooked like most first tries; either way, that’s the charm of paper folding shining through.
Slip it into a card, tuck it inside a gift, or leave it somewhere as a sweet little surprise. All it took was your hands, a little patience, and a heart you made yourself.
Frequently Asked Questions
How Long Does a Folded Paper Heart Usually Last?
It can stay in good condition for a long time when kept dry, stored flat, and handled gently.
How Can You Display Finished Paper Hearts?
Display them in a frame, string several into a garland, or group them together for a simple paper wall display.
Can You Add Decorations After Folding the Heart?
Yes, you can add handwritten names, small drawings, stickers, or short messages once the folding is complete.
How Should You Store Paper Hearts Without Damaging Them?
Keep them flat in a folder, envelope, or storage box to protect the folds from bending, moisture, and everyday handling.