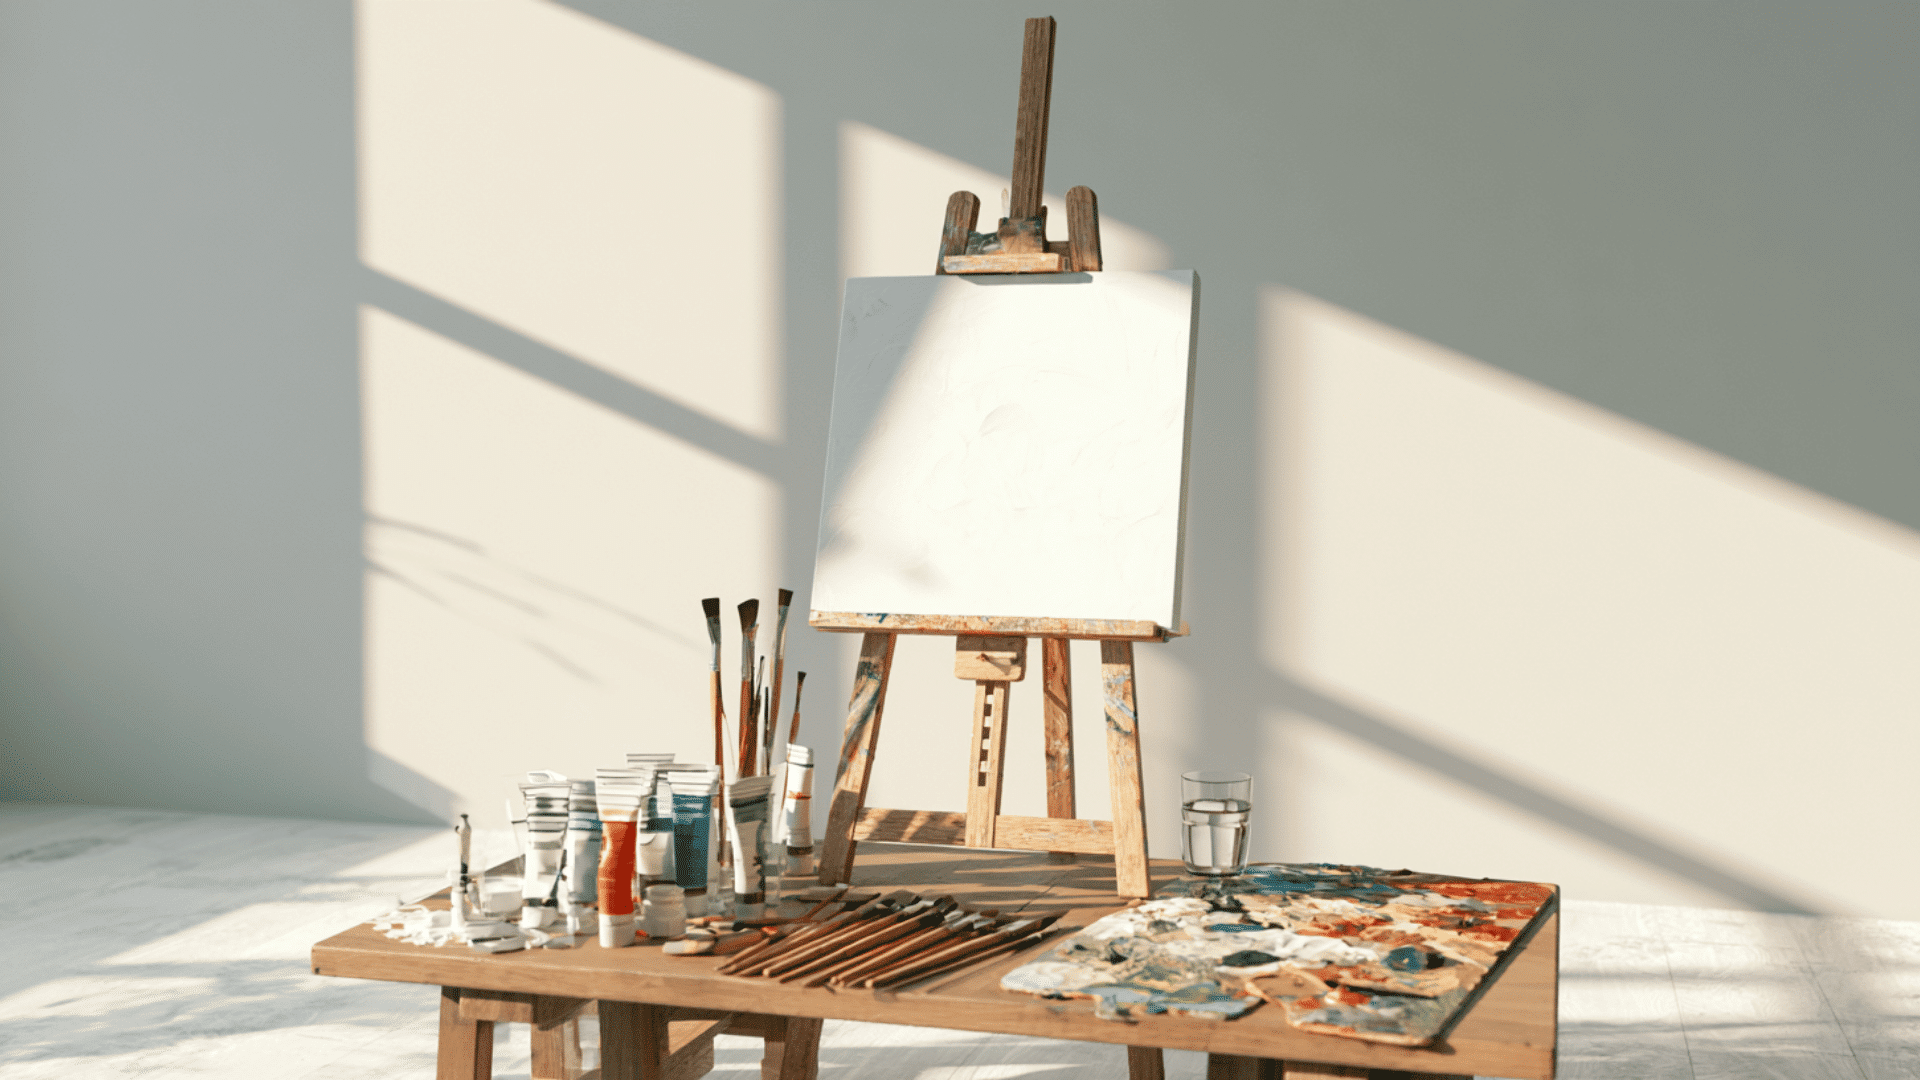
Looking for a way to make your gift-giving more personal and meaningful? Handmade gifts are the perfect solution!
Not only are they thoughtful and unique, but they can also be a fun and budget-friendly way to show someone you care.
Whether it’s for a birthday, or a special occasion, creating something with your own hands adds a personal touch that store-bought items simply can’t match.
In this blog, I’ll providehandmade/homemade gifts ideasforvarious occasions and recipients, including ideas for birthdays, friends, family, and even DIY paper crafts.
Let’s find the perfect DIY gift for everyone on your list!
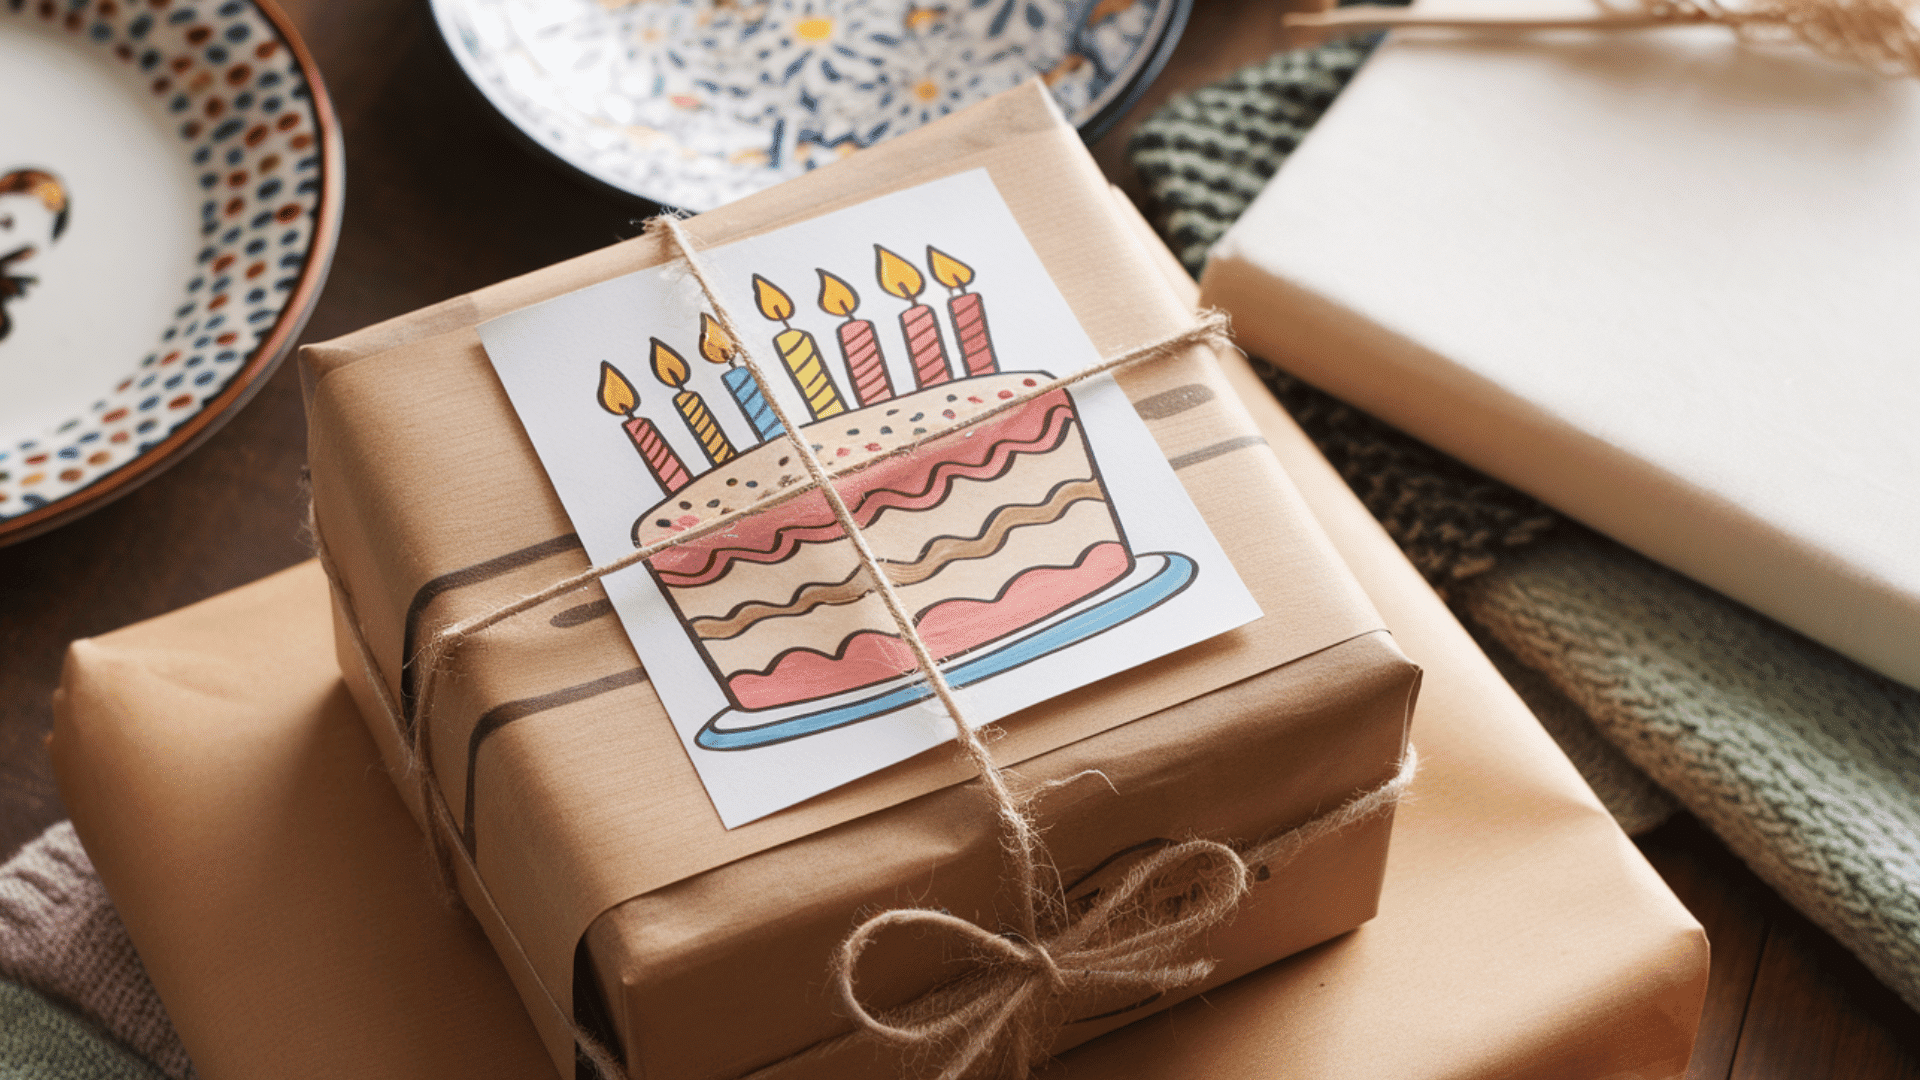
Handmade Gift Ideas for Birthdays
Looking for the perfect handmade gift for a birthday? Here are 15 thoughtful and creative ideas to make your loved ones feel special on their big day.
1. Personalized Photo Frame
A personalized photo frame is a thoughtful and unique way to display a favorite photo. It’s a versatile gift that can be customized with personal touches such as paint, decorations, or messages to make it extra special.
Materials Required:
- Wooden or cardboard photo frame
- Paint (acrylic or fabric)
- Decorative elements (stickers, buttons, ribbons, beads)
- Glue
- Photo of choice
How to Make:
- Start by painting the photo frame in your desired color. You can choose a solid color or create patterns.
- Once the paint is dry, decorate the frame with buttons, ribbons, or stickers to add a personal touch.
- Glue a memorable photo into the frame, and let everything dry completely before wrapping it as a gift.
DIY Hack: You can easily upcycle old or unused frames by repainting and redecorating them, which is both budget-friendly and eco-friendly.
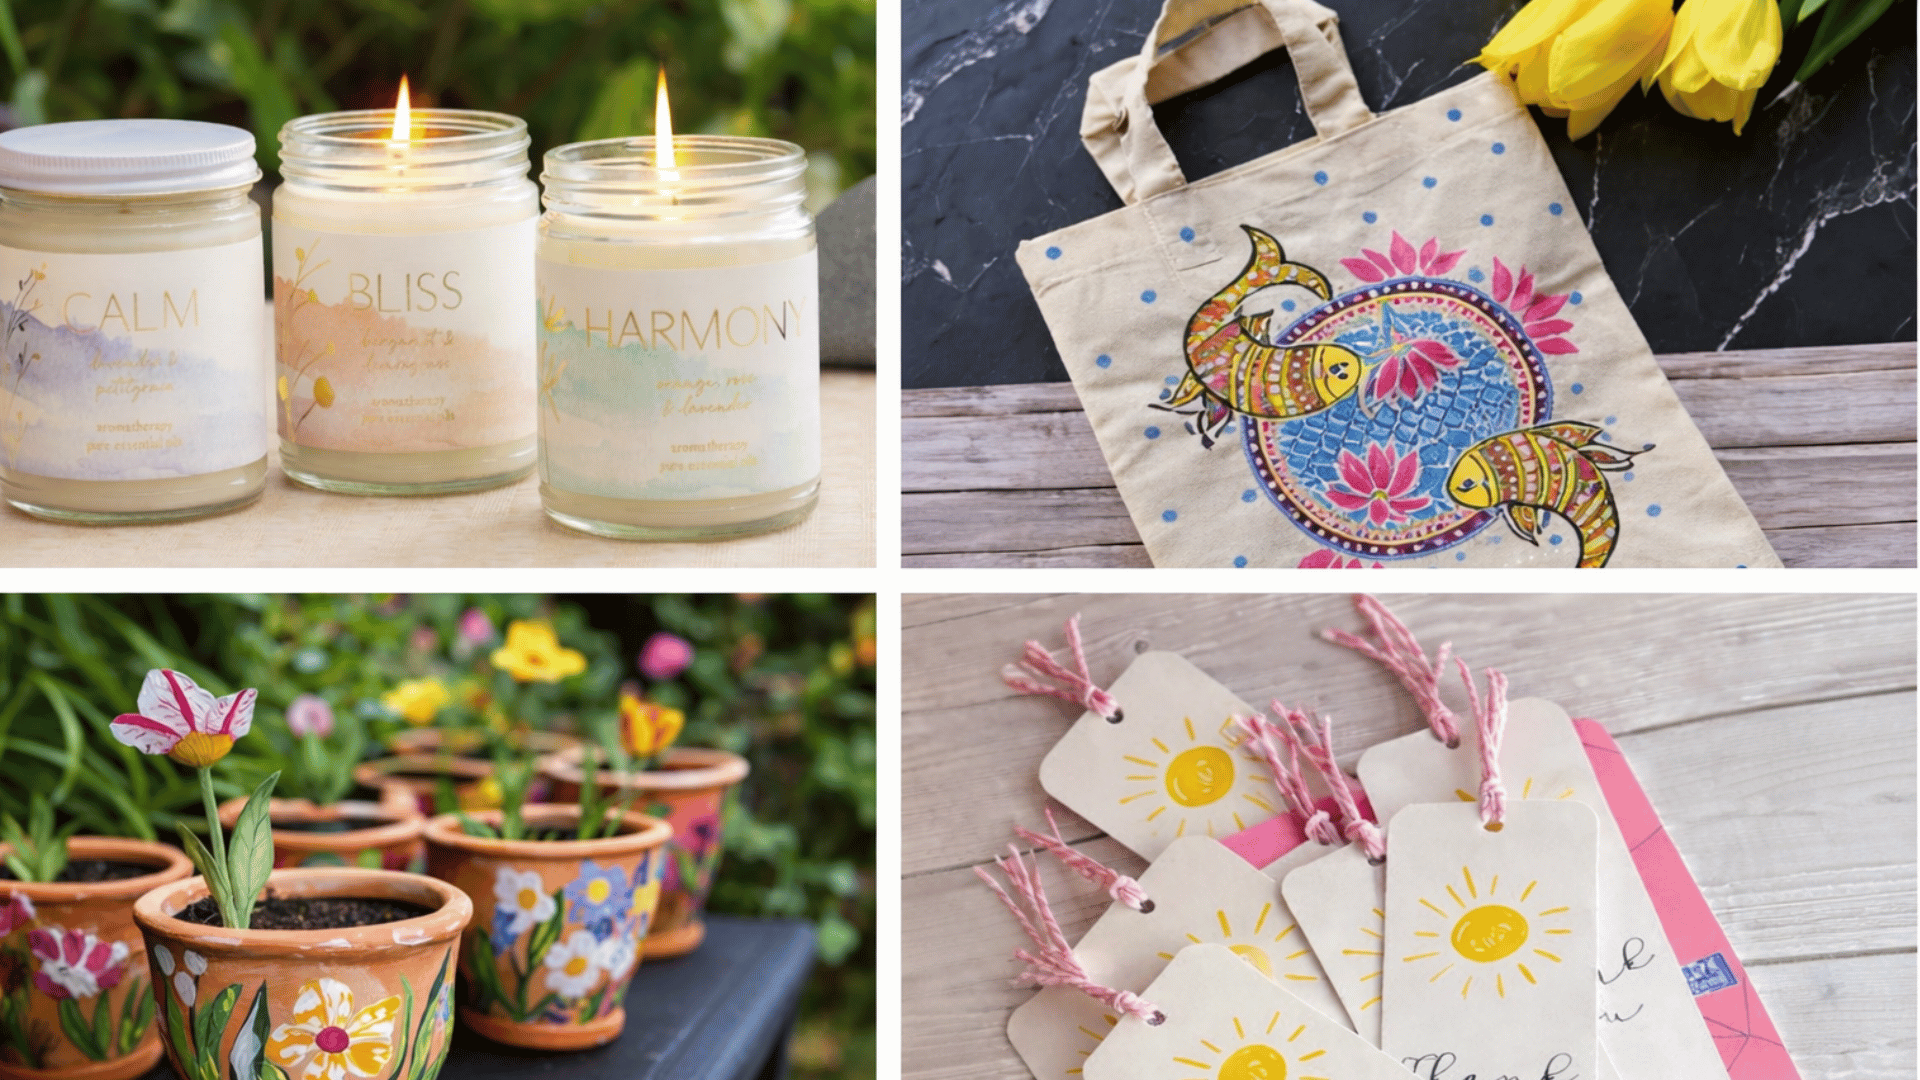
2. Handmade Candles with Essential Oils
Handmade candles with essential oils are a soothing, personalized gift that offers both relaxation and ambiance. They’re great for aromatherapy and can be tailored to any scent preference.
Materials Required:
- Wax (soy or beeswax)
- Essential oils (lavender, eucalyptus, or any scent of choice)
- Candle wick
- A container (mason jar, teacup, etc.)
- Dye (optional)
- Stirring stick
How to Make:
- Melt the wax in a double boiler until fully liquefied.
- Add essential oils (around 15-20 drops) for fragrance.
- Pour the melted wax into a container with a securely placed wick at the bottom.
- Allow the wax to harden (4-6 hours), trim the wick, and your candle is ready.
DIY Hack: Repurpose old candle containers like teacups or mason jars. These provide a charming and eco-friendly container option for your handmade candles.
3. Knitted Scarves or Hats
Knitted scarves or hats are cozy, warm accessories that make great winter gifts. They are both functional and stylish, perfect for keeping loved ones comfortable and fashionable during cold weather.
Materials Required:
- Yarn (preferably soft, warm yarn like wool or acrylic)
- Knitting needles (size depending on yarn thickness)
- Scissors
- Needle and thread (for finishing edges)
How to Make:
- Cast on stitches (about 30-40 for a scarf) and start knitting in your preferred stitch pattern.
- Continue knitting until your piece reaches the desired length.
- Bind off stitches, weave in any loose ends, and finish with a decorative edge or pom-pom.
- For a hat, knit a tube, then close the top to create a beanie shape.
DIY Hack: If you’re a beginner, start with a simple garter stitch for a smooth texture. You can find free tutorials online to help guide you step-by-step.
4. DIY Jewelry (Bracelets, Necklaces, Earrings)
DIY jewelry is a custom-crafted accessory that can be personalized to fit anyone’s style. It’s a fun way to create meaningful pieces that reflect the recipient’s personality.
Materials Required:
- Beads (variety of shapes and sizes)
- String or wire
- Clasps (optional)
- Jewelry pliers
How to Make:
- Choose your beads and string or wire. Lay out your design before you begin.
- Thread beads onto the wire or string and secure the ends with clasps or knots.
- For earrings, thread small beads or charms onto earring hooks.
- Use jewelry pliers to adjust and secure any wire or clasps.
DIY Hack: You can use old, broken jewelry for beads and wire, which is a great way to repurpose and save money while making unique jewelry pieces.
5. Memory Jar (Filled with Special Messages)
A memory jar is a heartfelt gift filled with positive messages, memories, or affirmations. It provides comfort and encouragement, offering a personal touch that can be cherished over time.
Materials Required:
- Jar (mason jar, glass jar, etc.)
- Small paper strips
- Pen
- Ribbon or twine (for decoration)
How to Make:
- Write special messages, memories, or uplifting quotes on small pieces of paper.
- Fold the strips and place them into the jar.
- Tie ribbon or twine around the jar and add a personal label with a message like “Open when you need a smile.”
- Optionally, decorate the jar with stickers or paint.
DIY Hack: For extra personalization, write messages about shared experiences or inside jokes that only you and the recipient would understand.
6. Custom Tote Bags (Painted or Embroidered)
A custom tote bag is a practical gift that can be personalized with unique designs, names, or phrases. It’s great for carrying everyday essentials, and it’s eco-friendly!
Materials Required:
- Plain canvas tote bag
- Fabric paint or embroidery floss
- Paintbrush or embroidery needle
- Stencils or patterns (optional)
How to Make:
- Paint or embroider your design onto the tote bag. You can use stencils for precision or freehand your design.
- Allow the paint to dry fully before adding any additional layers.
- Optionally, add fabric patches, buttons, or embroidery to personalize it further.
DIY Hack: If you’re in a rush, use fabric markers instead of paint for quicker and cleaner designs. Embroider initials or a small motif for a more intricate look.
7. DIY Bath Bombs
DIY bath bombs are fizzy, aromatic bath products that make the perfect gift for anyone who loves self-care and relaxation. They provide a spa-like experience at home.
Materials Required:
- Baking soda
- Citric acid
- Epsom salts
- Cornstarch
- Essential oils
- Coconut oil or water
- Molds (silicone molds work best)
How to Make:
- Mix the dry ingredients (baking soda, citric acid, Epsom salts, and cornstarch).
- Slowly add the wet ingredients (coconut oil or water and essential oils).
- Pack the mixture into molds and press it down tightly.
- Allow the bath bombs to dry for 24 hours, then remove them from the molds.
DIY Hack: Add dried flowers or glitter to the bath bombs for extra luxury and appeal. You can also experiment with different colors by adding a small amount of natural dye.
8. Homemade Cookie Mix in a Jar
A homemade cookie mix in a jar is a fun, edible gift that includes all the dry ingredients needed to bake cookies. Simply add wet ingredients, mix, and bake.
Materials Required:
- Jar (mason jar or any glass jar with a tight lid)
- Layered cookie ingredients (flour, sugar, chocolate chips, etc.)
- Ribbon or twine
- Recipe card (optional)
How to Make:
- Layer dry ingredients in the jar starting with flour, sugar, and baking soda.
- Add chocolate chips or other mix-ins to the top layer.
- Seal the jar with a lid and tie a ribbon around it.
- Attach a recipe card with instructions on how to complete the recipe.
DIY Hack: Use mason jars for a rustic look or repurpose any glass jar you have. For a holiday twist, add red or green M&Ms for a festive touch.
9. Embroidered Handkerchiefs
Embroidered handkerchiefs are simple yet elegant gifts that can be personalized with initials or decorative patterns. They’re a great gift for weddings, anniversaries, or just to show appreciation.
Materials Required:
- Plain cotton handkerchiefs
- Embroidery thread
- Embroidery hoop
- Needle
How to Make:
- Place the handkerchief in the embroidery hoop and tighten it.
- Use embroidery thread to create a design or monogram on the fabric.
- Once finished, trim excess thread and remove the hoop.
- Iron the handkerchief to smooth out wrinkles.
DIY Hack: To make embroidery easier, use embroidery transfer paper to trace your design onto the fabric. This makes it much easier for beginners to follow the design.
10. Homemade Lip Balm
Homemade lip balm is a natural, soothing gift that moisturizes and protects lips. You can personalize the scent and flavor to suit the recipient’s preferences.
Materials Required:
- Beeswax
- Coconut oil
- Essential oils (peppermint, lavender, or your choice)
- Small containers or tins
How to Make:
- Melt the beeswax and coconut oil together in a double boiler.
- Add 10-15 drops of essential oil for scent.
- Pour the mixture into small containers and let it set for several hours.
DIY Hack: For a fun twist, add natural coloring agents like beetroot powder for tinted lip balm or add honey for a touch of sweetness.
11. Personalized Birthday Banner
A personalized birthday banner is a festive and fun way to decorate for a birthday celebration. You can make it custom by adding the birthday person’s name, age, or a fun phrase.
Materials Required:
- Colored paper or fabric
- Scissors
- Glue or tape
- String or ribbon
- Letter stencils or stickers
How to Make:
- Cut out triangular or rectangular shapes from colored paper or fabric.
- Use stencils or stickers to add the birthday person’s name or age.
- Attach the pieces to a long string or ribbon.
- Hang the banner at the party location for a celebratory touch.
DIY Hack: Use metallic or glitter paper for a glamorous birthday banner, or add pom-poms or streamers for extra flair.
12. DIY Leather Wallet
A DIY leather wallet is a practical yet personalized gift that’s perfect for someone who appreciates quality craftsmanship. You can customize the design to fit their style and needs.
Materials Required:
- Leather (sheets)
- Leather hole punch
- Needle and thread
- Leather glue
How to Make:
- Cut the leather into the shape of a wallet (you can find templates online).
- Use a hole punch to create holes for stitching along the edges.
- Sew the pieces together using strong thread.
- Use leather glue to secure any edges that need reinforcement.
DIY Hack: Upcycle old leather items like jackets or bags to repurpose leather for your wallet project.
13. Custom Puzzle (from a photo)
A custom puzzle made from a photo is a unique and interactive gift. It’s personalized with a photo of your choice, making it a fun activity and a special memento.
Materials Required:
- Photo (printed)
- Puzzle blanks or wooden puzzle pieces
- Glue or puzzle adhesive
- Scissors or a jigsaw cutter
How to Make:
- Print a high-resolution photo and glue it onto puzzle blanks or a piece of wood.
- Allow the glue to dry completely.
- Cut the puzzle into pieces using scissors or a jigsaw cutter.
- Store the pieces in a small box or bag with a label.
DIY Hack: Use an online photo-to-puzzle service if you don’t have the tools to cut the pieces yourself. Many websites allow you to upload photos and receive a custom puzzle.
14. Hand-painted Flower Pots
Hand-painted flower pots are decorative and functional gifts that can be customized with a design, color, or message. They’re great for plant lovers and make a lovely addition to any home or garden.
Materials Required:
- Terracotta pots
- Paint (acrylic or fabric)
- Brushes
- Varnish (optional)
How to Make:
- Paint the outside of the pot with your desired design or color.
- Once dry, apply a layer of varnish to protect the paint.
- Let the pot dry completely before adding a plant or succulent.
DIY Hack: Use painters’ tape to create clean lines and geometric designs. You can also decorate with fabric or decoupage for a textured effect.
15. Customized Bookmarks
Customized bookmarks are thoughtful, practical gifts for book lovers. They can be personalized with favorite quotes, designs, or artwork, making them special and unique.
Materials Required:
- Cardstock or thick paper
- Markers, paints, or pens
- Ribbon or string (optional)
How to Make:
- Cut cardstock into long, bookmark-sized strips.
- Decorate with drawings, quotes, or designs that match the recipient’s style.
- Punch a hole at the top and add a ribbon for a cute finishing touch.
DIY Hack: Use laminated paper for a more durable bookmark, or add some glossy stickers for extra decoration.
Homemade Gifts Ideas for Him
Looking for the perfect gift for the special man in your life? These homemade gifts ideas are thoughtful, personalized, and can be tailored to his interests, making them the ideal way to show how much you care.
16. Personalized Cufflinks (Engraved with Initials)
Personalized cufflinks are a stylish and functional gift for the modern man. Custom engraved with initials or a special design, they add a personal touch to formal wear, making them a thoughtful and elegant gift.
Materials Required:
- Cufflink blanks (metal or brass)
- Engraving tool or professional service
- Personal design or initials (engraved)
How to Make:
- Choose the design or initials you’d like to engrave on the cufflinks.
- If you have an engraving tool, carefully engrave the design on the cufflink blanks. Alternatively, take the blanks to a professional engraving service.
- Allow the engraving to set before packaging.
DIY Hack: If you’re on a budget, you can buy plain cufflinks and use a DIY engraving kit, which is affordable and gives you complete control over the design.
17. Homemade Beard Oil
Homemade beard oil is a grooming essential that helps keep facial hair soft, nourished, and well-groomed. Perfect for men with beards, this natural oil blend also nourishes the skin underneath.
Materials Required:
- Carrier oils (jojoba, argan, or coconut oil)
- Essential oils (cedarwood, sandalwood, peppermint, etc.)
- Small glass dropper bottles
How to Make:
- Mix 2 ounces of your preferred carrier oil with 10-15 drops of essential oil.
- Stir or shake well to blend the oils.
- Pour the mixture into a small glass dropper bottle for easy use.
DIY Hack: To customize the scent, experiment with different essential oils that match his personality—woodsy scents like cedarwood and sandalwood are great for a masculine fragrance.
18. DIY Leather Wallet
A DIY leather wallet is a durable, stylish gift that’s both practical and personal. You can craft it yourself, choosing the leather and design that suits the recipient’s style.
Materials Required:
- Leather sheets (for wallet)
- Leather sewing kit (needle, thread, and hole punch)
- Wallet template or pattern
- Scissors
How to Make:
- Use a wallet template or pattern to cut the leather pieces.
- Use a leather hole punch to create holes for stitching.
- Sew the leather pieces together using a strong needle and thread.
- Finish the wallet edges for a clean, polished look.
DIY Hack: For a budget-friendly version, repurpose old leather items like belts or jackets to create your wallet.
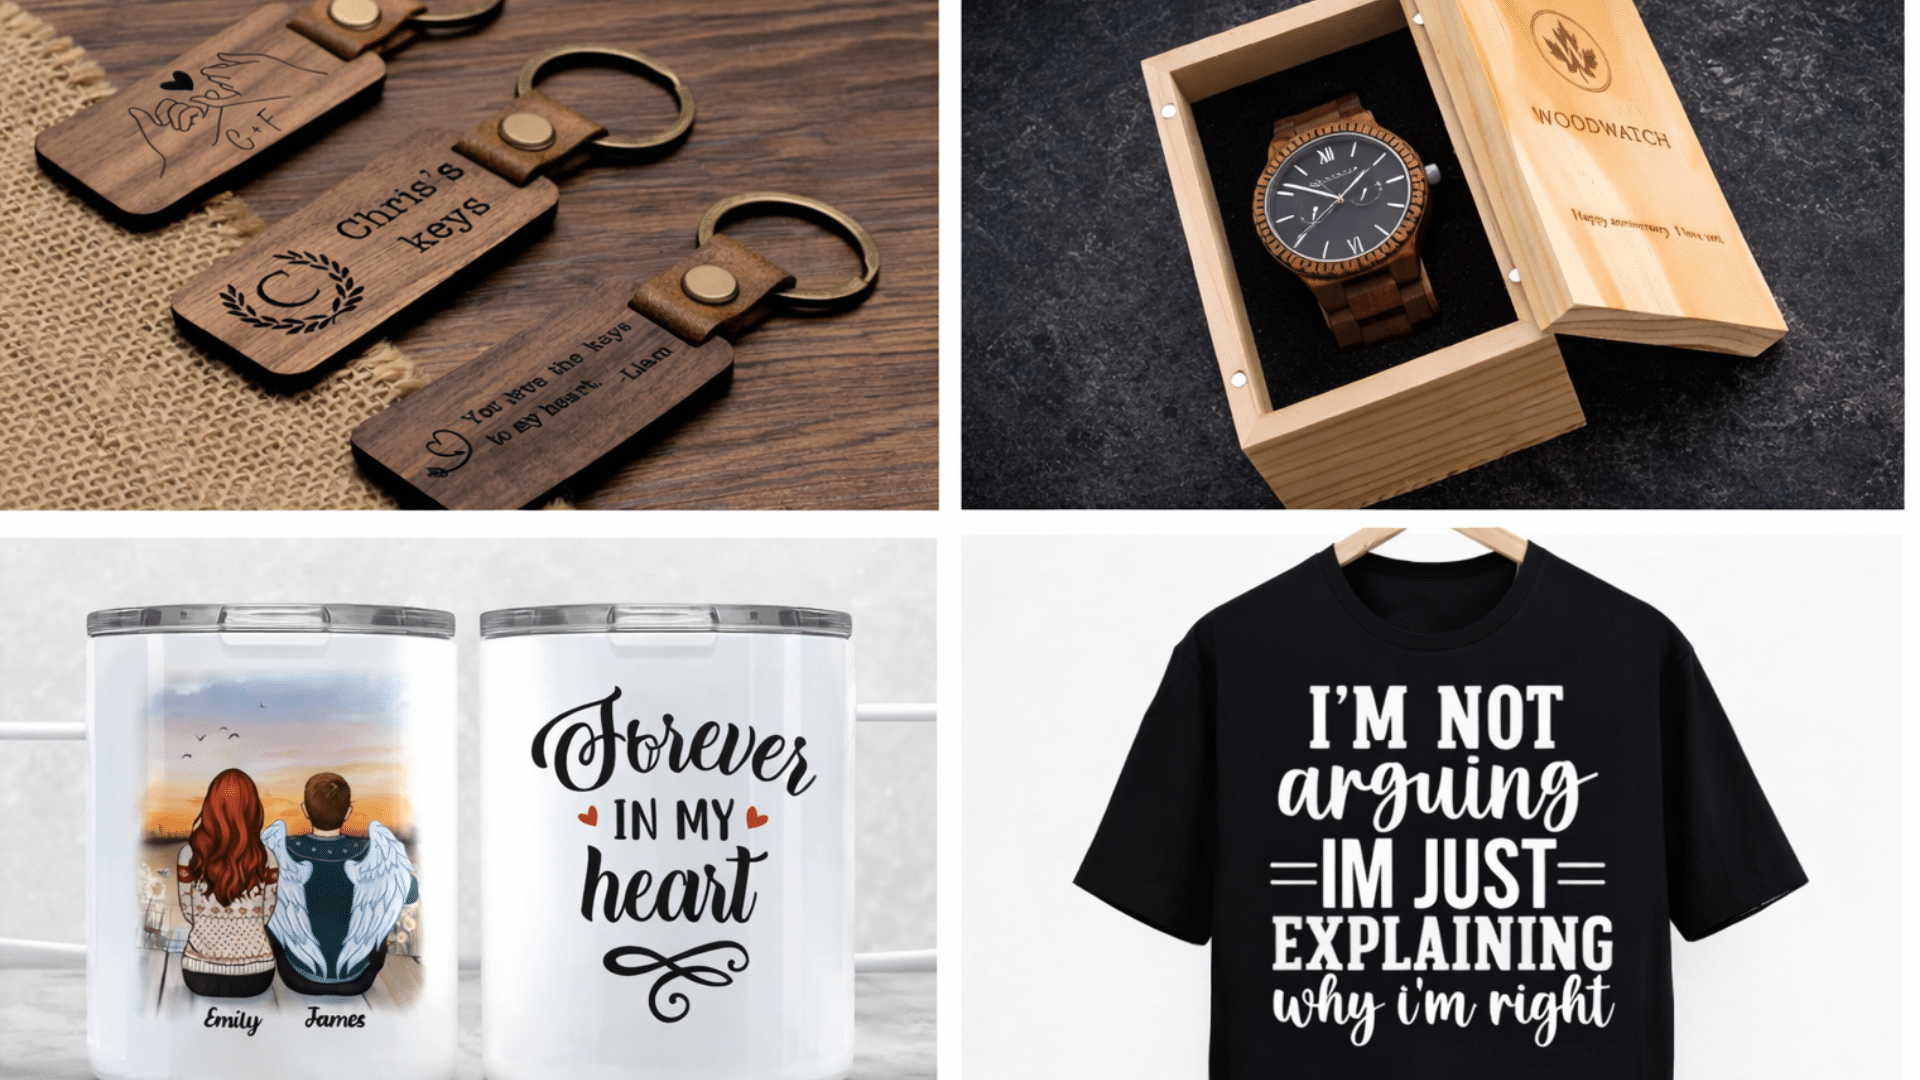
19. Customized T-Shirts (with a Fun Quote or Image)
A customized t-shirt is a fun and personalized gift that showcases a favorite quote, image, or inside joke. It’s a great way to give him something he can wear and enjoy on a daily basis.
Materials Required:
- Plain t-shirt (cotton or cotton-blend)
- Fabric paint or iron-on transfers
- Stencil or design (customized image or quote)
How to Make:
- Choose a design or quote for the t-shirt.
- If using fabric paint, create your design on the t-shirt with a paintbrush or stencil. Allow it to dry.
- If using an iron-on transfer, print your design on transfer paper, cut it out, and follow the instructions to iron it onto the shirt.
DIY Hack: For a no-mess approach, consider buying pre-made iron-on transfers with unique designs, or customize your own at home.
20. Handmade Keychains
Handmade keychains are a small but meaningful gift that can be personalized with initials, symbols, or favorite sports teams. They serve as both a decorative and practical accessory.
Materials Required:
- Keychain rings
- Beads, wood pieces, or charms
- String, wire, or leather cord
- Glue (optional)
How to Make:
- String beads or charms onto the cord or wire to create a design.
- Attach the keychain ring to the end.
- Tie a secure knot and trim any excess cord. You can glue decorative elements for added security.
DIY Hack: Use natural elements like wooden beads or leather strips for a rustic, masculine keychain look.
21. Personalized Wooden Watch
A personalized wooden watch is a stylish, eco-friendly gift that’s perfect for someone who loves unique accessories. It’s functional, sustainable, and can be engraved for a personal touch.
Materials Required:
- Wooden watch kit (available online)
- Engraving tool or service
- Sandpaper (for smoothing edges)
How to Make:
- Assemble the wooden watch kit according to the instructions.
- Use an engraving tool to add initials, a name, or a message to the back or face of the watch.
- Sand the edges for a smooth finish, and clean the watch before gifting.
DIY Hack: If you don’t want to purchase a watch kit, you can also find pre-made wooden watches online and have them engraved at a local engraving service.
22. Handmade Wooden Coasters
Handmade wooden coasters are practical and stylish gifts that can protect furniture while adding a personal touch to any living space.
Materials Required:
- Wooden circles or squares (from craft stores)
- Wood stain or paint
- Sealer (optional)
How to Make:
- Sand the wood pieces to smooth out any rough edges.
- Stain or paint the wood to match the recipient’s style.
- Once dry, seal the wood with a clear coat to protect it from moisture.
DIY Hack: If you’re looking for a more personal touch, you can also carve initials, names, or symbols into the coasters before staining.
23. DIY Desk Organizer
A DIY desk organizer helps keep a workspace neat and tidy while adding a personal touch. It’s a great gift for someone who likes to stay organized or works from home.
Materials Required:
- Cardboard, wood, or plastic containers
- Hot glue gun
- Paint (optional)
- Decorative paper (optional)
How to Make:
- Choose your materials for the base structure. You can use cardboard or wood for sturdiness.
- Cut the pieces to fit your design, then glue them together.
- Paint and decorate the organizer to match the recipient’s office decor.
- Add dividers for pens, papers, or other office supplies.
DIY Hack: Use old shoeboxes or recycled materials to make this project more eco-friendly and budget-conscious.
24. Custom Mug (with a Personal Message or Photo)
A custom mug is a functional and thoughtful gift that can be personalized with a favorite photo, quote, or image. It’s a perfect gift for someone who enjoys their morning coffee or tea.
Materials Required:
- Plain ceramic mug
- Permanent markers or paint (for ceramic)
- Oven (for setting the design)
How to Make:
- Design your mug by writing a message or drawing an image with permanent markers or ceramic paint.
- Allow the design to dry completely.
- Bake the mug in the oven to set the paint (follow the paint instructions for temperature and time).
- Let it cool before gifting.
DIY Hack: For a fun twist, try creating a two-tone mug by painting only the bottom half or adding a pop of color on the inside.
25. Handmade Bookmarks
Handmade bookmarks are a simple yet personal gift for book lovers. They can be crafted from various materials and decorated with designs, quotes, or even pressed flowers.
Materials Required:
- Cardstock or thick paper
- Markers, pens, or paint
- Ribbon (optional)
How to Make:
- Cut the cardstock into bookmark-sized strips.
- Decorate each bookmark with unique designs, quotes, or illustrations.
- Punch a hole at the top of each bookmark and add a ribbon for a decorative touch.
DIY Hack: Use recycled materials like old magazine pages or greeting cards to create eco-friendly bookmarks.
26. Personalized Tumbler (Engraved or Decorated)
A personalized tumbler is a practical and eco-friendly gift that keeps drinks hot or cold. You can engrave it with initials, a name, or a fun design to make it uniquely his.
Materials Required:
- Stainless steel tumbler
- Engraving tool or vinyl stickers
- Permanent markers (optional)
How to Make:
- Use an engraving tool to add initials or a design to the tumbler.
- If using vinyl stickers, cut out a design and apply it to the tumbler’s surface.
- Allow it to dry completely if using paint or markers before gifting.
DIY Hack: Instead of engraving, use waterproof vinyl stickers for an easier and quicker design application.
27. Homemade BBQ Rubs or Spice Mixes
Homemade BBQ rubs or spice mixes are a thoughtful gift for someone who enjoys grilling or cooking. You can create a blend of spices tailored to their taste.
Materials Required:
- Various spices (paprika, brown sugar, garlic powder, etc.)
- Small glass jars or containers
- Labeling materials
How to Make:
- Mix your chosen spices in a bowl according to your recipe.
- Fill small glass jars or containers with the spice blend.
- Add a personalized label with the spice name or a fun message.
DIY Hack: Create a set of BBQ rubs or spice mixes for different types of meat or cooking styles, giving the recipient a variety of options.
28. DIY Scented Candles (with Masculine Scents)
DIY scented candles with masculine scents are perfect for men who enjoy creating a cozy, aromatic atmosphere. Choose woodsy or musky scents to keep the fragrance bold and refreshing.
Materials Required:
- Wax (soy or beeswax)
- Essential oils (cedarwood, sandalwood, tobacco, etc.)
- Candle wick
- Container (mason jar, teacup, etc.)
How to Make:
- Melt the wax in a double boiler.
- Once melted, add 15-20 drops of essential oils to create a masculine scent.
- Secure the wick to the bottom of the container and pour the wax into the jar.
- Let the candle set for 4-6 hours before trimming the wick.
DIY Hack: Use wood chips or small pine cones as natural decorations in the candle for added texture and a more rustic feel.
29. Customized Leather Journal
A customized leather journal is a stylish and practical gift that can be used for personal reflection, work notes, or creative writing. The leather exterior can be personalized with initials or a meaningful message.
Materials Required:
- Leather journal or notebook
- Leather engraving tool or kit
- Stamps or stencil for designs
How to Make:
- Choose a leather journal or notebook.
- Use an engraving tool to add initials or a special design to the cover.
- Optionally, add a message or motivational quote inside the journal’s cover.
DIY Hack: If you’re on a budget, consider purchasing a simple notebook and covering it with a piece of inexpensive faux leather for a similar effect.
30. Handmade Soap (with Masculine Scents)
Handmade soap is a luxurious and thoughtful gift that’s practical and personalized. Use masculine scents like cedarwood, sandalwood, or bergamot to make the soap perfect for his skin and preferences.
Materials Required:
- Soap base (glycerin, shea butter, or coconut oil)
- Essential oils (cedarwood, sandalwood, bergamot)
- Soap molds (silicone works best)
- Colorants (optional)
How to Make:
- Melt the soap base in a microwave-safe container.
- Add essential oils and mix well. If you want to color the soap, add a few drops of soap-safe colorant.
- Pour the mixture into soap molds and let it set for 1-2 hours.
- Remove the soap from the molds and allow it to cure for 2-3 days before gifting.
DIY Hack: Use natural ingredients like ground coffee, oatmeal, or poppy seeds for added exfoliation and texture.
Handmade Gift Ideas for Friends
Looking for a meaningful and unique gift for your friends? Handmade gifts are the perfect way to show your appreciation and strengthen your bond, these handmade gift ideas will make your friend feel truly special and loved.
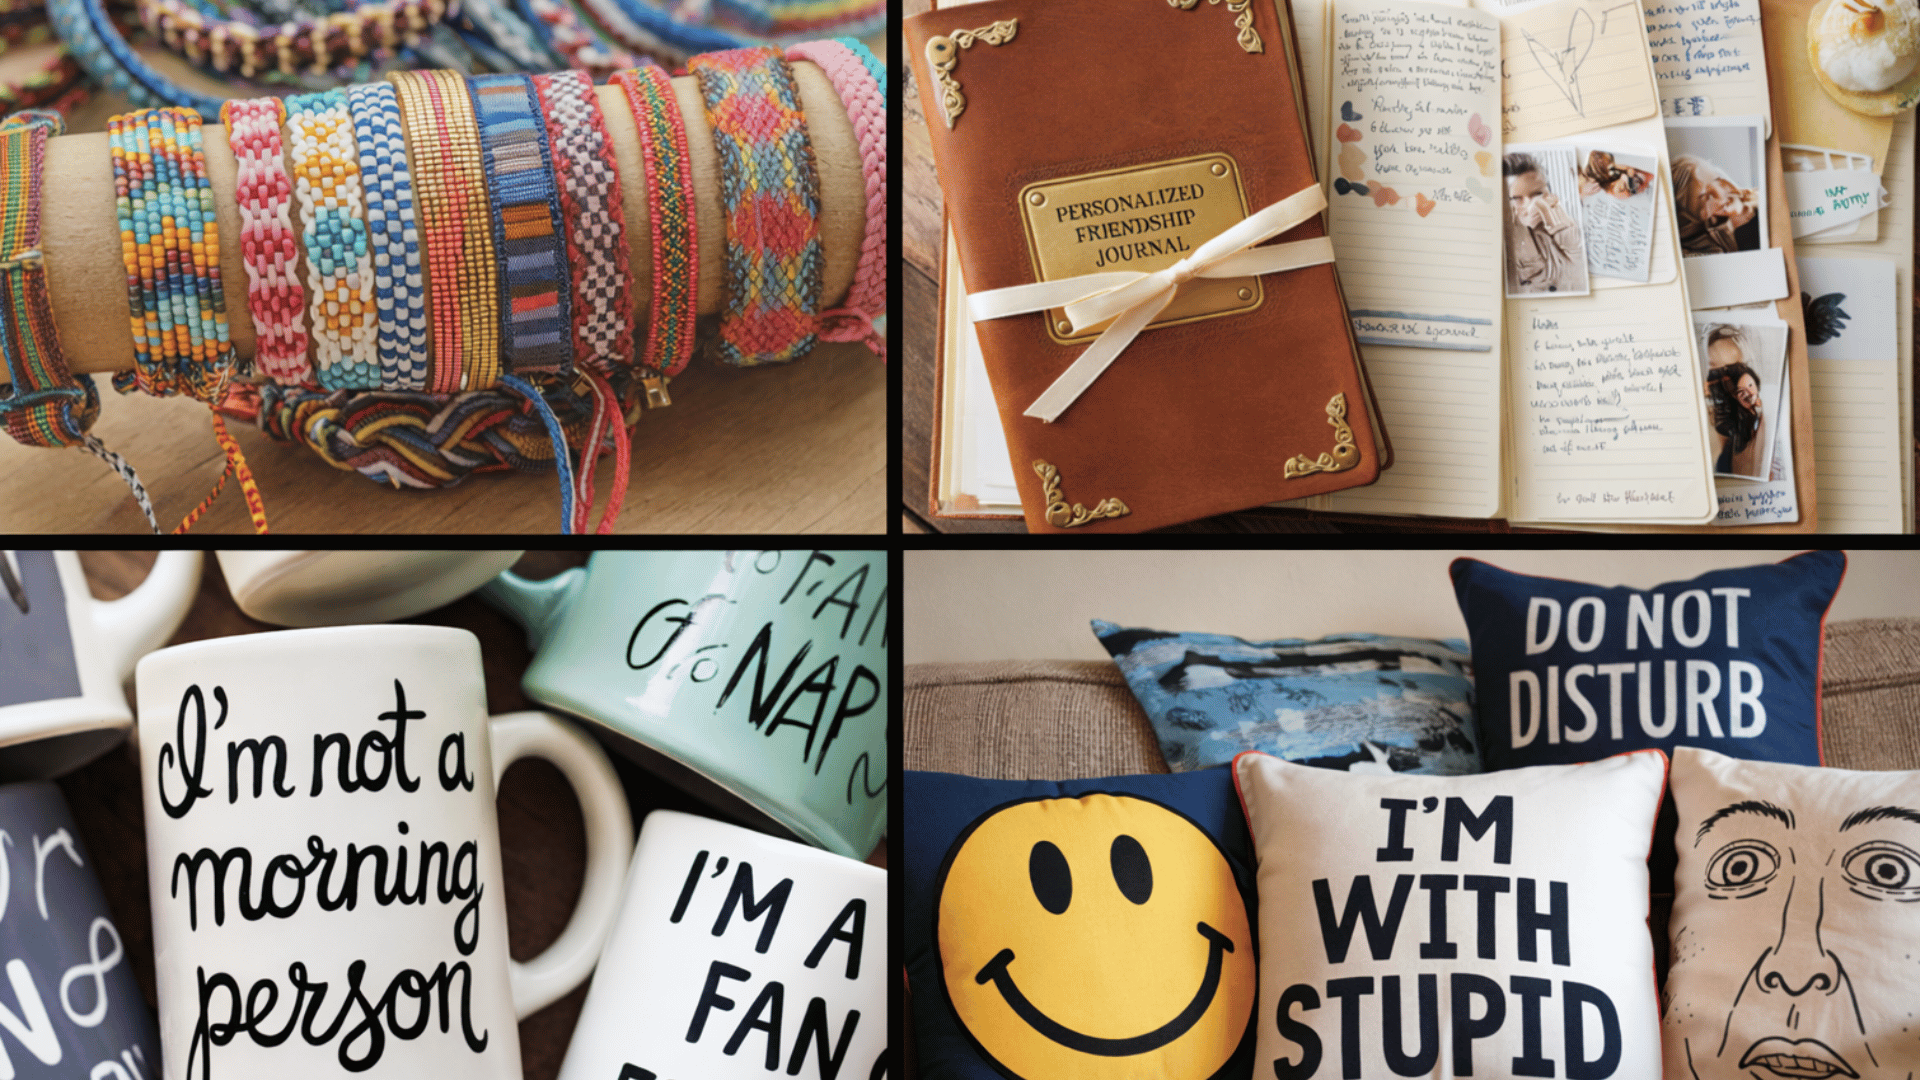
31. Customized Friendship Bracelets
Customized friendship bracelets are a fun and meaningful way to celebrate a friendship. These bracelets can be personalized with colors, charms, or initials, making them a perfect token of affection.
Materials Required:
- Embroidery floss or yarn
- Beads or charms (optional)
- Scissors
- Bracelet clasp (optional)
How to Make:
- Choose the colors for your bracelet that represent your friendship or your friend’s favorite colors.
- Cut several strands of floss (usually 3-6) and knot them together at one end.
- Braid or knot the floss into the pattern you desire. You can also add beads or charms for extra flair.
- Once the bracelet is the desired length, tie it off, leaving room for a knot or clasp if necessary.
DIY Hack: For a more intricate design, consider learning friendship bracelet knotting techniques like the fishtail or chevron patterns for a fun, more personalized design.
32. Personalized Friendship Journal
A personalized friendship journal is a thoughtful gift that allows friends to write down memories, thoughts, or goals together. You can customize it with special messages, photos, or quotes to make it unique.
Materials Required:
- Blank journal or notebook
- Stickers, washi tape, or decorative paper
- Pens or markers
- Photos or small mementos (optional)
How to Make:
- Start with a blank journal or notebook. Decorate the cover with meaningful quotes, photos, or stickers.
- Add some personalized pages inside. You could write a note to your friend, leave a fun question, or leave blank pages for memories.
- Decorate the edges with washi tape or small embellishments for extra flair.
DIY Hack: Add some DIY prompts on each page, like “What’s your funniest memory together?” or “Write about a time we both laughed uncontrollably.” It will make the journal even more fun to use.
33. DIY Memory Box (Filled with Shared Memories)
A DIY memory box is a great way to preserve the special moments you’ve shared with a friend. Fill it with small mementos, photos, notes, and other keepsakes that hold sentimental value.
Materials Required:
- Wooden or cardboard box
- Photos, ticket stubs, notes, or other small mementos
- Decorative paper, stickers, or fabric
- Glue or tape
How to Make:
- Decorate the outside of the box with paint, fabric, or decorative paper that matches your friend’s style.
- Inside, add mementos like photos, concert tickets, or notes you’ve exchanged.
- Leave room for future memories, so your friend can continue adding to the box.
DIY Hack: If you don’t have a pre-made box, you can easily repurpose a shoebox or small cardboard box and decorate it to make it more personal and meaningful.
34. Hand-painted Mugs (With Inside Jokes or Quotes)
Hand-painted mugs are both functional and personal. They can be customized with inside jokes, quotes, or designs that reflect your friendship, making each sip of tea or coffee extra special.
Materials Required:
- Plain ceramic mugs
- Ceramic paint or markers
- Paintbrushes
- Oven (for setting the design)
How to Make:
- Start by washing the mug to remove any dust or oils.
- Use ceramic paint or markers to create a design that’s meaningful to your friendship—whether it’s an inside joke, a quote, or a simple pattern.
- Allow the paint to dry, then bake the mug in the oven according to the paint instructions to set the design.
DIY Hack: To make sure your design lasts, bake the mug at a low temperature (around 350°F) for 30 minutes after painting. This will help the paint adhere properly and make it dishwasher-safe.
35. Personalized Picture Frames (With a Fun Photo)
Personalized picture frames are a great way to showcase a fun photo of you and your friend. You can decorate the frame to match the recipient’s personality or style for an extra special gift.
Materials Required:
- Wooden or cardboard frame
- Paint or decorative paper
- Photos (prints)
- Glue
How to Make:
- Choose a frame that suits your friend’s style, then decorate it with paint, stickers, or fabric.
- Attach a fun or memorable photo of you and your friend to the frame.
- Once the photo is securely in place, allow the frame to dry completely before gifting.
DIY Hack: Instead of using a plain photo, consider printing the photo on canvas or creating a collage of several photos to fit into the frame for a more dynamic gift.
36. Homemade Lip Scrub (In Cute Jars)
Homemade lip scrub is a nourishing, exfoliating treat for soft, smooth lips. It’s a simple and thoughtful gift, especially if your friend enjoys skincare or pampering themselves.
Materials Required:
- Brown sugar or white sugar
- Coconut oil or honey
- Essential oils (optional, for scent)
- Small jar or container
How to Make:
- In a small bowl, mix sugar with coconut oil or honey until it reaches a gritty, paste-like consistency.
- Add a few drops of essential oils if desired, mixing them in thoroughly.
- Pour the scrub into a small jar or container and label it with the ingredients.
DIY Hack: Use a cute fabric scrap to tie around the jar with twine, adding a decorative touch to your homemade lip scrub.
37. DIY Keychains (Personalized with Names)
Personalized keychains are small but meaningful gifts. You can customize them with initials, names, or special symbols that hold significance for you and your friend.
Materials Required:
- Keychain rings
- Wooden, acrylic, or clay pieces (for personalization)
- Paint, markers, or engraving tools
- Glue or hole punch
How to Make:
- Select the material for the keychain. Wooden pieces work well for painting, while clay is great for molding and shaping.
- Personalize the keychain with initials, names, or symbols using paint or engraving.
- Attach the keychain ring to the piece using glue or by punching a hole.
DIY Hack: Use polymer clay to mold unique shapes like hearts, stars, or symbols that represent your friendship. Bake the clay to harden it and add a keychain ring afterward.
38. Handmade Bath Bombs (Customized Scents)
Handmade bath bombs are a luxurious and fun gift. They fizz when placed in water and release soothing fragrances, making them perfect for a relaxing bath after a long day.
Materials Required:
- Baking soda
- Citric acid
- Epsom salt
- Cornstarch
- Essential oils (lavender, rose, or citrus)
- Molds
How to Make:
- Mix dry ingredients (baking soda, citric acid, Epsom salt, and cornstarch) in a bowl.
- Slowly add wet ingredients like coconut oil or water and essential oils.
- Pack the mixture into molds, pressing firmly.
- Let the bath bombs dry for 24 hours before removing them from the molds.
DIY Hack: Add dried flowers or glitter to the bath bombs for a touch of extra luxury and a visually stunning presentation.
39. Hand-sewn Pillow Covers (With Funny Designs)
Hand-sewn pillow covers are a fun and cozy way to brighten up a friend’s space. You can sew a pillow cover with funny designs, inside jokes, or favorite quotes.
Materials Required:
- Fabric (cotton or linen works well)
- Sewing machine or needle and thread
- Fabric paint (optional)
- Pillow insert or stuffing
How to Make:
- Cut the fabric to fit the pillow insert (usually two squares or rectangles).
- Sew the edges together, leaving one side open to insert the pillow.
- If desired, decorate the fabric with fabric paint, creating a funny or meaningful design.
- Insert the pillow and sew the final edge closed.
DIY Hack: Repurpose old t-shirts or sweaters to make the fabric for the pillow cover. This makes the gift extra personal and eco-friendly.
40. Customized Tote Bags (For a Day Out)
Customized tote bags are a versatile gift that’s both functional and fashionable. Whether used for groceries, beach days, or running errands, they can be personalized with fun designs or messages.
Materials Required:
- Plain canvas tote bags
- Fabric paint or markers
- Stencils or templates (optional)
How to Make:
- Choose a tote bag and prepare your design. Use fabric paint or markers to add a fun quote, inside joke, or unique design to the bag.
- If you’re using stencils, carefully trace the design and fill it in with paint or markers.
- Allow the bag to dry completely before gifting.
DIY Hack: Use fabric dye to give the tote bag a unique color before painting, or create a two-tone bag for a more modern, trendy look.
41. DIY Plant Pots (Decorated with Their Favorite Colors)
DIY plant pots are a simple yet thoughtful gift for plant lovers. You can decorate the pots with their favorite colors, patterns, or even fun messages to make them extra special.
Materials Required:
- Plain terracotta or ceramic plant pots
- Paint or markers
- Paintbrushes
- Small plants or succulents
How to Make:
- Paint the outside of the plant pots in your friend’s favorite colors or use stencils to create fun patterns.
- Allow the paint to dry completely.
- Optionally, plant a small succulent or indoor plant in the pot before gifting it.
DIY Hack: To add some flair, use a gold leaf or metallic paint for a trendy and high-end look, or add textured patterns like stripes or polka dots.
42. Personalized Candle Jars (With Meaningful Scents)
Personalized candle jars are a great gift for creating a cozy atmosphere. Choose meaningful scents and add a personal touch to the candle jar’s design or label.
Materials Required:
- Soy wax or beeswax
- Essential oils (lavender, vanilla, citrus)
- Candle jar (mason jar, teacup, etc.)
- Wick
How to Make:
- Melt the wax in a double boiler.
- Add 15-20 drops of essential oils and mix.
- Secure the wick in the candle jar and pour the wax into the container.
- Let the candle set for several hours before trimming the wick.
DIY Hack: Use an old teacup or mason jar for a vintage, eco-friendly candle container. Add a personalized label or message on the jar for an extra thoughtful touch.
Handmade Gift Ideas for Her
Looking to surprise the special woman in your life with something unique and personal? Handmade gifts offer a heartfelt touch that store-bought items can’t match. From personalized jewelry to cozy handmade scarves, these DIY ideas are perfect for showing how much she means to you on any occasion.
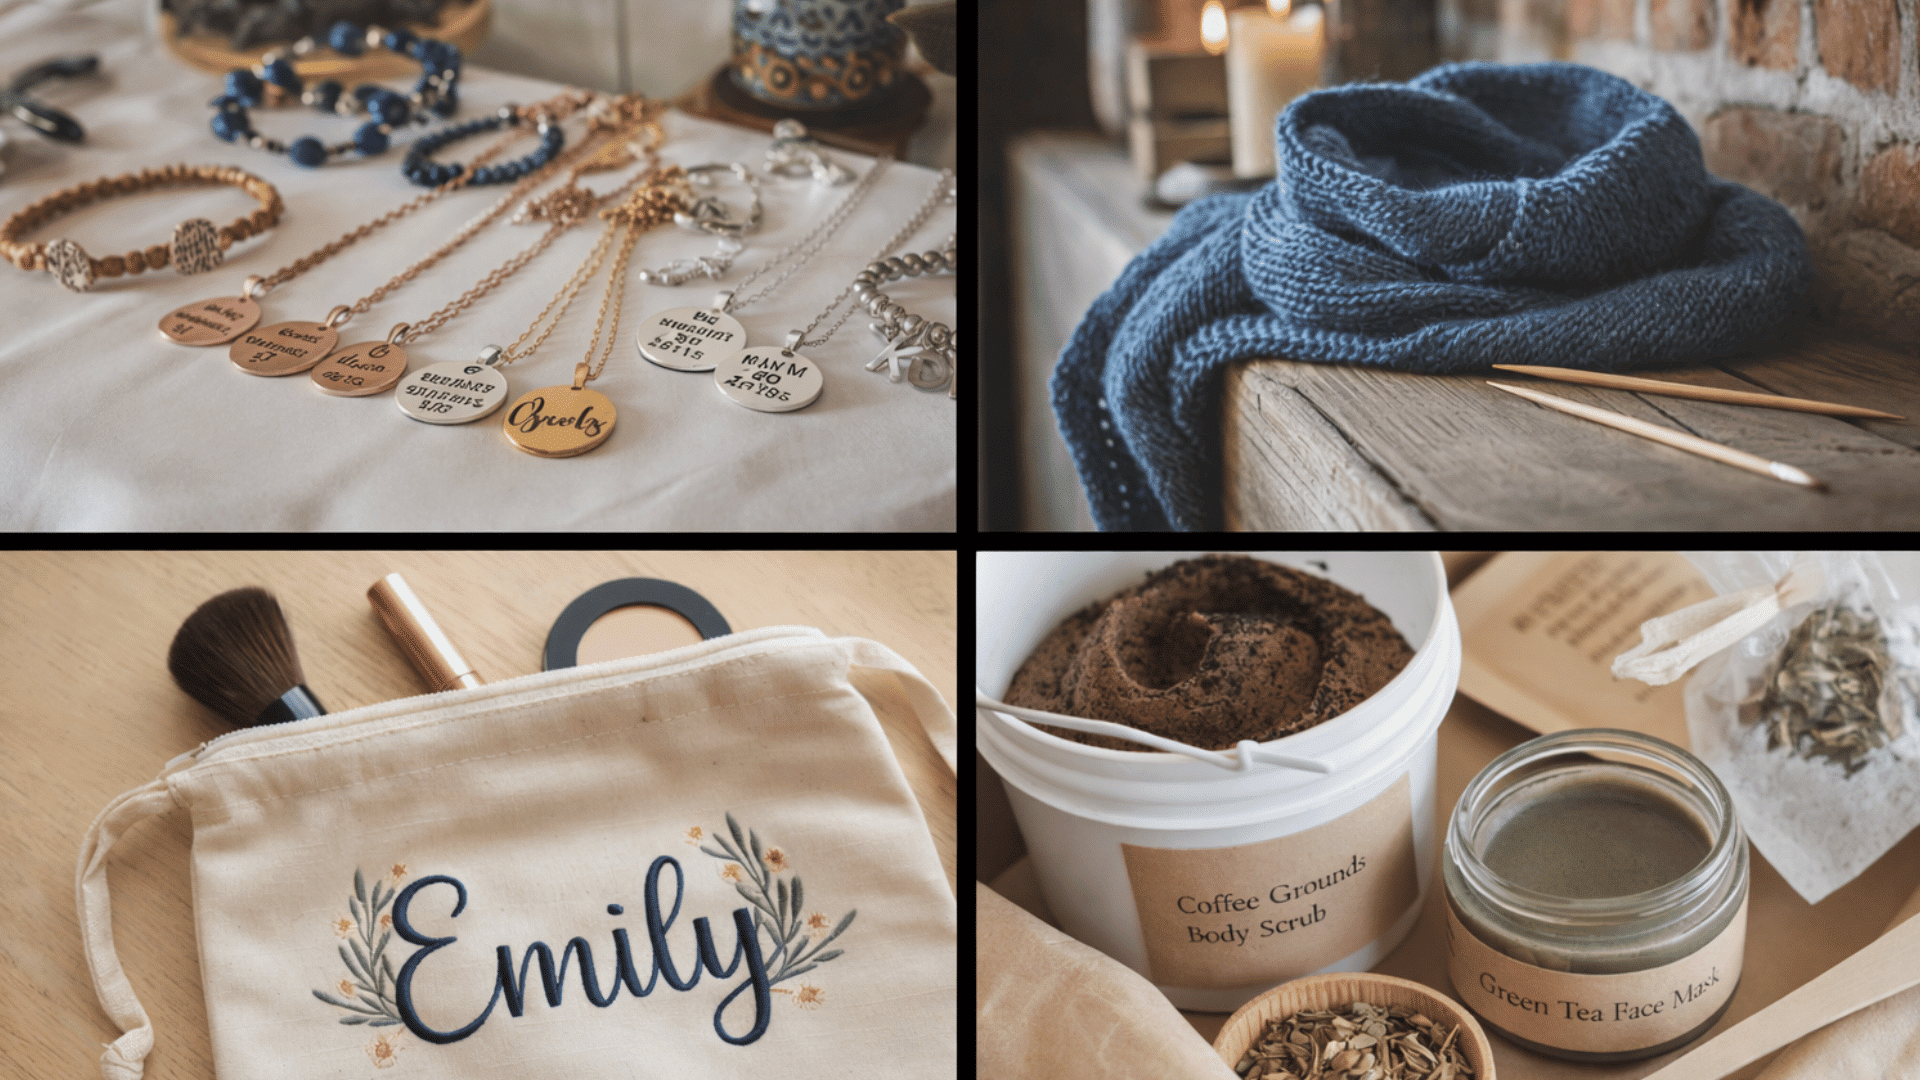
43. Personalized Jewelry (Necklaces or Bracelets)
Personalized jewelry is a timeless gift that adds a special touch to any outfit. Whether it’s a necklace, bracelet, or pair of earrings, you can personalize it with initials, names, or meaningful symbols to make it truly unique.
Materials Required:
- Beads or charms (for bracelets and necklaces)
- Jewelry wire or string
- Clasps (optional for necklaces/bracelets)
- Engraving tool or letter beads (optional)
How to Make:
- Choose your beads, charms, or letter beads based on your design and what you’d like to personalize (initials, names, or symbols).
- Thread the beads onto the wire or string, creating your pattern or design.
- Attach clasps if you’re making a necklace or bracelet.
- If you’re engraving, use an engraving tool to add initials or names to the jewelry.
DIY Hack: For a quick and budget-friendly project, use simple wire and bead designs or repurpose old jewelry by adding personal touches like initials or special charms.
44. Handmade Tote Bag (With Custom Fabric)
A handmade tote bag is a functional and stylish gift that can be customized with colors, designs, or personalized elements. Perfect for daily use, this gift can be made even more special with fabric choices and added details.
Materials Required:
- Plain canvas tote bag or fabric for the bag
- Sewing machine or needle and thread
- Fabric paint, markers, or embroidery floss
- Scissors
How to Make:
- Cut the fabric to the appropriate size to fit your desired tote dimensions.
- Sew the fabric pieces together to create the bag’s shape.
- Customize the tote with fabric paint or embroidery to add a personal design, quote, or name.
- Allow any paint or embroidery to dry before finishing and using.
DIY Hack: Repurpose old fabric scraps to make the bag more eco-friendly, and add pockets inside for extra functionality.
45. DIY Knitted Scarf (In Her Favorite Color)
A DIY knitted scarf is a cozy and thoughtful gift, especially if you knit it in her favorite color. It’s perfect for colder weather, offering warmth and style.
Materials Required:
- Yarn (choose a soft, comfortable type like wool or acrylic)
- Knitting needles (appropriate size for yarn thickness)
- Scissors
How to Make:
- Cast on enough stitches to create a scarf of your desired width (usually about 30-40 stitches).
- Knit the scarf using your preferred stitch (like stockinette or garter).
- Knit until the scarf reaches the desired length (usually around 60 inches).
- Bind off the stitches and weave in any loose ends.
DIY Hack: If you’re a beginner, start with a simple knit stitch. You can also make matching fingerless gloves to go with the scarf for an extra thoughtful gift.
46. Homemade Candles (In a Decorative Jar)
Homemade candles are a wonderful gift that adds ambiance to any room. You can personalize them with scents, colors, and decorations to suit the recipient’s preferences.
Materials Required:
- Soy wax or beeswax
- Essential oils (lavender, vanilla, or citrus)
- Candle wick
- Container (decorative jar, teacup, or mason jar)
How to Make:
- Melt the wax in a double boiler until it becomes liquid.
- Once melted, add essential oils for fragrance (15-20 drops per cup of wax).
- Secure the wick in the center of the container and pour in the melted wax.
- Allow the candle to harden for 4-6 hours, then trim the wick to about 1/4 inch.
DIY Hack: For a special touch, add dried flowers, glitter, or small charms to the wax before it hardens.
47. Personalized Journal (With a Meaningful Quote)
A personalized journal is a thoughtful and useful gift. It allows the recipient to jot down their thoughts, ideas, or dreams, and you can make it extra special with a meaningful quote or design on the cover.
Materials Required:
- Plain journal or notebook
- Stickers, washi tape, or decorative paper
- Markers or paint (for personal designs)
- Stamps or stencils (optional)
How to Make:
- Customize the cover of the journal with your chosen design. You can paint, use stickers, or add a personal quote or message.
- Add personal touches inside the journal, like motivational quotes or positive affirmations, to encourage the recipient to fill it with their thoughts.
- Allow any paint or glue to dry completely before gifting.
DIY Hack: You can make your own journal by binding loose sheets of paper and covering it with fabric or cardboard to create a truly one-of-a-kind gift.
48. DIY Bath Salts (With Relaxing Scents)
DIY bath salts are a luxurious and relaxing gift. Infused with essential oils, they provide a soothing experience during a bath, helping your friend unwind after a long day.
Materials Required:
- Epsom salts
- Sea salt or Himalayan pink salt
- Essential oils (lavender, chamomile, eucalyptus)
- Dried flowers (optional)
- Glass jar or container
How to Make:
- Mix equal parts of Epsom salts and sea salt in a bowl.
- Add 10-20 drops of essential oils and mix well.
- Optional: Add dried flowers like lavender or rose petals for extra fragrance and decoration.
- Store the bath salts in a glass jar or container.
DIY Hack: Add a few drops of food coloring to make your bath salts more colorful, or add glitter for a festive touch!
49. Custom Photo Album (With Pictures and Memories)
A custom photo album filled with cherished memories is a heartfelt gift. This allows your friend to relive happy moments, making it a perfect keepsake.
Materials Required:
- Blank photo album or scrapbook
- Photos (printed)
- Decorative paper, washi tape, or stickers
- Glue or photo corners
How to Make:
- Select your favorite photos to include and print them out.
- Arrange the photos in the album, leaving space for decorative elements like captions or stickers.
- Add decorative paper or washi tape to enhance the design and layout of each page.
- Glue the photos in place or use photo corners for easy removal and rearranging.
DIY Hack: For a fun twist, create themed sections in the album, like “Travel Memories” or “Special Moments Together,” to organize the photos.
50. Handmade Soap (Scented and Shaped Beautifully)
Handmade soap is a luxurious and practical gift. You can create unique scents and shapes to make the soap both functional and decorative. It’s perfect for pampering your friend.
Materials Required:
- Melt-and-pour soap base (glycerin, shea butter, or coconut oil)
- Essential oils (lavender, rose, citrus)
- Soap molds (silicone molds work best)
- Natural additives (like dried flowers or oatmeal)
How to Make:
- Melt the soap base in a microwave or double boiler.
- Add essential oils and any other desired additives (like dried flowers or exfoliants).
- Pour the mixture into molds and let it cool for several hours.
- Once hardened, remove the soap from the molds and store it in a decorative box.
DIY Hack: Use different molds for fun shapes like hearts, flowers, or even a simple bar. You can also layer different colors or scents for a more intricate design.
51. Personalized Makeup Bag (Embroidered with Her Name)
A personalized makeup bag is both a practical and thoughtful gift. You can embroider it with her name, initials, or a fun design to make it uniquely hers.
Materials Required:
- Plain makeup bag (cotton or canvas)
- Embroidery thread and needle
- Scissors
- Embroidery hoop (optional)
How to Make:
- Place the makeup bag in an embroidery hoop to keep it taut.
- Embroider her name or initials on the front of the bag, using colorful thread for extra flair.
- Once the embroidery is finished, trim any excess thread and iron the bag to remove wrinkles.
DIY Hack: If you don’t have embroidery skills, you can use iron-on letters or patches to personalize the makeup bag quickly and easily.
52. DIY Spa Kit (Filled with Homemade Scrubs and Masks)
A DIY spa kit filled with homemade scrubs, masks, and other beauty treatments is a luxurious gift. It gives your friend everything they need for a relaxing at-home spa day.
Materials Required:
- Homemade sugar or salt scrubs
- Face masks (can be homemade or store-bought)
- Small jars for storage
- Scented candles (optional)
How to Make:
- Make a simple sugar scrub by combining sugar, coconut oil, and a few drops of essential oil.
- Include a DIY face mask, such as a honey and oatmeal mask, in the kit.
- Add any extra items like a loofah or exfoliating gloves.
- Package the scrubs, masks, and extras in small glass jars and add a personal note or instructions.
DIY Hack: For a fun twist, include bath salts or bath bombs that you’ve already made, and create a theme (like “Relaxation” or “Glow” with specific products for each).
Handmade Gift Ideas for Kids
Looking for fun and creative gift ideas for kids? Handmade gifts are a great way to give something unique, thoughtful, and often educational. From personalized toys to craft kits, these DIY ideas will bring joy to any child while sparking their creativity and imagination.
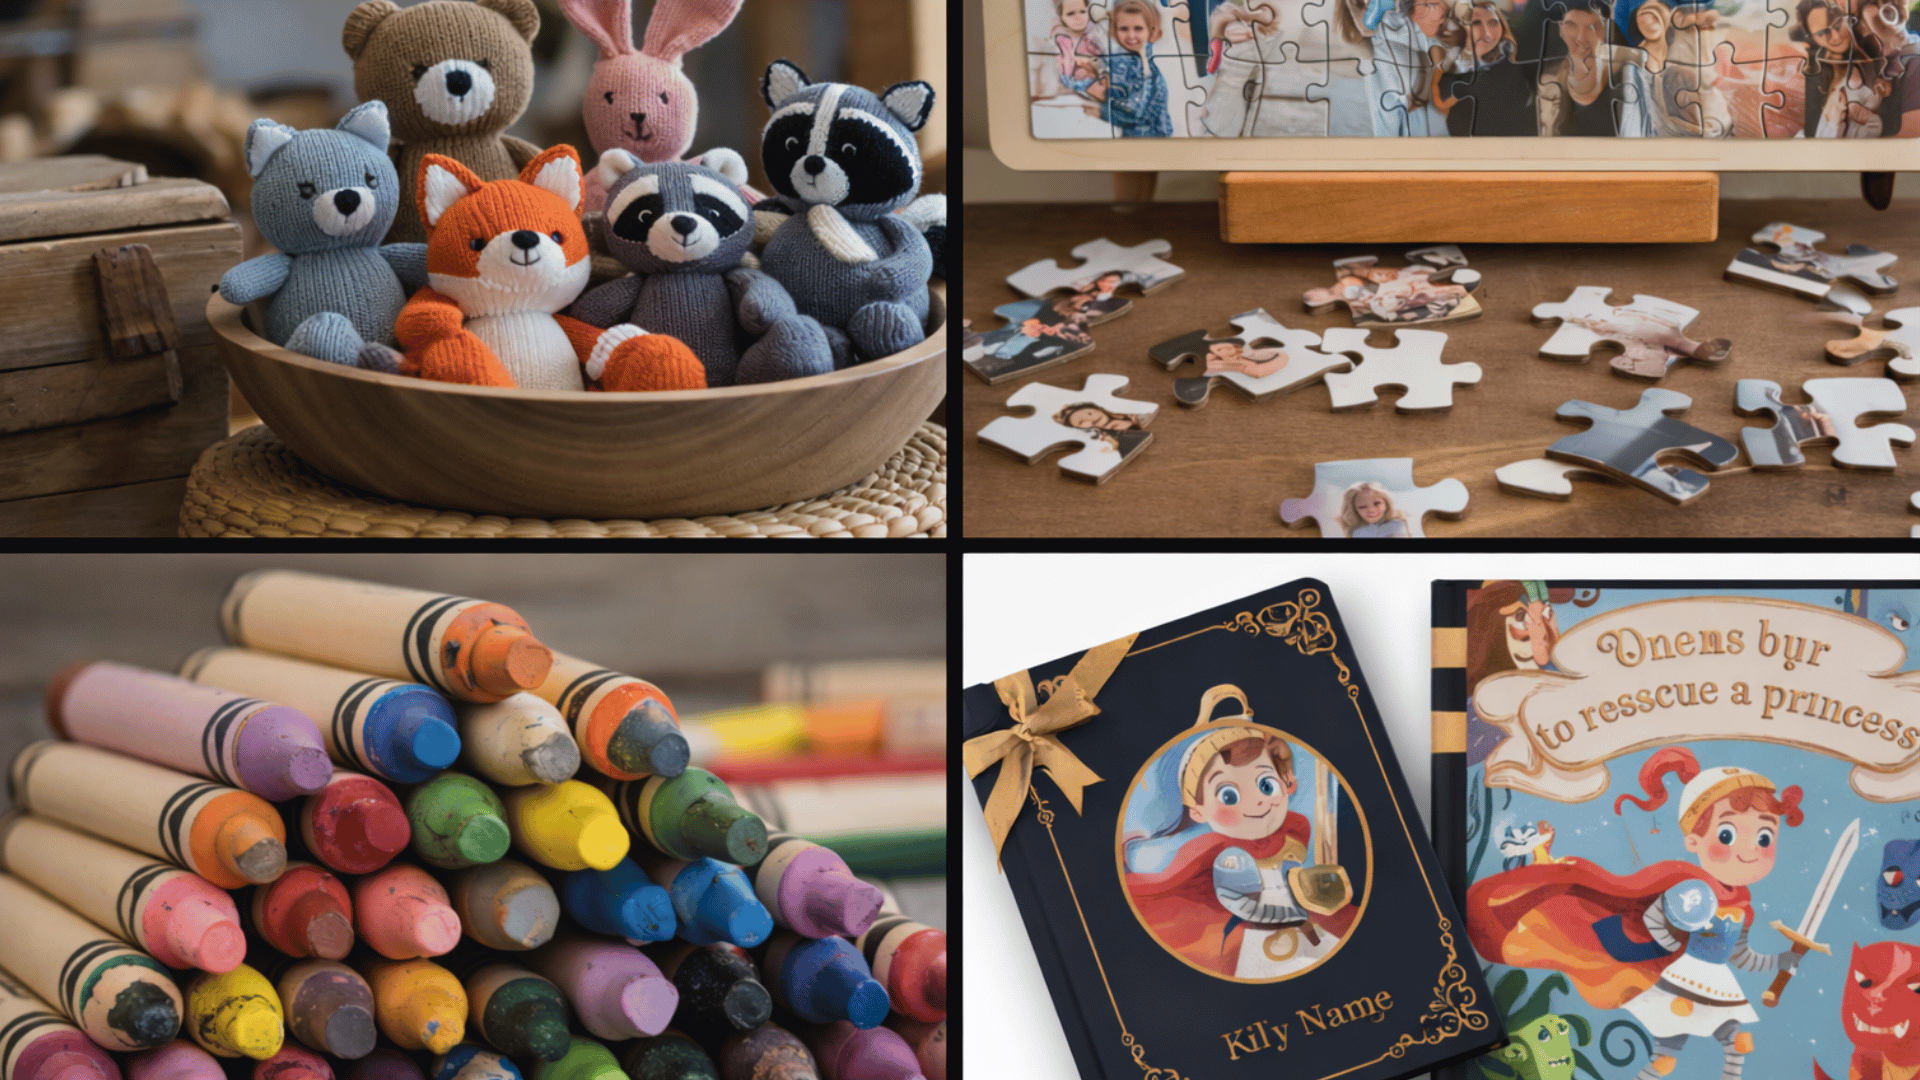
53. Stuffed Animals (Sewn or Knitted)
Stuffed animals are classic, cuddly toys that are perfect for children. Whether sewn or knitted, they can be personalized to look like a favorite animal or character, making them extra special.
Materials Required:
- Fabric (cotton, fleece, or felt)
- Thread (in matching colors)
- Needle and scissors
- Fiberfill stuffing
- Sewing pattern (optional)
How to Make:
- Use a pattern or freehand to cut out two identical pieces of fabric for the body and head of the stuffed animal.
- Sew the pieces together, leaving a small opening for stuffing.
- Turn the animal inside out, stuff it with fiberfill, and then sew the opening shut.
- Add details like eyes, ears, and a nose with felt, embroidery, or fabric paint.
DIY Hack: For a quick, no-sew option, use fabric glue to attach parts or create no-sew stuffed animals using fleece and fabric glue for the seams.
54. Painted Rock Animals or Shapes
Painted rock animals or shapes are simple yet delightful crafts that are fun for kids. These colorful creations can be used as toys, garden decorations, or just to brighten up a room.
Materials Required:
- Smooth, clean rocks
- Acrylic paints or paint markers
- Paintbrushes
- Clear sealant (optional)
How to Make:
- Clean the rocks and let them dry completely.
- Use acrylic paints to paint animals, faces, or shapes on the rocks. You can create creatures like ladybugs, cats, or dinosaurs.
- Once the paint is dry, apply a clear sealant to protect the paint.
DIY Hack: Use natural rock shapes to inspire the design (e.g., an oval rock can be painted as an egg or a bunny). Get creative by adding glitter or googly eyes!
55. DIY Playdough Kits (With Various Colors)
DIY playdough kits are a fun and interactive gift that allows kids to engage their creativity. With various colors and tools, kids can create endless shapes and designs.
Materials Required:
- All-purpose flour
- Salt
- Cream of tartar
- Food coloring
- Vegetable oil
- Water
How to Make:
- In a pot, mix 1 cup flour, 1/2 cup salt, 2 tsp cream of tartar, 1 tbsp vegetable oil, and 1 cup water. Stir continuously over medium heat.
- Once the mixture thickens into dough, remove from heat and knead it until smooth.
- Add food coloring to different portions of dough to create multiple colors.
- Store the playdough in airtight containers or ziplock bags.
DIY Hack: Add scents like vanilla extract or essential oils to make the playdough smell even more fun. Include cookie cutters or small rolling pins to complete the kit.
56. Handmade Puzzles (From Family Photos)
Handmade puzzles made from family photos are a personalized gift that children can enjoy while creating memories. These puzzles can be easily created by turning a photo into a fun activity.
Materials Required:
- Photo (printed on heavy cardstock or photo paper)
- Puzzle board or stiff cardboard
- Scissors or a craft knife
- Glue (optional)
How to Make:
- Print the photo on thick cardstock or glue it onto a stiff piece of cardboard.
- Use a craft knife to cut the photo into puzzle pieces (the number of pieces depends on the child’s age).
- Optionally, glue the puzzle pieces onto a backing board for extra stability.
DIY Hack: To make the puzzle last longer, laminate the photo before cutting it, or use larger pieces for younger kids and smaller pieces for older children.
57. Custom T-Shirts (Tie-Dye or Stenciled Designs)
Custom t-shirts with fun designs like tie-dye or stenciled images are a creative gift that kids can wear proudly. These personalized shirts can be made to fit the child’s unique interests and style.
Materials Required:
- Plain t-shirt (cotton or cotton-blend)
- Fabric paint, markers, or dye
- Stencils (optional)
- Rubber bands (for tie-dye)
- Plastic squeeze bottles (for dyeing)
How to Make:
- If tie-dying, twist or fold the shirt and secure it with rubber bands. Use fabric dye to color different sections of the shirt.
- For stenciling, place a stencil on the shirt and apply fabric paint or spray paint over the stencil.
- Allow the shirt to dry completely before wearing.
DIY Hack: Use masking tape to create geometric shapes or patterns on the t-shirt before dyeing for a more controlled design. For added fun, let the child help with the painting process!
58. Handmade Crayons (From Melted Old Crayons)
Homemade crayons made from old, melted crayons are a fun and eco-friendly way to repurpose old materials. Kids love the colorful and creative shapes these crayons take.
Materials Required:
- Old crayons (broken or unused)
- Silicone molds (shape molds or regular baking molds)
- Oven or microwave
How to Make:
- Peel the paper off the old crayons and break them into smaller pieces.
- Place the crayon pieces into silicone molds (you can mix colors or make rainbow crayons).
- Melt the crayons in the oven at a low temperature (around 250°F) or microwave them in intervals until fully melted.
- Let the crayons cool and harden in the mold, then pop them out.
DIY Hack: Use different shaped molds like animals or stars to make the crayons even more fun and exciting for kids. You can also add glitter to the melted crayons for a sparkly effect.
59. Personalized Storybook (Featuring the Child’s Name)
A personalized storybook featuring the child’s name is a magical gift that makes them the star of their own adventure. This gift encourages reading and imagination while making them feel special.
Materials Required:
- A printed personalized storybook (many online services offer custom printing)
- Photos (optional, for a photo-book version)
- Decorative items (stickers, embellishments)
How to Make:
- Choose a storybook template or purchase a personalized book online where the child’s name can be incorporated into the story.
- If desired, add photos or personal messages to make it even more unique.
- Decorate the cover and pages with fun stickers or embellishments for added flair.
DIY Hack: To make it extra special, read the story aloud to the child or create a new storyline with their name, using your own creativity for a completely custom tale.
60. DIY Craft Kits (Ready to Assemble)
DIY craft kits are a great way to keep kids entertained while allowing them to make their own creations. These kits can be tailored to the child’s interests, whether it’s painting, building, or creating.
Materials Required:
- Craft supplies (beads, string, paper, markers, etc.)
- Small containers or bags to organize materials
- Instructions (if needed)
How to Make:
- Gather a variety of craft supplies that match the child’s interests. For example, you can create a jewelry-making kit, painting kit, or paper crafting kit.
- Organize the materials into small containers or bags.
- Include simple instructions or inspiration ideas for how to use the supplies.
DIY Hack: For an eco-friendly craft kit, use recycled materials like old buttons, bottle caps, or fabric scraps. You can also include reusable items, such as reusable stickers or stencils.
61. Hand-painted Wooden Toys
Hand-painted wooden toys are classic, sturdy toys that make a great gift. You can paint them in bright, fun colors and personalize them with names, shapes, or fun designs.
Materials Required:
- Wooden toys (blocks, cars, animals, etc.)
- Acrylic paints
- Paintbrushes
- Clear sealer (optional)
How to Make:
- Paint the wooden toy pieces with bright colors or designs.
- Use a fine brush to add details, like eyes, names, or patterns.
- Once dry, seal the painted toys with a clear sealant to protect them.
DIY Hack: Use non-toxic paints and finishes to ensure the toys are safe for young children, and make the design simple and bold for easier play.
62. Homemade Doll Clothes (For Favorite Dolls)
Homemade doll clothes are a fun way to personalize a doll for a child. You can sew or knit clothes that fit their favorite doll, making them more interactive and fun to play with.
Materials Required:
- Fabric (cotton, fleece, or knit fabric)
- Needle and thread (or sewing machine)
- Patterns (for doll clothes)
- Buttons or small accessories (optional)
How to Make:
- Measure the doll to create custom-fit patterns for the clothes.
- Sew or knit the clothes for the doll, such as shirts, pants, dresses, or jackets.
- Add small buttons, ribbons, or other accessories for extra flair.
DIY Hack: Repurpose old clothes or fabric scraps to make doll clothes, turning old shirts into adorable doll-sized outfits. You can also make matching outfits for the child and their doll for an extra special gift.
Handmade Gift Ideas for Teachers and Co-Workers
Show your appreciation with thoughtful handmade gifts that are perfect for teachers and co-workers. Whether it’s a custom mug or a DIY desk organizer, these handmade gifts are a great way to say “thank you” in a meaningful way.
63. Personalized Stationery (Customized Notepads and Pens)
Personalized stationery, including notepads and pens, makes a thoughtful and practical gift for teachers and co-workers. It’s something they can use every day while keeping your gift both useful and personal.
Materials Required:
- Plain notepads or notebooks
- Markers, pens, or stamps for customization
- Stickers or decorative elements
- Personalized text (names, quotes, etc.)
How to Make:
- Start by choosing the notepad or notebook to personalize. You can buy pre-made ones or make your own by printing blank pages and binding them.
- Customize the cover with a name, quote, or design using markers, stamps, or stickers.
- Personalize pens by adding a small name tag or decorating the pen with washi tape, stickers, or vinyl lettering.
DIY Hack: To make the pens extra special, use metallic markers or add tiny embellishments like beads or ribbons for a more elegant touch.
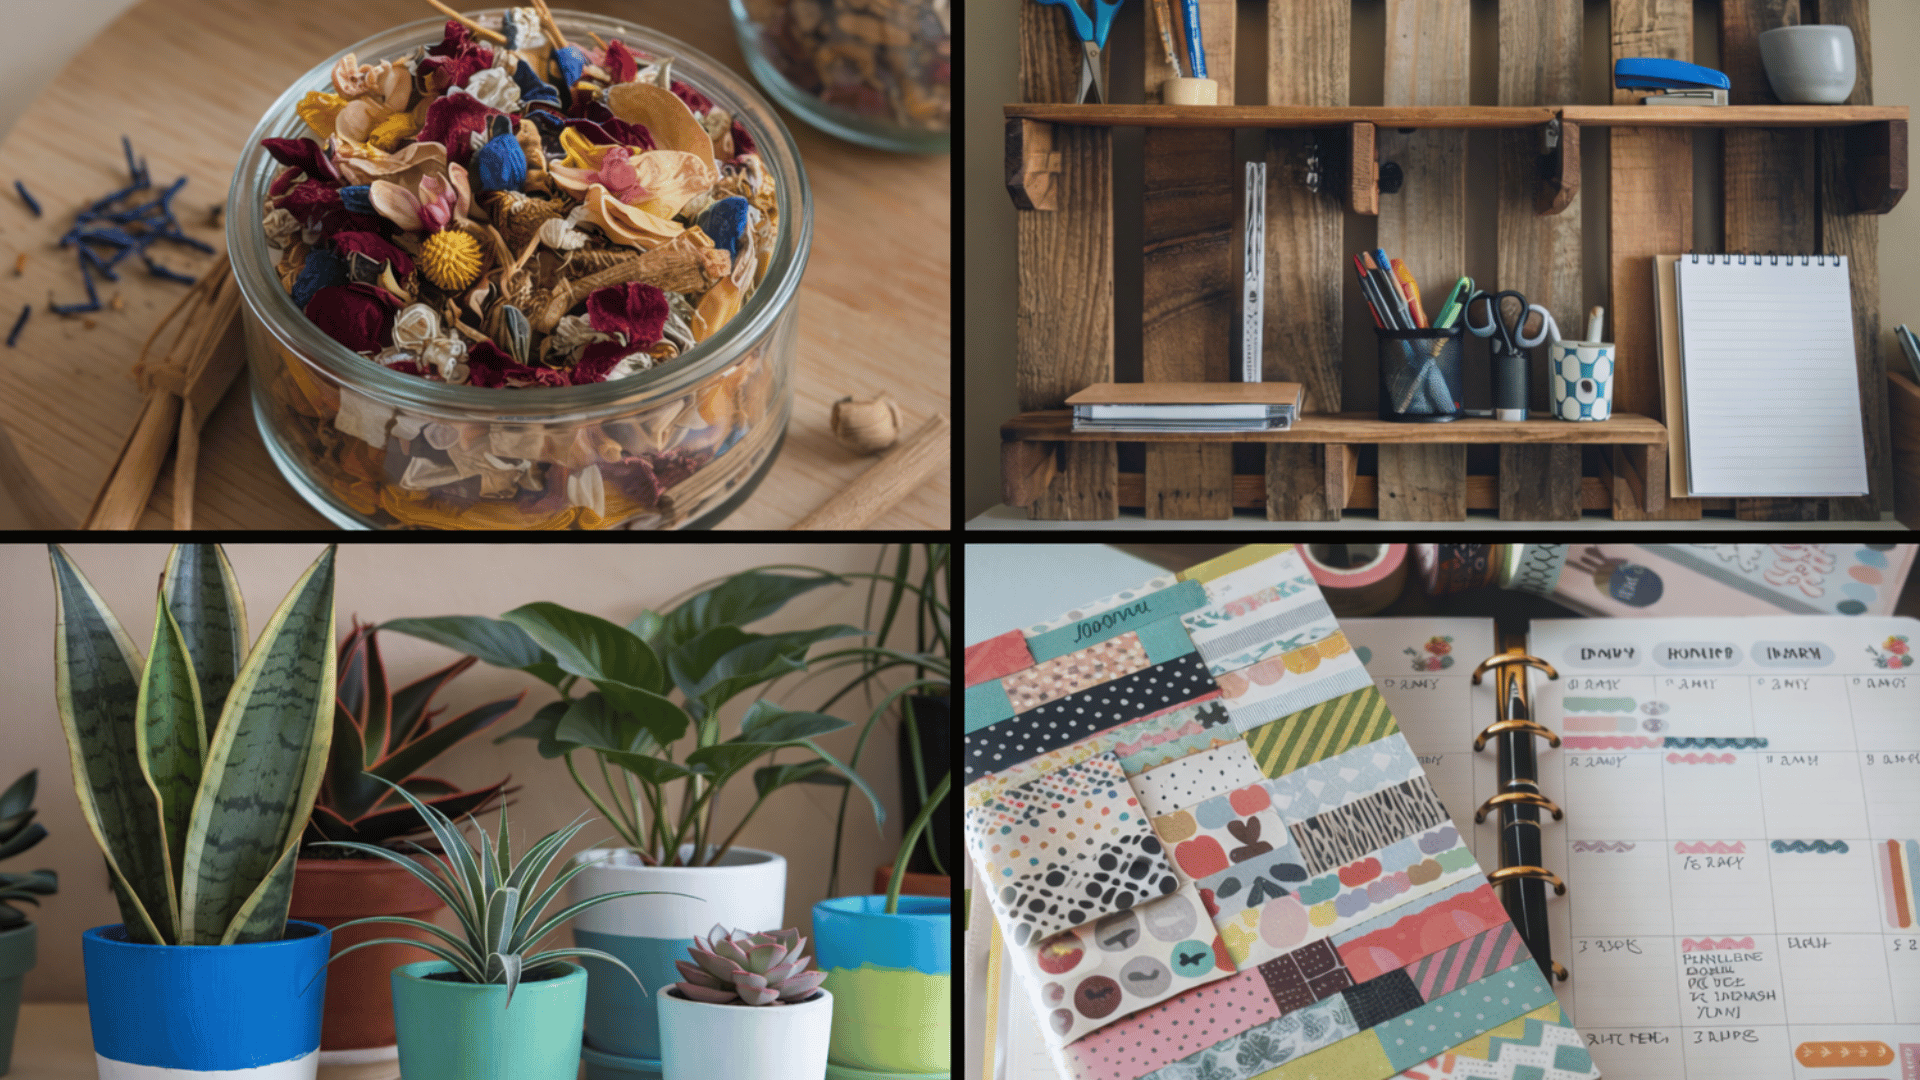
64. DIY Desk Organizer (Using Repurposed Materials)
A DIY desk organizer is a practical and thoughtful gift, especially for teachers or co-workers who could use a little extra storage. Using repurposed materials adds an eco-friendly touch to your gift.
Materials Required:
- Cardboard boxes or toilet paper rolls
- Glue gun or tape
- Decorative paper or fabric
- Scissors
How to Make:
- Collect and clean repurposed materials like cardboard boxes, toilet paper rolls, or old cans.
- Arrange the materials to create sections for holding pens, paper clips, and other office supplies.
- Cover the organizer with decorative paper or fabric and secure it with glue or tape.
- Add labels or embellishments to give the organizer a more personalized look.
DIY Hack: You can use old cereal boxes or shoe boxes as a base to create large organizers, and cover them with fun, patterned paper for a cohesive design.
65. Handmade Potpourri (Scented Mix of Dried Flowers)
Handmade potpourri is a fragrant, decorative gift that adds a pleasant scent to any space. It’s perfect for a teacher’s desk or a co-worker’s office, offering a natural and refreshing aroma.
Materials Required:
- Dried flowers (rose petals, lavender, etc.)
- Essential oils (lavender, citrus, or cinnamon)
- Dried herbs (mint, rosemary, etc.)
- Decorative jar or container
How to Make:
- Gather dried flowers, herbs, and spices. You can find them at craft stores or dry your own at home.
- Mix the dried flowers and herbs in a bowl and add a few drops of essential oils for fragrance.
- Place the potpourri in a decorative jar or container and seal it.
- Optional: Add small pinecones or cinnamon sticks for added texture and scent.
DIY Hack: Add dried citrus slices or colorful dried petals for a vibrant, visually appealing potpourri that also smells amazing.
66. Homemade Granola or Cookies in a Jar
Homemade granola or cookies in a jar is a sweet and edible gift that is easy to prepare. Layering the dry ingredients in a jar adds a decorative touch, and the recipient just has to follow a simple recipe to bake them.
Materials Required:
- Jar with lid (mason jar works well)
- Dry ingredients (oats, flour, sugar, etc. for granola or cookies)
- Recipe card (attached to the jar)
How to Make:
- Layer the dry ingredients in a mason jar, starting with flour, sugar, and other dry ingredients for cookies or granola.
- Attach the recipe card to the jar with a ribbon or twine, explaining how to make the cookies or granola.
- Seal the jar and decorate with a ribbon or label for a festive touch.
DIY Hack: For an extra special touch, decorate the jar lid with fabric or a cute sticker that matches the theme of the recipe.
67. Personalized Mugs (Painted or Engraved)
Personalized mugs are a classic, functional gift that can be customized with names, quotes, or images that reflect the recipient’s personality. Great for teachers or co-workers who enjoy their daily coffee or tea.
Materials Required:
- Plain ceramic mugs
- Ceramic paint or markers
- Stencils (optional)
- Oven (for setting paint)
How to Make:
- Clean the mugs and allow them to dry completely.
- Use ceramic paint or markers to add a personal design, quote, or image.
- For added precision, use stencils to paint specific shapes or letters.
- Bake the mug in the oven (as per the paint instructions) to set the design and make it dishwasher safe.
DIY Hack: For a fun twist, use chalkboard paint on the mug so the recipient can write their own messages and easily erase them.
68. Handmade Planner (Decorated with Washi Tape)
A handmade planner is a practical yet personal gift. You can customize a simple planner with washi tape, stickers, and other embellishments to make it more fun and functional for daily use.
Materials Required:
- Blank planner or notebook
- Washi tape, stickers, or decorative paper
- Pens, markers, or stamps (optional)
How to Make:
- Start with a blank planner or notebook.
- Use washi tape to decorate the cover and inside pages, adding fun patterns or frames.
- Add stickers or stamps to enhance the design, or add motivational quotes to the pages.
- Include extra sections for notes, goals, or to-do lists, making the planner even more useful.
DIY Hack: Create a monthly or weekly calendar on the inside pages using markers and rulers, adding more structure and personalization to the planner.
69. Desk Plants in Painted Pots
Desk plants in painted pots are a thoughtful gift that adds life to a work environment. You can personalize the pots with fun colors or designs that reflect the recipient’s style.
Materials Required:
- Small plants (succulents, cacti, or herbs)
- Small pots (terracotta or ceramic)
- Acrylic paint or spray paint
- Paintbrushes
How to Make:
- Paint the pots with your desired color or design. You can use solid colors, stripes, or patterns.
- Allow the paint to dry completely before planting.
- Add a small plant (succulents are great because they’re low-maintenance) and ensure it has proper drainage.
DIY Hack: For a personal touch, paint the recipient’s name or initials on the pot, or add a fun quote that will brighten up their desk.
70. Personalized Keychains
Personalized keychains are a practical and thoughtful gift. You can make them using various materials and customize them with names, initials, or meaningful symbols.
Materials Required:
- Keychain rings
- Wood, acrylic, or leather pieces
- Paint, markers, or engraving tool
- Hole punch (for attaching to the ring)
How to Make:
- Cut out the shape of the keychain (such as a heart, circle, or rectangle) from wood, acrylic, or leather.
- Personalize the piece with paint, markers, or an engraving tool.
- Use a hole punch to create a hole at the top and attach the keychain ring.
DIY Hack: Use colorful beads, charms, or fabric to decorate the keychain and add extra flair.
71. DIY Whiteboard or Corkboard (With Custom Frame)
A DIY whiteboard or corkboard is a functional gift that can be personalized with a custom frame. It’s perfect for a teacher’s desk or a co-worker’s office, helping them stay organized and inspired.
Materials Required:
- Whiteboard or corkboard
- Wooden frame (or repurposed old frame)
- Paint or fabric for decorating
- Dry-erase markers (for whiteboards) or push pins (for corkboards)
How to Make:
- Attach the whiteboard or corkboard to the back of the frame using glue or nails.
- Decorate the frame with paint, washi tape, or fabric for a personalized touch.
- If making a whiteboard, add a section with dry-erase markers and erasers for convenience.
DIY Hack: For a more eco-friendly option, repurpose an old frame and use it to create a functional and stylish board from scratch.
72. Homemade Scented Candles (In Small Jars)
Homemade scented candles in small jars are a practical and cozy gift. You can customize the scent to suit the recipient’s preferences, creating a relaxing atmosphere in any space.
Materials Required:
- Wax (soy or beeswax)
- Essential oils (lavender, vanilla, or citrus)
- Small glass jars (mason jars or teacups work great)
- Wick
How to Make:
- Melt the wax in a double boiler.
- Add essential oils for fragrance (around 15-20 drops per cup of wax).
- Secure the wick in the bottom of the jar and pour the melted wax into the container.
- Let the candle set for a few hours before trimming the wick to about 1/4 inch.
DIY Hack: Add dried herbs or flowers to the wax for an extra decorative touch that enhances both the look and scent of the candle.
Handmade Gift Ideas for Family
Looking to create a heartfelt gift for a family member? Handmade gifts are the perfect way to show love and appreciation for the people who mean the most. From personalized keepsakes to cozy home decor, these DIY ideas will make your family feel extra special and cherished.
73. Handmade Wooden Coasters (Personalized Designs)
Handmade wooden coasters are practical yet personalized gifts that can be customized with designs, names, or family logos. They make a great addition to any home or dining space.
- Materials Required:
- Wooden coaster blanks (round, square, or any shape)
- Wood stain or paint
- Stamps, stencils, or engraving tools
- Clear wood sealer (optional)
How to Make:
- Sand the edges of the wooden coasters to smooth out rough spots.
- Use wood stain or paint to color the coasters in your desired hues.
- Once dry, personalize the coasters by stamping or painting designs, initials, or family names.
- Finish by applying a clear wood sealer to protect the design.
DIY Hack: For added creativity, burn a design into the wood using a wood-burning tool for an etched look. You can also experiment with different shapes like hexagons or hearts for a unique twist.
74. Custom Family Recipe Book (Compiled Family Favorites)
A custom family recipe book is a thoughtful gift that compiles your family’s favorite recipes, creating a sentimental keepsake for cooking enthusiasts.
Materials Required:
- Blank recipe book or binder
- Decorative paper, fabric, or scrapbook elements
- Recipe cards or printed recipes
- Stickers or labels for personalization
How to Make:
- Choose a blank recipe book, binder, or create your own by binding blank pages together.
- Decorate the cover with family photos, fabric, or scrapbook paper to give it a personal touch.
- Write or print out the family’s favorite recipes and organize them in the book by categories (e.g., appetizers, desserts).
- Optionally, include family stories or memories associated with each recipe.
DIY Hack: Use a binder with clear plastic sleeves to easily add and replace recipes over time, making it a growing collection.
75. Hand-sewn Aprons (For the Home Chef)
Hand-sewn aprons are a fantastic gift for anyone who loves cooking or baking. These aprons can be personalized with colors, patterns, or family names, making them extra special.
Materials Required:
- Fabric (cotton or linen)
- Sewing machine or needle and thread
- Ribbon, pockets, or other decorative elements
- Pattern for apron shape (or create your own)
How to Make:
- Cut the fabric according to the pattern or measurements you want for the apron.
- Sew the pieces together, adding straps and pockets for a functional design.
- Personalize the apron by adding embroidery, a family name, or a fun quote.
DIY Hack: Repurpose old clothes or fabric scraps to make the apron more eco-friendly while still being creative with patterns and colors.
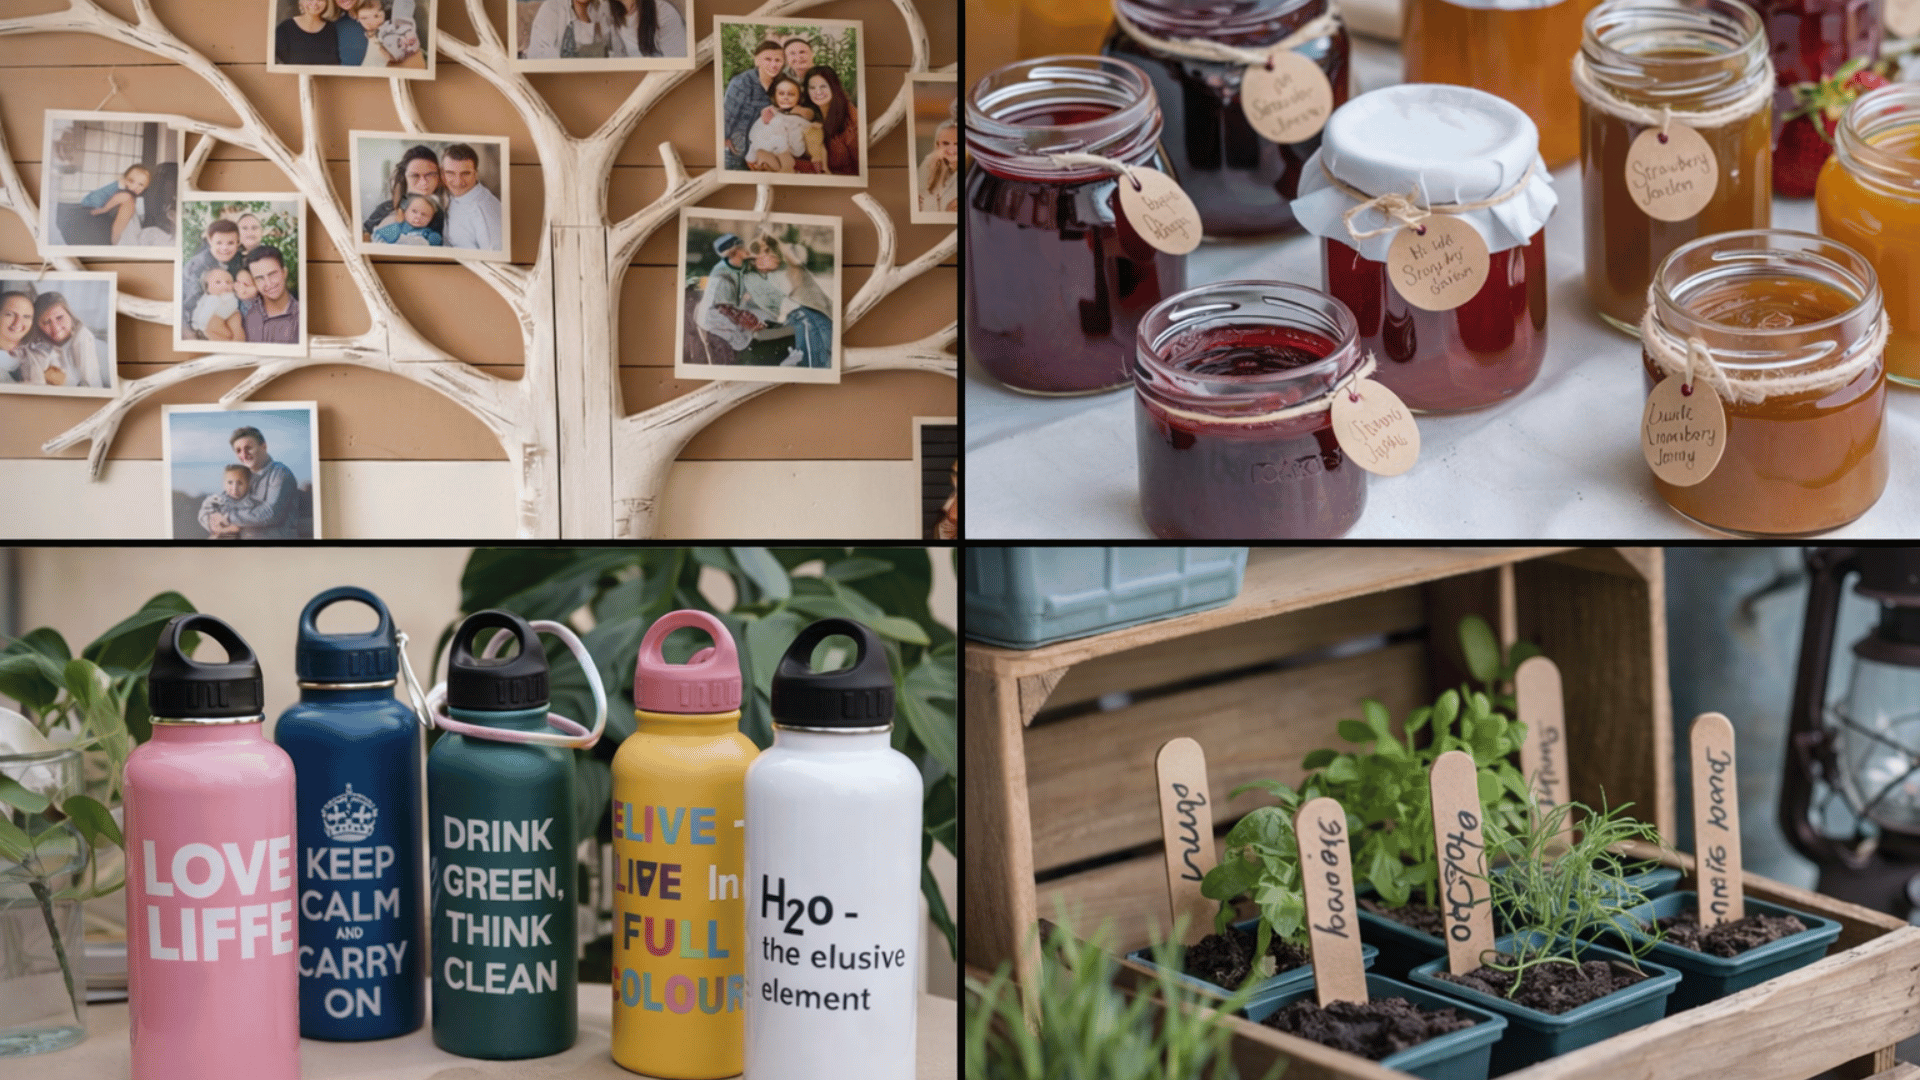
76. DIY Family Tree Wall Art (With Family Photos)
DIY family tree wall art is a beautiful way to showcase family heritage and connect multiple generations. It combines photos with creative design, making it a meaningful and visually stunning gift.
Materials Required:
- Canvas or wooden board
- Family photos (printed)
- Stencils or drawing tools
- Glue or photo-safe adhesive
- Paint for the tree design
How to Make:
- Choose a canvas or wooden board for the background.
- Paint or draw a tree shape using stencils or freehand.
- Print out family photos and cut them to fit the branches of the tree.
- Glue the photos onto the tree, arranging them from the oldest generation at the base to the youngest at the top.
- Optionally, add names or labels next to each photo.
DIY Hack: For a more modern look, consider using metallic or watercolor paints for the tree and adding floral or nature-themed accents around the edges.
77. Custom Quilts (Using Family Fabric Scraps)
A custom quilt made from family fabric scraps is a heartwarming gift that combines creativity and sentimentality. Each piece of fabric tells a story, making the quilt a treasured family heirloom.
Materials Required:
- Fabric scraps from old clothes, linens, or other family items
- Quilt batting
- Sewing machine or needle and thread
- Quilt pattern or design ideas
How to Make:
- Collect fabric scraps that hold sentimental value, such as old shirts, dresses, or sheets.
- Cut the fabric into squares or shapes based on the quilt design you want to create.
- Sew the pieces together to form a quilt top, then add the batting and quilt backing.
- Sew around the edges to finish the quilt.
DIY Hack: For a quicker version, create a patchwork quilt by simply sewing together fabric scraps in different shapes and sizes for a more rustic, homemade look.
78. Personalized Puzzle (With a Family Photo)
A personalized puzzle made from a family photo is a fun and interactive gift. It allows family members to bond over assembling a picture that holds special meaning.
Materials Required:
- Family photo (printed)
- Puzzle board or blank puzzle pieces
- Glue (optional)
How to Make:
- Choose a family photo and print it on sturdy paper or photo paper.
- Glue the photo onto a puzzle board or use a blank puzzle template.
- Cut the photo into puzzle pieces, making sure they fit together.
- If you’re using a custom puzzle board, follow the instructions to assemble the pieces.
DIY Hack: If you don’t have a puzzle kit, you can use cardboard and create your own puzzle pieces by hand, tracing and cutting them out yourself.
79. Homemade Jam or Jelly (In Cute Jars with Labels)
Homemade jam or jelly is a delicious and thoughtful gift. It’s perfect for sharing family recipes or creating a personal touch with different fruit combinations.
Materials Required:
- Fruit (berries, peaches, etc.)
- Sugar
- Pectin (for jam or jelly)
- Small mason jars or glass containers
- Labels for jars
How to Make:
- Prepare the fruit by washing and mashing it (or leaving it whole, depending on the recipe).
- Follow a jam or jelly recipe, adding sugar and pectin as needed.
- Boil the mixture until it thickens, then pour it into clean, sterilized jars.
- Seal the jars and add personalized labels with the date or a special message.
DIY Hack: Add a personal touch by using seasonal fruits or adding spices like cinnamon or vanilla to create unique flavors.
80. Sewn Family Pillows (With Family Names)
Sewn family pillows are a cozy and personal gift. Each pillow can feature the family name, a meaningful quote, or fun designs, perfect for adding warmth to any room.
Materials Required:
- Fabric (for the pillow cover)
- Needle and thread (or sewing machine)
- Pillow inserts
- Paint or embroidery thread for customization
How to Make:
- Cut fabric into two squares or rectangles to make the pillow cover.
- Sew the edges together, leaving one side open to insert the pillow stuffing.
- Customize the pillow with family names, quotes, or other personal designs using paint, embroidery, or stencils.
- Once decorated, insert the pillow and sew the opening shut.
DIY Hack: You can use old fabric or repurpose clothing to make eco-friendly family pillows. Add decorative buttons or pom-poms for extra flair!
81. Personalized Water Bottles (Decorated with Vinyl)
Personalized water bottles are practical gifts that can be customized with names, initials, or designs. They’re great for keeping hydrated while showing off a personal touch.
Materials Required:
- Plain water bottle (stainless steel, plastic, or glass)
- Vinyl stickers or decals
- Transfer tape
- Scissors
How to Make:
- Choose a water bottle to personalize, ensuring it’s easy to apply vinyl to.
- Cut vinyl decals or stickers in your desired shapes, such as initials or a fun design.
- Use transfer tape to apply the vinyl to the water bottle, making sure it sticks well and doesn’t peel.
- Smooth out any air bubbles with a plastic card or your fingers.
DIY Hack: If you don’t have vinyl decals, use permanent markers or paint to add your designs directly to the bottle. For an extra touch, include motivational quotes or fun designs.
82. DIY Herb Garden Kits (Small Pots and Seeds)
A DIY herb garden kit is a thoughtful gift that gives the recipient everything they need to start growing their own herbs. It’s perfect for those who love cooking with fresh ingredients.
Materials Required:
- Small pots (terracotta or plastic)
- Potting soil
- Herb seeds (basil, mint, rosemary, etc.)
- Labels for each pot
- Decorative items (optional)
How to Make:
- Fill each pot with potting soil.
- Plant the herb seeds according to the package instructions.
- Label each pot with the name of the herb, using a small wooden stick or decorative label.
- Add a decorative touch by painting or decorating the pots, if desired.
DIY Hack: Use recycled containers (like old jars or cans) for a more eco-friendly approach. You can also add small pebbles or stones at the bottom for drainage.
83. Hand-painted Picture Frames
Hand-painted picture frames are a great way to showcase a special photo. Personalize the frame with colors, designs, or patterns to match the recipient’s style or home décor.
Materials Required:
- Plain wooden or plastic frame
- Paint (acrylic or fabric)
- Paintbrushes
- Protective sealant (optional)
How to Make:
- Paint the frame with a base coat of your chosen color.
- Once dry, use additional colors to add patterns or designs like stripes, polka dots, or floral motifs.
- Optionally, seal the frame with a clear protective coat to prevent damage.
DIY Hack: Add a personal touch by painting the frame in colors that match the recipient’s home décor or wedding theme.
84. Handmade Slippers or Socks
Handmade slippers or socks are cozy and thoughtful gifts, perfect for keeping warm during the winter months. You can knit or sew them with personal colors and designs.
Materials Required:
- Yarn (wool or acrylic)
- Knitting needles (for knitted socks) or fabric (for sewn slippers)
- Scissors
- Needle and thread (for sewing)
How to Make:
- For knitted socks, follow a knitting pattern to create socks to fit the recipient’s feet.
- For sewn slippers, cut fabric pieces for the soles, sides, and top of the slipper, then sew them together.
- Add embellishments like pom-poms, buttons, or embroidery for a personal touch.
DIY Hack: For an easy version, consider knitting simple slipper socks using a thick yarn for extra warmth.
85. Customized Wooden Sign (With Family Name)
A customized wooden sign with the family name is a warm and welcoming gift. It can be displayed in the home or garden, adding a personal touch to any space.
Materials Required:
- Wooden board or plank
- Stencil or vinyl letters (for family name)
- Paint or wood stain
- Paintbrush
How to Make:
- Sand the wooden board to smooth out any rough spots.
- Paint the board with a base color and let it dry.
- Apply stencils or vinyl letters to create the family name design.
- Paint over the stencil or vinyl for a clean, bold design. Seal with a protective finish if desired.
DIY Hack: For a more rustic look, distress the wood by sanding edges to give it a weathered appearance.
86. Personalized Family Calendar (Featuring Important Dates)
A personalized family calendar is a practical and sentimental gift. It can feature important family dates, like birthdays, anniversaries, and other milestones.
Materials Required:
- Blank calendar (printed or a store-bought template)
- Photos of family members or memorable events
- Markers, stickers, or stamps for personalization
How to Make:
- Choose a blank calendar template, either online or from a craft store.
- Add family photos for each month or season.
- Mark important family dates like birthdays or anniversaries on the calendar.
- Decorate with stickers, stamps, or handwritten notes.
DIY Hack: Use an online printing service to print the calendar with your customized designs for a professional finish.
87. Homemade Sweets Box (Assorted Homemade Cookies, Chocolates)
A homemade sweets box is a delicious and thoughtful gift filled with a variety of homemade treats like cookies, chocolates, and candies. It’s perfect for sharing during holidays or special occasions.
Materials Required:
- Cookie dough or chocolate ingredients
- Baking supplies (cookie cutters, molds)
- Small decorative box or tin
- Wrapping or parchment paper
How to Make:
- Bake a selection of homemade cookies, chocolates, or other sweet treats.
- Allow the treats to cool and then arrange them in a small decorative box or tin.
- Wrap each treat in parchment paper for a neat presentation.
DIY Hack: Include a variety of sweets, like classic chocolate chip cookies, fudge, or homemade caramels, to offer a diverse selection in the box.
Handmade Paper Craft Gift Ideas
Looking for creative and personalized gifts made from paper? Handmade paper crafts offer endless possibilities for unique and thoughtful gifts. Whether it’s a customized greeting card, a scrapbook of memories, or a beautiful paper flower arrangement, these DIY ideas will add a personal touch to any occasion.
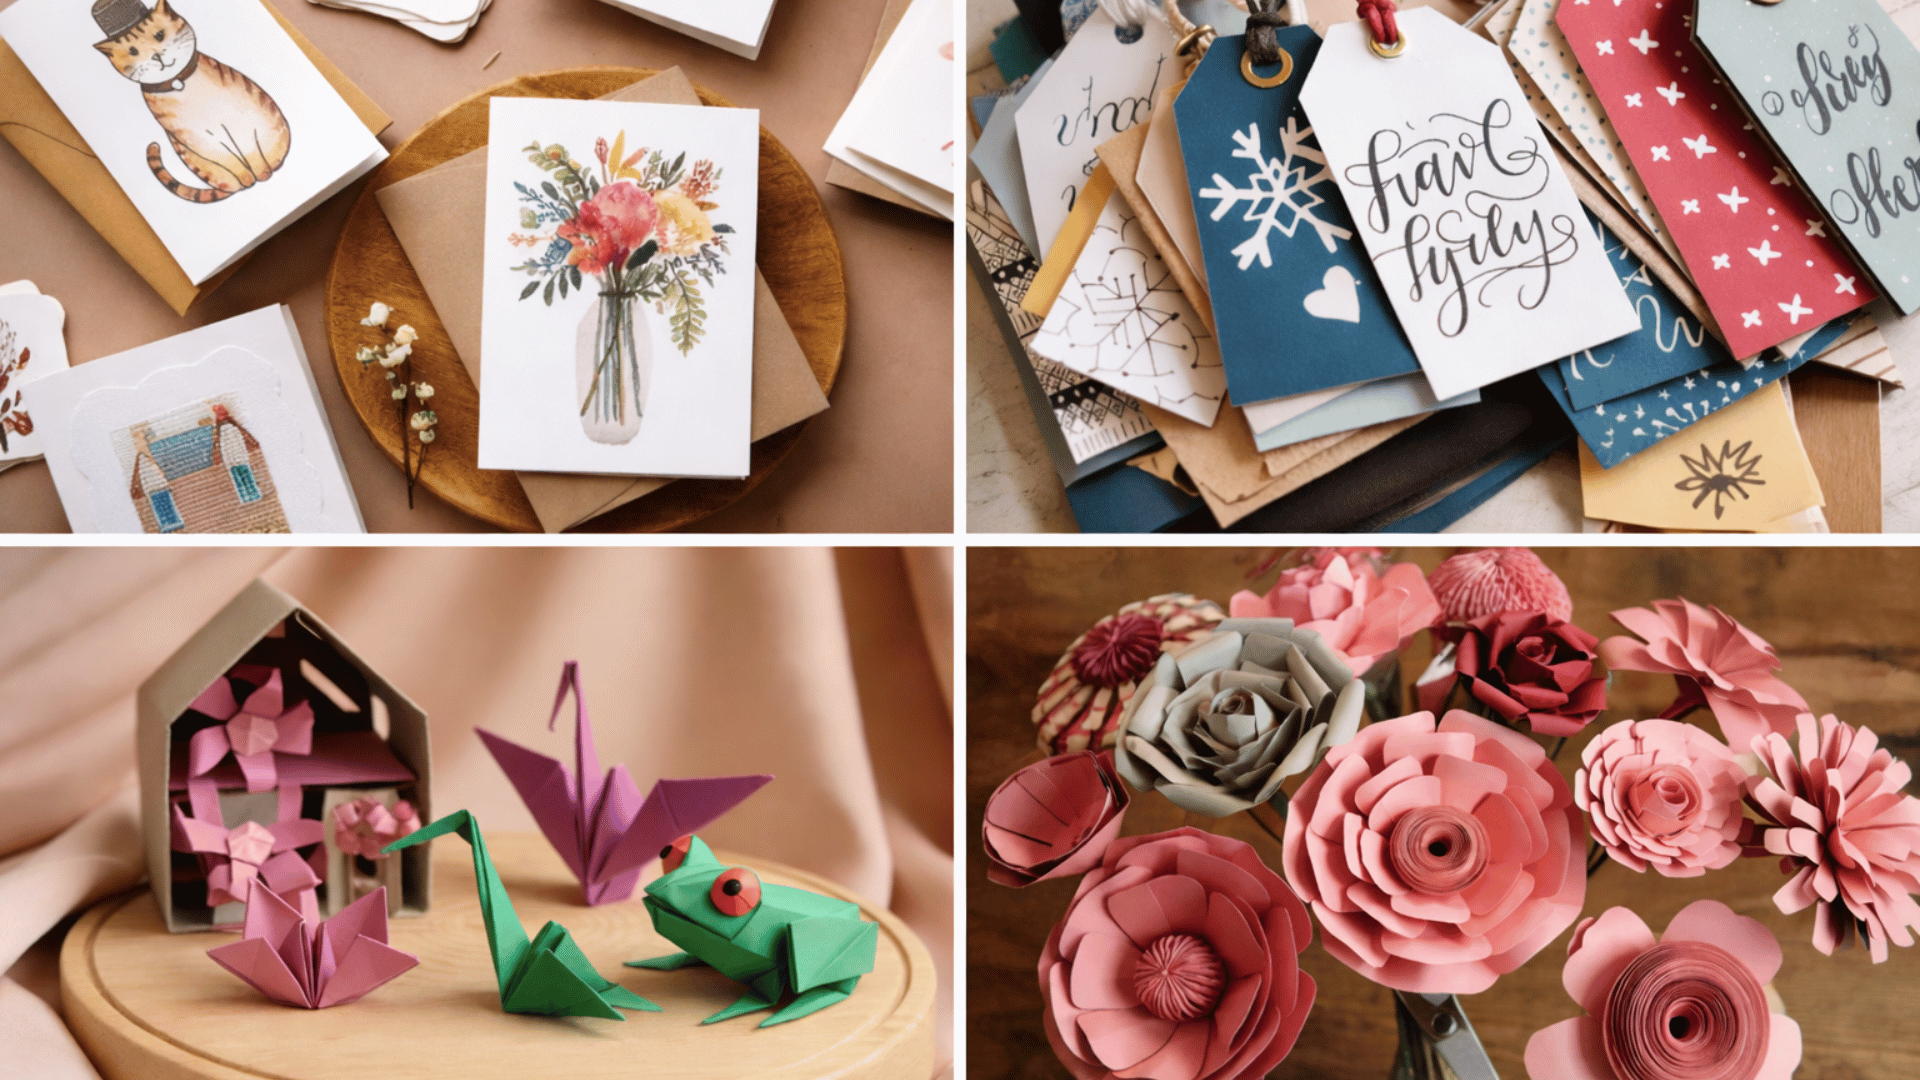
88. Personalized Greeting Cards (With Unique Designs)
Personalized greeting cards are a thoughtful and creative way to send well wishes for any occasion. Customizing them with unique designs, quotes, or personal messages makes them extra special.
Materials Required:
- Blank greeting cards or cardstock
- Markers, stamps, or paints
- Stickers or embellishments
- Ribbon or decorative paper (optional)
How to Make:
- Start with a blank greeting card or cut cardstock to your desired size.
- Design the card by drawing or stamping images, adding a heartfelt message, and using embellishments like glitter or ribbon.
- Personalize it further with the recipient’s name or a meaningful quote.
- Allow any ink or glue to dry completely before giving the card.
DIY Hack: Use a stamp set with interchangeable letters to create custom phrases or names, adding more versatility to your cards.
89. DIY Scrapbook (Filled with Memories and Photos)
A DIY scrapbook is a creative and sentimental gift that’s perfect for commemorating special events or memories. It’s a personalized way to preserve photos, mementos, and stories in a beautifully organized format.
Materials Required:
- Blank scrapbook or photo album
- Photos, ticket stubs, or other keepsakes
- Decorative paper, washi tape, and stickers
- Glue, scissors, and markers
How to Make:
- Choose a theme for your scrapbook (e.g., vacations, birthdays, or milestones).
- Organize the photos and keepsakes, arranging them on each page.
- Decorate each page with decorative paper, washi tape, and stickers that match the theme.
- Write captions or add personal notes alongside the photos to tell the story.
DIY Hack: Use envelopes or pockets on some pages to store additional mementos like concert tickets or postcards that can’t be glued down.
90. Handmade Gift Tags (Decorative and Personalized)
Handmade gift tags add a personal touch to any gift, making it extra special. You can customize them with unique designs, names, or messages to suit the occasion.
Materials Required:
- Cardstock or heavy paper
- String or ribbon
- Stamps, markers, or paints
- Punch (for holes)
How to Make:
- Cut cardstock into small rectangles or shapes for the tags.
- Use stamps, markers, or paint to decorate the tags with festive designs or names.
- Punch a hole at the top of the tag and tie a piece of string or ribbon for attaching it to a gift.
- Write a personalized message on the back for an added touch.
DIY Hack: For an eco-friendly option, use scrap paper or recycled materials to make the gift tags. You can also add small embellishments like buttons or sequins.
91. Pop-up Cards (Fun 3D Designs for Special Occasions)
Pop-up cards are a unique and fun way to surprise someone. They create a 3D effect when the card is opened, making them perfect for special occasions like birthdays or anniversaries.
Materials Required:
- Cardstock
- Scissors
- Glue or double-sided tape
- Markers or decorative paper for the design
How to Make:
- Fold a piece of cardstock in half to form the base of your card.
- Cut a shape or design that will pop up (such as a cake, flower, or heart) from a second piece of cardstock.
- Create a foldable mechanism to make the design stand upright when the card is opened.
- Glue the pop-up design inside the card and decorate the cover with drawings or messages.
DIY Hack: Use pre-made pop-up card templates found online or in craft stores to simplify the process, and experiment with different shapes for a more personalized touch.
92. Customized Origami Gifts (Small Decorative Pieces)
Customized origami gifts are small, intricate paper sculptures that make delightful decorative pieces. These can be personalized with colors, designs, or messages, making them a unique and meaningful gift.
Materials Required:
- Origami paper (square-shaped)
- Instructions or origami book (for patterns)
- Decorative markers (optional)
How to Make:
- Choose an origami pattern to follow, such as cranes, flowers, or animals.
- Fold the paper according to the instructions to create the design.
- If desired, use markers to add details or personalize the pieces with names or messages.
- Display the origami on a card or as a standalone gift.
DIY Hack: If you’re new to origami, start with simpler designs like paper cranes or hearts. Once you get comfortable, try creating more complex shapes like flowers or animals.
93. DIY Paper Flowers (For Wall Decor or Bouquets)
DIY paper flowers are a beautiful and long-lasting alternative to real flowers. They can be used as wall decor, for creating bouquets, or as centerpieces for special occasions.
Materials Required:
- Colored tissue paper, crepe paper, or cardstock
- Scissors
- Glue or floral wire
- Stamps or markers (optional)
How to Make:
- Cut the paper into petal shapes (using templates or freehand cutting).
- Layer the petals and glue them together to form the flower.
- Add floral wire to create stems for the flowers, or glue them onto a cardstock base for wall decor.
- Optionally, use stamps or markers to add details to the petals.
DIY Hack: Use different types of paper (like tissue paper for soft flowers or cardstock for sturdier flowers) to create different textures. For a more natural look, add small green leaves made of paper.
94. Personalized Paper Stationery (With Initials or Names)
Personalized paper stationery is a thoughtful and useful gift. Whether it’s notepads, letter sets, or writing paper, adding initials or names makes it unique and special.
Materials Required:
- Blank stationery or notepads
- Stamps, markers, or pens for customization
- Stickers or embellishments
How to Make:
- Choose a set of plain stationery or notepads.
- Customize the paper by adding initials, names, or a fun quote using stamps, markers, or pens.
- Decorate the paper with small embellishments, like floral stickers or borders, for extra personality.
- Create matching envelopes or include a personalized pen.
DIY Hack: If you don’t have stamps, create your own custom design by using printable templates and coloring them in with markers or pens.
95. Handmade Paper Lanterns (Perfect for Any Occasion)
Handmade paper lanterns are a beautiful way to add light and decoration to any space. These lanterns can be personalized with colors and designs to match the occasion.
Materials Required:
- Colored paper or cardstock
- Scissors
- Glue or double-sided tape
- String lights or LED candles (optional)
How to Make:
- Cut the paper into strips, leaving a solid edge at the top for the lantern’s frame.
- Fold the paper into a cylinder shape and glue the edges together.
- Cut along the strips to create slits, being careful not to cut all the way through.
- Optional: Insert string lights or a small LED candle inside for illumination.
DIY Hack: Make the lanterns colorful by using colored cardstock, or decorate the paper with drawings or stamps. You can also create lanterns in different shapes, such as hearts or stars.
Conclusion
Handmade gifts bring a personal touch that truly stands out, making them the perfect way to show someone you care.
Whether it’s a personalized photo frame, a custom-made candle, or a DIY bath bomb, each project offers a unique opportunity to create something special and memorable.
With so many ideas to choose from, you can find the perfect handmade gift for anyone on your list. Get creative and make your gift-giving extra thoughtful this year with DIY handmade gifts.
Let these gift ideas inspire you to craft something meaningful, and don’t forget to add your personal flair to every creation!

