
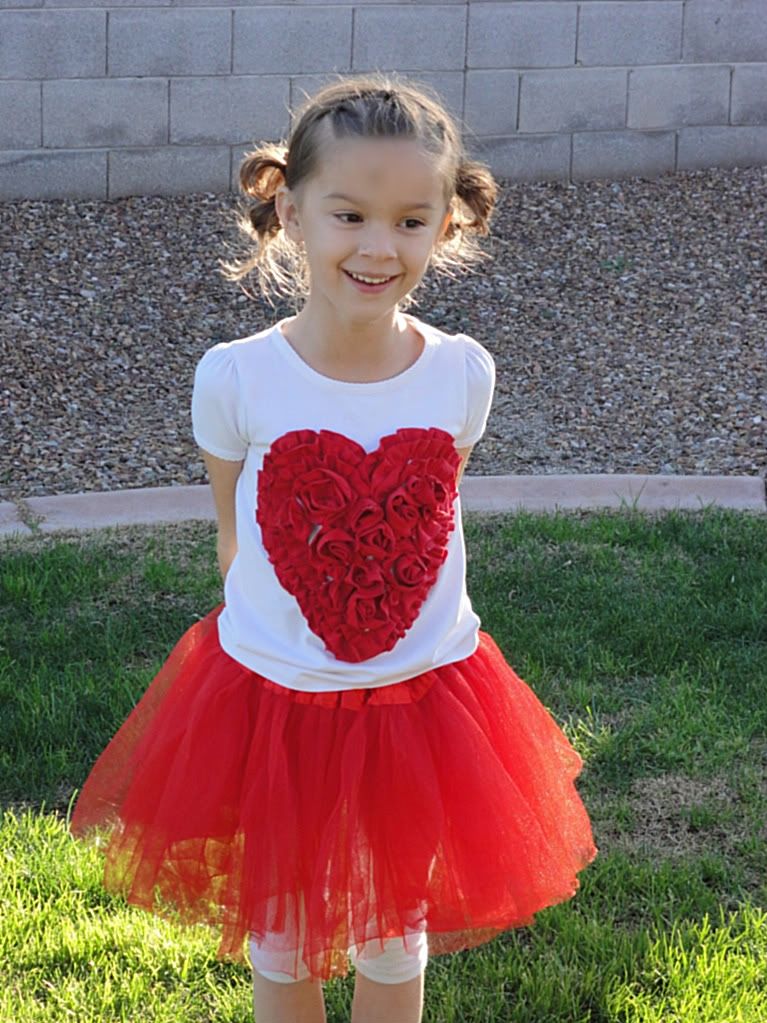
So, with Valentine's Day coming up, I thought all us girls need a cute shirt to wear. I made this for my daughter, but you could easily make it for yourself too. Enter the Ruffle/Rosette Heart shirt!

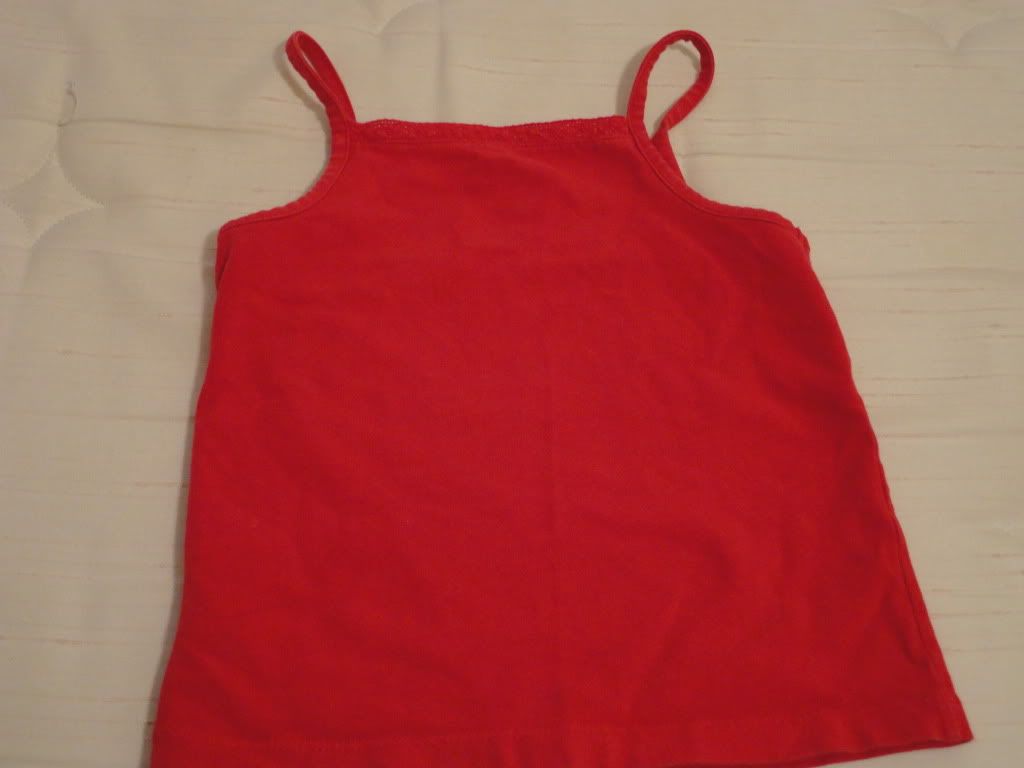
First, you need a t-shirt to use as your base, and either fabric or another t-shirt to cut up for your heart. Knit fabrics are great because they won't fray. $5 dollar Target shirts are great for this if you want them the same color! I decided to repurpose, and used an old red tank top my daughter had outgrown. She has two little brothers, so no need to save it for hand-me-downs!
Next, open the shirt at the seam so you can cut nice, long strips.
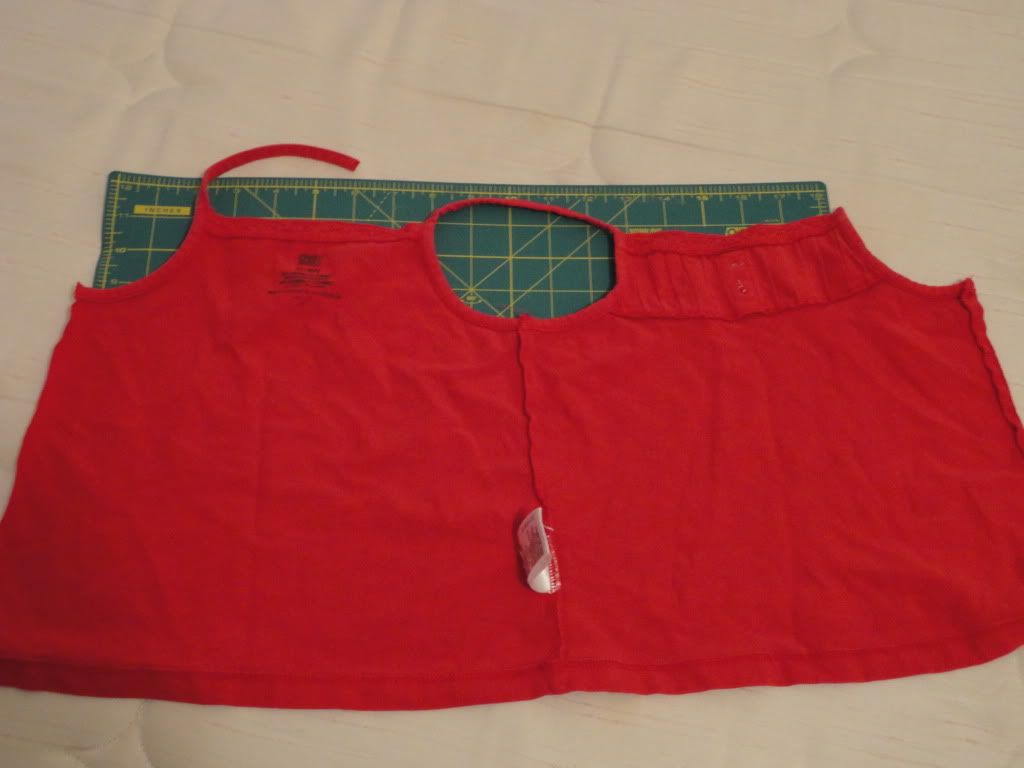
I cut my strips about 3/4" wide. Adjust your width to how big you want your ruffles, and how many layers you want to do.

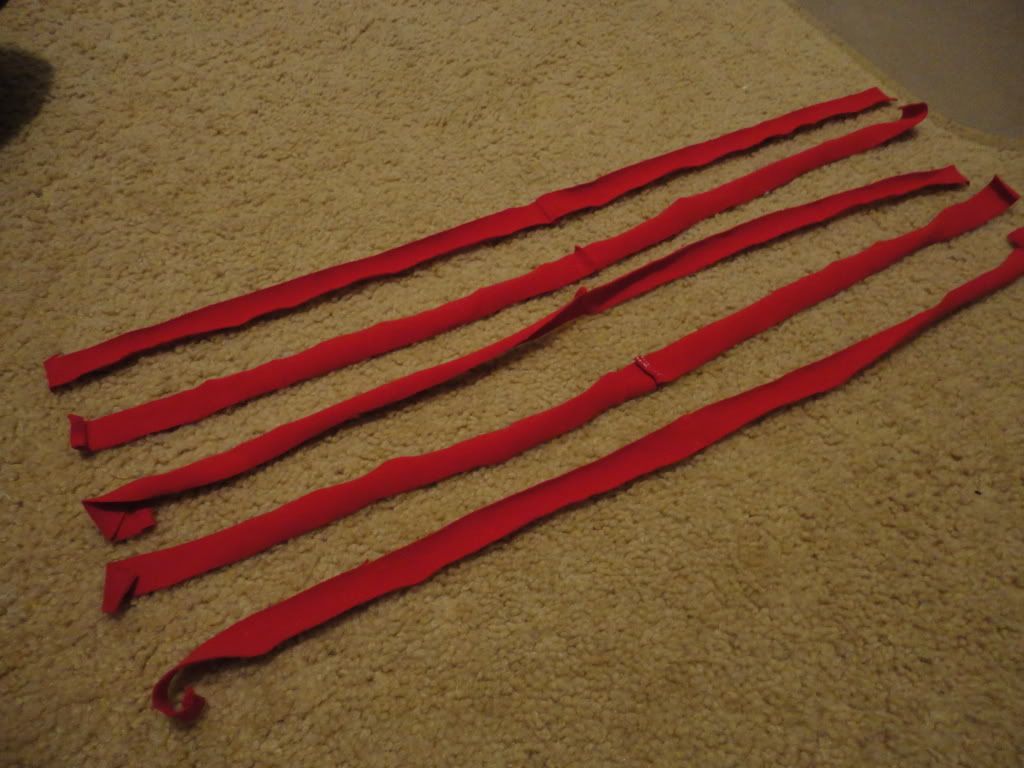
Ruffle your strips. For this shirt, we are sewing along the edge of the fabric, not down the middle.
Most of you probably know how to ruffle fabric after the trend of ruffles this last year, but if not, follow one of these methods:
1. Set your top thread to the highest tension and your stitch length to the longest setting. Sew. Your fabric will automatically ruffle.
2. Set your stitch length to the longest setting and sew. Leave both ends of the thread long. Remove fabric from sewing machine. Pull the bobbin thread gently to gather fabric. Spread ruffles evenly throughout the strip until you get the look you want.
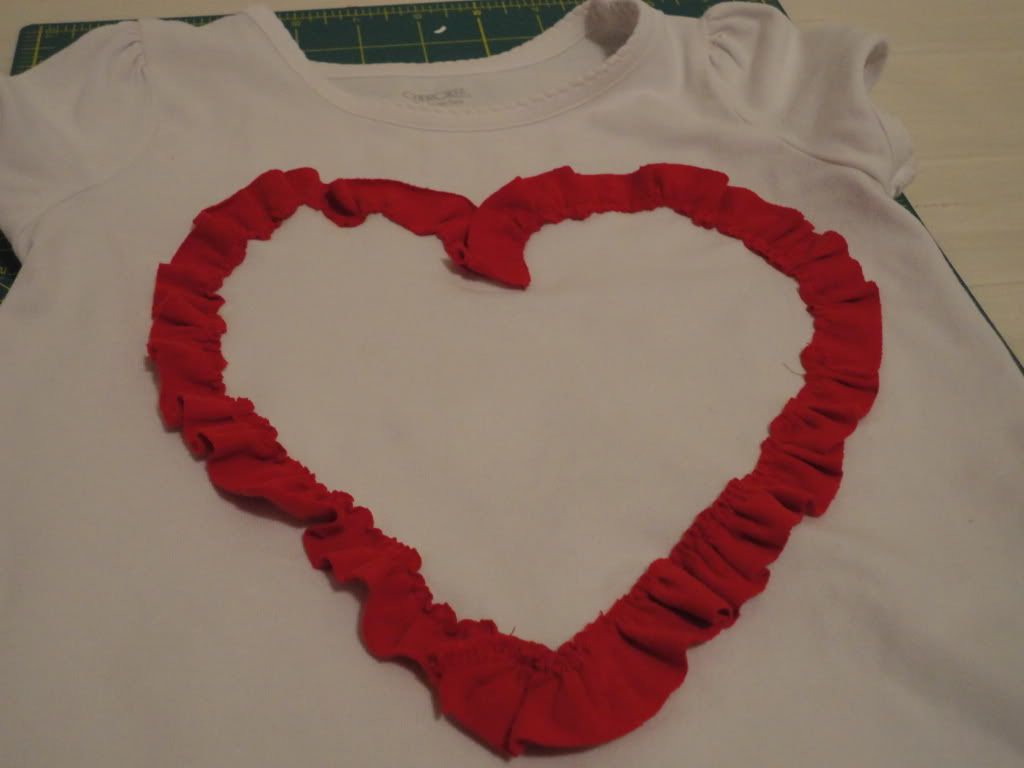
Once your strips are ruffled, pin them into a heart shape. You can cut out a template to use as a guide, but I am lazy and just eyeballed it. I used one strip for each side, then cut off the excess. It just seemed cleaner that way. Also, make sure to trim your threads. They just get in the way.

Two helpful hints: #1- Put a piece of cardboard or cardstock inside the shirt before you pin. This way you can keep from pinning the layers together without having to distort the shirt with your hand.
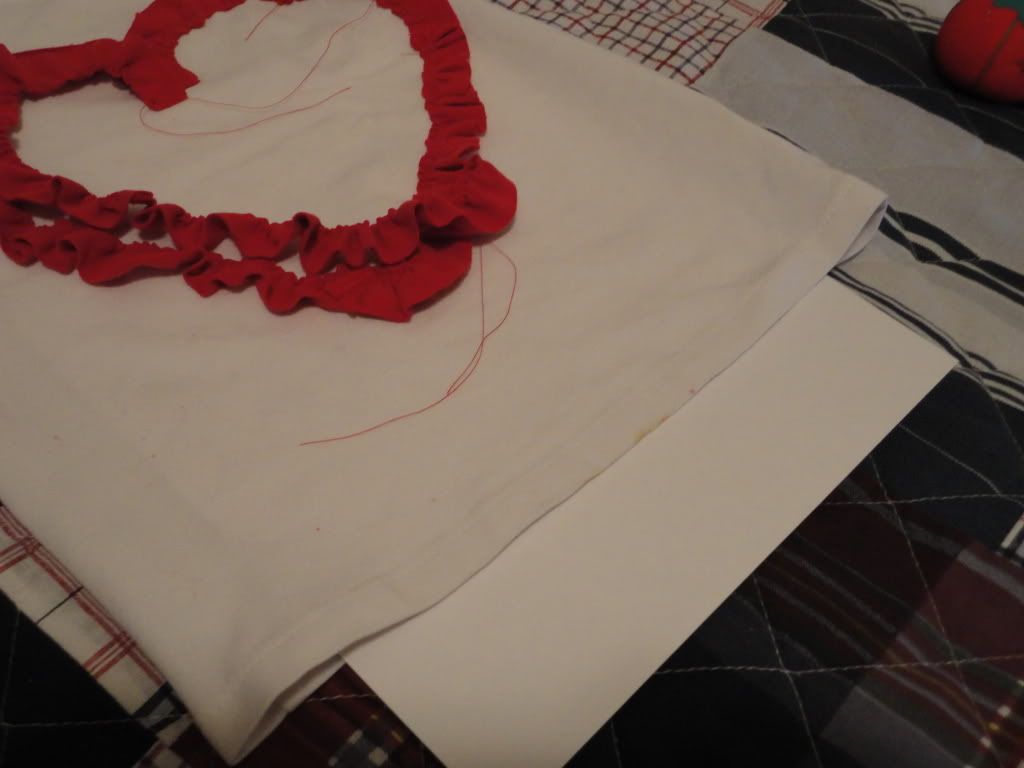
#2- When using stretchy knits, USE A LOT OF PINS! I get frustrated easily, and this helped me keep things where I wanted them. It may sound obvious, but if you tend towards the lazy crafting, as I do, trust me-- it's worth it to take the extra time.
Sew your heart in place, following the stitch line from your ruffle.
Now, you can stop here if you want. This is pretty cute on it's own. But let's keep going, just for fun!
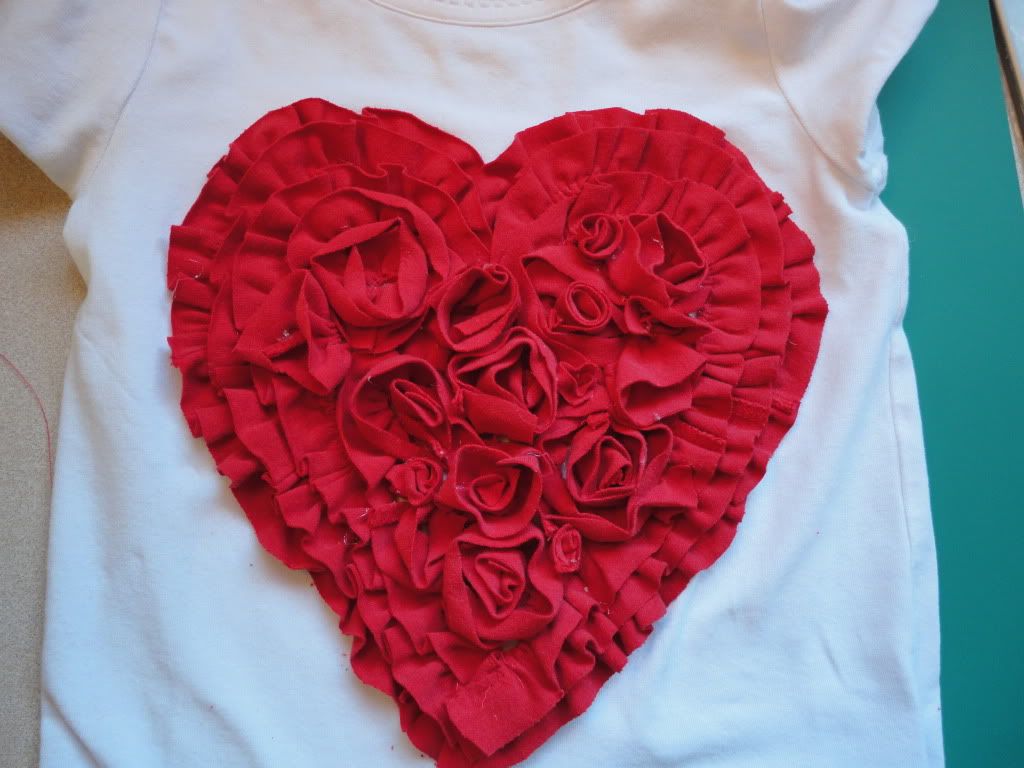
Pin another layer of strips into a smaller heart shape, making sure your new layer of ruffles slightly overlaps the first. Sew in place. Continue for as many layers as you want. I went with three.
Now for the fun part. You can just make hearts all the way in, if you want. Or, you can use your extra ruffle strips to create ruffle rosettes. Following the technique I learned here, I hot glued a whole bunch of rosettes together.
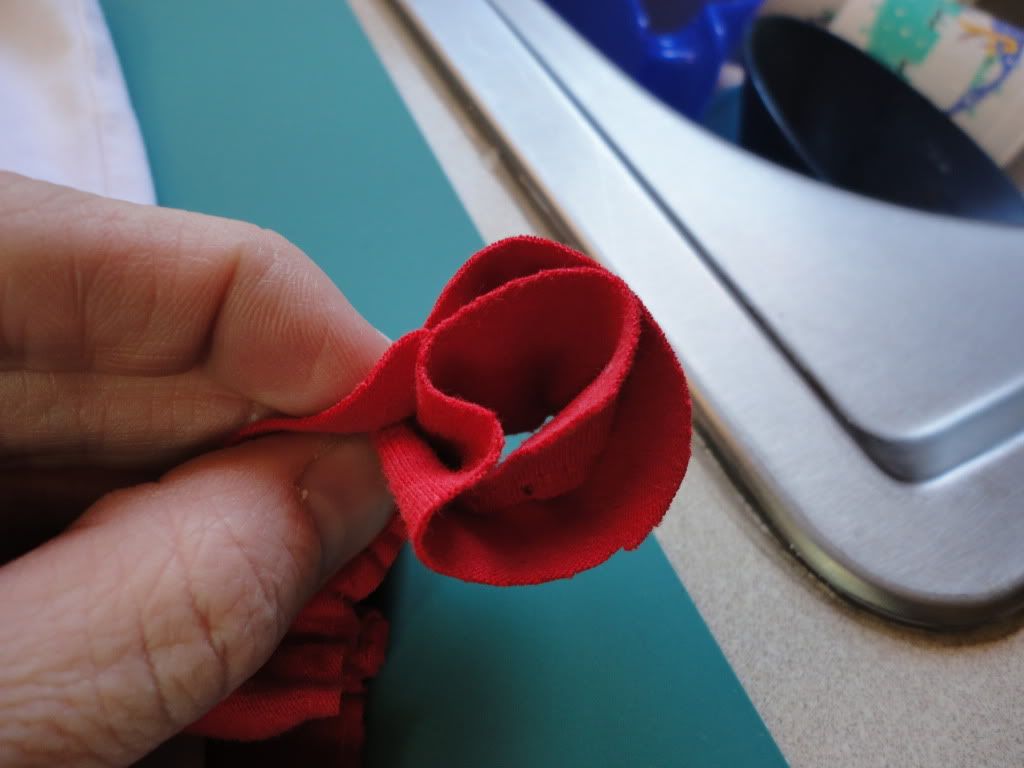
Then, using a combination of hand stitches and fabric glue, I attached them to the center of the shirt. I made little buds by wrapping fabric around my finger to fill in the gaps. When I got the placement the way I wanted, I took a book and smashed them all flat.
Now you have a striking shirt for that special girl in your life. I went with a contrasting heart because I wanted to match her tutu, but you could make yours the same color for a totally different look.
I won't say this was quick, but it was actually pretty easy. I'm not a great sewer/seamstress by any means, so if I can do it, so can you!
Linking up!


24 comments:
Thanks so much for stopping by! I try to answer all valid comments as soon as possible, but you can also email info@occasionallycrafty.com with an urgent question. Have a great day!