
Hand your toddler a paintbrush and paper, and within ten minutes you’ll have paint on the wall, the dog, and somehow the ceiling.
Painting with kids gets messy fast, but it doesn’t have to be complicated. A two-year-old just needs thick paint and their own fingers. A seven-year-old can handle a brush, a plan, and maybe even a straight line or two.
These easy painting ideas for kids are sorted by age, so pick one that fits, grab some paper, and let the paint do the rest. You can also browse more easy painting ideas when you need activities that are not grouped by age.
What to Know Before You Start Painting with Kids
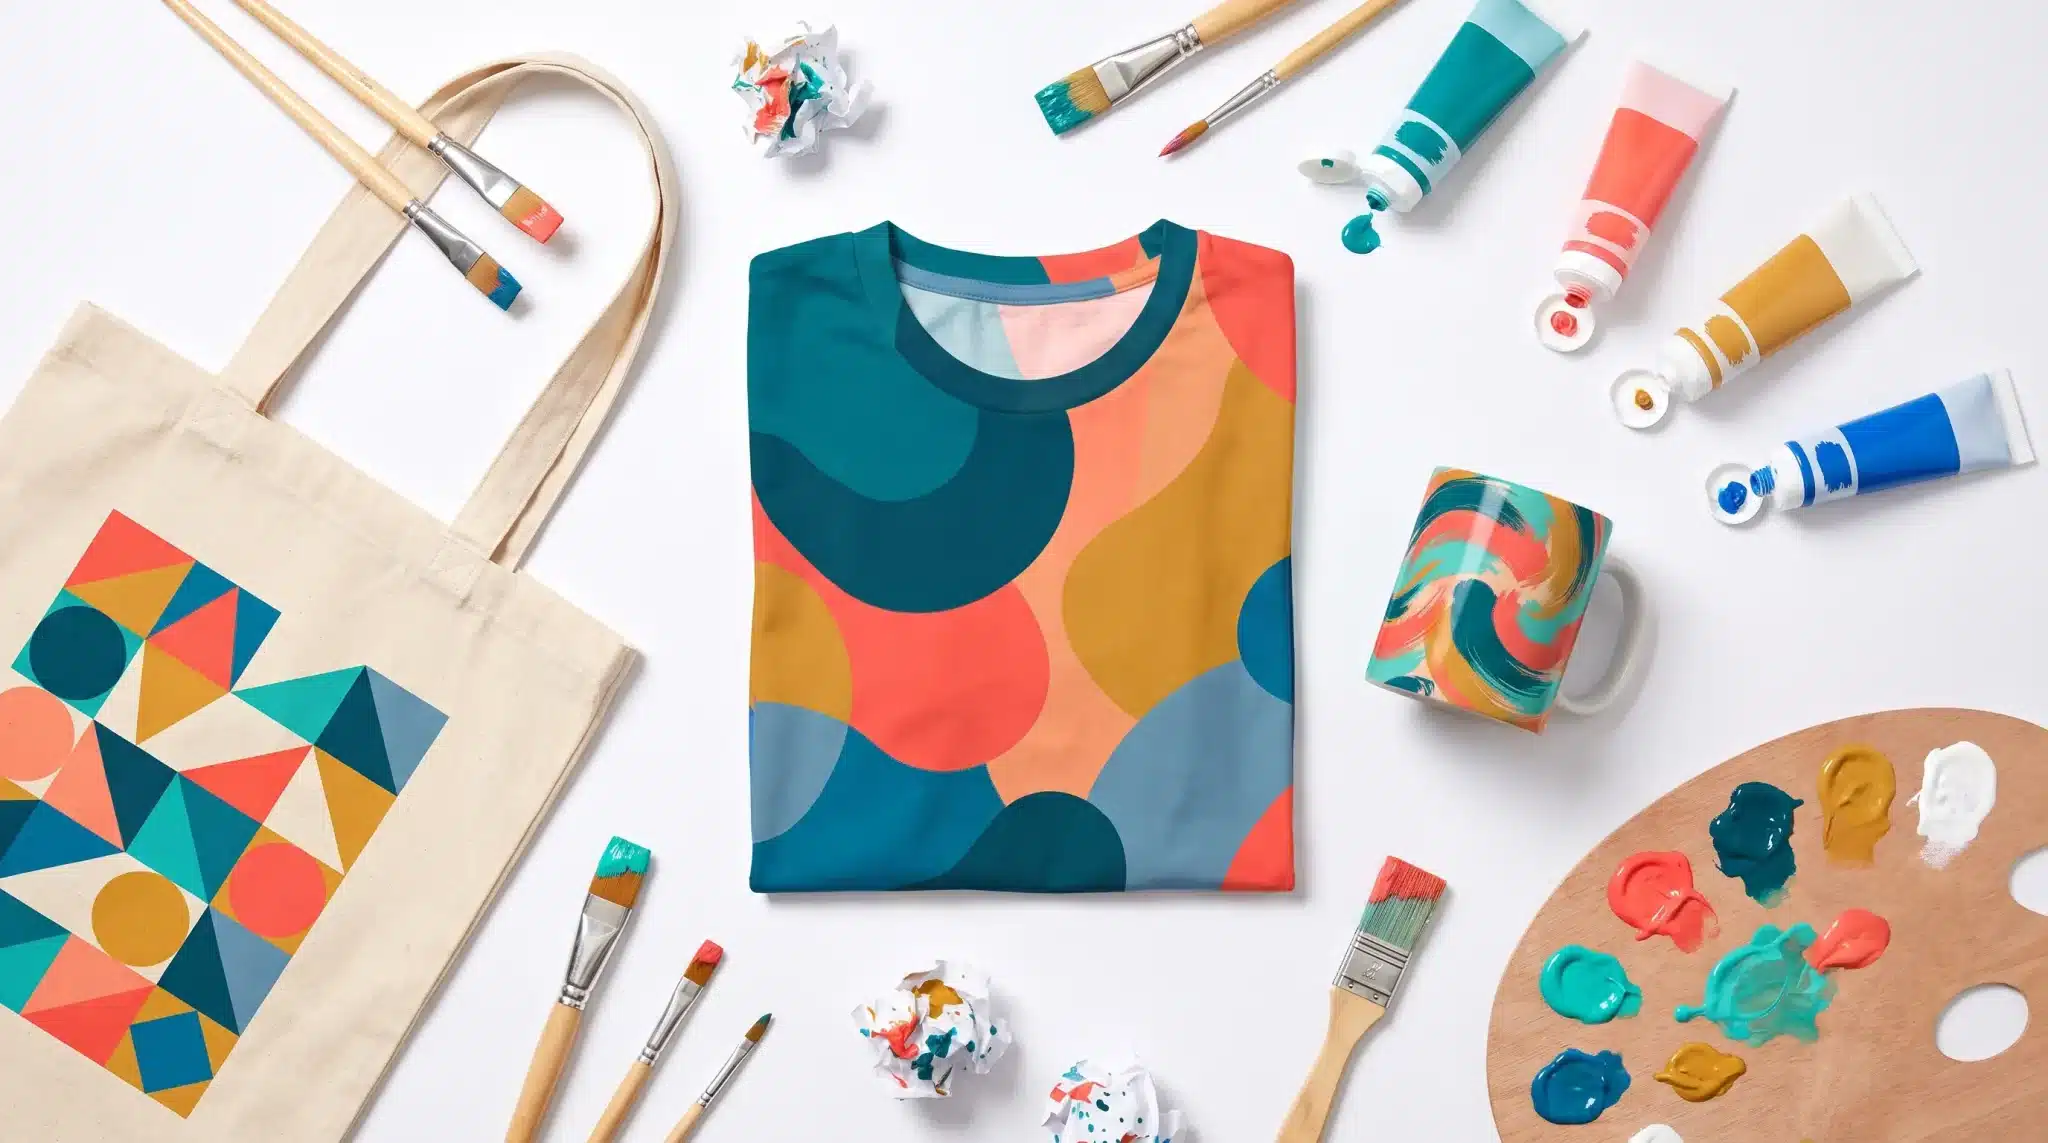
Skip the fancy easel and start with what’s already in the kitchen drawer. Many simple art activities also use basic supplies such as paper, sponges, cotton swabs, and items collected outdoors.
Washable paint and thick paper handle most messes without much cleanup. Younger kids do better with wide brushes, sponges, or just their fingers instead of anything fine-tipped.
A plastic tablecloth or an old bedsheet under the workspace catches spills before they hit the floor.
Match the activity to the child, not the other way around. A toddler wants to smear and stamp, while an older kid can follow a few steps toward an actual picture.
Easy Painting Ideas for Toddlers
These toddler painting ideas use big movements and simple tools, perfect for small hands still building control and confidence with paint.
1. Finger Painting
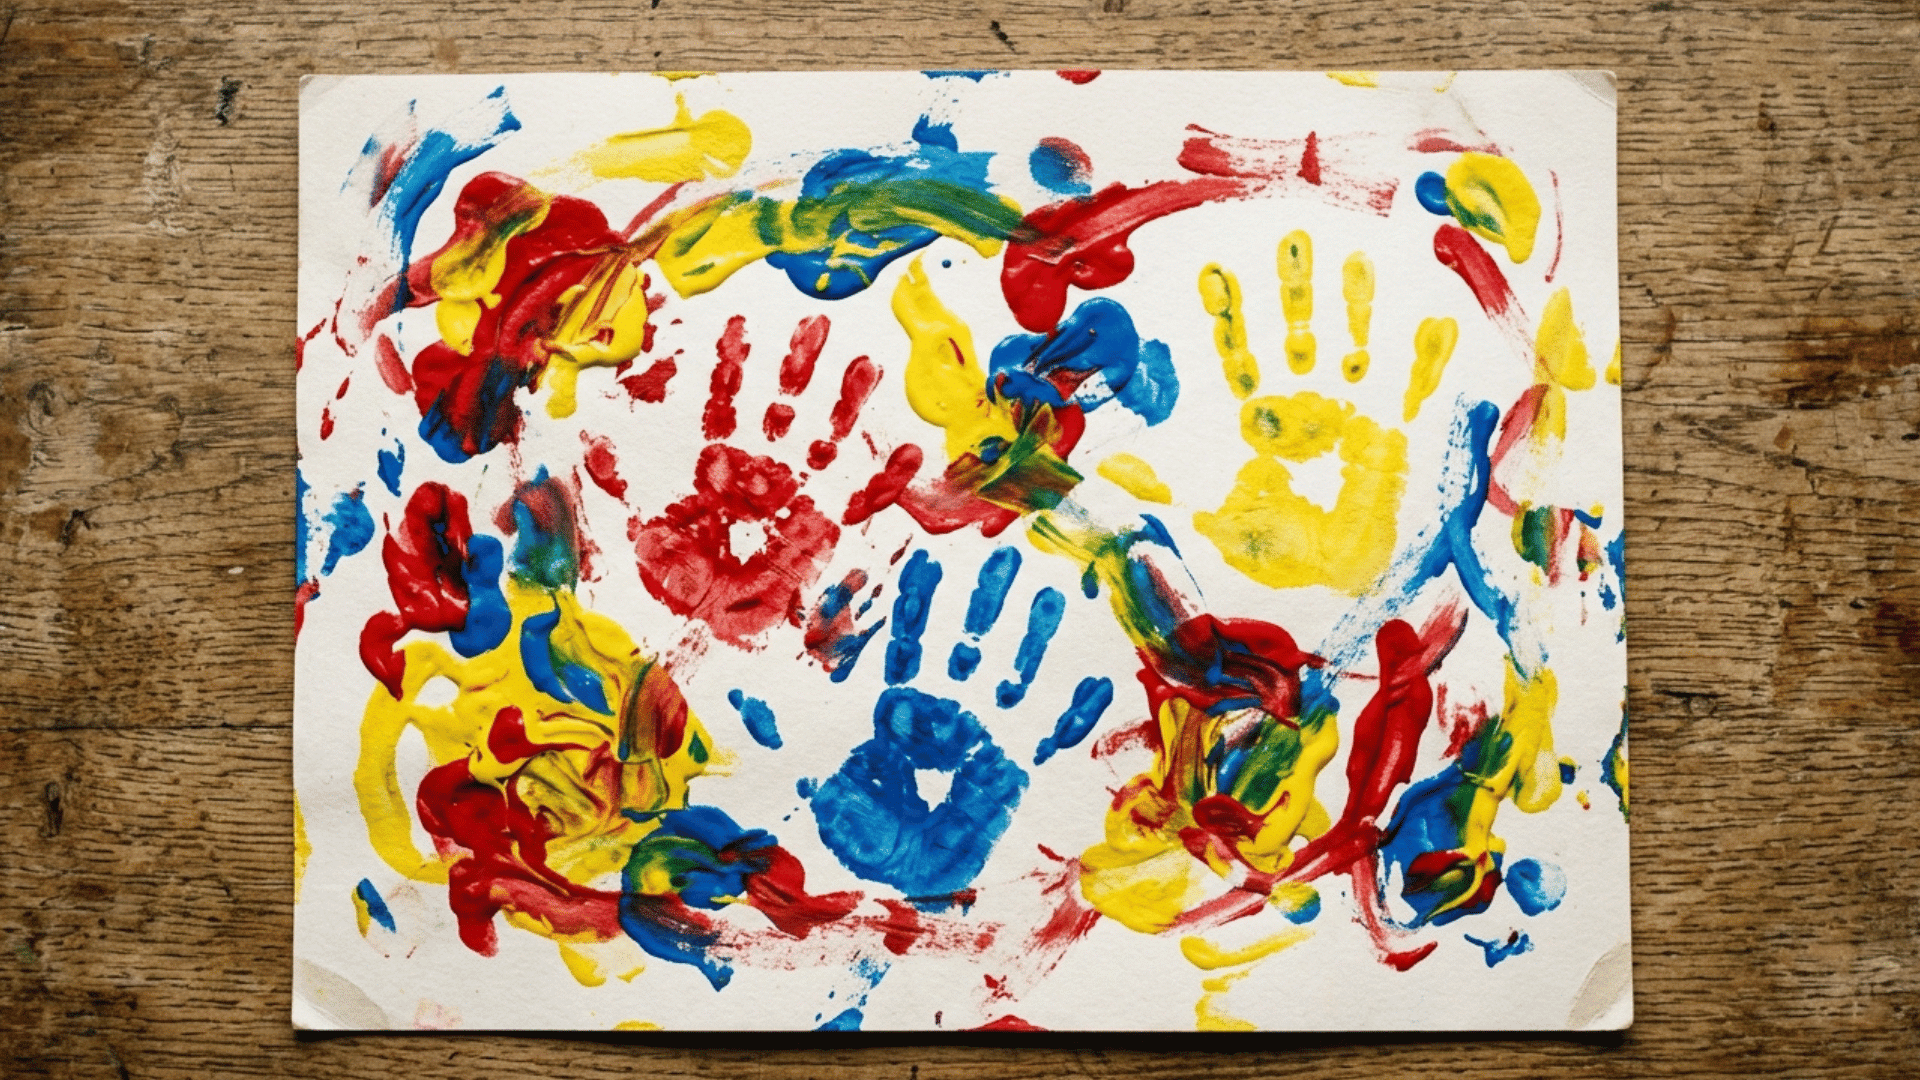
Finger painting is a soft, open-ended activity that lets toddlers use color and texture with nothing but their own hands, no tools or setup required.
- Key Features to Focus On: Bright, washable paint colors and large sheets of paper for full-hand movement.
- Easy Painting Approach: Squeeze small dabs of paint onto paper and let the toddler smear, tap, and swirl freely.
- Technique Ideas: Dotting, swiping, mixing two colors, or pressing a full handprint into the paint.
- Creative Variations: Try one color per session, mix primary colors, or add a sensory twist with textured paint.
- Final Touches: Let the paper dry flat, then trim or frame the finished piece as a keepsake.
2. Handprint Animals
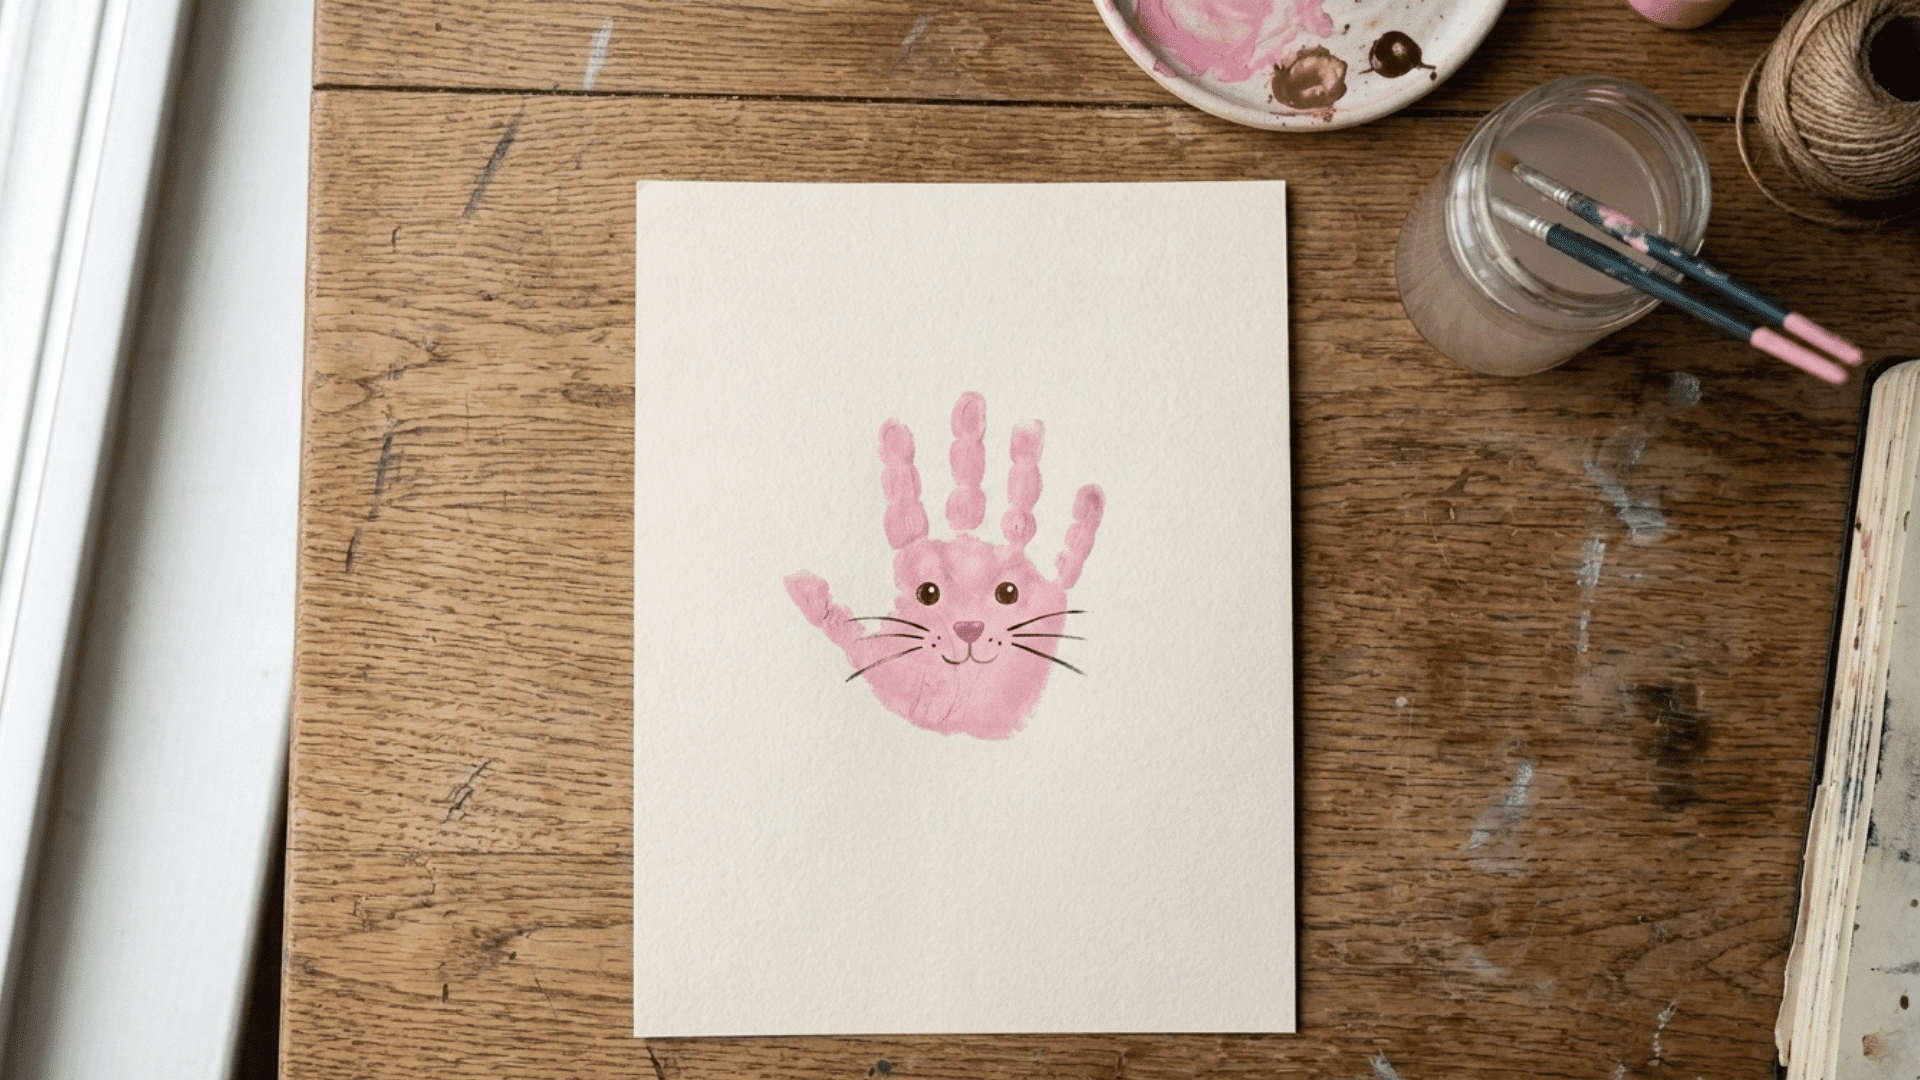
Handprint animals turn a simple palm print into a recognizable shape, giving toddlers an early sense of finished artwork and a keepsake parents tend to hold onto.
- Key Features to Focus On: A clean handprint base with fingers spread for ears, wings, or legs.
- Easy Painting Approach: Paint the toddler’s palm, press it onto paper, then add eyes and details once dry.
- Technique Ideas: Try a bunny, owl, or turkey shape depending on how the fingers spread.
- Creative Variations: Use different colors per finger or turn multiple prints into a family of animals.
- Final Touches: Add dot eyes, a nose, or simple lines with a fine brush once the paint sets.
3. Painting with Cotton Balls
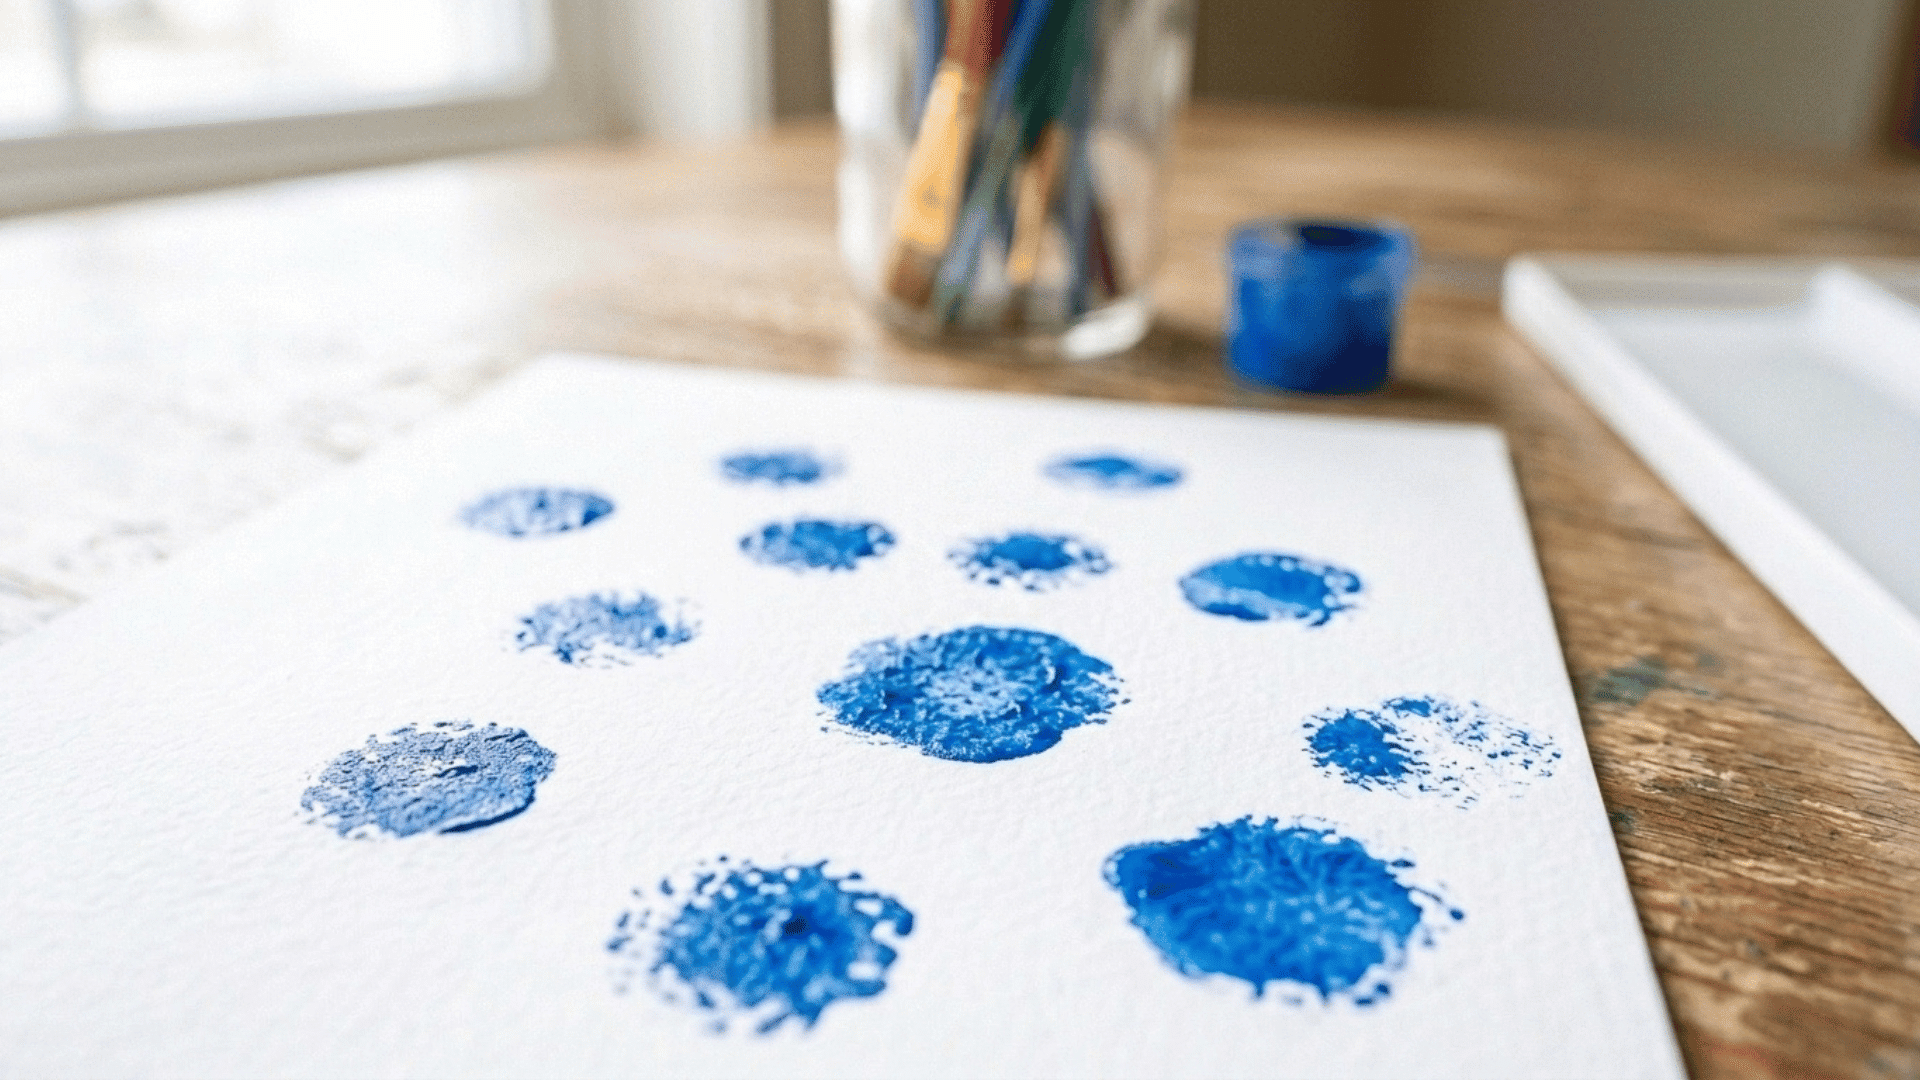
Cotton ball painting swaps a brush for a soft, forgiving tool that’s easy for small hands to grip and dab, making it a gentle first step before real brushes.
- Key Features to Focus On: Soft, rounded strokes instead of sharp lines or fine detail.
- Easy Painting Approach: Clip a cotton ball to a clothespin, dip it in paint, then dab it across the paper.
- Technique Ideas: Dabbing dots, dragging soft lines, or stamping in clusters for a textured look.
- Creative Variations: Use cotton balls to paint clouds, snow, sheep, or a full-color background.
- Final Touches: Let dabbed areas dry fully before adding any extra detail on top.
4. Bubble Wrap Stamping
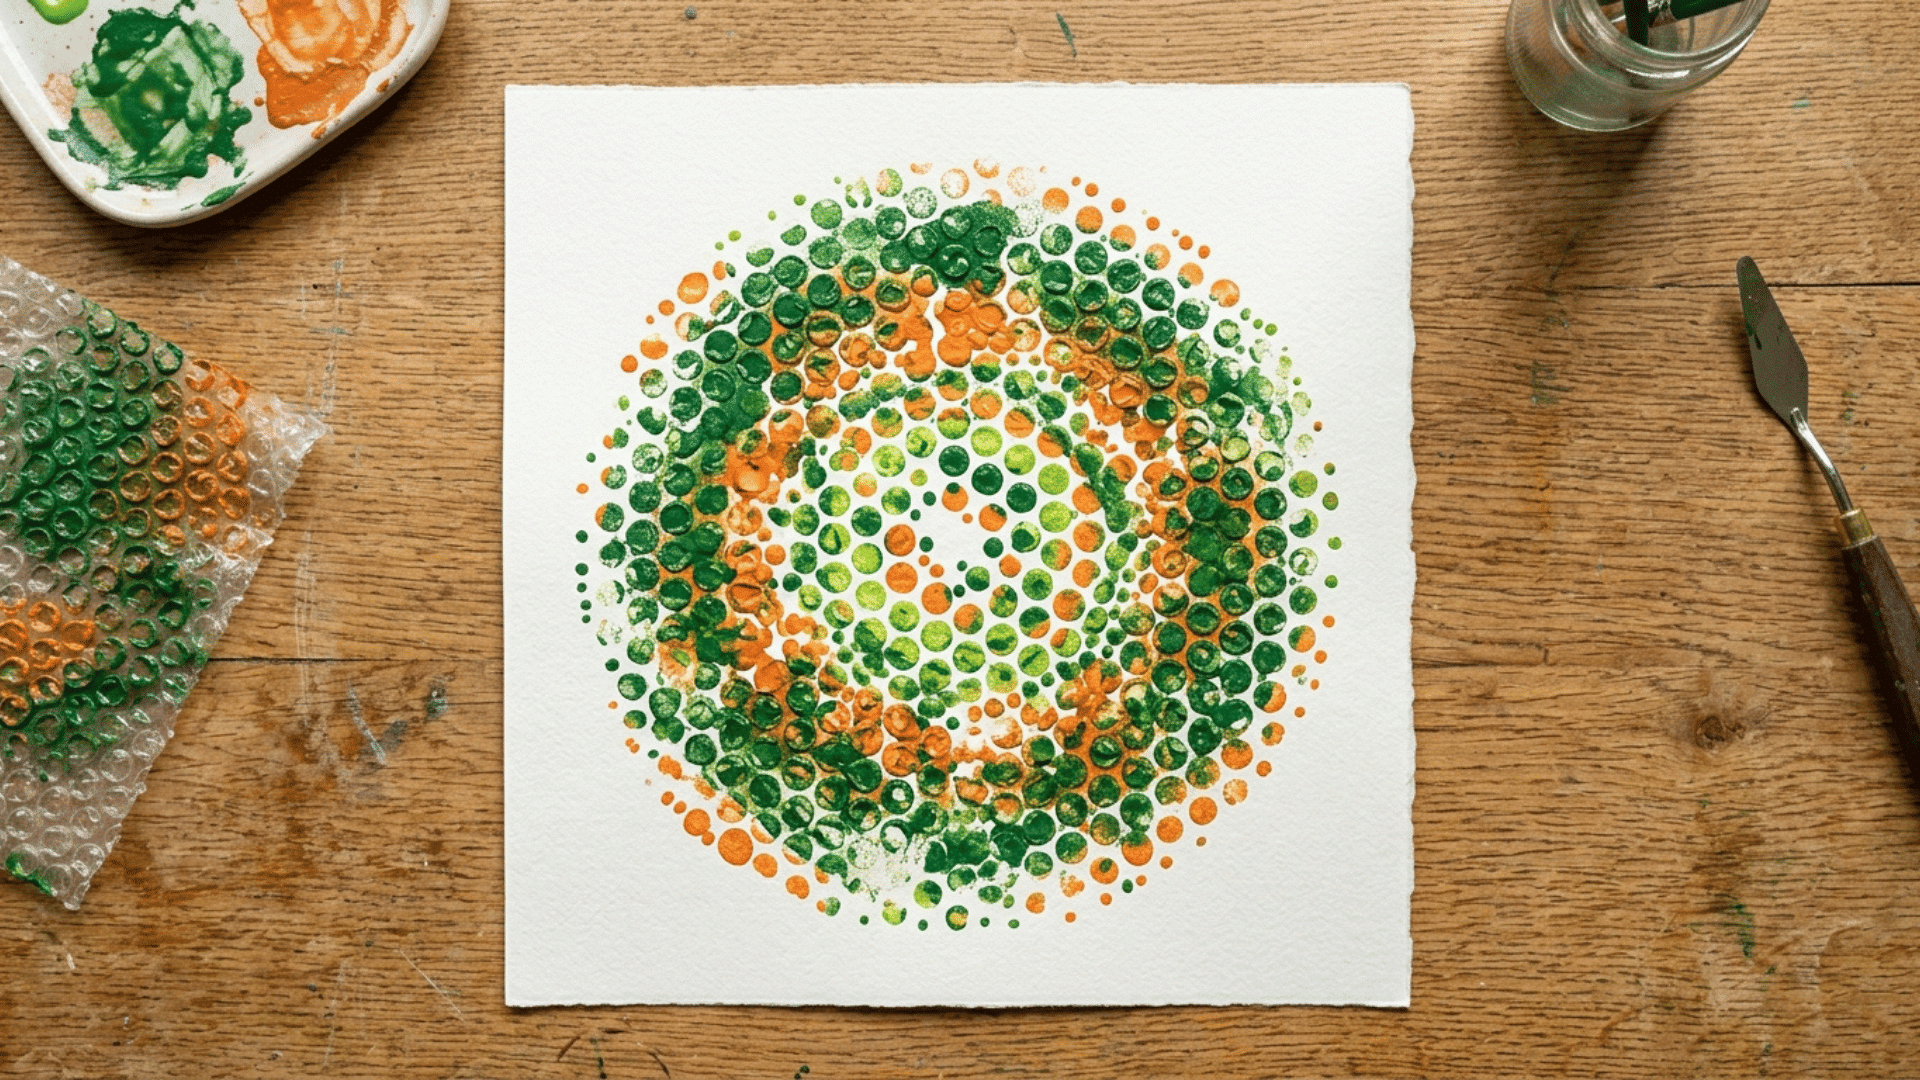
Bubble wrap stamping creates an instant textured pattern, giving toddlers a satisfying result with very little effort and almost no chance of a plain-looking page.
- Key Features to Focus On: Even paint coverage on the bubble wrap before each stamp.
- Easy Painting Approach: Roll or brush paint onto bubble wrap, then press it firmly onto paper.
- Technique Ideas: Single stamps, repeated rows, or overlapping prints in different colors.
- Creative Variations: Cut the bubble wrap into shapes like circles or hearts before stamping.
- Final Touches: Wipe the bubble wrap between colors to keep prints crisp and clean.
5. Water Painting on Pavement
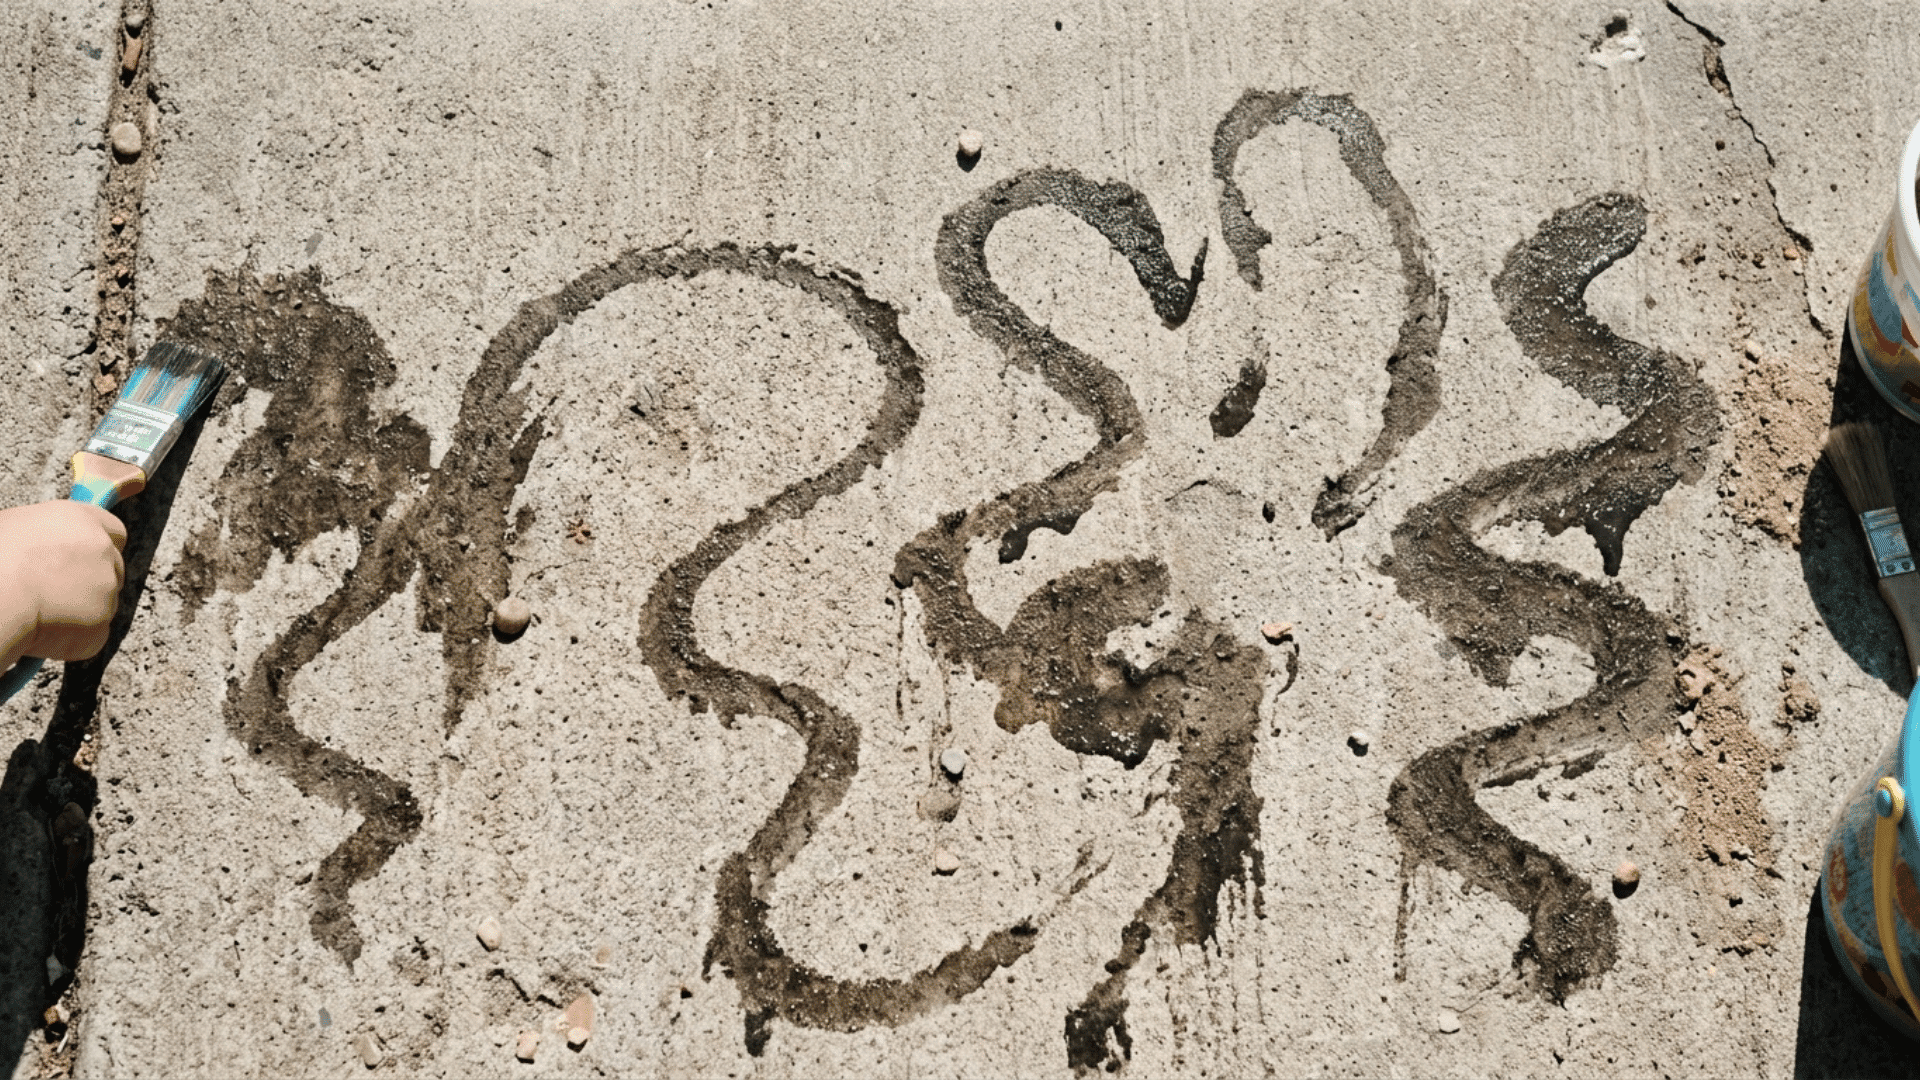
Water painting lets toddlers practice brush control outdoors with zero mess and cleanup, making it an easy pick for a quick backyard activity.
- Key Features to Focus On: A wide brush and a cup of plain water instead of paint.
- Easy Painting Approach: Dip the brush in water and paint directly onto dry pavement or a fence.
- Technique Ideas: Painting shapes, letters, or simply covering as much space as possible before it dries.
- Creative Variations: Race to see whose painted shape dries first, or add sidewalk chalk for contrast.
- Final Touches: None needed. The activity finishes naturally once the water evaporates.
6. Painting with Toy Cars
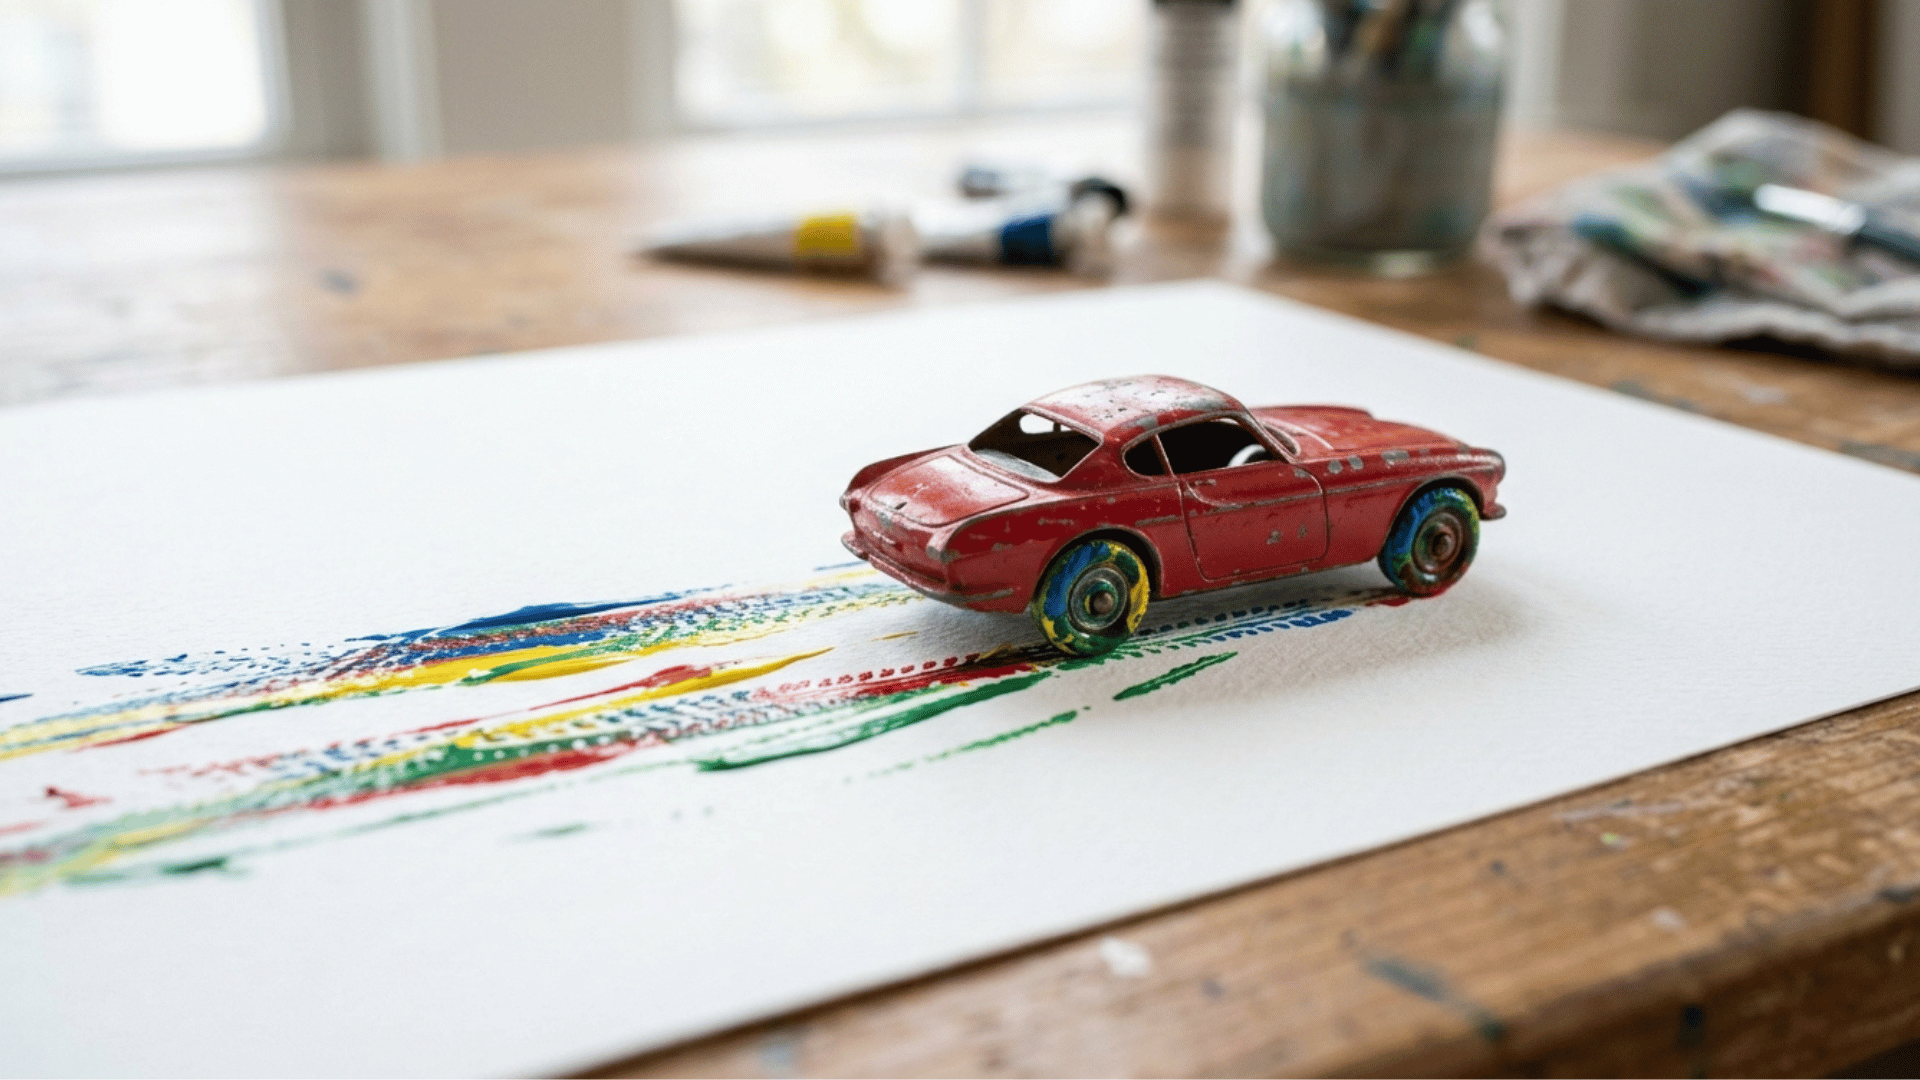
Painting with toy cars turns a favorite toy into a painting tool, adding movement to the artwork itself and giving toddlers a reason to paint across the whole page.
- Key Features to Focus On: Textured tires that leave a visible track when rolled through paint.
- Easy Painting Approach: Dip a toy car’s wheels in paint and roll it across paper to create tire tracks.
- Technique Ideas: Straight lines, loops, or crisscross patterns depending on how the car moves.
- Creative Variations: Use different vehicles for different track widths or combine with a road-themed background.
- Final Touches: Wipe the wheels clean between colors to avoid muddy tracks.
7. Sponge Shape Stamping
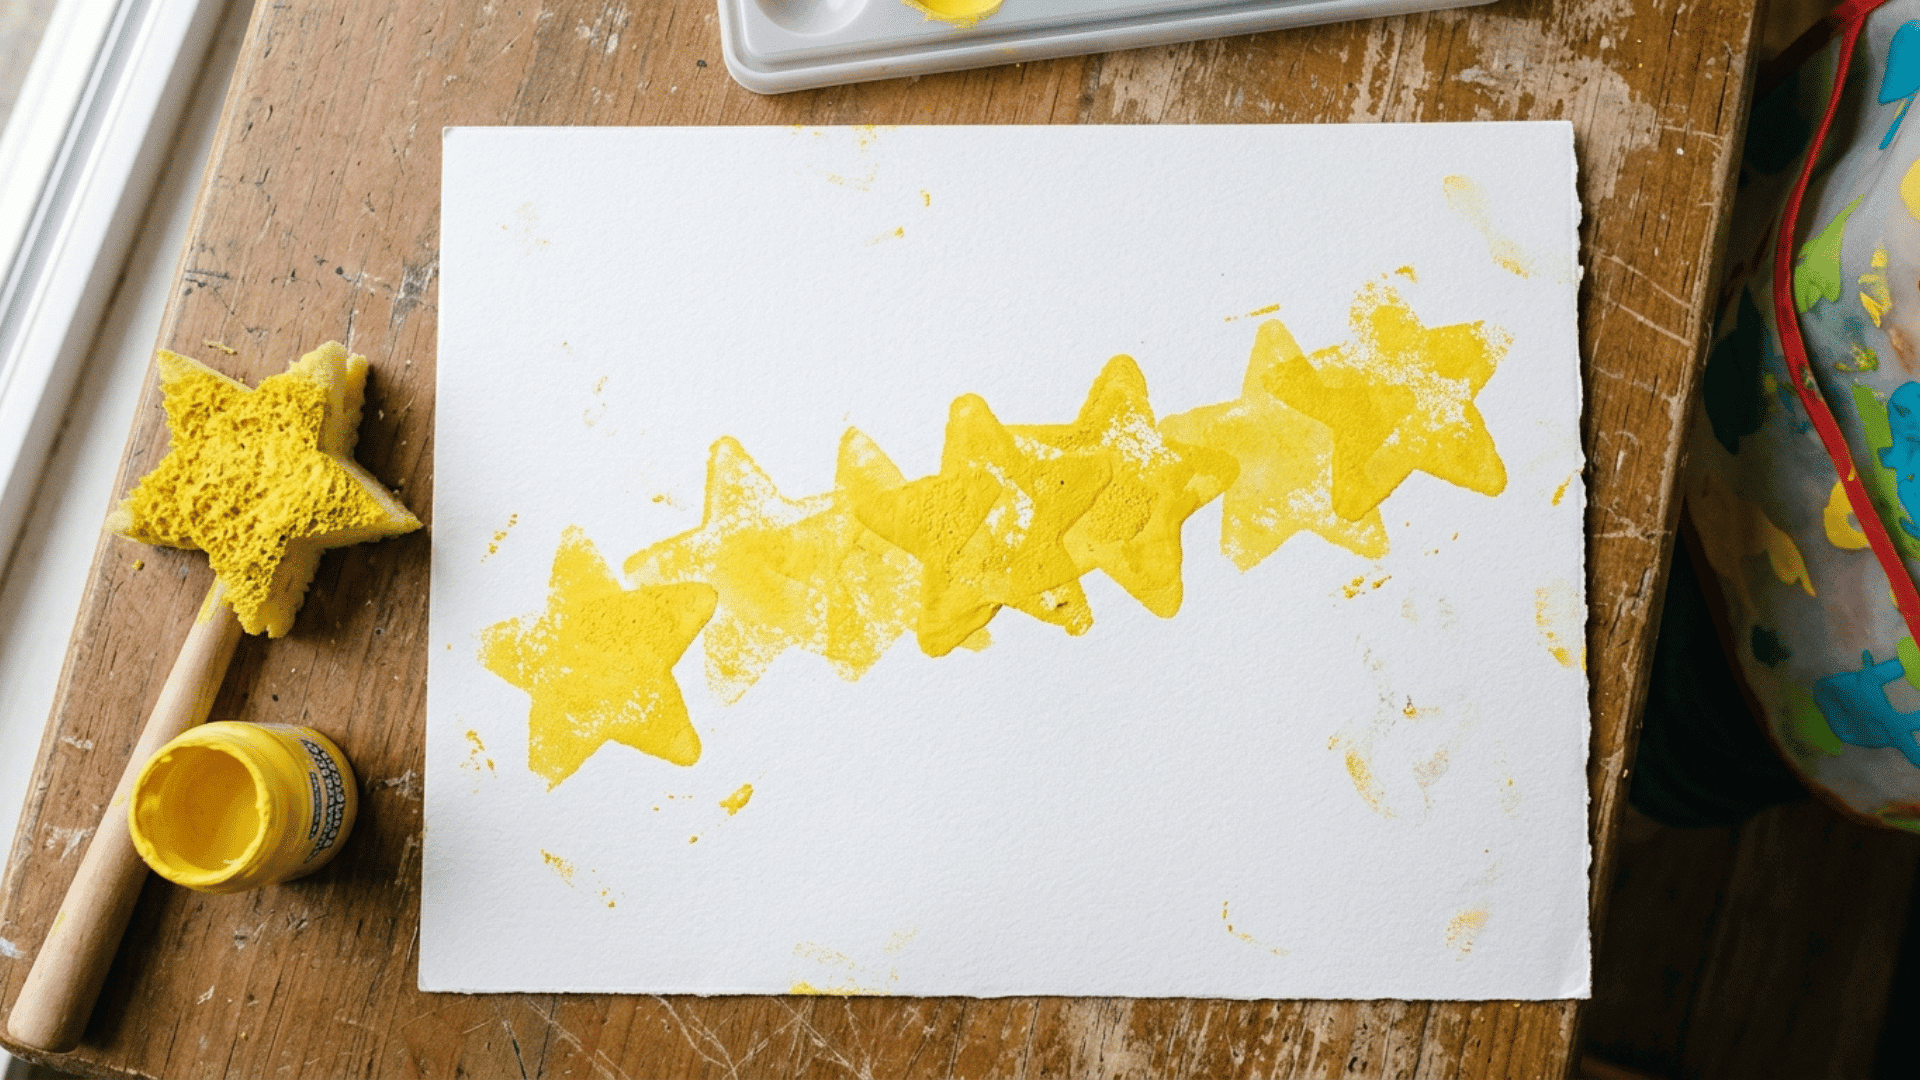
Sponge stamping introduces simple shapes without requiring any drawing skills from the toddler, making it an easy way to fill a full page with color fast.
- Key Features to Focus On: Pre-cut sponge shapes like circles, stars, or hearts dipped in paint.
- Easy Painting Approach: Press the paint-covered sponge firmly onto the paper, then lift straight up.
- Technique Ideas: Repeating one shape in a row or mixing several shapes across the page.
- Creative Variations: Layer two shapes to build a simple flower, sun, or tree.
- Final Touches: Let each stamp dry before overlapping another shape on top of it.
8. Ice Cube Painting
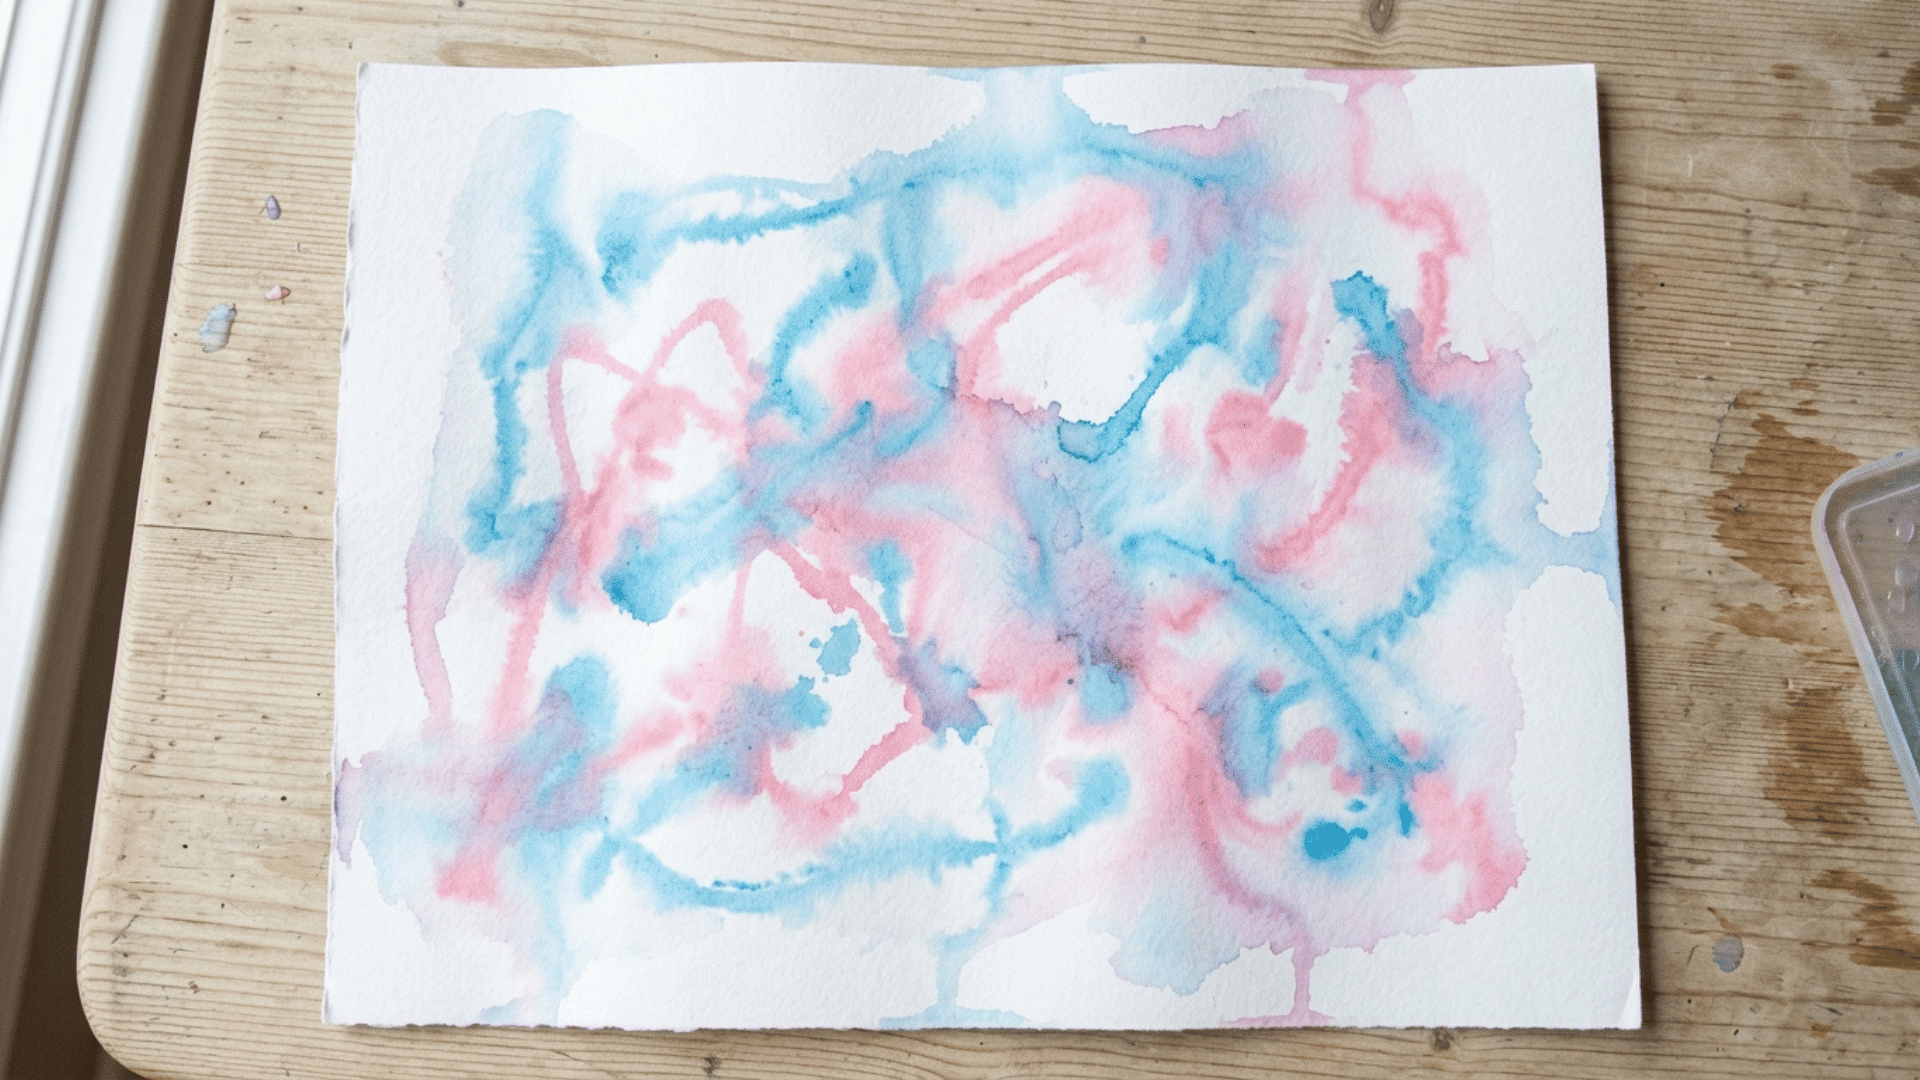
Ice cube painting combines melting ice with color for a slow, sensory-friendly painting experience that holds a toddler’s attention longer than a standard brush activity.
- Key Features to Focus On: Frozen paint cubes that melt slowly as the toddler moves them.
- Easy Painting Approach: Freeze paint in an ice tray with a stick, then let the toddler drag the melting cube across paper.
- Technique Ideas: Dragging, swirling, or holding the cube still to let color pool in one spot.
- Creative Variations: Freeze multiple colors at once for a blended, rainbow effect.
- Final Touches: Let the paper dry fully once the ice has completely melted
Easy Painting Ideas for Preschoolers
These easy painting ideas for kids use simple tools and short steps, building on toddlers’ skills while keeping every project quick and mess-friendly.
9. Bubble Prints with Straws
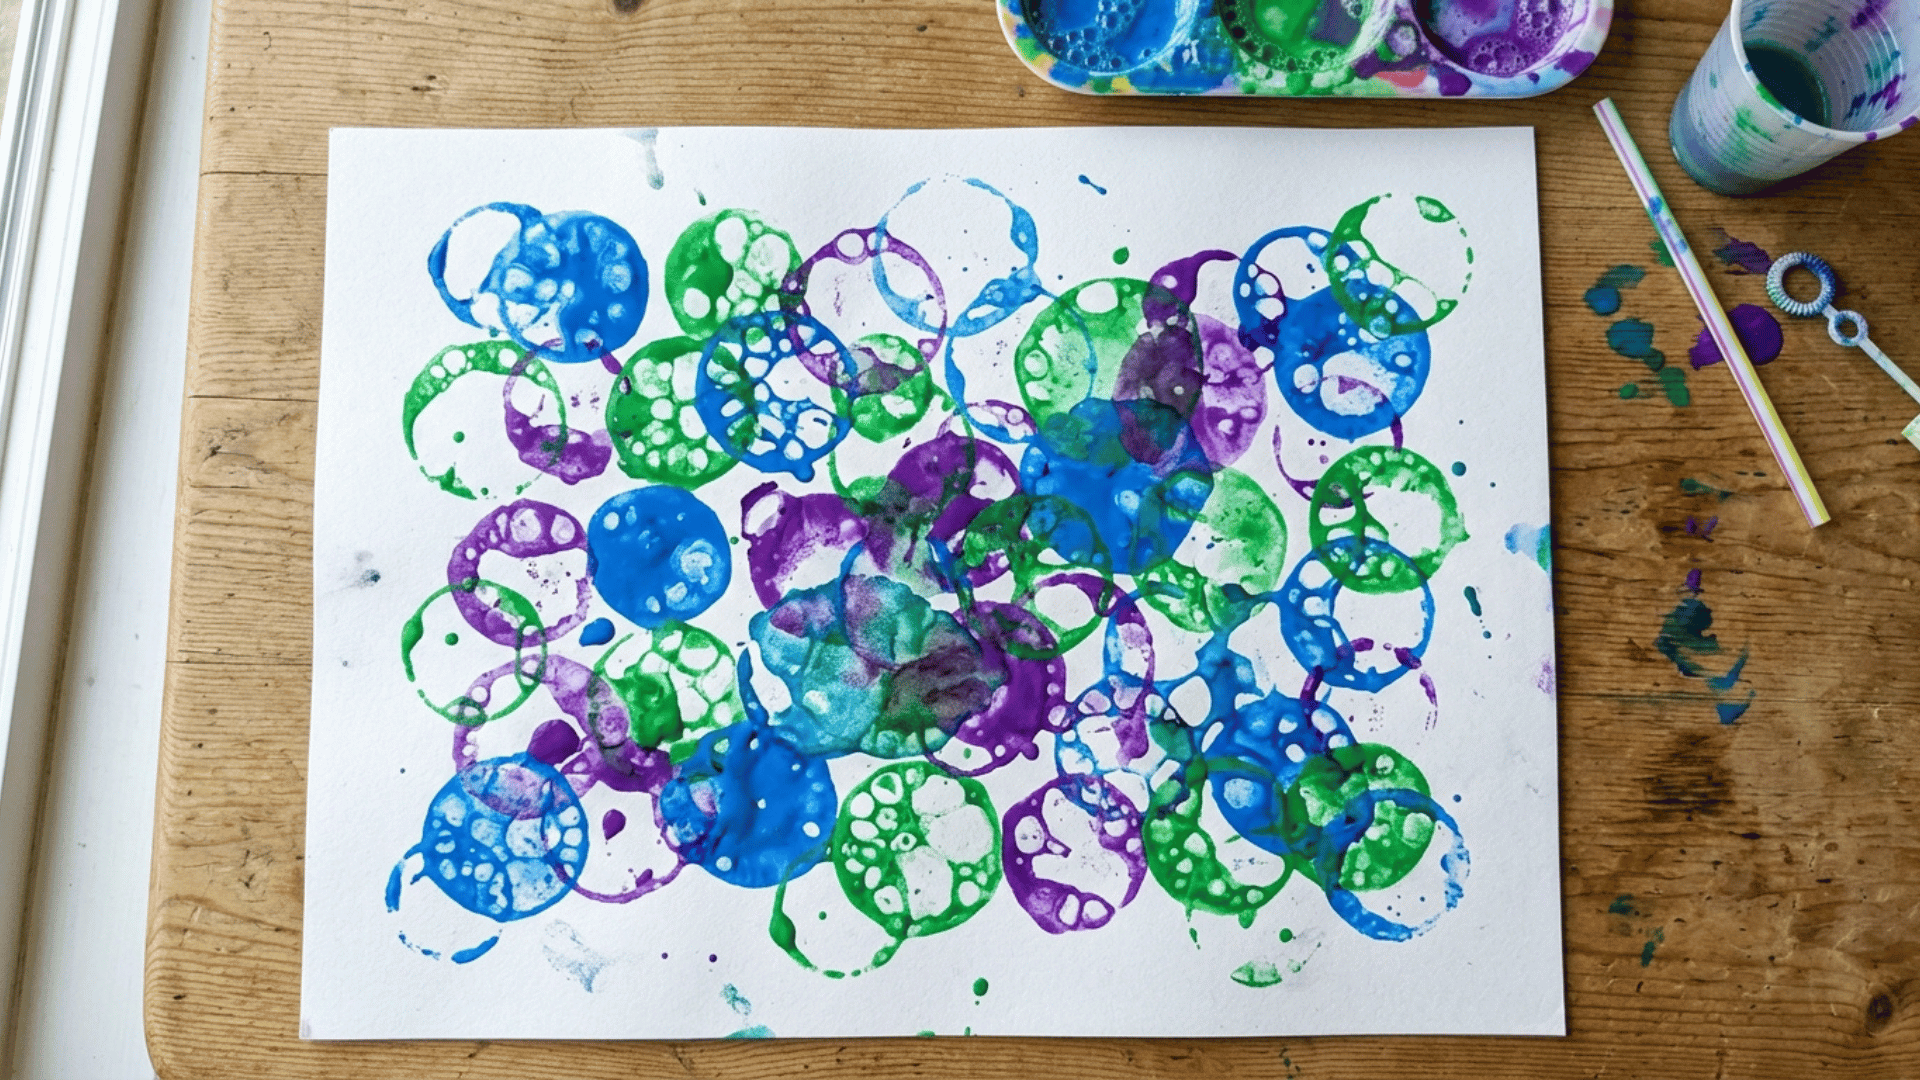
Bubble prints turn ordinary bubble mix into a painting tool, giving preschoolers a fun science-meets-art activity they can repeat again and again.
- Key Features to Focus On: Soapy, colored bubble mix and a straw for blowing controlled bubbles.
- Easy Painting Approach: Mix paint into bubble solution, blow bubbles until they rise above the cup, then press paper on top to catch the prints.
- Technique Ideas: Single overlapping circles, layered colors, or covering the whole page in one go.
- Creative Variations: Use different colors for each cup, or blow bubbles at different heights to create varied print sizes.
- Final Touches: Let the paper dry flat before trimming any smudged edges.
10. Spin Art with a Salad Spinner
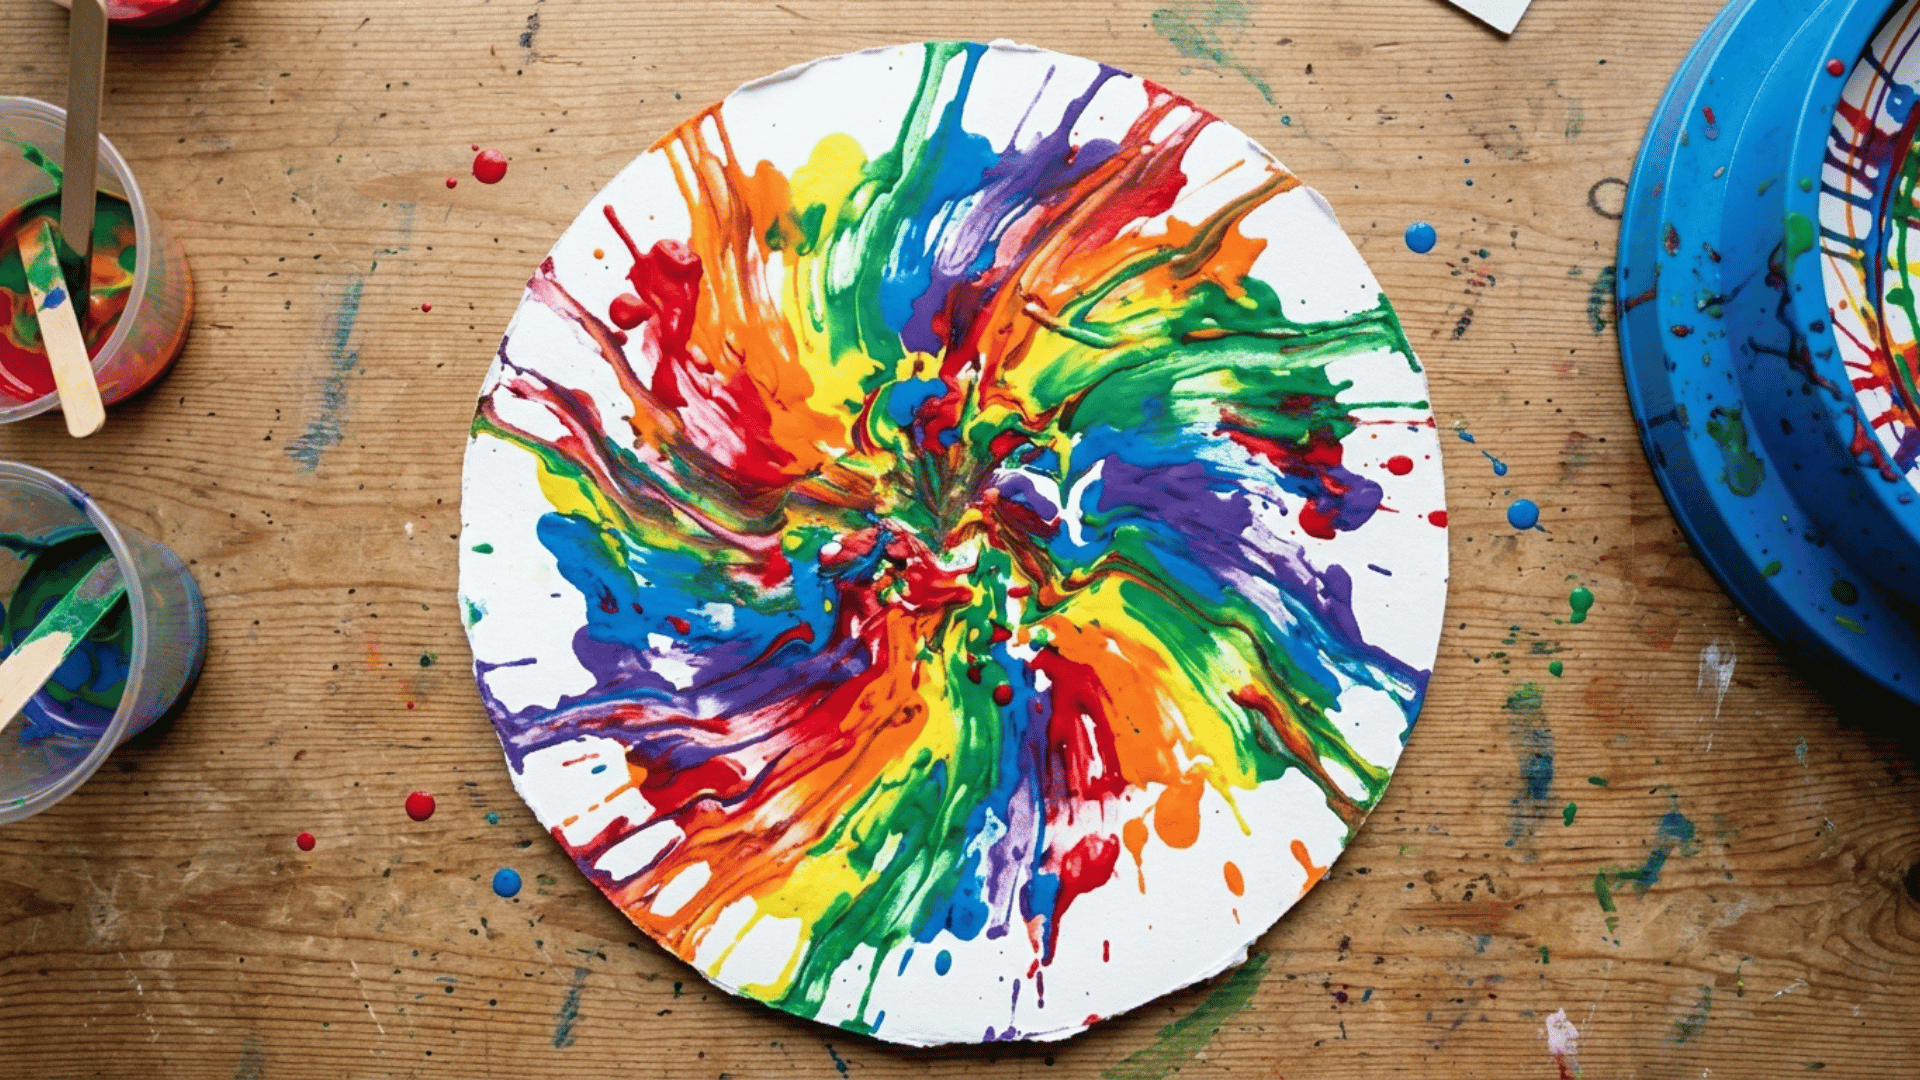
Spin art uses centrifugal motion to spread paint automatically, giving preschoolers a colorful result without needing steady brush control.
- Key Features to Focus On: A round piece of paper fitted inside a salad spinner basket.
- Easy Painting Approach: Drop small amounts of paint onto the paper, close the lid, and spin until the colors spread outward.
- Technique Ideas: Dripping one color at a time or adding several colors before each spin.
- Creative Variations: Try different spin speeds or stop halfway to add a new color layer.
- Final Touches: Let the spun paper dry completely before removing it from the spinner.
11. Q-Tip Dot Painting
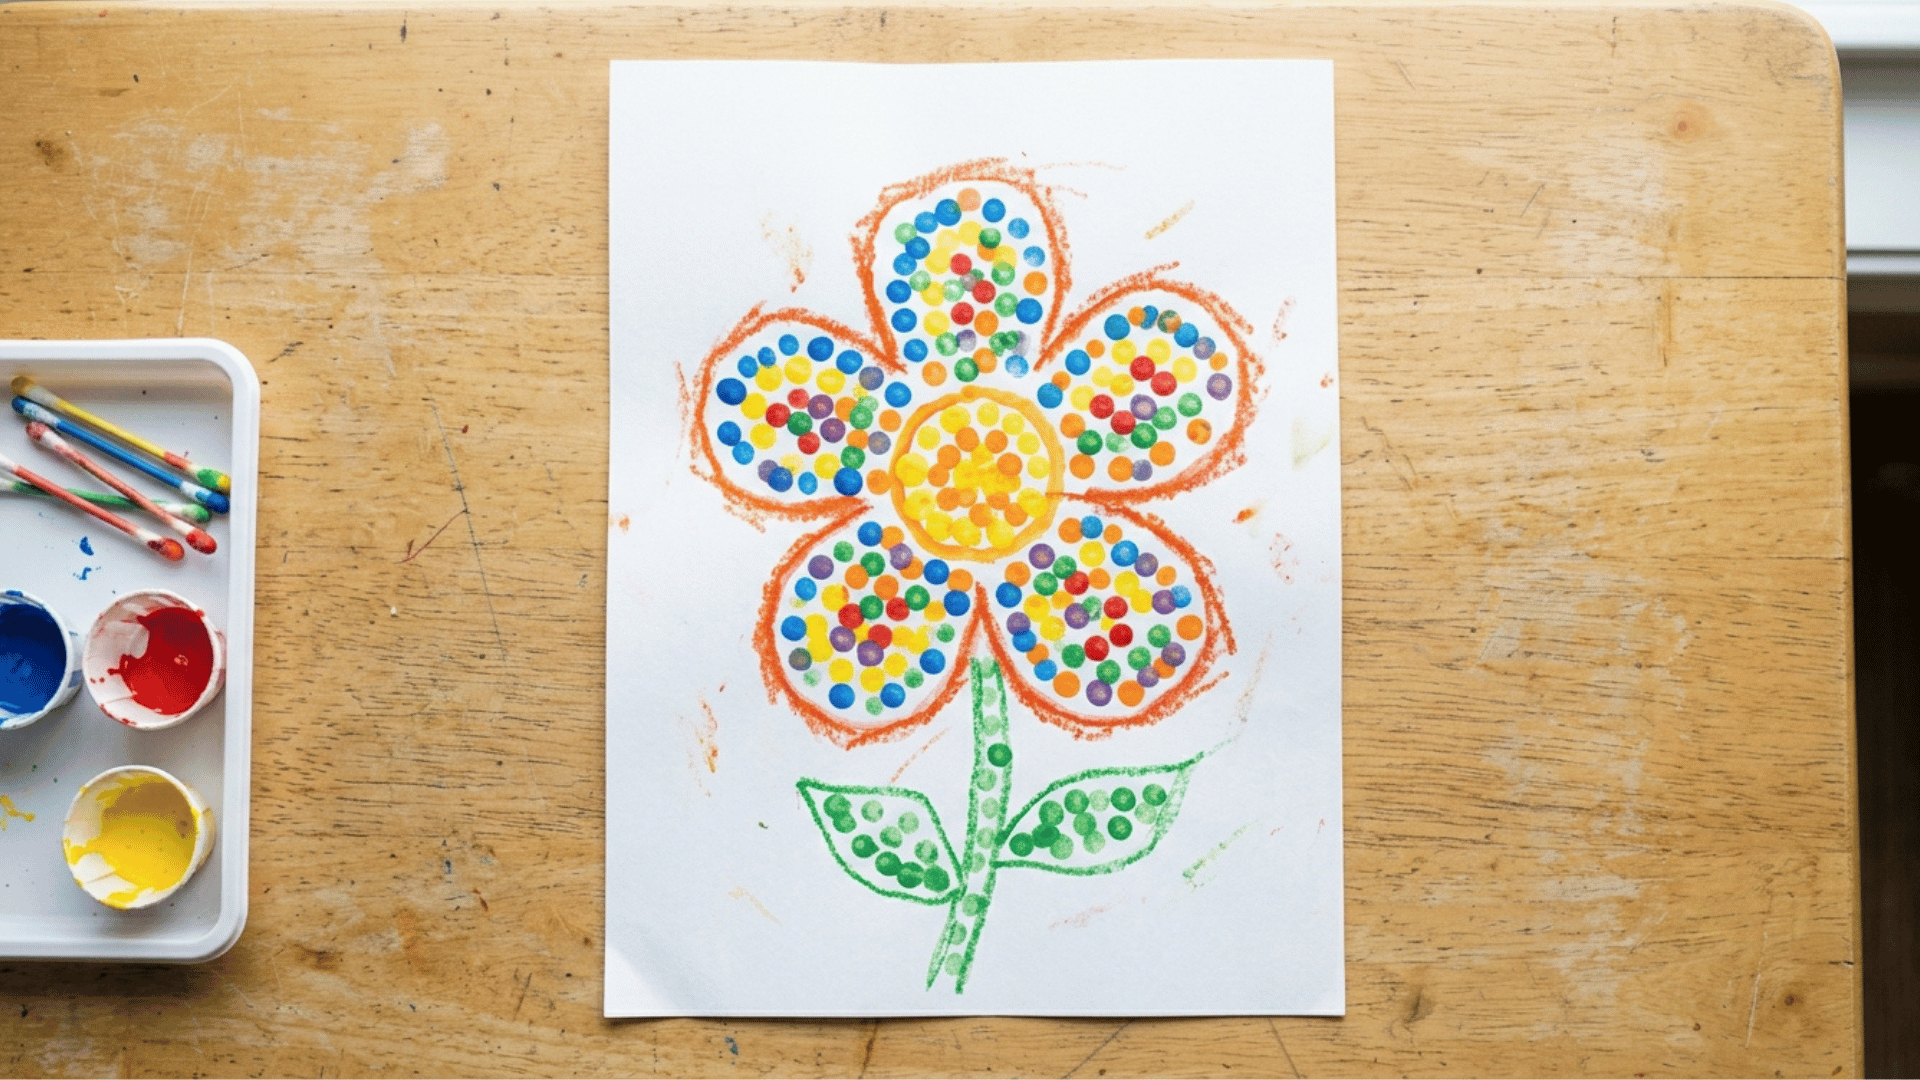
Q-tip painting builds fine motor control through simple dotting, making it a natural next step after finger and sponge painting.
- Key Features to Focus On: A cotton swab dipped in paint for small, controlled dots.
- Easy Painting Approach: Dip the Q-tip in paint and press dots onto paper to fill in a shape or pattern.
- Technique Ideas: Filling outlines, creating polka dot patterns, or building texture like tree leaves or flower petals.
- Creative Variations: Use multiple Q-tips at once or space dots to form a picture like a caterpillar or grapes.
- Final Touches: Let dots dry before adding outlines or details with a fine brush.
12. Tape Resist Shapes
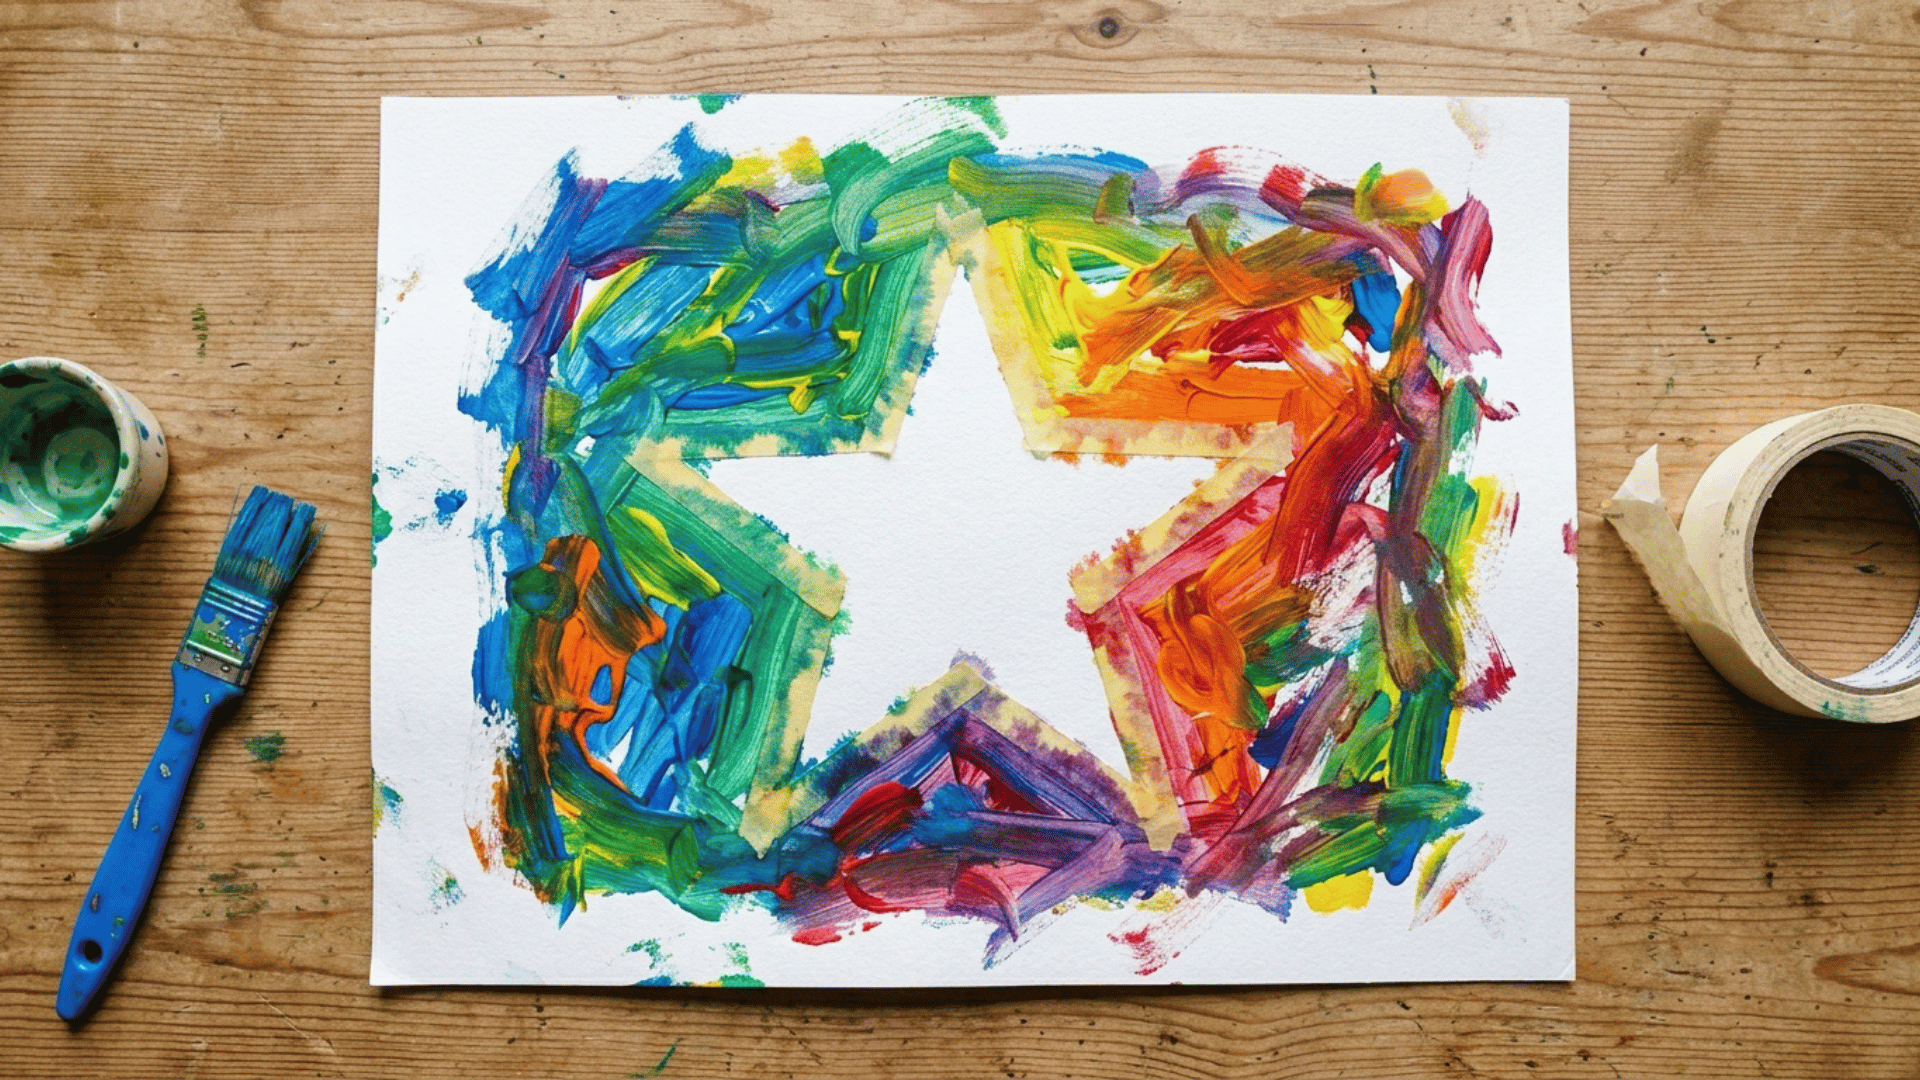
Tape-resist painting reveals a clean shape once the tape comes off, giving preschoolers a satisfying moment at the end.
- Key Features to Focus On: Painter’s tape arranged in a simple pattern before any paint goes down.
- Easy Painting Approach: Place tape strips or shapes on paper, paint freely over the entire surface, then peel the tape off once dry.
- Technique Ideas: Stripes, crisscross patterns, or a single large shape like a star or heart.
- Creative Variations: Layer two tape removals with different colors for a striped, multi-tone effect.
- Final Touches: Peel the tape slowly to keep edges clean and the paper from tearing.
13. Salt and Watercolor Painting
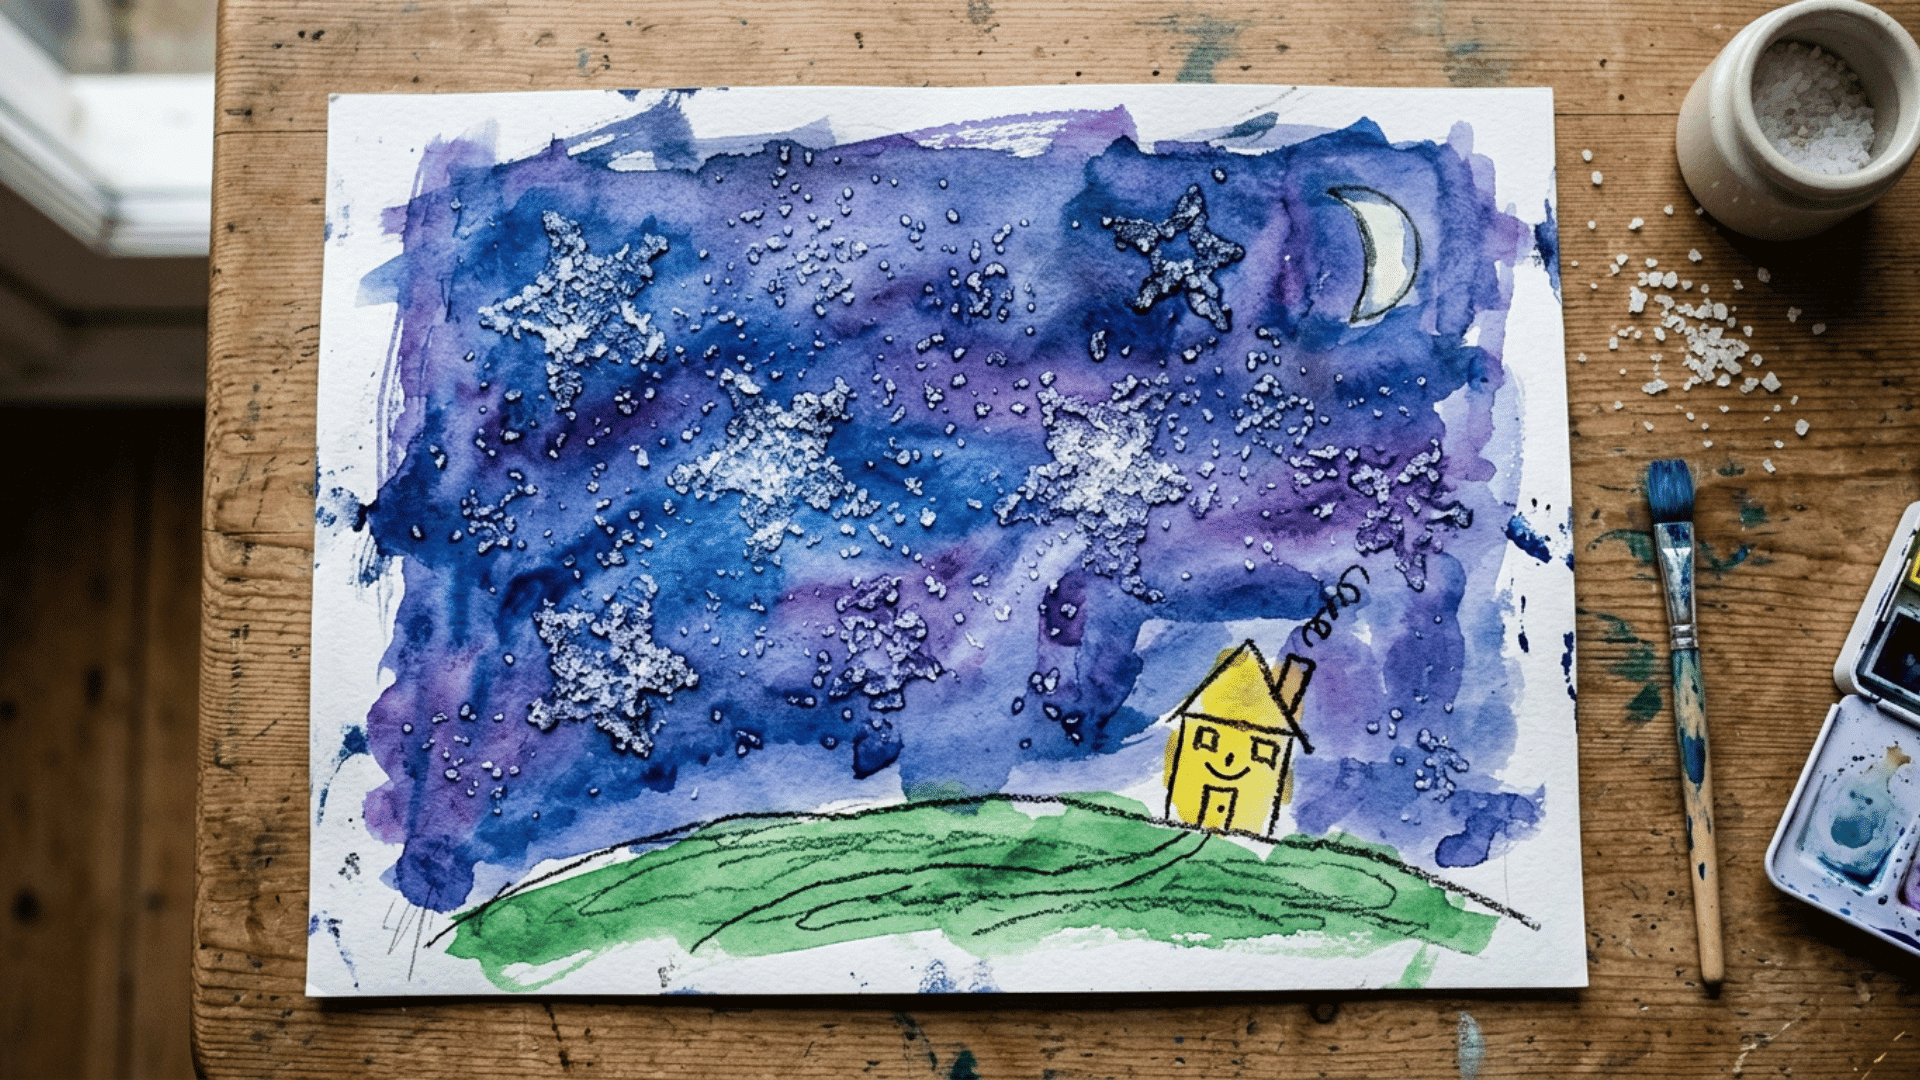
Salt and watercolor painting create a soft, crystallized texture that preschoolers find genuinely surprising once it dries.
- Key Features to Focus On: Wet watercolor paint and a light sprinkle of table salt while it’s still damp.
- Easy Painting Approach: Paint a design with watercolors, then sprinkle salt over the wet paint and let it sit undisturbed.
- Technique Ideas: Covering a full background or salting just one section for contrast.
- Creative Variations: Try the effect on a night sky, ocean scene, or winter landscape.
- Final Touches: Brush off any excess dried salt once the paint has fully set.
14. Paper Plate Animal Faces
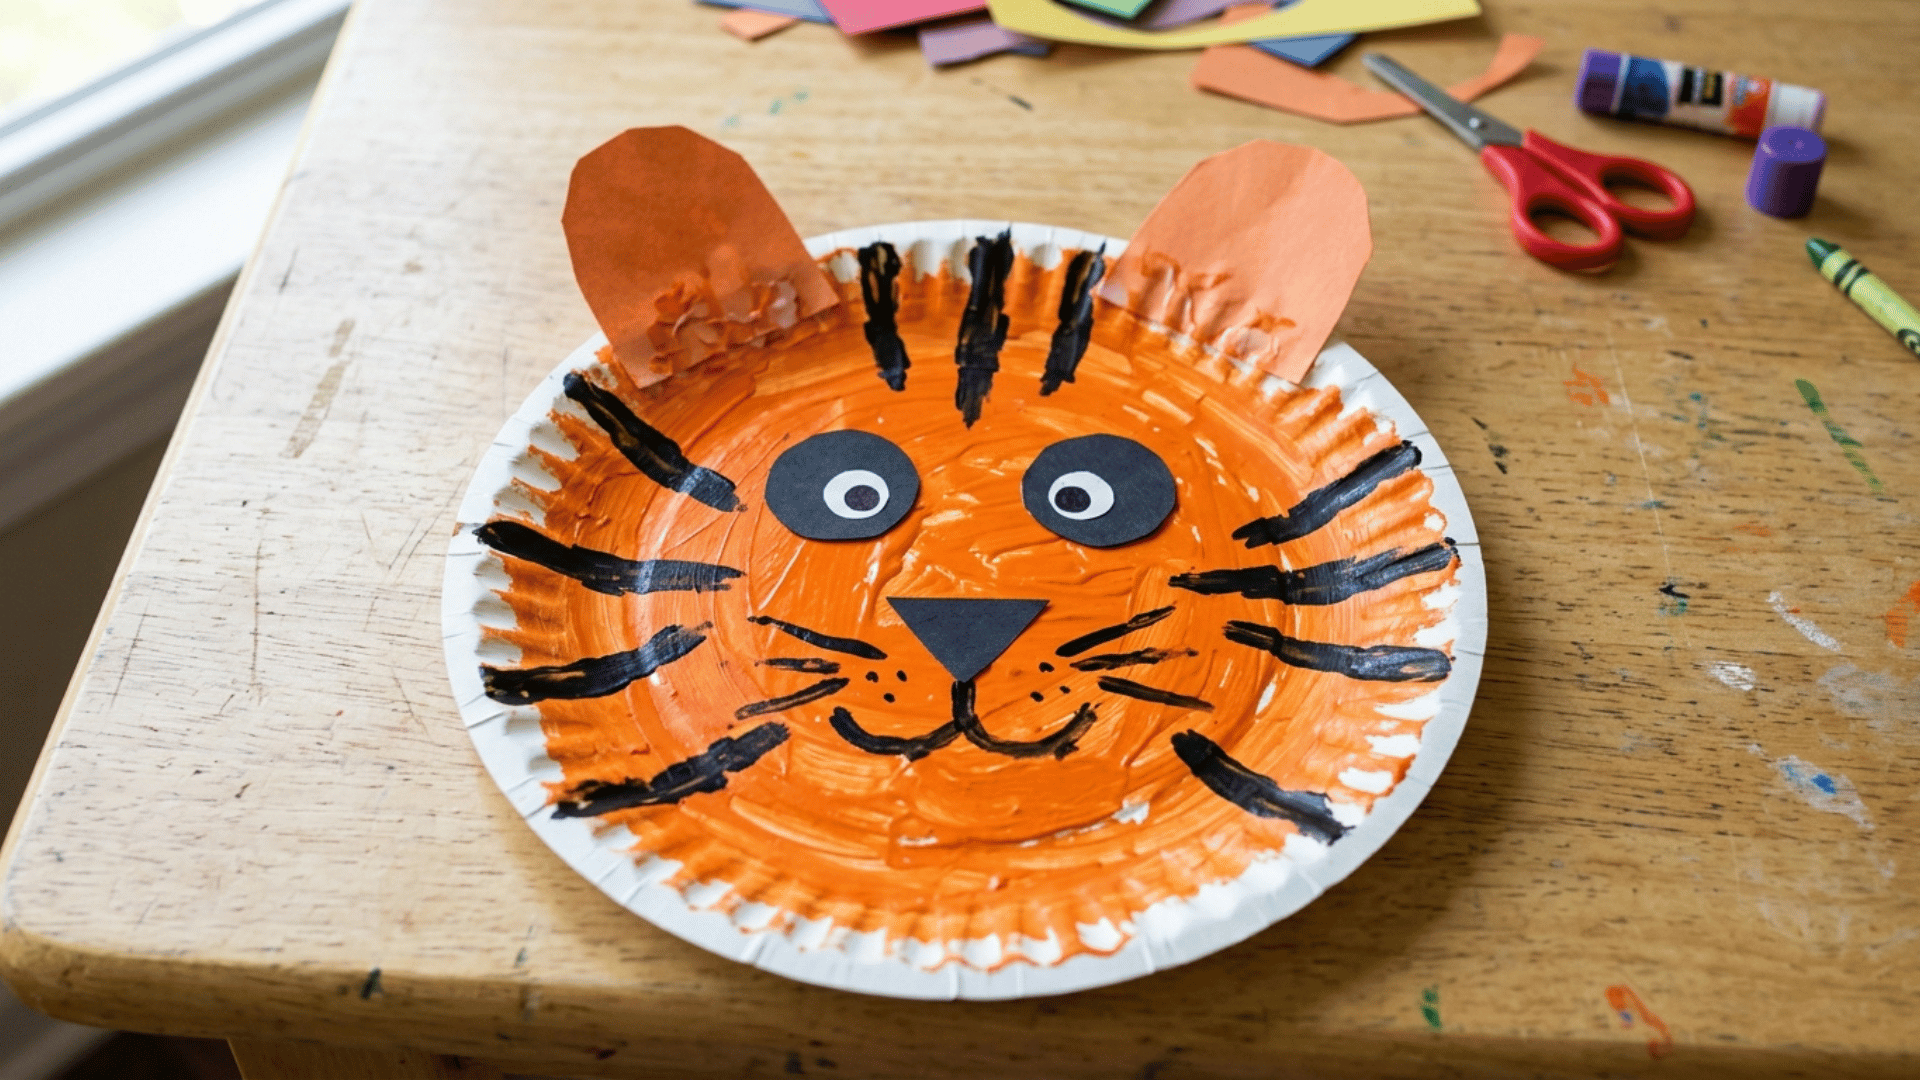
Paper plate faces give preschoolers a ready-made round shape to build a full animal face around.
- Key Features to Focus On: A plain paper plate as the base shape for the animal’s head.
- Easy Painting Approach: Paint the plate a base color, then add ears, eyes, and a nose once it dries.
- Technique Ideas: Painting solid color fills or adding simple patterns like stripes or spots.
- Creative Variations: Turn the plate into a lion, panda, or pig depending on added features.
- Final Touches: Glue on paper cutouts for ears or a nose once the paint is fully dry.
15. Leaf and Nature Stamping
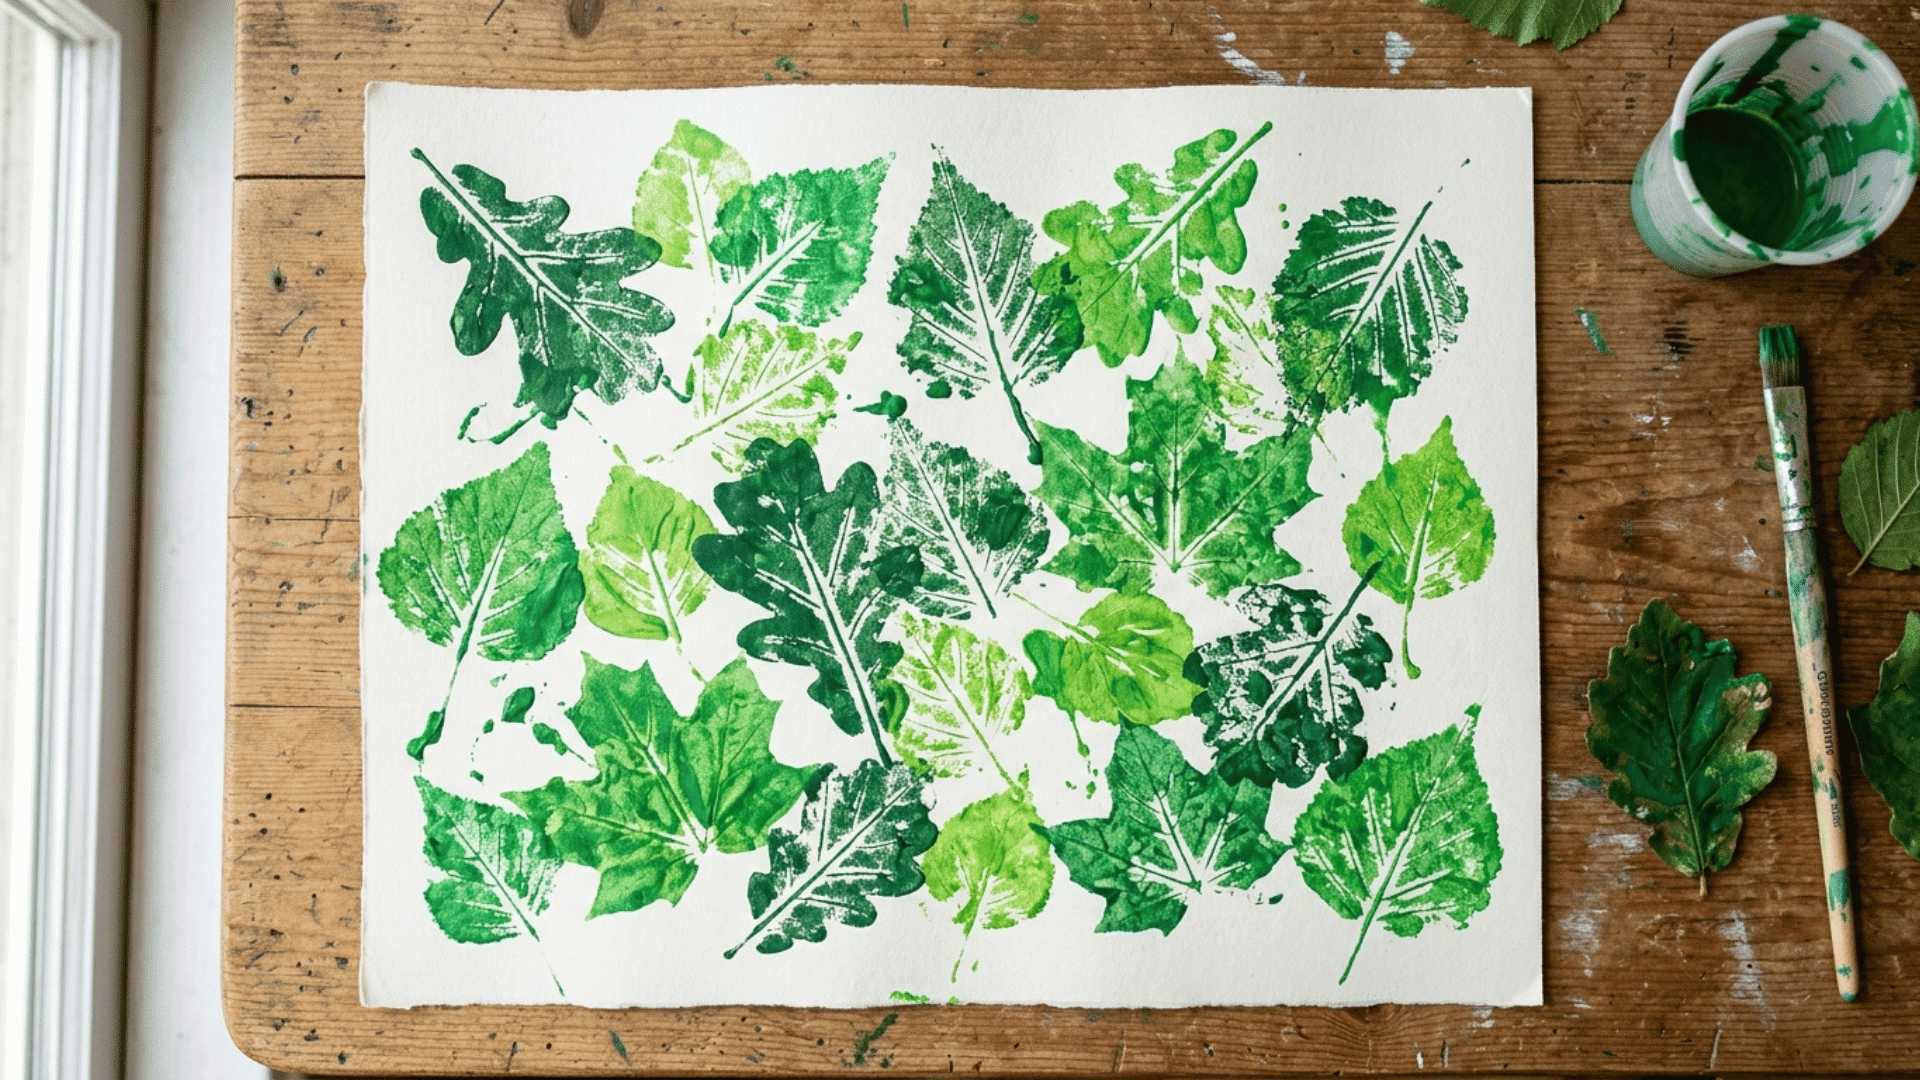
Nature stamping connects painting to the outdoors, using real leaves or twigs as a print tool instead of store-bought stamps.
- Key Features to Focus On: Flat leaves with clear vein lines for the best print detail.
- Easy Painting Approach: Brush paint onto one side of a leaf, then press it paint-side down onto paper.
- Technique Ideas: Single stamped leaves, layered prints, or a full tree made from repeated stamps.
- Creative Variations: Collect leaves of different shapes and sizes for a varied, textured print.
- Final Touches: Let each print dry before stamping another leaf on top of it.
16. Marble Painting in a Box
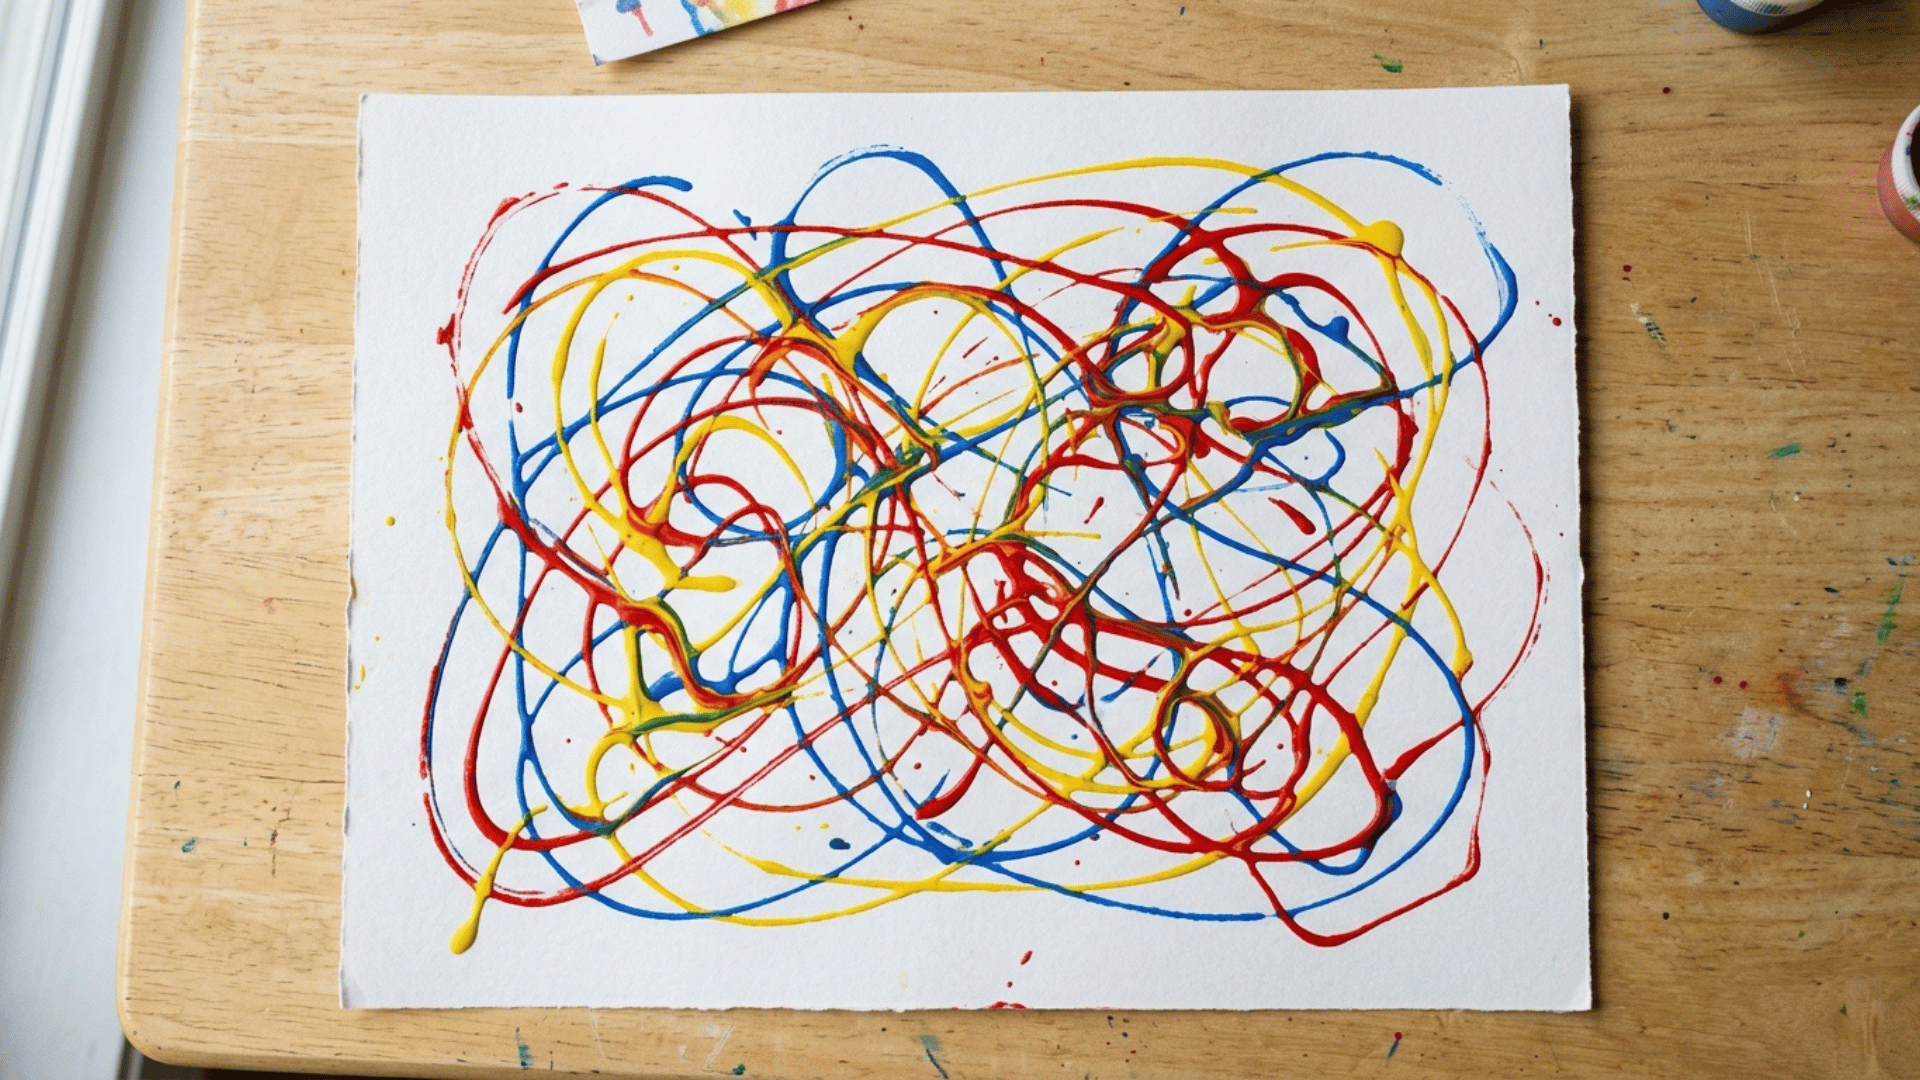
Marble painting uses a rolling motion instead of a brush, giving preschoolers an active, hands-off way to spread color.
- Key Features to Focus On: A shallow box or tray to contain the marble and paper.
- Easy Painting Approach: Drop paint-covered marbles onto paper inside the box, then tilt it side to side to let the marbles roll.
- Technique Ideas: Using one marble for simple lines or several colors for a layered, tangled pattern.
- Creative Variations: Swap marbles for small balls or dice for a different rolling texture.
- Final Touches: Carefully remove the marbles and let the paper dry flat.
17. Rock Painting
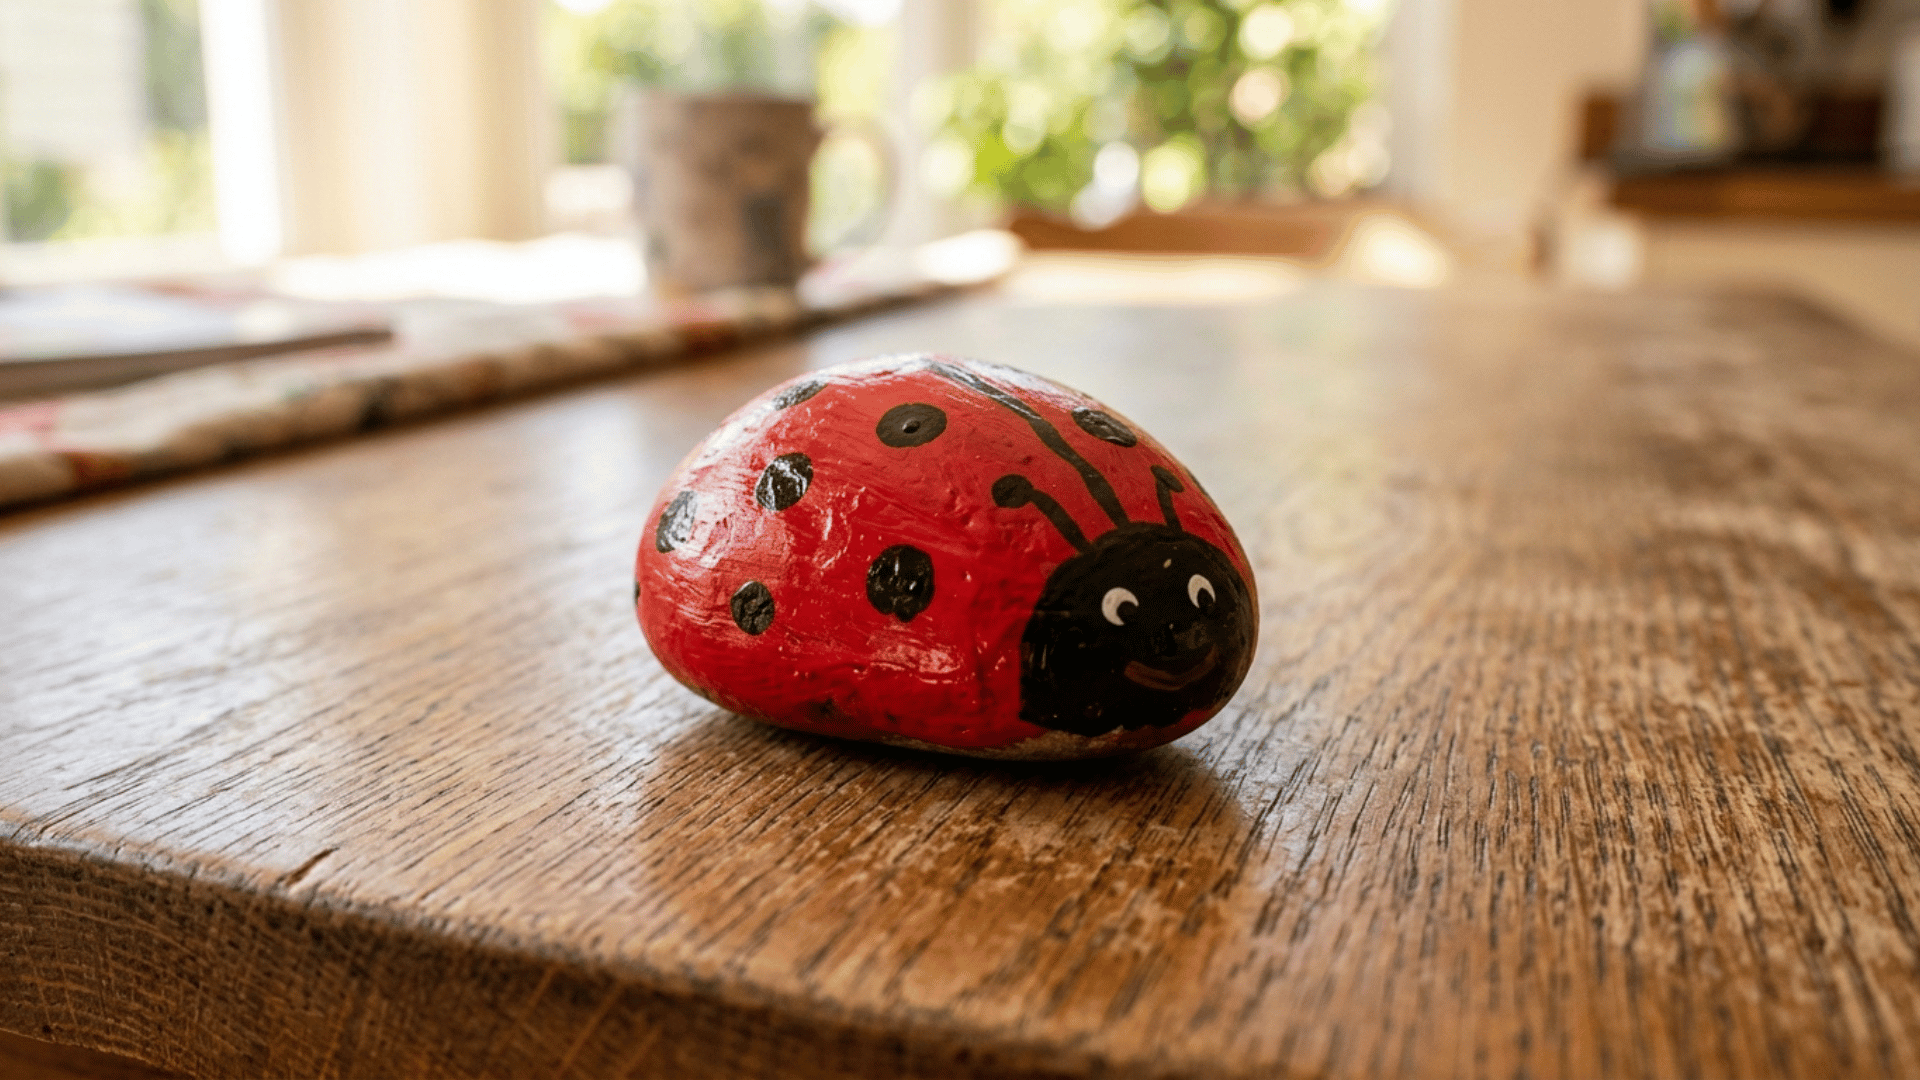
Rock painting turns a simple outdoor find into a small, durable art piece that preschoolers can display or give away.
- Key Features to Focus On: Smooth, clean rocks that hold paint well without cracking it off.
- Easy Painting Approach: Paint a base color on the rock, let it dry, then add a simple design, like a ladybug or a face, on top.
- Technique Ideas: Solid color bases, dot patterns, or simple painted characters.
- Creative Variations: Turn rocks into a matching set, like a family of ladybugs or a rainbow collection.
- Final Touches: Seal the finished rock with a clear coat to protect the design outdoors
Easy Painting Ideas for School-Age Kids
These easy painting ideas for kids introduce more control and planning, giving kids with steadier hands room to work toward an actual finished picture.
18. Monoprinting with a Pie Plate
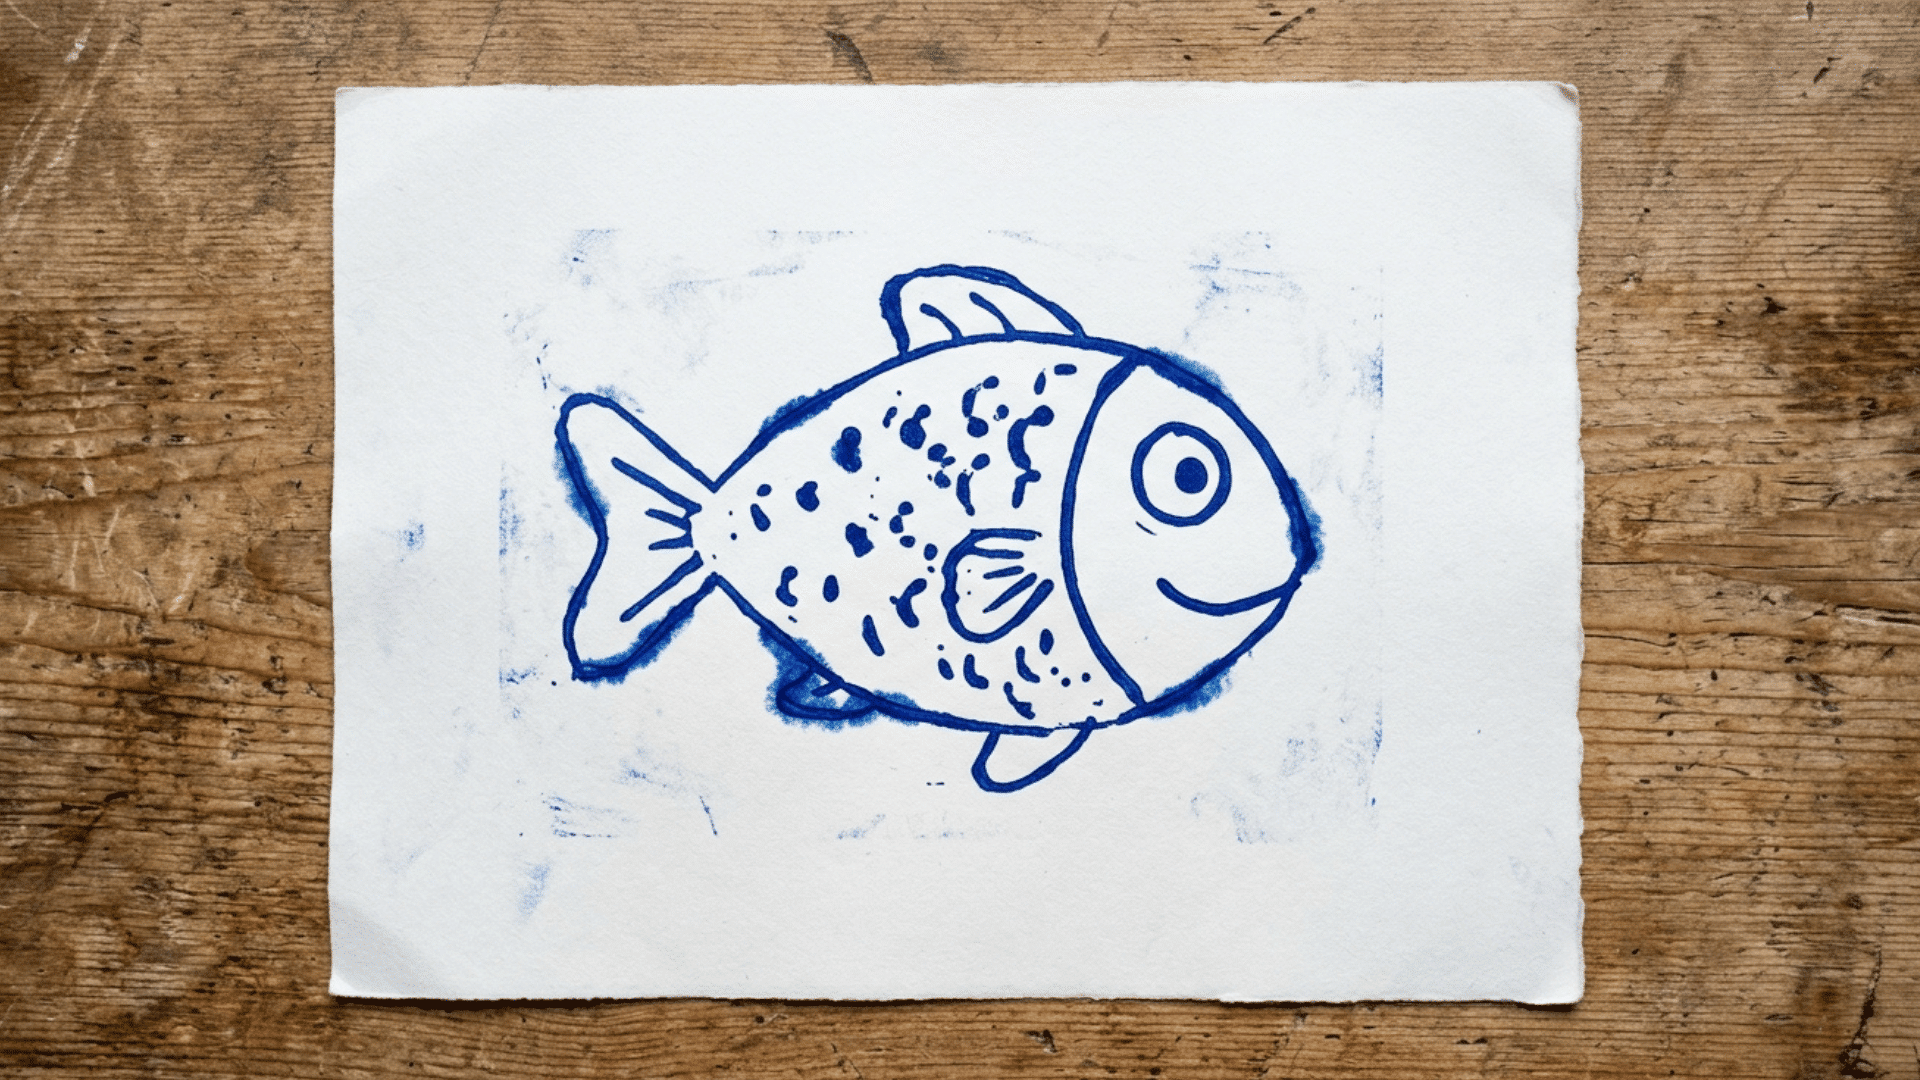
Monoprinting introduces the idea of transferring an image, giving school-age kids their first taste of printmaking without any special equipment.
- Key Features to Focus On: A flat surface like a pie plate spread evenly with paint.
- Easy Painting Approach: Spread paint thinly across the plate, draw a design into it with a cotton swab, then press paper on top to lift the print.
- Technique Ideas: Simple line drawings, patterns, or a single subject like a flower or fish.
- Creative Variations: Try two-color prints by adding a second layer of paint before pressing.
- Final Touches: Peel the paper off slowly and let the print dry flat.
19. Watercolor Resist with Crayon
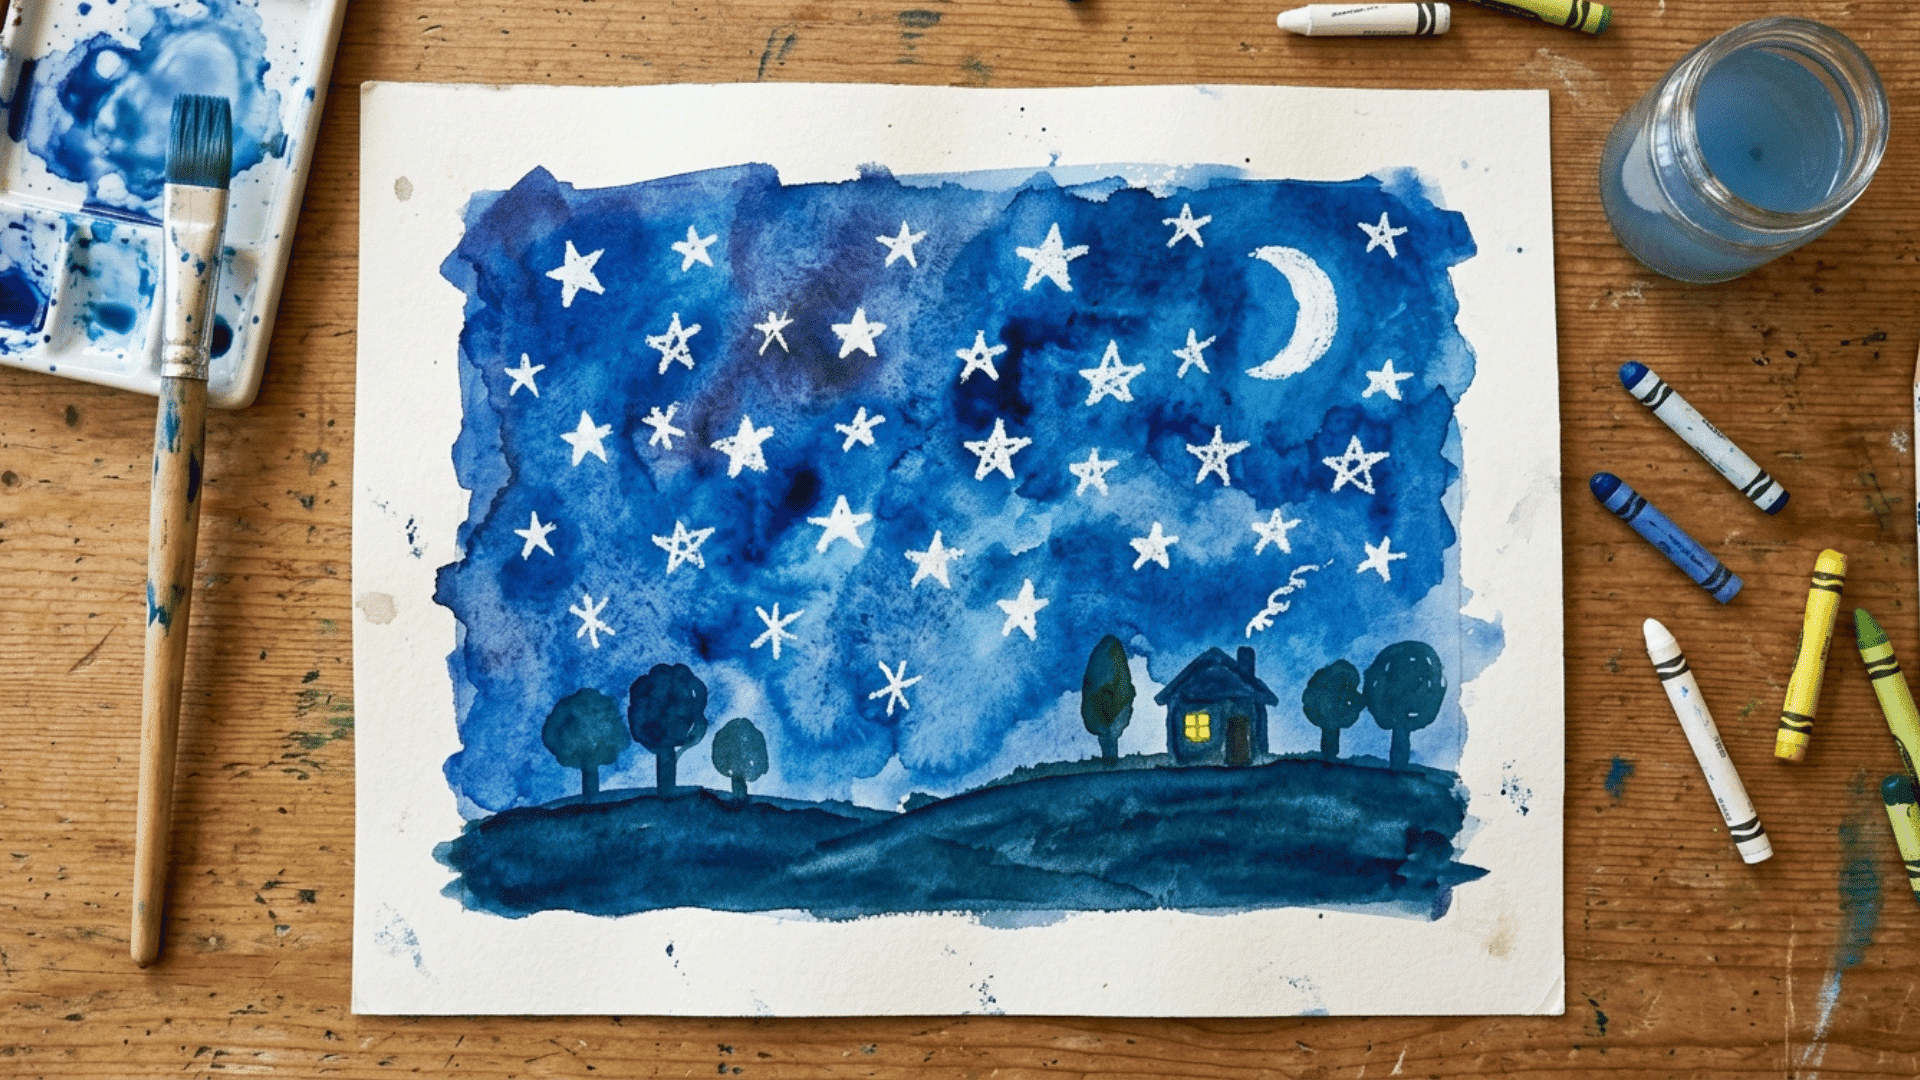
Crayon resist combines drawing and painting in one step, revealing a hidden design once the paint goes on.
- Key Features to Focus On: A white crayon drawing that stays invisible until watercolor is added.
- Easy Painting Approach: Draw a design with a white crayon on white paper, then brush watercolor over the entire page to reveal it.
- Technique Ideas: Hidden shapes, secret messages, or a full scene like stars in a night sky.
- Creative Variations: Use colored crayons instead of white for a layered, textured resist effect.
- Final Touches: Let the watercolor dry completely before handling the paper.
20. Splatter Painting with a Toothbrush
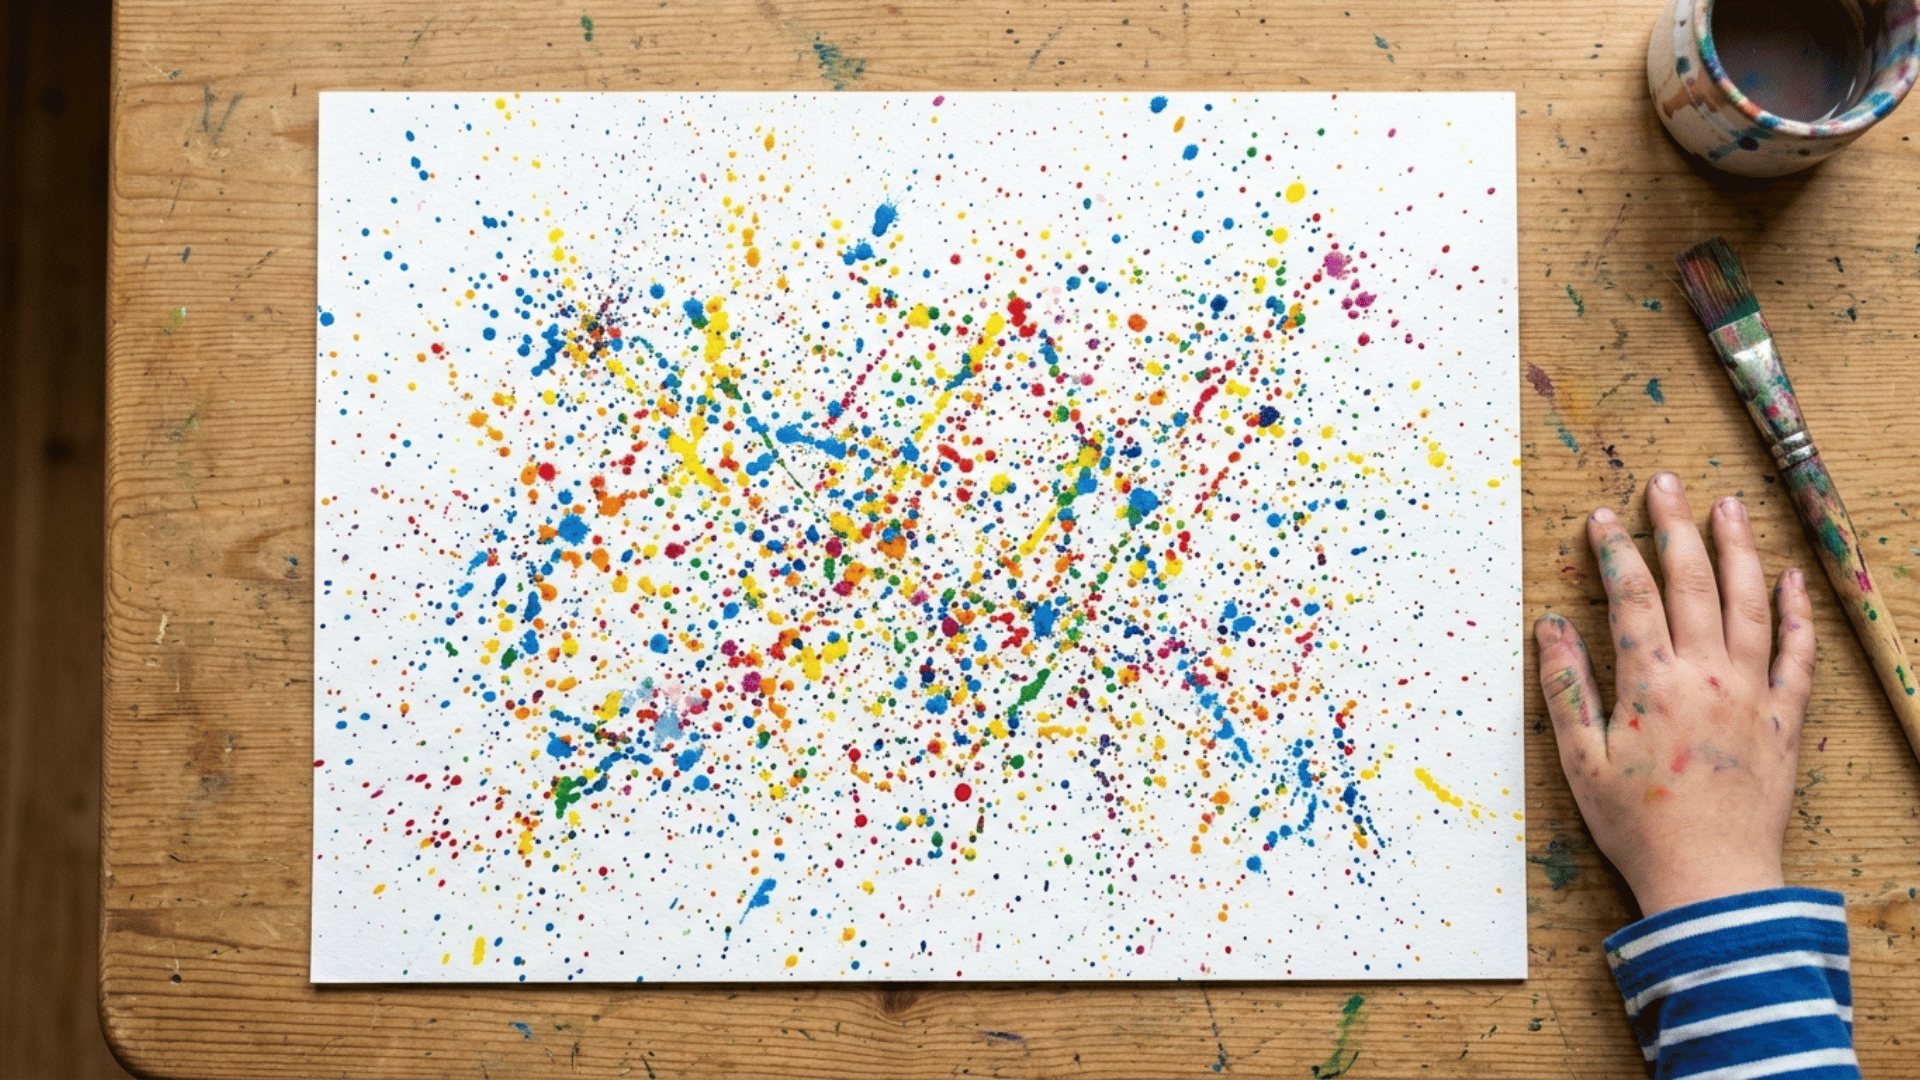
Splatter painting gives school-age kids a controlled way to make a mess, using a flicking motion instead of brushstrokes.
- Key Features to Focus On: An old toothbrush loaded with a small amount of thin paint.
- Easy Painting Approach: Dip the toothbrush in paint, then run a finger across the bristles to flick small splatters onto paper.
- Technique Ideas: Layering multiple colors or splattering around a taped-off shape for a stencil effect.
- Creative Variations: Combine with tape resist to splatter around a star, name, or simple outline.
- Final Touches: Let each color dry before adding the next to avoid smudging.
21. Symmetry Painting with Folded Paper
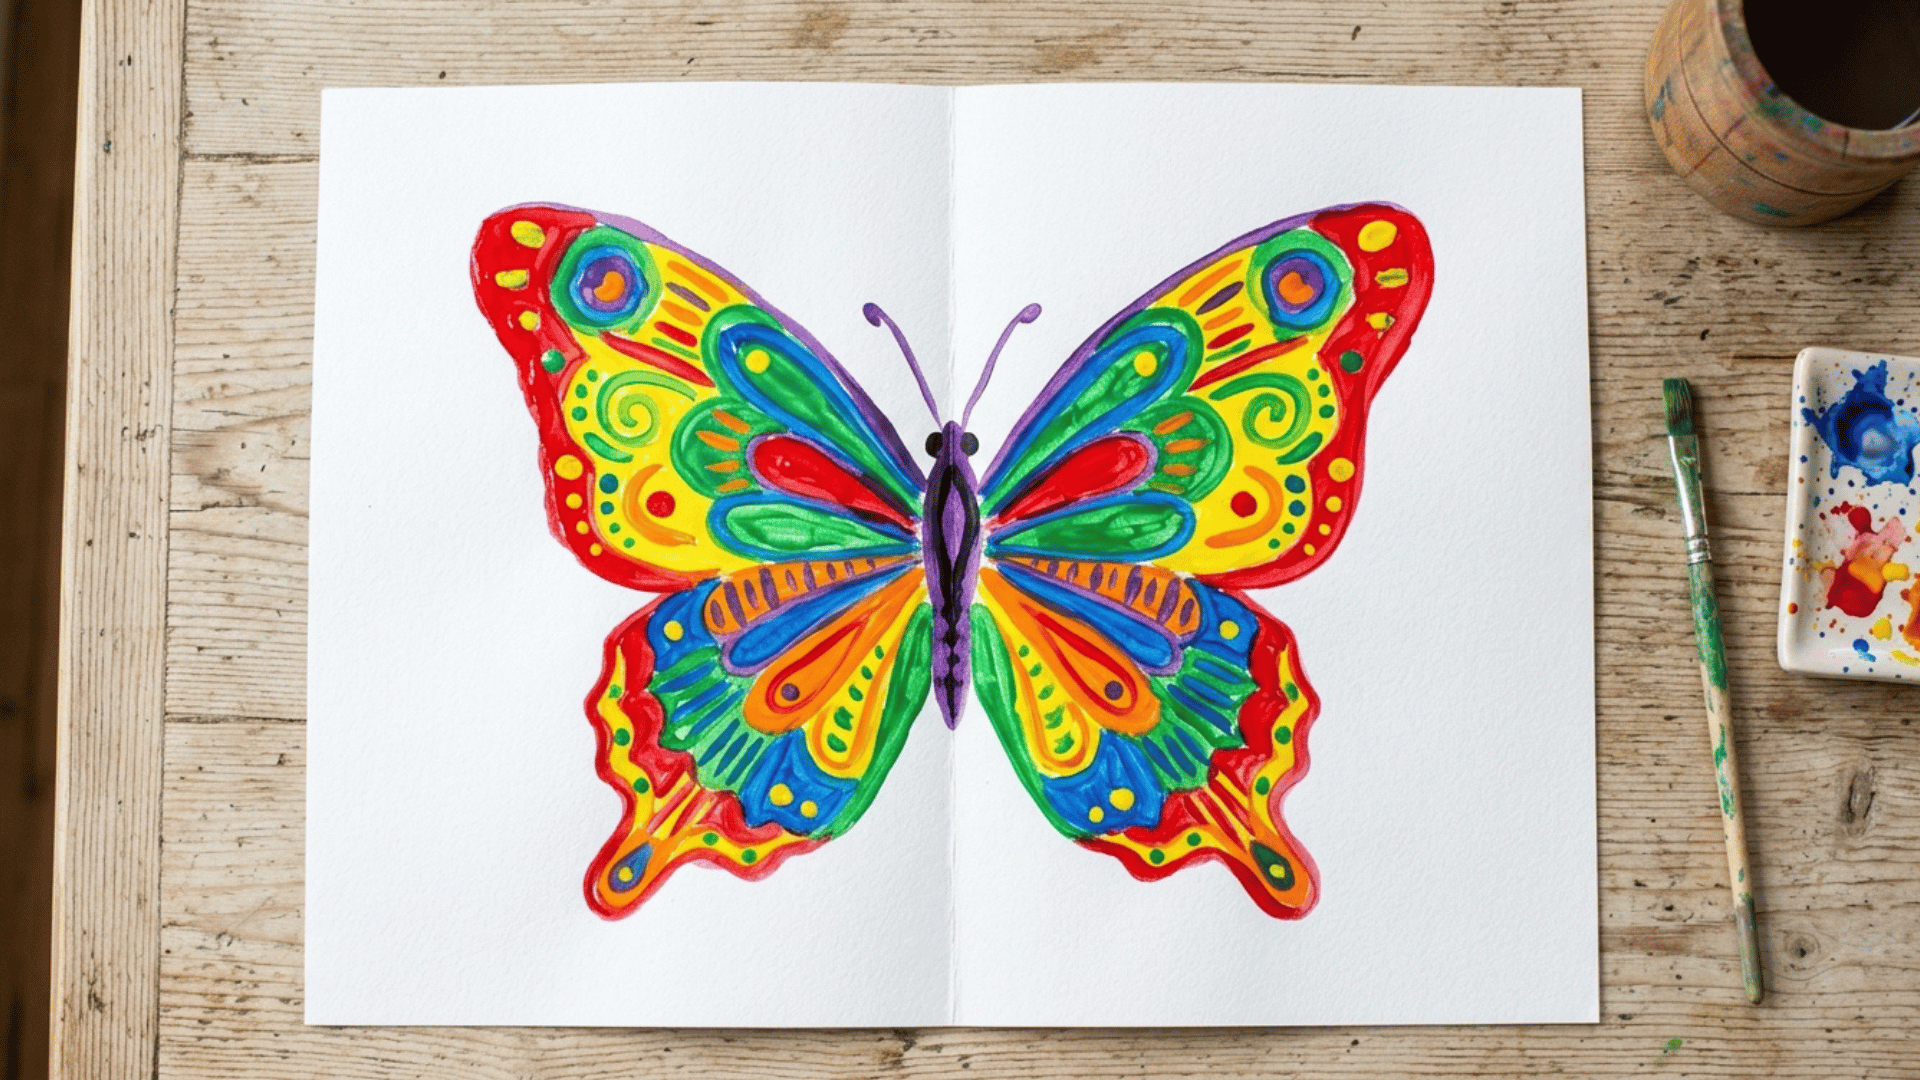
Symmetry painting teaches an instant lesson in mirrored design, using a simple fold instead of careful measuring.
- Key Features to Focus On: A single fold down the center of the paper before any paint is added.
- Easy Painting Approach: Paint a design on one half of the folded paper, then press the two halves together and open to reveal the mirrored print.
- Technique Ideas: Simple blobs and lines for younger kids or a butterfly shape for more detail.
- Creative Variations: Try three or four folds for a more complex, layered symmetry pattern.
- Final Touches: Let the print dry fully open and flat to avoid smearing.
22. Simple Landscape Painting
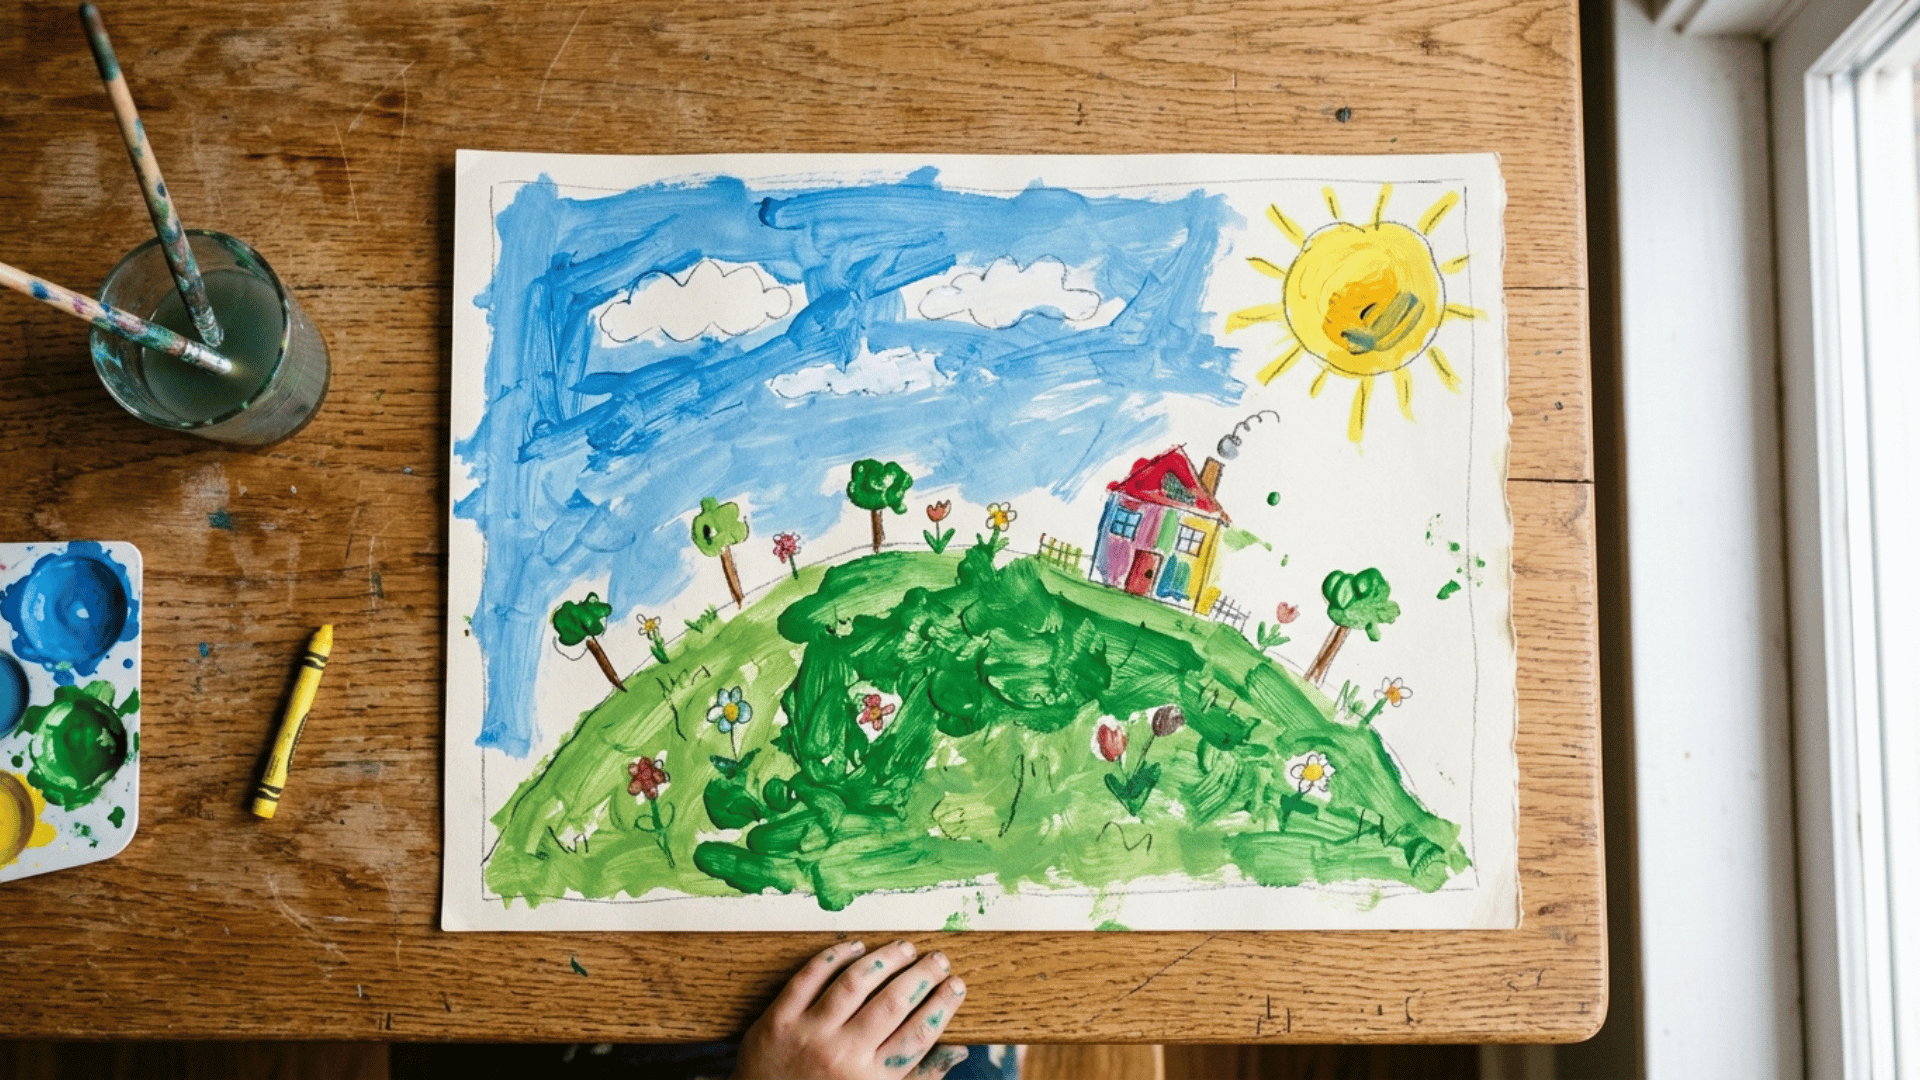
Landscape painting introduces the basics of composition, teaching kids to build a scene in layers, from background to foreground.
- Key Features to Focus On: A horizon line dividing the paper into sky and ground.
- Easy Painting Approach: Paint the sky and ground first, let it dry, then add simple shapes like hills, trees, or a sun on top.
- Technique Ideas: Flat color blocking for beginners or blended sky colors for more advanced painters.
- Creative Variations: Try a beach, mountain, or forest scene using the same basic layered approach.
- Final Touches: Add small details, such as birds or clouds, once the base layers are fully dry.
23. Watercolor Ombre Sky Painting
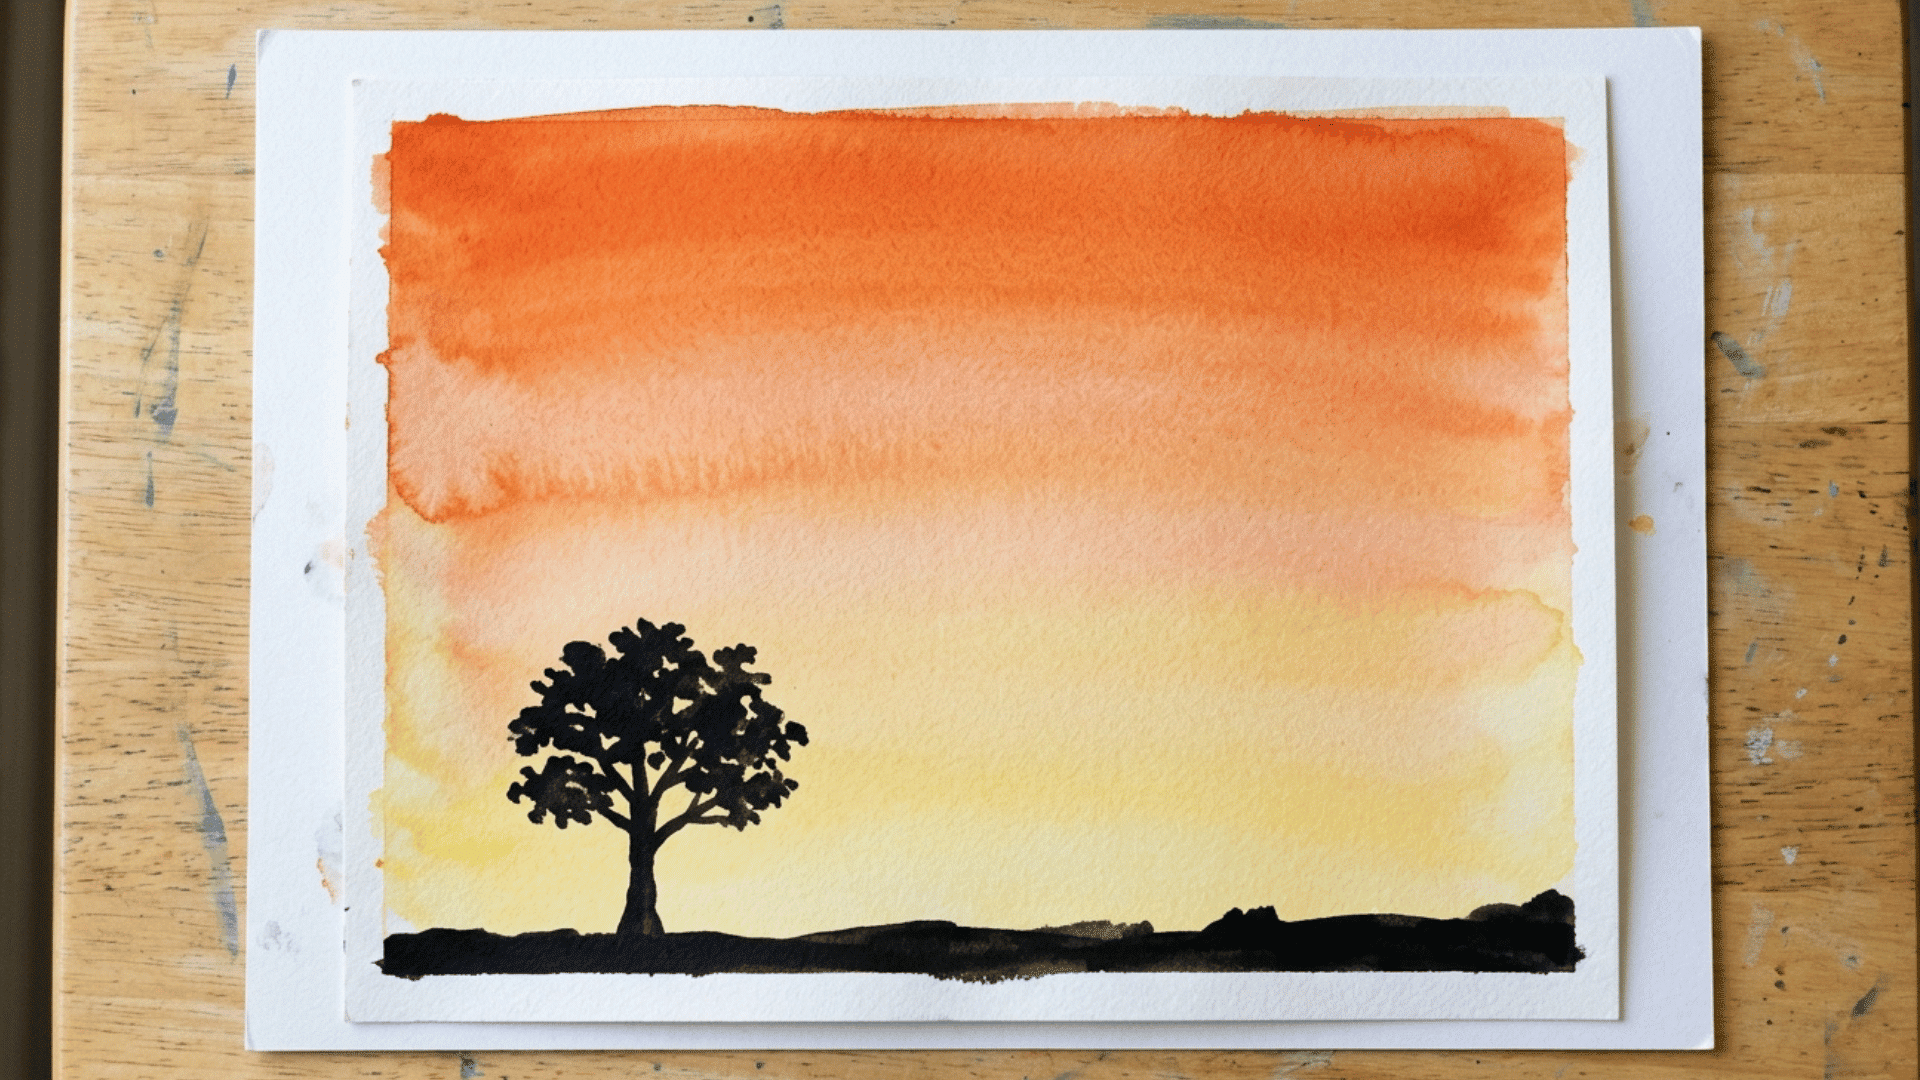
Ombre sky painting teaches color blending in a low-pressure way, since a smooth gradient reads as successful even with some unevenness.
- Key Features to Focus On: Three to four watercolor shades blended wet-on-wet from dark to light.
- Easy Painting Approach: Paint the darkest color at the top of the page, then work downward, adding water to lighten each new stripe before it dries.
- Technique Ideas: Horizontal bands for a sunset sky or vertical bands for an abstract color study.
- Creative Variations: Add a simple black silhouette, like trees or mountains, once the sky layer is fully dry.
- Final Touches: Let the paper dry flat to avoid warping before adding any silhouette details.
24. Painted Rock Pet Portraits
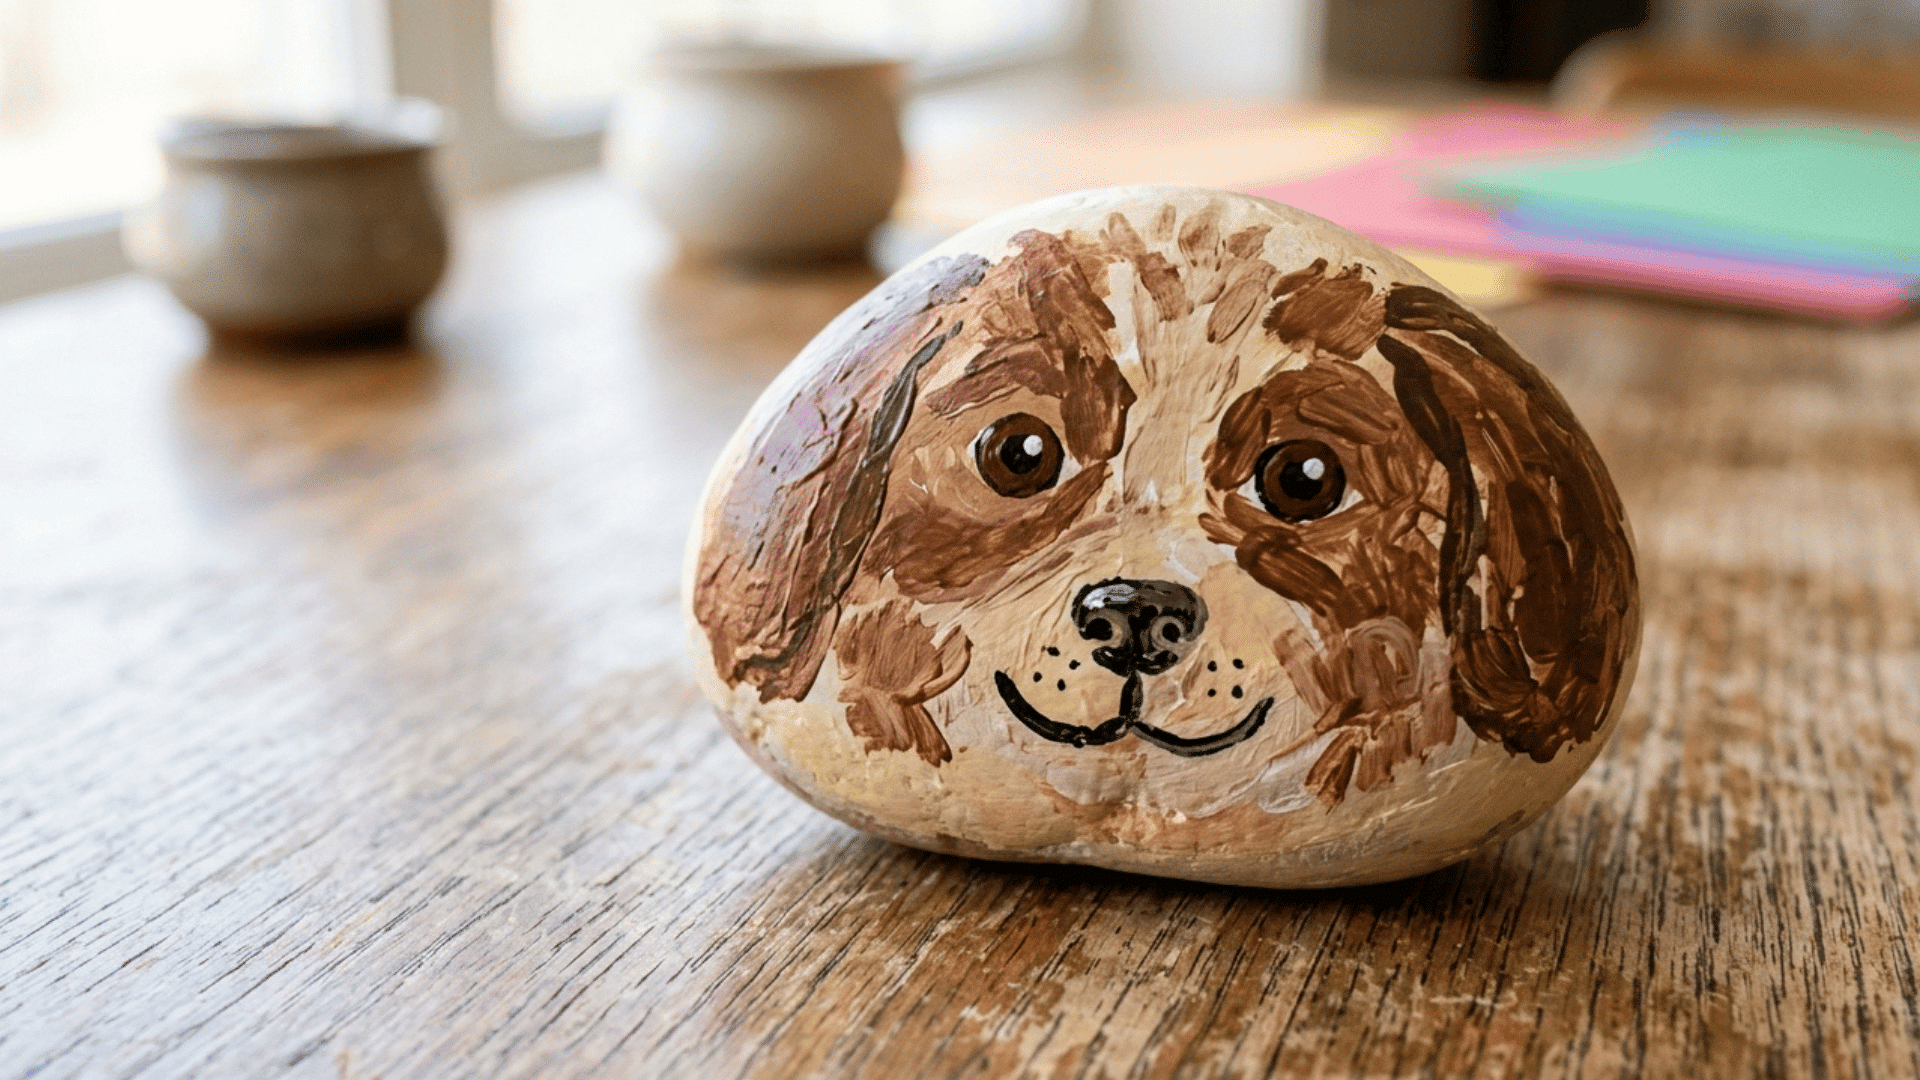
Painted rock portraits let kids practice painting a familiar subject, using a pet or favorite animal as the reference.
- Key Features to Focus On: A smooth rock shaped roughly like the animal’s head or body.
- Easy Painting Approach: Paint a base coat matching the pet’s main color, then add facial features and markings once dry.
- Technique Ideas: Simple color blocking for beginners or added texture and shading for more detail.
- Creative Variations: Paint a whole set of rocks to match every pet or animal in the family.
- Final Touches: Seal the finished rock with a clear coat to protect the paint.
25. Canvas Painting with a Simple Subject
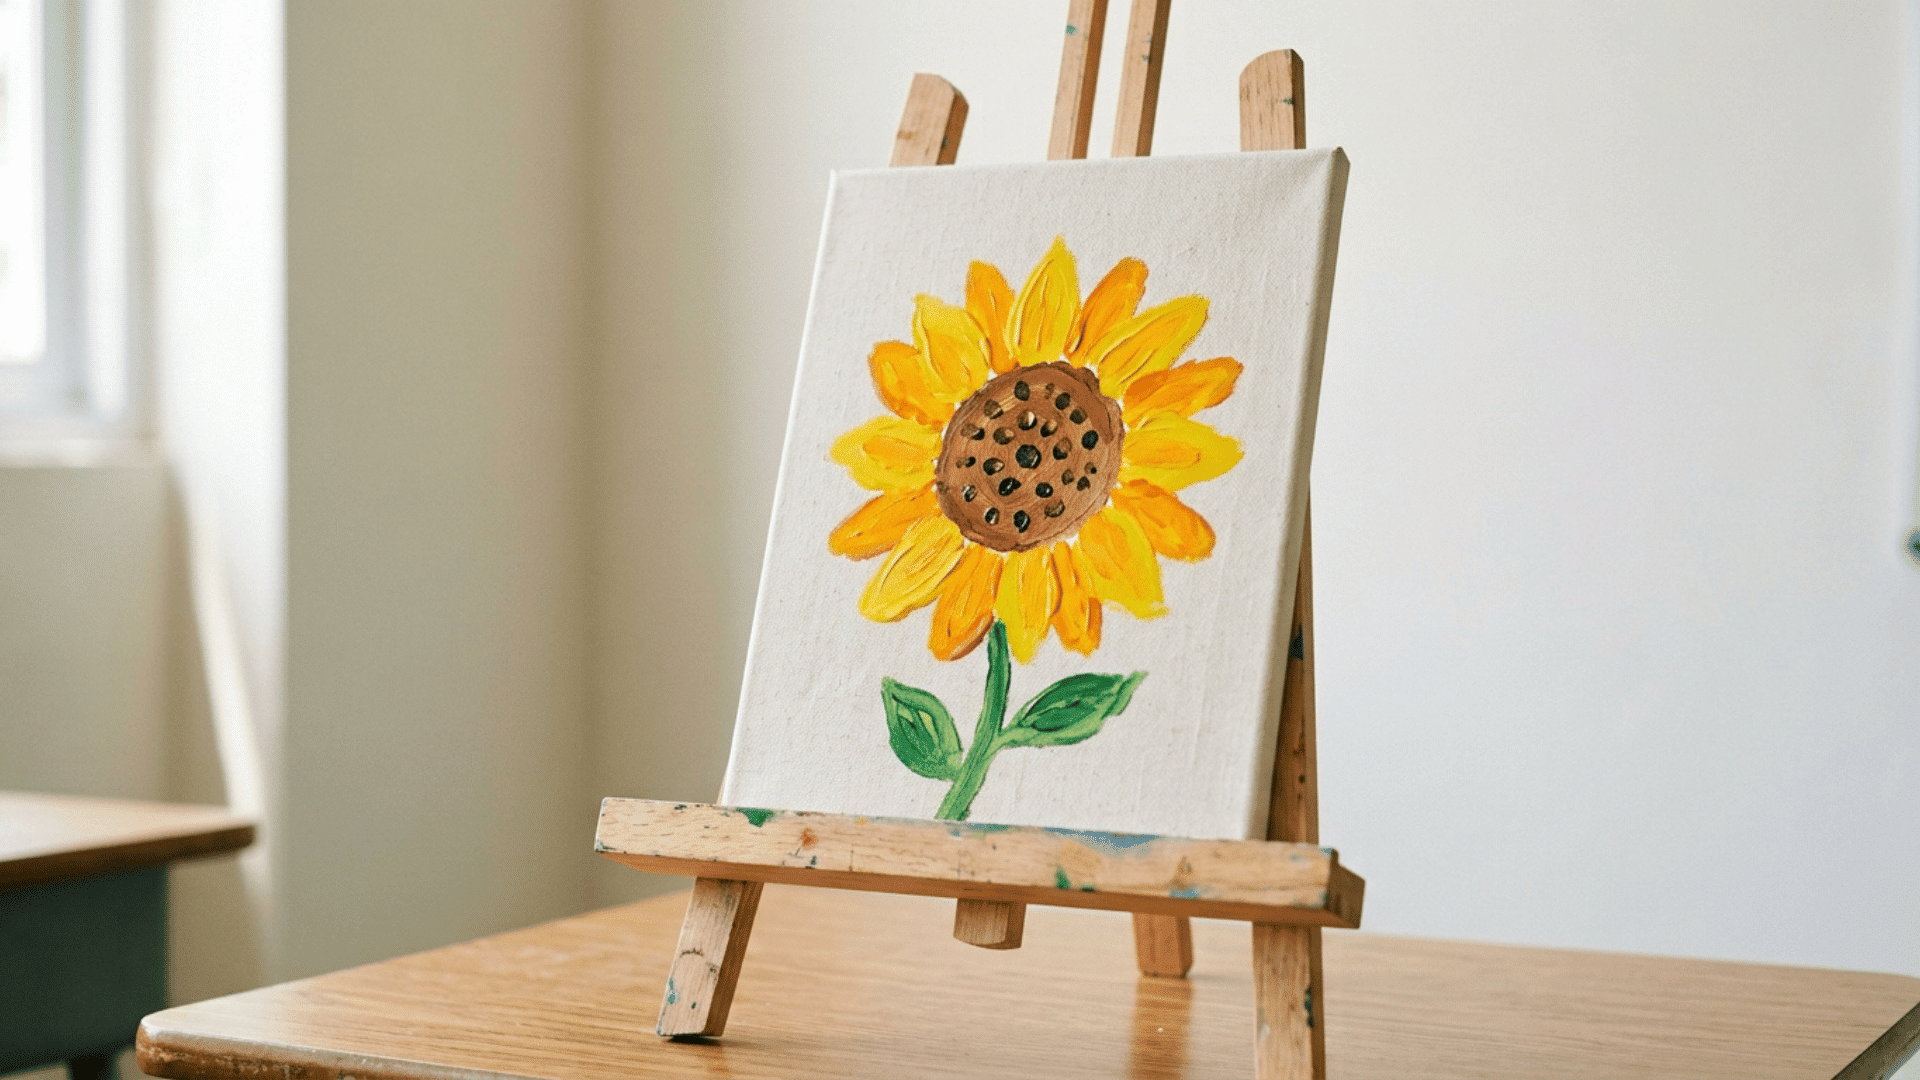
Canvas painting gives kids a chance to work on a more permanent surface while using a single subject to keep the project manageable.
Older children can also use beginner canvas painting ideas when they are ready to try more detailed compositions or create artwork for their room.
- Key Features to Focus On: A single, clear subject like a sun, flower, or fish rather than a full scene.
- Easy Painting Approach: Sketch a light outline first, then fill it in with color before adding small details.
- Technique Ideas: Flat color fills for a clean look or blended shading for extra depth.
- Creative Variations: Turn the subject into a small series, like three different flowers or a school of fish.
- Final Touches: Let the canvas dry fully, then add a thin coat of sealant to protect the paint.
In a Nutshell
A toddler smearing finger paint and a kid working on a canvas fish are doing the same thing at different speeds.
Pick one project that matches the child in front of you, not the one that photographs best for a parent’s feed. A ruined shirt and a proud grin are usually a sign the afternoon went well.
Keep a few basic supplies stocked in a drawer or bin, since these easy painting ideas for kids come in handy faster than expected on the next rainy day or bored afternoon.
Half the fun is in the mess anyway, so let that part happen too.
Frequently Asked Questions
What Age Can Kids Start Painting?
Most toddlers can start finger painting or handprint art around 12 to 18 months with close supervision and washable paint.
How Do You Keep Painting Activities From Getting Too Messy?
Use washable paint, cover the workspace with a plastic sheet, and stick to techniques suited to the child’s age and control level.
What Painting Supplies are Worth Keeping on Hand?
Washable tempera paint, thick paper, a few wide brushes, sponges, and painter’s tape cover most of the ideas in this list.