

I’ve watched so many people stand in their room, picture exactly how they want it to look, then do nothing for six months.
The idea is clear; it just never turns into action. In my years writing about interior design, I’ve found the real holdup isn’t skill or money it’s not knowing where to start.
Most room decor projects take one afternoon and a handful of supplies you can grab in one trip. Here, I’m sharing DIY room decor ideas you can try right away and make your own.
Why DIY Room Decor Works for Every Budget and Style
DIY home decor makes it easy to update your space at a comfortable price.
Small projects using paint, fabric, paper, wood, or recycled materials can add character without the cost of store-bought decor.
Each project can also be adjusted to match your preferred look. You can change the colors, materials, size, and finish to suit anything from a cozy bedroom to a clean, modern space.
Making your own decor also allows you to gradually improve the room.
DIY Room Decor Ideas Worth Making at Home
These ideas cover walls, lighting, storage, and small touches you can finish in an afternoon. Each one uses cheap or leftover materials, so you can try a few without spending much.
1. Washi Tape Wall Art

Washi tape wall art uses colored paper tape to make shapes, lines, or patterns right on your wall. It comes off clean, so it’s great for renters.
Try arches, checkerboards, mountain outlines, or simple borders around posters. Mix two or three tape colors to make the pattern stand out.
Materials Required: Washi tape, scissors, ruler, pencil.
How to Put Together:
- Lightly mark your wall space with a pencil and choose a pattern, such as a sunburst or a grid
- Cut strips of tape to different lengths
- Stick the strips down, pressing each one flat to remove air bubbles
2. Macrame Wall Hanging
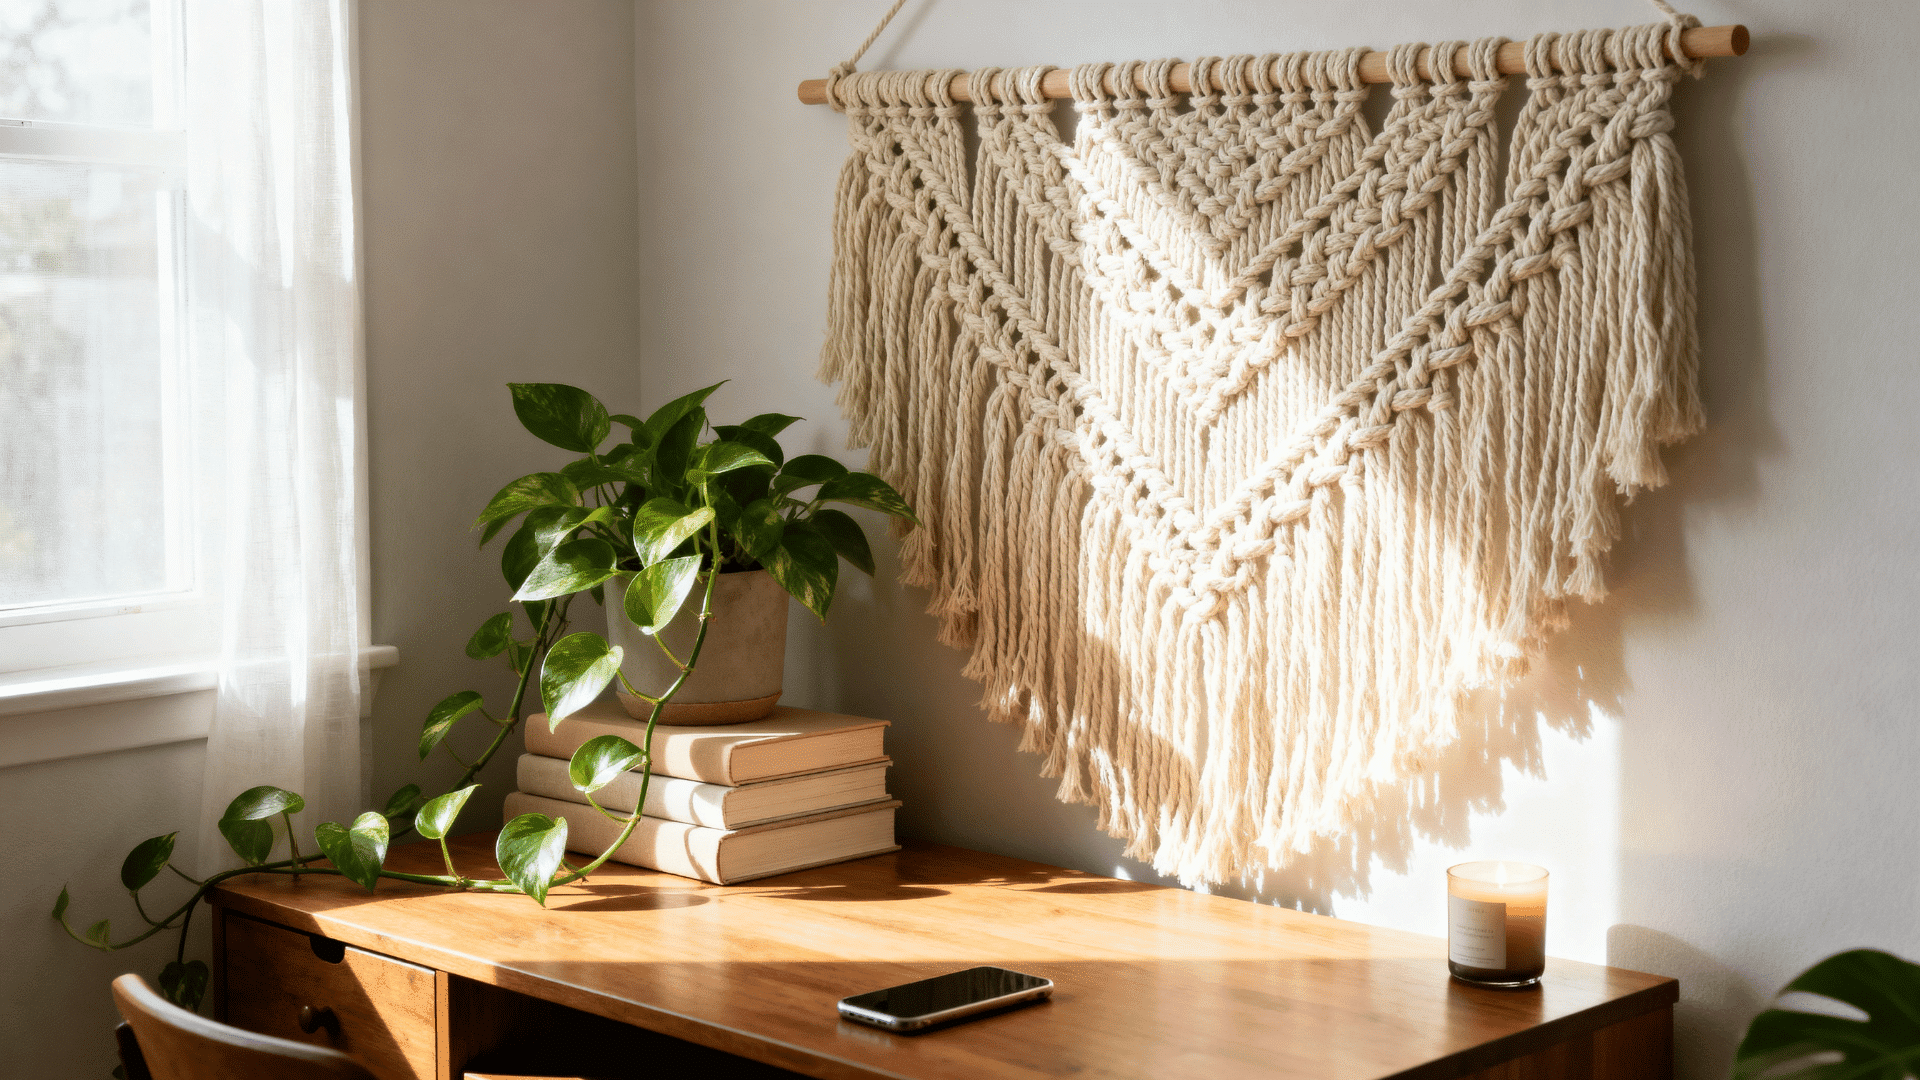
A macrame wall hanging is a knotted rope design that adds texture to a bare wall. This is one of the most popular crafts at home right now because it looks handmade yet requires only one material.
Different knot styles can create stripes, diamonds, and layered sections. Natural cotton cord suits neutral rooms and brings softness to hard wall surfaces.
Materials Required: Cotton cord, a wooden dowel, scissors.
How to Put Together:
- Cut the cord into equal 6-foot lengths
- Fold each piece in half and loop it around the dowel
- Tie rows of square knots to build the pattern
- Trim the bottom ends evenly
- Hang the dowel using string or ribbon
3. Painted Mason Jar Vases
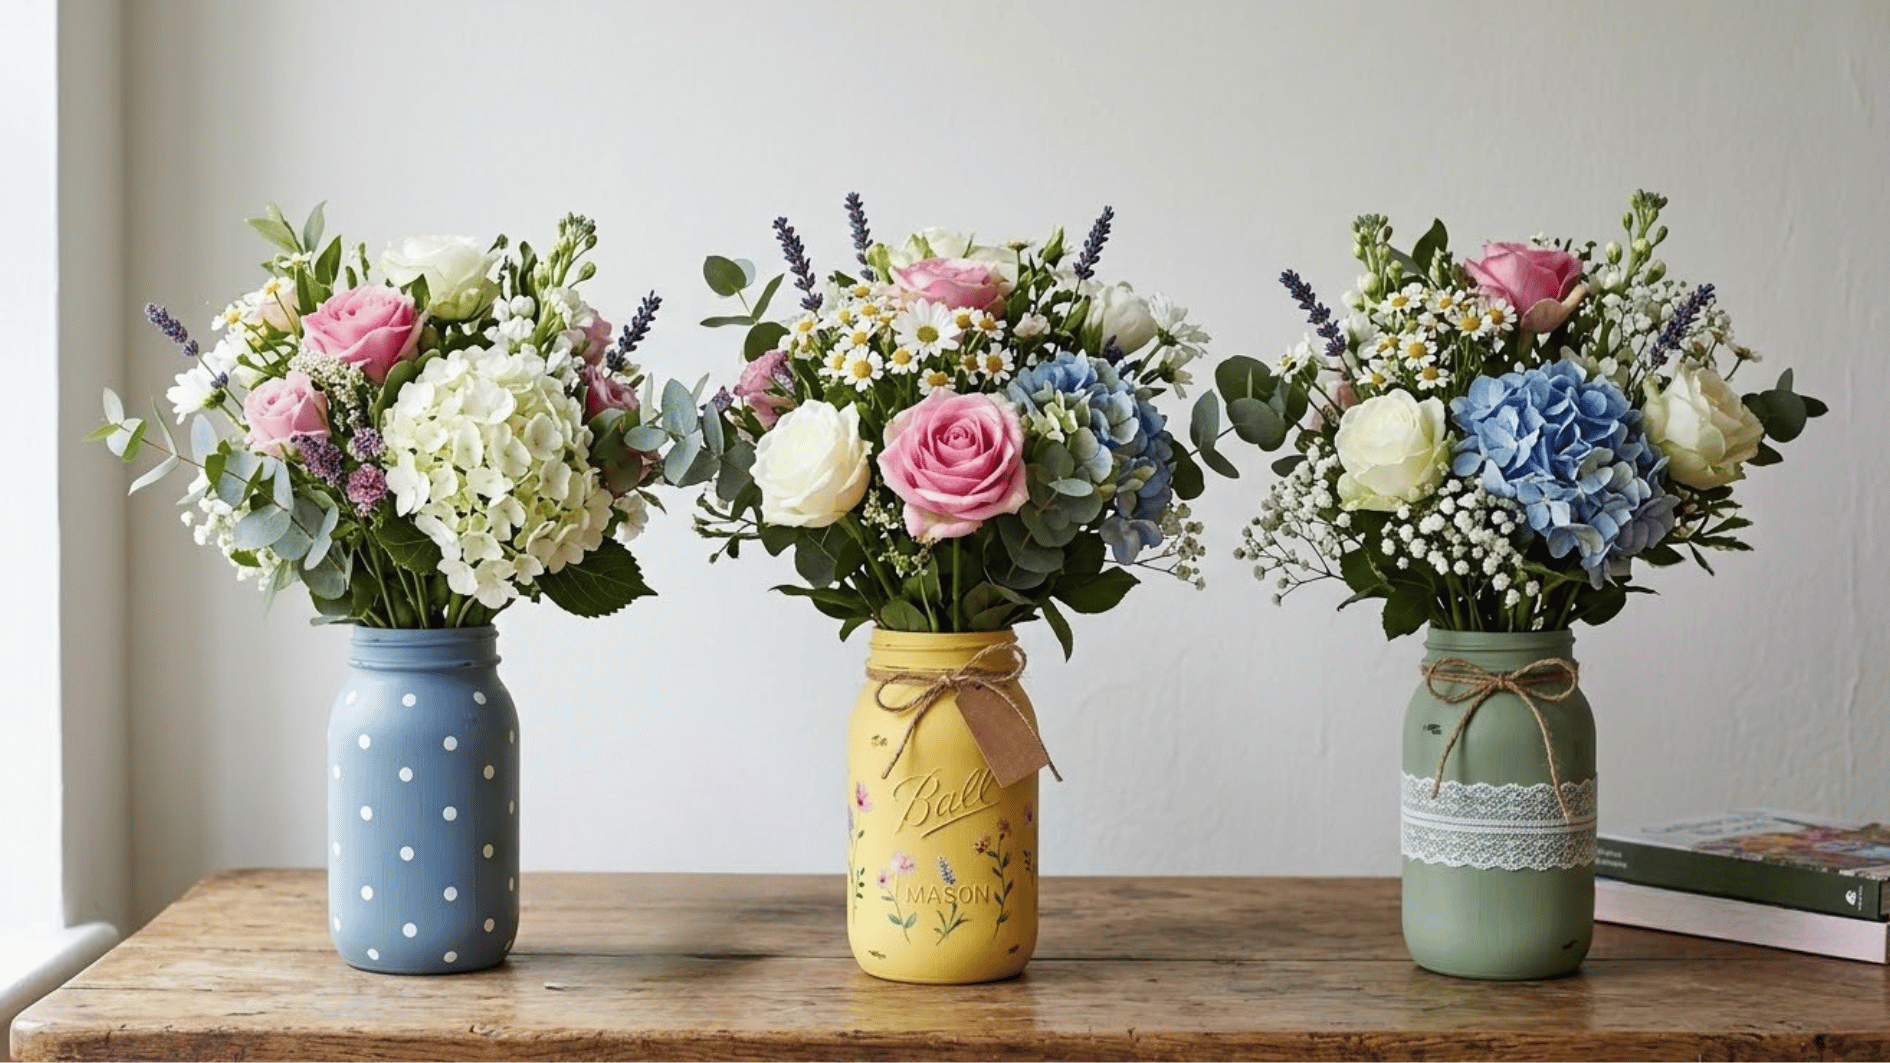
Painted mason jars turn plain glass into colorful vases for flowers, pens, or brushes. Each jar can be a different color for a fun, mismatched look.
Materials Required: Mason jars, acrylic paint, paintbrush, painter’s tape.
How to Put Together:
- Clean and dry the jars completely
- Tape off any stripes or patterns you want to keep bare
- Paint the open areas, then let the first coat dry before adding a second coat
Tip: Use matte paint for a soft finish or metallic shades for a brighter look. Painter’s tape can help you add clean stripes, blocks, or angled sections.
4. Floating Wooden Shelves
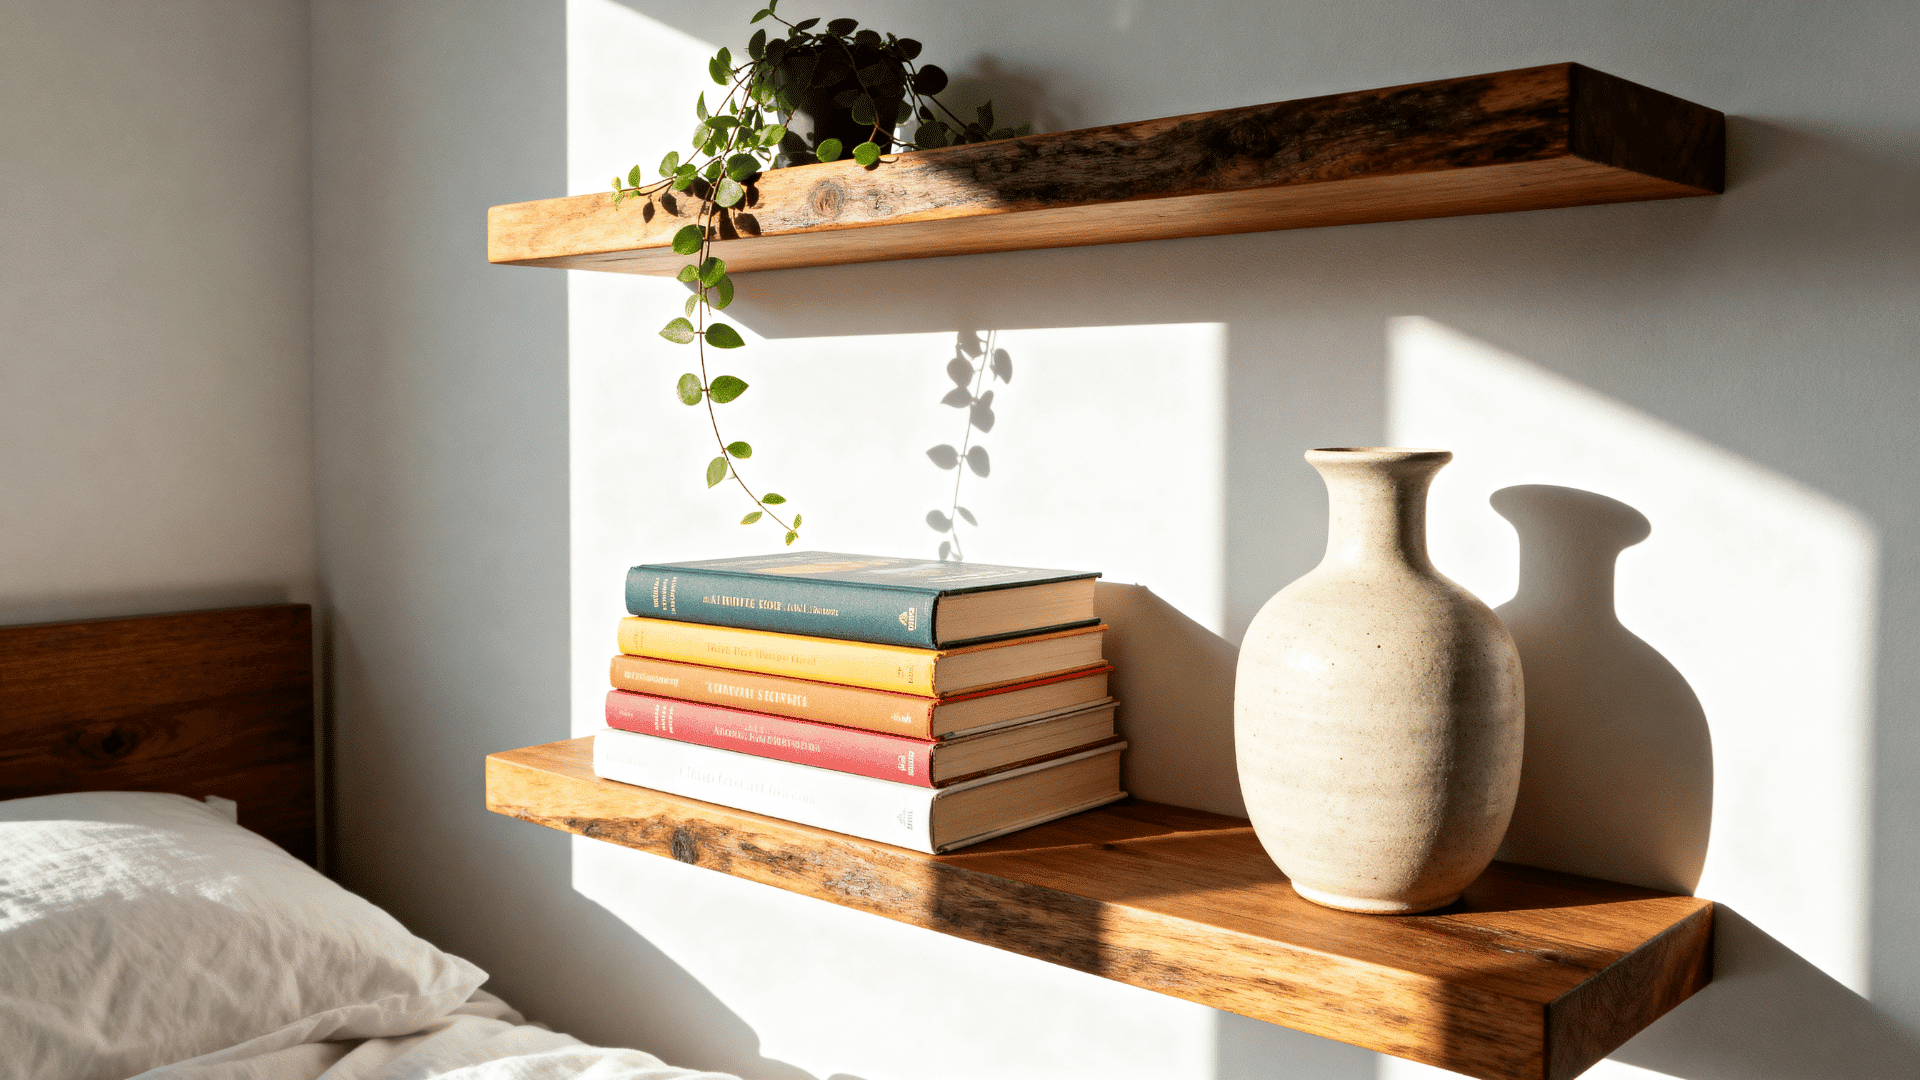
Floating shelves look like they’re stuck to the wall with no visible brackets. They’re a simple way to display books, plants, or small decor.
These shelves use empty wall space while keeping the floor clear. Stain the wood to show its grain or paint it to match nearby furniture, an approach covered further in these DIY wood craft ideas.
Materials Required: Wood board, L-brackets, screws, drill, level.
How to Put Together:
- Mark the shelf spot on the wall using a level
- Drill the L-brackets into place
- Set the board on top of the brackets
- Screw the board down from underneath so nothing shows
- Check that it sits flat before adding anything to it
5. DIY Canvas Painting
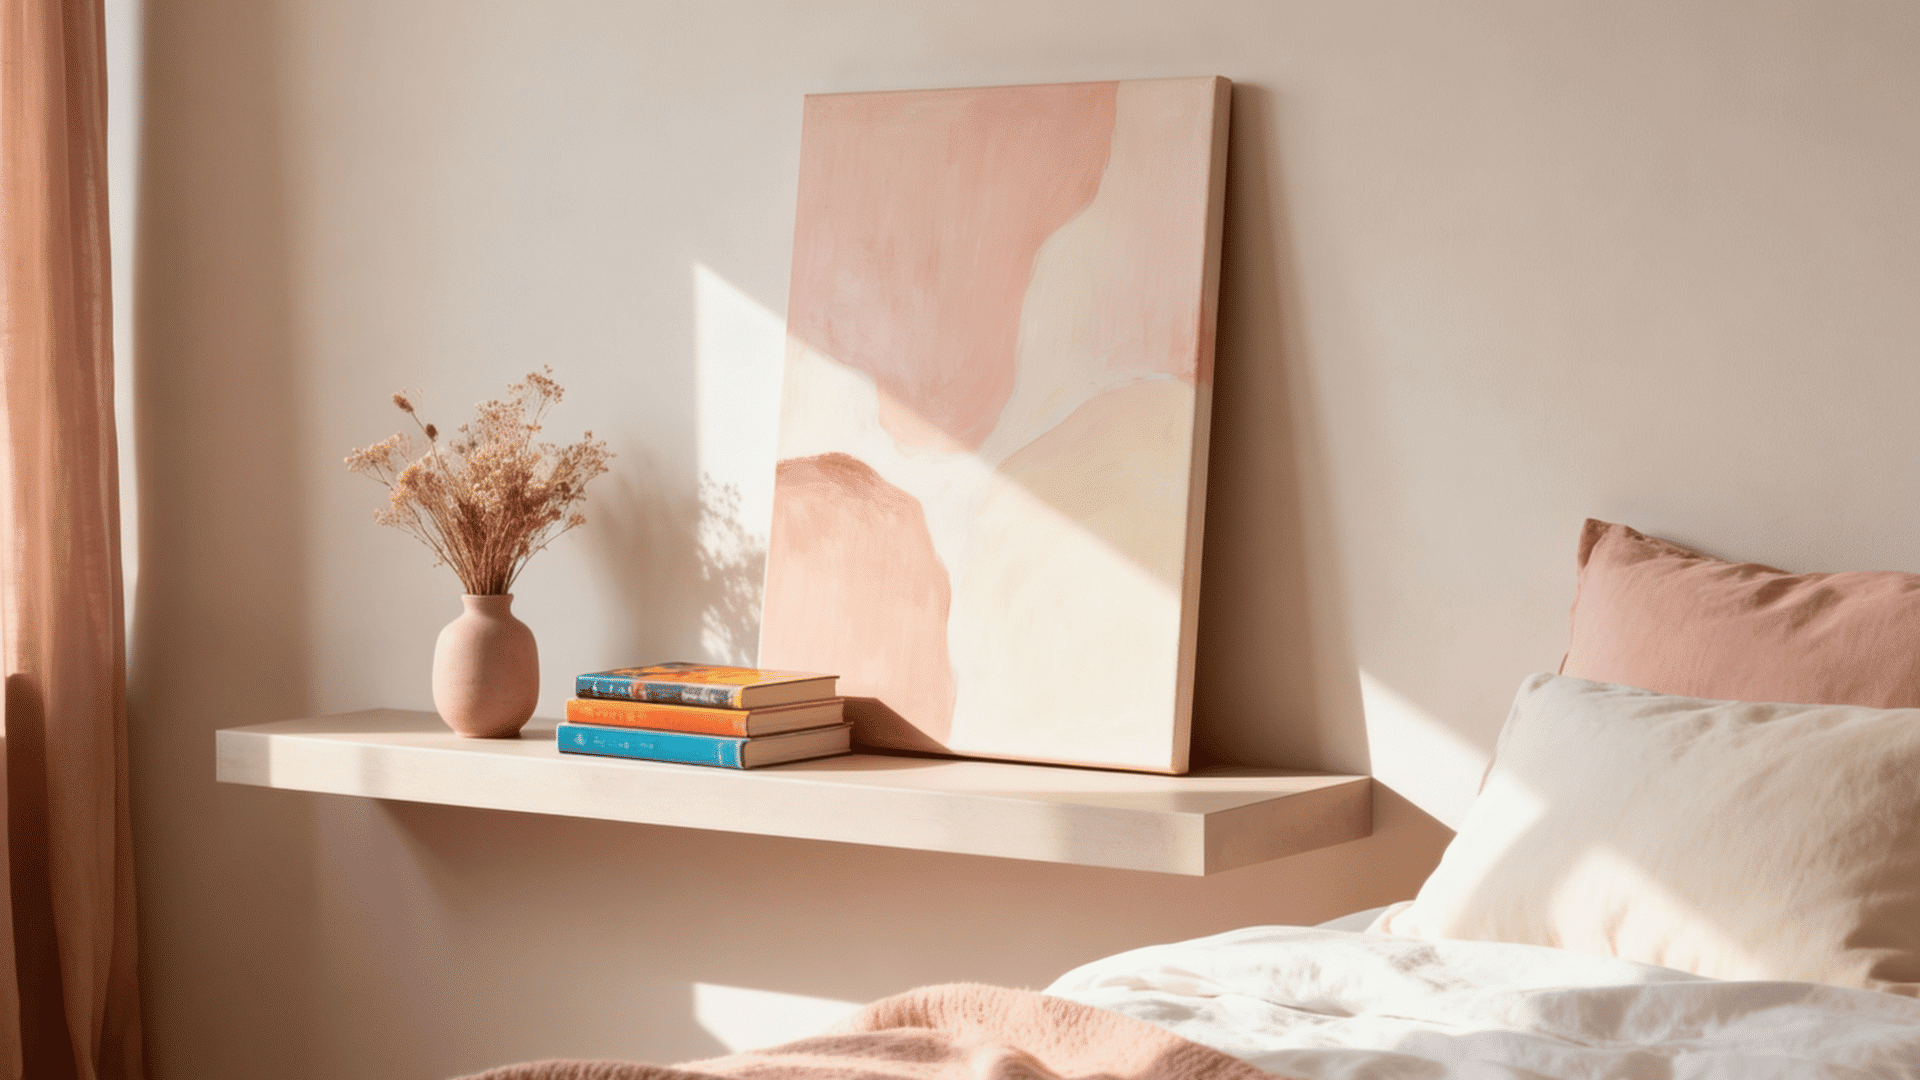
A homemade canvas painting doesn’t need to be perfect to look good on a wall. Simple shapes or one bold color block can work just as well as a detailed picture.
Materials Required: Blank canvas, acrylic paint, paintbrushes, painter’s tape (optional).
How to Put Together:
- Pick one or two colors that match your room
- Tape off any straight lines or shapes you want
- Paint the canvas in layers, letting each one dry
- Remove the tape once the paint is dry
- Let the canvas sit for a few hours before hanging it up
6. Pressed Flower Frames
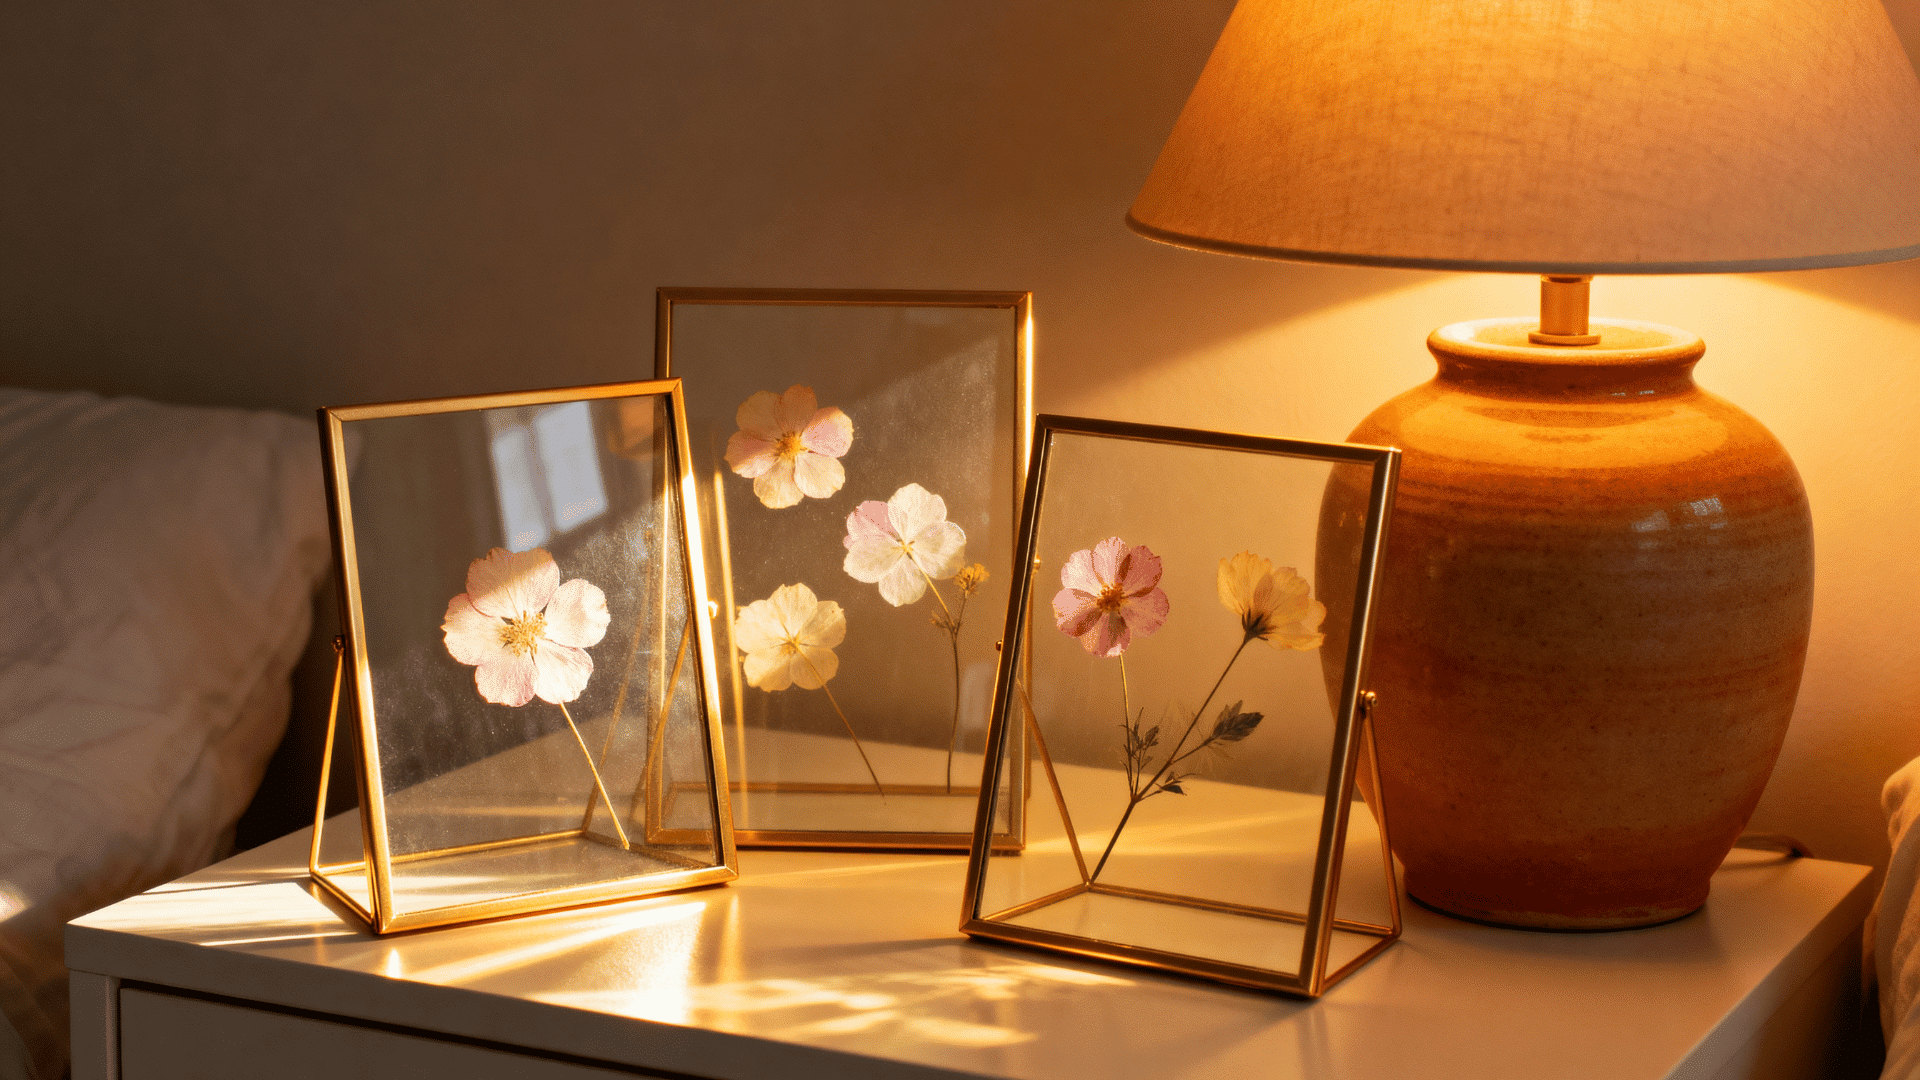
Pressed flower frames turn real flowers into flat art you can keep for years. They work well with flowers from a yard, a walk, or a bouquet you don’t want to toss.
Materials Required: Flowers, heavy books, parchment paper, picture frame.
How to Put Together:
- Place the flowers between two sheets of parchment paper.
- Stack heavy books on top and leave them for one to two weeks.
- Once flat and dry, arrange the flowers inside the frame
7. Stenciled Throw Pillow Covers
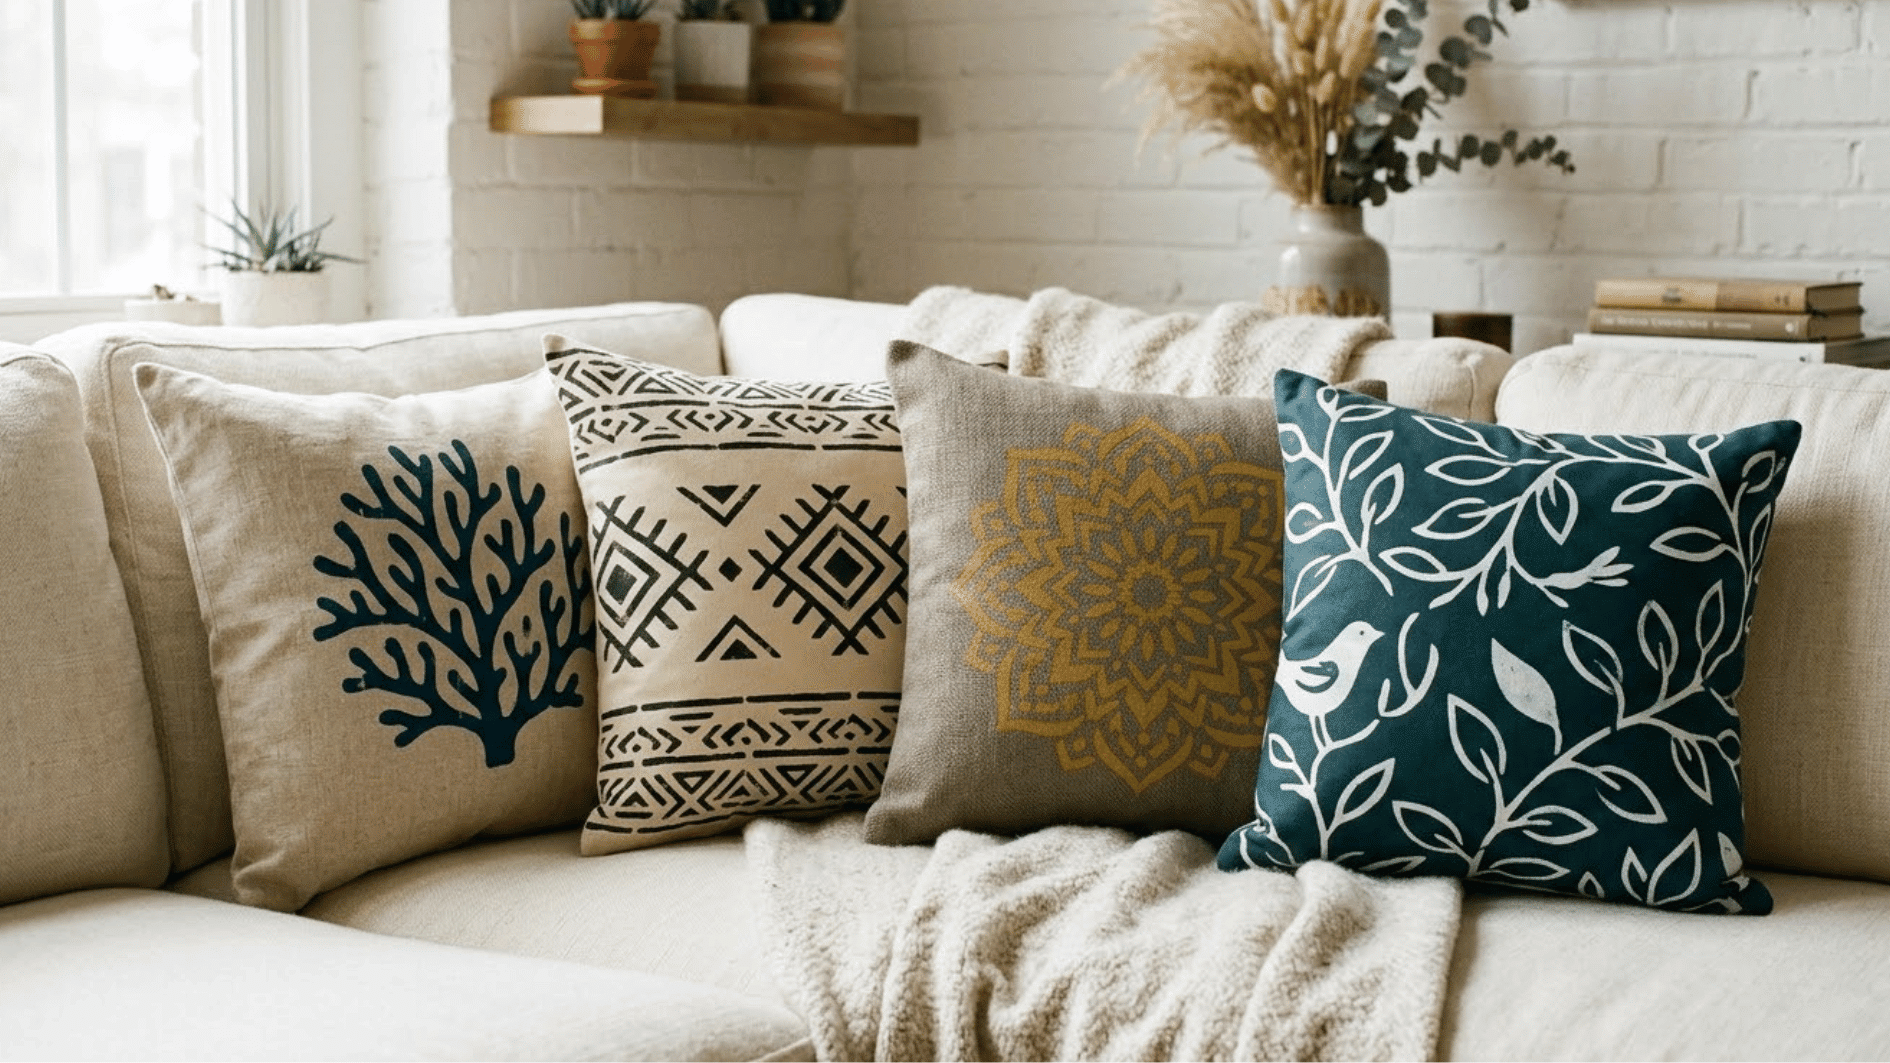
Plain pillow covers get a hand-painted pattern using a stencil, giving your couch or bed a custom look without buying new pillows.
Materials Required: Plain pillow covers, fabric paint, stencil, foam brush, and cardboard.
How to Put Together:
- Slide a piece of cardboard inside the pillow cover so paint doesn’t bleed through
- Position the stencil where you want the design
- Dab fabric paint over the stencil using a foam brush, applying light, even coats
- Peel the stencil off carefully while the paint is still slightly wet
- Let it dry fully before removing the stencil
8. Rope-Wrapped Mirror Frame
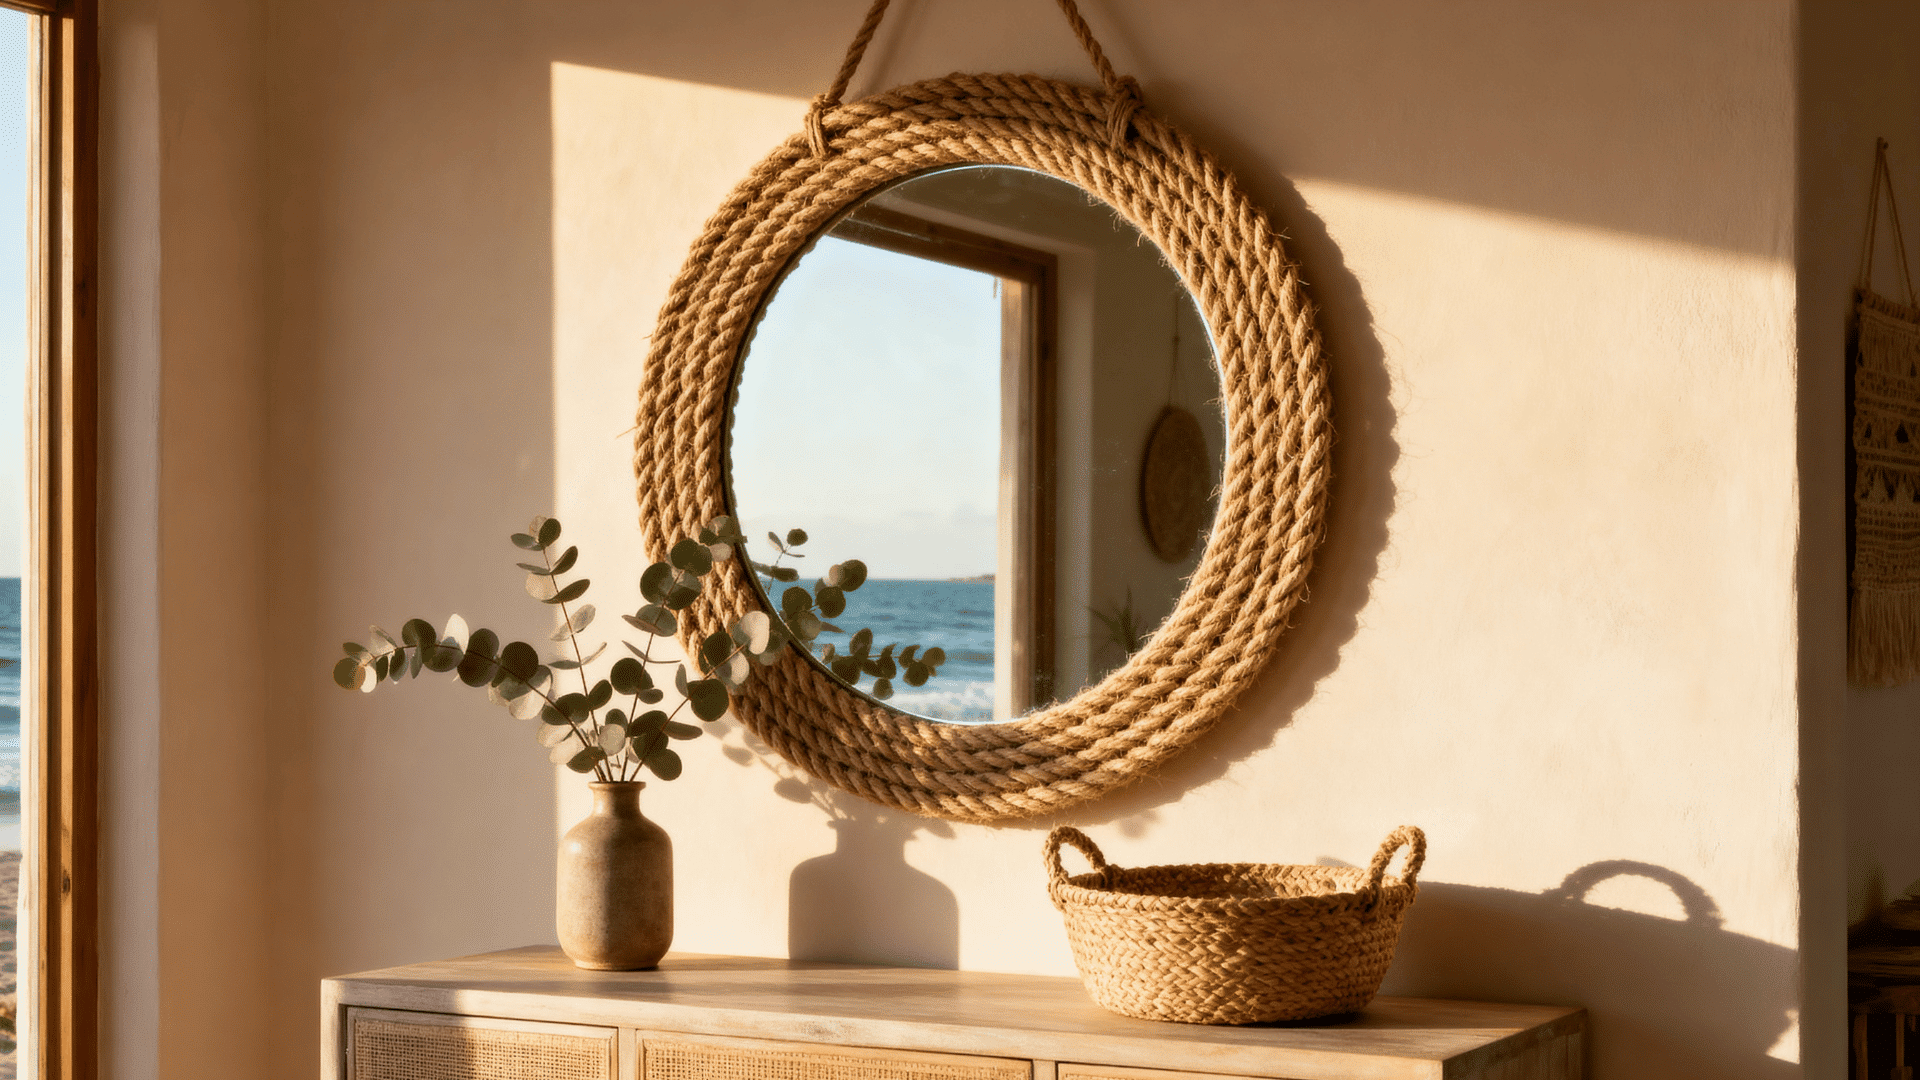
A rope-wrapped mirror frame covers a plain round mirror with jute or cotton rope for a beachy, natural look.
Materials Required: Round mirror, jute rope, hot glue gun.
How to Put Together:
- Add a small line of hot glue to the edge of the mirror
- Press the rope down and start wrapping
- Keep wrapping tightly, adding glue every few inches
Tip: Start every new row at the same point to keep the joins less noticeable. A small loop at the top can provide a decorative nautical detail.
9. Tassel Garland Wall Hanging
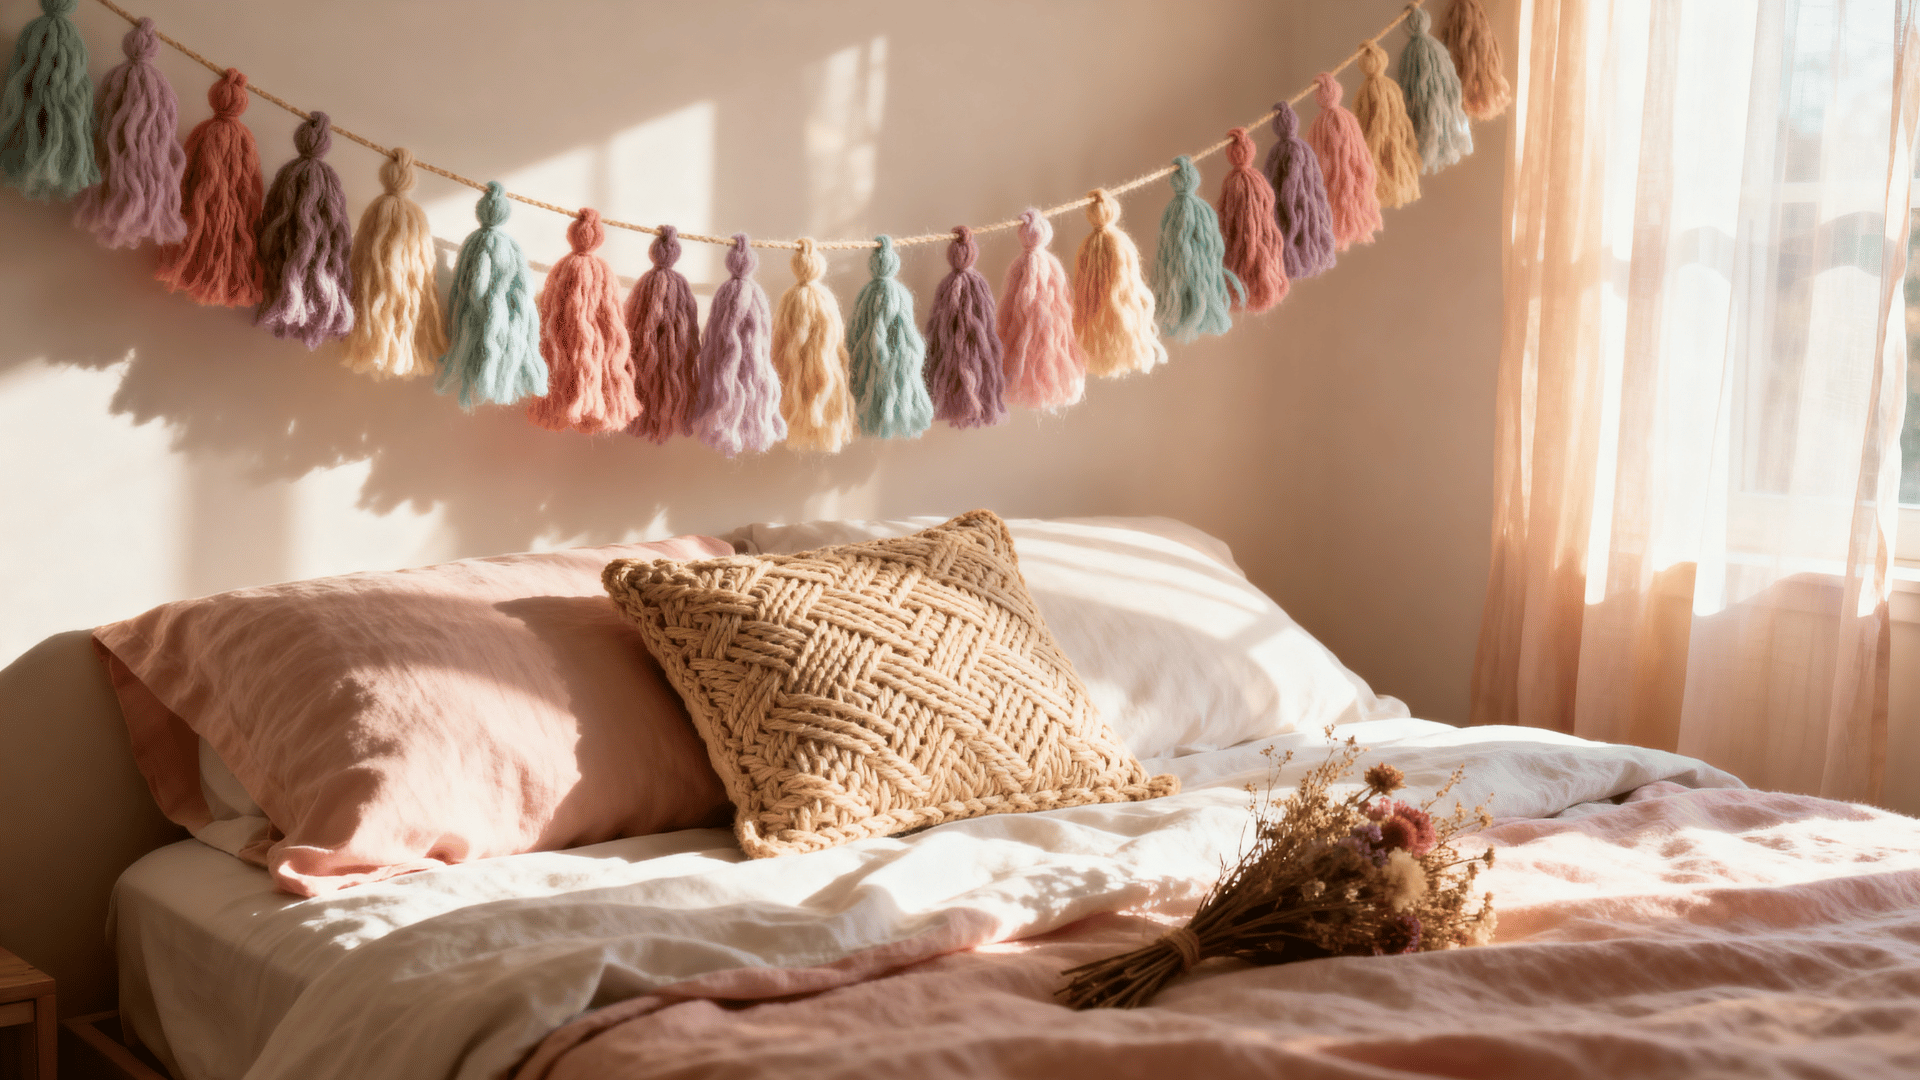
A tassel garland is a string of small yarn tassels that adds color and movement to a wall or shelf. It’s one of the easiest crafts at home for beginners since there’s no cutting patterns or measuring involved.
Materials Required: Yarn, scissors, twine or string.
How to Put Together:
- Wrap yarn around your fingers about 20 times
- Tie the top tightly and slide the bundle off your fingers
- Cut the bottom loops open to form the tassel
- Tie each finished tassel onto a long piece of twine, spacing them evenly
10. Upcycled Tin Can Planters
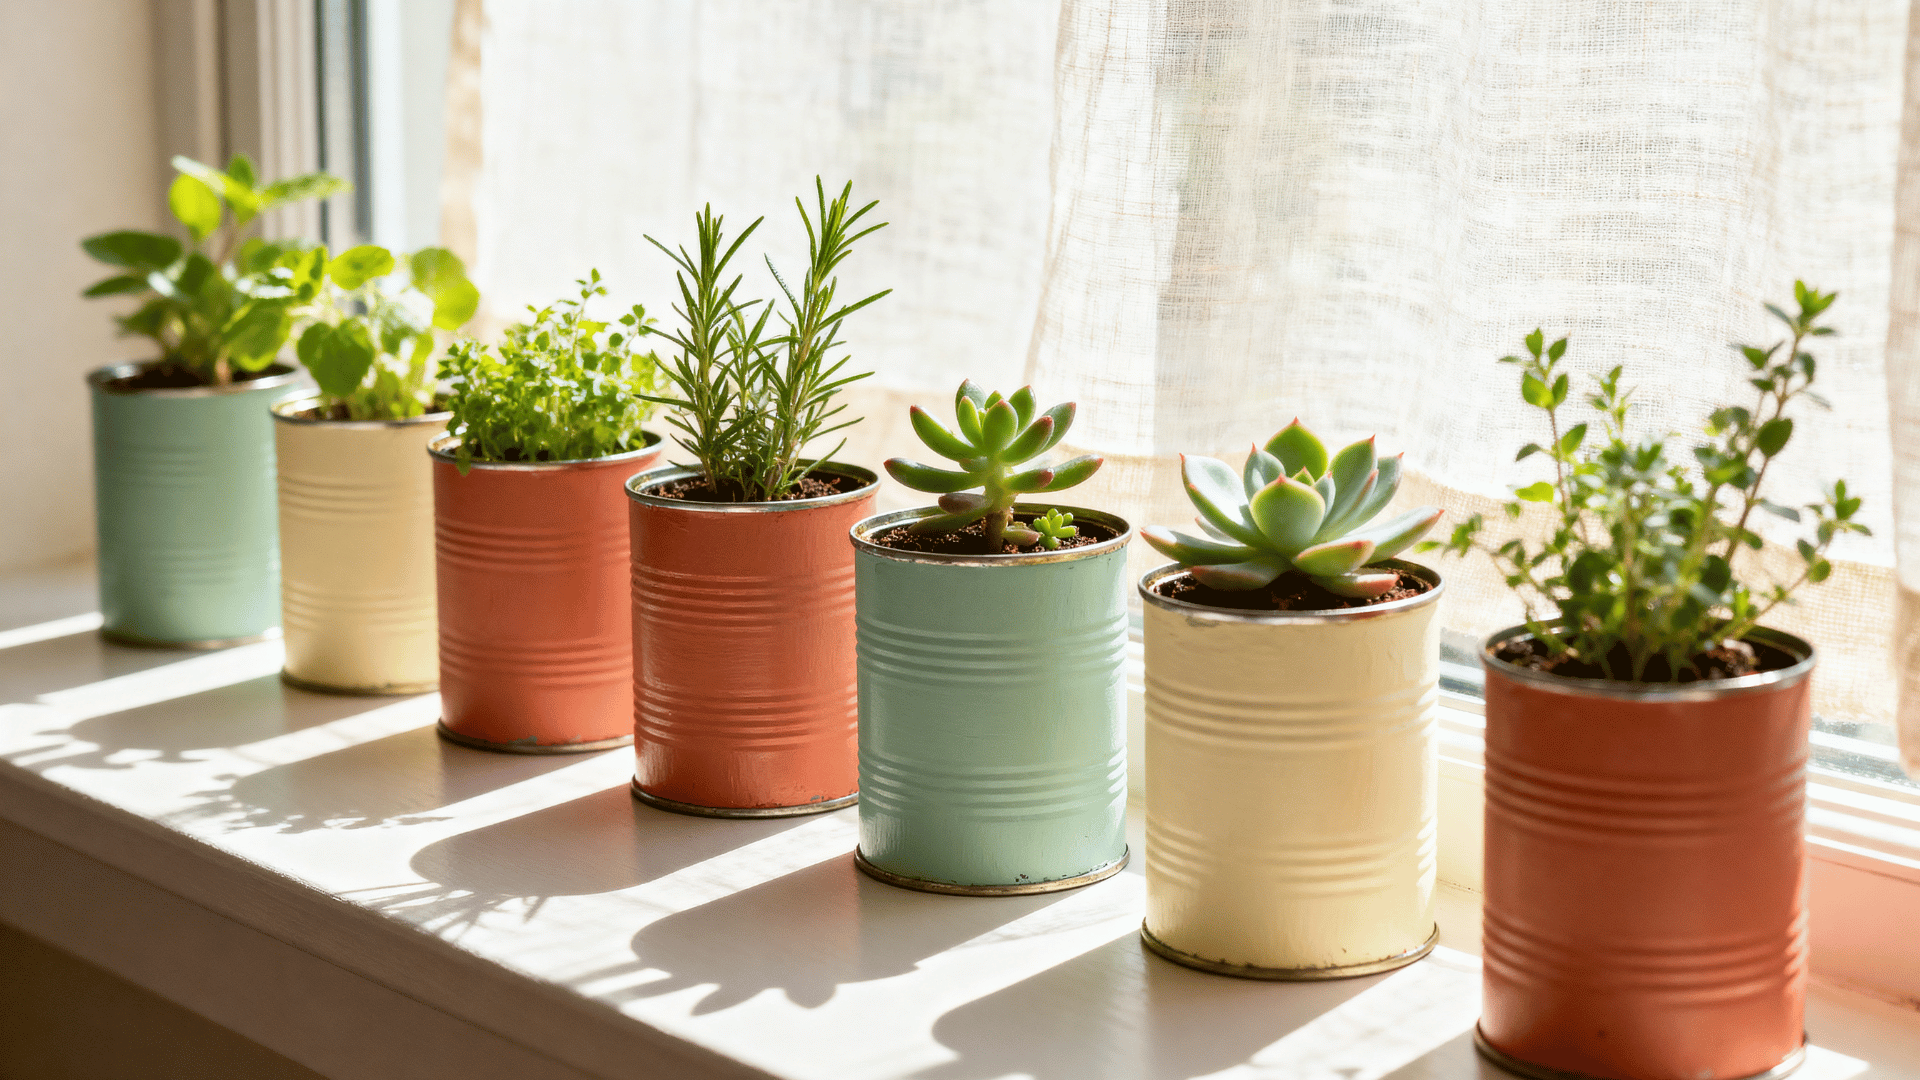
Punch a drainage hole in the base before adding plants that dislike wet soil. Wrap the rim with twine if any sharp edge remains after opening the can.
Labels, dots, and hand-painted leaves can give every planter its own appearance. Place several together to form a small herb garden near a sunny window.
Materials Required: Empty tin cans, acrylic paint, paintbrush, clear sealant spray.
How to Put Together:
- Wash the cans and remove any labels or leftover glue
- Paint the outside and let it dry, adding a second coat if needed
- Add soil and a small plant once the paint dries
- Set the planter somewhere with a bit of sunlight
11. Ombre Dip-Dyed Curtains
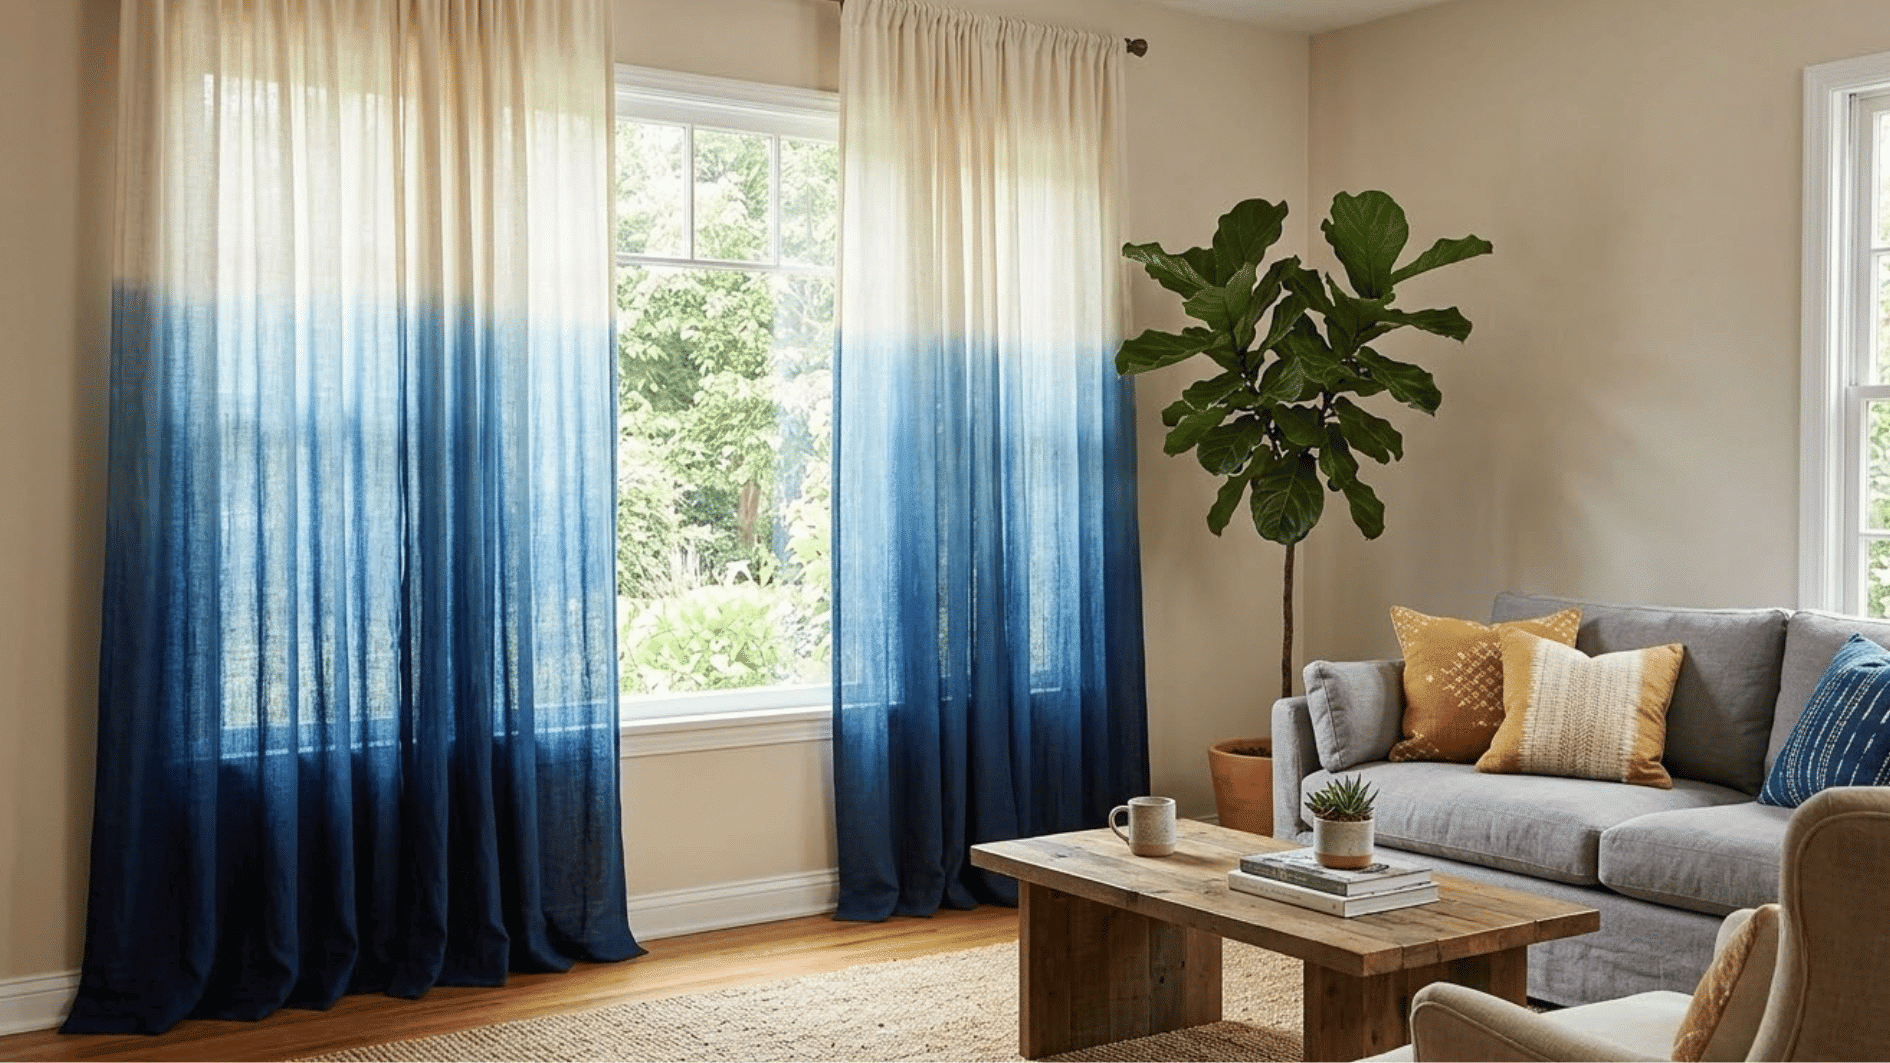
Ombre curtains fade from light to dark or from one color to another using a simple dyeing method. This is a fun weekend project instead of buying patterned curtains.
Materials Required: Plain white curtains, fabric dye, large bucket, rubber gloves.
How to Put Together:
- Mix the fabric dye in a bucket following the package instructions
- Dip the bottom few inches of the curtain into the dye for a few minutes
- Lift the curtain out slowly and let it dry
12. Paper Lantern Lighting Corner
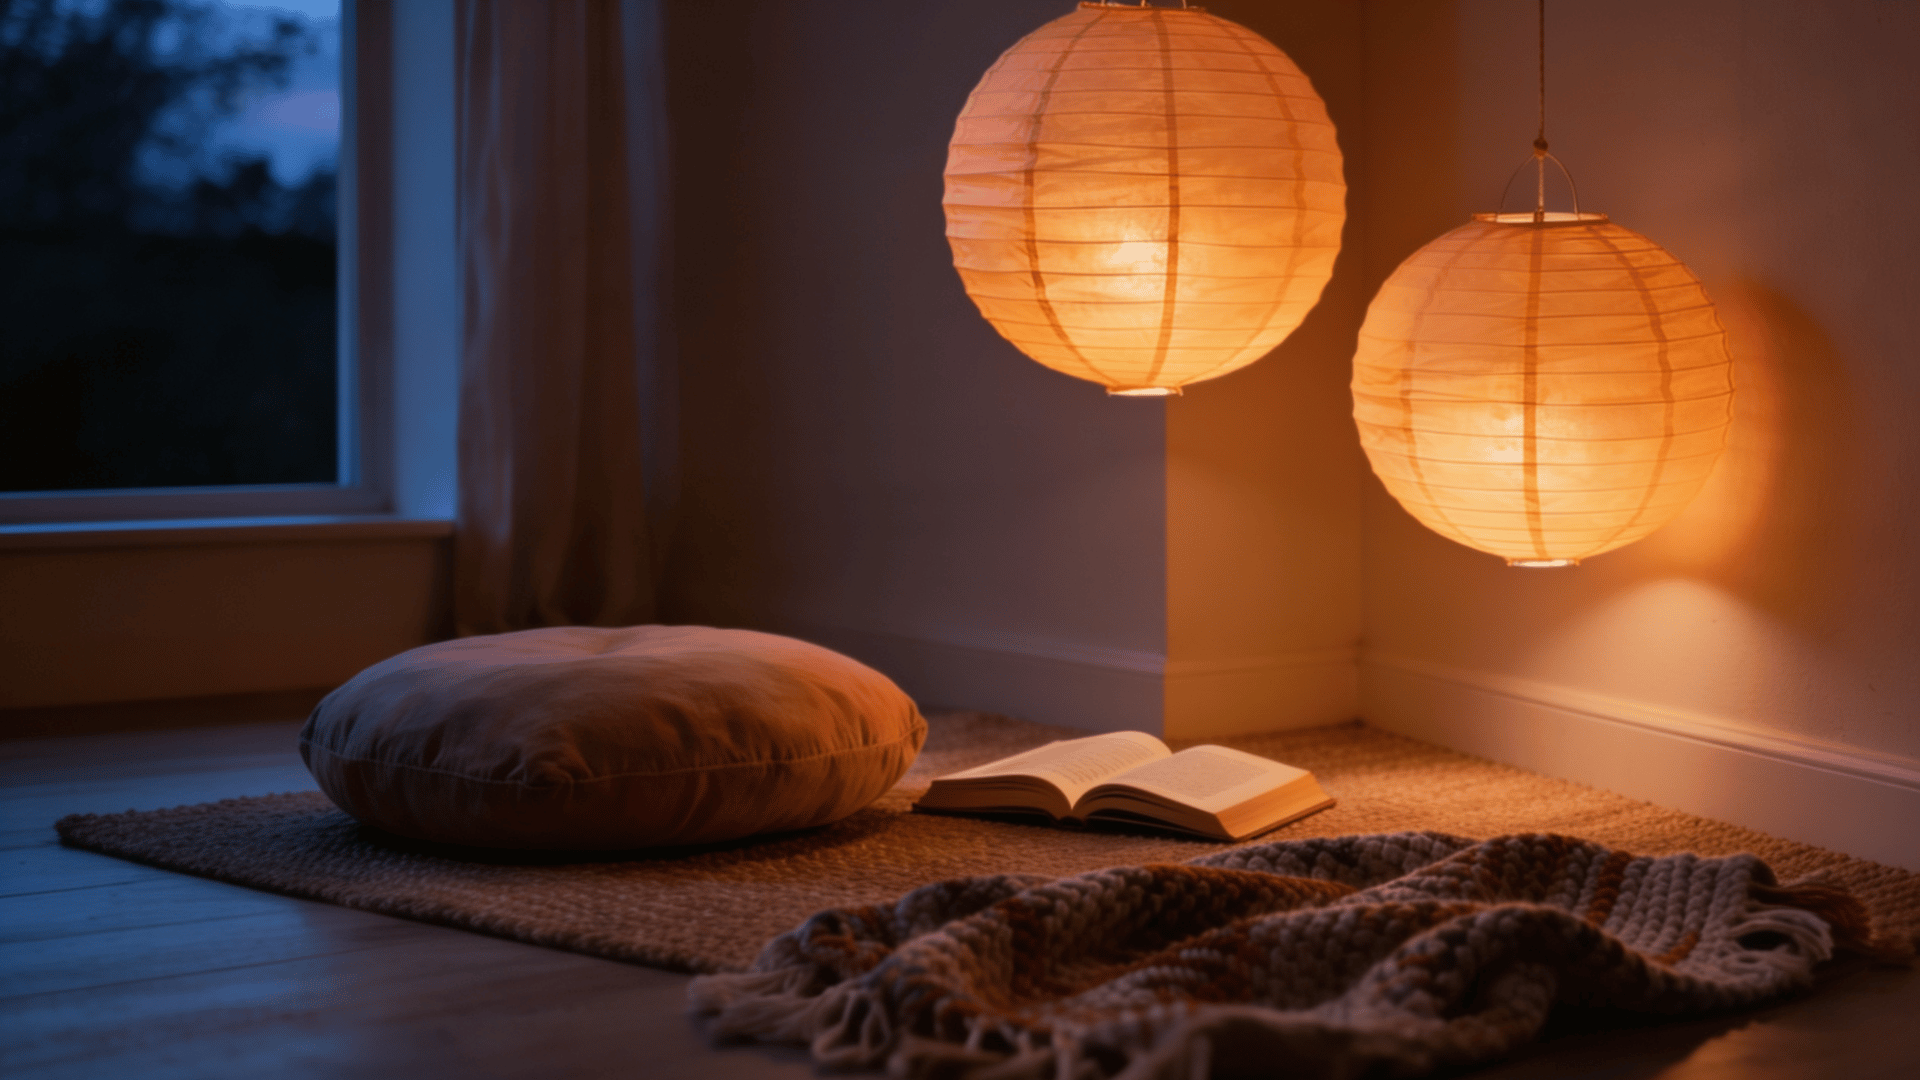
A cluster of paper lanterns in different sizes makes a cozy reading corner or desk area feel warmer at night. Choose lanterns in related shades so the cluster appears coordinated.
Varying their sizes and hanging heights prevents the display from looking flat. Battery-powered LED bulbs are safer because they produce very little heat.
Place a chair and small side table underneath to complete the reading area.
Materials Required: Paper lanterns, string lights, fishing line or string.
How to Put Together:
- Insert a small battery light into each paper lantern
- Tie the fishing line to the top of each one
- Hang the lanterns from the ceiling at different heights
- Group two or three close together for a cluster effect
13. Wooden Crate Storage Shelf
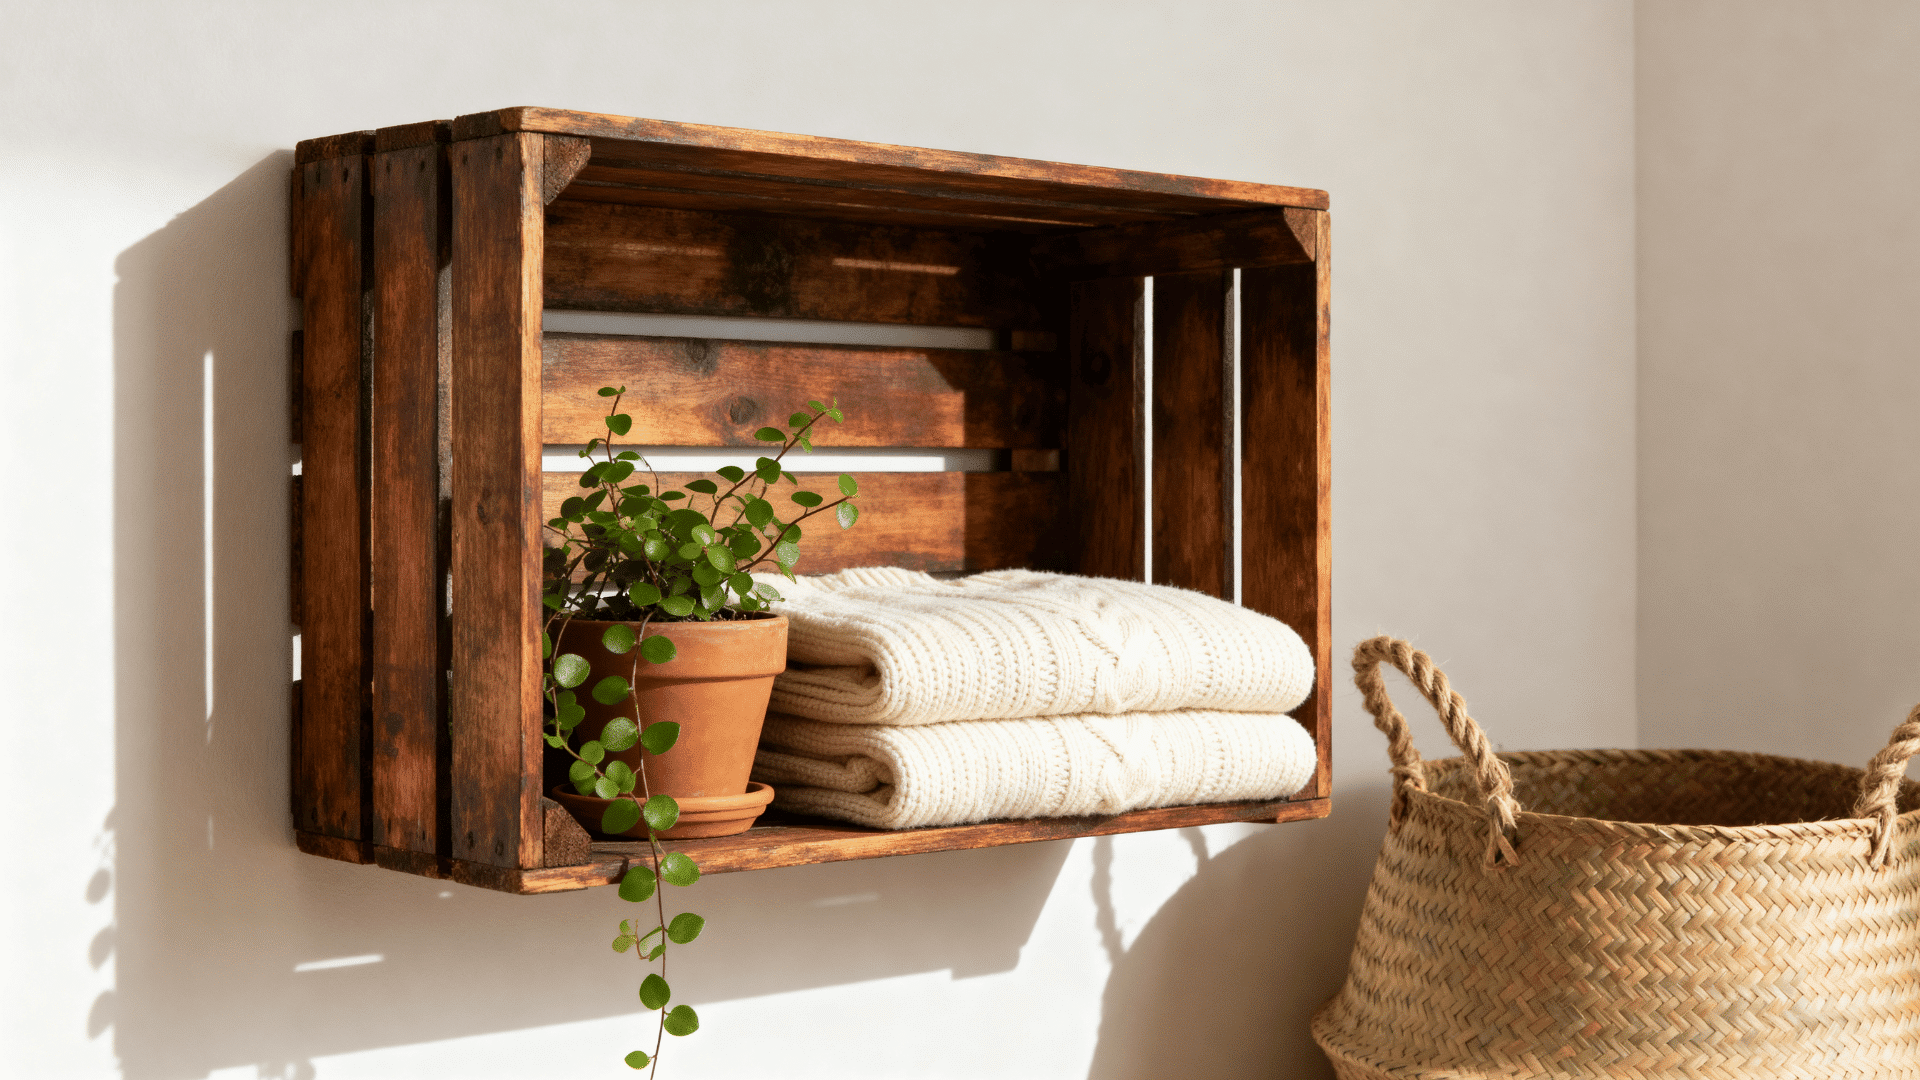
A wooden crate mounted on the wall works as an open shelf for books, plants, or folded clothes. This is a favorite for anyone doing diy decor on a tight budget since crates are cheap or free.
Materials Required: Wooden crate, sandpaper, wood stain or paint, wall anchors, screws.
How to Put Together:
- Sand down any rough edges on the crate
- Paint or stain the crate and let it dry fully
- Hold the crate against the wall and mark the screw spots
- Drill in the wall anchors
- Screw the crate onto the wall through the back panel
14. DIY Headboard From Pallets
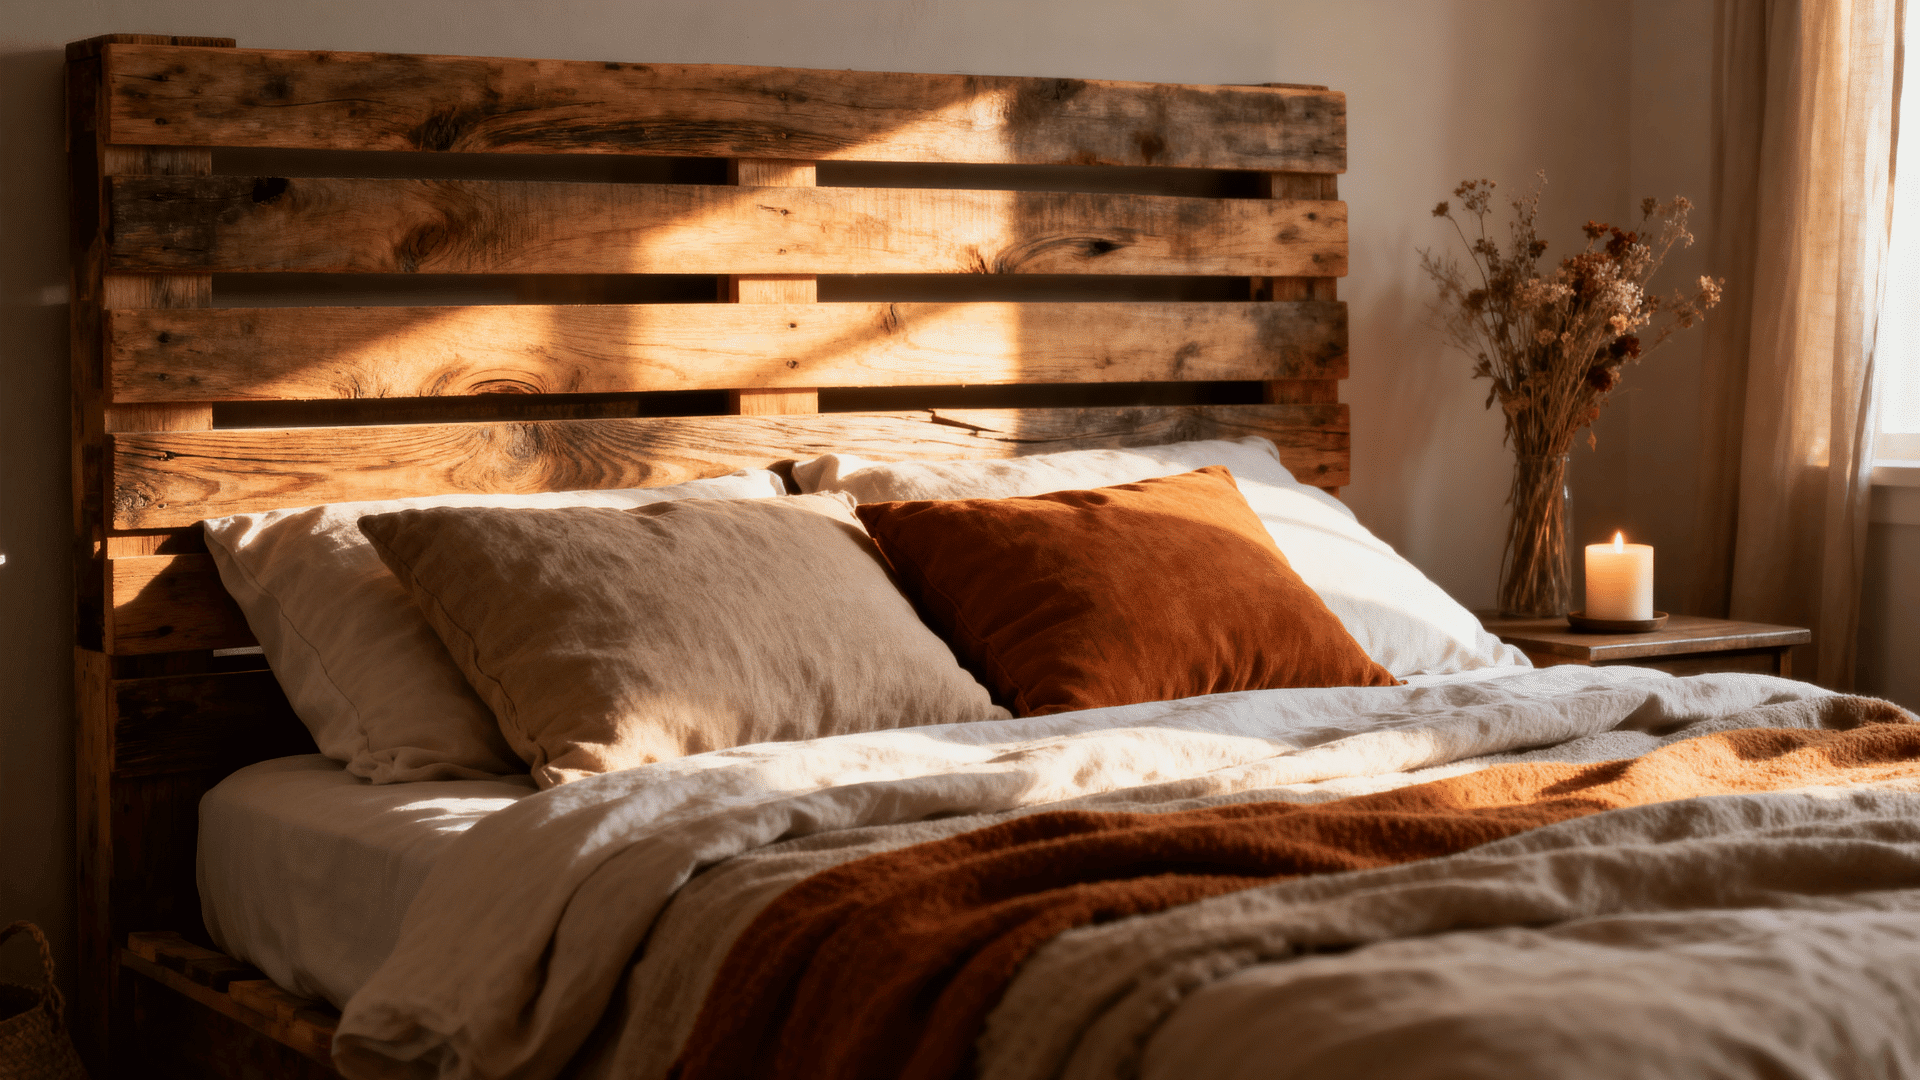
A pallet headboard gives your bed a rustic, finished look without having to buy an expensive frame. It also adds warmth to the room with a natural wood texture that pairs well with almost any bedding style.
Materials Required: Wood pallets, sandpaper, wood stain, screws or brackets.
How to Put Together:
- Sand the pallet wood to remove splinters
- Cut or arrange the pallets to fit your bed width
- Apply wood stain and let it dry completely
Tip: Check every board carefully for loose nails, cracks, and rough patches before use. A clear protective coat can preserve the wood’s natural color and grain. Battery-operated lights may be woven around the boards for gentle evening lighting.
15. Neon-Style Sign Wall Art
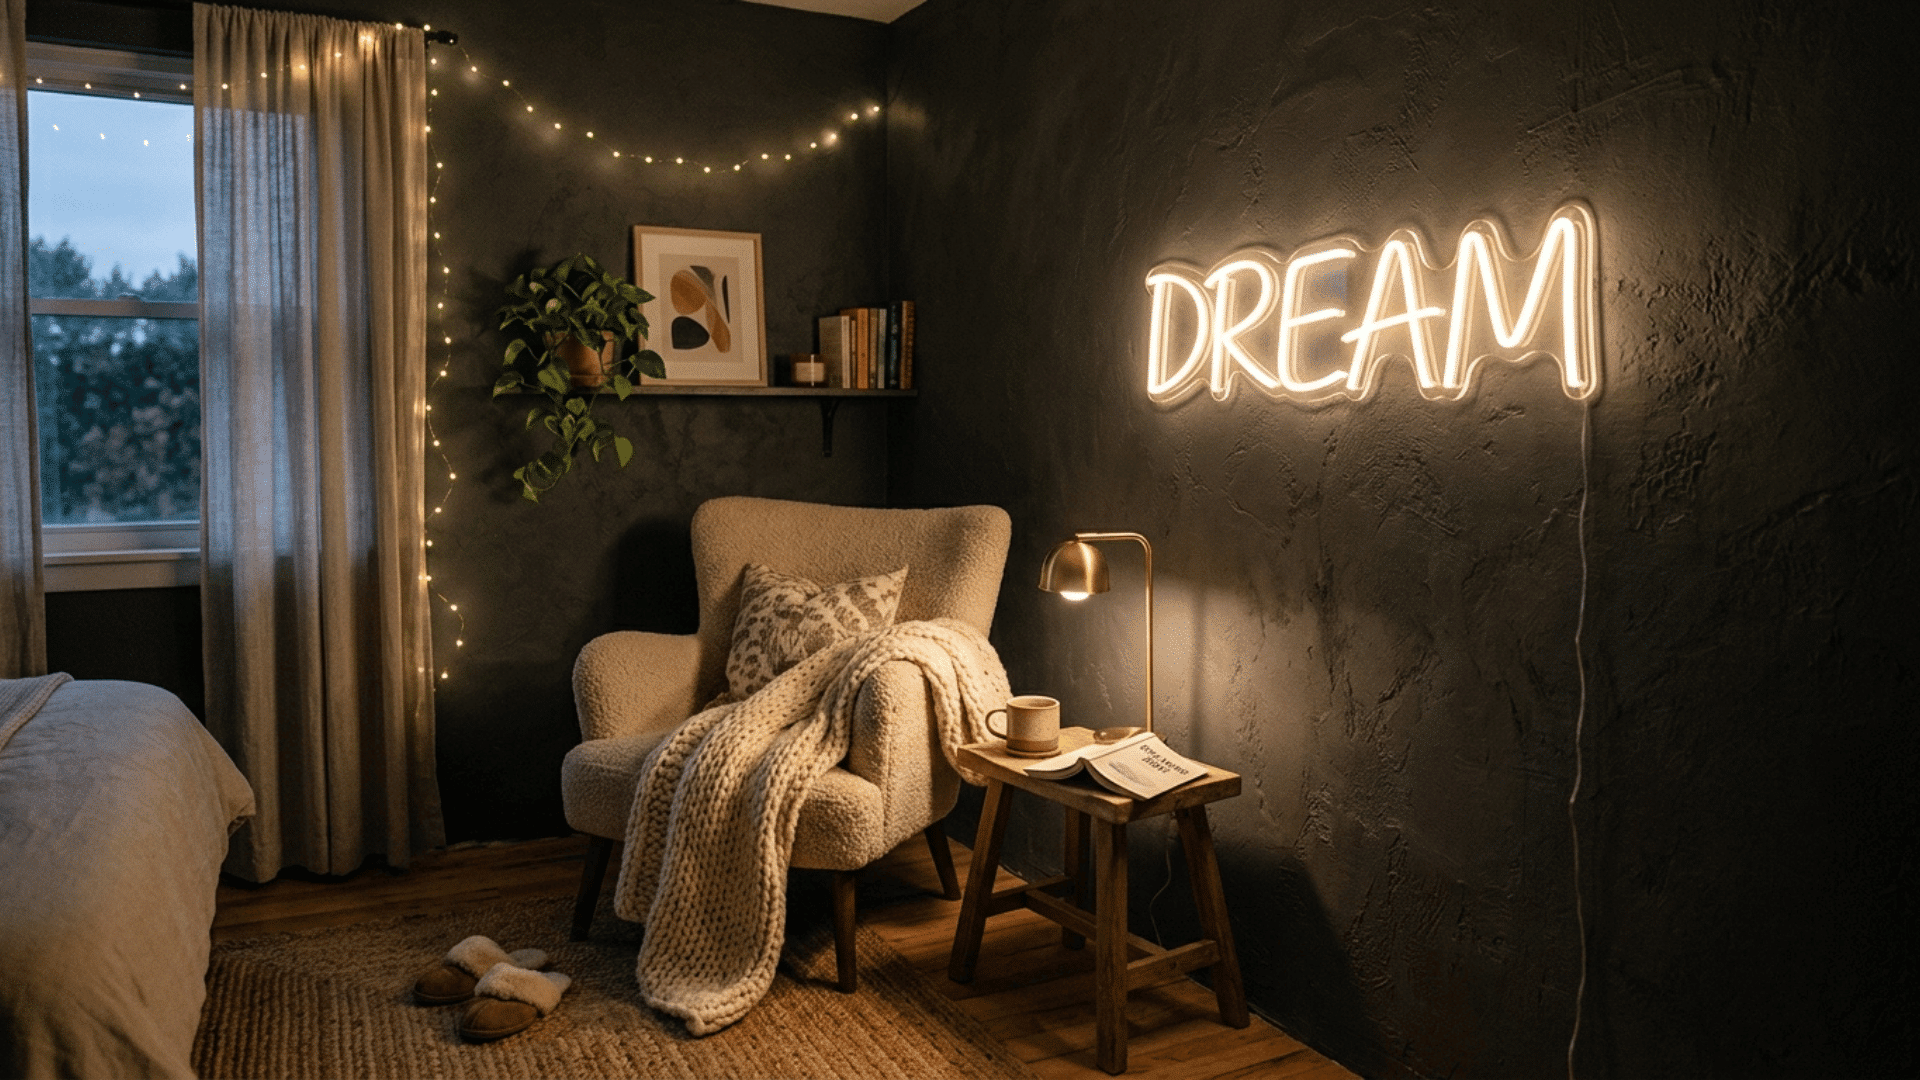
A neon-style sign uses LED strip lights bent into a word or shape, giving off a soft glow without the cost of a real neon sign.
Pick a short word or uncomplicated outline that the light strip can follow easily. A dark backing board will make the illuminated shape look brighter at night.
Materials Required: LED strip lights, cardboard or wood board, hot glue gun, pencil.
How to Put Together:
- Sketch your word or shape lightly on the board
- Trace the outline with hot glue in small sections
- Press the LED strip into the glue while it’s still warm
- Plug in the lights once the glue has fully dried
16. Hanging Glass Terrarium
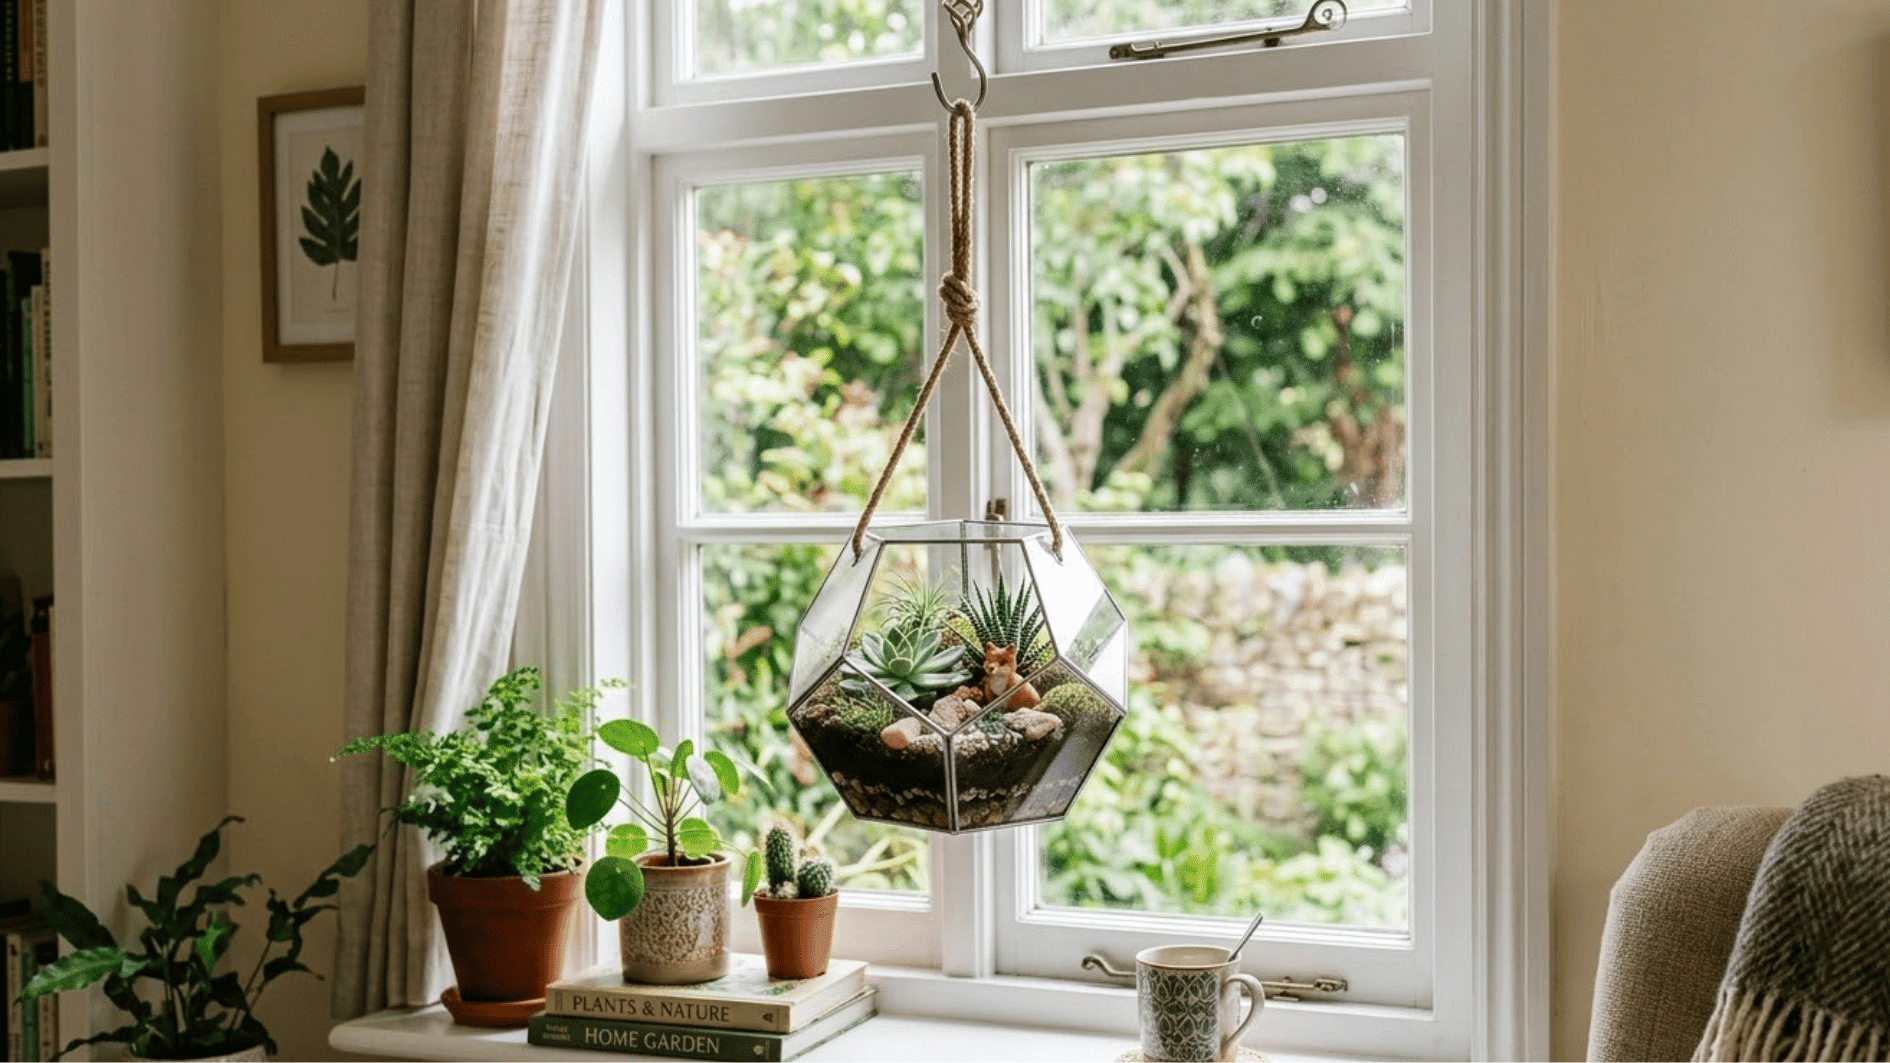
A hanging terrarium holds a small plant inside a glass container suspended from the ceiling or a hook. It brings a touch of greenery to small spaces without taking up any shelf or floor space.
Materials Required: Terrarium container, small rocks, potting soil, small plant, string or macrame hanger.
How to Put Together:
- Add a layer of small rocks to the bottom of the jar
- Add a layer of potting soil on top
- Plant the small plant into the soil
- Secure the jar inside the hanger
- Hang it near a window for natural light
17. Painted Geometric Accent Wall
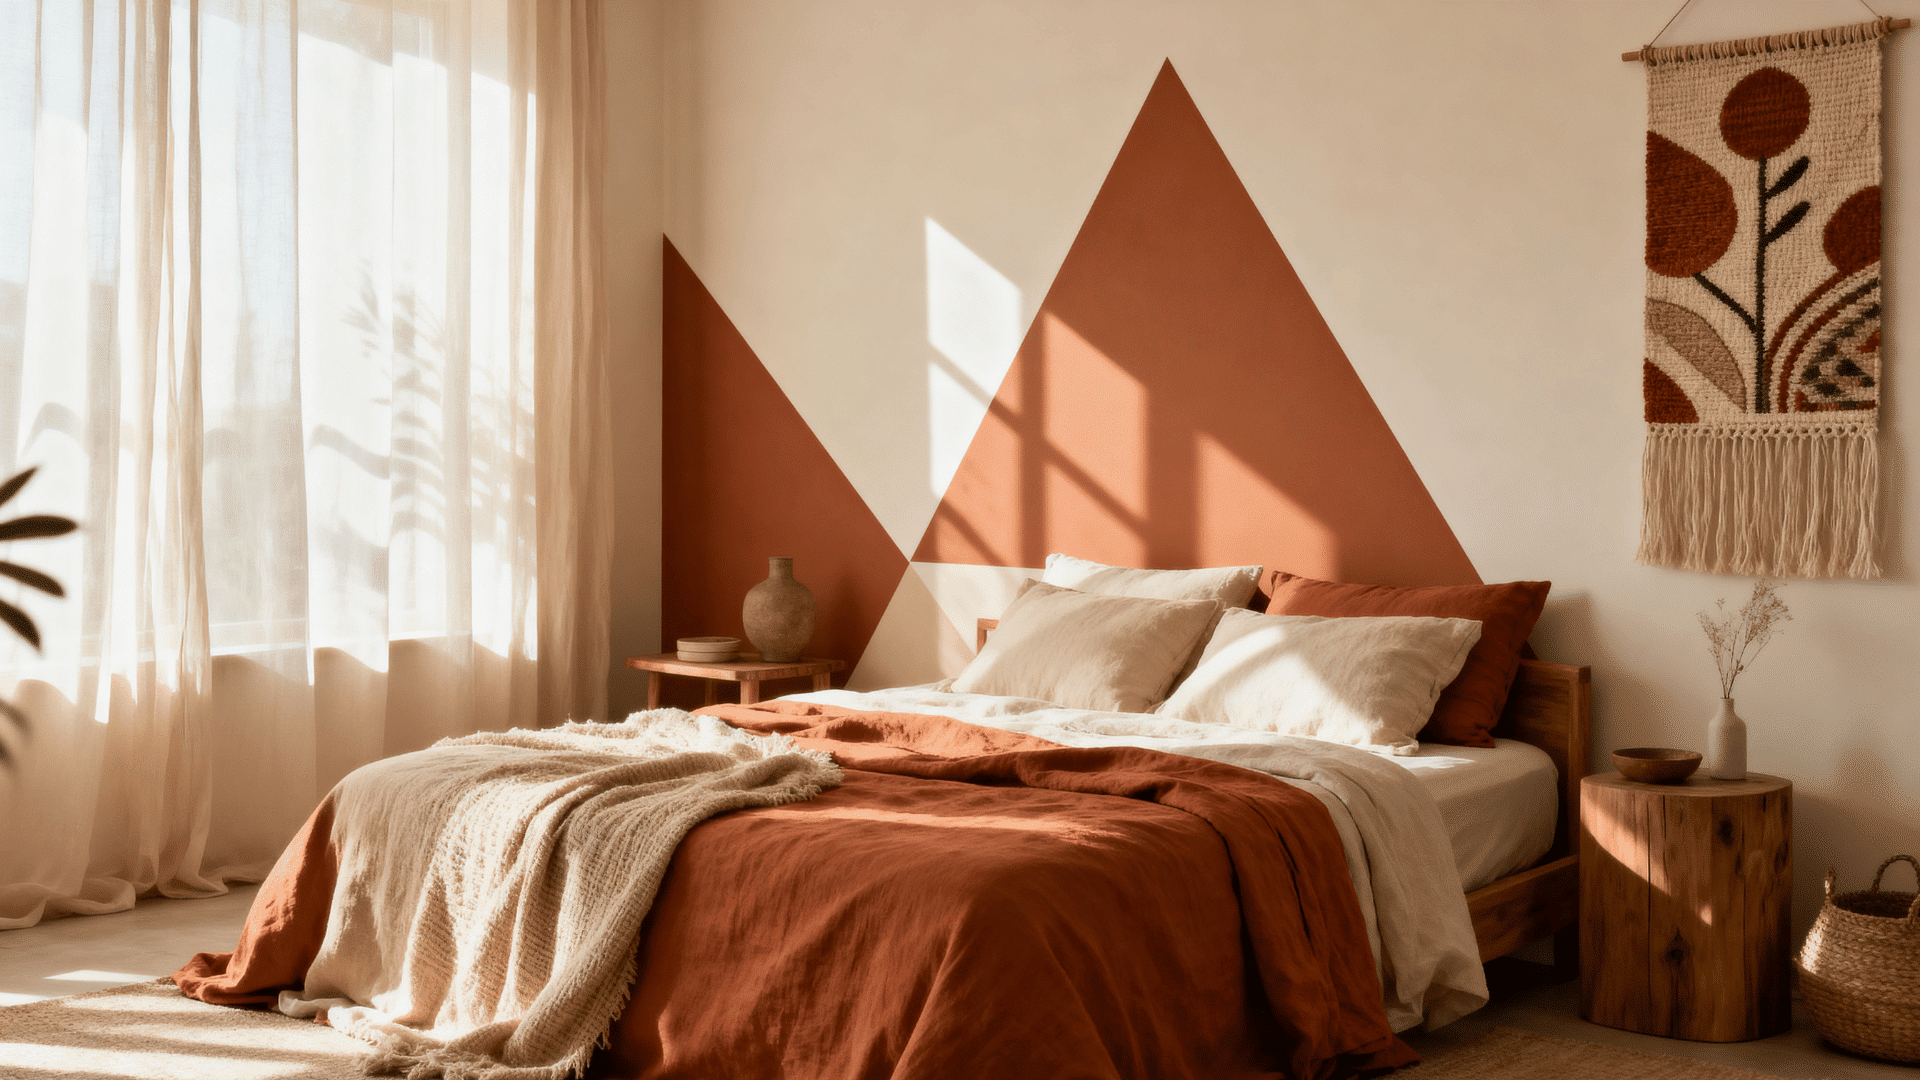
A geometric accent wall uses tape to create triangle or diamond shapes in one or two paint colors on a single wall.
Press the tape edges firmly to stop paint from slipping underneath. Remove the tape before the final coat fully hardens to achieve sharper lines.
Materials Required: Painter’s tape, wall paint, paintbrush or roller, pencil, ruler.
How to Put Together:
- Sketch the shape pattern lightly on the wall
- Apply painter’s tape along the lines
- Paint inside the taped sections
18. Denim Pocket Wall Organizer
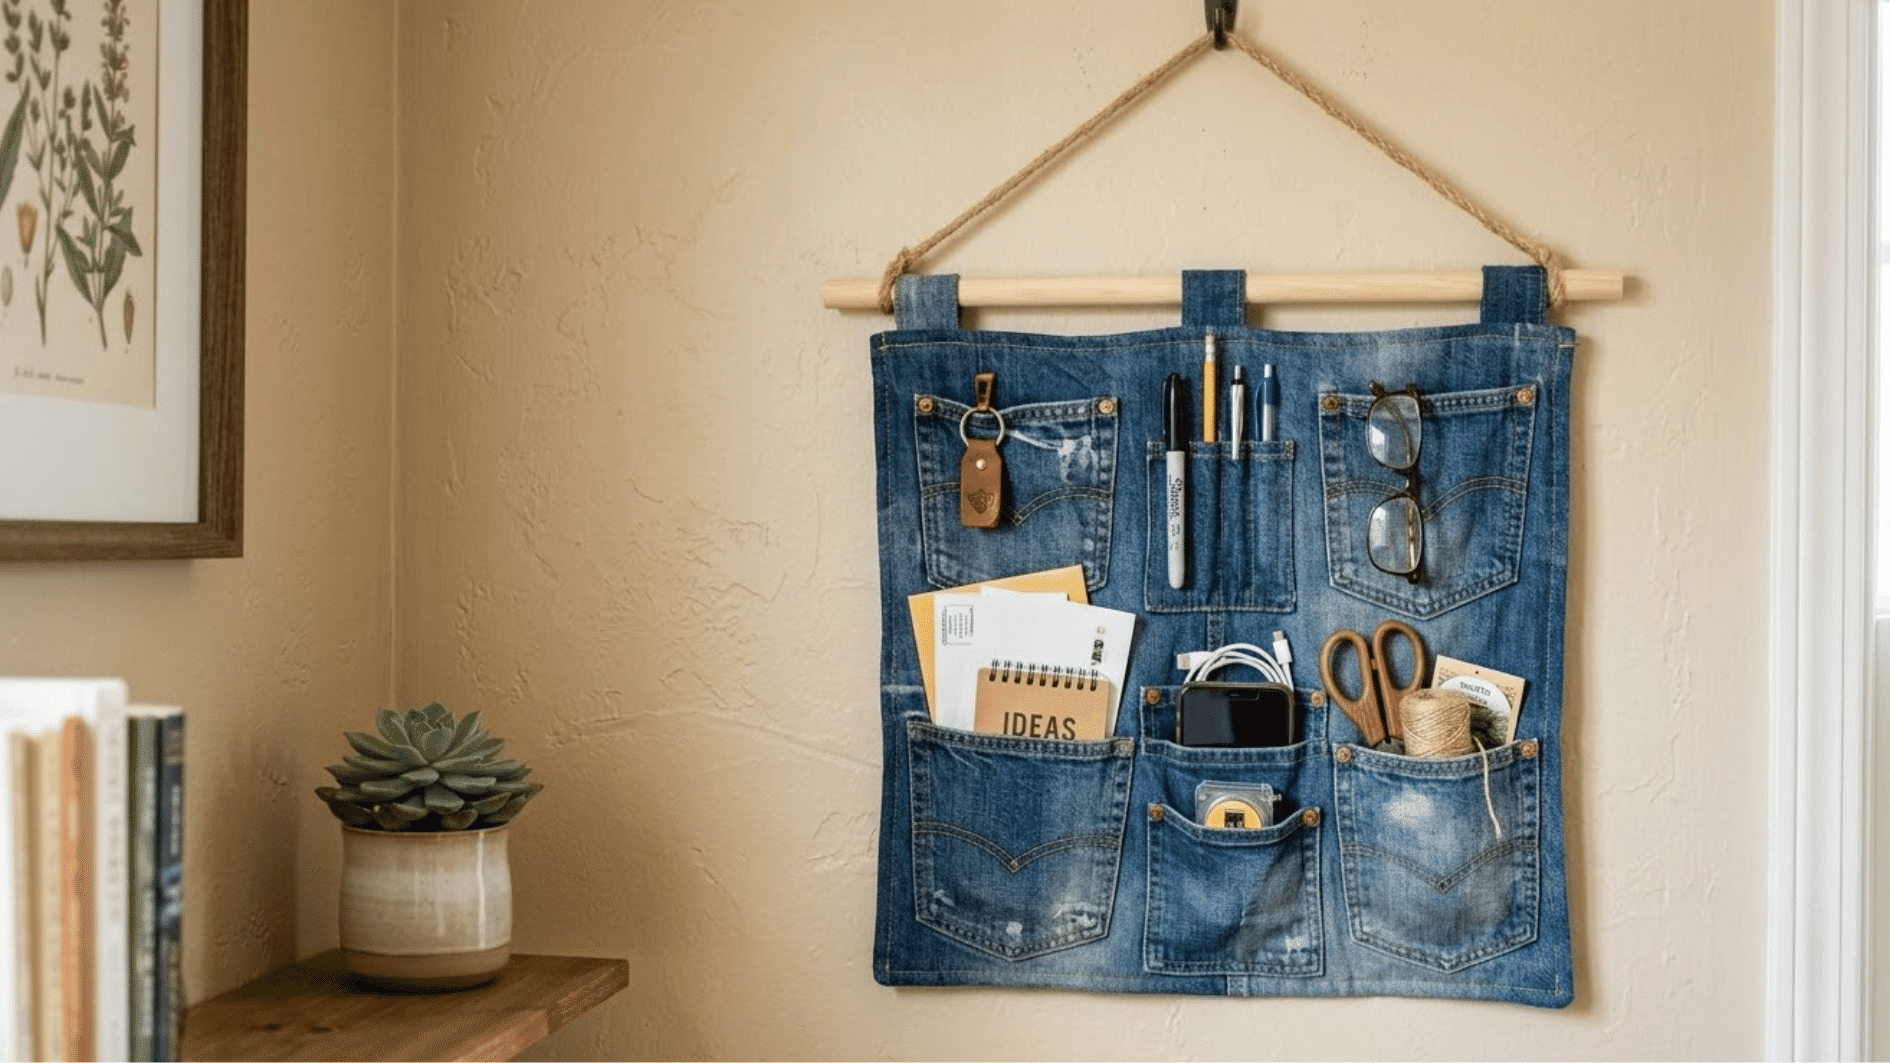
Cut off old jeans pockets and turn them into small wall pockets for holding mail, pens, or other small items. Pockets in different washes add natural color variation to the finished organizer.
Keep rivets, seams, and labels intact to retain the character of the original jeans.
Materials Required: Old jeans, scissors, fabric glue or needle and thread, wood board or fabric backing.
How to Put Together:
- Cut the pockets off the jeans, leaving extra fabric around the edges
- Arrange the pockets in rows on the backing
- Glue or sew the edges of each pocket down
- Hang the finished organizer using hooks or nails
19. Recycled Bottle Bud Vases
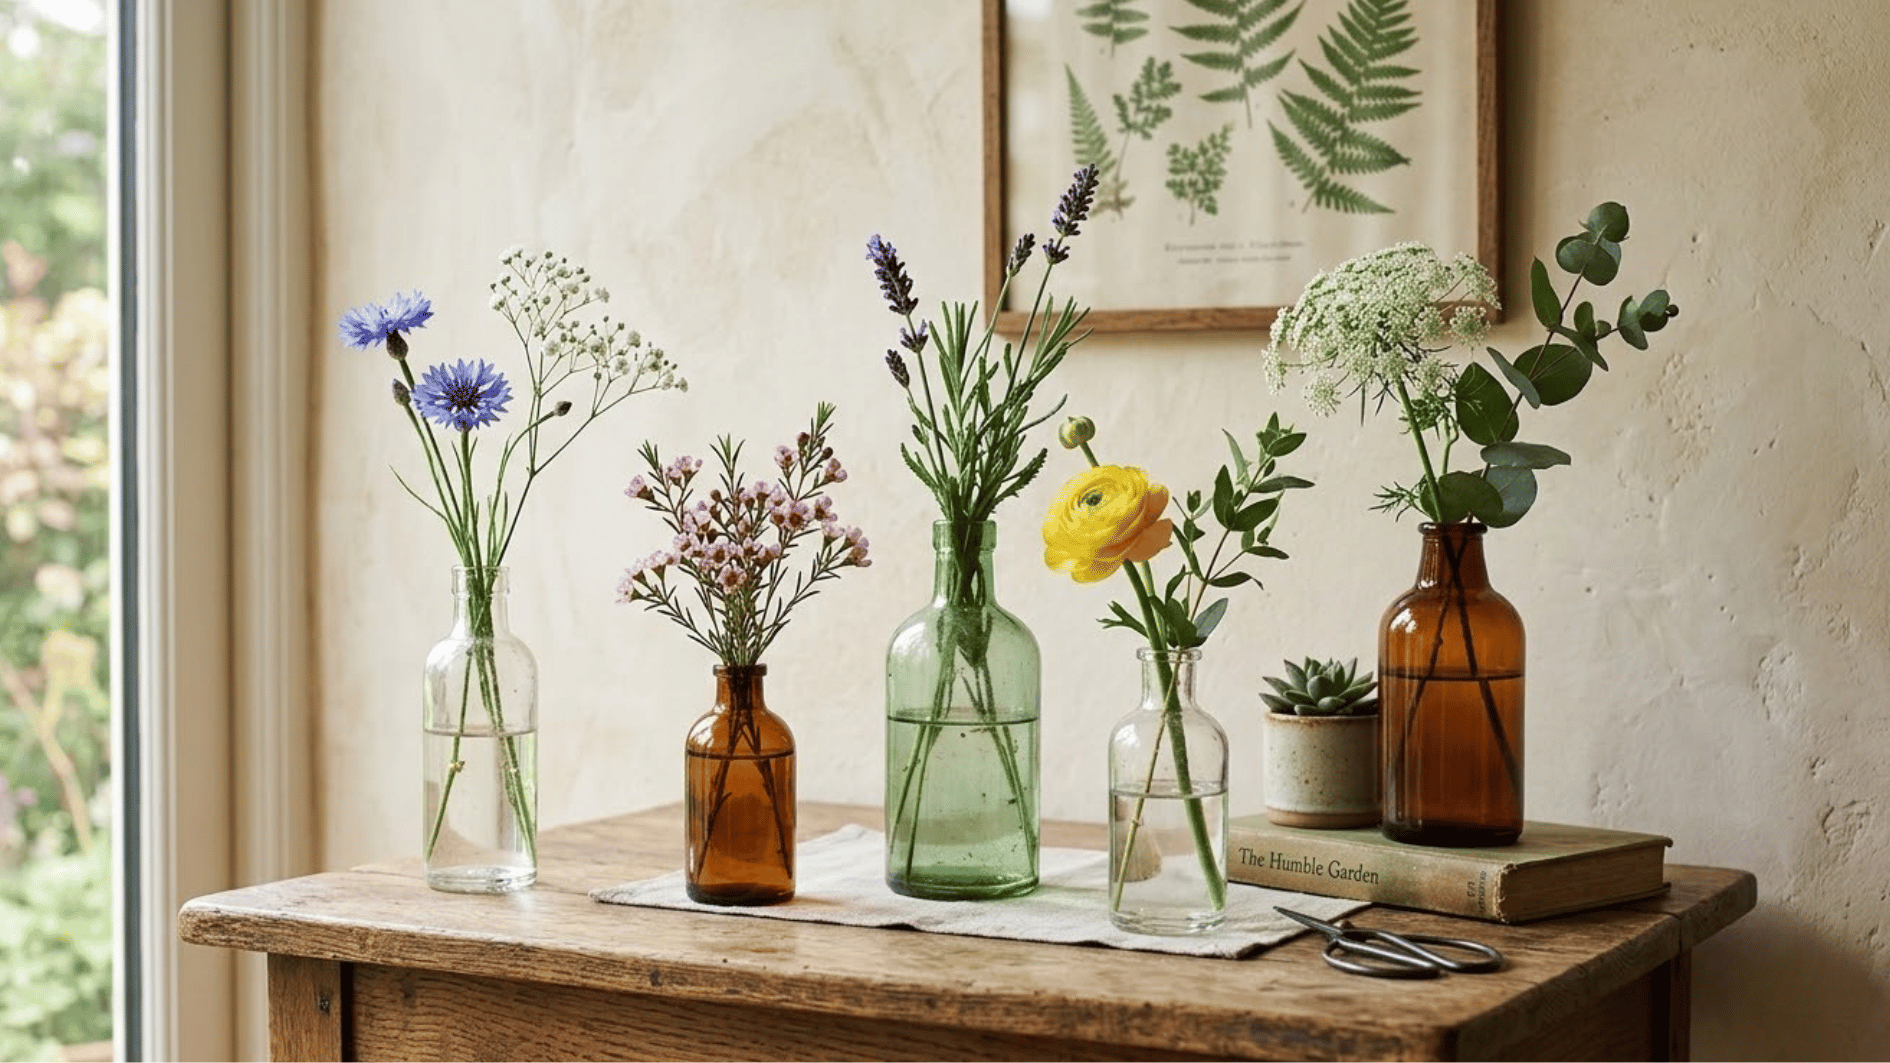
Small glass bottles cluster into bud vases for single-flower stems on a shelf or windowsill. It’s a simple way to give leftover bottles a second life and keep your flowers fresh with a DIY food-flower recipe.
Materials Required: Small glass bottles, label remover, or soapy water.
How to Put Together:
- Soak the bottles in warm soapy water to remove labels
- Scrub off any leftover glue and dry the bottles fully
- Fill each bottle with water and a single flower stem
- Group a few together on a windowsill for the best look
Tip: A single stem in each bottle gives every flower enough room to be noticed. Line them across a windowsill or gather them on a small wooden tray.
20. Yarn-Wrapped Letter Decor
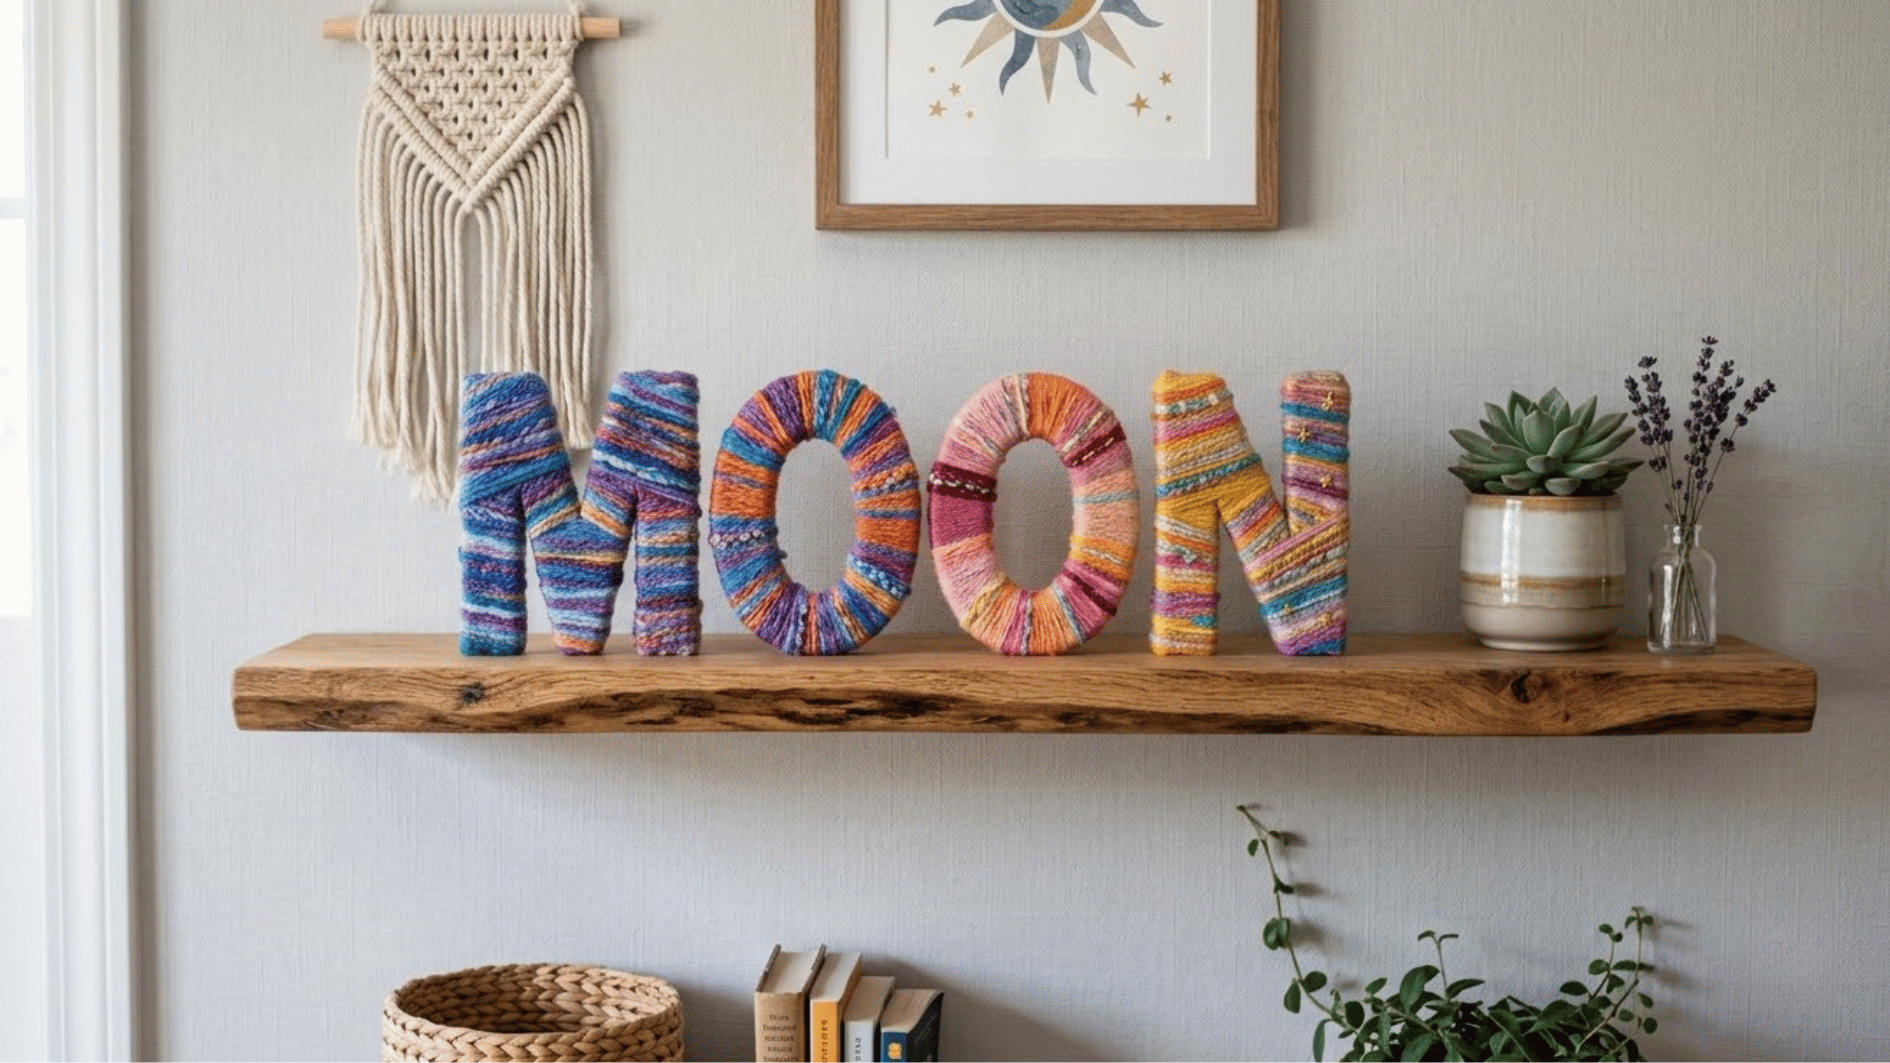
Large cardboard letters get wrapped in yarn to spell out a name or word for a shelf or wall.
It’s a cozy, textured way to display initials or a favorite word without spending much on store-bought letters, and this wine cork letter art shows how well the same cardboard-letter technique works with a different material entirely.
Materials Required: Cardboard letters, yarn, hot glue gun, scissors.
How to Put Together:
- Glue the end of the yarn to the back of the letter
- Wrap the yarn tightly around the letter, covering all sides
- Add more glue every few wraps to hold it in place
21. Cloud-Shaped Floating Shelf
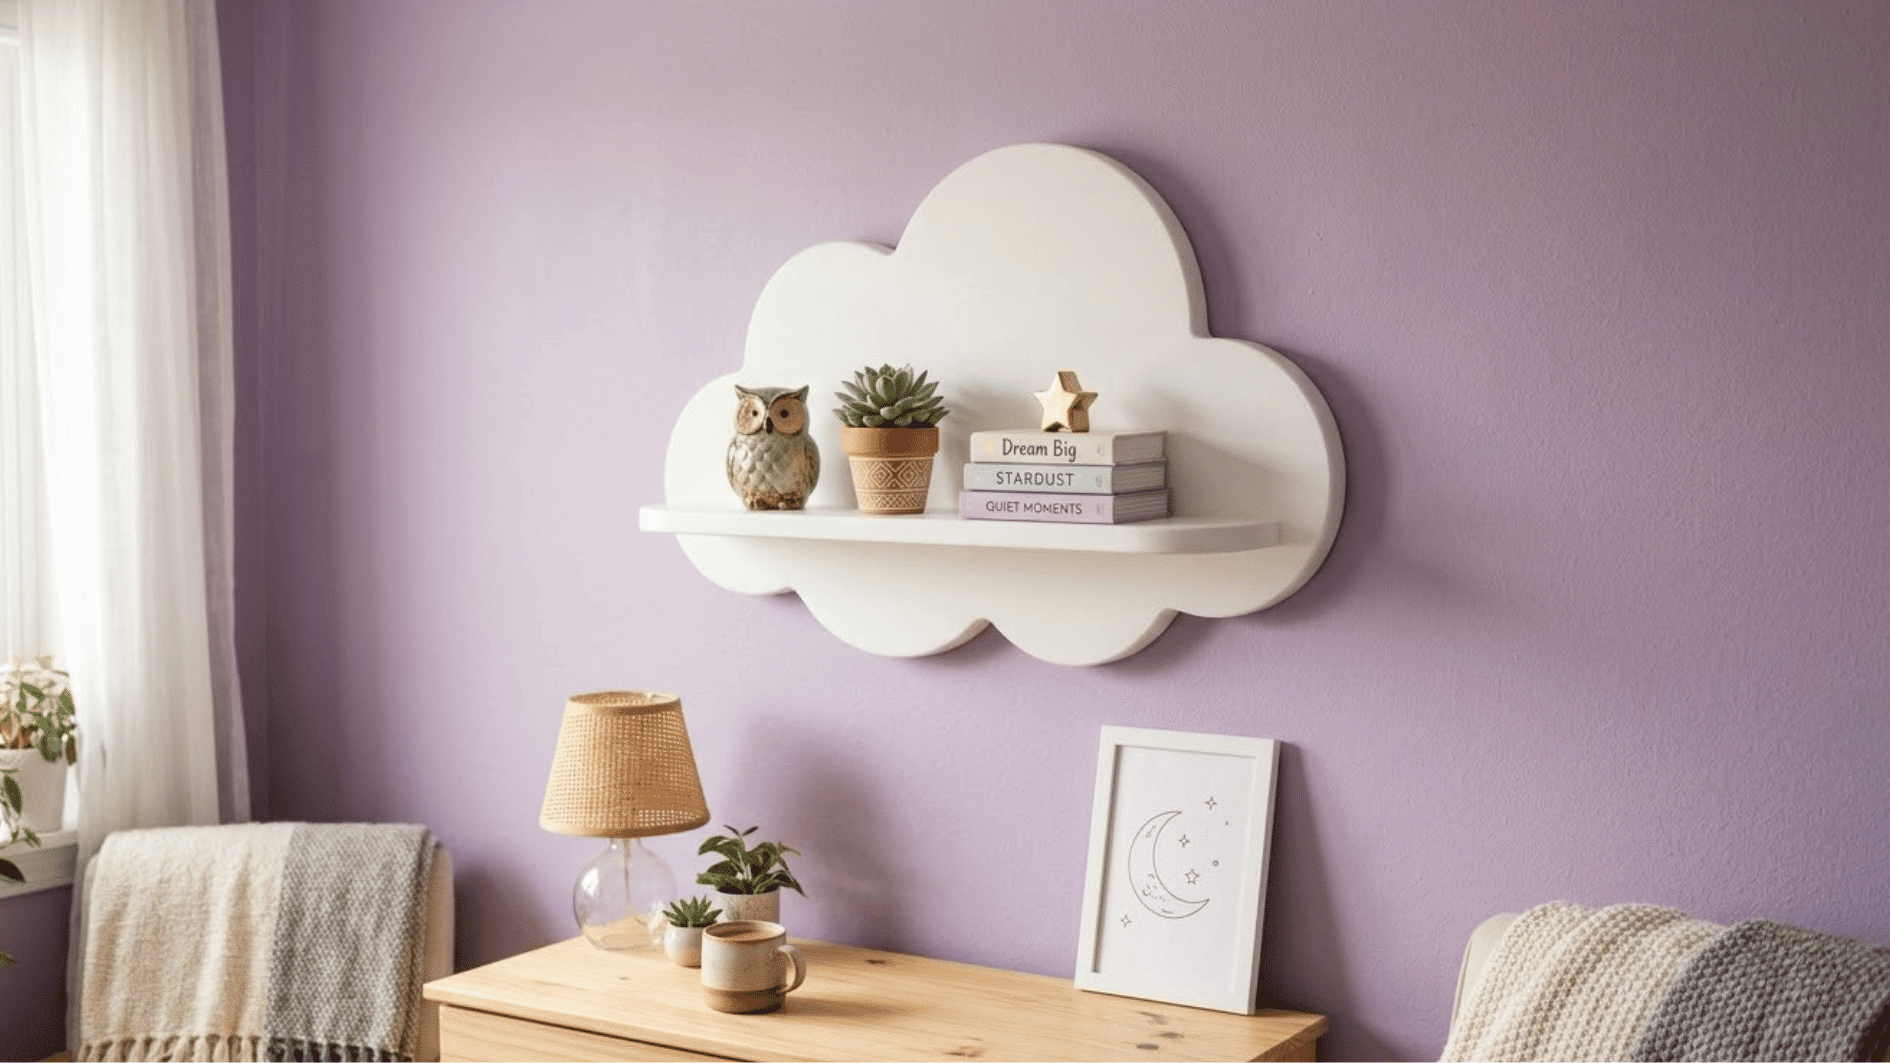
A cloud-shaped shelf is a soft, rounded wooden shelf, great for a kid’s room or a playful reading nook. It’s a unique decor idea because it reads as a shape on the wall rather than just an empty shelf.
Keep the objects on top small so the cloud outline remains easy to see. Raindrop wall stickers beneath it can extend the design across the wall.
Materials Required: Plywood board, jigsaw, sandpaper, paint, wall brackets.
How to Put Together:
- Draw a cloud outline onto the plywood board
- Cut along the outline using a jigsaw
- Sand the edges until smooth
- Paint the shelf and let it dry fully before mounting
22. No-Sew DIY Bean Bag
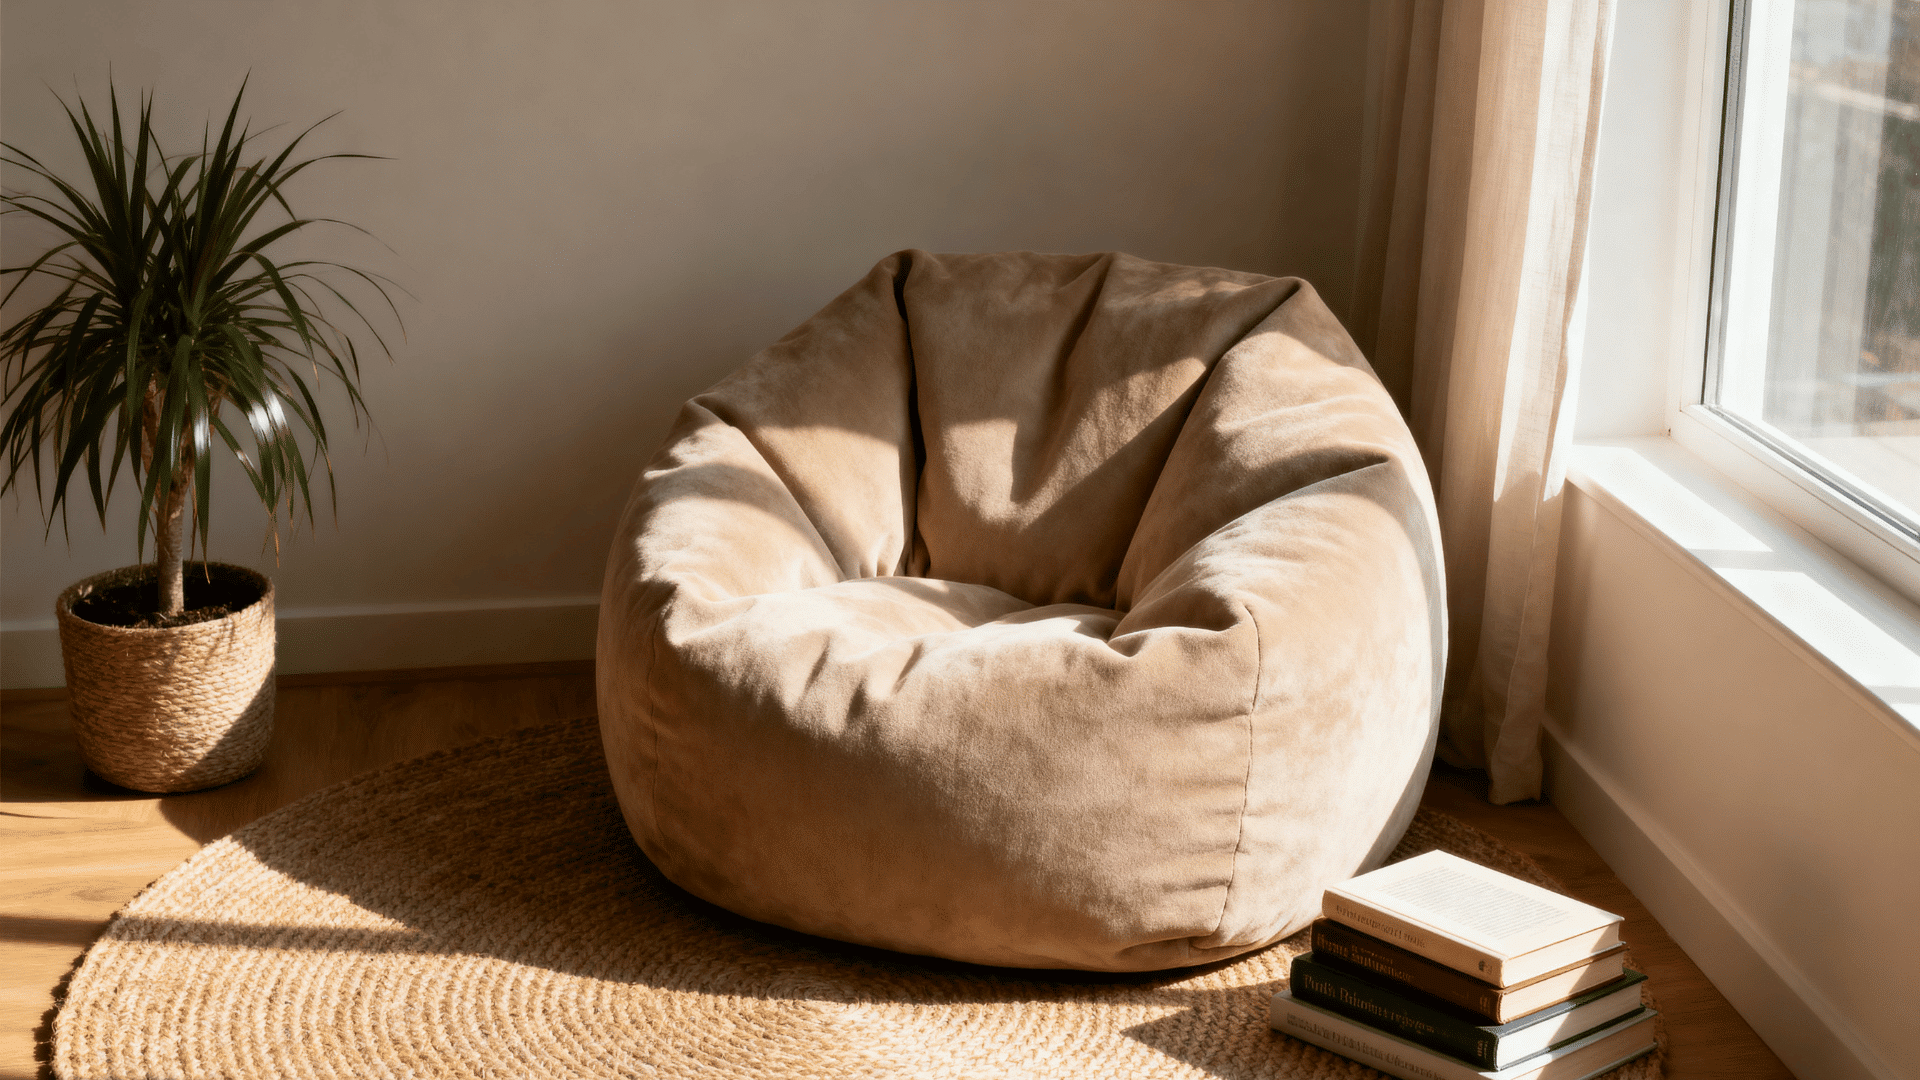
This bean bag chair uses fabric glue instead of a sewing machine, making it a good project for beginners.
Materials Required: Large fabric pieces, fabric glue, foam beads or shredded foam filling.
How to Put Together:
- Cut the fabric into panels to form the bean bag shape
- Glue the panels together, leaving one side open
- Turn the bag right-side out once the glue dries
- Fill it with foam beads
- Glue the final seam shut
Tip: Use extra filling for a firm seat or less filling for a softer shape. Set it near a bookshelf or low table to create a comfortable casual corner.
23. Personalized Wooden Name Sign
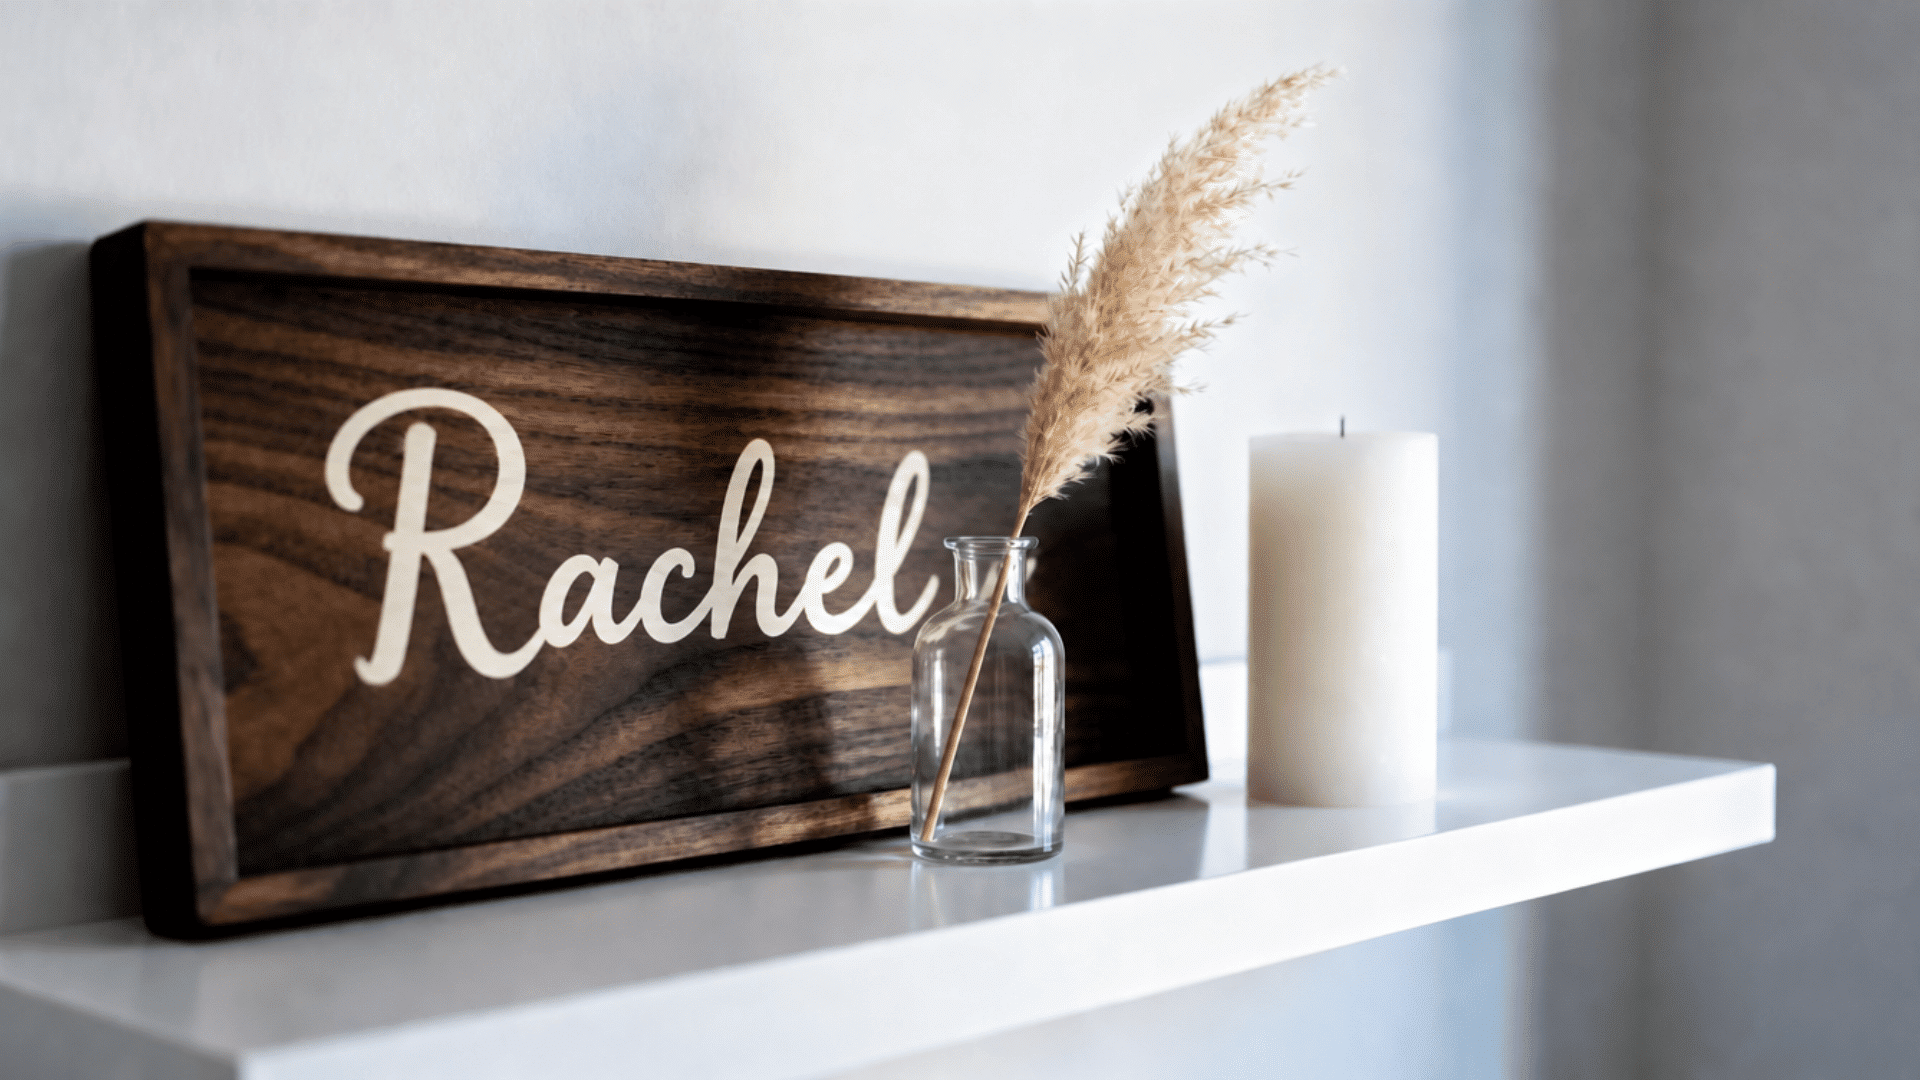
A wooden name sign spells out a name or word using cut wooden letters glued onto a board. It’s an easy way to add a personal touch to a nursery, a reading nook, or a space above a desk.
Materials Required: Wood board, wooden letters, wood glue, paint or stain.
How to Put Together:
- Arrange the letters on the board to check spacing
- Glue each letter down one at a time
- Paint or stain the letters and board once the glue is dry
24. Book Page Paper Wreath
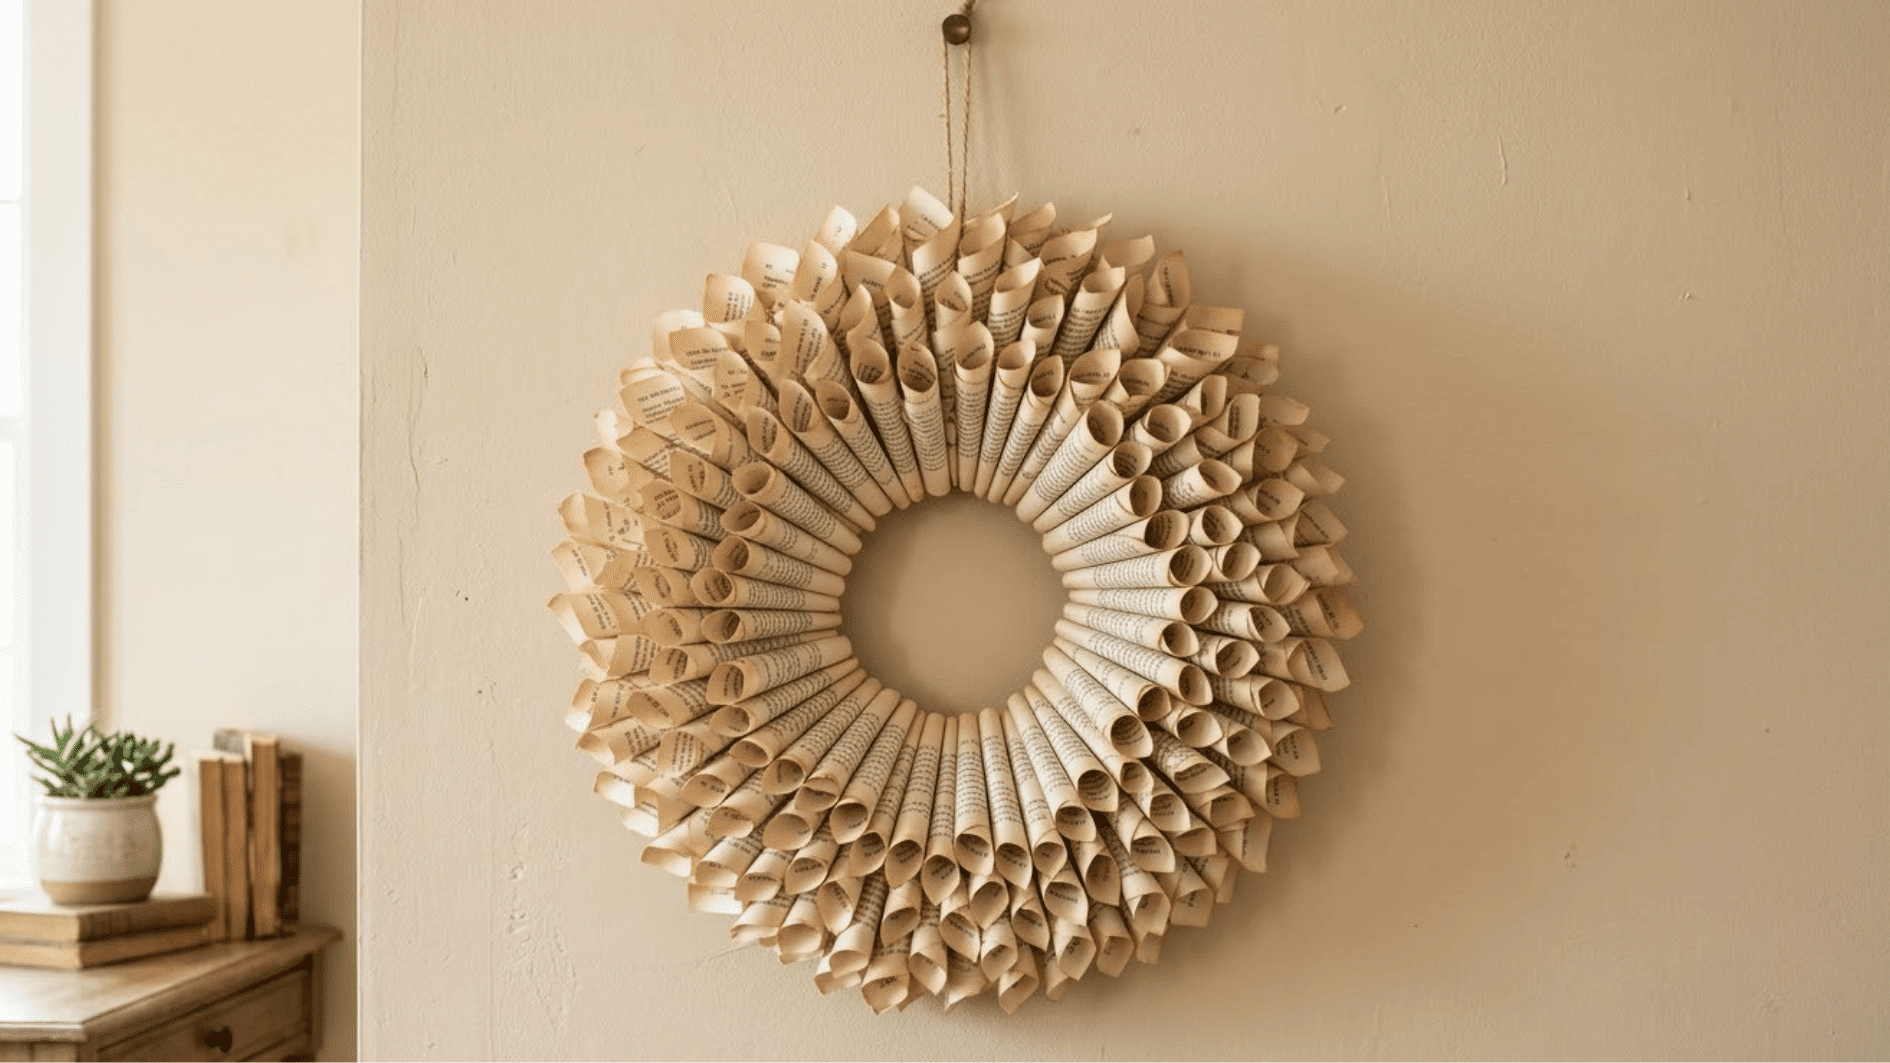
Old book pages get folded and shaped into a circular wreath, giving new life to a book you no longer need.
A ribbon at the top provides color and makes hanging easier. Display it indoors where moisture cannot weaken or wrinkle the paper.
Materials Required: Old book pages, a cardboard circular base, a hot glue gun, and scissors.
How to Put Together:
- Fold each book page into a small cone shape
- Glue the folded pages onto the cardboard circle, slightly overlapping each one
- Keep going in rows until the circle is fully covered
- Attach a loop of string to the back for hanging
25. Corkboard World Travel Map
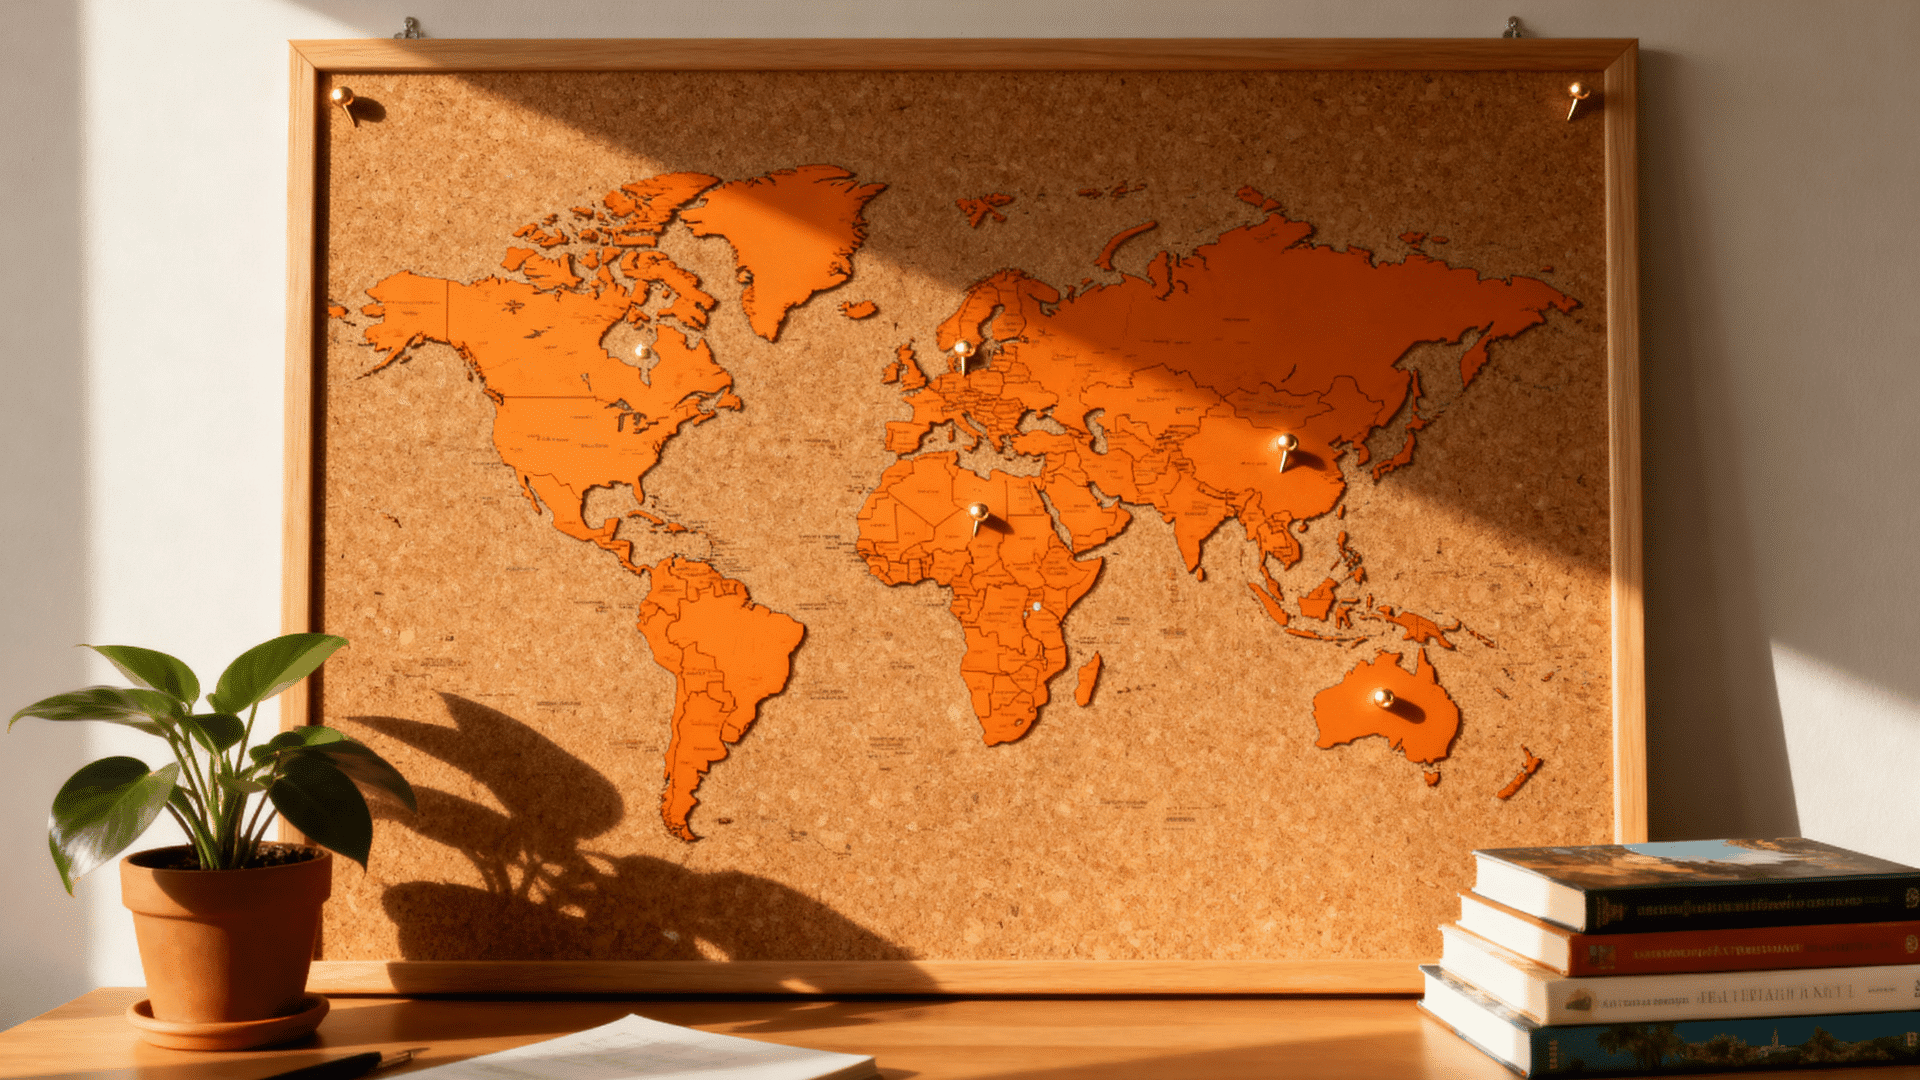
A corkboard map lets you pin photos or notes over the places you’ve visited or want to visit, mixing decor with function.
Materials Required: Large corkboard, printed world map, spray adhesive, push pins.
How to Put Together:
- Trim the printed map to fit the corkboard
- Apply spray adhesive to the back of the map
- Press the map onto the corkboard, smoothing out any bubbles
- Let it dry fully and use push pins to mark places you’ve been or plan to visit
Simple Tips for a More Polished Look
A few small choices are what separate a homemade project from something that looks store-bought, and none of them take extra time or money.
- Pick One Color Story: Choose 2-3 colors before you start any project, and stick to them across your room.
- Mind Your Scale: A tiny frame on a huge wall looks lost; match the size of your project to the size of the wall.
- Leave Breathing Room: Don’t fill every inch of a wall or shelf. Empty space makes it stand out.
- Use Real Tools when You Can: A hot glue gun holds up better than tape for anything permanent.
- Group Items in Odd Numbers: Three vases or five frames look more natural than an even number.
- Repeat One Material Somewhere Else: If you used rope on your mirror, add a touch of rope elsewhere in the room.
- Step Back Before You Commit: Hold a piece up to the wall first, before gluing or nailing anything.
Wrapping It Up
Start with one project, and that’s it.
A blanket ladder in the corner, a fresh coat of paint, a gallery wall grab a glue gun and whatever’s already in your craft drawer, and block out one afternoon this weekend.
You don’t need a full room makeover to feel the difference.
Sometimes it’s one small corner that changes how the whole space feels. So stop planning and start gluing your room’s been waiting long enough.