


A DIY blanket ladder is one of those weekend projects that looks impressive but takes only a few hours to build.
From rustic farmhouse charm to clean modern lines, a handmade blanket ladder adds warmth and storage to any room without costing much.
You only need a few basic materials, some simple tools, and a clear step-by-step plan to get it done right.
This guide walks you through everything, from choosing your wood and cutting the rails to assembling, finishing, and styling your ladder so it looks like it came straight from a home décor store.
Things to Consider Before Building a DIY Blanket Ladder
Before you start building your DIY blanket ladder, take some time to plan the details.
First, choose the right location, such as a living room, bedroom, or a small corner that needs extra storage.
Next, think about the ladder height. Standard blanket ladders are usually 5 to 6 feet tall, but you may need a different size based on your ceiling height and storage needs.
Finally, pick a design style that matches your home. Popular options include farmhouse, modern, rustic, and minimalist designs for a cohesive look.
Tools and Materials Required for a DIY Blanket Ladder
Before starting your DIY blanket ladder project, gather the materials and tools listed below to ensure a smooth, hassle-free build.
| Tools | Materials |
|---|---|
| Tape measure | Two wooden side rails |
| Pencil | Wooden dowels or boards (for rungs) |
| Saw, Clamps | Wood screws |
| Drill, Level | Wood glue |
| Sandpaper | Paint, stain, or sealant |
How to Craft a Blanket Ladder: Step-by-Step Process
Follow the simple steps below to build a sturdy and stylish DIY blanket ladder that fits your space and décor perfectly.
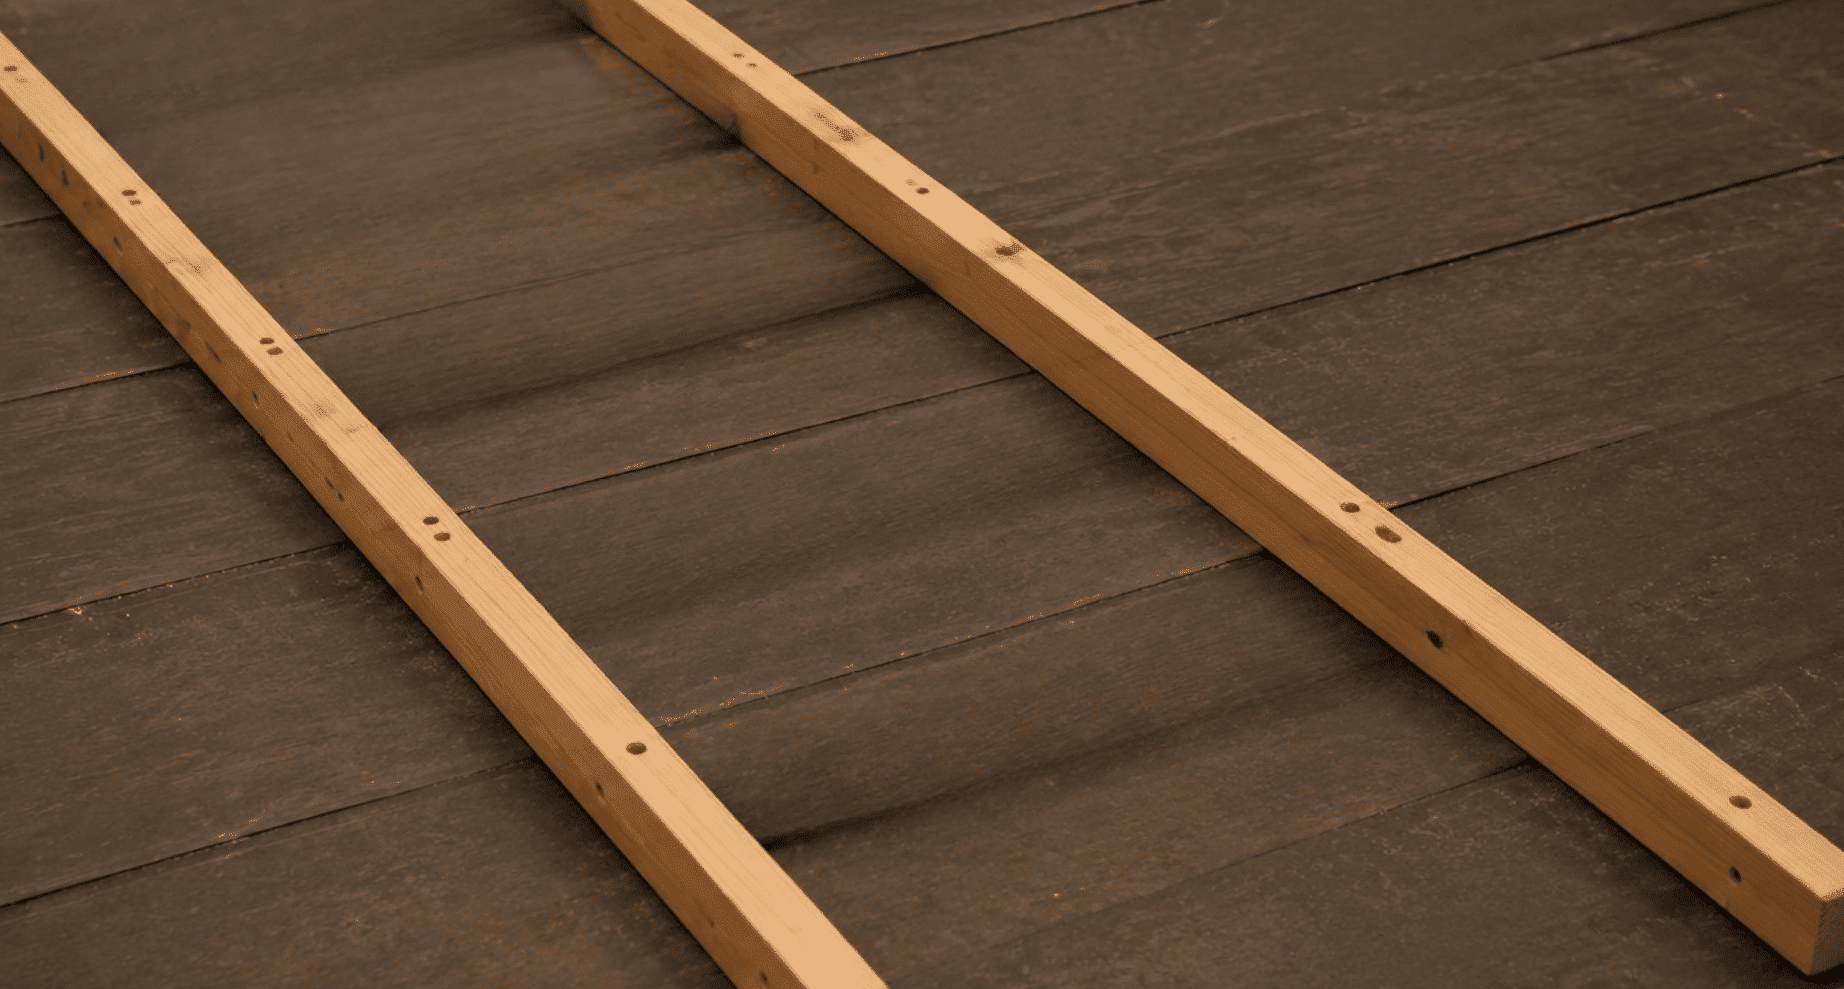
Step 1: Prepare and Cut the Side Rails
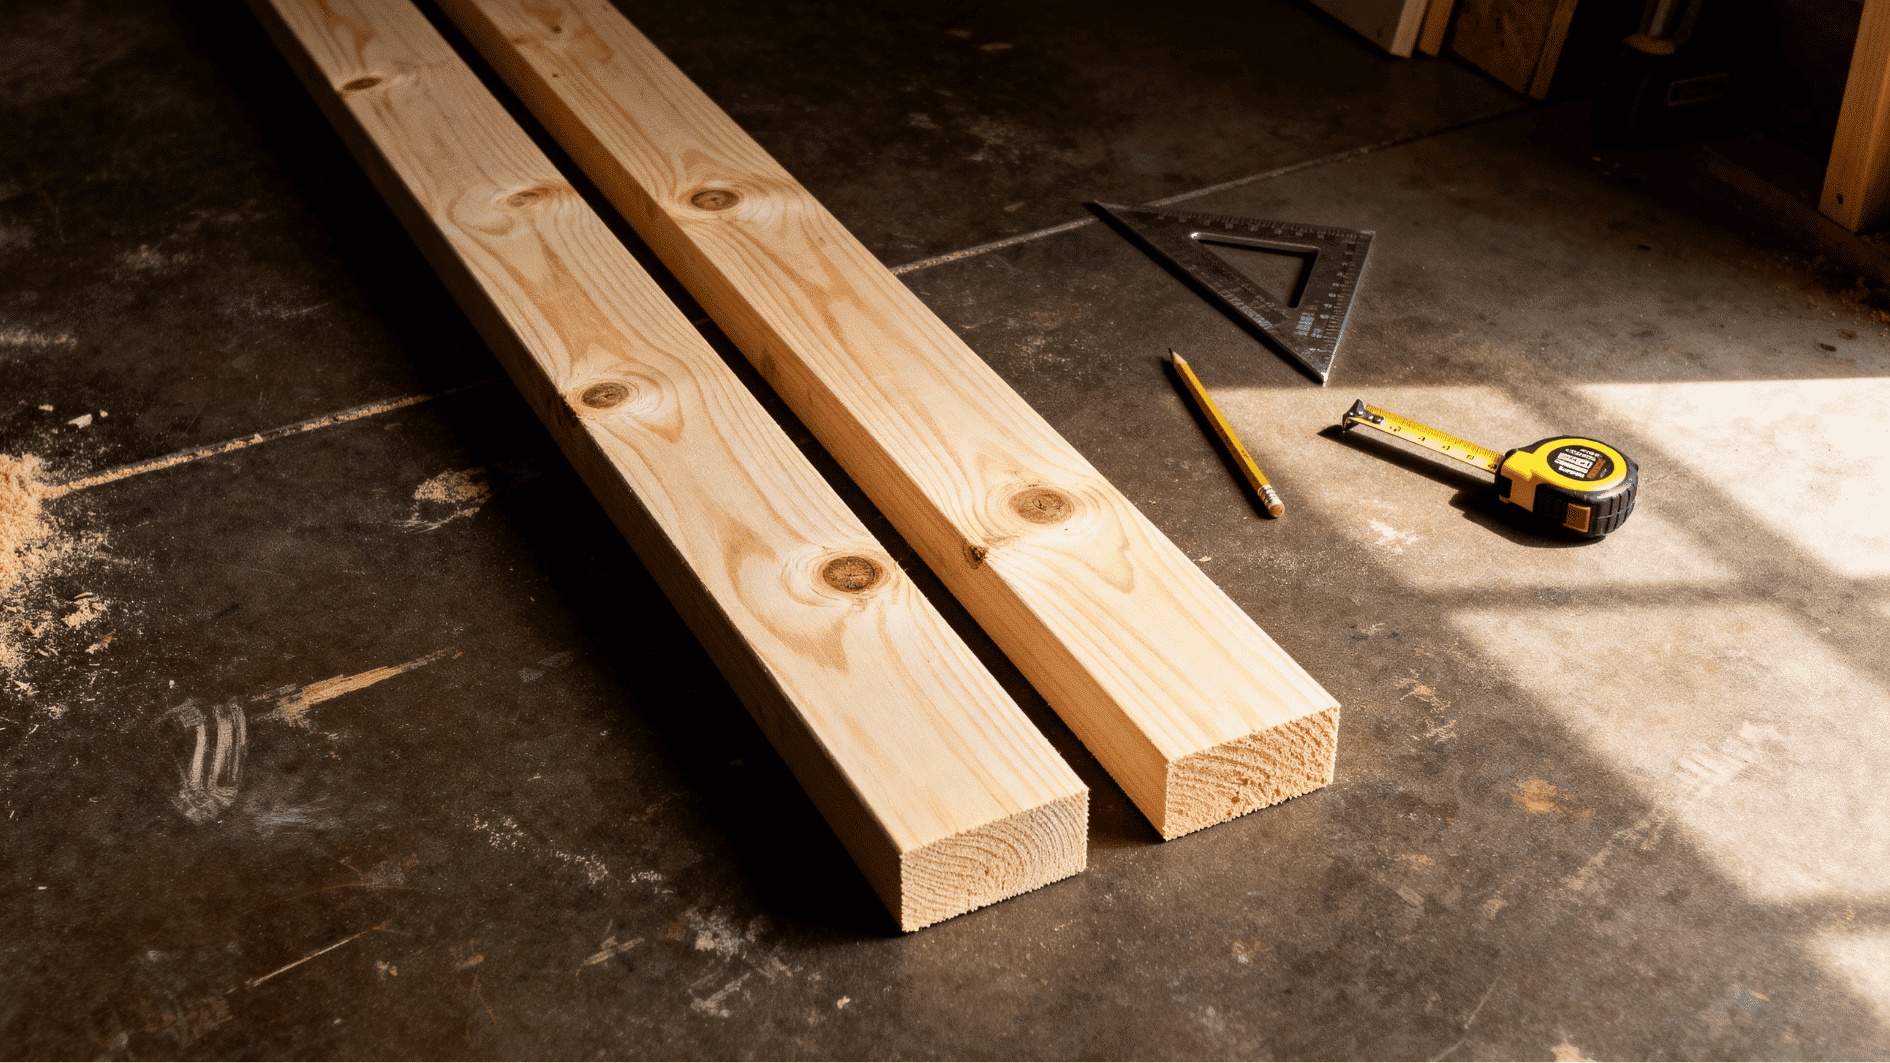
Start by cutting two 2×4 boards to the height you want for your blanket ladder. The boards are cut to 6 feet long, which works well for most living rooms and bedrooms.
Measure each board carefully before cutting to ensure both pieces are the same length. This helps create a sturdy, balanced ladder that looks neat and professional.
Tip: Measure twice before cutting.
| Suggested: you might also want to try DIY floating shelves, a similarly simple project that adds storage without taking up floor space. |
Step 2: Create the Ladder Angles
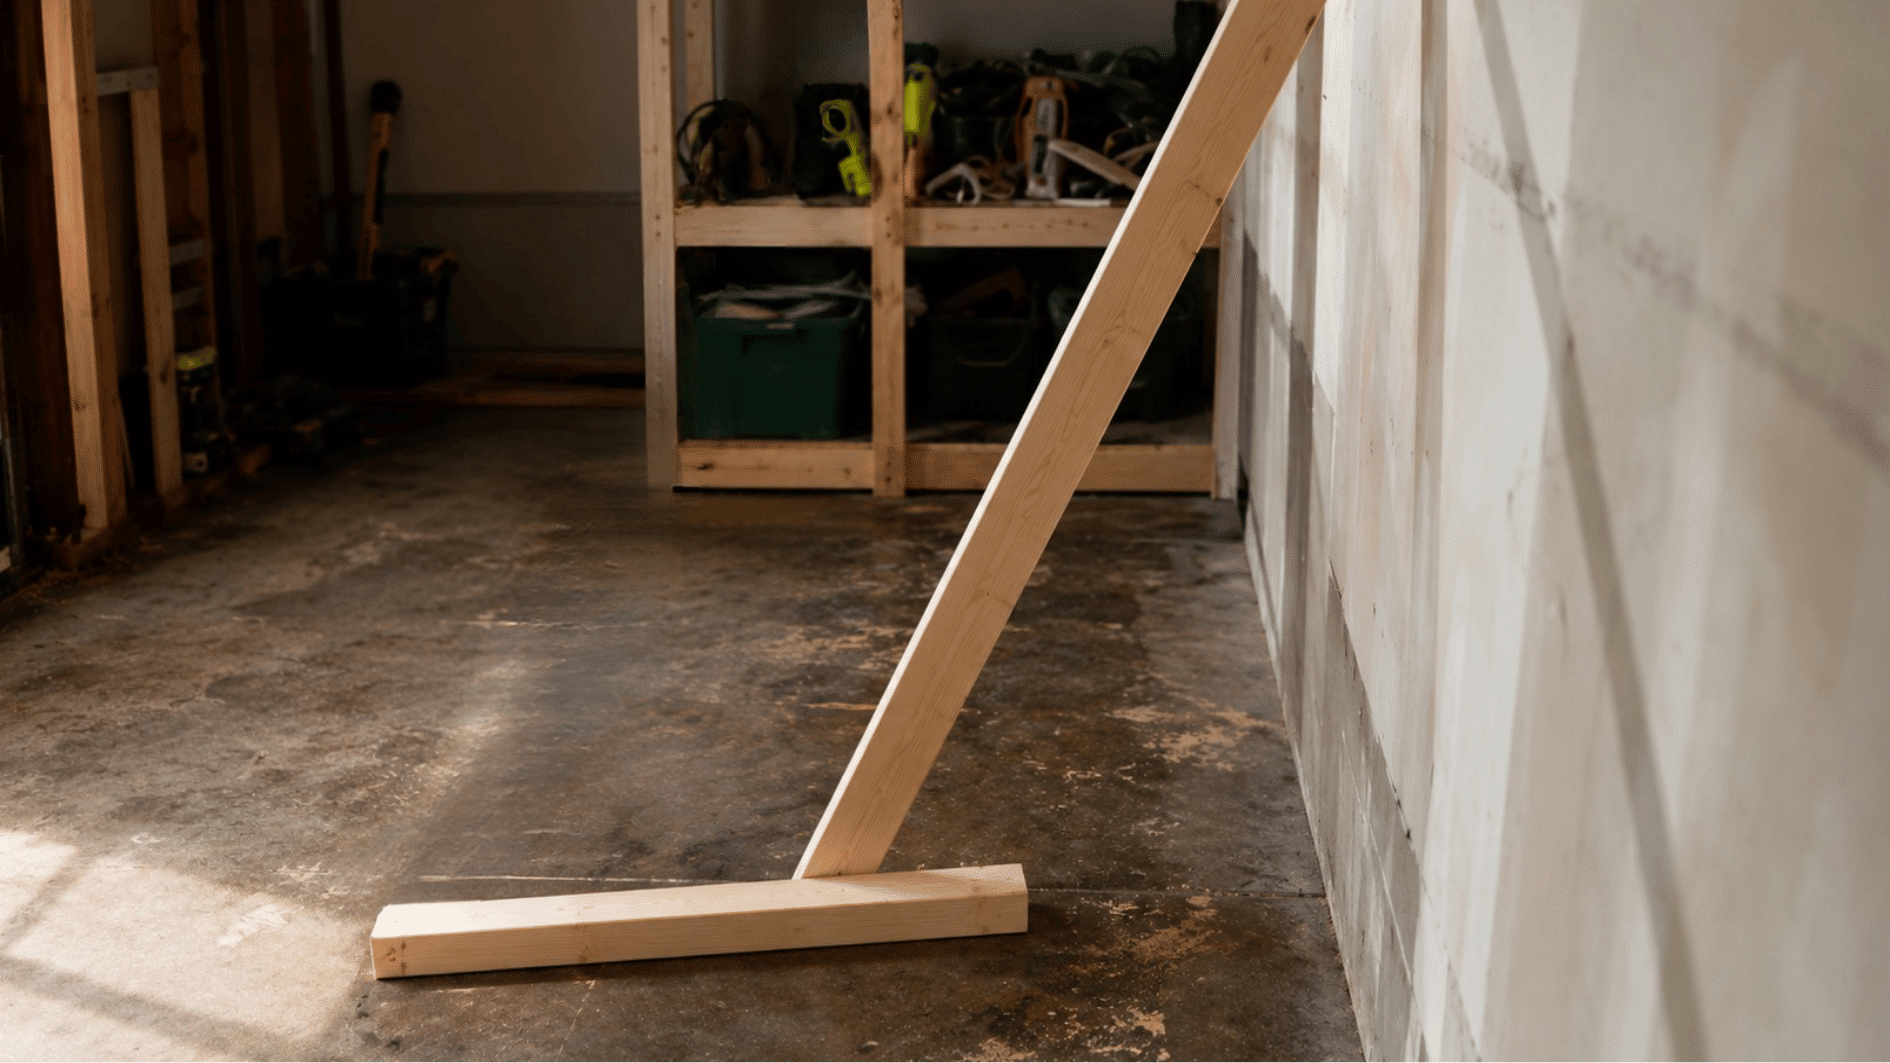
To help the blanket ladder lean safely against the wall, place one rail at your preferred angle and mark the top and bottom ends.
Cut along these marks to create angled edges. Then, use the first rail as a template to trace the same angles onto the second rail for a perfect match.
Tip: Use one rail as a template for matching angles.
Step 3: Mark and Drill the Rung Holes
Next, measure and mark the locations for the ladder rungs. Keep the spacing even so the blanket ladder looks balanced and holds blankets neatly.
Once the marks are in place, find the center of each rail and drill 1-inch holes about ¾ inch deep. Drilling to the same depth on both sides helps the dowels fit securely and keeps the ladder sturdy.
Tip: Label each hole location before drilling.
Step 4: Cut and Test-Fit the Dowel Rungs
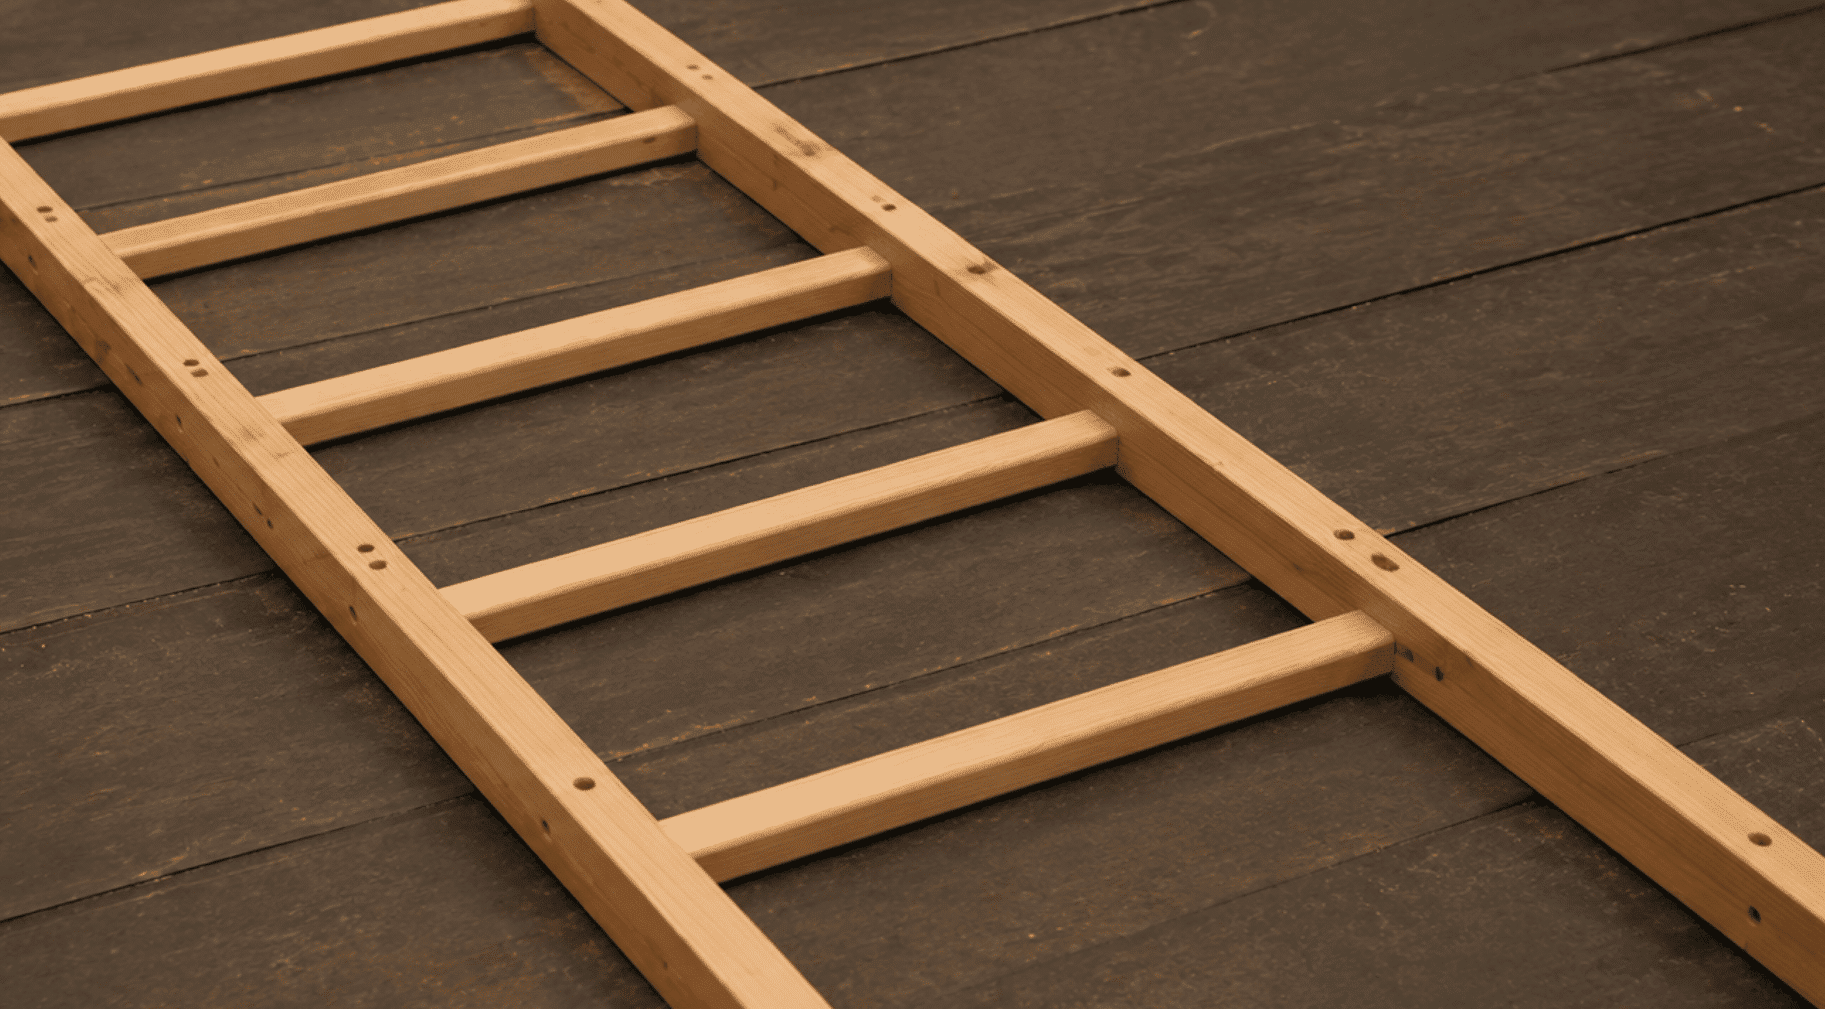
Cut the dowels to 17½ inches long and place them into the drilled holes without glue. This dry fit helps you check that all the pieces line up correctly and that the ladder is the right size.
If anything feels loose or uneven, make adjustments now before moving on to final assembly.
Tip: Sand dowel ends for an easier fit.
Step 5: Assemble, Glue, and Finish the Ladder
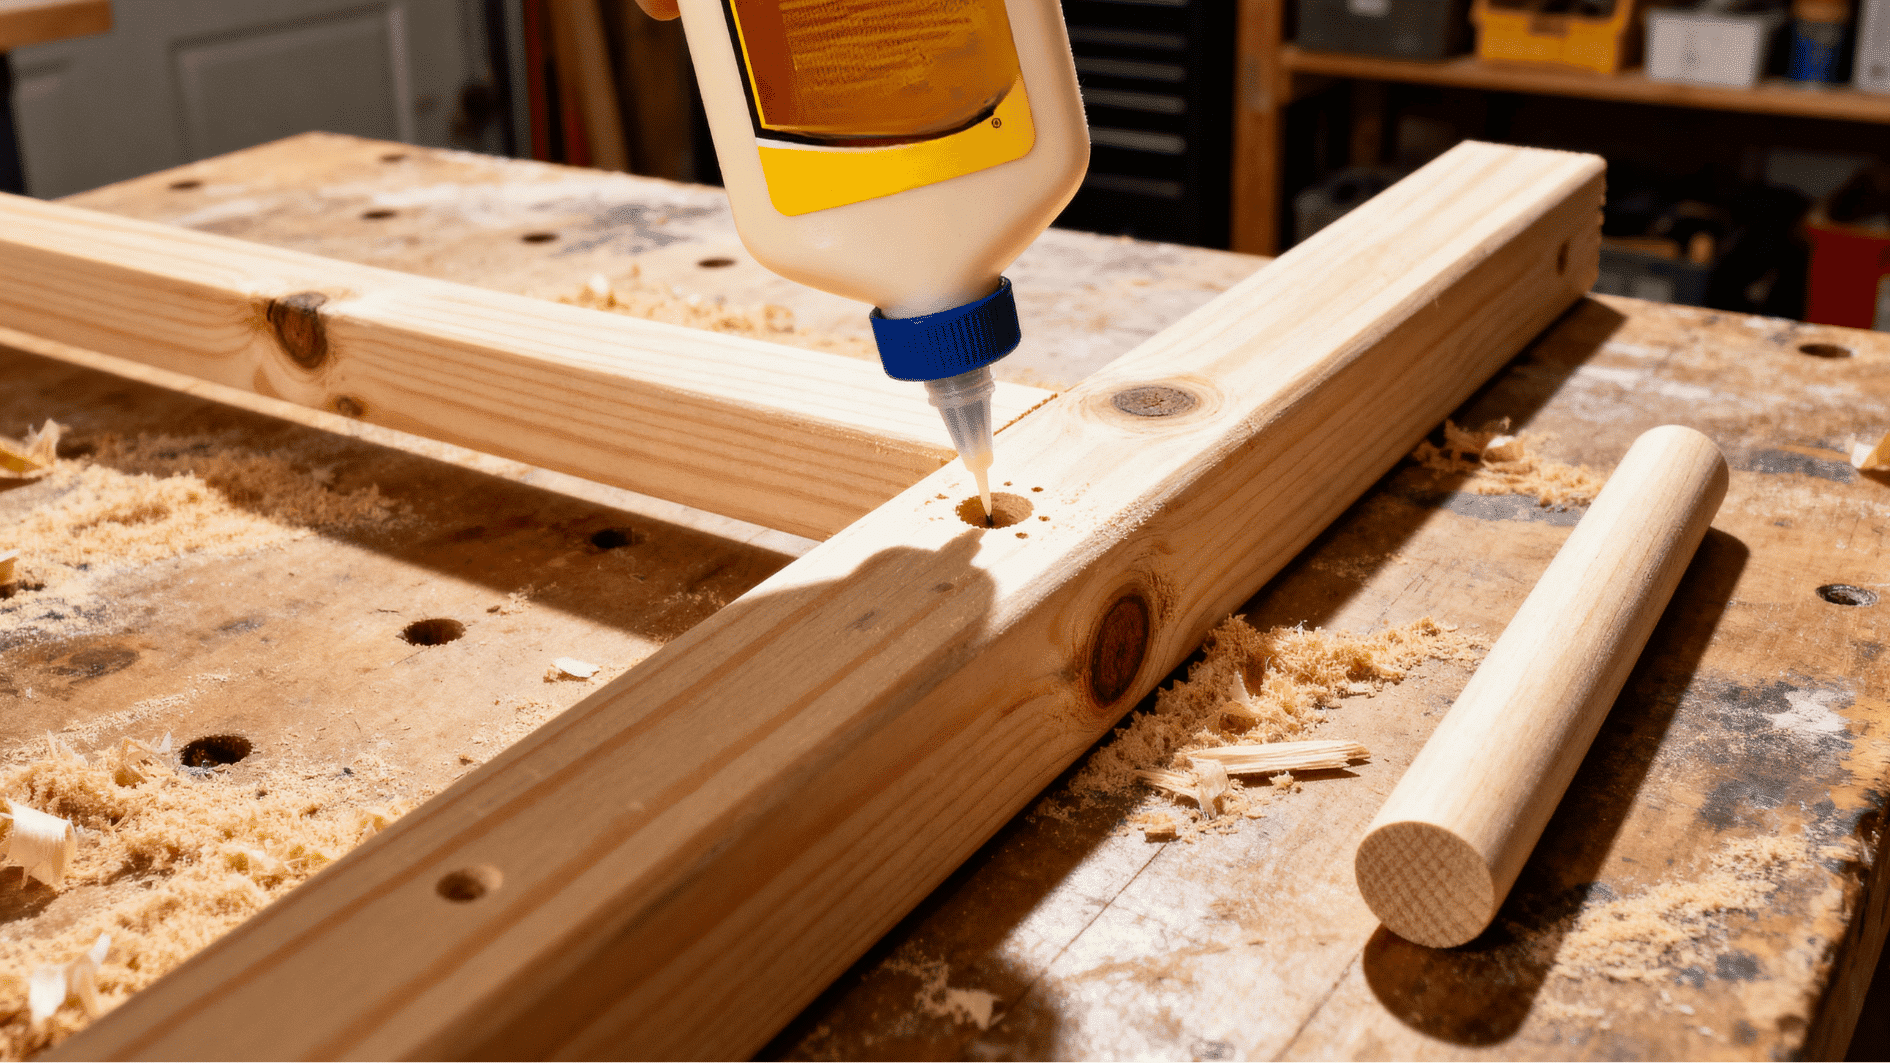
Apply wood glue inside each drilled hole and on the ends of the dowels before putting the ladder together.
Once assembled, use clamps to hold everything firmly in place and check that the ladder is square. Let the glue dry completely.
Afterward, sand the entire ladder down to a smooth finish and apply your choice of stain or paint for a polished finish.
Tip: Wipe away excess glue immediately.
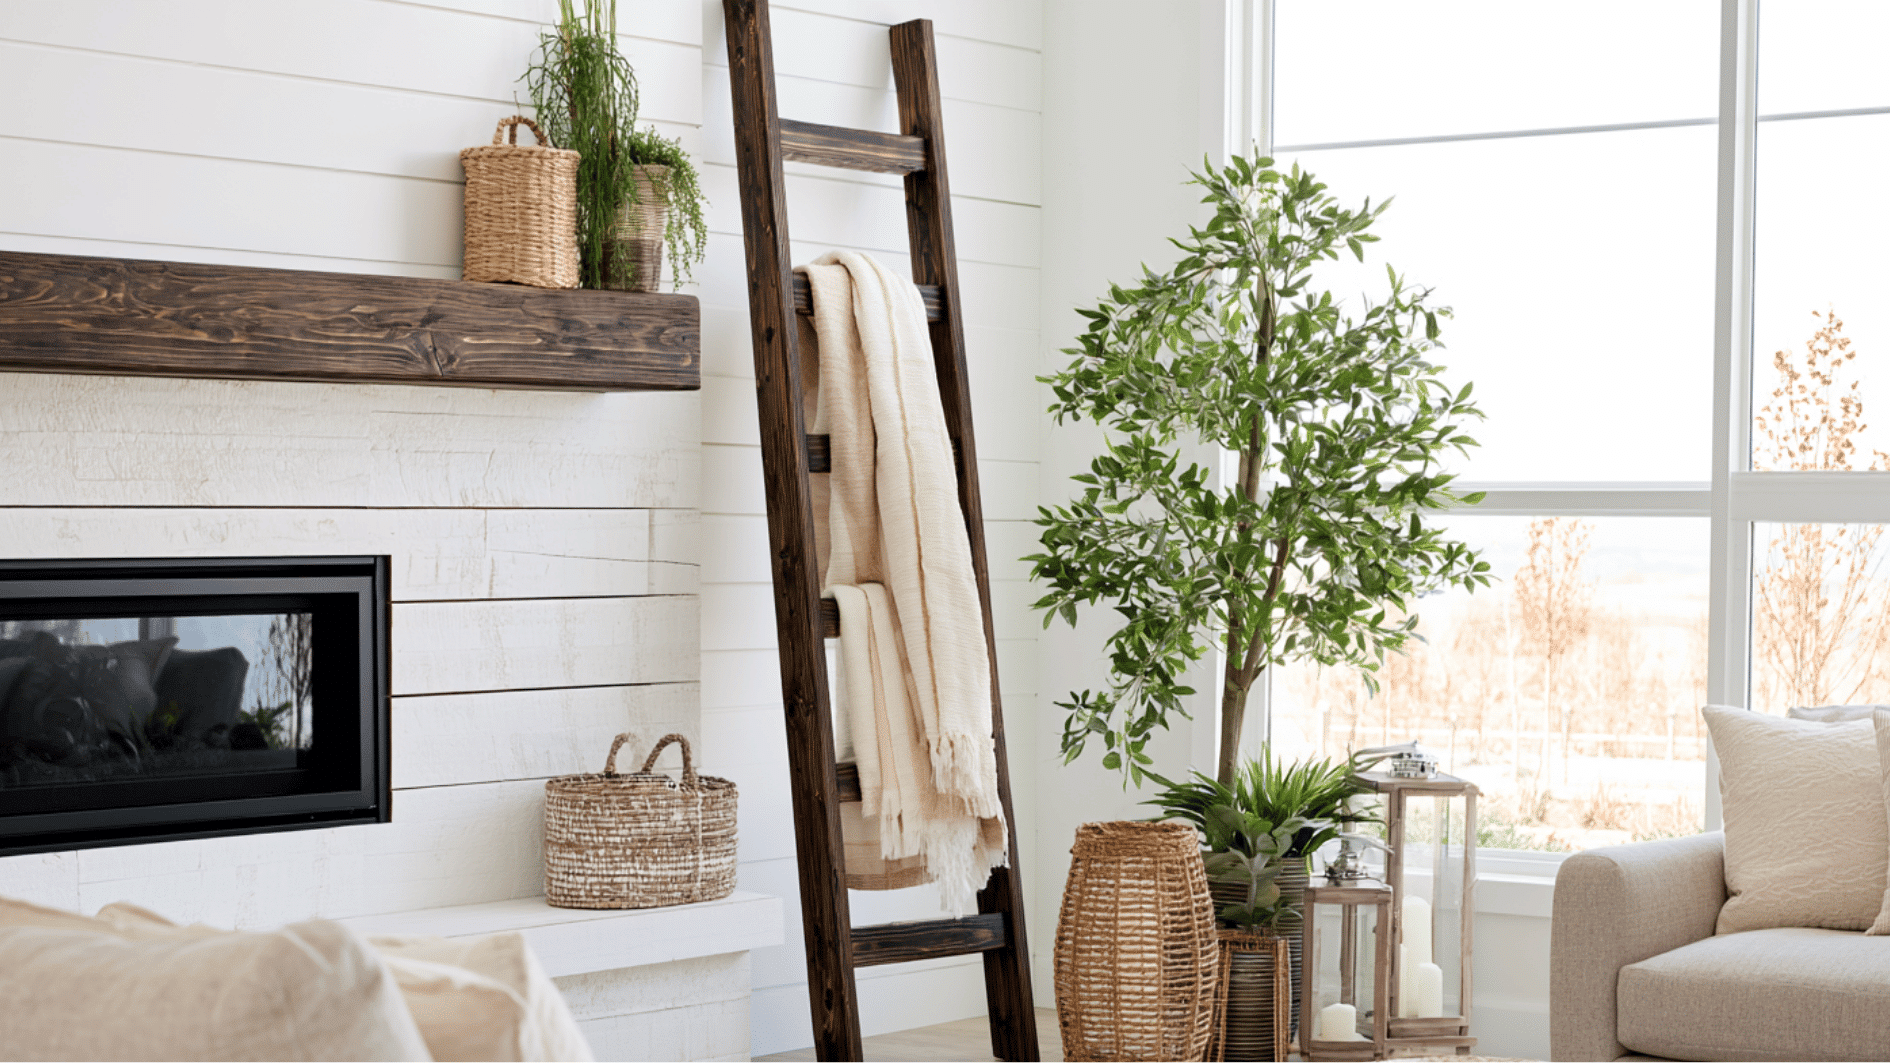
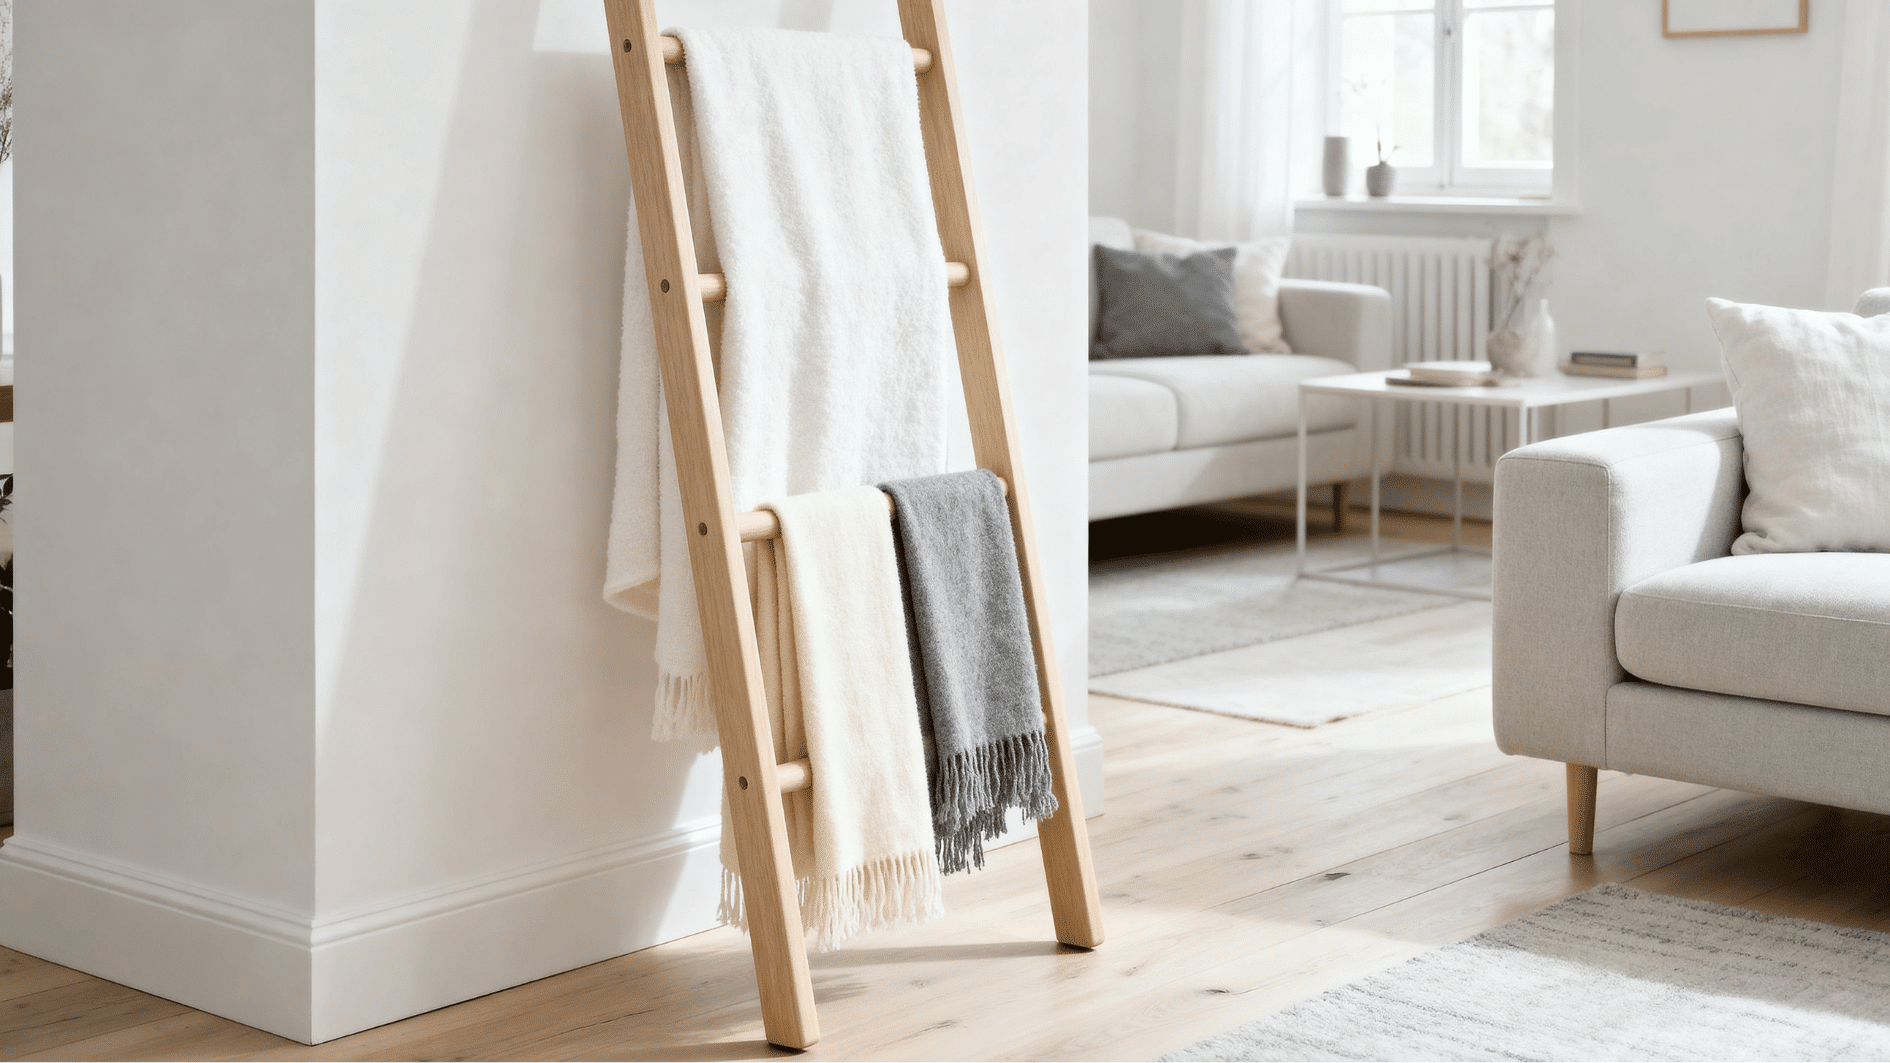
Step 6: Style and Display Your Blanket Ladder
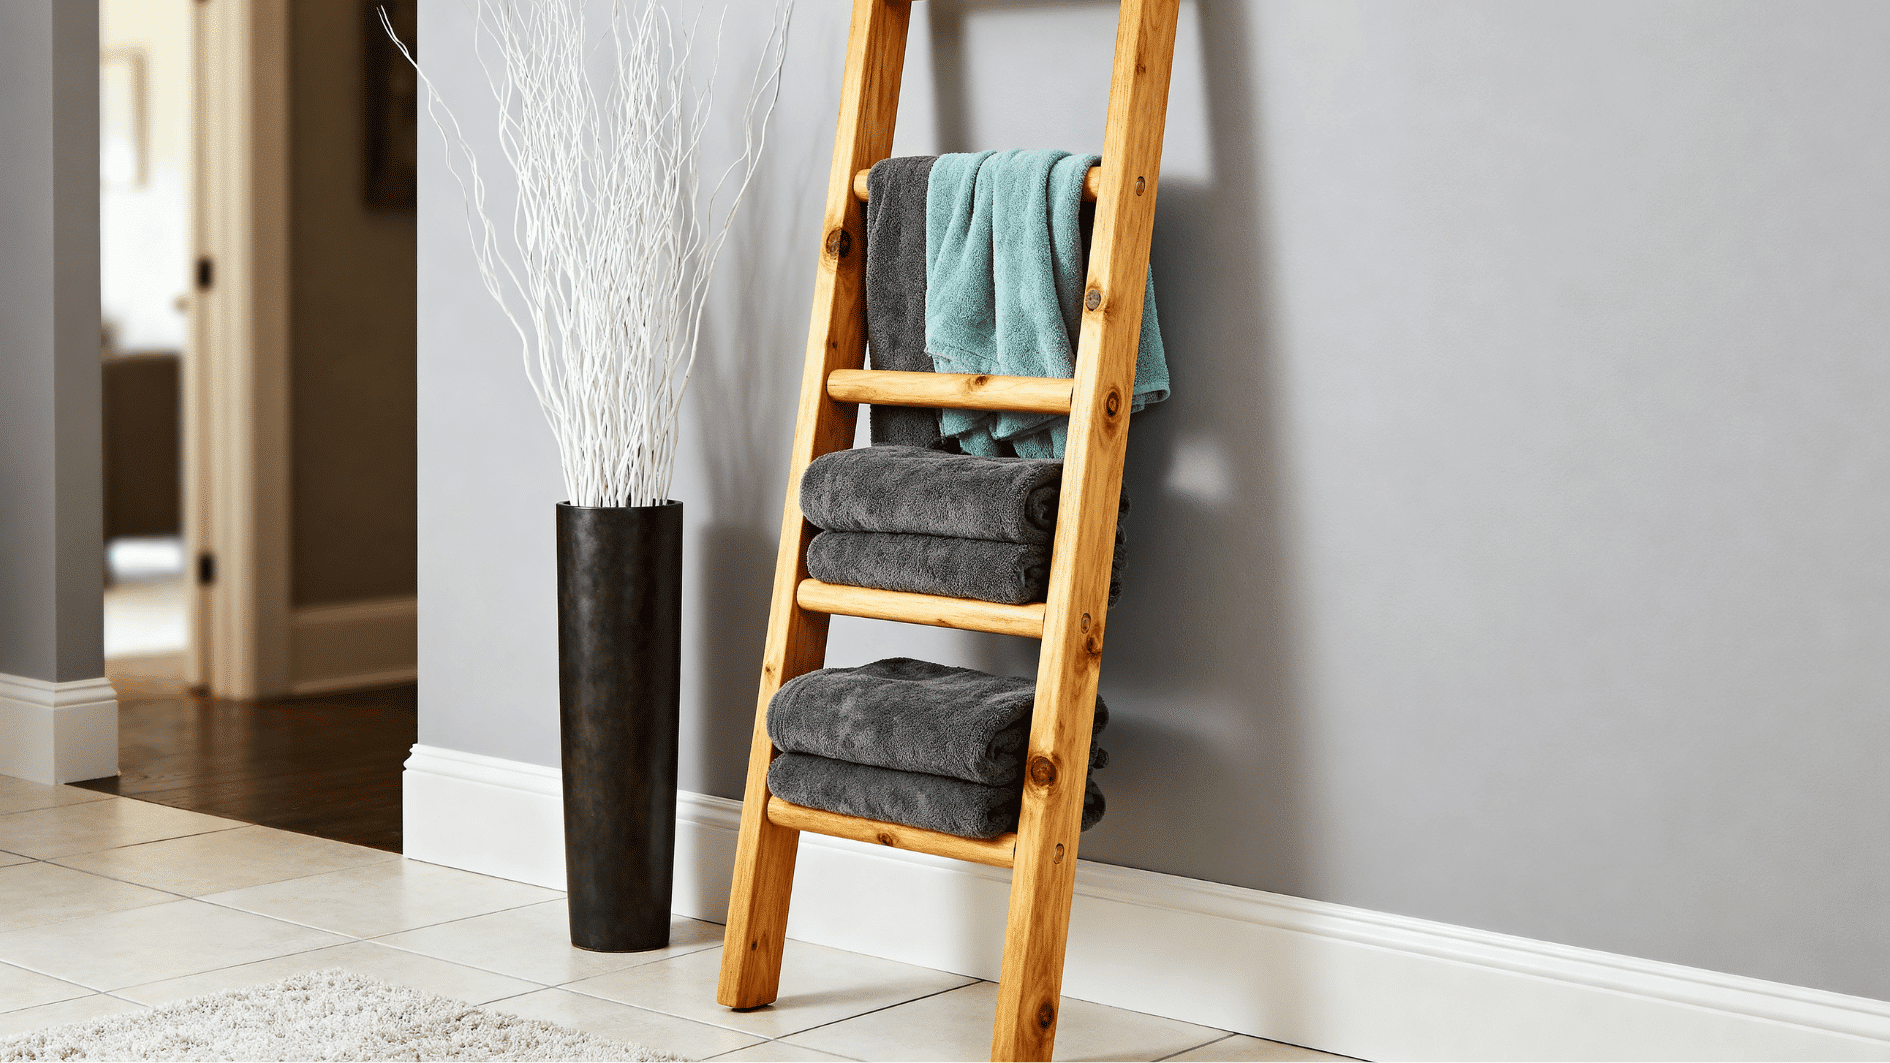
Once the finish is completely dry, place your blanket ladder against a wall in your living room, bedroom, or guest room.
Drape your favorite blankets, throws, or quilts over the rungs to add warmth and texture to the space. This simple step turns your DIY project into both a practical storage solution and a stylish home décor accent.
Tip: Place heavier blankets on lower rungs for better balance.
Popular Blanket Ladder Styles to Try
Look into the popular blanket ladder styles to find a design that complements your décor and inspires your next DIY project.
1. Rustic Farmhouse Appeal
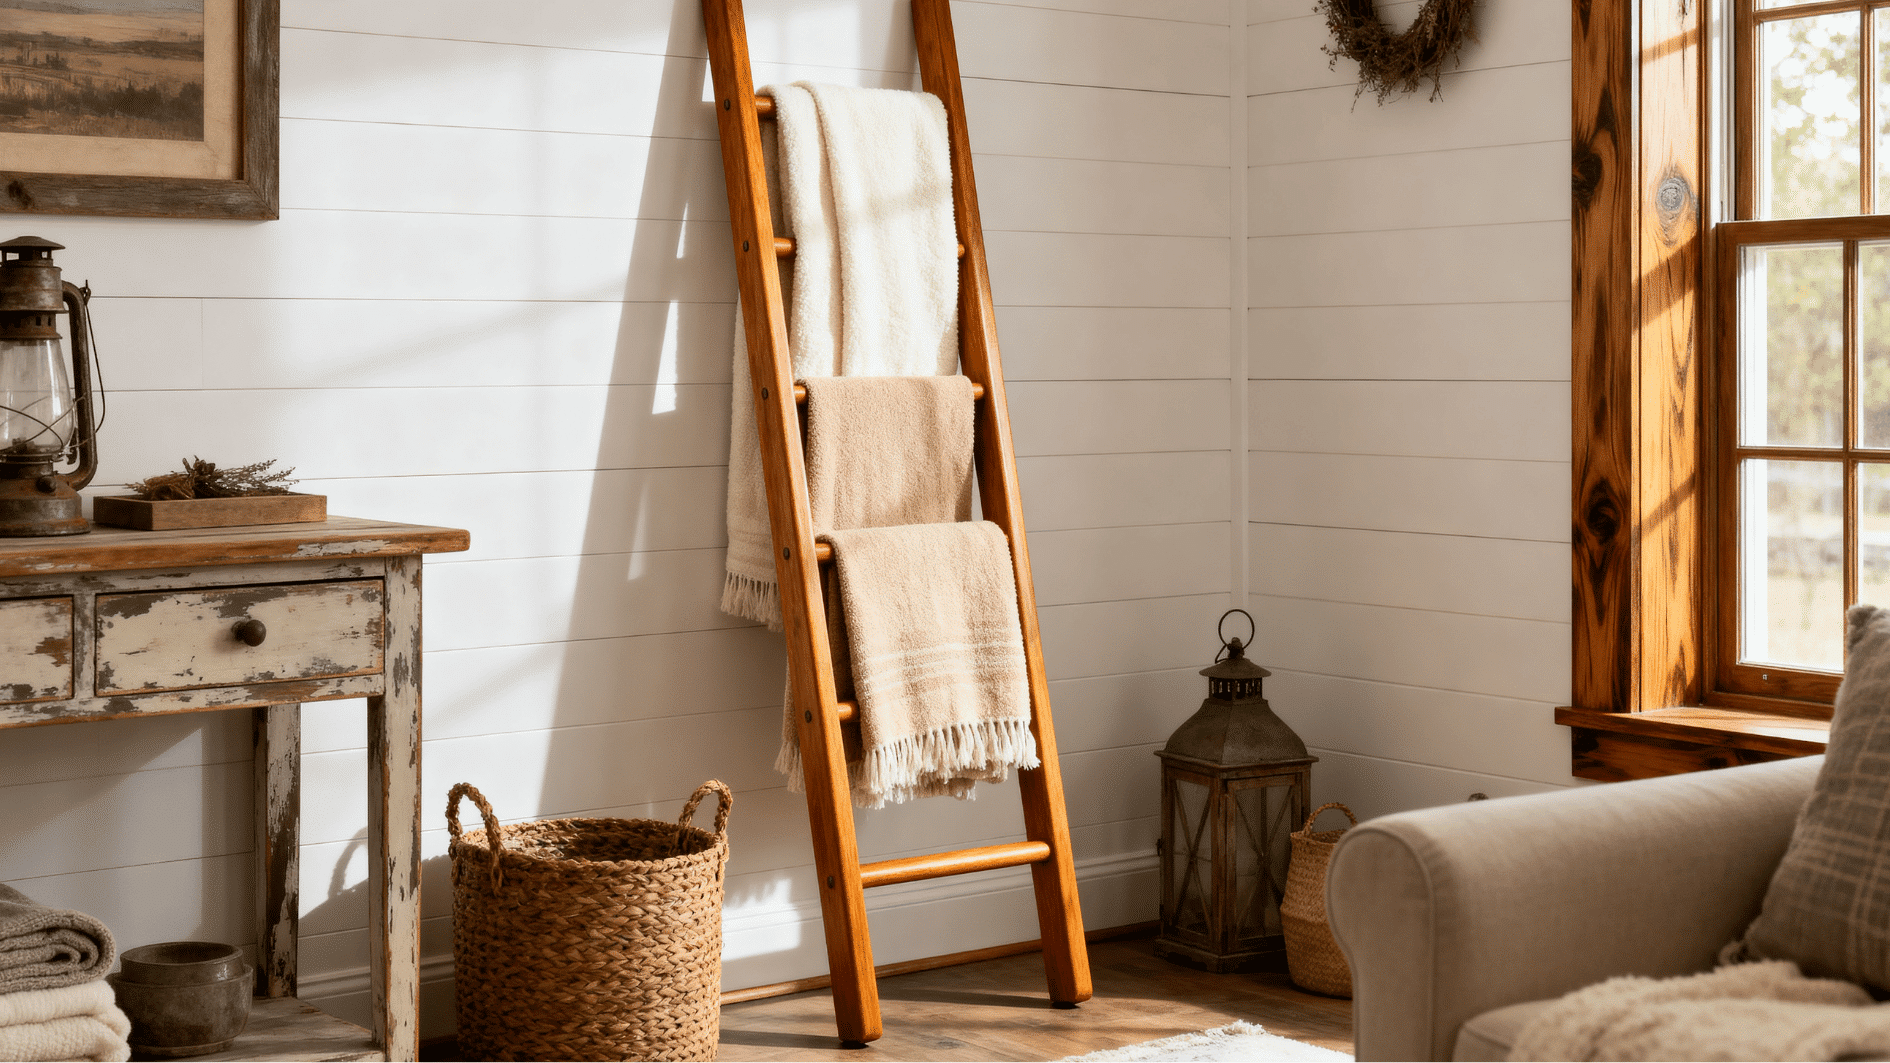
A blanket ladder with a rustic farmhouse style adds warmth and charm to any room. The natural wood grain and simple design create a cozy, welcoming look.
It works well with neutral colors, soft blankets, and farmhouse décor. This style blends beauty and function, making the ladder both decorative and practical.
2. Simple Modern Design
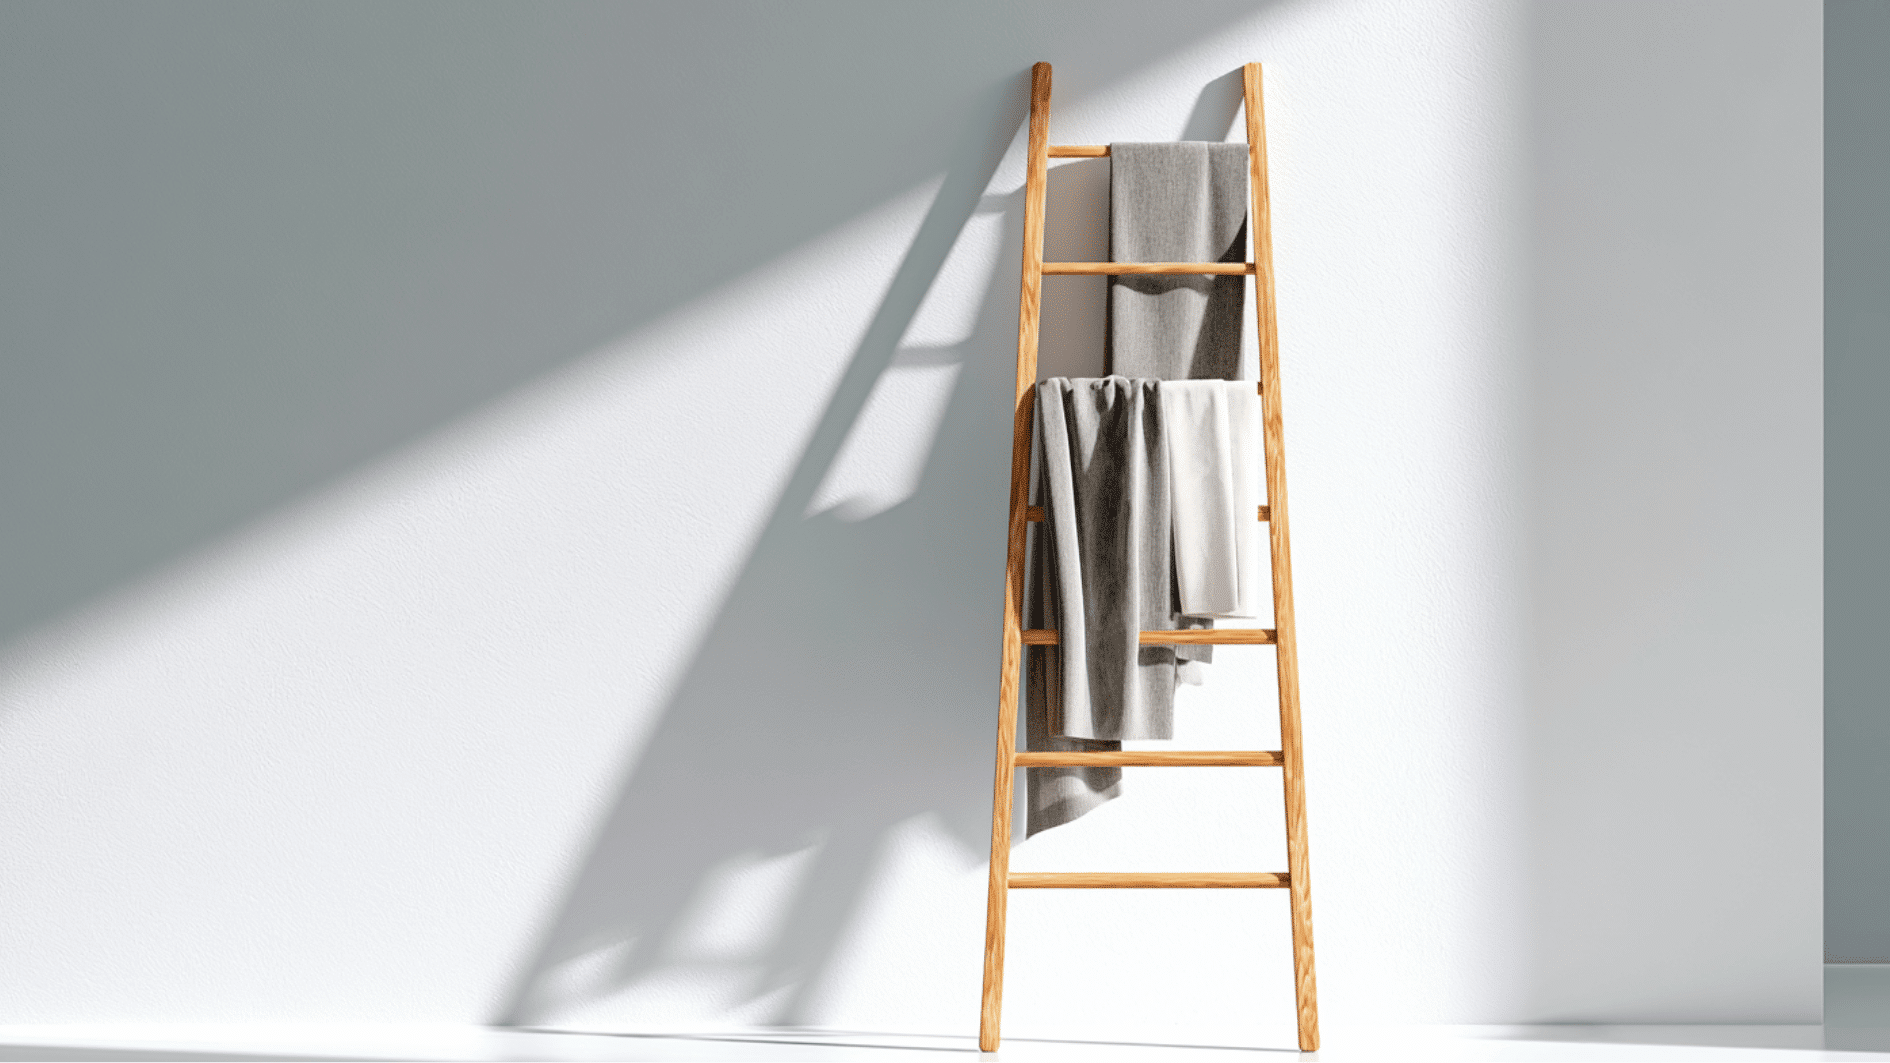
A simple, modern blanket ladder gives your space a clean, fresh look. Use smooth wood, straight lines, and a light stain or painted finish.
This design works well in bedrooms, living rooms, and small spaces. It keeps blankets organized while adding a neat, stylish touch to your home.
3. Eco-Friendly Choice
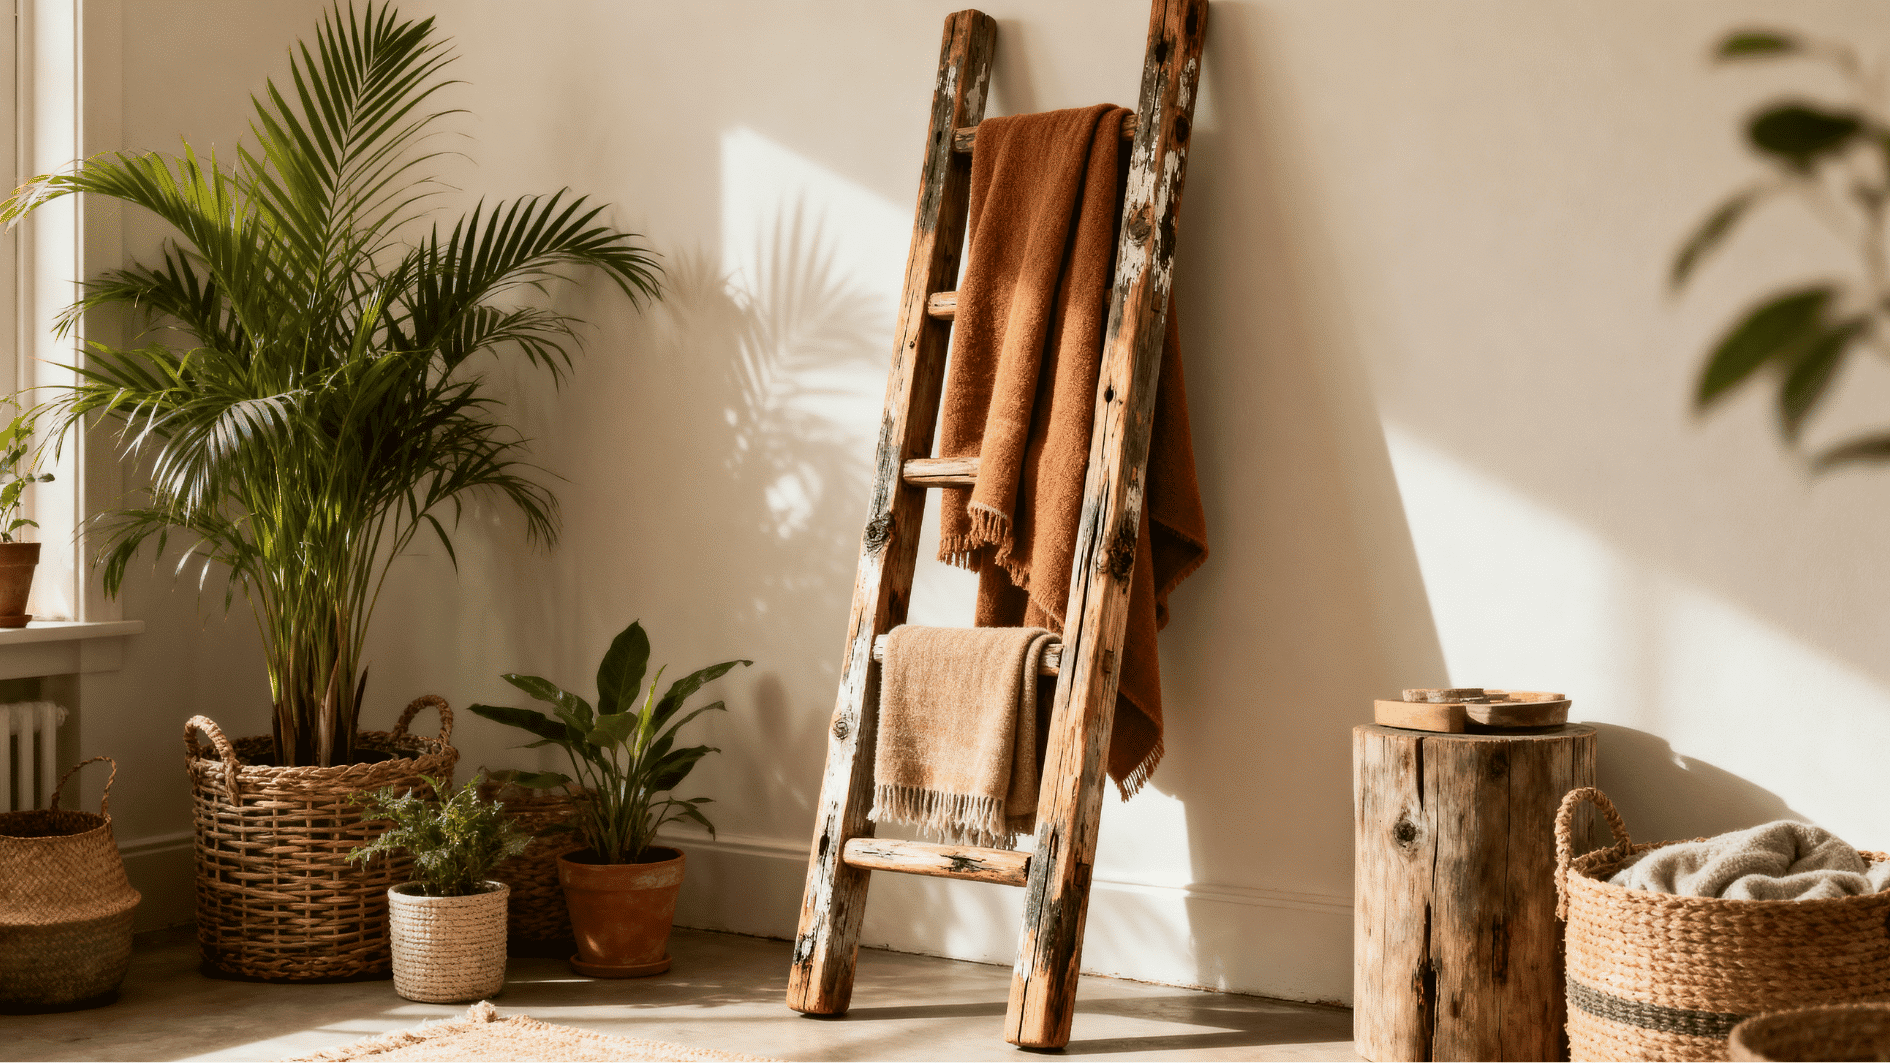
An eco-friendly blanket ladder is a great way to decorate while reducing waste. You can use reclaimed wood, leftover lumber, or sustainably sourced materials.
This simple project gives old wood a new purpose and helps limit waste. It adds style to your home while supporting a more environmentally friendly lifestyle.
4. Space-Saving Corner Style
A corner blanket ladder is perfect for saving space in smaller rooms. It fits neatly into an unused corner while still providing room for blankets, throws, or towels.
This design keeps your space organized without taking up much floor area. It also adds a stylish decorative touch to the room.
| Recommended: If you are working with limited square footage, our roundup of studio apartment décor ideas has even more clever ways to make every inch count. |
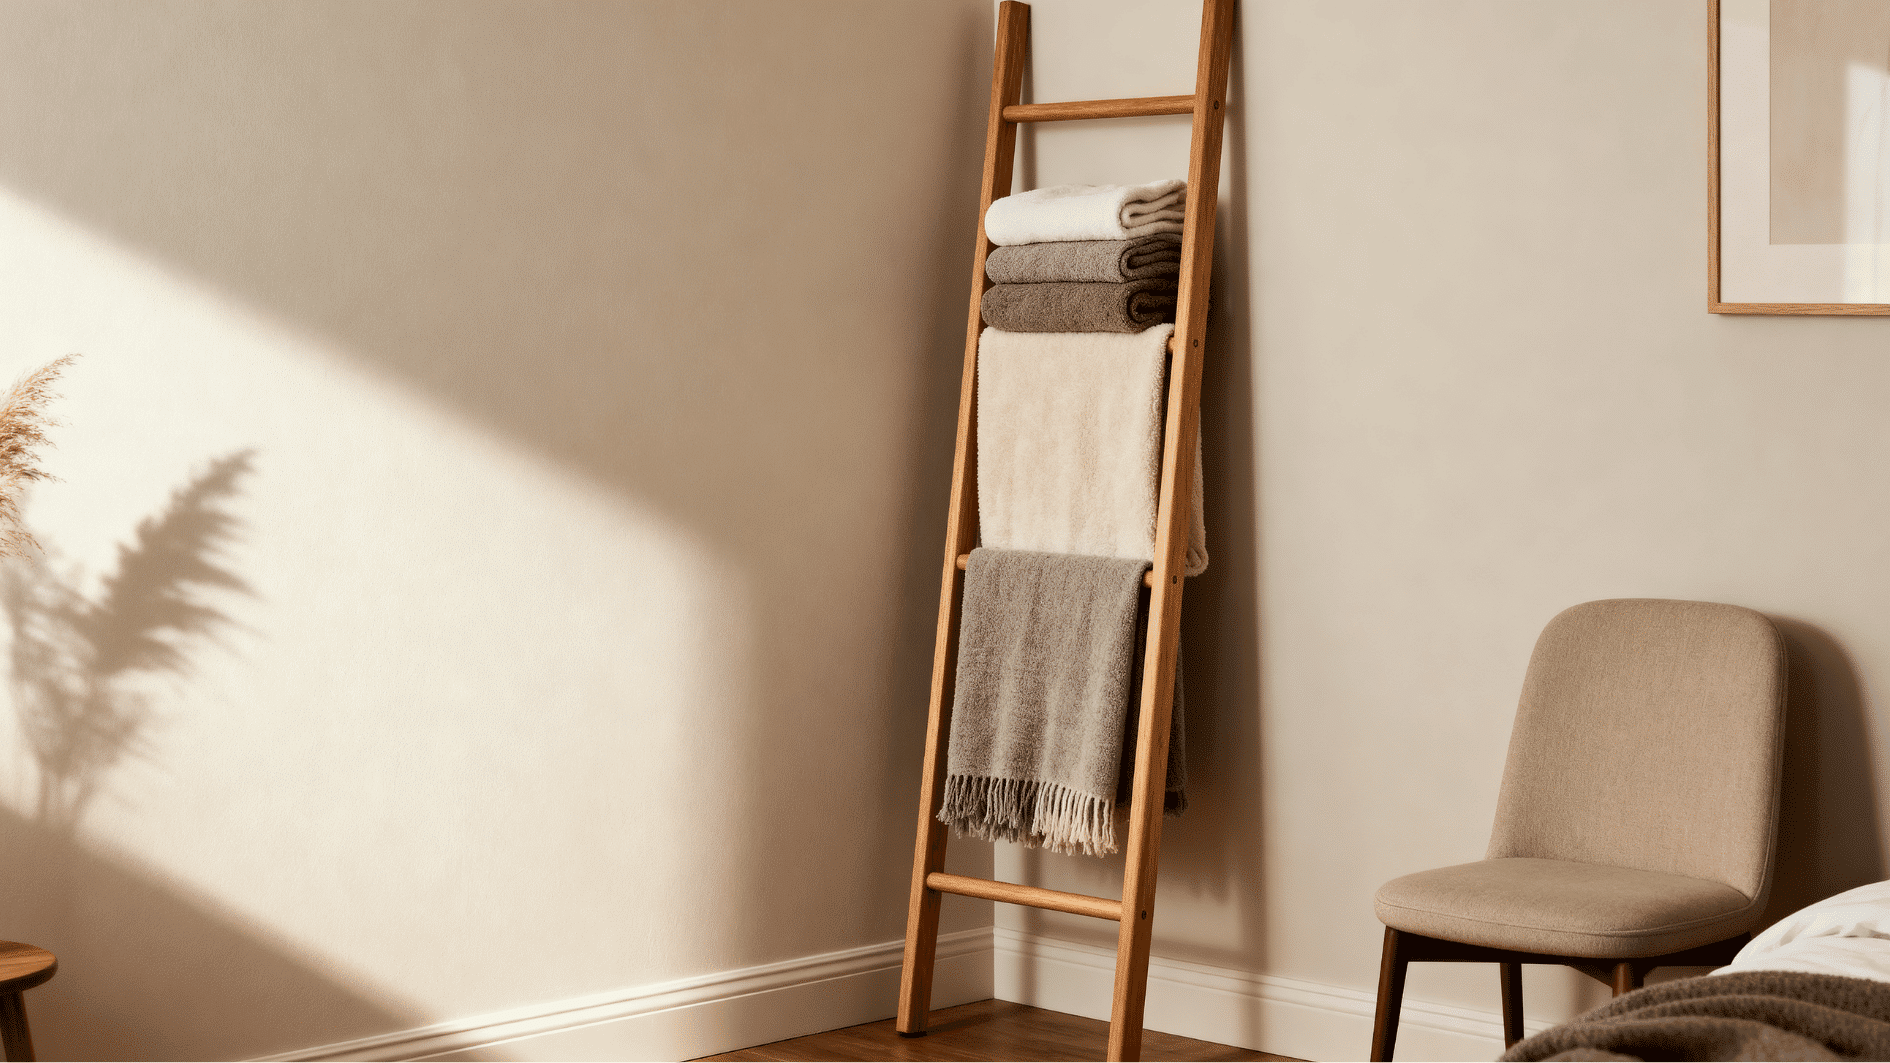
5. Minimalist Scandinavian Style
A minimalist Scandinavian blanket ladder focuses on simplicity, function, and natural beauty.
Light wood tones, clean lines, and an uncluttered design help create a calm and inviting space. This style works well in modern homes and small rooms.
It keeps blankets organized while adding warmth without making the room feel crowded.
Tips to Maintain Blanket Ladder
Regular care helps keep your blanket ladder looking its best and lasting longer. Follow the maintenance tips below.
- Dust Regularly: Use a microfiber cloth or soft duster to remove dust and keep the wood looking clean.
- Use Safe Cleaners: Wipe the ladder with a damp cloth and a mild wood-safe cleaner to avoid damaging the finish.
- Protect the Finish: Reapply a wood sealant or protective topcoat every few years to maintain its appearance.
- Avoid Moisture Exposure: Keep the ladder away from damp areas and wipe up spills quickly to prevent warping.
- Check Stability Often: Inspect joints and tighten any loose screws or hardware to keep the ladder secure and sturdy.
Wrapping it Up
Building a DIY blanket ladder is an easy way to add both style and function to your home.
With a few basic materials, simple tools, and a little time, you can create a custom piece that keeps blankets organized and within reach.
If you prefer a rustic or modern look, this project can be perfect to match your décor.
Follow the steps, add your personal touch, and enjoy a handmade blanket ladder that can improve any room in your home.
Frequently Asked Questions
What is the 4-To-1 Rule for Ladders?
The 4-to-1 rule means placing the ladder base 1 foot away from the wall for every 4 feet of height.
What is the Best Angle for a Blanket Ladder?
A blanket ladder should lean about 10–15 degrees from the wall for stability.
What is the Best Width for a Blanket Ladder?
Most blanket ladders are 18–24 inches wide, providing enough space for blankets without taking up too much room.