
All you really need to learn how to crochet is a hook, a ball of yarn, and a little patience. There’s no sewing machine to purchase and no prior experience required before you begin.
Maybe you’ve looked at a chunky blanket or a stack of granny squares and assumed it was out of your reach. It isn’t!
Every crocheter you admire started the same way, with a slip knot and one single stitch.
Consider the basic tools your starter kit, then add the core stitches you’ll use in almost every pattern, and the small habits that make your first rows go smoothly.
Why Crochet is Worth Learning as a Hobby?
Crochet builds a skill that carries over into other crafts, since reading stitch patterns and counting rows are the same habits used in cross-stitch embroidery projects, simple weaving projects, and even some sewing projects.
It also gives you full control over the finished result.
Changing the yarn color, hook size, or stitch used shifts the entire look of a project, so no two people crocheting the same pattern end up with identical pieces.
Many crocheters also find the repetitive motion calming, similar to other repetitive crafts, which makes it a hobby people return to well after the beginner stage; it’s part of why yarn crafts are trending again right now.
Let’s Understand the Basic Structure Behind Every Crochet Stitch
Every crochet stitch has a front loop and a back loop sitting on top. Knowing where these loops are changes how your finished fabric looks and feels.
| Stitch Part | Location | Use |
|---|---|---|
| Top of the stitch | V-shaped section at the top | Formed by the front and back loops |
| Front loop | Loop closest to you | Creates a ribbed texture when used alone |
| Back loop | Loop farthest from you | Leaves a visible ridge on the front |
| Both loops | Front and back loops together | Creates a solid, even fabric |
| Post of the stitch | Vertical body below the loops | Used for front-post and back-post stitches |
What You Need to Start Crocheting
Crocheting requires only a few basic items to get started. A hook and yarn are essential, while a few extra tools make learning easier and your finished stitches neater.
- Crochet hook: Forms and pulls yarn loops to create stitches.
- Yarn: Creates the fabric. Medium-weight yarn is easiest for beginners.
- Scissors: Cut the yarn when changing colors or finishing a project.
- Yarn needle: Weaves in loose ends after fastening off.
- Stitch markers: Mark specific stitches or rows to help you track your place.
- Measuring tape: Checks the gauge and project size as you work.
Once you're comfortable with the basics, plenty of fun beginner craft projects use these same tools to build your very first small pieces.
Step by Step Crochet for Beginners
Every crocheter starts the same way, with a hook, a slip knot, and a chain. Follow these steps in order to complete your first swatch of fabric.
Step 1: Hold Your Hook and Yarn Correctly
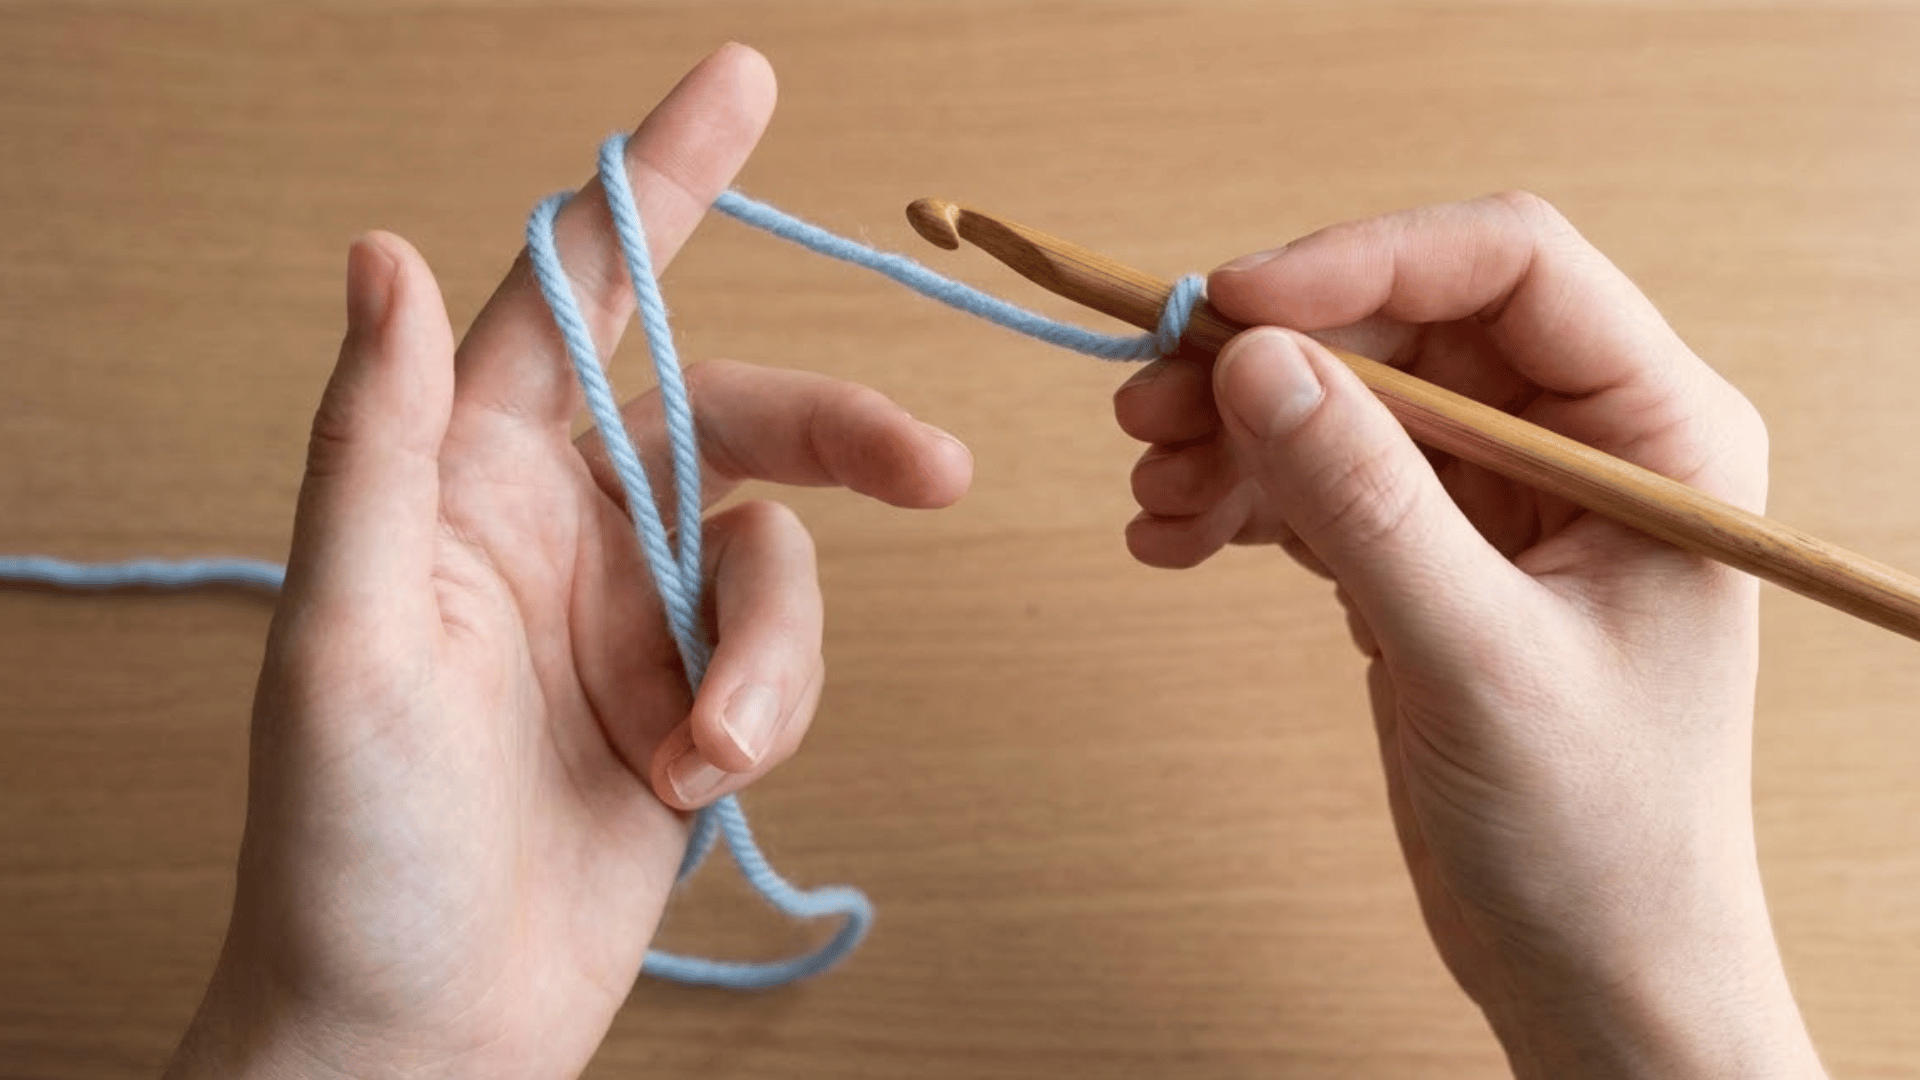
Grip the hook like a pencil or a knife, whichever feels natural. Loop the yarn through your other hand’s fingers to control tension as you pull each stitch through.
Rest the hook lightly rather than gripping it tight, since a stiff grip tires your hand quickly and makes tension harder to control.
Tip: There’s no single correct grip. Test both within your first few rows and stick with whichever keeps your tension even.
Step 2: Make a Slip Knot
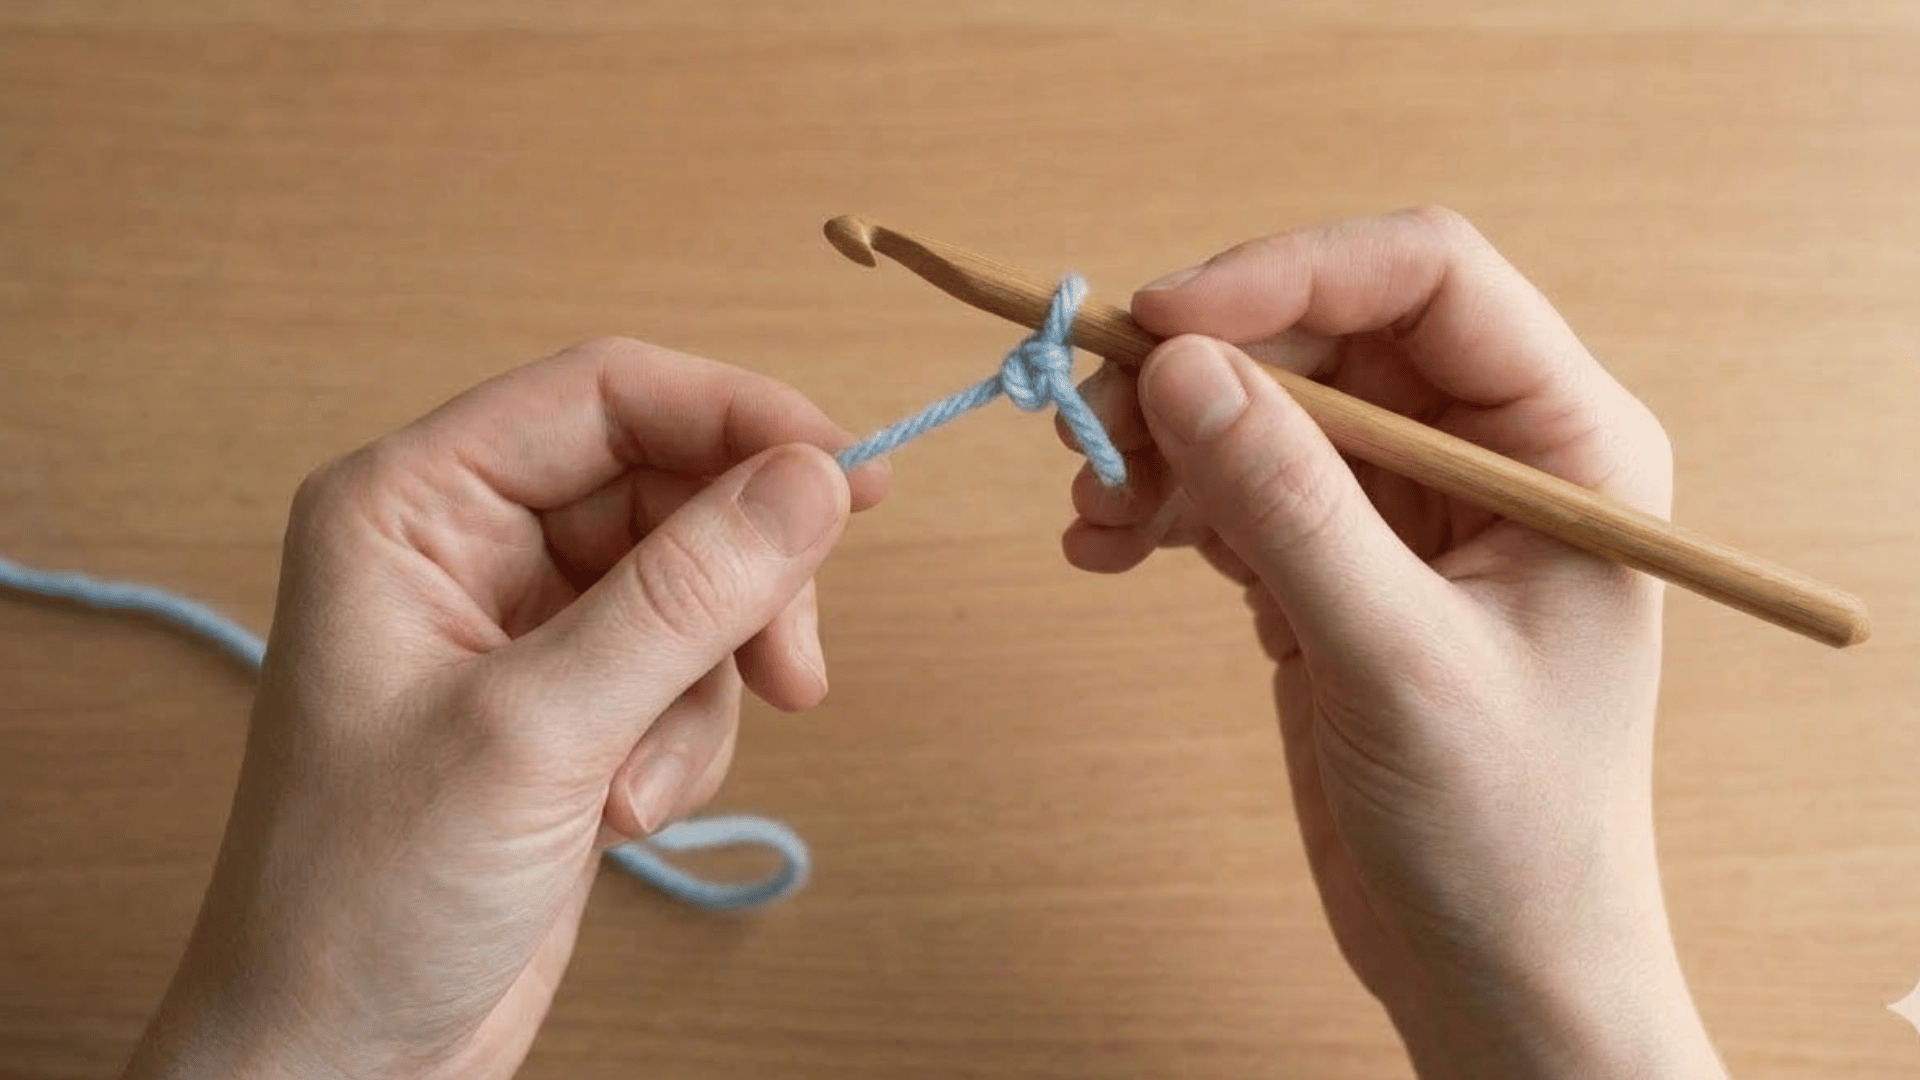
Loop the yarn, pull the tail through, and tighten it around your hook. This loop is the anchor point for every stitch that follows.
Leave a tail of a few inches before making the knot, since a short tail is harder to weave in later.
Tip: Keep the knot loose enough to slide on the hook. A tight slip knot makes your first chain stitch hard to work.
Step 3: Work a Foundation Chain
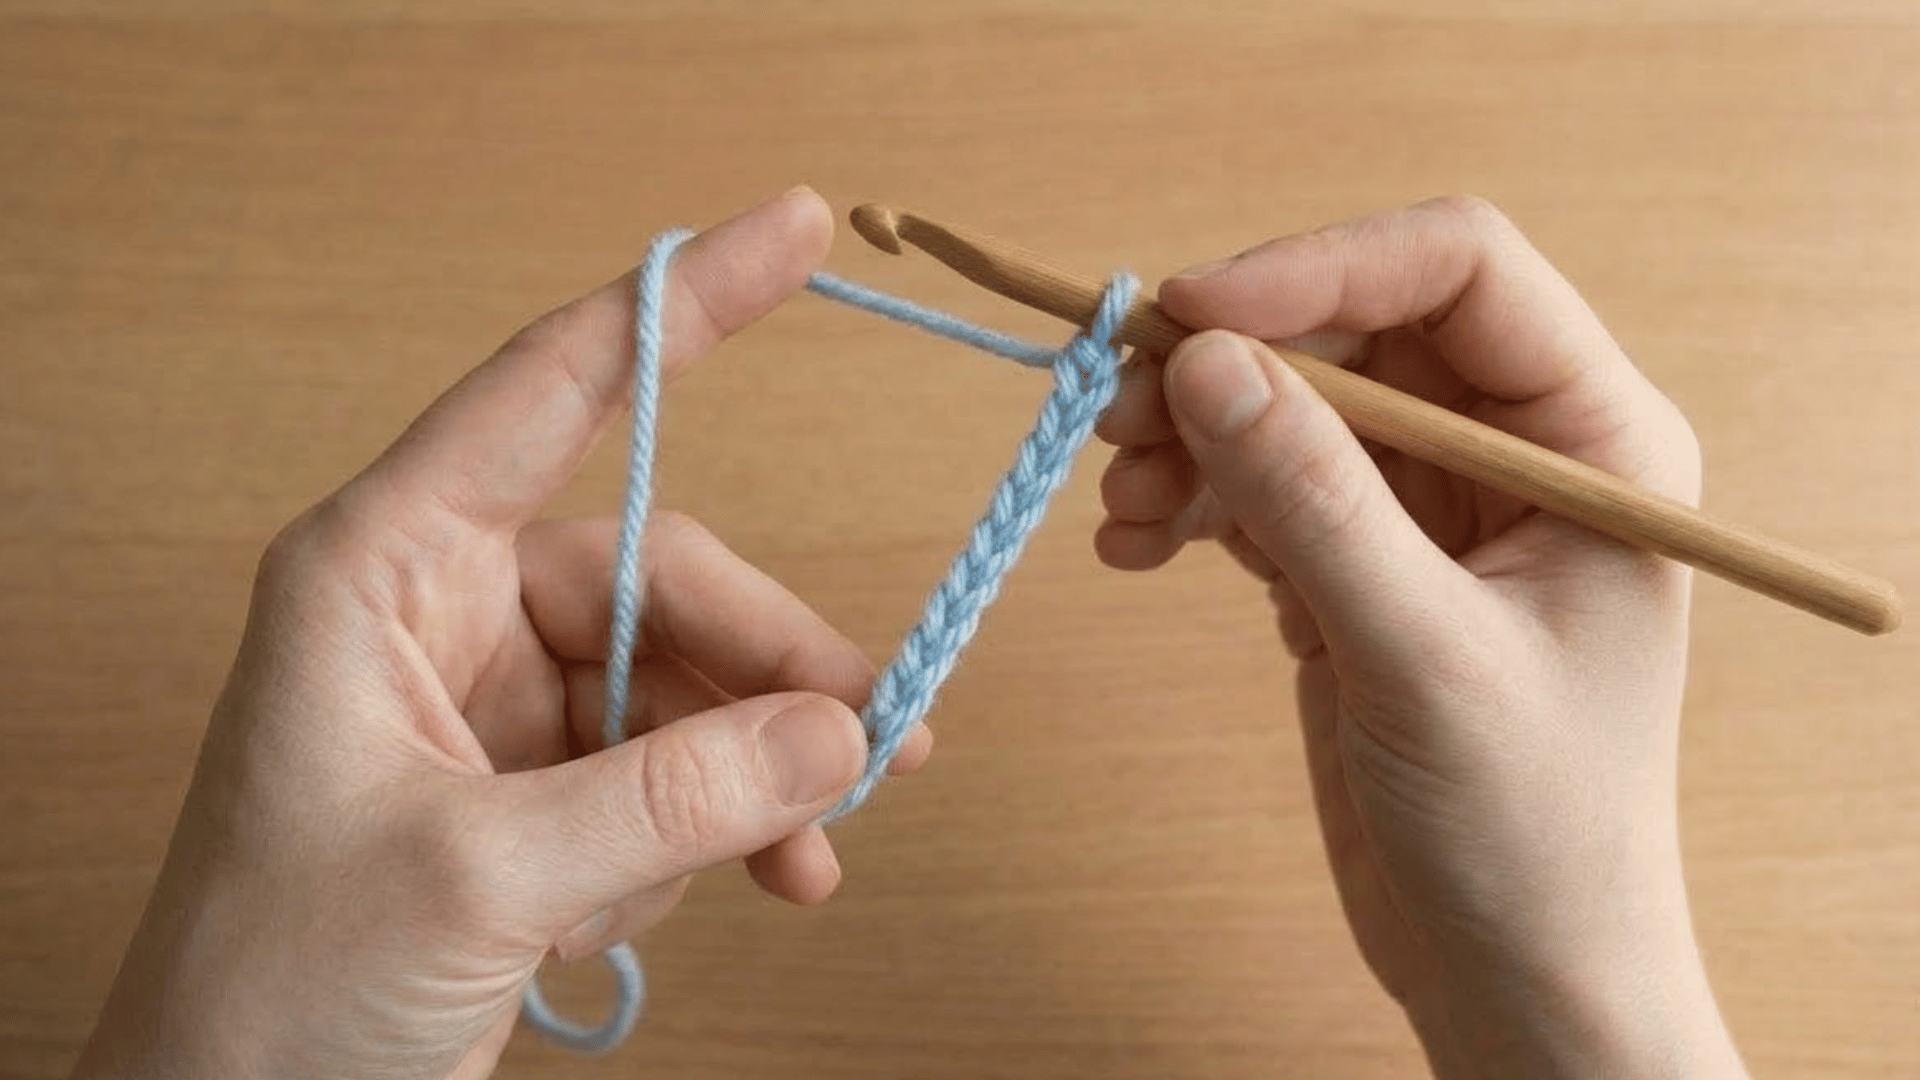
Yarn over the hook and pull it through the loop already on the hook. Repeat this to build a chain of the required length.
Aim for even tension throughout, since a chain that’s too tight or too loose changes how easily your next row sits into it.
Tip: Count your chains as you go. Losing track here throws off your stitch count in every row after it.
Step 4: Work Your First Single Crochet
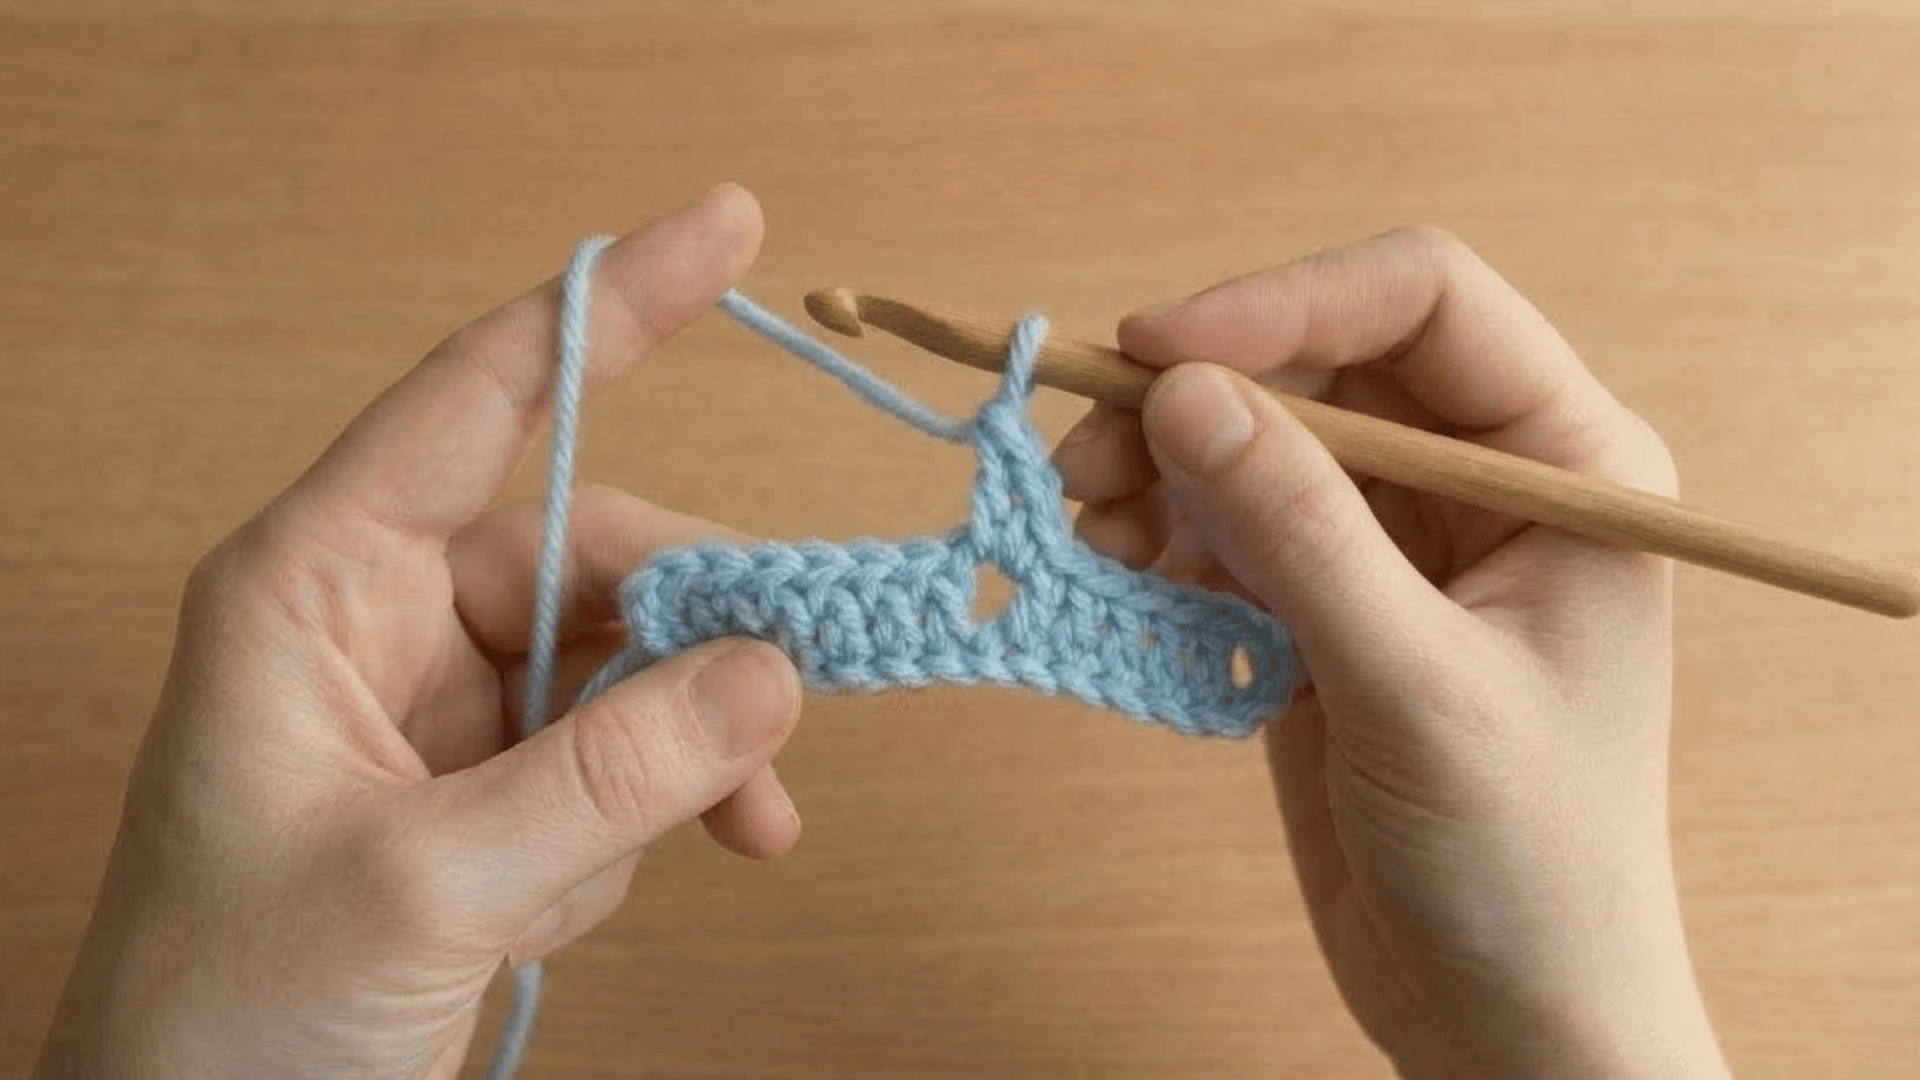
Insert the hook into the second chain from the hook, yarn over, and pull through. Yarn over again and pull through both loops on the hook.
Repeat this same motion into each remaining chain across the row to complete your first line of stitches.
Tip: “Check that your stitches sit at an even height across the row. A stitch pulled too tight looks noticeably shorter than the ones beside it.”
Step 5: Turn Your Work and Start Row Two
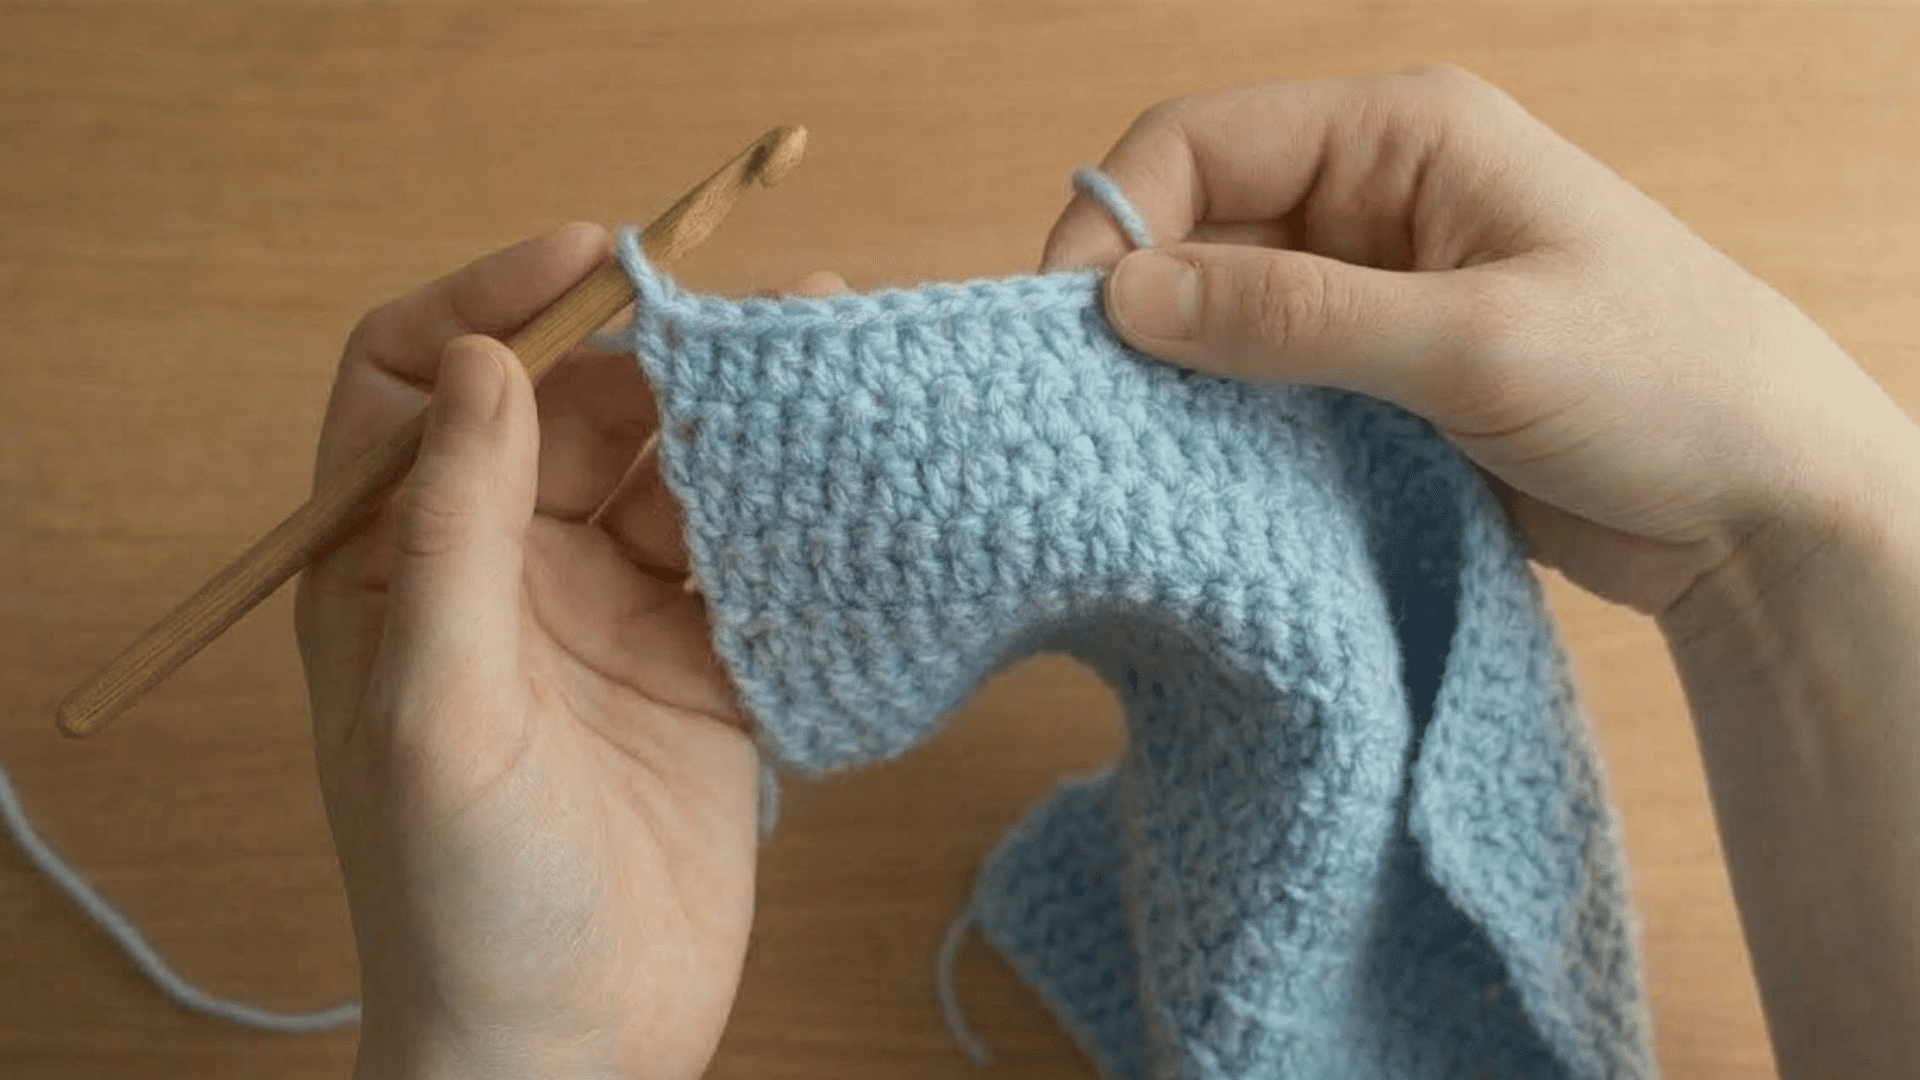
Once a row ends, turn the piece like a page in a book and chain one before your next stitch. This keeps the fabric growing in one direction.
The chain one doesn’t count as a stitch itself; it simply brings your hook up to the right height to start the next row evenly.
Tip: Always turn the same way each time. Switching direction mid-project twists your fabric out of shape.
Step 6: Fasten Off and Weave in Ends
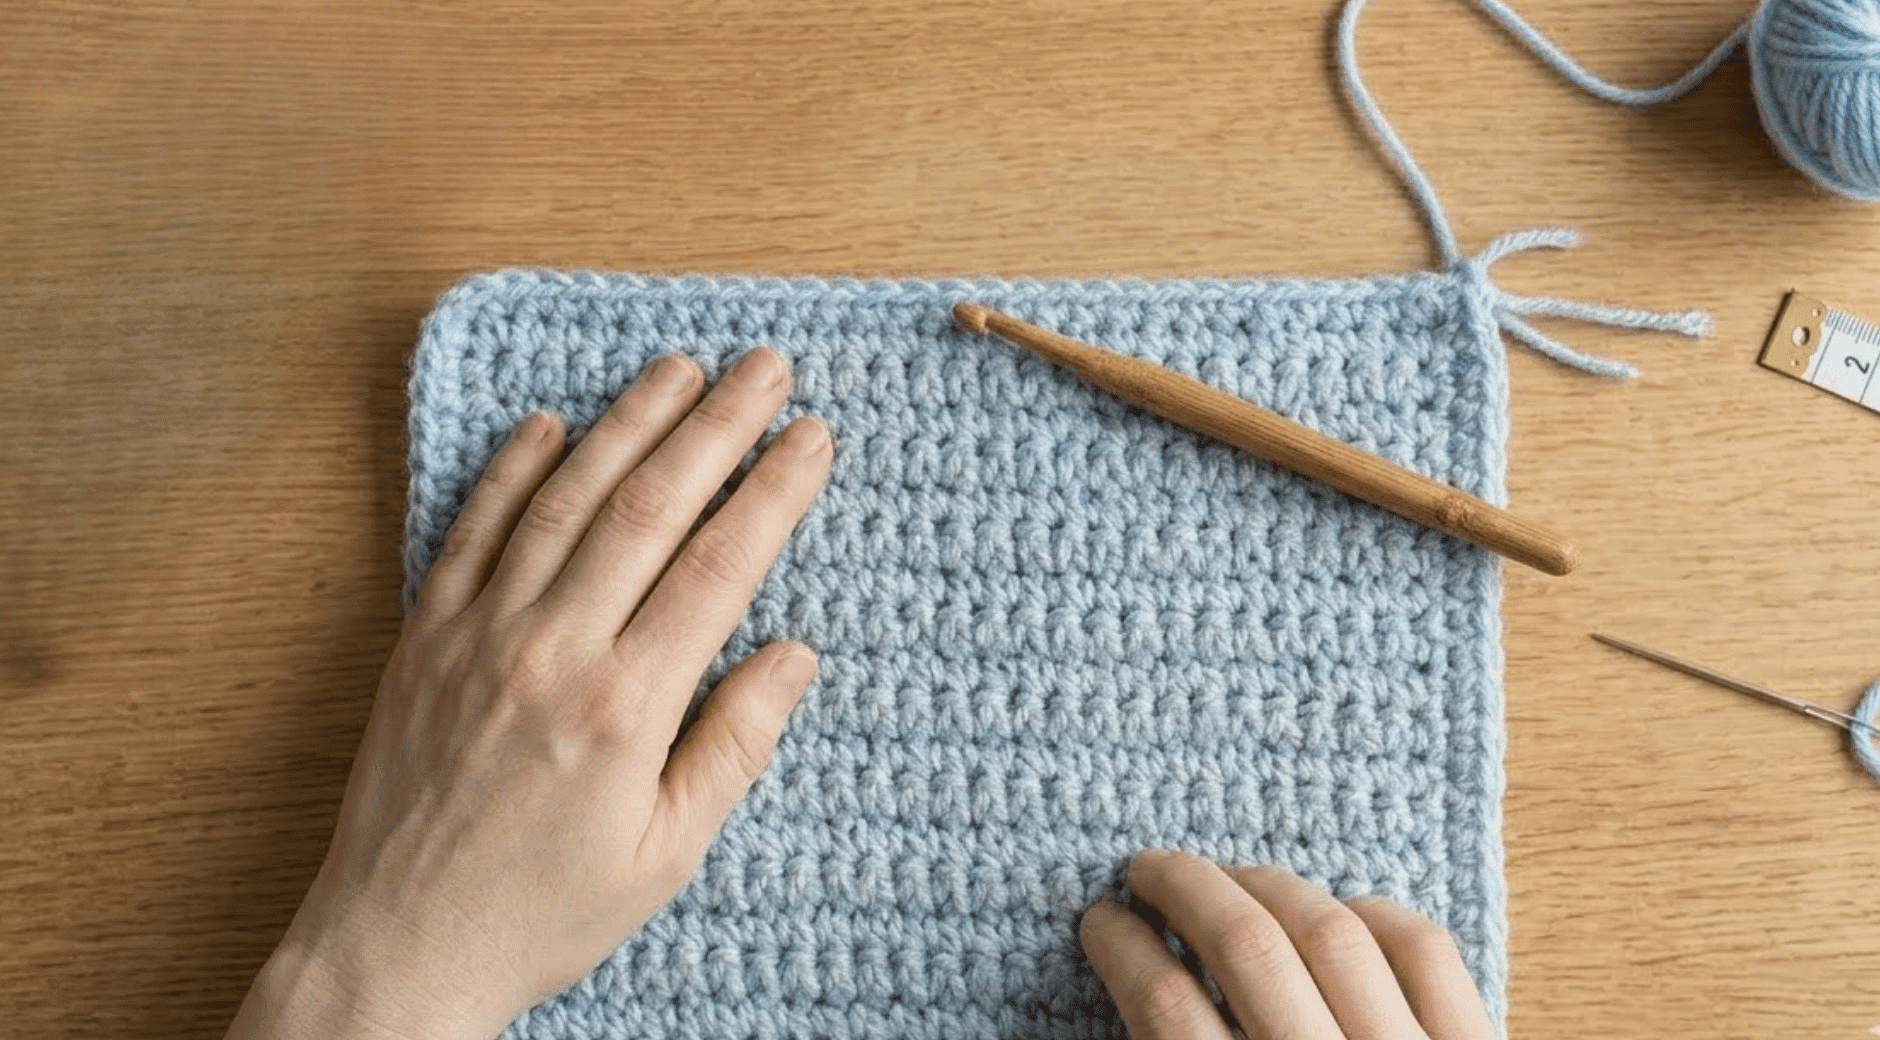
Cut the yarn, pull the tail through the last loop, and pull tight to secure it. Thread the tail onto a yarn needle and weave it through nearby stitches.
Trim any excess yarn close to the fabric once the tail is fully secured, so no loose thread pokes out from the finished piece.
Tip: Weave the tail through at least four stitches in different directions so it won’t work loose over time.
How to Read a Crochet Pattern Properly?
Crochet patterns use short abbreviations and symbols instead of spelling out each instruction. Once these basics click, following how to crochet from a written pattern becomes far less confusing.
- Stitch Abbreviations: Sc means single crochet, dc means double crochet, ch means chain, and sl st means slip stitch.
- Stitch Counts: Listed at the end of a row, usually in brackets, so you can check your work before moving on.
- Repeats: Appear inside asterisks or parentheses, telling you to work a set of stitches multiple times across the row.
- Pattern Terms: Words like “turn,” “fasten off,” and “right side” tell you what to do between rows, not just which stitch to make.
Crochet Project Ideas to Try After the Basics
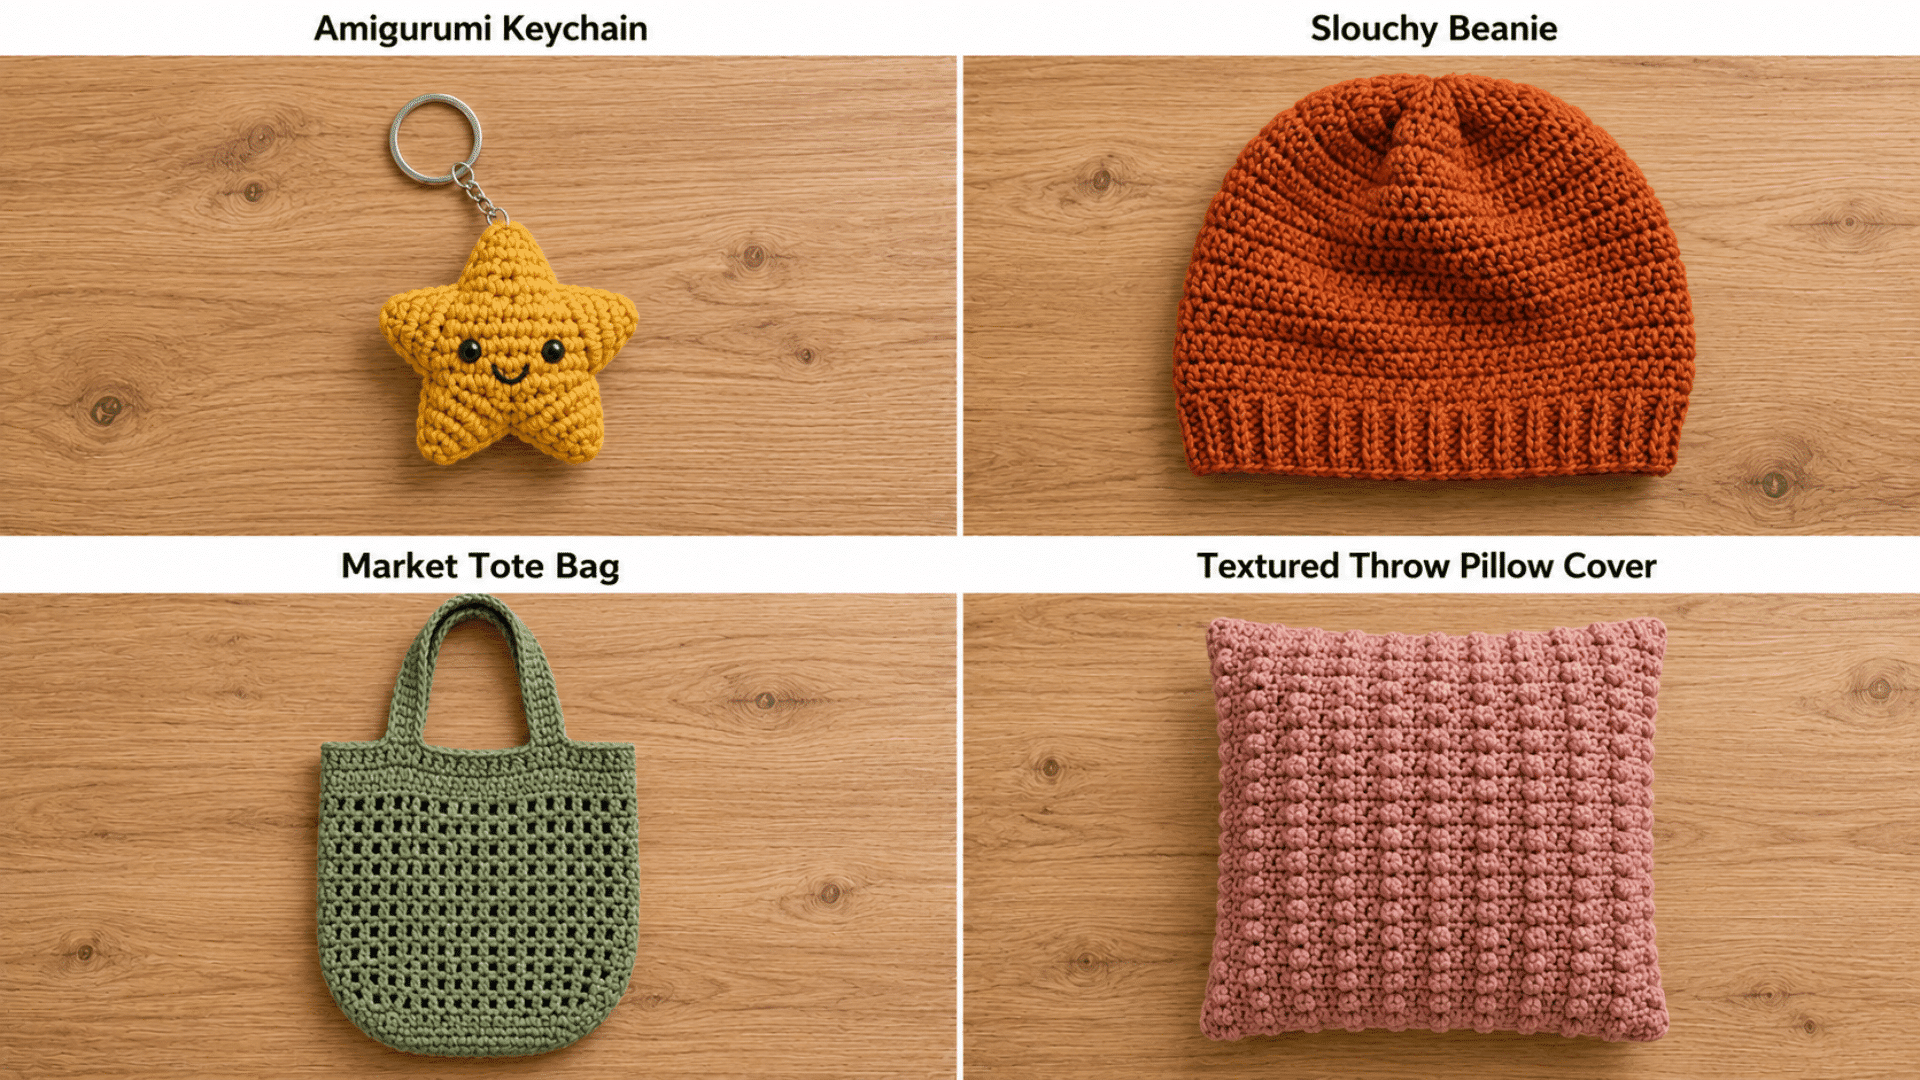
Once single crochet feels comfortable, these four projects put your new skills to use. Each one introduces a different shape or structure, from flat pieces to items worked in the round.
1. Amigurumi Keychain
Amigurumi uses single crochet worked in a tight spiral, stuffed as you go instead of left open like a flat swatch.
A small keychain-sized shape is dense enough to hold its form, giving you practice with increases and decreases on a project that takes under an hour.
2. Slouchy Beanie
A beanie starts with a small circle and increases outward before switching to straight rounds, unlike anything worked flat in rows.
This shape teaches you to read a pattern’s increase count accurately, since too few or too many stitches change how the hat sits on your head.
3. Market Tote Bag
A tote bag uses a firmer cotton yarn and a smaller hook than most beginner projects, since the fabric needs to hold weight without stretching.
Straps worked separately and then attached give you practice joining two finished pieces, a skill most flat projects never require.
4. Textured Throw Pillow Cover
A pillow cover introduces a bobble or shell stitch instead of a plain stitch repeated throughout, adding raised texture to the surface.
Working two matching panels and joining them along three sides gives you a project that finishes as something structural, not just flat fabric.
Additional Stitches Every Beginner Should Learn
Single crochet is only the starting point. These three stitches add height and texture to your fabric, and most patterns rely on a mix of all four to shape a finished project.
Half Double Crochet (HDC)
One extra yarn over before inserting the hook, creating a stitch taller than single crochet but shorter than double crochet.
It works well for scarves and blankets where a mid-weight drape is needed.
Double Crochet (DC)
Yarn over once before inserting the hook, then pull through two loops at a time across two steps, giving an open, flexible fabric.
This stitch shows up often in granny squares and lightweight garments, the same kind of pieces you’ll find among these easy handmade gift ideas once you’re ready to make something to give away.
Treble Crochet (TR)
Yarn over twice before inserting the hook, producing the tallest of the four basic stitches and a looser weave. Projects worked in treble crochet come together faster since each stitch covers more height.
Note: The same stitch name can mean different things depending on the pattern’s origin, so a US single crochet matches a UK double crochet, not a UK single crochet. Always check which system a pattern uses before starting.
Conclusion
Crocheting takes repetition, not talent. A shaky first row of single crochet usually looks noticeably better by the tenth row, simply from doing it again.
Reading about a slip knot and tying one still feels different, which is why the next step is picking up a hook. How to crochet is learned through continuous practice, not by memorizing instructions.
Start with a granny square or a small dishcloth. Both follow the same step-by-step crochet-for-beginners method, repeated enough times to become second nature.
Once you’ve built up that confidence, easy crochet border stitches make a natural next skill to add a finished, polished look to your work.
Frequently Asked Questions
Is It Easier to Learn How to Crochet or Knit?
Most beginners find crochet easier to pick up. It uses one hook instead of two needles, and a dropped stitch is far simpler to fix since only one loop stays active at a time.
How Long Does It Take to Learn How to Crochet?
Most people learn the basic stitches within a few practice sessions. Comfort with tension and speed usually builds over two to three weeks of regular practice, depending on how often you pick up a hook.
Is Crochet an Expensive Hobby to Start?
No. A basic hook costs a few dollars, and a single ball of medium-weight yarn is enough for a first project. Costs rise only if you move into specialty yarns or larger blankets.