


Ever look at a beautiful woven wall hanging and think, “I could totally do that,” only to see that a professional loom costs more than a car payment?
Yeah, it’s a real buzzkill when a hobby feels locked behind a massive price tag. But here’s the thing: weaving is just string under tension, and you don’t need a fancy studio to get started.
I’m going to walk you through a few DIY methods that are cheap, sturdy, and perfect for beginners. Let’s roll up our sleeves and build something cool.
What is a Loom?
Think of a loom as your primary teammate in the weaving game. Its main job is to hold a set of vertical threads, which we call the warp, under enough tension so they don’t sag while you work.
This setup lets you interlace horizontal threads, known as the weft, over and under them to create your fabric. The whole thing boils down to three simple parts:
- The Frame: This is the outer shell that holds the entire structure together.
- The Warp: These are the vertical “skeleton” threads of your project.
- The Weft: These are the horizontal threads you weave through the warp to build the “flesh” of your design.
Why Make Your Own Loom?
Making your own loom comes with plenty of perks! Not only does it save you money, but it also lets you customize the loom to fit your exact needs and gives you a hands-on learning experience.
- Massive Savings: While professional looms can set you back anywhere from $100 to a staggering $5,000, you can build a perfectly functional frame for under $15 using basic scraps like wood or cardboard.
- Customization: You get to dictate the dimensions. If you want a tiny loom for coasters or a massive four-foot frame for a statement wall hanging, you just build it to that exact size.
- A Smarter Way to Learn: There’s something really satisfying about the hands-on process. Constructing the tool from scratch actually helps you wrap your head around the physics of tension, which makes you a much better weaver in the long run.
- The “I Made This” Factor: Beyond just being educational, it’s just plain fun to create something functional with your own two hands before you even touch a piece of yarn.
Types of Looms
Looms come in various styles, each designed for different weaving techniques and project sizes. Here are four popular types of looms that you can build at home.
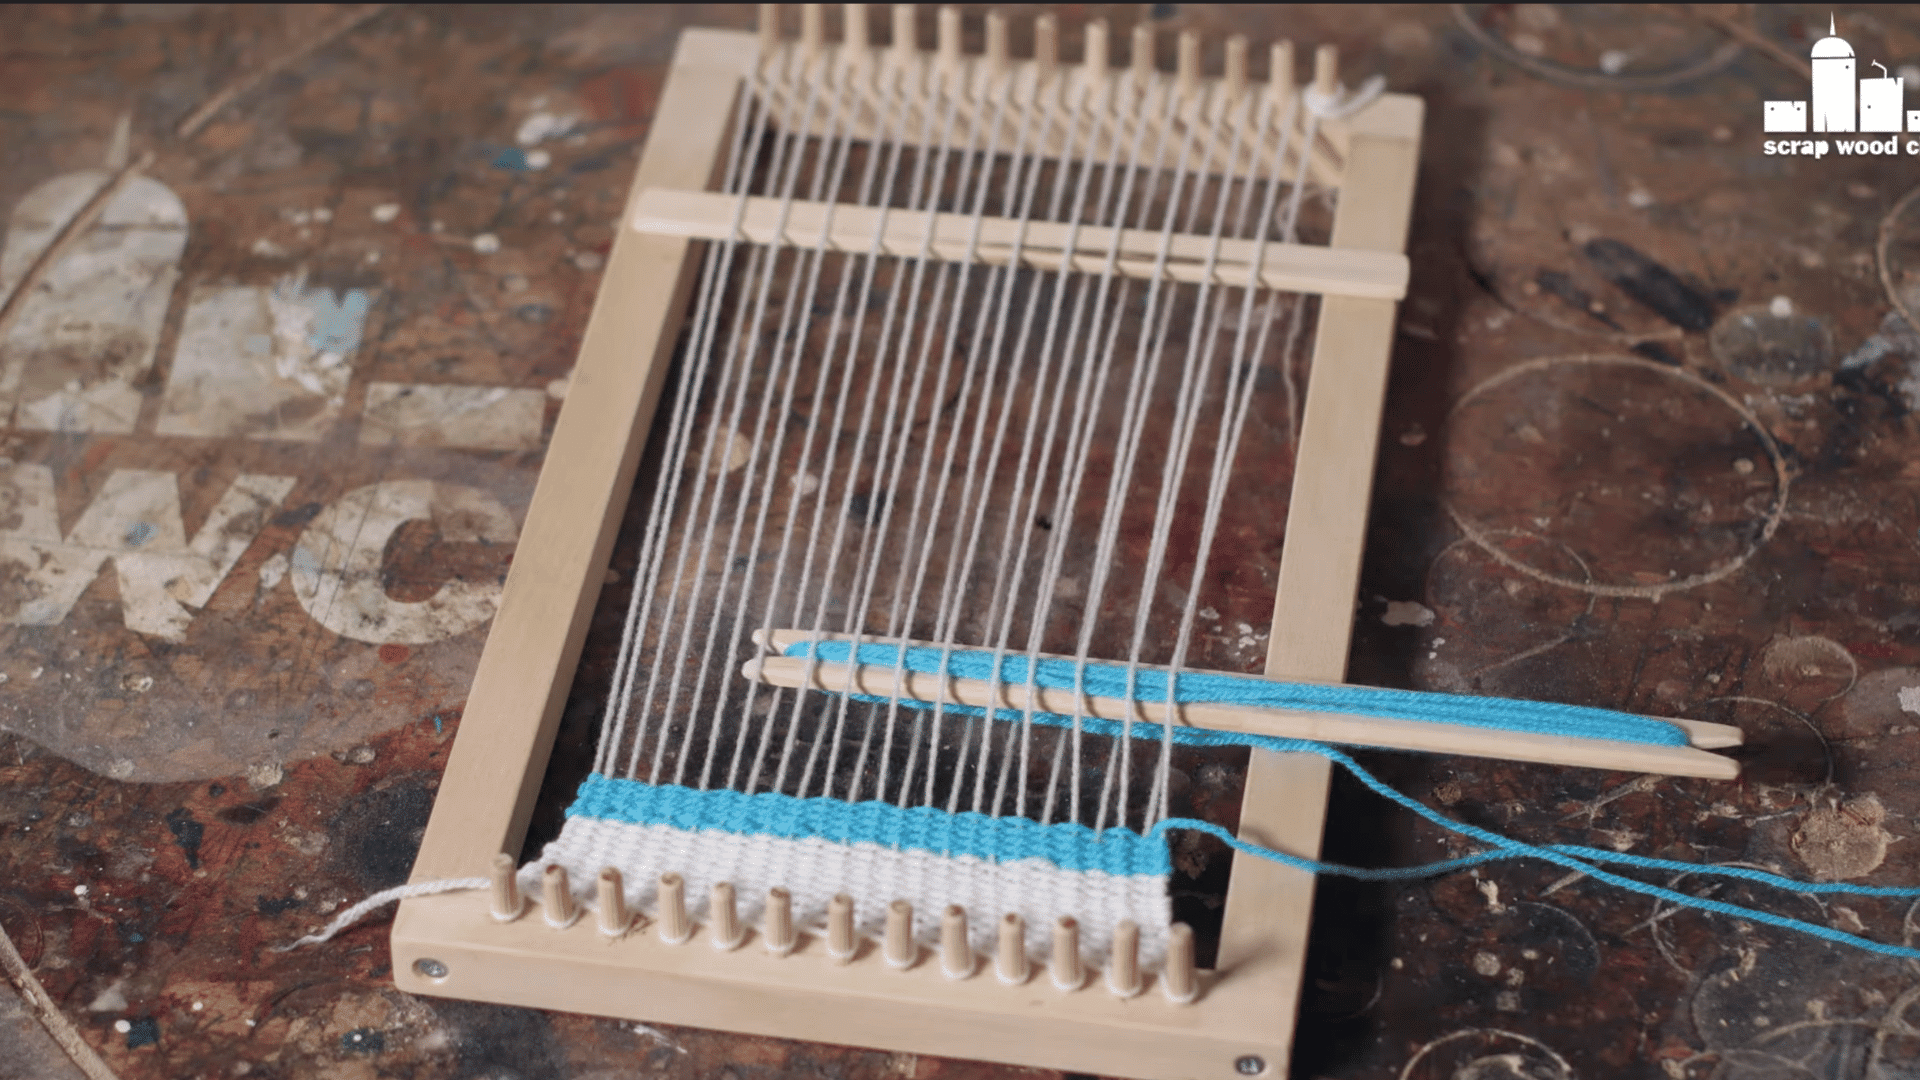
1. Wooden Loom
Wooden looms are sturdy and versatile, ideal for larger projects like rugs, scarves, and tapestries. They are simple to make, and their strength ensures a consistent and even weave.
The solid frame allows for tight tension, making it easier to achieve smooth, durable fabric. Plus, they’re great for long-term use and larger-scale weaving projects.
2. Cardboard Loom
Cardboard looms are a great option for beginners or small projects. They are easy to make, and you can quickly get started on weaving small items like bookmarks or coasters.
The solid frame allows for tight tension, making it easier to achieve smooth, durable fabric. Plus, they’re great for long-term use and larger-scale weaving projects.
3. Rigid Heddle Loom
A rigid heddle loom uses a heddle to separate the warp threads. It’s perfect for narrower projects, like scarves or table runners, and can create more complex patterns than simpler looms.
you’ll need a pre-made frame, yarn for both the warp and weft, a shuttle for weaving, and a heddle to separate the warp threads.
4. Frame Loom
Frame looms are very flexible and ideal for creating woven pieces. You can make the frame from almost any material like wood or plastic, making them customizable for different types of weaving.
You’ll need a sturdy frame (wood, metal, or plastic), warp yarn to stretch across the frame, and weft yarn to weave through the warp.
How to Make a Simple Wooden DIY Weaving Loom
Creating your own weaving loom from wood is a fun and rewarding DIY project. In this guide, we’ll walk you through the simple steps to make a sturdy wooden loom that’s perfect for weaving all kinds of projects.
Tools and Materials Required
Start by collecting everything you need. For this project, simple hand tools and a few power tools make the work faster, but nothing exotic is required.
| Item | What You’ll Need | Why You Need It |
| Wood | Basswood or soft hardwood (1/2″ to 3/4″ thick) | Provides a sturdy, lightweight frame that won’t snap under tension. |
| Fasteners | Small wood screws or brass pins | These keep your joints tight and secure. |
| Measuring | Ruler, pencil, and a speed square | Essential for marking cuts and ensuring your corners are a perfect 90°. |
| Cutting Tools | Miter box and hand saw (or a small circular saw) | Helps you get those clean, straight edges for the frame pieces. |
| Sanding | Sanding block or belt sander | Smooths out any rough spots so your yarn doesn’t snag and fray. |
| Drill Bits | Drill with countersink bits | Prevents the wood from splitting when you drive in your screws. |
| Optional | Block plane or bandsaw | Great for adding decorative touches or smoothing long edges. |
Step 1: Decide Loom Size and Cut the Frame
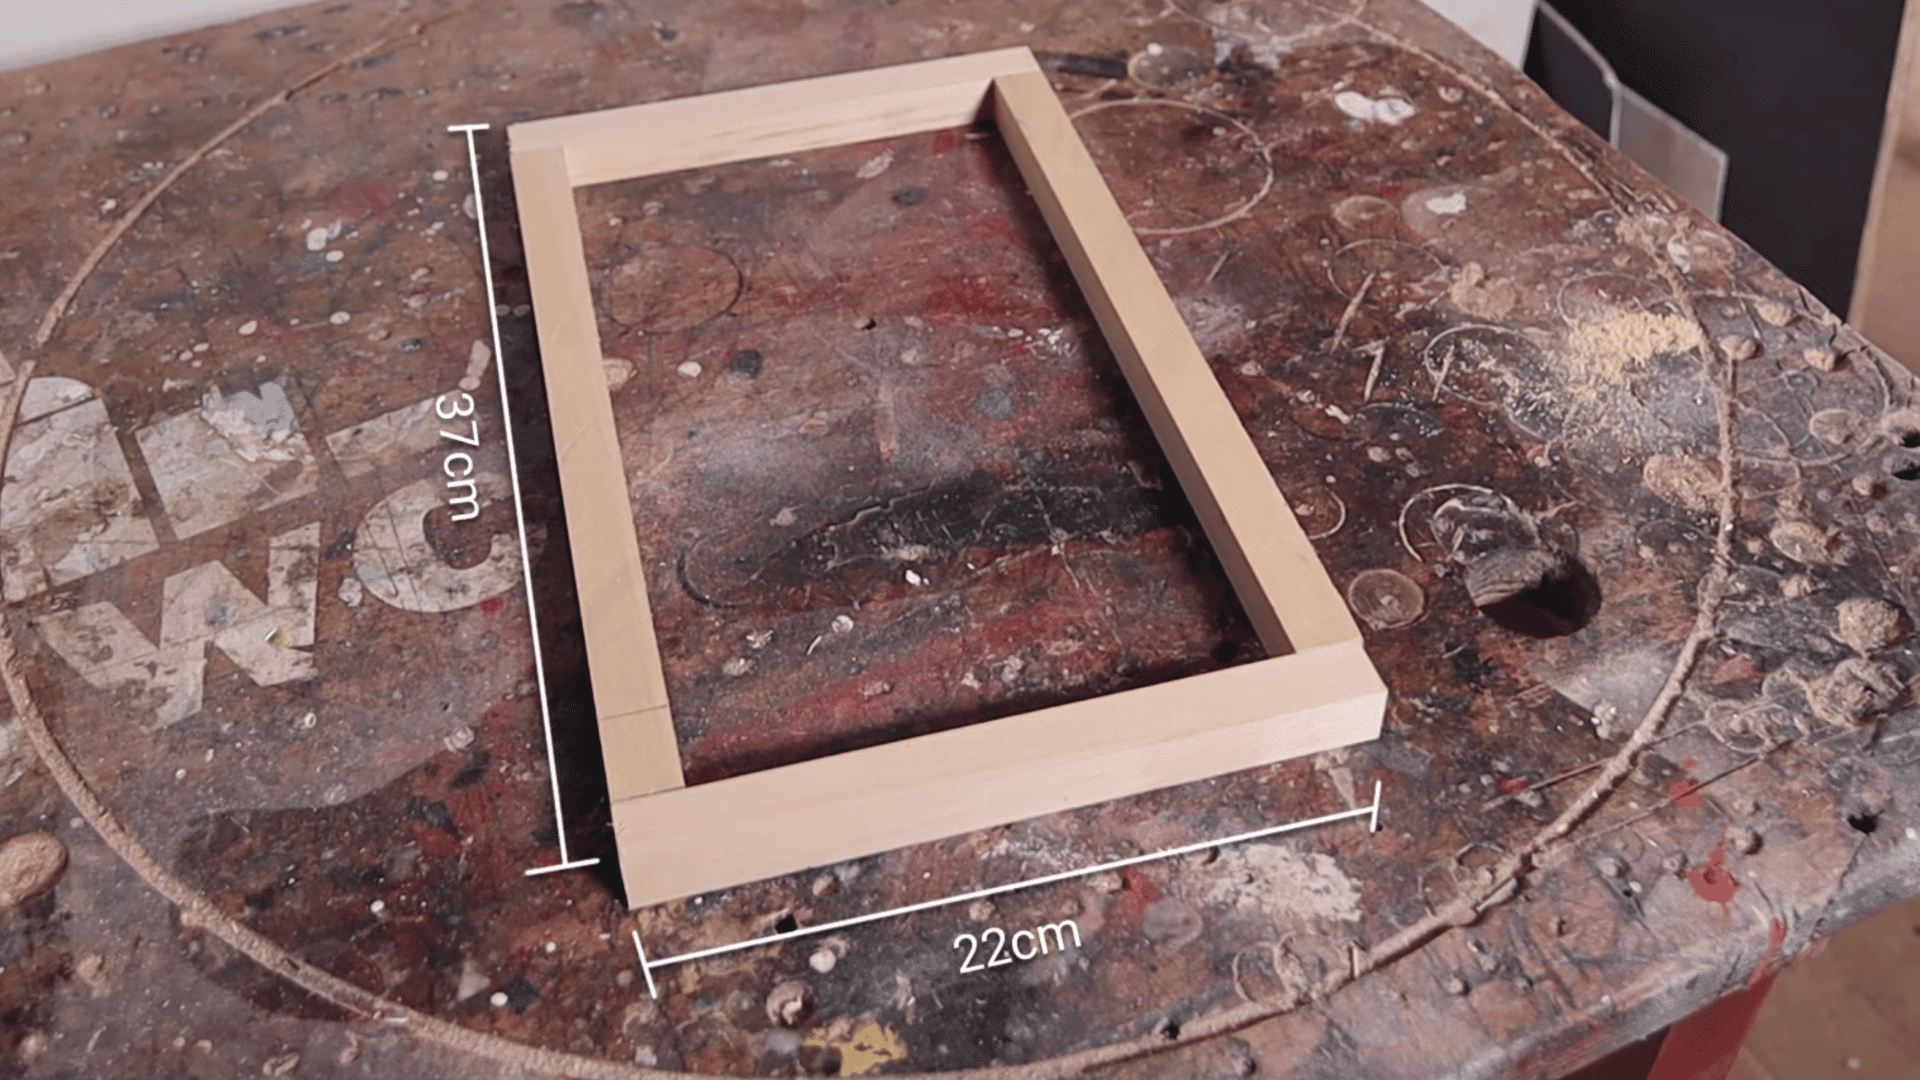
Decide how wide you want the weaving area. A 12″ to 18″ width is great for samples and small projects. Mark two long rails and two shorter end pieces to construct a rectangular frame.When cutting, trim clean square ends so corners meet neatly. If you’re wondering how to make loom frames that stay square, spend a little extra time here: use a speed square while gluing and fastening for accuracy. The frame should be robust enough to accept tension without twisting.
Step 2: Lay Out and Mark Reed Positions
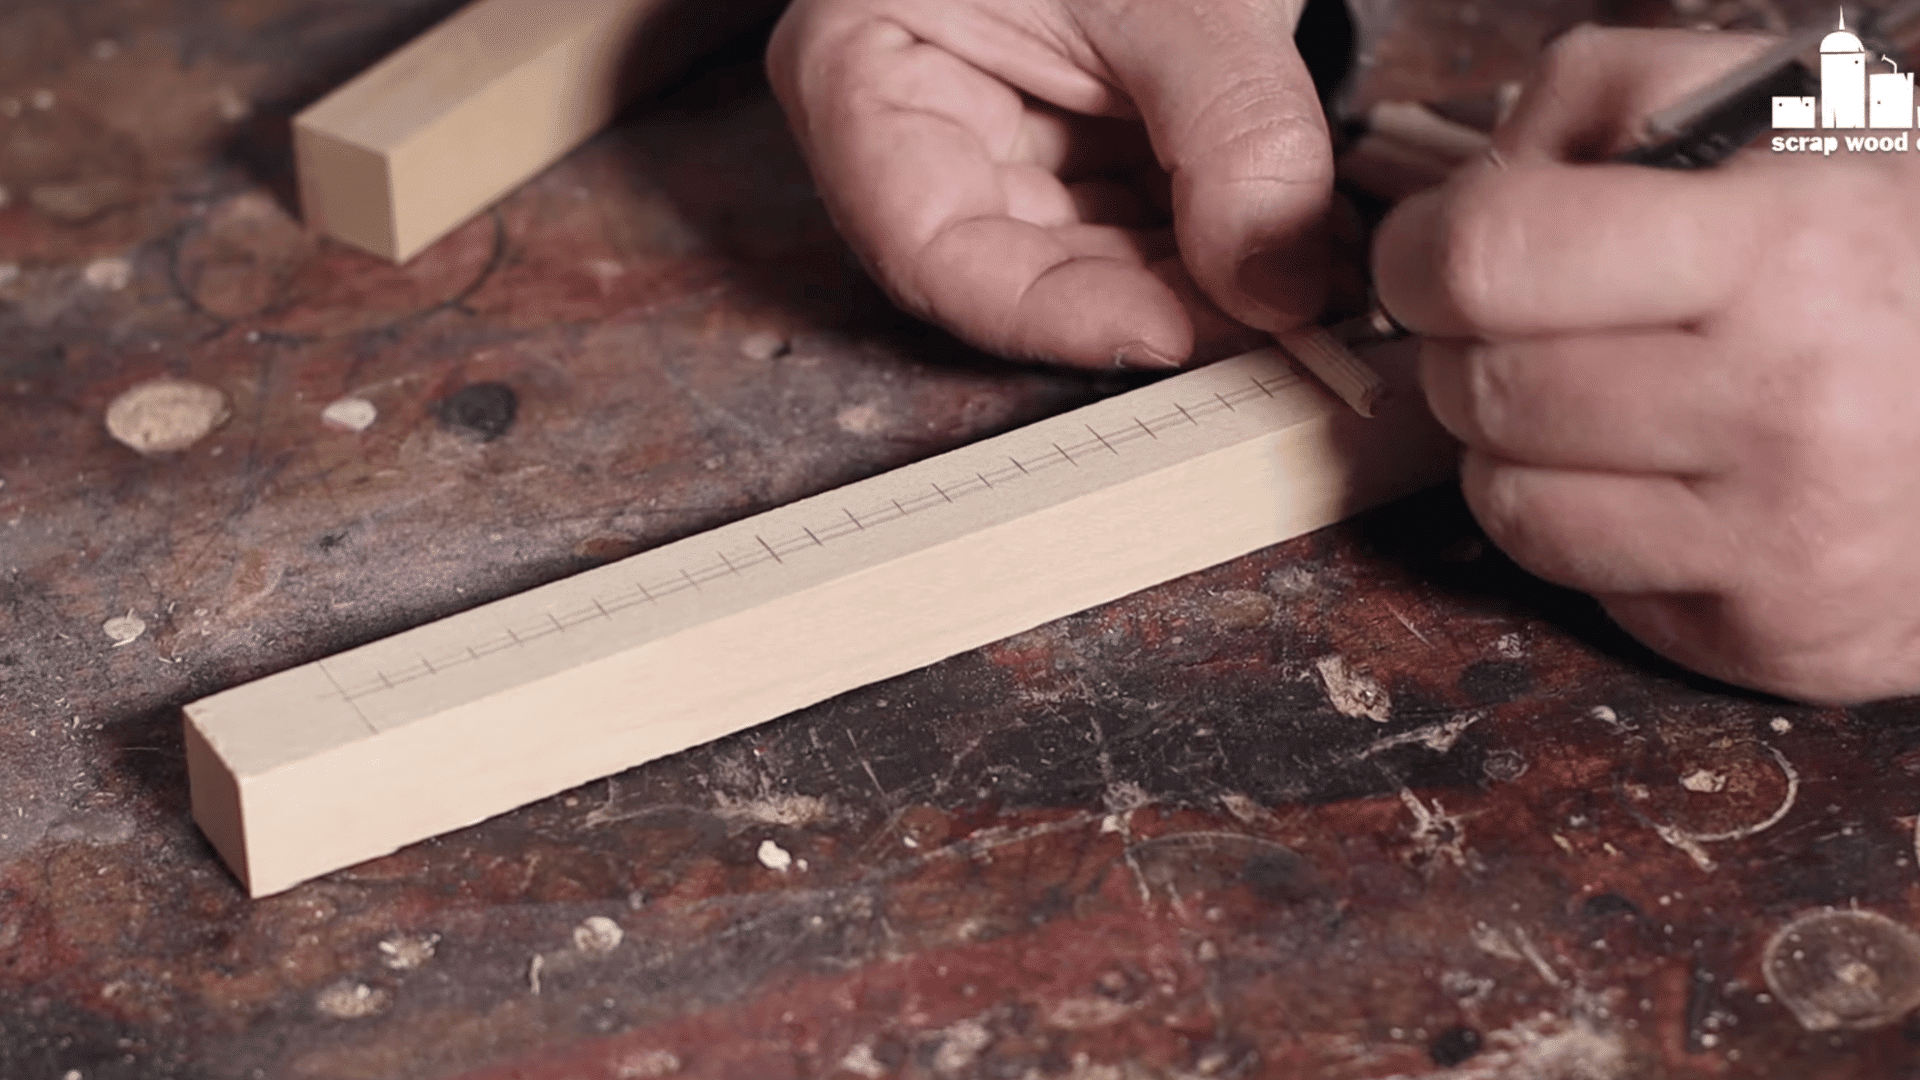
- For a Dense Warp: Mark every 1/8″.
- For a Looser Sett: 3/16″ to 1/4″ works well.
- How to Make Loom Warp Spacing Consistent: Use a template or a piece of paper with pre-drawn lines to transfer marks quickly.
Accuracy here determines how evenly your warp will behave when you weave.
Step 3: Cut Notches or Drill Holes

Choose either notches or holes for your warp. Notches are quick: use a small saw or chisel to make shallow V-shaped grooves. Holes require a drill and a bit matching your string or warp thickness.
When you cut notches, keep them shallow enough not to weaken the rail. If using holes, drill from both sides to avoid tear-out and countersink slightly so warp yarn won’t snag. A steady repeat in this step makes the final weave much neater.
Step 4: Assemble the Frame

Dry fit the rails and ends, then glue and screw or pin them together. Clamp while the glue sets for the straightest results. If you are thinking about how to make loom joints that do not loosen, use countersunk screws and a dab of glue in each joint.
After the glue dries, sand the frame smooth and round any sharp edges with a block plane or sandpaper. Comfortable handling matters when you are weaving for longer sessions.
Step 5: Add Warping Pegs or a Tension Bar
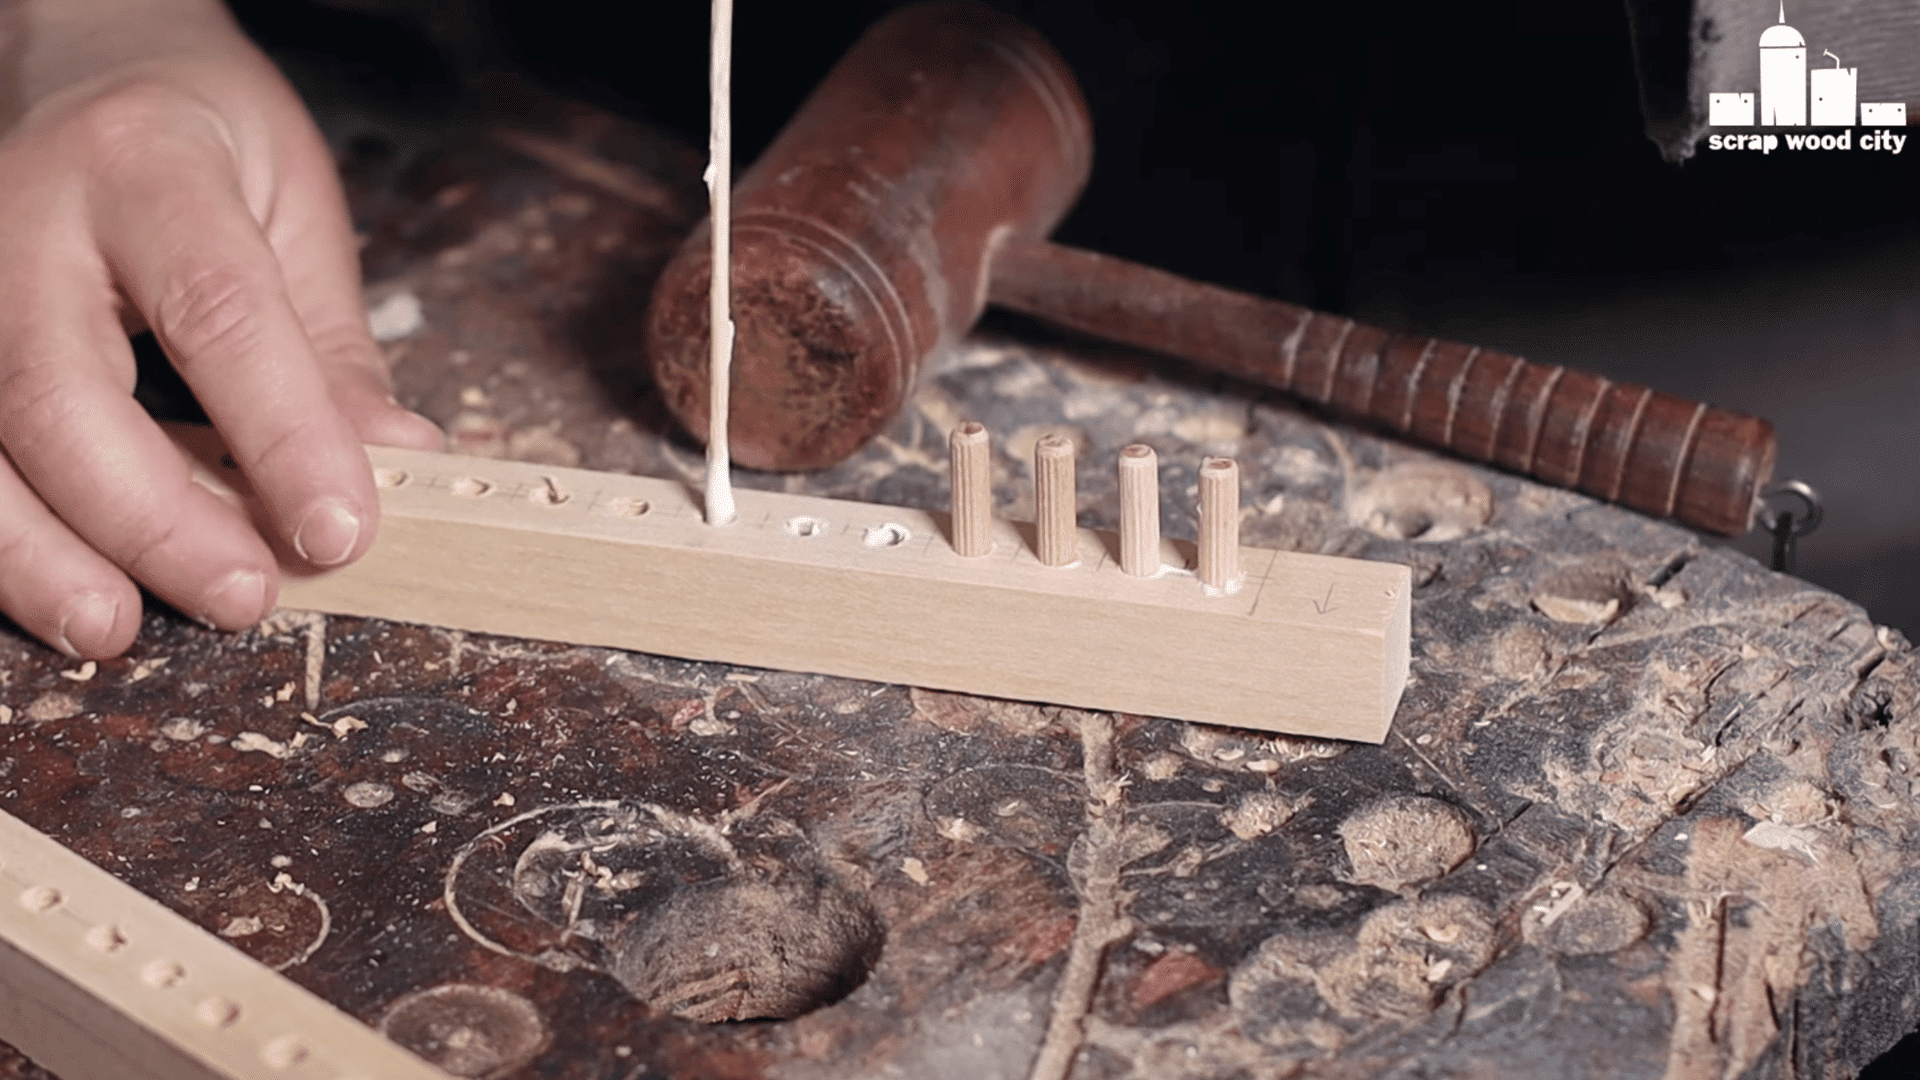
For a simple loom design, drive small brass pins or screws into the top and bottom rails to act as warping pegs. Another option is a removable tension bar that fits into notches on the sides.
If you’re curious about how to make loom tension reliable, position pegs symmetrically and keep the distance between top and bottom consistent. This helps the warp remain even as you weave and prevents one side from going slack.
Step 6: Warp the Loom
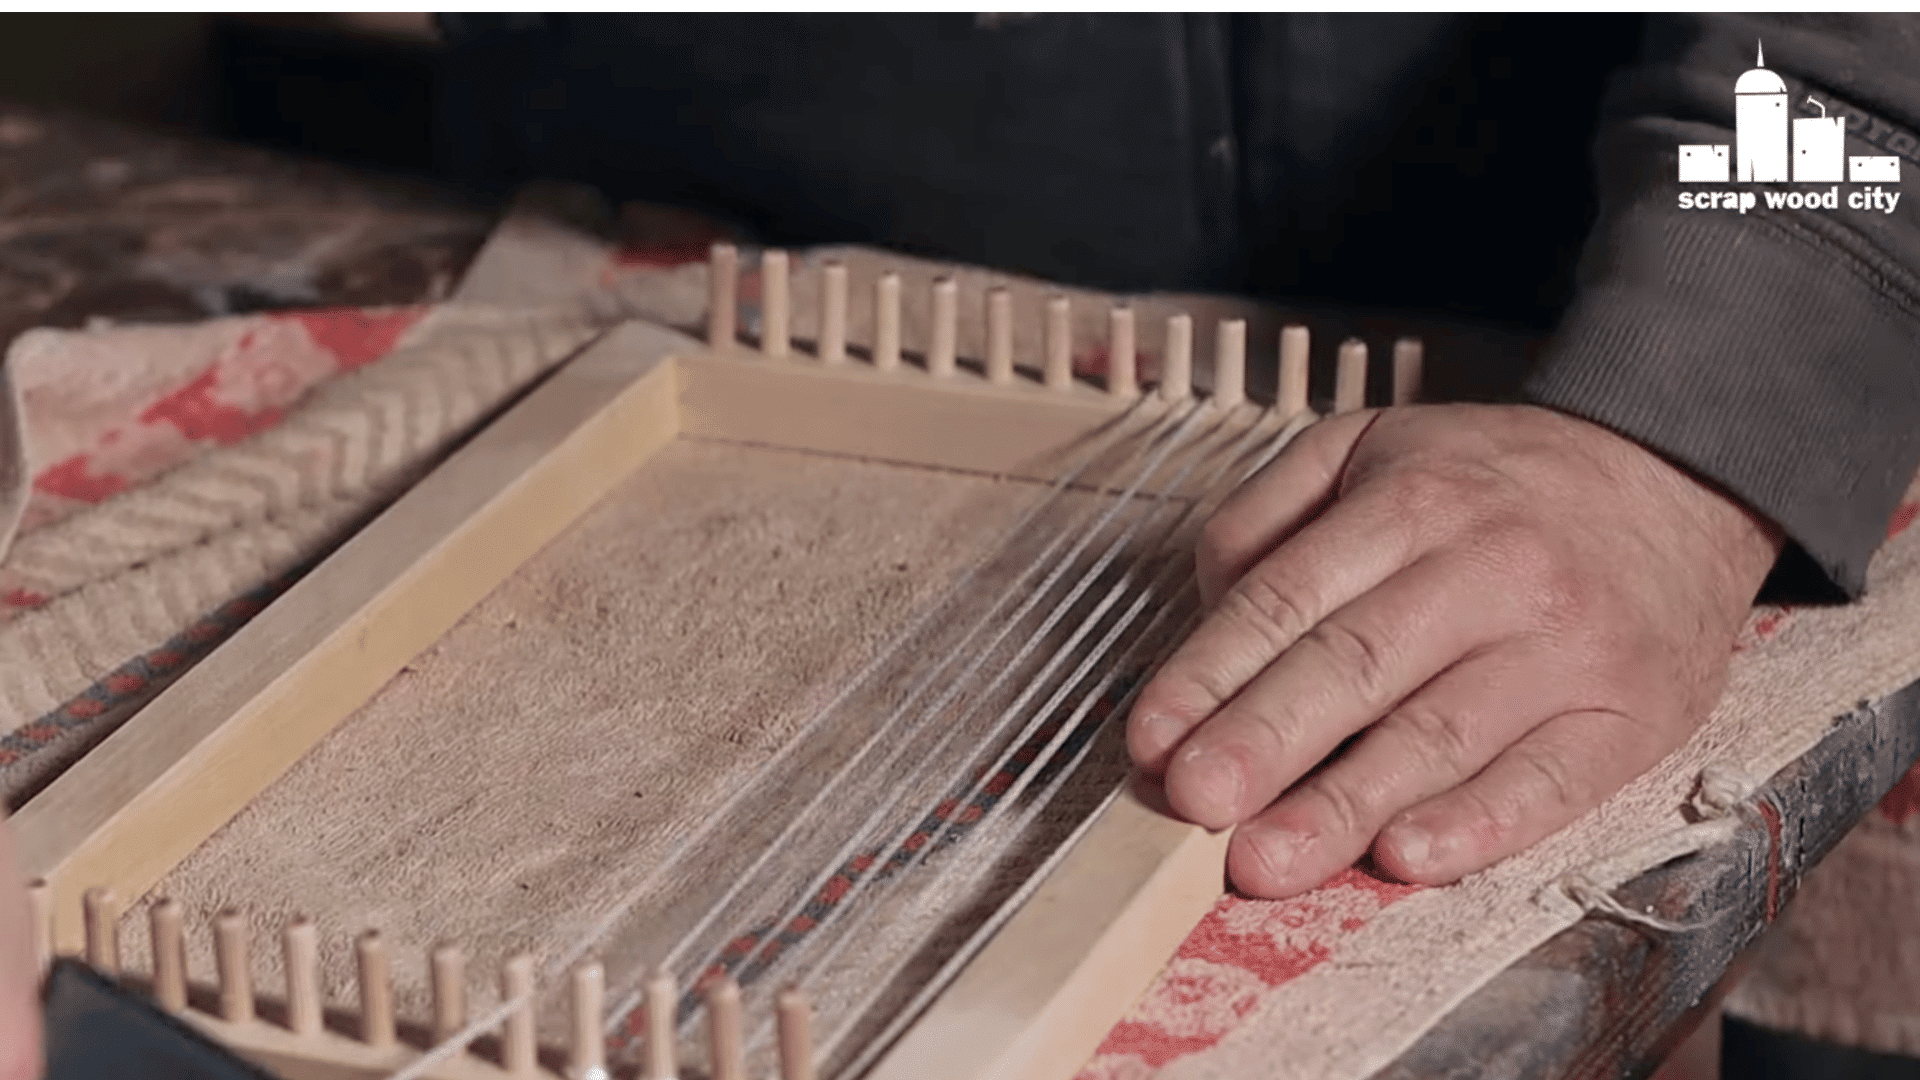
Warping is the process of stretching your vertical threads. Start by tying the yarn to a starting peg, run the yarn across to the opposite top peg, down to the bottom, and continue until the loom is filled. Maintain even tension as you go.
How to make loom ready for weaving quickly? Use a contrasting temporary thread or weight to keep the starter warp taut while you complete the full set. Neat warping saves time and produces a cleaner cloth edge, known as the selvedge.
Step 7: Weaving Basics
Use a simple shuttle or an improvised cardboard strip to pass your weft yarn over and under the warp. Beat each pick down gently to keep the fabric even. Alternate the shed by lifting different groups of warp threads if you built a heddle system, or simply use a stick as a shed bar for plain weave.
If you are practicing how to make loom projects, start with plain weave until you are comfortable. Plain weave teaches control of tension, beating, and selvedge formation before moving to more advanced patterns.
Check out the full video below:
How to Make a Cardboard Loom
Making a cardboard loom is an easy and fun way to get started with weaving. Whether you’re new to weaving or just looking for a quick project, this method is perfect. Here’s a detailed, step-by-step guide to help you create and warp your very own cardboard loom.
Tools and Materials Required
| Tools | Materials |
|---|---|
| Ruler | Sturdy piece of cardboard (size of your choice) |
| Pencil or Sharpie | Warp thread (cotton, linen, or thin yarn) |
| Scissors | Weft thread (yarn, twine, etc.) |
| Double knotting thread (if desired) |
Step 1: Preparing Your Cardboard Loom
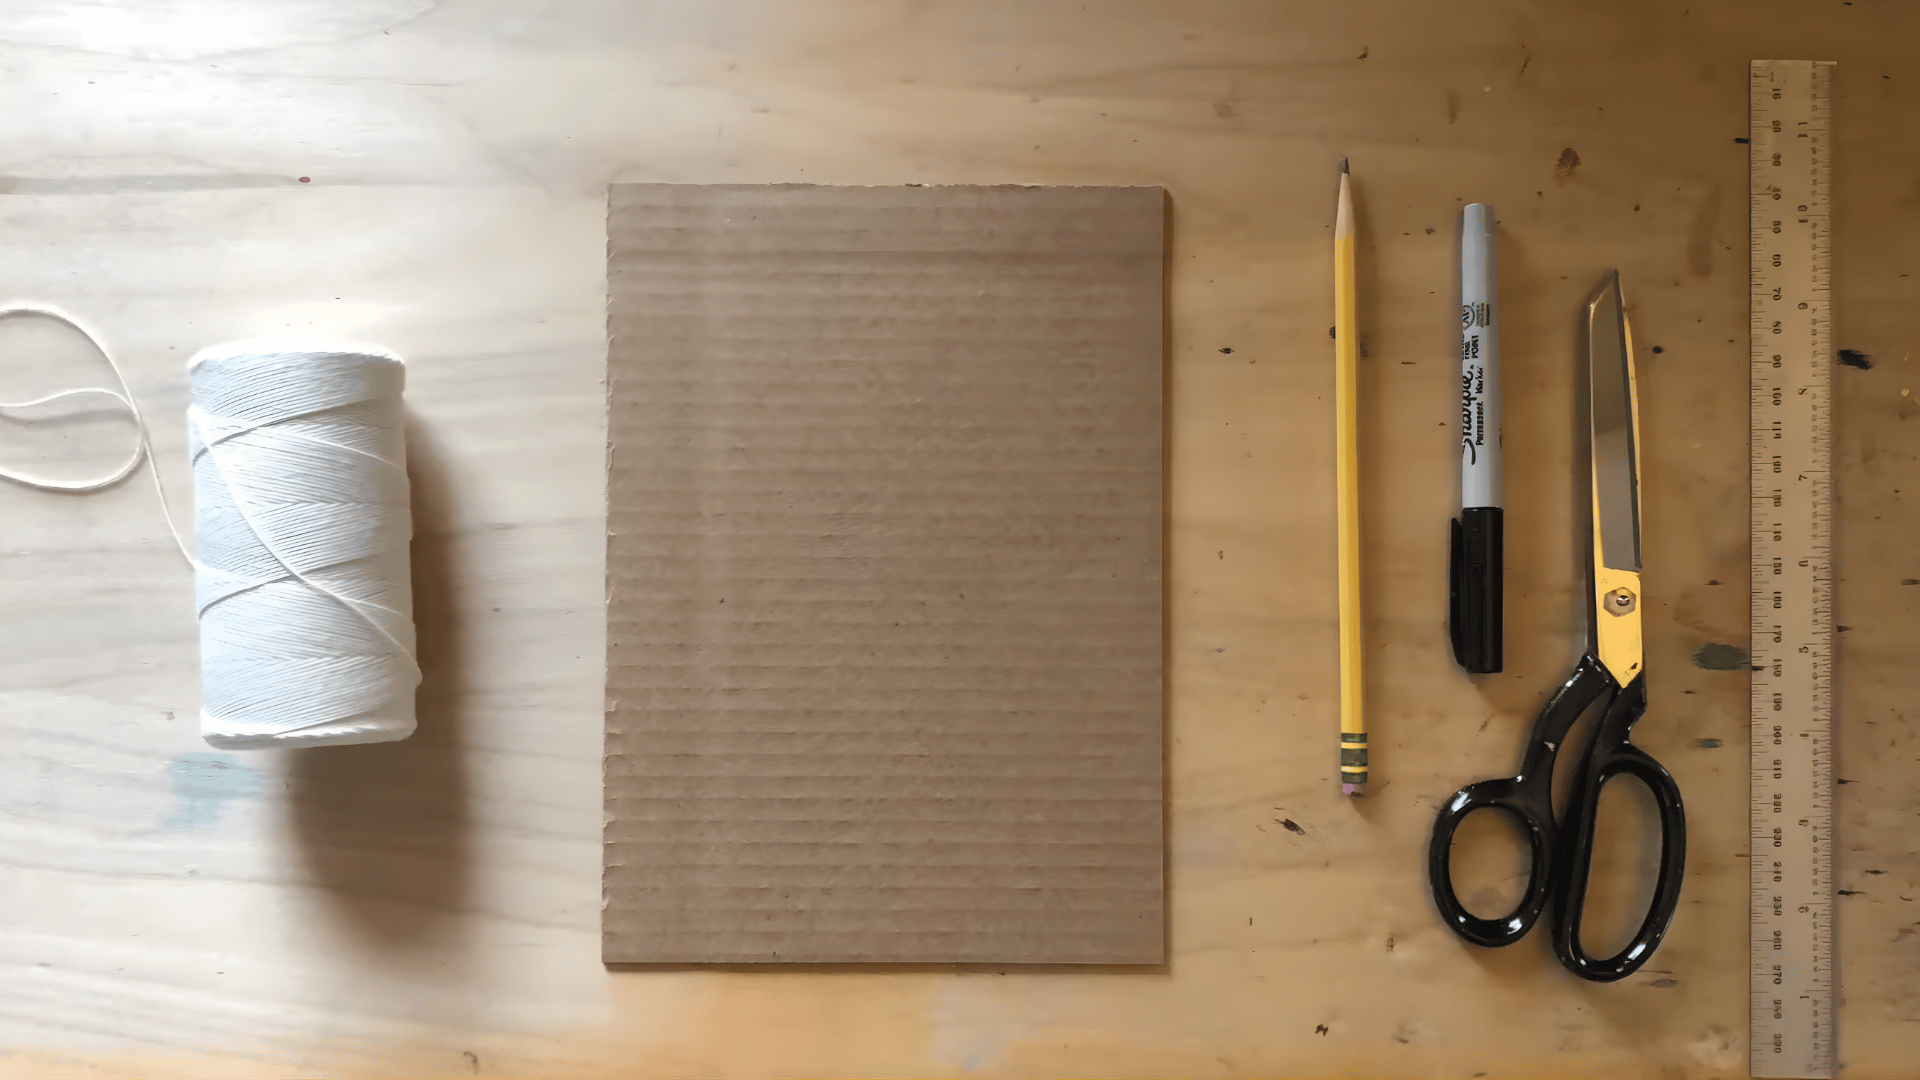
For this step, you’ll need a piece of cardboard, a ruler, a pencil or Sharpie, a pair of scissors, and some thread for the warp.
Once you have everything, select a cardboard piece that’s large enough for your weaving project. It doesn’t need to be huge, just big enough to accommodate your design. Place the cardboard flat on a surface to begin the process.
Step 2: Marking the Top
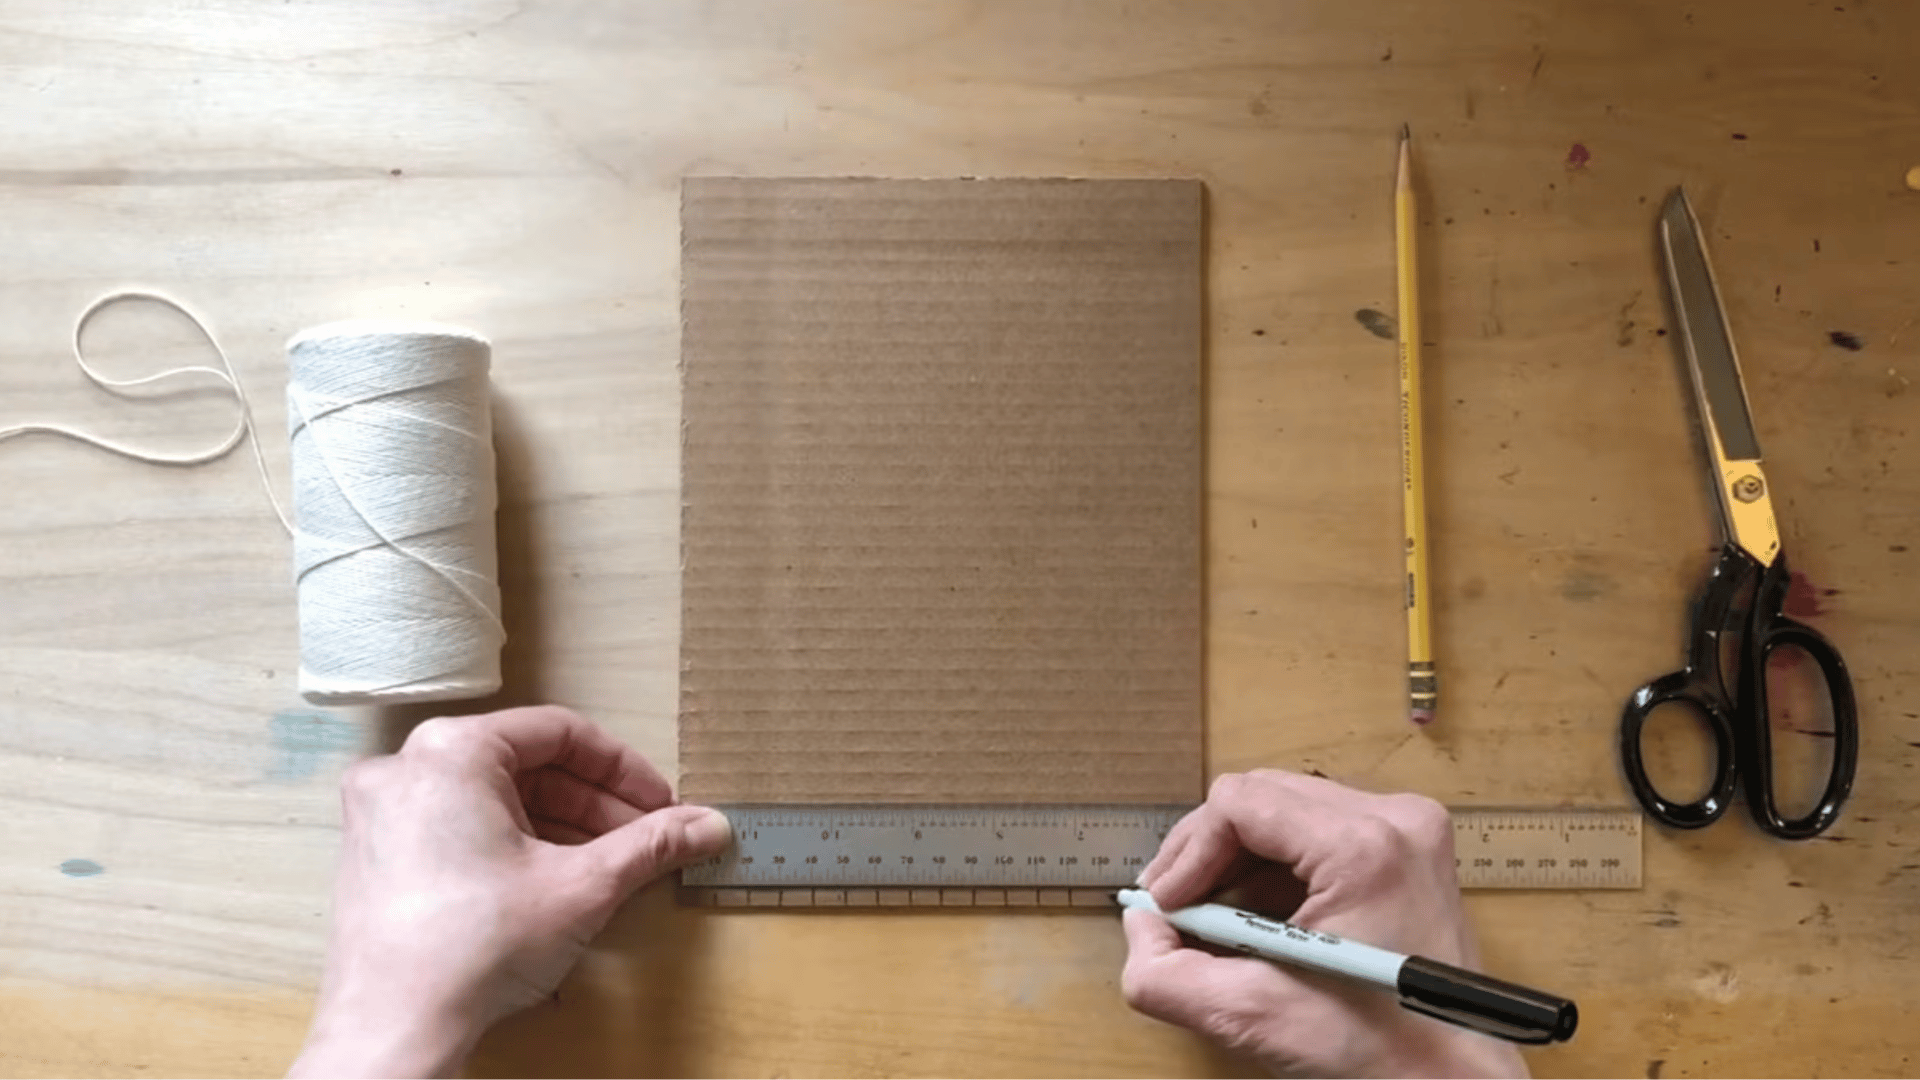
Once you’ve marked the notches along the bottom edge, it’s time to mark the top of your loom. Use the ruler and Sharpie to measure and mark the notches at the top.
Keep the ruler facing the same direction as the bottom to ensure the notches are aligned. This alignment is important because it ensures your warp threads will be evenly spaced and straight.
Do not flip the cardboard around to mark the top, as this can throw off the symmetry and affect your weaving.
Step 3: Cutting the Notches
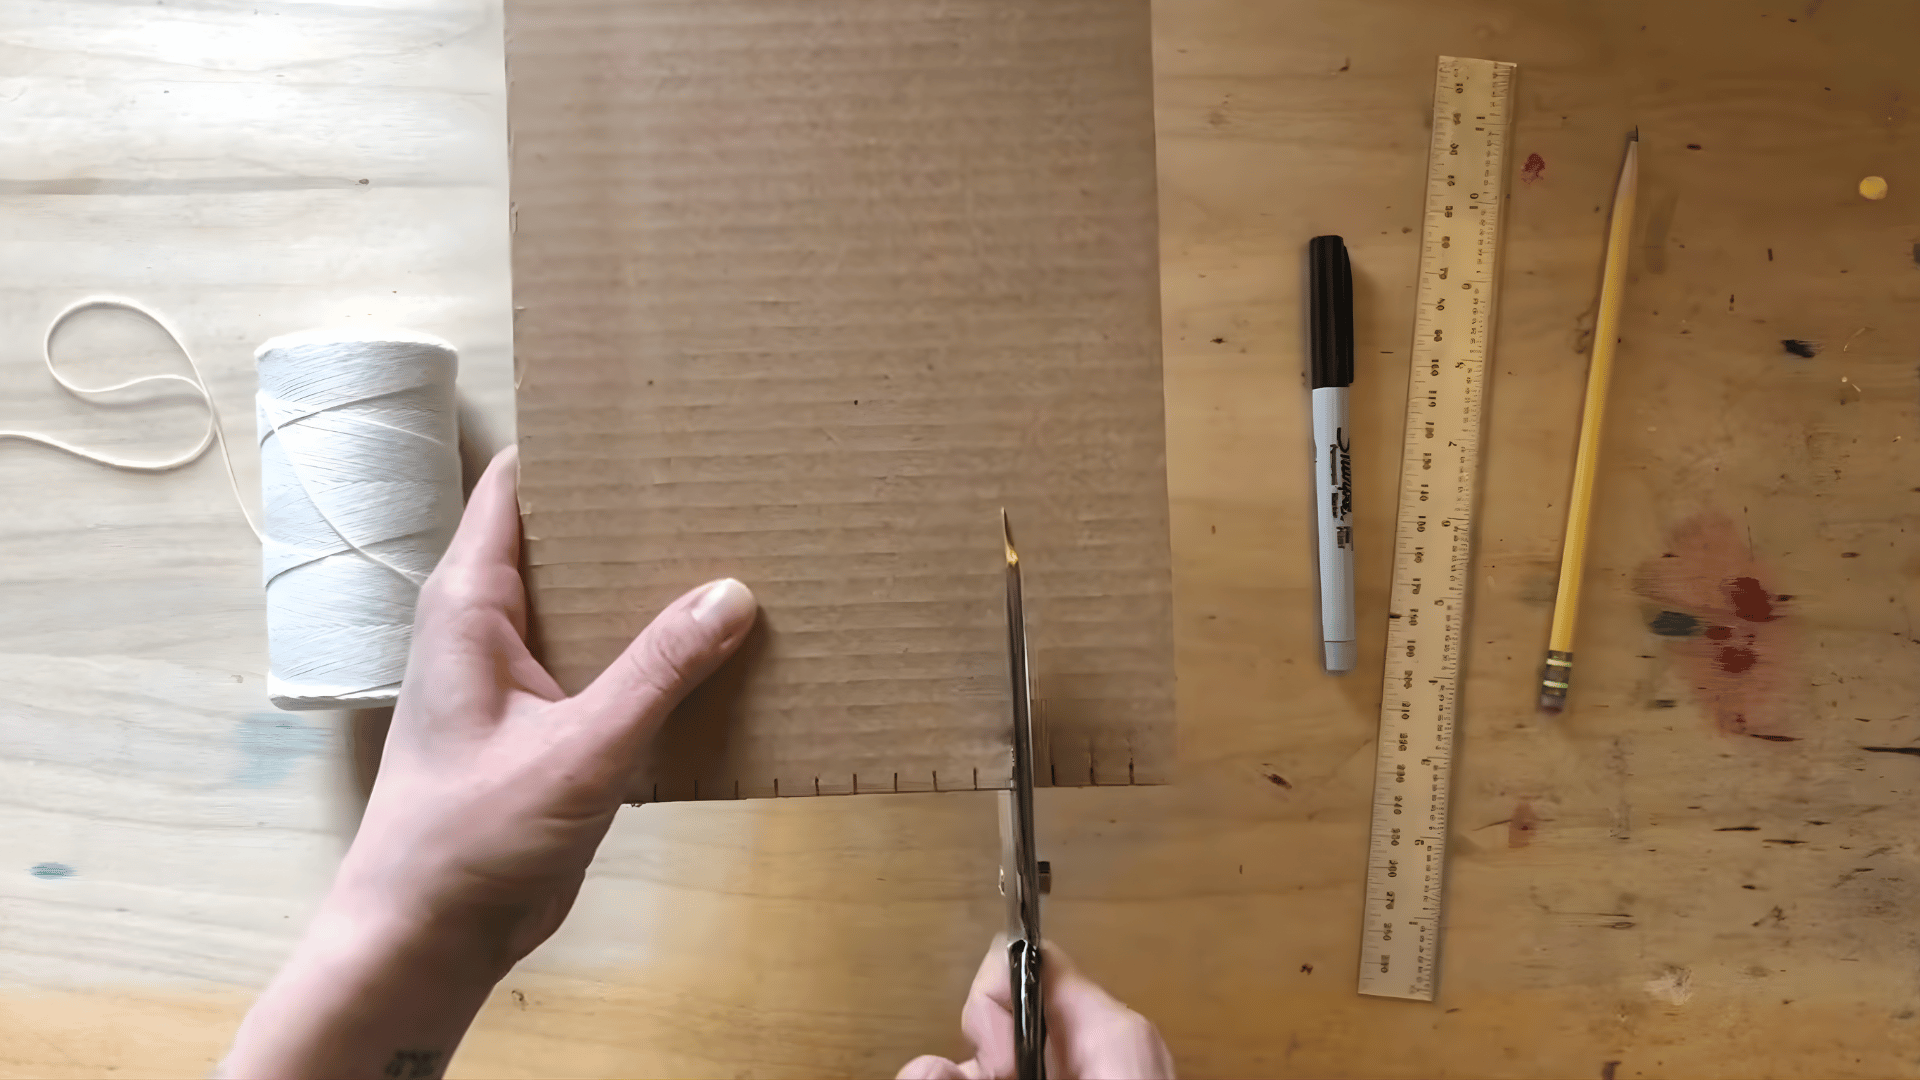
Now that your notches are marked, it’s time to cut the notches. Using your scissors, carefully cut along each marked line to create small slits, about half an inch to an inch long.
Be sure the notches aren’t too deep or too shallow. You want them deep enough to hold the warp threads securely but not so deep that the threads can slip out easily.
Take your time with the cutting to ensure clean, even notches across the bottom of your loom.
Step 4: Drawing the Starting and Ending Lines
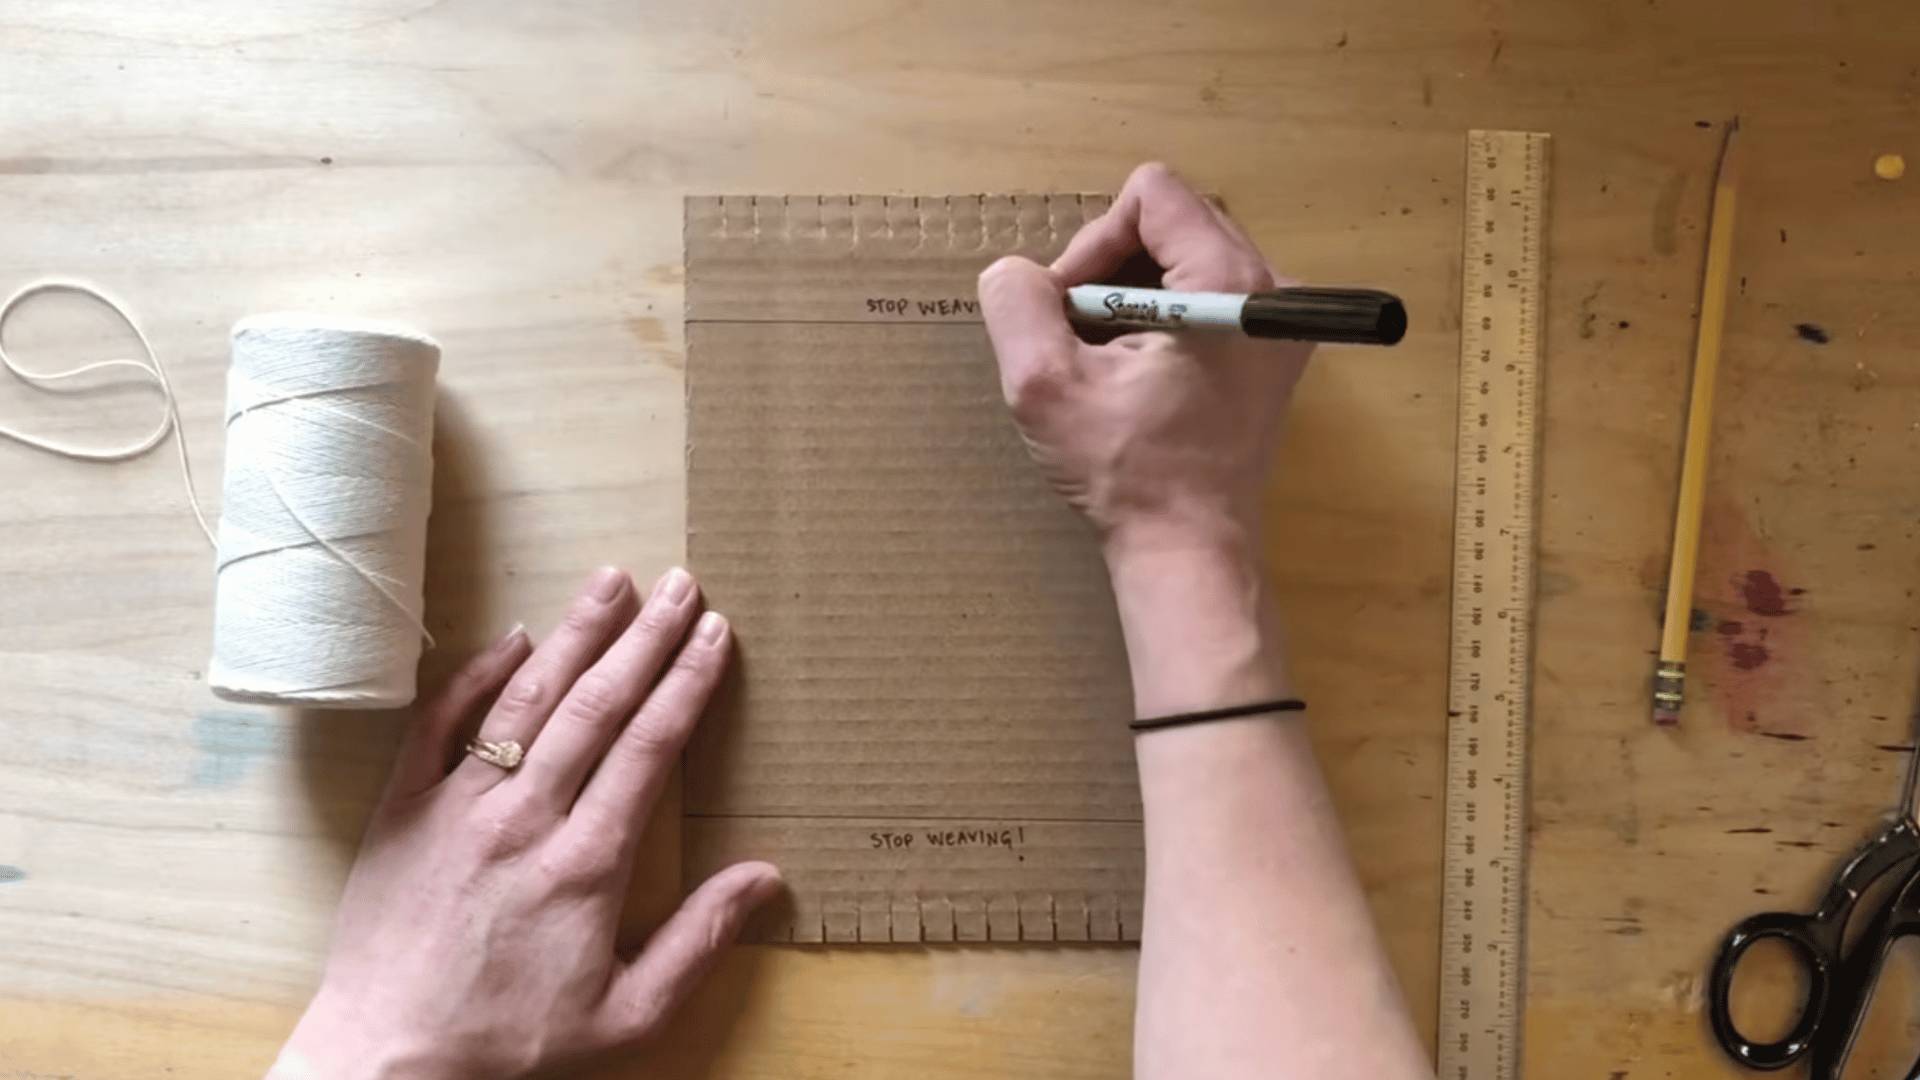
After you’ve cut the notches, the next step is to draw two lines across the loom—one at the top and one at the bottom. These lines will serve as guides for your weaving.
The top line should be about one ruler-width away from the notches, and the bottom line should be slightly higher to leave enough space for tying off knots.
These lines help you stay within the desired area when you start weaving, ensuring the finished piece is neat and even.
Step 5: Adding the Warp Thread
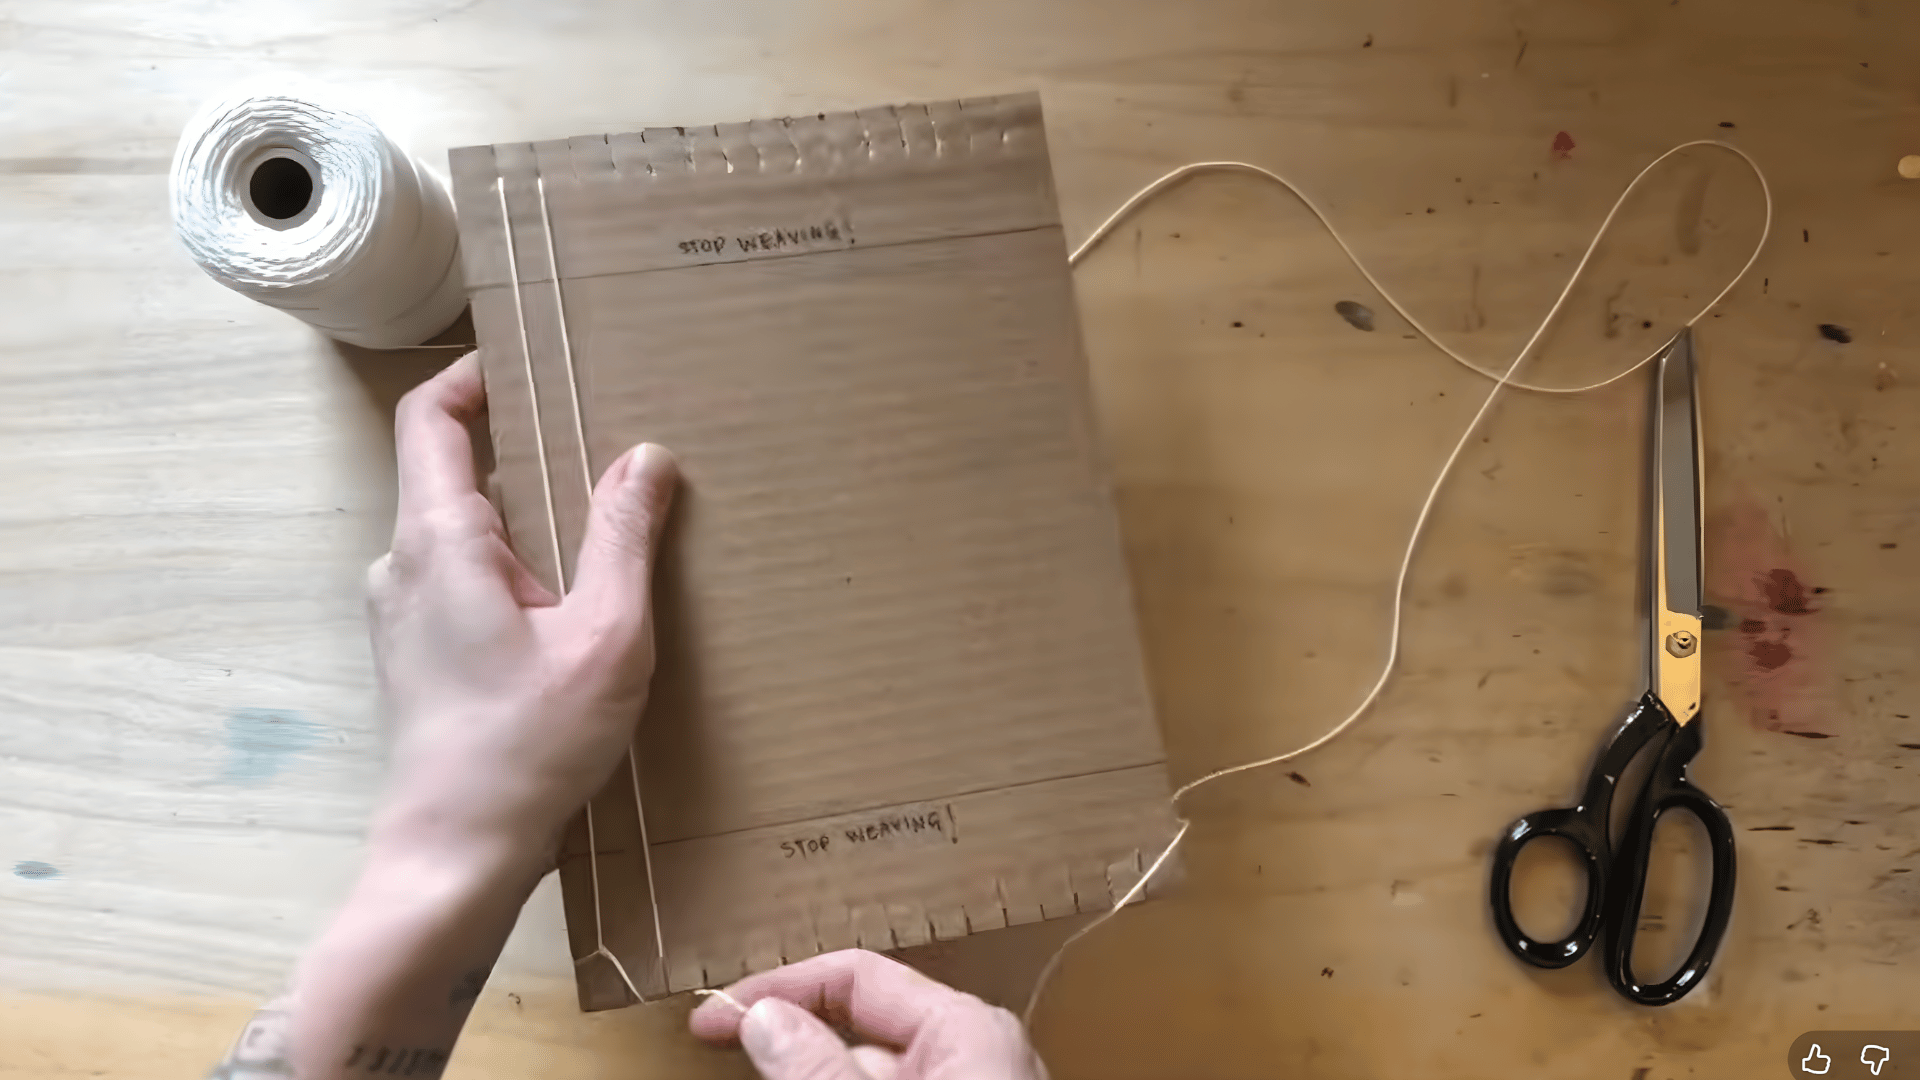
Now it’s time to add the warp thread to your loom. Start by tying a double knot with your warp thread at the first notch on your loom. This will anchor your thread securely.
Next, bring the thread up to the top notch, looping it through to the back of the loom, and then through the second notch at the top. Make a little loop in the back, and continue threading it down to the bottom, into the next notch. Repeat this process, bringing the warp thread back and forth through the notches. Keep it tight and neat.
Continue until you’ve threaded the entire loom, ensuring each warp thread is evenly spaced across the loom. Don’t worry if it gets a little sticky or tangled; just work through it carefully.
Step 6: Finishing the Warp Thread
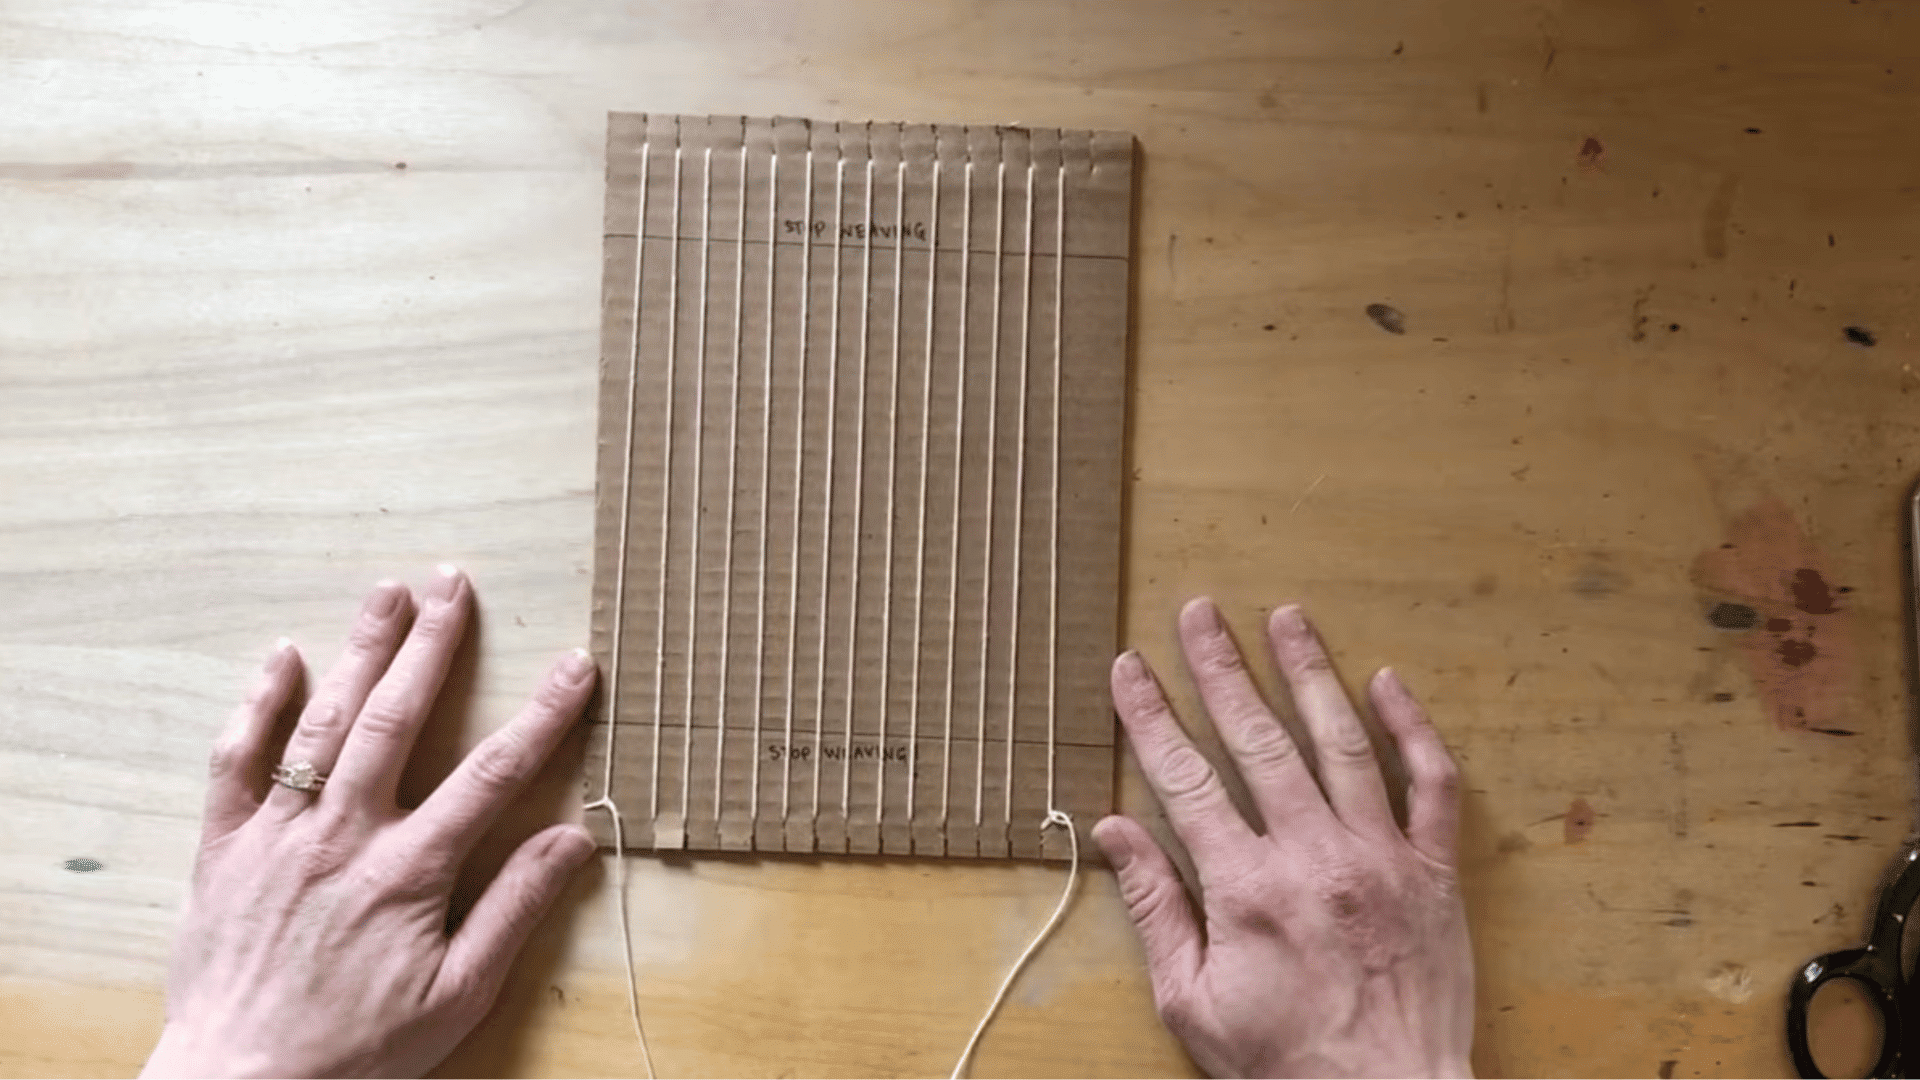
Once you’ve added all your warp threads, you’ll want to finish them at the bottom. If the ends are uneven, it’s okay, just cut the thread and tie a double knot to secure it in place. Ending the warp at the bottom makes it easier to remove your woven piece later on.
Once you’ve tied the last knot, your loom is ready to go!
Step 7: Preparing to Weave
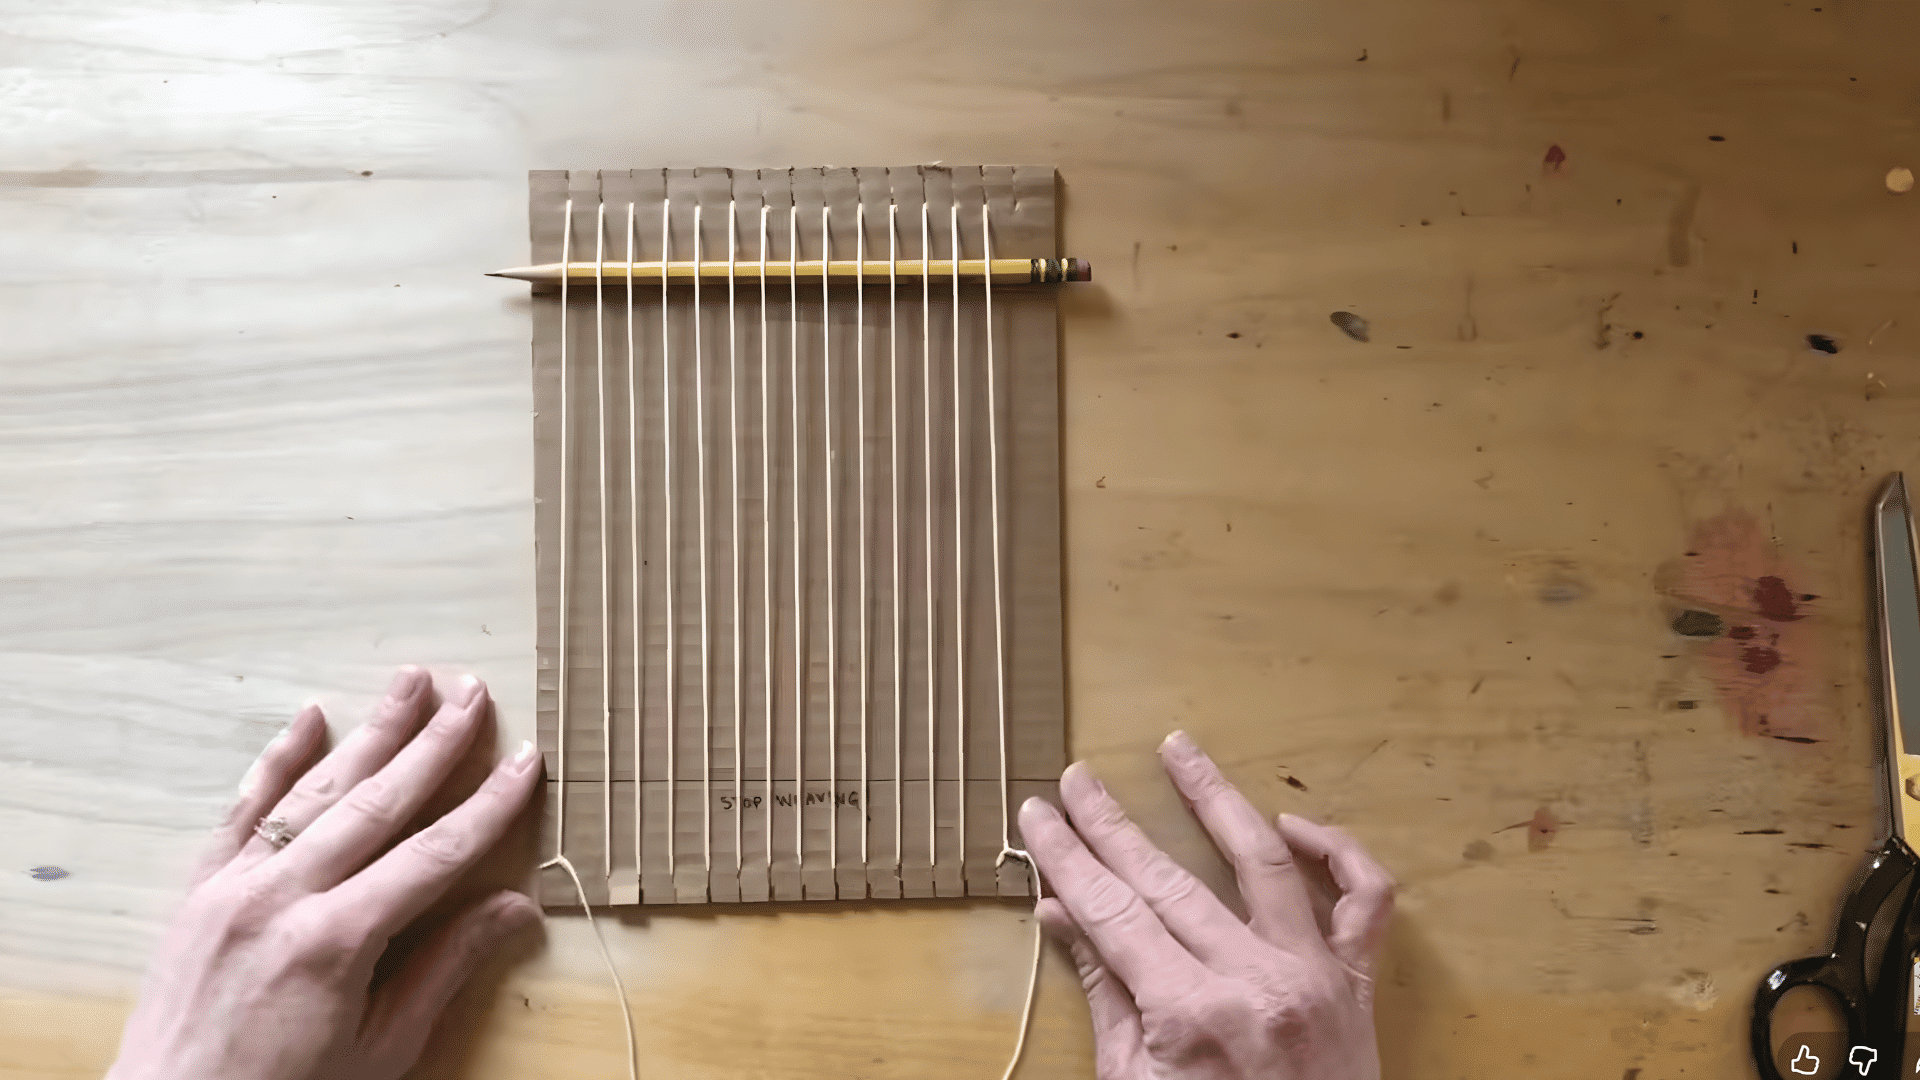
For easier weaving, you can add a small pencil behind the warp threads to create some space. This will help you weave more easily by keeping the threads apart.
You can refer to the video below:
Weaving Tips and Common Fixes
Weaving can be a rewarding process, but it comes with its challenges. To help you create beautiful woven pieces, here are some tips for successful weaving, as well as solutions to common problems you may encounter.
- Choose the Right Yarn: Select a yarn that suits your project. Thicker yarn works best for large items like rugs, while lighter yarn is ideal for delicate, smaller pieces.
- Maintain Even Tension: Keeping your warp threads at a consistent tension is crucial for a smooth, even weave. If your threads are too tight or loose, your fabric will be uneven.
- Use a Shuttle or Needle: A shuttle or needle will help you weave the weft yarn through the warp more easily and ensure an even, tight weave.
- Uneven Weaving: If your fabric looks uneven, check the tension of your warp threads. They might be too tight or too loose, resulting in an inconsistent weave.
- Warp Threads Breaking: If the warp threads break, it could be due to excessive tension. Loosen the threads slightly or switch to a stronger yarn.
- Weft Threads Not Fitting Properly: If the weft yarn doesn’t fit properly through the warp threads, check the spacing between the warp threads. Adjusting their position or tension might help.
Final Thoughts
Building a loom is an exercise in intentionality. In a world of fast fashion and instant gratification, taking the time to hammer nails into wood or notch out cardboard connects you to the tactile reality of how our clothes and blankets are actually made.
Your first DIY loom doesn’t have to be a masterpiece; it just needs to hold tension.
Once you throw that first shuttle of yarn through the warp, you’ll find that the rhythm of weaving is one of the most meditative practices available to the modern maker.