


Most room dividers at furniture stores are either overpriced, flimsy, or both. Building your own DIY room divider takes less time than you’d think and gives you something that actually fits your space, your style, and your budget.
I’ve helped people figure out how to make a room divider from scratch using nothing more than basic materials and a free afternoon, and the result is almost always sturdier and more personal than anything bought off a shelf.
This blog covers the most common DIY divider types, from fabric and PVC builds to folding screens and repurposed materials, so you can pick what works for your skill level and space.
Why Add a DIY Room Divider to Your Space?
Adding a divider creates a visual and physical boundary, making each zone feel more like its own defined space rather than a single crowded room.
It also adds privacy where a wall isn’t possible, whether that’s blocking a home office from view during video calls or separating a sleeping area from the rest of the room.
When I help someone choose a divider, I recommend identifying the main priority first: privacy, storage, sound reduction, light flow, or portability. One divider rarely provides all five, so knowing the main goal prevents you from choosing a design that looks good but does not solve the actual layout problem
Since most dividers aren’t permanent, they can be moved, replaced, or removed entirely if your space or needs change down the line, which makes them a lower-risk option than any structural change.
How to Make a Room Divider: Inspo & Steps
Each idea below includes the materials needed and the basic steps to build it, so you can jump straight into whichever one fits your space. They range from simple fabric hangs that take under an hour to more involved builds, such as folding screens and sliding panels.
1. Fabric Curtain Divider
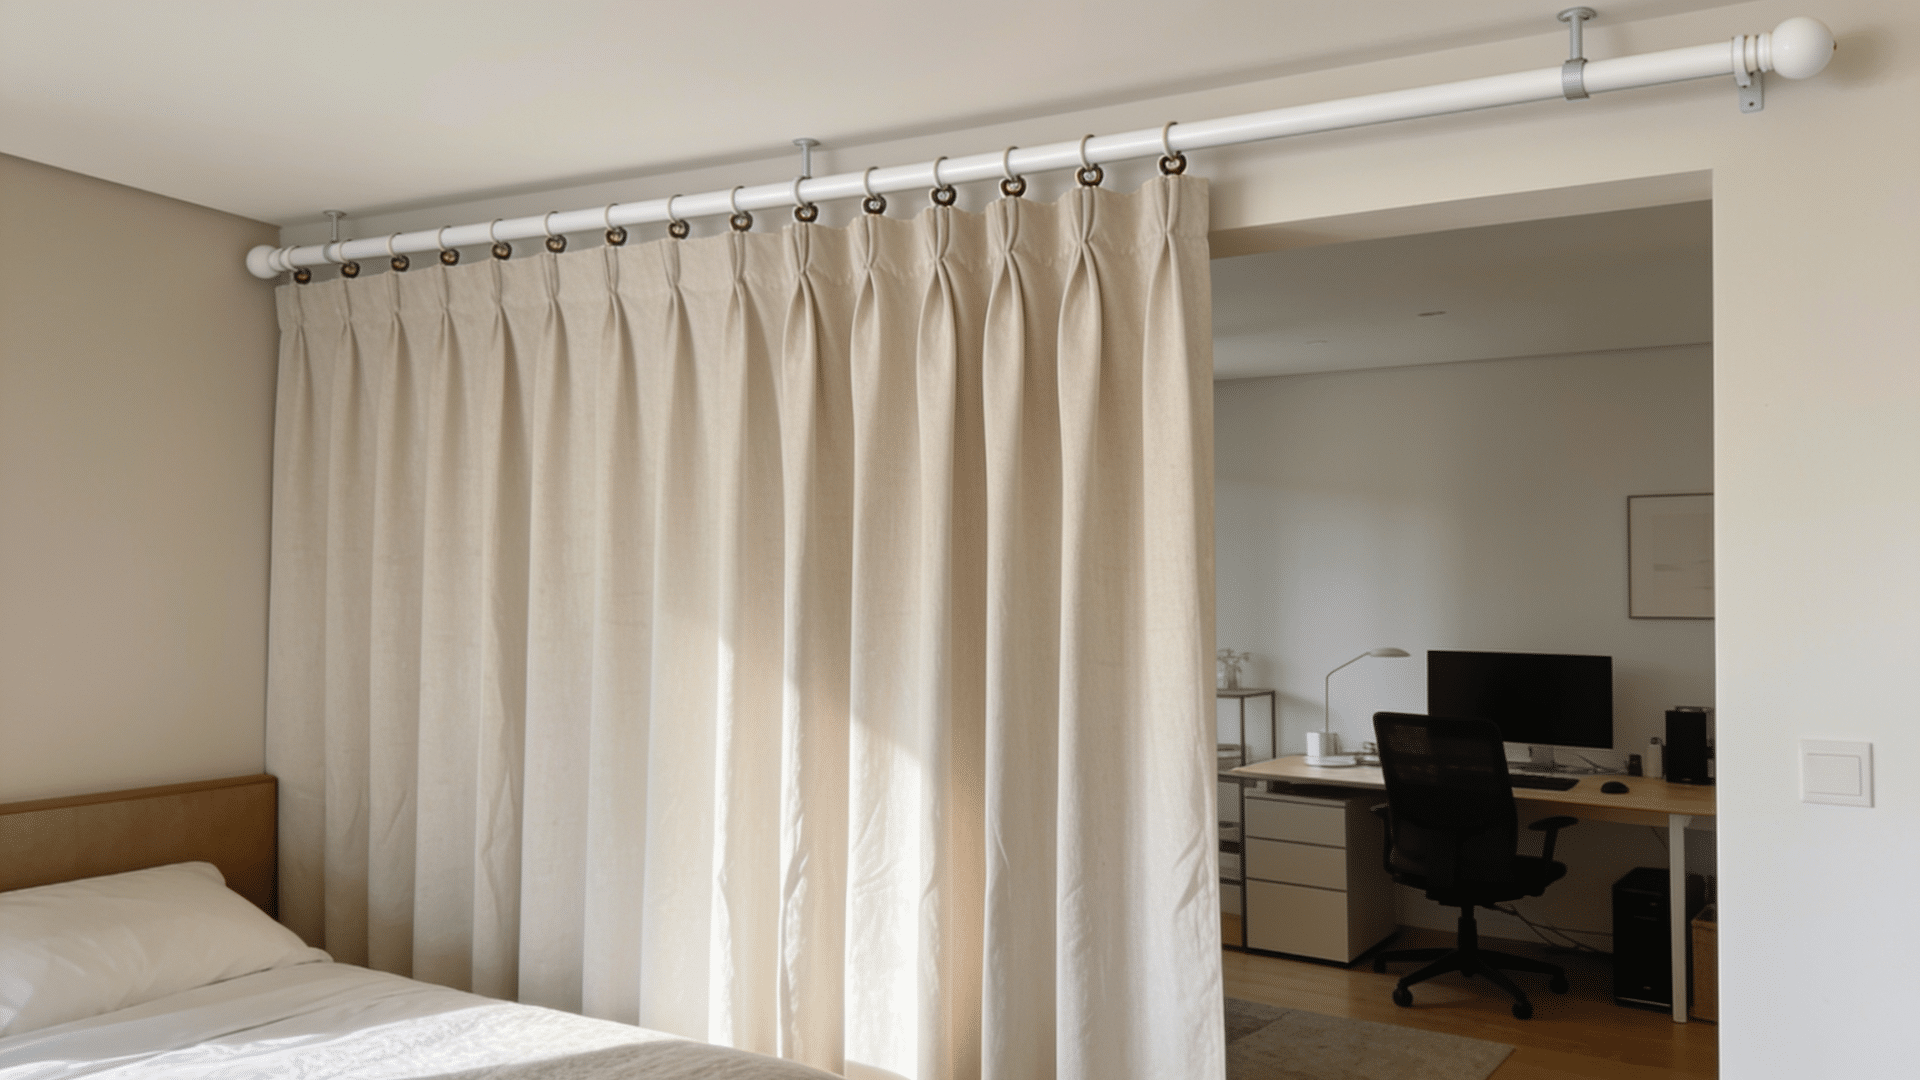
Curtain panels hang from a ceiling-mounted or tension rod, giving you instant privacy that pulls back whenever you need the space open.
Materials Required:
- Curtain rod or dowel
- Fabric panels
- Curtain rings or a sewn rod pocket
Steps:
- Measure the height and width of the space, adding 6–8 inches to the height for hemming and the rod pocket
- Hem the bottom edge of each panel and sew a rod pocket along the top wide enough for the rod to slide through
- Mark mounting points on the wall or ceiling using a level, then drill pilot holes and fit the brackets
- Slide the fabric panels onto the rod before mounting it into the brackets
- Hang the rod and adjust the fabric so it sits evenly across the full width of the space
2. PVC Pipe Frame Divider
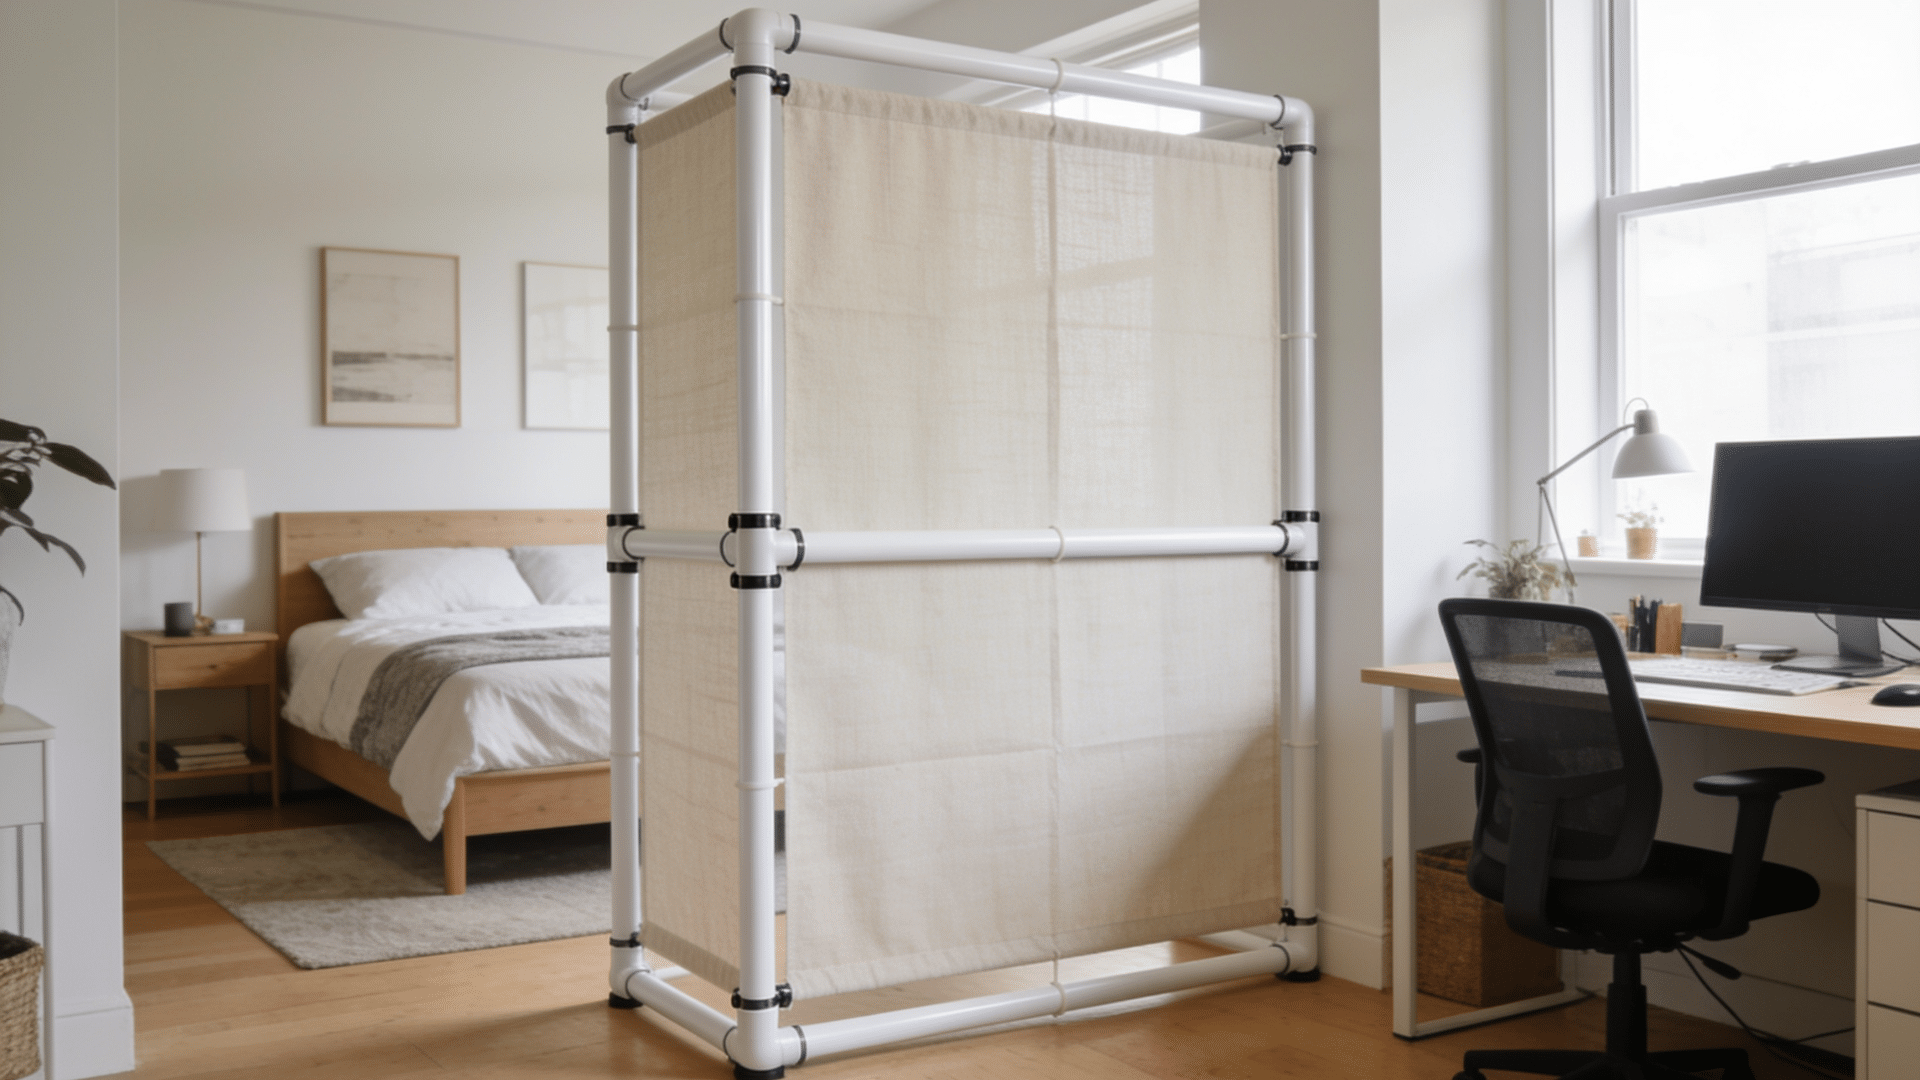
A PVC pipe frame divider is a lightweight, budget-friendly build that works well for fabric or curtain-based designs. The frame snaps together without any specialist tools
Materials Required:
- PVC pipes and connectors
- Fabric panels
- Hacksaw
Steps:
- Measure the height and width of the space, then cut the PVC pipes to the correct lengths using a hacksaw or pipe cutter
- Dry-fit all connectors and pipes together before committing to the final assembly
- Sew or glue a fabric pocket along the top edge of each panel, then slide the horizontal pipe through it
- Snap or glue all connectors into place to form the full rectangular frame
- Add T-joints or base connectors at the bottom corners for stability and stand the frame upright
3. Hanging Rug Divider
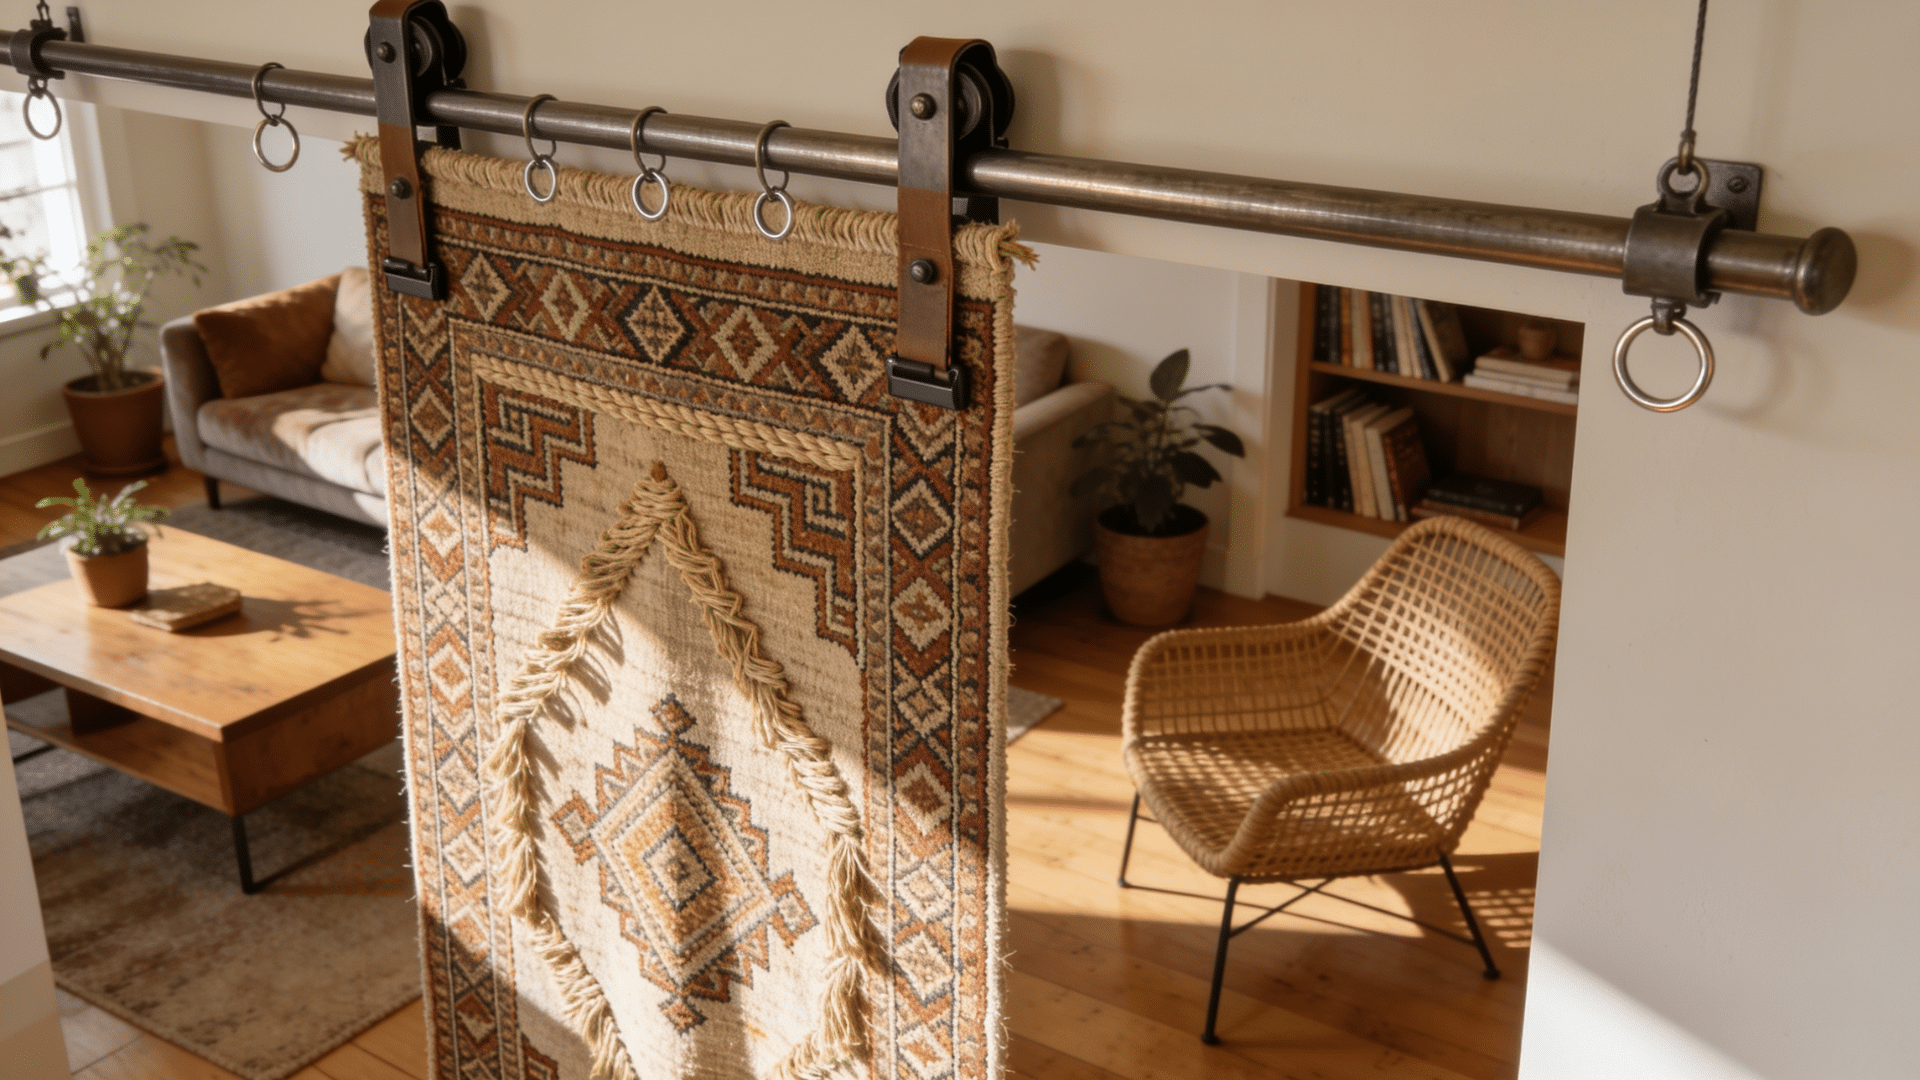
A decorative rug is suspended from a ceiling-mounted rod or dowel, doubling as both a functional divider and a statement piece.
Materials Required:
- Rug or tapestry
- Curtain rod or wooden dowel
- Clips or a sewn rod pocket
Steps:
- Measure the rug against the space to confirm the width and drop fit the area you want to divide
- Choose a rod or dowel that extends slightly beyond the rug width on both sides for a clean hang
- Mark mounting points on the ceiling or wall using a level, drill pilot holes, and fit the brackets securely
- Attach curtain clips evenly along the top edge of the rug, or sew a rod pocket for a cleaner finish
- Slide or clip the rug onto the rod, hang it in place, and adjust until it hangs straight and even
Safety Note: Rugs are much heavier than standard curtains. Mount the rod into wall studs or ceiling joists and use hardware rated above the rug’s total weight. Avoid hanging a heavy rug from a tension rod or lightweight adhesive hook.
4. Macrame Hanging Divider
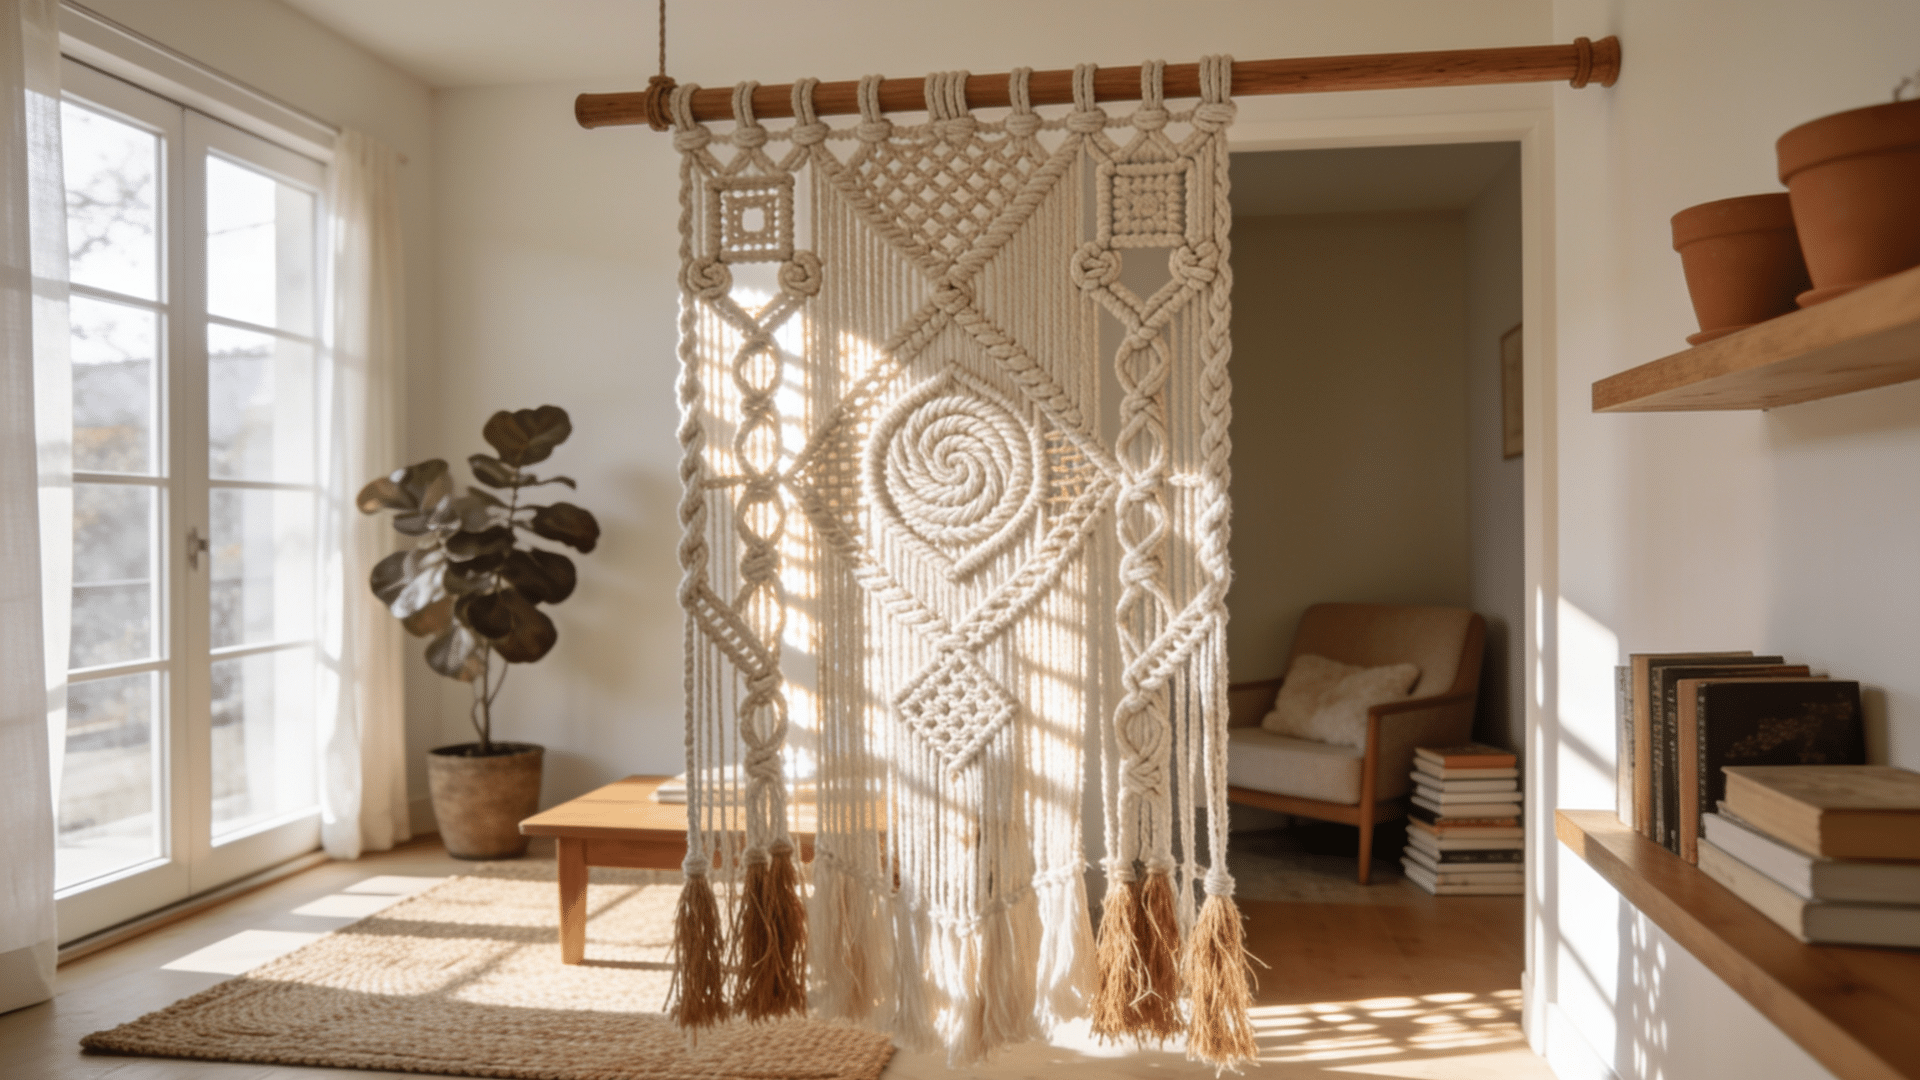
It suits bohemian, coastal, and natural-style interiors particularly well and doubles as a statement piece even when no division is needed.
Materials Required:
- Rope or macrame cord
- Wooden dowel
- Scissors
Steps:
- Measure the width of the space, then cut rope lengths to roughly four times the desired finished height of the panel
- Fold each rope in half and attach it to the dowel using a lark’s head knot, working across the full width
- Tie square knots or spiral knots across the cords to build the panel pattern downward
- Continue knotting until the panel reaches the desired length, then trim the ends into an even or decorative fringe
- Mount a ceiling hook or wall bracket and hang the finished dowel securely in place
5. Folding Wood Screen
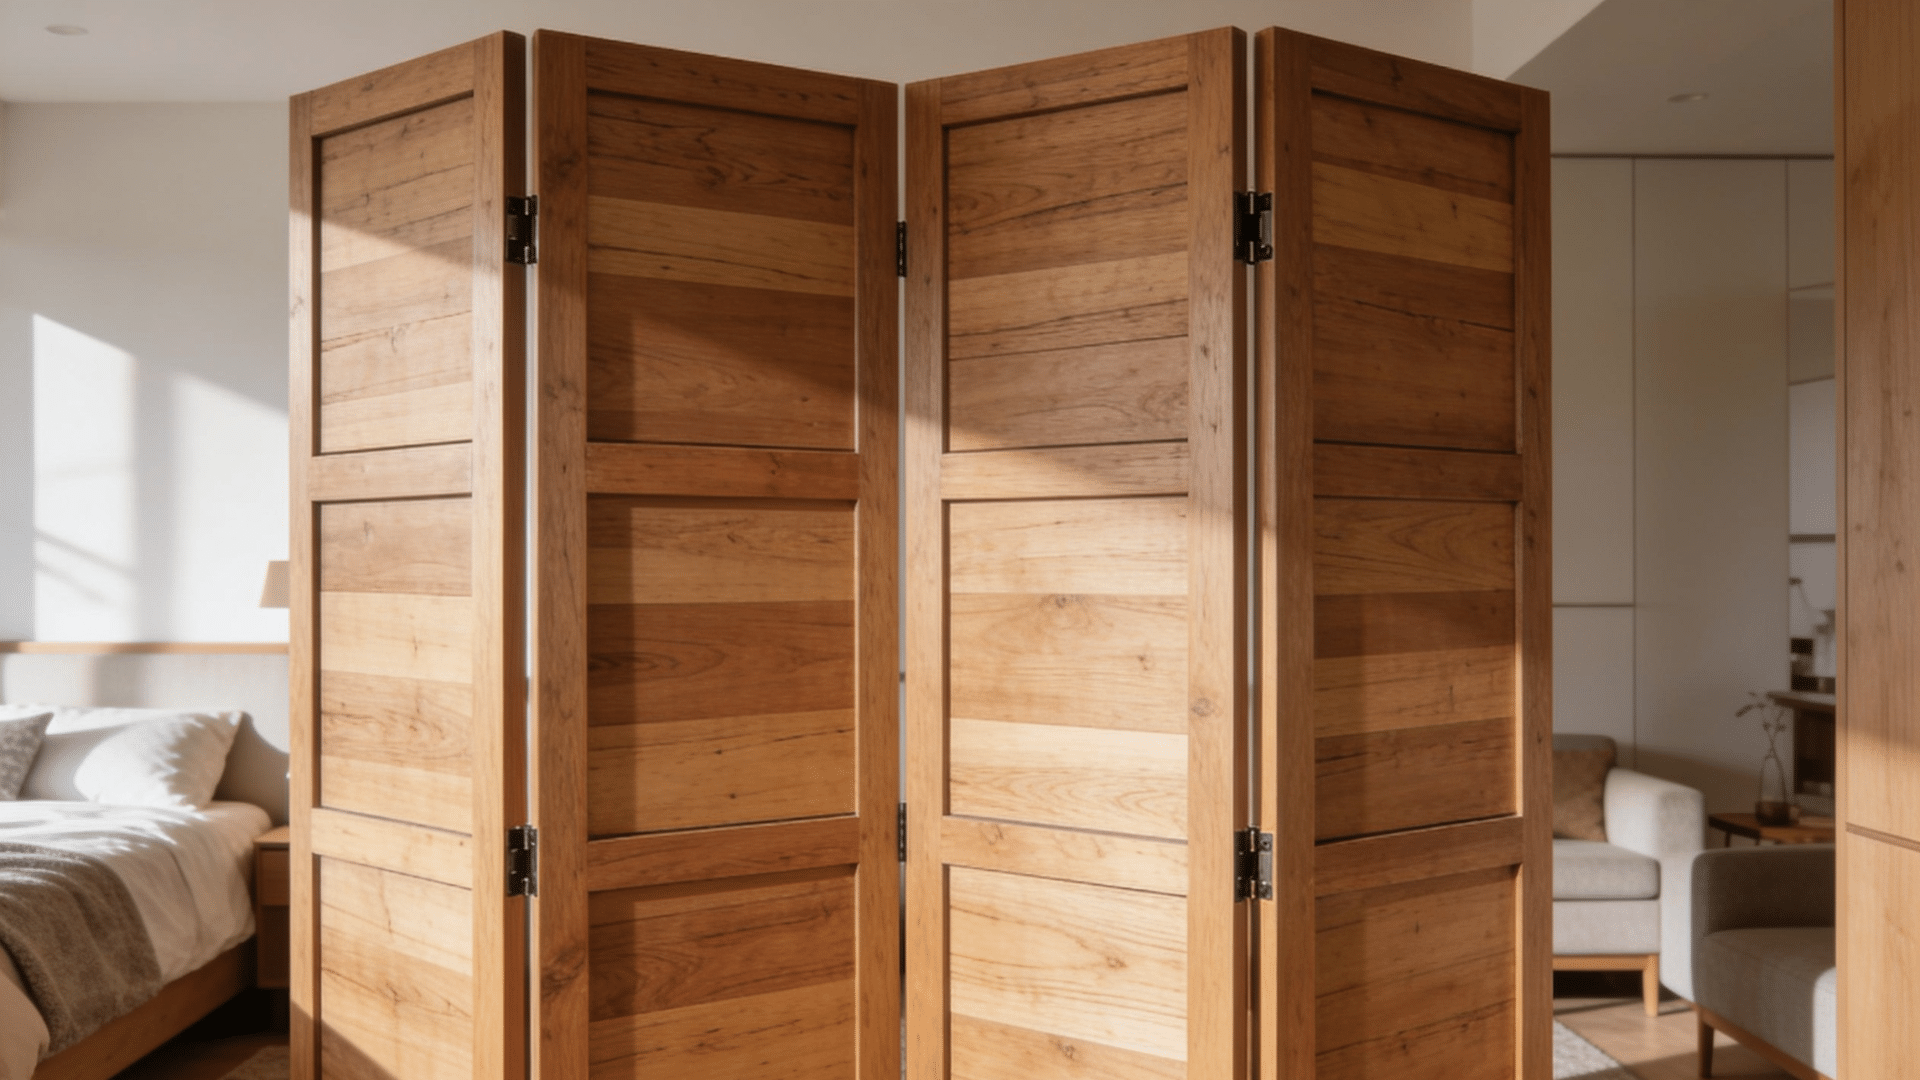
Hinged panels stand freely on the floor and fold flat when not in use, making it one of the most practical options for spaces that change frequently.
Materials Required:
- Wood panels
- Hinges
- Screws, drill, paint, or stain
Steps:
- Measure the room height and decide on the width of each panel, then cut all panels to a matching size
- Sand each panel starting with coarse sandpaper and finishing with a fine grit for a smooth surface
- Apply paint or stain in thin, even coats and let each coat dry fully before adding the next
- Lay two panels flat side by side, mark evenly spaced hinge positions, drill pilot holes, and attach the hinges
- Stand the screen upright, attach remaining panels the same way, and adjust the fold angle until it sits balanced
6. Pallet Wood Divider
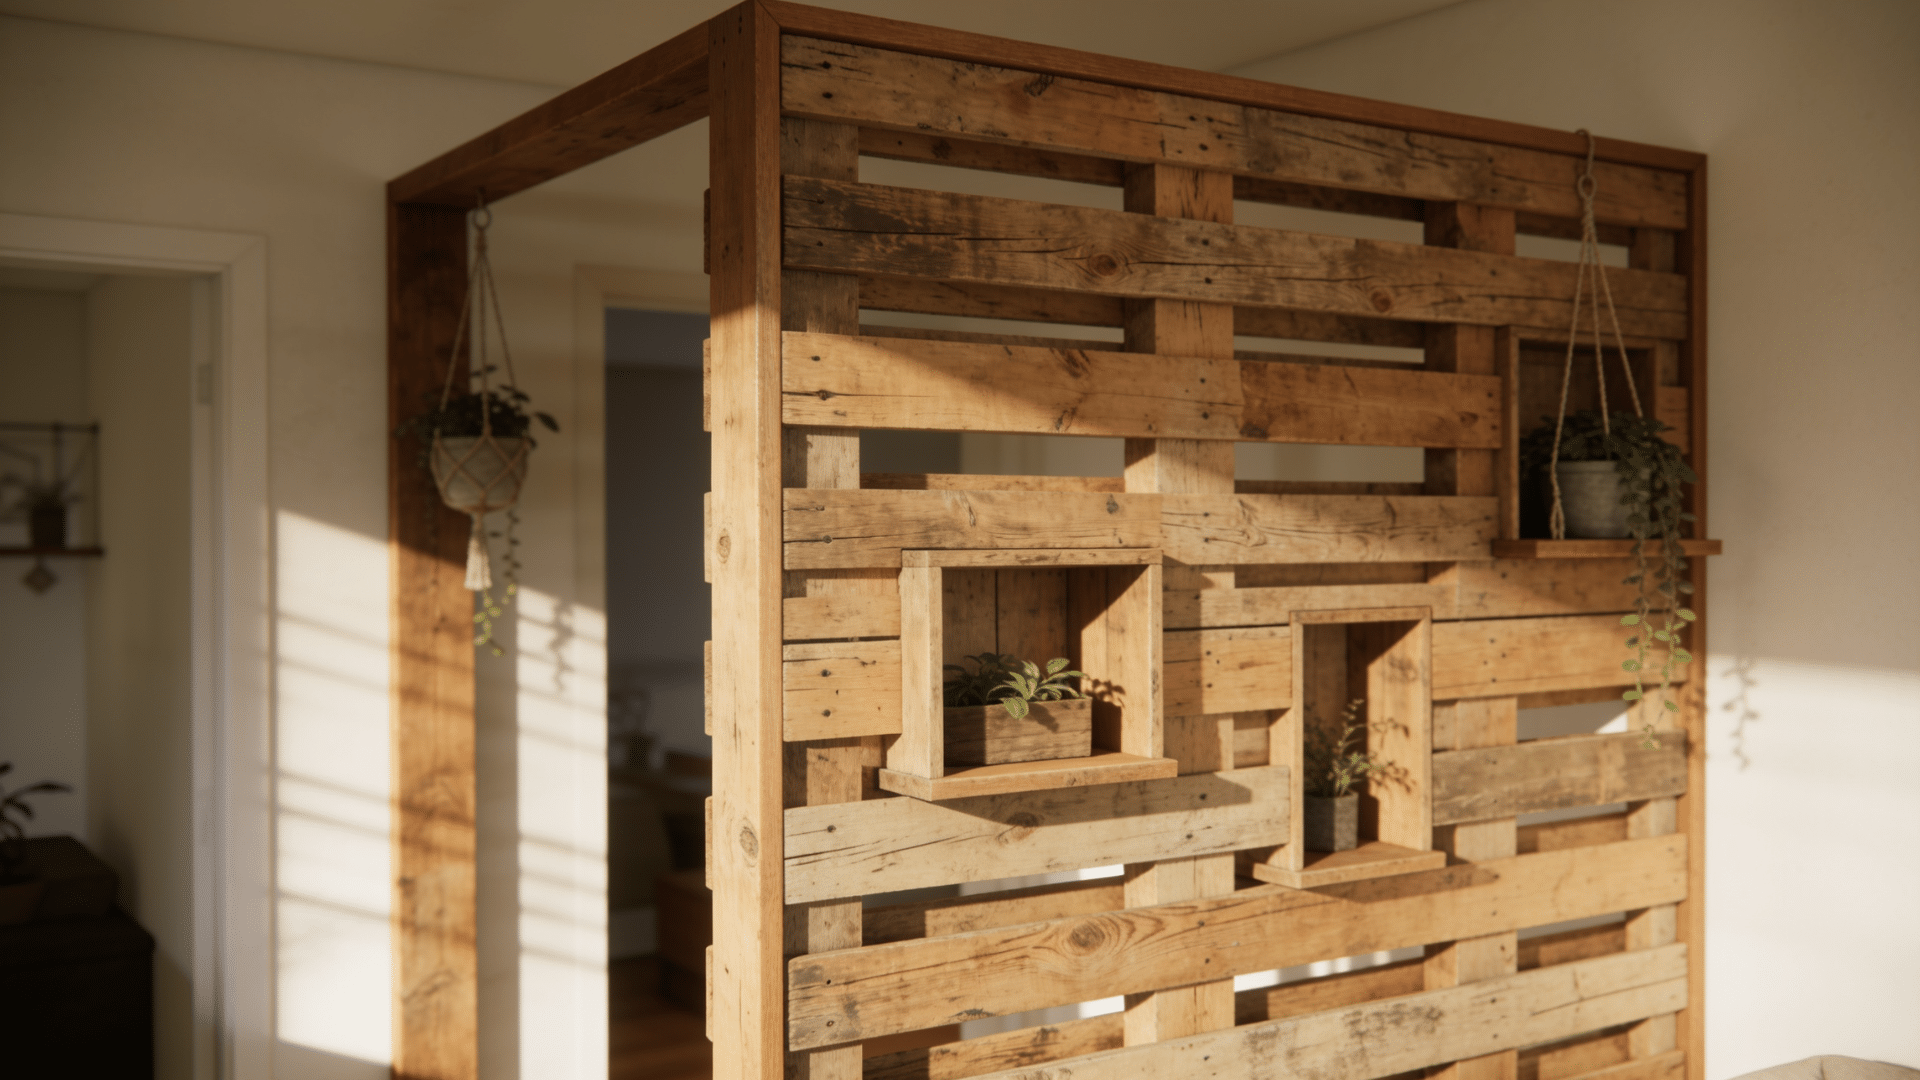
A pallet wood divider is a rugged, industrial-style option that repurposes reclaimed wood into a functional room separator, one of the most budget-friendly builds available
Materials Required:
- Wood pallets
- Sandpaper
- Screws, drill, paint, or stain
Steps:
- Inspect each pallet for damage or rot, then disassemble into individual boards using a pry bar and hammer
- Sort boards by size and condition, setting aside any that are warped or cracked
- Sand every board thoroughly to remove splinters, rough patches, and old residue
- Reassemble the boards into a flat panel using screws and add vertical support beams along each side edge
- Paint or stain once assembled, then attach casters or hinges before placing in position
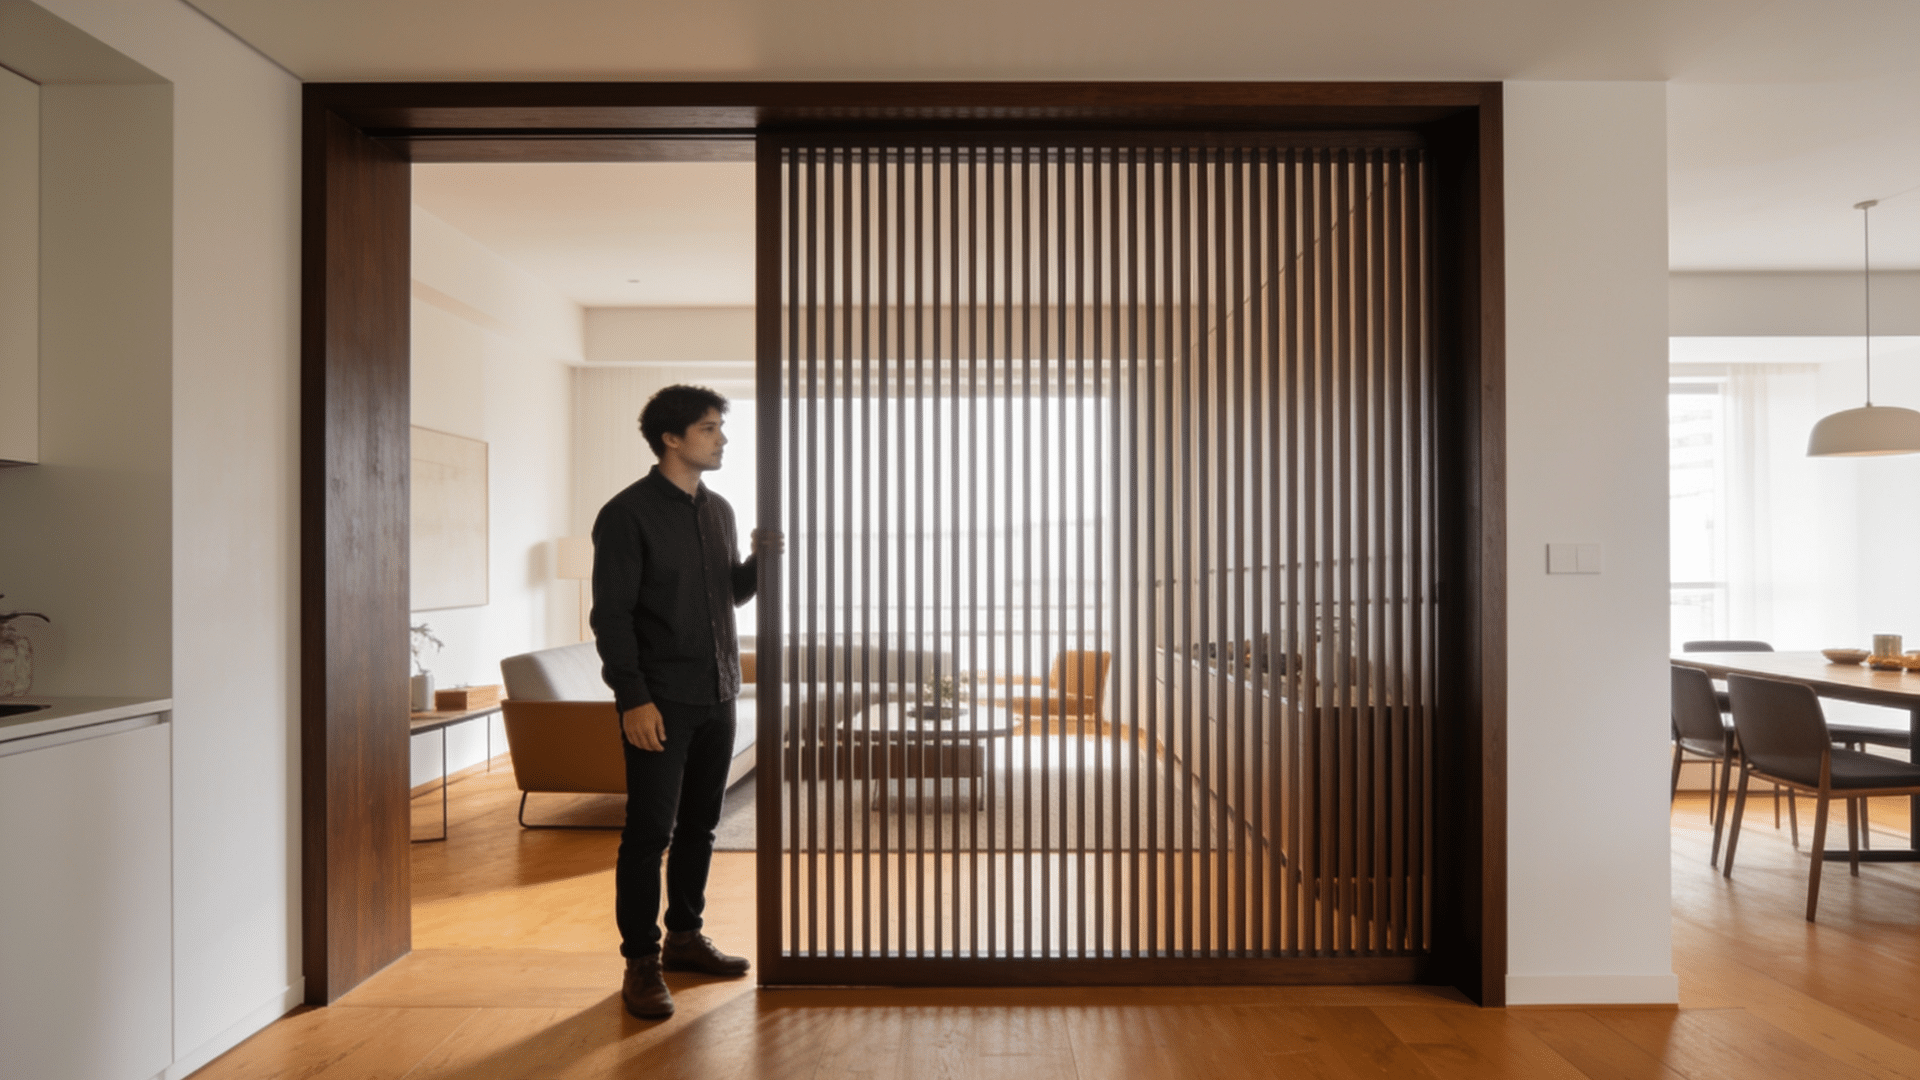
7. Sliding Barn Door Panel
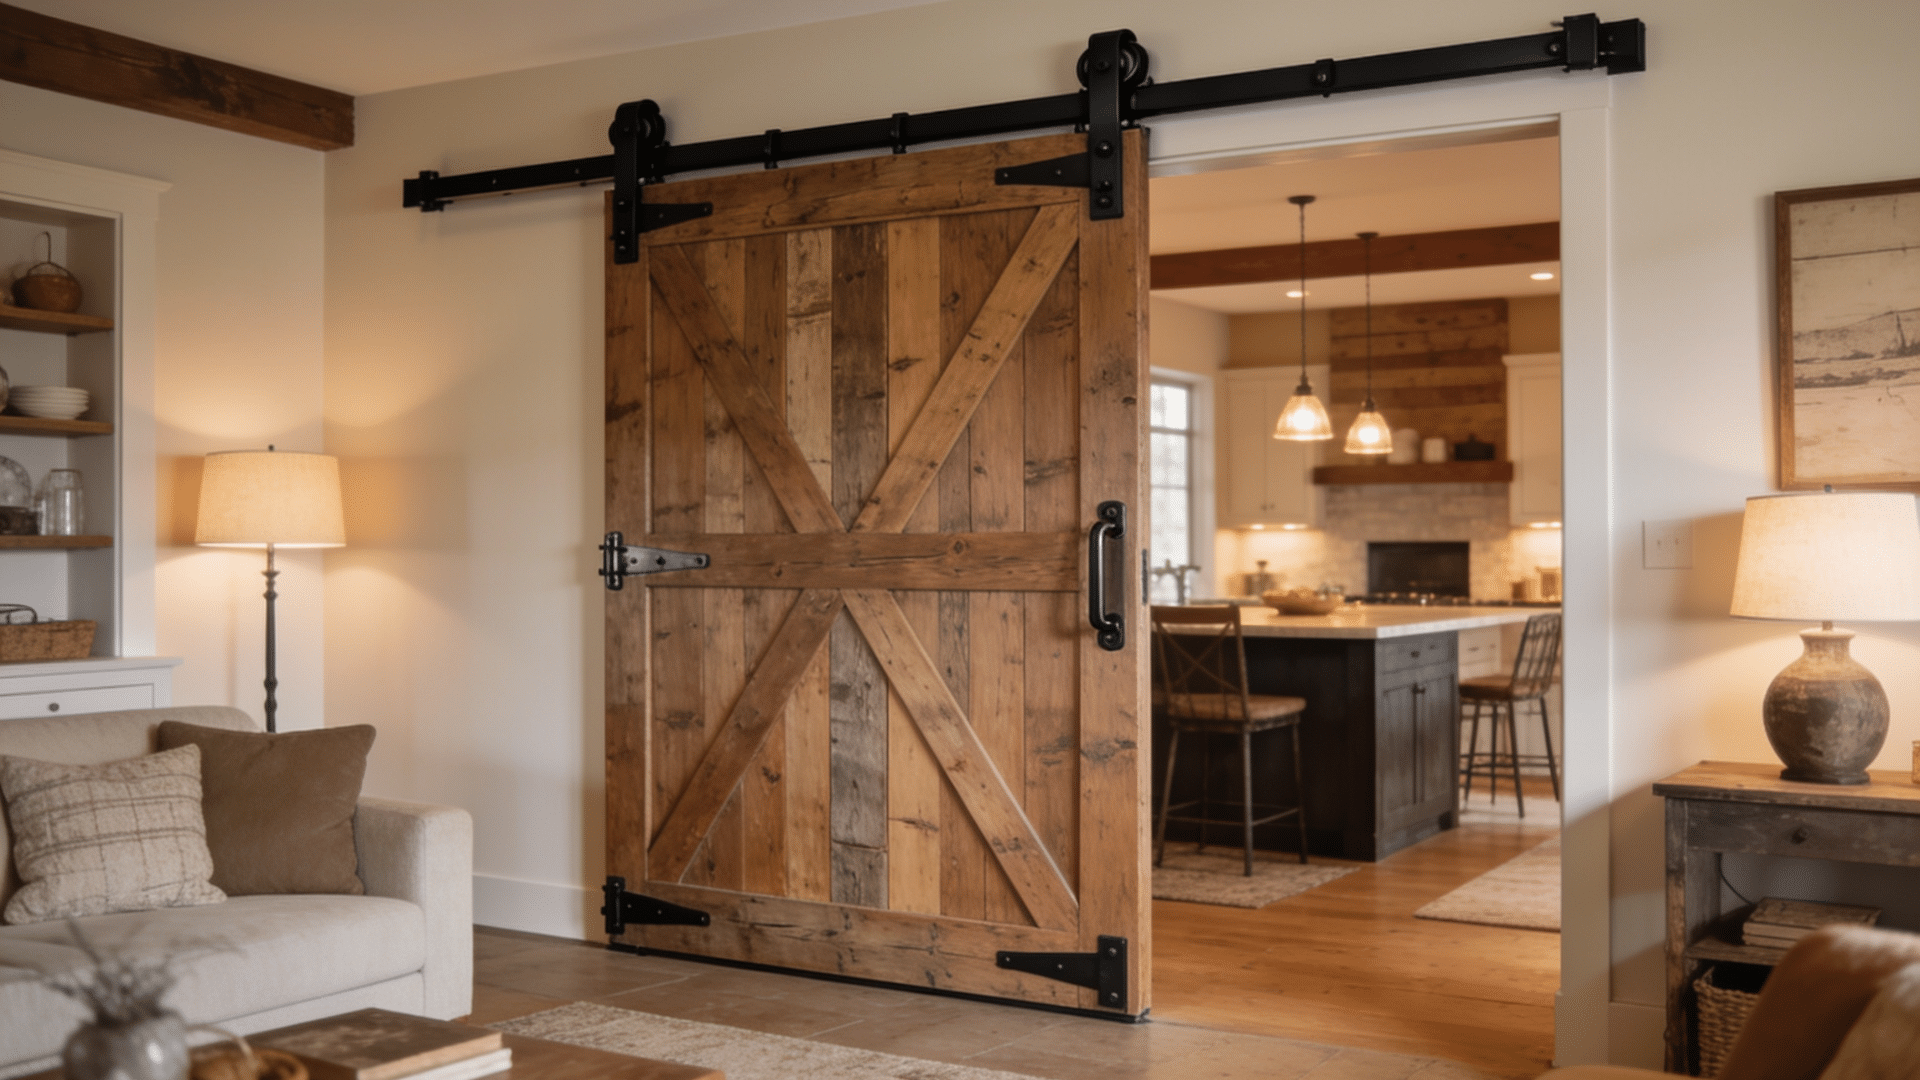
A pallet wood divider is a rugged, industrial-style option that repurposes reclaimed wood into a functional room separator, available since the main material is often free or low-cost.
Materials Required:
- Wood door or panel
- Sliding track and rollers
- Drill, screws, level
Steps:
- Measure the width of the opening and choose a panel at least 2 inches wider on each side for full coverage
- Mark the track position above the opening using a level, locate wall studs along the line, and drill mounting holes
- Mount the sliding track securely into the studs using the provided hardware
- Attach roller brackets to the top edge of the door panel at the correct spacing, then lift and hook the rollers onto the track
- Test that the panel slides smoothly across the full length of the track and attach a floor guide at the base.
8. Repurposed Clothing Rack Divider
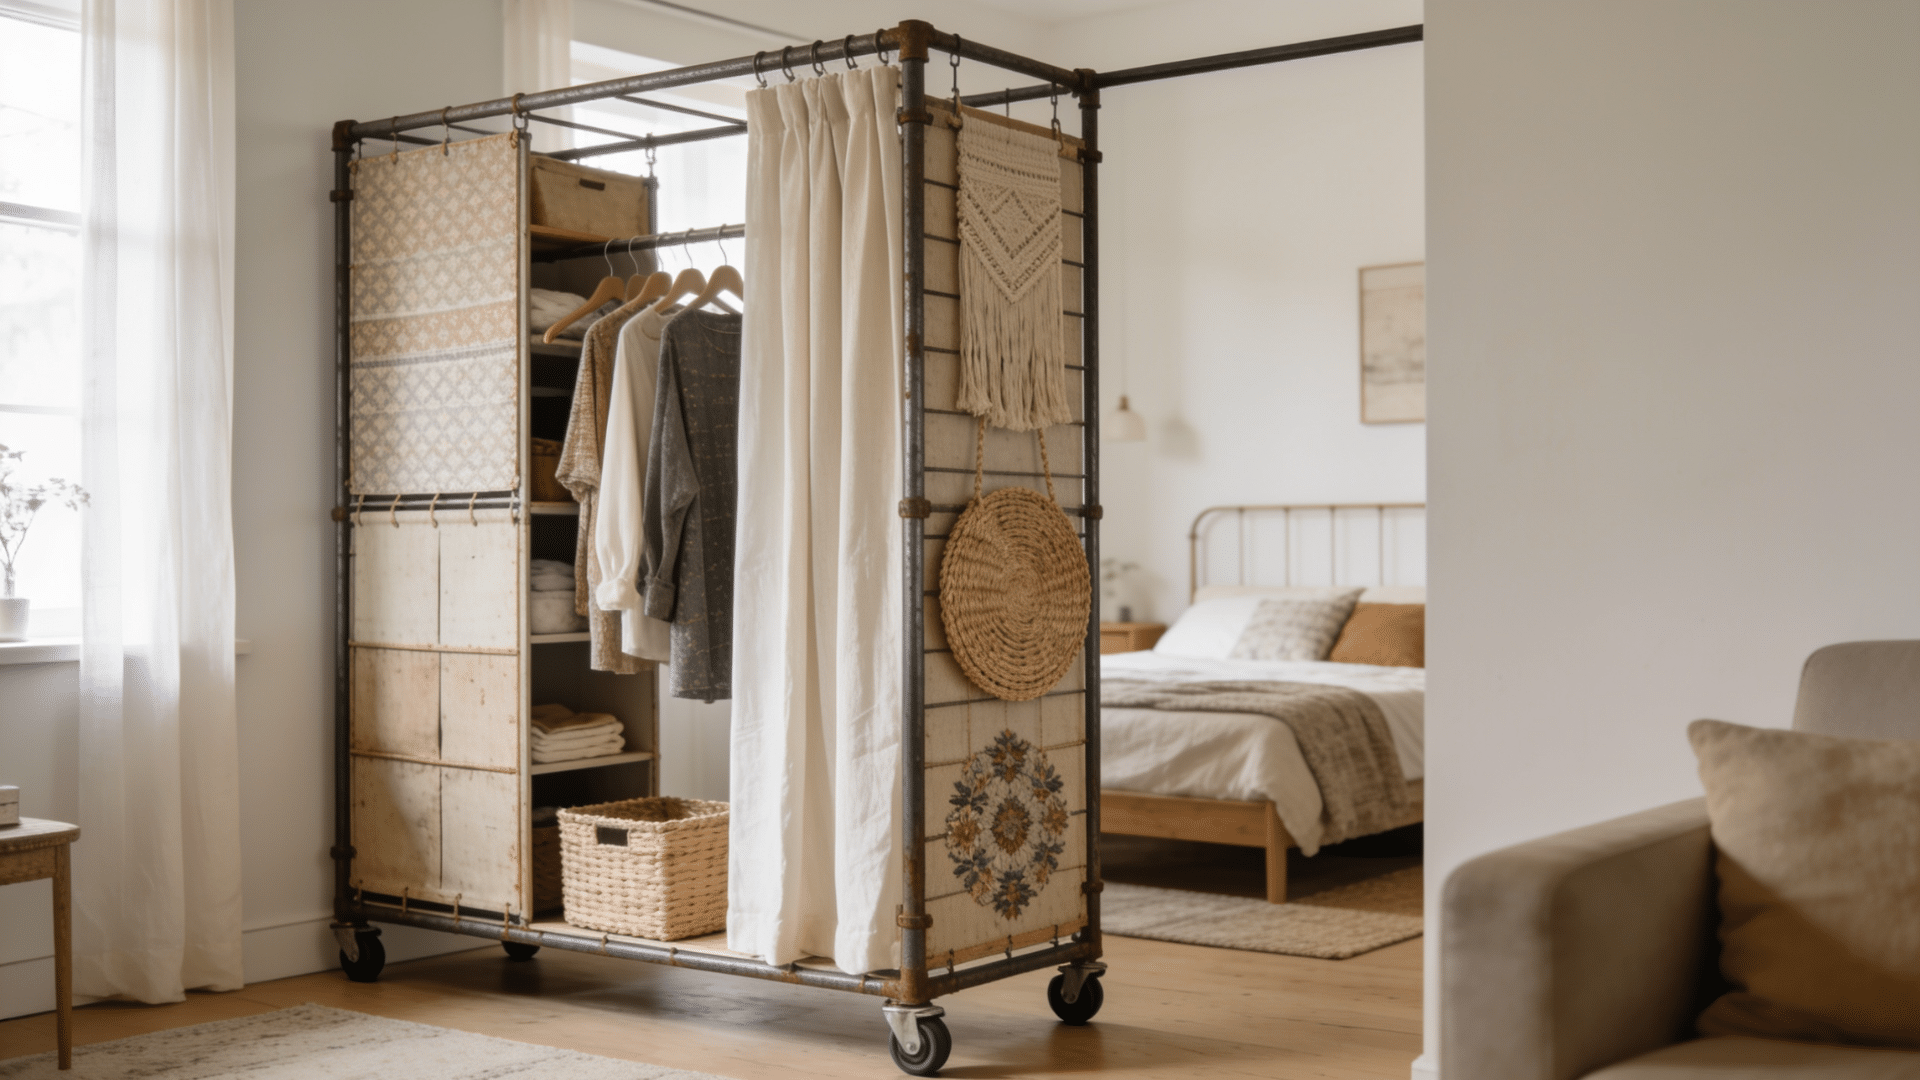
A repurposed clothing rack divider is one of the quickest setups on this list since the frame is already built. Hang fabric panels, curtains, or even plants
Materials Required:
- Clothing rack
- Fabric or blanket
- Safety pins or clips
Steps:
- Position the clothing rack in the exact spot where you want to divide the room and check that it sits level
- Measure the fabric against the rack height and width before cutting or folding to size
- Drape the fabric evenly over the top bar so both sides hang at an equal length
- Secure the fabric along the top bar using evenly spaced clips or safety pins, smoothing out any bunching
- Add a second layer of fabric or hanging plants for more visual depth if the single layer feels too minimal
9. Repurposed Shutters Divider
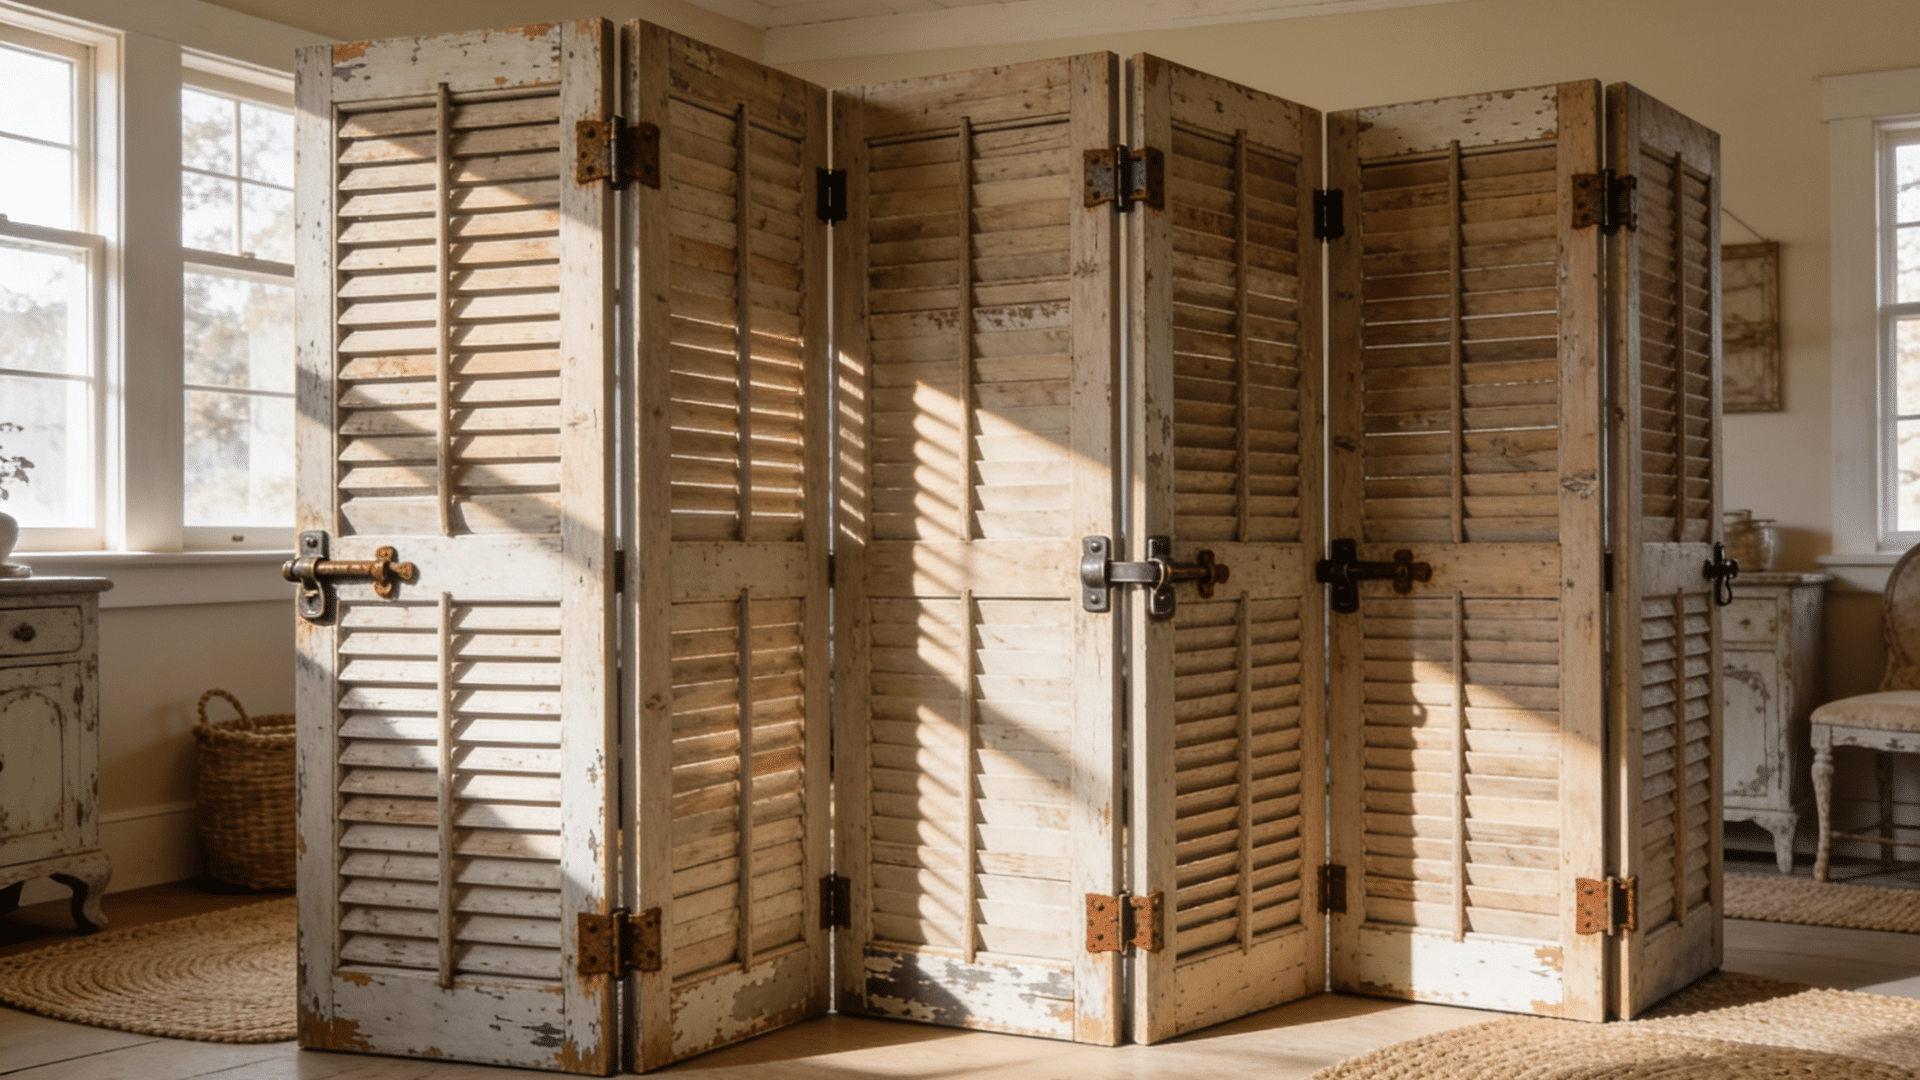
Repurposed shutters make a charming and sturdy divider that adds architectural character to any room. Hinge two or more together, stand them upright
Materials Required:
- Old window shutters
- Hinges
- Screwdriver, paint
Steps:
- Collect shutters of matching or complementary sizes, then sand down any rough edges or peeling paint
- Apply fresh paint or leave the shutters in their existing finish depending on the look you want
- Lay two shutters side by side, mark evenly spaced hinge positions along the joining edge, and drill pilot holes
- Attach hinges so alternating panels fold in opposite directions for a stable freestanding stance
- Connect any additional shutters the same way, stand the finished screen upright, and adjust the fold angle until balanced
10. Bookshelf Divider
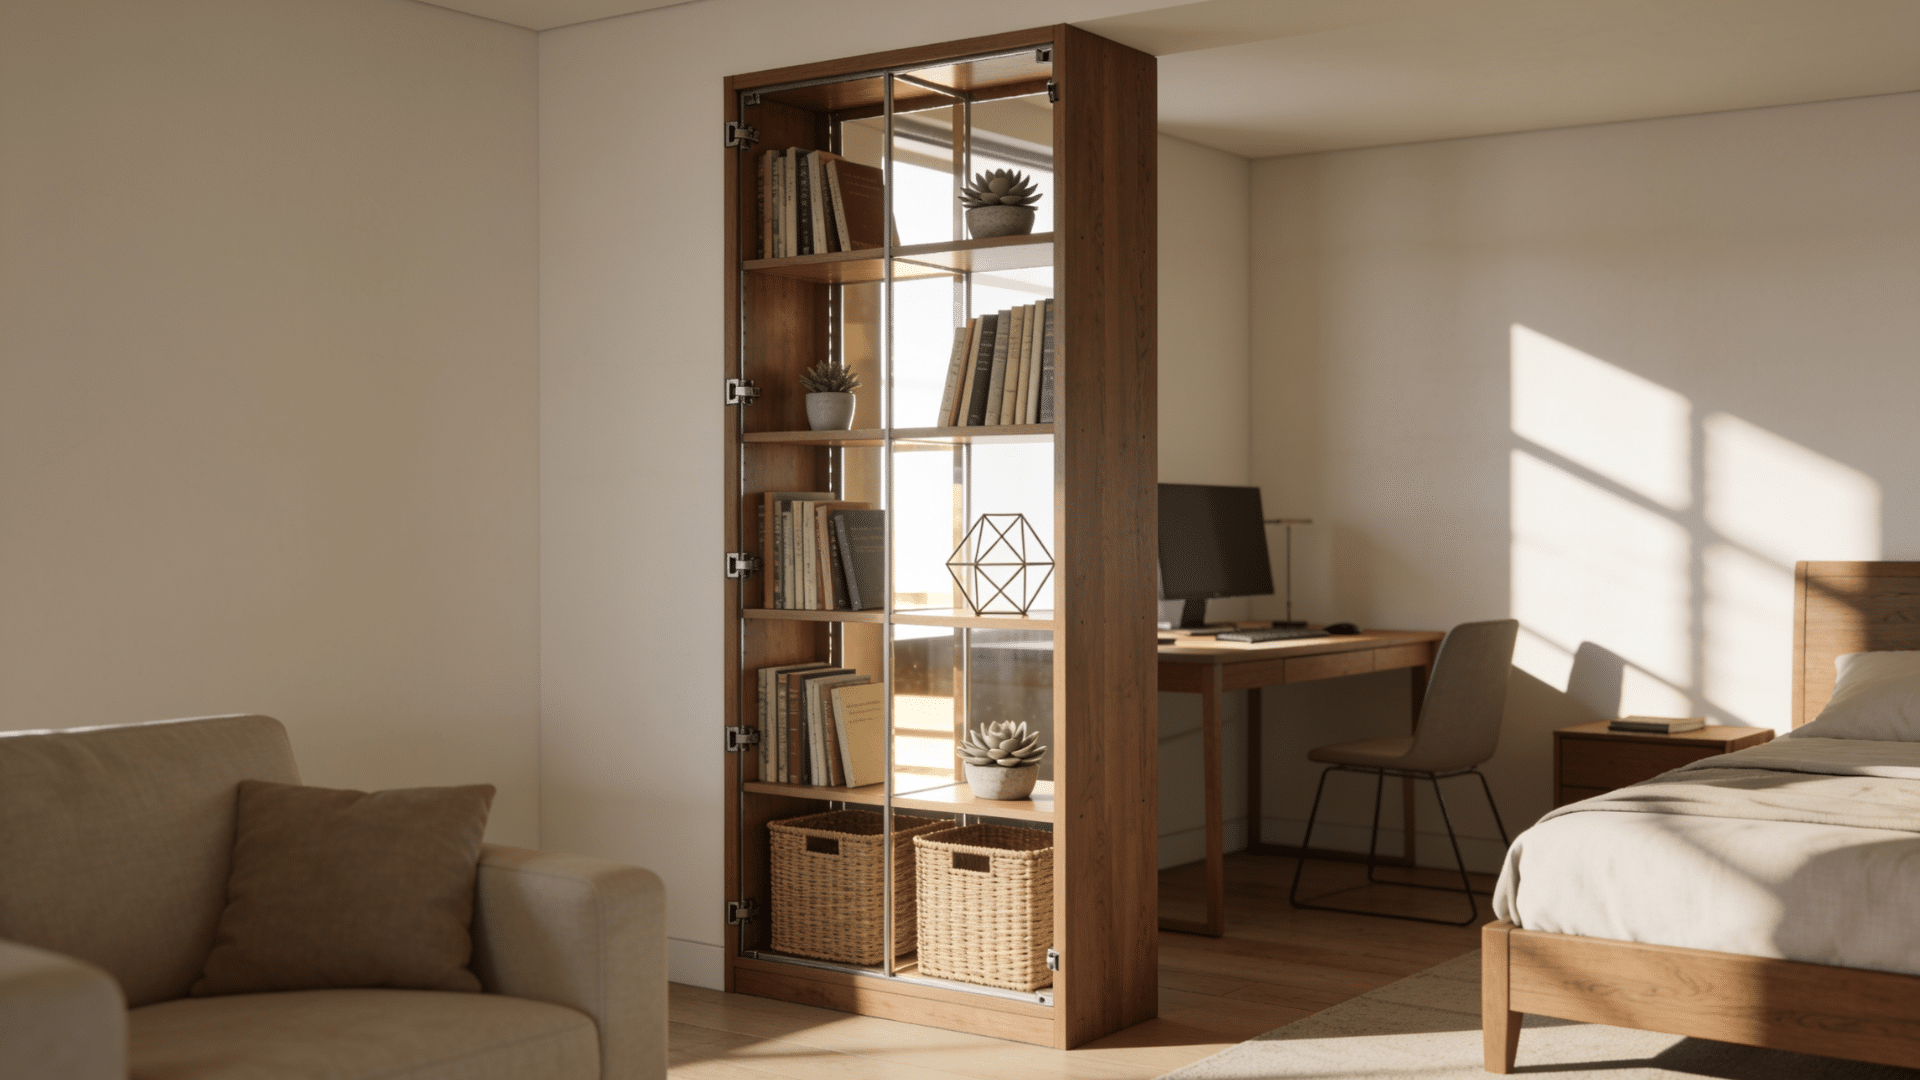
A bookshelf divider is one of the most functional options on this list since it splits the room and adds usable storage at the same time.
Materials Required:
- Freestanding bookshelf
- Anti-tip wall strap, if needed
- Books or storage bins
Steps:
- Measure the space to confirm the bookshelf height and width fit the intended spot without blocking walkways
- Position the unit and use a level to check it sits straight before loading it with any weight
- Secure it to the nearest wall using an anti-tip strap if the shelf is tall or top-heavy
- For open-backed shelves, arrange items so they face outward on both sides for a clean look from either direction
- Distribute weight evenly across all shelves and adjust shelf heights to suit the items being stored
11. Ladder Shelf Divider
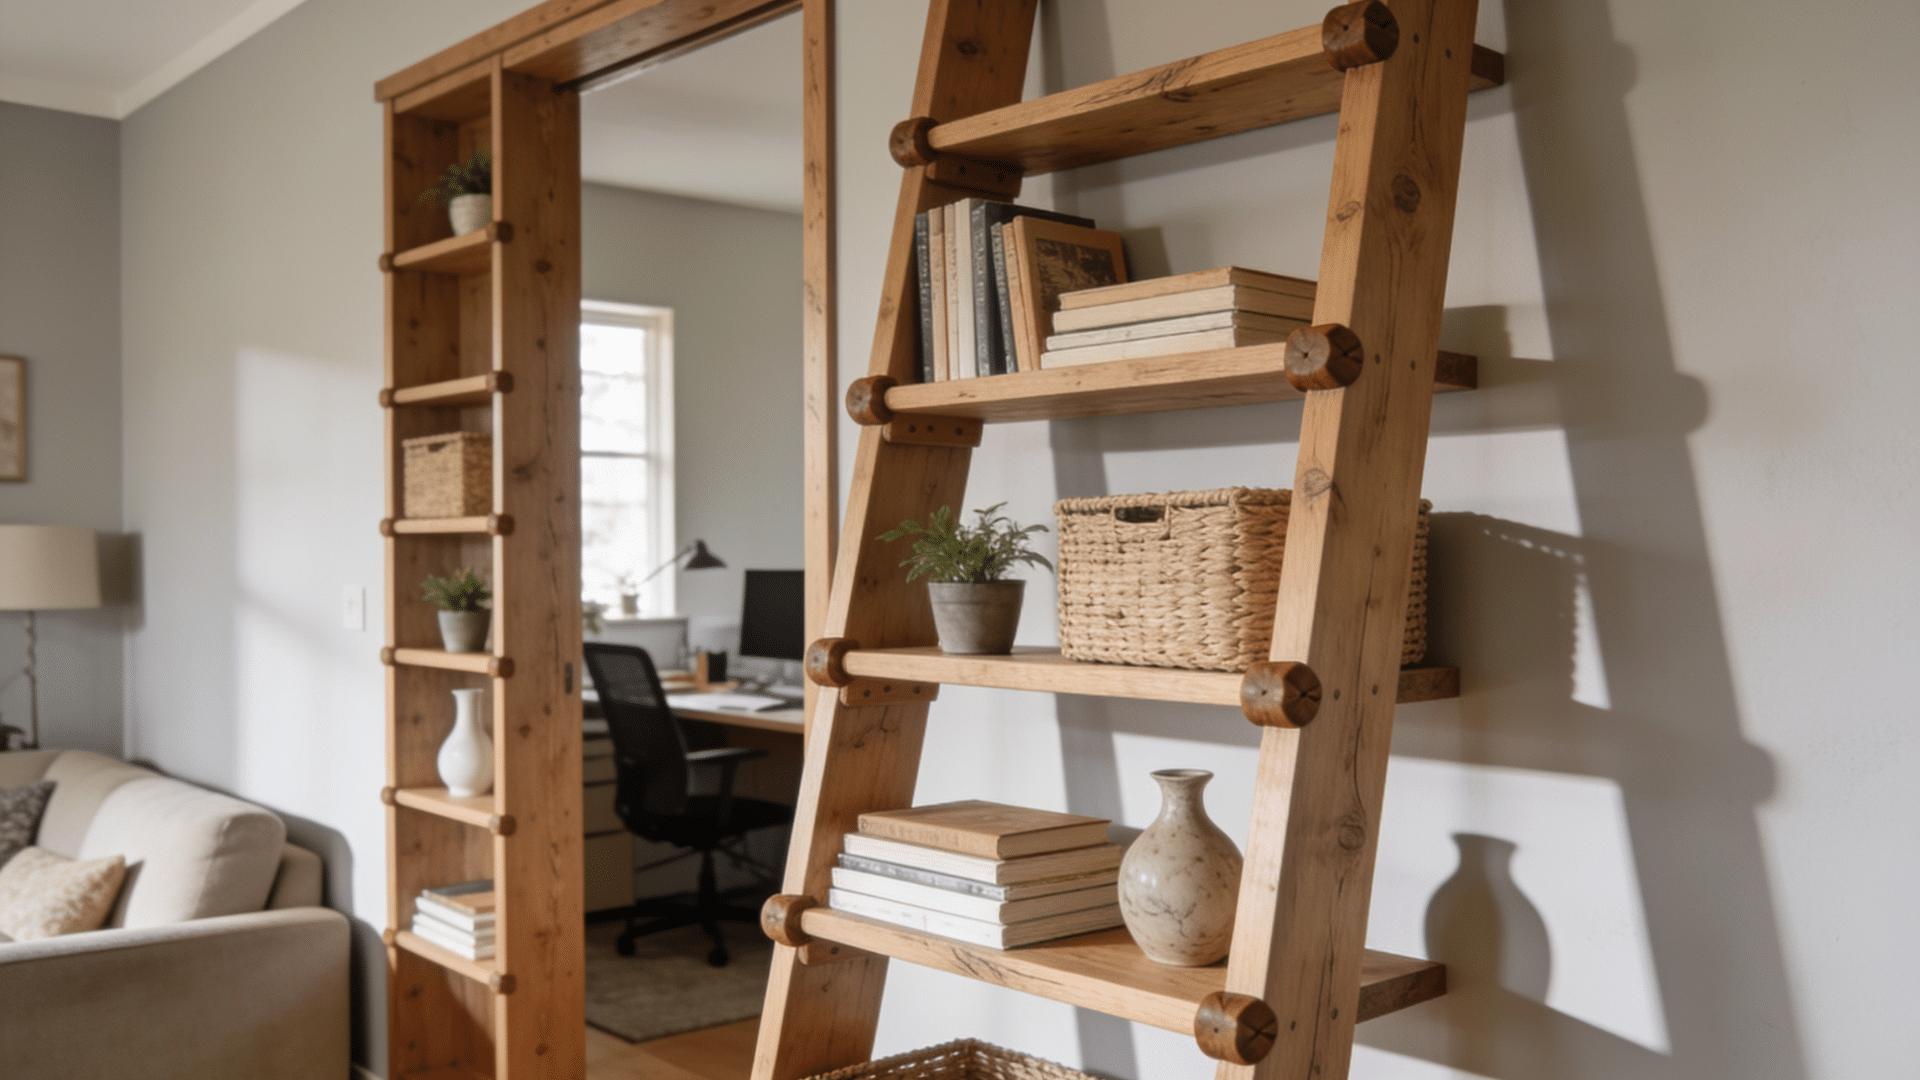
A ladder shelf divider is a sleek, minimal option that creates separation without blocking light or making the room feel closed off.
Materials Required:
- Ladder shelf unit
- Decor items or plants
- Anti-tip strap, if needed
Steps:
- Measure the ceiling height to confirm the ladder shelf fits without sitting at an awkward angle
- Position the unit in the divider location and secure the top to the wall with an anti-tip strap if it is tall or freestanding
- Use a level to confirm the unit sits straight before adding any items
- Load from the bottom shelves upward, keeping heavier items low and lighter decorative pieces toward the top
- Alternate items between both sides of the shelf and step back to check the arrangement from both directions
12. Cork Board Divider
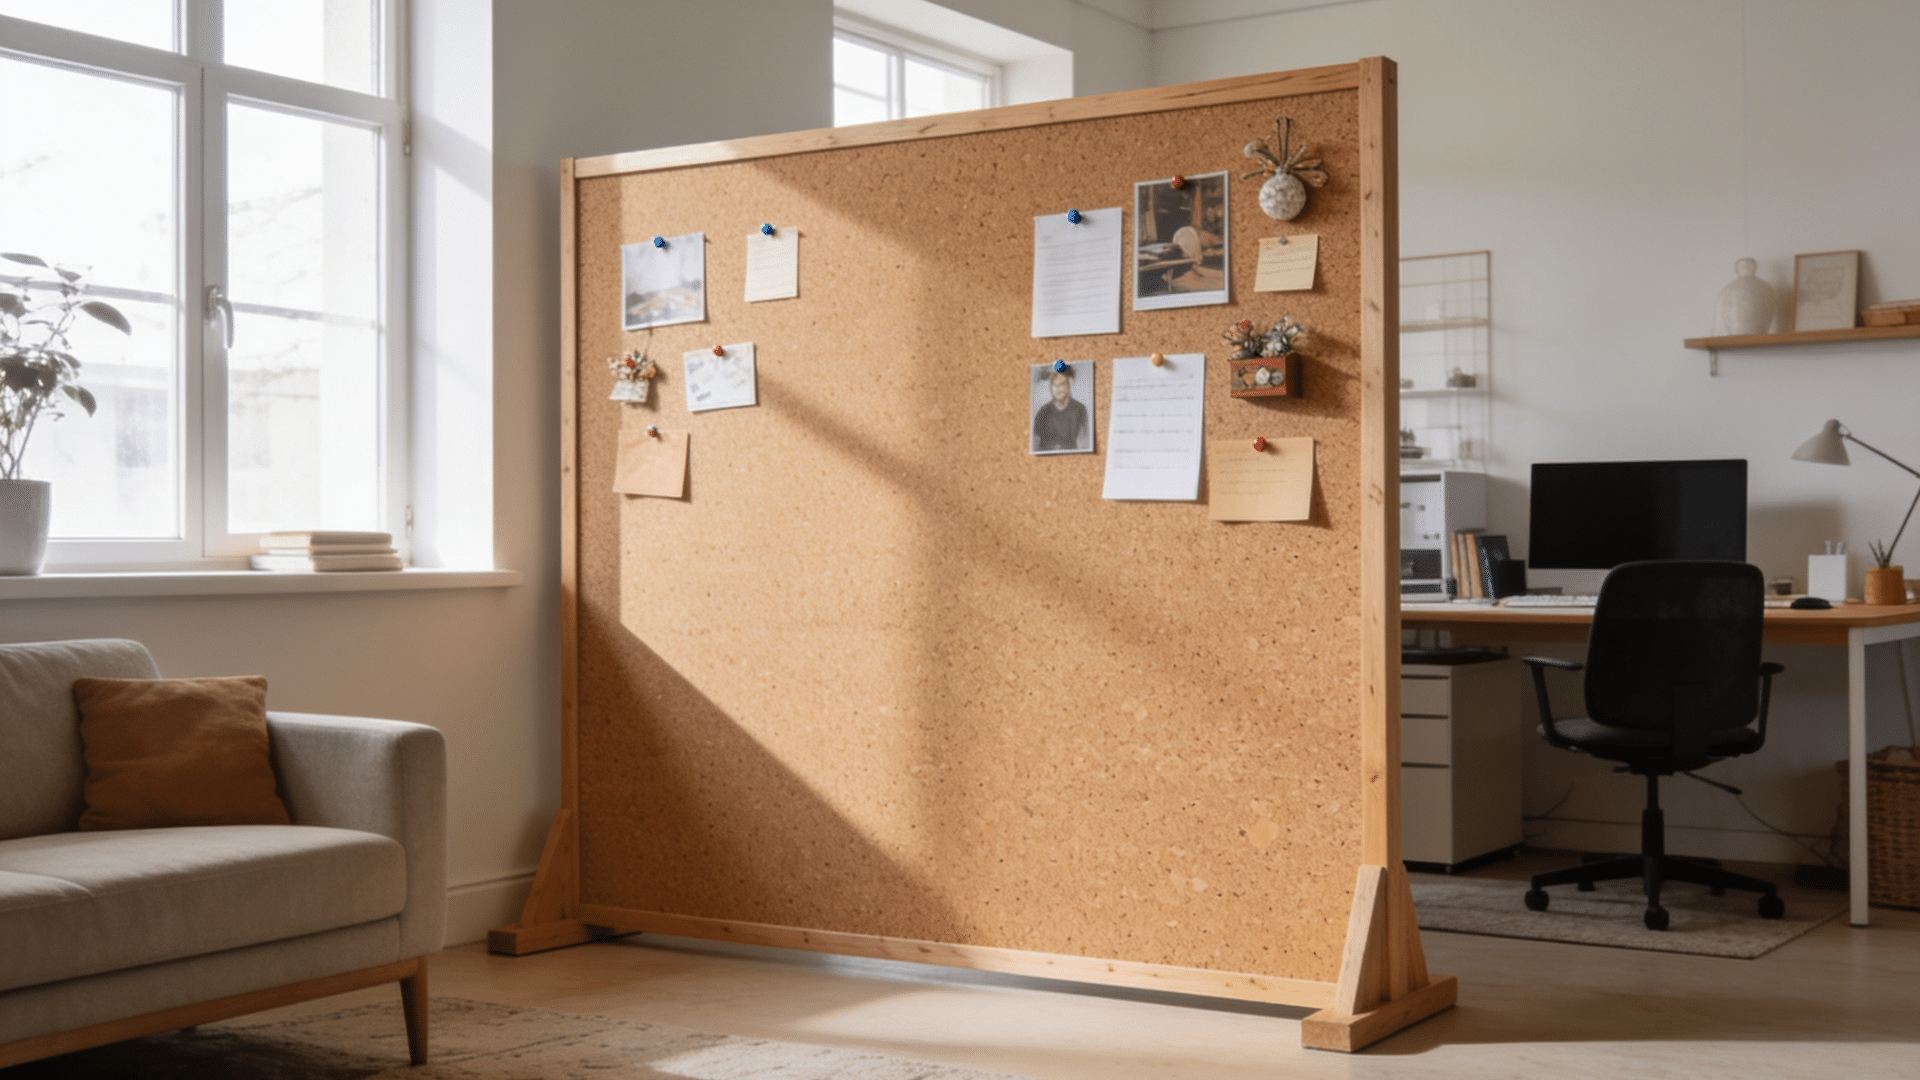
A cork board divider pulls double duty as a functional partition and an everyday organizational tool. It’s a practical pick for home offices or shared spaces where keeping notes.
Materials Required:
- Cork panels
- Wood frame
- Glue or screws
Steps:
- Measure the space to determine the overall frame size, then cut the wood pieces to length and sand any rough edges
- Join the frame corners using wood glue and corner brackets for added rigidity, then let it dry completely
- Lay cork panels inside the frame, mark any areas that need trimming, and cut them to fit using a utility knife
- Attach cork panels to the frame using strong adhesive or small screws along the edges
- Stand the finished frame upright in the divider space and check that it sits level before use
13. Plant Wall Divider
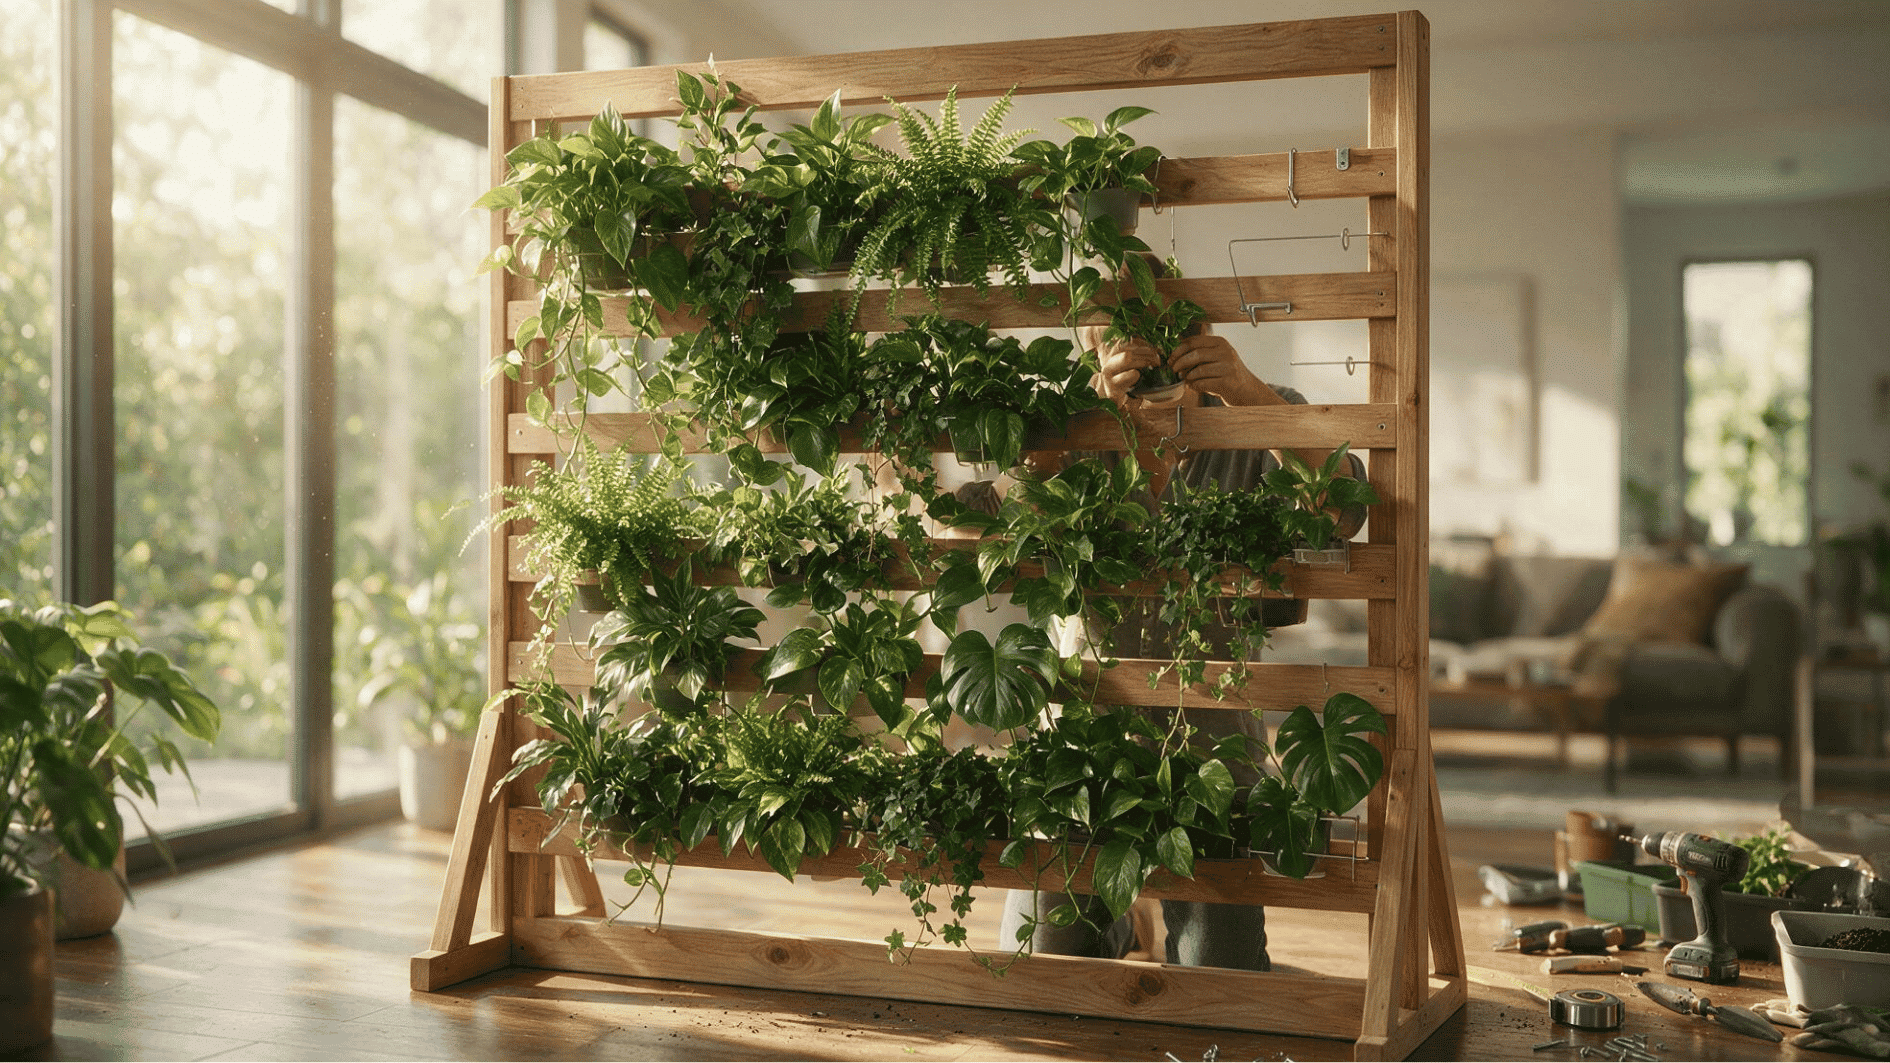
A plant wall divider is the most natural-looking option on this list, using greenery to create a soft boundary between spaces, particularly well in living rooms or sunlit areas.
Materials Required:
- Tall plants or a plant stand
- Pots
- Watering can
Steps:
- Measure the space to determine the width and height the plant arrangement needs to cover
- Choose a plant stand or tiered shelf sized to fit without overcrowding the area
- Select a mix of tall and trailing plants, using pots with drainage holes to prevent overwatering
- Arrange the tallest plants at the back and shorter ones toward the front, then place saucers under each pot.
- Position the stand in the divider space, check it sits level, and rotate plants regularly so all sides receive even light.
14. Frosted Glass Panel Divider
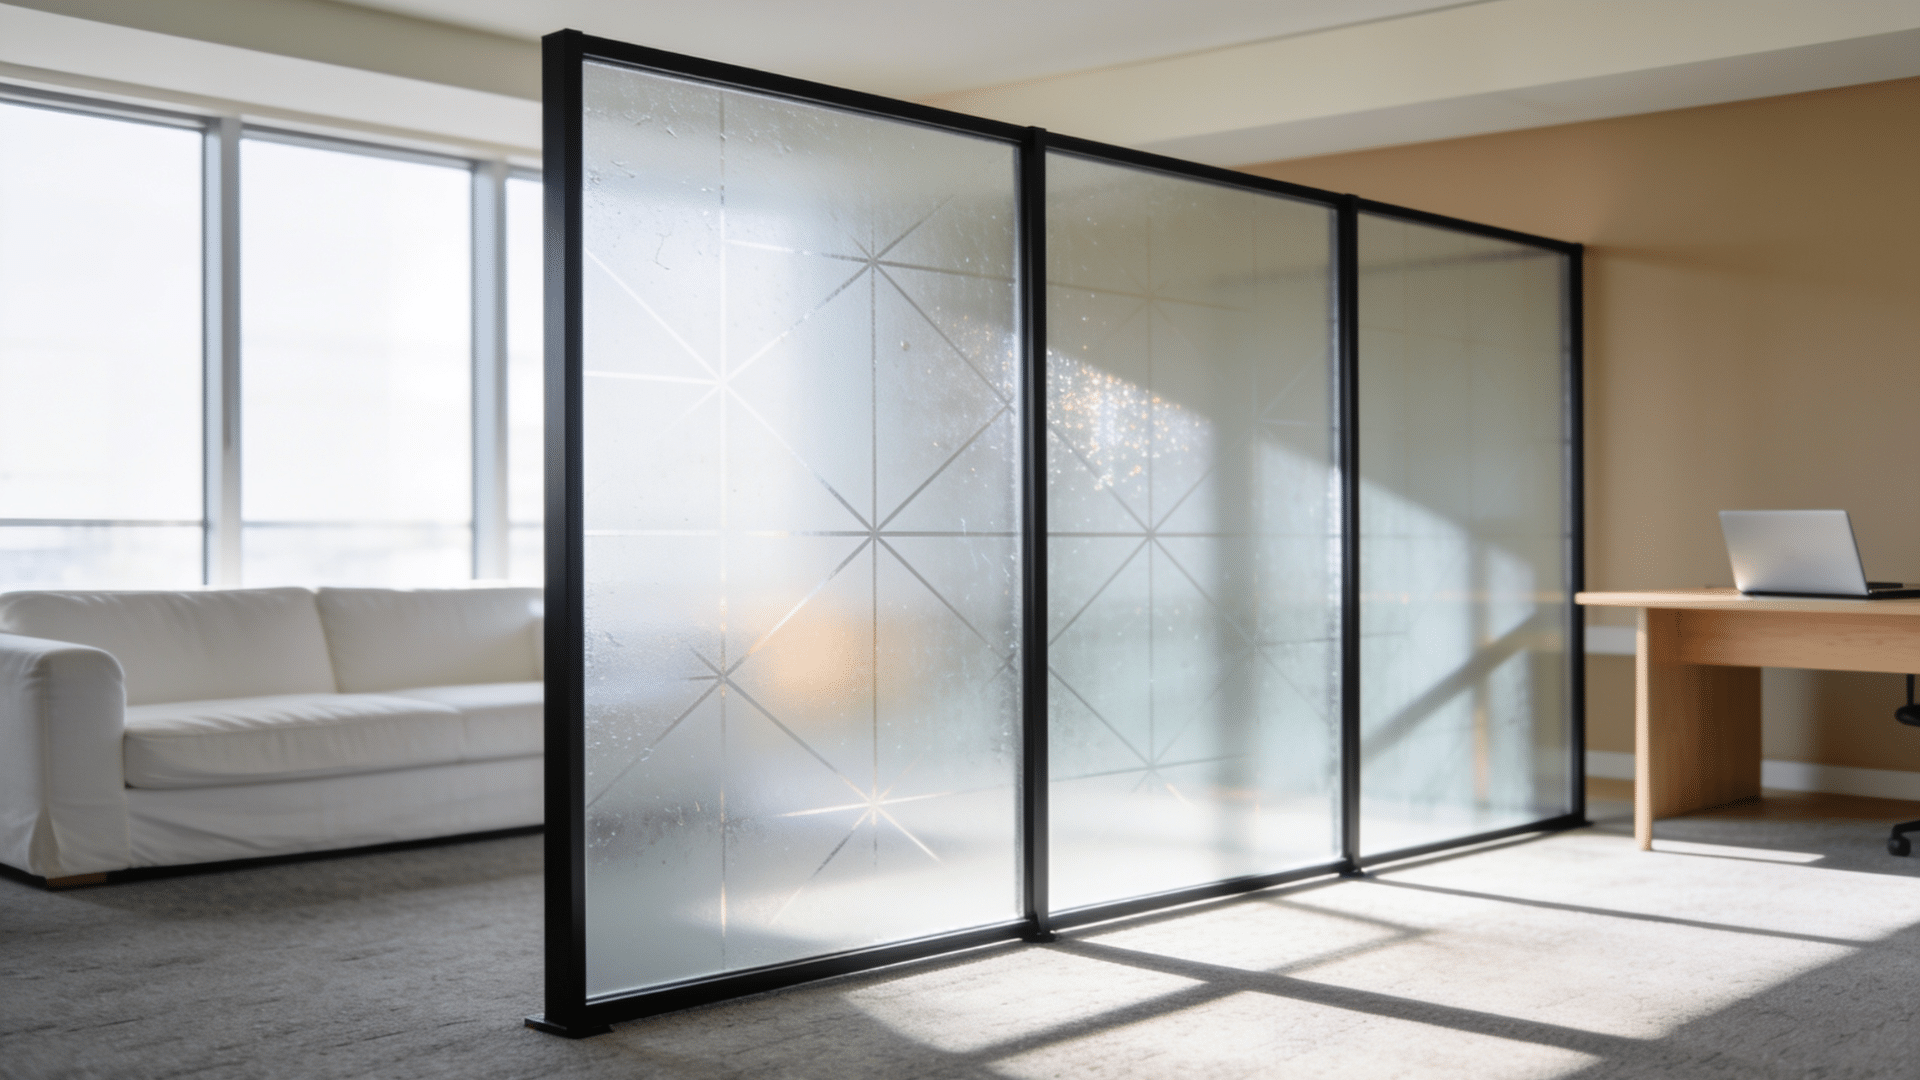
A frosted glass panel divider creates a clean, modern separation that lets light through while still blocking the view between spaces.
Materials Required:
- Frosted glass panels
- Wood or metal frame
- Screws, mounting brackets
Steps:
- Measure the space carefully and order frosted glass panels cut to those exact dimensions
- Build or purchase a frame sized to hold the panels securely, then sand and finish it before inserting the glass
- Line the inner edges of the frame with rubber glazing tape, then carefully slide the glass panels into place
- Fasten the glass using glazing clips or a retaining bead along all four edges to hold it firmly
- Mark mounting points using a level, drill holes suited to the wall or floor type, and secure the frame.
15. String Light Curtain Divider
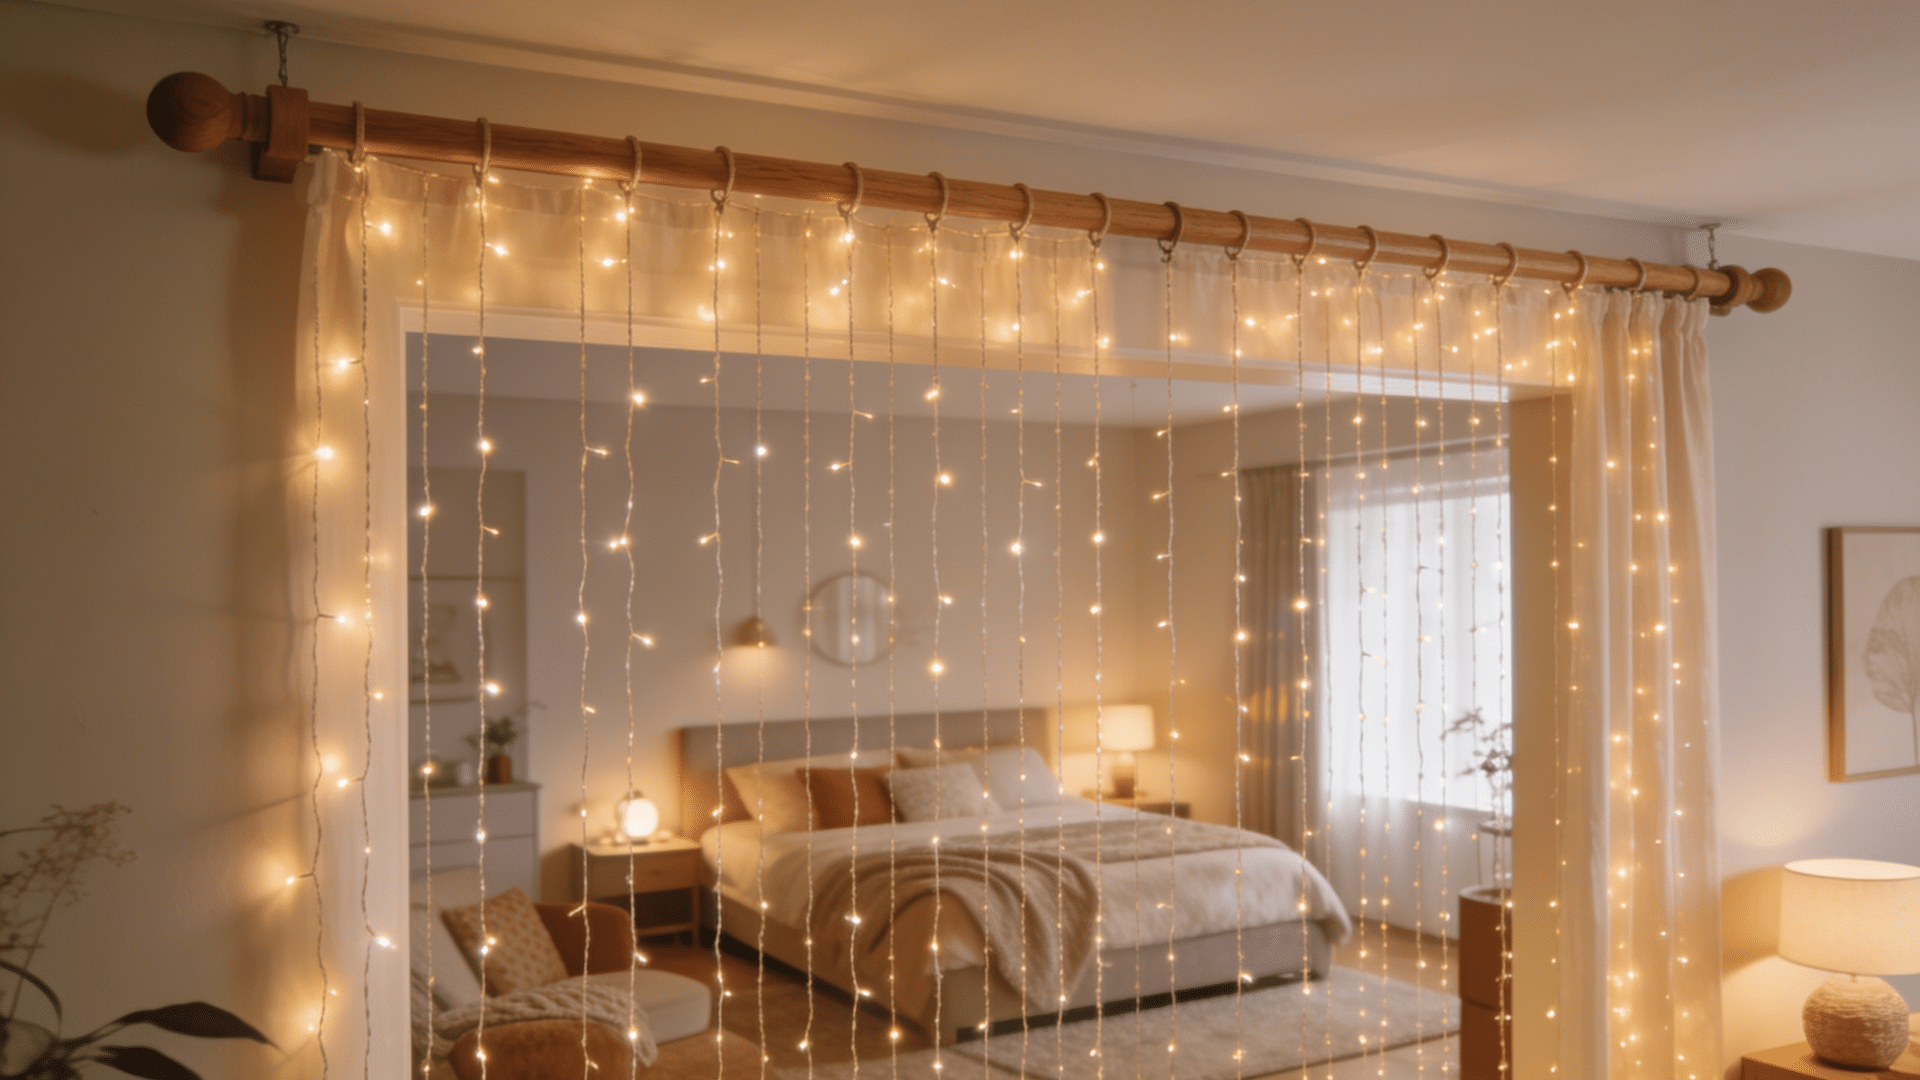
A string light curtain divider is the most atmospheric option on this list, combining soft fabric with warm lighting to create a boundary that feels more like a feature than a partition.
Materials Required:
- Sheer fabric panels
- String lights
- Curtain rod
Steps:
- Measure the height and width of the space, then cut or buy sheer fabric panels to match.
- Hem the bottom edge of each panel and sew a rod pocket along the top wide enough for the curtain rod
- Weave string lights vertically through the fabric from top to bottom at even intervals.
- Mark and drill the rod bracket positions using a level to keep the hang straight, then fit the brackets securely
- Slide the fabric panels onto the rod, hang it in place, and plug in the lights to test the full effect before finalizing
DIY vs. Store-Bought vs. Professional Room Dividers
Choosing between a DIY, store-bought, or professionally installed room divider depends on your budget, skills, and how permanent the change needs to be.
A DIY divider usually costs $40–$350 and suits rentals, temporary layouts, or weekend projects. A store-bought divider generally costs $70–$700 and offers the quickest setup, with folding screens and shelving units requiring little installation.
A custom freestanding divider may cost $400–$2,000 or more, providing a tailored look without major construction. For permanent changes, a professionally installed half wall may cost $1,100–$4,000, while a full partition wall can range from $2,000–$6,700 or more.
I recommend setting aside an additional 10%–15% for hardware, delivery, paint, replacement materials, and unexpected installation issues. Get written estimates for permanent work and confirm whether permits, landlord approval, or building-management permission are required.
Best Ready-Made Room Dividers You Can Buy Right Now
If building isn’t practical for your timeline or skill level, a pre-made divider can achieve a similar result with far less effort. Here are the most popular types along with the best places to buy them.
| Divider Type | Description | Where to Buy |
|---|---|---|
| Folding Wood or Rattan Screen | No assembly needed beyond unfolding, available in 3, 4, and 6-panel designs | Wayfair · IKEA |
| Sliding Barn Door Partition | Mounted on a wall track for a more permanent feel without full construction | Home Depot · Lowe’s |
| Accordion Partition Wall | Expands and collapses as needed, ideal for spaces that change configuration frequently | Walmart · Wayfair |
| Modular Office Panel System | Freestanding panel kits built for flexible layouts that are easy to move and reconfigure | Staples · Office Depot |
| Tension Rod Curtain Divider | Installs in minutes with no drilling, best option for renters or temporary setups | Target · IKEA |
| Freestanding Shelving Unit | Divides space while adding built-in storage on both sides | IKEA · Wayfair |
Room Divider Styles for Different Spaces

Different room divider styles serve different needs; what works in a bohemian bedroom won’t suit a modern open-plan living space.
- Macrame and woven dividers work best in bedrooms or reading corners where softness and texture matter more than solid privacy.
- Geometric carved wood screens add visual detail without fully blocking light I’d recommend these for living rooms where the divider needs to feel decorative as much as functional.
- Frosted glass partitions suit home offices or bathroom-adjacent spaces where privacy is the priority but natural light still needs to pass through.
- Fabric tri-fold dividers are the most portable option, easy to reposition and ideal for spaces where the division needs to change regularly.
- Open shelving dividers with trailing plants are one of the most practical choices for studio apartments, dividing the space while adding greenery and storage at the same time.
- Tall arched dividers work well in rooms with high ceilings where a standard-height panel would look undersized and out of proportion.
Final Thoughts
A DIY room divider is one of the simplest ways to reshape a room without permanent construction. The core process stays the same regardless of the type you build: measure carefully, build for stability, and finish in a style that fits the space.
For a first project, I would start with a fabric curtain, clothing-rack divider, or lightweight folding screen. These options are easier to adjust when the dimensions or placement need changing.
Everything after that- the decorating, the personalizing- is the straightforward part.
Frequently Asked Questions
What is the cheapest way to make a DIY room divider?
Repurposing an existing clothing rack, old door, or shutters with fabric attached is usually the cheapest option, since it avoids buying new materials entirely.
How do I keep a freestanding room divider from tipping over?
Add weight to the base, use a wider footprint, or, where possible, anchor it to a wall or floor to prevent tipping.
Can I make a room divider without a premade one?
Yes, safety pins, clips, or premade curtains can attach fabric to a frame or rod without any sewing required.
How tall should a DIY room divider be?
Most dividers are cut to match the room’s ceiling height minus 1 to 2 inches, though shorter versions work well for partial privacy.