


There’s nothing quite like the satisfaction of finishing a DIY project yourself. Whether it’s hanging a gallery wall, putting up a shelf for your craft supplies or building a planter box for the garden, getting it done with your own hands feels great. That feeling doesn’t last long, though, if the shelf starts drooping or the planter falls apart after the first winter.
More often than not, the problem isn’t the design or the materials. It’s the fixings. Screws, bolts, plugs and anchors are easy to treat as an afterthought, but they’re what actually hold a project together. Here are the most common fixing mistakes we see, and some simple ways to avoid them on your next project.
Mistake 1: Using the Wrong Fastener
It’s tempting to grab whatever screws are rattling around in the bottom of the toolbox. The trouble is that fasteners are designed for specific jobs, and a screw that works perfectly in one situation can fail badly in another.
A short, thin wood screw is fine for attaching a small hook or a lightweight frame. It won’t do much for a heavy mirror, a loaded bookshelf or a garden structure that has to cope with wind. For heavier timber to timber connections, such as fixing a pergola beam to a post, building a sturdy raised garden bed or joining thick sleepers, coach screws are a much better choice. Their coarse thread and hex head let you drive them in with a socket or spanner and pull the timbers tightly together, giving you a far stronger joint than standard screws.
Before you start, ask yourself a few quick questions:
- How heavy is the item, and will the load increase over time?
- Is the fixing holding something up, or stopping it from moving sideways?
- Will people lean on, pull or bump into it regularly?
- Does the screw need to reach deep into a second piece of timber?
Mistake 2: Drilling Incorrectly
Drilling seems simple enough, but plenty of projects go wrong at this stage. Using a drill bit that’s too large leaves the fixing with nothing to grip. A bit that’s too small can split timber or make it almost impossible to drive the screw in fully. Drilling at an angle can throw off the alignment of brackets, leaving shelves crooked and putting uneven stress on the fixings.
Always check the packaging or product instructions for the recommended pilot hole size. Mark your holes clearly, keep the drill straight and level, and take your time. In hardwood or treated timber, a pilot hole is essential if you’re using larger screws like coach screws, otherwise the wood can crack along the grain.
Mistake 3: Overlooking the Base Material
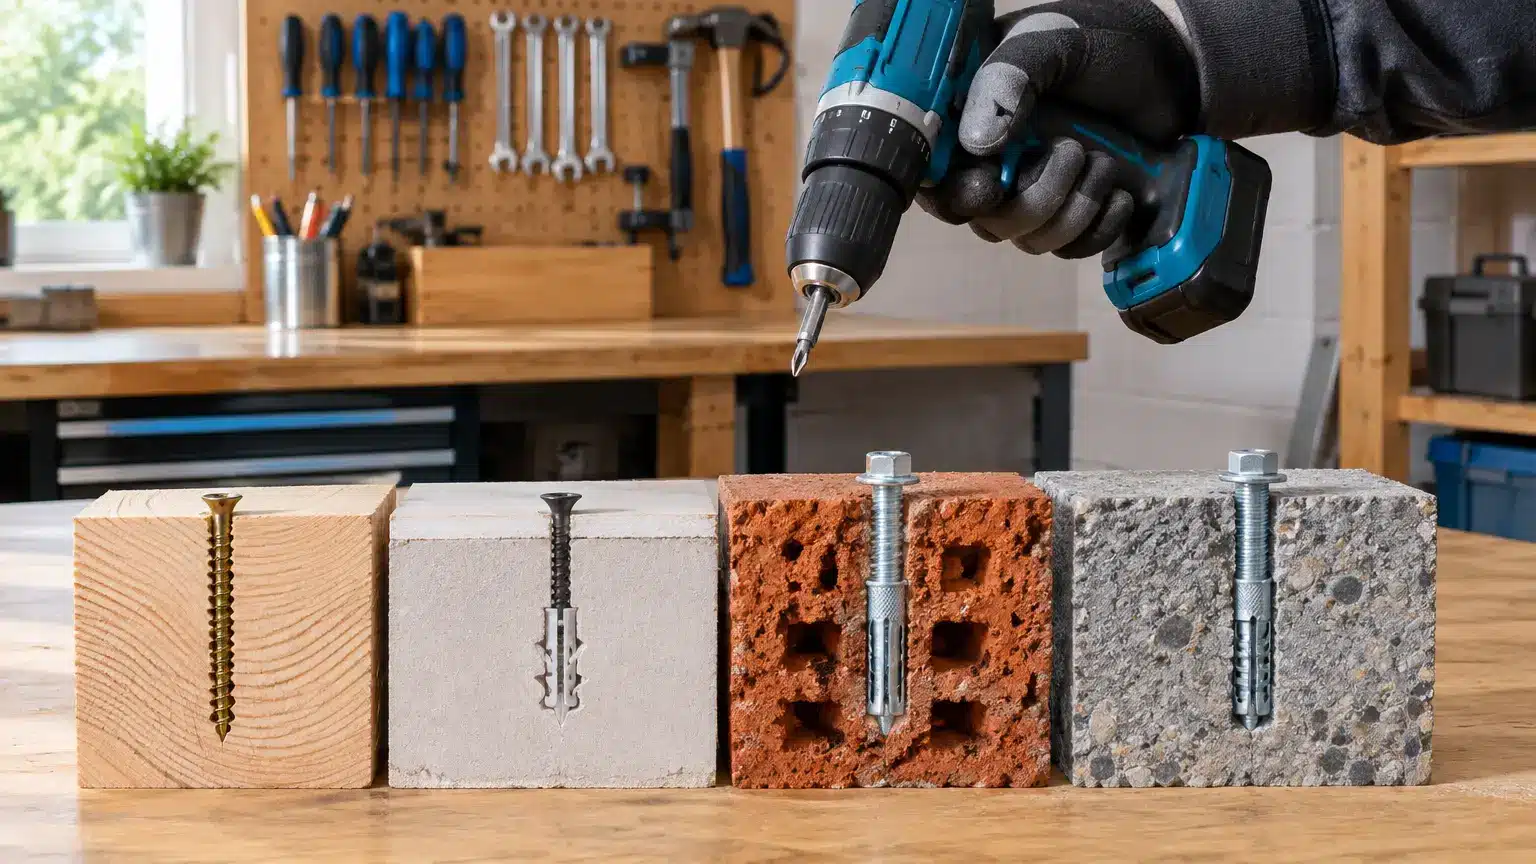
This is one of the most common mistakes, especially for anyone new to DIY. What you’re fixing into matters just as much as what you’re fixing. Timber, plasterboard, brick, block and concrete all behave differently, and each needs the right kind of fixing.
Plasterboard is soft and crumbly, so a screw on its own will often pull straight out. It needs a proper plasterboard anchor, or better still, a fixing into the timber stud behind it. Brick and concrete are the opposite. They’re hard and brittle, and ordinary screws won’t hold in them at all.
When you’re working with concrete or masonry, such as fixing a bracket to a garage wall, securing a post to a patio or mounting a heavy planter hook on a brick wall, concrete screw fasteners are a great option. They cut their own thread into the concrete as you drive them in, so you get a strong, secure hold without needing a separate plug. They’re also easy to remove if you change your mind about placement, which is handy for anyone who likes to rearrange things.
If you’re not sure what’s behind your wall, drill a small test hole first. The colour and texture of the dust will usually tell you whether you’ve hit timber, plasterboard or masonry.
Mistake 4: Forgetting About Outdoor Exposure
Garden projects bring their own challenges. Rain, humidity, sun and salty coastal air can all take a toll on fixings, and standard steel screws can start rusting surprisingly quickly outdoors. Rust doesn’t just look bad. It weakens the fixing, stains the surrounding timber and can eventually cause the whole joint to fail.
Treated timber adds another layer to think about, because the chemicals used to protect it can speed up corrosion in uncoated metal. For anything that lives outside, choose fixings made for the conditions.
Here’s a quick guide to keep in mind:
- Zinc plated fixings are best kept for dry, indoor projects.
- Galvanised fixings suit most general outdoor jobs like fences, planters and garden structures.
- Stainless steel is the best choice near the coast, in wet areas or when working with treated timber.
- Use the same type of metal throughout a connection where possible to avoid corrosion between different metals.
A Few Final Tips
Read the instructions that come with your fixings, even if you’ve done similar jobs before. They’ll tell you the right drill size, how deep to go and how tight to make things. Don’t overtighten, as that can strip threads or crack the material you’re fixing into. And if a project involves a lot of weight or anything safety related, like a balustrade or overhead structure, it’s worth getting advice from a professional.
With the right fixings and a little care, your DIY projects will look great and stay strong for years to come. Happy making!