

Flowers may look difficult to draw at first because of their many petals, curves, and small details.
The good news is that you can simplify those details into basic shapes, making flower drawing much easier for beginners.
If you want to learn how to draw a flower, you do not have to create the whole bloom at once. Instead, you can start with a few light shapes and gradually build the drawing as you become more comfortable with its form.
This beginner-friendly tutorial will help you work through the process at an easy pace. With a pencil, paper, and a little practice, you can create a simple flower while building skills you can use for other drawing ideas for beginners too.
Practice Drawing Flowers From Real References
Following a tutorial helps you learn flower structure, while real references show natural shapes and details. Study the bloom outline, petal arrangement, center size, and stem direction before adding smaller features.
Since flowers vary in structure, references help you create more accurate and diverse drawings. Use simple shapes first, then build details as you understand the flower better.
- Study the flower structure: Observe where petals connect, how they overlap, and how the bloom changes from different angles.
- Compare proportions: Look at the relationship between petal length, flower width, center size, stem height, and leaf placement.
- Practice individual parts: Draw separate pages of petals, leaves, centers, and stems before combining them into a complete flower. Repeating individual petals, leaves, and stems is also a practical way toimprove your drawing skills before attempting more detailed flowers.
- Try different viewpoints: Draw the same flower from the front, side, and an angled view to see how the shape changes.
- Simplify before adding details: Begin with basic forms, then gradually add textures, veins, and smaller features.
- Change the viewing angle: A petal facing you may look broad, while one tilting away can appear shorter and narrower.
Paying attention to scale and proportion can help you compare petal length, flower width, center size, stem height, and leaf placement more accurately.
What You Need to Draw a Flower
You do not need a large collection of art supplies to get started. For beginner flower drawing, a few basic tools are enough to practice shapes, correct mistakes, and add details.
| Tool or Material | Use |
|---|---|
| Drawing paper or sketchbook | Provides a smooth surface for sketching |
| HB or school pencil | Creates light guidelines and darker final lines |
| Eraser | Removes extra lines and corrects mistakes |
| Pencil sharpener | Keeps the pencil precise for small details |
| Fine-tip pen (optional) | Adds a clean, defined final outline |
| Colored pencils or markers (optional) | Adds color after the drawing is complete |
| Real flower or reference photo | Helps with petal shapes, curves, and proportions |
How to Draw a Flower Step by Step
For this drawing, you will create a simple front-facing flower with a round center, rounded petals, a curved stem, and two leaves.
Breaking the flower into basic shapes makes it easier to control proportions and adjust the design before adding final details.
Step 1: Draw the Center of the Flower
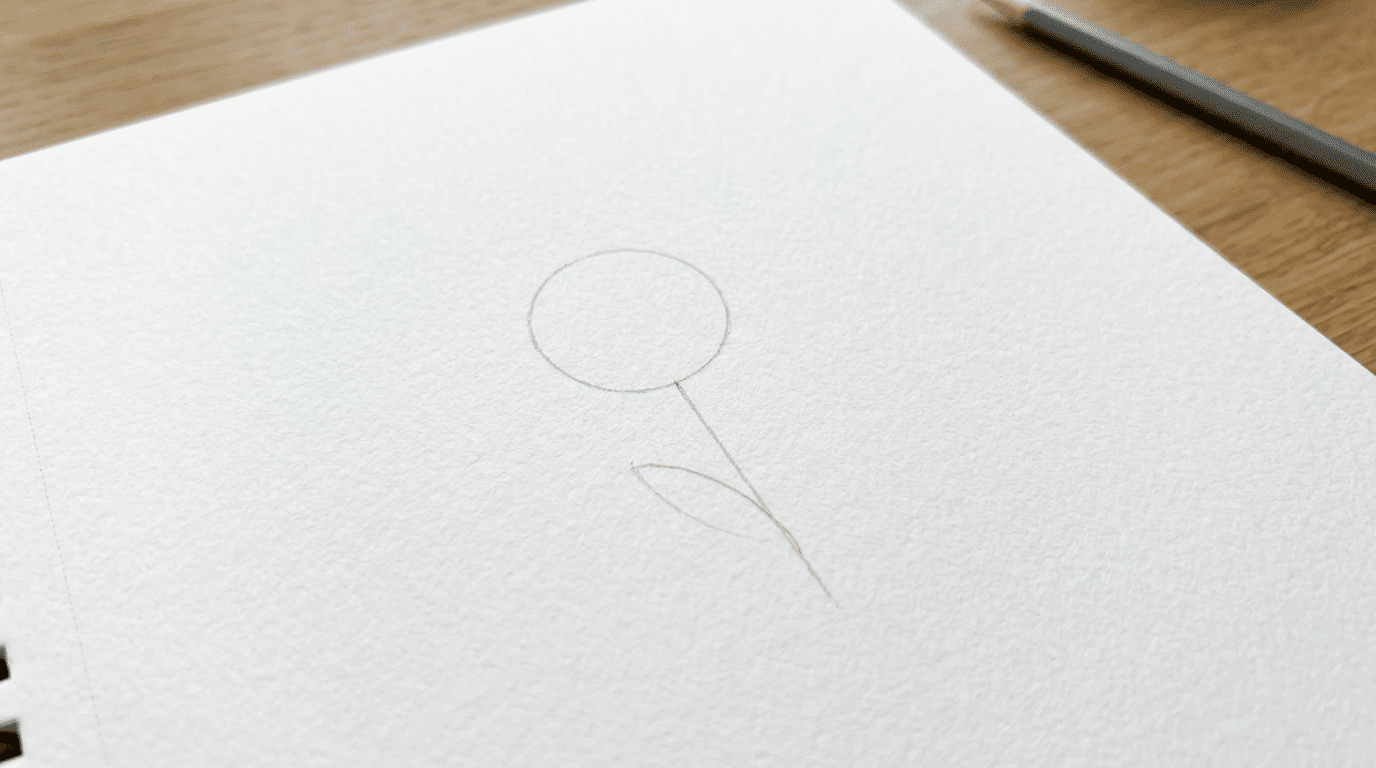
Draw a small, light circle slightly above the middle of your paper. Starting with simple construction shapes helps you control proportions before adding details.
Leaving more space below the bloom also gives you room to think about basic composition before adding the stem and leaves.
A slightly uneven shape can still work well once you add the petals around it.
Step 2: Mark the Size of the Bloom
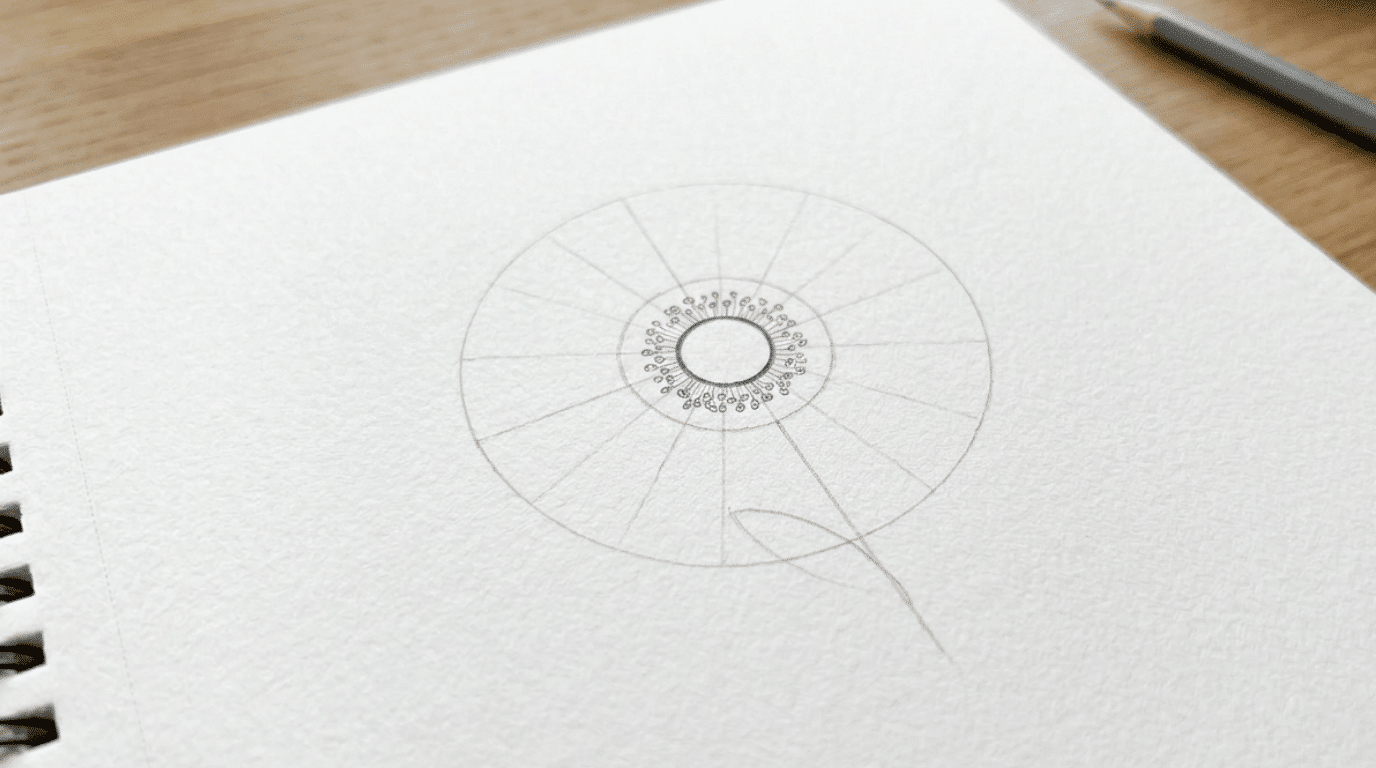
Draw a larger, faint circle around the center circle. Keep the smaller circle near the middle of this larger shape to guide the overall size of the flower.
This outer circle helps control petal length and spacing. It is only a construction guide so that the final petals can sit slightly inside or outside the boundary.
Step 3: Add Guidelines for the Petals
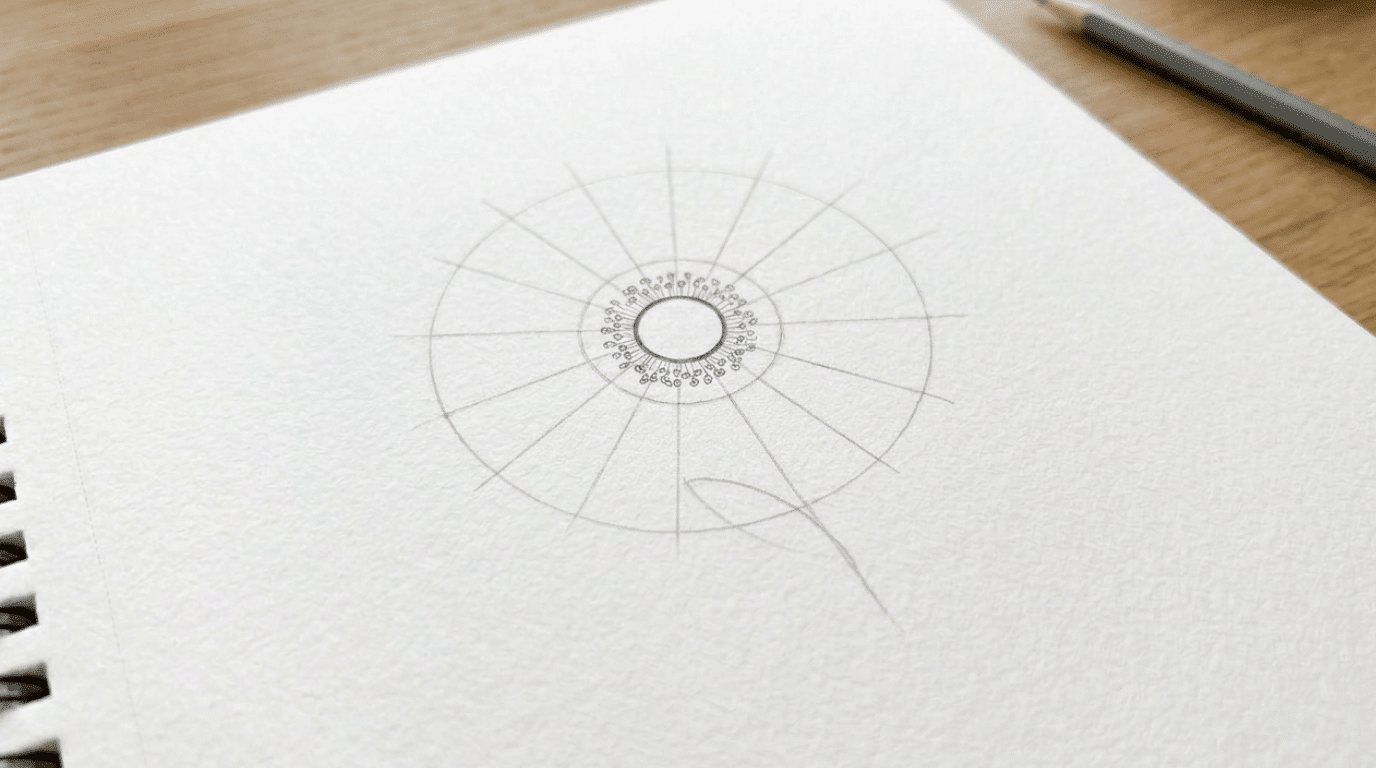
Draw light lines from the center toward the outer circle, similar to spokes on a wheel. Spread them evenly around the center to create a balanced arrangement.
These guidelines indicate the direction of each petal, making it easier to keep the flower symmetrical before adding natural variations.
Step 4: Draw the First Petals
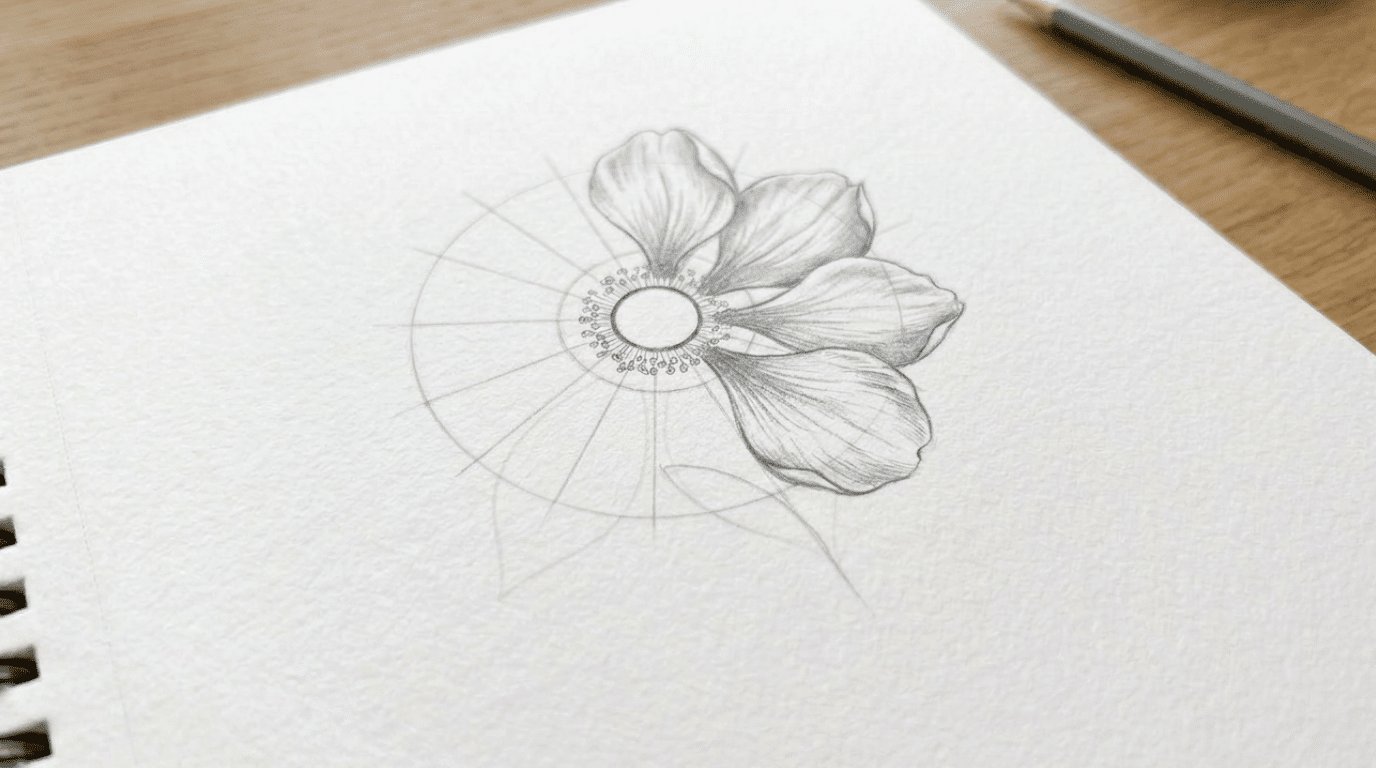
Choose one guideline and draw a rounded petal around it. Start near the edge of the center circle, curve outward toward the guideline, round the tip, and bring the line back toward the center.
Create the first four petals on opposite sides of the flower. Placing these main petals first helps you judge the remaining spaces and keeps the bloom from becoming crowded.
Step 5: Fill In the Remaining Petals
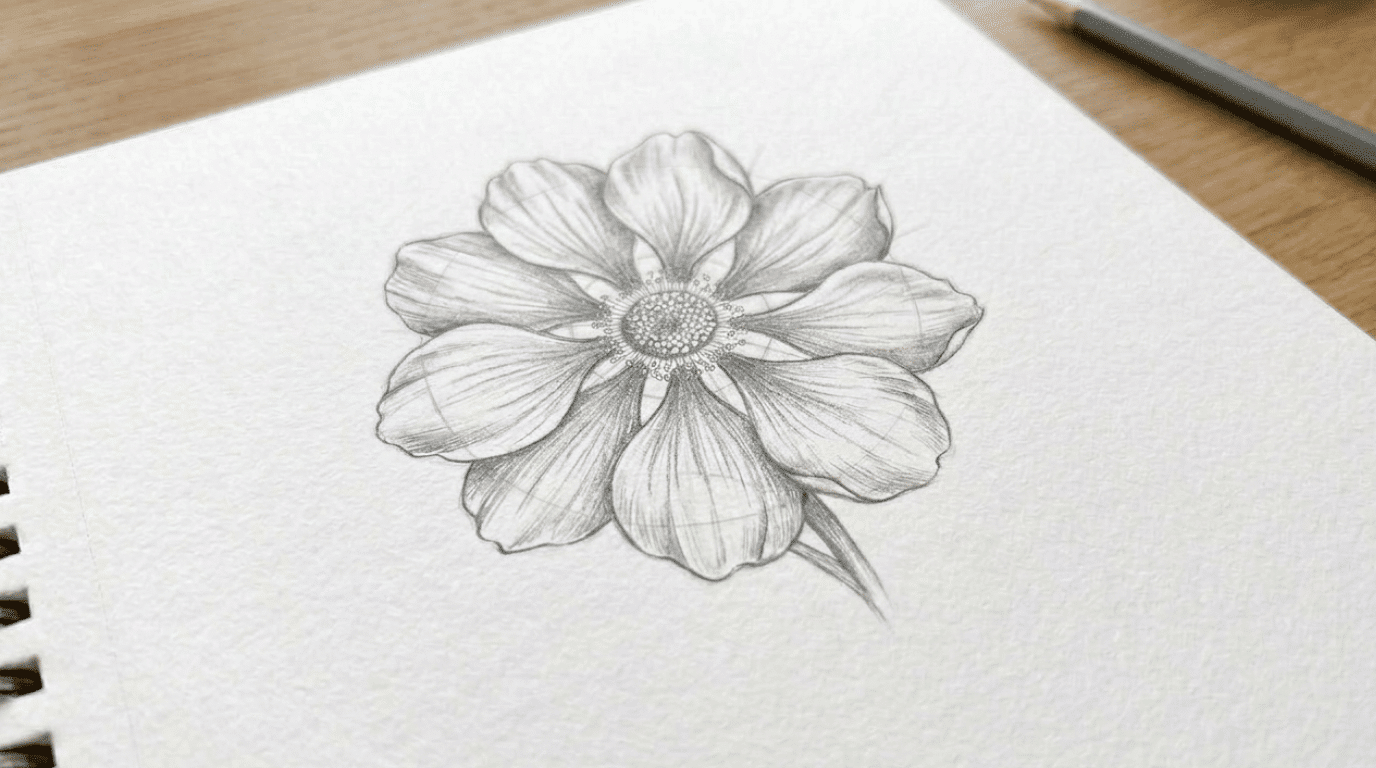
Add petals between the first four, following the remaining guidelines. Keep the overall size similar, but allow small differences in width, length, or curve.
Slight variation prevents the flower from looking stiff while keeping the bloom balanced. Avoid leaving uneven gaps between the petals.
Step 6: Draw the Stem
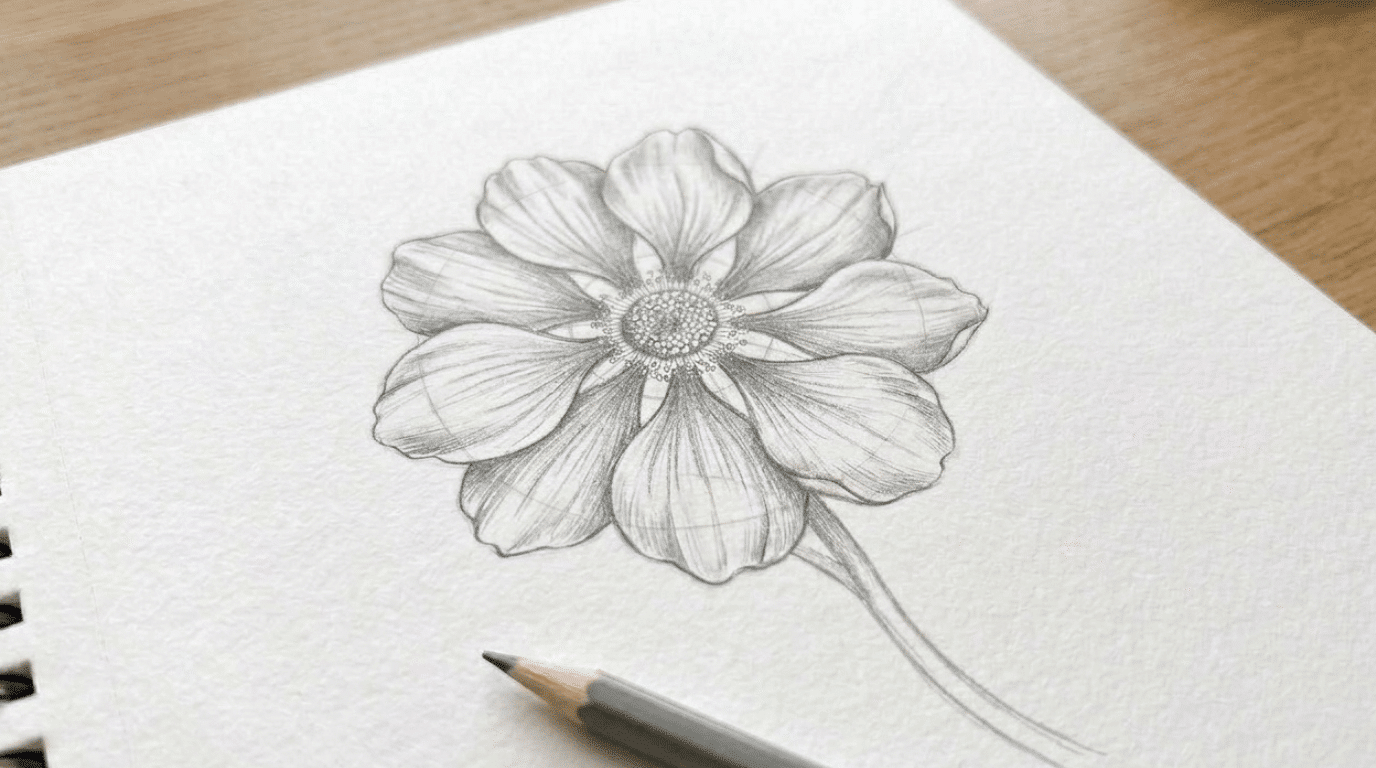
From the bottom of the bloom, draw a slightly curved line downward. Add a second line beside it that follows the same curve to create the width of the stem.
Keep the top of the stem behind the flower rather than connecting it through the center. This creates a more natural flower structure.
Step 7: Add Two Leaves
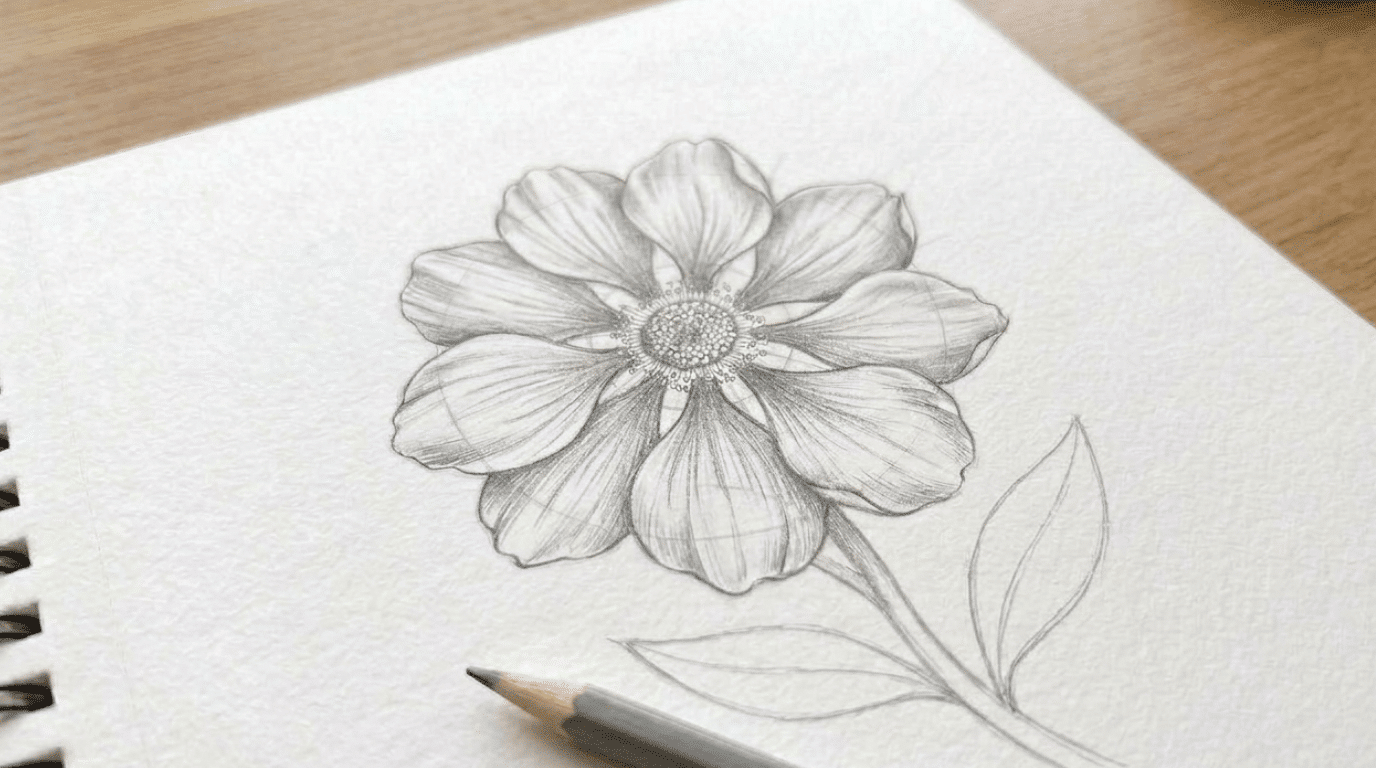
Draw a curved center line extending from the stem to guide the first leaf. Add two curved edges that meet at a pointed tip.
Create the second leaf on the opposite side of the stem. Slightly changing the size or angle can make the leaves look less repetitive.
Step 8: Clean Up the Flower Outline
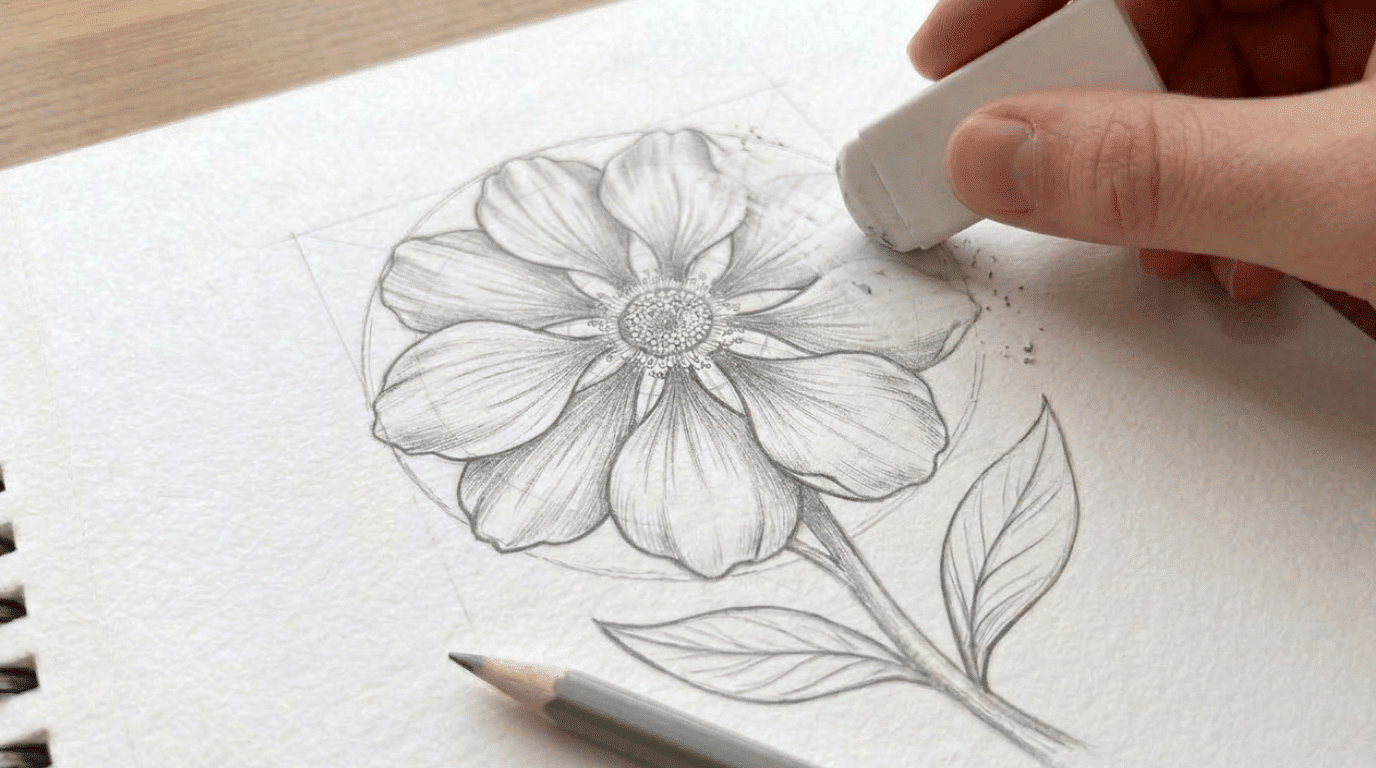
Review the drawing before darkening the final lines. Check that the petals are balanced, the stem connects naturally, and the leaves follow the direction of the plant.
Once the structure looks correct, darken the lines you want to keep, then gently erase the outer circle, guidelines, and any extra marks.
Step 9: Add the Finishing Details
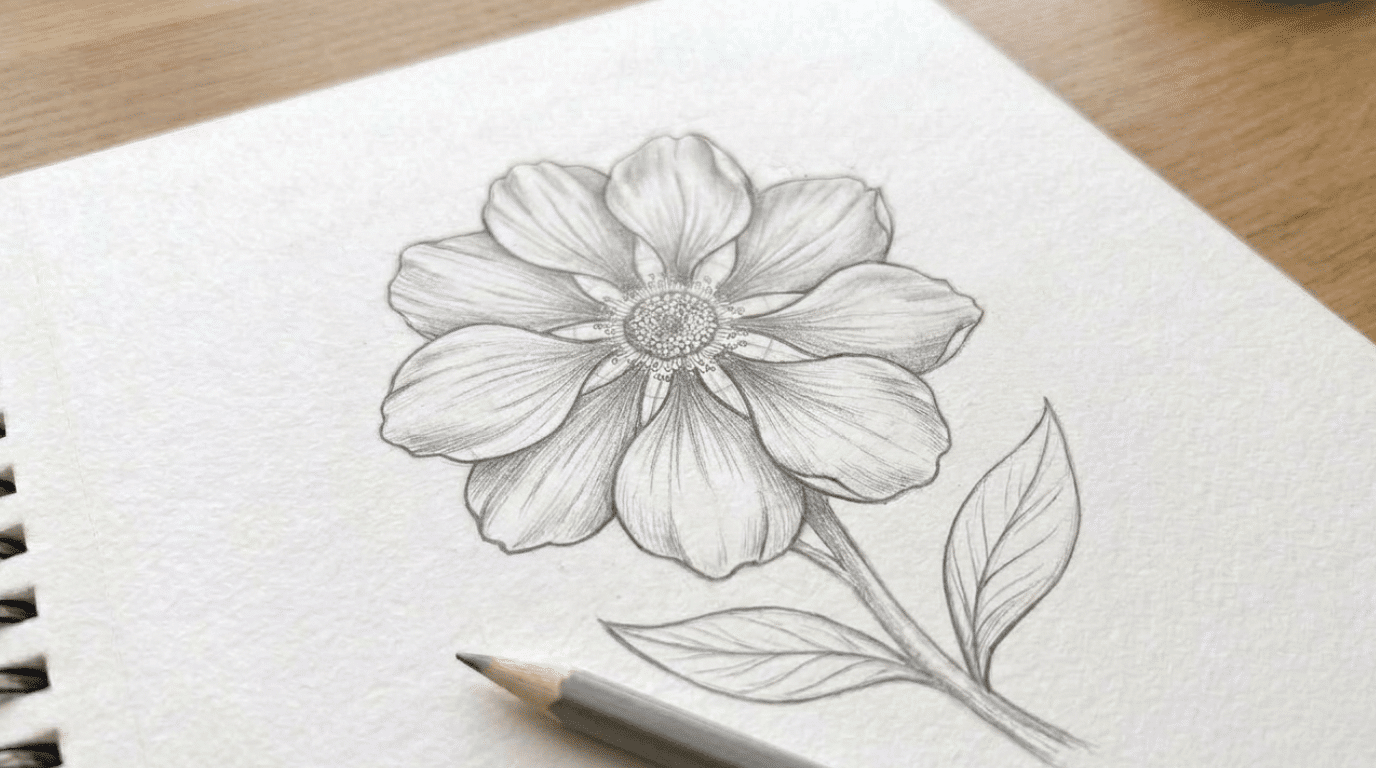
Small dots, short marks, and fine lines are simple ways to add texture to a drawing without making the flower too detailed.
Finish the leaves with a center vein and optional smaller veins. These small details add structure without making a beginner flower drawing feel too complicated.
How to Make Flower Petals Look More Natural?
Flower petals do not need to be identical to look balanced. Small changes in size, curves, direction, and placement can add natural variation without making the drawing difficult.
- Vary the petal size: Make some petals slightly longer, shorter, wider, or narrower than others. Keep the differences subtle so the petals still look like they belong to the same flower.
- Change the petal curves: Avoid repeating the exact same curve for every petal. Give some petals a fuller curve and make others slightly narrower or more tapered.
- Adjust the petal direction: Let a few petals tilt or curve in different directions instead of pointing them all outward at the same angle. This helps break up a perfectly symmetrical pattern.
- Add slight overlaps: Allow the edge of one petal to disappear behind another in a few places. Overlapping petals can help show which petals sit in front and which sit farther back.
- Leave small differences in spacing: Petals do not have to be spaced exactly the same distance apart. Slight changes in the gaps can keep the bloom from looking too uniform.
- Keep construction lines light: Draw your early guidelines with light pencil pressure. Faint lines are easier to adjust or erase as you refine the petal shapes and spacing.
Choose a Coloring Method for Your Flower
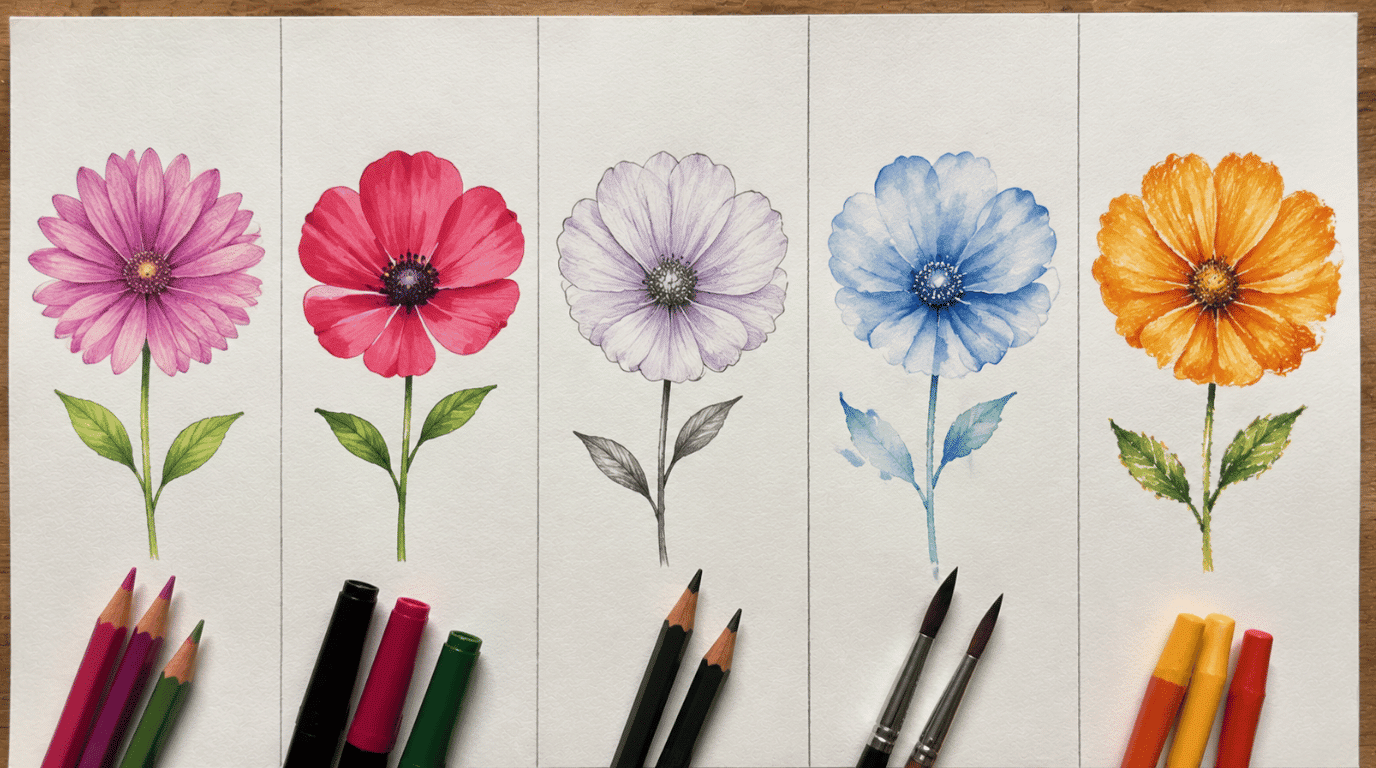
Different coloring tools create different effects. Choose a medium that suits the style you want to achieve, and start with lighter layers before adding stronger colors.
| Medium | Best For | Basic Approach |
|---|---|---|
| Colored pencils | Soft, layered drawings | Build color gradually with light layers |
| Markers | Bright, clean artwork | Add colors carefully because they are harder to erase |
| Crayons | Simple beginner coloring | Use gentle pressure and layer shades |
| Watercolors | Soft blended effects | Apply thin layers and keep lighter areas visible |
| Oil pastels | Bold textured flowers | Create bold color with blended or textured effects |
How to Draw Different Flowers Using Basic Shapes
Once you understand the basic construction method, you can create different flowers by changing the center, petals, and bloom shape.
1. Round Center and Radiating Petals
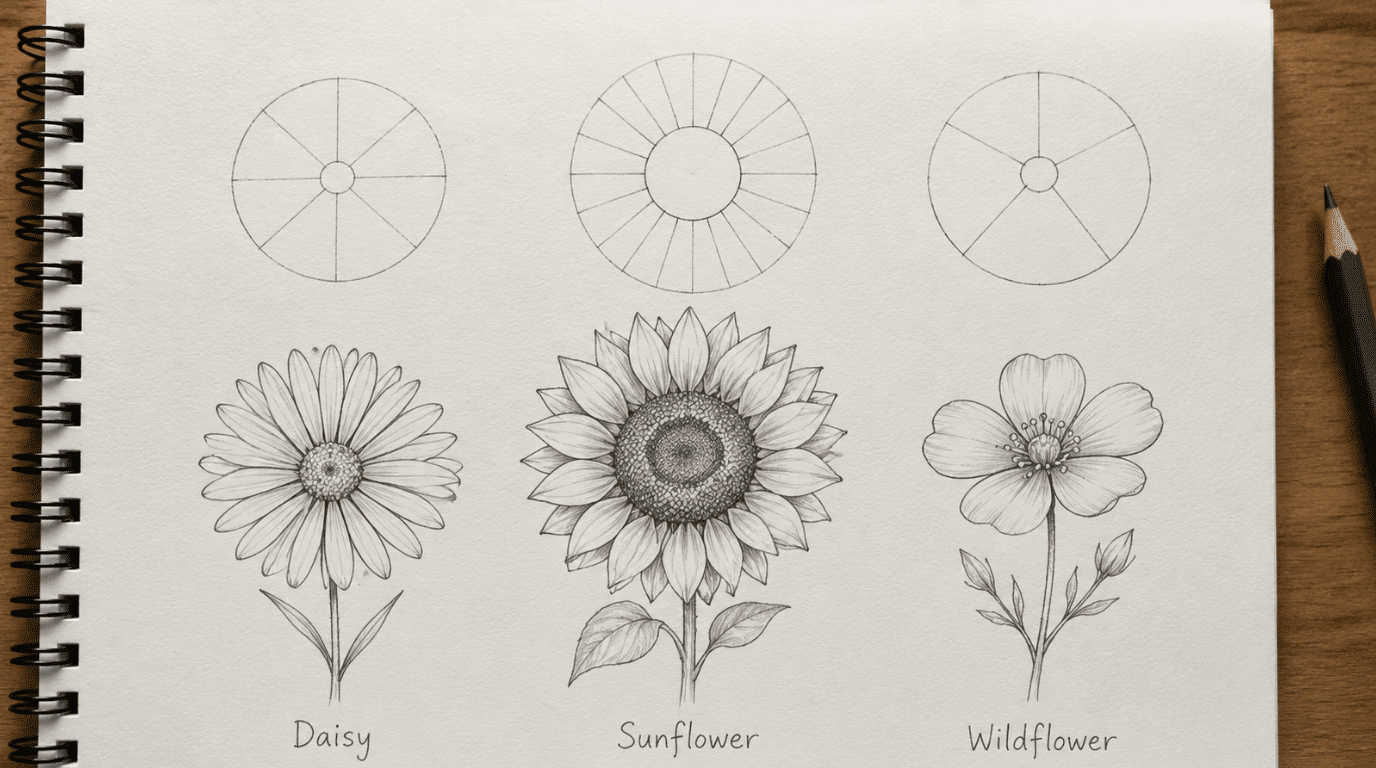
This structure works well for flowers with petals that spread outward from a visible center. A circular base helps create even spacing, while changes in the center size and petal shape make each flower look different.
- Daisy: Use a smaller center with evenly spaced narrow petals around it.
- Sunflower: Create a larger center with several layers of pointed or tapered petals.
- Simple wildflowers: Experiment with fewer petals, shorter shapes, or different petal angles.
2. Cup-Shaped and Oval Blooms
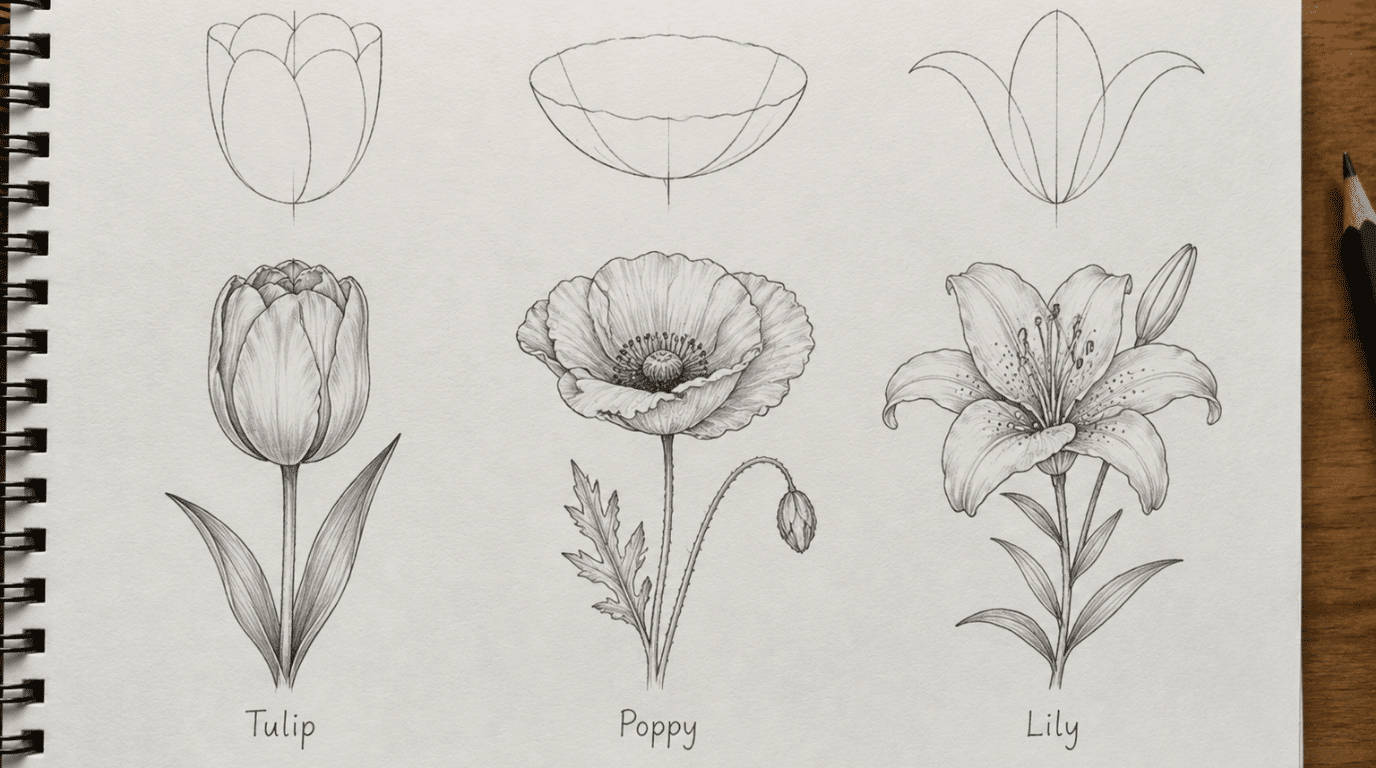
This structure works best for flowers with curved blooms that face upward or remain partially closed. Starting with an oval or cup-like outline helps capture the overall shape before adding visible petal sections.
Instead of building petals around a circular center, focus on the outer silhouette first. Once the main shape is correct, add a few curved lines to show how the petals divide and overlap.
- Tulip: Use a rounded cup shape with a few large curved petal sections.
- Poppy: Create a wider bloom with softer, curved edges.
- Lil: Start with a narrower center and extend longer petals outward.
3. Layered Curves for Fuller Flowers
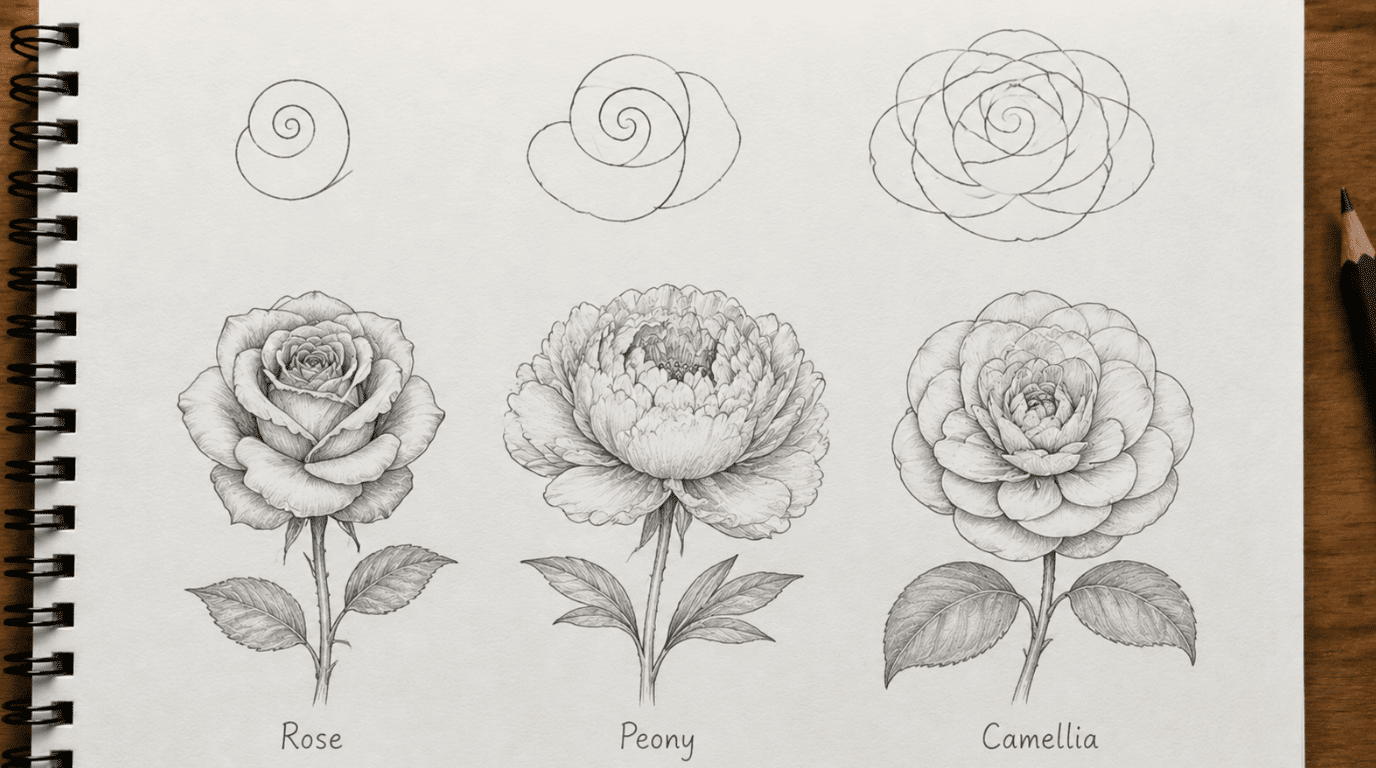
This structure works best for flowers with many overlapping petals because their blooms are formed from curved layers rather than evenly spaced petals. Building from the center outward helps show the folded shape and fullness of these flowers.
Focus on the movement of the petals rather than drawing each one separately. Use curved layers that follow the direction of the bloom to create depth and structure.
- Rose: Start with a small center, then add curved petals that expand outward with slight overlap.
- Peony: Add wider, softer layers around the center to create a rounded bloom with folded petals.
- Camellia: Use smooth overlapping curves around the center to create a compact, layered flower shape.
Common Mistakes and How to Fix Them
Small issues with spacing, proportions, and construction lines can make a flower look uneven or flat. Understanding these common mistakes can help you improve your flower drawings faster.
| Problem | Why It Happens | How to Fix It |
|---|---|---|
| Petals look crowded | Uneven spacing or center size | Add light petal guides before outlining |
| Flower looks too perfect | Petals are too similar | Vary petal size, curves, and angles |
| Flower looks flat | No overlap or shading | Add overlaps and light shadows |
| Center looks oversized | Center circle is too large | Make the center smaller before adding petals |
| Stem looks stiff | Stem lines are too straight | Use a gentle curve for a natural look |
| Leaves look disconnected | Leaf direction was not planned | Draw the leaf vein first |
| Erased lines remain visible | Initial marks were too dark | Use lighter construction lines |
Conclusion
Learning how to draw a flower becomes easier when you focus on simple shapes before adding details.
Start by building the basic structure, then experiment with different petal arrangements, flower types, and references to improve your skills. For beginners learning to draw flowers, practice matters.
Practice matters more than creating a perfect first sketch. Each drawing helps you better understand shapes, proportions, and details, so keep exploring different flowers and techniques as you build confidence.
Frequently Asked Questions
What Should I Draw First When Learning Flowers?
Start with the largest shapes first, such as the bloom outline and center, before adding smaller details.
What Is the Easiest Flower to Draw?
A daisy-style flower is one of the easiest flowers to draw because it uses a simple center with repeated petals arranged around it.
Can I Draw Flowers Without a Reference?
Yes, but references help you understand natural proportions, petal placement, and flower structure more accurately.
How Often Should Beginners Practice Flower Drawing?
Regular short practice sessions help improve control, shape recognition, and confidence over time.