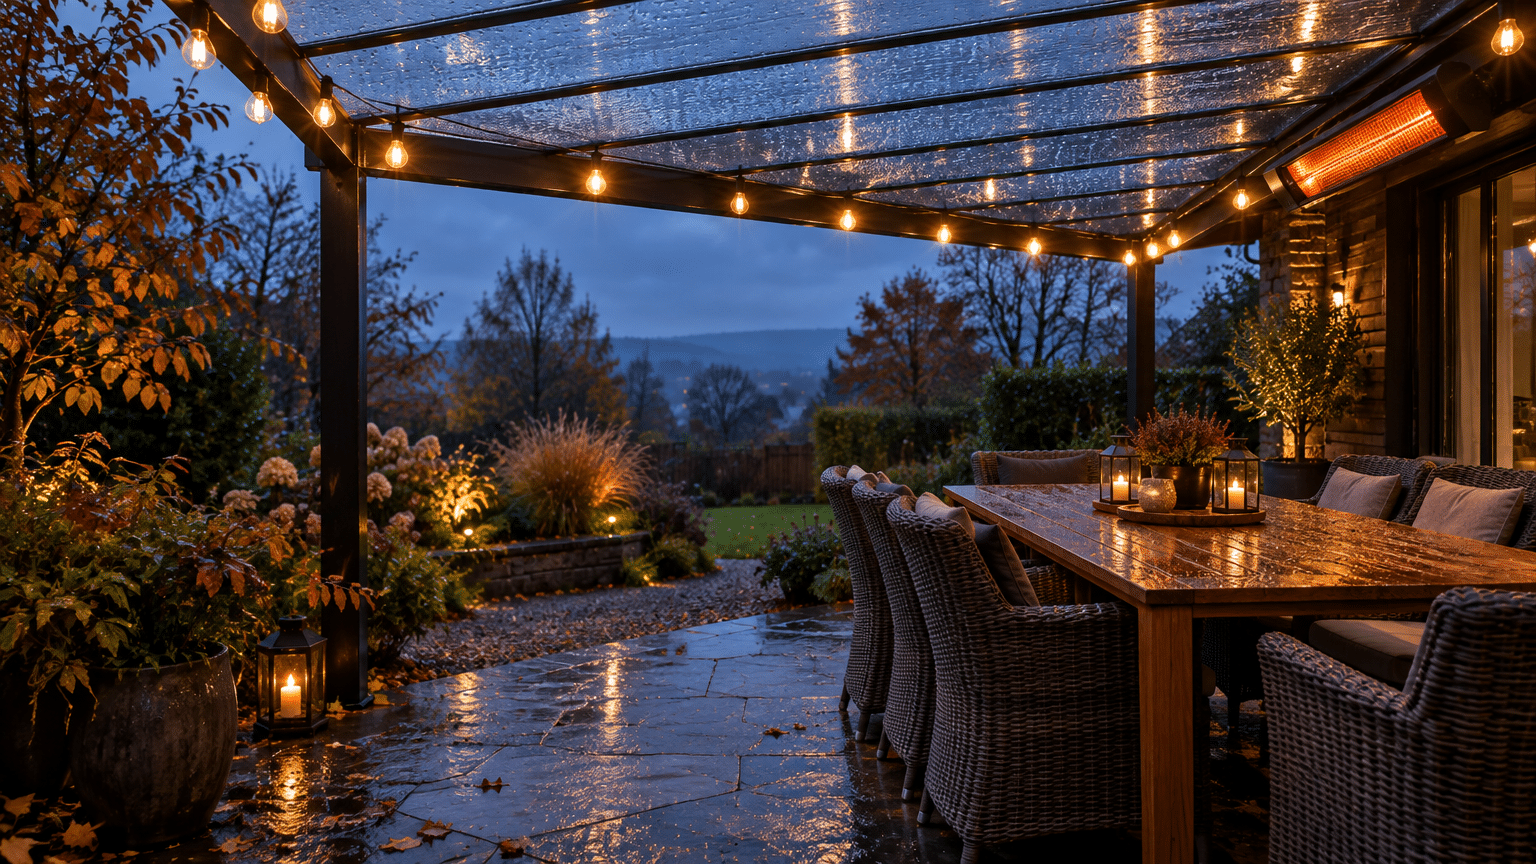

I never expected a bar cart to become my favorite corner of the room, but here we are. You do not need a huge budget or much space to make one feel special, just creativity and thoughtful choices.
A bar cart is a small, movable piece of furniture designed to hold drinks, glassware, and serving supplies. Most have two or three open shelves, and many include wheels, handles, bottle holders, or glass racks for serving.
It does not have to be all about alcohol either. You can use it for coffee supplies, sparkling water, snacks, or party essentials.
Once the basics are in place, a few clever bar cart ideas can easily completely change how your setup looks and works.
Things to Keep in Mind Before Buying a Bar Cart
A bar cart can look like a simple purchase, but the right choice should work naturally with your home and everyday routine. A little planning can prevent an awkward fit later.
- Measure the floor space you have available
- Check the cart’s height against nearby furniture
- Look at the gap between shelves before buying
- Check the weight limit listed by the maker
- Decide if you need wheels at all
- Look for wheel locks on rolling models
- Consider how easy the surface is to wipe down
- Make sure your tallest bottles will fit
- Check that the base feels steady, not wobbly
- Leave enough open floor space around it for movement
Bar Cart Essentials You Need
Putting together a bar cart is much easier for me when everything needed is ready before I begin. It also keeps the setup process organized from start to finish.
| Tool or Material | Category | Use |
|---|---|---|
| Bar cart | Furniture | Holds drinks and serving supplies |
| Serving tray | Organizer | Keeps bottles or tools grouped together |
| Cocktail shaker | Bar tool | Mixes chilled cocktails |
| Jigger | Bar tool | Measures drink ingredients |
| Corkscrew | Bar tool | Opens wine bottles |
| Bottle opener | Bar tool | Opens capped bottles |
| Ice bucket | Serving | Holds ice during serving |
| Ice tongs | Serving | Moves ice without using hands |
| Glassware | Drinkware | Holds drinks |
| Napkins | Cleanup | Handles spills |
| Coasters | Cleanup | Protects nearby surfaces |
| Small bowl | Serving | Holds fruit or packaged snacks |
| Pitcher | Serving | Serves water, juice, or mixed drinks |
| Shelf liner | Organizer | Helps bottles stay in place |
| Cleaning cloth | Cleanup | Wipes spills and wet surfaces |
Bar Cart Styling Ideas that Add Character to Your Home
A bar cart can become a fun focal point rather than simply filling an unused corner. Small choices can give it plenty of personality.
1. Add a Vase of Fresh Flowers
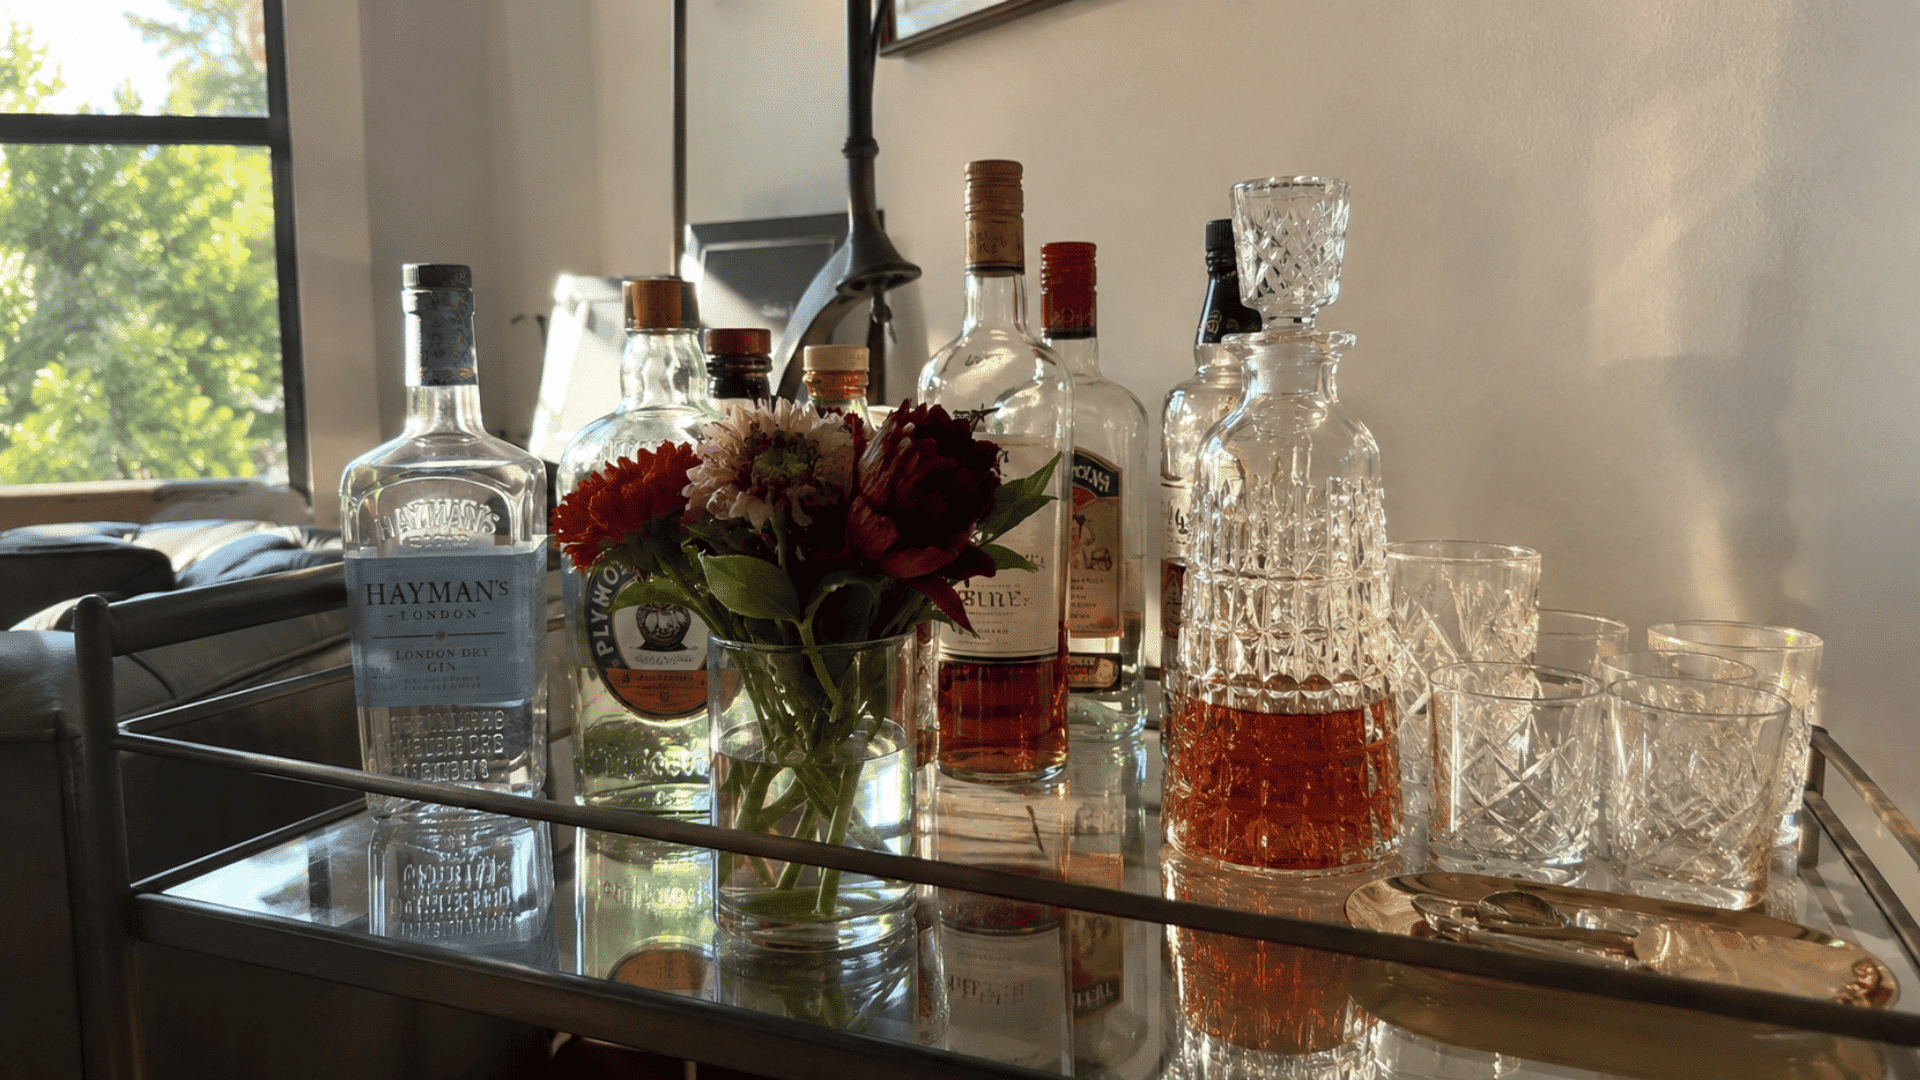
Pick this idea when your bar cart needs a lively detail without making the setup feel overdone. It works especially well when the surrounding space feels a little plain.
For this look, bring together a few simple elements:
- Right-sized vase: Choose one that leaves enough usable shelf space.
- Coordinated blooms: Pick shades that work with colors already in the room.
- Fresh upkeep: Replace the water regularly so stems stay presentable.
- Easy alternative: Use faux stems when you want something maintenance-free.
2. Hang a Mirror or Wall Art Above the Cart
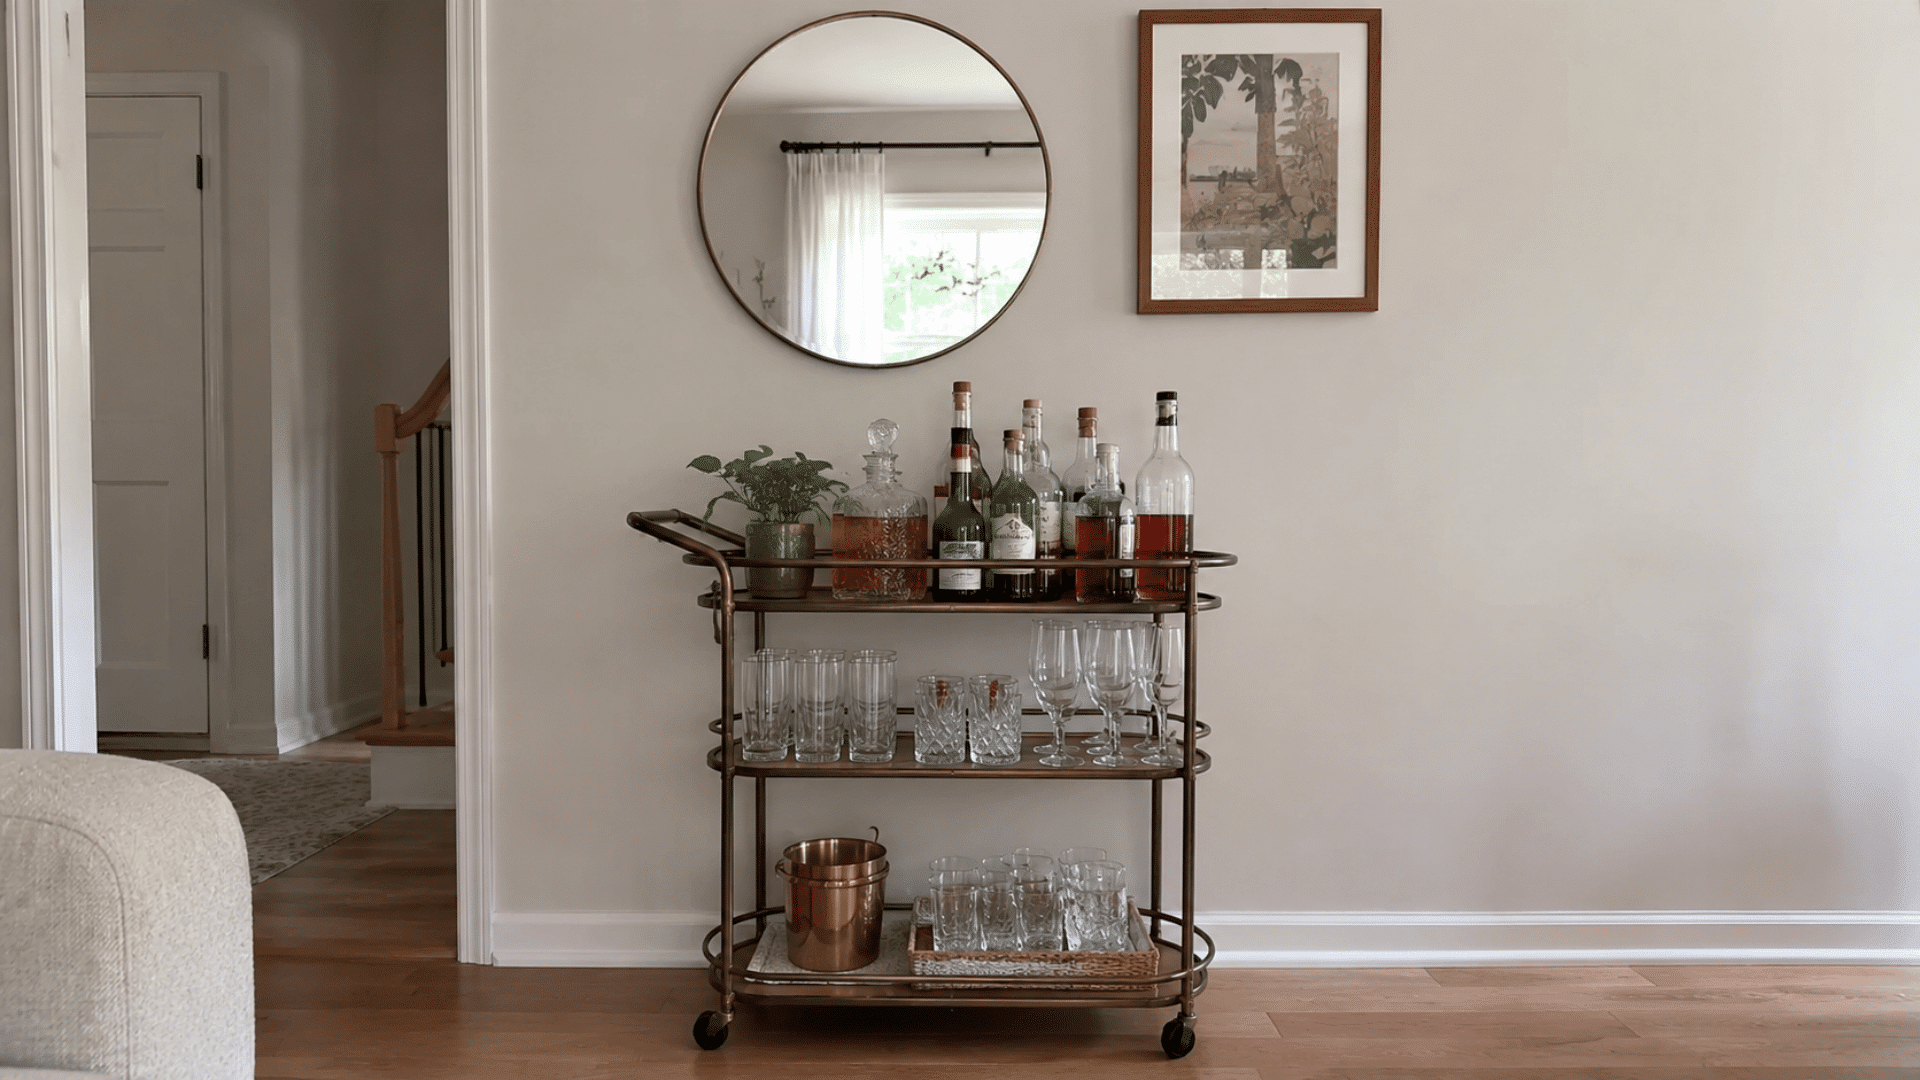
Choose this approach when the area above your bar cart feels unfinished. It gives the entire setup a stronger presence and helps connect it with the surrounding room.
- Mirror: Use it to reflect light around the area.
- Framed artwork: Select a print that works with your existing color scheme.
- Secure hardware: Make sure the piece is properly attached to the wall.
- Enough clearance: Leave room between the display and anything tall underneath.
3. Use a Tray to Group Small Accessories
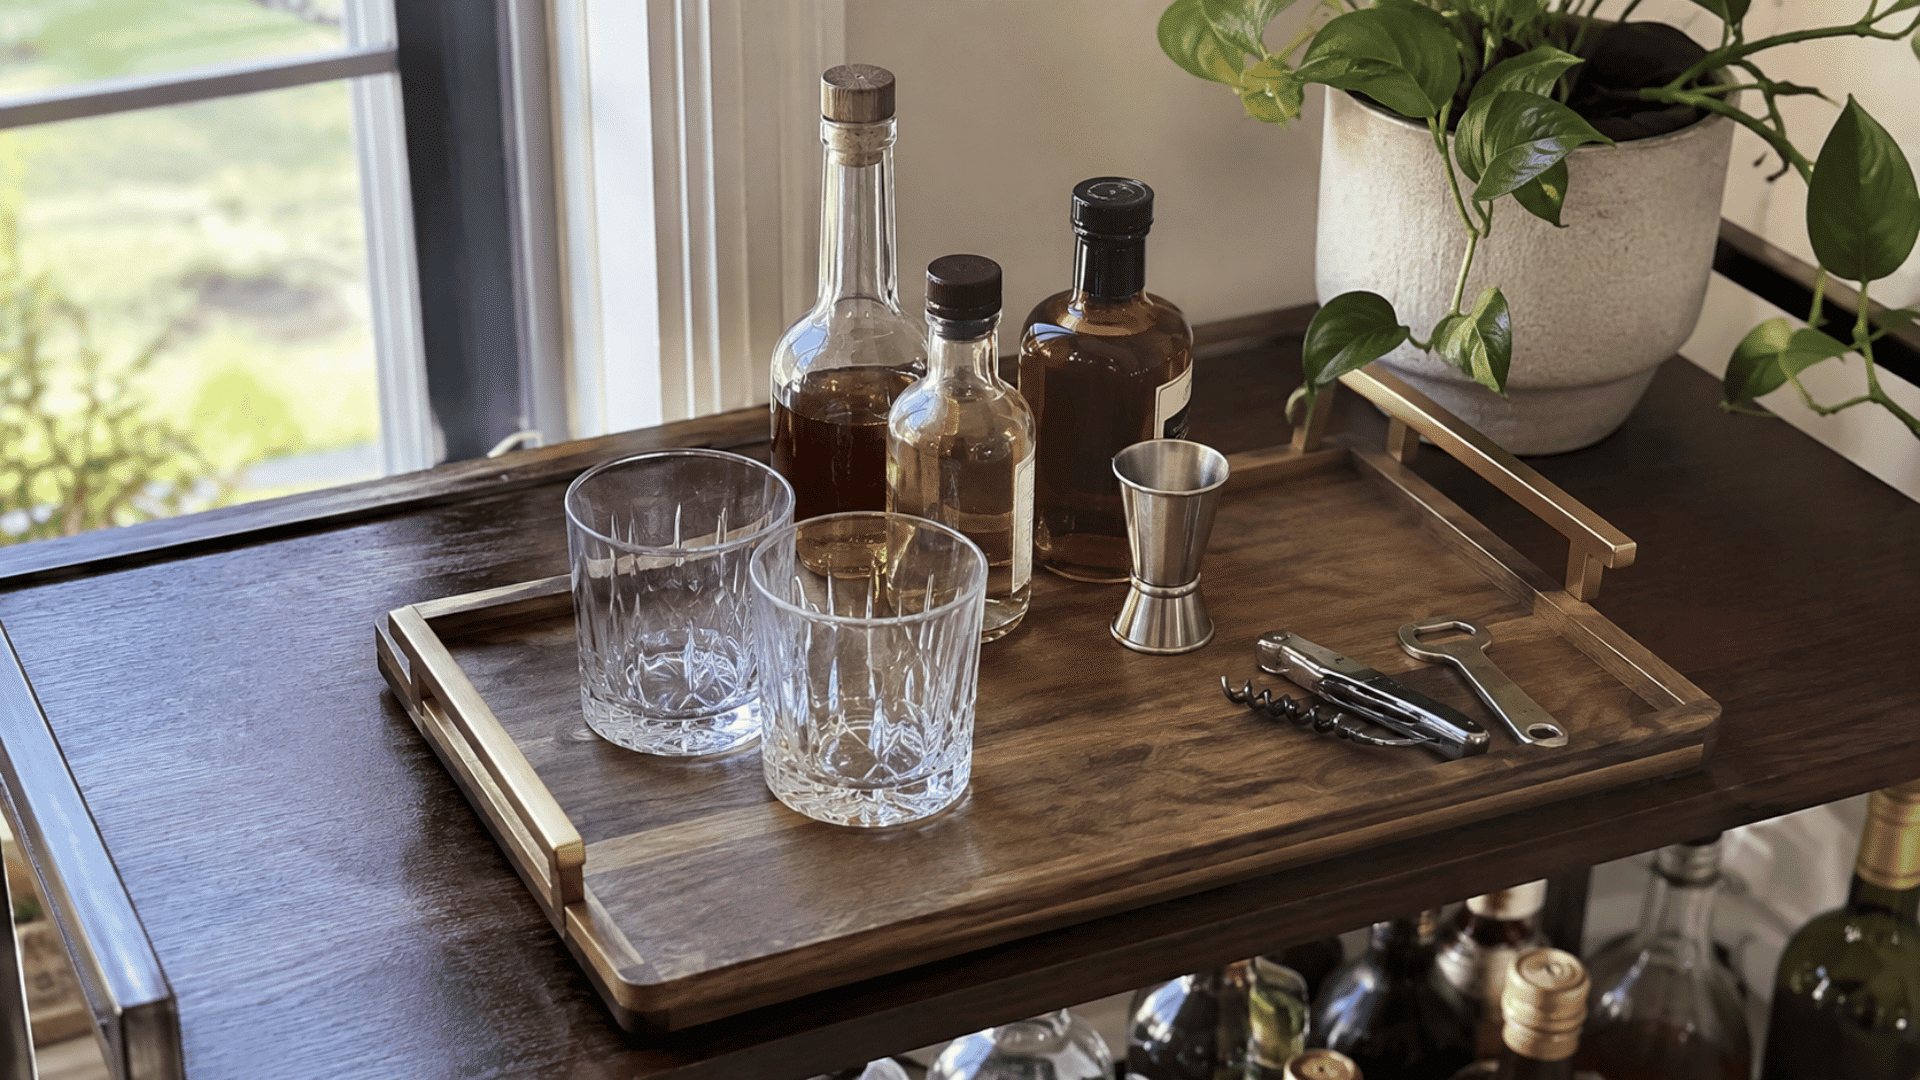
This idea works well if your bar cart tends to look busy once you add several essentials. A cleaner visual arrangement can make everyday use more convenient.
- Decorative tray: Choose metal, wood, or mirrored material.
- Grouped essentials: Keep similar supplies together instead of scattering them.
- Accessible placement: Position frequently used pieces within easy reach.
- Regular cleaning: Wipe the surface after serving drinks.
4. String Lights for Soft Ambiance
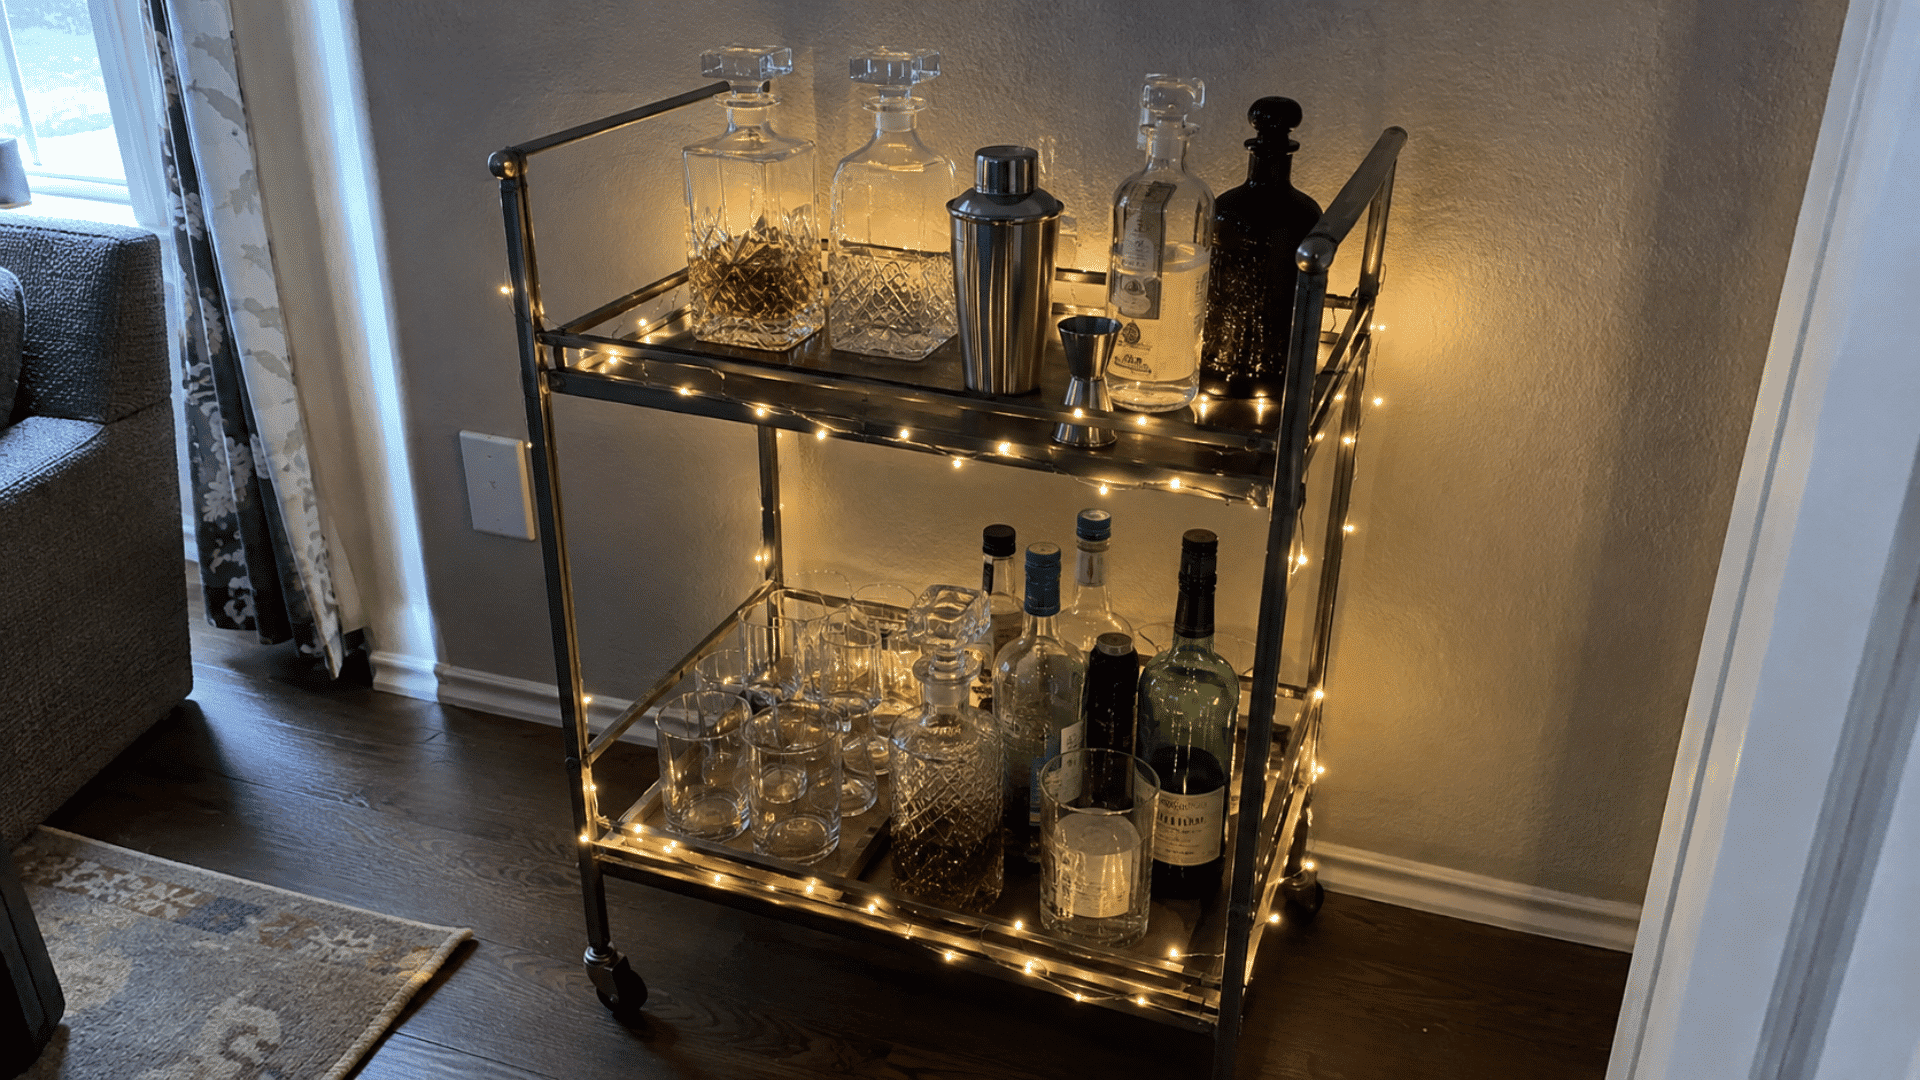
Pick this idea when you want the bar cart to feel more inviting during nighttime gatherings. It adds visual interest after dark without requiring a major styling change.
- Light source: Choose a battery-powered or plug-in strand.
- Loose placement: Run it gently along the shelf edges.
- Evening use: Switch it on when entertaining after sunset.
- Safe positioning: Keep the strand away from heat and flammable objects.
5. Stack a Few Cocktail Recipe Books
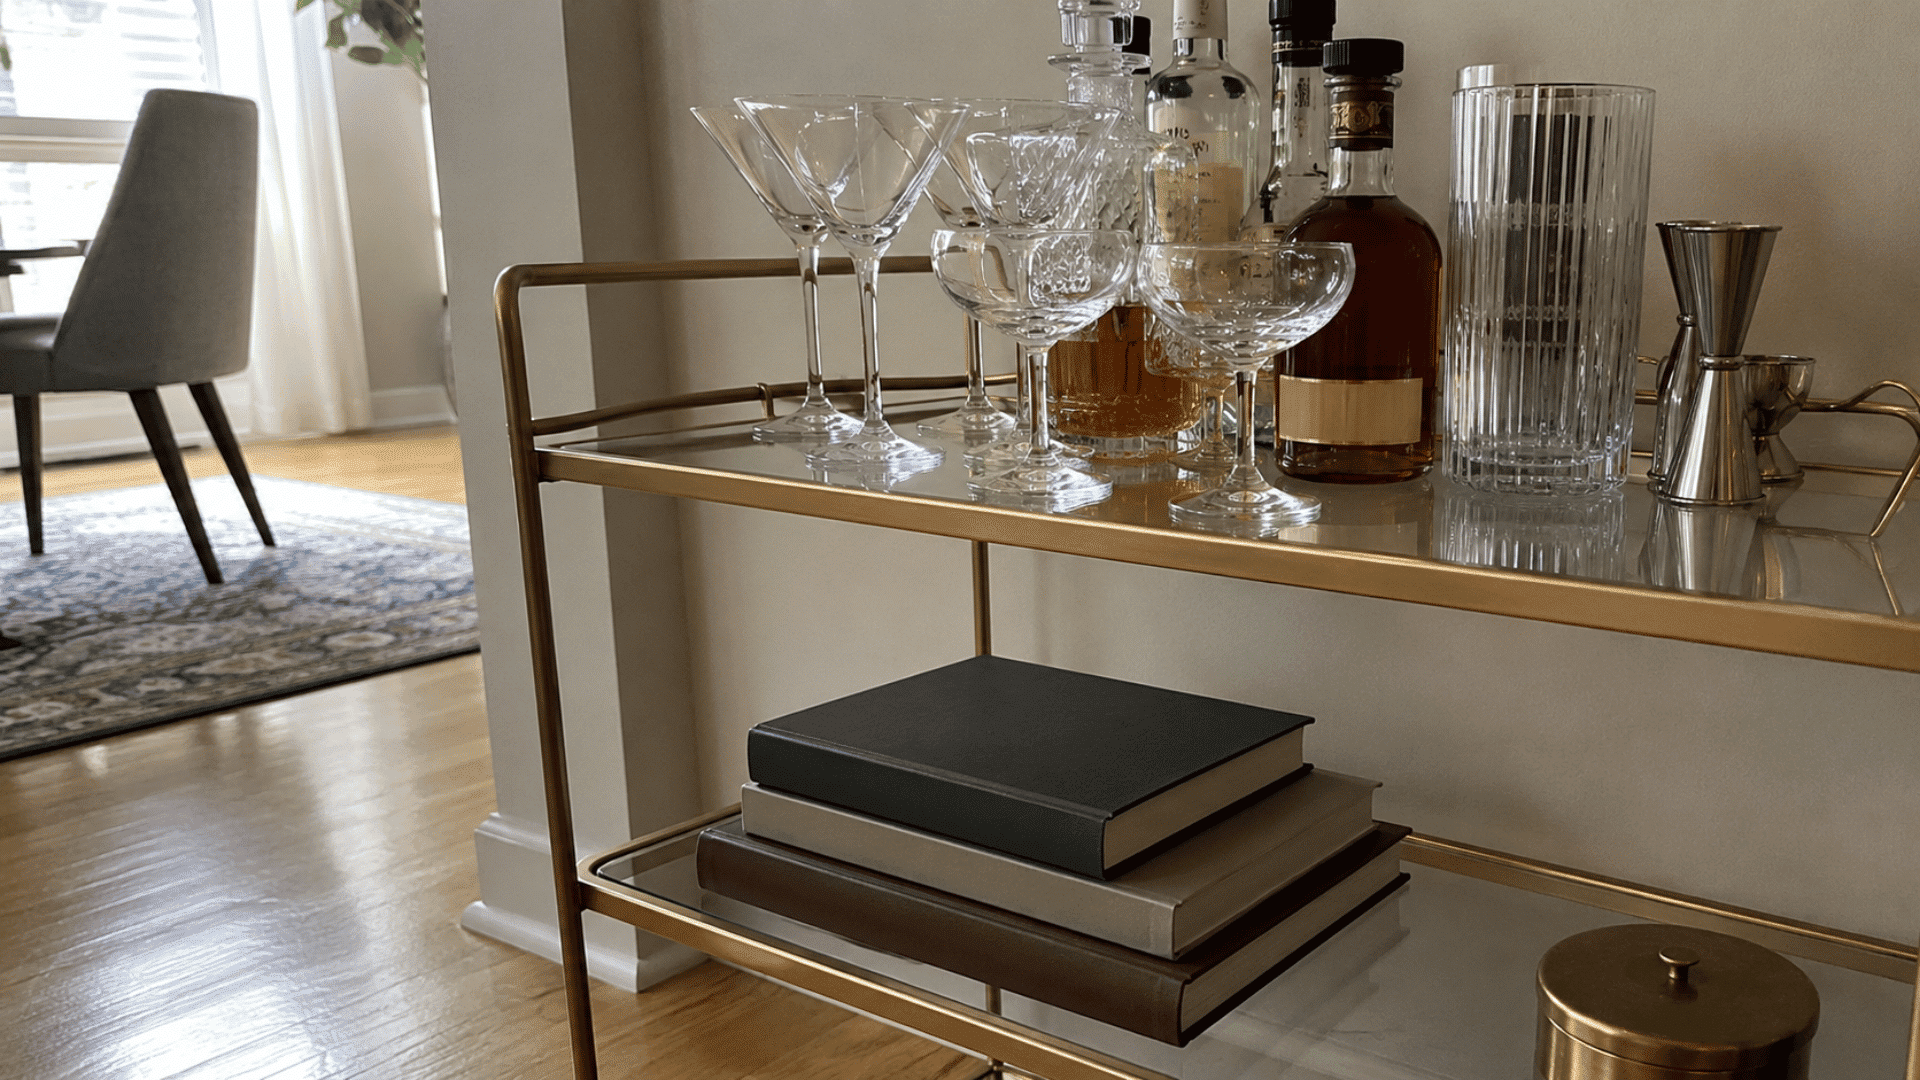
This option suits a cart that needs an interesting decorative feature with a practical purpose. It can also give guests something enjoyable to flip through while drinks are being prepared.
- Small collection: Use two or three hardcover cocktail books.
- Stable arrangement: Place the largest title at the bottom.
- Lower position: Keep the stack where it is less likely to fall.
- Occasional updates: Change titles to suit seasons or special occasions.
6. Bring in Metallic Accents
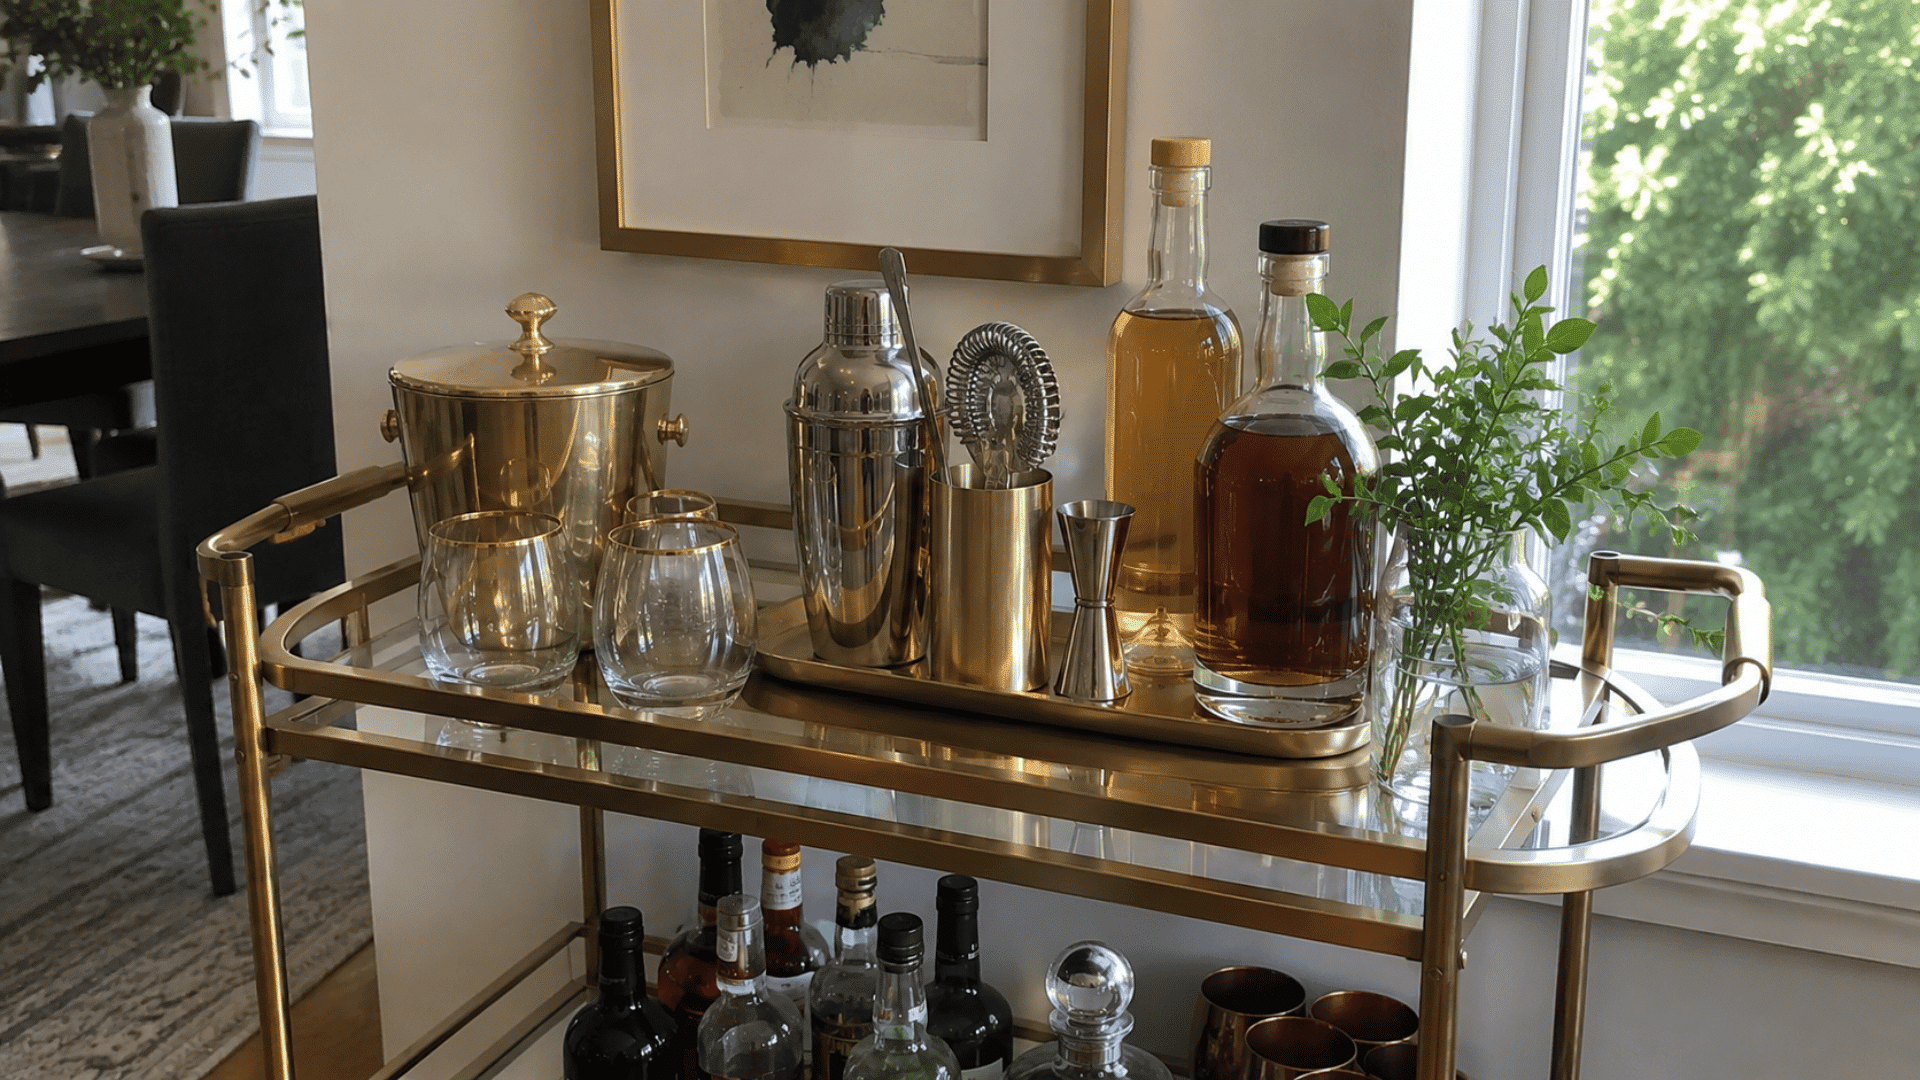
I like this idea when a bar cart feels a little too plain but does not need a complete restyle. A little shine can make the arrangement feel more polished.
Work a few of these pieces into the display:
- Brass accessory: Add a tray or ice bucket.
- Detailed glassware: Try glasses with subtle gold rims.
- Bar tools: Introduce a chrome-finished shaker, strainer, or jigger.
- Limited shine: Stick to a couple of metallic pieces rather than covering every surface.
7. Add a Tall Vase or Sculptural Object for Height
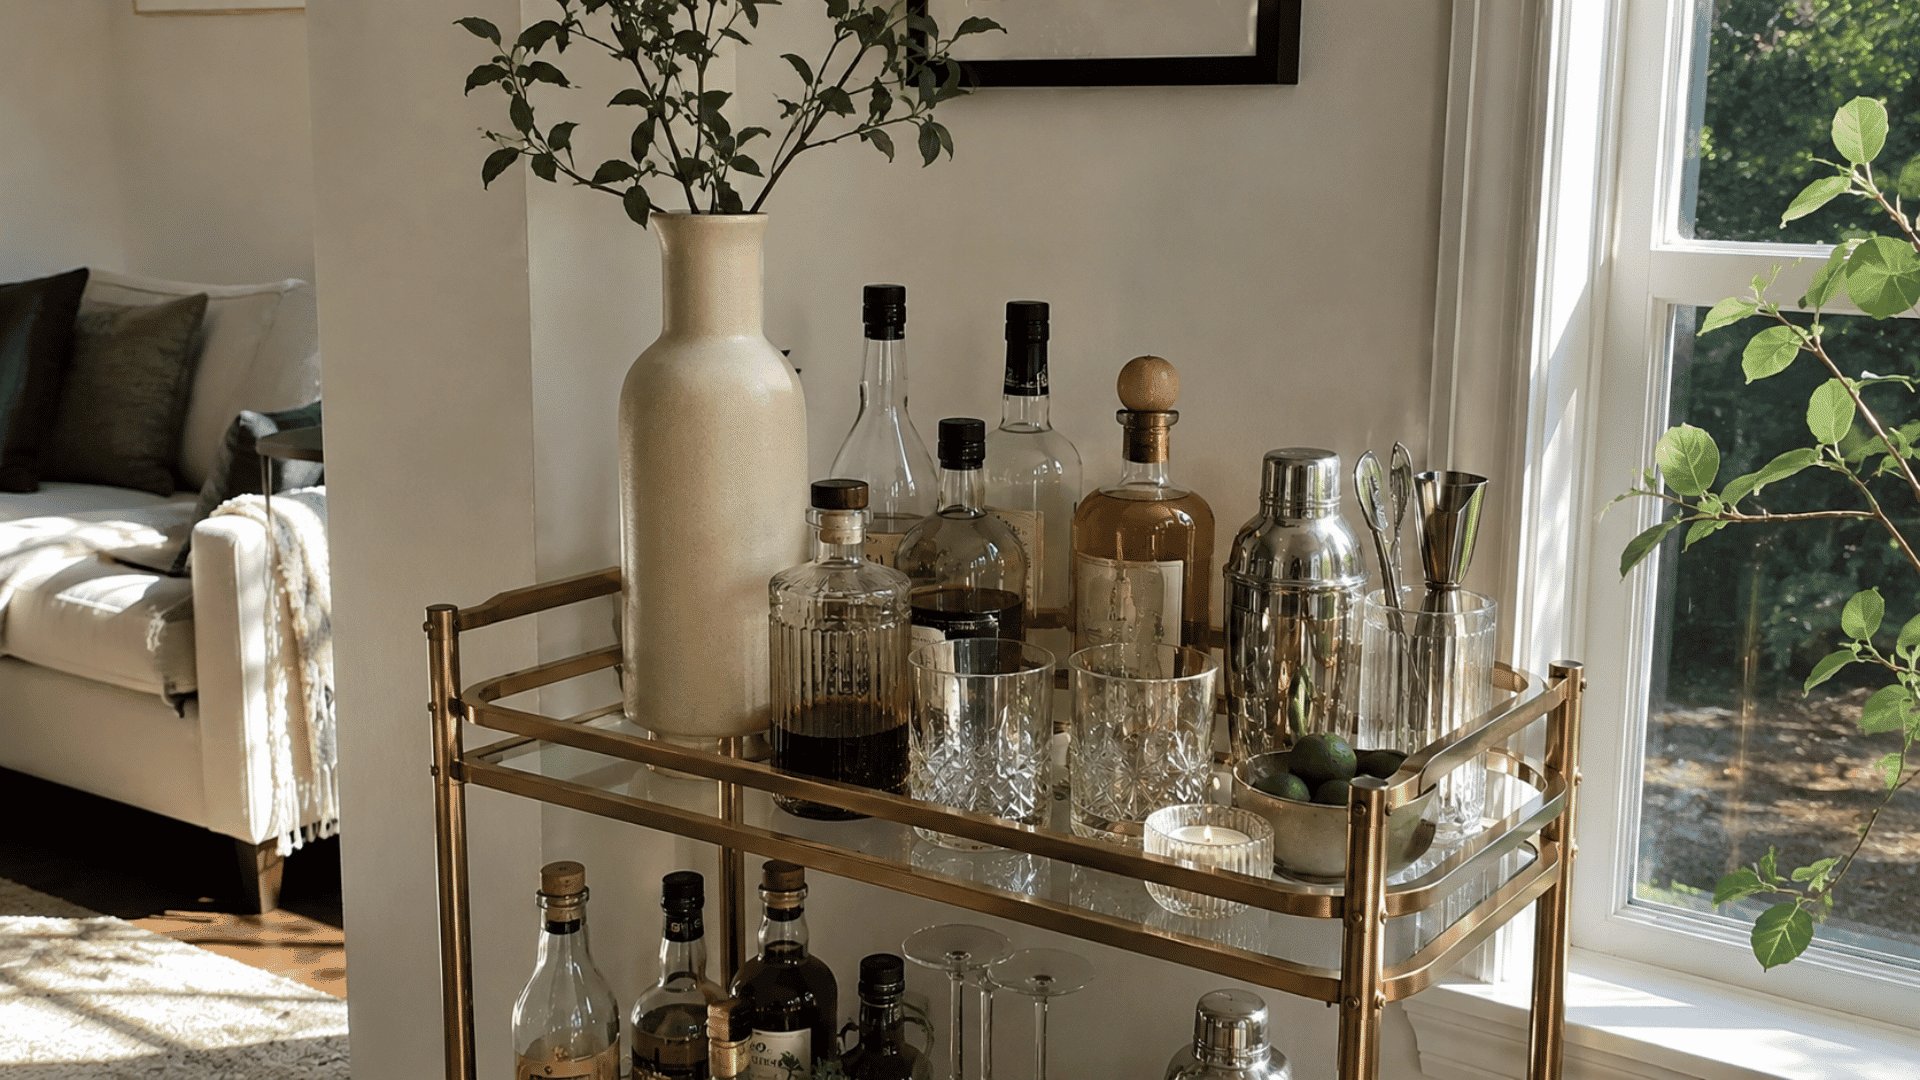
This is a smart choice when everything on your cart sits at roughly the same level. Changing the visual scale makes the arrangement feel more considered and less uniform.
- Tall vase: Use an empty decorative vessel or fill it as desired.
- Sculptural piece: Add one compact decorative object as an alternative.
- Back placement: Position taller pieces behind frequently used supplies.
- Stable base: Check that the object cannot tip easily.
8. Set Out Matching Coasters and Napkins
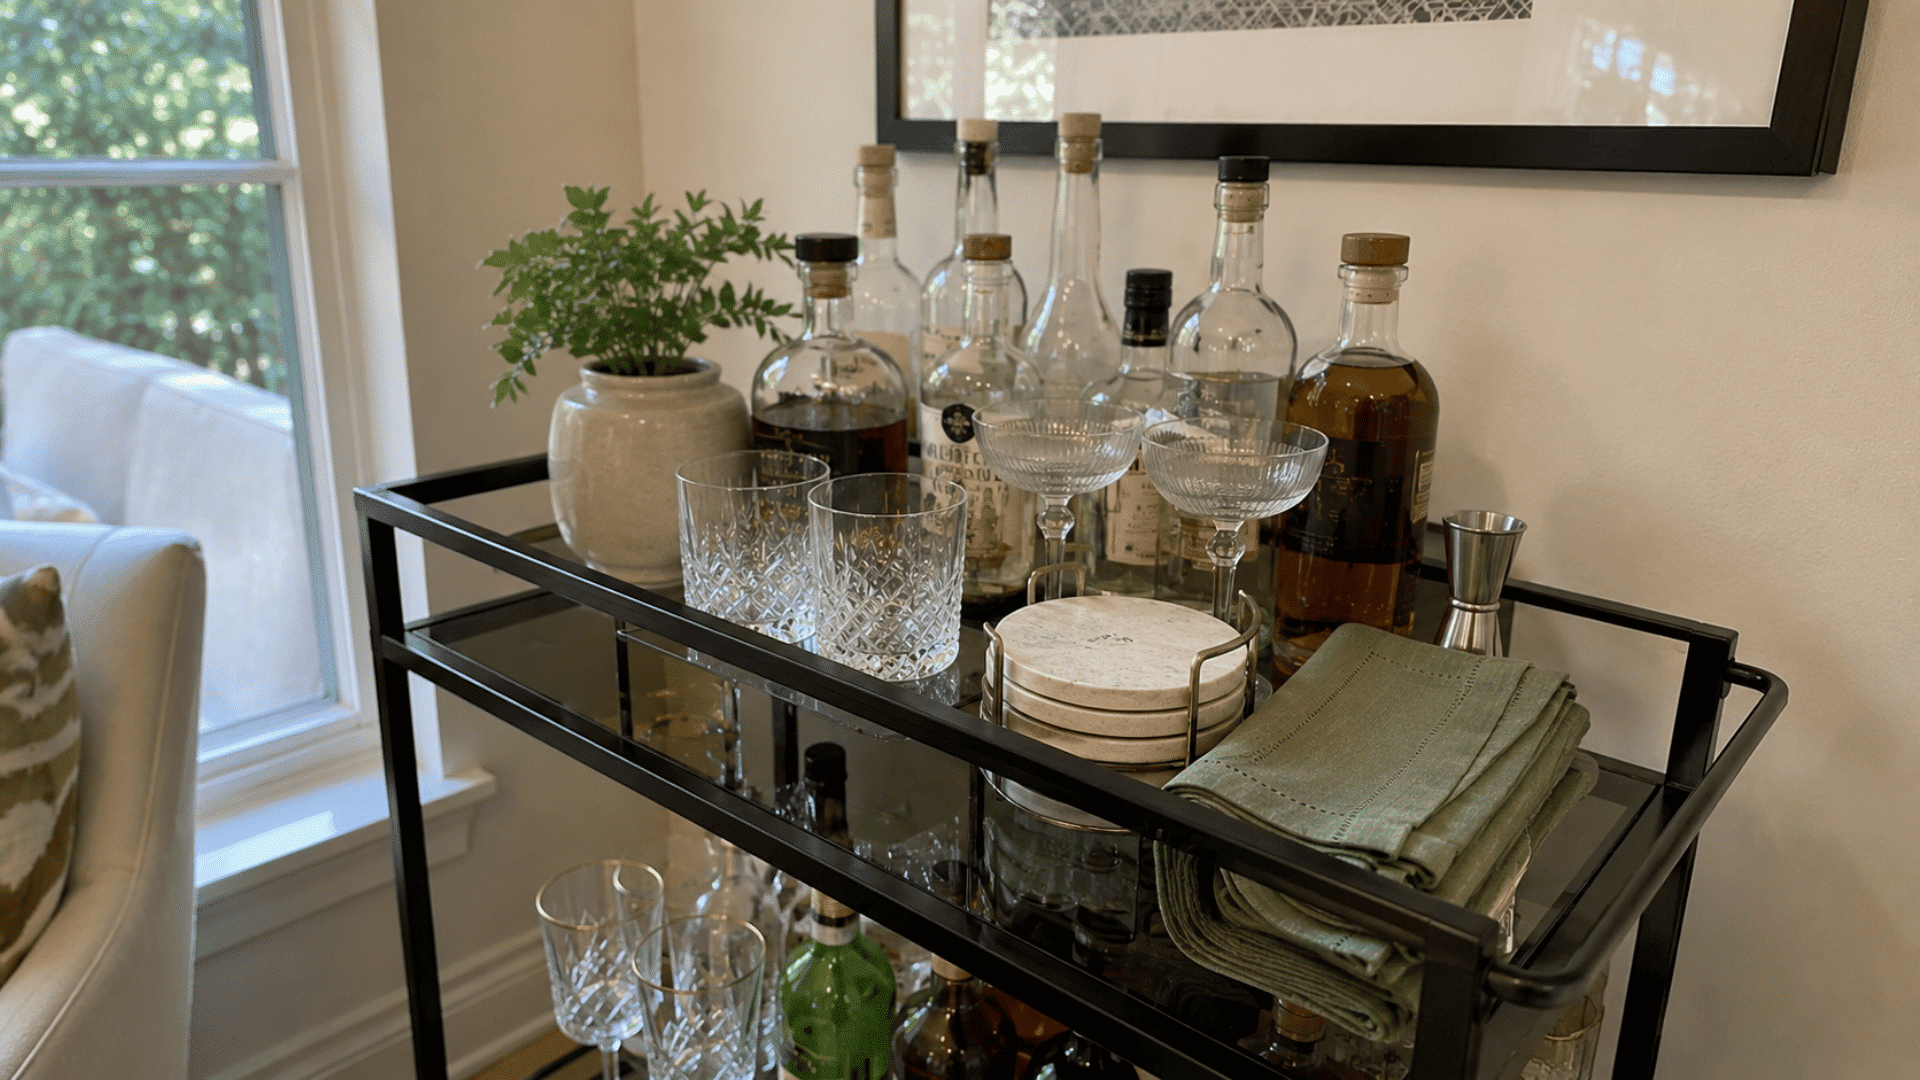
Pick this approach when you want your bar cart to feel prepared for guests rather than purely decorative. It also makes small serving essentials easier to find when you’re pouring drinks.
Include these practical touches:
- Matching coasters: Keep a neat stack ready for glasses.
- Cloth napkins: Fold a small set nearby.
- Connected colors: Choose tones that match your color scheme.
- Fresh replacements: Wash or switch pieces when they become marked.
9. Place a Small Rug or Runner Underneath
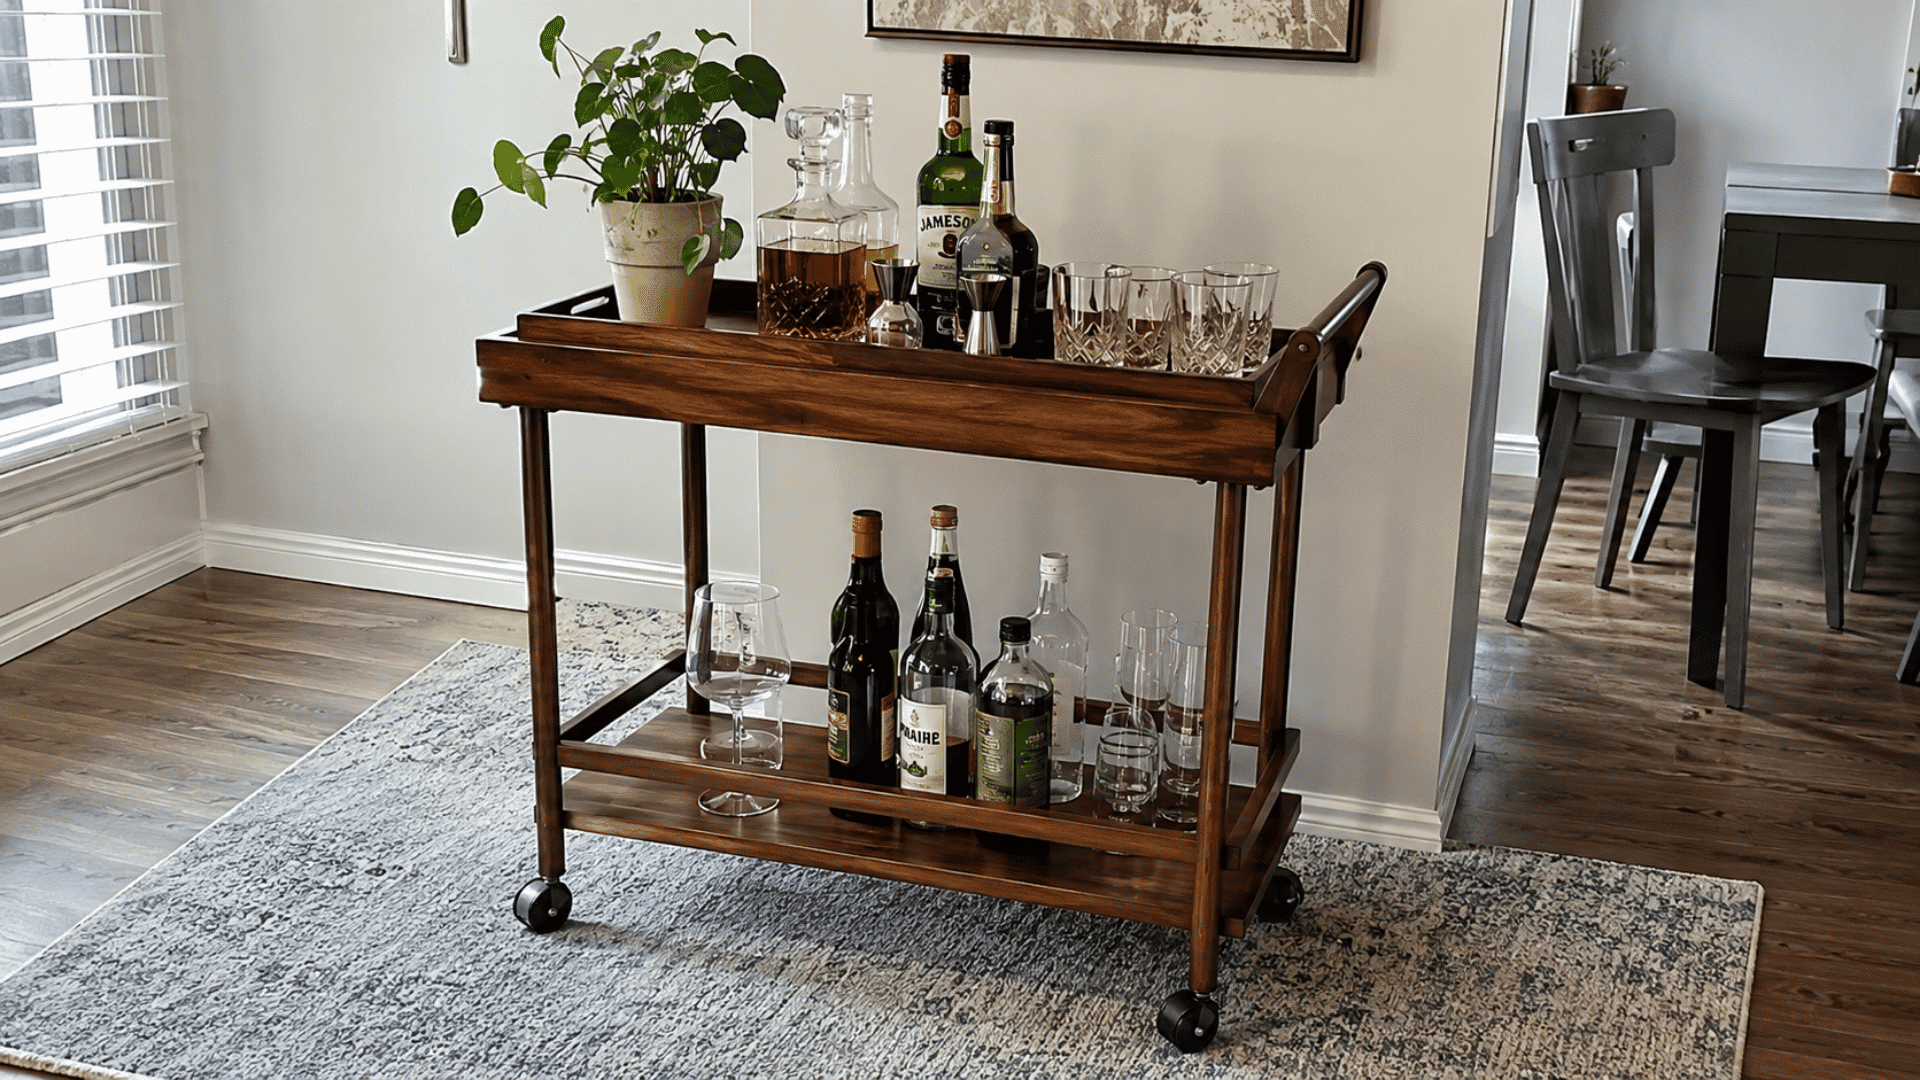
Choose this idea when the cart seems visually disconnected from the rest of the room. Defining the area underneath can make the entire arrangement feel more intentional.
- Low pile: Select a surface that will not interfere with the wheels.
- Suitable dimensions: Choose the right rug size to extend slightly beyond the cart.
- Visible contrast: Pick a pattern that stands apart from the flooring.
- Simple care: Favor material that is easy to clean after spills.
10. Style with a Focused Color Palette
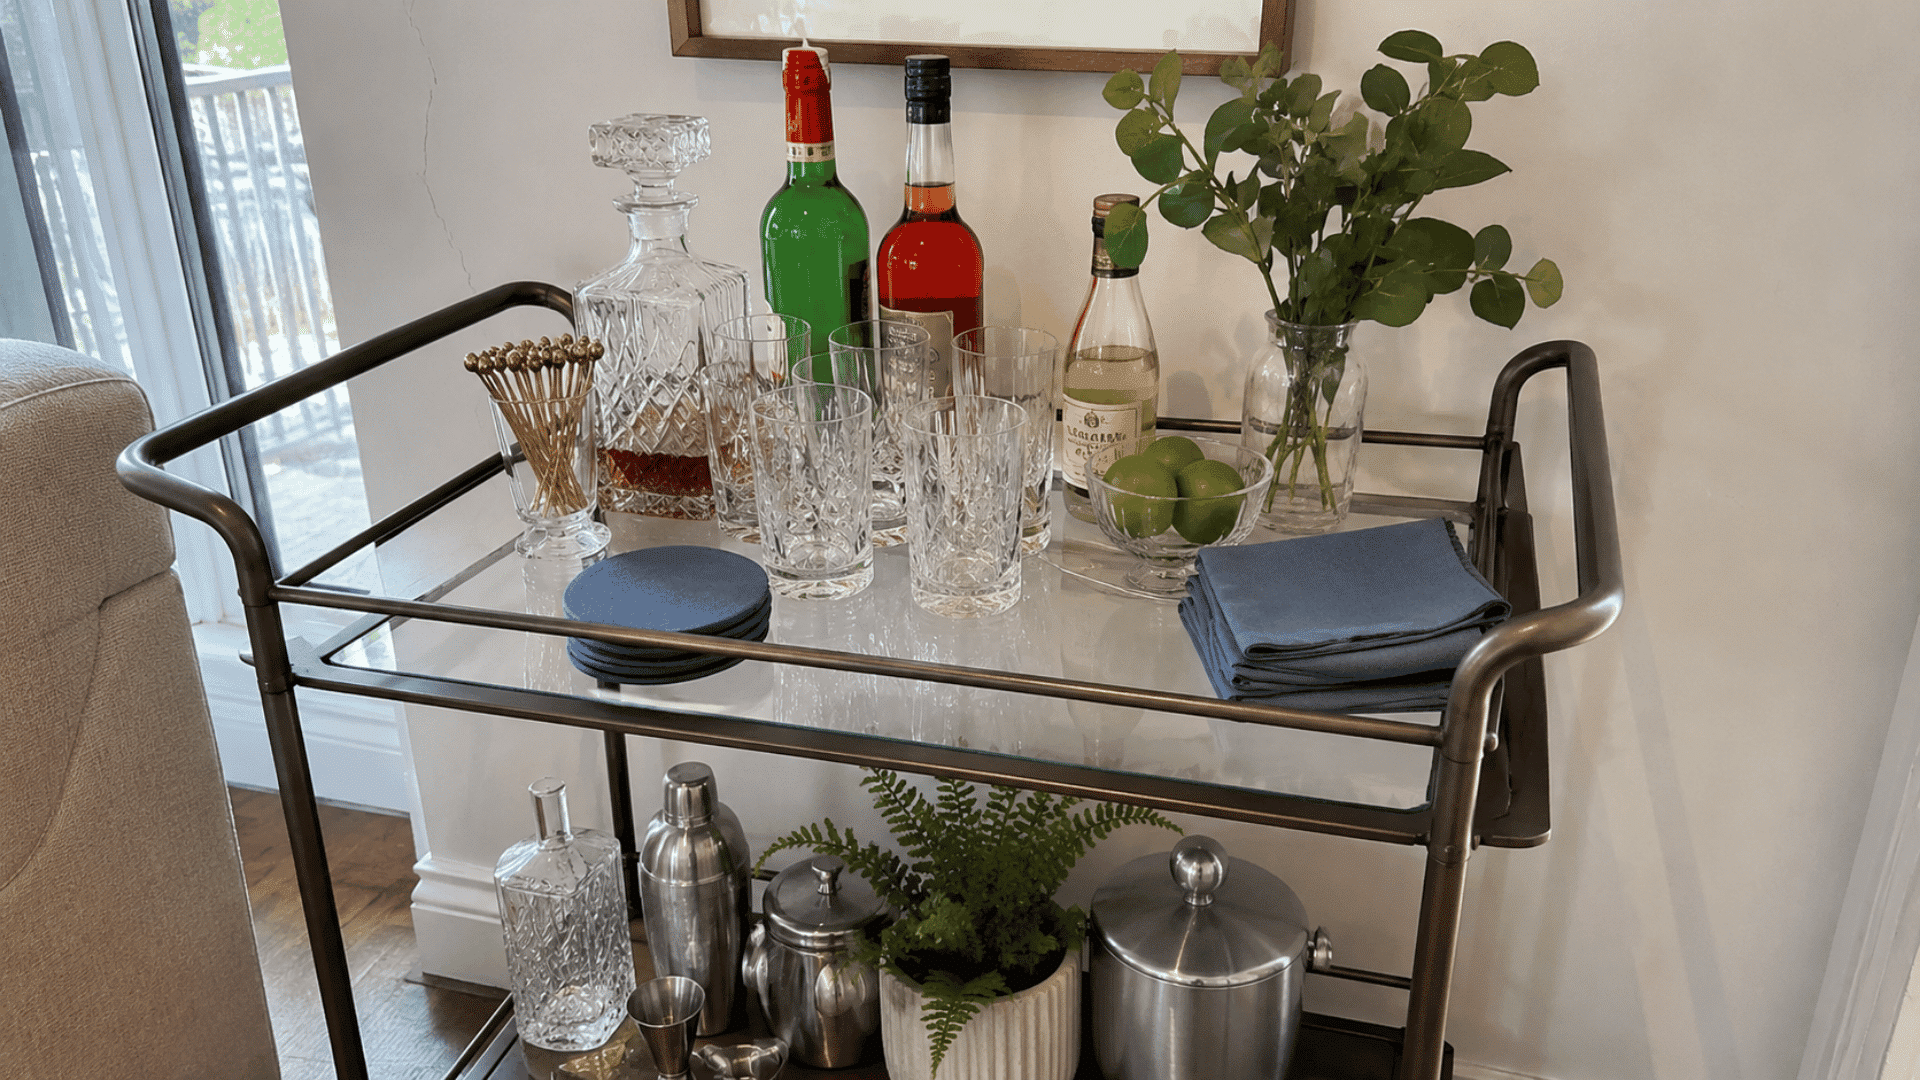
This works well when a fully stocked cart starts feeling visually overwhelming. Limiting the overall scheme gives the eye fewer competing elements and creates a more cohesive result.
- Core palette: Settle on two or three main colors.
- Simple glassware: Use neutral pieces alongside colorful packaging.
- Connected accessories: Coordinate smaller serving pieces.
- Flexible accent: Rotate one extra shade when you want a seasonal update.
11. Swap Decor by Season
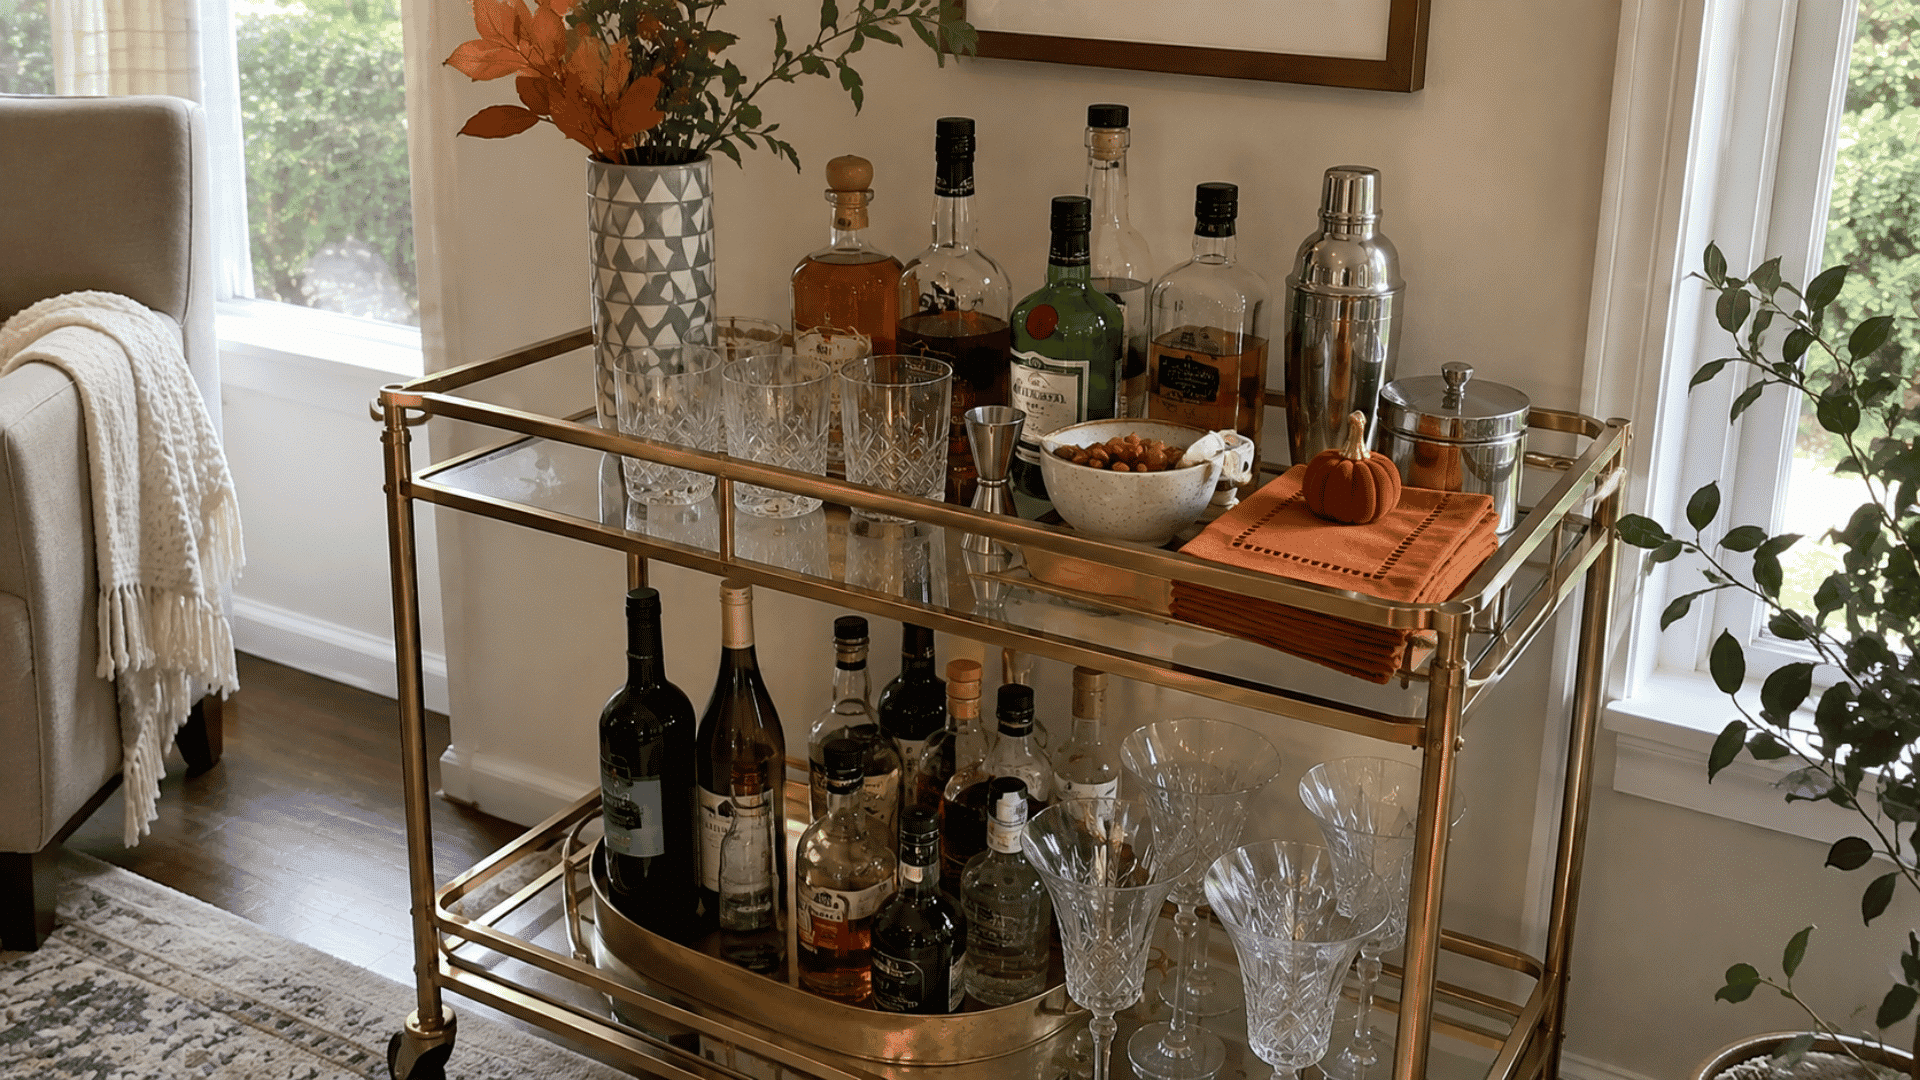
Pick this idea if you enjoy changing your interiors throughout the year but do not want to restyle an entire room. The cart provides a manageable spot for occasional updates.
Make seasonal changes with these elements:
- Small accessories: Rotate napkins, bowls, or similar pieces.
- Featured drinks: Highlight one or two suitable options.
- Selective changes: Bring in a few seasonal decor ideas without changing everything.
- Consistent foundation: Leave the main arrangement in place.
12. Add a Statement Ice Bucket
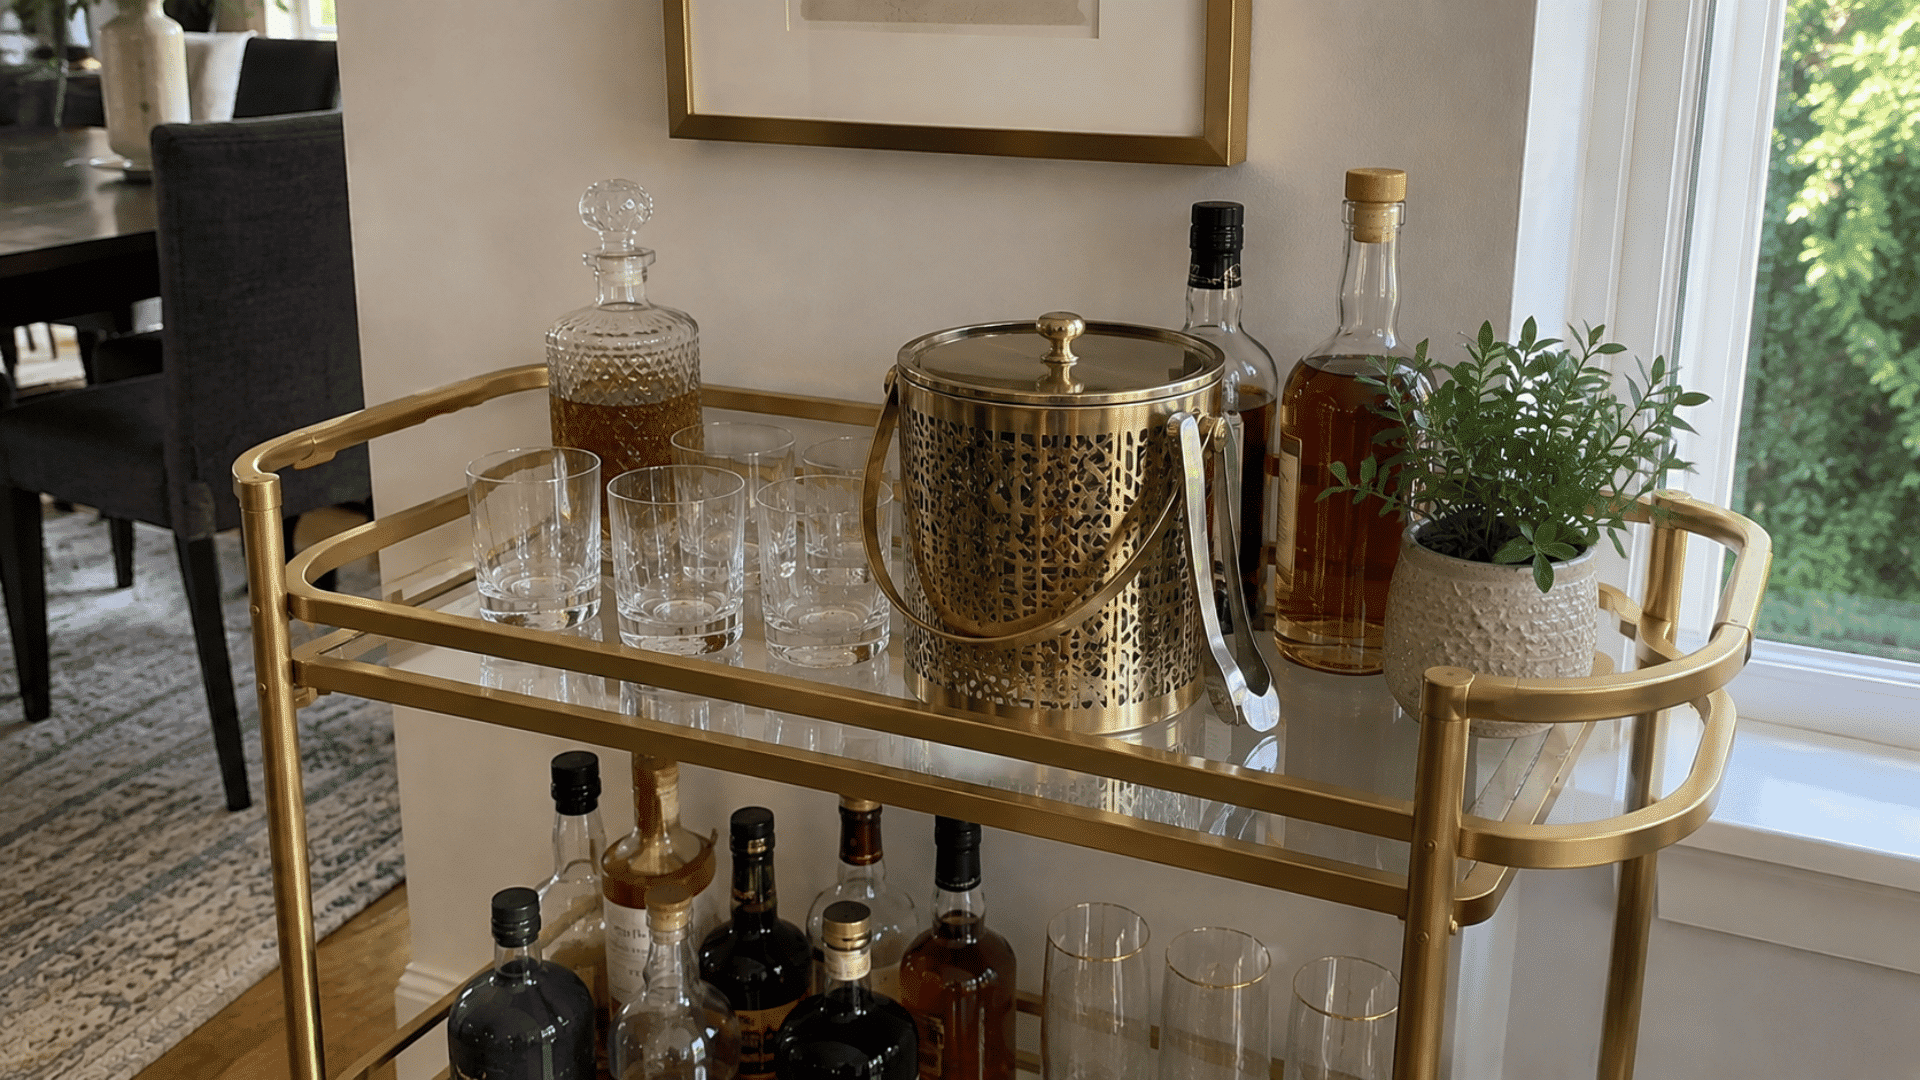
Choose this option when you want a functional item to contribute to the overall appearance too. It can become a strong focal feature without sacrificing valuable space to decoration alone.
- Distinctive finish: Consider metallic, patterned, or textured designs.
- Practical capacity: Make sure it holds enough ice for serving.
- Coordinated tongs: Keep a matching pair beside it.
- Display value: Leave the bucket visible between gatherings.
13. Light It with Candles for Evening Use
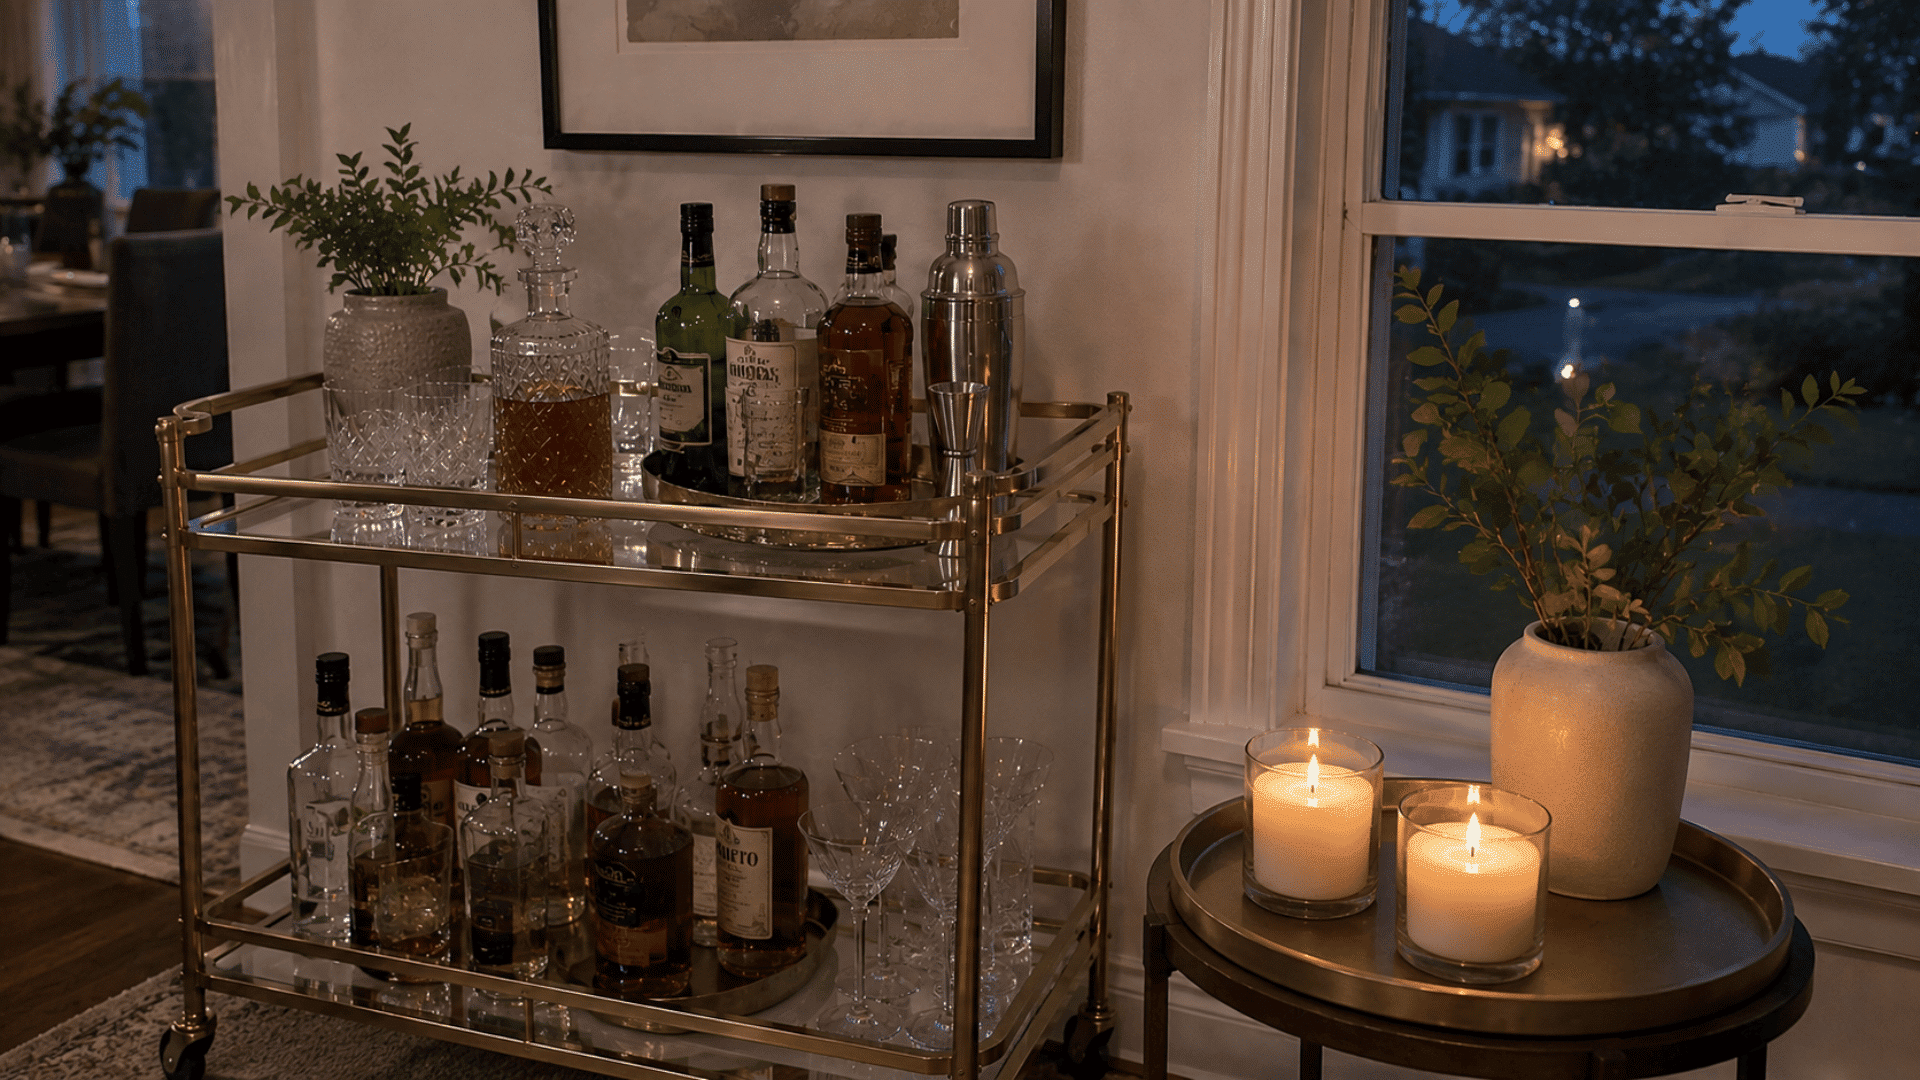
This approach suits dinner parties and relaxed evening gatherings when softer surroundings feel more appropriate. It gives the bar area a welcoming presence once daylight fades.
- Stable candles: Choose short designs with sturdy bases.
- Separate holder: Place them on their own stand or tray.
- Supervised use: Keep flames lit only while someone is nearby.
- Clear surroundings: Keep them away from paper, fabric, and other combustible materials.
14. Display a Few Standout Bottles
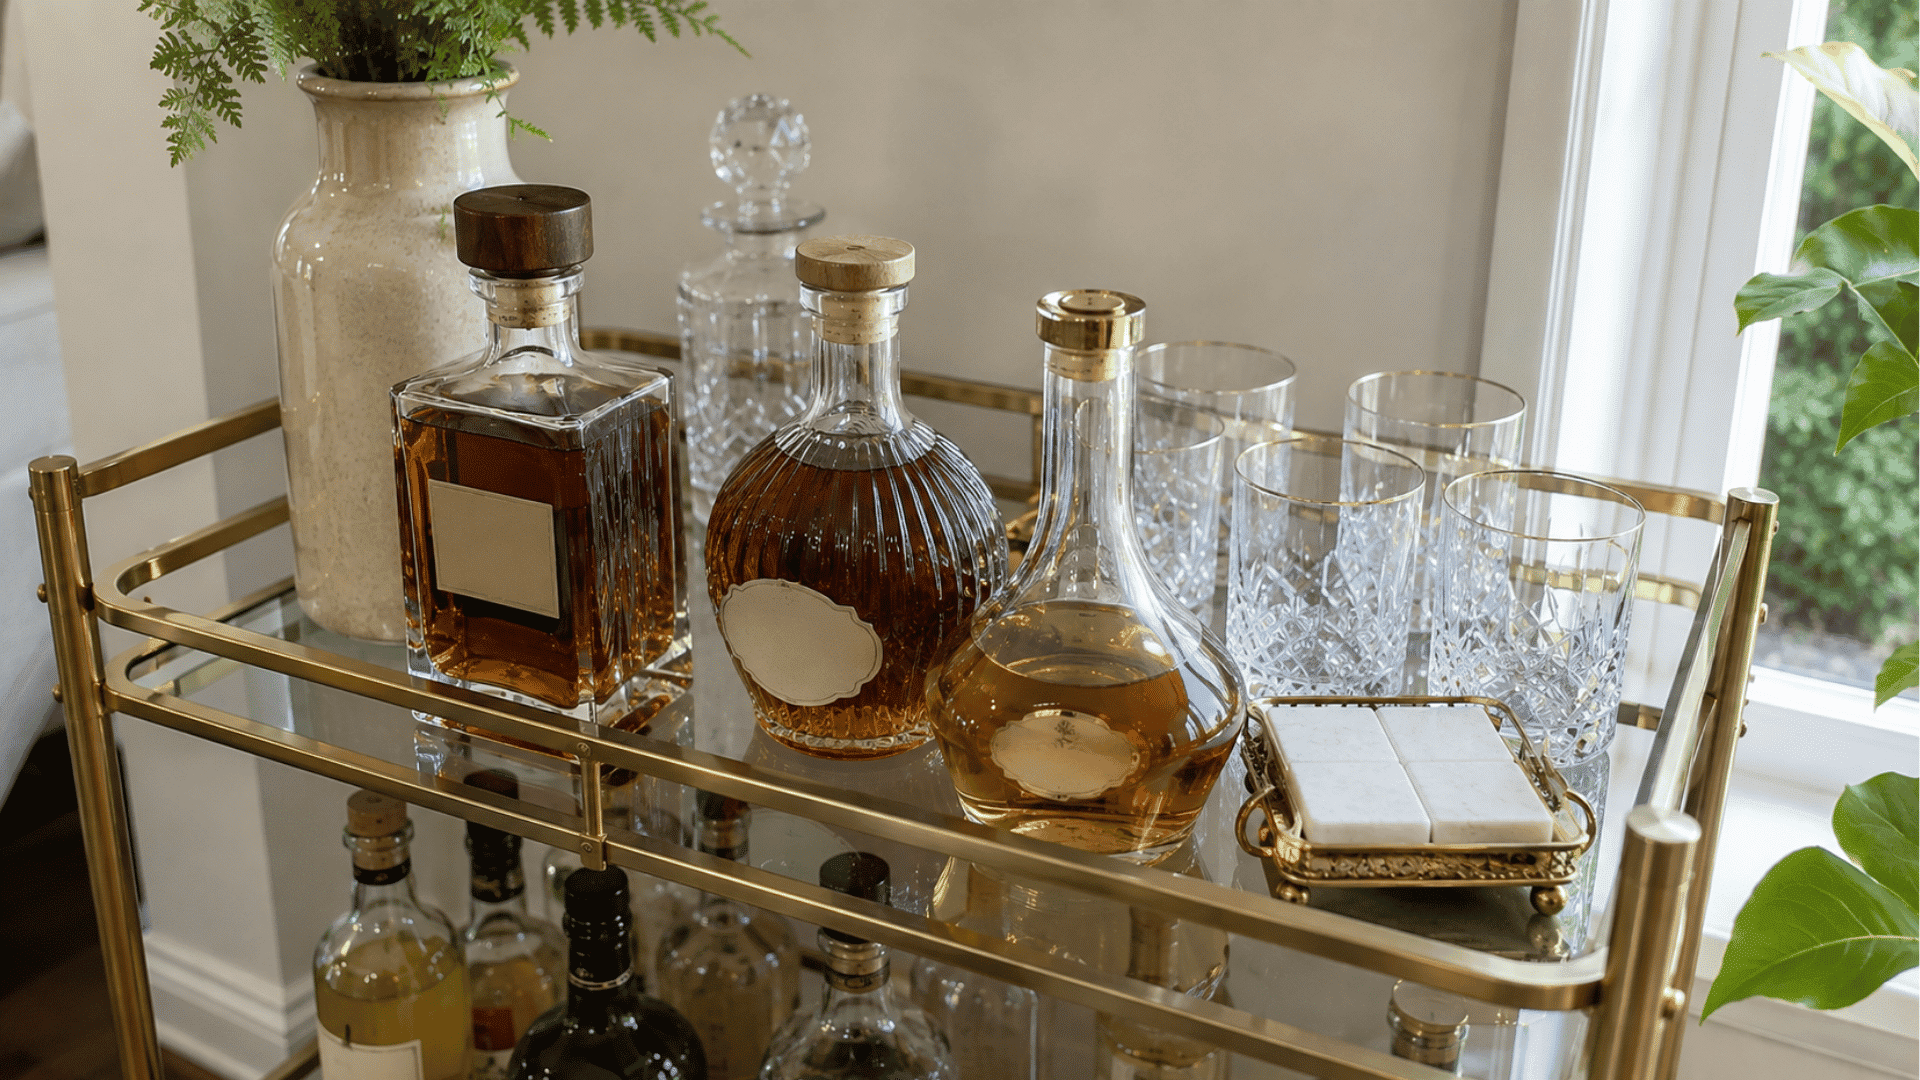
Choose this idea if attractive packaging is already part of your collection. Letting selected bottles take center stage can create visual interest without introducing extra decorative objects.
- Distinctive designs: Pick bottles with interesting shapes or labels.
- Front position: Give the most attractive options greater visibility.
- Regular rotation: Change the display as drinks are finished or replaced.
- Hidden extras: Store less appealing backups elsewhere.
15. Curate Matching Glassware
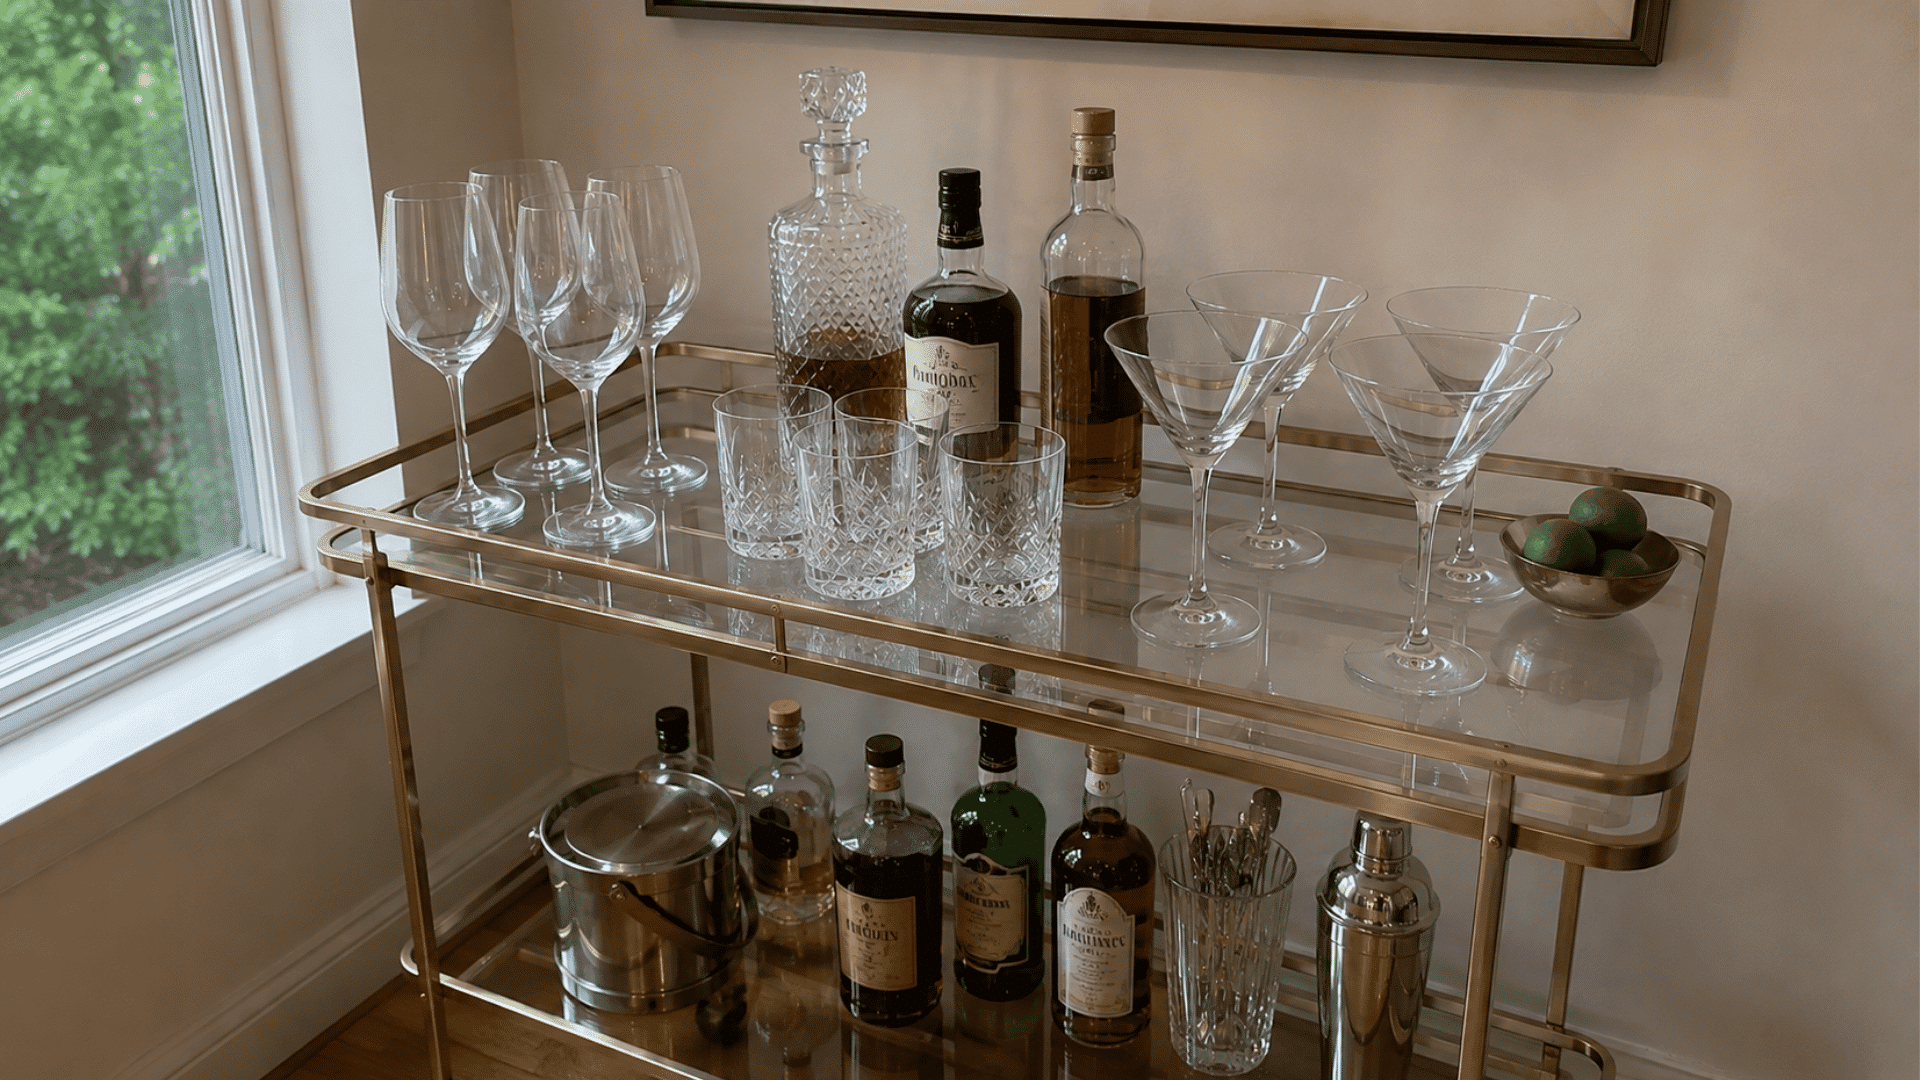
Pick matching glassware when you want a more coordinated and orderly setup. Repeating similar shapes creates consistency, even when the rest of the cart contains different bottles and accessories.
- Drink-specific styles: Assign one glass shape to each beverage type.
- Neat groups: Keep matching pieces beside one another.
- Extra storage: Move spare sets to a nearby cabinet.
- Quality check: Remove chipped or noticeably mismatched pieces.
16. Add a Cutting Board or Bar Mat
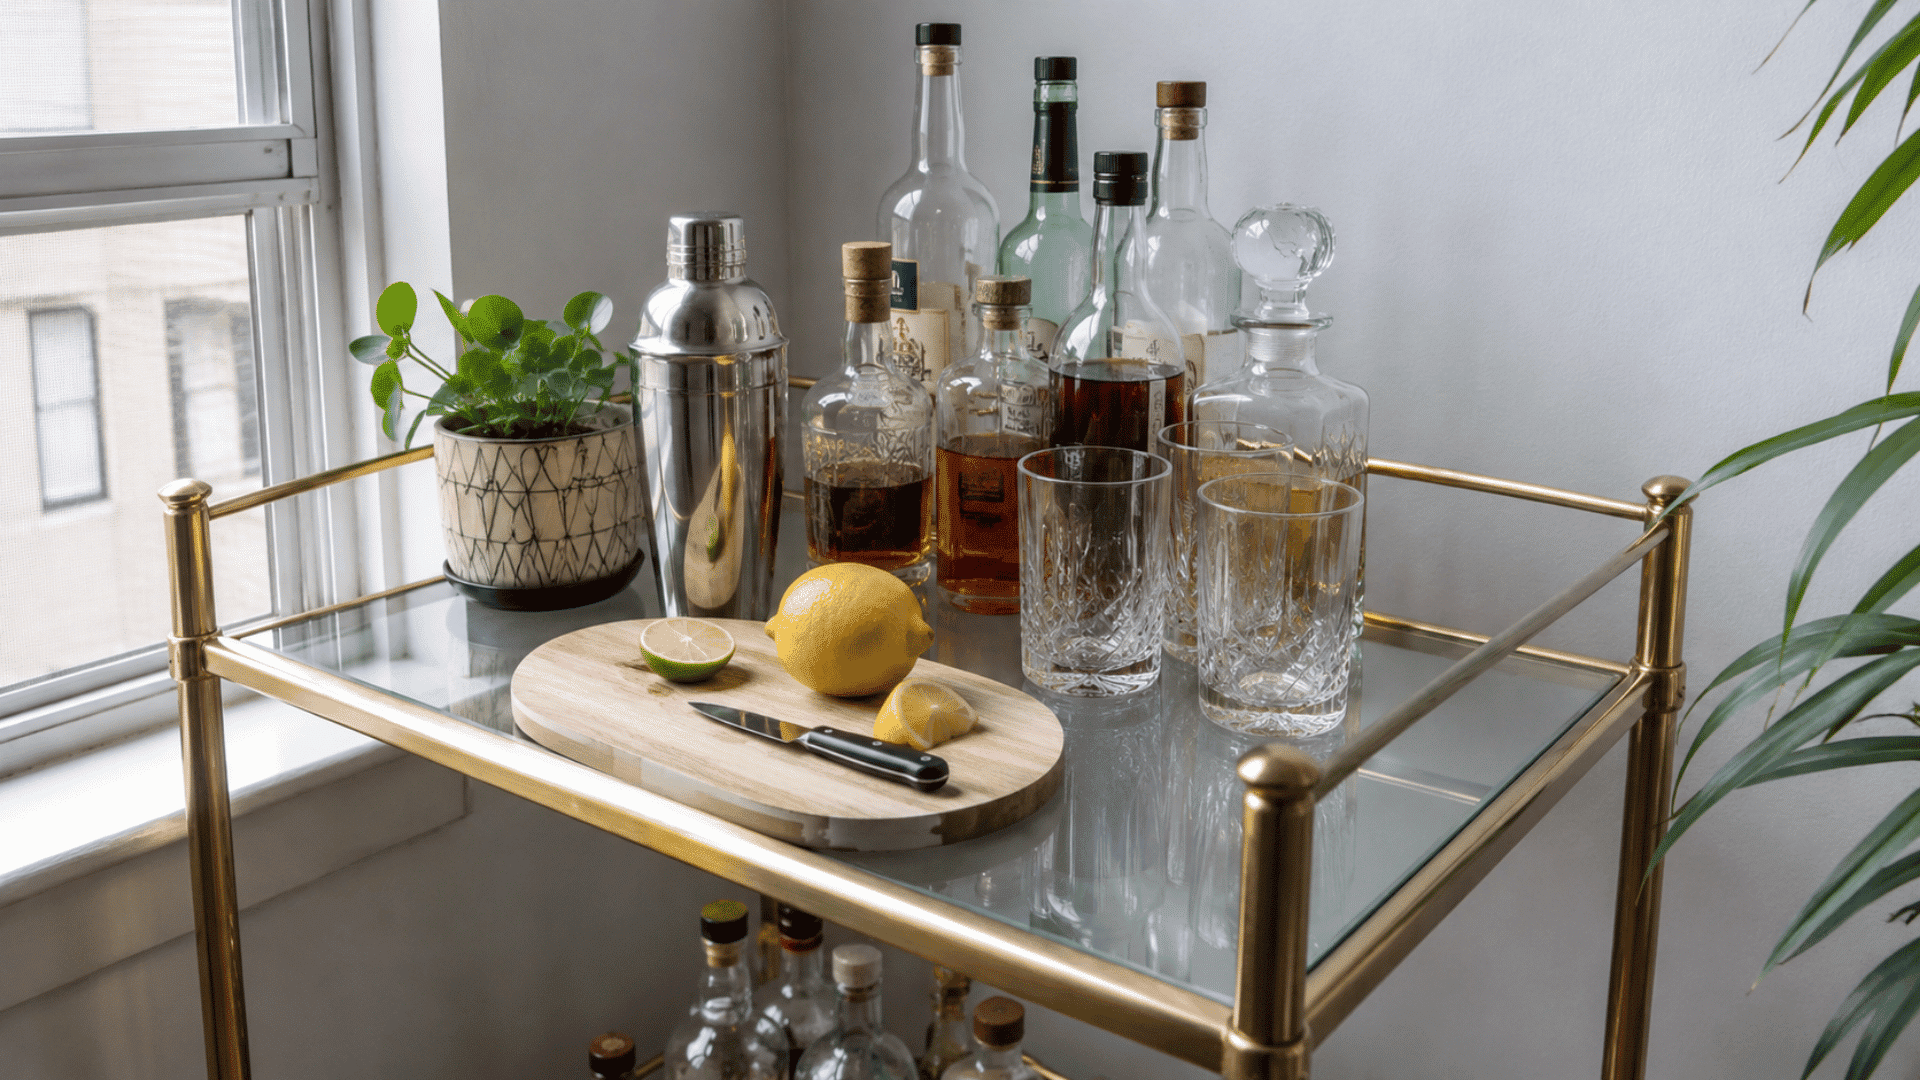
This idea is useful when your cart doubles as a working drink station rather than simply a display. It gives you a designated preparation area and helps protect the surface underneath.
- Compact board: Choose wood, marble, or another suitable material.
- Useful location: Keep it on the shelf where you usually prepare drinks.
- Easy cleanup: Wipe it after every use.
- Extra function: Use the board for serving small snacks when needed.
17. Use a Vintage Decanter Set
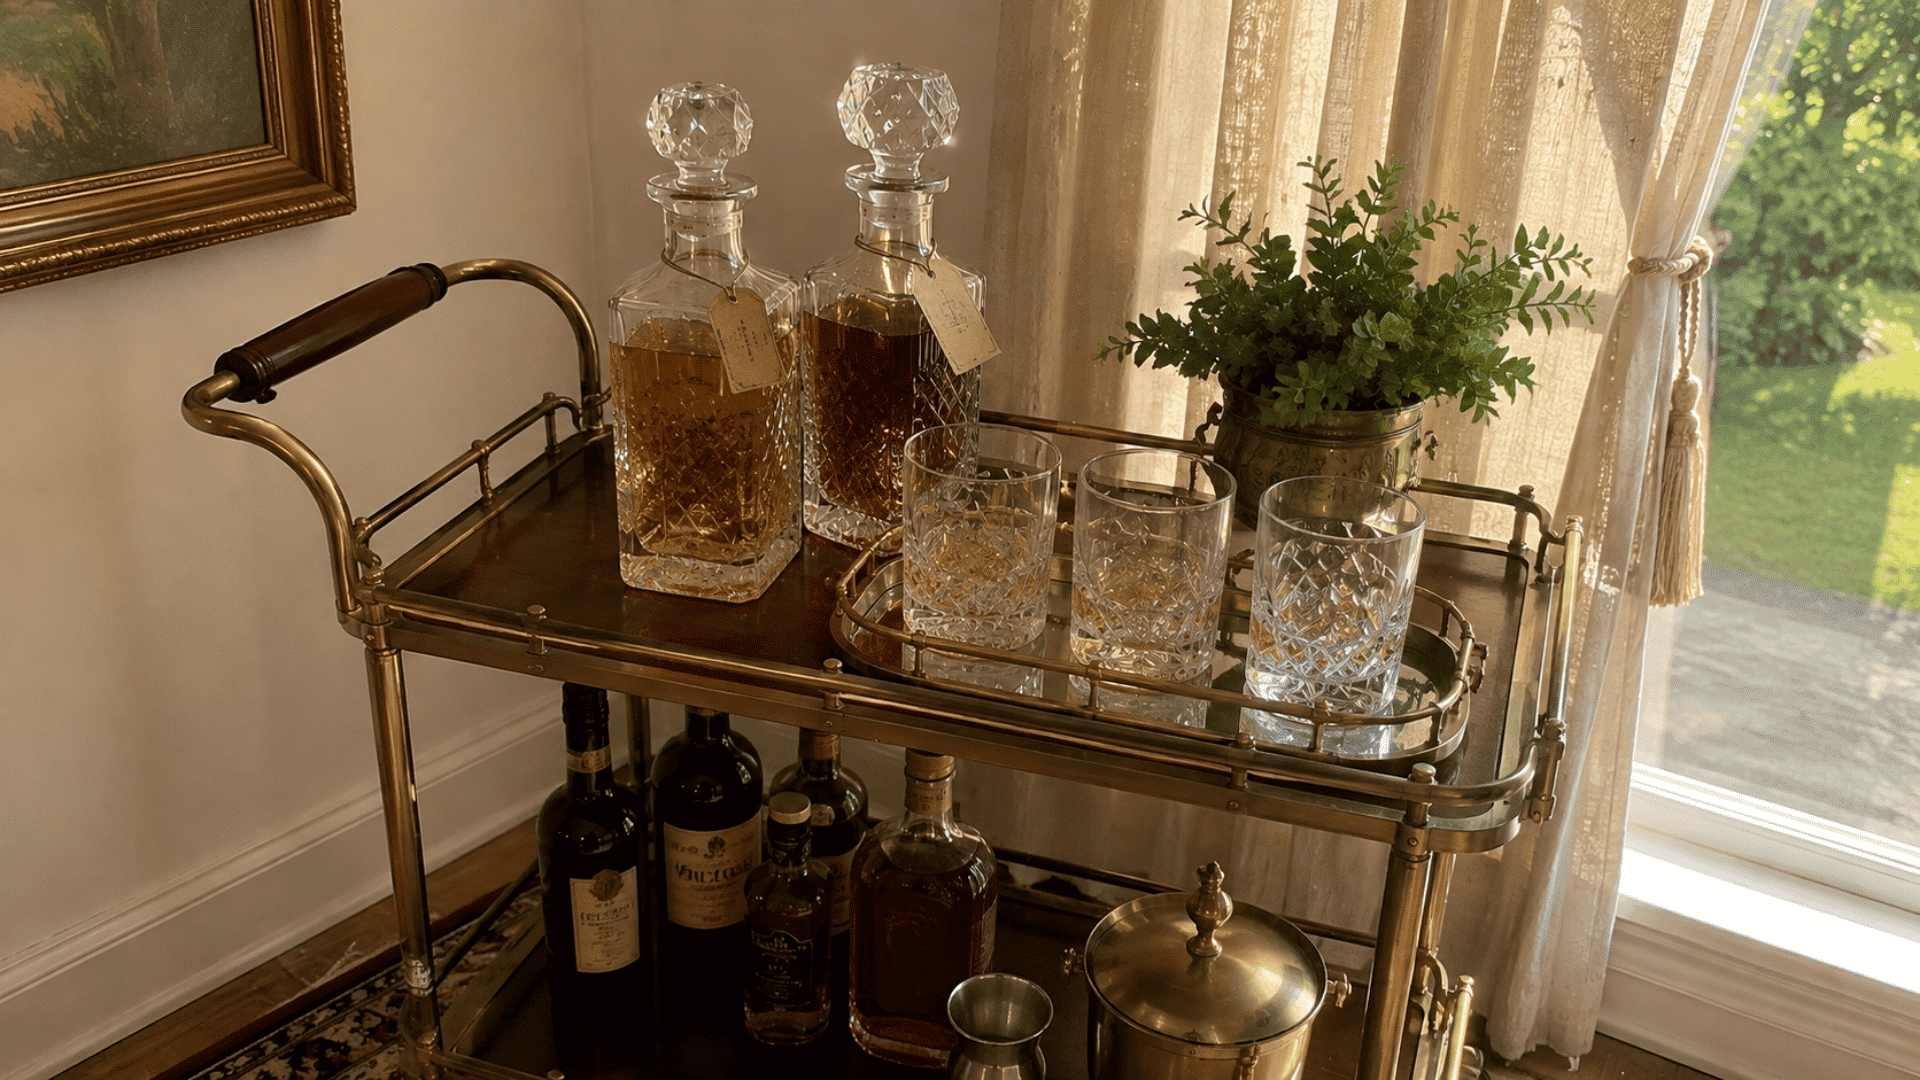
Choose this look when you want the cart to have more character than a standard modern setup. It fits especially well with traditional, retro, or antique-inspired interiors.
Complete the display with these elements:
- Glass decanters: Fill them with spirits you serve regularly.
- Identification tags: Label contents so bottles are easy to tell apart.
- Coordinated glasses: Pair them with pieces in a similar style.
- Routine care: Clean the vessels to prevent residue from collecting.
18. Add a Small Chalkboard or Menu Sign
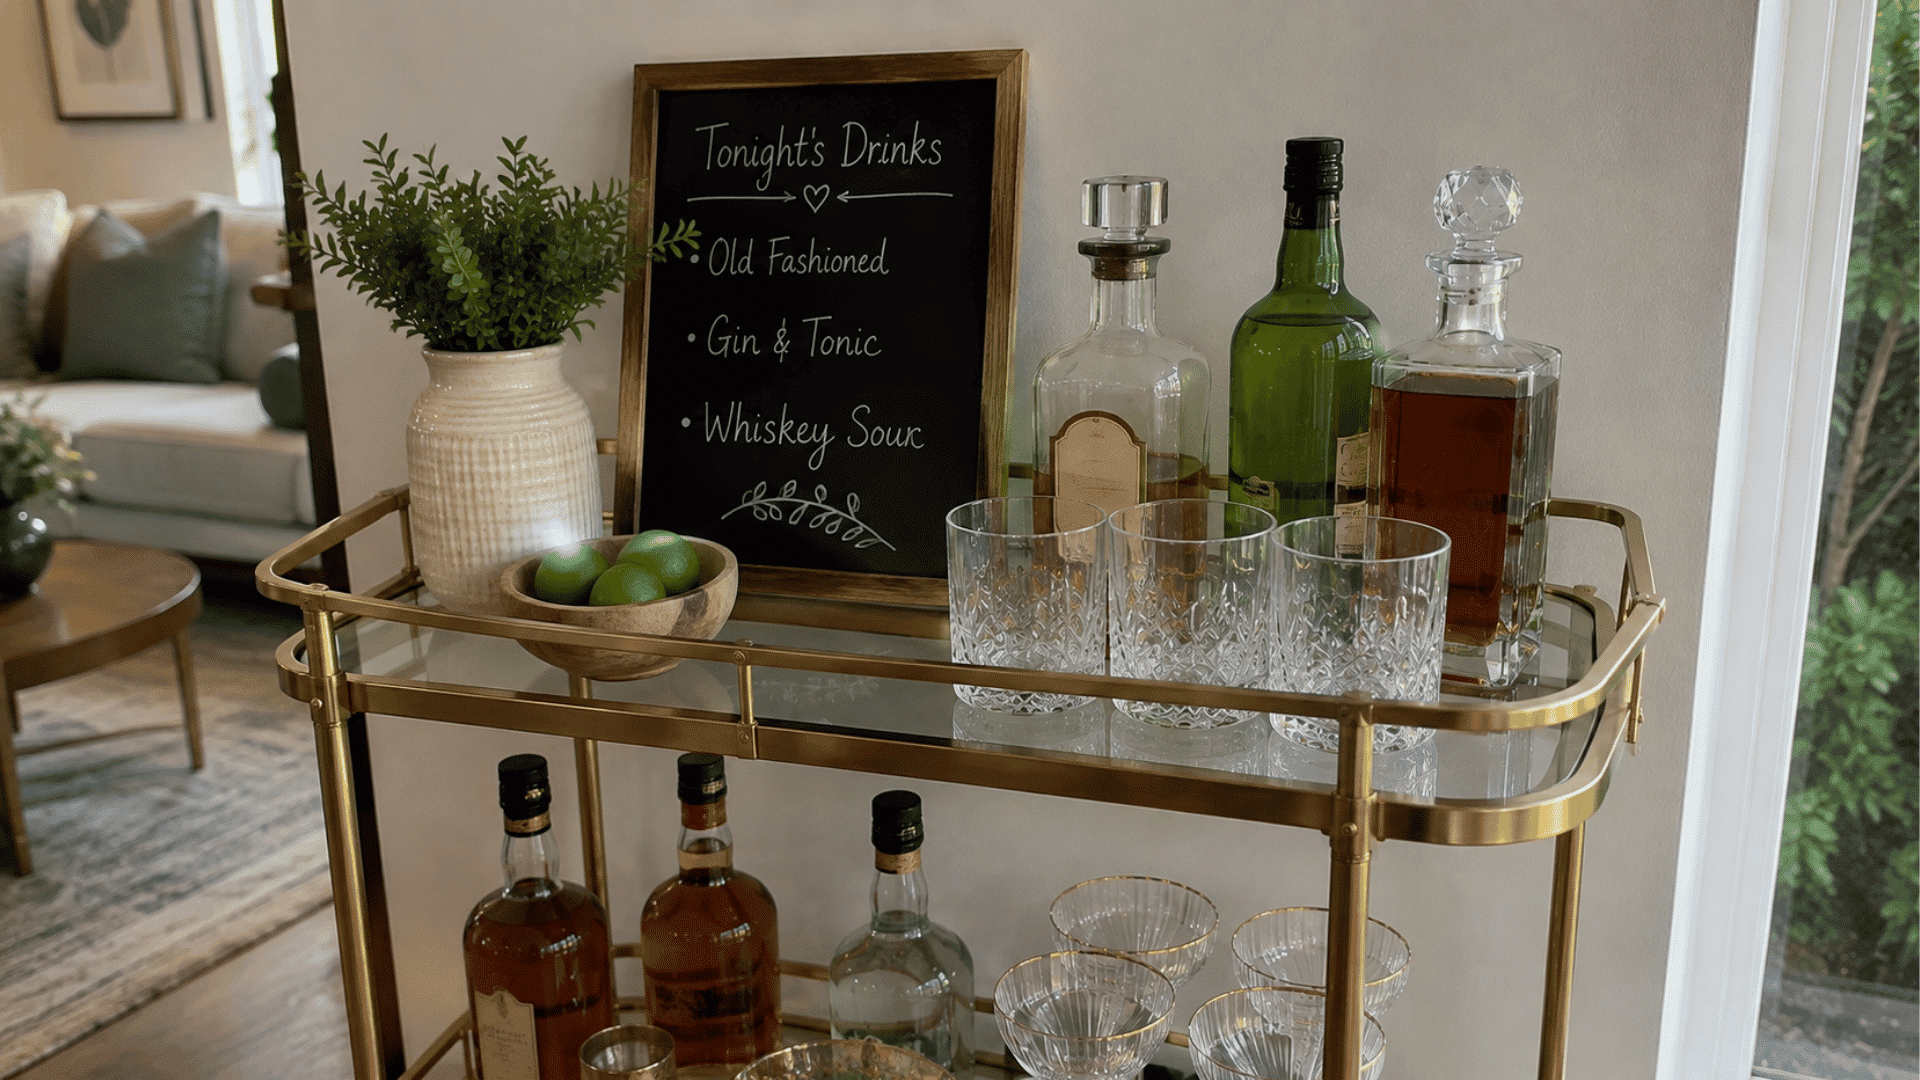
This is a useful party idea when you plan to serve a limited selection rather than a fully open bar. Guests can quickly see their choices without repeatedly asking the host.
- Small sign: Use a mini chalkboard or framed card.
- Short menu: Feature only a few available drinks.
- Writable tool: Keep a chalk marker or erasable pen nearby.
- Visible position: Prop the sign toward the back where guests can see it.
19. Style with Baskets for Texture
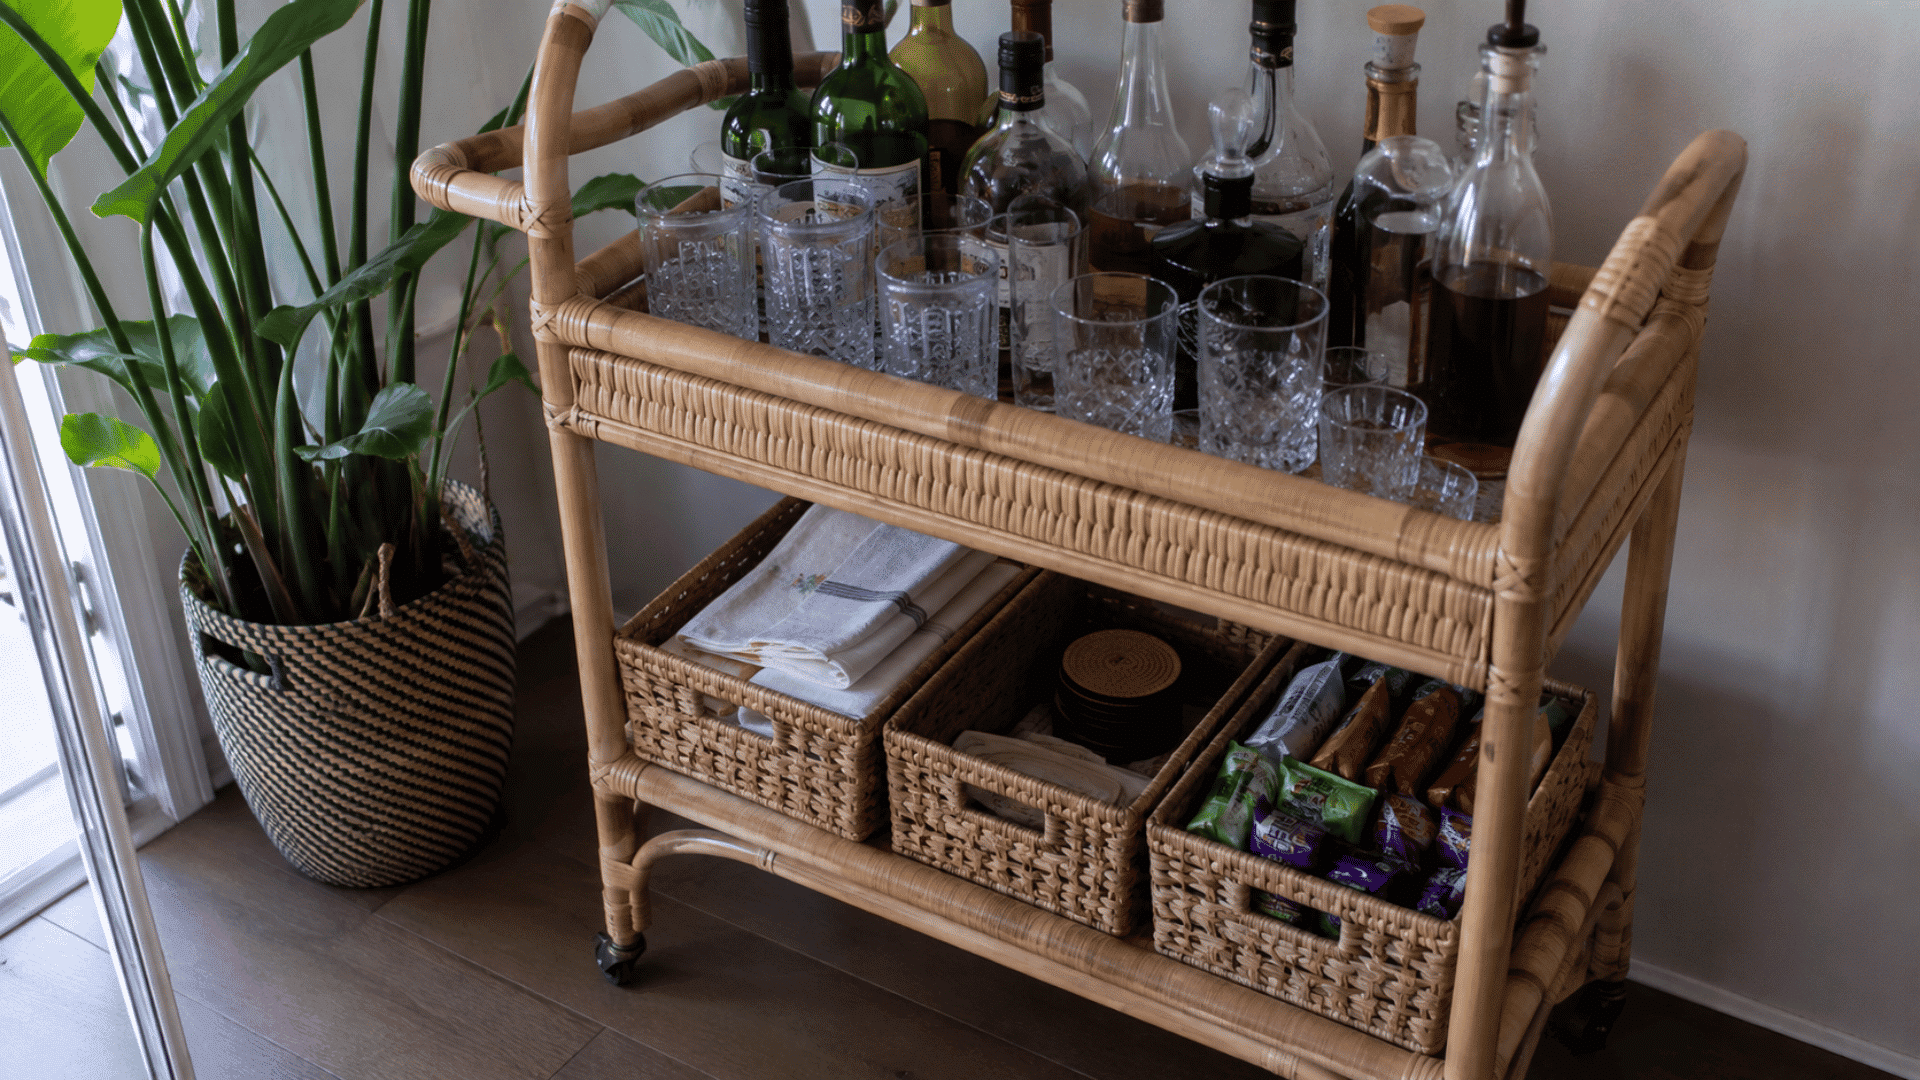
Choose baskets when you want to soften a setup dominated by smooth, hard surfaces. They are particularly useful when you need extra organization without putting every small supply on display.
Work them in with these choices:
- Shelf-sized baskets: Pick proportions that fit comfortably.
- Hidden storage: Use them for smaller serving supplies or packaged snacks.
- Lower placement: Keep baskets on the bottom level when possible.
- Natural material: Consider wicker, rattan, or another woven finish.
20. Add a Trailing or Potted Plant
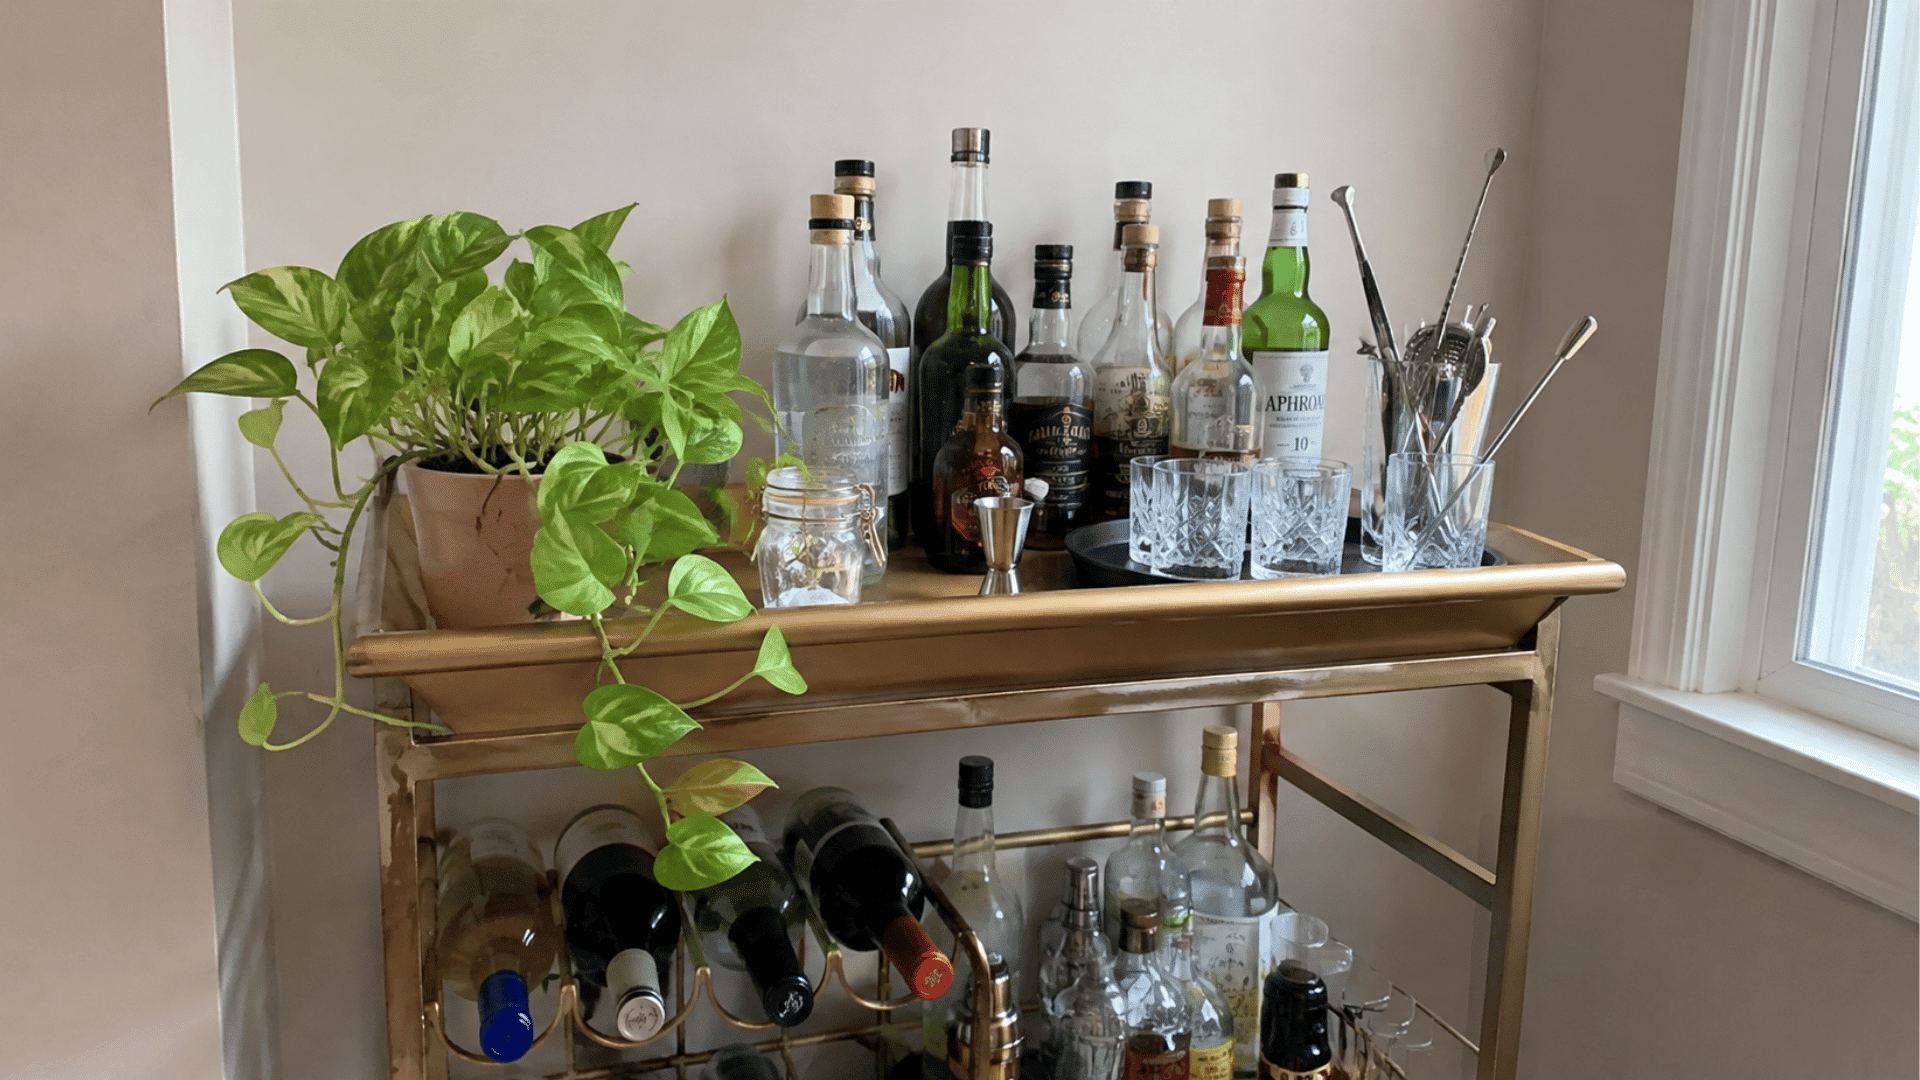
I often prefer this approach when a bar cart needs something to break up its structured appearance. It adds a more relaxed feel without taking up much room.
- Compact plant: Try pothos or another suitable indoor variety.
- Small container: Choose a pot that fits comfortably on the shelf.
- Side placement: Keep it away from the busiest serving area.
- Low-care option: Substitute a faux plant when upkeep is inconvenient.
21. Layer Trays for Depth
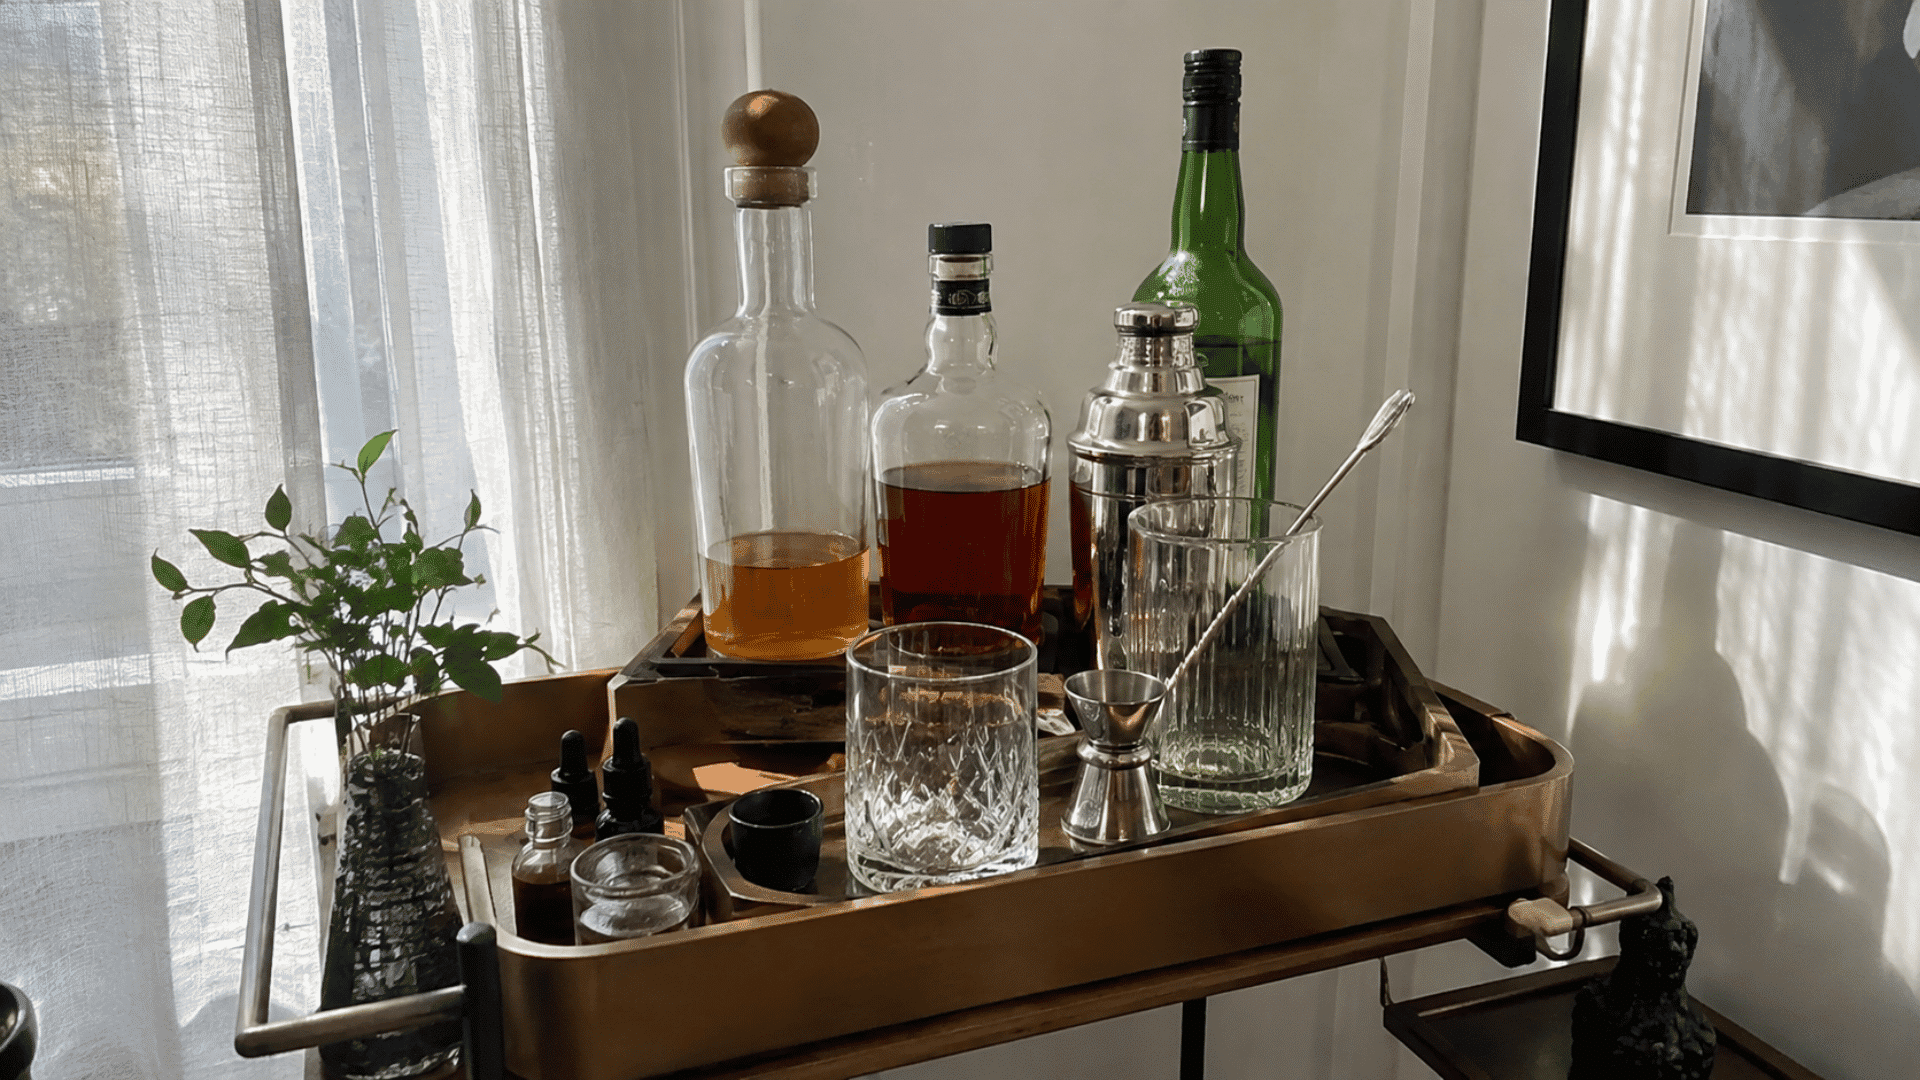
This technique works well on broad shelves that look flat once everything is spread across one level. Layering creates clearer visual sections and makes smaller accents feel more deliberate.
- Large base: Begin with a generously sized tray.
- Smaller layer: Position another tray above or within the first arrangement.
- Material contrast: Combine different finishes for greater definition.
- Secure setup: Make sure both surfaces remain stable during use.
22. Add a Framed Print or Photo
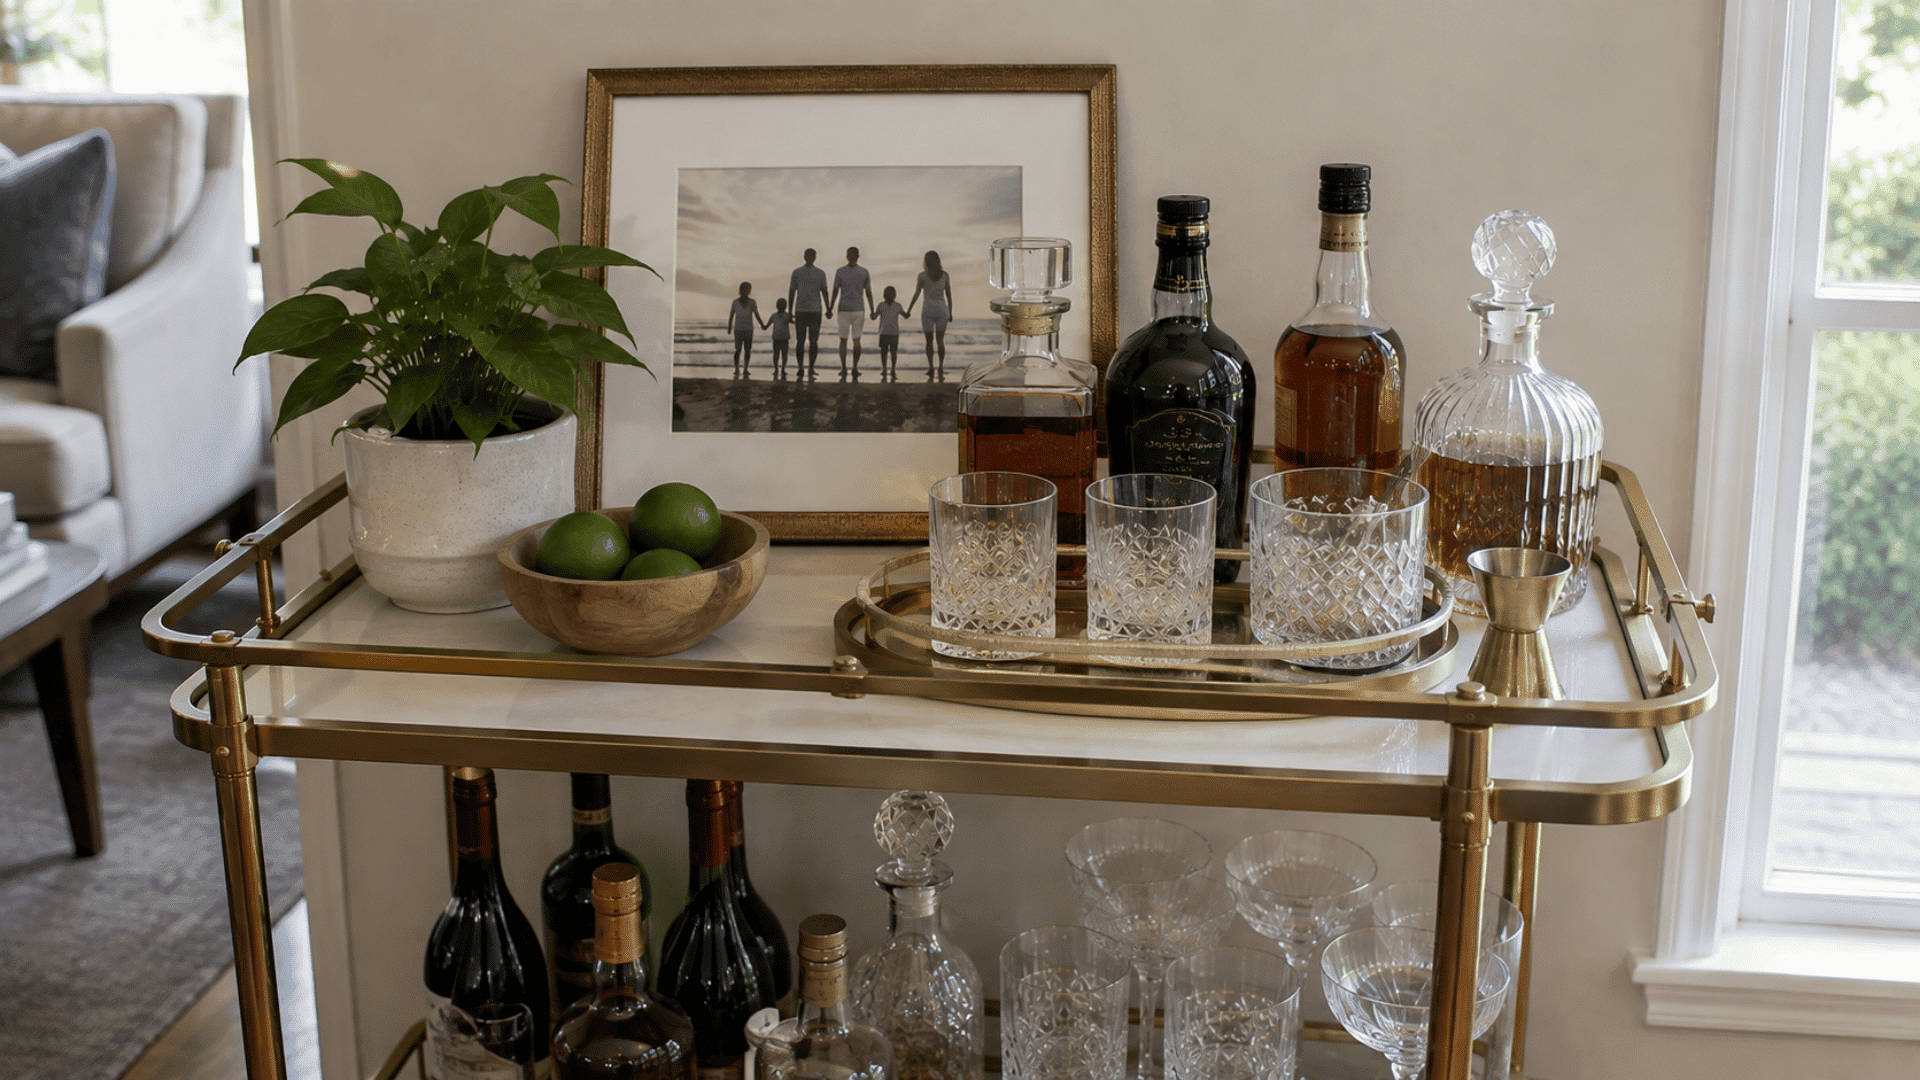
Choose this idea when you want the cart to feel connected to your personality or the rest of your home. It adds blank wall decor without requiring permanent changes.
- Compact frame: Pick artwork or a photograph that fits the available area.
- Leaning display: Rest it securely against the rear of the shelf.
- Easy rotation: Change the image whenever you want a different look.
- Dry location: Keep it clear of condensation and spills.
23. Style with a Punch Bowl Centerpiece
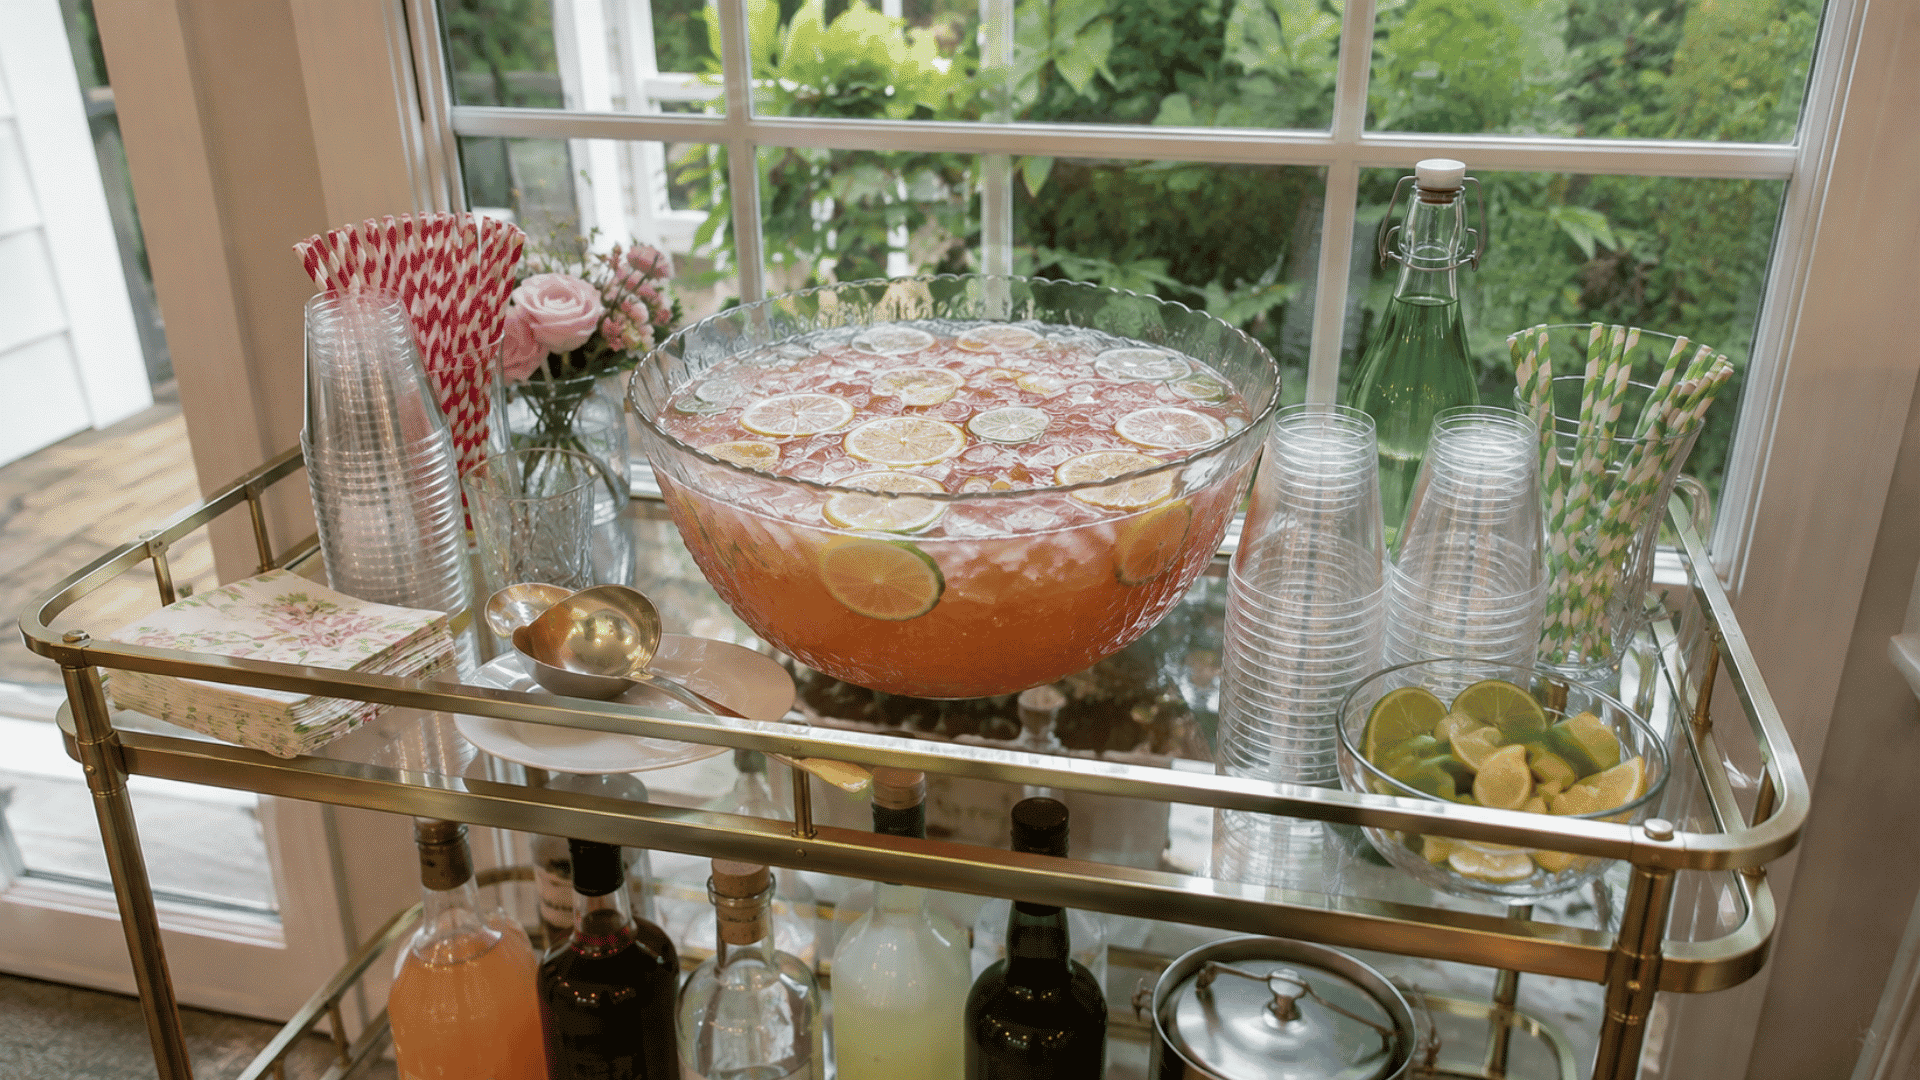
Pick this setup for gatherings where several guests will be drinking the same beverage. It simplifies serving while giving the middle of the cart a clear visual focus.
Prepare the station with these essentials:
- Punch bowl: Choose glass or ceramic in a suitable capacity.
- Serving ladle: Place it where guests can reach it easily.
- Nearby cups: Arrange drinkware close to the bowl.
- Last-minute ice: Add it shortly before guests begin serving themselves.
24. Use Fresh Herbs as Living Garnish Decor
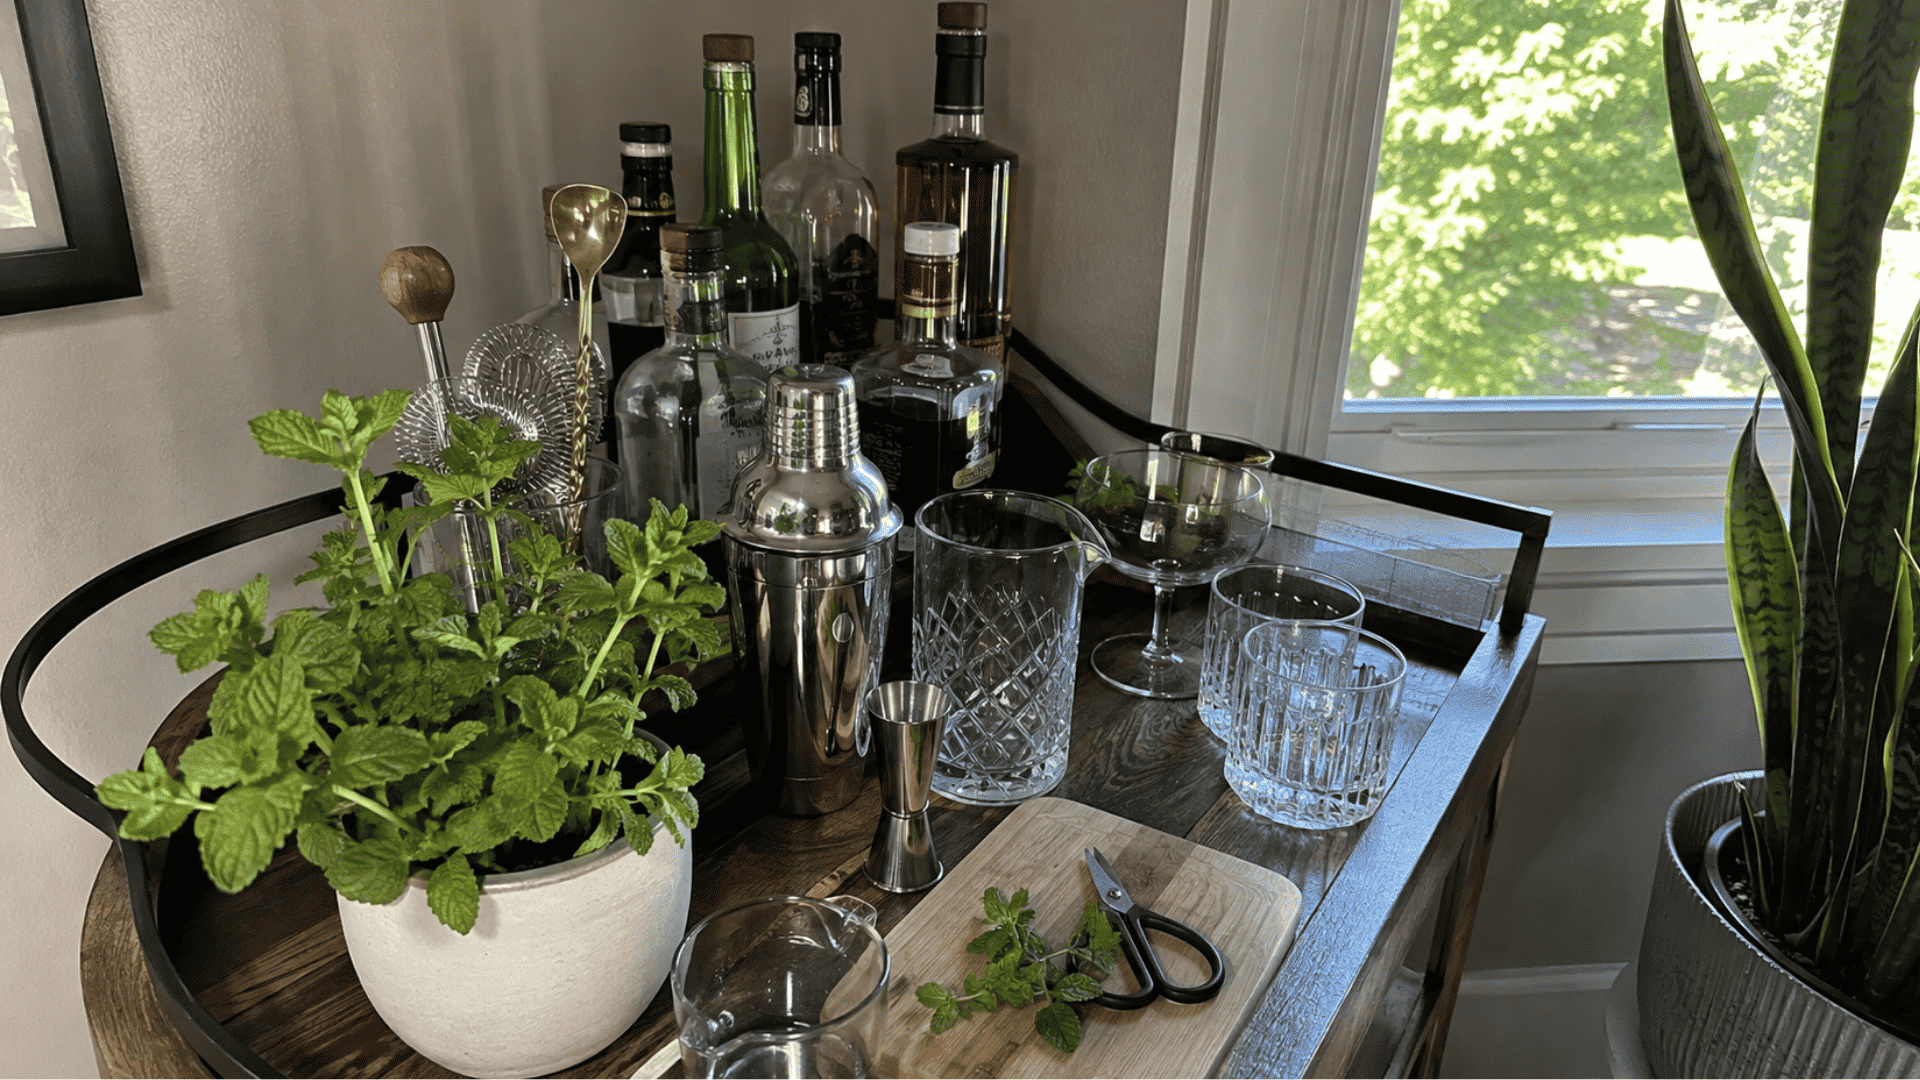
This idea works particularly well if you prefer decorative choices that earn their place. The addition brings a fresh element to the setup while staying useful during drink preparation.
- Potted herb: Choose mint, rosemary, or another suitable garnish.
- Reachable location: Position it close to your preparation area.
- Regular trimming: Snip small amounts as you make drinks.
- Suitable light: Move the plant to a brighter location when needed.
25. Add a Personal Touch Like a Monogram
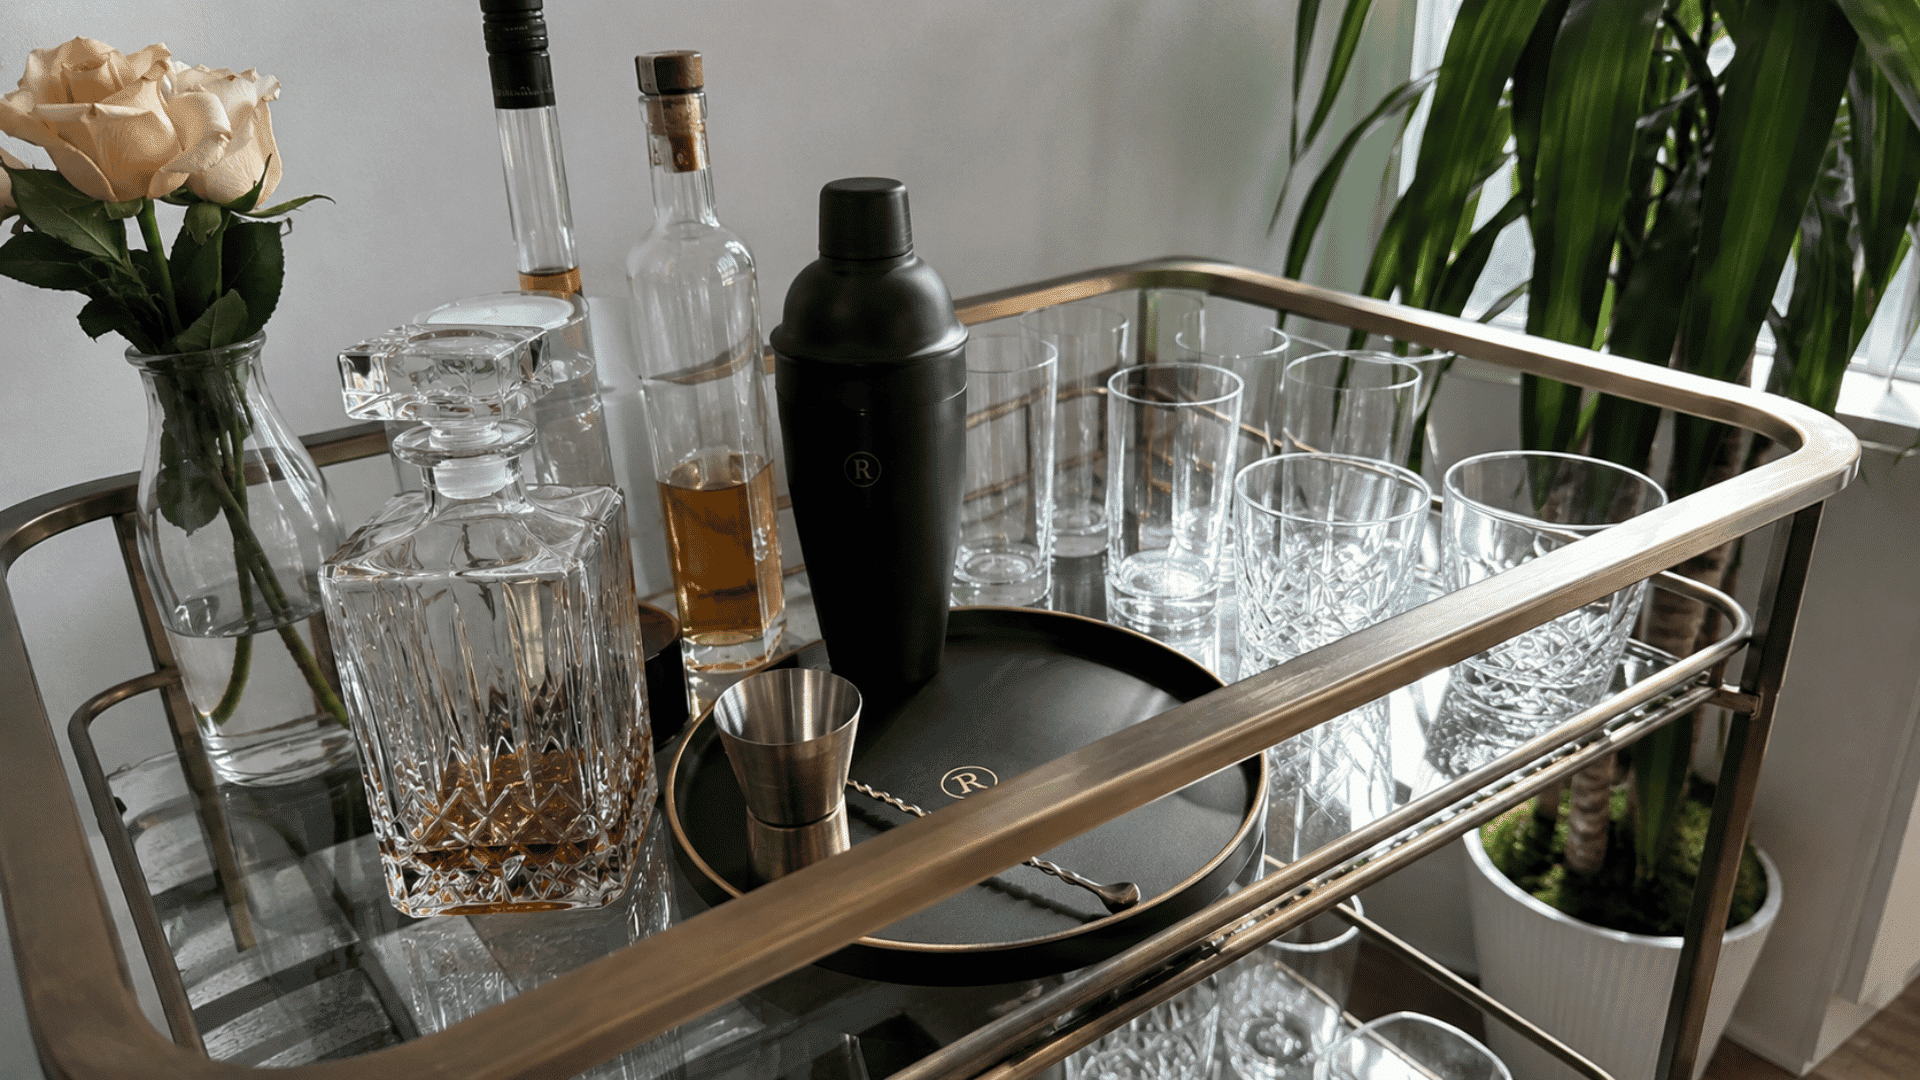
Choose personalization when you want your setup to feel distinctive rather than copied from a showroom. A single customized detail is usually enough to make the arrangement feel more individual.
- Personalized accessory: Use a monogrammed tray or ice bucket.
- Initialed drinkware: Introduce a coordinated set of glasses.
- One focal piece: Avoid repeating initials across every item.
- Gift potential: Consider customized pieces when furnishing a cart for someone else.
26. Style with Symmetry on Each Shelf
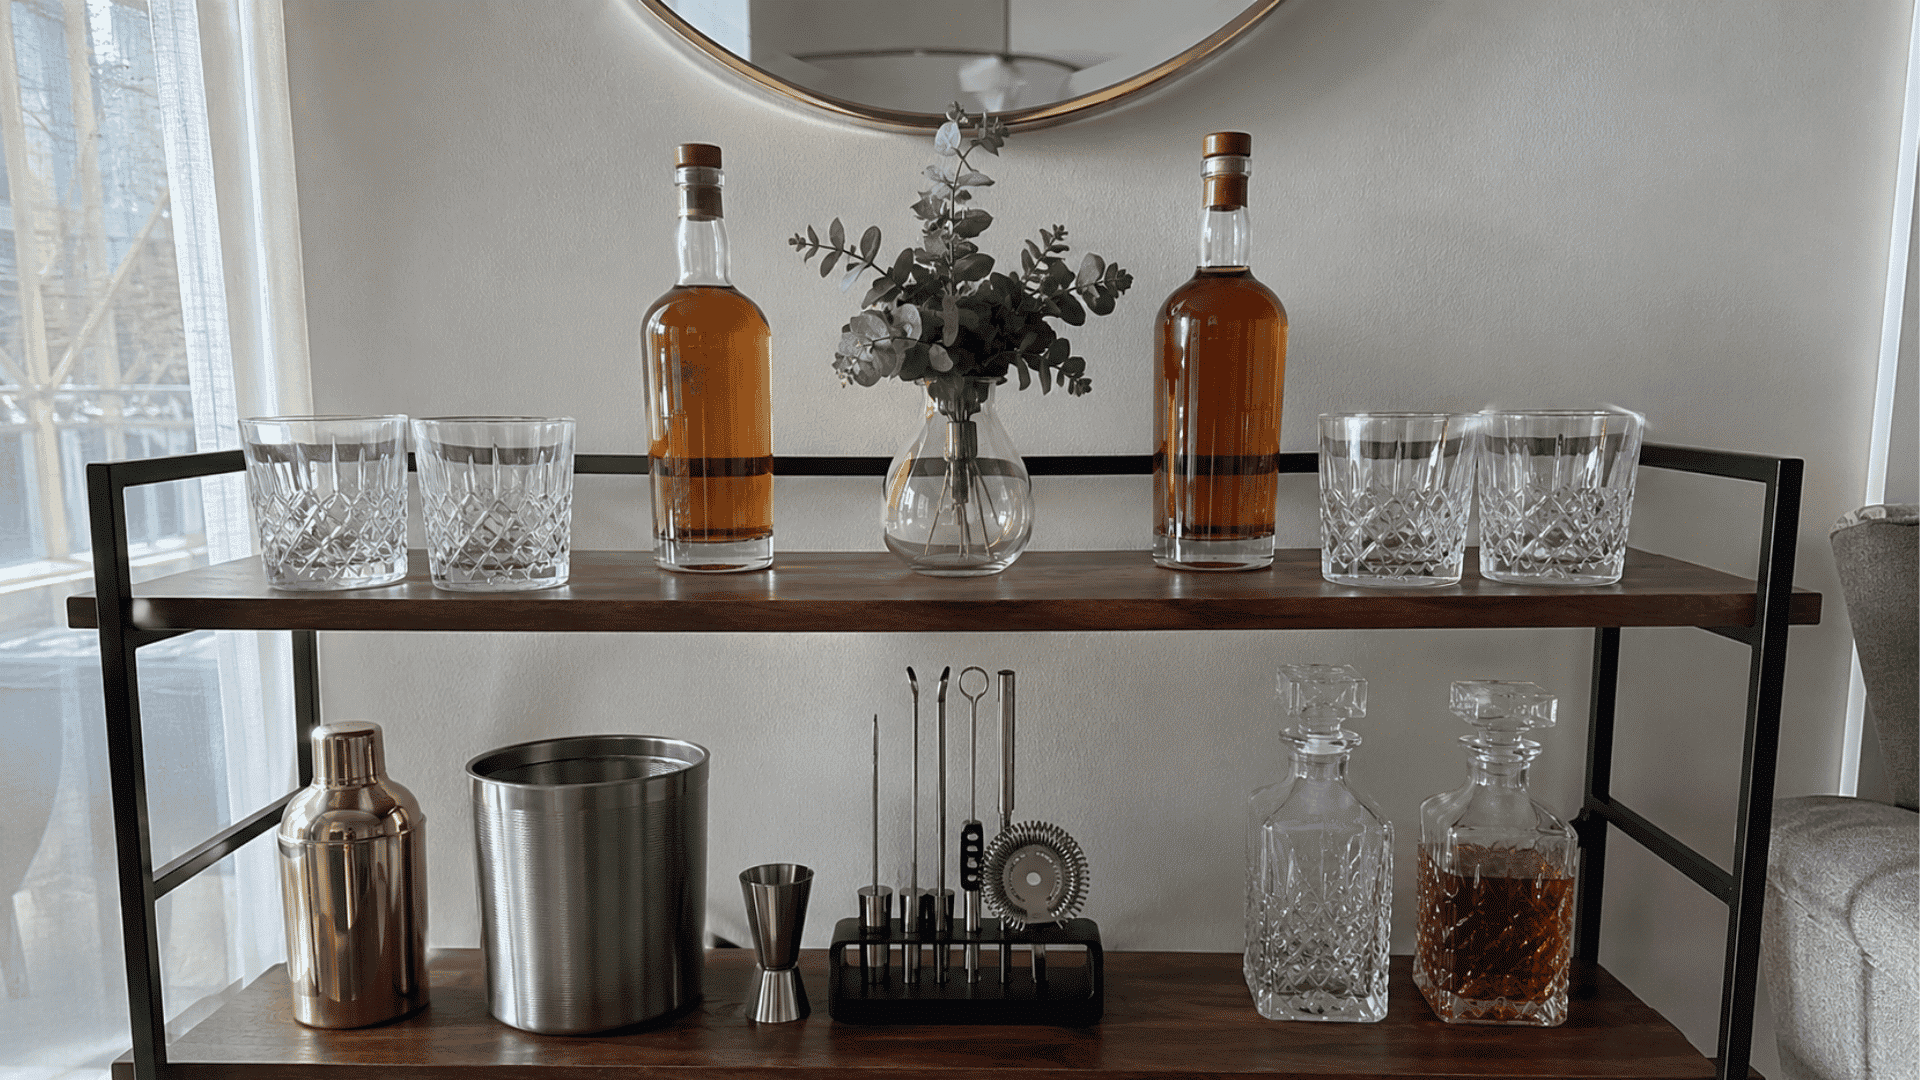
Pick symmetry if you prefer interiors that feel orderly and structured. It works especially well when the cart is wide enough to create clearly defined left, center, and right areas.
- Paired items: Place similar bottles or glasses on opposite sides.
- Central feature: Anchor the arrangement with one focal object.
- Comparable scale: Keep visual weight consistent across both ends.
- Wide format: Use this approach on rectangular carts with enough shelf room.
27. Pair Dark Finishes with Clear Glassware
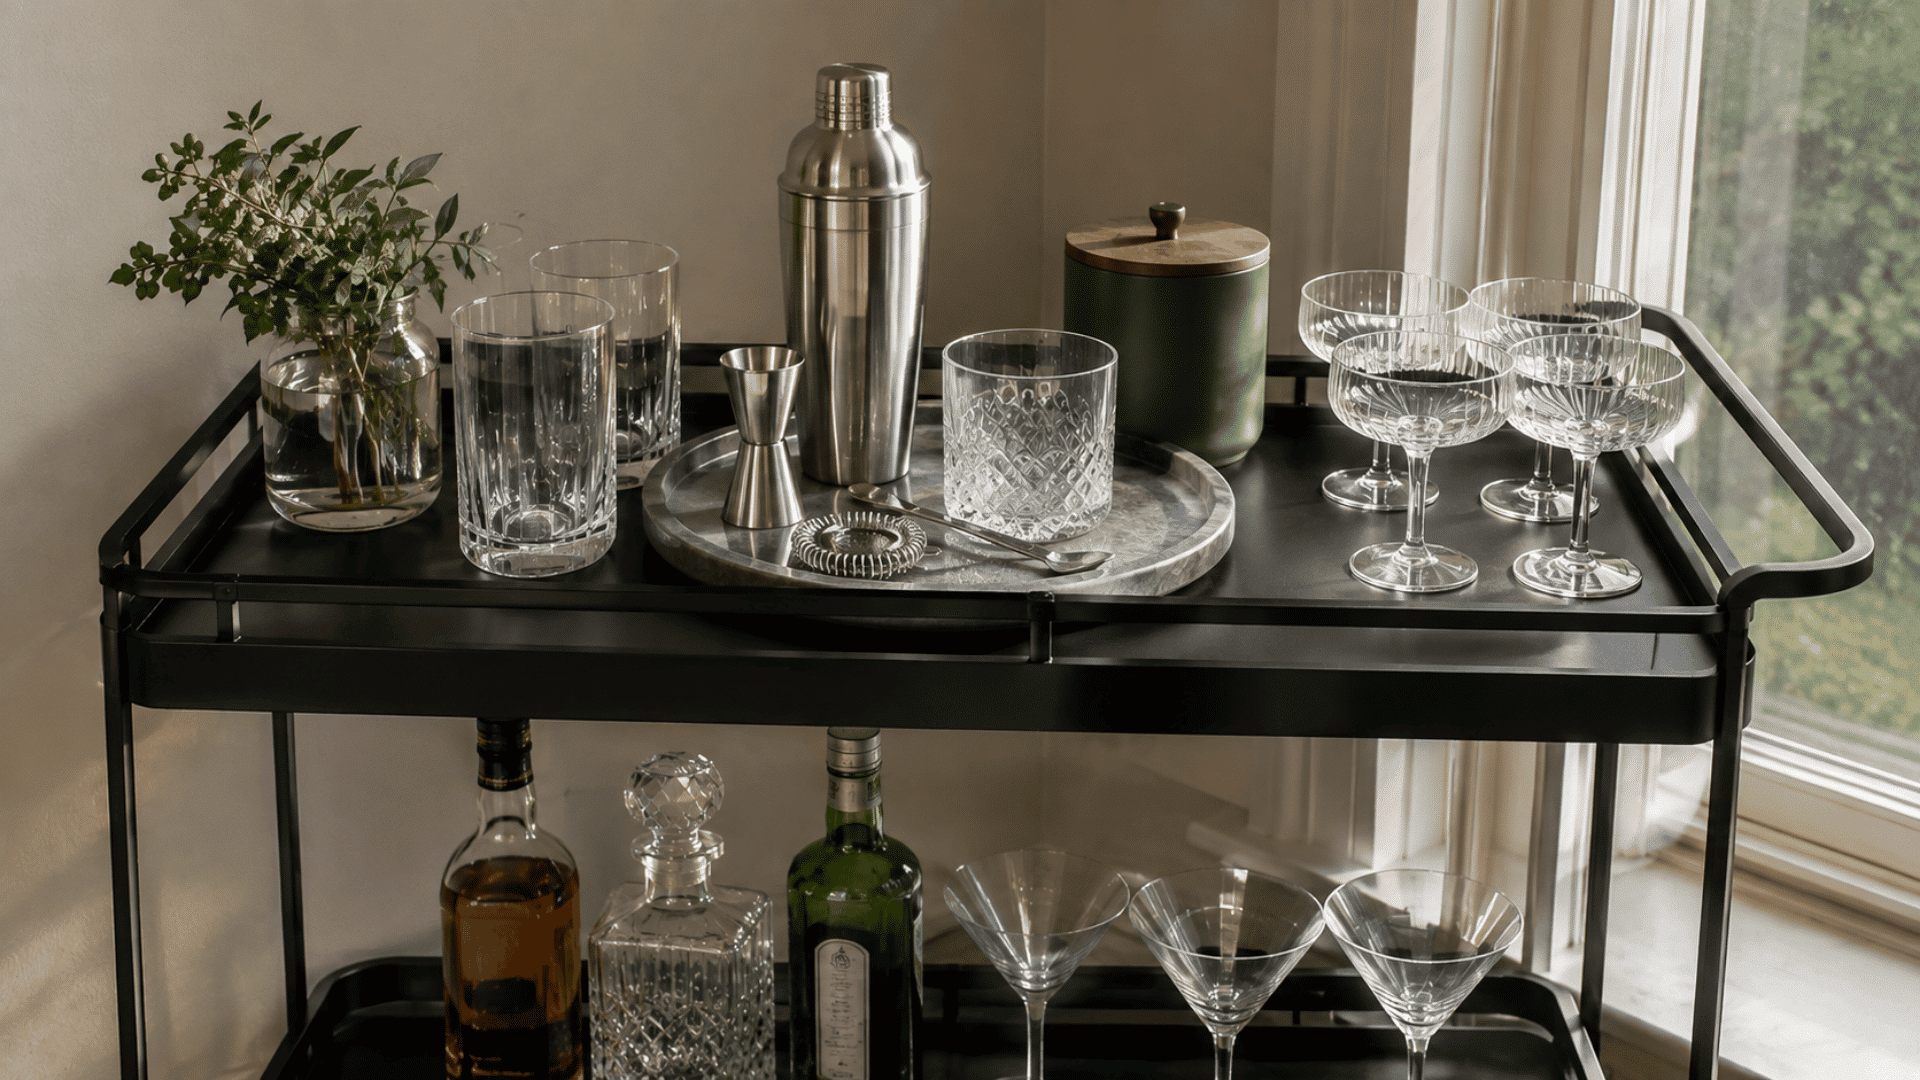
This combination suits a dark-framed cart that already has a strong visual presence. Keeping surrounding additions understated prevents the finished arrangement from becoming too heavy.
- Clear drinkware: Let transparent glasses lighten the setup.
- Metal accessories: Introduce restrained tools or serving pieces.
- Minimal accents: Limit additional colors to one or two.
- Single tray: Corral smaller objects without adding unnecessary layers.
28. Style a Wood Cart with Natural Textures
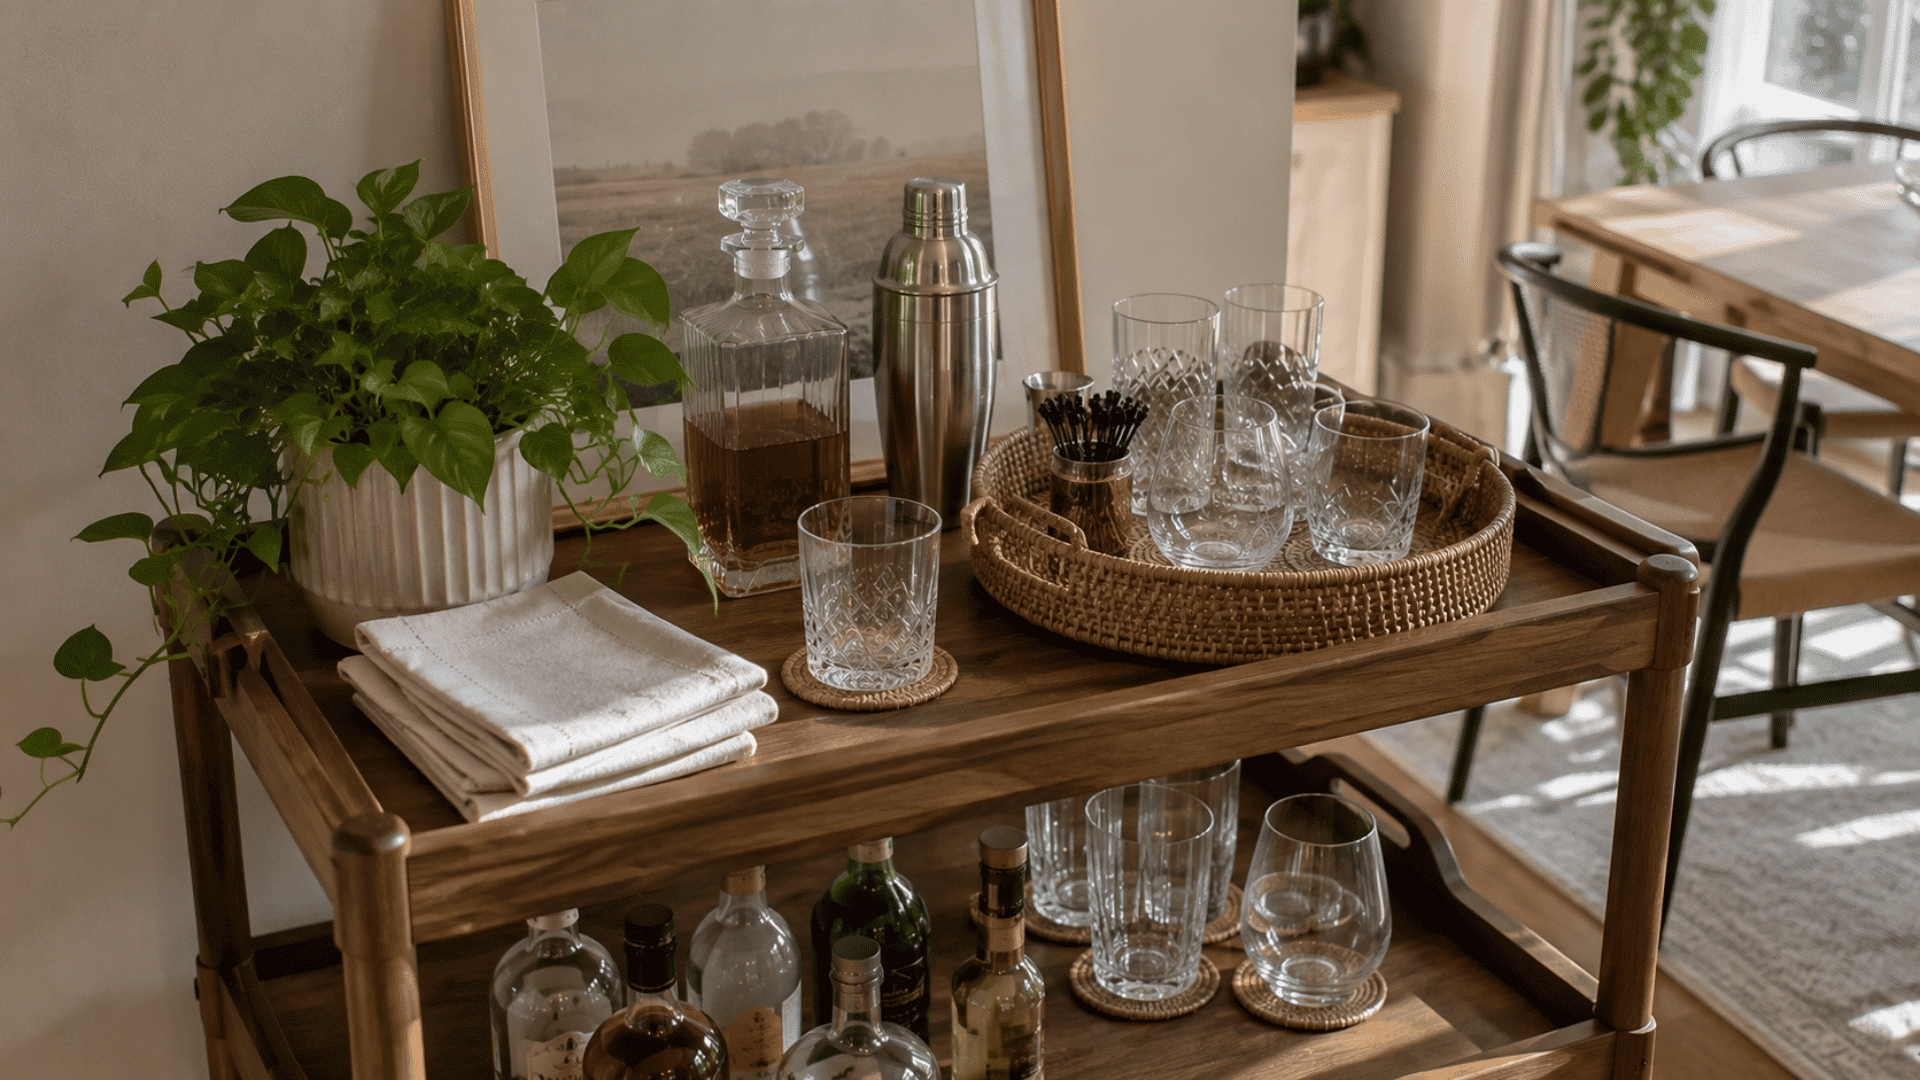
I’d use this approach with a wooden cart because softer materials naturally complement its warm appearance. The result can feel connected without adding too many decorative pieces.
- Woven tray: Introduce rattan or wicker.
- Fabric accents: Use linen or cotton serving pieces.
- Greenery: Add plant life instead of relying heavily on shiny finishes.
- Surface protection: Place coasters beneath drinks to help protect the wood.
29. Style an Outdoor Cart for Patio or Fire Pit Seating
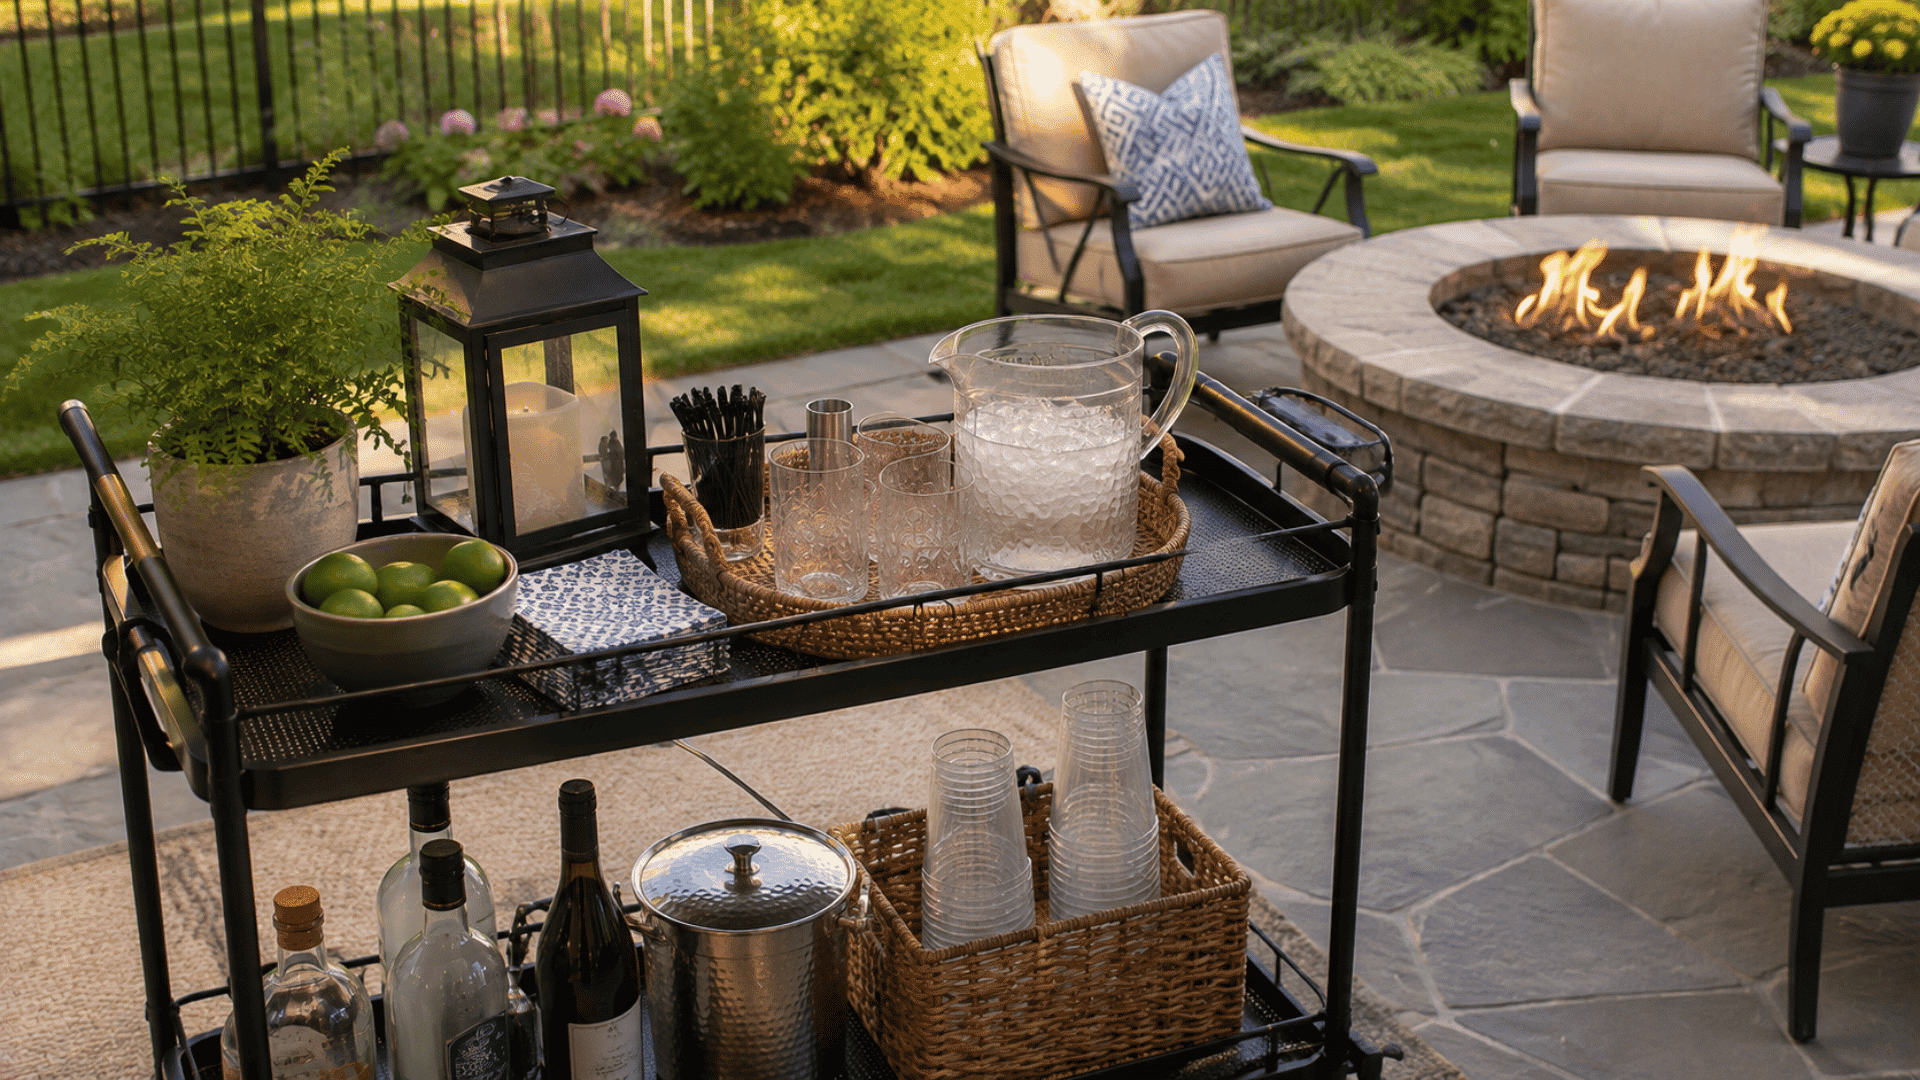
Pick this idea when drinks will be served beside your patio furniture and you want supplies close to the seating area. Outdoor conditions call for a setup that prioritizes practicality as much as appearance.
- Shatter-resistant drinkware: Avoid fragile glasses outdoors.
- Covered lighting: Choose a lantern rather than exposed flames.
- Wind-conscious decor: Secure lightweight accessories.
- Indoor storage: Bring supplies back inside once the gathering ends.
30. Dress Up a Rolling Cart for a Party
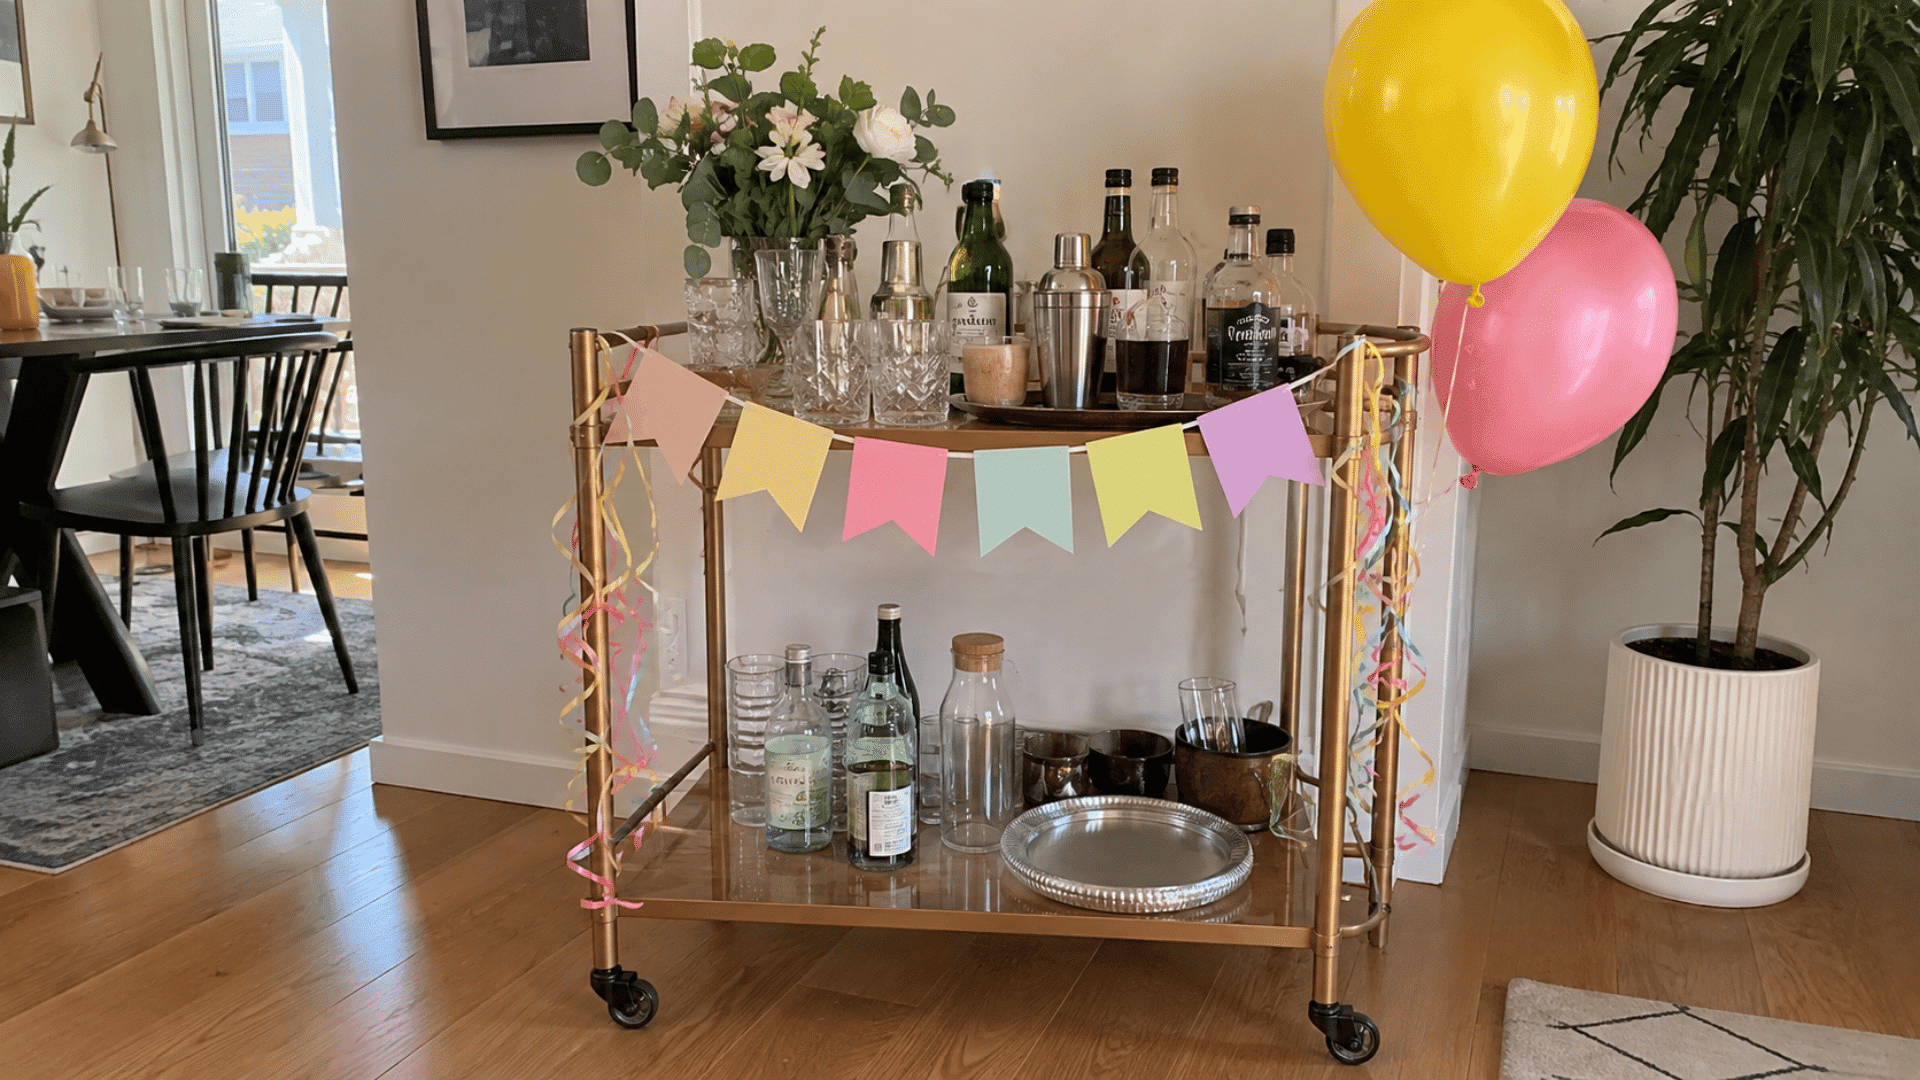
This option is ideal when you want the cart to match a celebration without permanently changing its everyday appearance. Temporary details make it easy to switch back once guests leave.
Give it a party-ready update with these DIY party decorations:
- Festive decoration: Attach a small banner or streamers.
- Optional balloons: Secure them to the frame without blocking access.
- Temporary setup: Take decorative pieces down after the event.
- Everyday base: Keep your regular arrangement underneath.
31. Add a Cart Skirt or Cloth for a Softer Look
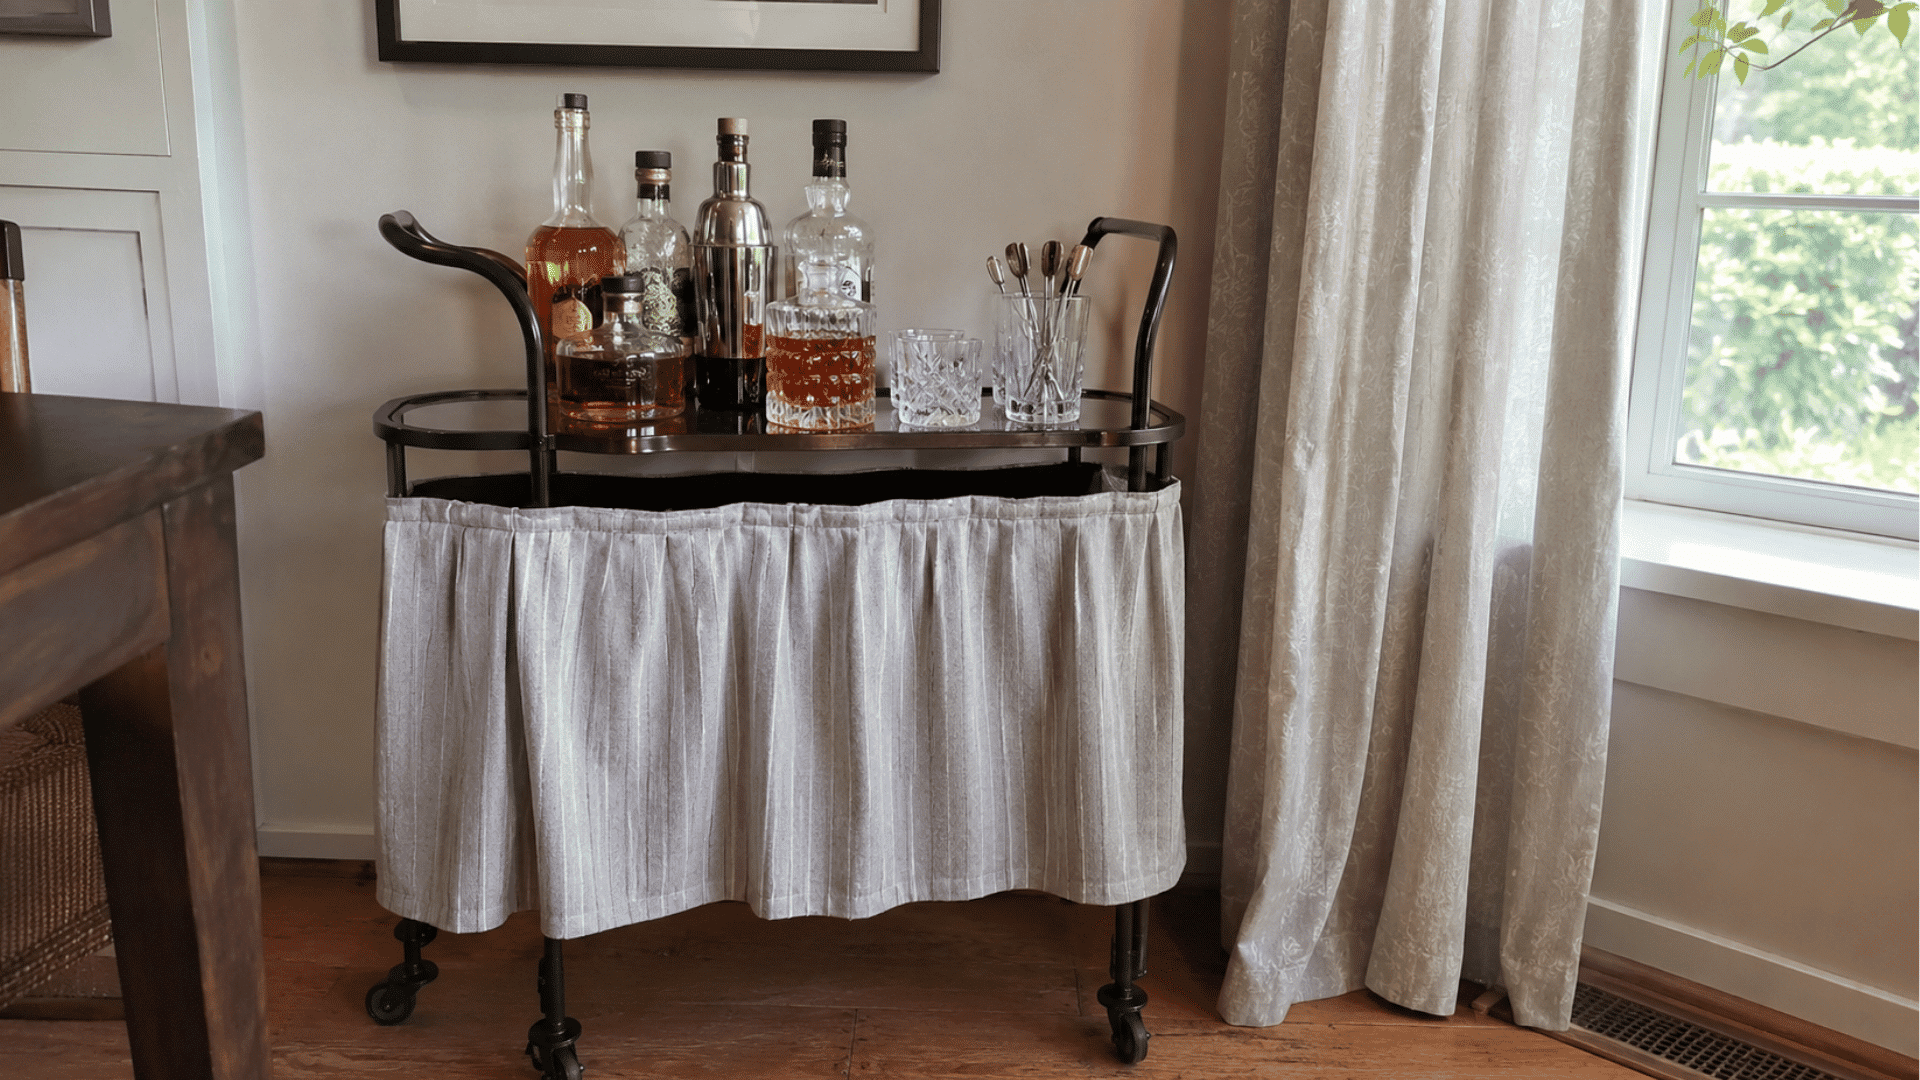
Choose fabric when a metal or wood cart feels too rigid against the rest of your furnishings. It can also introduce another material without adding more objects to the shelves.
- Fitted textile: Use a short cloth or skirt around the lower section.
- Room coordination: Pick fabric that works with nearby linens.
- Safe length: Keep the hem away from wheels and the floor.
- Removable design: Choose something that can be taken off easily for washing.
Steps to Execute Your Bar Cart Ideas from Start to Finish
A thoughtful setup can make this small piece of furniture feel more connected to the rest of your room. You can also adjust the finished look as your needs change.
Step 1: Choose the Right Location
Start by deciding where you’ll use the cart most. Consider your living room furniture, keep it close to the main serving area, and leave enough room for people to walk past.
Keep it away from direct heat and strong sunlight, check that the floor underneath is level, and lock the wheels before serving if the cart has locks.
My Tip: Make sure one person can stand at the cart without blocking a doorway or main walkway.
Step 2: Place the Larger Bottles First
Bottles take up the most room, so add them before smaller items. Keep similar bottles grouped, and put heavier bottles on the lower shelf.
Avoid setting bottles right along the shelf edge; keep tall bottles from blocking your tools; and store backup bottles somewhere else, not on the cart.
Step 3: Add the Glassware
Pick glasses based on the drinks you actually plan to serve. Keep often-used glasses within easy reach, and leave a little space between each glass.
Avoid setting glassware close to the cart edge; do not stack more glasses than the shelf can comfortably hold, and store extra sets in a cabinet.
Step 4: Add Mixers and Drink Extras
Mixers work best placed near the bottles they go with. Add soda or sparkling water, and group shelf-safe syrups together for easy access.
Use a small bowl for whole citrus fruit, keep cut fruit refrigerated until you need it, and keep dairy and other cold items chilled until serving time.
Step 5: Organize the Small Tools
Small bar tools can scatter across a cart fast. Keep openers together in one spot, and store the jigger near the shaker.
Use a single tray for loose small pieces, keep napkins away from the ice bucket, and store tools you rarely use somewhere off the cart.
Step 6: Finish with Simple Decor
Check how much open room is left before adding decor. Add one small plant or vase if there is room, and use wall decor instead of more shelf items.
Leave part of the top shelf open for pouring, skip tall decor pieces that can tip over easily, and remove anything the blocks serving.
My Tip: A cart that still has open space is usually easier to use than one that looks fully decorated.
Mistakes to Avoid While Creating a Bar Cart
A few common mistakes can make a cart harder to use or riskier to keep near guests. Checking your setup before people arrive can help avoid most of them.
- Packing too many bottles onto one shelf
- Setting heavy bottles on an unstable upper shelf
- Leaving glasses too close to an edge
- Blocking the cart’s wheels
- Leaving cut fruit or dairy out for too long
- Keeping bottles in direct sunlight
- Placing the cart too close to a fireplace or an open flame outdoors
- Letting sticky spills dry on the shelves
- Mixing unrelated household items with drink supplies
- Leaving no open space for pouring or preparing drinks
Wrapping It Up
I used to think styling was the hard part, but honestly, just getting started is what trips most people up. Pick one idea, try it out, and see how it feels before piling on more.
Small tweaks add up faster than you’d expect, and your cart will look pulled together in no time. There’s no rulebook here, just what works for your space and how you like to entertain.
So take these bar cart ideas, run with a few, and let the rest come together naturally over time.
Frequently Asked Questions
How Tall Should a Bar Cart Be?
Most bar carts sit at counter height for standing use. The right height depends on nearby furniture and how easily you reach the top shelf.
What Can You Use Instead of a Bar Cart?
A small cabinet, console table, rolling kitchen cart, or sturdy shelf can all work in place of a bar cart, especially in a tight room.
Do Bar Carts Need Wheels?
No, wheels make it easier to move a cart between rooms or out to a patio. A stationary cart works fine for many homes.