


A single wall can completely change the feel of a room. I’ve seen how the right statement wall can add warmth, depth, color, or texture without needing a full renovation.
It can make a plain bedroom feel cozy, a living room feel bolder, or a hallway feel less empty and forgotten.
The good part is that I don’t need a professional designer or a big budget to get a polished look. Many DIY accent wall ideas can be created using paint, wood trim, wallpaper, shelves, or simple patterns.
In this collection, I’ve put together all those feature wall ideas that I have actually tried at home, ranging from simple paint tricks to more detailed DIY projects that add real character to any space.
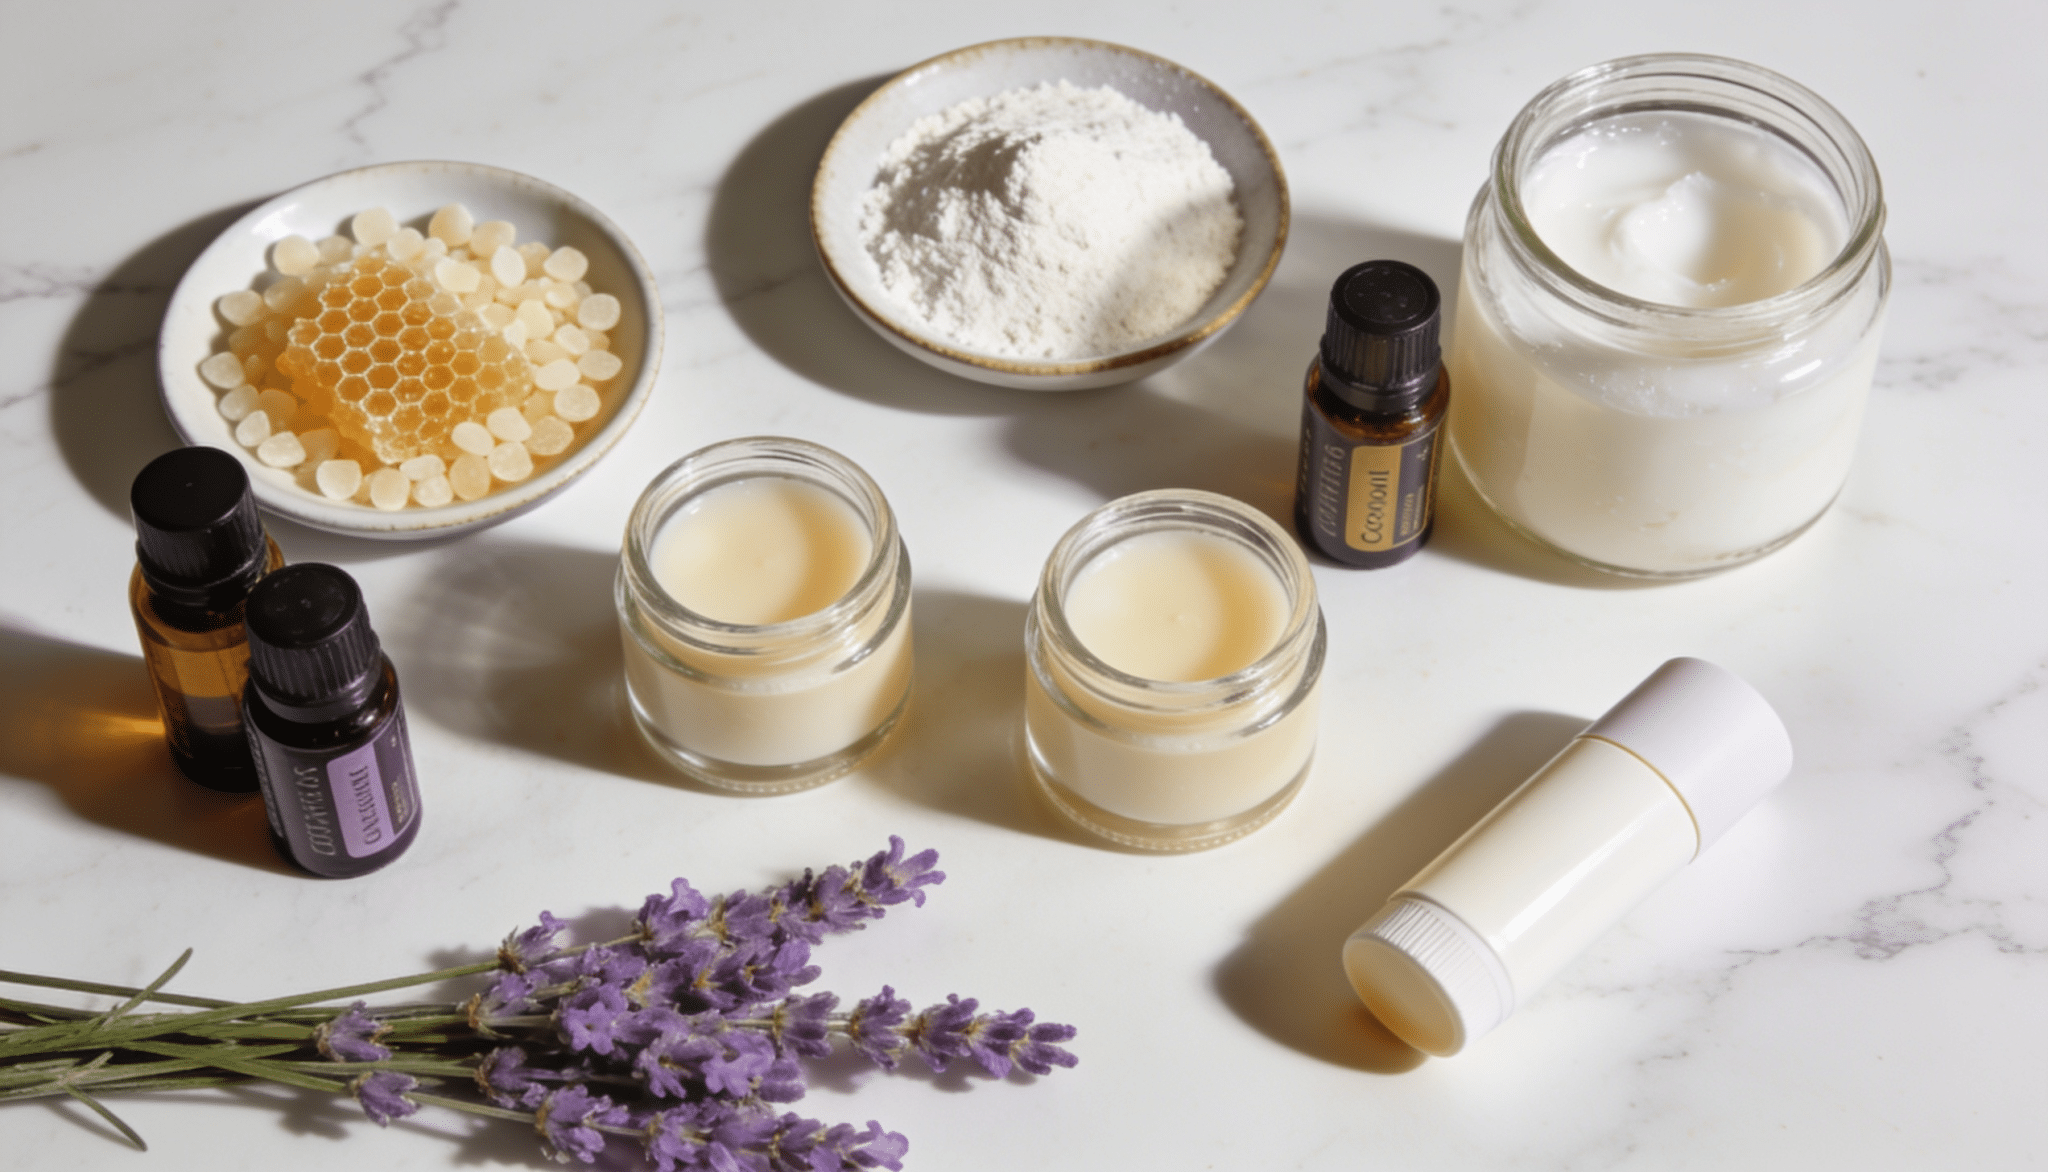
Must-Have Tools and Materials Before You Start
Before starting your project, it’s important to gather all the necessary tools and materials in one place. This will help ensure a smooth workflow, reduce delays, and improve accuracy during installation and finishing.
| Category | Items | Purpose |
|---|---|---|
| Basic Toolkit | Level, measuring tape, painter’s tape | Ensures accurate alignment, measurement, and clean edges |
| Paint Supplies | Rollers, brushes, drop cloths | Used for surface preparation and smooth, mess-free painting |
| Adhesives & Fixings | Construction adhesive, nail gun, peel-and-stick options | For secure installation and mounting of materials |
Best DIY Accent Wall Ideas for Every Room in Your Home
From rustic wood finishes to bold painted patterns, these DIY accent wall ideas offer plenty of inspiration. Each project brings its own unique look while remaining achievable for most homeowners.
1. Reclaimed Wood Pallet Wall
Rustic, warm, and full of natural character, a reclaimed wood pallet wall brings earthy texture and depth to any room. Its weathered grain and rich tones create an effortlessly organic focal point with evergreen appeal.
DIY Instructions:
- Source clean, dry wooden pallets
- Sand all surfaces smooth
- Arrange pallets across the wall
- Nail or screw pallets securely
- Seal with clear wood finish
2. Bold Painted Stripes
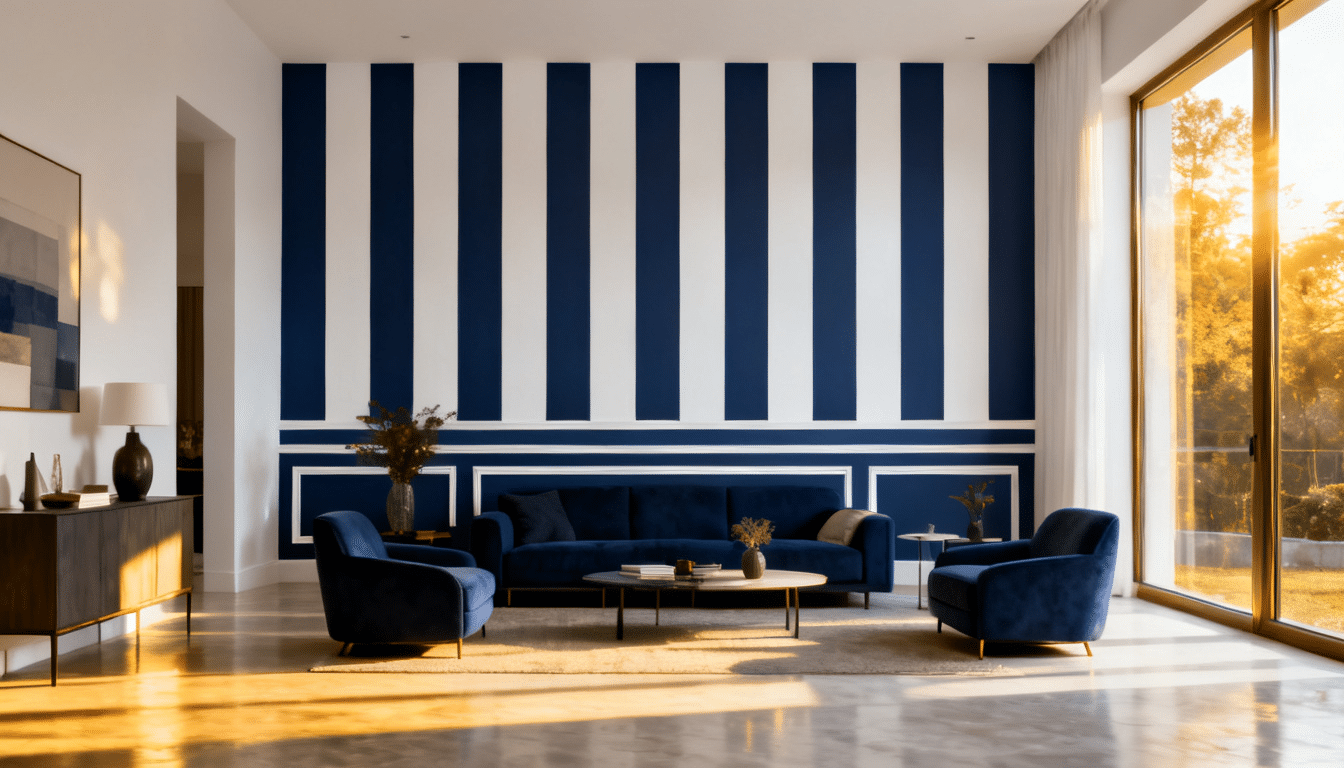
Dramatic and energizing, bold painted stripes instantly elongate or widen a room depending on their direction. Whether horizontal or vertical, they add a graphic punch that transforms a plain wall into a striking design statement.
DIY Instructions:
- Choose two contrasting paint colors
- Measure and mark even stripe widths
- Apply painter’s tape along the lines
- Paint alternating stripes carefully
- Peel the tape before the paint dries
3. Stenciled Pattern Wall
Intricate and artistic, a stenciled pattern wall brings the polished look of wallpaper without the commitment or cost. Repeating motifs add visual rhythm and personality, turning a bare wall into a handcrafted decorative masterpiece.
DIY Instructions:
- Choose a repeating stencil design
- Mark a level starting point
- Tape the stencil firmly to the wall
- Dab paint evenly through the stencil
- Reposition and repeat across the wall
4. Faux Brick Wall with Paint
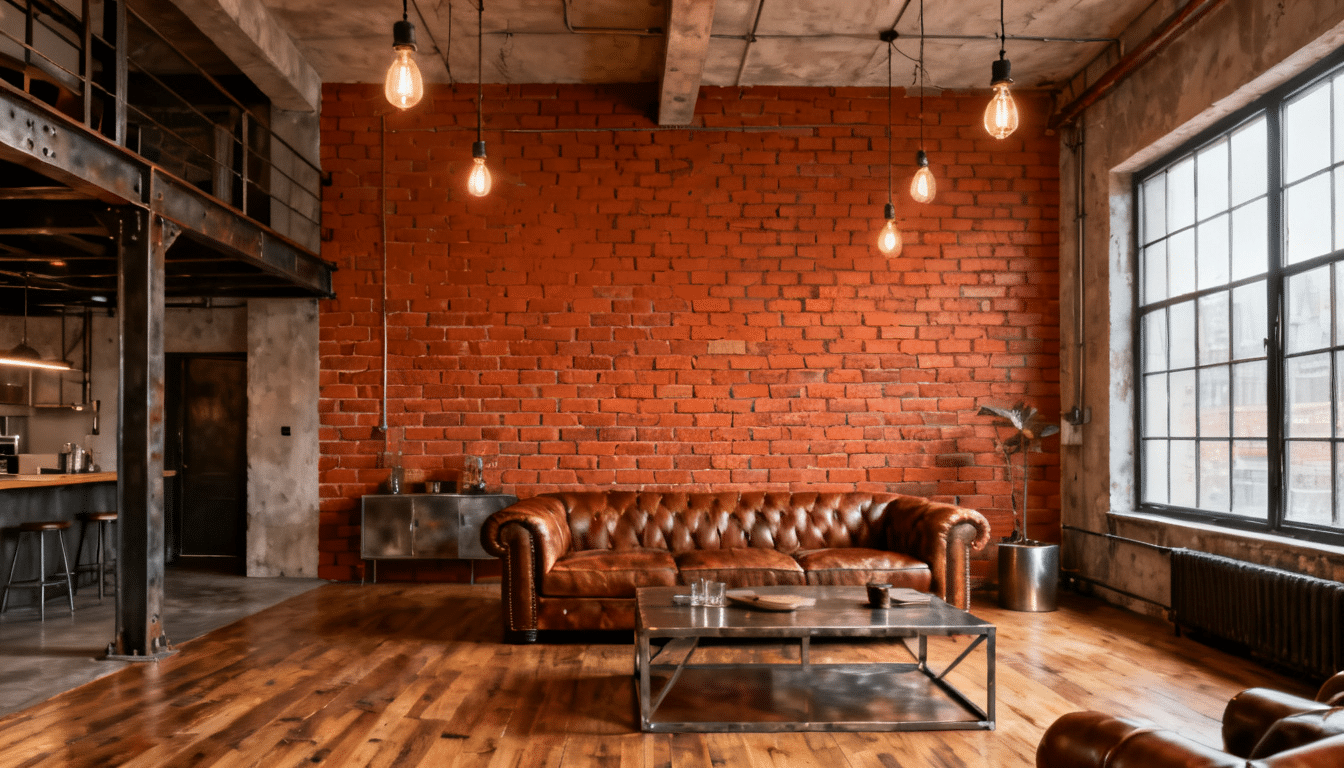
Gritty, urban, and full of industrial charm, a faux-brick wall adds raw texture and character without the need for actual masonry.
The layered tones of painted bricks create a rugged yet clean backdrop for any interior style.
DIY Instructions:
- Apply a base coat of mortar color
- Tape off individual brick shapes
- Sponge on brick-toned paint
- Vary tones for a realistic look
- Remove tape and blend edges
5. Chalkboard Paint Wall
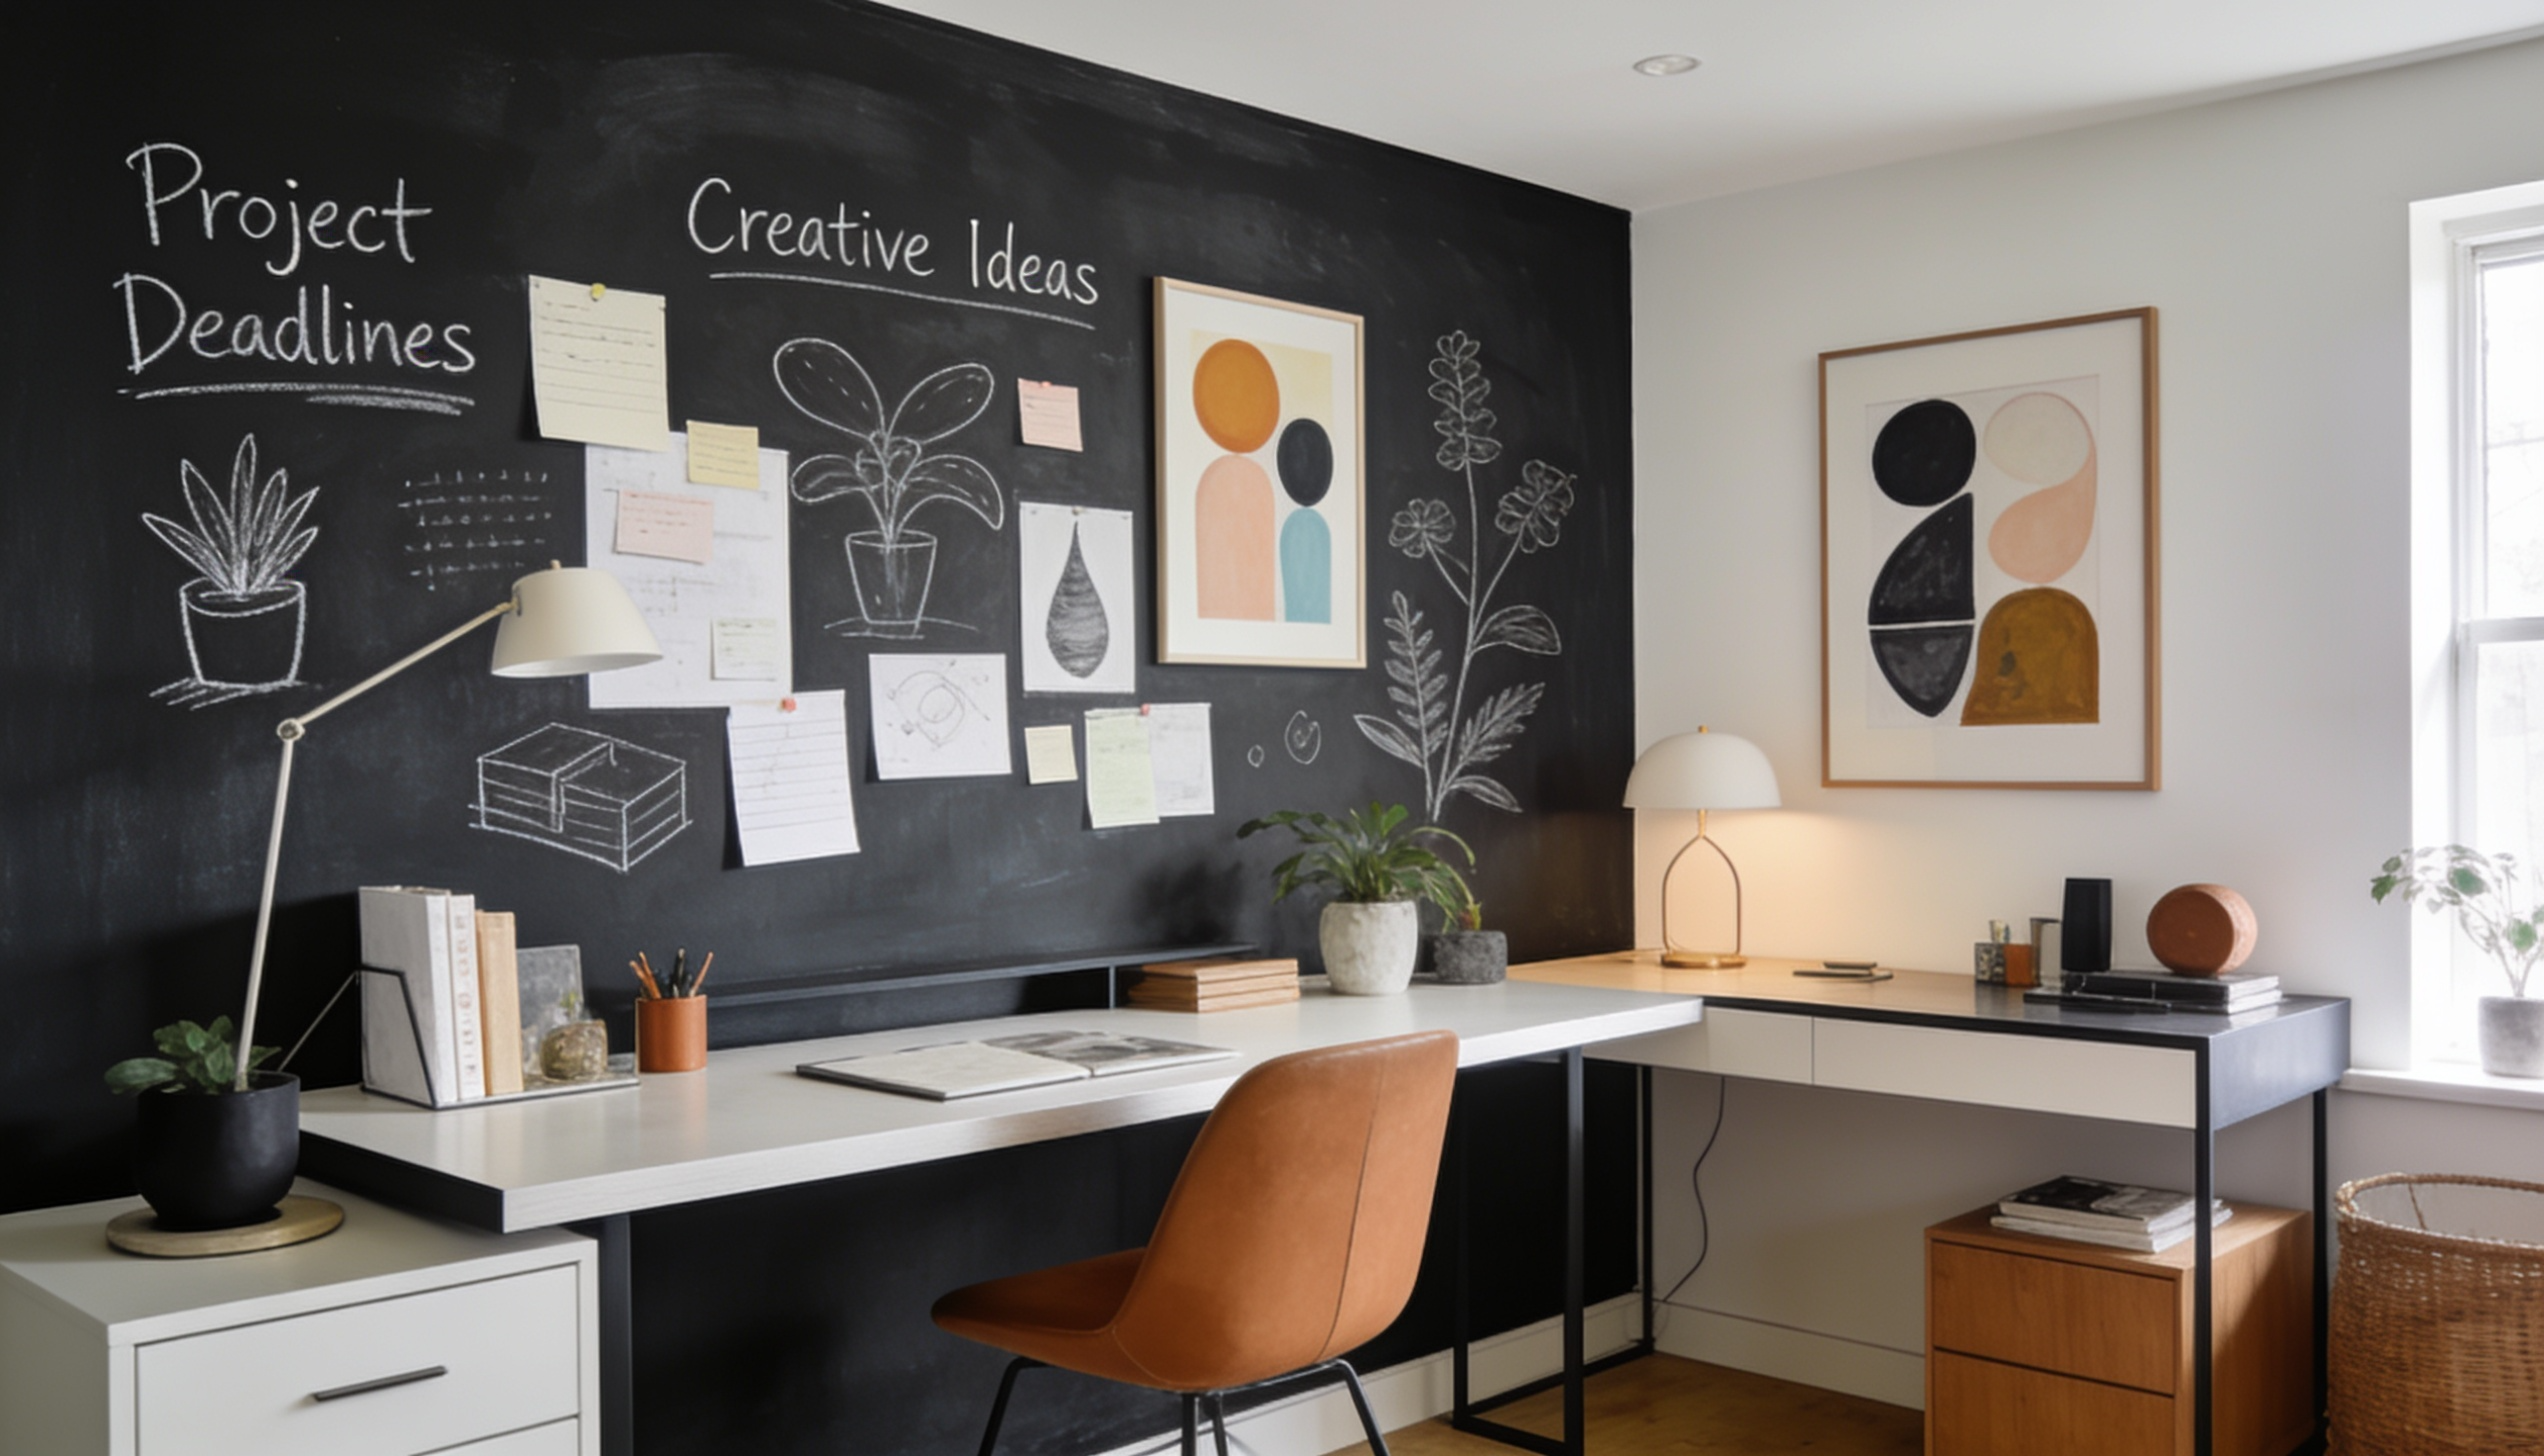
Playful, functional, and effortlessly cool, a chalkboard paint wall turns an ordinary surface into an ever-changing creative canvas.
It adds matte, velvety depth while inviting daily creativity, doodles, and handwritten messages to the space.
DIY Instructions:
- Clean and prime the wall surface
- Apply chalkboard paint evenly
- Let dry between multiple coats
- Season the wall with chalk before use
- Erase and redecorate freely
6. Watercolor Wash Wall
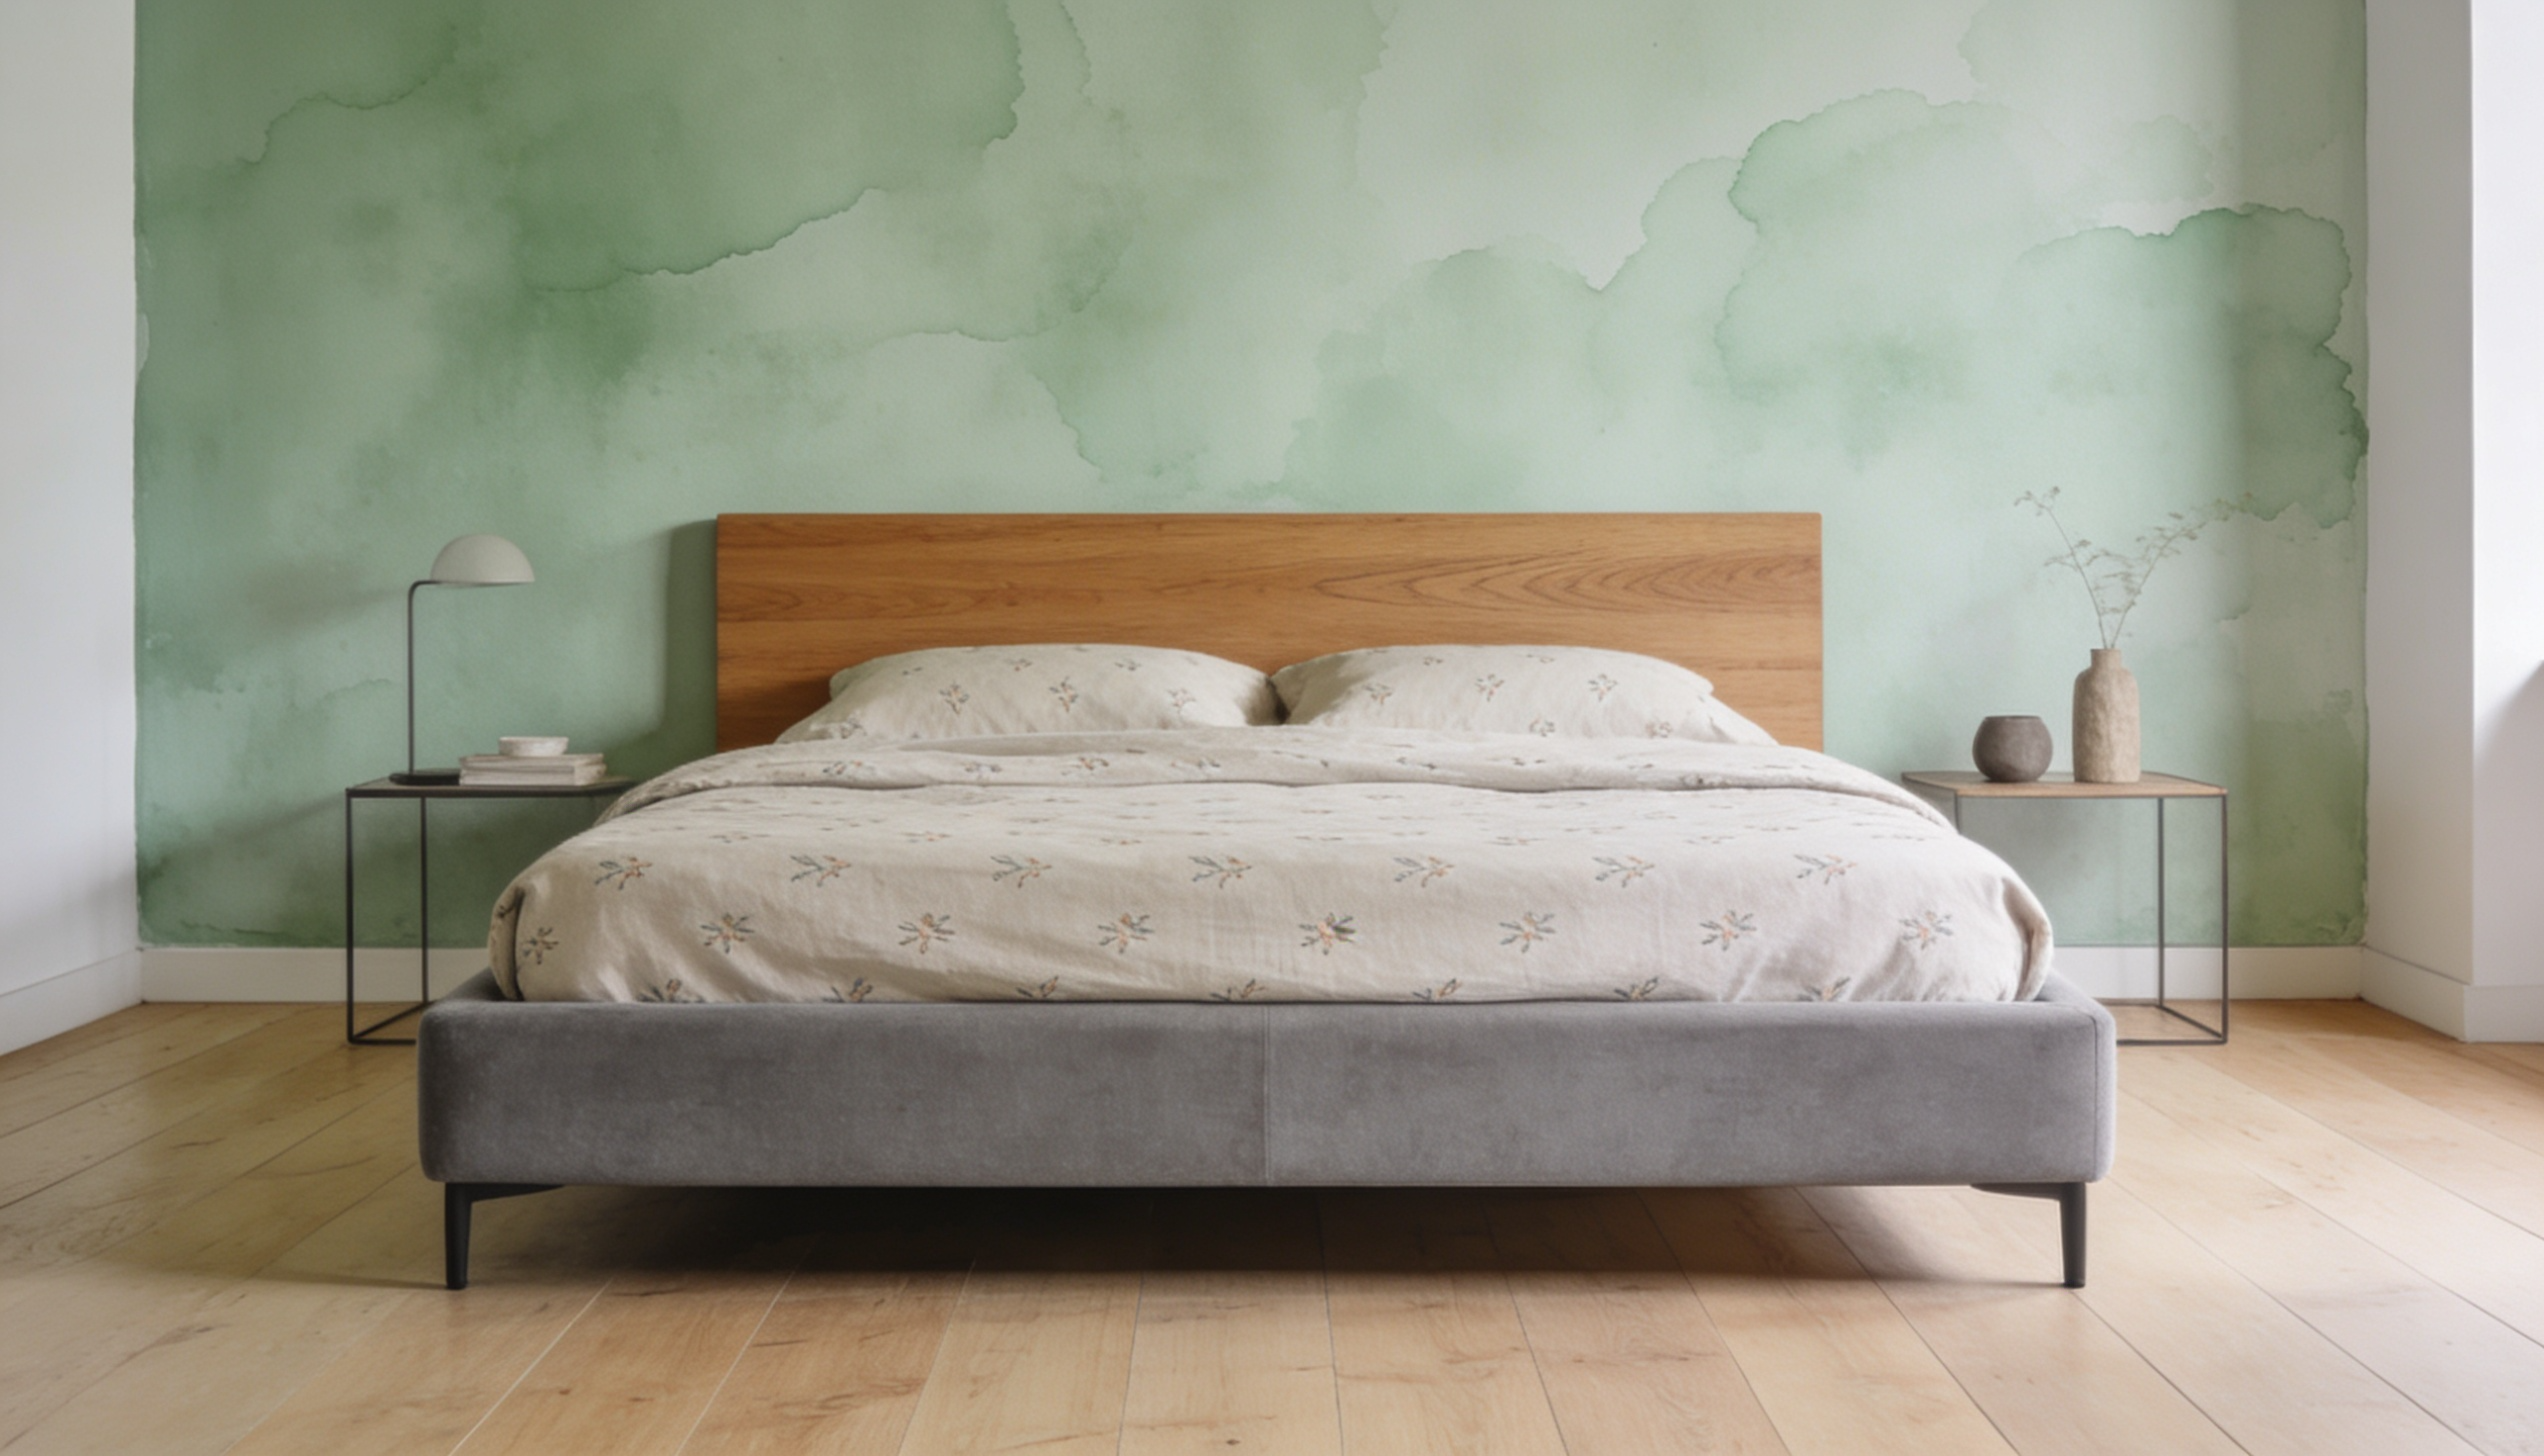
Soft, dreamy, and beautifully fluid, a watercolor-wash wall mimics the gentle blending of fine-art brushstrokes. Its hazy, gradient-like quality adds a romantic, soft mood that feels both modern and painterly.
DIY Instructions:
- Dilute paint with water generously
- Wet the wall surface lightly
- Brush on paint in loose strokes
- Blend colors while still wet
- Layer additional washes when dry
7. Fabric Panel Wall
Luxurious, warm, and acoustically softening, a fabric panel wall introduces rich texture and color in an instant. It brings the look of upholstered interiors to any room, adding softness and a curated, polished finish.
DIY Instructions:
- Cut fabric to panel dimensions
- Wrap fabric around foam boards
- Staple fabric tightly to boards
- Mount panels evenly on the wall
- Adjust spacing for clean alignment
8. Colorful Tapestry Wall
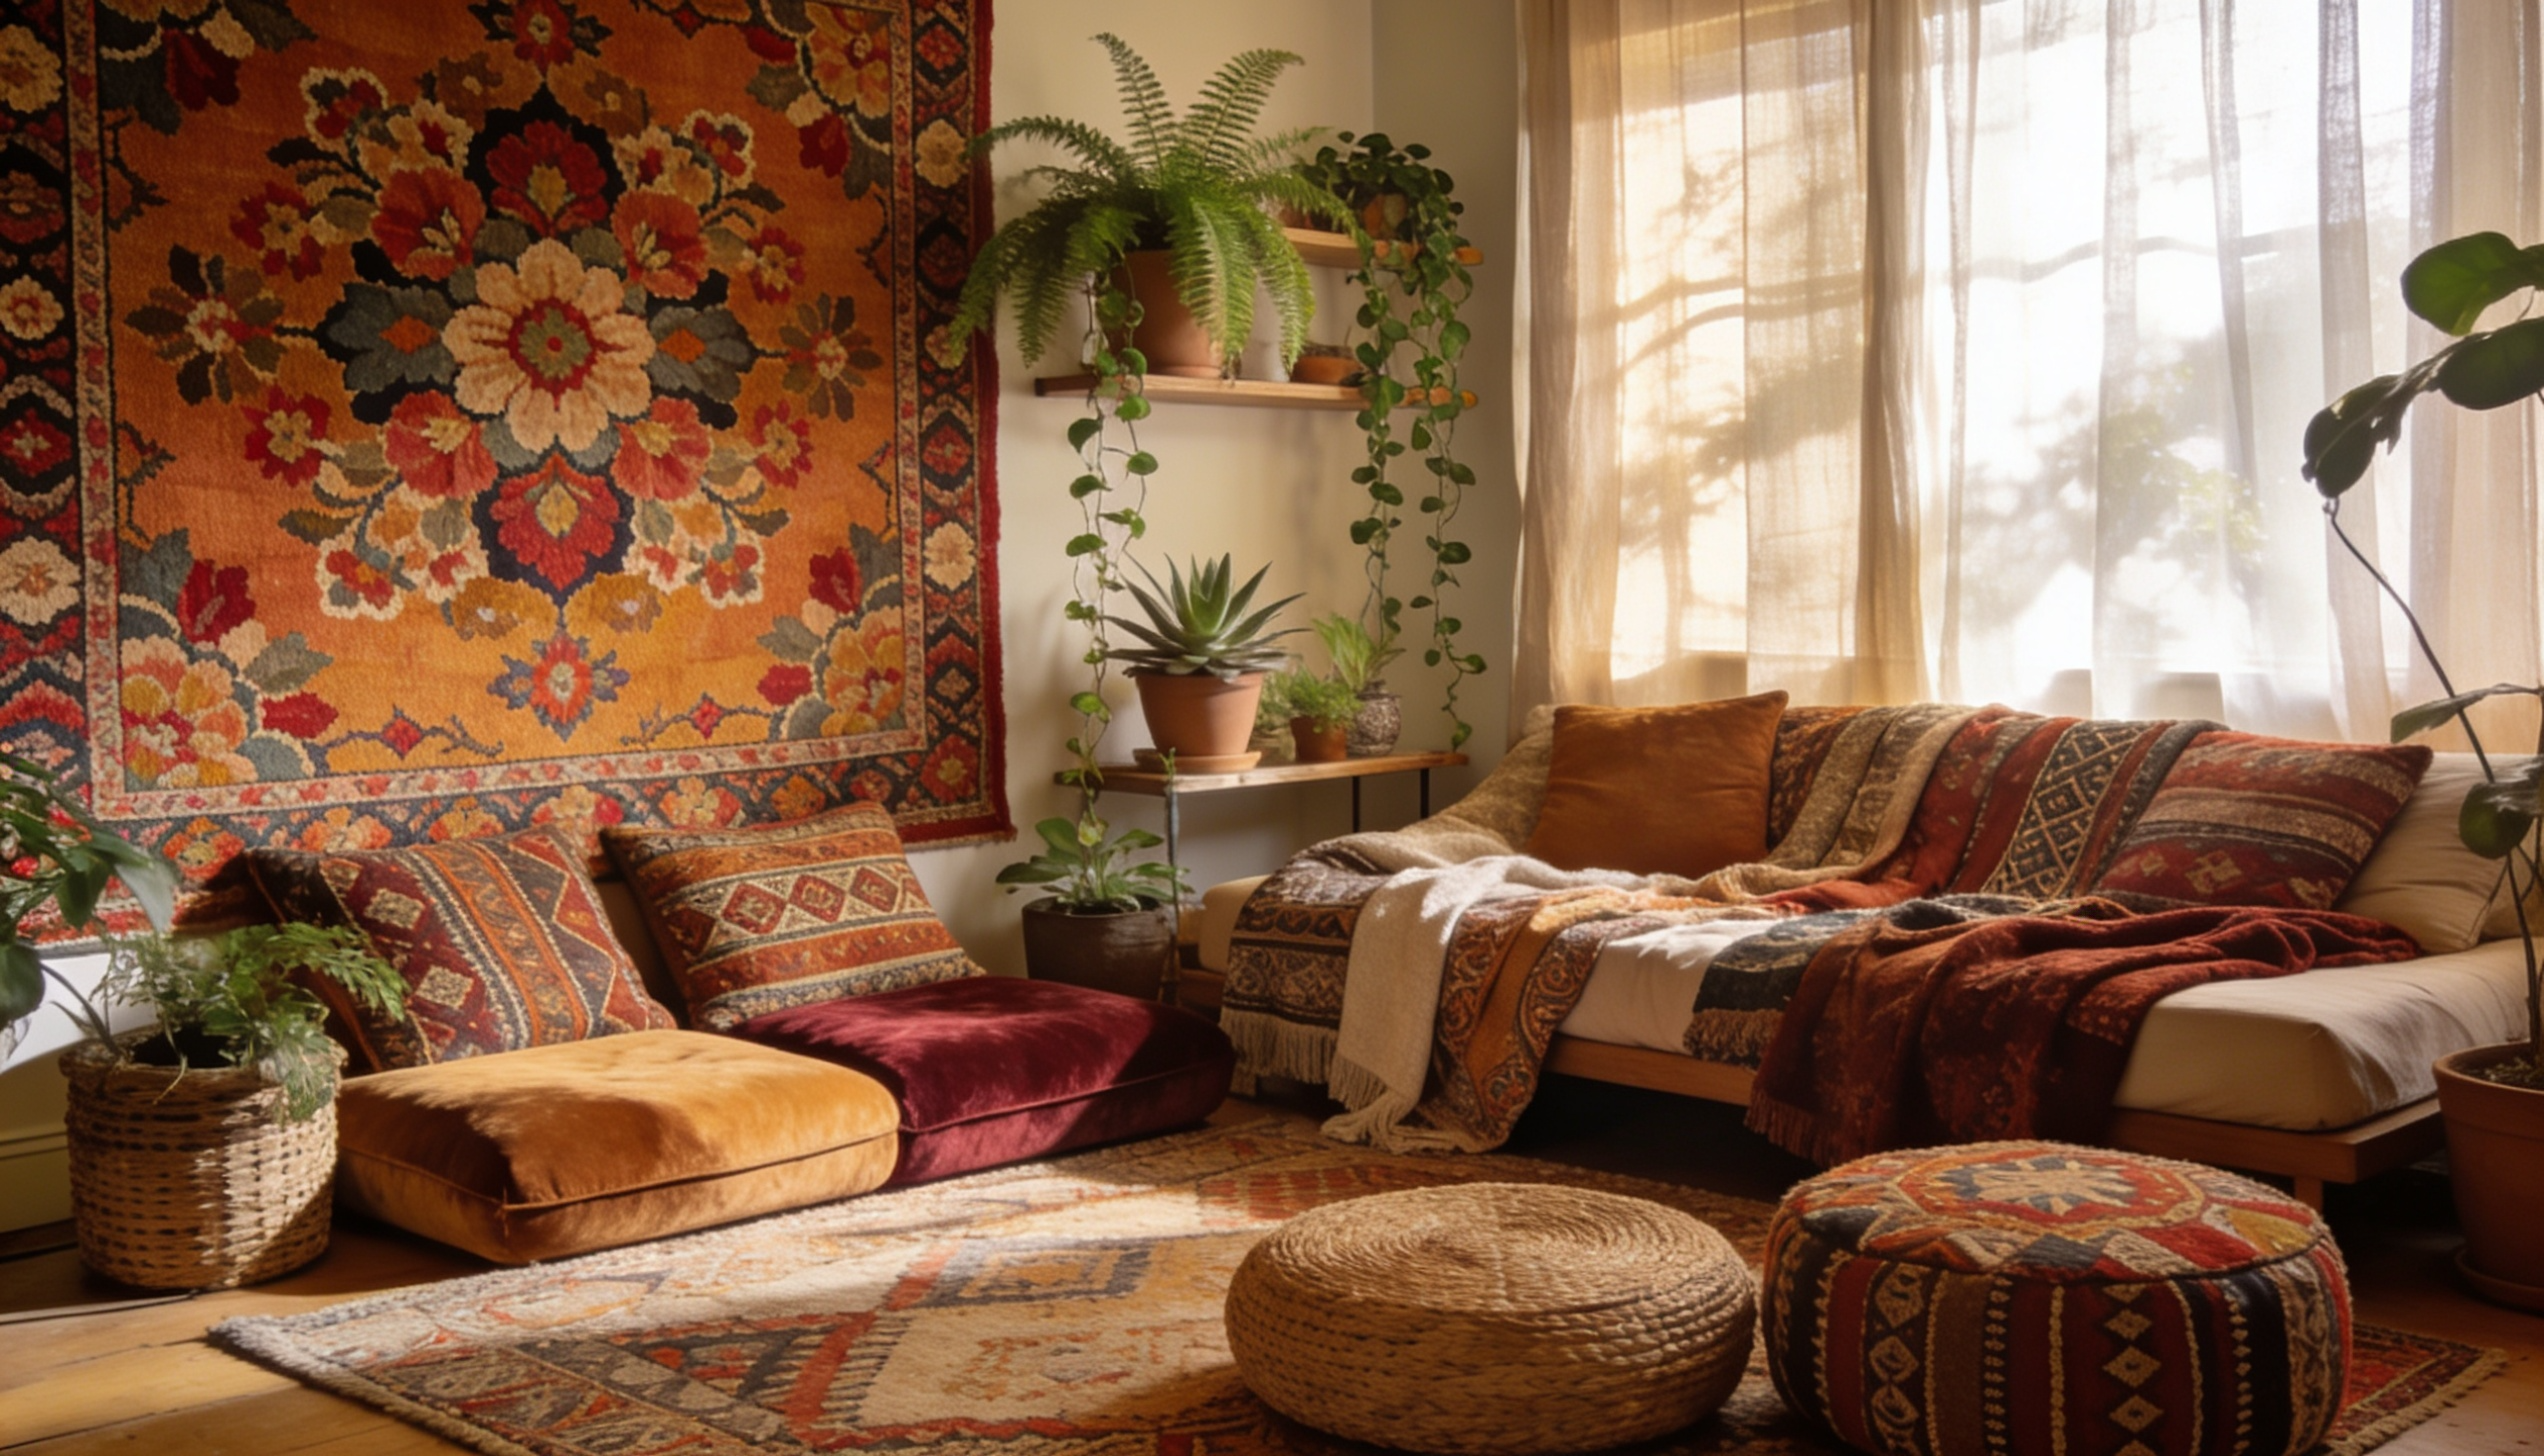
Vibrant, bohemian, and effortlessly expressive, a colorful Tapestry wall transforms a plain surface into a bold artistic statement.
Rich patterns and saturated hues bring cultural depth, warmth, and personality to any living space.
DIY Instructions:
- Choose a fabric that fits the wall
- Install a sturdy curtain rod or dowel
- Hang the fabric from the rod evenly
- Smooth out any folds or wrinkles
- Secure bottom edges if needed
9. Cork Tile Wall
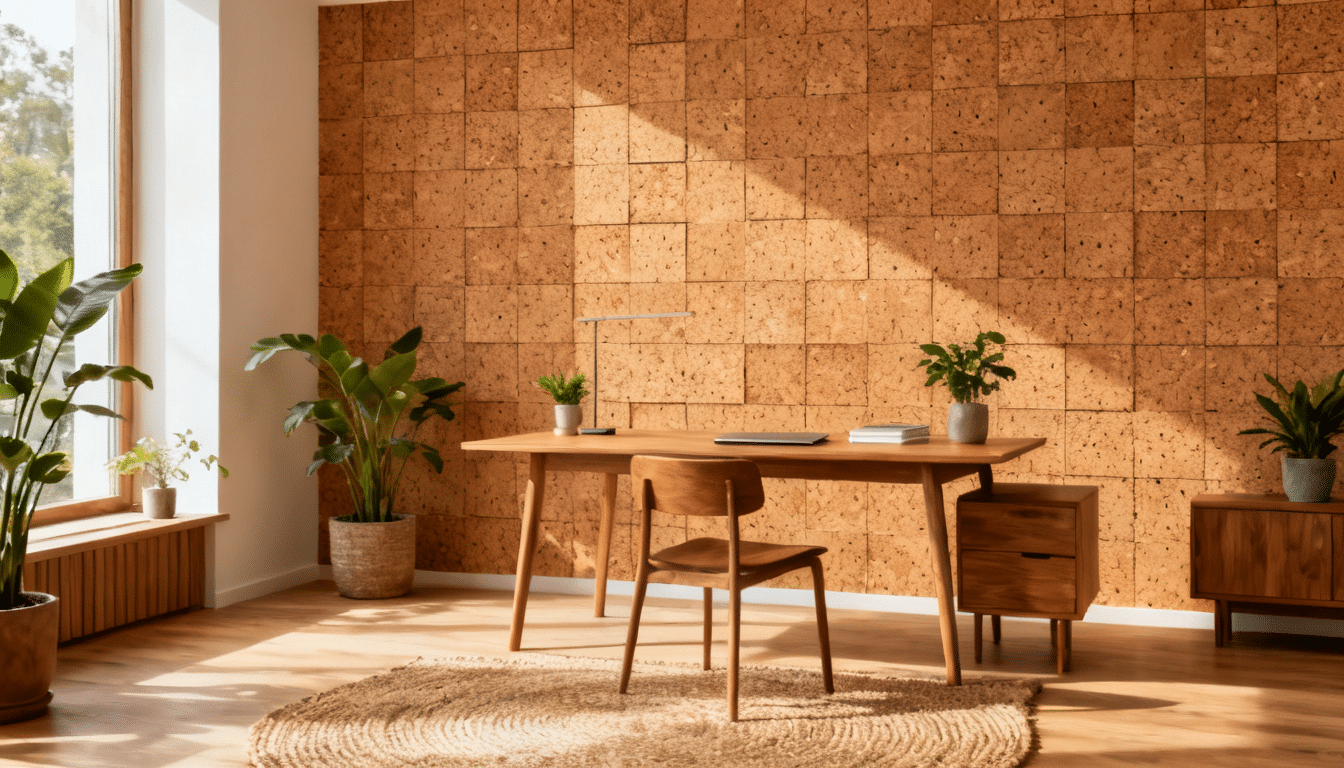
Natural, textural, and wonderfully practical, a cork tile wall adds an earthy, warm tone that absorbs sound beautifully. Its organic grain and muted color palette make it an understated yet functional design feature in any room.
DIY Instructions:
- Measure and plan the tile layout first
- Apply adhesive to the wall section
- Press cork tiles firmly in place
- Trim edge tiles as needed
- Seal tiles for a finished look
10. Geometric Tape Art Wall
Bold, modern, and visually electric, a geometric tape art wall turns a flat surface into a dynamic abstract composition. Sharp angles and contrasting colors create a gallery-worthy focal point that feels graphic and intentional.
DIY Instructions:
- Plan the geometric design on paper first
- Apply painter’s tape in sharp lines
- Paint sections in chosen colors
- Let each section dry fully
- Peel tape for crisp, clean edges
11. Ombre Gradient Wall
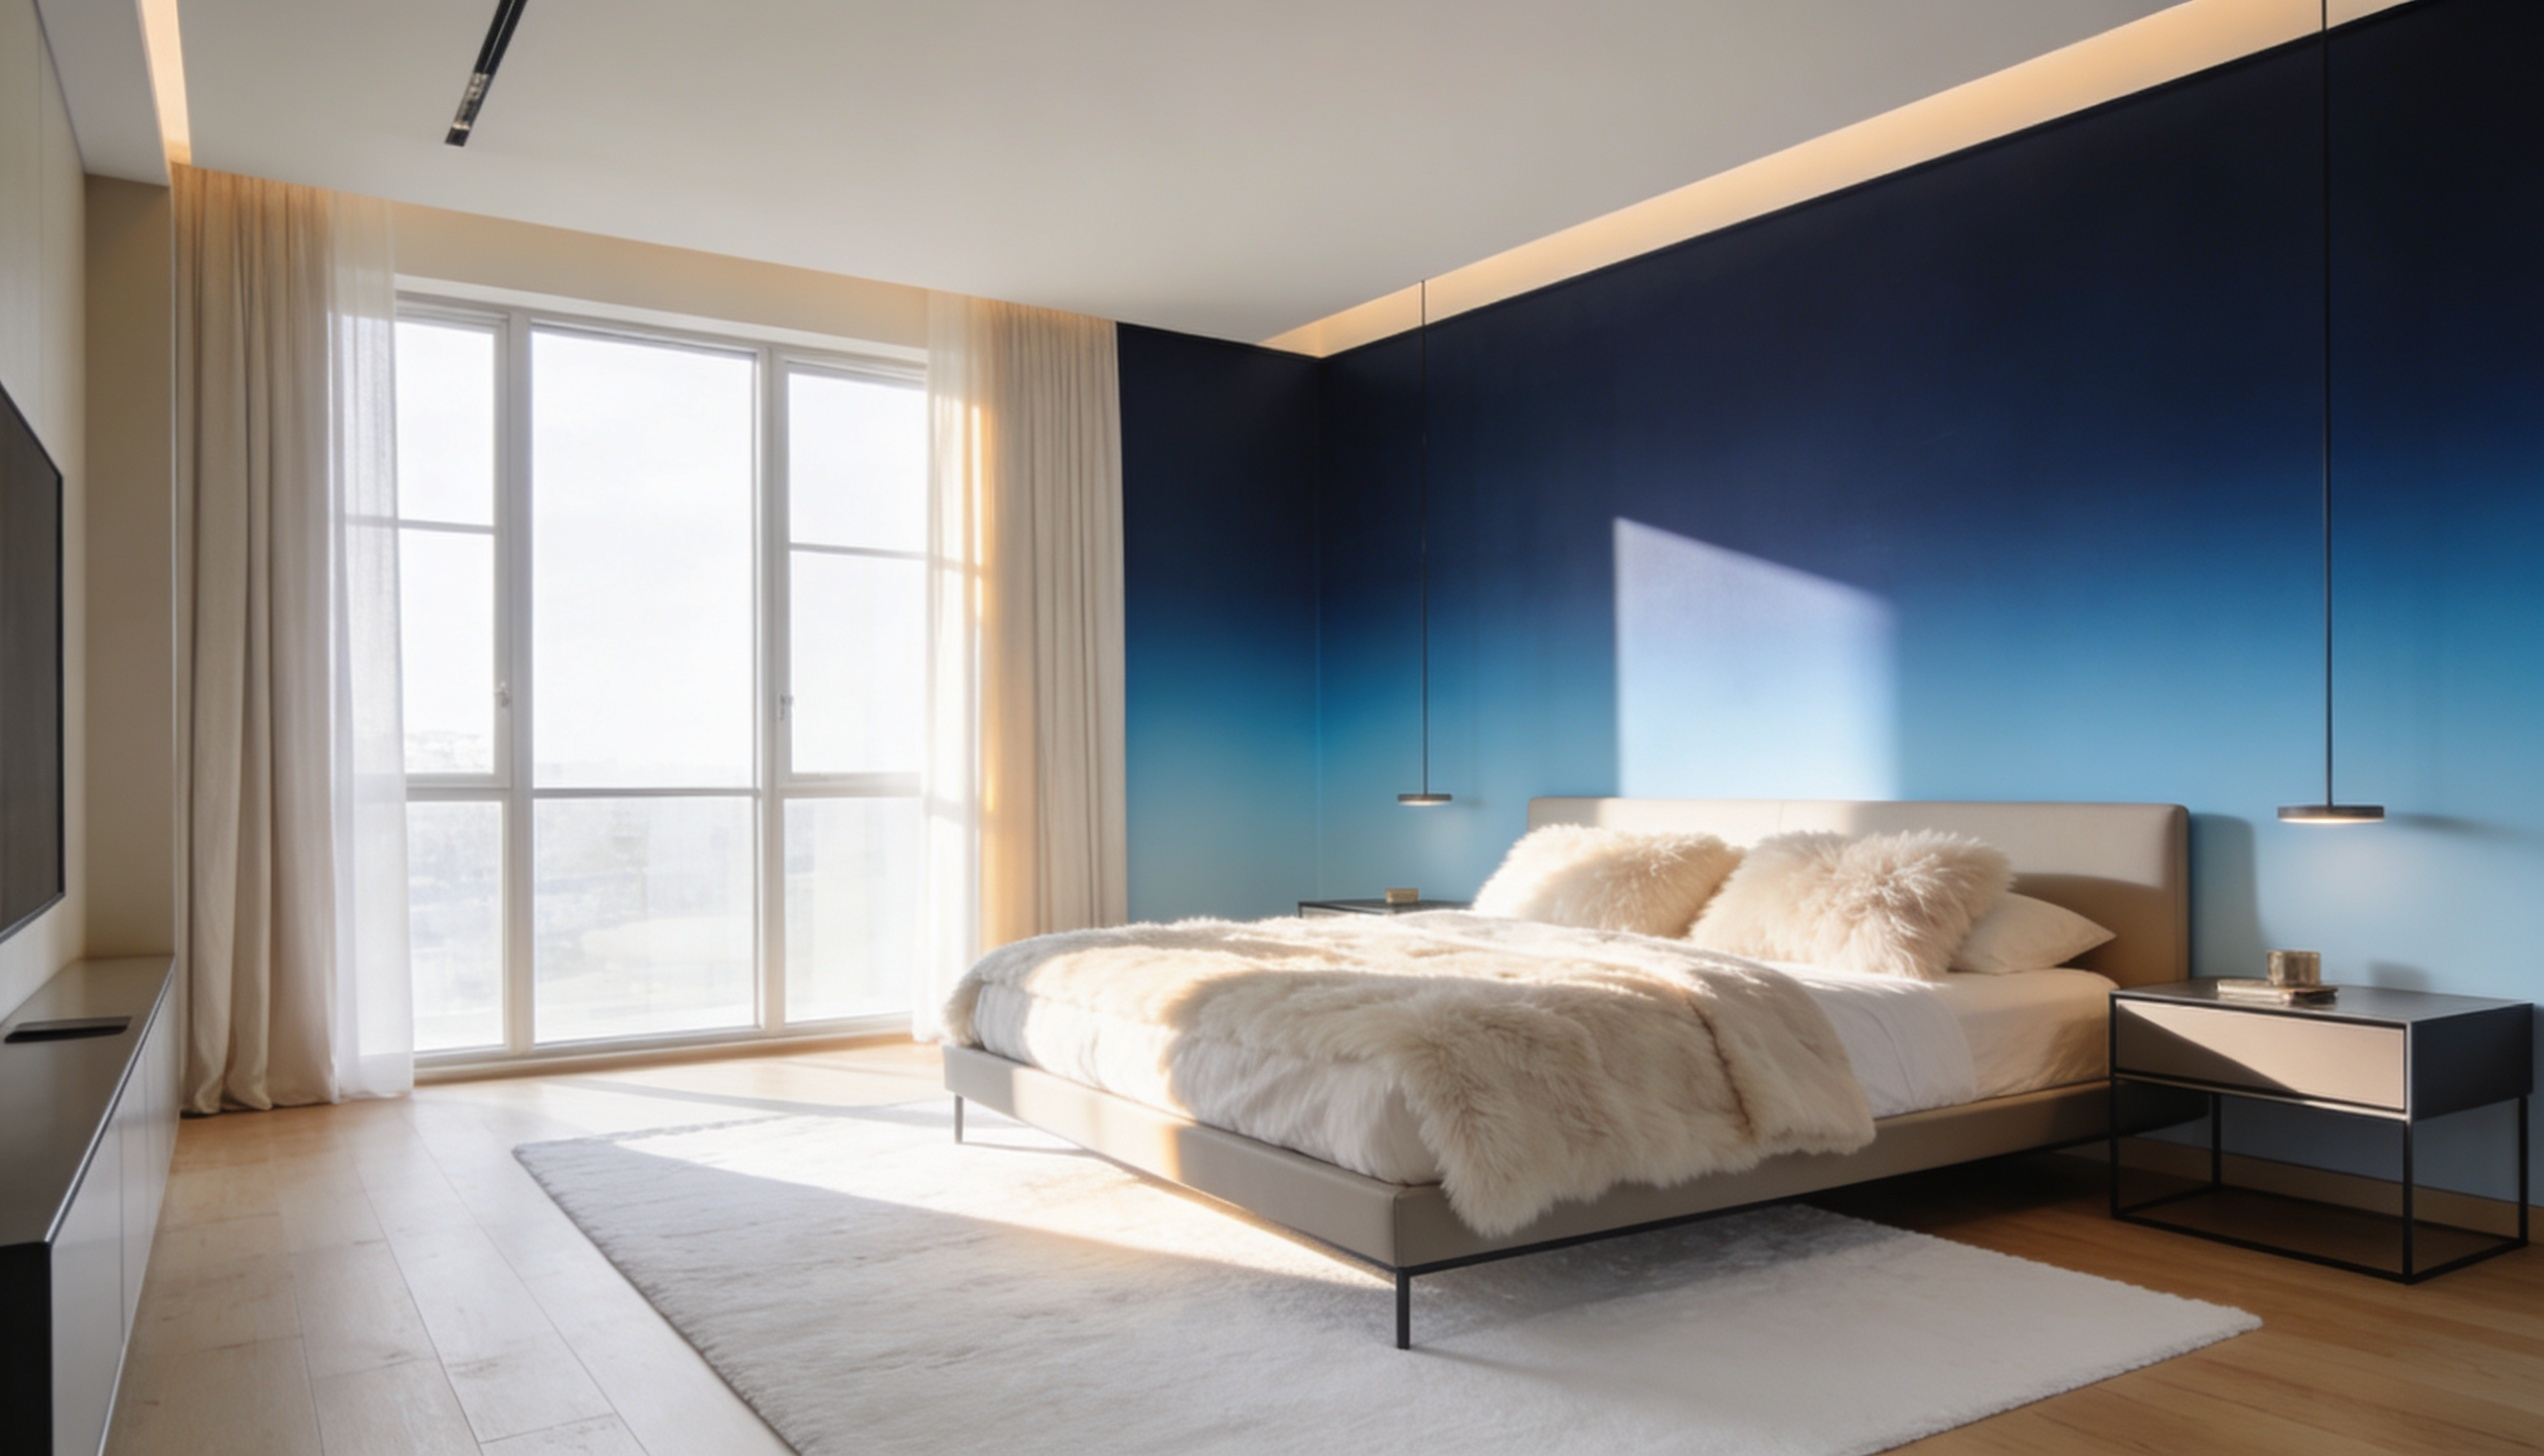
Serene, artistic, and effortlessly clean, an ombre gradient wall shifts smoothly from one tone to another in a breathtaking fade.
The gentle color transition adds depth and mood, making any room feel immersive and thoughtfully designed.
DIY Instructions:
- Choose two or three blending colors
- Paint the darkest shade at the bottom
- Apply mid-tone above it while wet
- Blend colors together at the seams
- Feather lightest shade at top
12. DIY String Art Wall
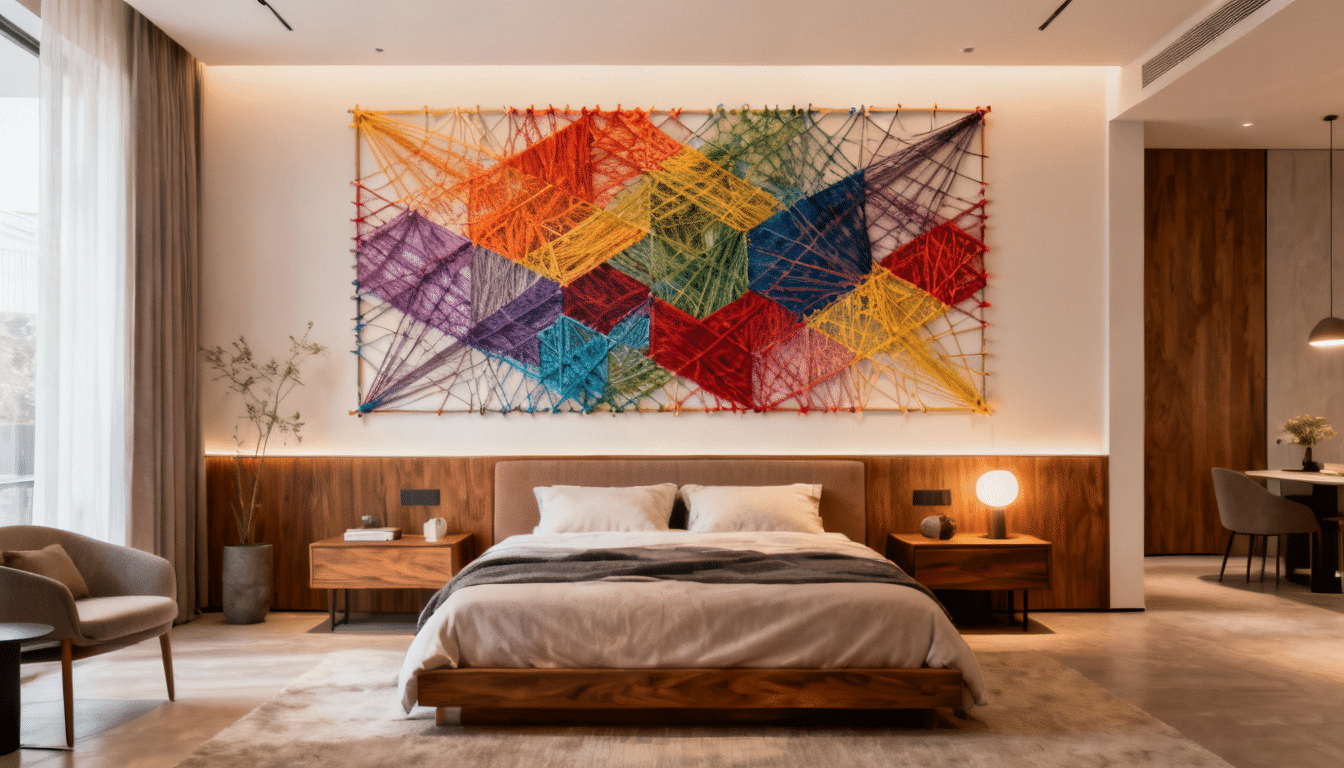
Simple yet striking, a string art wall creates intricate geometric or figurative designs through the simple tension of thread.
The interplay of lines and negative space produces a sculptural, Three-dimensional quality that feels artisan and unique.
DIY Instructions:
- Sketch the desired design on paper
- Hammer nails along the design outline
- Tie the string to a starting nail
- Wrap the string across the nail pattern
- Knot and trim string securely
13. Mosaic Tile Accent Wall
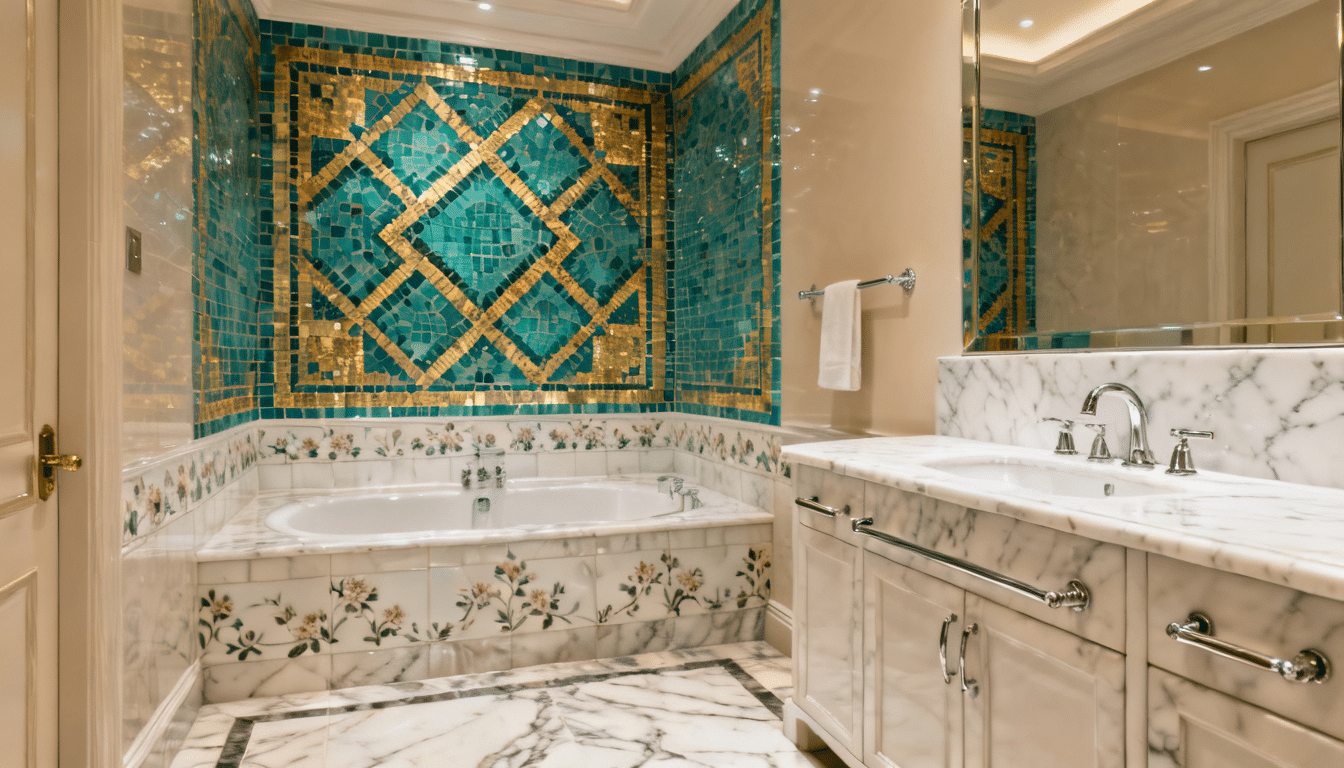
Dazzling, colorful, and rich with artisan detail, a mosaic tile accent wall brings the grandeur of Mediterranean craftsmanship to any interior.
Each piece of tile contributes to a luminous, intricate composition full of texture and brilliance.
DIY Instructions:
- Plan a mosaic pattern on paper
- Apply tile adhesive to the wall section
- Press tiles firmly into adhesive
- Allow adhesive to cure fully
- Grout between tiles and wipe clean
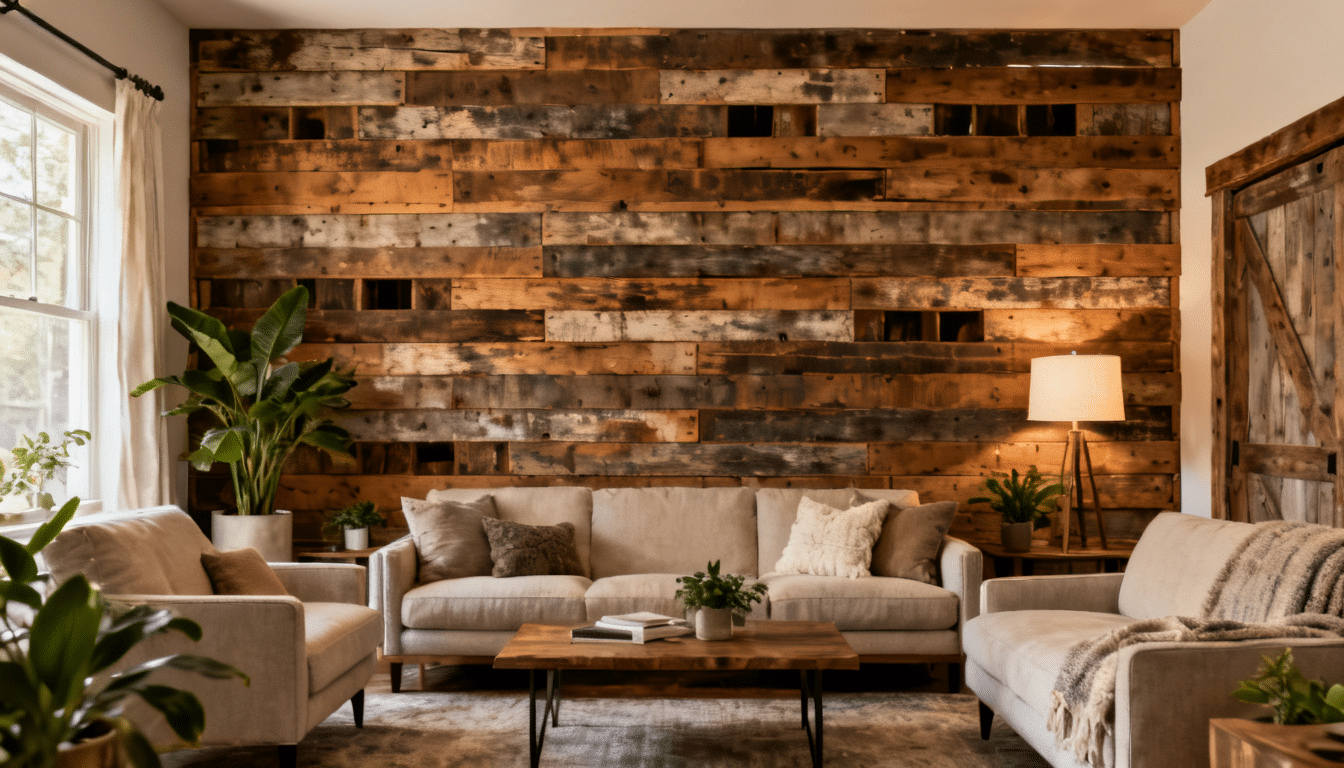
14. Reclaimed Barn Wood Herringbone Wall
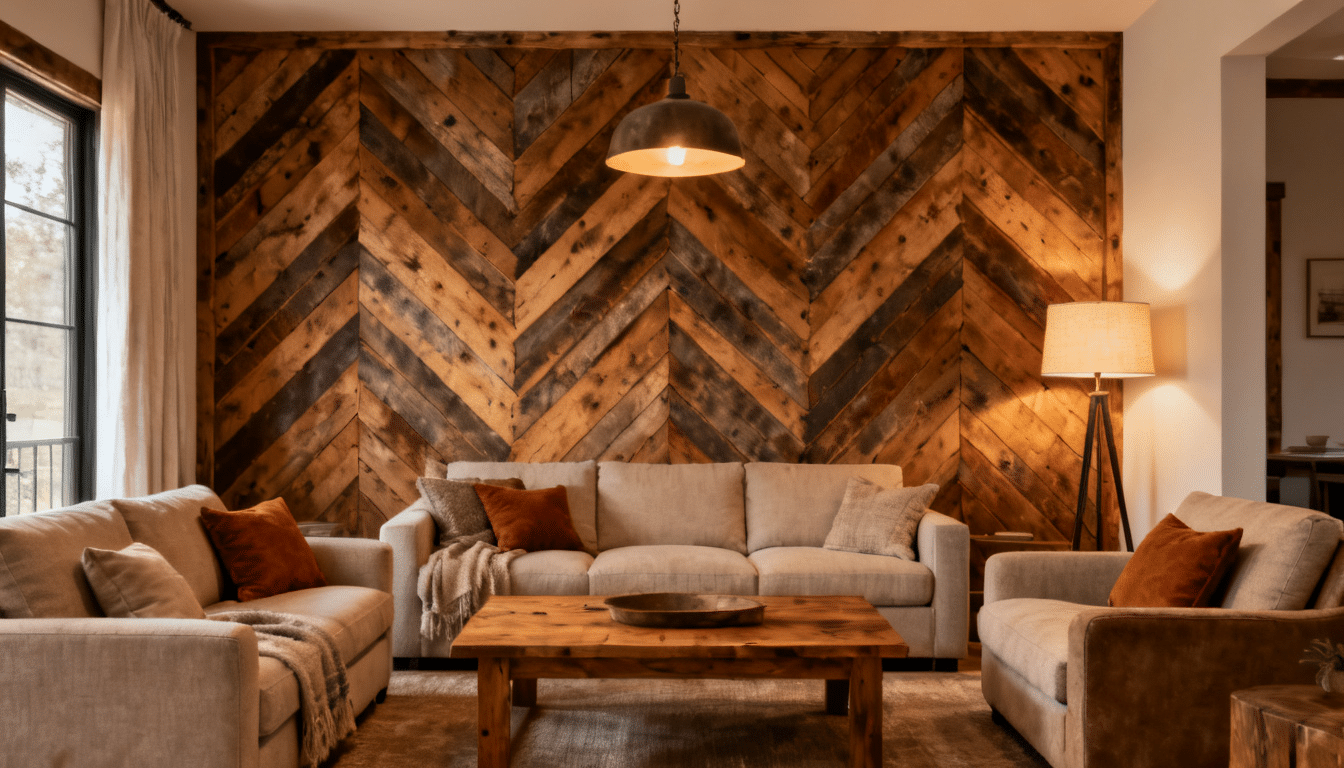
Dramatic and deeply textural, a reclaimed barn-wood herringbone wall combines rustic warmth with geometric sophistication in a single eye-catching surface.
It pairs beautifully with the rest of the room when paired with farmhouse-style living room elements like shiplap accents and natural textiles.
The angled pattern adds movement and visual complexity, making it an unforgettable centerpiece in any room.
DIY Instructions:
- Sort wood planks by length and tone
- Mark a center vertical line on the wall
- Nail the first plank at a 45-degree angle
- Alternate directions across the wall
- Trim edge pieces to fit flush
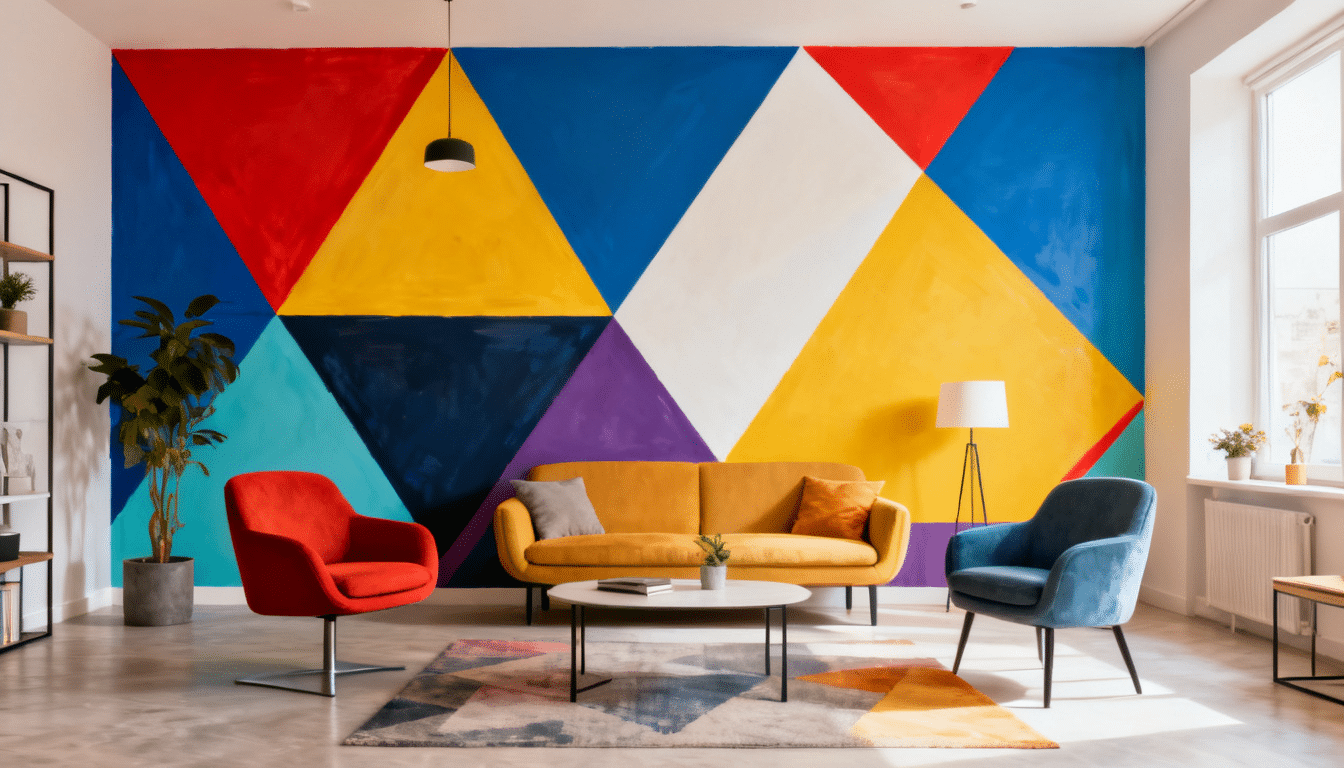
15. DIY Triangle Faux Wallpaper
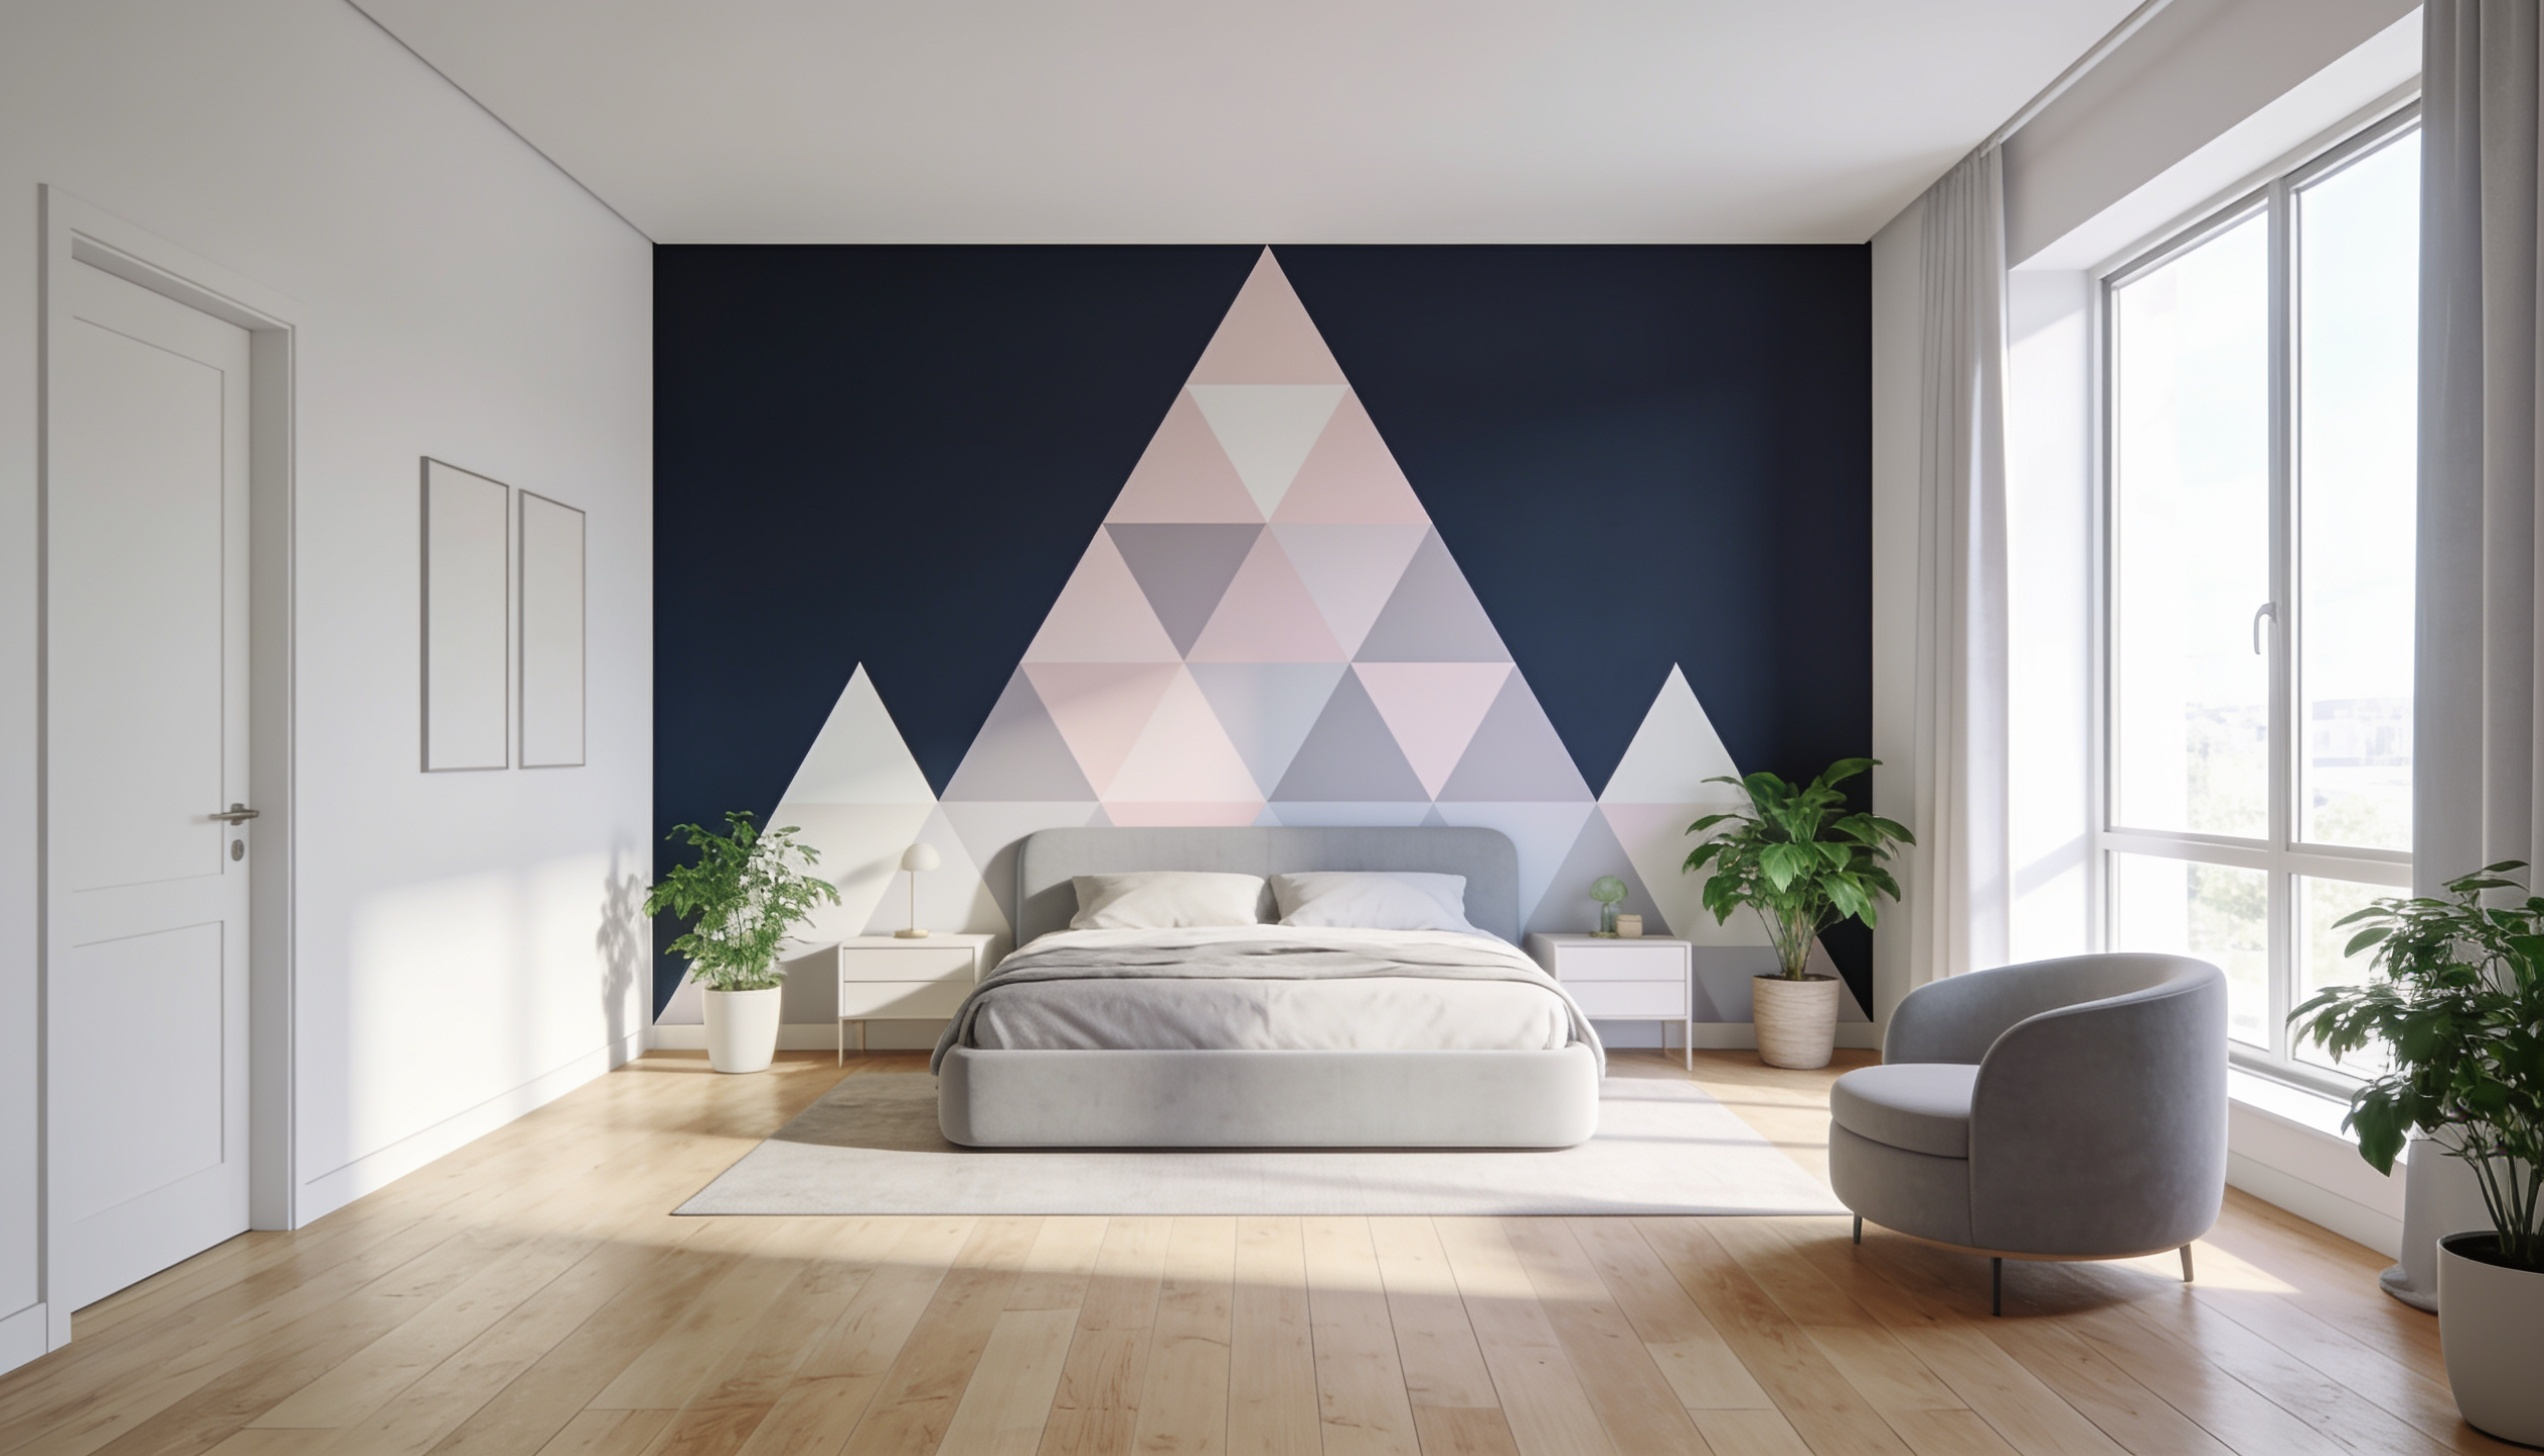
Crisp, contemporary, and full of graphic energy, a DIY triangle faux wallpaper wall brings bold geometric charm with just paint and tape.
The tessellating shapes create a visually stimulating pattern that feels both modern and handcrafted.
DIY Instructions:
- Measure and mark a triangle grid across the wall
- Apply painter’s tape along all lines
- Fill triangles with alternating paint colors
- Let each color dry before continuing
- Remove tape slowly for clean edges
16. DIY Stone Veneer Wall
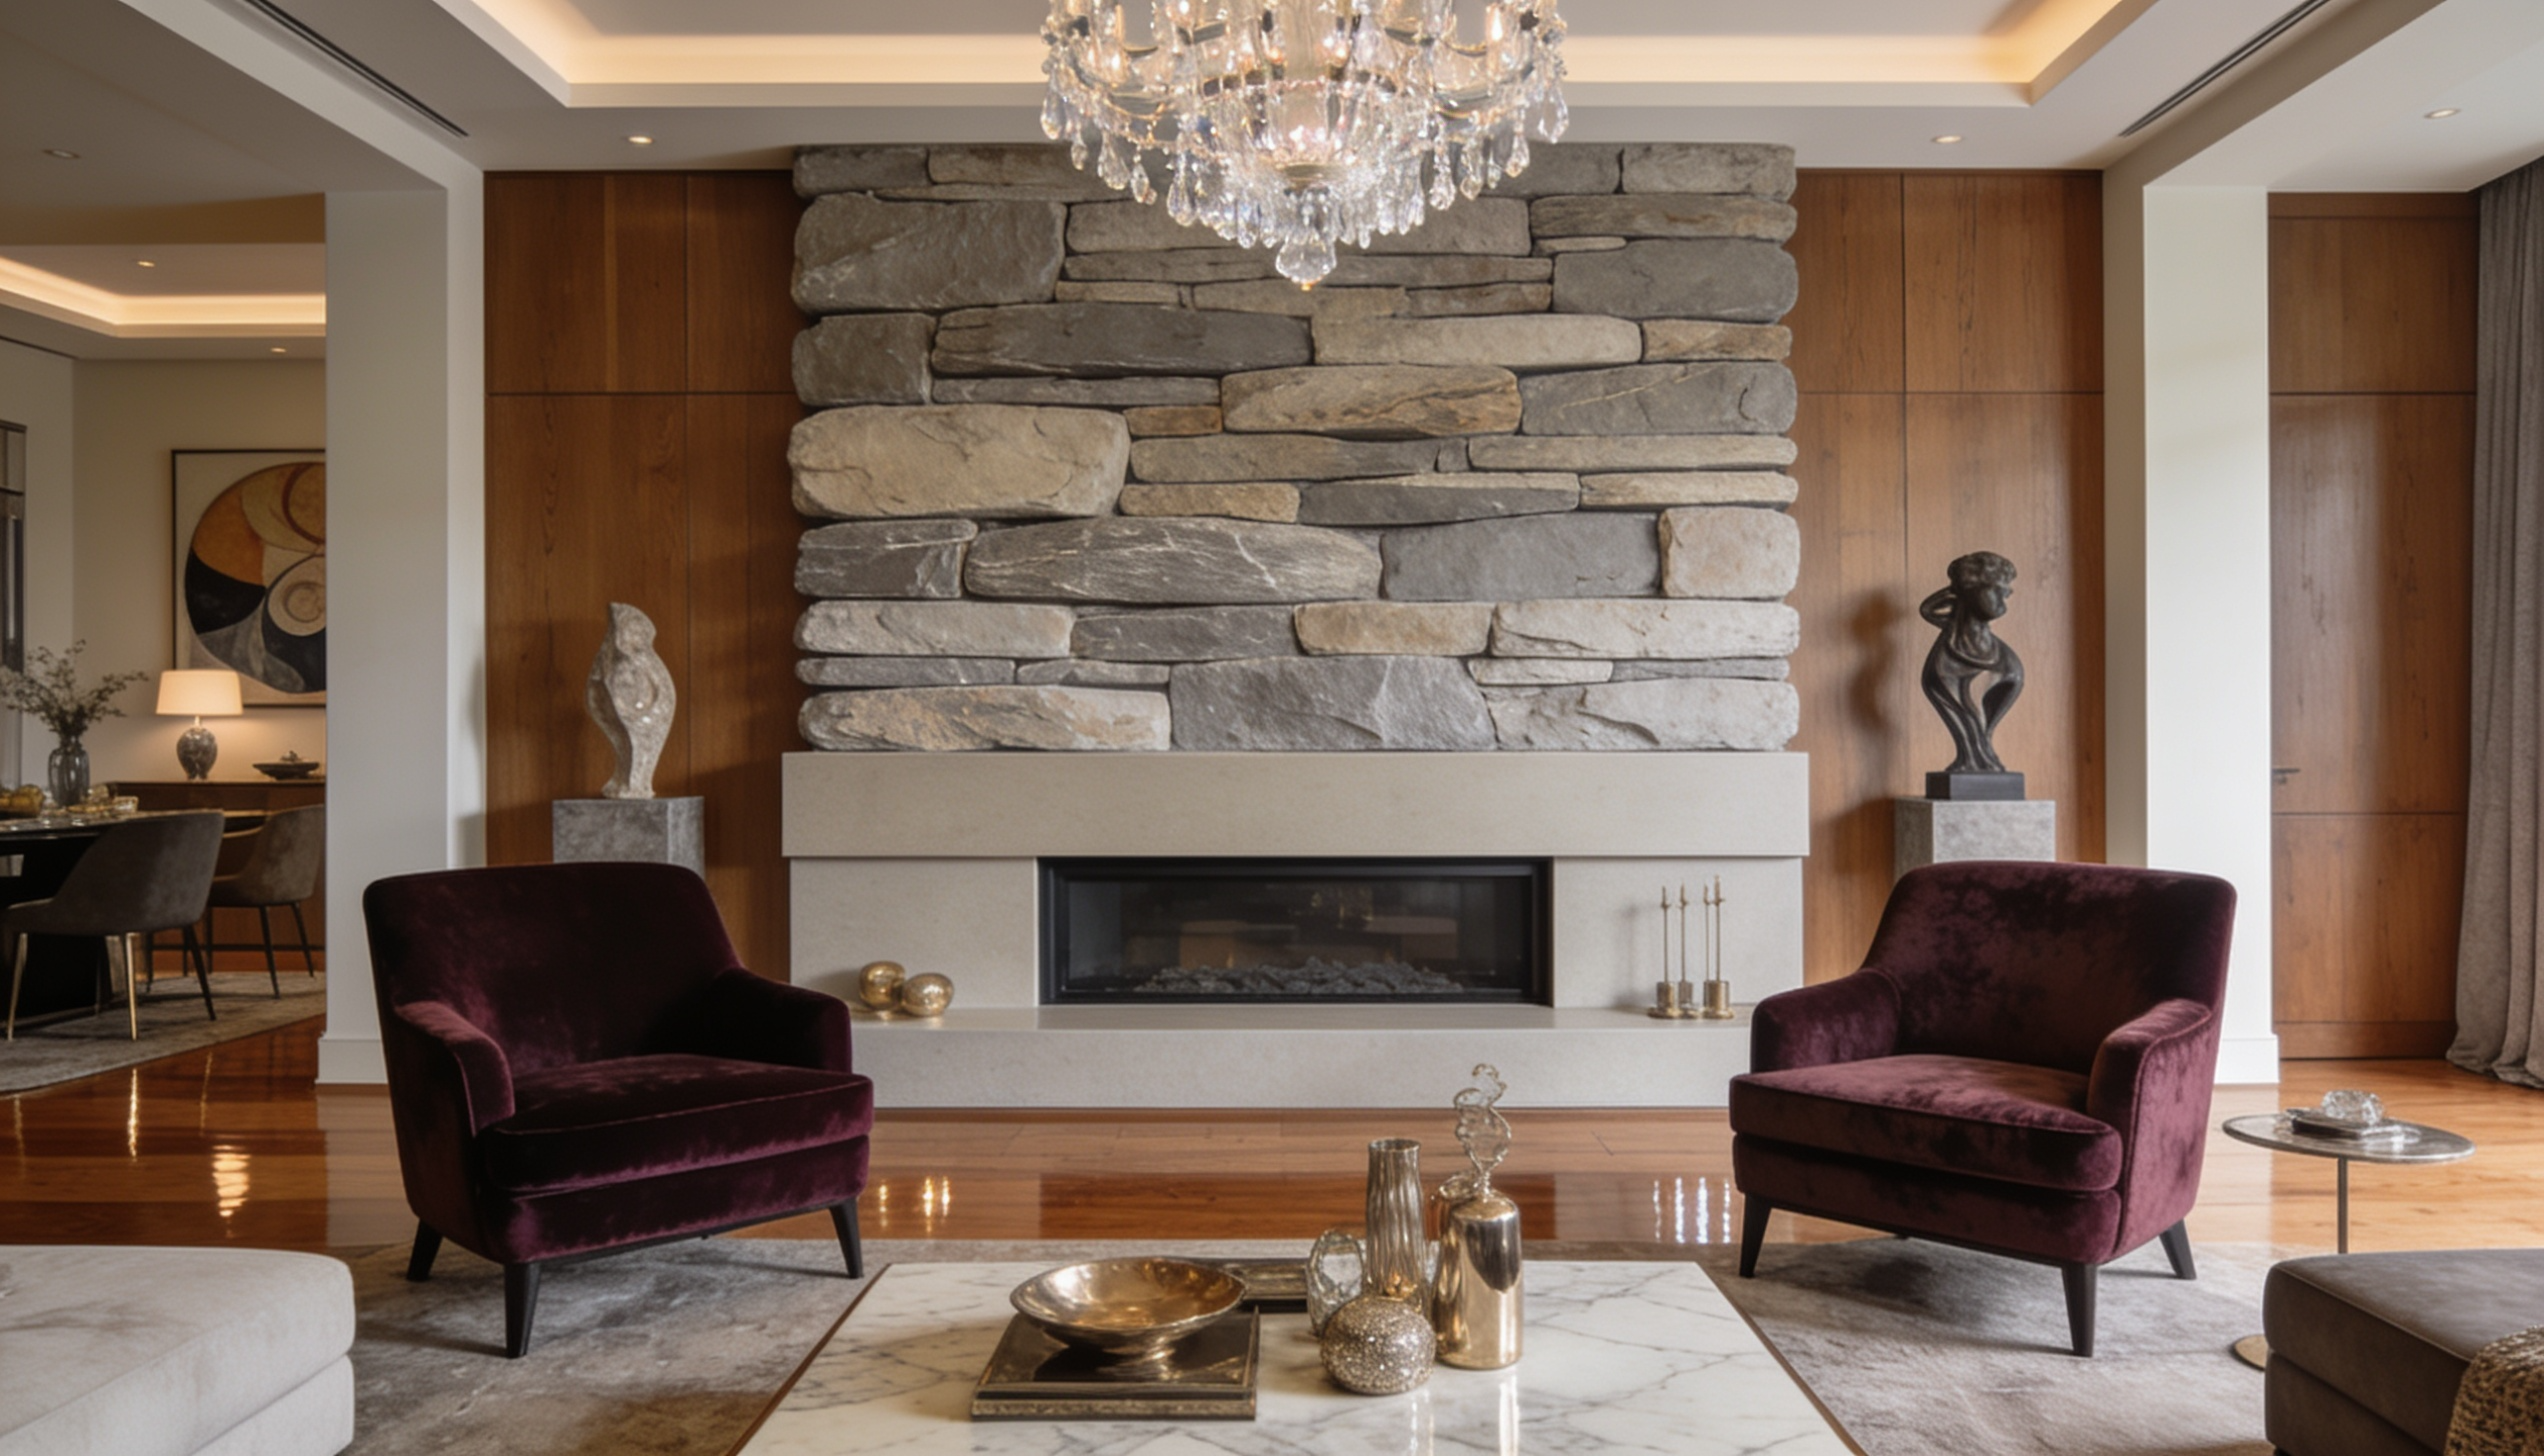
Majestic, rugged, and evergreen in style, a stone veneer wall delivers the grandeur of natural stone without the structural demands.
Its layered texture and earthy tones bring a dramatic, grounded presence that anchors any room with authority.
DIY Instructions:
- Clean and prime the wall surface
- Mix the mortar to the correct consistency
- Apply mortar to the wall in sections
- Press stone veneer pieces firmly
- Fill gaps with matching grout
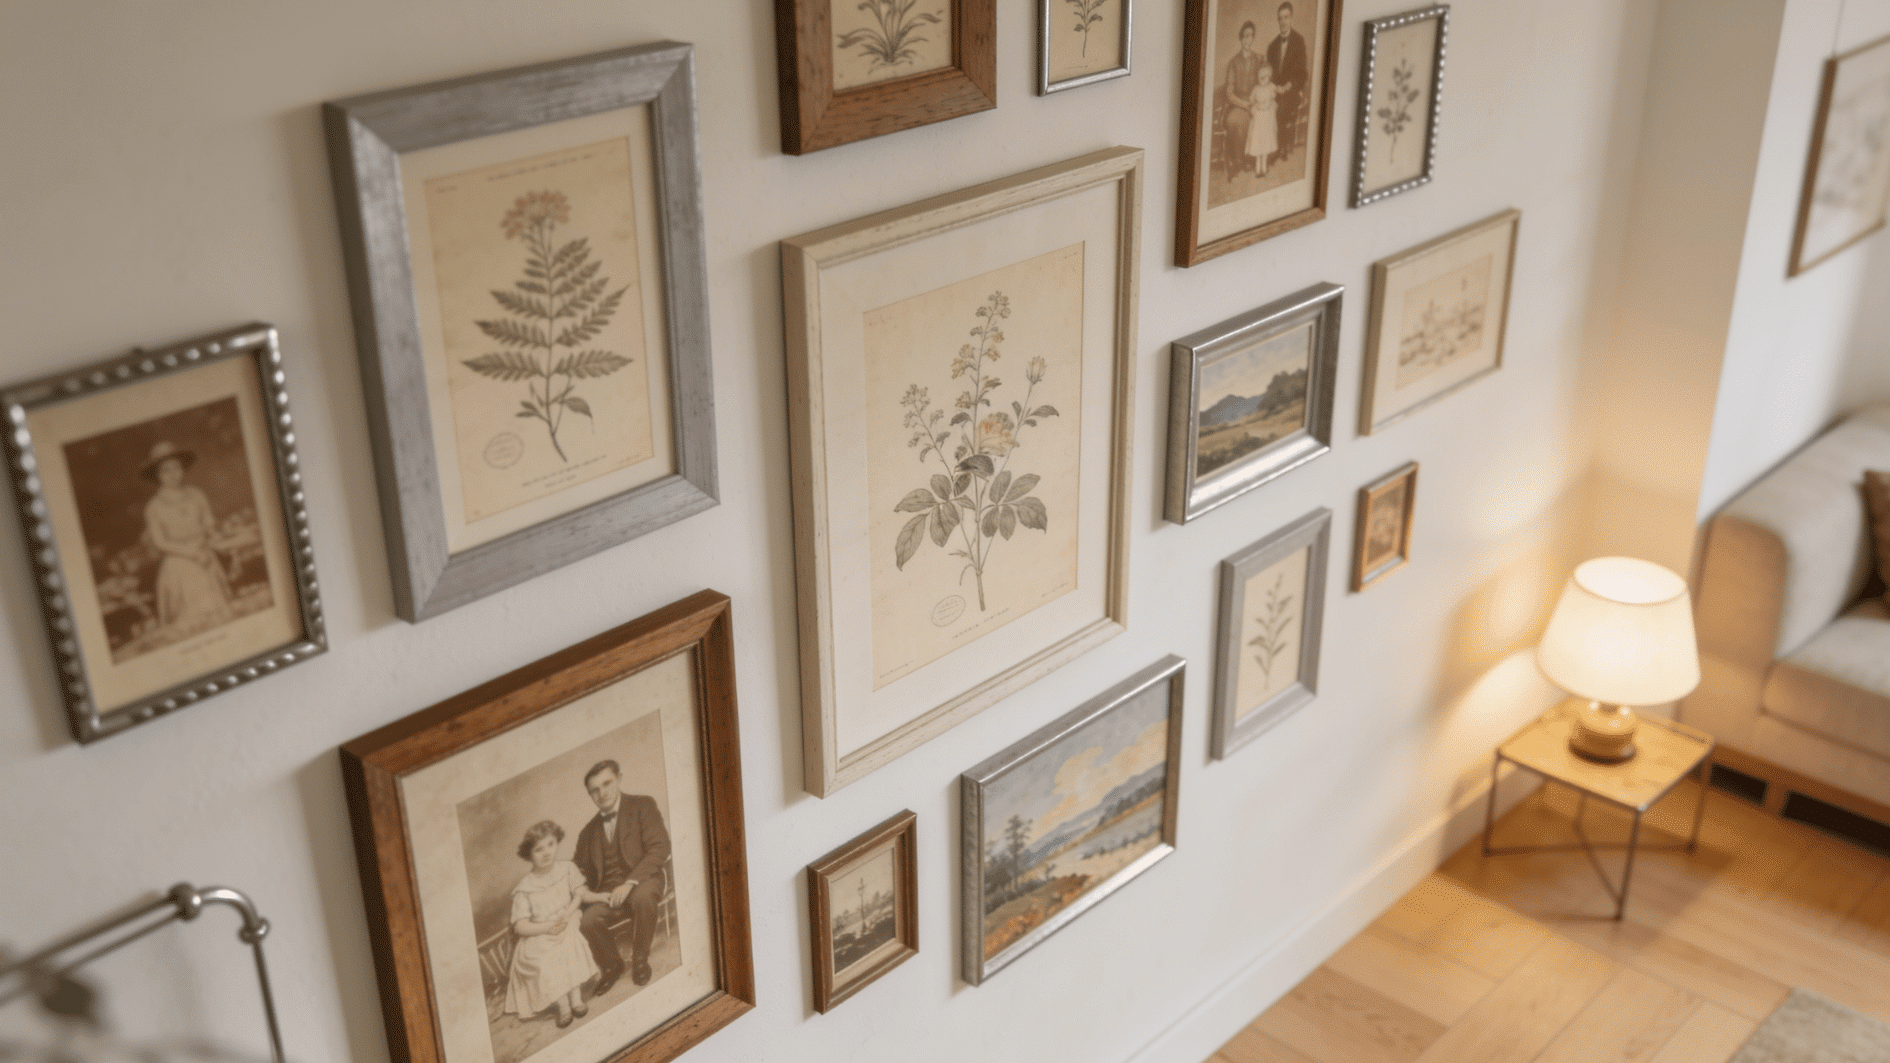
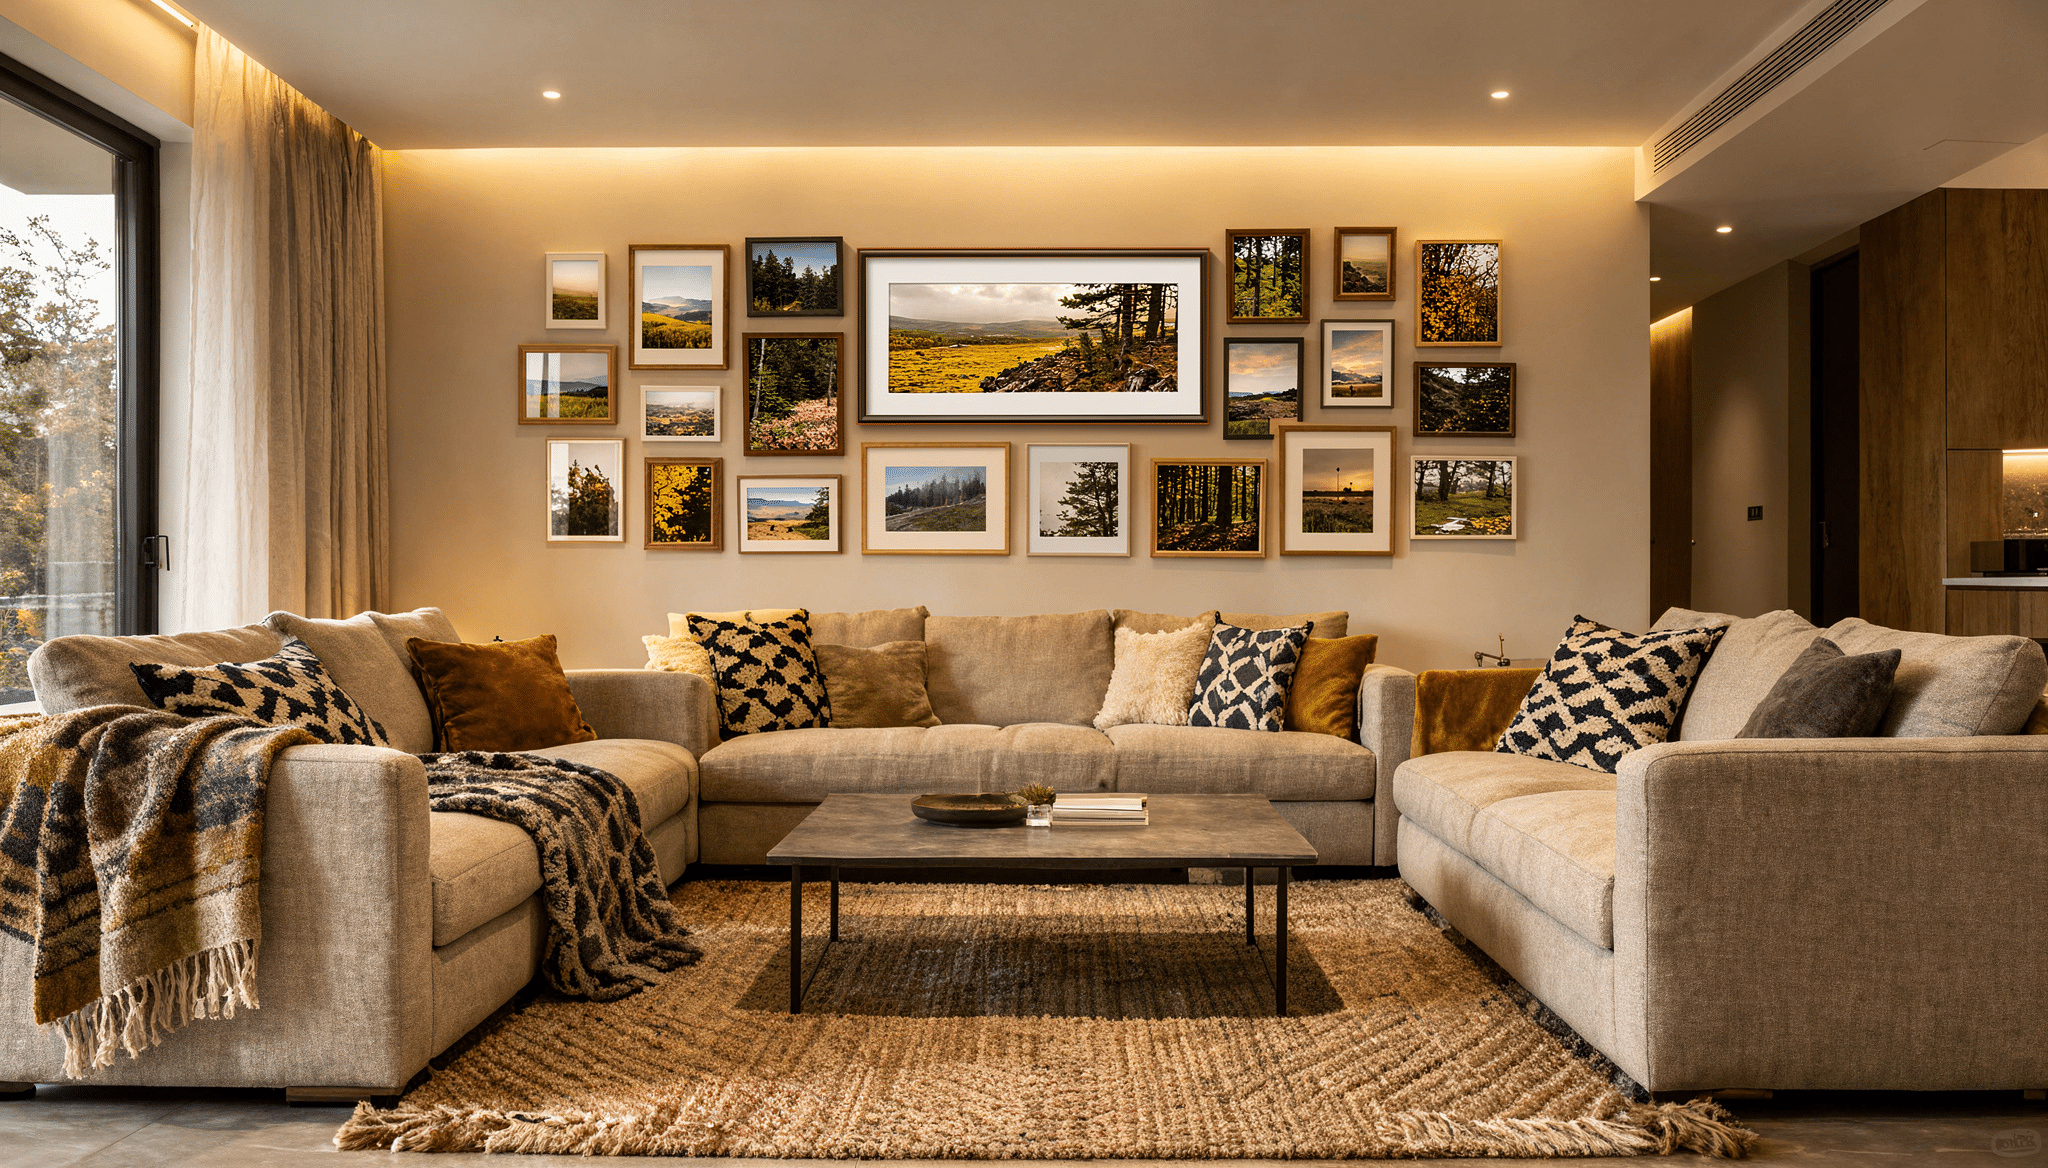
17. Painted Gallery Wall
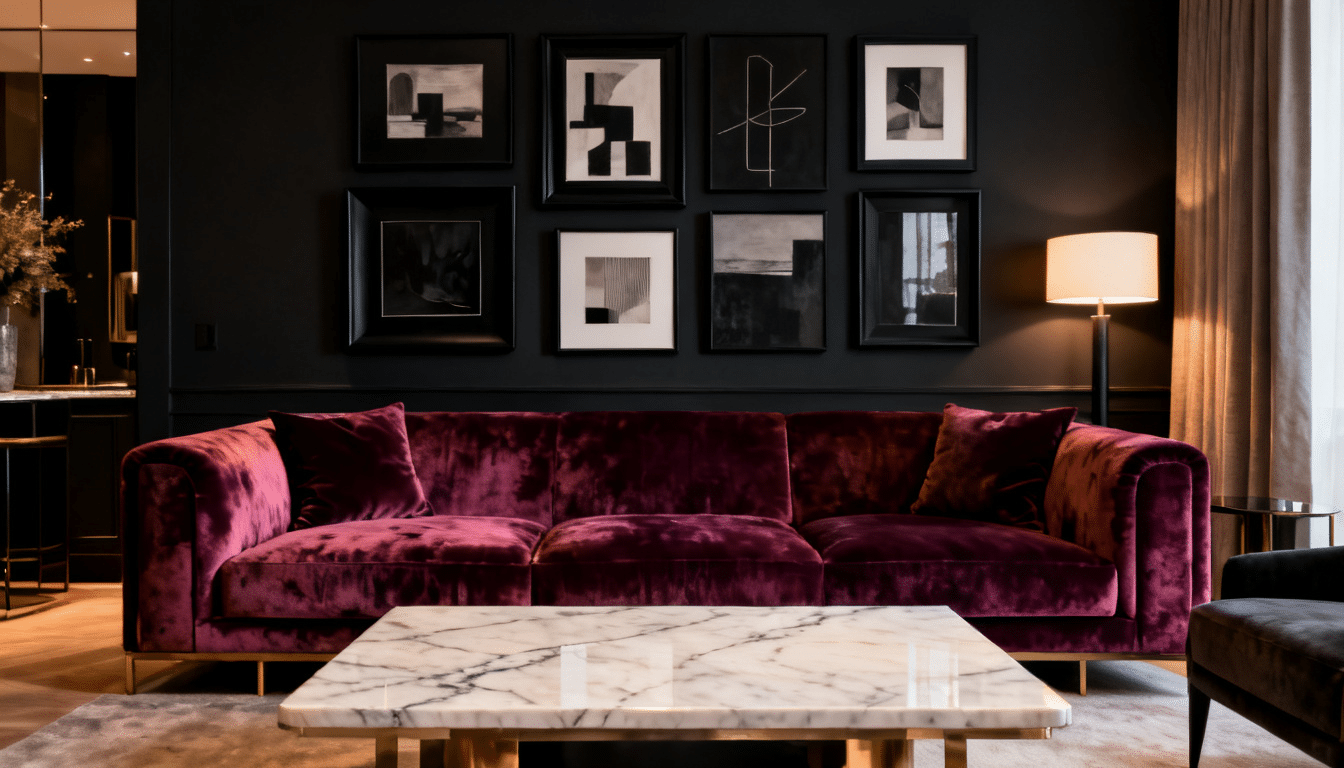
Clean, curated, and rich with artistic intention, a painted gallery wall uses color-blocked backdrops to make artwork truly sing.
Strategic paint placement frames pieces dramatically, turning a simple art arrangement into a styled editorial display.
Take it even further by learning how to create a gallery wall that’s properly balanced and visually cohesive.
DIY Instructions:
- Select artwork grouping and arrangement
- Paint backdrop shapes behind each piece
- Let the paint dry completely before hanging
- Arrange and hang artwork centered
- Adjust spacing for visual balance
18. Botanical Wall Art
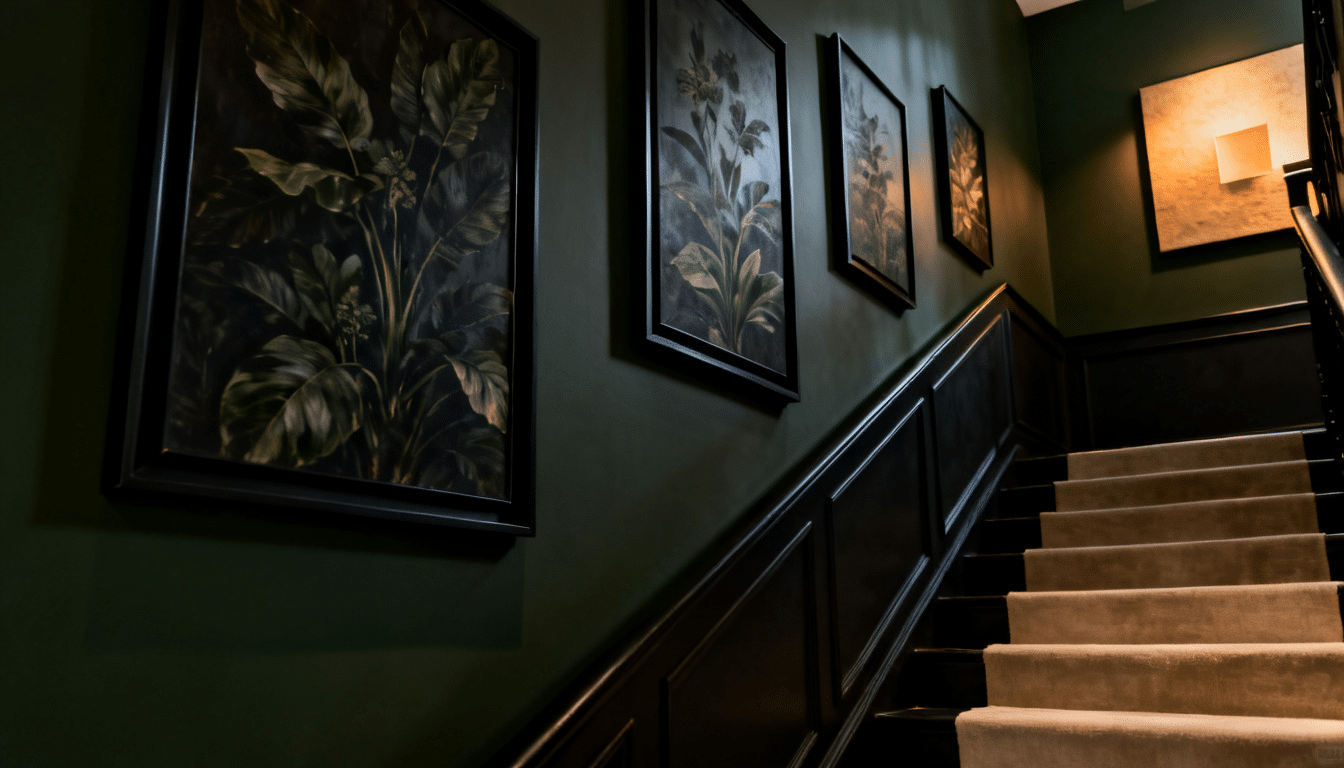
Fresh, lush, and alive with natural beauty, a botanical wall art display brings the serenity of the garden indoors.
Layered greenery, pressed leaves, and framed plant prints create a calming, organic gallery full of an earthy, polished look.
DIY Instructions:
- Gather or press botanical specimens
- Frame individual plants or prints
- Plan the arrangement layout on the floor
- Mark hanging positions on the wall
- Hang frames in a planned arrangement
19. Fairy Lights Wall
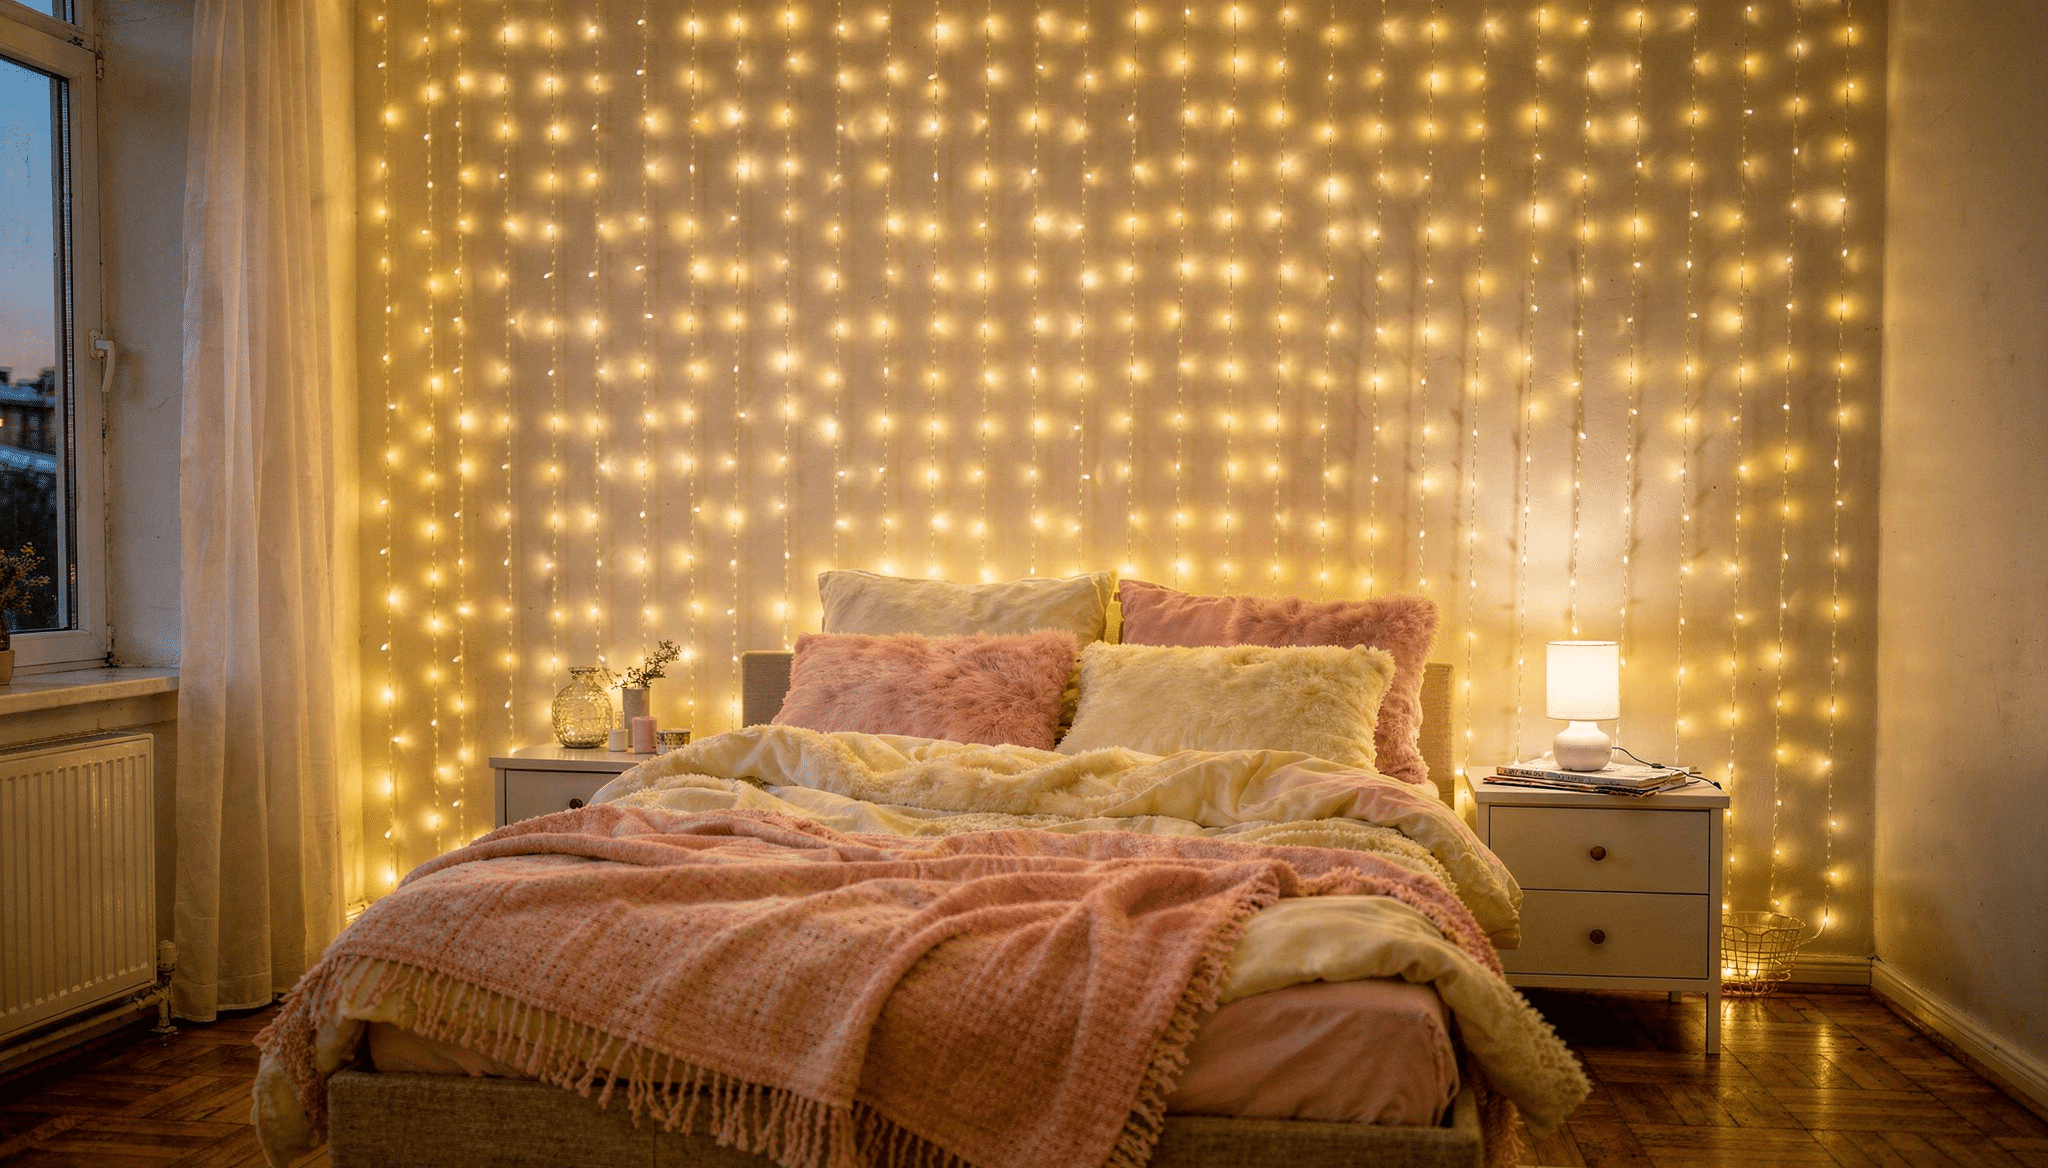
Magical, romantic, and endlessly atmospheric, a fairy-lights wall drapes a room in a warm, twinkling glow that feels warm day or night. The soft luminance creates intimacy and whimsy, transforming any blank wall into a dreamy backdrop.
DIY Instructions:
- Plan the light arrangement or shape
- Install small hooks across the wall
- Drape or shape lights on hooks
- Secure wires neatly along edges
- Plug in and adjust for evenness
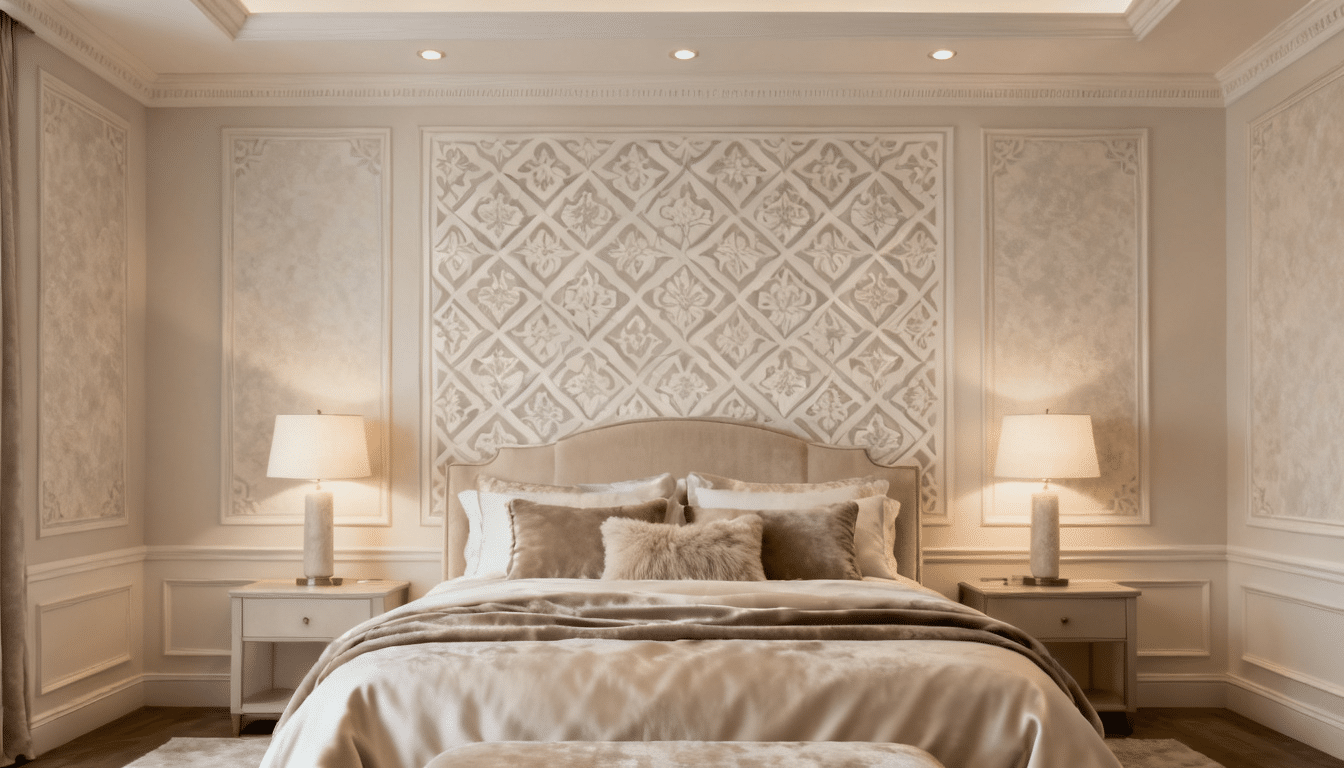
20. Decorative Molding Wall
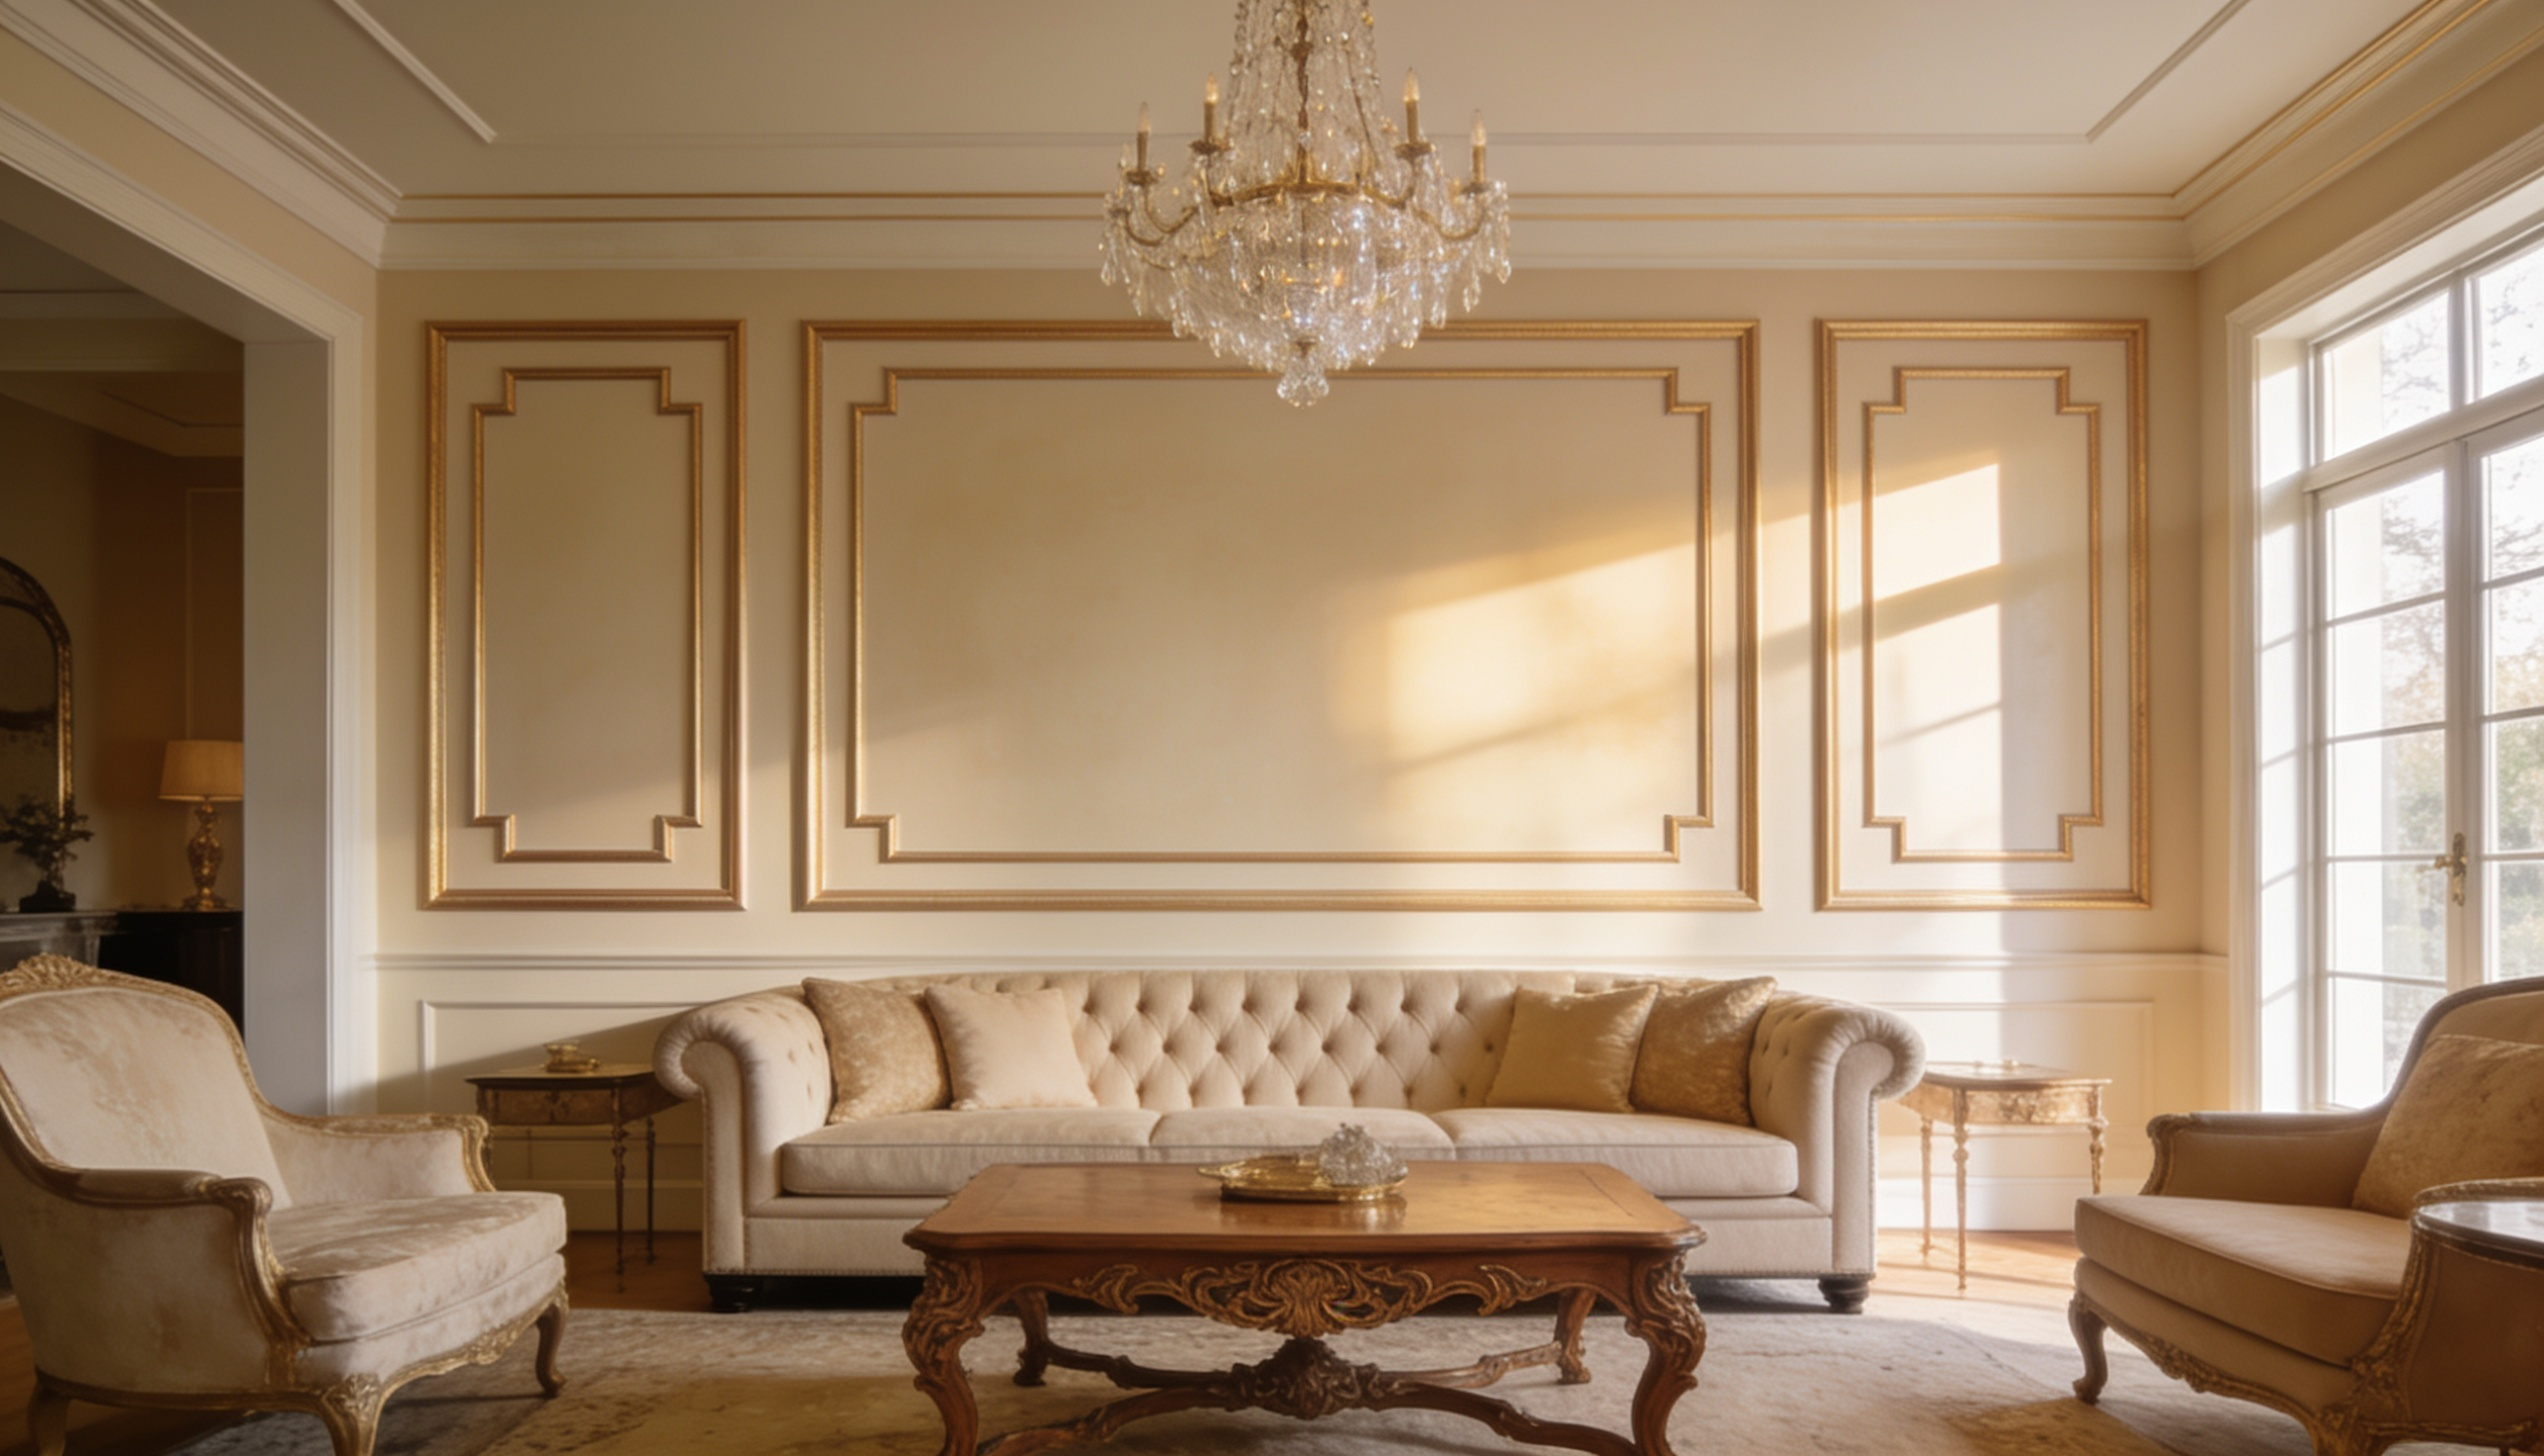
Refined, classical, and architecturally polished, decorative molding walls add the polished look of historic craftsmanship to modern interiors.
Grid-like frames of molding create a sense of structure and grandeur that instantly improves a room’s calmness.
DIY Instructions:
- Measure and plan the molding grid layout
- Cut molding pieces to exact length
- Apply construction adhesive to the molding
- Press pieces firmly against the wall
- Caulk seams, prime, and paint
21. Photo Collage Wall
Personal, heartfelt, and visually eye-catching, a photo collage wall turns treasured memories into a living piece of art. The layered mix of sizes, frames, and moments creates a rich, storytelling display that fills a room with warmth.
DIY Instructions:
- Select and print photos in varied sizes
- Plan the layout on the floor first
- Mark hanging positions lightly on the wall
- Hang the largest photos as anchors
- Fill gaps with smaller prints
22. Upcycled Frame Collage Wall
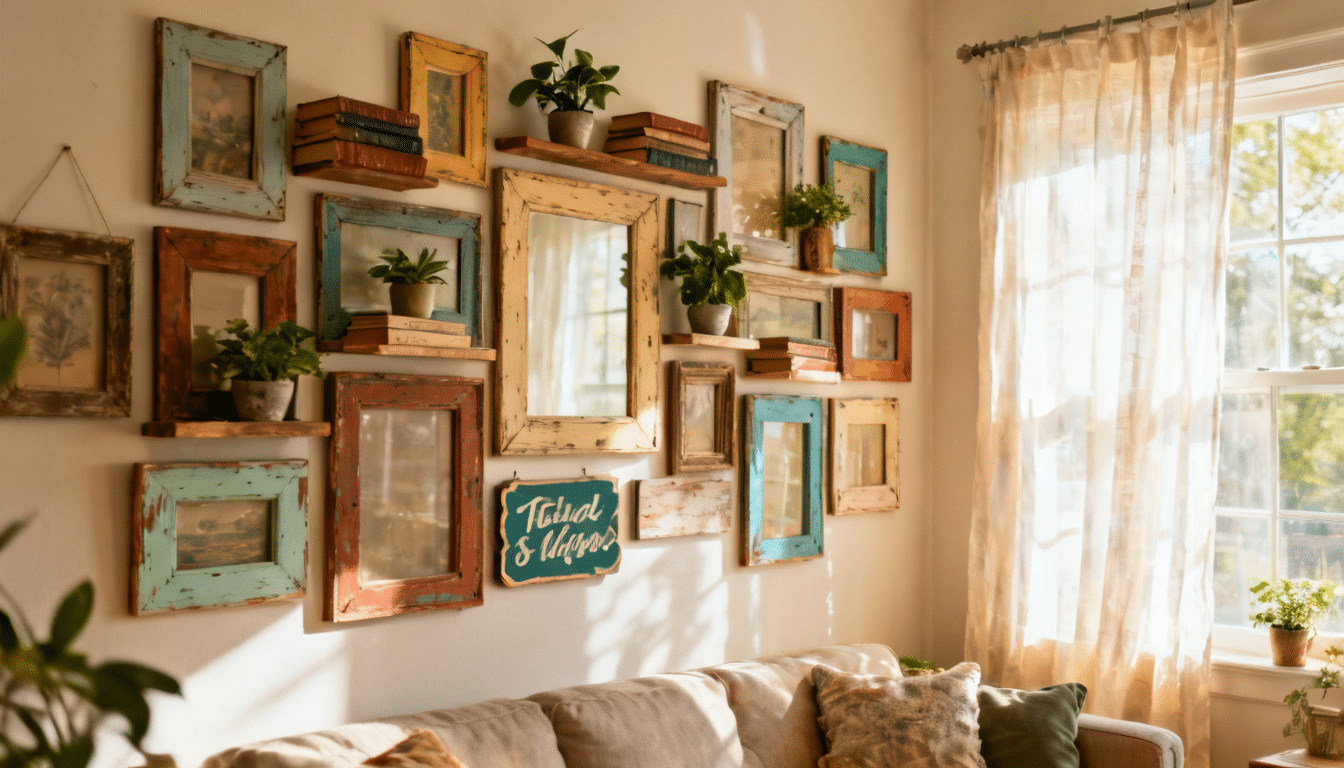
Eclectic, creative, and wonderfully sustainable, an upcycled frame collage wall combines mismatched vintage frames into a cohesive, character-rich display.
The variety of shapes, finishes, and sizes creates a layered, story-filled wall full of charm and personality.
DIY Instructions:
- Collect frames of varying shapes
- Paint all frames in a unified palette
- Arrange frames in the layout on the floor
- Hang the largest frame as a focal anchor
- Fill the surrounding space with smaller frames
23. Geometric Wood Paneling
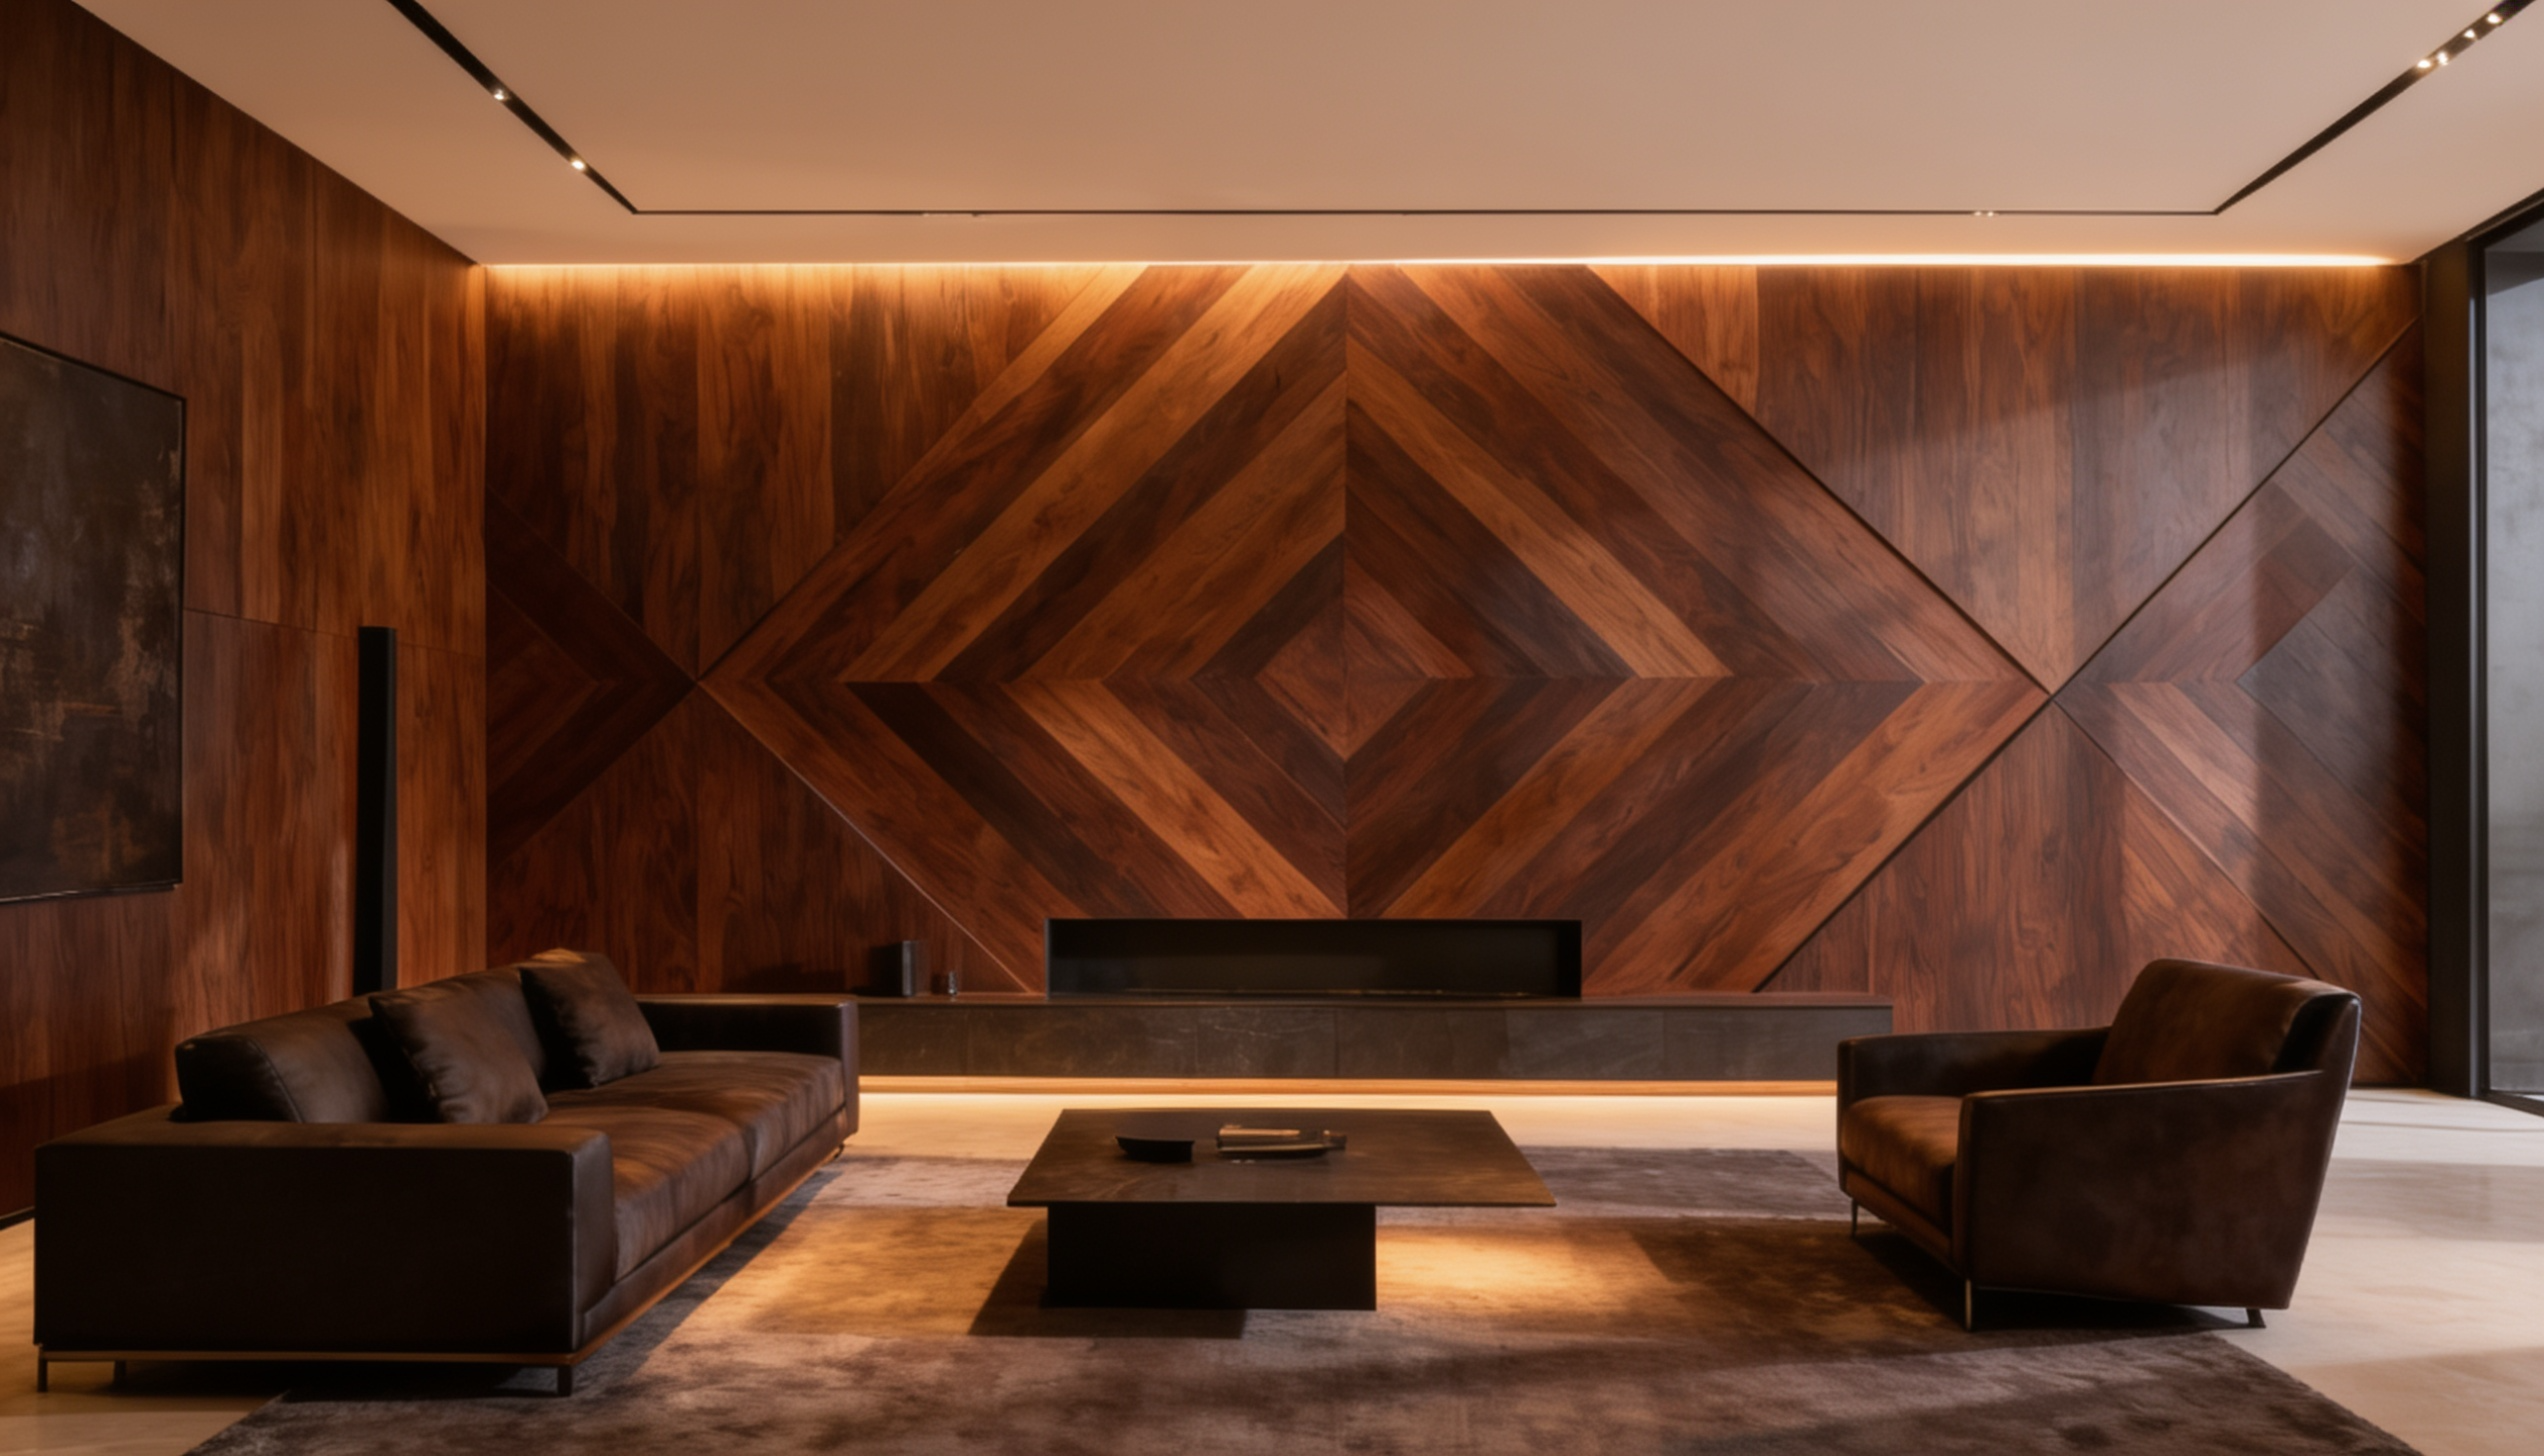
Architectural, bold, and strikingly modern, geometric wood paneling transforms a flat wall into a three-dimensional sculptural surface.
The precise angles and clean lines add visual depth and calmness, creating a statement wall with serious design impact.
DIY Instructions:
- Plan geometric shapes on graph paper
- Cut wood panels to precise measurements
- Sand all cut edges smooth
- Nail panels to the wall in a pattern
- Paint or stain to the desired finish
24. Layered Textile Wall
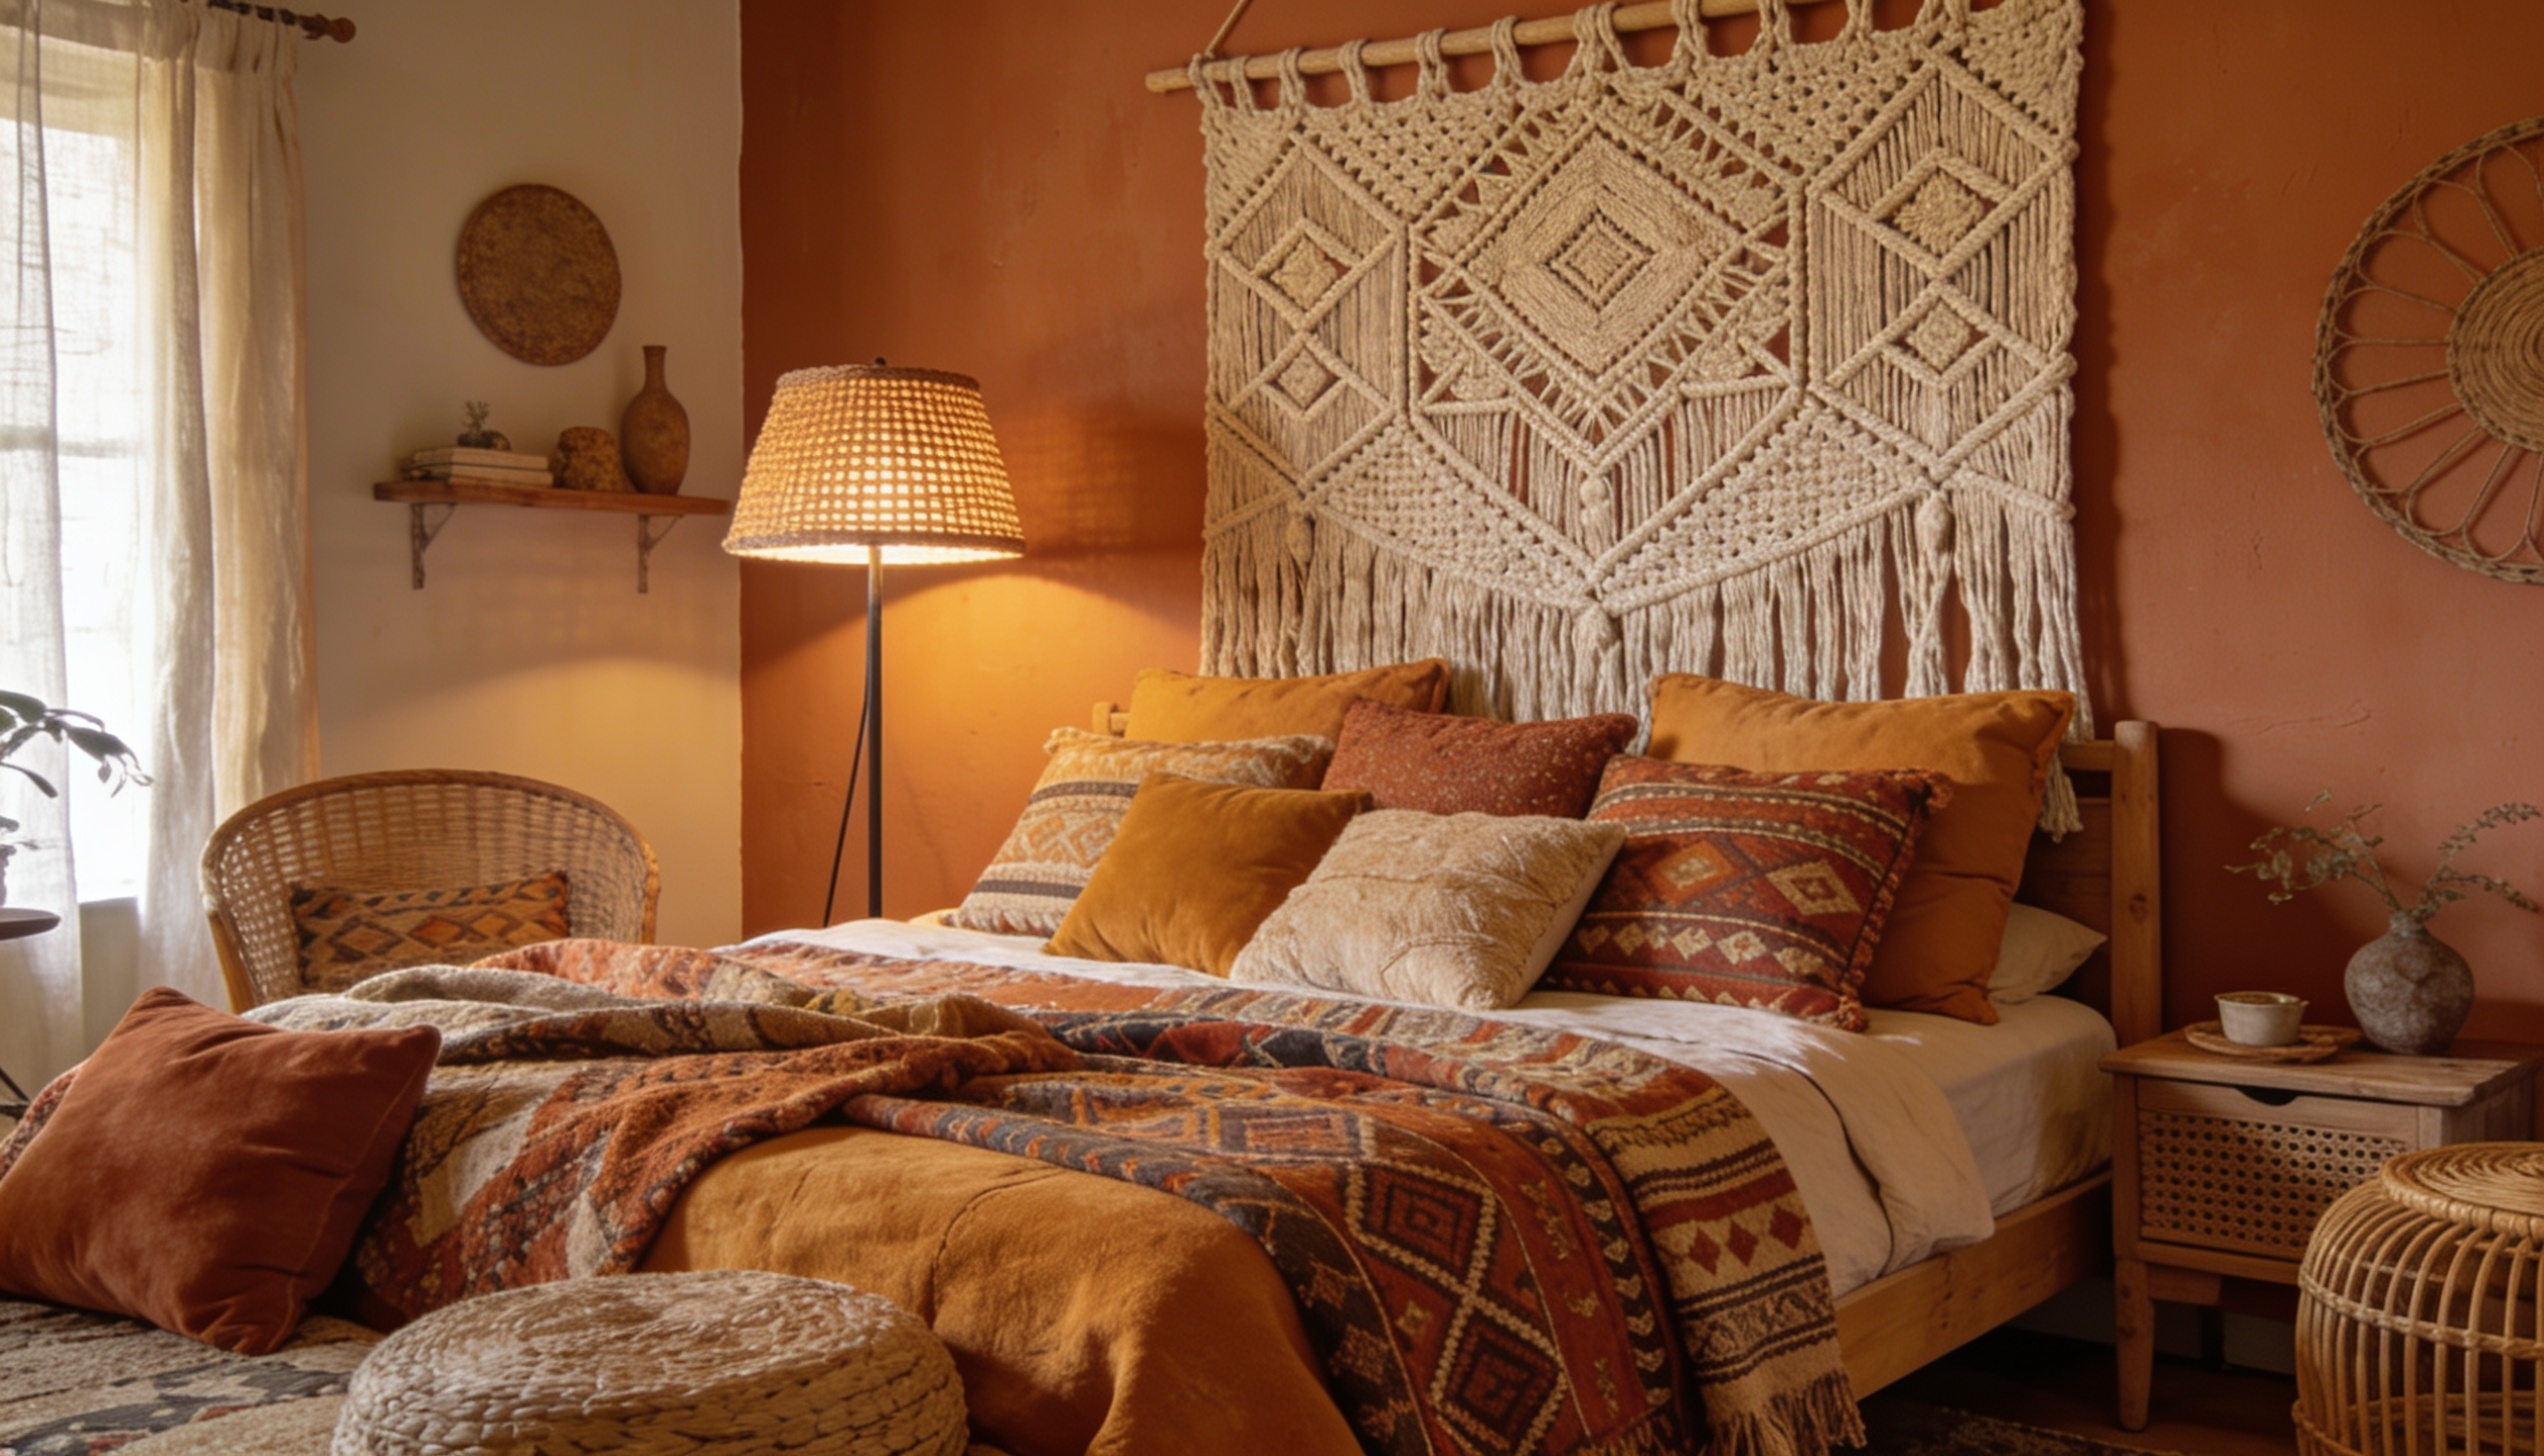
Cozy, tactile, and richly dimensional, a layered textile wall brings warmth and artistic depth through overlapping fabrics and woven pieces.
The combination of textures, patterns, and materials creates an immersive, bohemian composition that feels curated and deeply personal.
DIY Instructions:
- Gather textiles of varied texture and size
- Install a ceiling-mounted rod or hooks
- Hang the largest textile piece as the base
- Layer smaller pieces overlapping naturally
- Adjust and pin for balanced composition
25. Painted Silhouette Wall
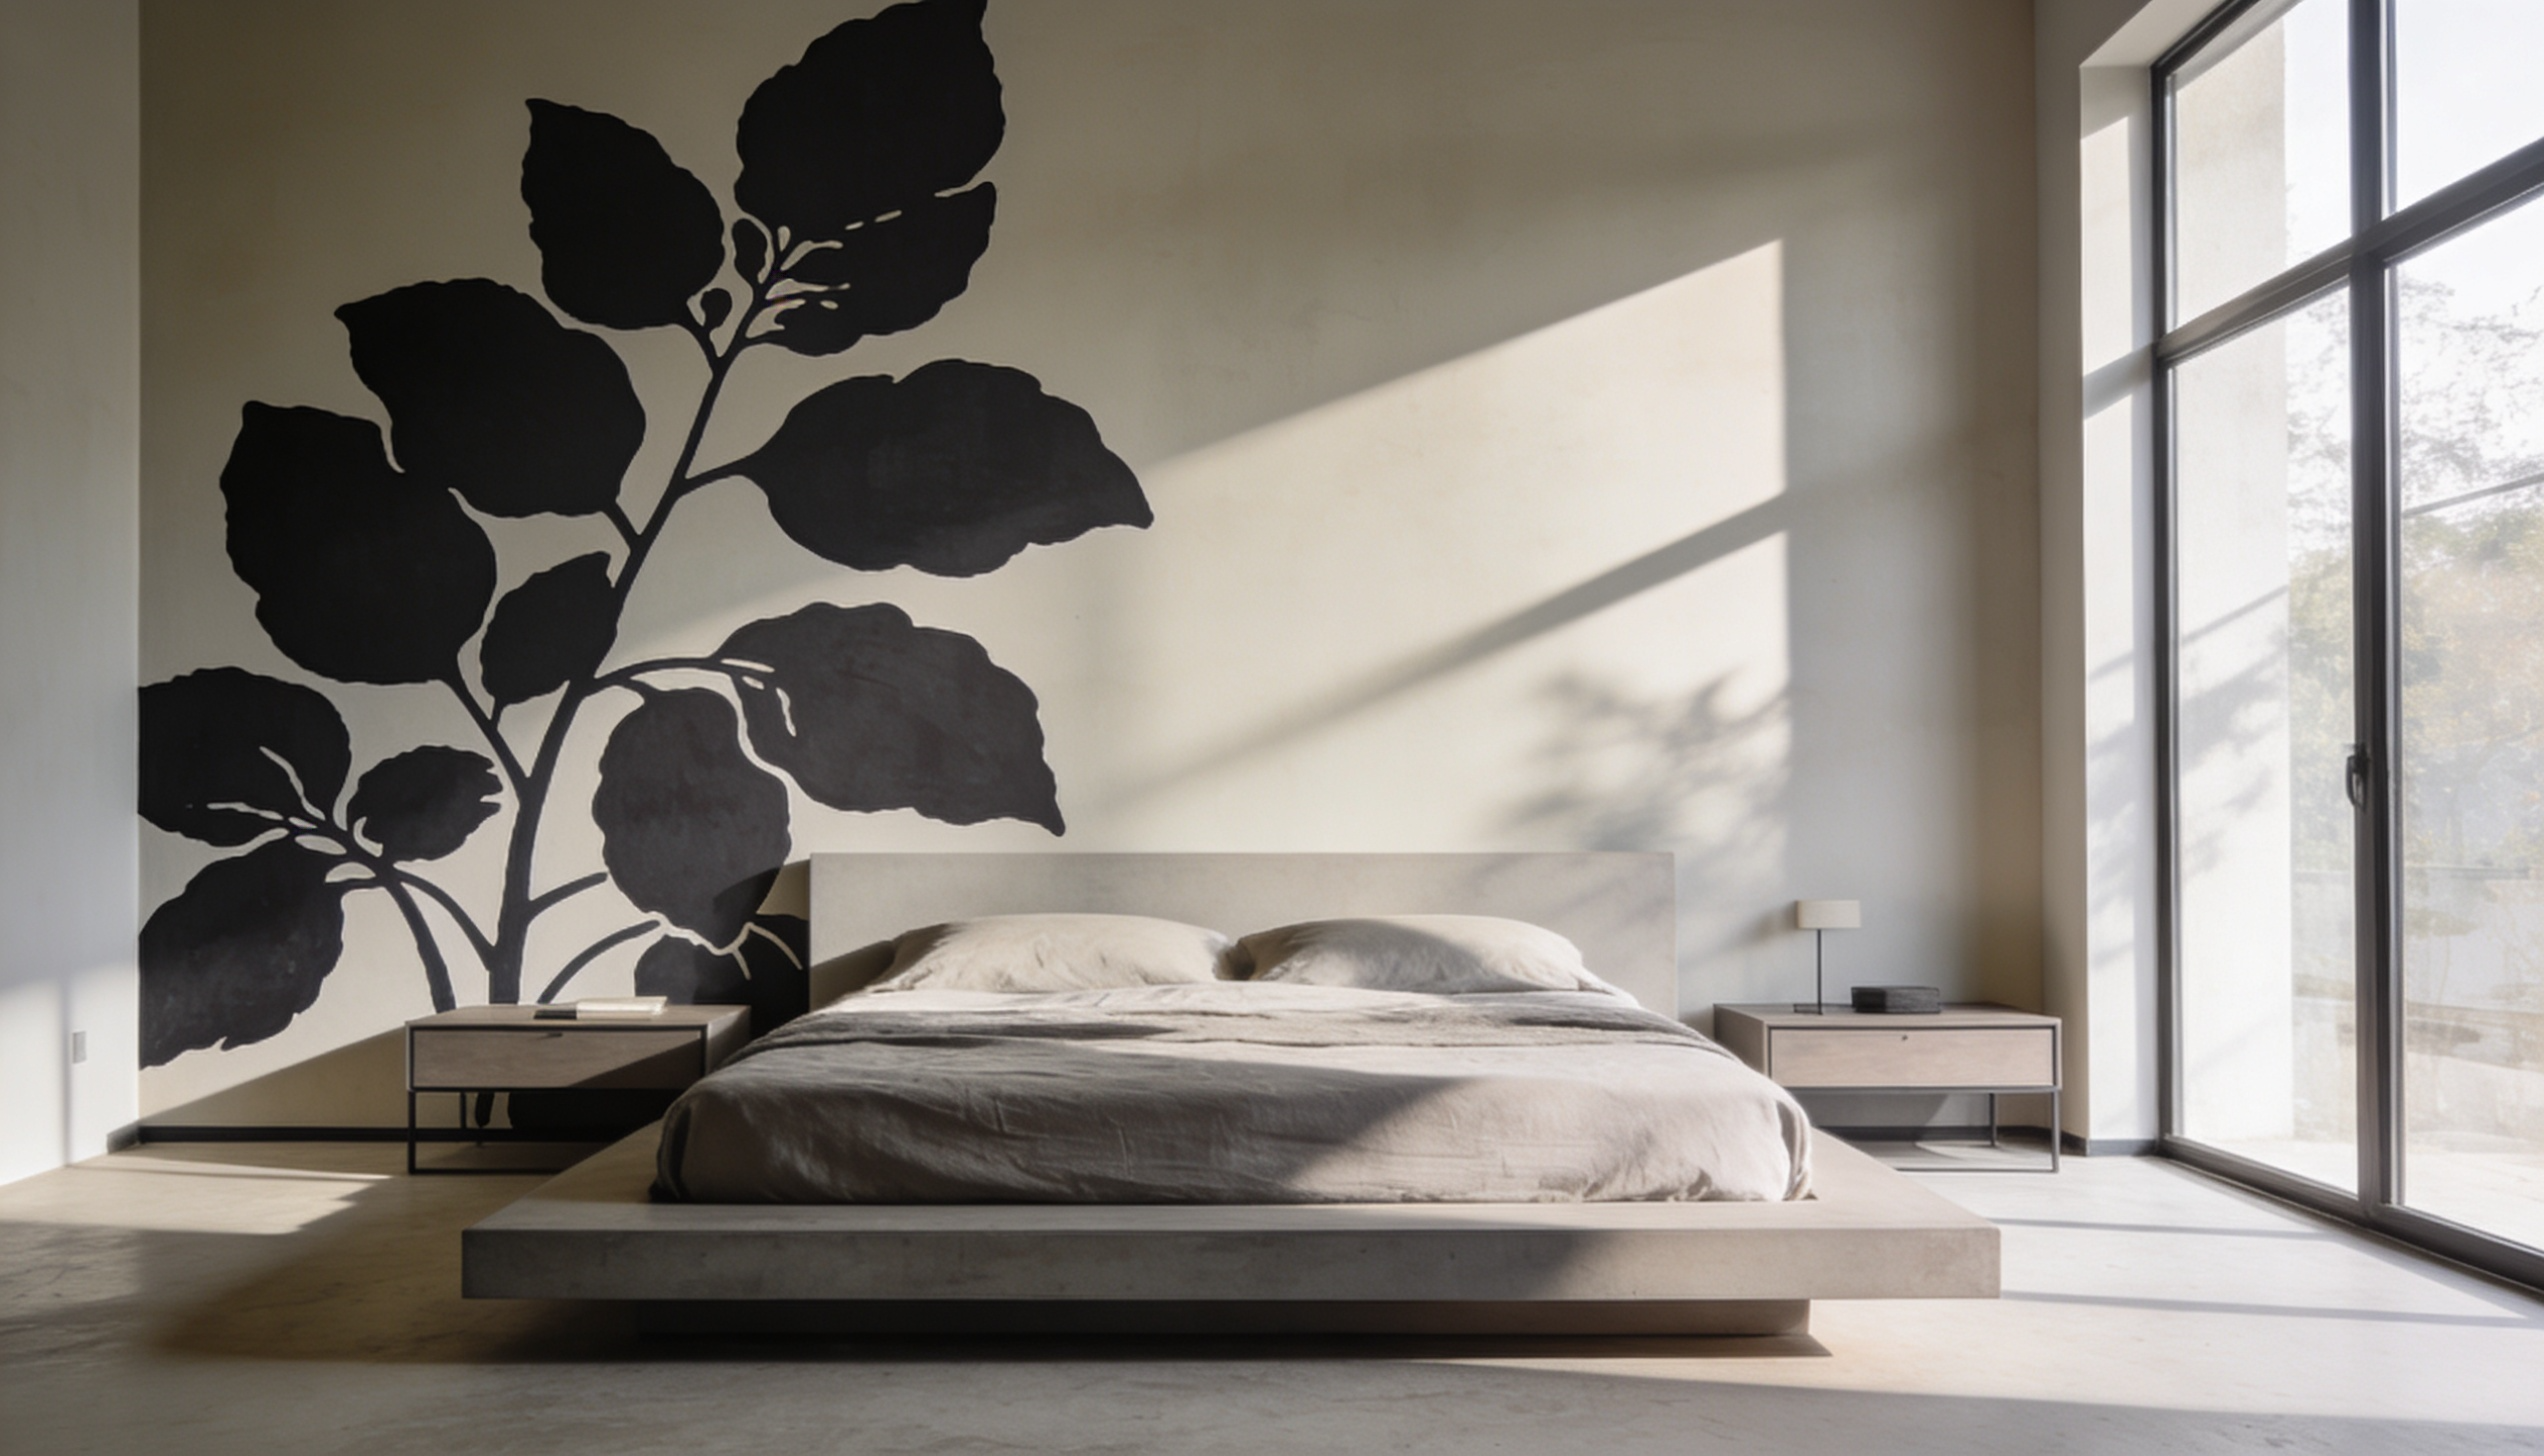
Dramatic, whimsical, and deeply expressive, a painted silhouette wall uses bold, flat shapes to create striking narrative imagery, depicting nature, cityscapes, or figures.
Silhouettes bring graphic artistry and storytelling to an otherwise bare surface.
DIY Instructions:
- Choose a silhouette design or subject
- Project or trace the design onto the wall
- Outline the full design in pencil
- Fill the silhouette with solid dark paint
- Touch up edges for crisp lines
26. DIY Shiplap Wall
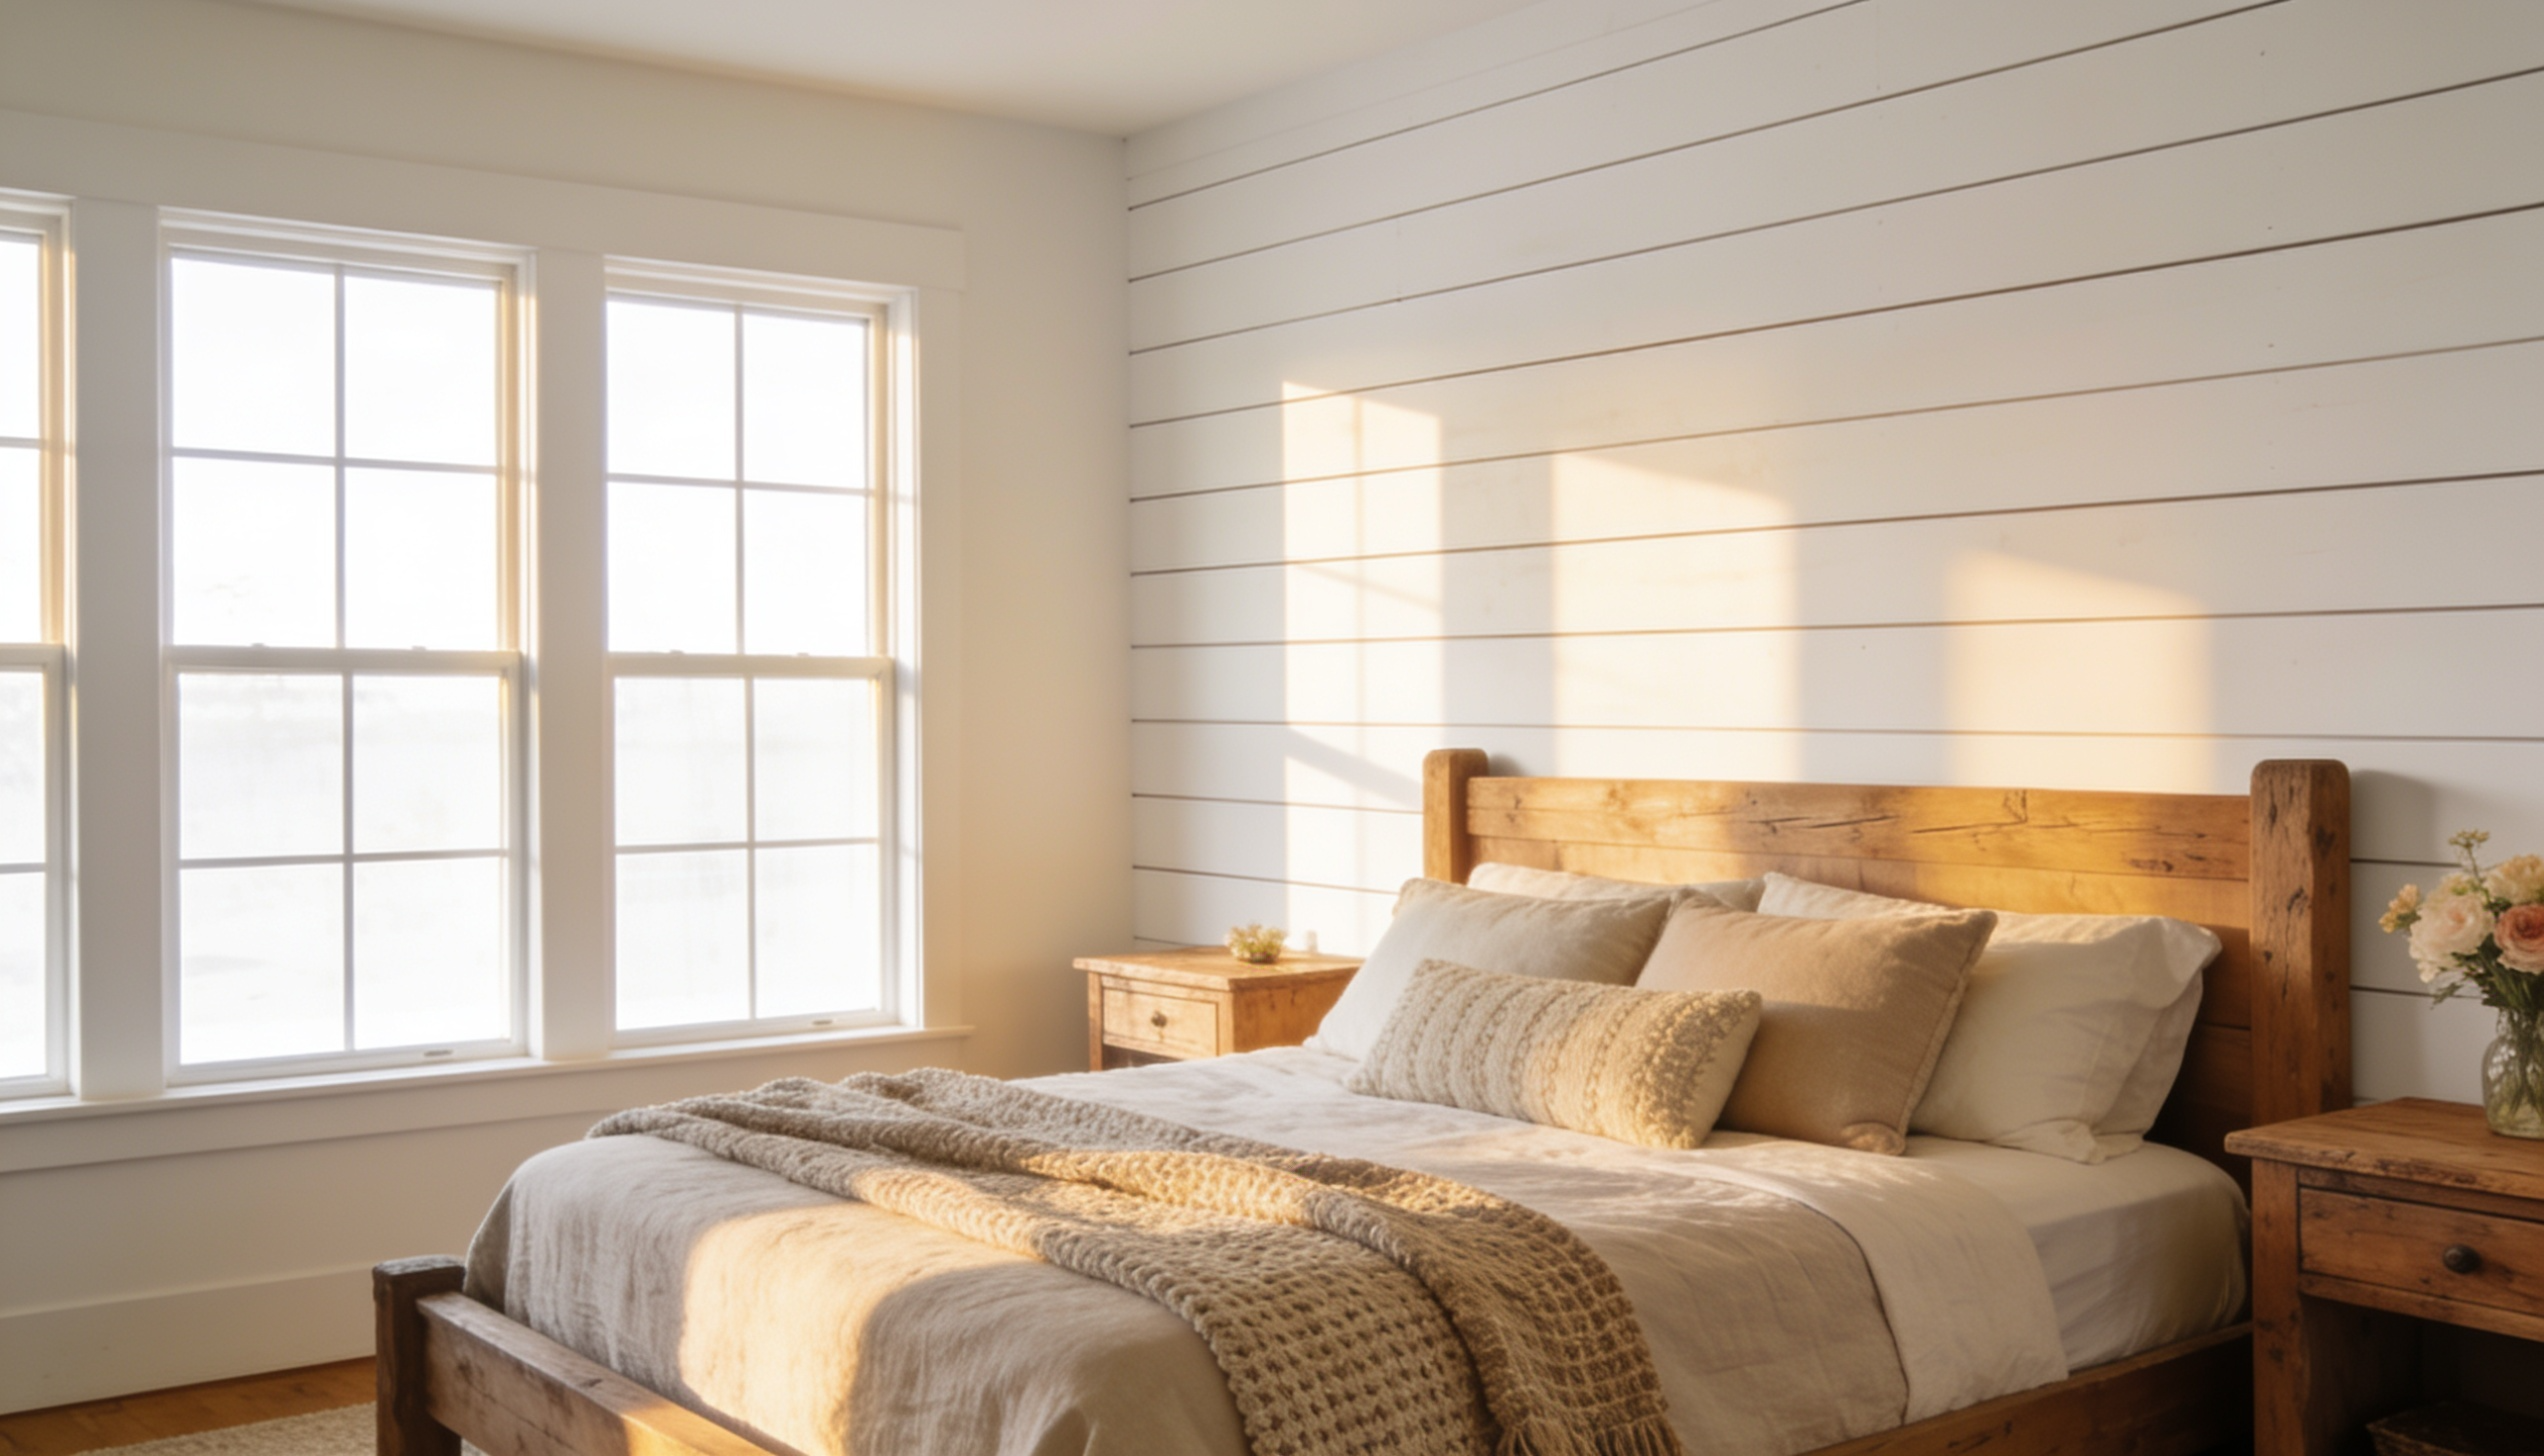
Clean, evergreen, and full of farmhouse charm, a shiplap wall adds texture and character without overwhelming a space.
Its crisp lines create a bright, polished focal point that works in both traditional and modern interiors.
DIY Instructions:
- Cut plywood into equal strips
- Mark level installation lines
- Nail strips across the wall
- Use spacers between boards
- Paint a bright white finish
27. Pegboard Functional Accent Wall
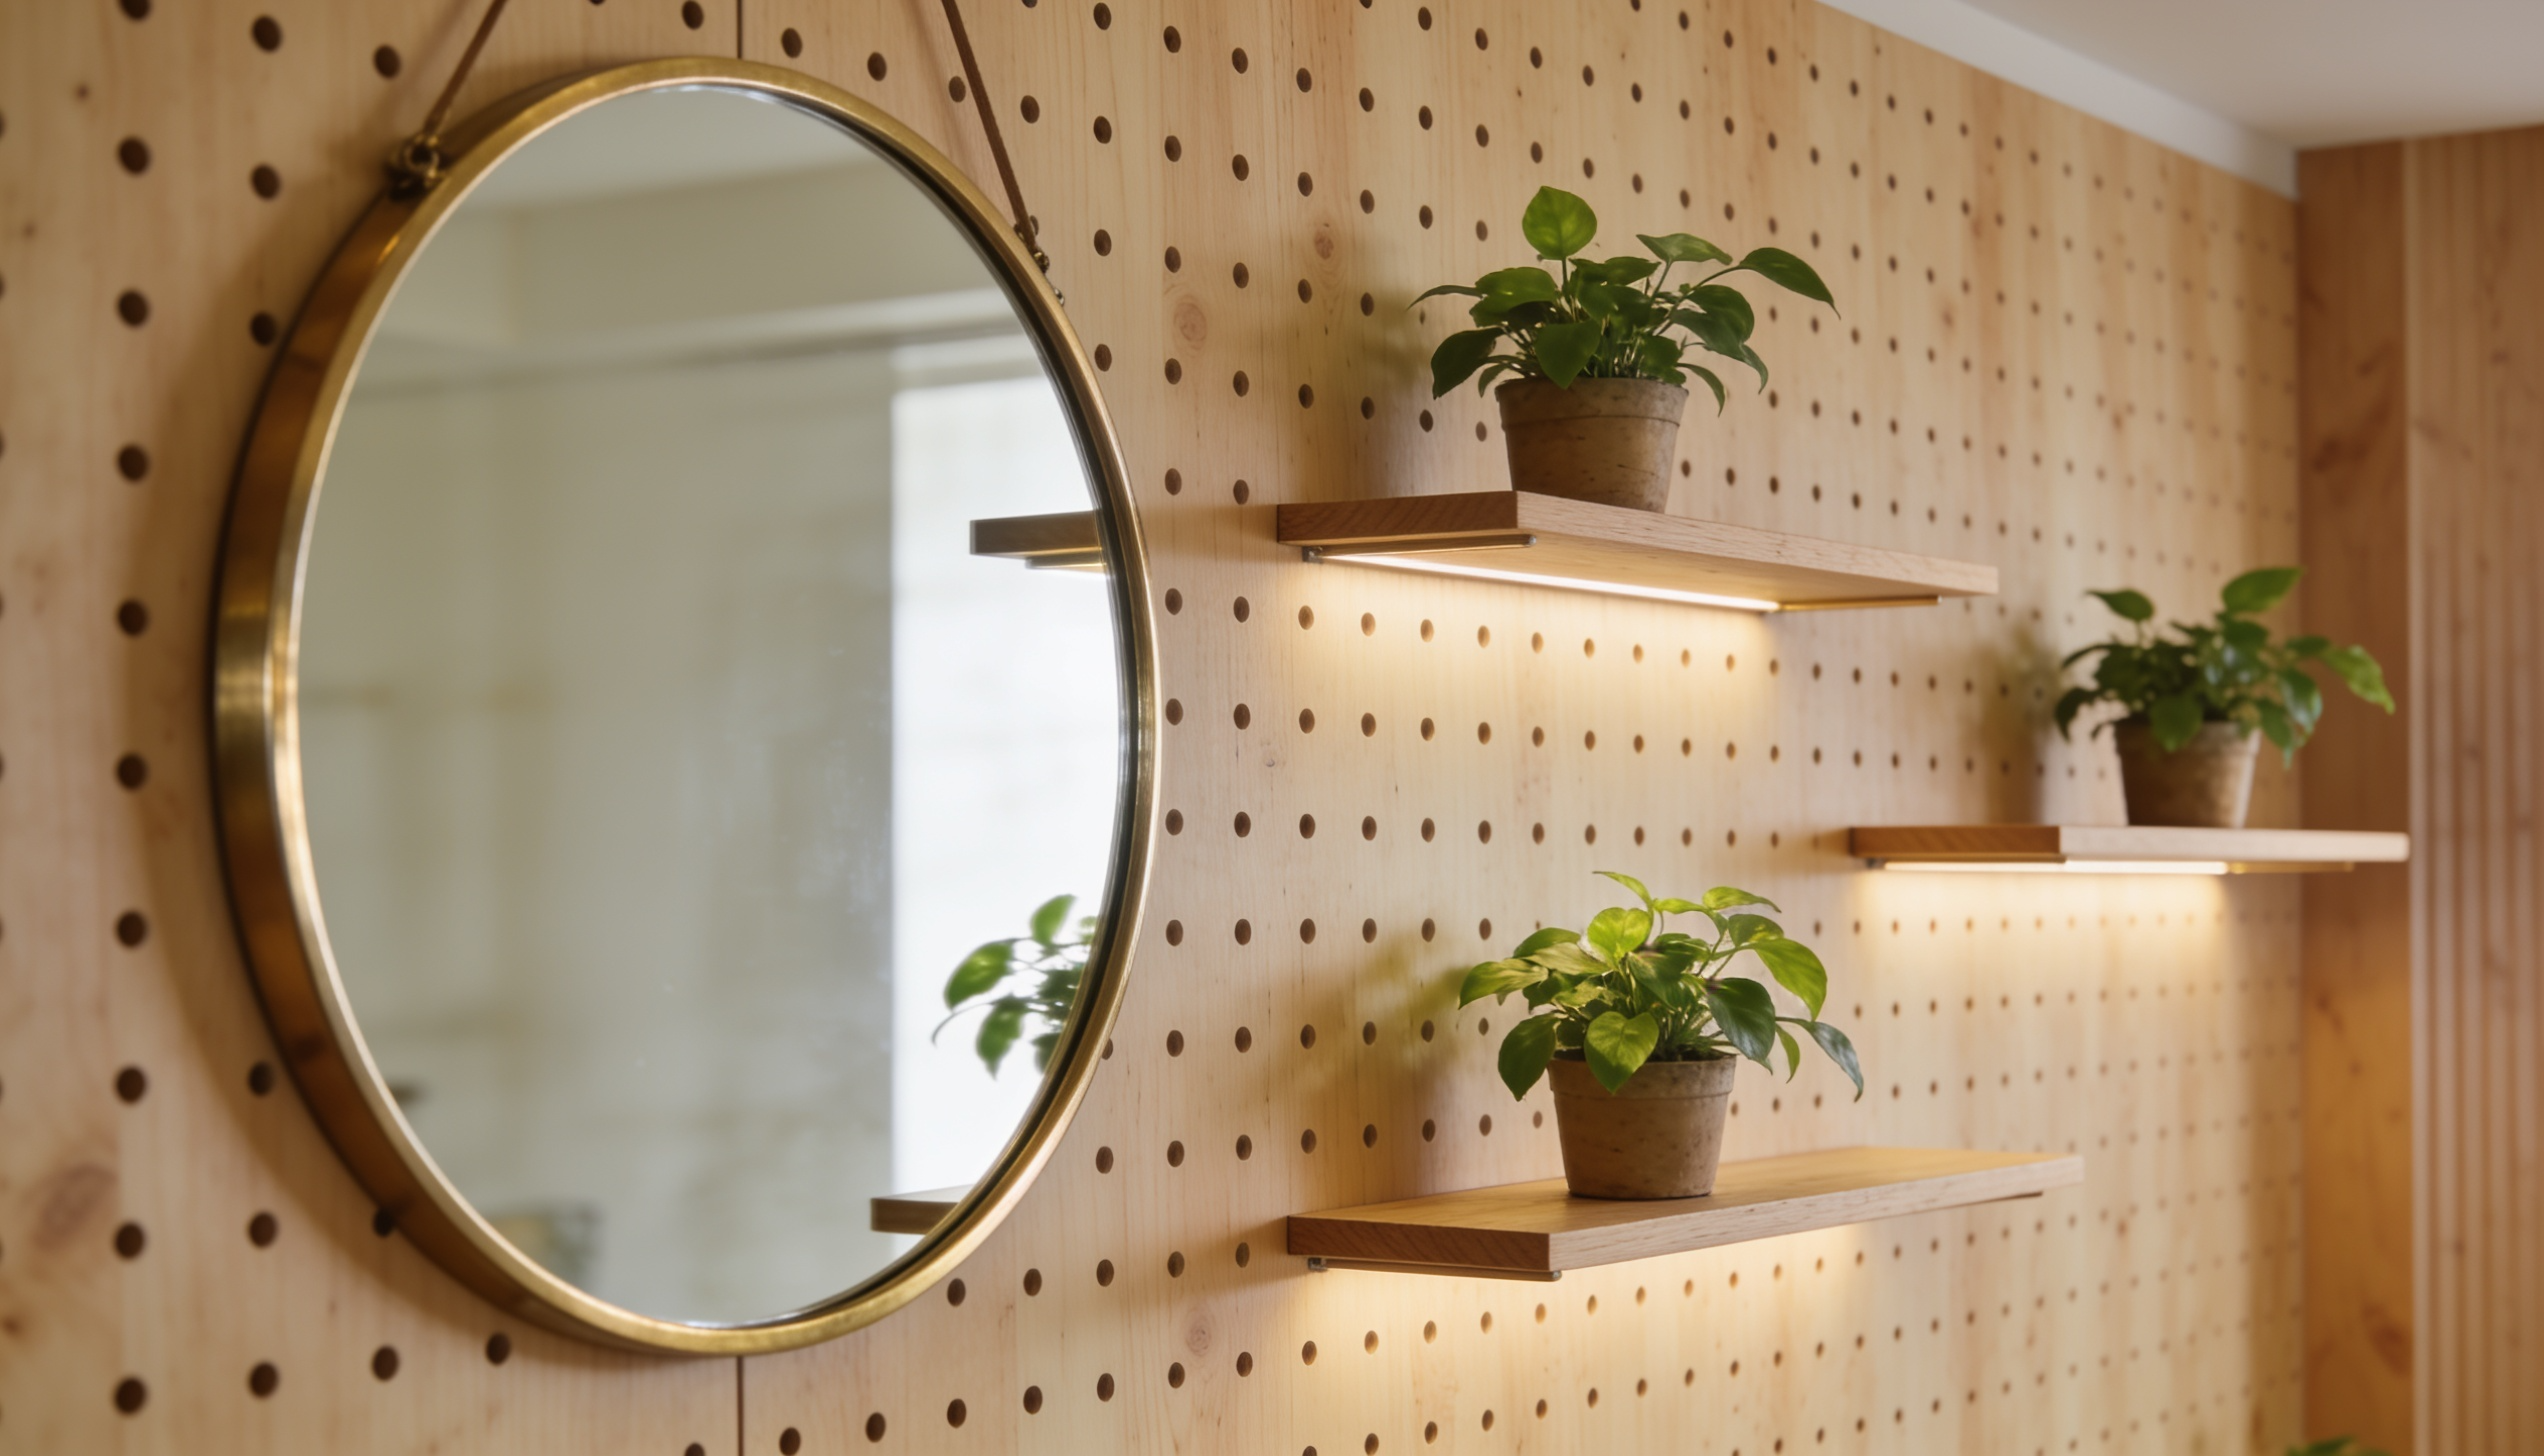
Practical, modern, and highly customizable, a pegboard accent wall turns any space into a flexible storage and display system. It blends design with function, making it perfect for studios, kitchens, or workspaces.
DIY Instructions:
- Cut and paint a pegboard sheet
- Mount securely onto wall studs
- Insert hooks, shelves, and pegs
- Arrange tools or décor items
- Reorganize as needed for flexibility
28. Vertical Garden Living Wall
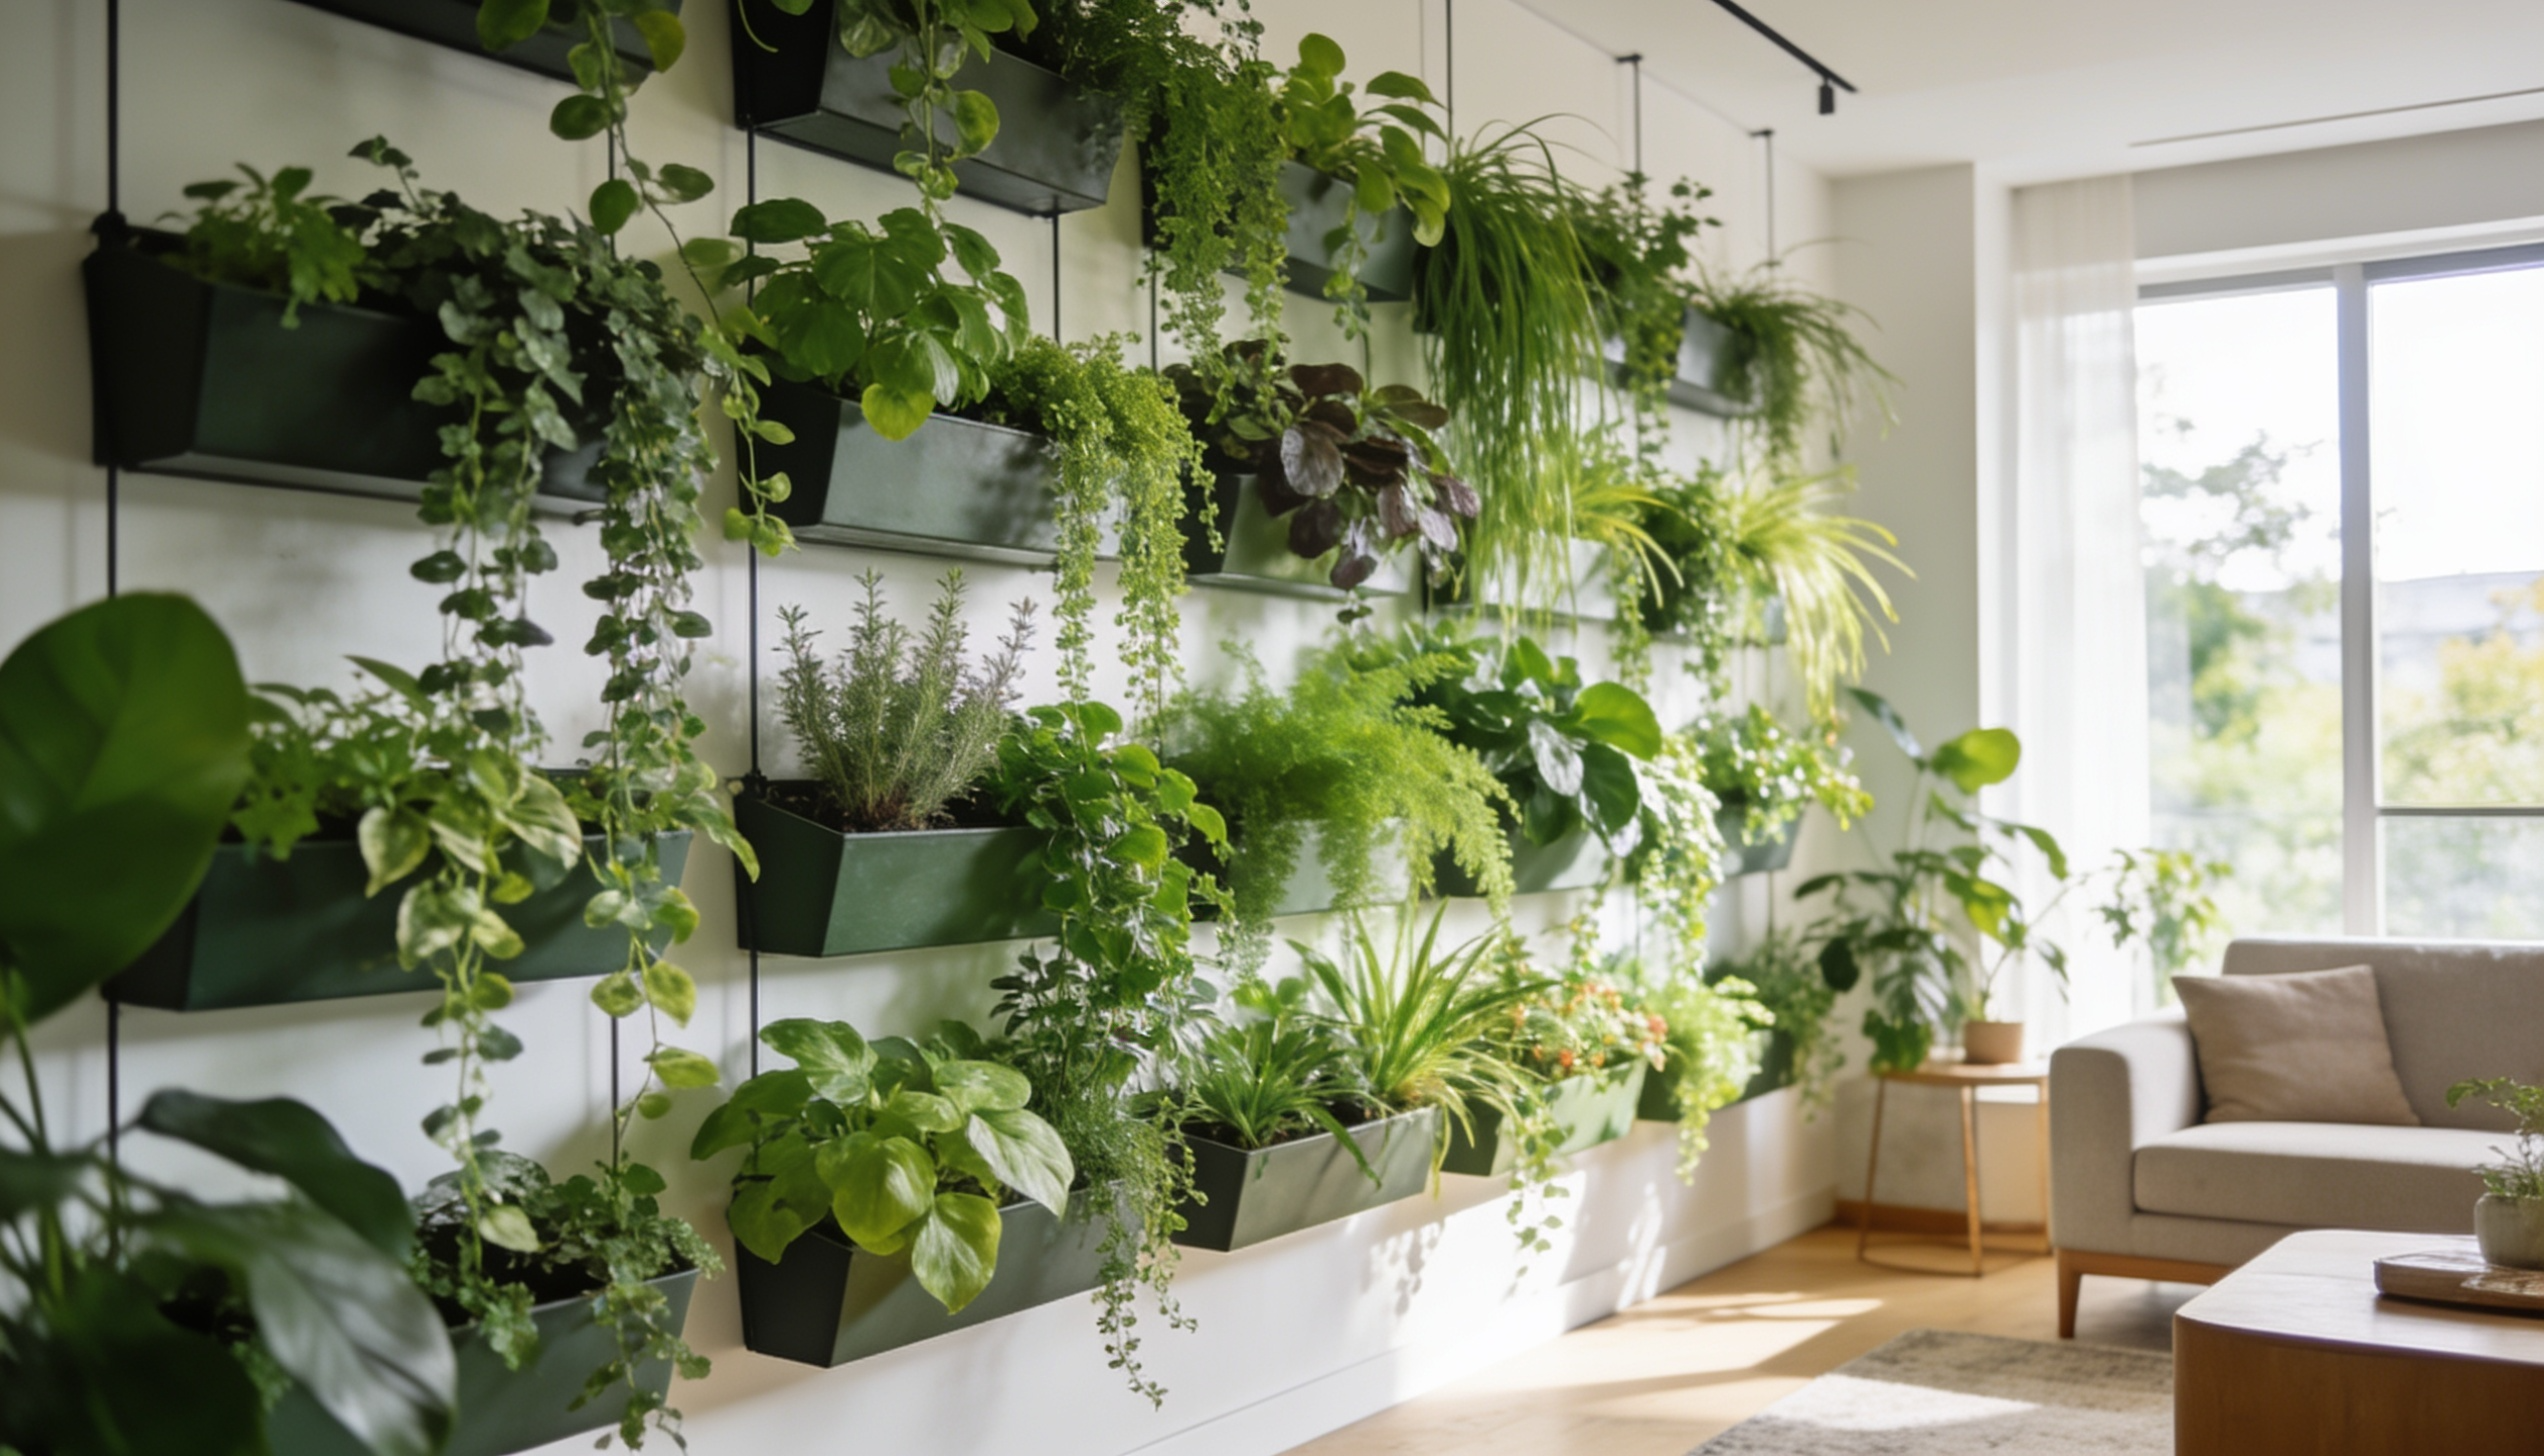
Fresh, vibrant, and naturally calming, a vertical garden wall brings real greenery indoors. It adds life, texture, and improved air quality to any room.
DIY Instructions:
- Install wall-mounted planters or frames
- Add a waterproof backing layer
- Fill with indoor plants or herbs
- Arrange plants by size and light needs
- Water and maintain regularly
29. Peel-and-Stick Wallpaper Wall

Fast, renter-friendly, and stylish, peel-and-stick wallpaper is an easy way to transform a space without permanent changes.
It comes in a wide range of patterns and textures, making it simple to create a bold or subtle accent wall with a clean, polished finish.
DIY Instructions:
- Clean and dry the wall surface
- Measure and cut wallpaper panels
- Apply from the top, smoothing air bubbles
- Align patterns carefully
- Trim excess edges
30. Rope Accent Wall Design
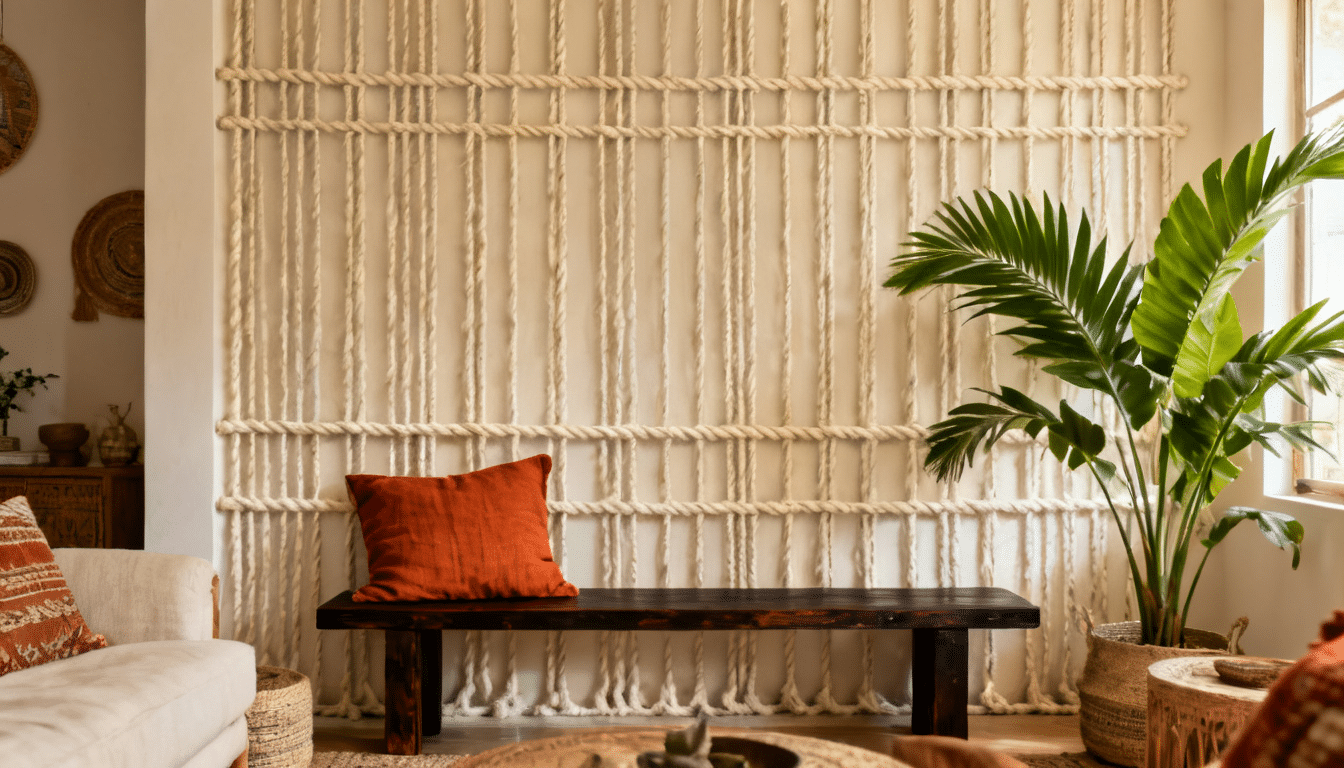
Rope accent walls add a handcrafted, textured look that brings warmth and subtle nautical charm to any space. It’s a simple way to create depth using just adhesive and rope.
DIY Instructions:
- Sketch a pattern on the wall
- Apply strong adhesive in sections
- Press the rope along the design
- Secure ends tightly
- Let dry completely
31. Mirror Panel Accent Wall
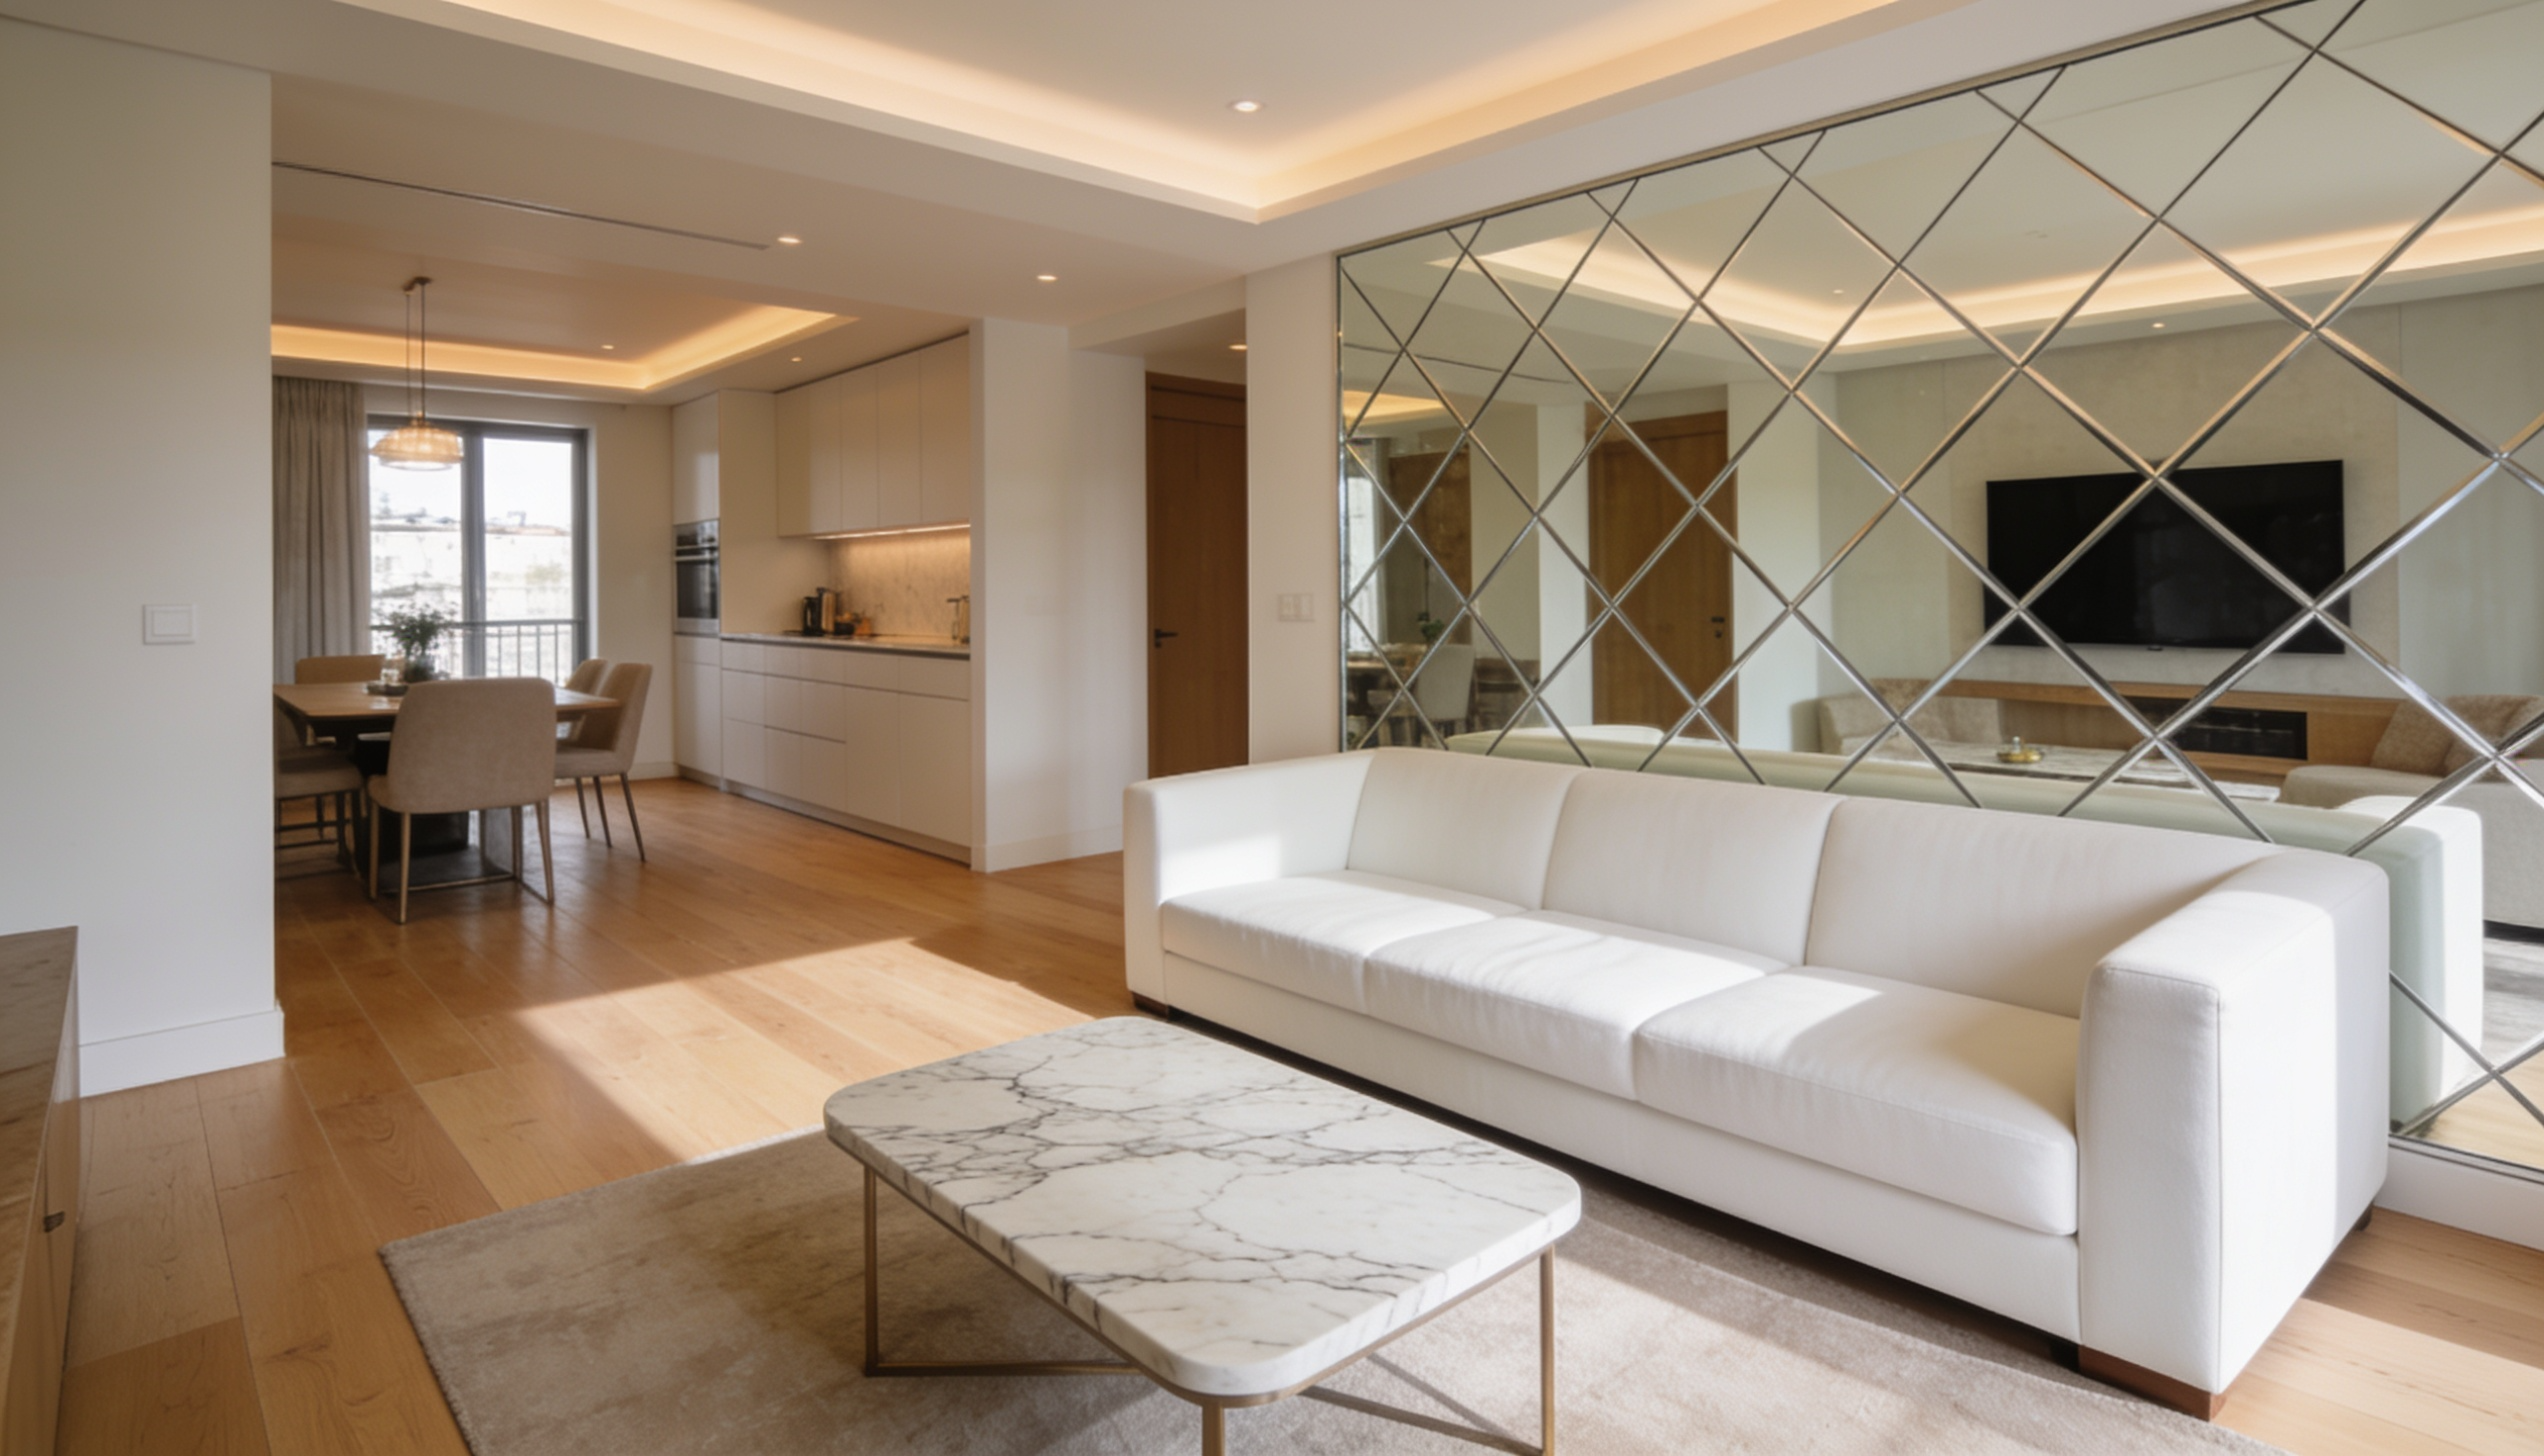
Mirror panels are a great way to make small or dark rooms feel brighter and more spacious. They reflect light beautifully and instantly elevate any wall.
DIY Instructions:
- Measure wall sections precisely
- Apply mirror-safe adhesive
- Mount panels evenly
- Clean surface for clarity
- Ensure secure alignment
32. LED Backlit Accent Wall
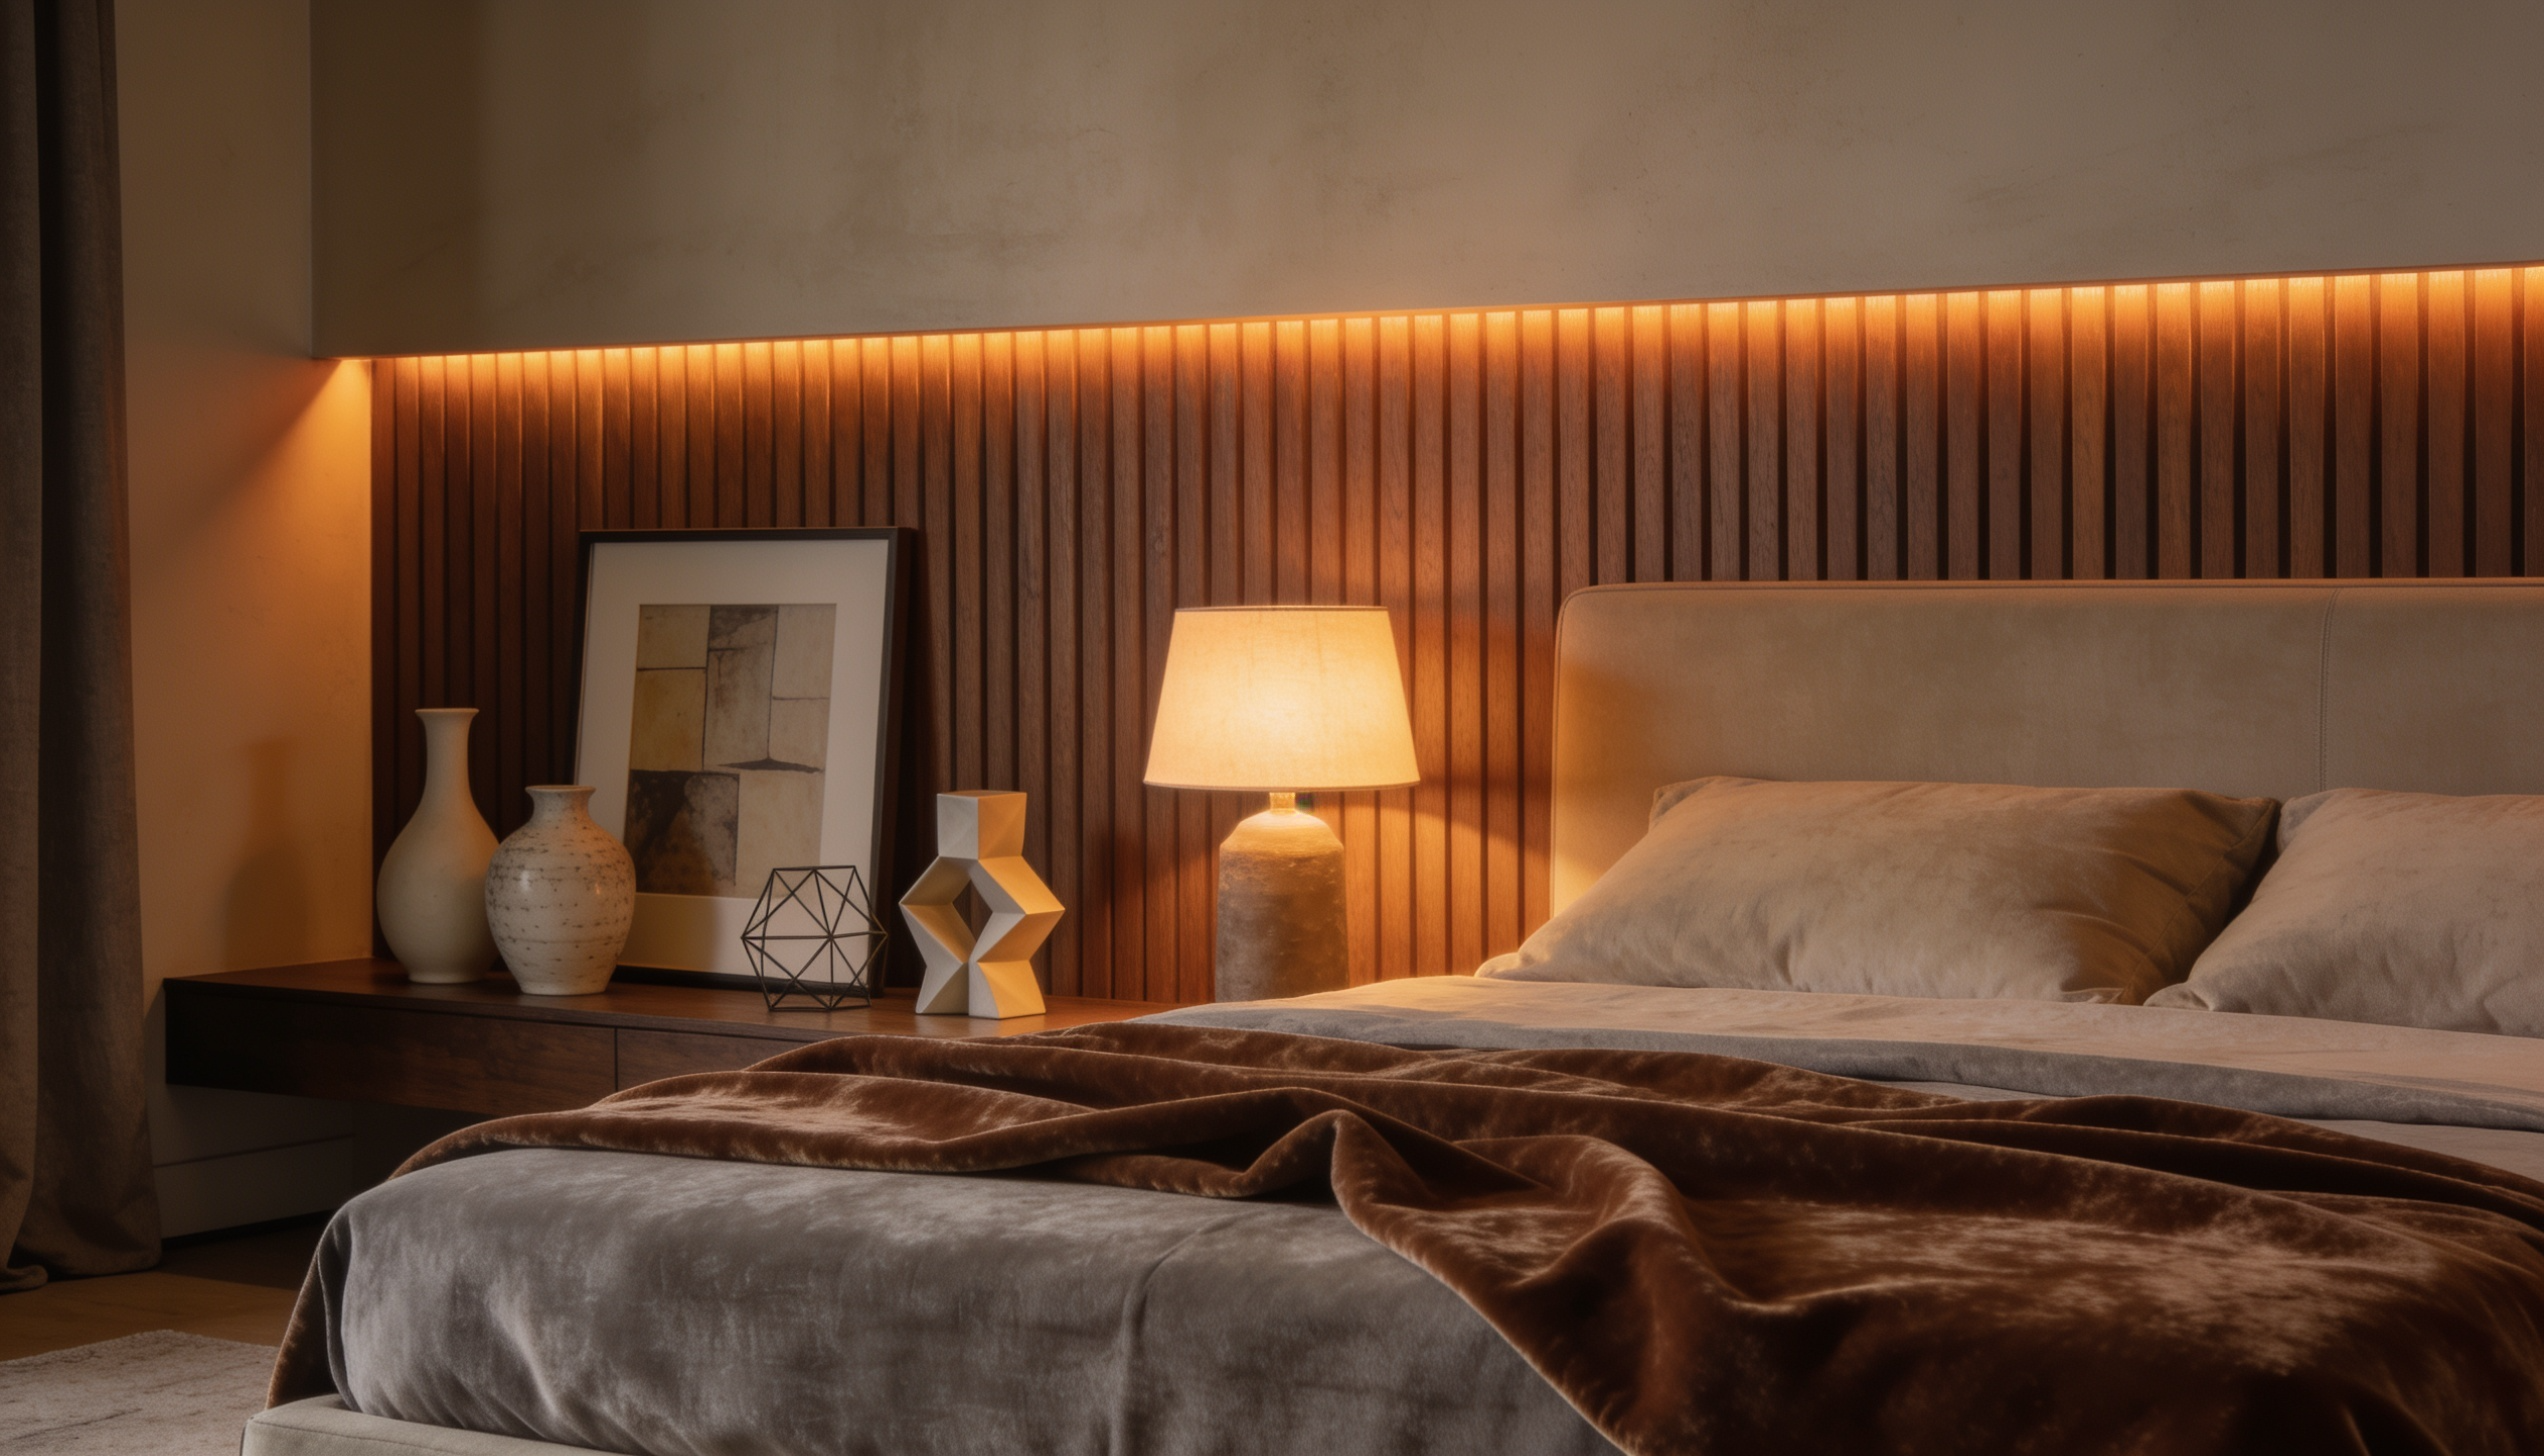
LED-backlit walls create a modern ambient glow that adds depth, mood, and a premium feel to any room. They work especially well in bedrooms and living spaces.
DIY Instructions:
- Install LED strip lights behind panels
- Secure wiring along edges
- Test lighting before final placement
- Hide cables neatly
- Adjust brightness and color
33. Textured Plaster Accent Wall
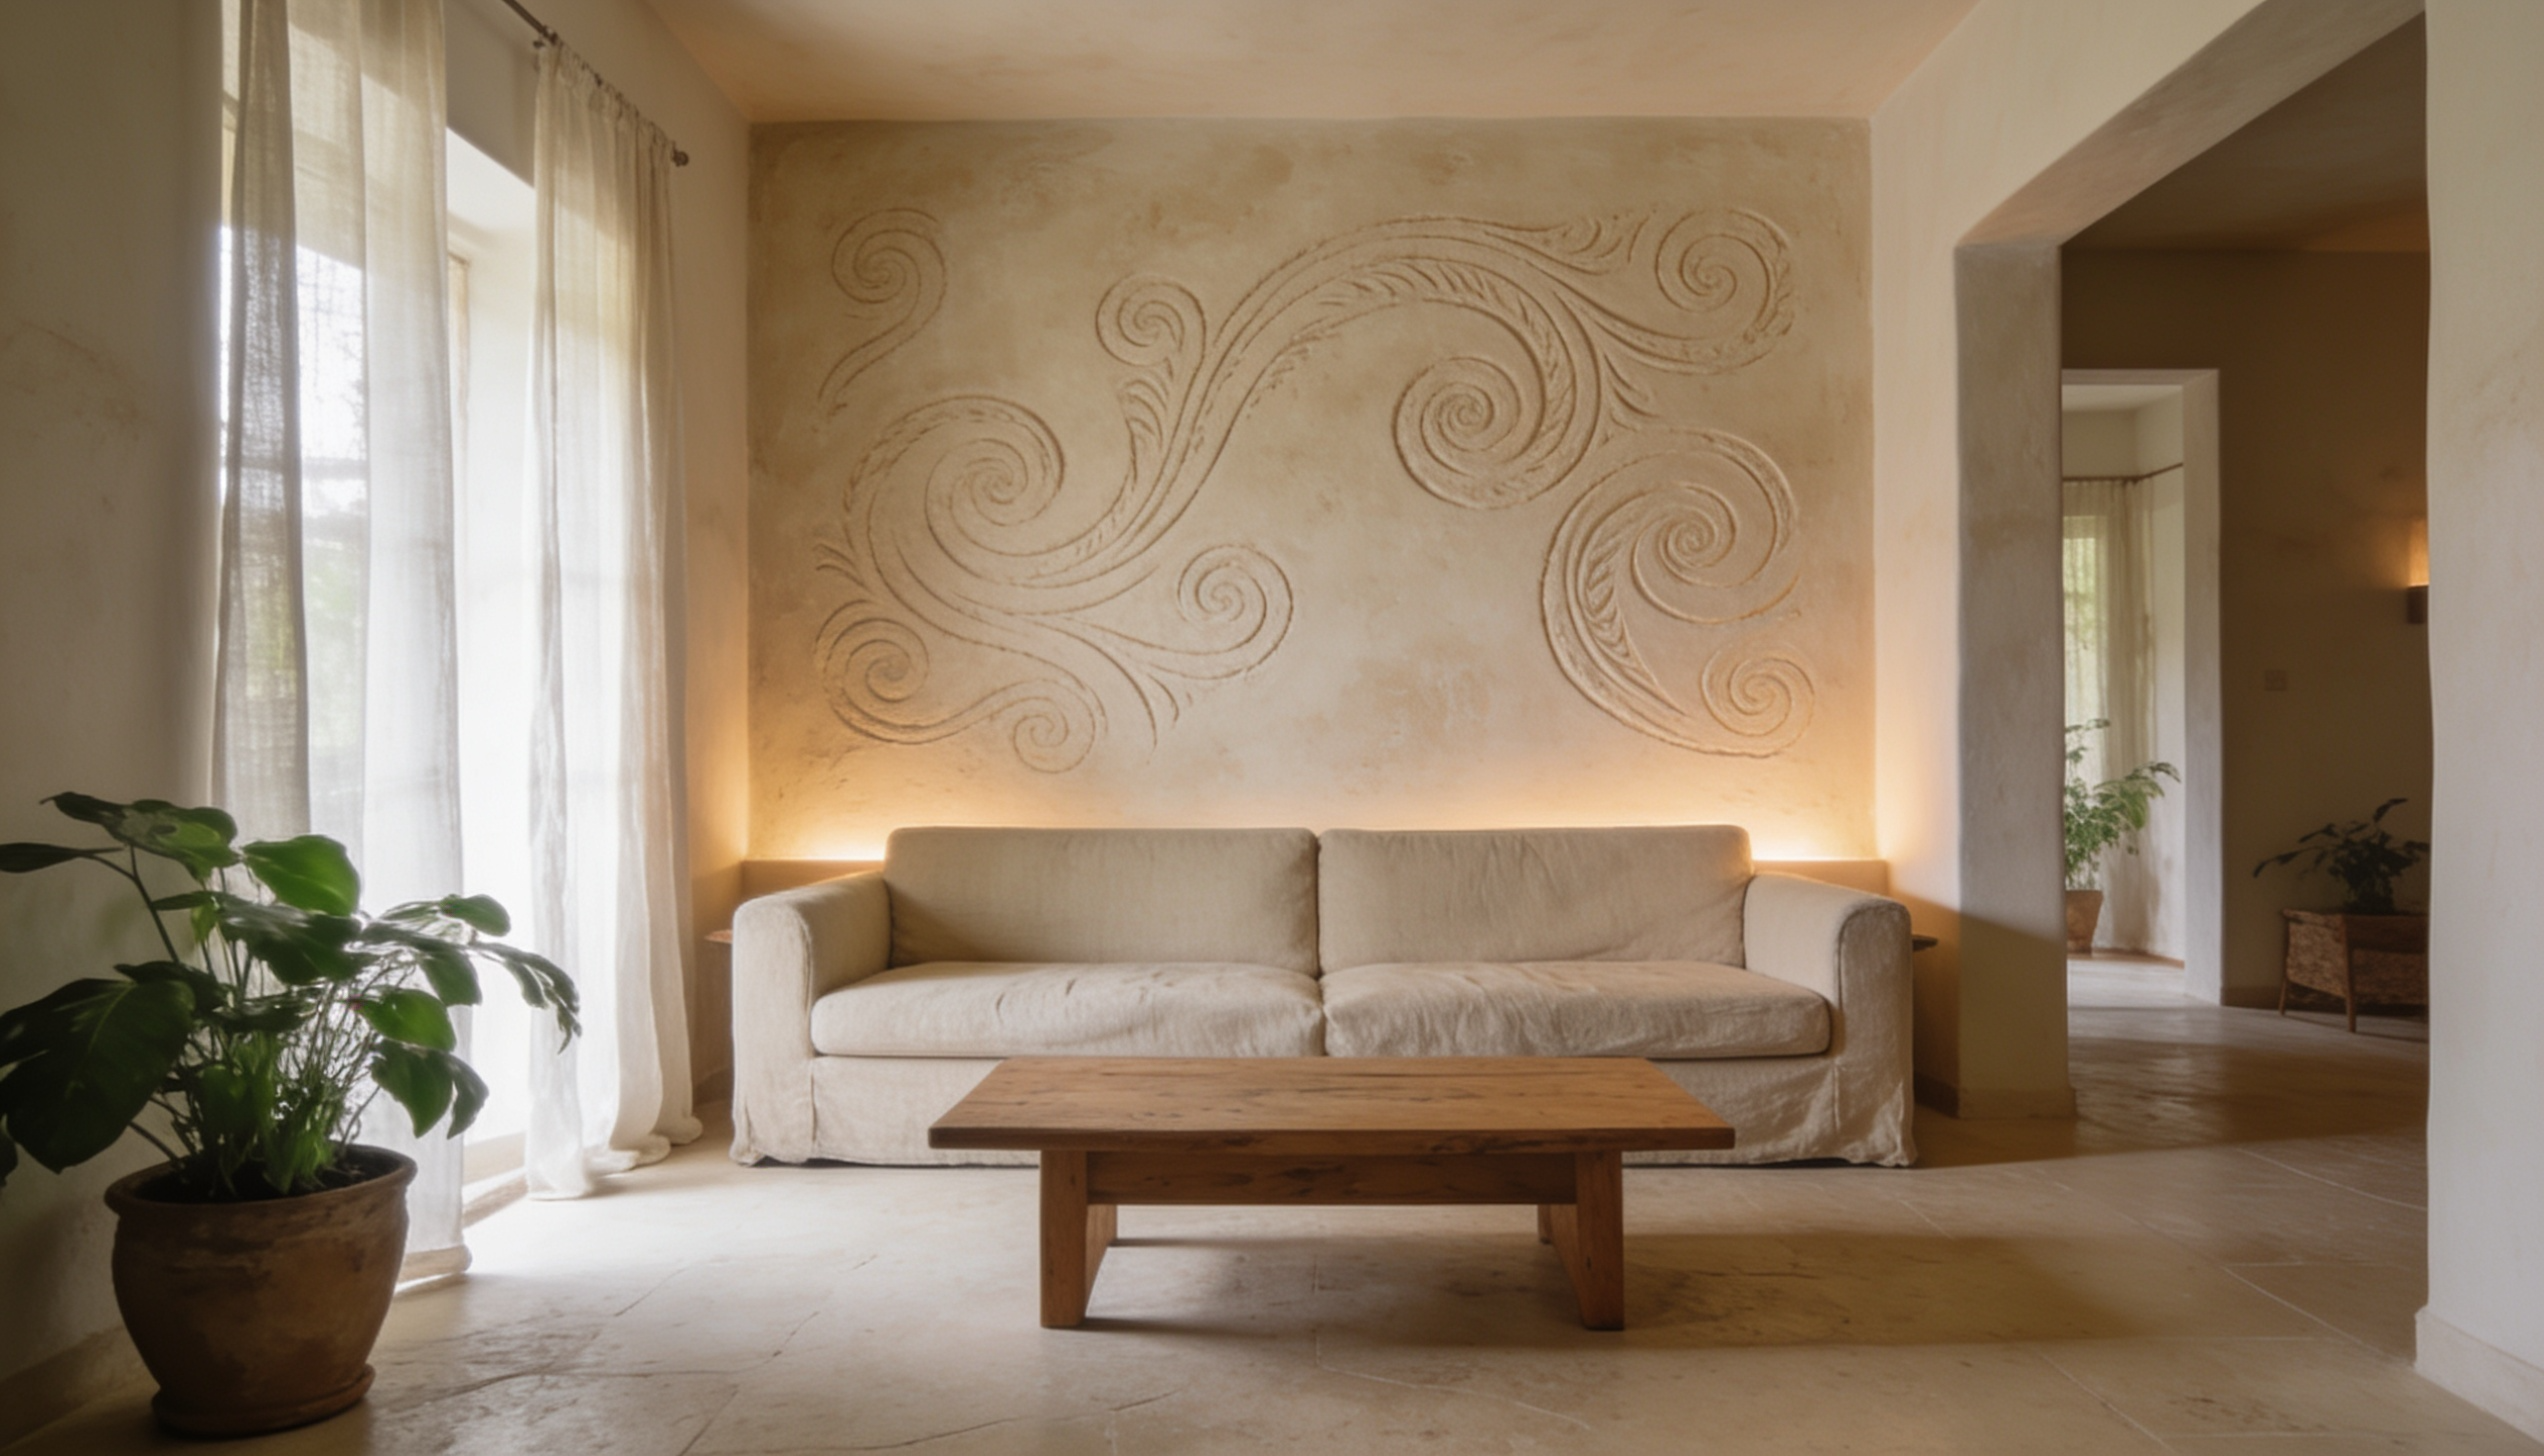
A textured plaster wall adds an organic, handcrafted feel with soft depth and natural imperfections. It works beautifully in modern, minimalist, and Mediterranean-style interiors.
DIY Instructions:
- Apply base plaster coat evenly
- Use a trowel to create texture patterns
- Let it dry partially and refine the texture
- Sand lightly for smooth balance
- Seal with a protective finish
How to Pick the Best Accent Wall for Your Space
Selecting the ideal wall for a feature design is key to achieving balance and harmony in a room. Consider the room’s layout, lighting, and purpose before deciding. The following factors can help guide the choice:
- Identify the Natural Focal Point: Choose the wall behind a bed, sofa, TV unit, or dining table where attention naturally falls.
- Consider Lighting: Bright, sunlit walls can support darker tones and bold patterns; low-light walls benefit from lighter or reflective finishes.
- Account for Room Size: Small rooms work best with subtle textures or soft contrasts; larger spaces can handle stronger colors, patterns, or textures.
- Check Furniture Placement: Ensure the wall complements the major furniture pieces rather than competing with them.
- Assess Wall Condition: Smooth walls are ideal for paint or wallpaper; uneven surfaces suit wood panels, stone veneer, or textured finishes.
- Match Room Function and Mood: Use calm, minimal designs for restful spaces and more expressive styles for social or energetic areas.
Wrapping it Up
DIY accent wall ideas are a simple way to refresh a room without changing everything. From painted stripes and fabric panels to wood trim, cork tiles, and bold feature walls, there’s a style for every home and comfort level.
A statement wall can be simple, textured, colorful, or personal, which is what makes it so special.
The best part of DIY is that you can experiment, adjust, and make it your own. Some projects take a weekend, while others need just paint and tape.
Which idea would you try first? Share your favorite plans or project photos in the comments.

