


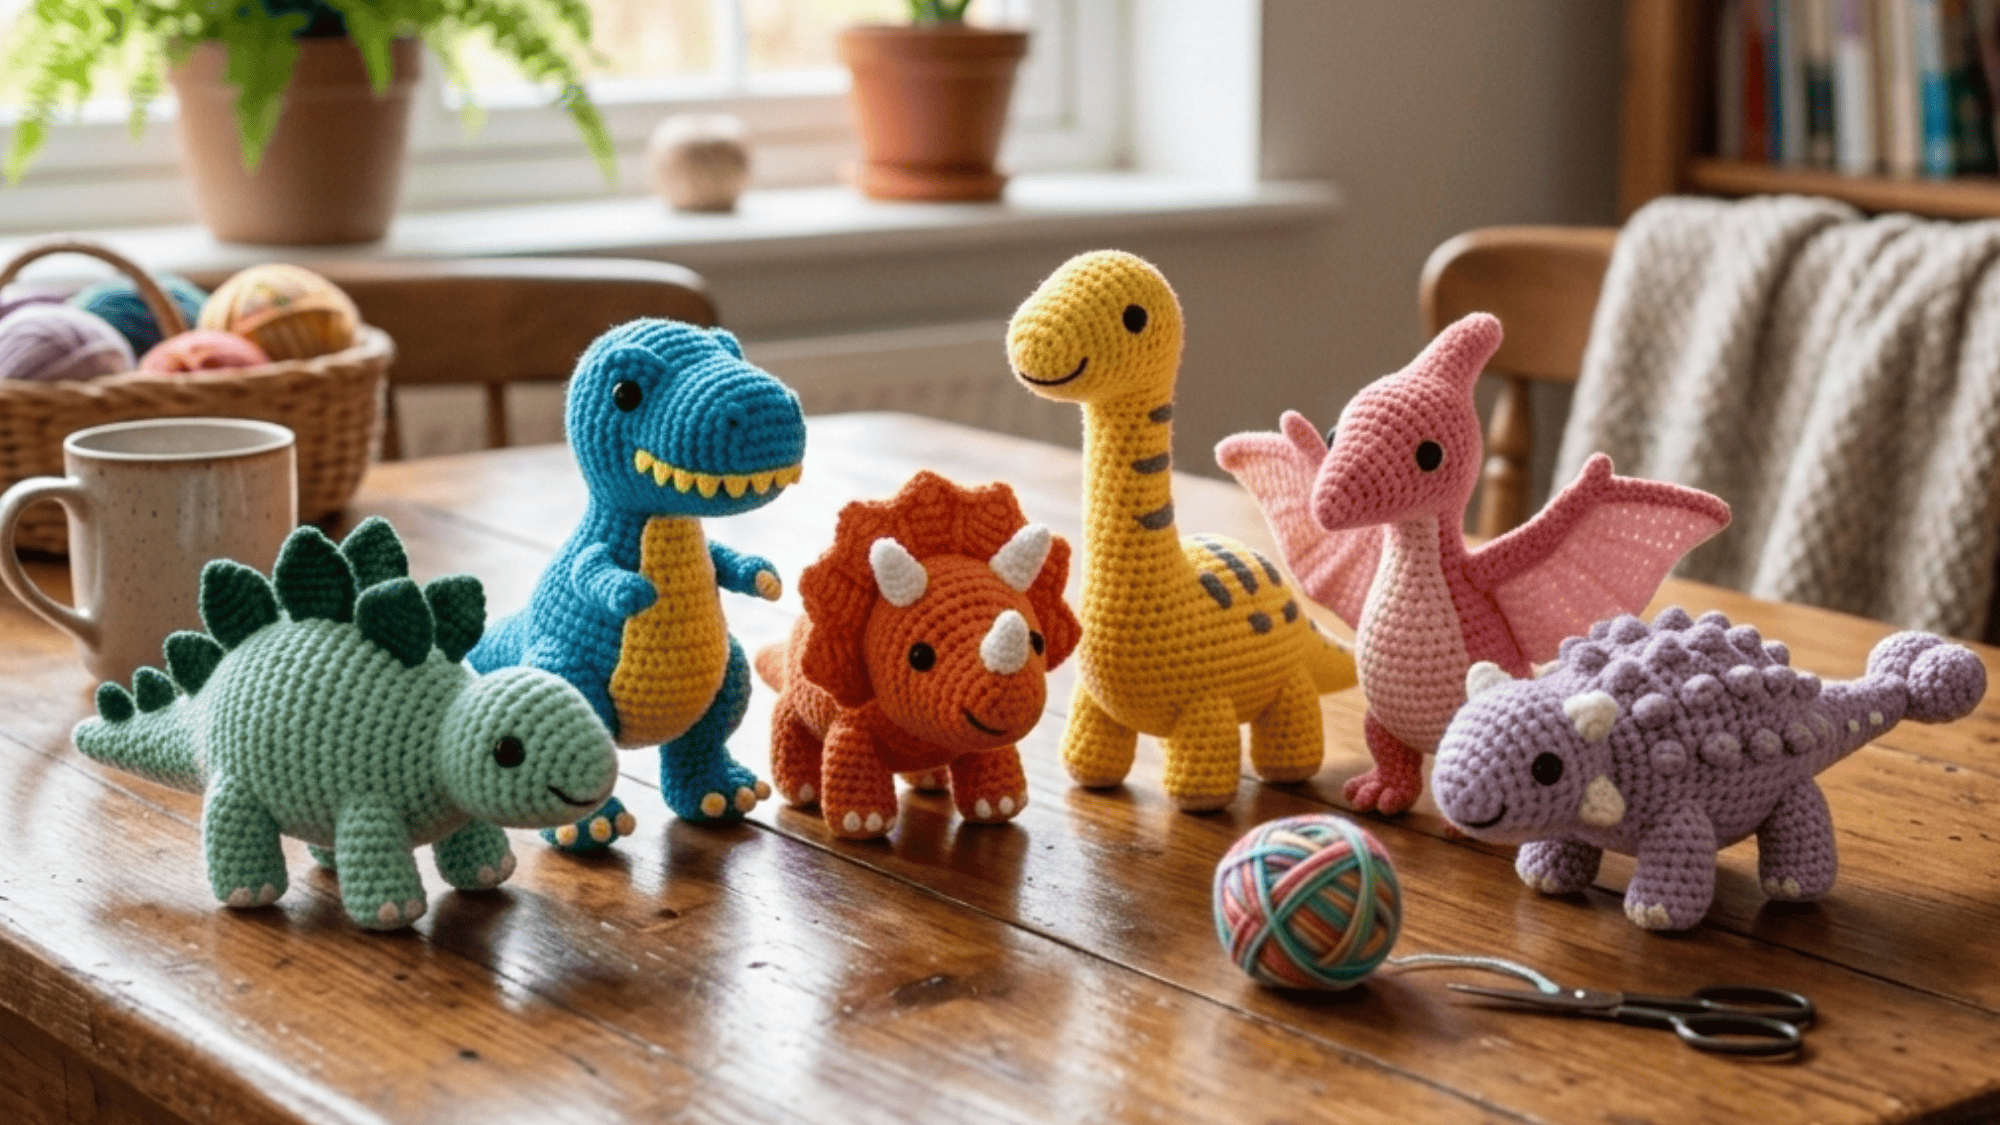
Crocheting dinosaurs? Yes, you heard that right! If you’ve ever wanted to bring a T. rex or Triceratops to life with your crochet hook, you’re in for a fun adventure.
No matter if you’re a beginner or an experienced crafter, this dinosaur crochet pattern has something for everyone, from mighty creatures to cute, quirky designs.
It’s a fun, easy way to add a little prehistoric charm to your handmade collection. So, grab your yarn, get comfy, and let’s enter the dino world of crochet.
Why are Dinosaur Crochet Patterns Trendy?
Dinosaur crochet toys are handmade, crocheted items designed to resemble various dinosaur species. These toys are made with yarn, a crochet hook, and sometimes additional materials such as safety eyes or stuffing.
They are popular because they combine the fun of dinosaurs with the creativity of crochet, resulting in soft, cuddly, and unique creations.
Dinosaur crochet toys make great gifts, room decorations, or playthings for dinosaur fans of all ages! They can be customized in different colors, sizes, and patterns to suit personal preferences.
Many crafters also enjoy making them as a relaxing hobby or even selling them as part of a small handmade business.
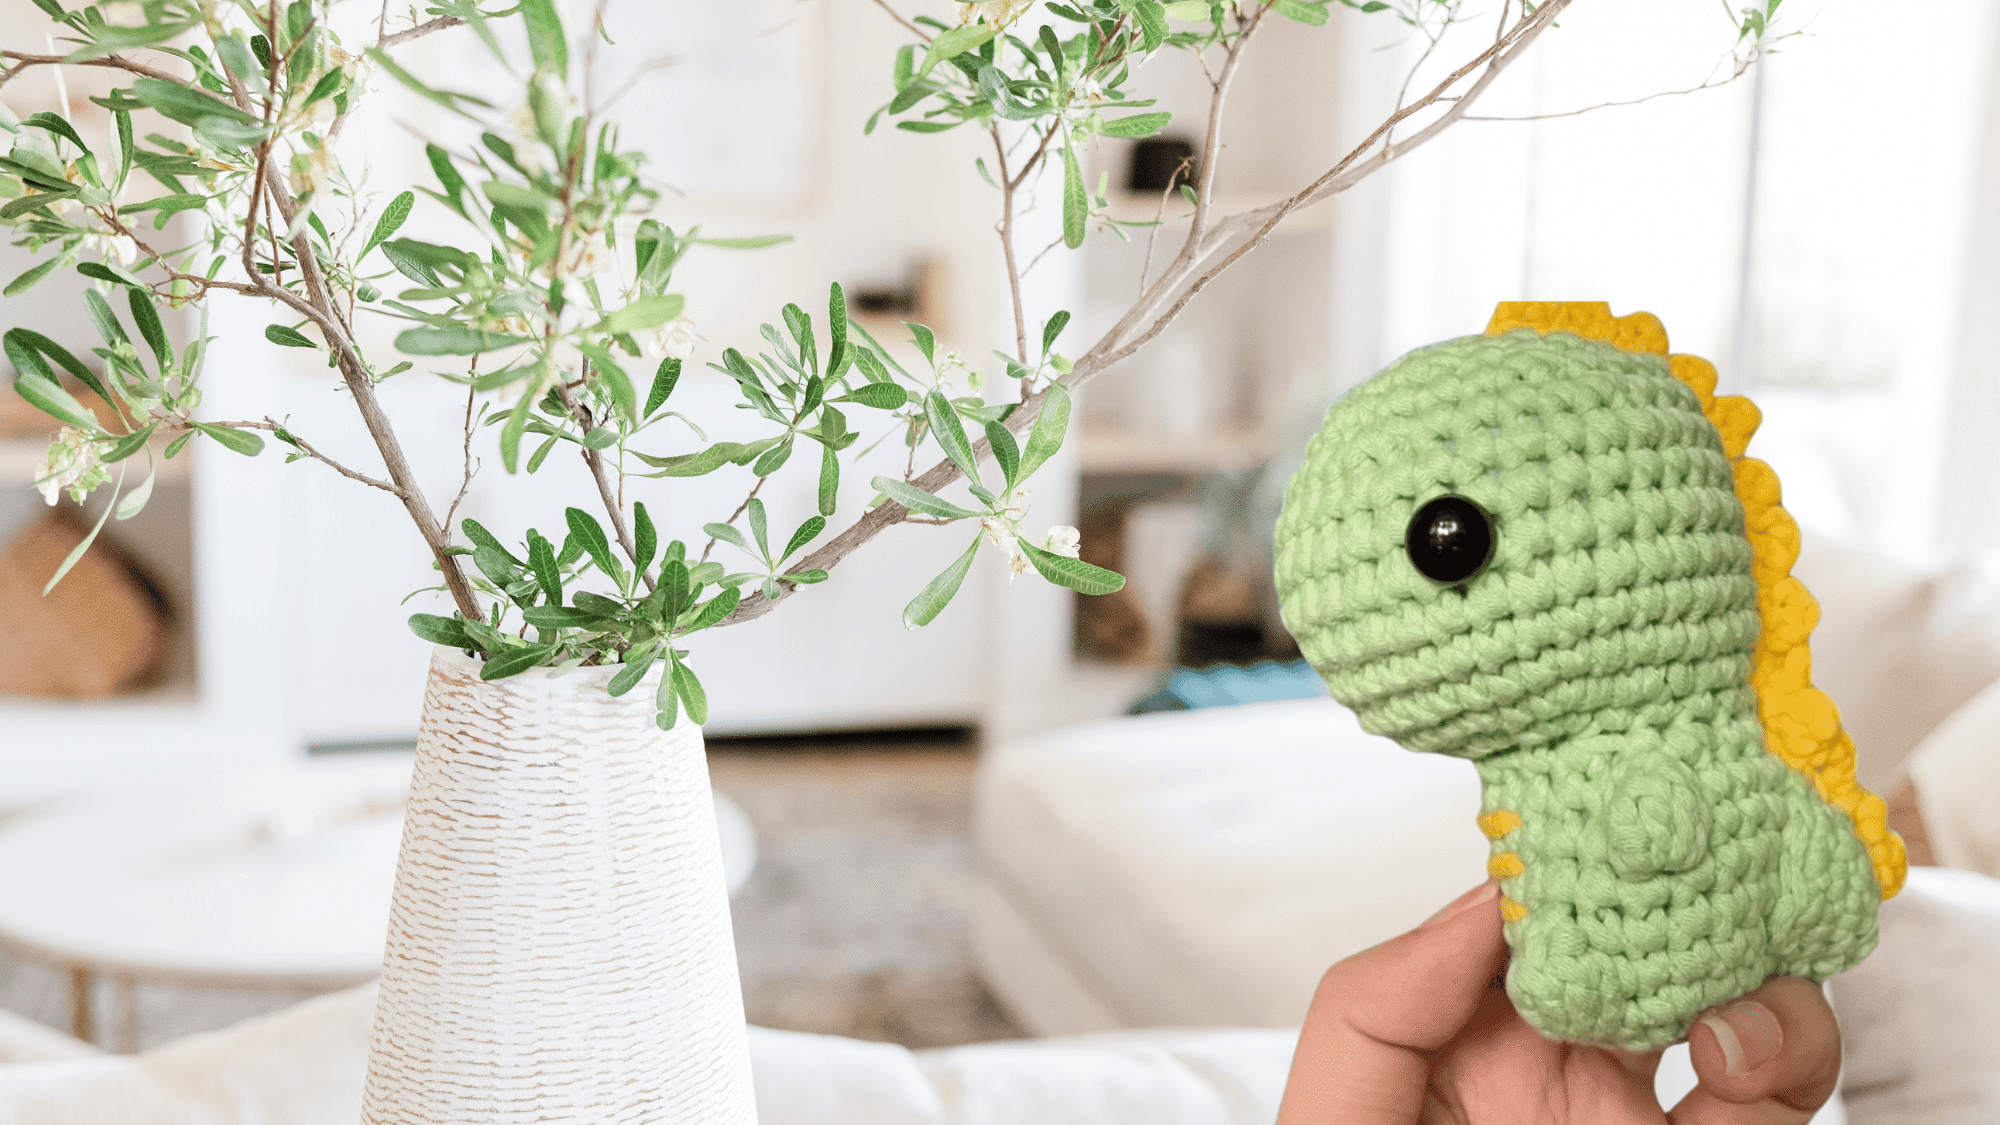
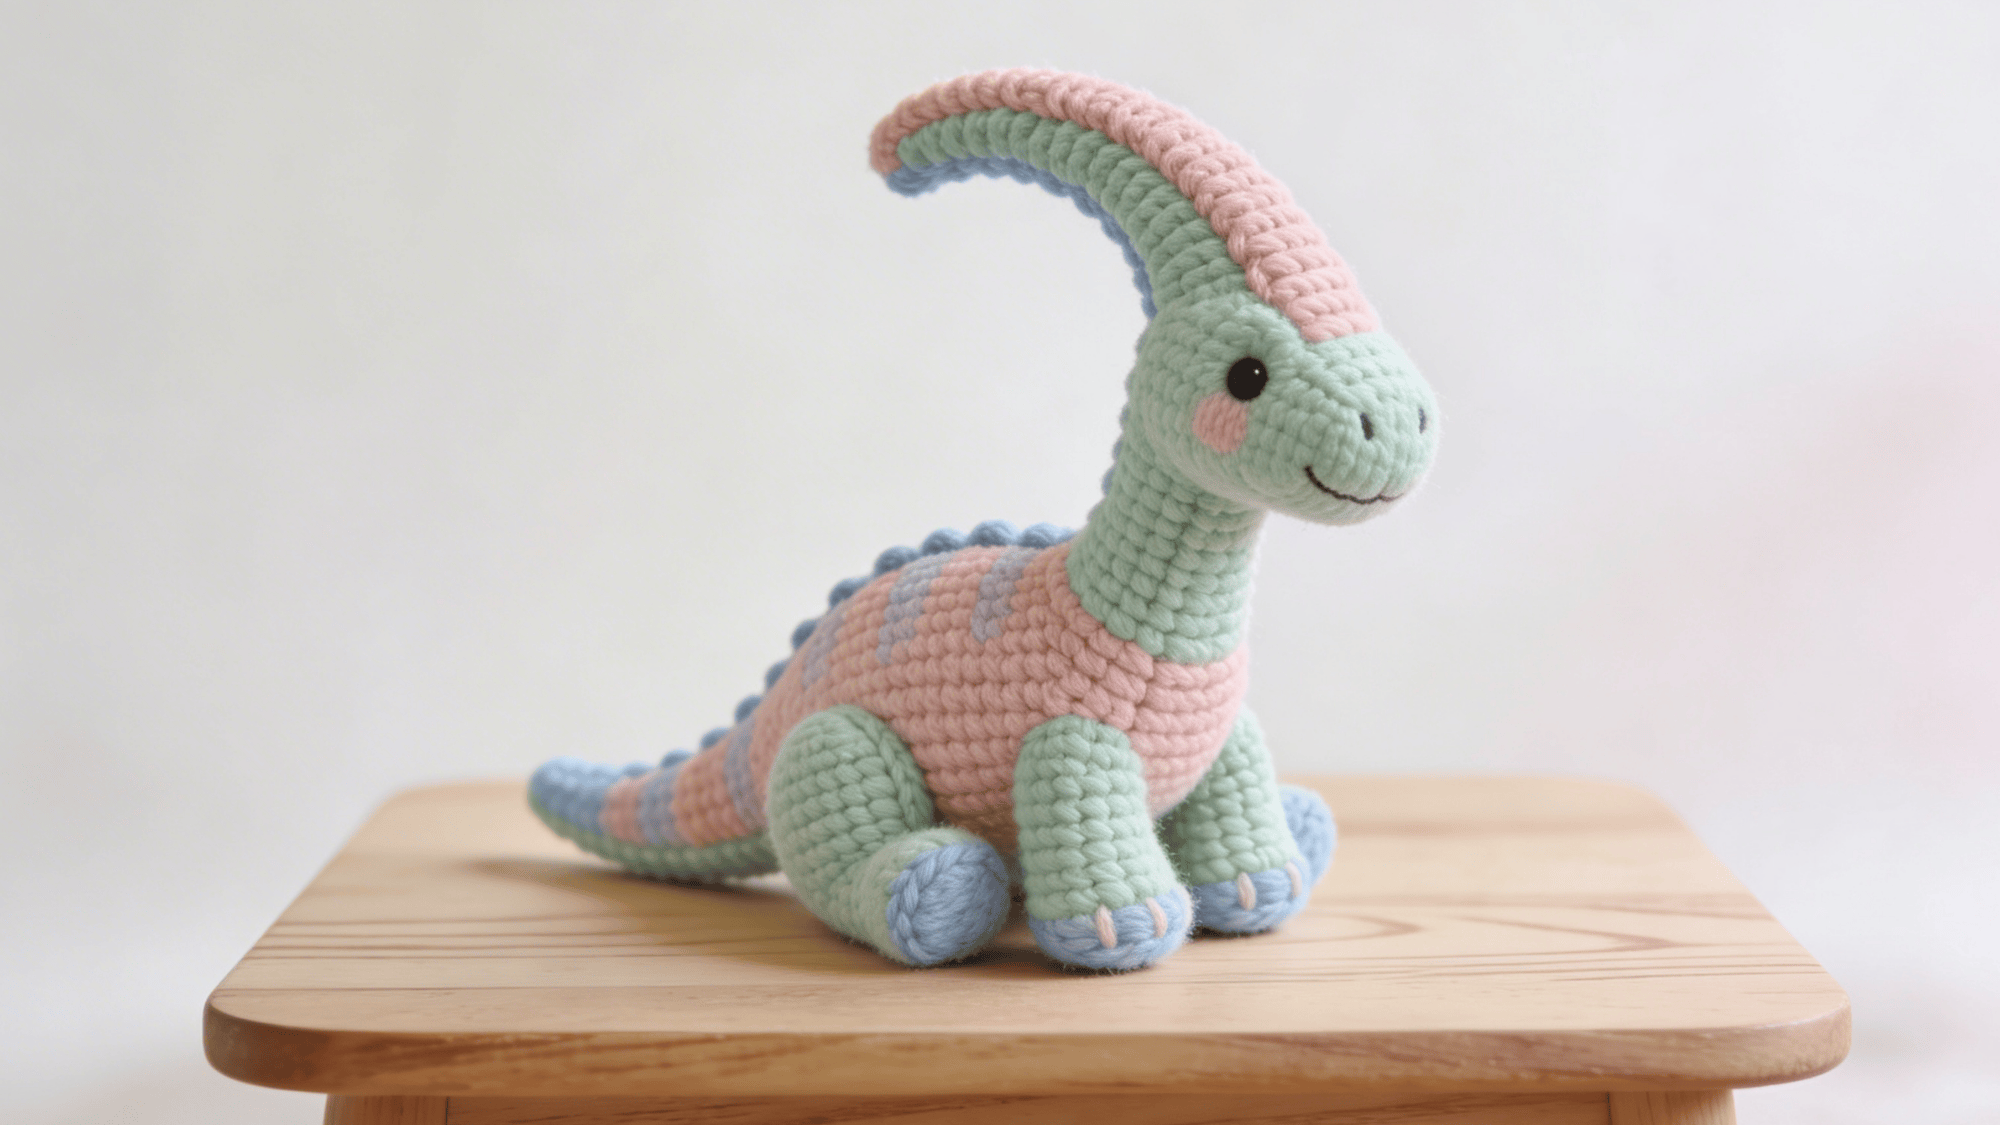
Beginner’s Guide to Crochet Dinosaurs
New to crocheting? This will help you understand the basics and prepare you to create your very first crochet dinosaur with ease.
Materials Required
Before you begin, gather the essential tools and supplies needed to bring your crochet dinosaur to life.
| Item | Description |
|---|---|
| Worsted-weight yarn | In your chosen dinosaur colors (e.g., green + accent) |
| 3.5 mm crochet hook | Standard size for the project |
| Safety eyes (11.5 mm) | For use with caution for young kids |
| Stitch markers | To keep track of your stitches |
| Tapestry needle | For sewing pieces together |
| Scissors | For cutting yarn and thread |
| Stuffing (polyfill) | To stuff the crochet project |
Step-by-Step Guide
Follow these simple, easy-to-understand steps to start crocheting your dinosaur from the first stitch to the final touch.
Step 1: Create the Magic Ring & Body
Start by creating a magic ring, which serves as the foundation for your dinosaur’s body.
From there, you’ll crochet in continuous rounds using single crochet stitches to form the cylindrical shape of the body. You’ll increase in the first few rounds to give it a nice rounded shape.
This technique keeps the stitches tight, so the stuffing doesn’t show through.
Step 2: Crochet the Tail
Next, crochet the tail by following the pattern’s instructions for increases and decreases. This section helps you shape the tail to be thicker at the base and then taper toward the end.
Now make the tail curved and proportional to the body.
Step 3: Crochet the Back Spikes / Features
One of the fun parts is adding the back spikes (or any fun details you want to add).
Using small crochet rounds or triangles, create spikes that will sit along the dinosaur’s back.
These can be sewn into place afterward, giving your dino a truly unique look. You can also add extra features, such as a ridge along the tail or body.
Step 4: Crochet the Legs and Arms
Crochet four separate small limb pieces, two legs, and two arms. Follow the pattern’s directions for shaping and placing the stitches.
The legs will be slightly larger than the arms to help your dinosaur stand up, but you can adjust based on the type of dinosaur you’re creating.
Step 5: Add Eyes & Accessories
Once all the body parts are crocheted and assembled, it’s time to give your dinosaur some personality!
Attach the safety eyes (or embroider them if you’re using a different method) and any extra details like nostrils, a smile, or even little claws.
These small touches help make your crochet dinosaur more unique and adorable.
Step 6: Stuff and Assemble
Stuff all of the individual pieces with polyfill until they’re firm and rounded. Use a tapestry needle to carefully sew the arms, legs, tail, and head to the body.
Make sure everything is securely attached. Afterward, weave in any loose ends, and your dinosaur is ready to show off!
For a hands-on walkthrough, watch the full tutorial below:
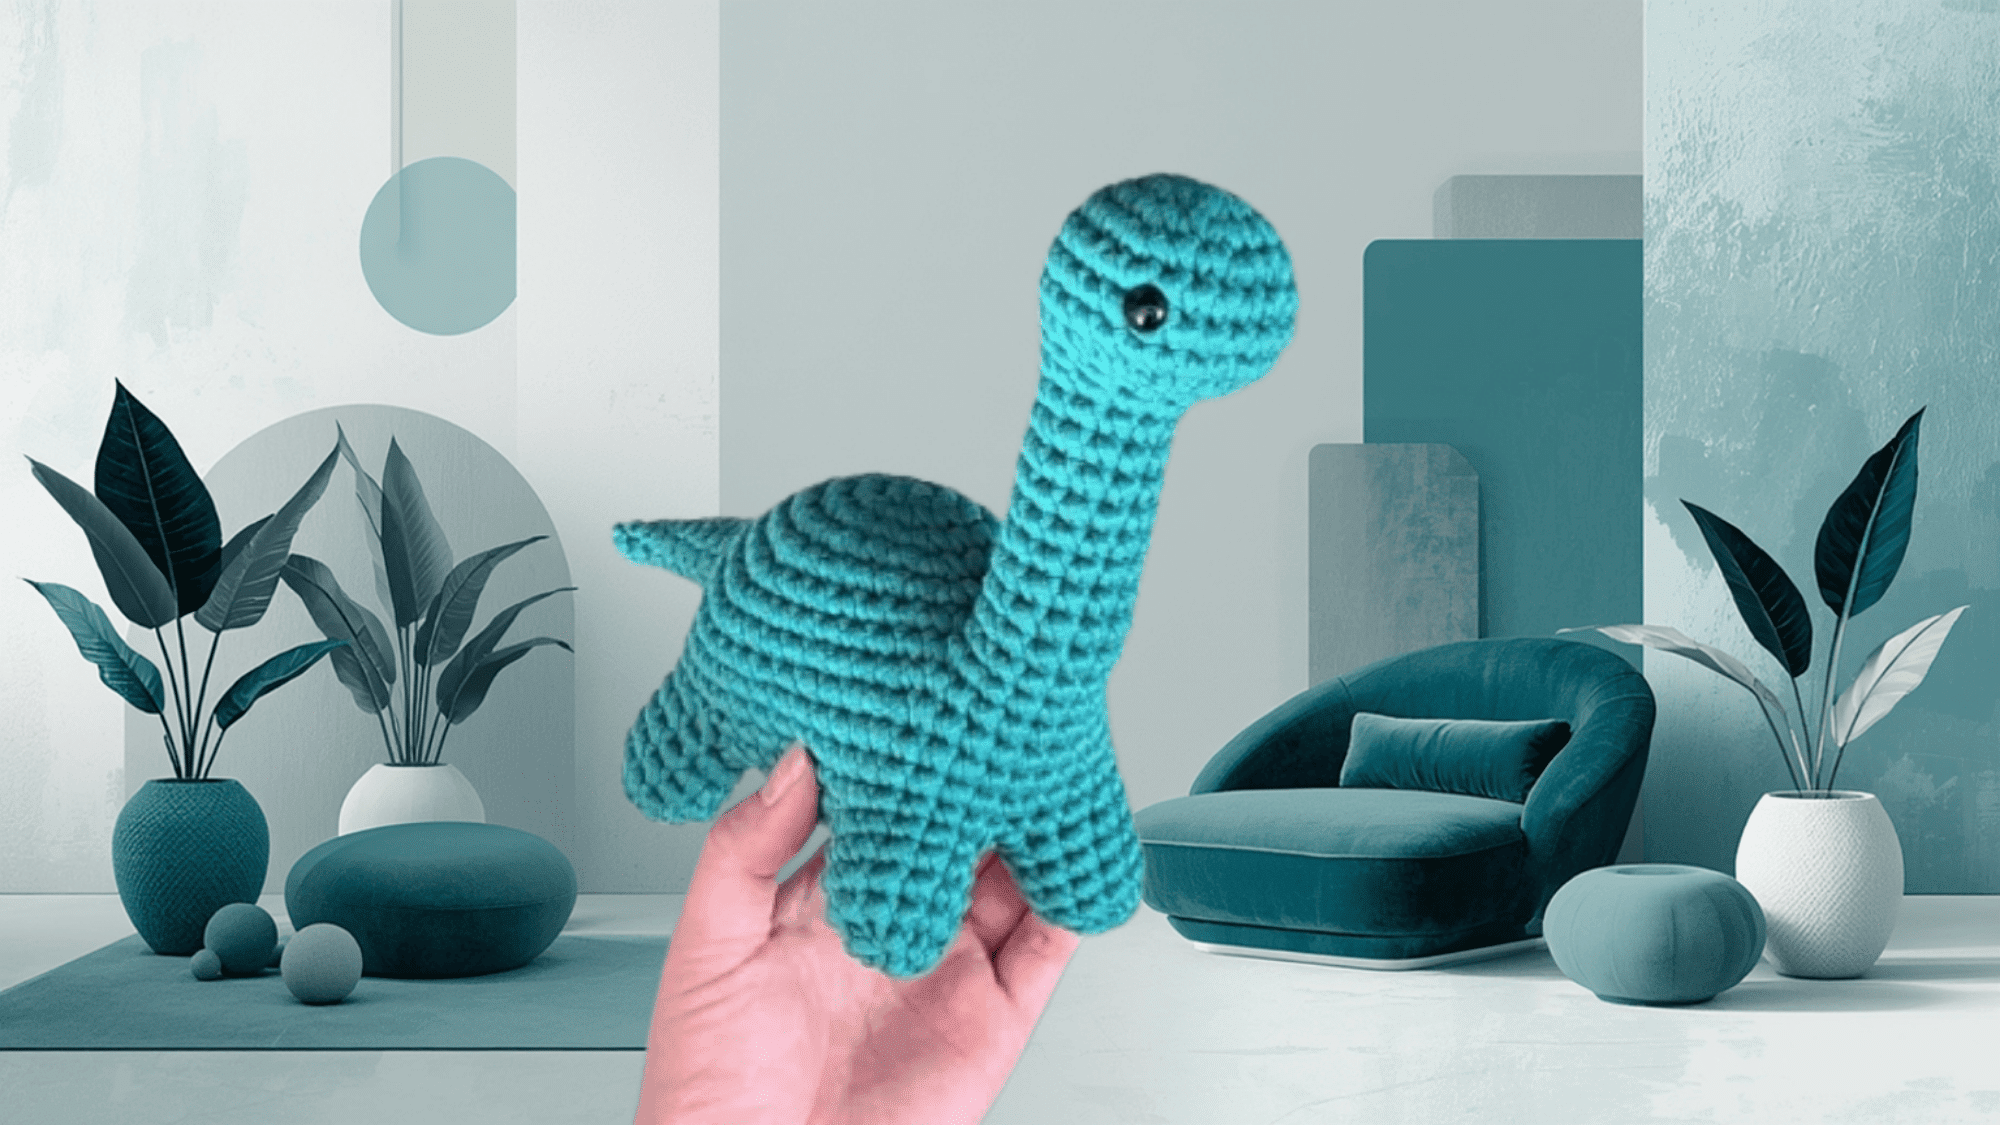
Advanced Dinosaur Crochet Creations
Ready to take your skills to the next level? Explore more detailed patterns and intricate designs to create impressive, lifelike crochet dinosaurs.
Materials Required
For advanced projects, you may need additional tools and specialty materials to achieve more complex shapes and fine details.
| Item | Description |
|---|---|
| Worsted-weight yarn | For your chosen dinosaur colors |
| Crochet hook (3.5 mm–4 mm) | Suited to your yarn for the best tension |
| Safety eyes | To give character to your dinosaur |
| Stuffing (polyfill) | To stuff your crochet project |
| Stitch markers | To keep track of your stitches |
| Tapestry (yarn) needle | For sewing pieces together |
| Scissors | To cut yarn and thread |
Step-by-Step Guide
Follow these detailed instructions carefully to master advanced techniques and bring your calm dinosaur creation to life.
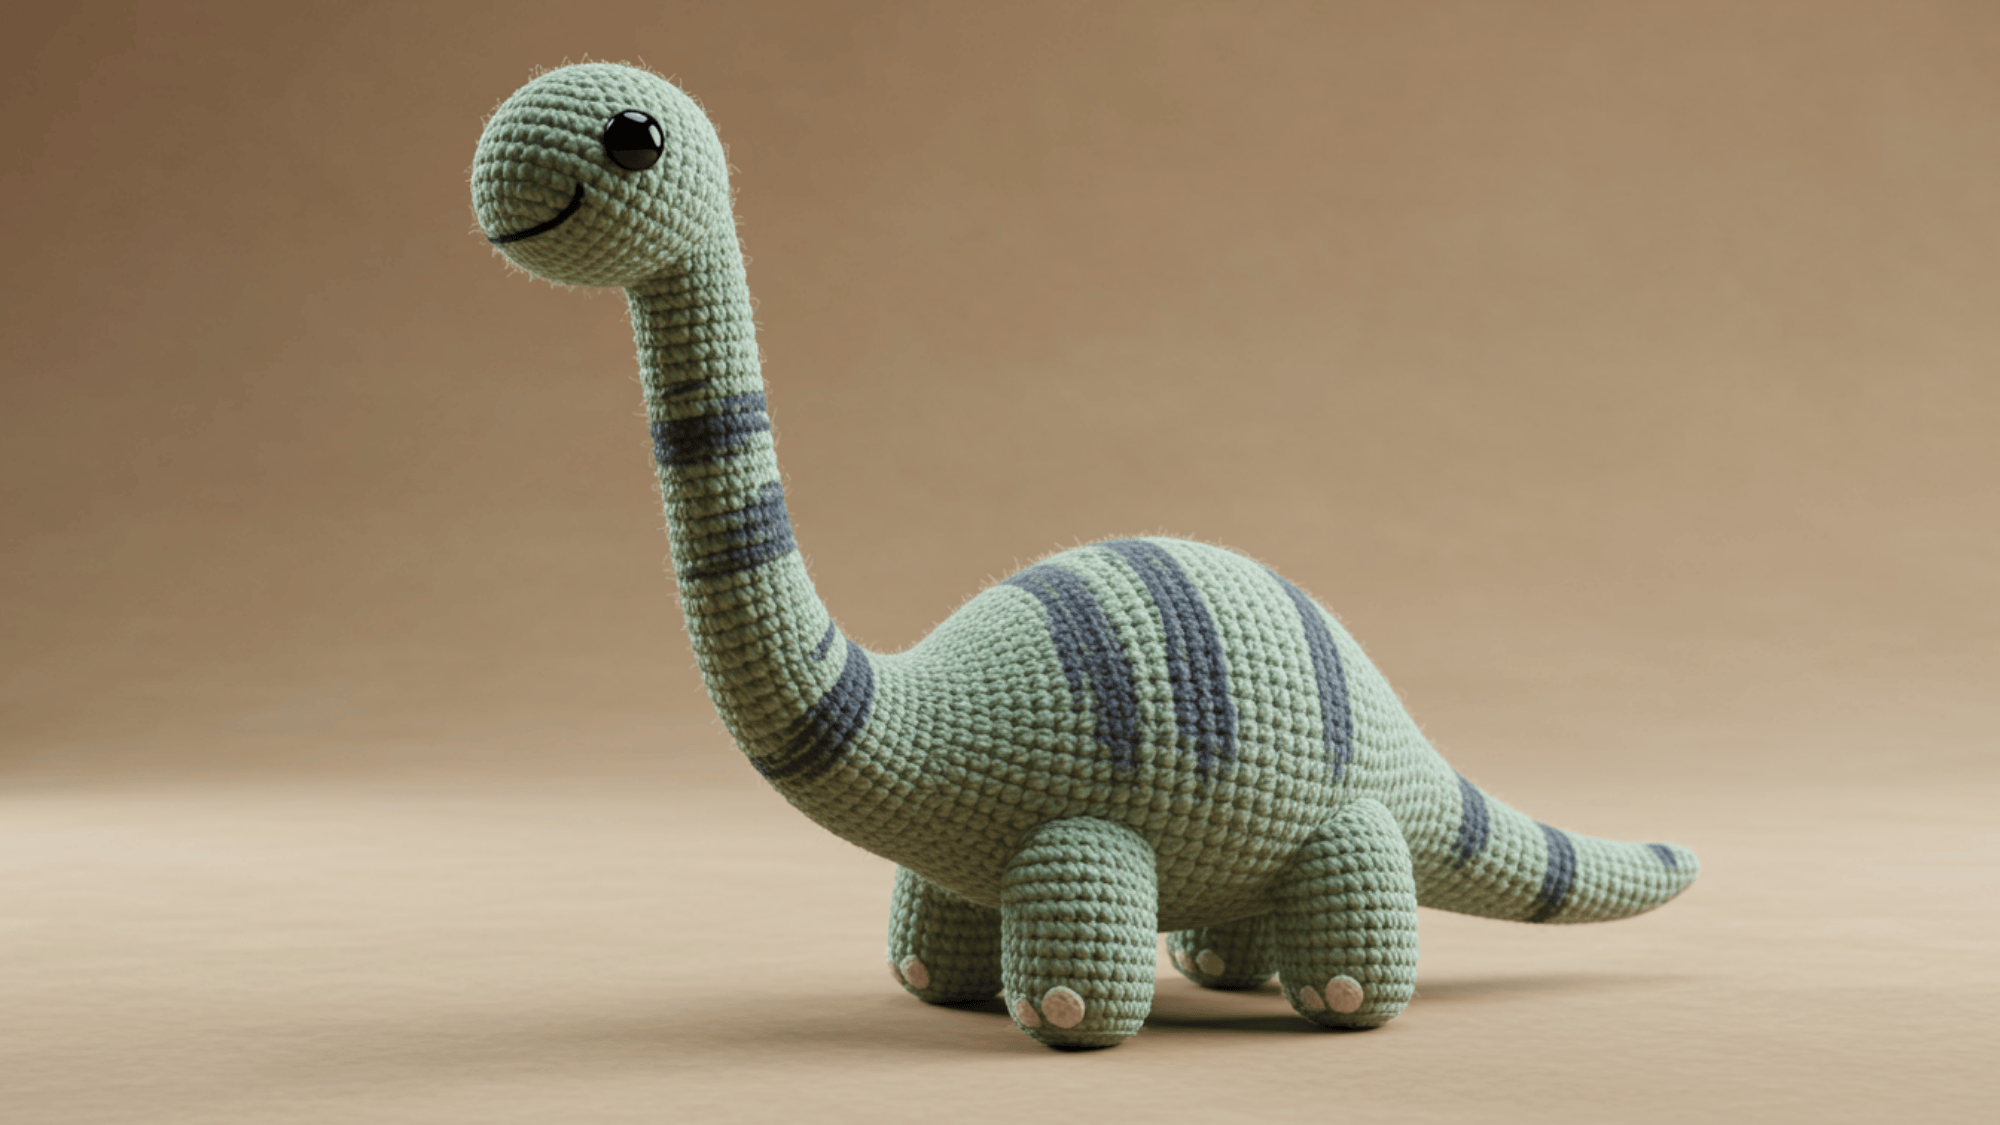
Step 1: Start with the Head & Body
Begin your Bronto by creating a magic ring, the foundation of your crochet project.
Once you’ve set up your magic ring, crochet in continuous rounds to shape the head and body. You’ll gradually increase the stitches at first to give the body a rounded form, then work in regular rounds.
The key here is keeping the stitches tight and even so the stuffing won’t peek through.
Step 2: Make the Neck
After finishing the body, continue working on the neck by creating additional rounds to extend and shape it.
You’ll want the neck to flow naturally from the body, and the video shows exactly how to do this, ensuring you increase and decrease stitches where needed for smooth shaping.
The neck is a signature feature of Bronto, so be sure to give it the right length and taper to match the body’s proportions.
Step 3: Crochet the Tail
For the tail, you’ll switch colors if desired (Bronto can have a colorful tail!), and then work in rounds to gradually taper the tail from base to tip.
Increases and decreases are key here to get the right shape. The tail should be long and thick near the body, then taper to a point, mimicking the shape of a real brontosaurus tail.
Step 4: Make Legs & Feet
Crochet the four legs individually, working each one in rounds. As the legs are small, be sure to stuff them lightly so they maintain a solid structure but remain soft and cuddly.
You’ll use simple increases and decreases to shape each leg, and once completed, attach them firmly to the body. The feet will also have some shaping.
Step 5: Add Eyes & Details
With your Bronto’s body and limbs finished, it’s time to add some personality! Attach safety eyes to the head, making sure they are positioned evenly for that adorable look.
If you’re creating a custom Bronto, you can add a smile, spots, or other features like nostrils or claws. These small additions will make your dinosaur truly unique and more fun.
Step 6: Stuff and Assemble
Now comes the fun part, putting everything together! Stuff each of your dinosaur’s parts (head, body, legs, tail) with polyfill.
Use your tapestry needle to stitch the legs, tail, and neck to the body, ensuring everything is secure and aligned. As you assemble, take your time to ensure that all pieces fit properly and are stitched securely.
Finally, trim any extra yarn and weave in the ends to clean up your work
Want to see the process in action? Check out the YouTube video below:
Roar-Worthy Crochet Dino Designs!
Let’s find some creative and interesting dinosaur crochet pattern ideas. If you’re making a cute T. rex or a friendly Triceratops, these projects will be fun and rewarding.
1. T. rex Dinosaur Crochet Pattern
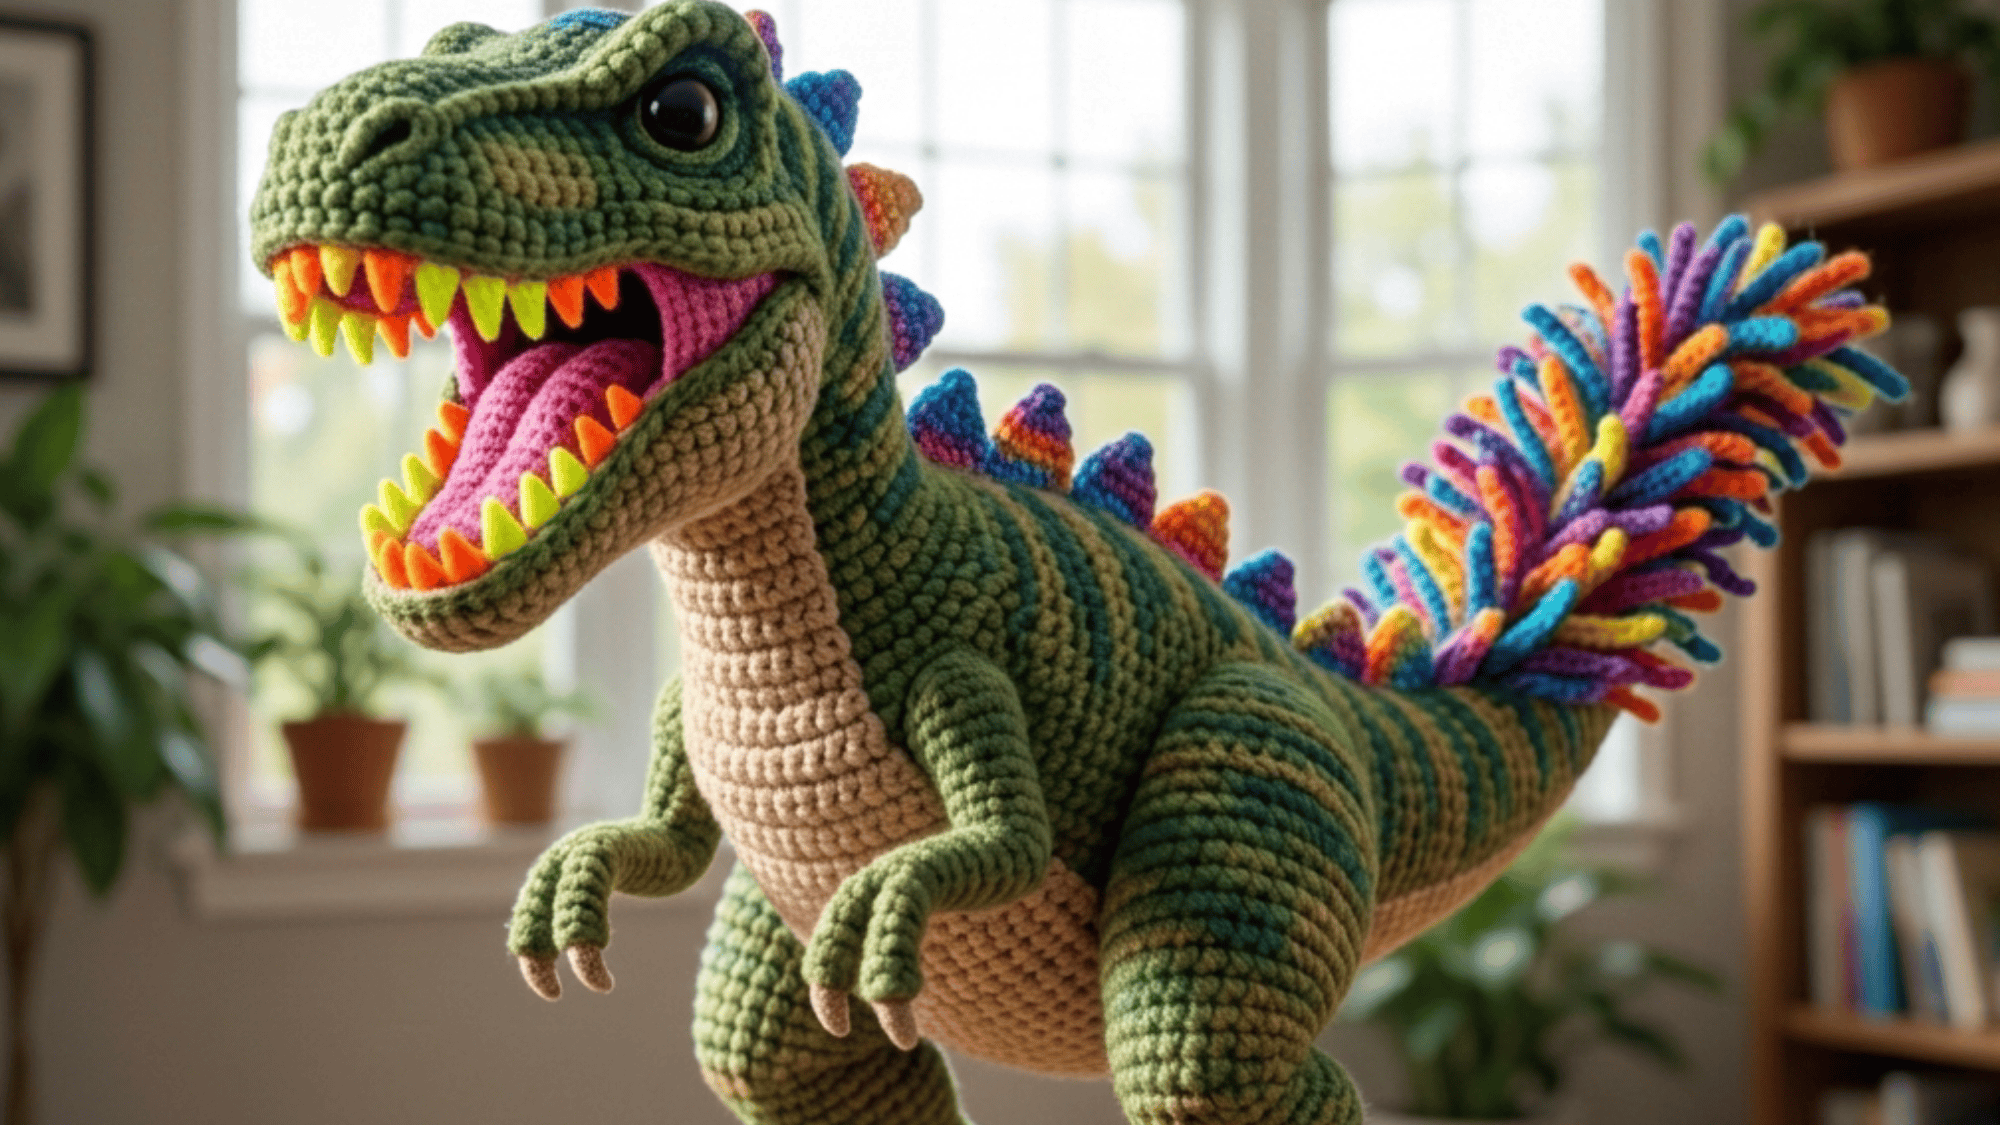
Create the mighty T. rex with a bold stance and a fun, detailed body. Use vibrant yarn colors for its spiky tail and sharp teeth to make it truly stand out.
Perfect for adding a little fierceness to your crochet collection!
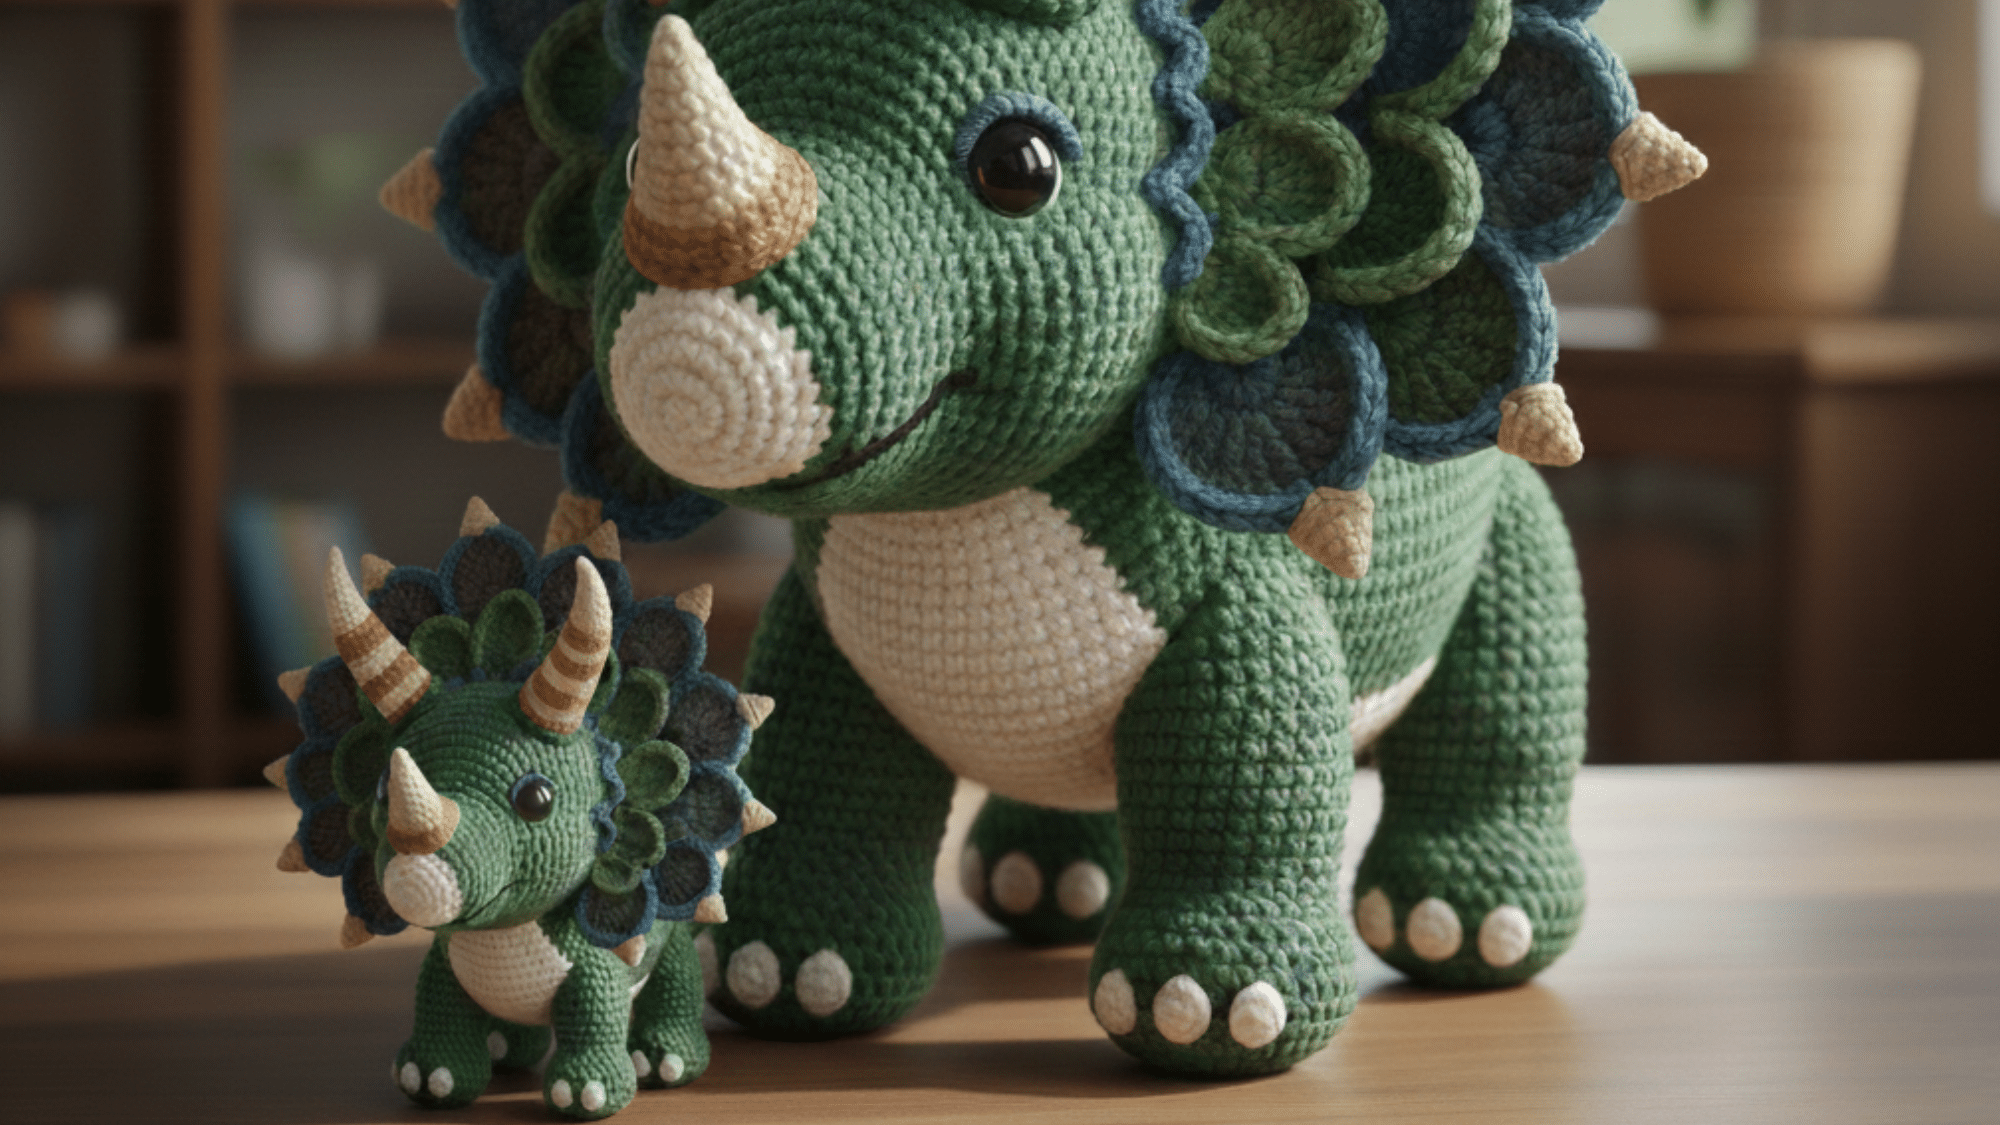
2. Triceratops Crochet Pattern
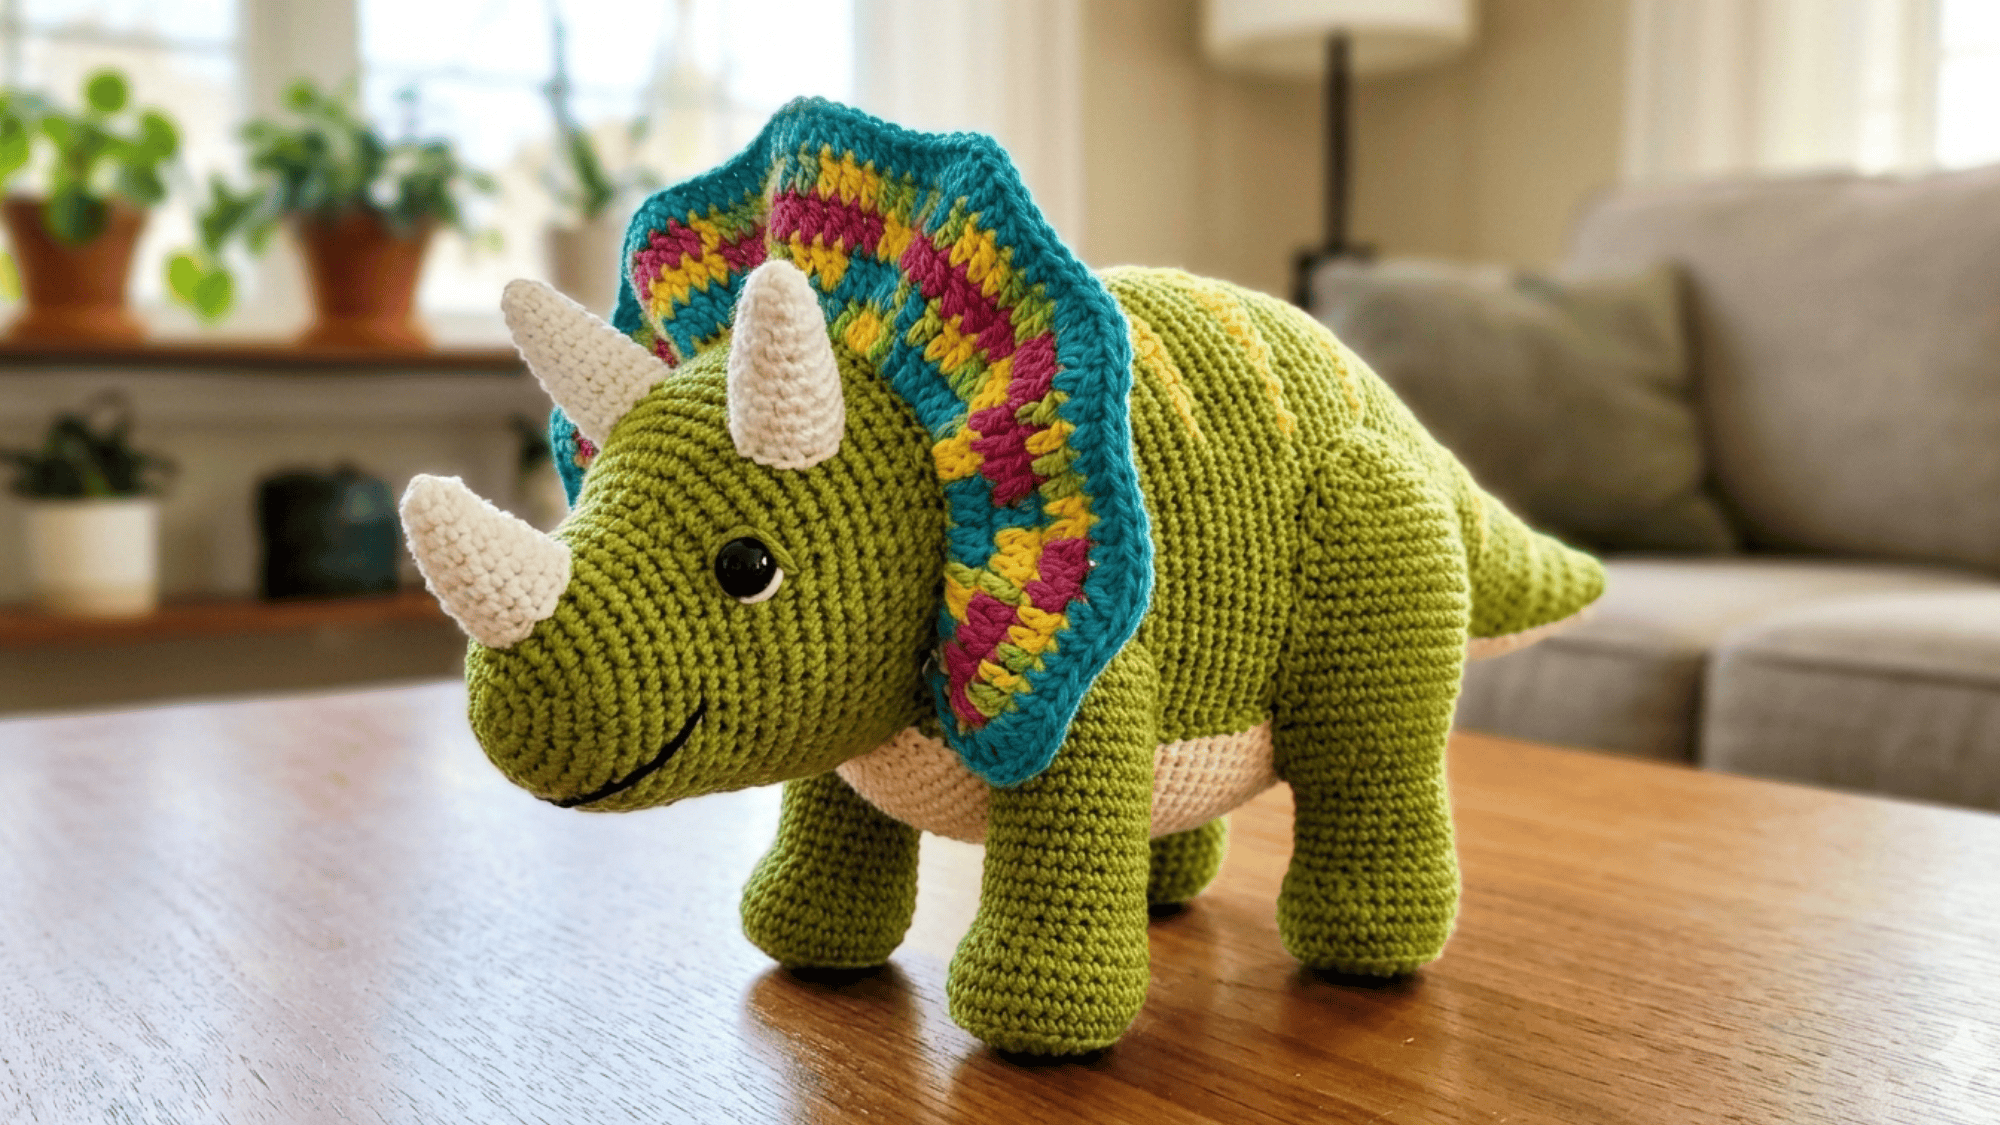
This pattern features a dinosaur with three distinct facial horns. Add a fun frill around the neck and experiment with colors for a unique, eye-catching look.
Its gentle, herbivorous nature makes it a fun and friendly crochet project.
3. Stegosaurus Crochet Pattern
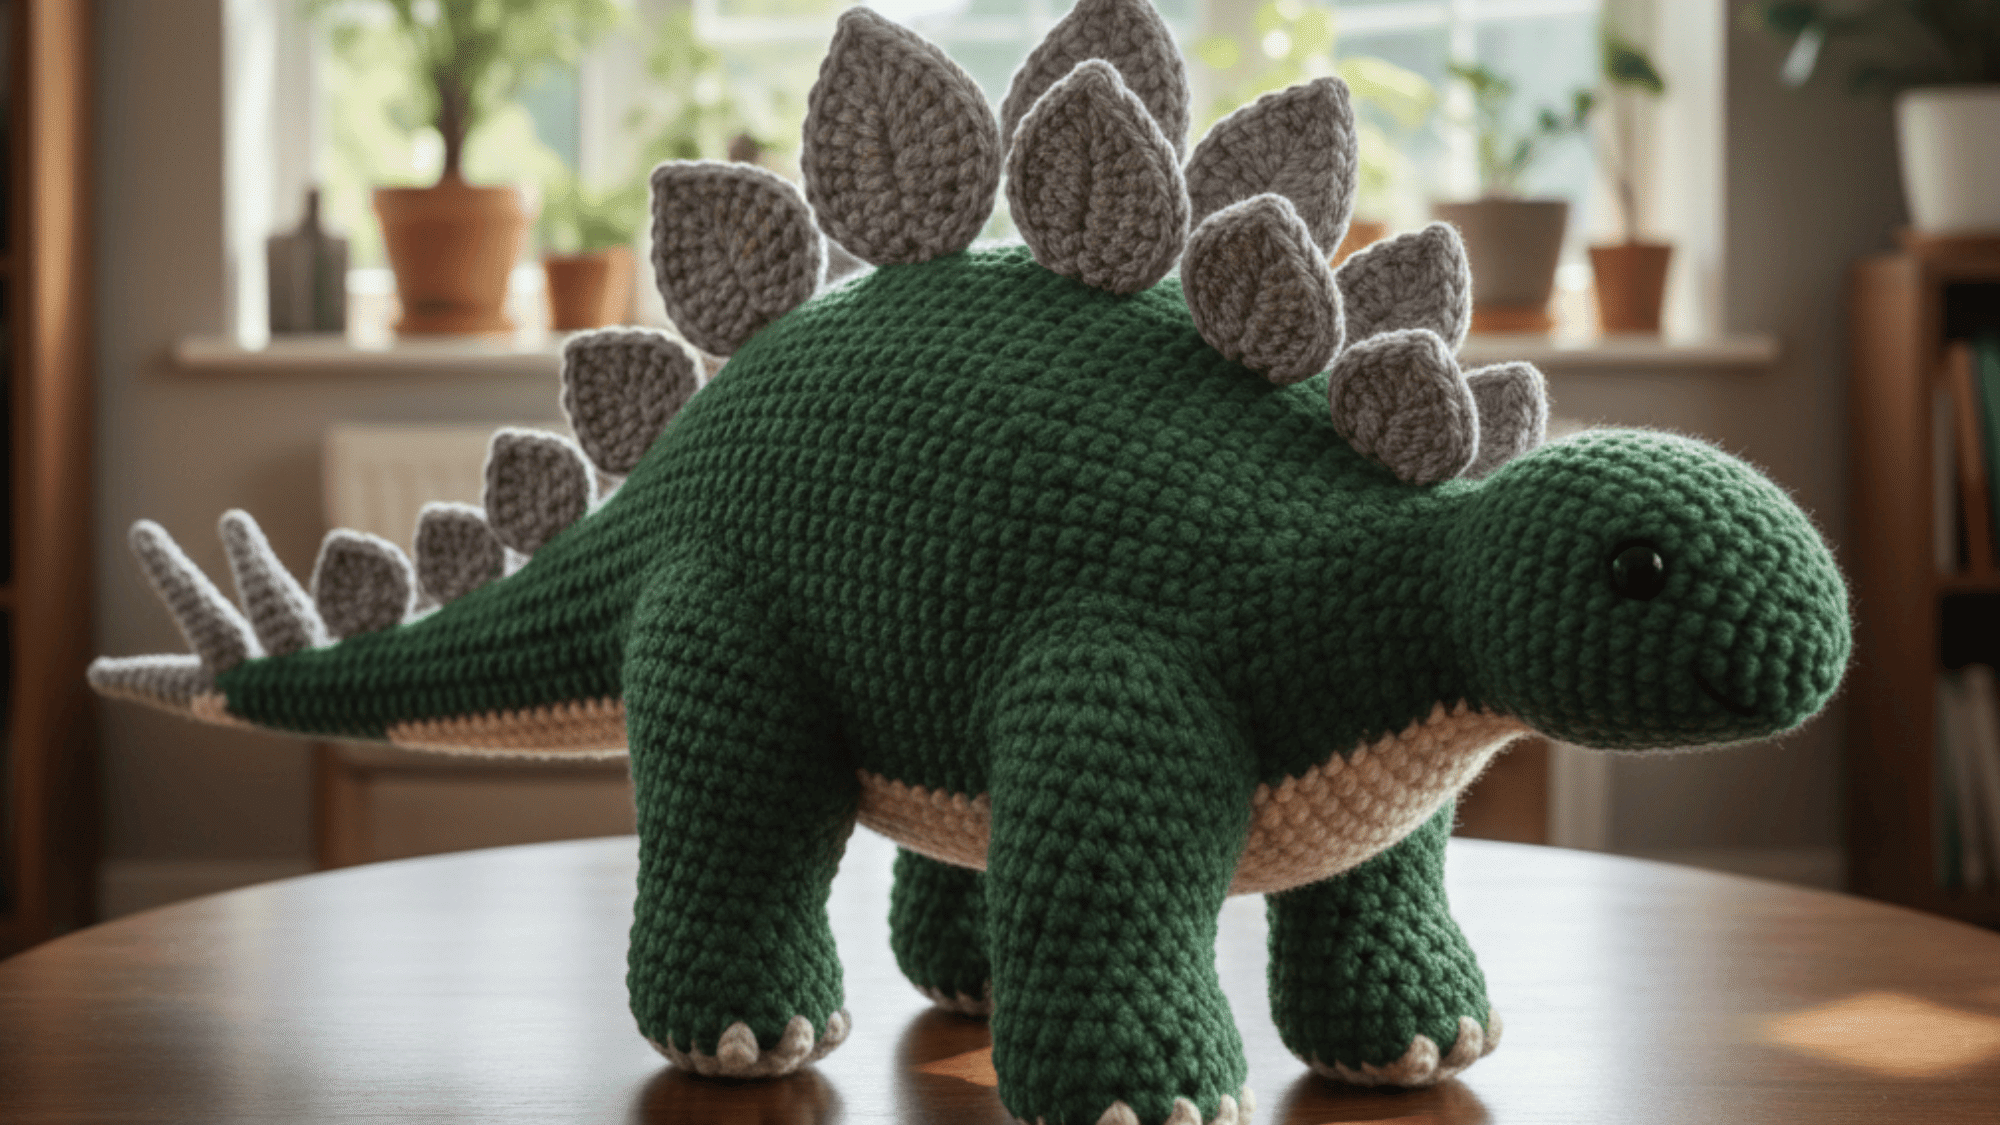
Craft a stegosaurus with its iconic back plates and spiky tail. Use different textures and shades to make its armor-like back plates pop.
A great way to combine crochet techniques for a one-of-a-kind creation!
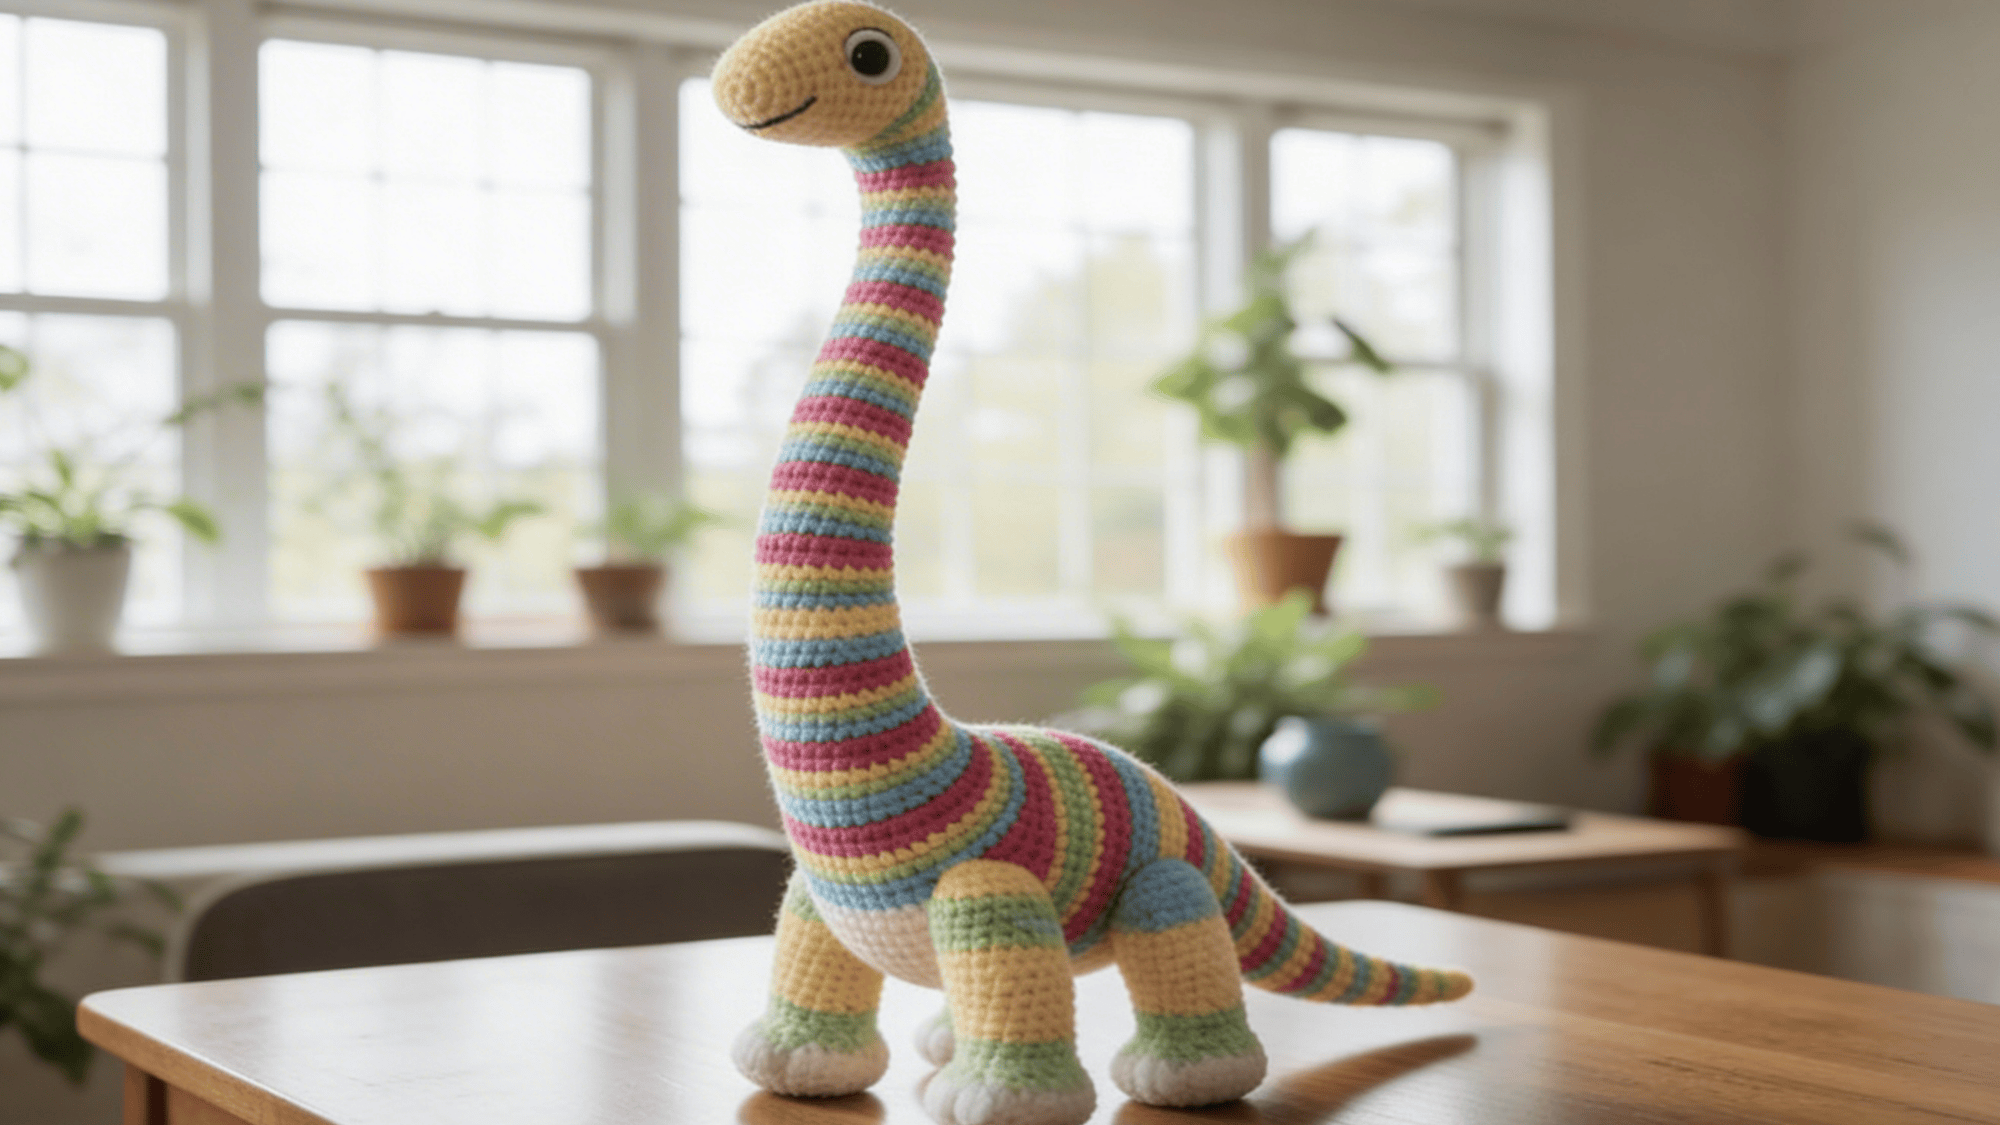
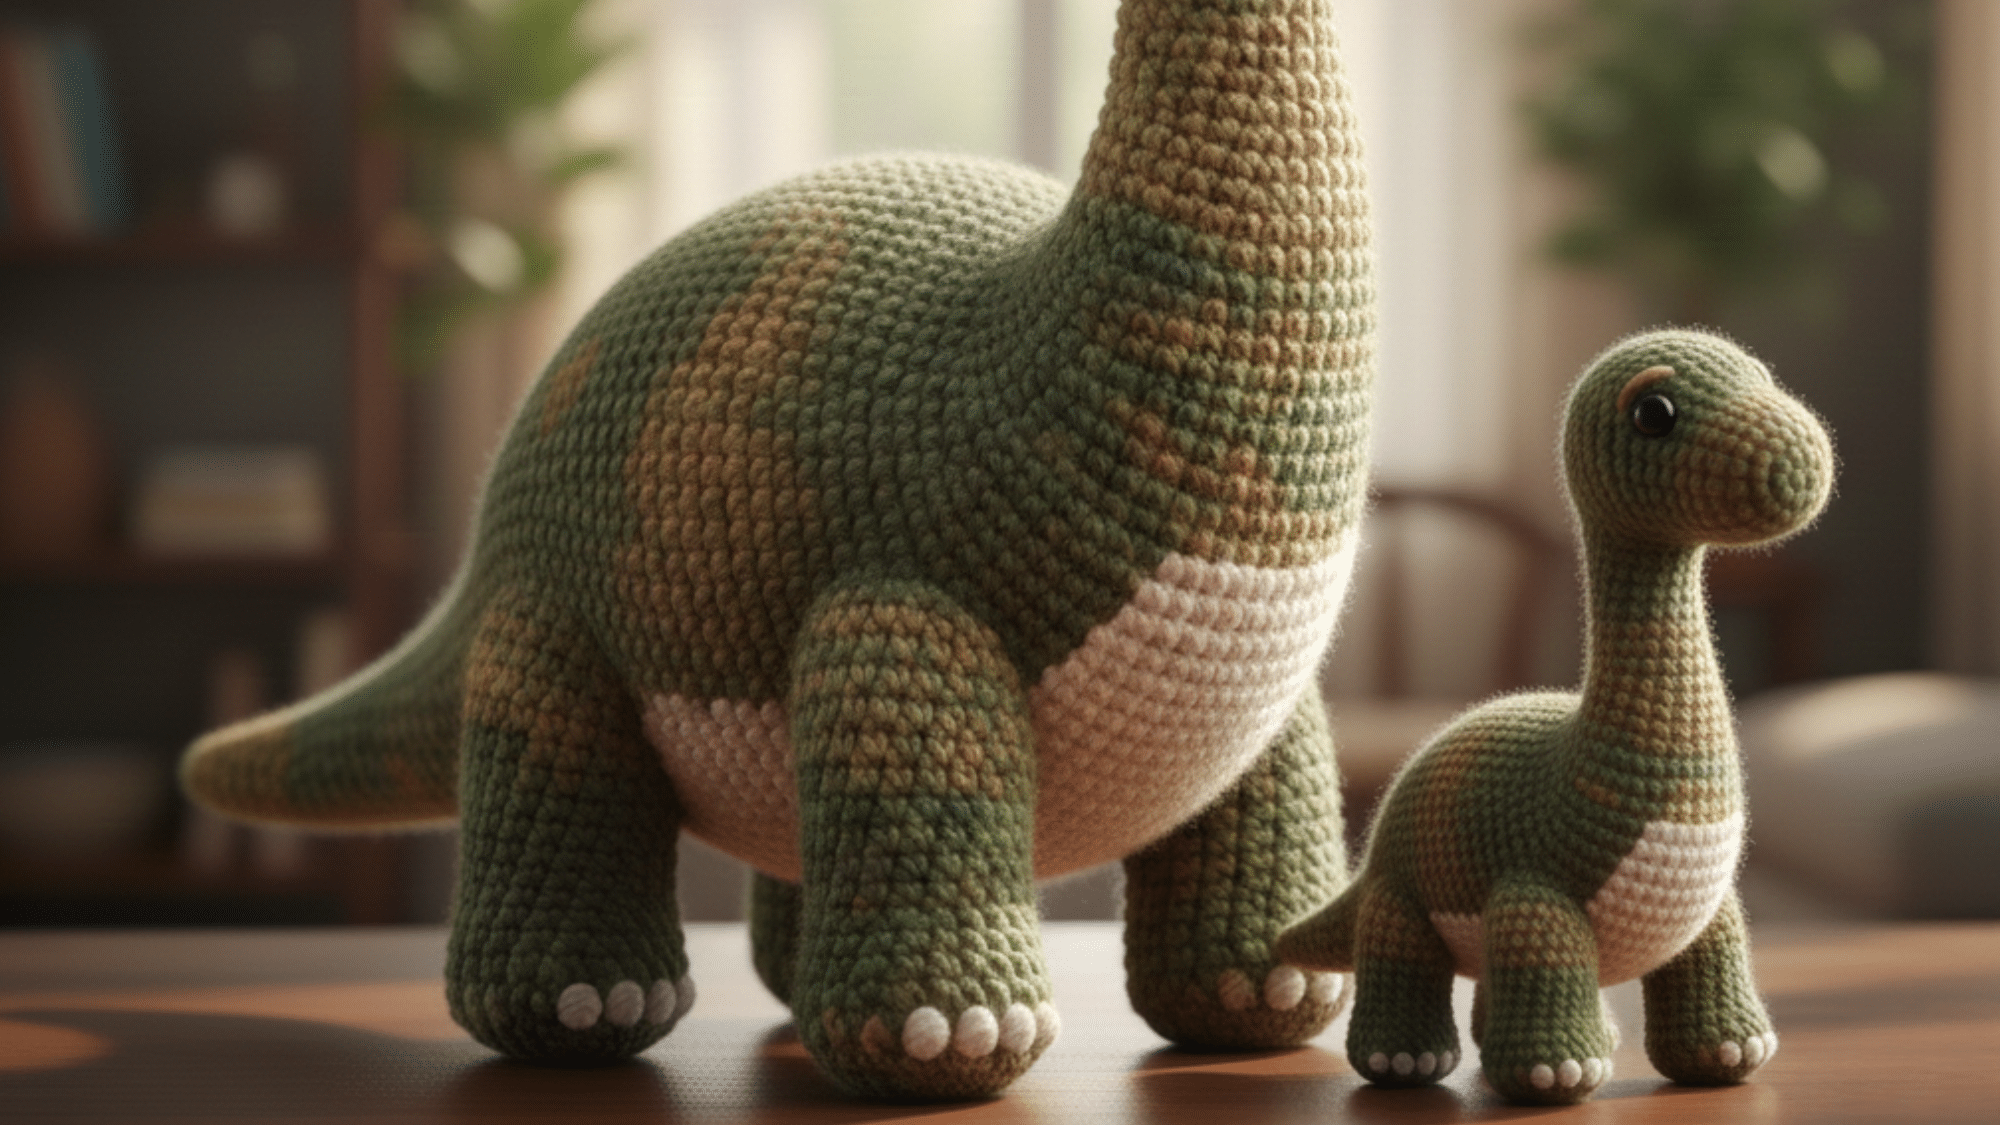
4. Brontosaurus Crochet Pattern
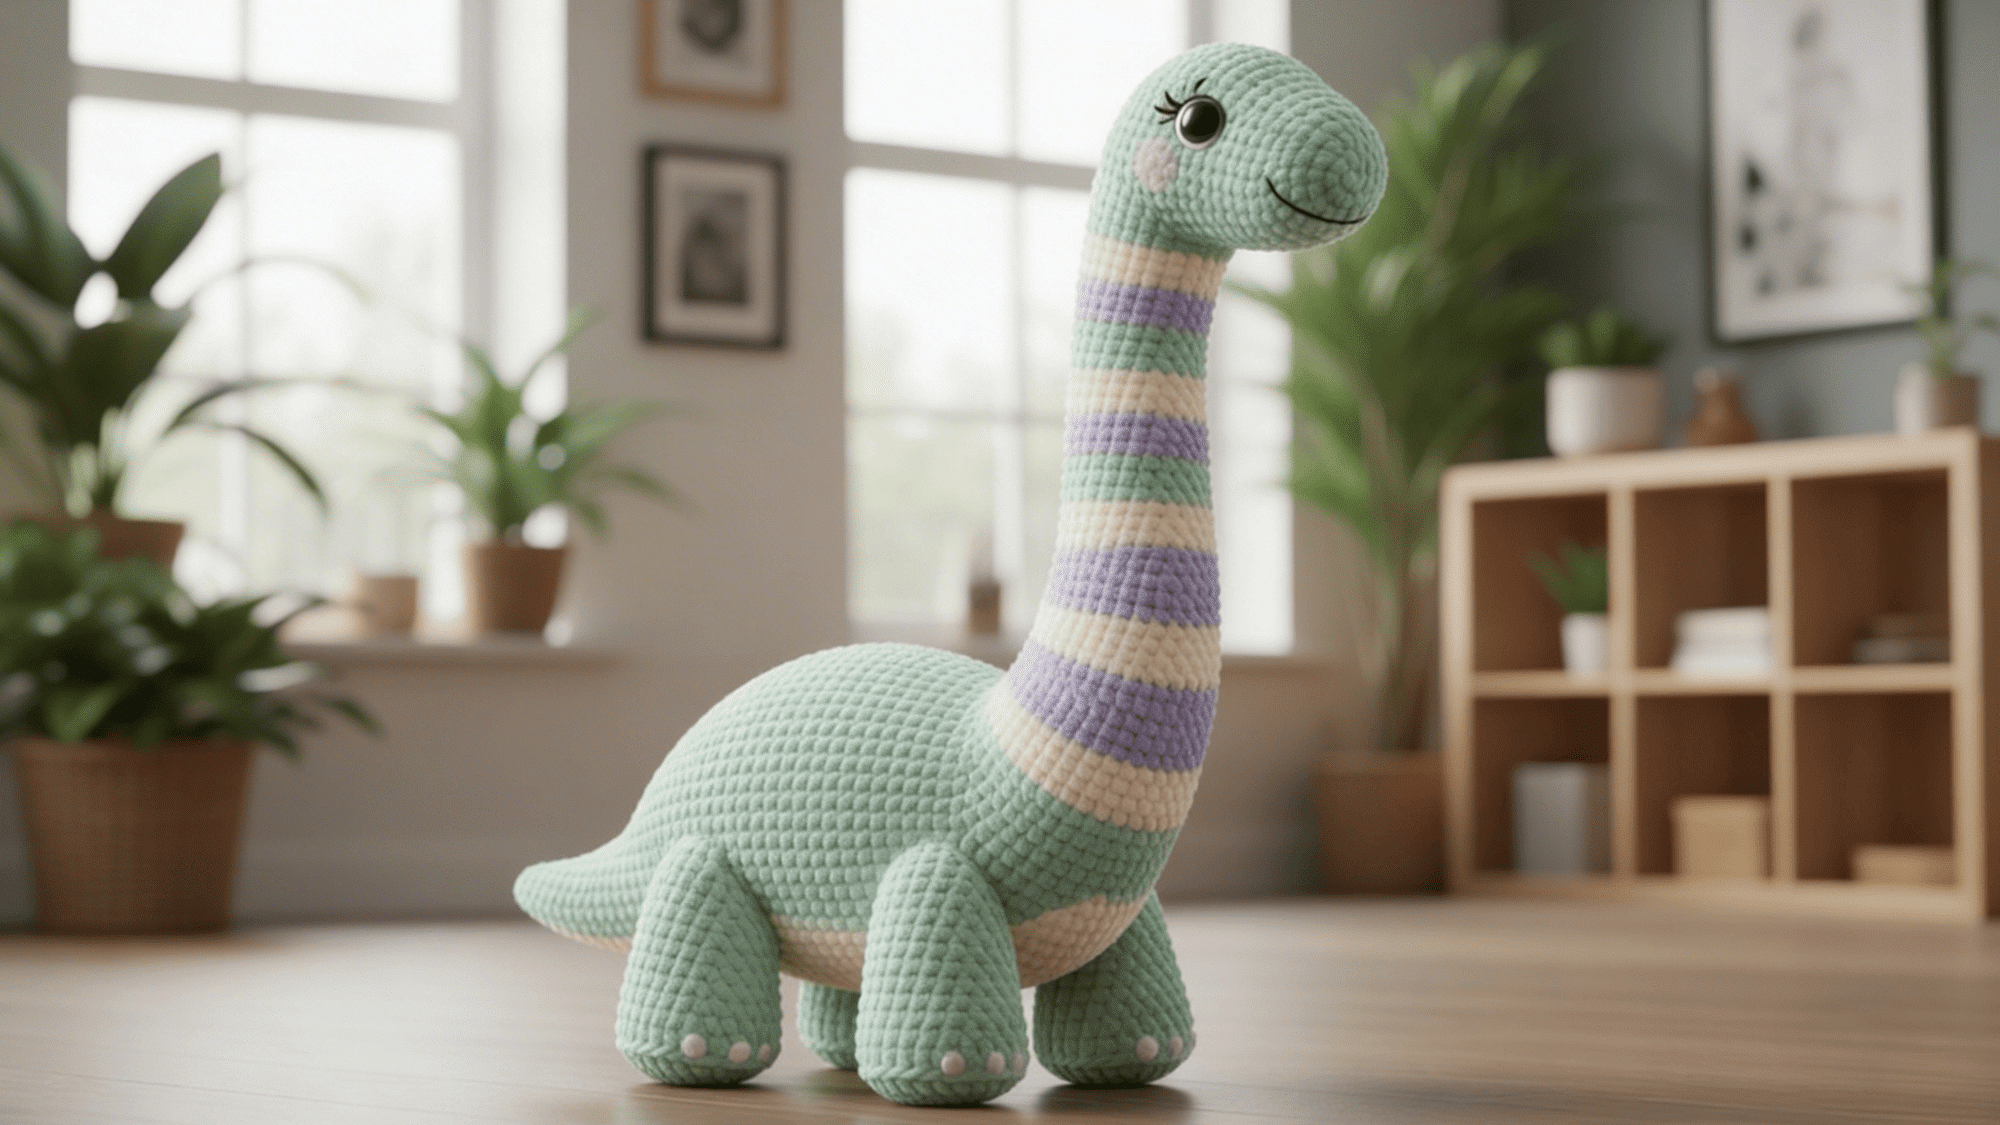
Make a long-necked dinosaur with gentle, friendly features. Focus on a smooth body shape and add soft colors to create a cuddly, lovable version of this gentle giant.
The long neck makes it an impressive piece to crochet and display.
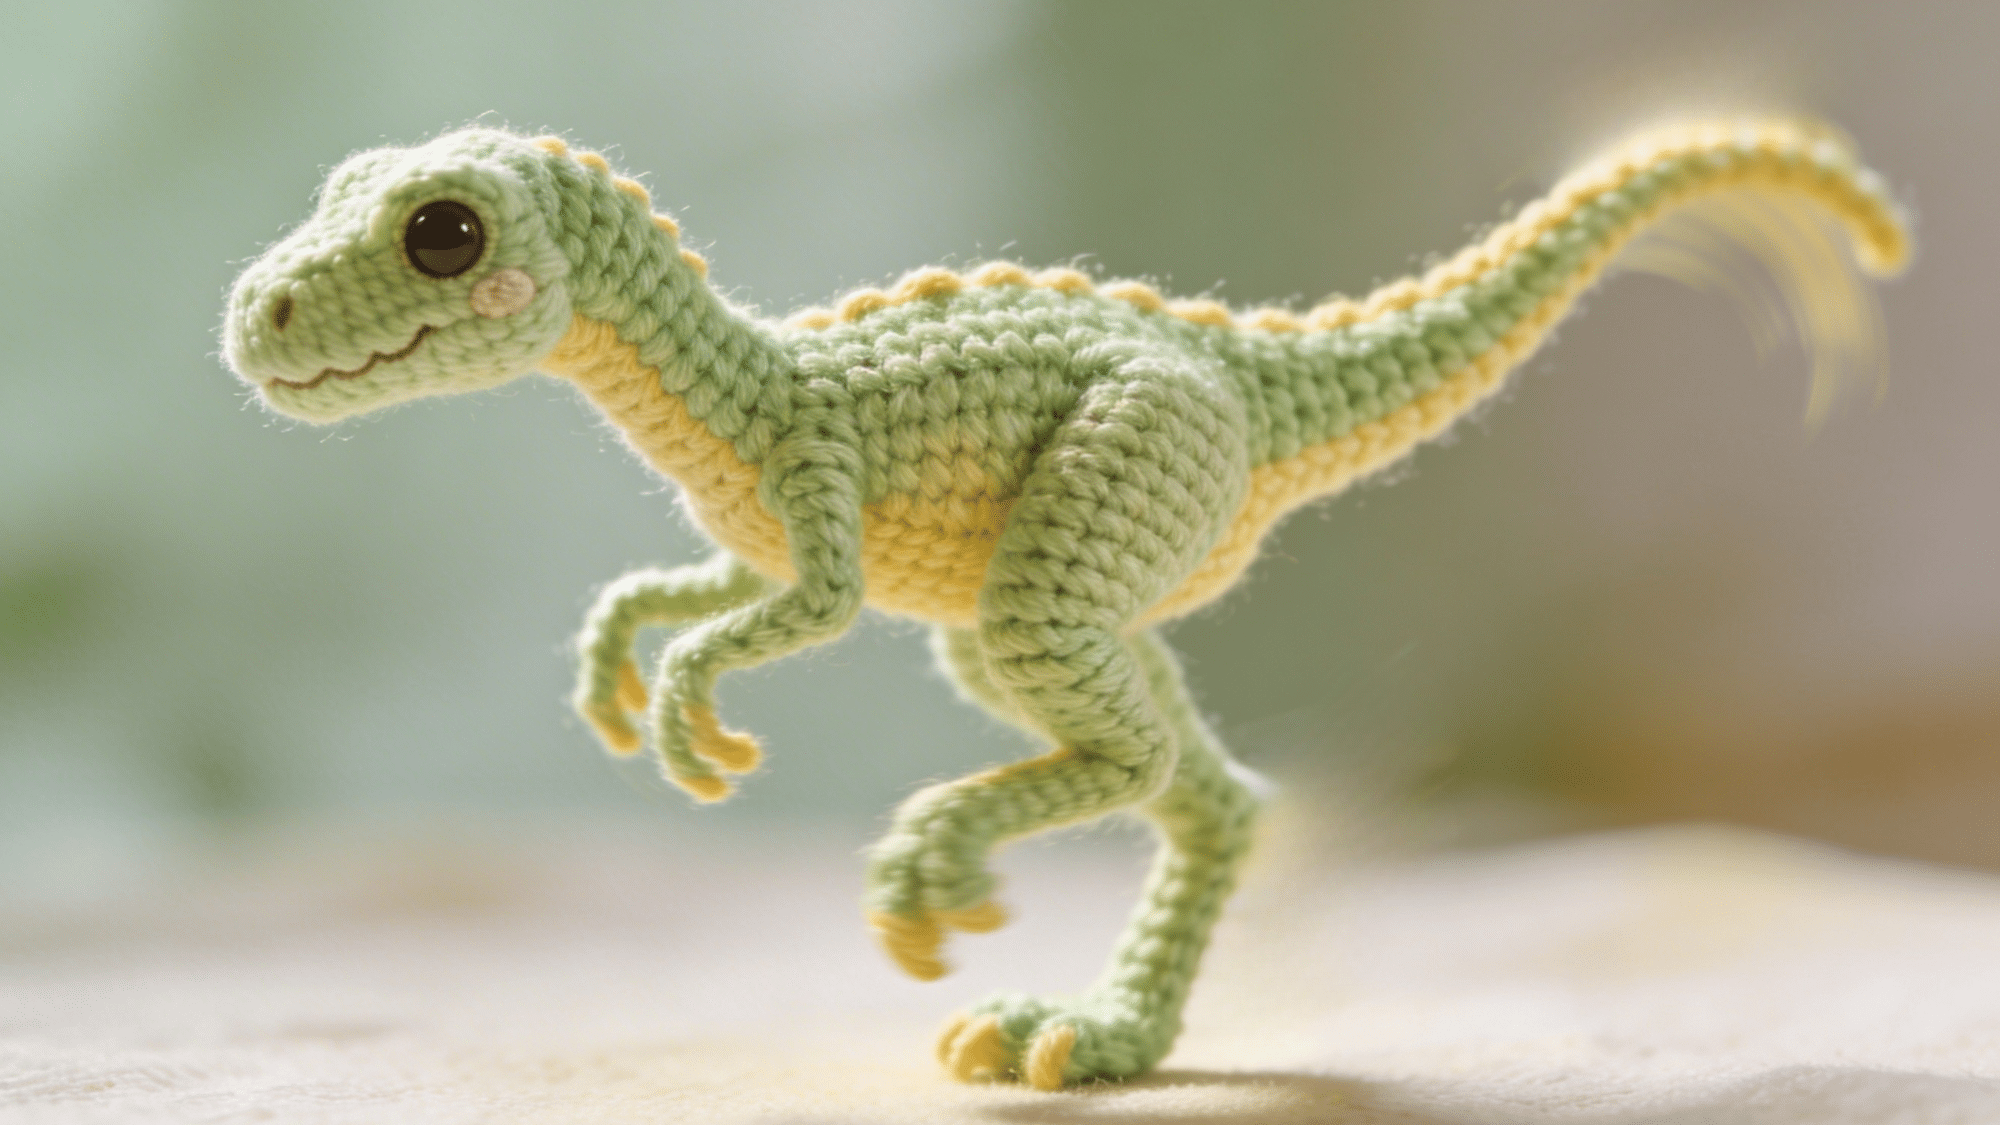
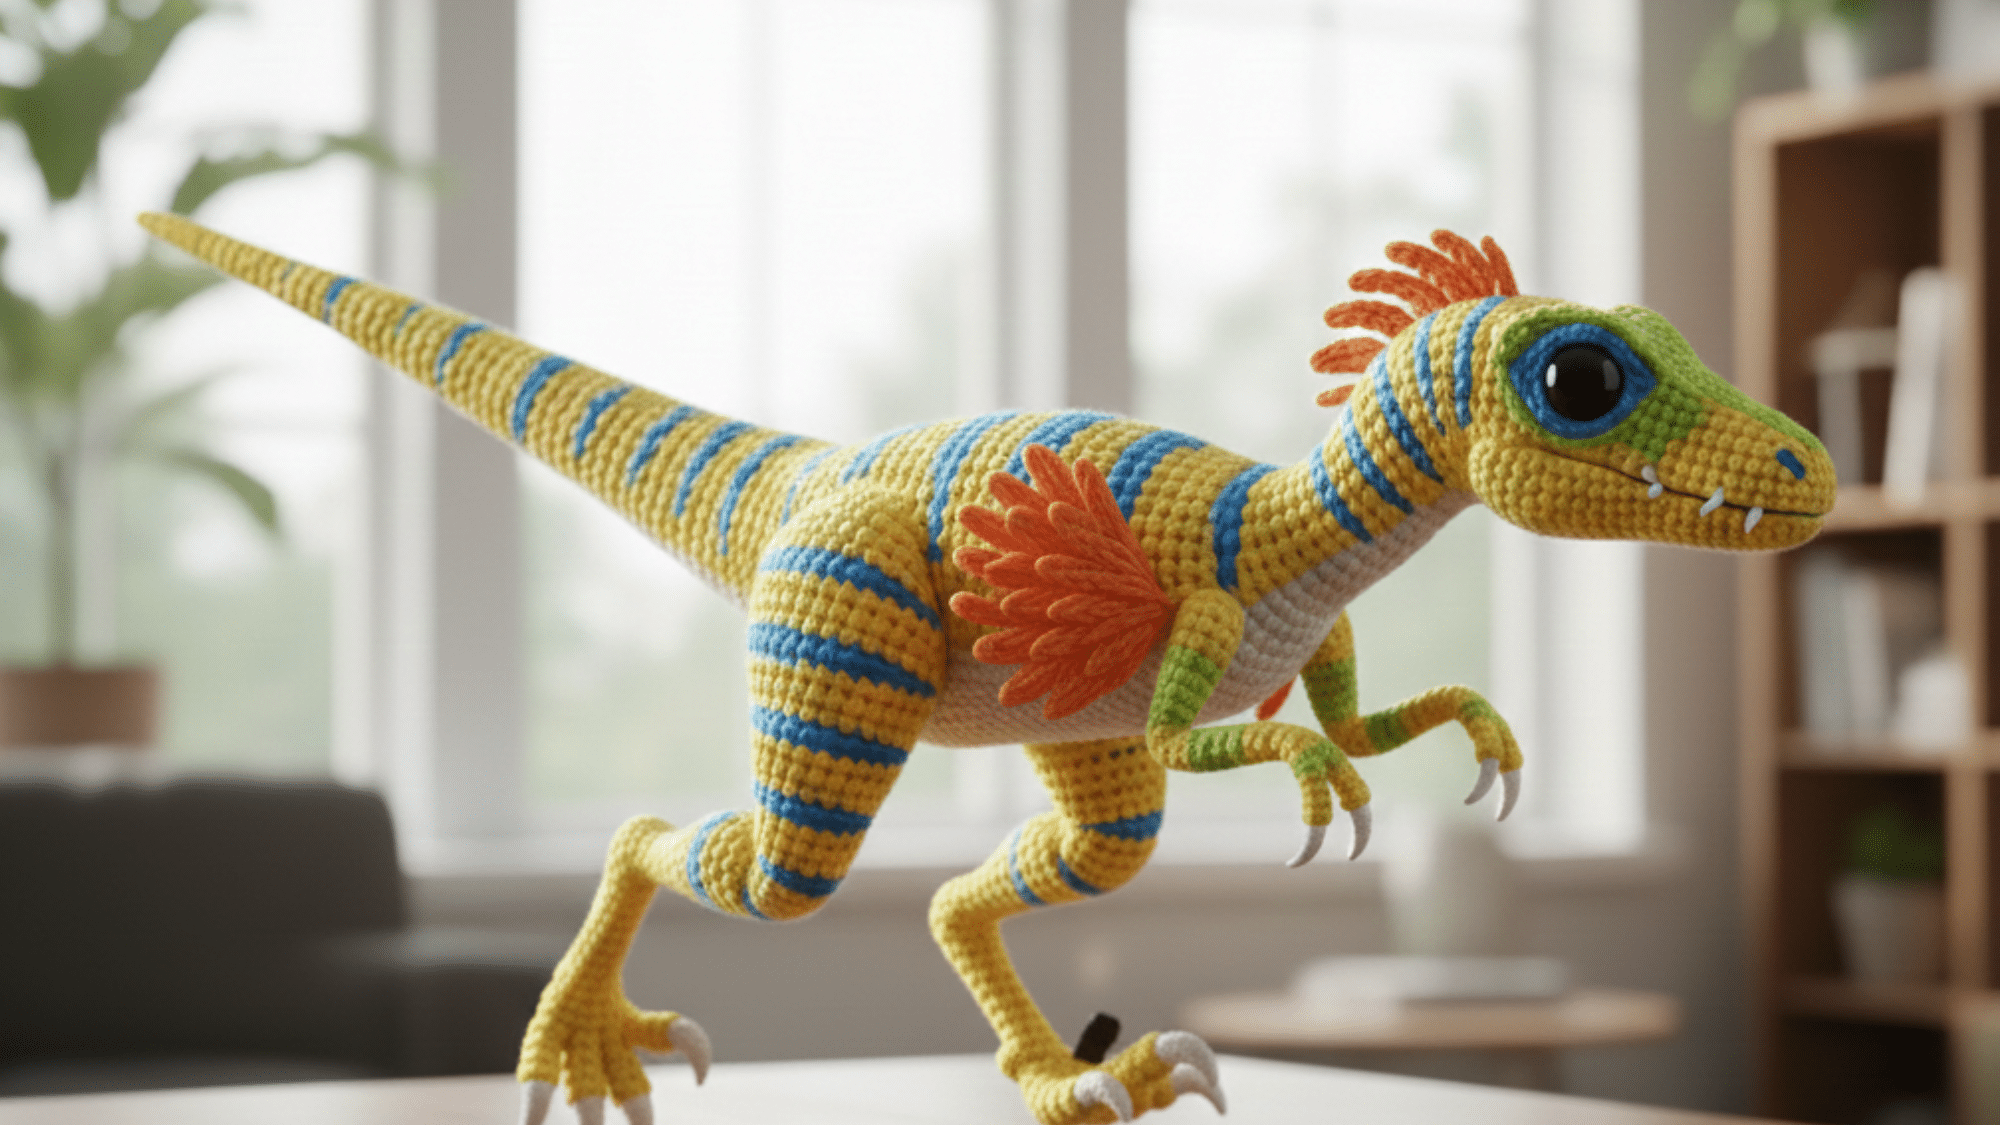
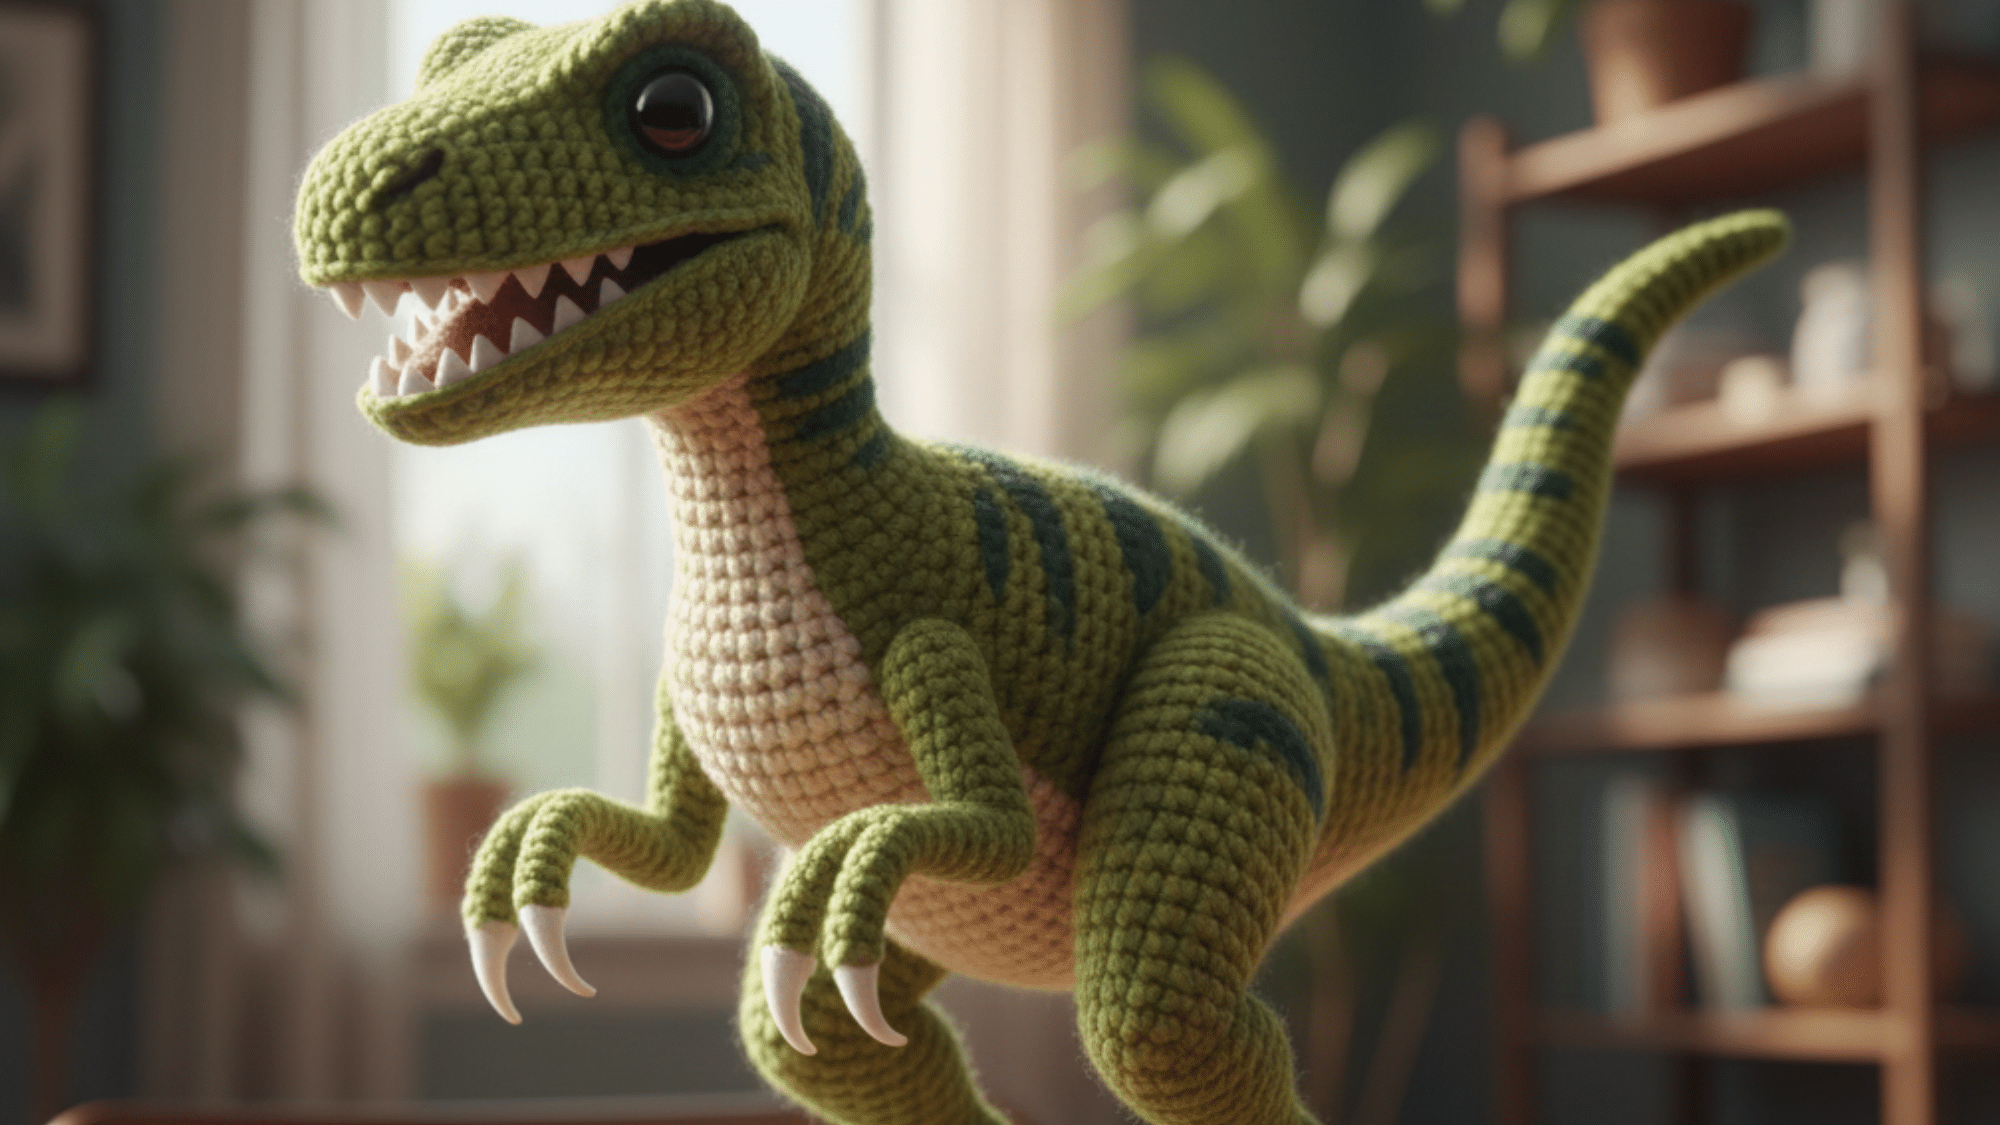
5. Velociraptor Crochet Pattern
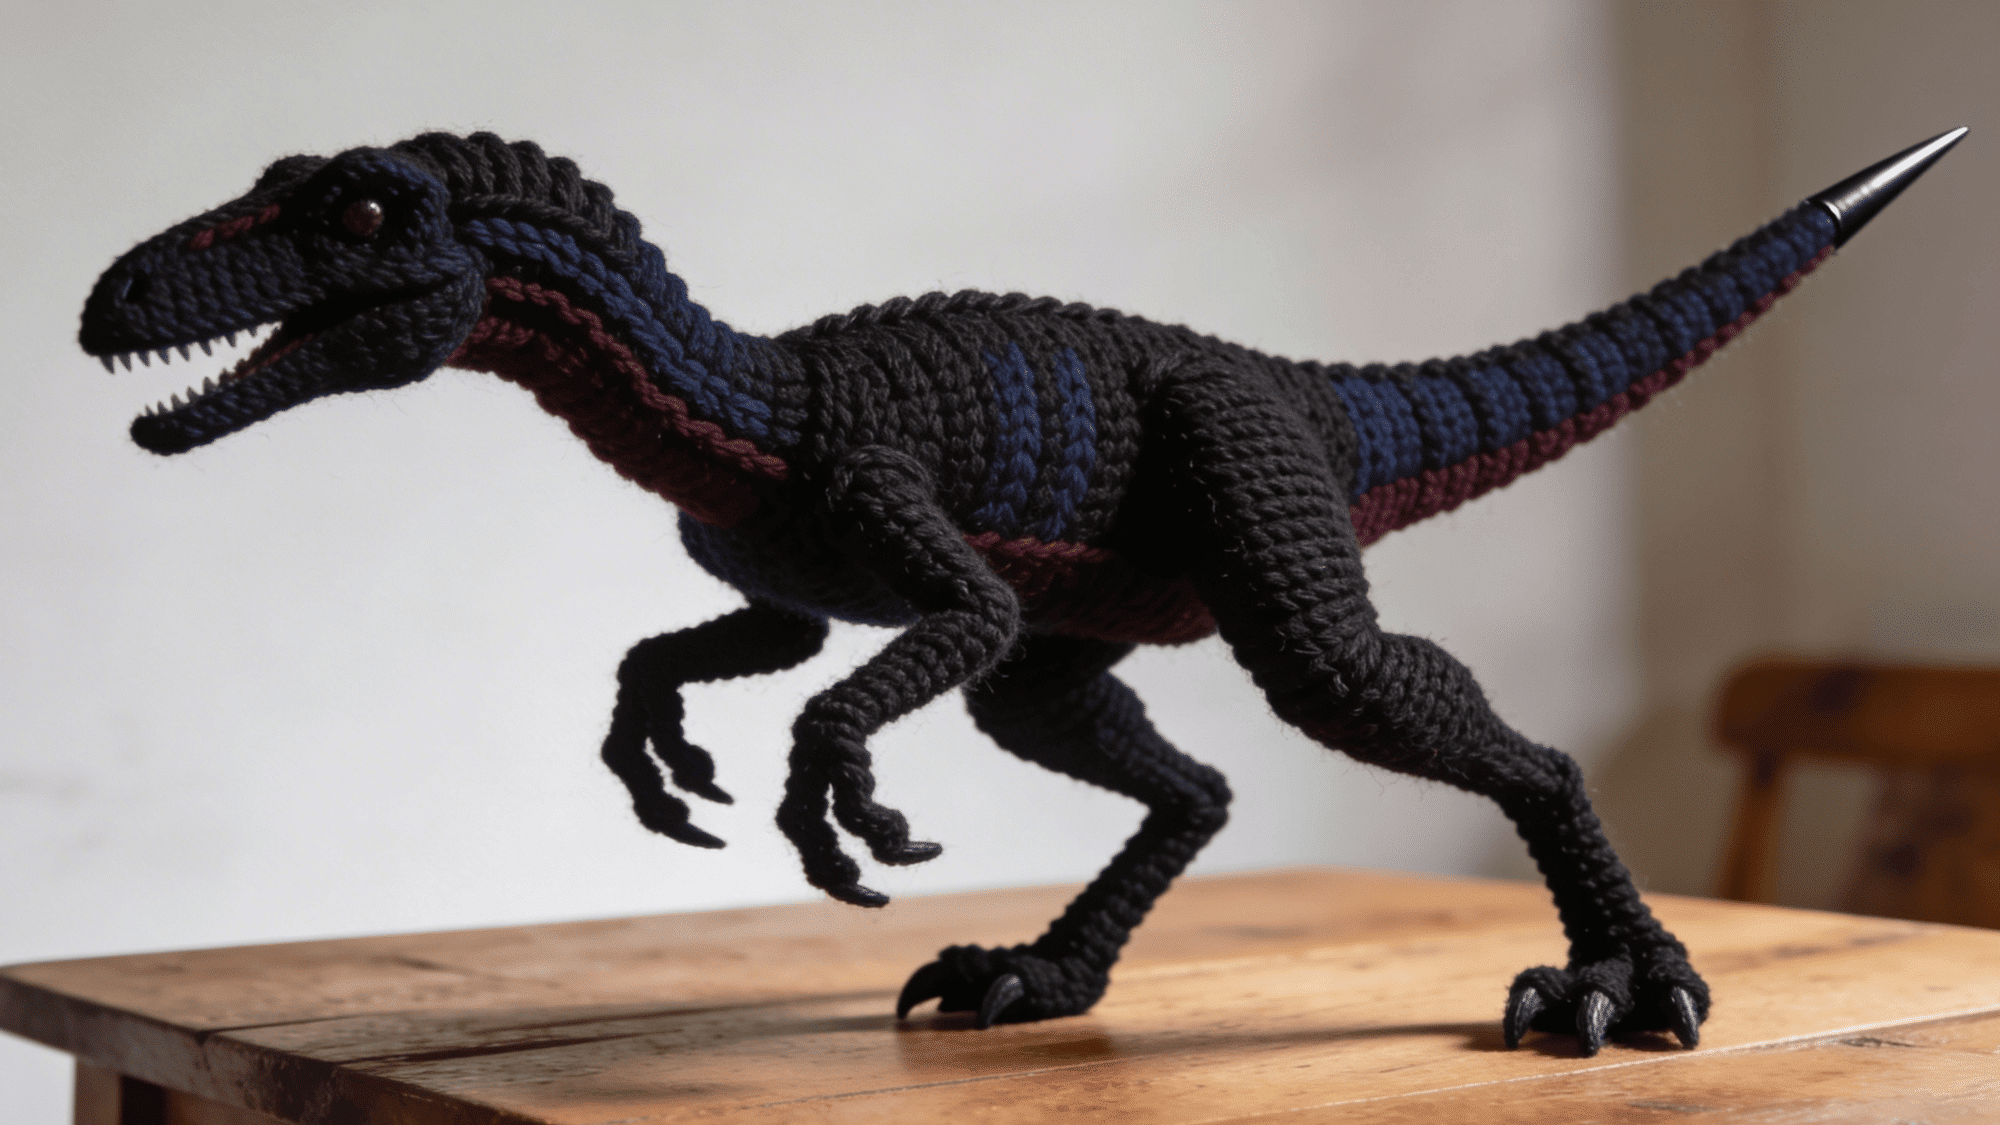
Design a quick and agile raptor with sleek legs and a sharp tail. Experiment with bold, dark colors to highlight its predatory nature.
Perfect for those who love a fast-paced, dynamic crochet project.
6. Ankylosaurus Crochet Pattern
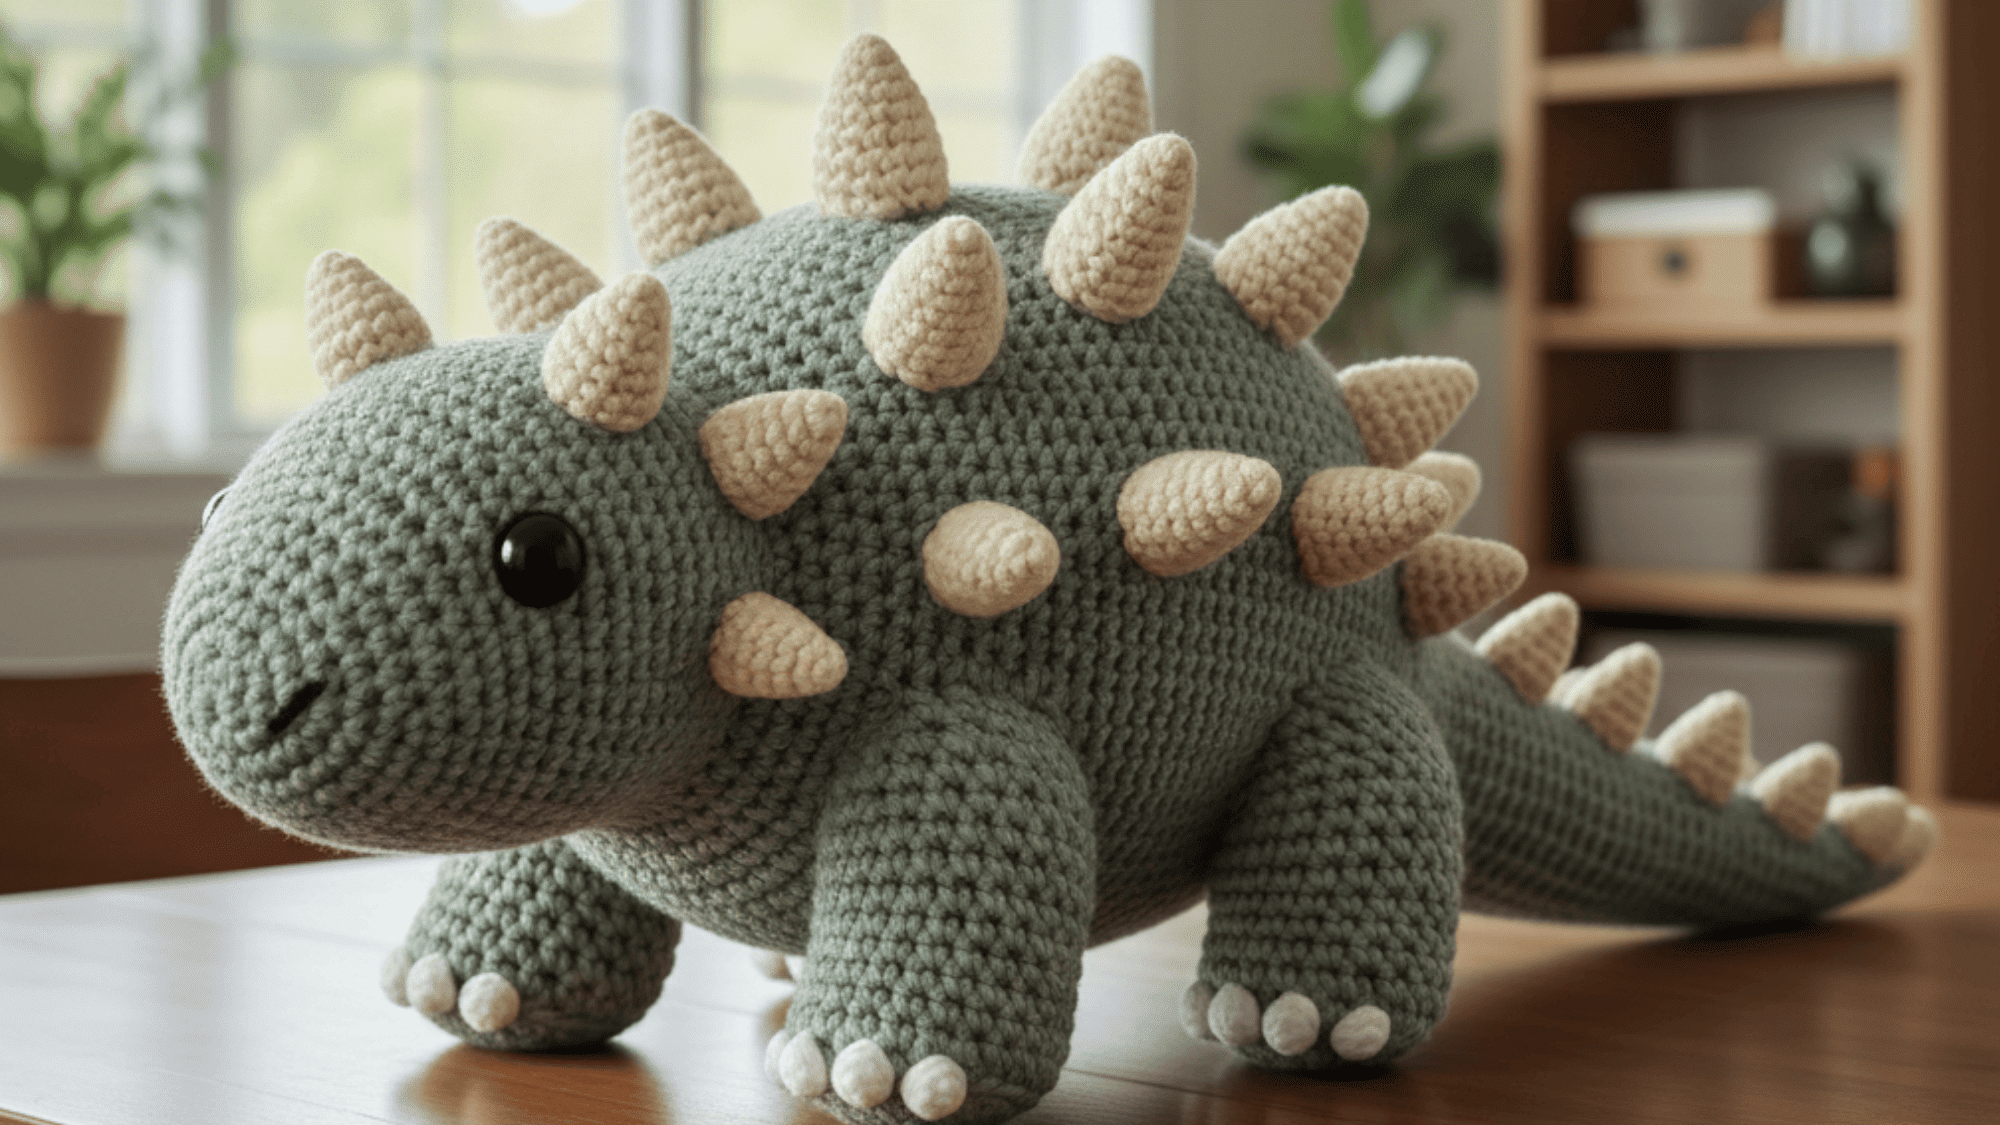
Create a sturdy, armored dinosaur with a clubbed tail. Use textured yarn for the body and spikes for a more realistic, armored look.
This project is ideal for adding some heavy-duty charm to your crochet dinosaur collection.
7. Brachiosaurus Crochet Pattern
With its long neck reaching for the treetops, this pattern emphasizes a tall, stylish design. Use bright colors for a vibrant, cheery version of the classic herbivore.
Its gentle stance makes it a perfect project for any crochet enthusiast.
8. Spinosaurus Crochet Pattern
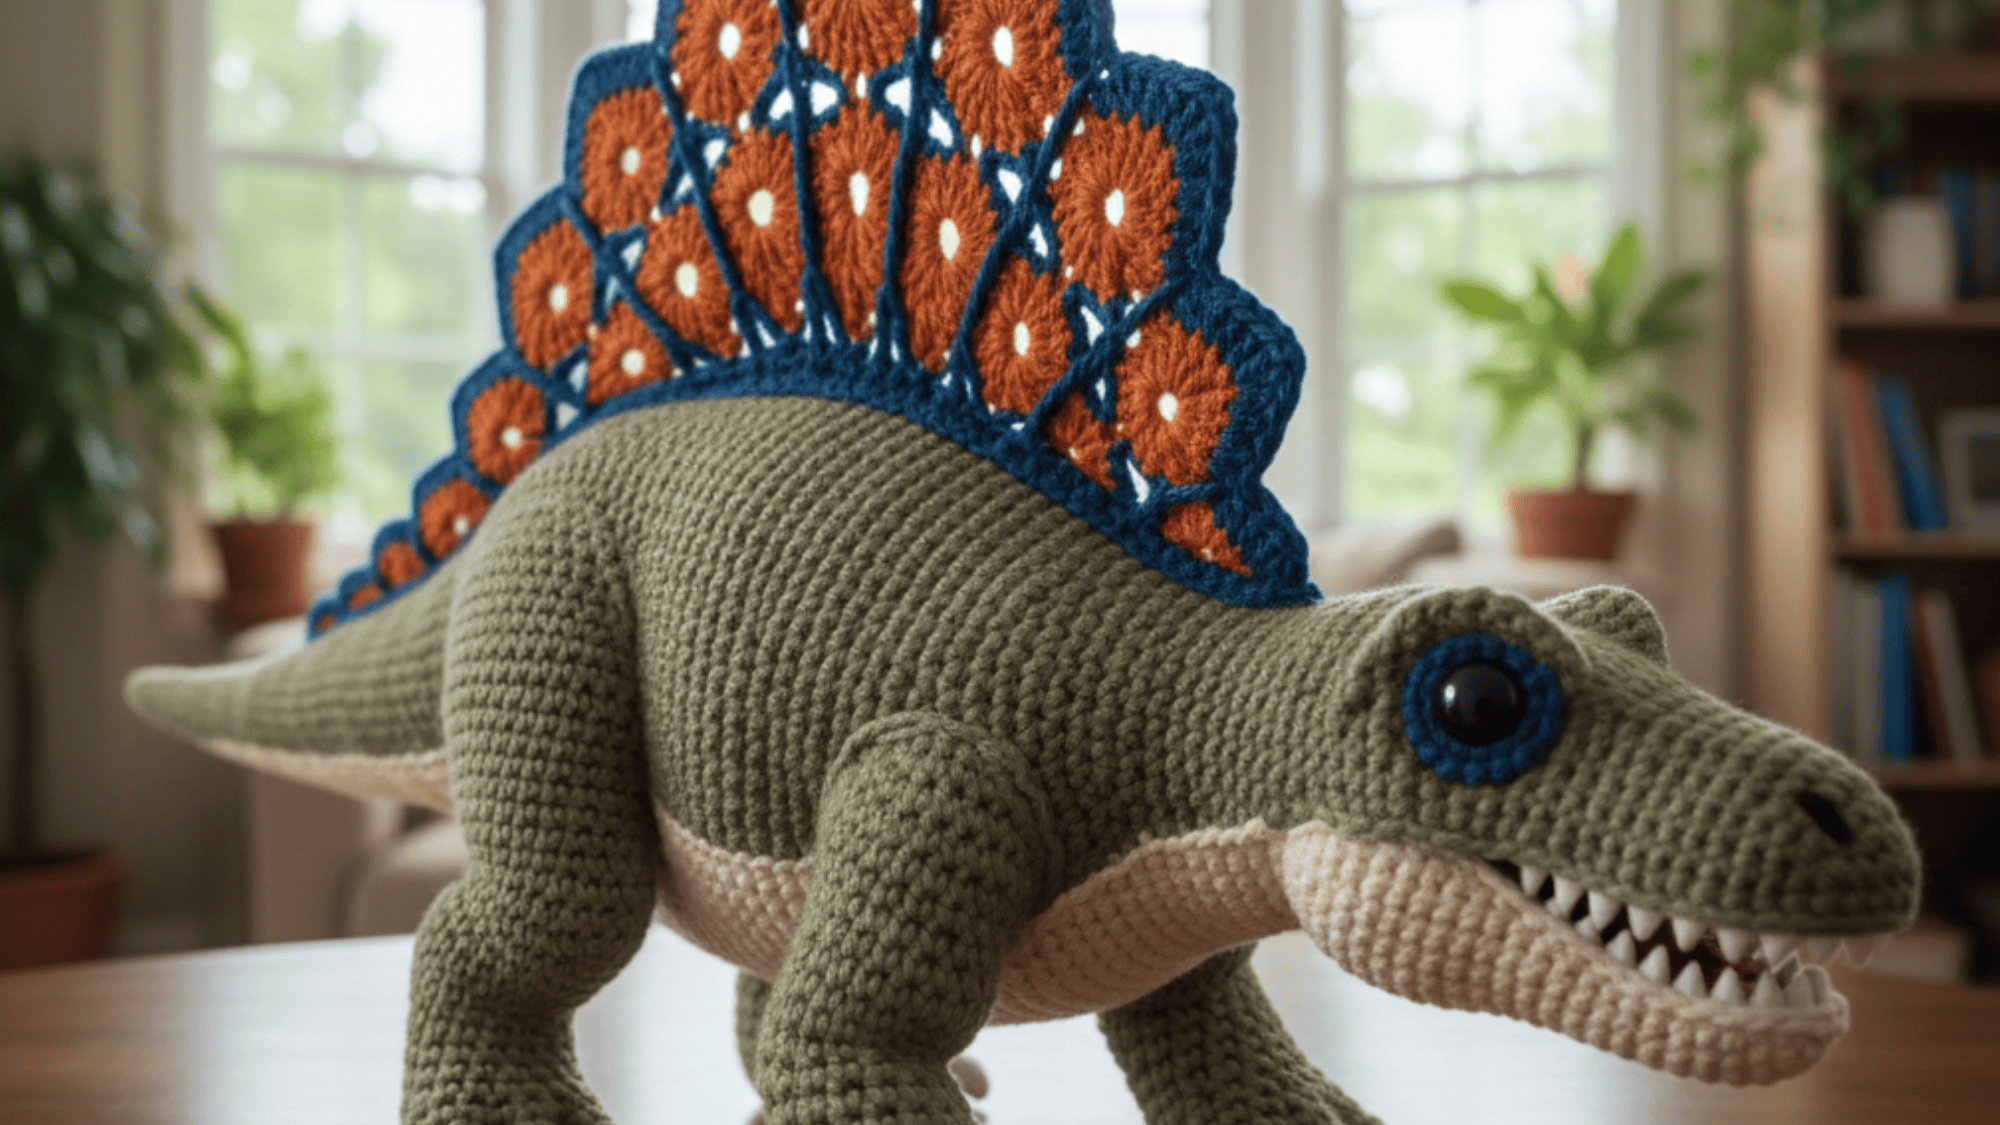
This one features a dinosaur with a sail-like structure on its back. Create a powerful and unique design by experimenting with contrasting colors and adding details to the sail.
A great project to practice detailed shaping and color work.
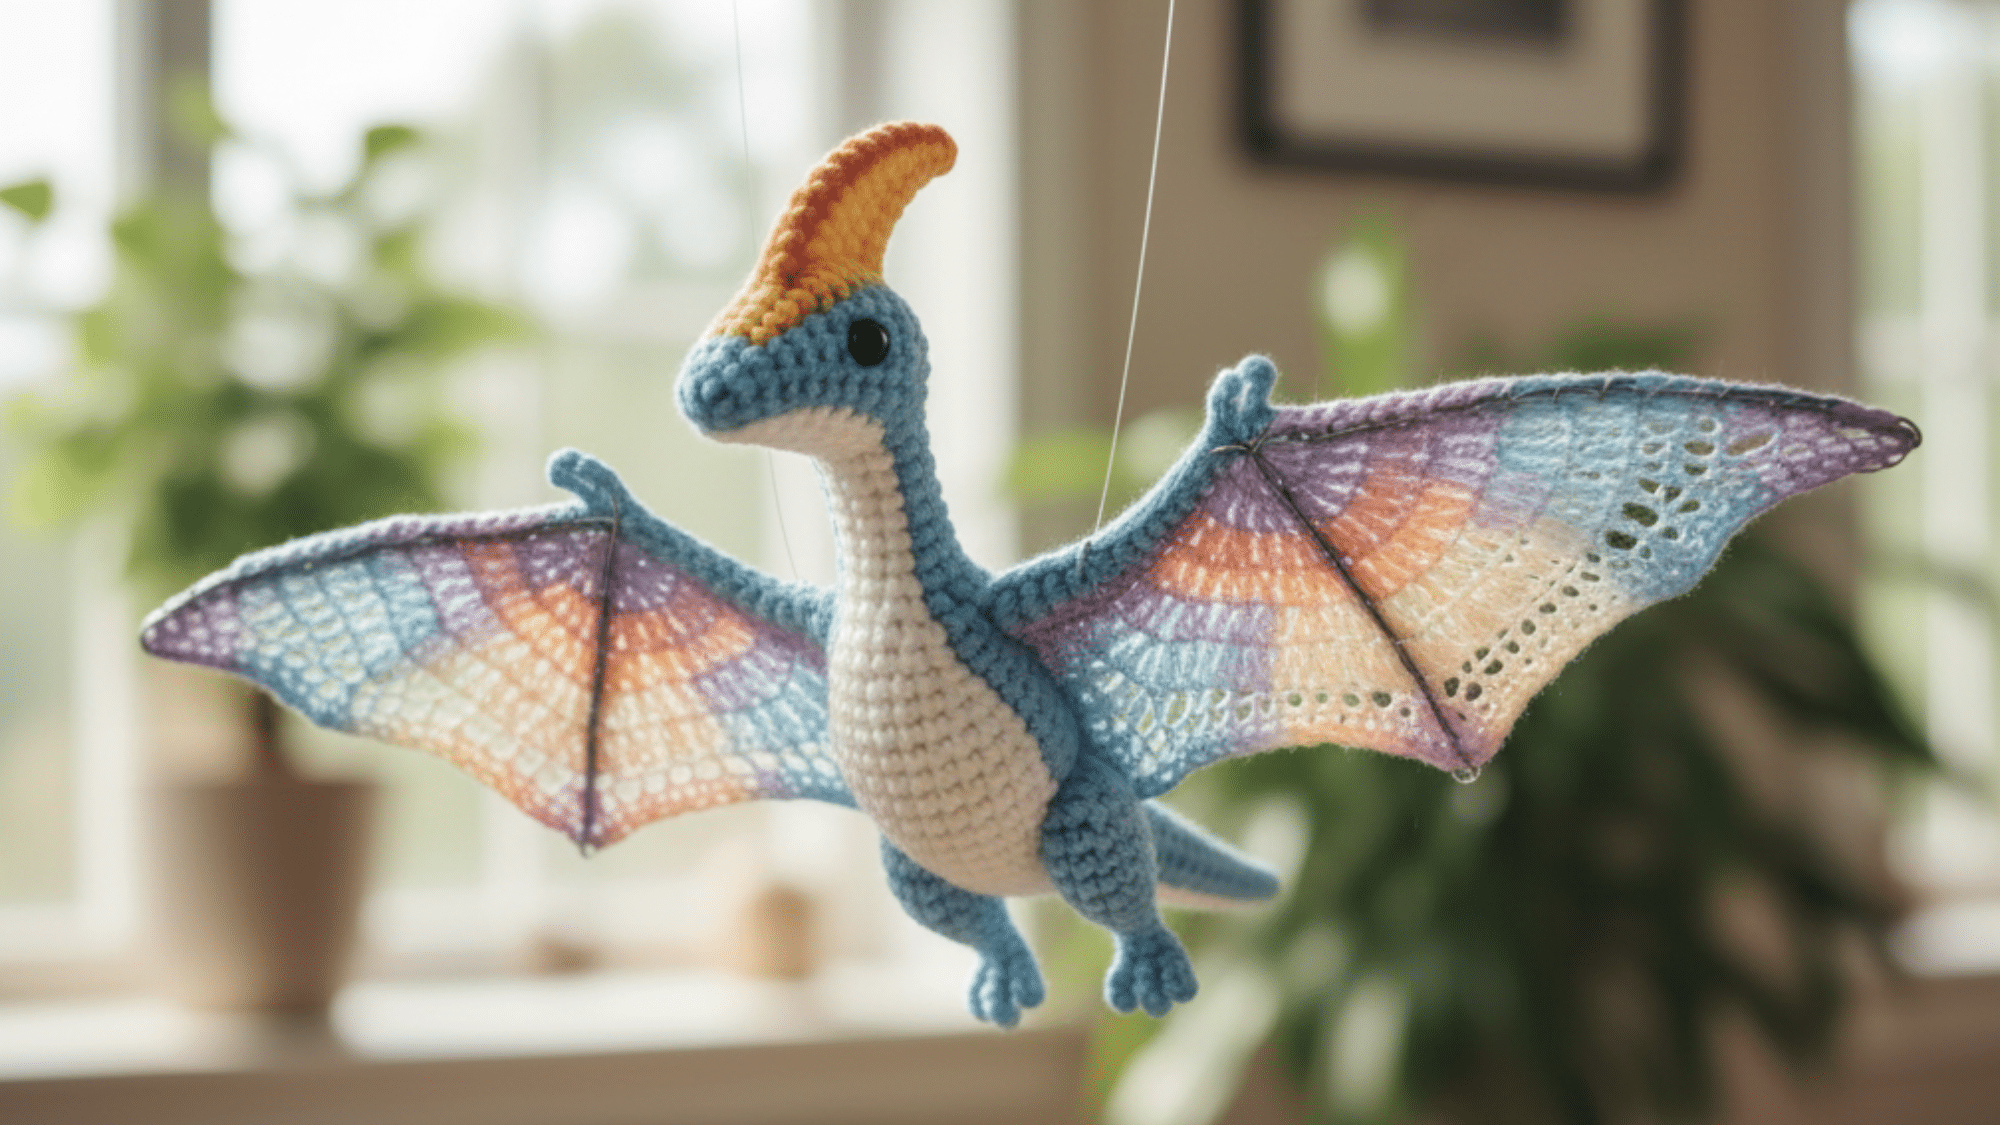
9. Pterodactyl Crochet Pattern
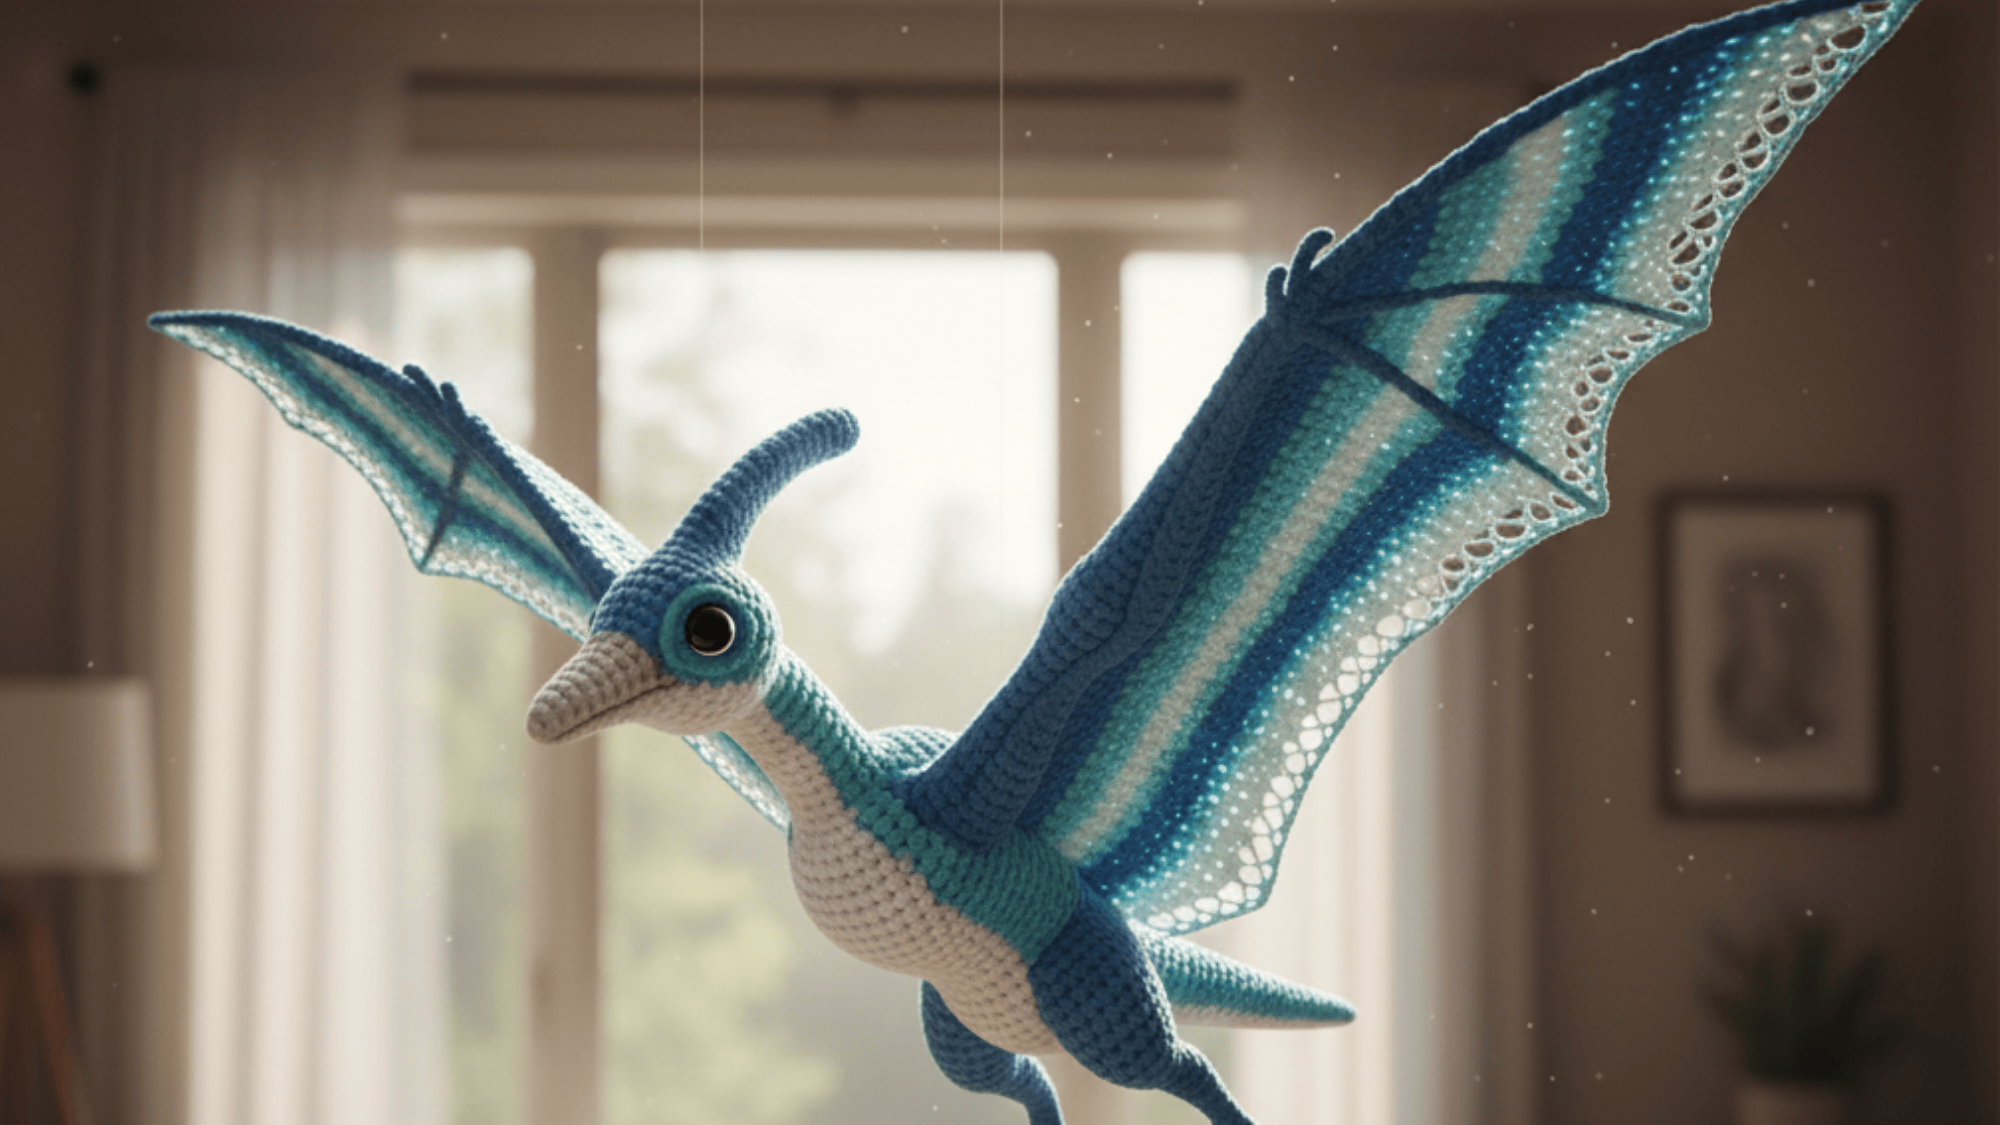
Add some flying action to your collection with a crochet pterodactyl. Focus on large wings and a streamlined body for this majestic flying dinosaur.
Perfect for adding an aerial touch to your crochet dinosaur family.
10. Parasaurolophus Crochet Pattern
This dinosaur is known for its long, curved crest.
Use a soft color palette to create a whimsical and gentle version of this herbivorous dinosaur a great option for those who want a dino with a bit more flair and personality.
11. Diplodocus Crochet Pattern
With a long body and neck, the Diplodocus offers a fun challenge. Focus on proportion and length, with subtle patterns to bring out the ddinosaur’slarge yet friendly appearance.
Its unique shape makes it a standout crochet piece.
12. Iguanodon Crochet Pattern
Create a strong herbivorous dinosaur with a bulky build and sturdy legs.
Experiment with muted tones for a realistic yet charming look. This project offers a perfect balance between sturdiness and fun details.
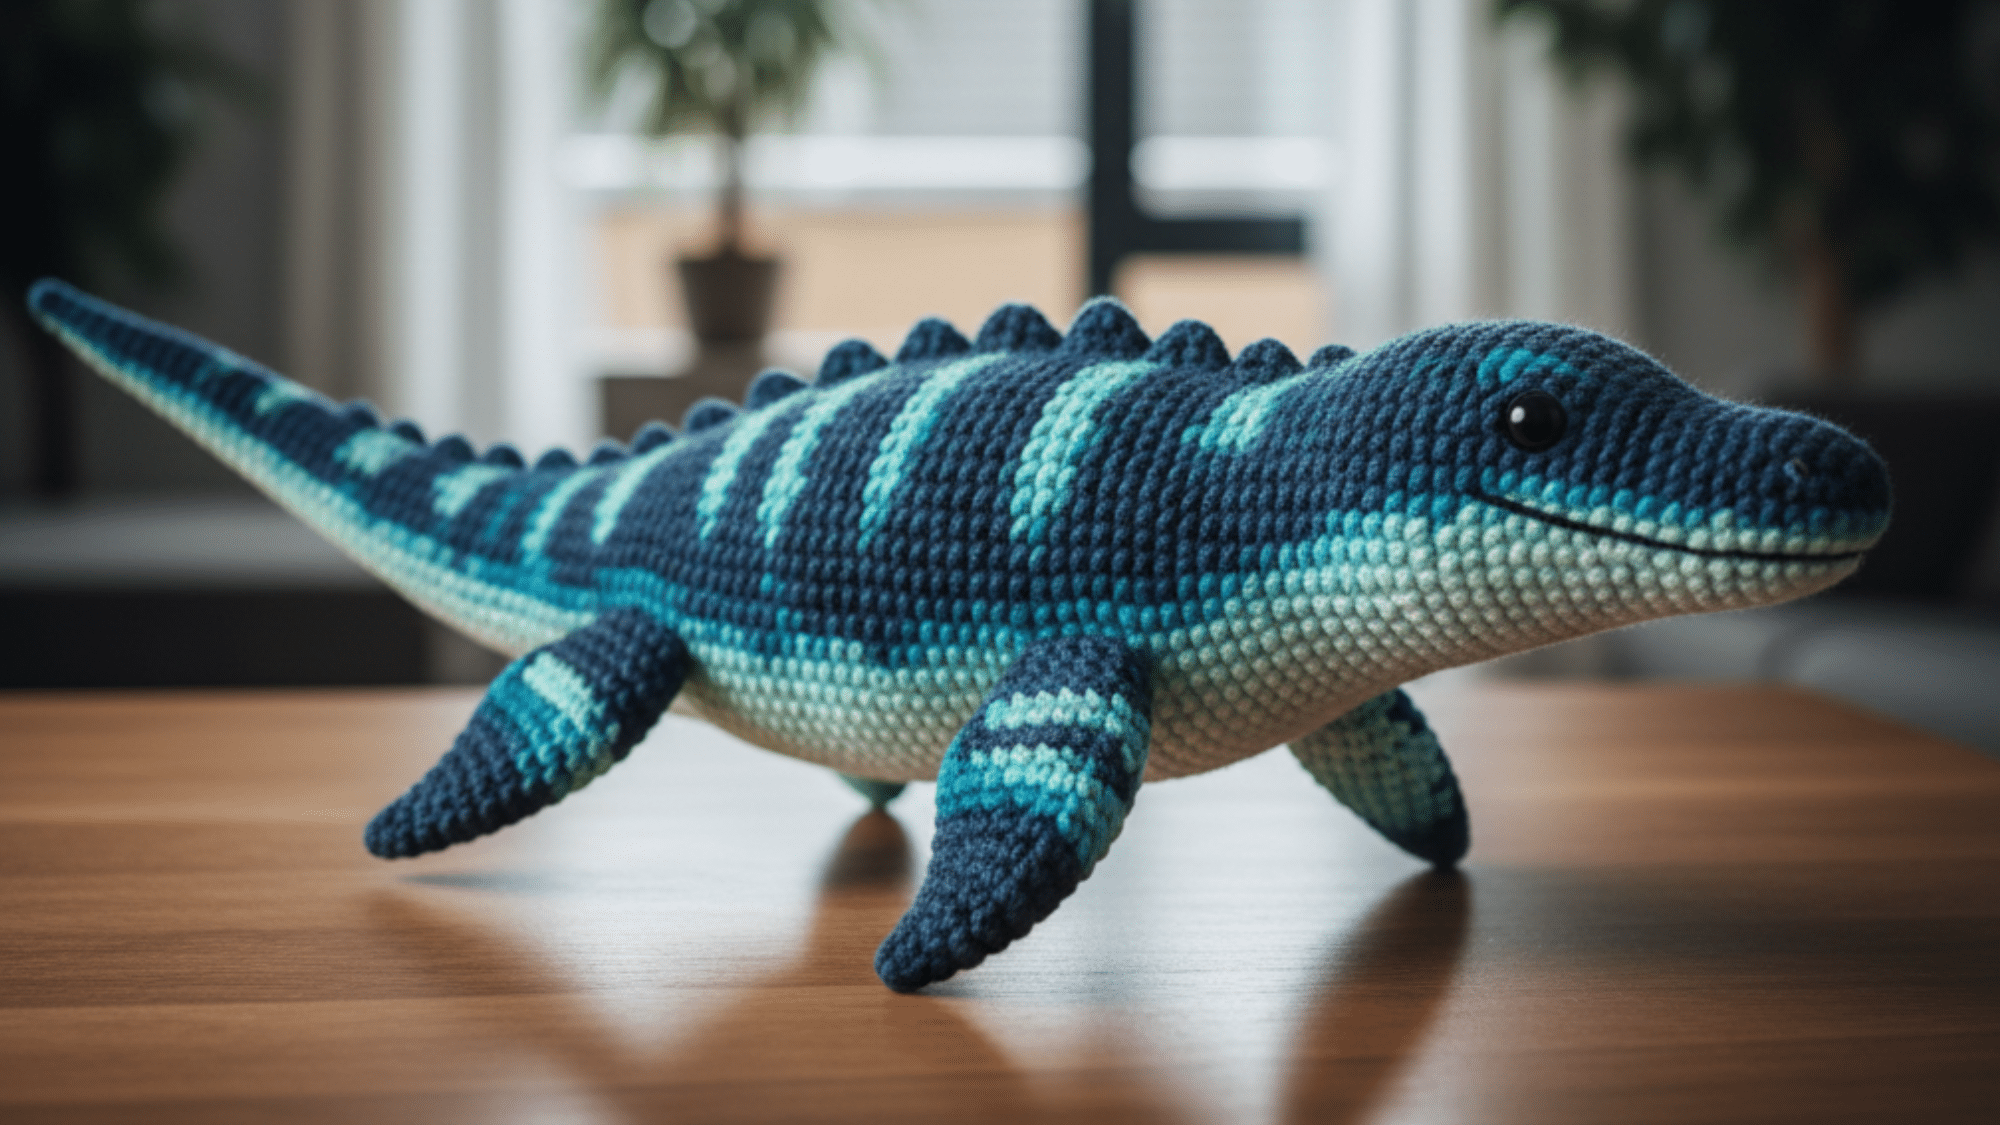
13. Plesiosaurus Crochet Pattern

For a unique twist, crochet a water-dwelling dinosaur like the Plesiosaurus. Its long neck and flippers create a graceful design that stands out among land-dwelling dinos.
Perfect for adding variety to your crochet creations.
14. Compsognathus Crochet Pattern
Design a tiny, fast-moving dinosaur with delicate features. Use fine yarn for its smaller size and focus on creating quick, agile movements in its pose.
This is an excellent project for those looking to create a mini crochet dinosaur.
15. Gallimimus Crochet Pattern
Known for its speed, it creates a lightweight and swift-looking dinosaur.
Use bright colors to capture its energy and lightweight build, along with a dynamic stance, to make a fast, energetic-looking crochet dinosaur.
16. Allosaurus Crochet Pattern
Make a smaller but fierce dinosaur with distinctive features like sharp claws and a long tail. Add some dramatic colors to emphasize its predatory nature.
This pattern will give you a great chance to explore aggressive poses and sharp details.
17. Microraptor Crochet Pattern
This tiny flying dinosaur is full of charm. Create a delicate and colorful crochet piece with wings spread wide, showcasing its ability to glide through the skies.
A great crochet pattern for lovers of small and detailed creatures.
18. Corythosaurus Crochet Pattern
This dinosaur has a distinctive helmet-like crest. Focus on detailed facial features and creative use of colors to highlight its unique head shape and charm.
The dramatic crest adds an exciting challenge to your crochet project.
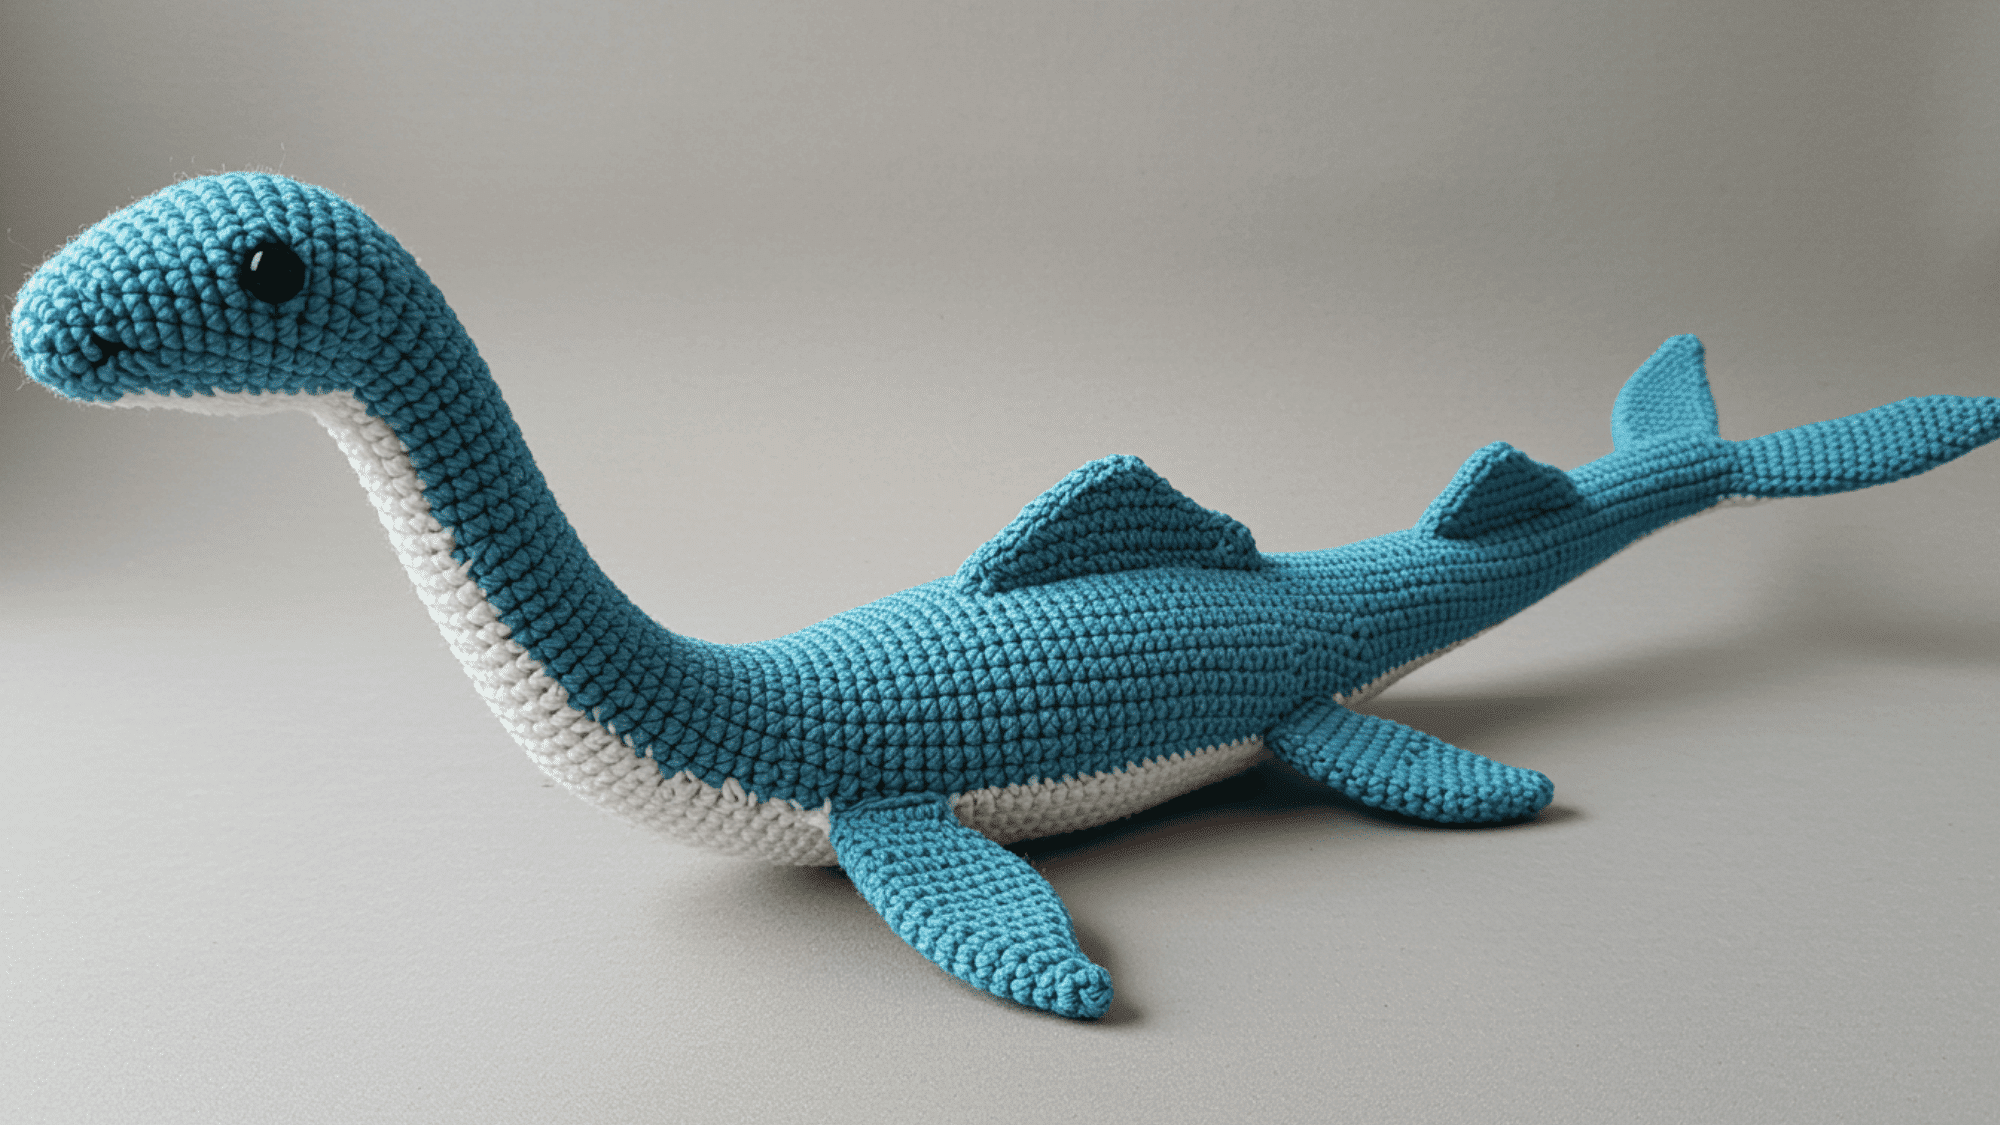
19. Mosasaurus Crochet Pattern
A marine reptile: make a sleek, streamlined mosasaurus with a smooth body and flippers. Experiment with oceanic tones for an aquatic feel.
This crochet pattern offers a refreshing change with its aquatic theme.
20. Hypsilophodon Crochet Pattern

Craft this small, herbivorous dinosaur with slender limbs and a streamlined shape. Use subtle colors to highlight its delicate and swift appearance.
A perfect project for creating a tiny, stylish crochet dinosaur.
21. Ceratopsian Dinosaur Crochet Pattern
These dinosaurs have a large frill and horns. Experiment with adding layers to the frill and detailing on the horns to create a fun, majestic crochet piece.
It’s perfect for those who love detailed, robust designs.
22. Shonisaurus Crochet Pattern
Create a long, graceful marine dinosaur. With a large, elongated body and tail, focus on making the figure look smooth and sleek for a stylish effect.
This crochet project is a great way to challenge your skills while creating something stylish.
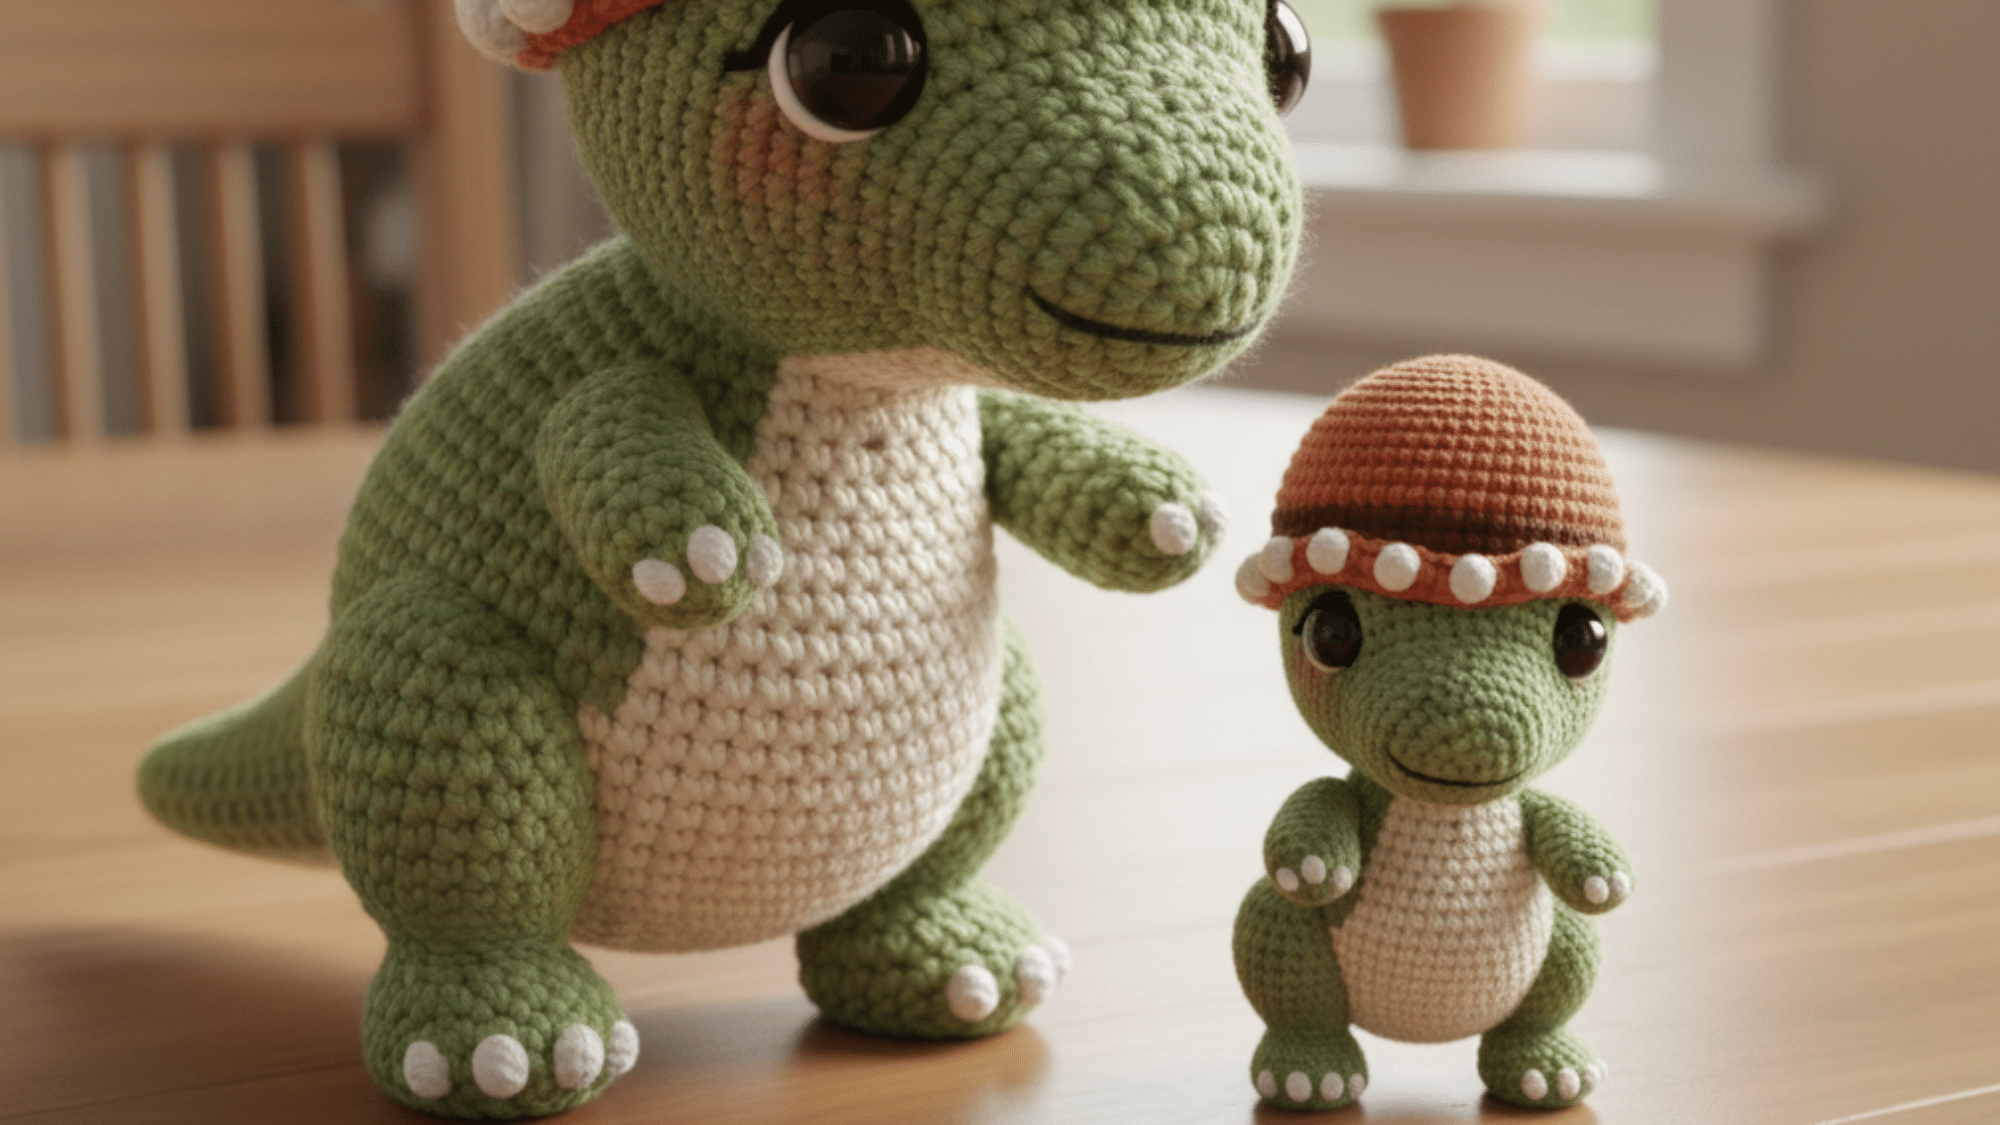
23. Baby Pterosaur Crochet Pattern
Create an adorable baby pterosaur with wide, floppy wings and a small, round body.
Use light, soft yarns to give it a cute and cuddly look, and focus on making the wings large and airy to capture the flying nature of the creature.
Tips and Tricks for Crocheting Dinosaur Toys
Know about some useful tips and tricks for the perfect dinosaur crochet.
- Experiment with Colors: Use bold or natural yarn shades to personalize your dino.
- Add Unique Features: Customize with spikes, horns, frills, or facial expressions.
- Create Different Species: Adjust size, shape, and details to make various dinosaur types.
- Sew Pieces Securely: Ensure parts are tightly sewn for durability, especially for toys.
- Add Fun Accessories: Decorate with scarves, hats, or other small details for extra charm.
In a Nutshell
Creating your own Dinosaur Crochet Toy is a fun, rewarding experience.
Not only do you get to make an adorable and personalized toy, but you can also experiment with different designs and features to make your dinosaur truly one-of-a-kind.
The process is easy to follow, and the results are always delightful! Try the pattern, find other fun crochet projects, and let your creativity soar!
Frequently Asked Questions
What Type of Yarn Is Best for This Pattern?
Worsted-weight yarn is perfect for this pattern, as it provides a good balance between durability and softness. Cotton or acrylic yarns work well and are easy to handle.
Can I Sell Items Made from This Crochet Pattern?
Yes! Many crochet patterns, including the Dinosaur pattern, can be used to sell finished items. However, be sure to check the pattern’s terms and conditions.
What Other Crochet Toy Patterns Are Similar to Dinosaurs?
If you love crocheting dinosaur toys, you may also enjoy other animal crochet patterns like dragons, sharks, or jungle animals.