Somewhere back in my family history, one of my relatives was involved in the whole Salem Witch Trial mess. I'd have to look up the details, but from what I understand, her name was Sarah, and she was sentenced to die and awaiting her sentence when the whole thing finally got called off. Talk about good timing!!
So, I thought it would be fitting to make a sign celebrating our family roots (tongue-in-cheek). I was inspired by Monday's Child Primitives- so check them out if you love primitive decor!
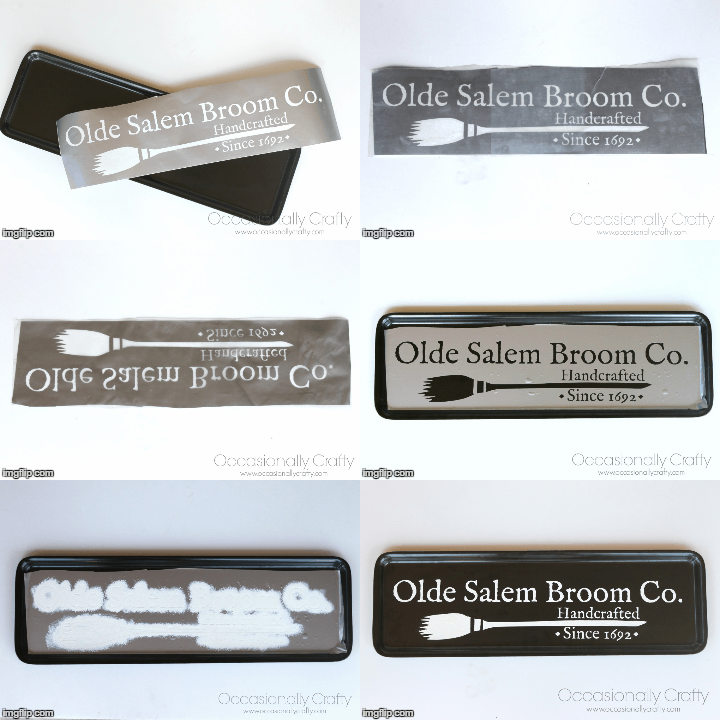
Since I've lost the steady hand you need for hand-painting, my favorite painting technique is using vinyl as a stencil. I put together a little .gif for you below to show you how easy it is to make your own stenciled sign. I used some Oracal 631 vinyl scraps and my Silhouette Cameo to make this.
Here's a quick written tutorial to go with the images:
1- Cut your desired stencil and weed out the letters/images you want to paint on your sign. Make sure you leave the little inner parts of the letters.
2- Place transfer tape (I used clear) over the whole stencil so you can move it in one piece. Go over it firmly with a hard edge to make sure you pick up all the pieces.
3- Peel the vinyl away from the paper backing. The stencil should now be on the transfer tape.
4- Carefully lay your stencil on the tray. Rub firmly with a credit card or something similar to make sure the vinyl sticks firmly to your sign/tray.
5- Use a stencil brush and your desired paint to carefully paint over your stencil. Multiple light coats is much better than one heavy coat- it is much less likely to bleed through! I used three coats of vanilla paint.
6- Let the paint dry slightly, then carefully peel up the vinyl, taking care not to pull the paint off. Take your time and be careful! Remove the little insides of letters. Did I mention to be careful?
7- (not shown) Spray with clear sealer if desired to keep the paint protected.
That's it- you'll have a lovely little sign to add to your Halloween decor! You can literally make anything you want!
:


