August 2010Occasionally Crafty: August 2010

Thursday, August 26

Rosette Pillow

I finished another pillow for my entryway.  I saw this on Make It and Love It for a wall hanging and thought it would be perfect for a pillow.  


I love the way it turned out, and think it adds an extra touch to my entryway bench.


Monday, August 23

What the....

I am having problems with my design.  Sorry.  Hang in there while I mess with things!

Saturday, August 21

Fall Jars

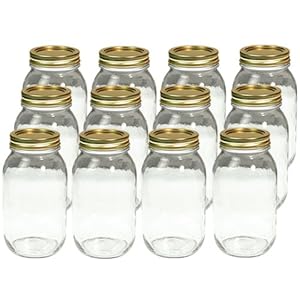
I was browsing Michael's for some fall decor, when I came across some really cute tall jars with stiched sayings glued to the front of them.  I fell for them instantly.

I did not fall for the price tag- which was like $8 each.  I knew it was something I could make, so off I went to buy the supplies.
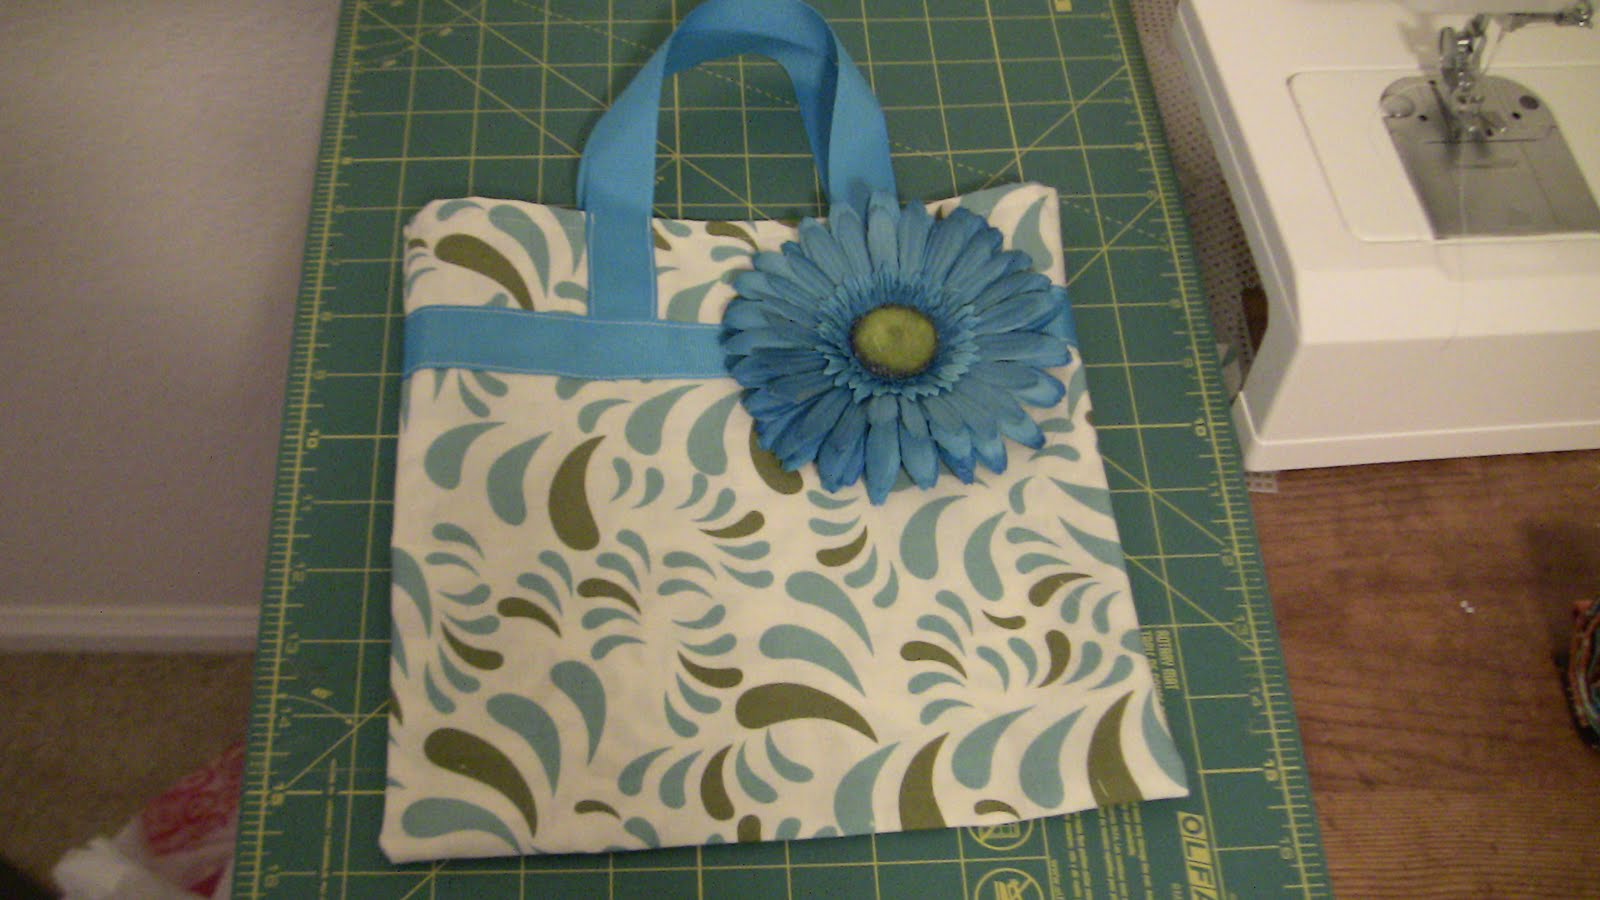
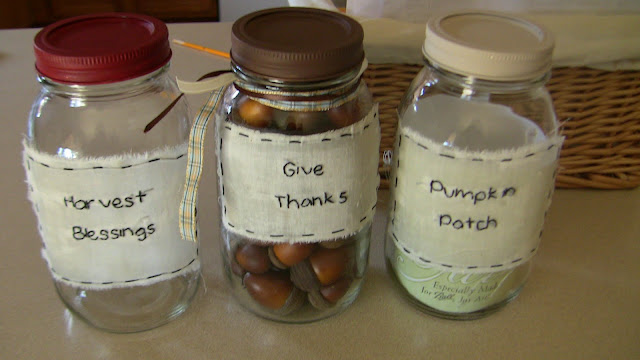
Here's my version:


I used the smooth Ball jars, created my own stitchery (more on that in a minute), and Mod Podged it to the jar.  I then painted the lid and tied some fall ribbon around the neck.  I filled it with some fall goodies, and I have a really cute decoration to add to my fall decor.

I have two more just waiting to be filled and embellished.  I'm trying to decide what to put in them-- cinnamon sticks, leaves, mini pumpkins....


So, want to make your own stitchery?

Prepare your material.  I used muslin, and since I was going for a rustic look, ripped my fabric instead of cutting it.


Print out your quotation or phrase in a cute font in the size and layout you need for your project.  Tape it to a window or other light source.  Tape your fabric over the paper, and trace your pattern with a pencil.


 Use a needle and embroidery floss to stitch your phrase onto the fabric.  If I am going to frame it or make it into something else, I will  pin some Warm n Natural batting behind the fabric and stitch through both, but since mine was just glued to a jar, I kept it simple.

Use clip art from Microsoft Office or your favorite websites to create cute, one of a kind stitchery patterns.  I made my own pillow this way for Valentine's Day.


Or you can just copy something you see in a store, like I did for my jars.

Anyway, I can't wait to decorate for fall.  Look for a few more projects coming soon!

Linking to some of THESE PARTIES.


Photobucket

Wednesday, August 18

Pillow and Entryway Redo

I have been wanting to recover some pillows for some time now.  Today I got the supplies and spent the afternoon on the first one while the kids had "quiet time".  


The husband hates how our entryway bench becomes a gathering place for bags and junk, so my solution is to cover it with pillows.  For this one, I used this tutorial from Make It and Love It.  It's hard to see with the bad lighting, but I used black and white contrasting fabrics for my first pillow.  It used to be stained red "velvet".  Isn't it pretty now?


Now my entryway is starting to come together.  I'm not sure that I love it yet.  I think I need something larger over the FAMILY sign.  But it's a start.   


Tuesday, August 17

Getting Ready for Fall

I have been on vacation for the last week or so, which is why I have no projects to share.  However, I've been carefully examining everything from magazine layouts to my mother-in-law's decor for ideas for fall.  I know it's technically still Summer, and I know it's still 110 degrees here, but I like to put my decorations out around Labor Day.  I want some new handmade things to display this year, so that means I'd better get my patootie in gear.

I've got a few great ideas to showcase involving these

this


and this


among other things.  Stay tuned!

Friday, August 6

Scripture Tote/Purse

I have been wanting to make a placemat scripture tote for awhile.  My friend's birthday is on Friday, and I know she has been wanting one of these, so I forged ahead.

I followed this tutorial from Little Birdie Secrets.  However, I could NOT find a cute placemat in the limited time I had, so instead I used some cute, sturdy fabric.  I used a placemat I already have as a pattern, cutting 1/2 inch extra all around for a seam allowance.  Then I put right sides together and sewed it, leaving a small space to turn it right side out.  After turning it, I topstitched around the whole thing, and it turned out a lot like a placemat!

Another change from the tutorial is that I just used ribbon for handles.  After the tutorial was finished, I embellished with a large flower.  I hope she likes it!  I think I might have to make one for myself!

Monday, August 2

Girl Play Mat

So, I love the car mats and other boy-themed mats I've seen out there.  The only thing is, I have a daughter, too.  She has a vivid imagination, and is particularly enchanted by dollhouses and things like that.  I wanted to make her something portable for our trip too, and after an EPIC FAIL attempt at a mini travel dollhouse, I came up with this.

I'm sure something like this exists out there in Craft Blog-land, but I haven't seen it, so I just came up with the pieces on my own.  I used the same tutorial I did for the Car Mat.

Now these little guys

have a place to play.


Thanks again to Serving Pink Lemonade for the inspiration.  Yes, I stalk her blog.

Linking to some of these parties.

Car Mat

We're going on a trip soon, so I'm putting together a bag of "tricks" for my kids- ages 5, 3, and 10 months.

I got this idea from Serving Pink Lemonade.  Mine isn't as fancy, but my son is really excited to play with this.  I followed the tutorial on her site, using Heat N Bond under the felt to adhere the pieces.


Stay tuned for a "girly" version for my daughter.