


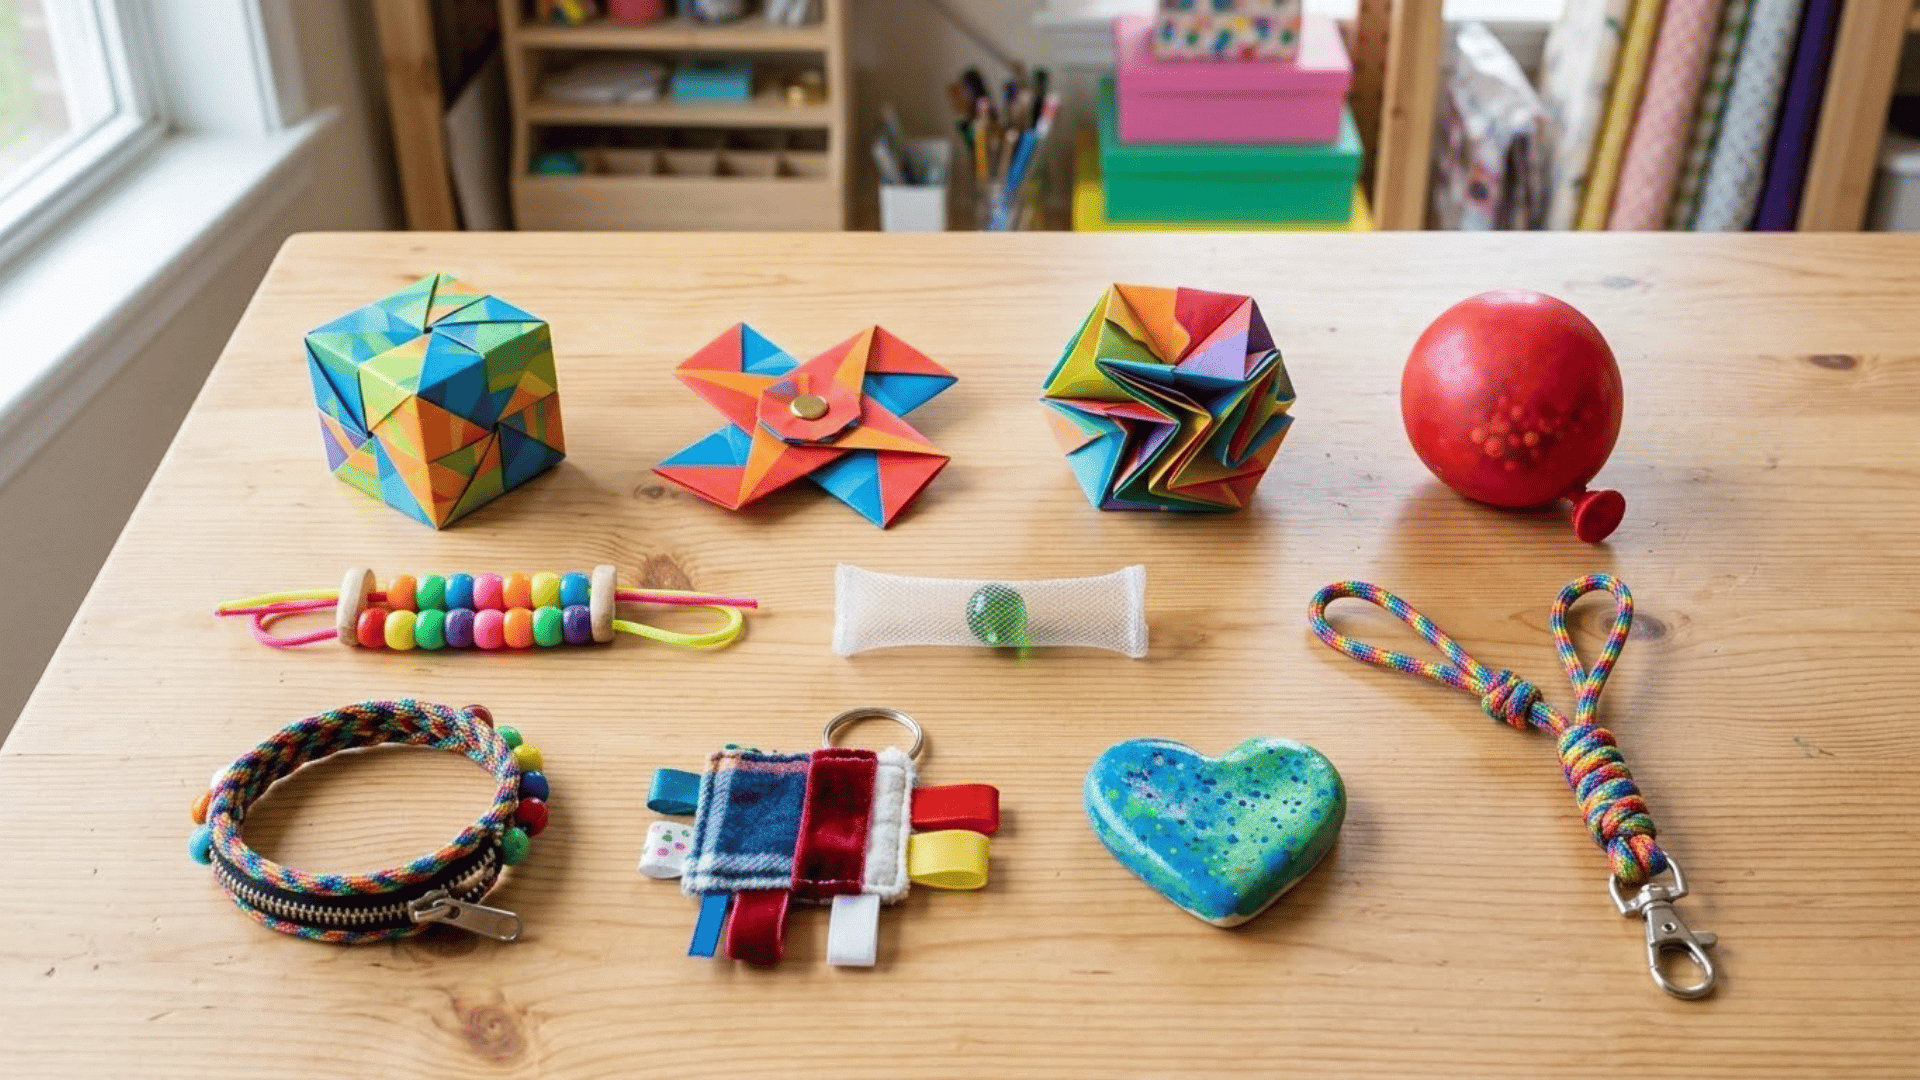
Restless hands need something to do, and store-bought fidget toys can get pricey surprisingly fast. I started looking into making my own after realizing that half the fun is figuring out which textures, movements, and designs actually work best for you or your child.
DIY fidget toys can give kids a simple way to keep their hands busy through squeezing, twisting, sliding, flipping, or pressing.
For some children, these repetitive movements may support focus, provide useful sensory input, and feel calming during homework, reading, travel, or other quiet activities. The key is finding a fidget that supports attention rather than becoming another distraction.
Here’s where to start making your own fidget toys at home.
Simple DIY Fidget Toys Made with Everyday Items
Homemade fidgets can be adapted to different ages, preferences, and skill levels without making the project complicated.
If your child already enjoys simple paper crafts, the first few fidgets are an easy place to begin because they use familiar folding, cutting, and taping skills.
1. Folded Paper Infinity Cube

This classic paper project produces a cube that folds inward on itself continuously. It is one of the most satisfying options on this list because the motion never stops at a hard endpoint.
Time: 30-45 minutes
Materials: Cardstock or regular paper, clear tape, scissors, ruler
Instructions:
- Cut 8 equal squares from cardstock (about 3×3 inches each)
- Fold each square in half diagonally, then fold again to form a smaller triangle
- Tape two triangles together at the open edges to form one cube unit
- Repeat to make 8 units total
- Connect units in a row using tape on alternating sides
- Fold the connected row into a cube shape and tape the final join
2. Cardboard Infinity Fidget
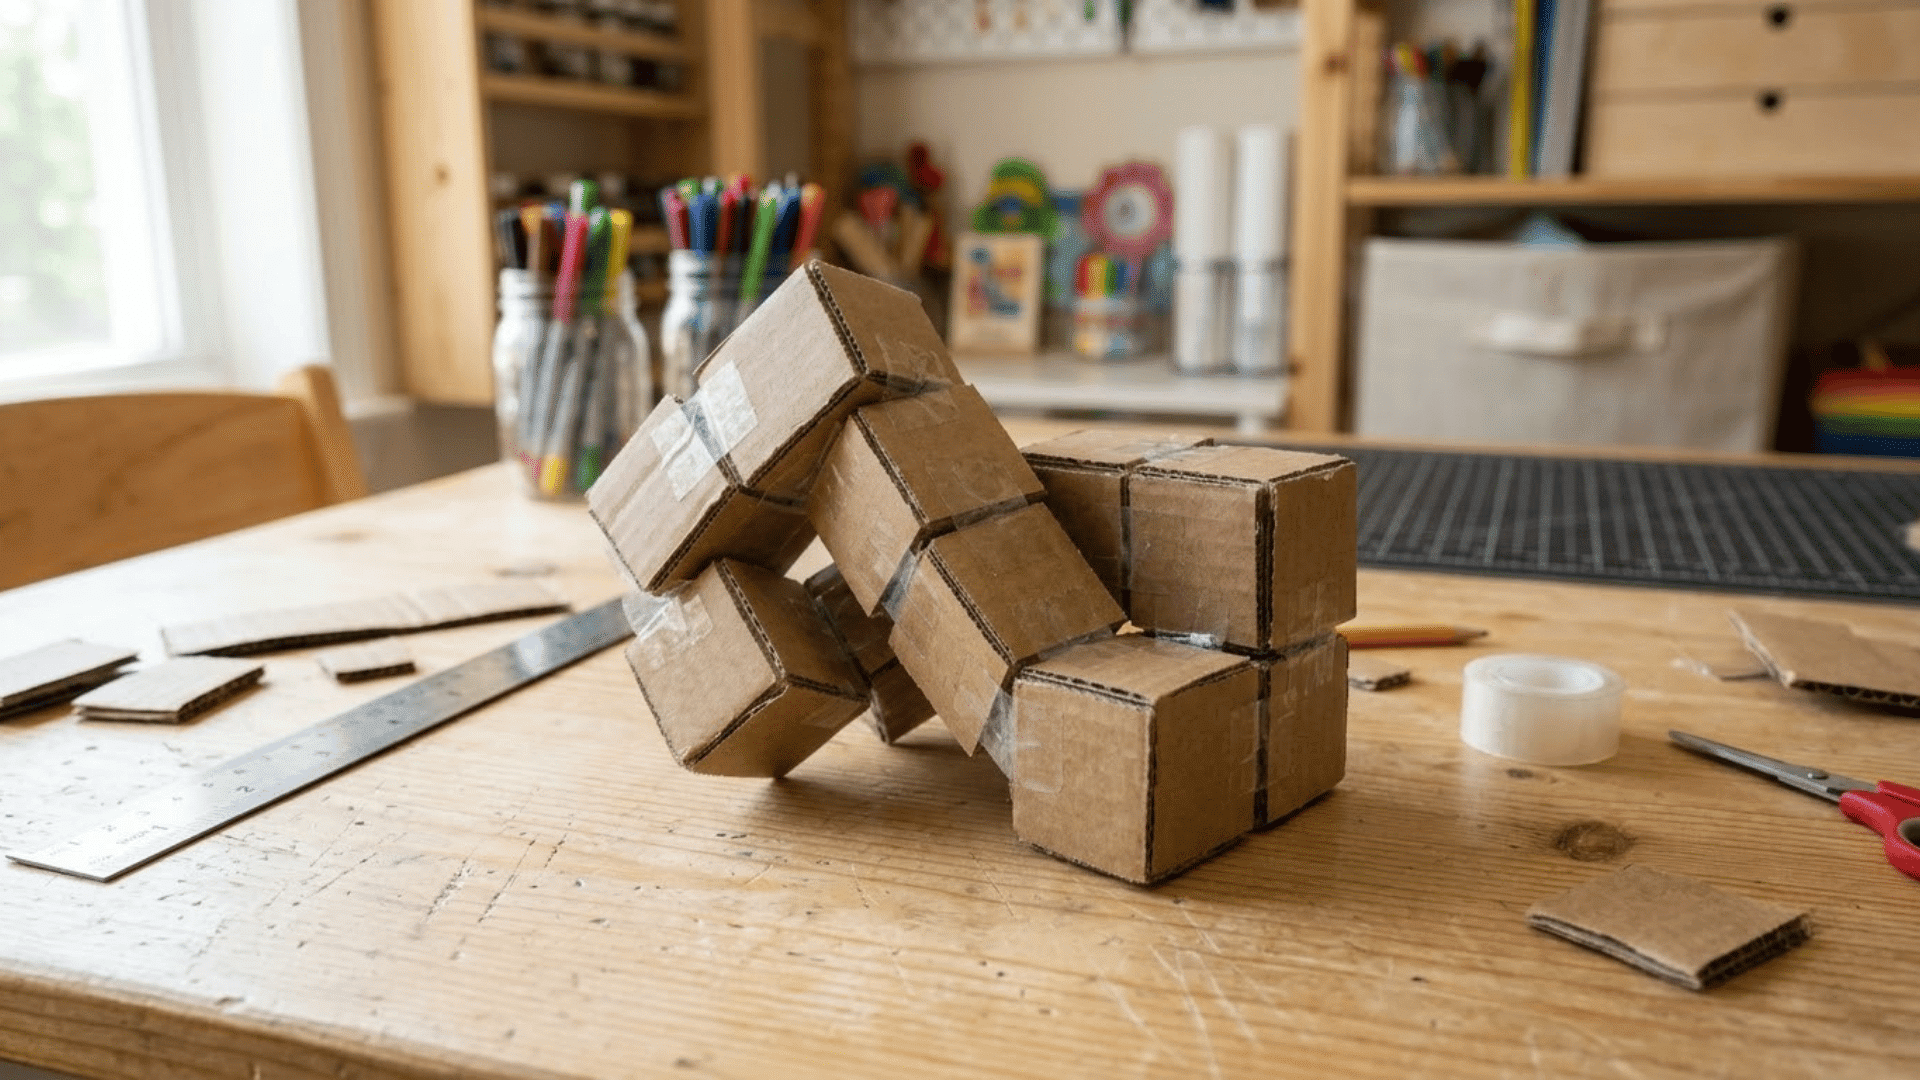
This version uses cardboard blocks instead of paper, making it sturdier and longer-lasting. The key to getting it right is in how you place each tape hinge.
Time: 45-60 minutes
Materials: Cardboard, strong tape, scissors, ruler, marker
Instructions:
- Cut 8 cardboard blocks of equal size (roughly 1.5×1.5 inches)
- Lay all 8 blocks in a row with a small gap between each
- Apply tape hinges between each block, alternating the tape direction with every joint
- The first hinge tape goes on top, the second goes on the bottom, and so on
- Fold the chain to test movement before pressing hinges firmly flat
- Reinforce any loose hinges with a second layer of tape
Note: If the blocks resist folding smoothly, check that each tape hinge alternates correctly before adding more tape.
3. Paper Fidget Spinner

A paper spinner is lighter than store-bought versions and easy to rebuild if it gets damaged. Getting the arms even is what makes the difference between a smooth spin and a wobbly one.
Time: 20-30 minutes
Materials: Cardstock, toothpick, small cardboard pieces, scissors, tape
Instructions:
- Cut three equal arms from layered cardstock and arrange them in a Y shape
- Cut two small cardboard circles for the center pieces
- Push the toothpick through both center circles to form the spin axle
- Tape the arms firmly to the center on both sides
- Spin and check balance; trim any arm that makes the spinner wobble
- Add a small tape wrap around the toothpick ends to prevent sharp points
Note: Removing too much at once can over-correct the balance. Keep the toothpick ends covered with tape at all times.
4. Origami Flexagon Fidget
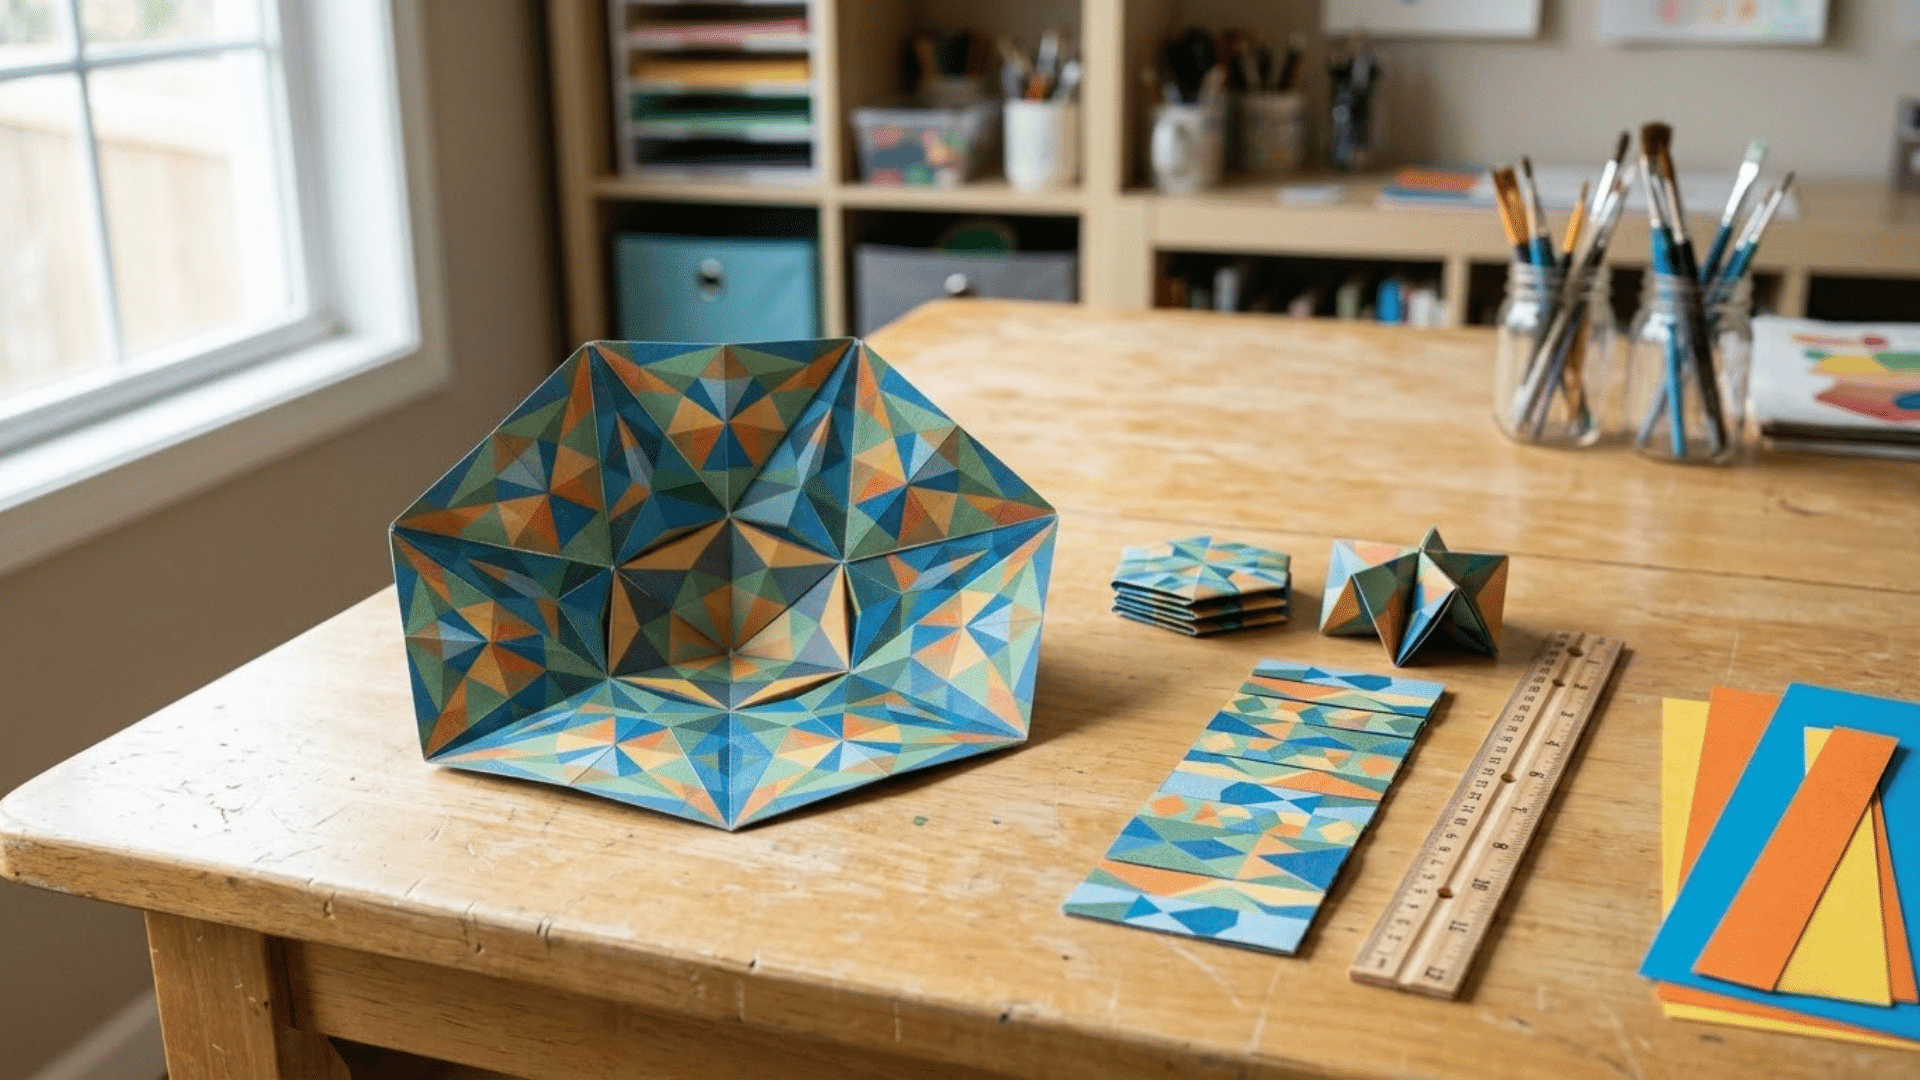
A flexagon is a folded paper loop that reveals hidden panels each time it is flexed. It makes no sound and sits flat, which makes it a practical option for quiet settings.
Time: 15-20 minutes
Materials: A long strip of paper or cardstock, scissors, tape or glue
Instructions:
- Cut a long, even strip of paper (about 1 inch wide and 12-14 inches long)
- Fold the strip at 60-degree angles to form a series of triangular panels
- Continue folding until the strip forms a closed hexagonal loop
- Secure the last panel to the first using a small piece of tape or glue
- Flex by pushing opposite edges inward to reveal hidden panels
5. Paper Squishy Toy
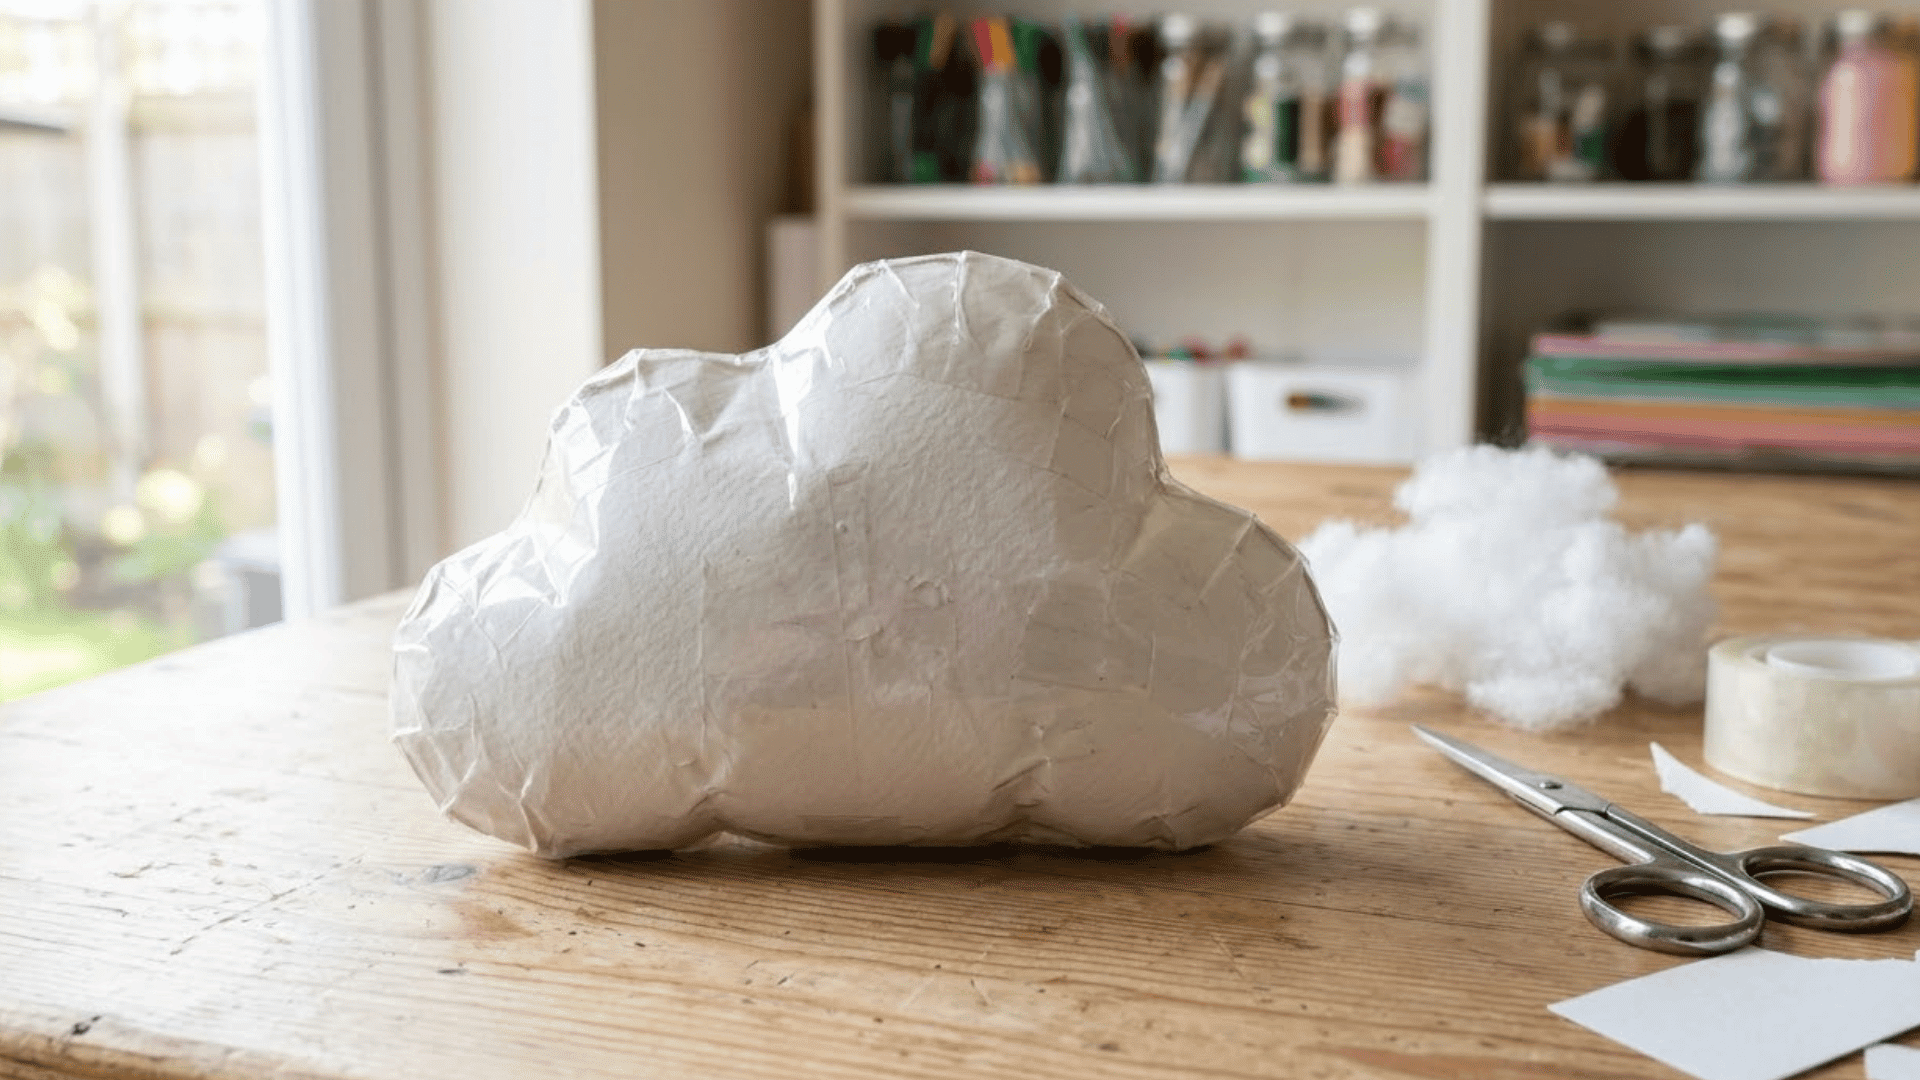
This project turns a simple paper shape into something soft and squeezable. The stuffing inside is what gives it its feel, so the quality of the seal matters more than the shape.
Time: 30-40 minutes
Materials: Thick paper or cardstock, clear tape, soft stuffing (cotton balls or foam scraps), scissors
Instructions:
- Cut and fold the paper into a small pouch shape (cube or rounded square)
- Tape all outer seams except one opening
- Fill the pouch loosely with cotton balls or foam scraps
- Press each seam firmly before sealing the final opening with tape
- Run a finger along every seam to check for gaps before use
6. Cardboard Pop Button Board
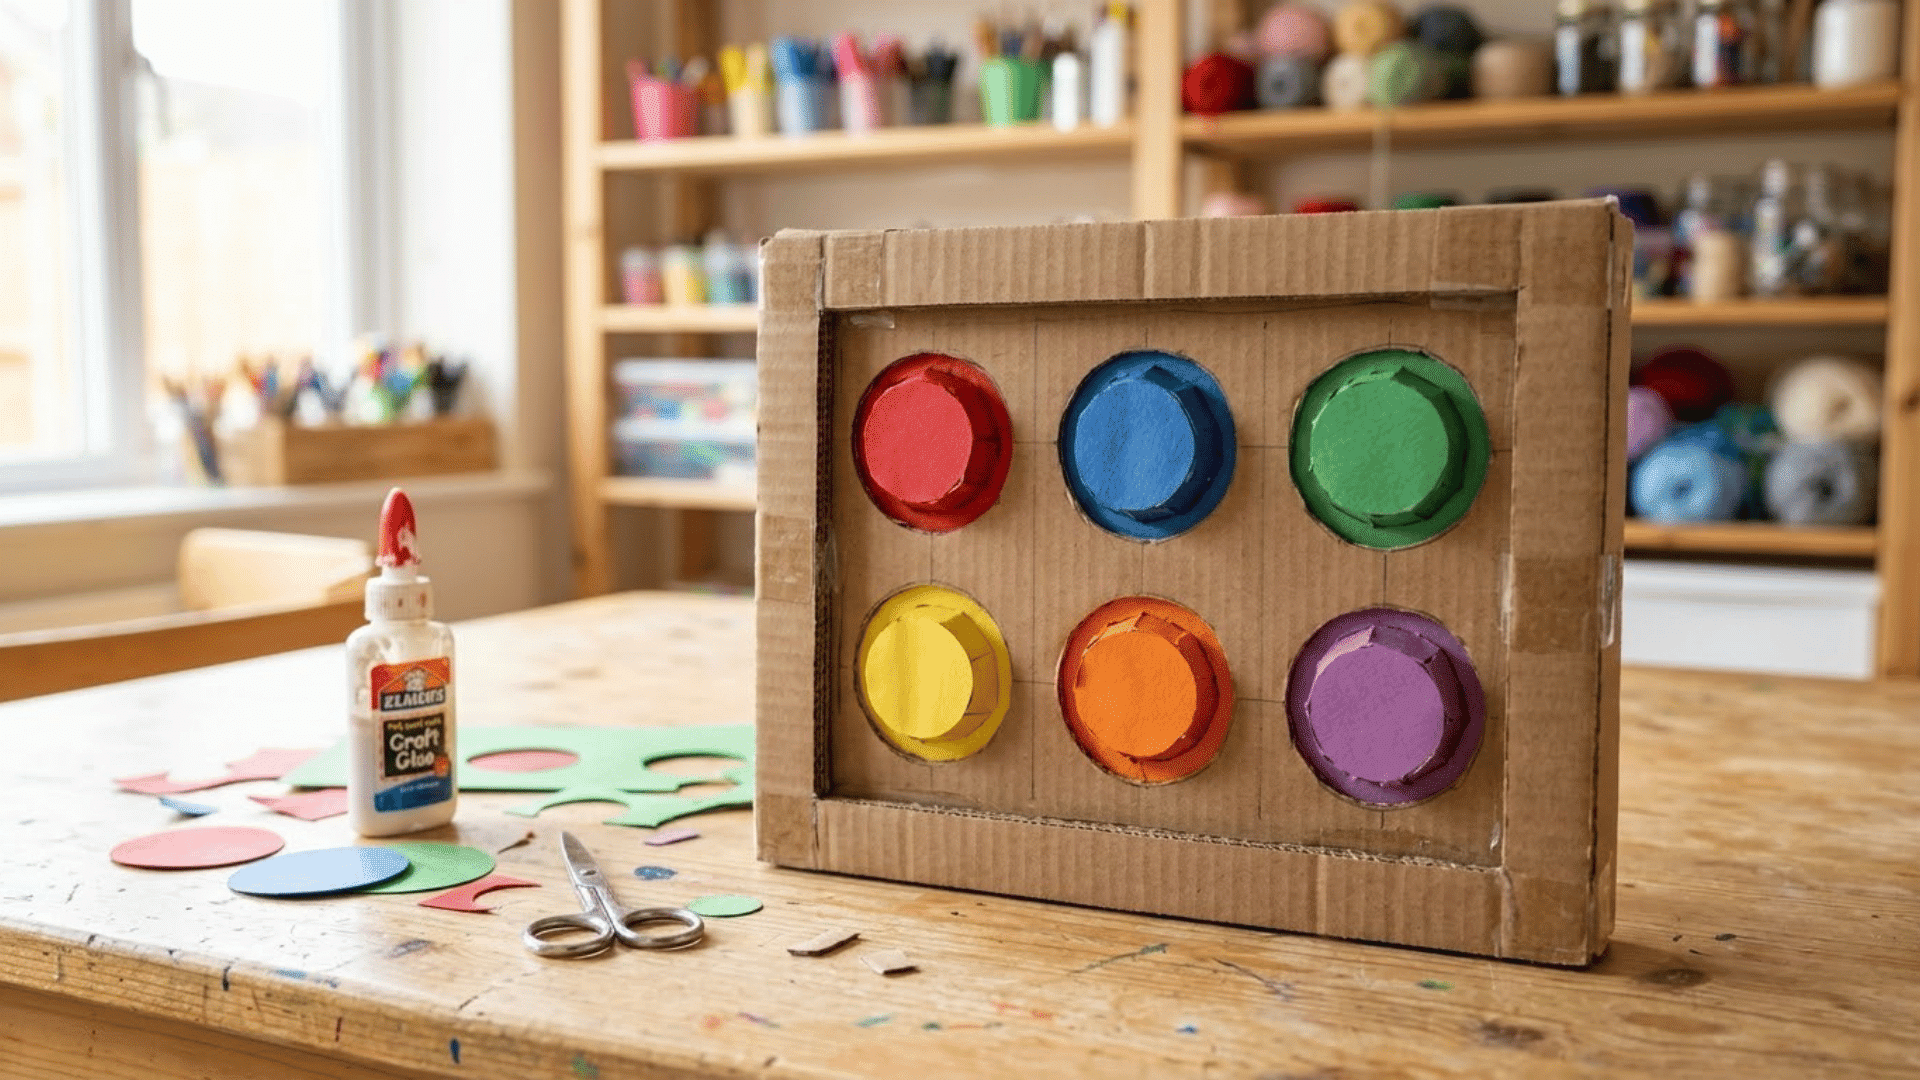
This fidget mimics the feel of a bubble wrap sheet using foam domes on a cardboard frame. It works best at home because the pressing action makes a light sound.
Time: 30-45 minutes
Materials: Cardboard, foam sheet, scissors, glue, ruler
Instructions:
- Cut a small cardboard rectangle for the base frame
- Cut small foam circles and dome each one slightly by pressing the center up
- Glue the foam domes onto the cardboard in a grid pattern
- Allow glue to dry fully before pressing the domes
- Press each dome to test resistance and re-glue any that sit flat
7. Straw Bending Fidget
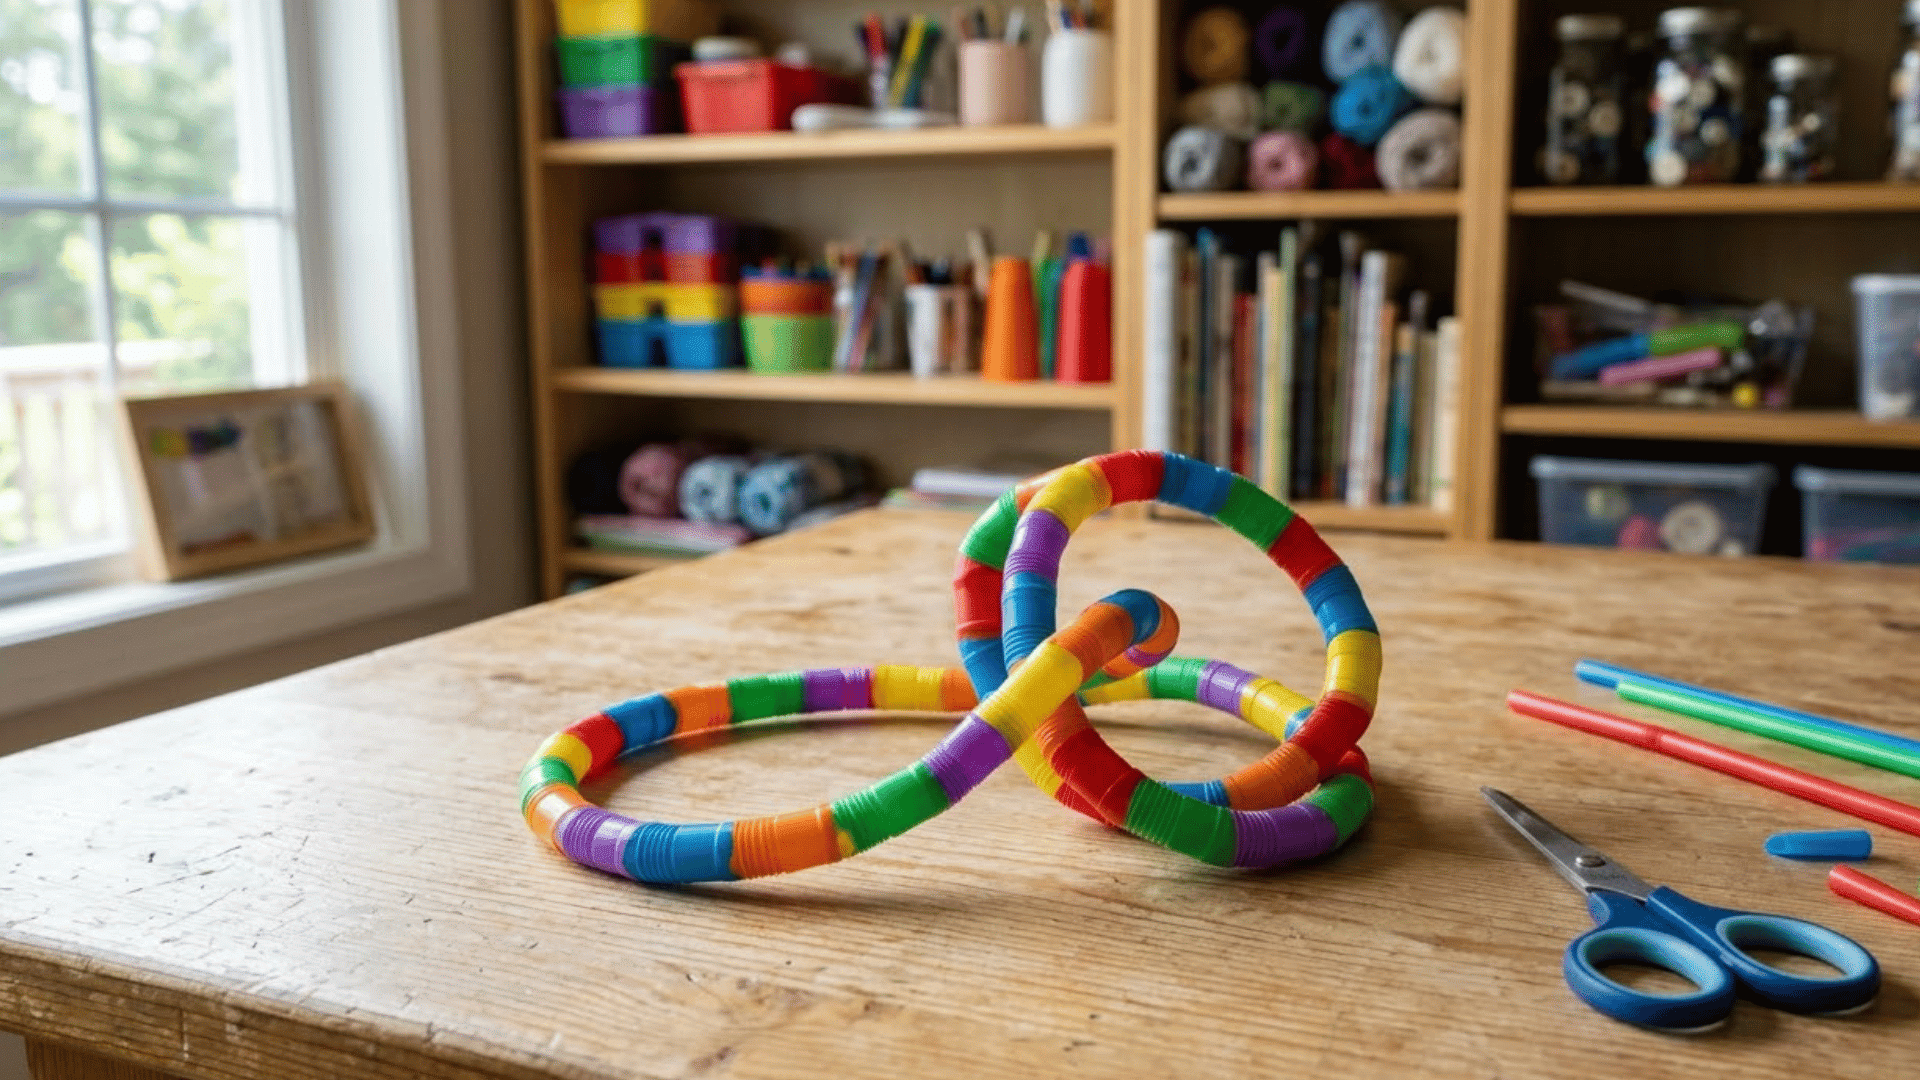
Bendable straws linked together form a flexible loop that can be twisted and folded repeatedly. The finished loop is lightweight and easy to carry in a pocket or bag.
Time: 15-20 minutes
Materials: Bendable straws, tape, scissors
Instructions:
- Cut bendable straws into equal sections, keeping the flex joint on each piece
- Connect sections end to end by inserting one straw tip into the next
- Wrap each connection point with a small piece of tape to hold it firm
- Form the connected sections into a flexible loop and join the two ends
- Test each connection by bending gently before adding tape
Note: Cover all cut straw edges with tape before assembling. Sharp cut edges can catch skin during repeated bending.
8. Craft Stick Bead Slider
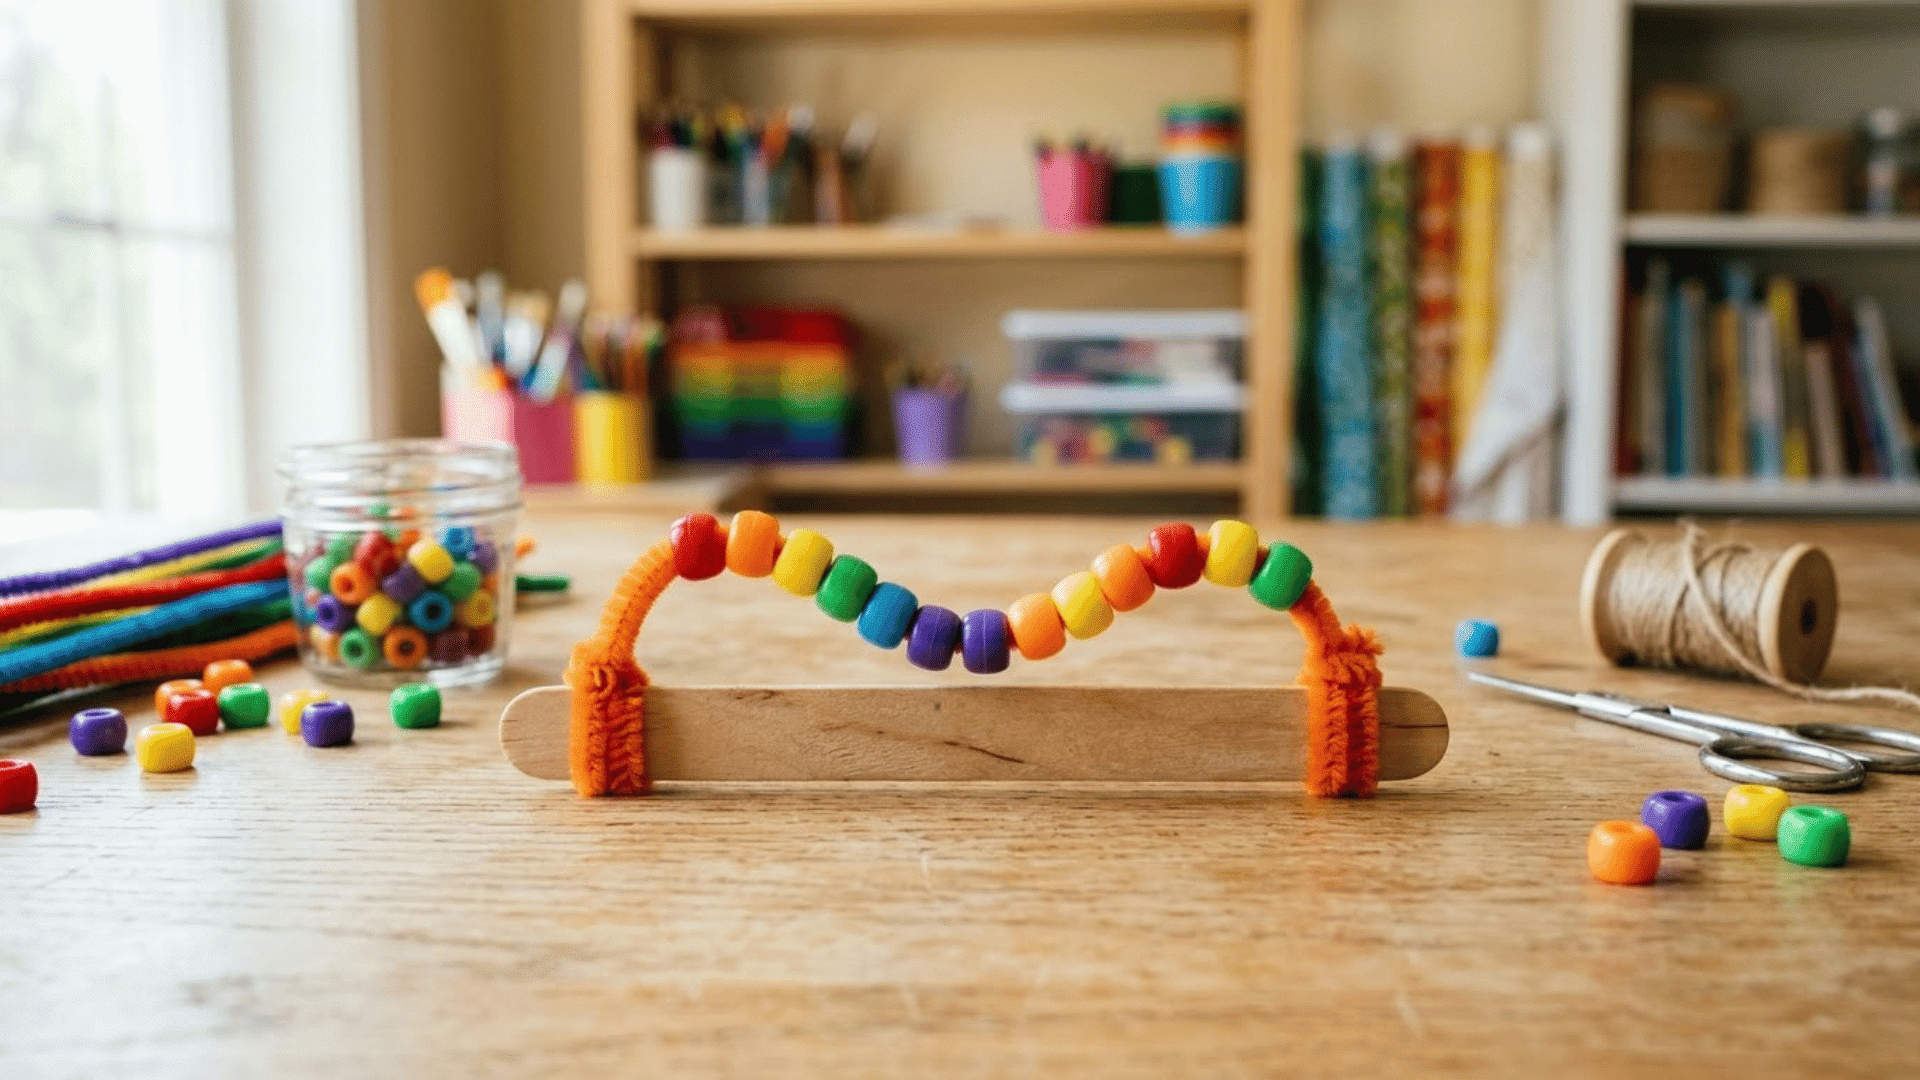
A pipe cleaner threaded with beads and wrapped around a craft stick creates a simple sliding fidget that lies flat on any surface. It works well on a desk without rolling or shifting.
Time: 15-20 minutes
Materials: Wooden craft stick, pipe cleaner, pony beads, scissors
Instructions:
- Thread 5-8 pony beads onto a pipe cleaner
- Wrap the pipe cleaner ends tightly around each end of the craft stick
- Twist the ends securely so the pipe cleaner sits flat and parallel to the stick
- Slide beads back and forth to test movement
- Adjust pipe cleaner tension if beads move too freely or feel too stiff
Note: Keep the pipe cleaner ends twisted tightly under the stick so no sharp wire tip is exposed.
9. Pipe Cleaner Bead Loop
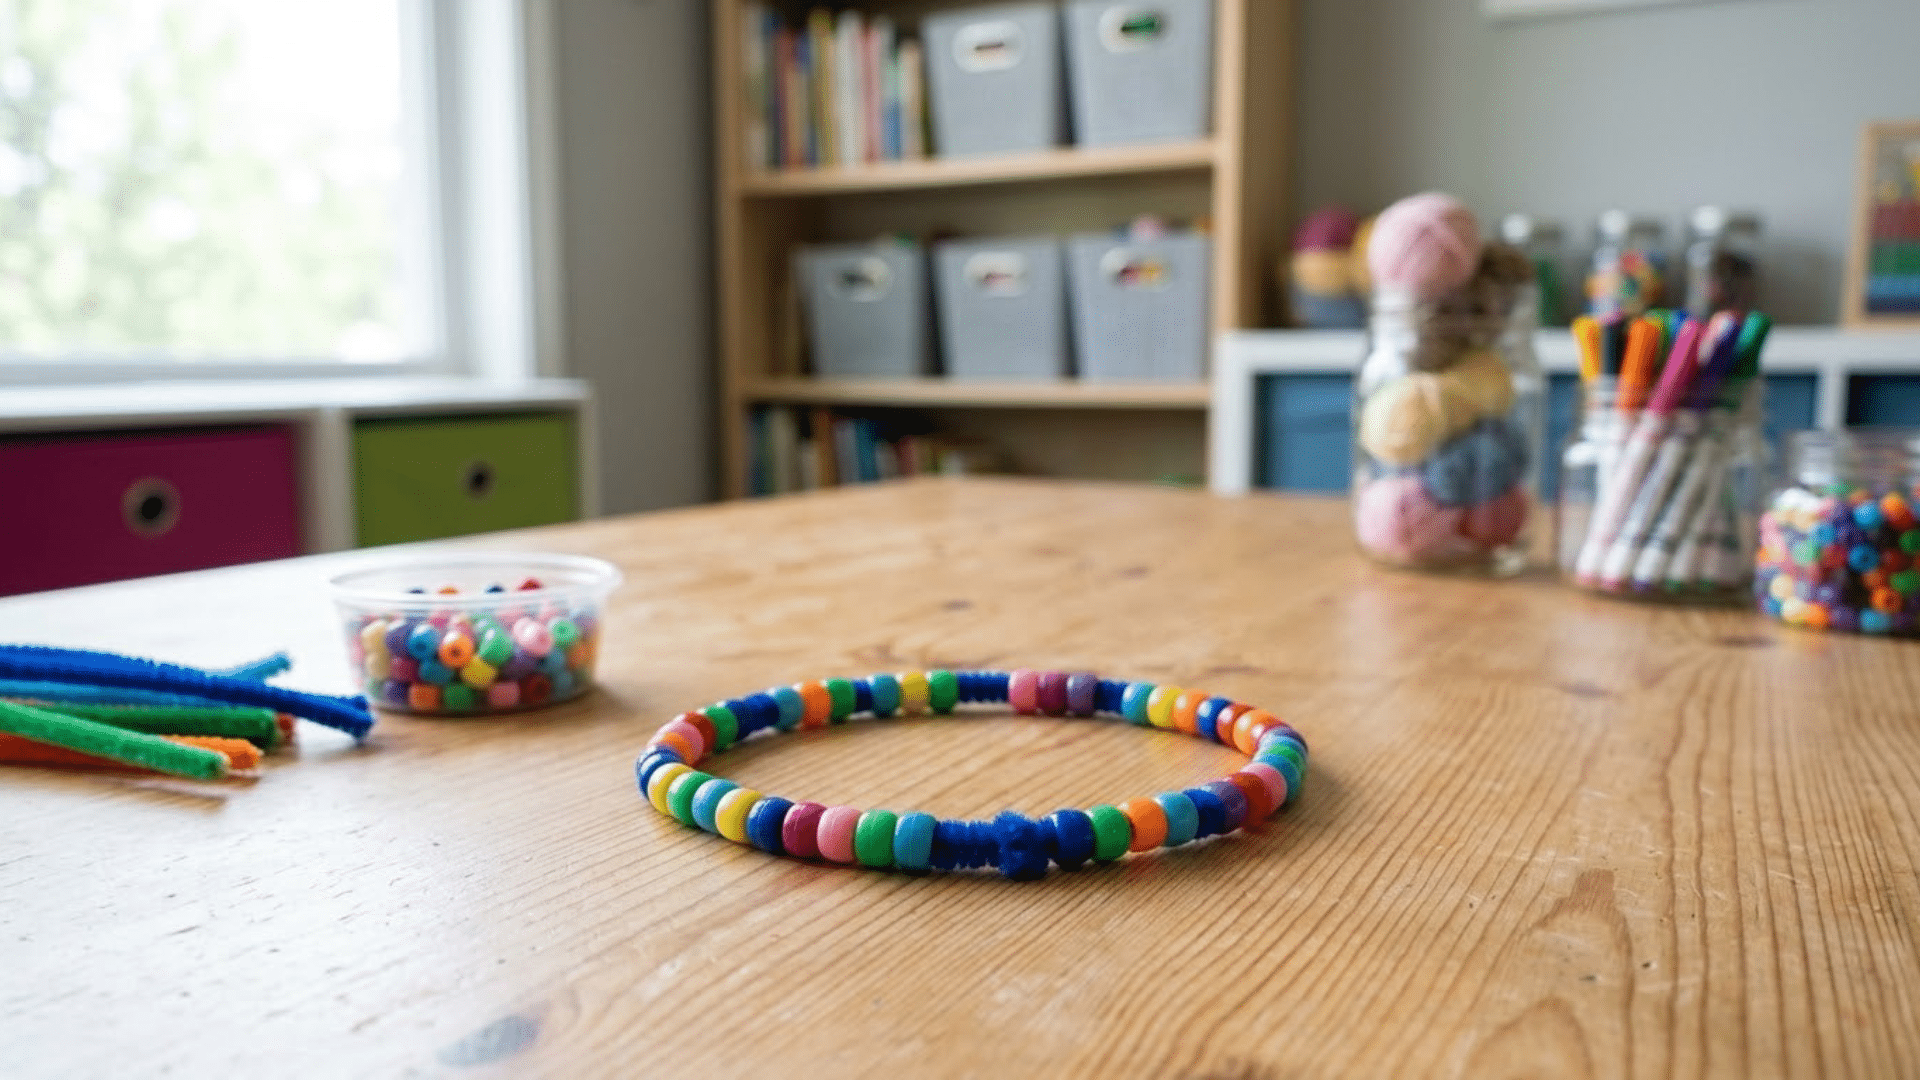
Threading beads onto a pipe cleaner and closing it into a loop takes less than 15 minutes. The bead spacing controls how the loop feels in the hand, and that is easy to adjust before sealing.
Time: 10-15 minutes
Materials: Pipe cleaner, pony beads, scissors
Instructions:
- Thread pony beads onto the full length of a pipe cleaner
- For loose movement, leave small gaps between beads
- For firmer movement, pack beads tightly with no gaps
- Bend the pipe cleaner into a loop and twist the two ends together securely
- Tuck the twisted end against the nearest bead to hide any sharp tip
10. Paper Clip Bead Slider
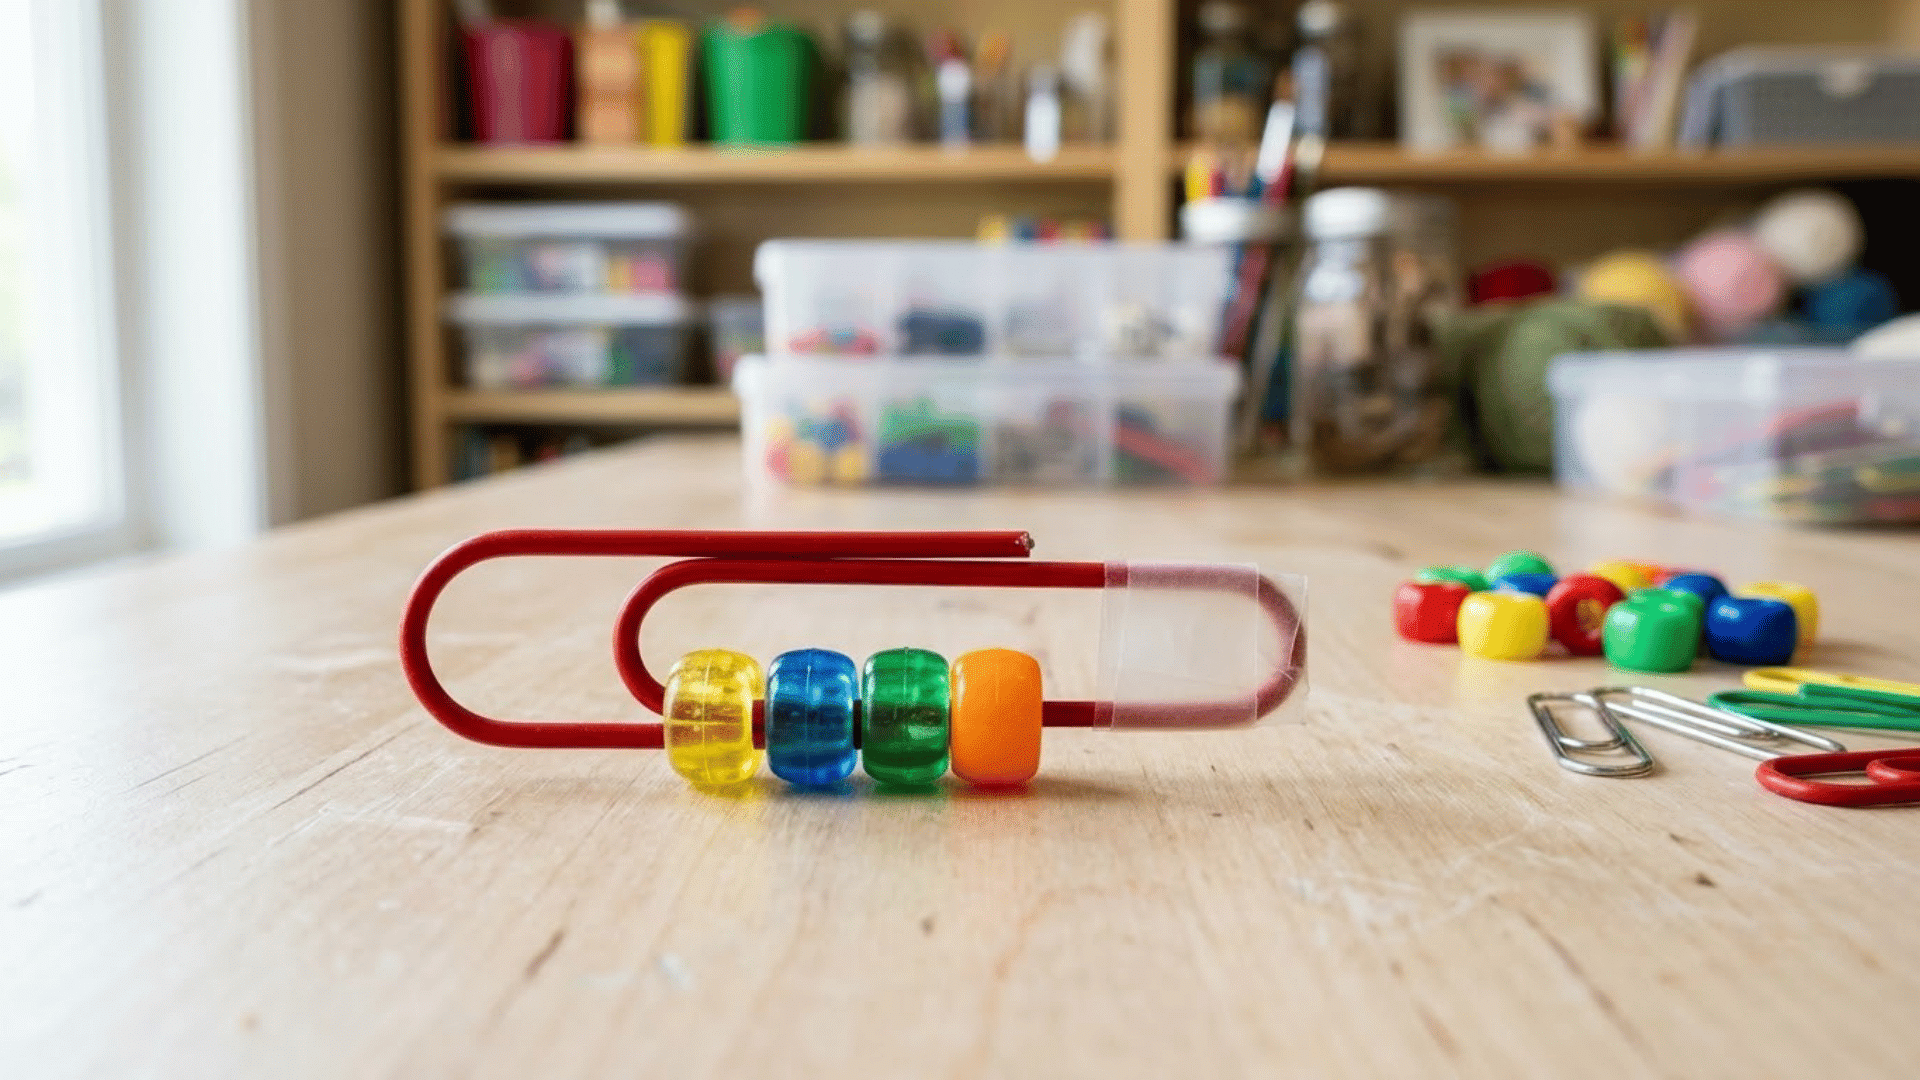
A large paper clip with a few beads threaded on it becomes a pocket-sized fidget that needs no tools to assemble. The beads spin and slide along the clip’s curve as fingers move.
Time: 10 minutes
Materials: Large paper clip, small beads, tape, pliers (optional)
Instructions:
- Open the outer loop of a large paper clip slightly
- Thread 3-5 small beads onto the outer loop
- Use pliers or firm finger pressure to close the open end back down
- Cover the closed wire tip with a small piece of tape
- Test bead movement by sliding them across the loop
Note: The exposed wire end can be sharp. Always cover it with tape after closing.
11. Paper Clip Fidget Chain
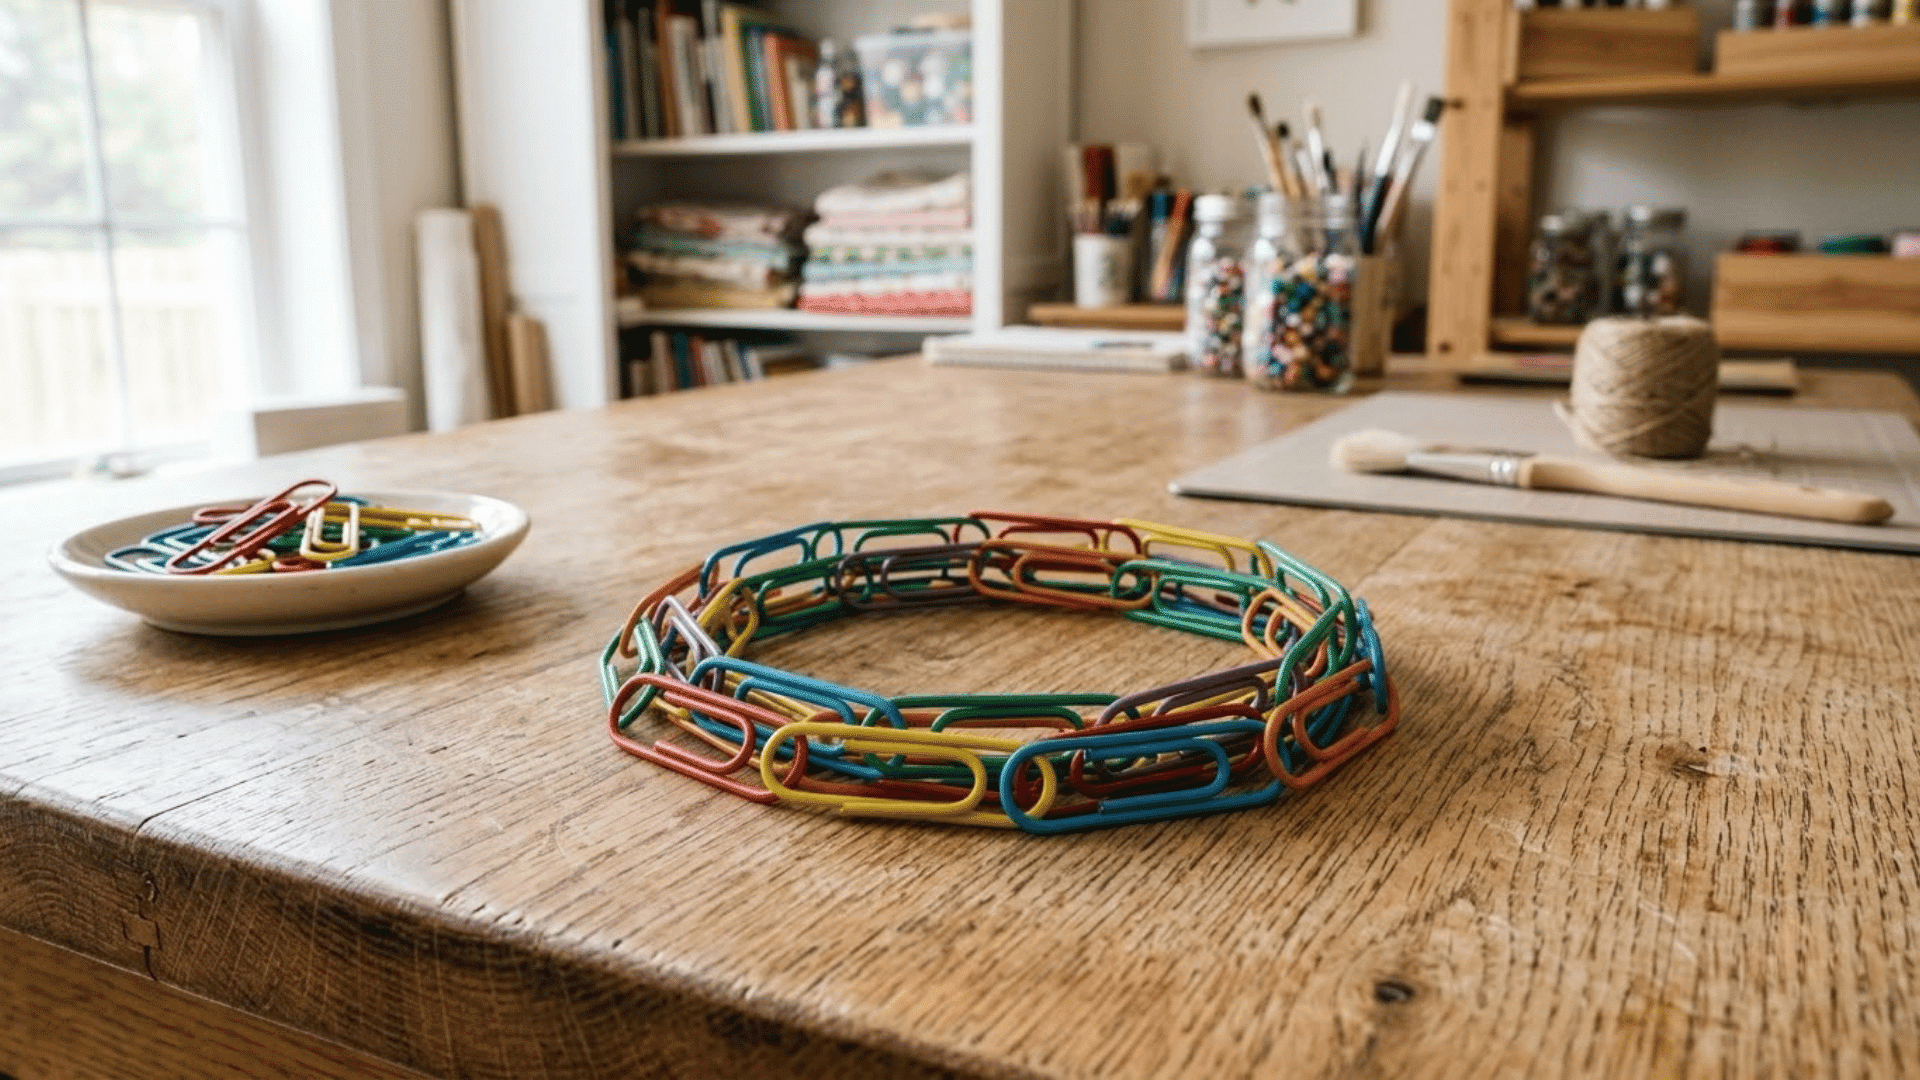
Linking coated paper clips into a short closed loop creates a quiet, low-profile fidget that fits in any pocket. Larger clips are easier to handle and keep the chain feeling substantial.
Time: 10-15 minutes
Materials: Coated paper clips (medium or large), hands only
Instructions:
- Hook one paper clip through the next to form a chain
- Continue linking until the chain is 6-10 clips long
- Join the last clip back to the first to form a closed loop
- Test the loop by turning it through your fingers
12. Cord and Bead Fidget
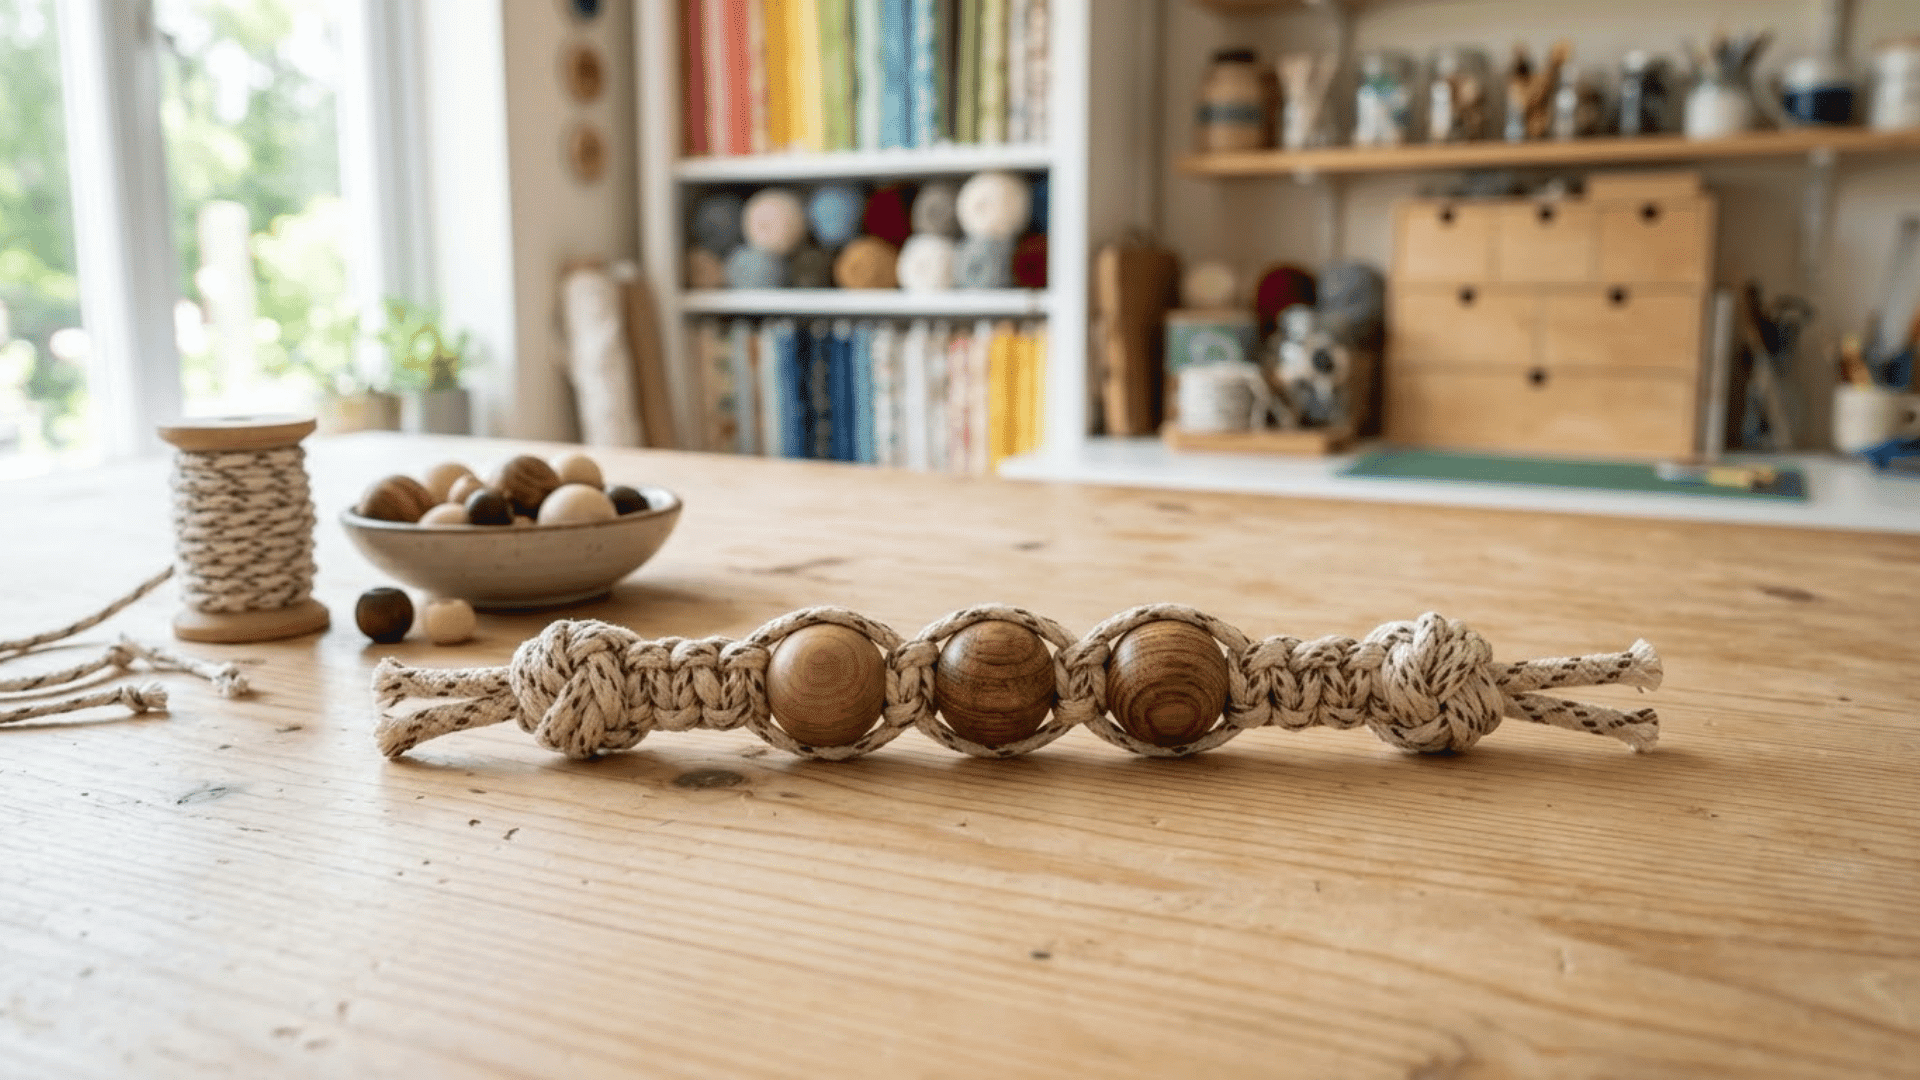
A short knotted cord with a few beads in the middle is one of the simplest fidgets to make. The spacing between the knots is what keeps the beads moving freely without sliding off.
Time: 10-15 minutes
Materials: Short cord or paracord (8-10 inches), 2-3 pony beads, scissors, lighter or tape
Instructions:
- Cut the cord to about 8-10 inches
- Thread 2-3 beads onto the center of the cord
- Tie a firm knot on each side of the bead cluster, leaving 1-2 inches of cord free on each end
- Tie a final knot at each cord end to prevent fraying
- Seal cord ends with a lighter flame or clear tape
13. Beaded Key Ring Fidget
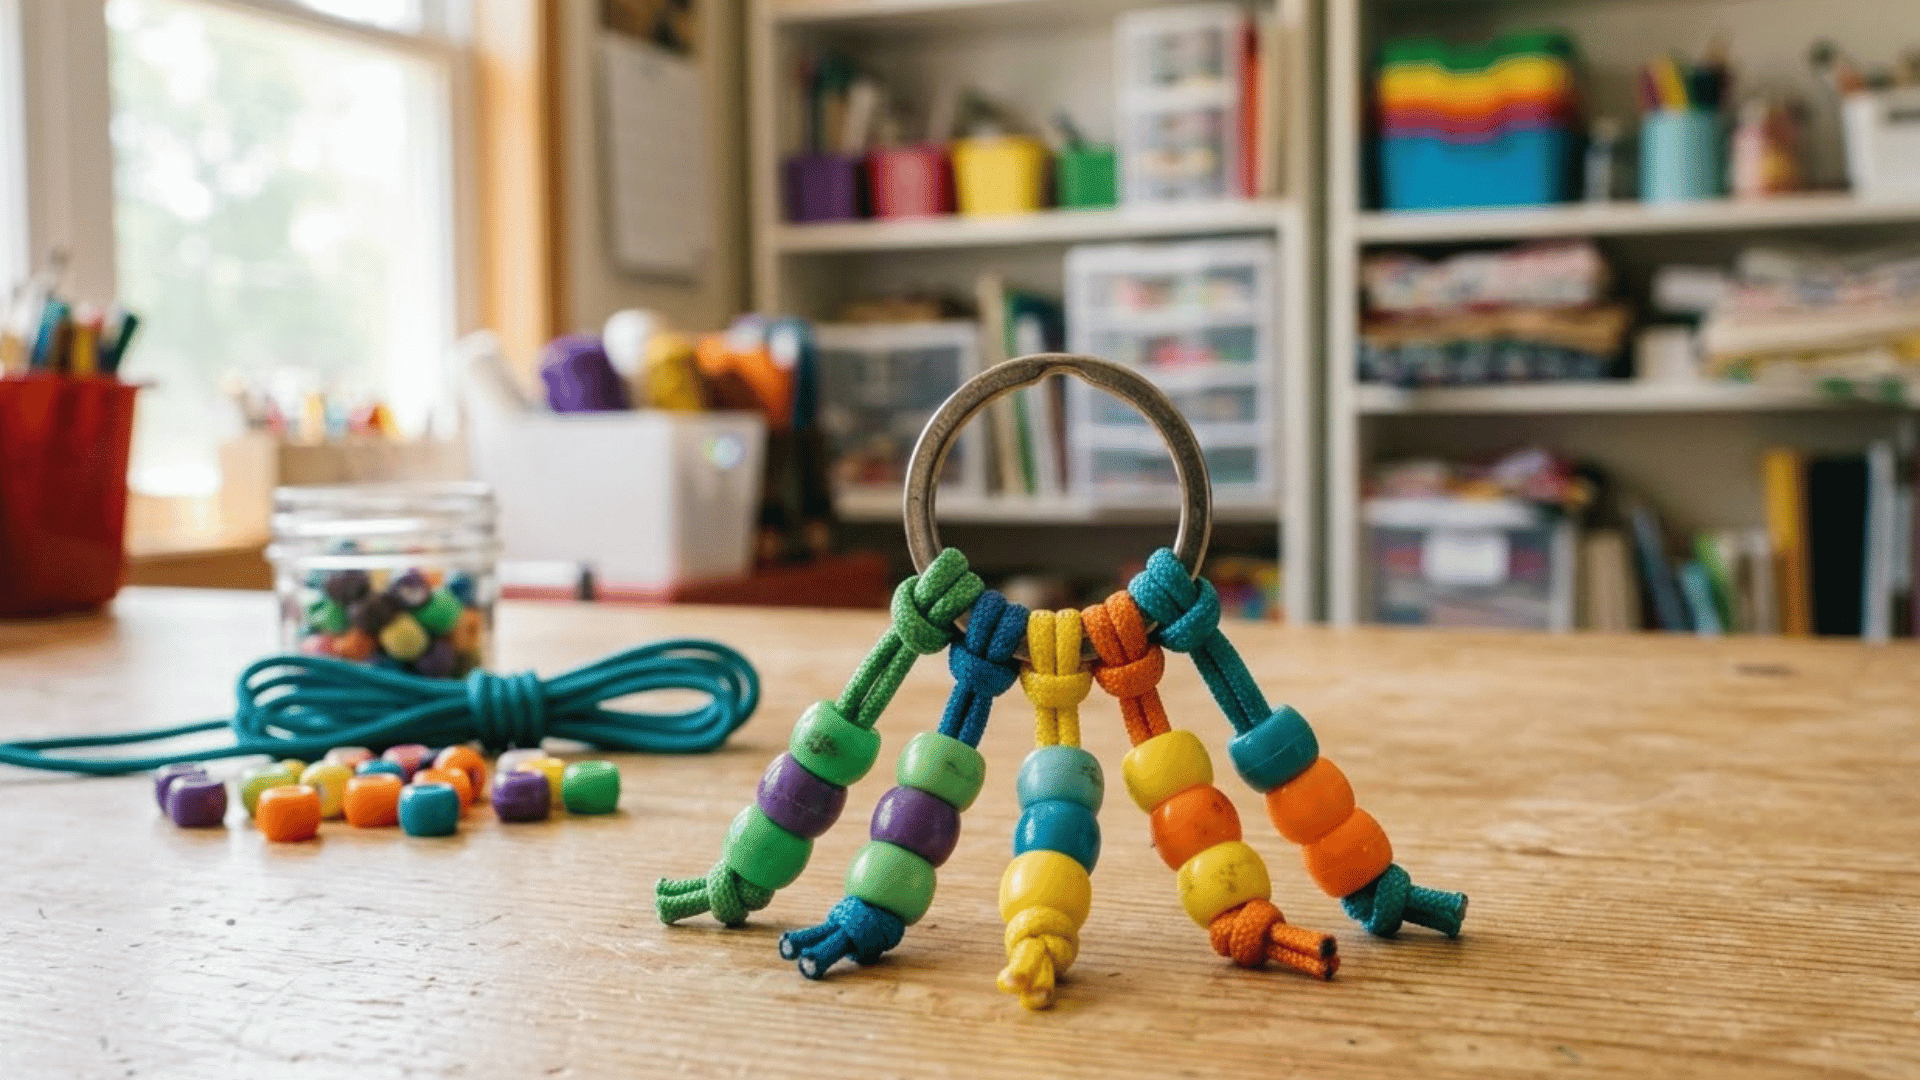
This option turns a standard split key ring into a wearable or attachable fidget. Multiple beaded cord loops on one ring give different textures and weights in a single piece.
Time: 15-20 minutes
Materials: Split key ring, pony beads, short cord or elastic, scissors
Instructions:
- Thread beads onto short cord lengths and knot each end
- Loop each beaded cord through the key ring and secure with a tight knot
- Add 3-5 cord loops of different bead colors or sizes
- Tug each loop firmly to test that the knots hold before use
- Attach the finished ring to a backpack zip, pencil pouch, or belt loop
14. Marble Mesh Tube
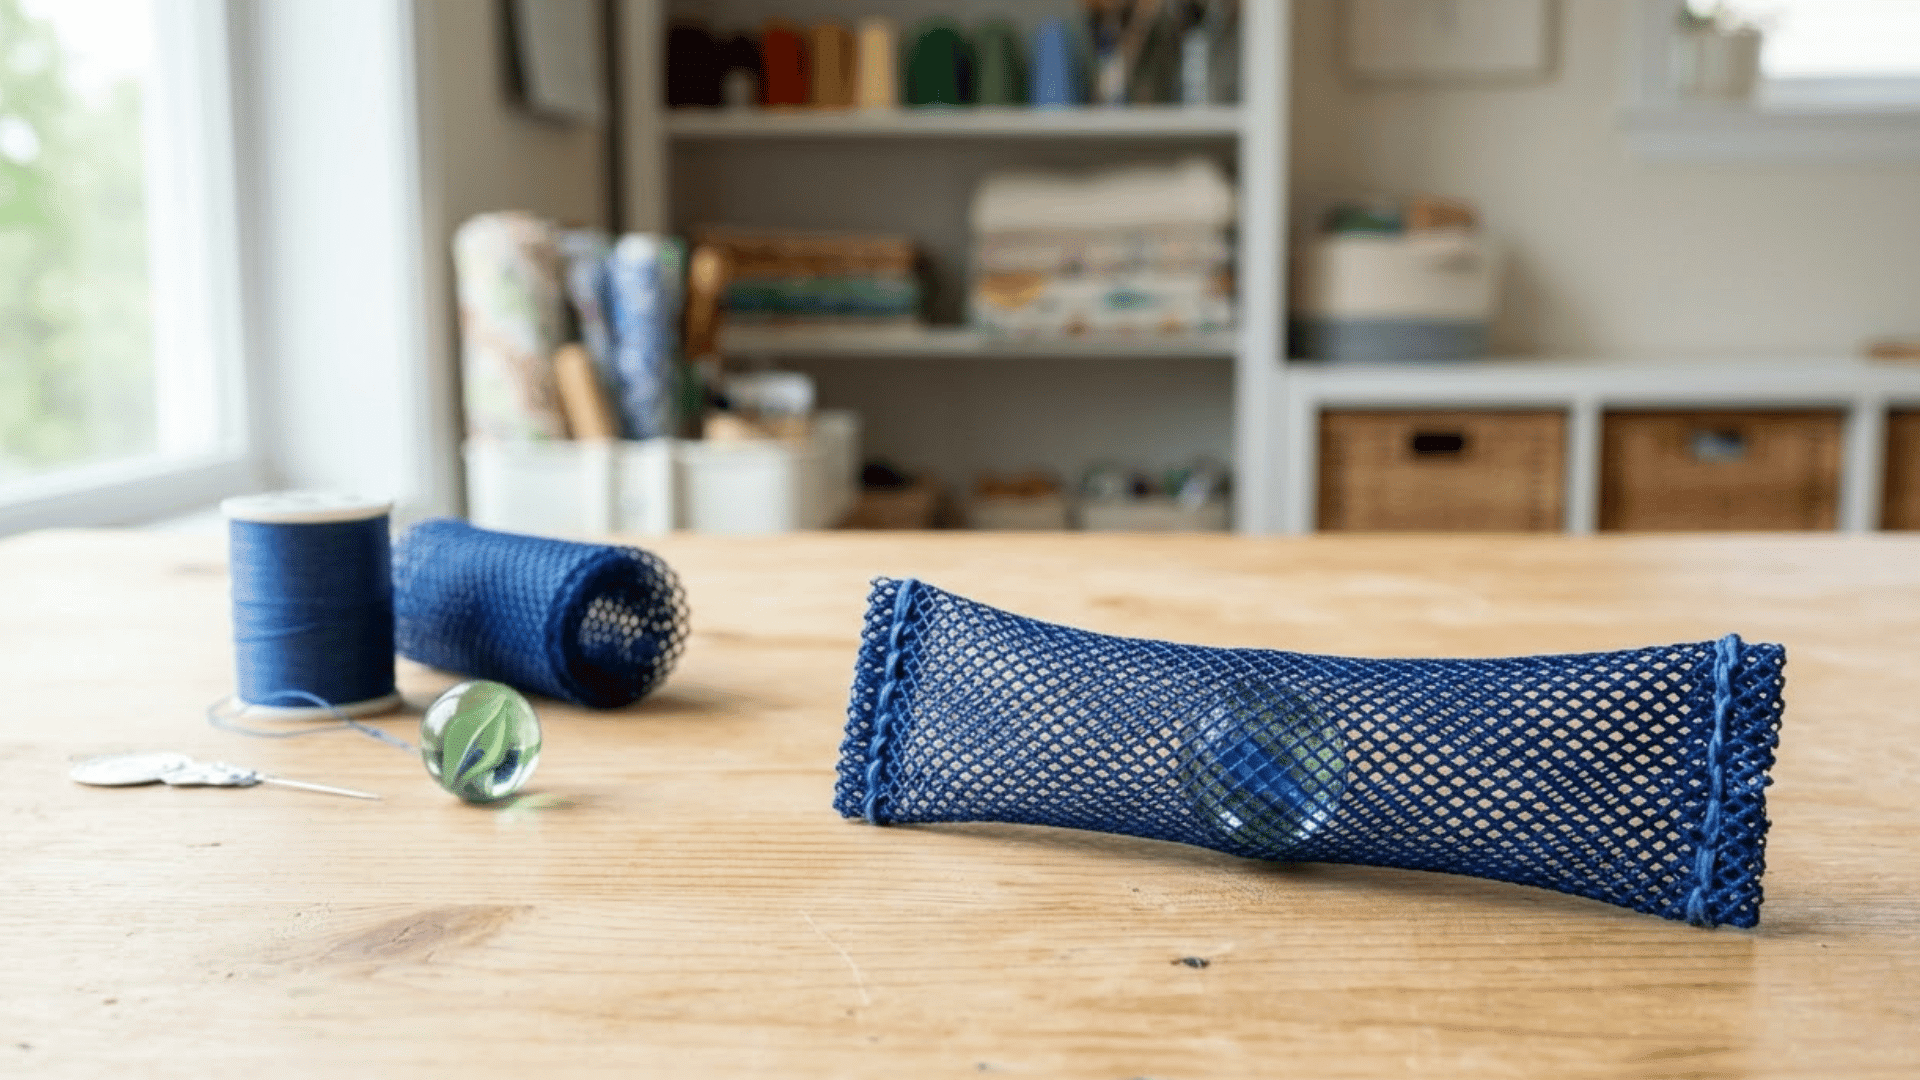
A single marble inside a short length of mesh tubing creates a rolling, shifting fidget that responds to the slightest hand movement. The closure method determines how long it holds up with regular use.
Time: 20-30 minutes
Materials: Mesh tubing (craft or hardware store), one marble, strong thread or hot glue, scissors
Instructions:
- Cut a length of mesh tubing about 4-5 inches long
- Insert one marble into the center of the tube
- For a no-sew closure, fold each end twice and secure tightly with strong thread tied in multiple knots
- For a stitched closure, use a needle and thread to sew the end flat in two passes
- Squeeze the tube to push the marble back and forth
15. Zipper Bracelet Fidget
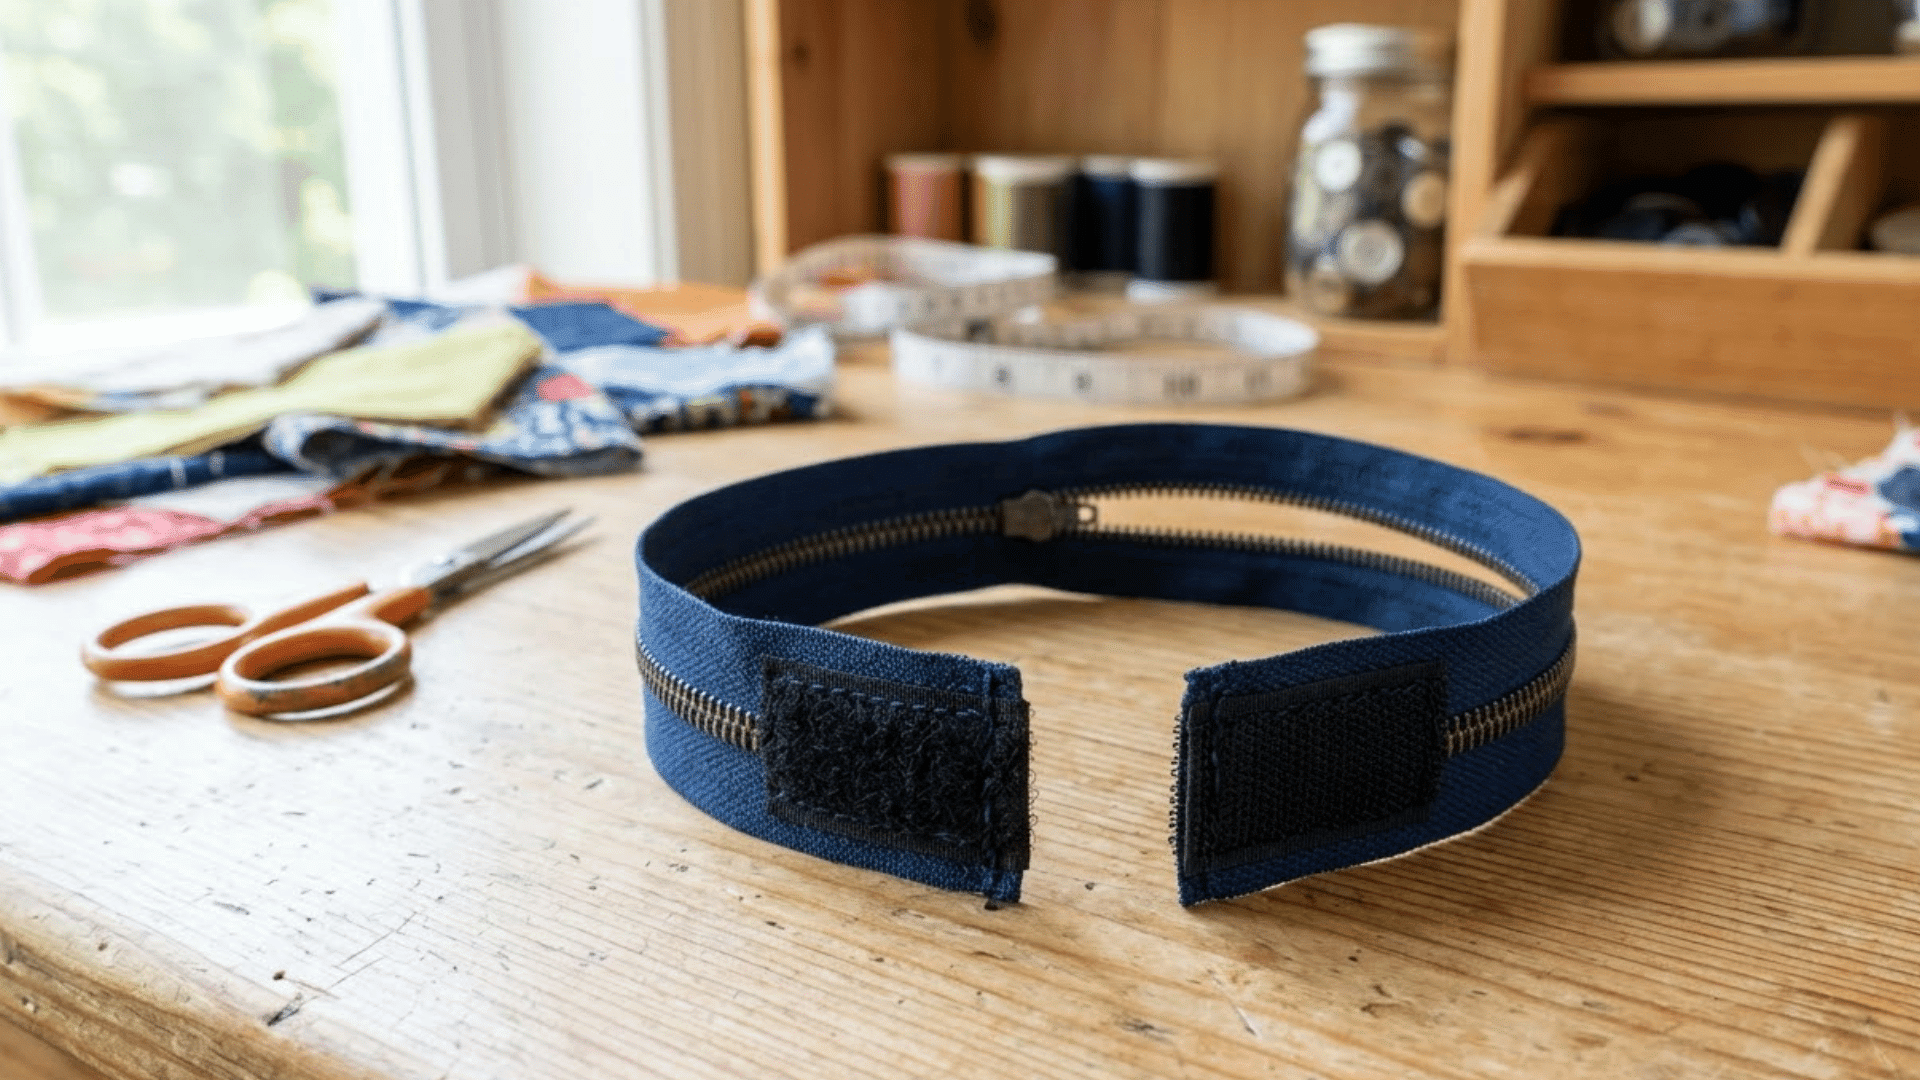
A zipper worn as a bracelet gives fingers something to slide back and forth throughout the day. This project works with a zipper pulled from an old garment or a new craft zipper from a fabric store.
Time: 20-30 minutes
Materials: Clean zipper (from an old garment or craft store), fabric scraps or hook-and-loop tape, scissors, needle and thread or fabric glue
Instructions:
Version 1 (old garment zipper):
- Cut a zipper from an old jacket or bag, leaving 1 inch of fabric on each side
- Fold the fabric edges over and stitch or glue to form a clean backing
- Attach hook-and-loop tape to each end to form a wearable loop
Version 2 (new craft zipper):
- Cut a craft zipper to wrist length
- Glue or stitch a fabric strip along the back for comfort
- Attach hook-and-loop closures at each end
Note: Check that zipper teeth are smooth along the full length before wearing. A bent tooth can catch skin.
16. No-Sew Marble Maze
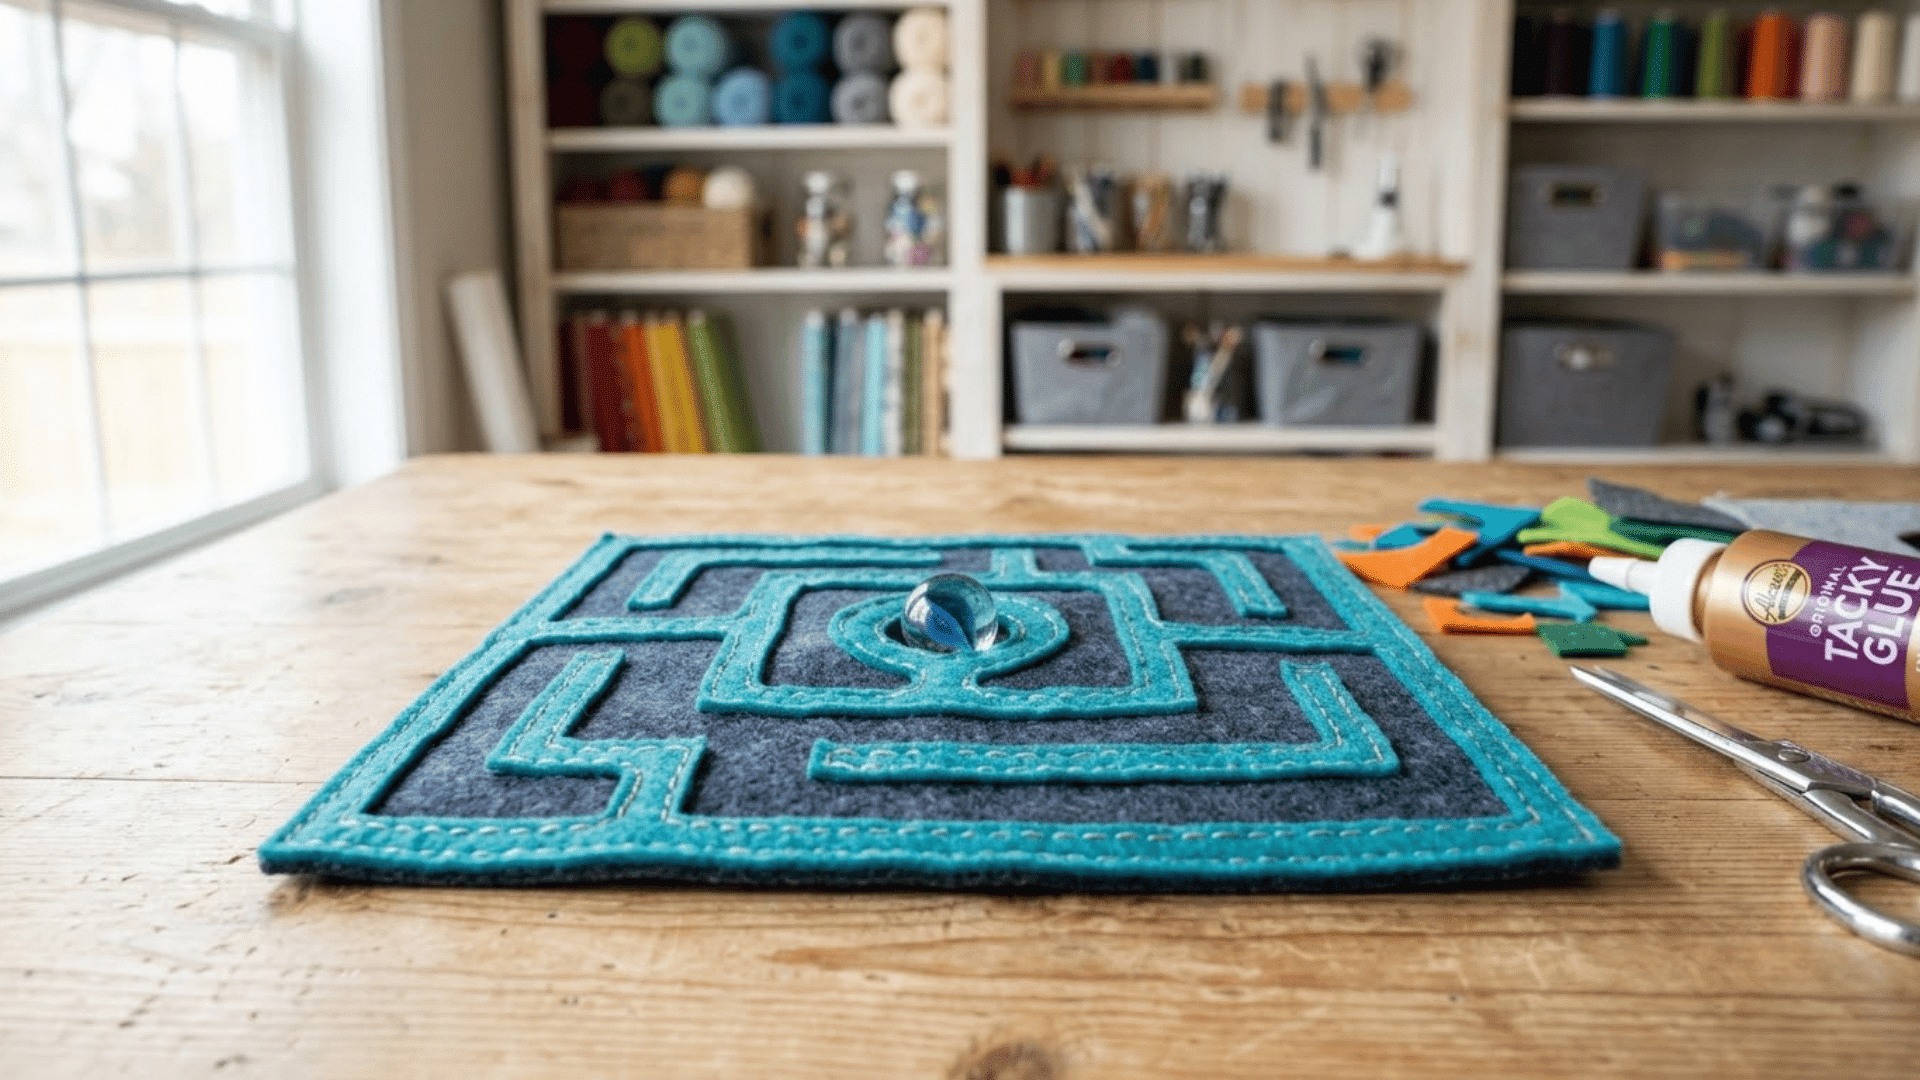
Two pieces of felt glued together with a winding internal path trap a marble inside a handheld maze. Tilting the felt guides the marble through the path without any buttons or moving parts on the outside.
Time: 20-30 minutes
Materials: Two felt pieces (same size), fabric glue, one large marble, ruler, pen
Instructions:
- Lay one felt piece flat and draw a short winding path using a pen
- Apply fabric glue along the path lines and press the second felt piece firmly on top
- Allow to dry fully (at least 2 hours) before inserting the marble
- Cut a small opening at one end of the path, insert the marble, then glue the opening shut
- Tilt the maze to guide the marble through the path
17. Fabric Texture Tag
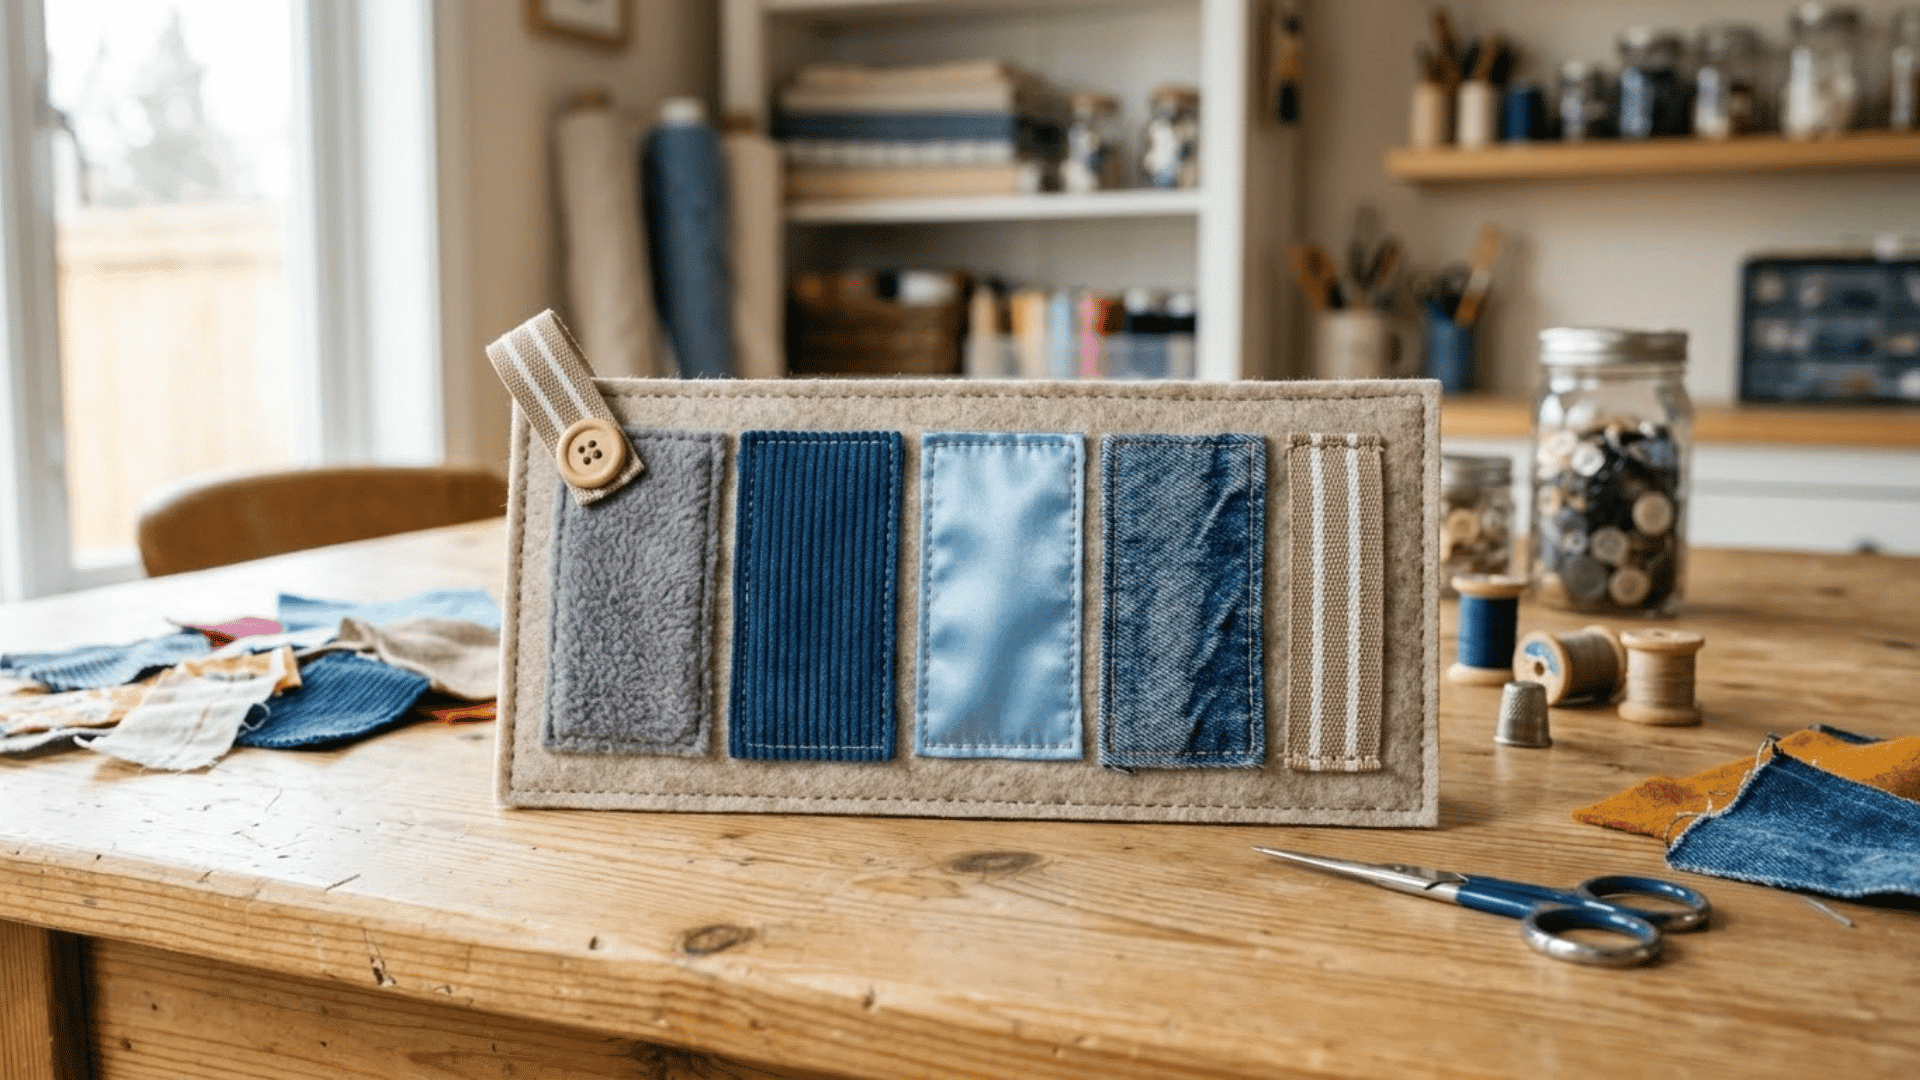
Different fabric textures stitched onto a small felt base give fingers a range of sensations. The contrast between materials like satin and corduroy is what makes this useful for sensory-seekers.
Time: 20-25 minutes
Materials: Felt square (base), small pieces of fleece, corduroy, satin, textured ribbon, fabric glue or needle and thread, scissors
Instructions:
- Cut the felt base into a rectangle about 3×4 inches
- Cut small swatches of each fabric (fleece, corduroy, satin, ribbon) roughly 1×1 inch
- Glue or stitch each swatch onto the felt base, leaving a small gap between each
- Allow glue to dry fully before handling
- Run a finger across each swatch to confirm all edges are secured flat
18. Sponge Squeeze Fidget

A sponge cut to palm size and wrapped in fabric gives hands a soft, squeezable grip with just enough resistance. The fabric cover keeps the shape together and makes it more comfortable to hold.
Time: 20-30 minutes
Materials: Clean, dry sponge, fabric scrap, scissors, needle and thread, or rubber bands
Instructions:
- Cut the sponge into a palm-sized oval or square shape
- Cut a fabric piece large enough to wrap around the sponge with overlap
- Wrap the fabric snugly around the sponge and tie or stitch the edges shut
- Test the squeeze resistance before sealing the final edge
Note: A damp sponge inside fabric will develop mildew quickly. Keep it away from water and replace it if any musty smell develops.
19. Flour Balloon Stress Ball

Filling a balloon with flour or cornstarch creates a soft, moldable stress ball that holds its shape between squeezes. A second balloon layer over the first makes it significantly harder to break.
Time: 15-20 minutes
Materials: 2 thick latex balloons, flour or cornstarch, small funnel, scissors
Instructions:
- Stretch the first balloon opening over a funnel
- Pour flour or cornstarch slowly until the balloon is about the size of a tennis ball
- Pinch the balloon neck and press out excess air before tying a firm knot
- Snip the neck of the second balloon and stretch it over the first as a second layer
- Squeeze gently to test firmness; add more filling through the funnel before tying if needed
Note: Use cornstarch for a softer feel and flour for a firmer one. Check for small cracks or leaks before each use.
20. Rice Sock Hand Fidget
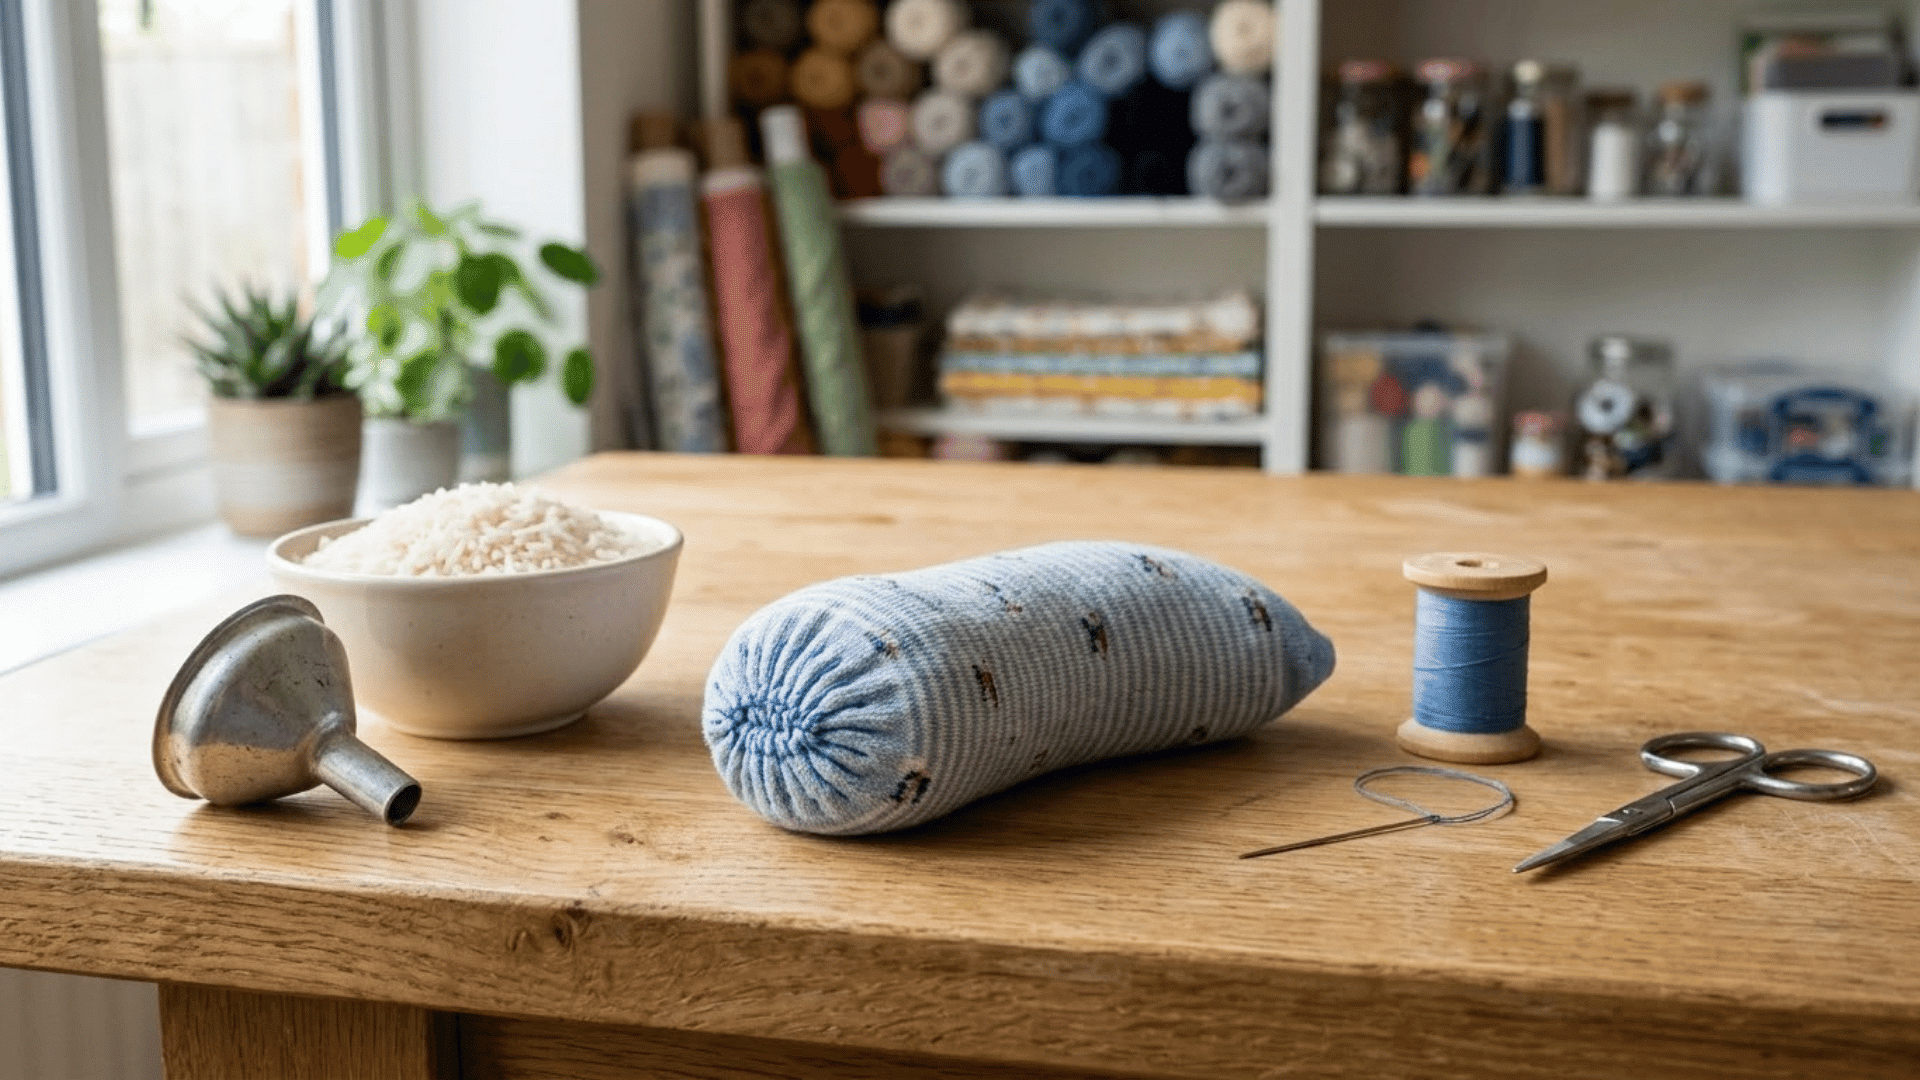
A sock filled with uncooked rice is one of the fastest fidgets to put together. The rice shifts and settles with every squeeze, giving hands constant low-level feedback.
Time: 10-15 minutes
Materials: Small clean sock, uncooked rice, needle and thread or rubber band, scissors
Instructions:
- Fill the sock with uncooked rice until about three-quarters full
- Press out excess air and close the opening with a tight knot or several stitches
- Squeeze and roll the sock to confirm the rice moves freely inside
- Trim any loose thread ends close to the knot
21. Rubber Band Pencil Fidget

Layering rubber bands around the upper section of a pencil turns an everyday item into a rolling finger grip. It adds a fidget function to something already in a pencil case, so nothing extra needs to be carried.
Time: 5 minutes
Materials: Standard pencil, 4-6 rubber bands
Instructions:
- Hold the pencil with the eraser end up
- Wrap rubber bands one at a time around the upper third of the pencil
- Layer them close together to form a thick rolling grip
- Roll the bands between a finger and thumb to test movement
- Adjust the number of bands until the resistance feels right
22. Braided Chair Fidget Band

A braided fabric band stretched between two chair legs gives feet something to press and bounce against while sitting. It keeps movement quiet and contained without pulling attention away from the task at hand.
Time: 20-30 minutes
Materials: Stretchy fabric strips (cut from old leggings or t-shirt), scissors, measuring tape
Instructions:
- Cut three fabric strips of equal length (about 24-28 inches each)
- Braid the strips together and tie both ends to prevent unraveling
- Loop the braided band between two front chair legs at ankle height
- Knot each end around a chair leg so the band sits low and stays flat
- Test the height by sitting and resting one foot lightly on the band
Note: A band that sits too high can slip upward and become a tripping risk when standing.
23. Salt Dough Worry Stone
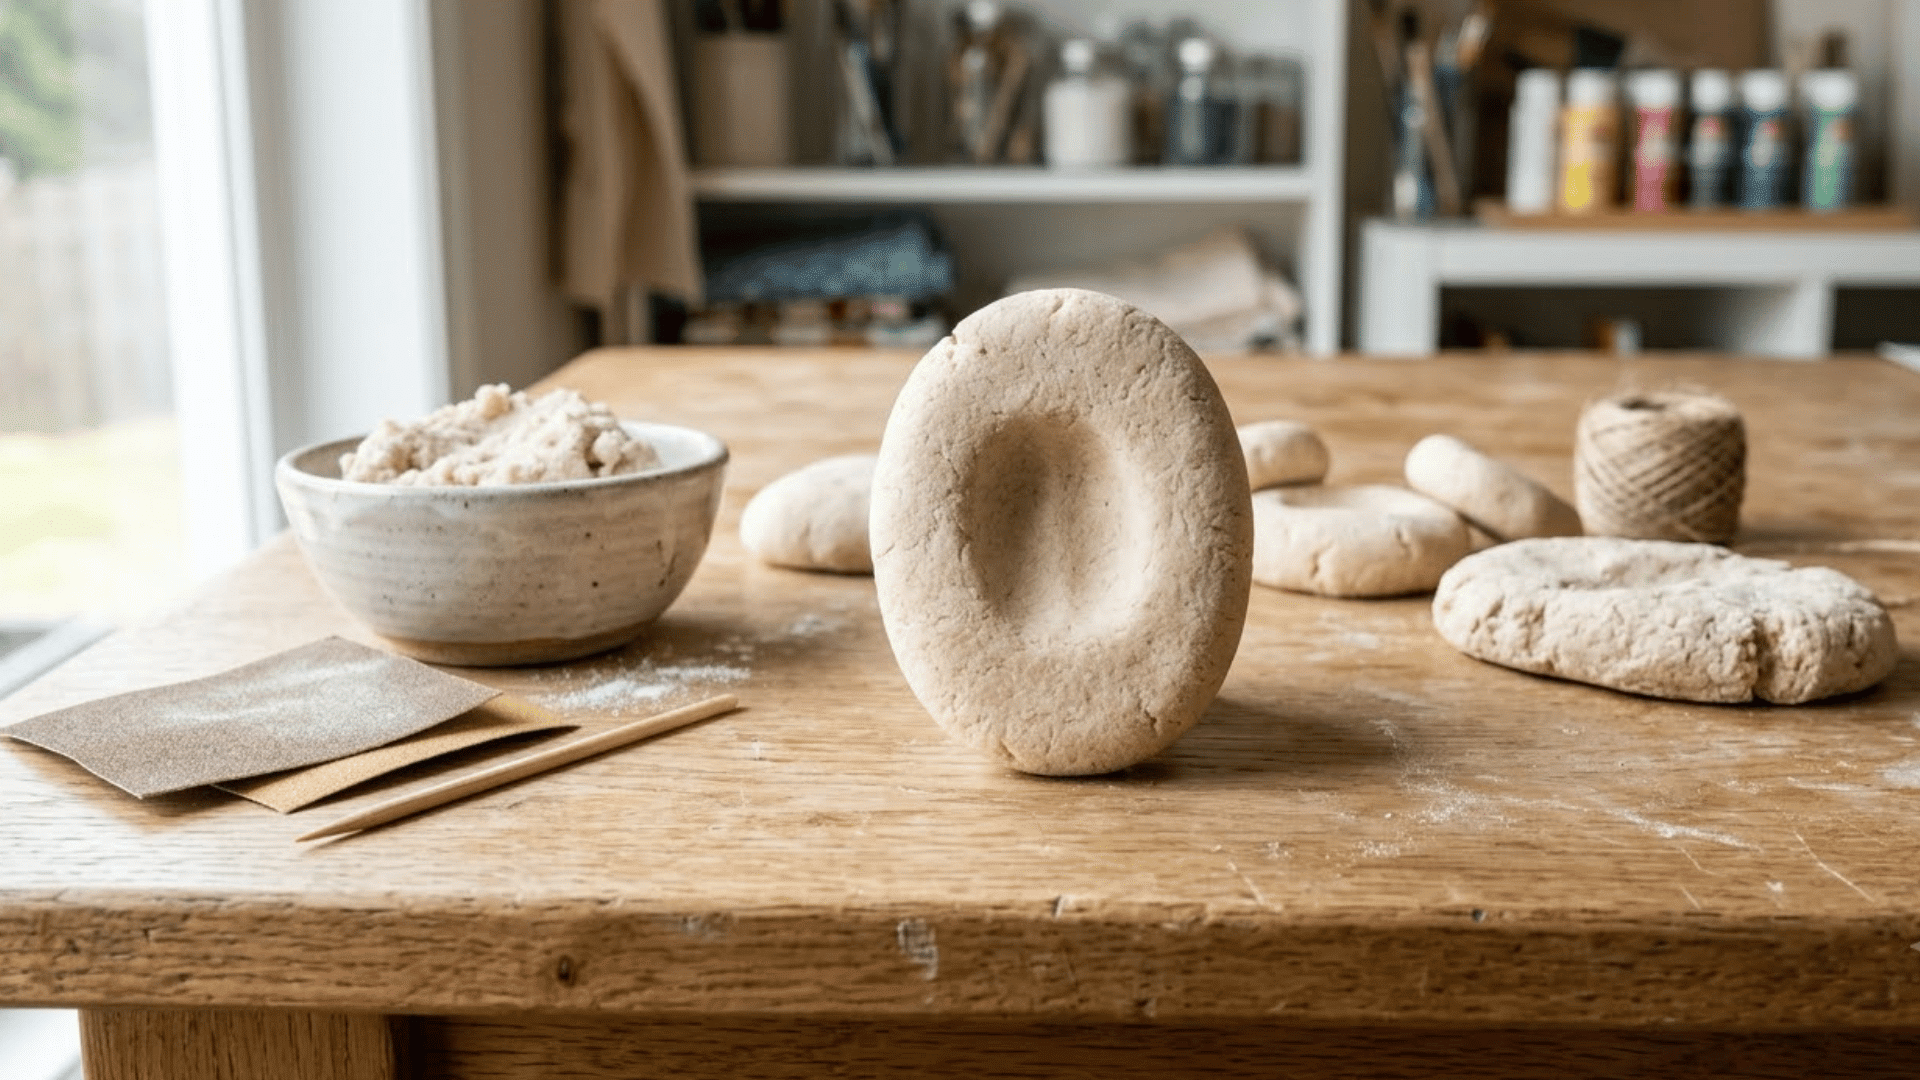
Salt dough baked into a small oval with a thumb groove gives fingers a smooth, solid surface to rub repeatedly. It produces no sound and has no moving parts, making it one of the most discreet options on this list.
Time: 1-2 hours (including baking)
Materials: 1 cup flour, 1/2 cup salt, 1/2 cup water, oven, sandpaper (fine grit), baking sheet
Instructions:
- Mix flour, salt, and water into a smooth dough
- Pinch off a small piece and roll it into an oval slightly larger than a thumb
- Press a smooth thumb groove into the center of the oval
- Place on a baking sheet and bake at 200°F (93°C) for 2 hours until fully hardened
- Allow to cool completely, then sand any rough spots with fine-grit sandpaper
Here’s How to Build Safer Diy Fidgets From the Start
Homemade fidgets can be simple to make, but a few basic precautions help keep them suitable for regular use. Materials, age, and construction all matter.
| Safety Check | What to Watch For | Safer Choice |
|---|---|---|
| Small parts | Beads, marbles, or buttons | Avoid for young children |
| Loose pieces | Parts that may detach | Secure knots and joins |
| Sharp edges | Cut plastic or cardboard | Smooth or cover edges |
| Balloon material | Latex sensitivity or tearing | Use latex-free options if needed |
| Fillers | Leaking flour, rice, or gel | Double-layer and seal well |
| Long cords | Tangling or wrapping risks | Keep cords short |
| Magnets | Swallowing hazard | Leave them out |
| Batteries | Access to button cells | Avoid battery-powered designs |
| Wear and damage | Cracks, tears, or loose seams | Replace damaged fidgets |
| Age suitability | Toy may be too complex or small | Match the design to the user |
Fun Ways to Personalize Your Fidget Toys
Small changes can make a homemade fidget feel more comfortable and better suited to the person using it. You can also adjust the look without changing how the toy works.
- Change the texture: Use felt, foam, fabric, or smooth materials.
- Try different sizes: Make the fidget smaller or larger for easier handling.
- Switch the colors: Use bright, neutral, or favorite color combinations.
- Add larger beads: They can make sliding and gripping easier.
- Use firmer fillings: Adjust stress balls for a stronger squeeze.
- Try softer fillings: Create a gentler, squishier feel.
- Add a keychain loop: Make small fidgets easier to carry.
- Use patterned tape: Add decoration without changing the structure.
- Mix two movements: Combine sliding, squeezing, flipping, or pulling.
- Label group sets: Use colors or symbols to keep several fidgets organized.
Wrapping It Up
Making something with your own hands and using it every day feels good.
Start with one project. See how it feels in your hand after a few days of use. If it works, keep it. If it does not, try another one from the list and adjust from there.
Frequently Asked Questions
How Long Does It Take to Make a Simple Fidget Toy at Home?
Most basic options like a bead slider or cord fidget take under 15 minutes. Projects involving baking, gluing, or braiding can take one to two hours total.
Can Fidget Toys Help with Focus During Studying?
Some people find that having something to do with their hands helps them stay on task. Results vary, and what works for one person may not work for another.
What Age Is Appropriate to Start Using a Fidget Toy?
Most fidget toys suit children aged 3 and up, depending on the materials involved. Projects with small parts, wire, or marbles need closer adult supervision for younger users.
Can Homemade Fidget Toys Be Used in Therapy Settings?
Some occupational therapists incorporate fidget tools into sessions, but a homemade version should always be reviewed by the therapist first before use in a clinical setting.