




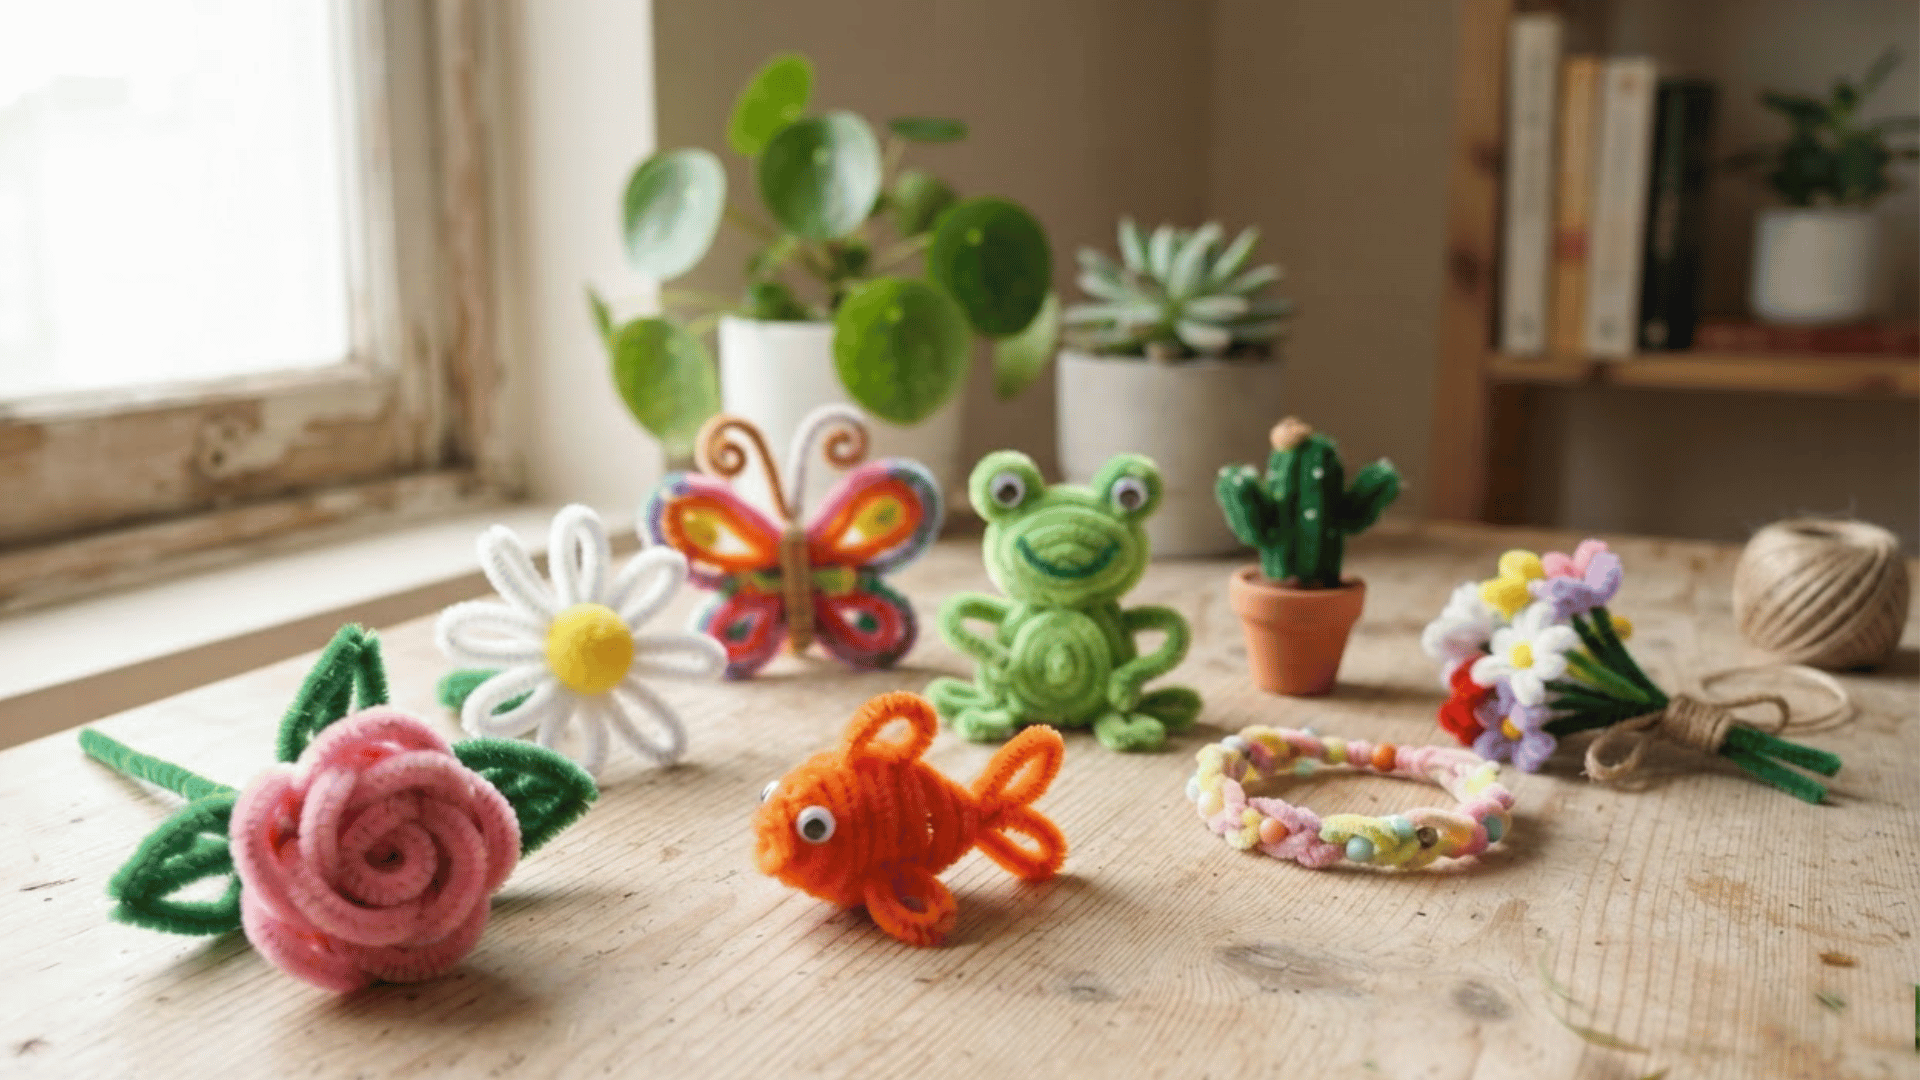

You don’t need fancy tools or a trip to the store to make something fun today. That’s the magic of a good salt dough recipe. Mix it up, shape it, let it dry, and suddenly you’ve got an ornament or keepsake worth keeping.
I remember trying this for the first time and being surprised how easy it actually was. No stress, no mess-ups you can’t fix. Just simple steps that lead somewhere sweet.
Whether it’s a rainy day project or a holiday craft on your list, this one’s forgiving and fun to make.
Ready to see how it all comes together? Check out the steps below.
What Is Salt Dough Used For?
Salt dough is mainly used for making simple homemade crafts, decorations, and keepsakes. Its soft texture makes it easy to shape into ornaments, handprint crafts, figurines, and other easy clay craft ideas for seasonal decorating.
Many people use it for holiday projects, classroom activities, or creative activities with children because it is made from basic kitchen ingredients. Once dried, salt dough can be painted, decorated, and displayed.
It is also useful for creating personalized gifts, name tags, and memory pieces. Since it is inexpensive and easy to prepare, salt dough is a popular choice for beginner-friendly craft projects at home.
Everything You Need to Make Salt Dough
Making salt dough requires only a few simple ingredients and basic craft supplies. The main recipe uses everyday pantry items, while optional materials help you shape, decorate, and personalize your creations.
| Material or Ingredient | Amount | Purpose |
|---|---|---|
| All-purpose flour | 2 cups | Builds the dough base |
| Table salt | 1 cup | Strengthens and preserves the dough |
| Warm water | 1 cup | Combines ingredients into a dough |
| Extra flour | As needed | Reduces stickiness while shaping |
| Food coloring (optional) | Few drops | Adds color before crafting |
| Acrylic paint (optional) | As needed | Decorates dried creations |
| Paint brushes (optional) | 1 or more | Adds details and designs |
| Cookie cutters (optional) | As needed | Creates fun shapes and patterns |
| Rolling pin (optional) | 1 | Helps flatten dough evenly |
| Parchment paper or baking sheet | 1 sheet | Provides a clean drying or baking surface |
Salt Dough Recipe You Can Try at Home
Making salt dough is a simple process that uses basic pantry ingredients and a few easy techniques. The right balance of ingredients helps create a dough that is smooth, flexible, and easy to shape.
Salt dough is easy to shape by hand, and many of the basic techniques are similar to working with air-dry clay, such as rolling, pressing, and forming small pieces.
1. Combine the Dry Ingredients
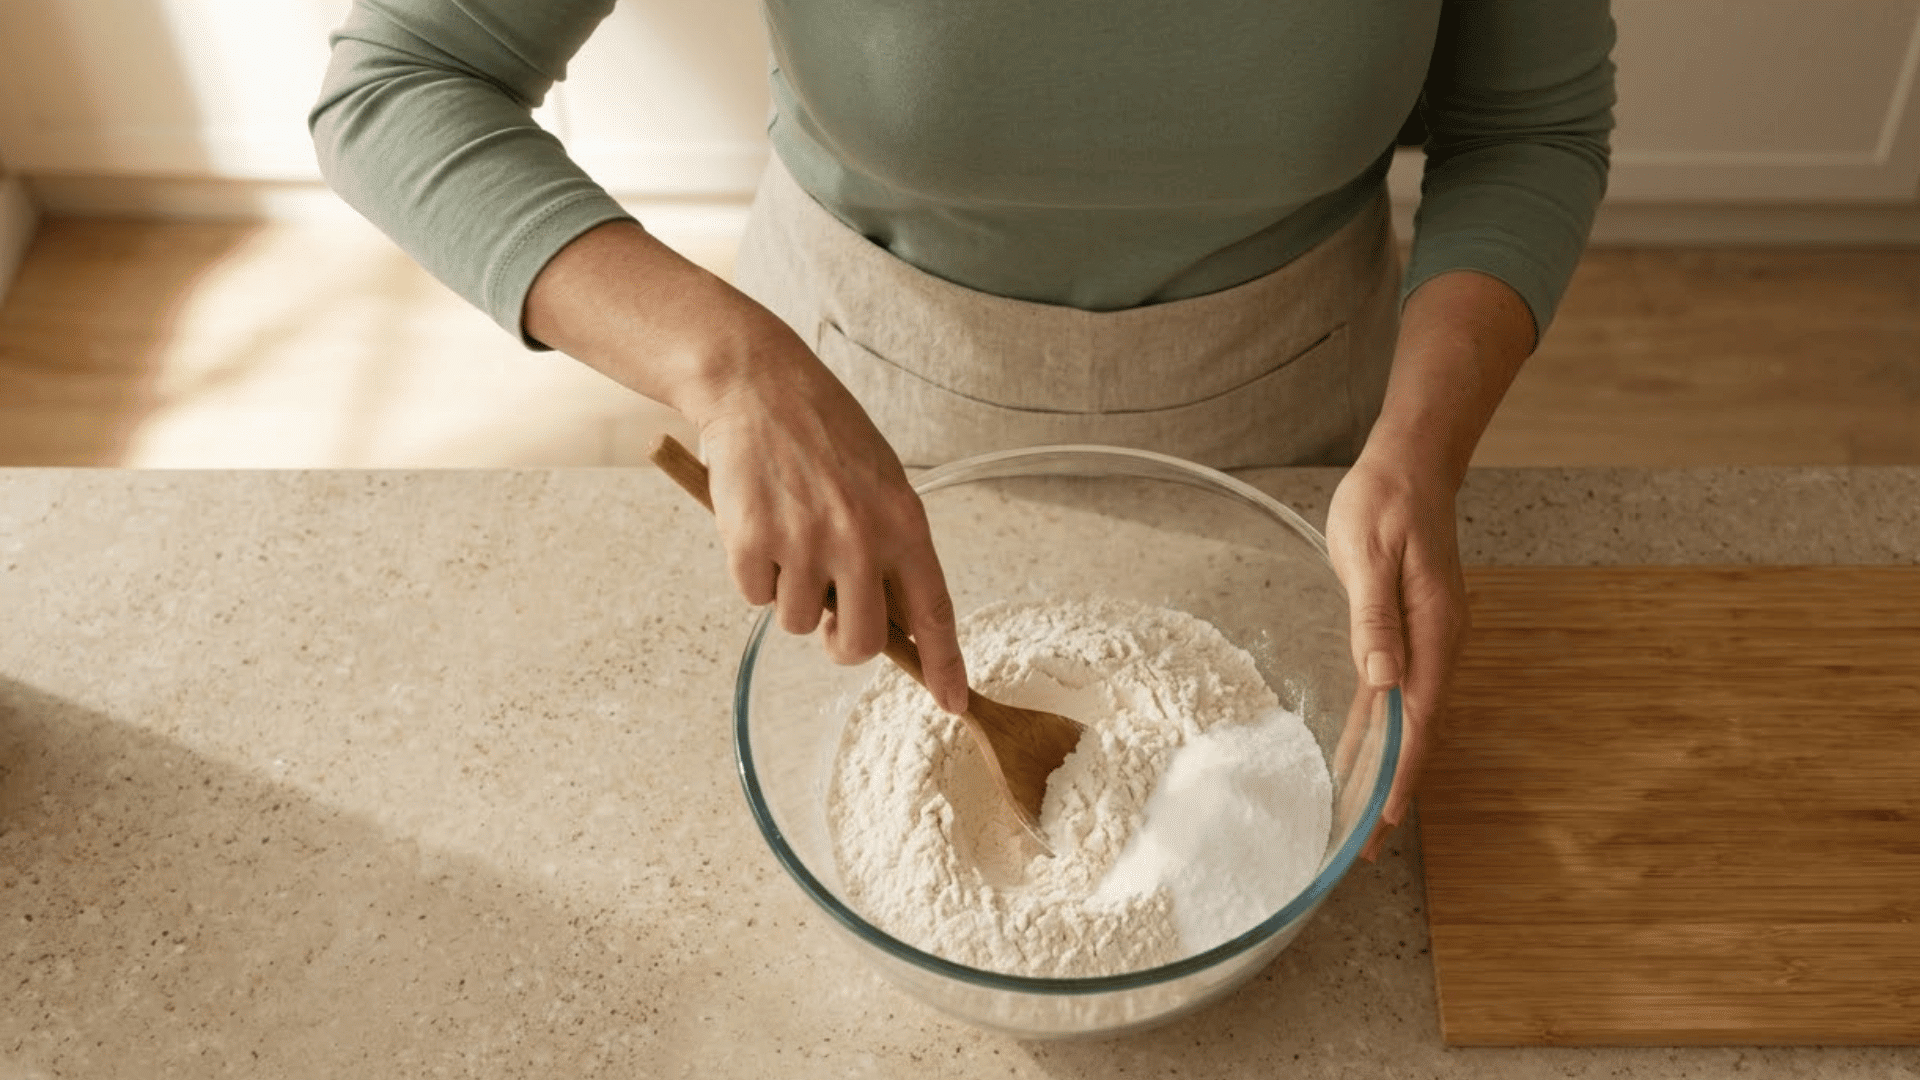
Starting with the dry ingredients helps create an even dough texture before adding moisture. Properly mixing the flour and salt ensures the final dough is balanced and easier to work with.
- Measure flour and salt carefully using the correct ratio for consistent results.
- Add both ingredients to a large mixing bowl.
- Stir the flour and salt together until evenly combined.
- Break up any lumps before adding water.
- Use a large bowl with enough space to mix and knead.
- Keep extra flour nearby to adjust the dough later if needed.
2. Add the Water Slowly
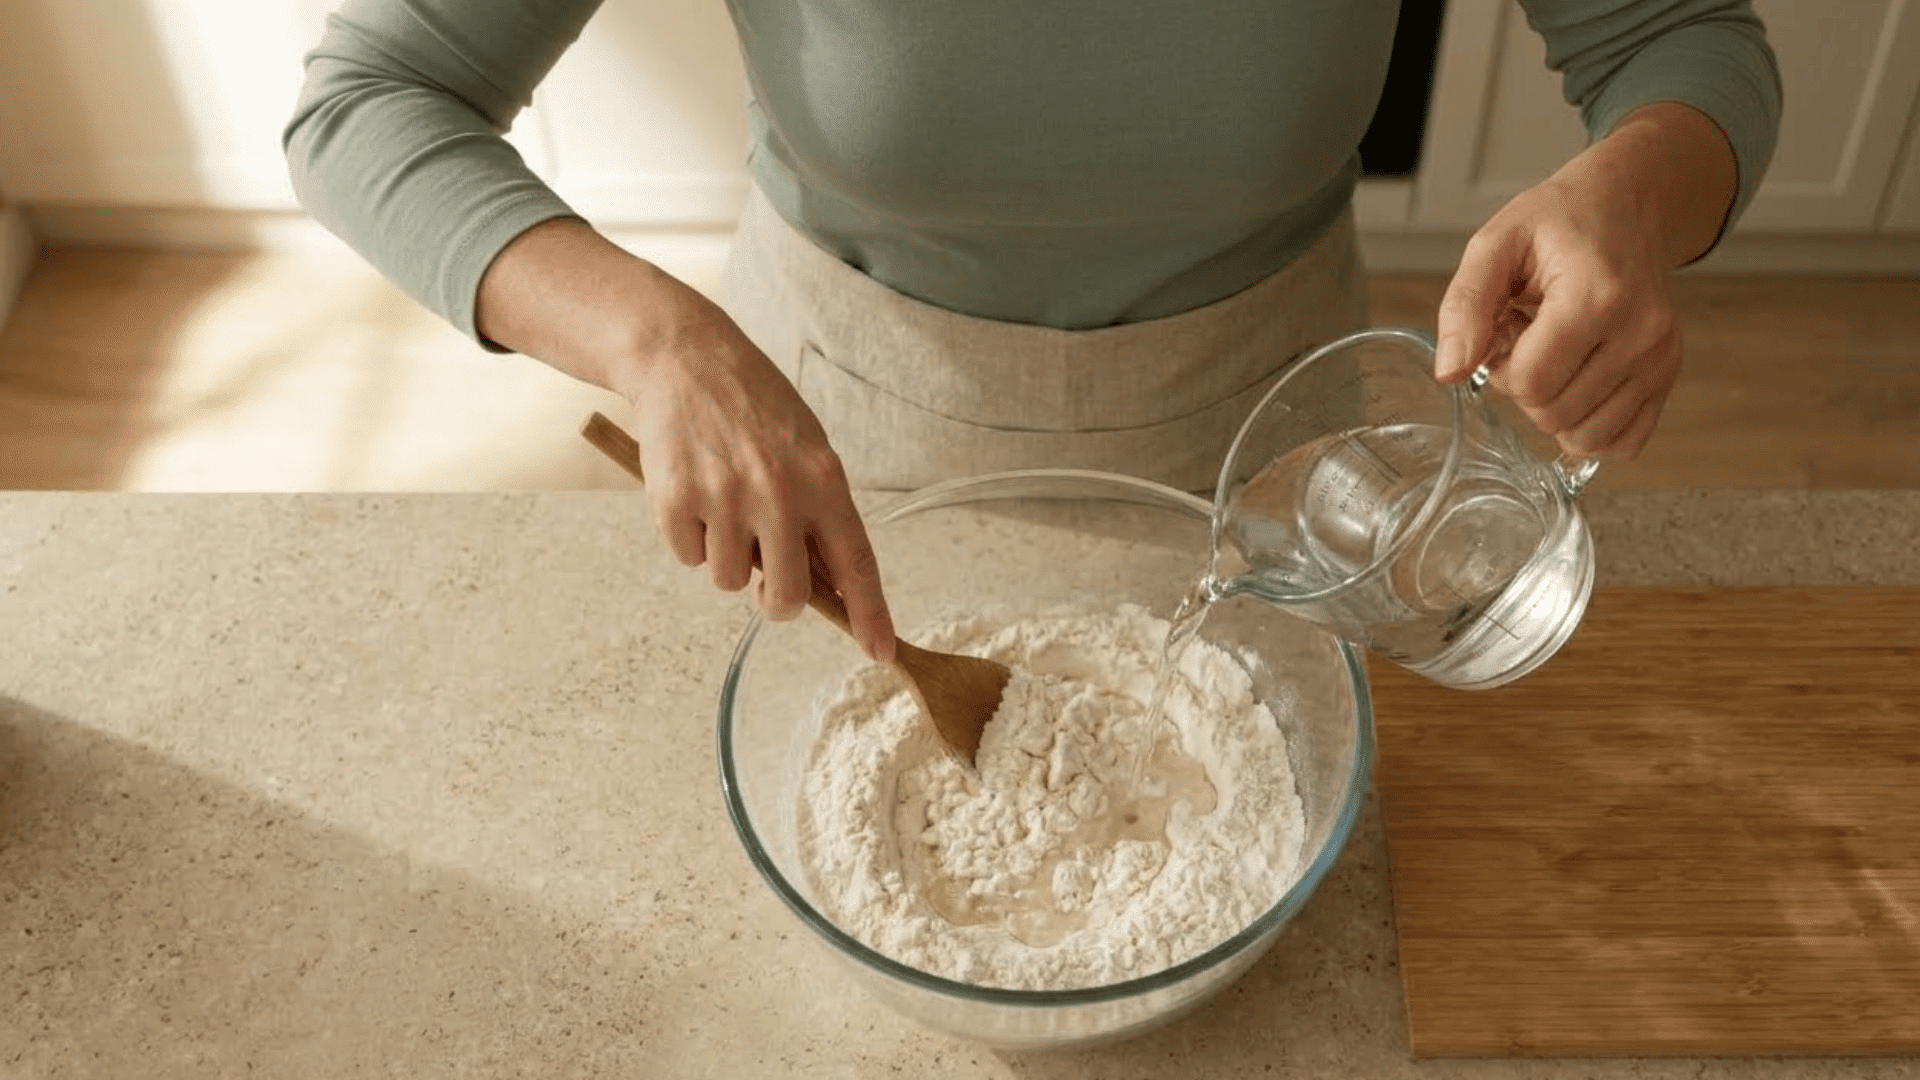
Adding water slowly helps control the texture and prevents the mixture from becoming too sticky. The goal is to create a dough that holds together without feeling wet or difficult to handle.
- Pour water gradually into the dry mixture while stirring continuously.
- Mix until the ingredients begin forming a rough dough.
- Avoid adding all the water at once if the mixture feels too wet.
- Add small amounts of flour if the dough becomes sticky.
- Check that the mixture pulls away from the sides of the bowl.
- Continue mixing until there are no dry patches remaining.
3. Knead Until Smooth
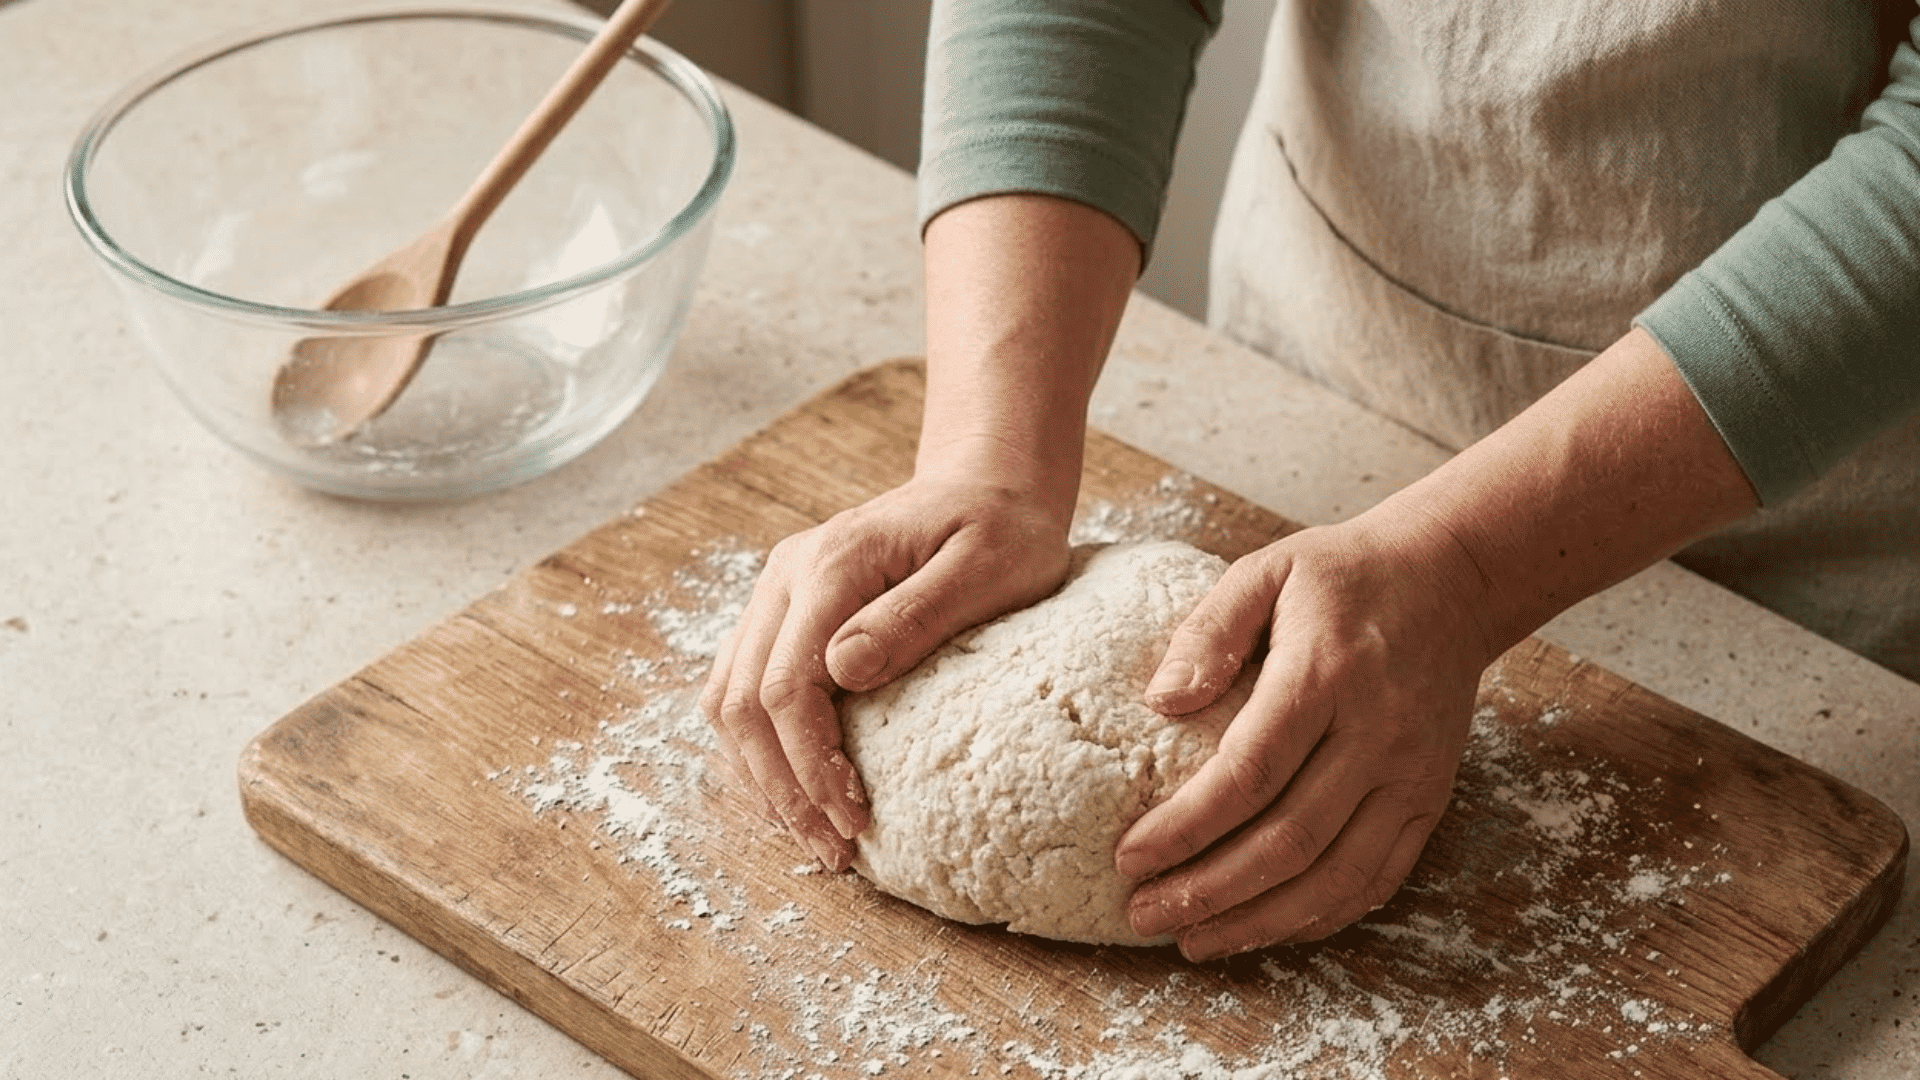
Kneading improves the dough texture and makes it easier to shape into different crafts. A well-kneaded dough should feel soft, flexible, and smooth without cracking easily.
- Place the dough on a lightly floured surface before kneading.
- Press, fold, and stretch the dough repeatedly for several minutes.
- Continue kneading until the texture becomes smooth and even.
- Add a little flour if the dough sticks to your hands.
- Add a few drops of water if the dough feels too dry.
- Avoid overworking the dough, as it can become harder to shape.
4. Roll the Dough Evenly
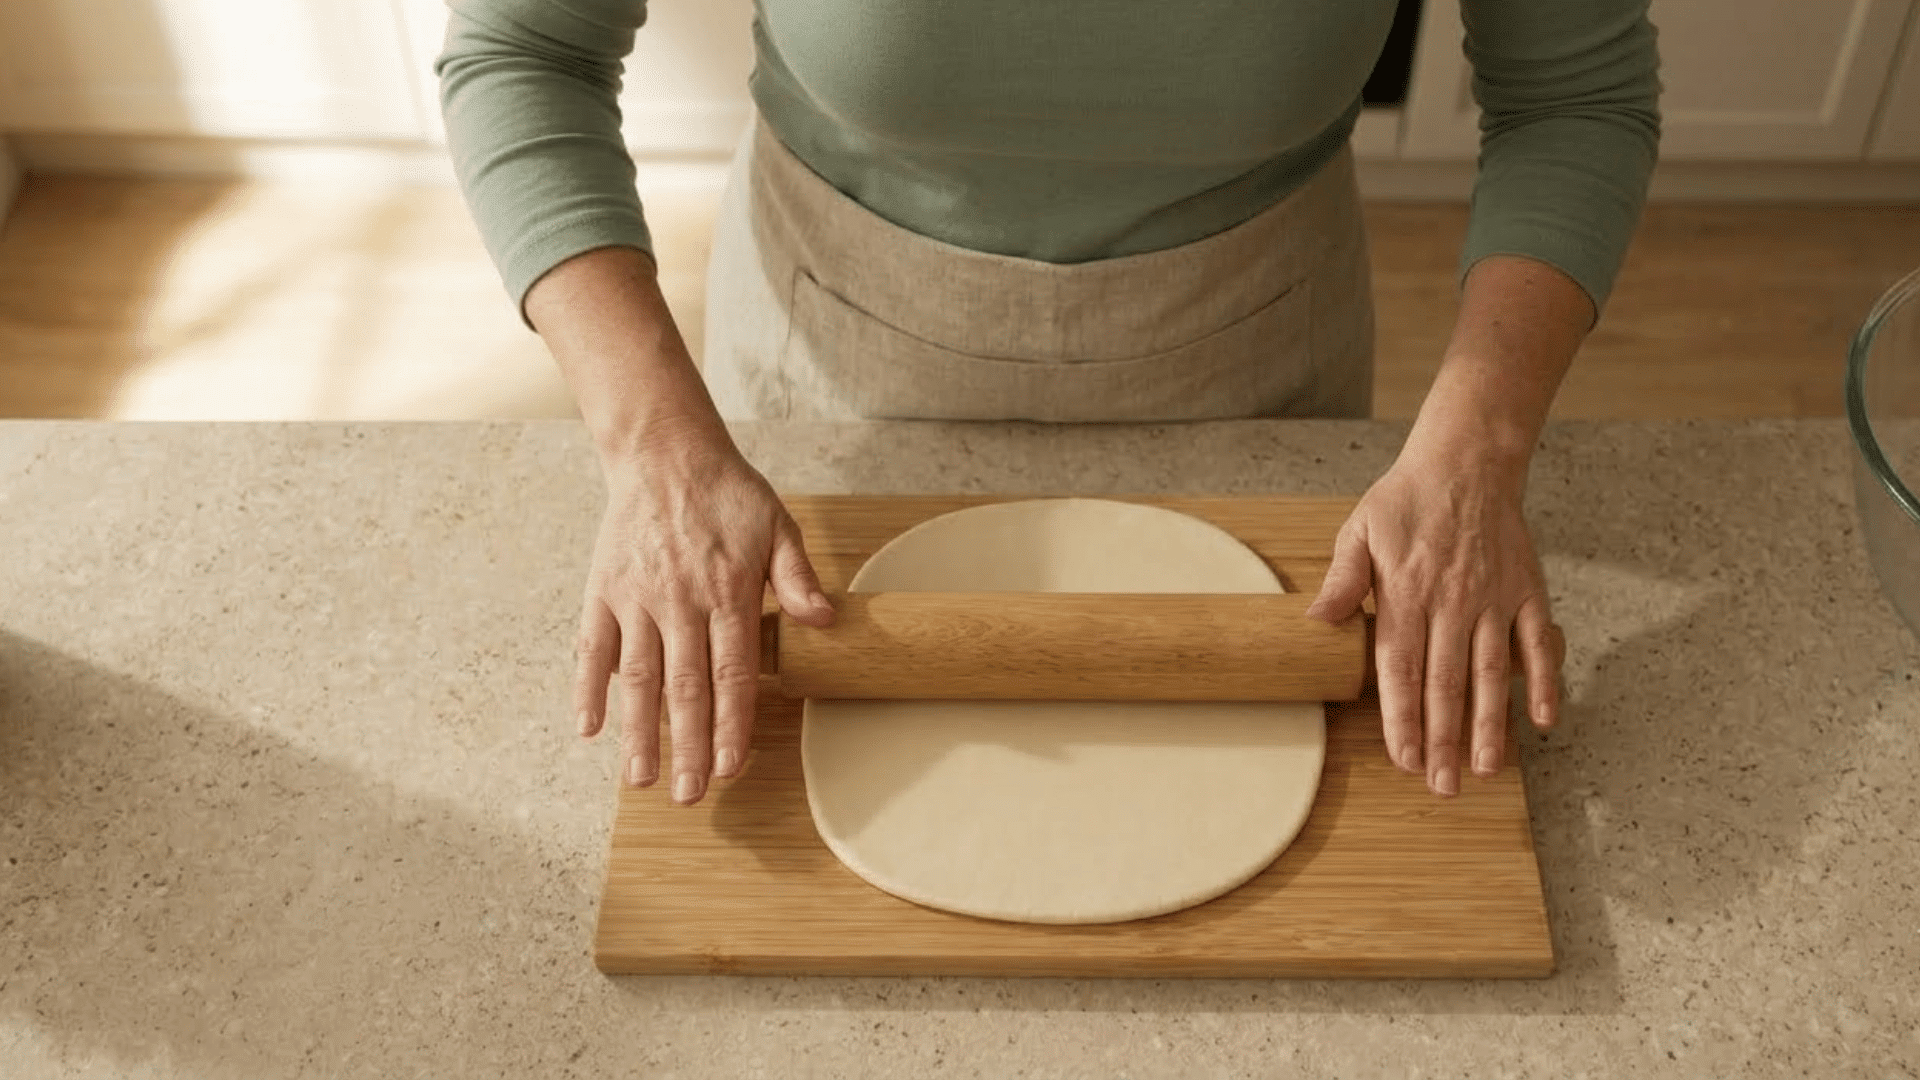
Once the dough reaches the right texture, you can turn it into different crafts and decorations. Working carefully helps create clean shapes that dry evenly and hold their details.
- Roll the dough flat using a rolling pin for ornaments or cutouts.
- Use cookie cutters, molds, or your hands to create different shapes.
- Press designs, fingerprints, or patterns into the dough before drying.
- Keep pieces similar in thickness for even drying.
- Avoid making very thick shapes because they take longer to dry.
- Place finished designs on a lined baking tray or flat surface.
5. Cut and Shape the Pieces

Once the dough reaches the right texture, you can turn it into different crafts and decorations. Working carefully helps create clean shapes that dry evenly and hold their details.
- Roll the dough flat using a rolling pin for ornaments or cutouts.
- Use cookie cutters, molds, or your hands to create ornaments, figurines, and simple clay shapes.
- Press designs, fingerprints, or patterns into the dough before drying.
- Keep pieces similar in thickness for even drying.
- Avoid making very thick shapes because they take longer to dry.
- Place finished designs on a lined baking tray or flat surface.
6. Dry or Bake the Salt Dough
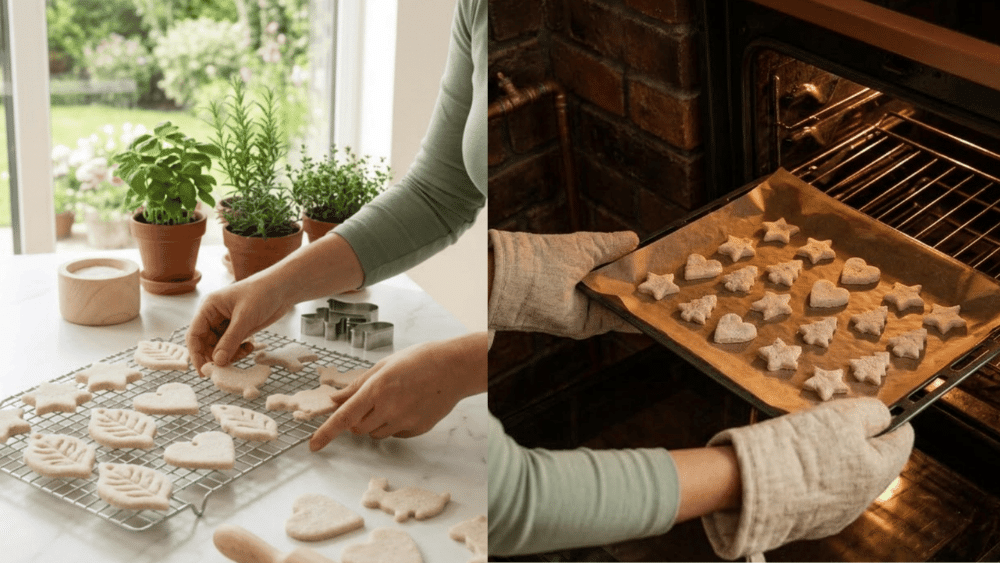
Properly drying the dough helps create strong, long-lasting crafts. Choosing the right method depends on how quickly you need the project finished and the size of your creations.
- Air dry small pieces in a dry area until completely hardened.
- Bake larger pieces at a low temperature for faster results.
- Avoid high heat because it can cause cracks or uneven drying.
- Turn pieces during drying to help all sides harden evenly.
- Check that the center feels firm before decorating.
- Let baked pieces cool completely before painting or adding details.
How to Store Leftover Salt Dough?
Leftover salt dough can be saved and reused for future craft projects if stored correctly. Wrap the unused dough tightly in plastic wrap or place it in an airtight container to prevent it from drying out.
Keep it in the refrigerator to help maintain its texture and extend its shelf life.
Before using stored dough again, let it sit at room temperature for a short time and knead it until soft. If the dough develops a strange smell, mold, or a hard texture that cannot be fixed, it is best to discard it and prepare a fresh batch.
How to Make a Smaller or Bigger Salt Dough Batch
Not every project needs a full batch. If you are making just a few ornaments or testing the recipe for the first time, a half batch is more than enough and wastes far less dough.
- Keep the same ratio: Adjust each ingredient equally to maintain the original dough texture.
- Measure carefully: Use precise measurements, as small changes can affect consistency.
- Add water gradually: Increase moisture slowly to prevent the dough from becoming sticky.
- Mix larger batches in portions: Divide large quantities to make mixing and kneading easier.
- Test small amounts first: Try a smaller batch before making larger quantities for new projects.
- Match the batch to your project: Choose the dough amount based on your craft size and needs.
- Avoid unnecessary leftovers: Scale the recipe to reduce dough waste after crafting.
- Check the dough texture: Make sure the adjusted dough stays smooth and flexible before shaping.
Use the guide below to adjust the batch size without changing how the dough feels or behaves.
| Batch Size | Flour | Salt | Water |
|---|---|---|---|
| Full Batch | 2 cups | 1 cup | ¾ to 1 cup |
| Half Batch | 1 cup | ½ cup | ⅜ to ½ cup |
| Quarter Batch | ½ cup | ¼ cup | 3 to 4 tablespoons |
I always start with a half batch when I am trying a new shape or cutter, just to see how it turns out before committing to a full mix.
Right Ways to Paint and Seal Salt Dough
Painting and sealing gives salt dough crafts a finished look and helps protect the surface over time. The process works best when you complete each stage properly, from drying the piece to applying the final protective layer.
- Dry completely first: Make sure the entire piece is fully hardened before adding paint or decorations.
- Choose acrylic paint: It sticks well and creates a smooth finish on dried dough.
- Apply thin paint layers: Add light coats rather than thick ones to prevent uneven drying.
- Let each coat dry: Allow the paint to dry fully before adding another color or detail.
- Add small details carefully: Use fine acrylic paint brushes for patterns, names, or small decorative details.
- Seal every surface: Cover the front, back, sides, and edges to protect the entire craft.
- Use a clear sealer: Apply a craft sealant or clear finish for added durability.
- Add multiple coats if needed. Let each sealer layer dry before applying the next.
- Handle gently after sealing: Give the finished piece enough time to cure before displaying or storing it.
- Store finished crafts properly: Keep sealed salt dough creations away from moisture and humid areas.
How to Fix Common Salt Dough Problems
Even with the right ingredients and measurements, salt dough can sometimes have texture or drying issues. Most problems are easy to identify and fix with small adjustments before finishing your craft.
| Problem | Why It Happens | Easy Fix |
|---|---|---|
| Sticky dough | Too much water | Add flour slowly and knead again |
| Dry or crumbly dough | Not enough water | Add a few drops of water and mix |
| Cracks while shaping | Dough lacks moisture | Knead with slightly damp hands |
| Hard dough | Too much flour or over-kneading | Add small amounts of water and soften |
| Shapes lose details | Dough is too soft | Add flour and let it rest briefly |
| Puffy pieces | Oven temperature is too high | Bake at a lower temperature |
| Warped crafts | Uneven thickness | Roll dough evenly before shaping |
| Soft centers | Pieces are too thick | Continue drying until firm |
| Brown surface | Excess oven heat | Lower temperature and monitor closely |
| Sticking to tray | No protective surface | Use parchment paper before baking |
| Mold growth | Dough trapped with moisture | Dry fully before storing |
| Broken pieces | Crafts are too thin | Make shapes slightly thicker for strength |
Wrapping It Up
Three ingredients and a little time are genuinely all you need to get this right. I know it can feel uncertain the first time, but once you try this salt dough recipe, the process becomes second nature fast.
Keep your pieces fully sealed, away from moisture, and they will last far longer than you expect.
This craft rewards patience over perfection. Take your time with drying and sealing, and the results speak for themselves.
Try it this weekend and see how it turns out for you.
Frequently Asked Questions
Does Salt Dough Work in High Humidity?
High humidity slows drying significantly and can cause soft spots. Air-drying may take up to 72 hours, so oven-drying is the better option in humid conditions.
How Long Do Finished Salt Dough Pieces Last?
Properly sealed and stored pieces can last for years, even decades. The key is to fully seal all surfaces and keep finished pieces away from moisture at all times.
Can You Reuse Salt Dough Scraps After Cutting Shapes?
Yes, gather the scraps, knead them back together, and roll out again immediately. If the dough feels dry, add a few drops of water before rolling a second time.

One Response
testing 2