


Installing base cabinets can seem like a big task, but with the right tips and a little know-how, you can do it yourself and save money.
If you’re upgrading your kitchen or adding storage to a new space, this guide will show you how to install base cabinets like a pro.
You’ll learn about preparing your space, handling uneven floors, and making sure everything is level and sturdy.
It might take some patience, but with the right steps, you’ll be able to tackle the job and have your cabinets up in no time. Ready to get started on installing base cabinets? Let’s get started!
Types of Base Cabinets
Before you begin installing, it’s important to understand the different types of base cabinets available. Each type serves a specific purpose and will affect how your installation goes.
| Cabinet Type | Description | Best For |
|---|---|---|
| Standard Base Cabinets | The most common cabinet type is used for a variety of storage purposes. Provides a sturdy foundation for countertops. | General storage and countertop support |
| Corner Base Cabinets | Fit into corners to maximize space, often with specialized doors or pull-out shelves for easy access. | Tight spaces and efficient kitchen layouts |
| Drawer Base Cabinets | Feature drawers instead of doors, providing easy access to smaller kitchen essentials. | Storing utensils, pots, and pans |
| Sink Base Cabinets | Designed to house a sink with space for plumbing, often with extra storage or pull-out drawers. | Storing cleaning supplies or housing plumbing |
| Appliance Cabinets | Built to store larger appliances like dishwashers, trash compactors, or microwave ovens. | Keeping larger appliances organized |
Why Proper Planning Makes All the Difference
Installing base cabinets can seem straightforward, but without proper planning, it’s easy to run into problems.
- Measure Your Space: Carefully measure the room, including wall length, ceiling height, and any obstructions to ensure the cabinets fit and function properly.
- Check for Level and Plumb: Ensure the floor is even, and the walls are straight. Use shims and filler strips to adjust as needed for proper alignment.
- Plan Your Cabinet Layout: Map out the cabinet placement to ensure everything aligns correctly, minimizing gaps and reducing the need for rework during installation
A well-planned layout minimizes gaps and avoids rework, making the installation process smoother and more efficient.
How to Install Base Cabinets: A Step-by-Step Guide
Now for the main event. Follow these steps in order, and installing base cabinets will feel far more manageable than it might look.
Tools and Materials Required
Before you get started, gathering everything upfront saves time and unnecessary trips to the hardware store. Here’s a clear look at what you’ll need for installing base cabinets successfully.
| Tool/Material | Purpose |
|---|---|
| Level | To check and mark the height and ensure the cabinets are level |
| Tape Measure | To measure cabinet height and placement |
| Shims | To level the cabinets on uneven floors |
| Drill and 2 ½-inch Screws | To attach the cabinets to the wall studs |
| Filler Strips | To fill the large gaps between the cabinets and the floor |
| Screwdriver or Drill Attachment | To drive screws into the wall studs |
| Saw (if needed for filler strips) | To trim filler strips to the proper length |
| Pencil | To mark reference lines for cabinet placement |
Now that you have all the necessary tools and materials, it’s time to dive into the installation steps:
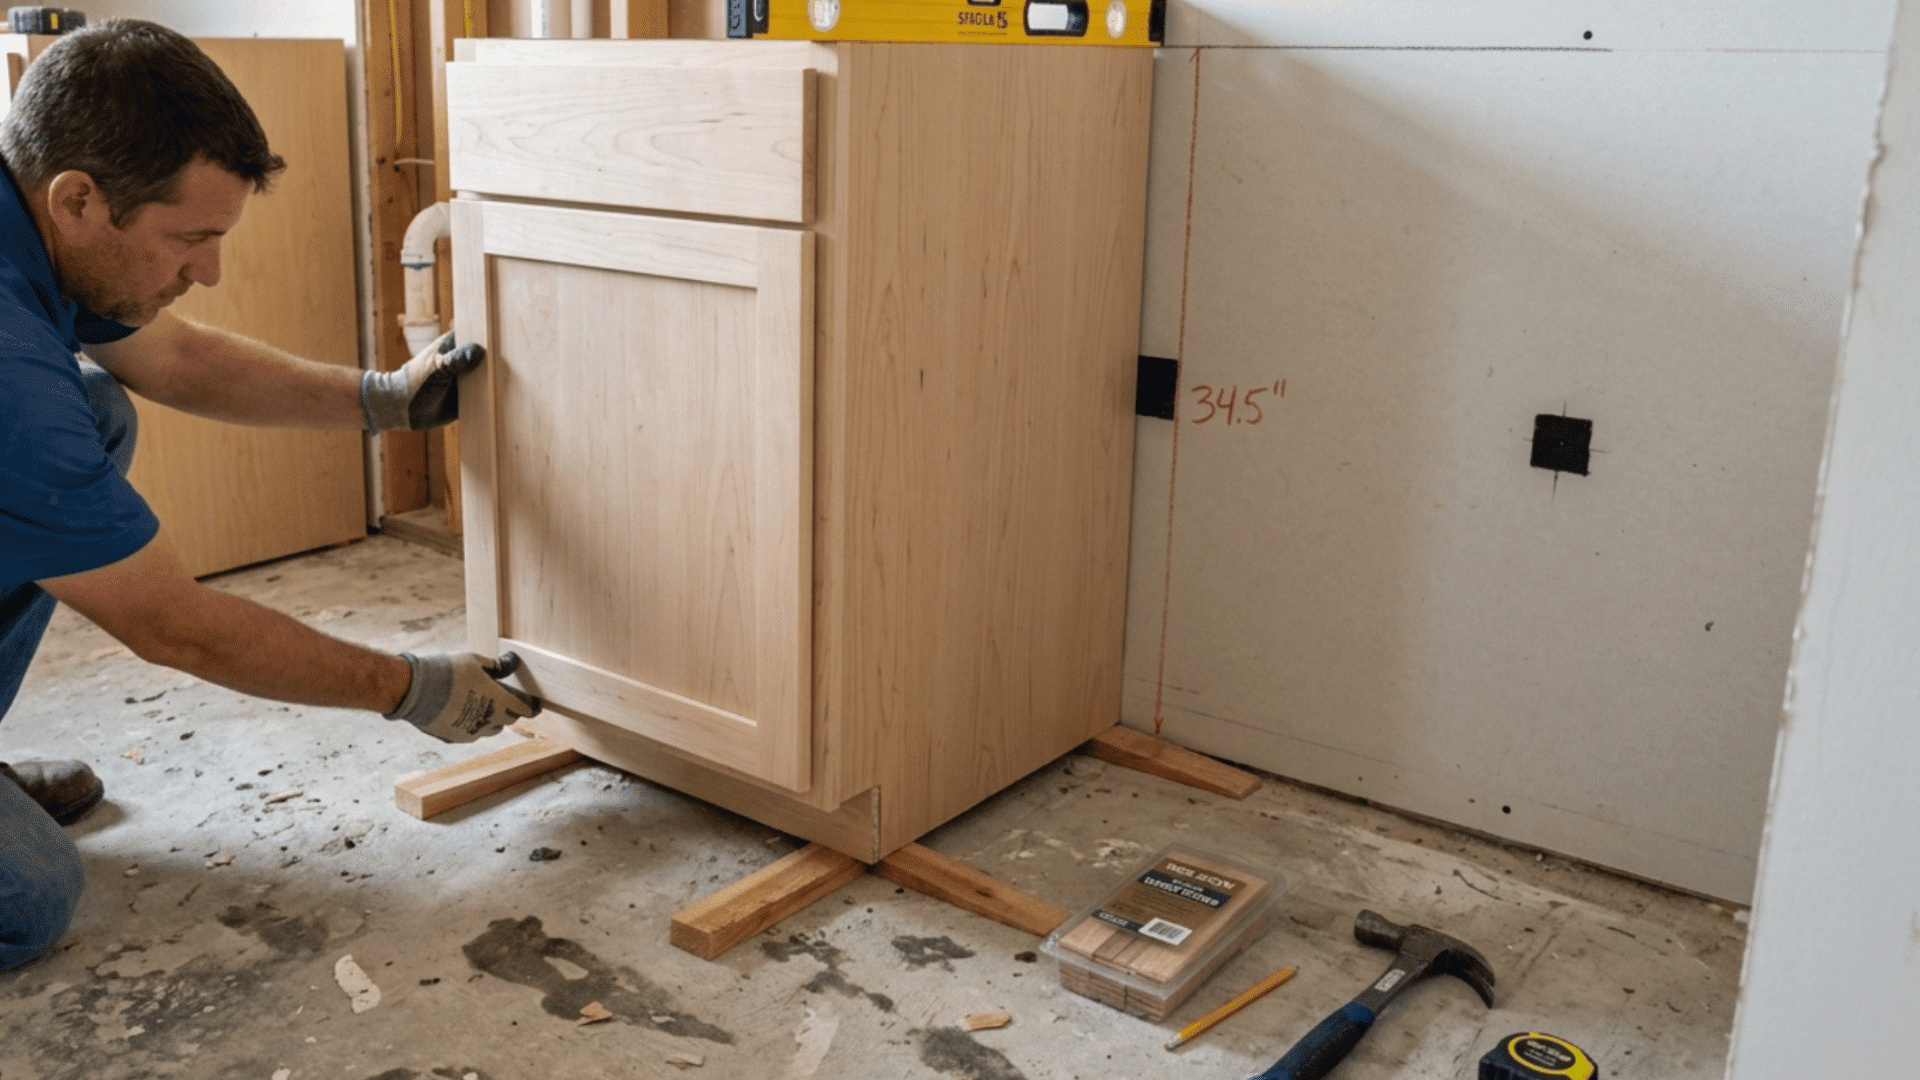
Step 1: Measure and Mark the Cabinet Height

The standard height for base cabinets is typically 34 ½ inches. Start by measuring this height from the high spot of your floor to ensure proper alignment.
Then, use a level to mark a reference line around the room at this height, which will guide you in keeping the cabinets consistently aligned as you install them.
Step 2: Position and Shim the First Cabinet
Once you’ve marked the reference line, position your first cabinet (such as a sink base cabinet) in place, making sure it’s centered where necessary, like over a window.
Align the cabinet’s bottom edge with the reference line you’ve marked. If the floor is uneven, insert shims under the cabinet to raise it to the correct height, ensuring the cabinet is level with the line.
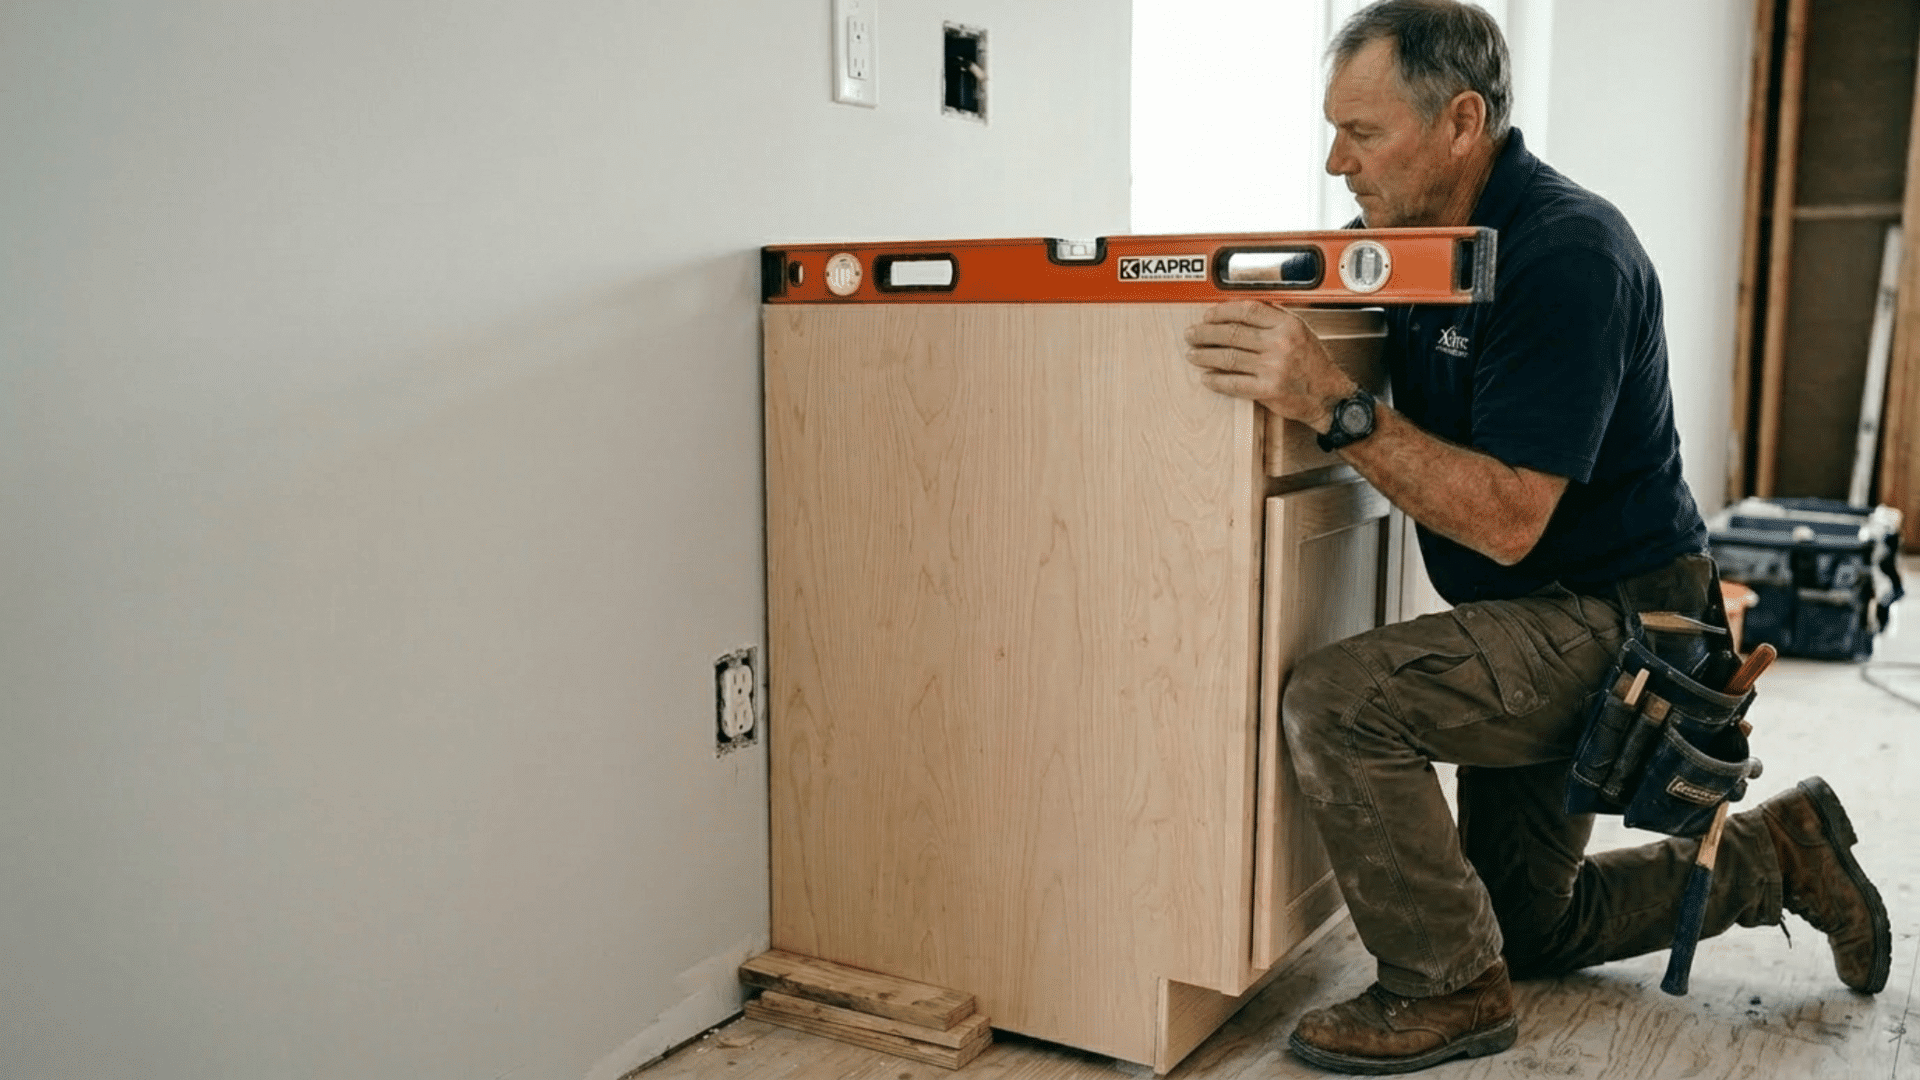
Step 3: Check Cabinet Alignment and Leveling
After positioning the first cabinet, use a level to check both the front-to-back and side-to-side alignment of the cabinet. If the cabinet isn’t level, adjust by adding or removing shims until the cabinet is perfectly aligned and stable.
If necessary, recheck the cabinet’s position after adjusting the shims to ensure it’s still aligned with the reference line. Once the cabinet is level in all directions, tighten the screws to secure it firmly in place.
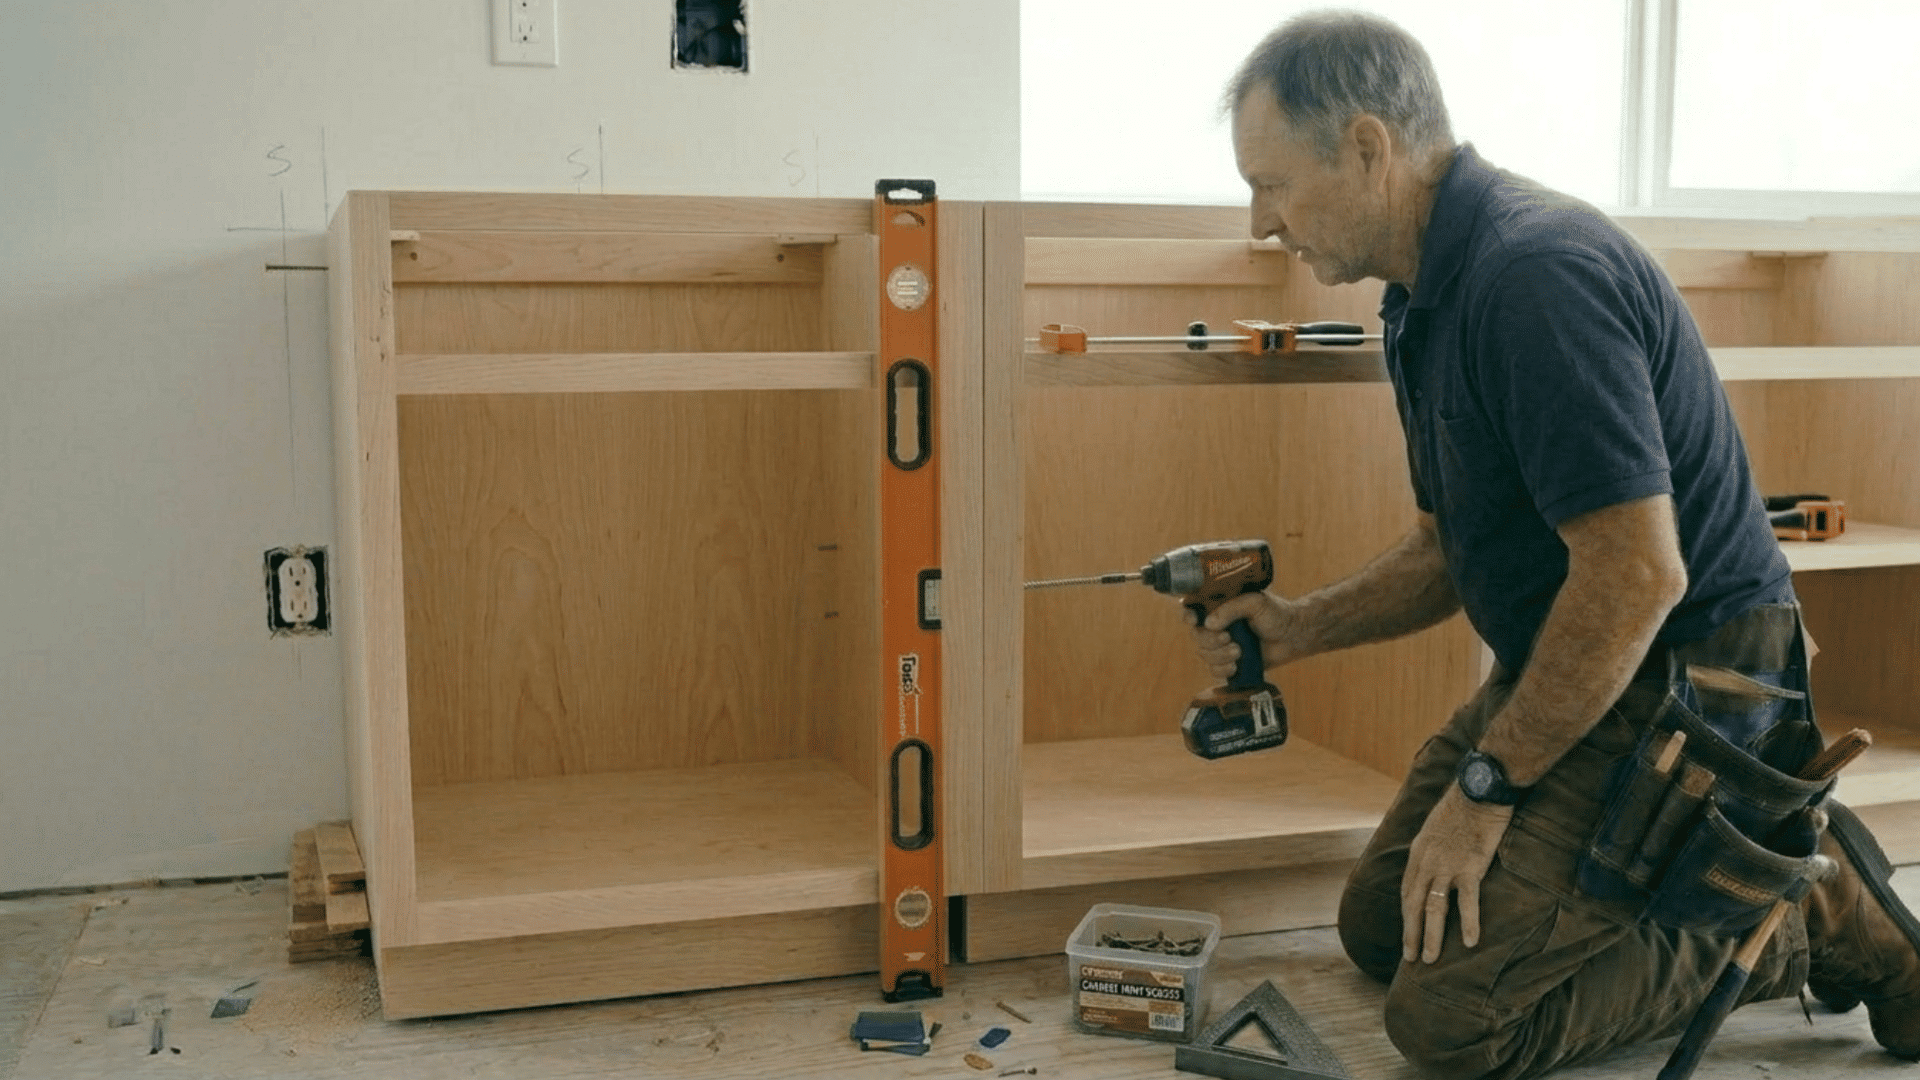
Step 4: Attach Cabinets to Wall Studs

Now that the cabinet is aligned and level, it’s time to secure it to the wall. Using a drill and 2 ½-inch screws, attach the cabinet to the wall studs for a sturdy installation.
Ensure the screws penetrate deeply into the studs, securing the cabinet firmly. Tighten the screws without overtightening to avoid damaging the cabinet.
Step 5: Fill Gaps with Shims or Filler Strips
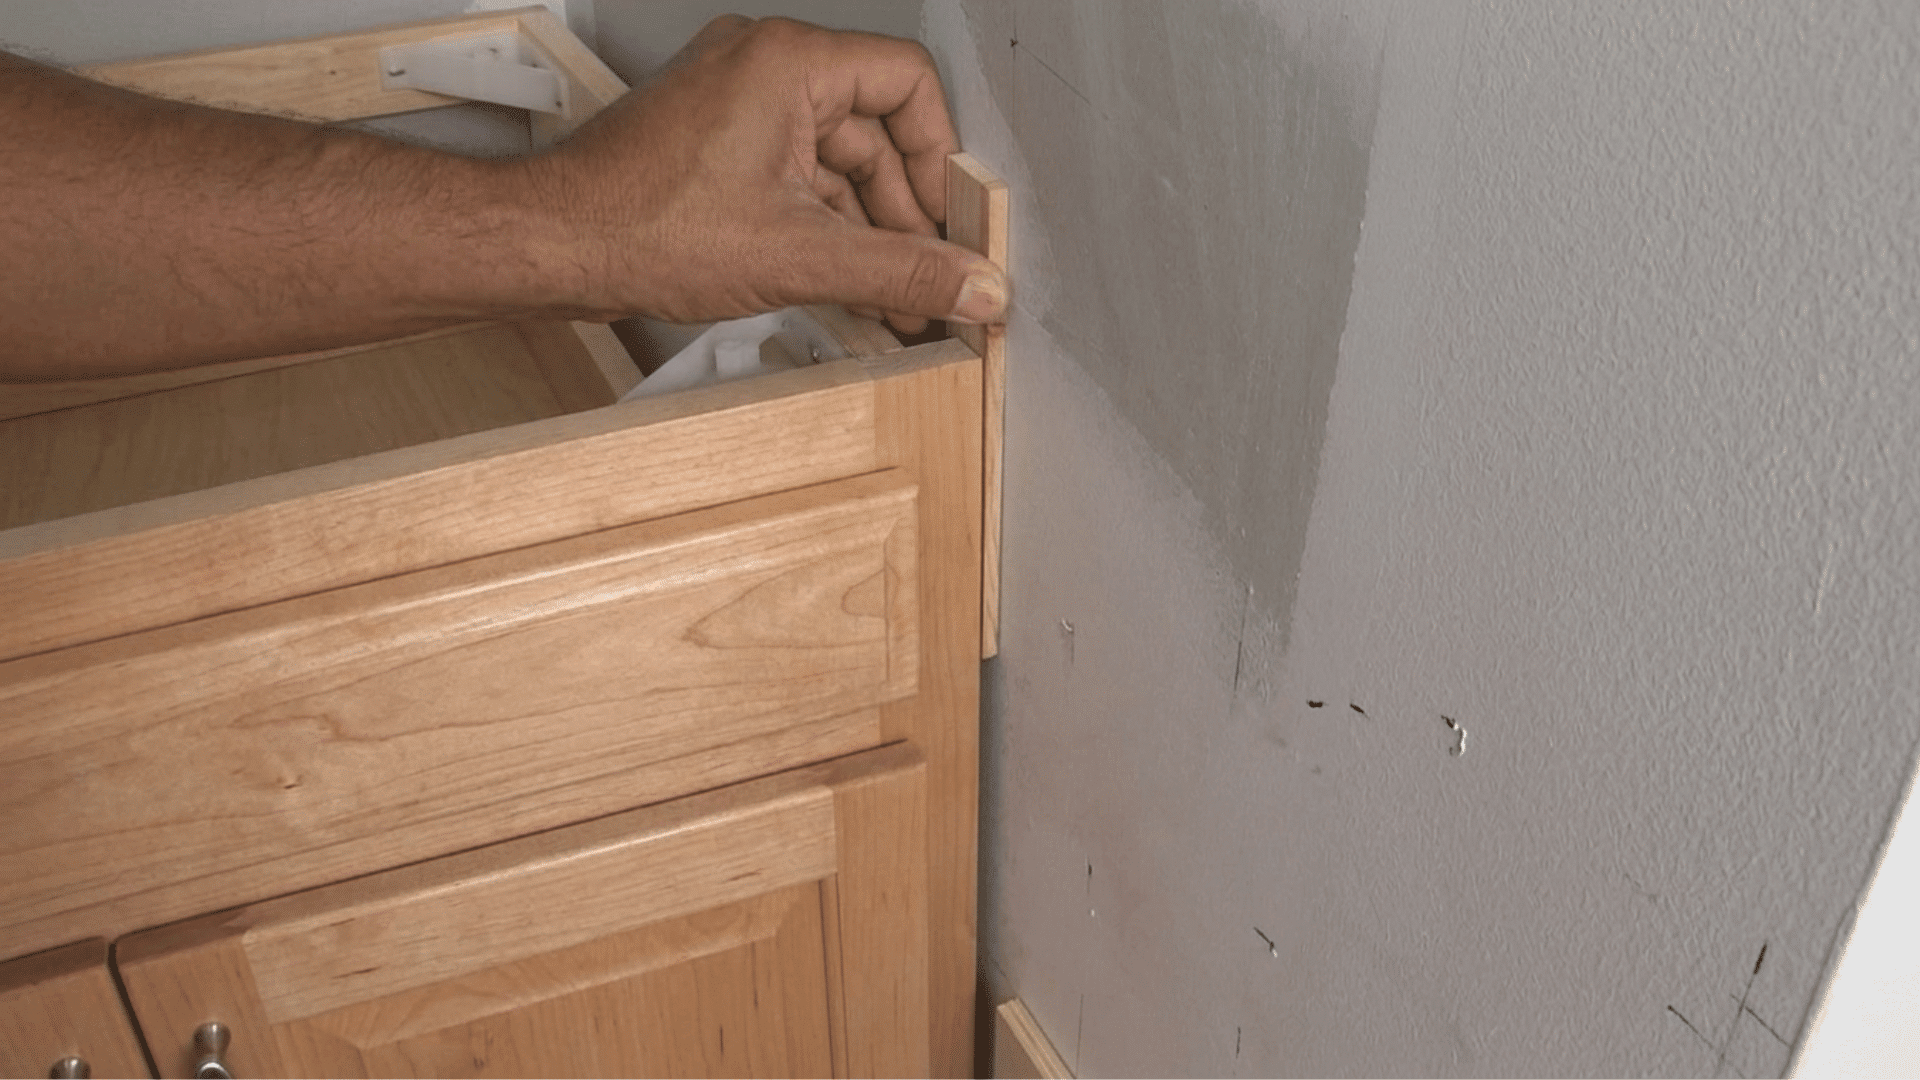
If you notice gaps between the wall and the cabinet (more than ¾ inch), you will need filler strips. Measure and cut the filler strips slightly shorter than the gap, then shim them to the correct height.
Once the filler strips are installed, break off any excess shim material for a clean finish. After the filler strips are secure, use wood glue or screws to ensure they stay in place, then sand the edges for a smooth, seamless look.
Step 6: Secure Multiple Cabinets Together Before Installing

If you’re installing several cabinets, it’s easier to attach them together first. Use screws to connect the face frames of adjacent cabinets, ensuring that they are aligned properly.
If necessary, add shims between the cabinets to fill any gaps, making sure they are evenly spaced before moving on to the next step.
Step 7: Install the Cabinet Assembly as a Unit
After the cabinets are secured together, carefully move the entire unit into place along the wall. Recheck the alignment and level of the cabinet unit.
Once everything looks perfect, secure the whole unit to the wall studs, ensuring it’s tightly anchored and aligned before finalizing the installation.
Expert Advice for Successful Installation
- Use a laser level: For larger kitchens or longer walls, a laser level helps maintain consistent alignment across multiple cabinets. This ensures that your cabinets are lined up correctly, even over a long stretch of wall.
- Pre-drill holes: To avoid damaging your cabinets or walls, always pre-drill screw holes in both the cabinet and the wall studs. This prevents the wood from splitting and helps with a more secure hold.
- Don’t rush: Take your time to ensure everything is level, aligned, and securely fastened. Rushing can lead to mistakes that may be hard to fix later on. It’s worth spending extra time on these steps for a flawless finish.
- Consider the cabinet weight: When lifting and installing large cabinets, enlist help to prevent injury and ensure they’re positioned properly before securing them. Having an extra set of hands makes the job much safer and easier.
- Use the right screws for the job: Not all screws are the same. When securing cabinets, choose screws that are long enough to penetrate deeply into the studs but not so long that they go through the cabinet walls.
- Double-check alignment before securing: It’s easy to get excited and start drilling, but always check the alignment one last time before securing each cabinet. Even a small misalignment can throw off your entire installation.
Conclusion
Installing base cabinets is absolutely something you can do on your own with the right prep, the right tools, and a bit of patience.
The process of how to install base cabinets boils down to measuring carefully, shimming where needed, securing firmly into studs, and checking the level at every stage.
Take it one cabinet at a time, and don’t skip the alignment checks. Ready to get started? Grab your level and tape measure, and let the installation begin.
If you found this guide helpful, share it with someone else who’s planning a kitchen or bathroom update soon.
Frequently Asked Questions
How Long Does It Take to Install Base Cabinets?
Installing base cabinets typically takes a few hours per cabinet, depending on the complexity of your kitchen layout and experience. Set aside a full day for the entire process if you are new to DIY projects.
Can I Install Base Cabinets without Professional Help?
Yes, with proper preparation, measurements, and the right tools, installing base cabinets can be done by most DIYers. Make sure to take your time to ensure everything is level and securely fastened.
How Much Does It Cost to Install Base Cabinets?
The cost of installing base cabinets can range from $100 to $300 per cabinet, depending on factors such as material, design complexity, and labor costs. DIY installation can significantly lower costs.