


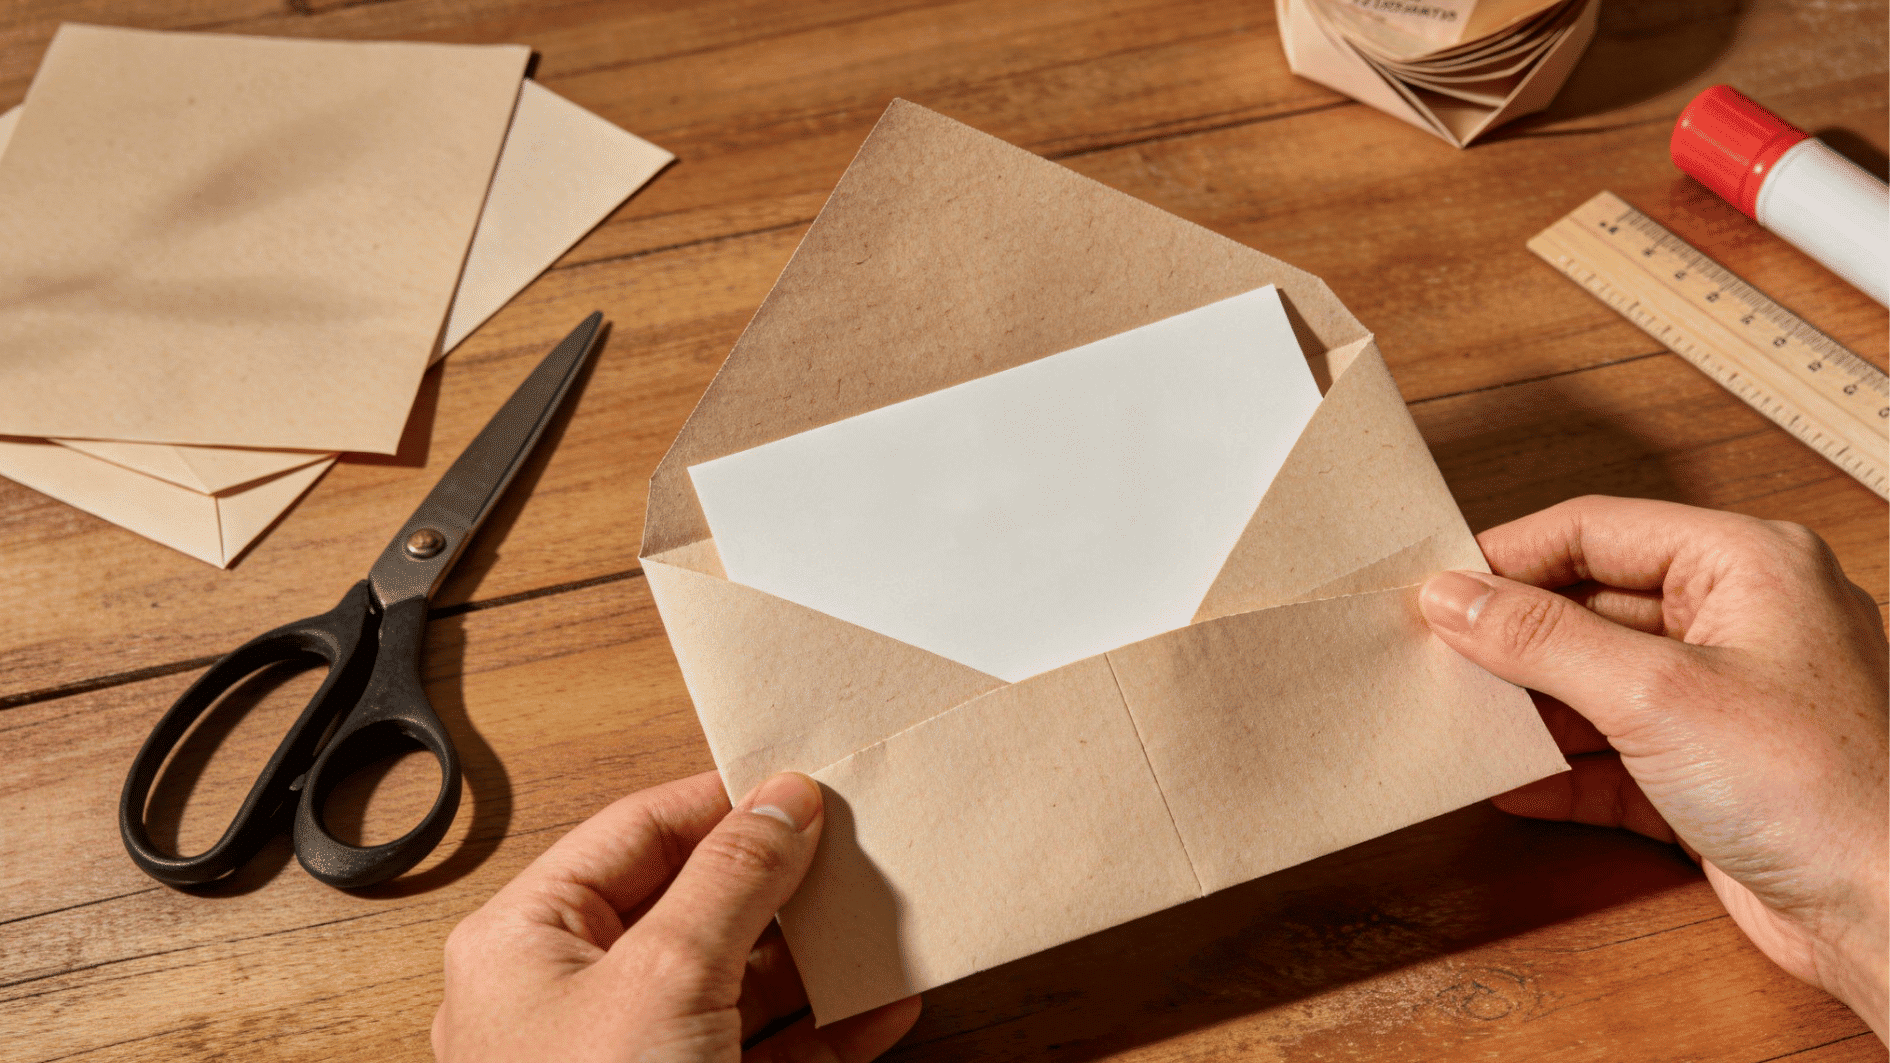
Making your own envelope is easier than you think, and it’s a fun way to add a personal touch to your letters and gifts.
If out of envelopes or just want something handmade, this blog walks you through the step-by-step process of how to fold an envelope
You don’t need fancy tools or special paper – just a flat sheet and a few minutes of your time. Learning how to fold a piece of paper into an envelope is a skill you’ll use again and again.
From simple square folds to decorative styles, there’s an envelope design for every need and occasion. By the end of this blog, you’ll know exactly how to make, decorate, and use your own DIY envelopes like a pro.
Why Make Your Own Envelopes?
A pack of 50 envelopes can cost up to $10 – your scrap paper costs nothing. Also, Store-bought envelopes do the job, but they don’t say much.
Making your own lets you match the vibe of your message, save money, and reuse paper you already have at home. Plus, it’s surprisingly quick once you get the hang of it.
Most people already have usable paper sitting around. Old magazines, kraft paper, or scrapbook sheets all fold into great envelopes instead of ending up in the trash.
And honestly, a handmade envelope just feels different. It tells the person you took a little extra time – and that always comes across.
What You’ll Need Before You Start
Before you jump into folding, gather your supplies. You don’t need much – most of what you need is probably already sitting on your desk.
| Item | Purpose |
|---|---|
| Paper | Main material for making the envelope |
| Scissors or Craft Knife | Cuts clean, straight edges |
| Ruler | Helps measure and fold accurately |
| Glue Stick / Double-Sided Tape / Wax Seal | Seals the envelope closed |
| Pencil | Marks fold lines lightly before creasing |
Step-by-Step: How to Fold a Piece of Paper Into an Envelope
This is the simplest method and works with any standard piece of paper. It’s the go-to approach when you need an envelope fast and don’t have a template handy.
Follow these steps, and you’ll have a working envelope in under two minutes.
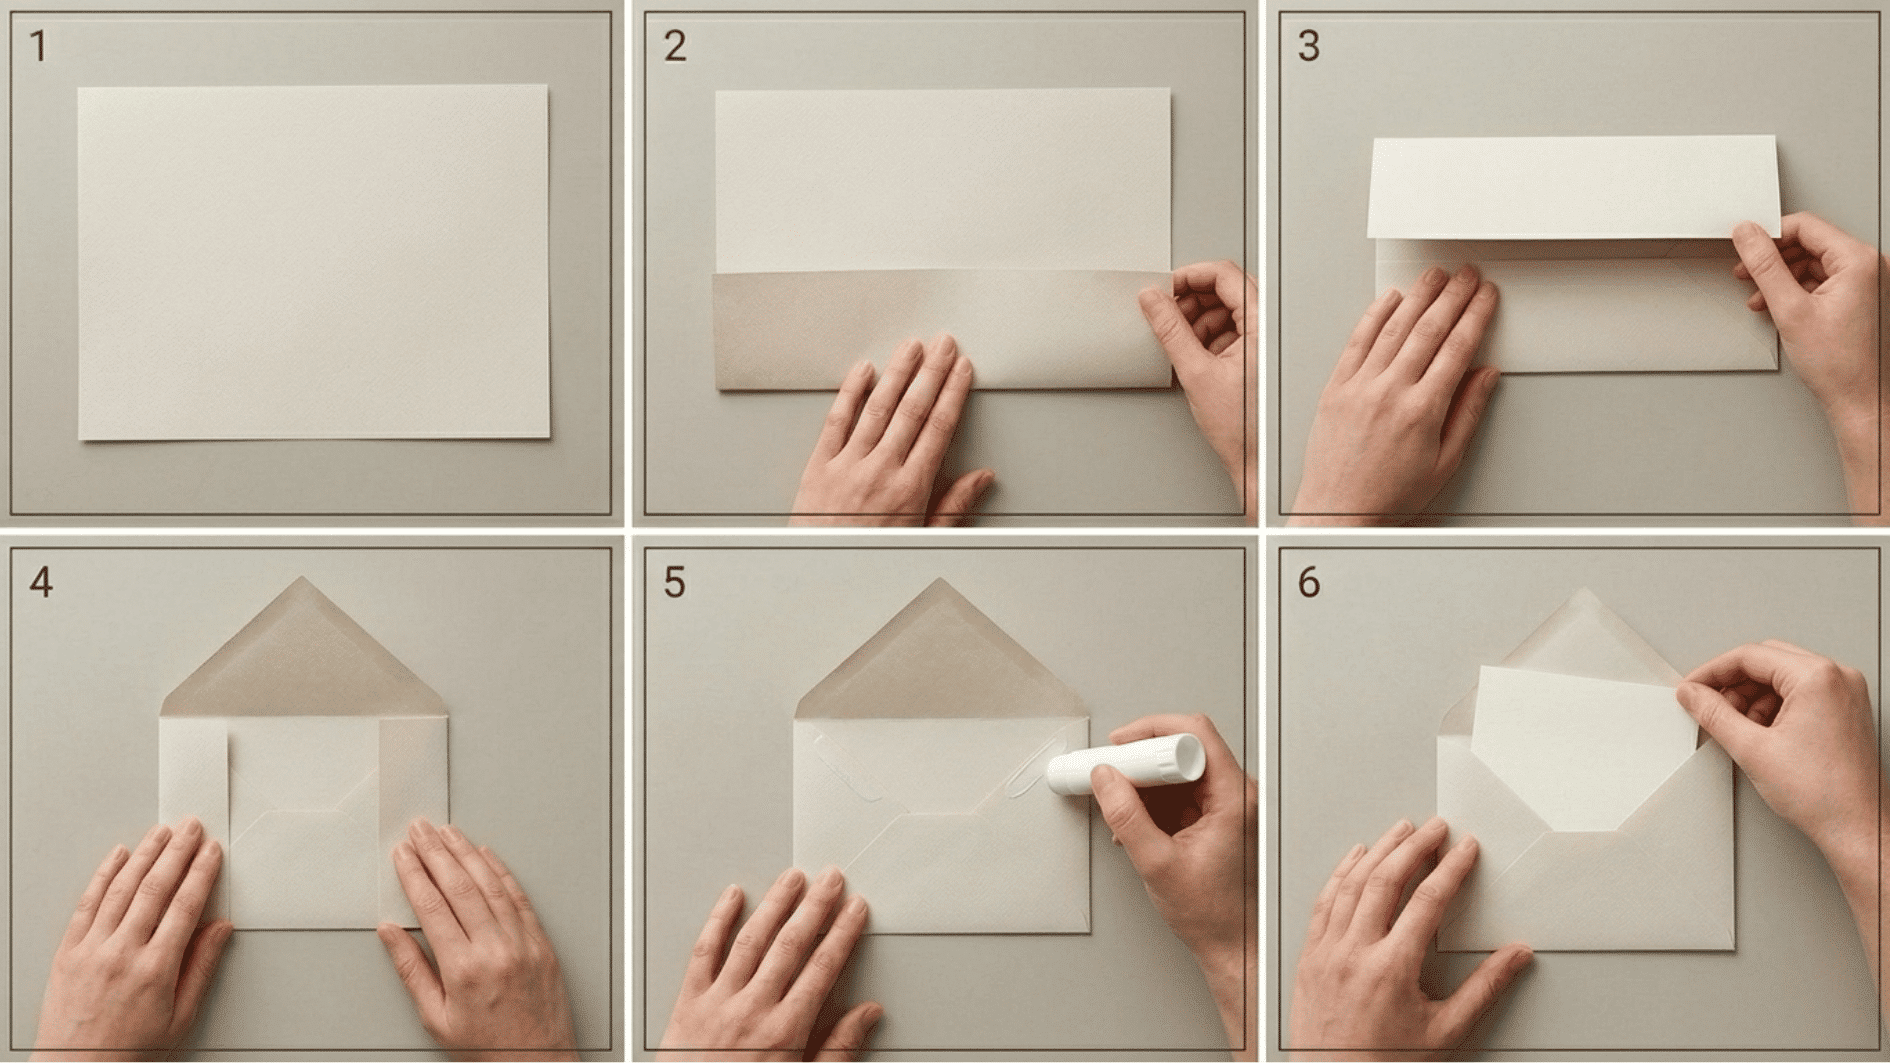
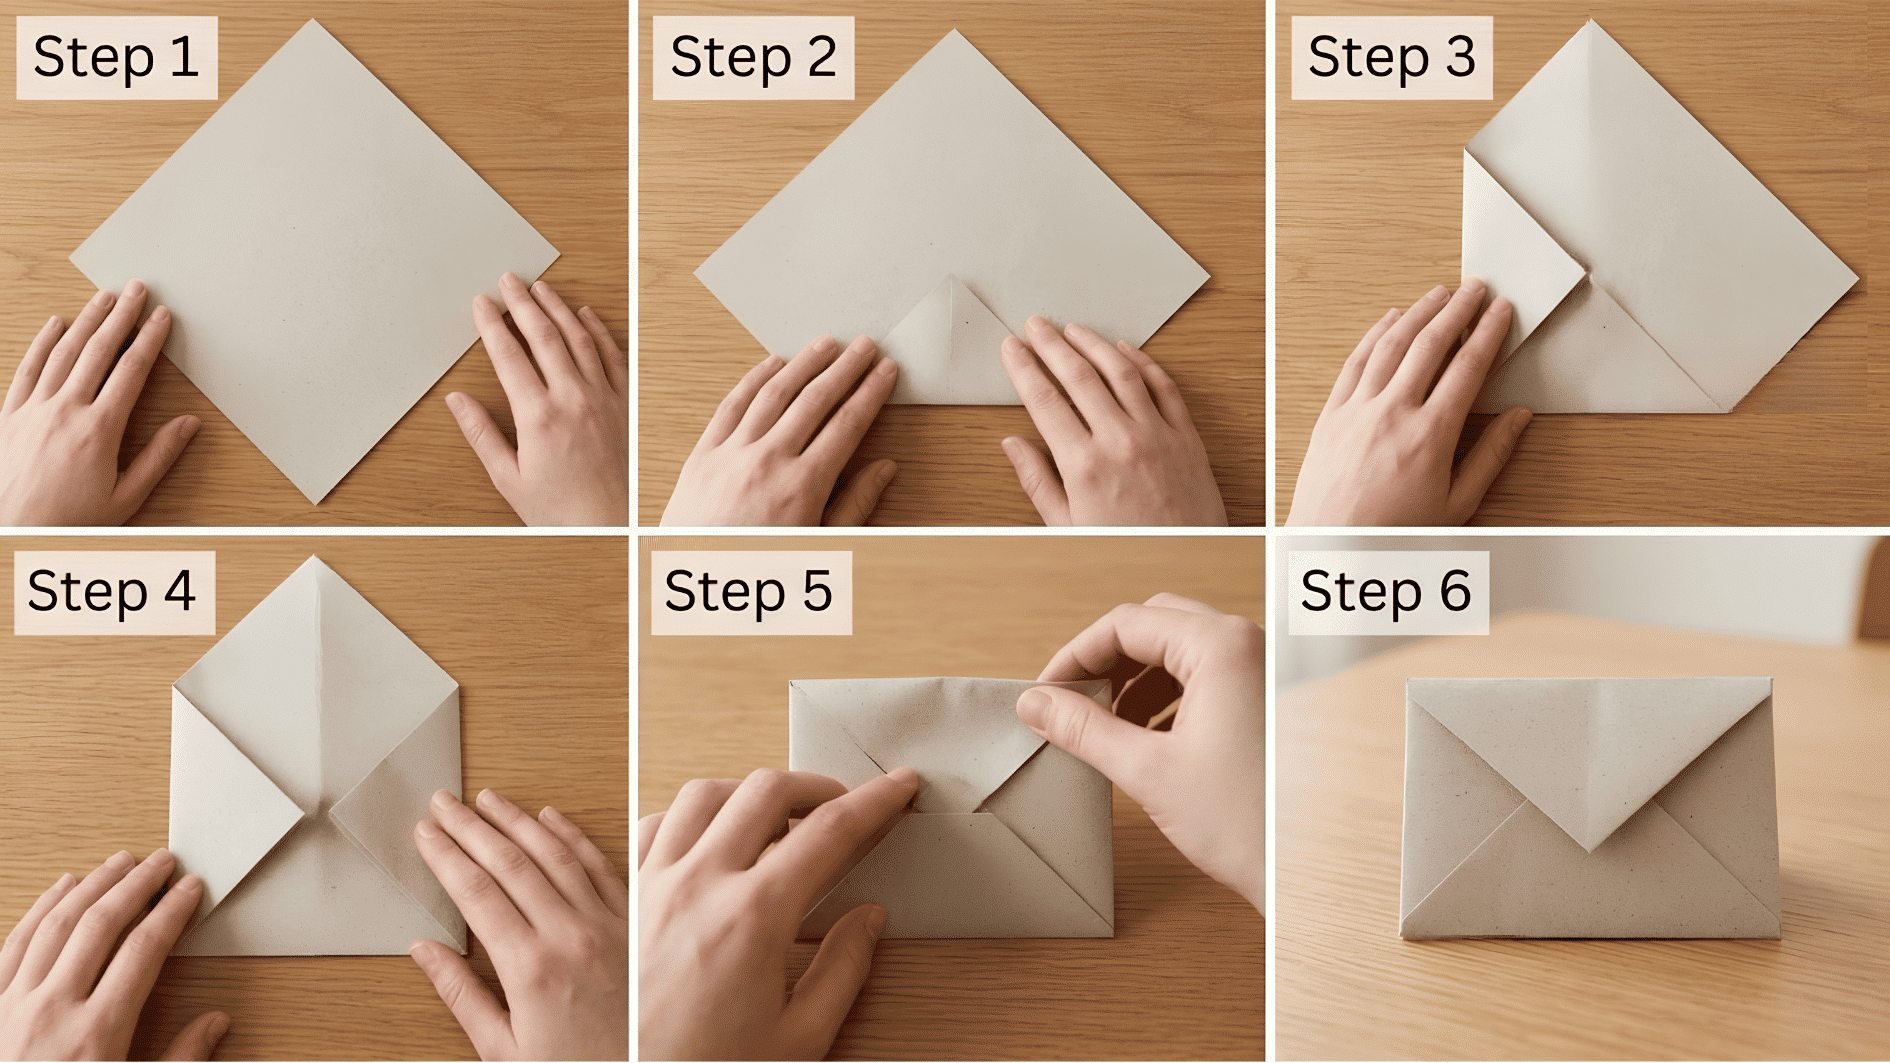
Step 1: Position Your Paper
Lay your paper flat on a table in a horizontal (landscape) position. An 8.5 x 11″ sheet works perfectly for a standard letter-size envelope.
Make sure your surface is clean and flat – wrinkles in the paper before you even start will show in your final folds.
Step 2: Fold the Bottom Third Up
Bring the bottom edge of the paper up about one-third of the way toward the top. Press the fold flat with your finger or run a ruler along the crease to make it sharp.
A clean crease here makes every step after this much easier.
Step 3: Fold the Top Third Down
Now fold the top edge down so it slightly overlaps the bottom fold. Fold it inside or cut it into a triangle shape.
This top flap will become the part you seal when you close the envelope. Don’t glue it yet – just crease it and leave it open.
Step 4: Fold in The Sides
Fold both the left and right side edges inward about half an inch each. Make sure they overlap evenly in the middle, so there are no gaps on either side. This is where your envelope starts to actually look like an envelope.
Step 5: Seal the Bottom and Sides
Use a glue stick or double-sided tape to seal the bottom edge and both side folds. Press firmly and hold for a few seconds so everything sticks. Leave the top flap open – that’s where your letter goes in.
Step 6: Tuck and Close
Slide your note or card inside, then run a line of glue along the inside edge of the top flap and press it down to seal. For a fancier finish, skip the glue and use a round sticker, a stamp, or a wax seal to close it.
Tip: Heavier paper, like cardstock or scrapbook paper, holds its shape better and looks more polished than thin printer paper. If you’re making an envelope for a special occasion, go with something a little heavier.
Other DIY Envelope-Making Methods for Everyone
Not every DIY envelope needs glue, scissors, or complicated folds. From quick origami-style folds to creative handmade designs, these are other easy envelope-making methods anyone can try at home with simple materials.
1. Envelope Template Method
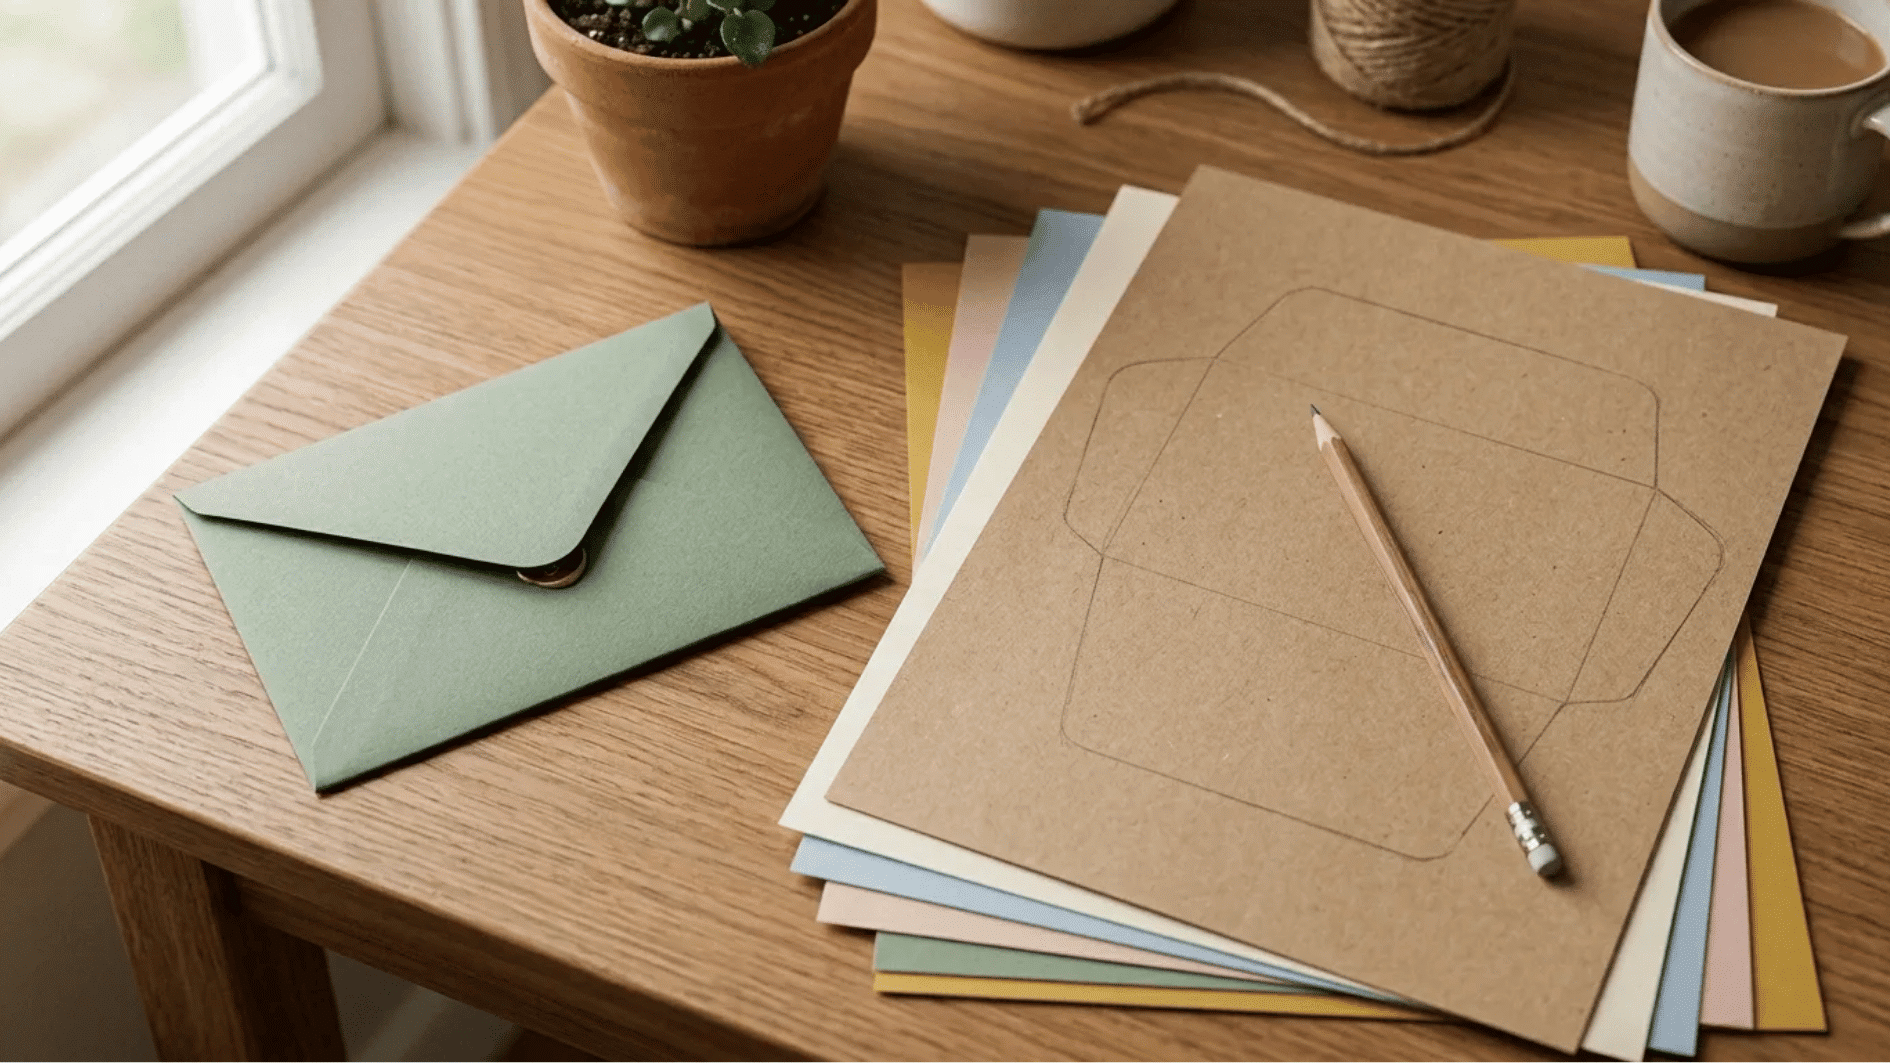
If you want a clean, consistent envelope every time, the template method is the way to go. You need – an old cereal box (for the template), paper, pencil, scissors, ruler, & glue stick or tape
You make one template out of cardstock, then trace and cut as many envelopes as you need. It takes a few extra minutes upfront but saves time on every envelope after the first.
Steps:
- Draw a cross shape on your cardstock – a large rectangle in the center with three flaps extending from the top, bottom, left, and right sides.
- Cut it out and fold all four flaps inward to check that your envelope shape and size are right. Adjust if needed.
- Once you’re happy with the shape, use this as your template going forward.
- Lay the template on your decorative paper, trace around it lightly with a pencil, and cut it out.
- Fold the left and right flaps in first, then the bottom flap up, and glue the side edges of the bottom flap to the left and right flaps.
- Let it dry, slide your card or note inside, then seal the top flap down.
2. The Origami Diamond Fold (No Glue Needed)
This method looks impressive, but it takes less than five minutes once you’ve done it once. It uses a square sheet and folds into a clean diamond-shaped envelope that closes on its own – no glue or tape required.
Steps:
- Place your square sheet on the table rotated like a diamond, with one corner pointing toward you.
- Fold the bottom corner up to the center point of the paper and crease.
- Fold the left corner inward to the center and crease flat.
- Fold the right corner inward the same way, slightly overlapping the left fold.
- Fold the top corner down toward you, then tuck the tip into the pocket formed by the two side folds.
- Press everything flat. The tuck holds it shut – no glue needed.
Creative Paper Ideas for DIY Envelopes
Once you know how to fold a piece of paper into an envelope, the fun part begins – picking your paper.
| Paper type | Style | Folds well | Best use |
|---|---|---|---|
| Scrapbook paper | Patterned, decorative | Yes – holds creases cleanly | Gift enclosures, cards, any occasion envelope |
| Old book pages or sheet music | Vintage, handmade | Yes – thin but sturdy enough | Keepsake notes, literary or music-themed gifts |
| Brown kraft paper | Clean, natural | Yes – folds and seals well | Rustic mailers, eco-friendly packaging |
| Gift wrapping paper | Colorful, festive | Yes – avoid very thin varieties | Seasonal cards, birthday and holiday notes |
| Newspaper or magazine pages | Casual, eclectic | Yes – easy to work with | Informal notes, zero-cost everyday use |
| Watercolor paper | Artistic, one-of-a-kind | Moderate – thicker stock | Painted envelopes, special handmade gifts |
The material you use completely changes the look and feel of the finished envelope.
Conclusion
You now know how to fold an envelope using more than one method – no store run needed, no special tools required.
Next time you write a card or letter, skip the store-bought pack and fold one yourself. A piece of paper and a few clean creases are really all it takes.
Start simple. Try different papers as you go. Once you get comfortable with how to fold a piece of paper into an envelope, the store version will honestly feel like a downgrade.
Frequently Asked Questions
Can You Actually Mail a Handmade Envelope Through Usps?
Yes; as long as it is made of paper or cardstock, rectangular, and meets size and weight requirements, a handmade envelope can be mailed at standard postage rates without extra charges.
What Size Does a Diy Envelope Need to Be to Mail at Regular Postage?
USPS requires letters to be at least 3.5 x 5 inches and no larger than 6.125 x 11.5 inches, with a maximum thickness of 0.25 inches.
How Do You Keep the Folds from Coming Apart Before Sealing?
Scoring fold lines lightly with a ruler and bone folder – or the back of a butter knife – before creasing keeps everything crisp and prevents the paper from springing back open

