


Creating abstract self-portraits is a wonderful way for kids to express their creativity while learning about art.
This fun and simple guide will take you through the process of making your own abstract self-portrait, focusing on self-expression rather than realistic details.
No matter if you’re a beginner or looking for new ways to express yourself, this tutorial will give you all the tools you need.
With easy steps and a focus on fun, you’ll learn how to represent yourself through bold colors, shapes, and textures. Let’s create a masterpiece that truly reflects who you are!
Why Create an Abstract Self-Portrait?
Abstract art focuses on shapes, colors, and emotions rather than realistic details. It allows you to express how you feel or how you see yourself in a non-traditional way. For kids, creating an abstract self-portrait can:
- Encourage creativity: Abstract art encourages free expression through color, texture, and form.
- Boost self-awareness: Kids reflect on their emotions and personalities through the artistic process.
- Build confidence: The focus is on expressing feelings, not perfection, which helps kids feel more confident in their creative abilities.
Abstract self-portraits also teach valuable skills, such as the use of shapes, lines, and colors, which contribute to cognitive and emotional growth
Materials You’ll Need for an Abstract Self-Portrait
Before you begin creating your abstract self-portrait, gather the following materials. These items are easy to find and perfect for kids just starting with abstract art.
| Tools/Materials | Purpose |
|---|---|
| Paper | For sketching and drawing your portrait. |
| Pencil | For sketching the outline before coloring. |
| Eraser | To remove any pencil lines after inking. |
| Black Marker | To outline the drawing after sketching. |
| Colored Markers/Paints | For adding bold and creative colors. |
| Ruler (Optional) | To help fold the paper evenly (for guides). |
Step-by-Step Guide to Creating Your Abstract Self-Portrait
Now that you have your materials, it’s time to create your abstract self-portrait! Here’s a detailed guide on how to draw your own abstract self-portrait in seven simple steps.
Step 1: Create Your Paper Guides
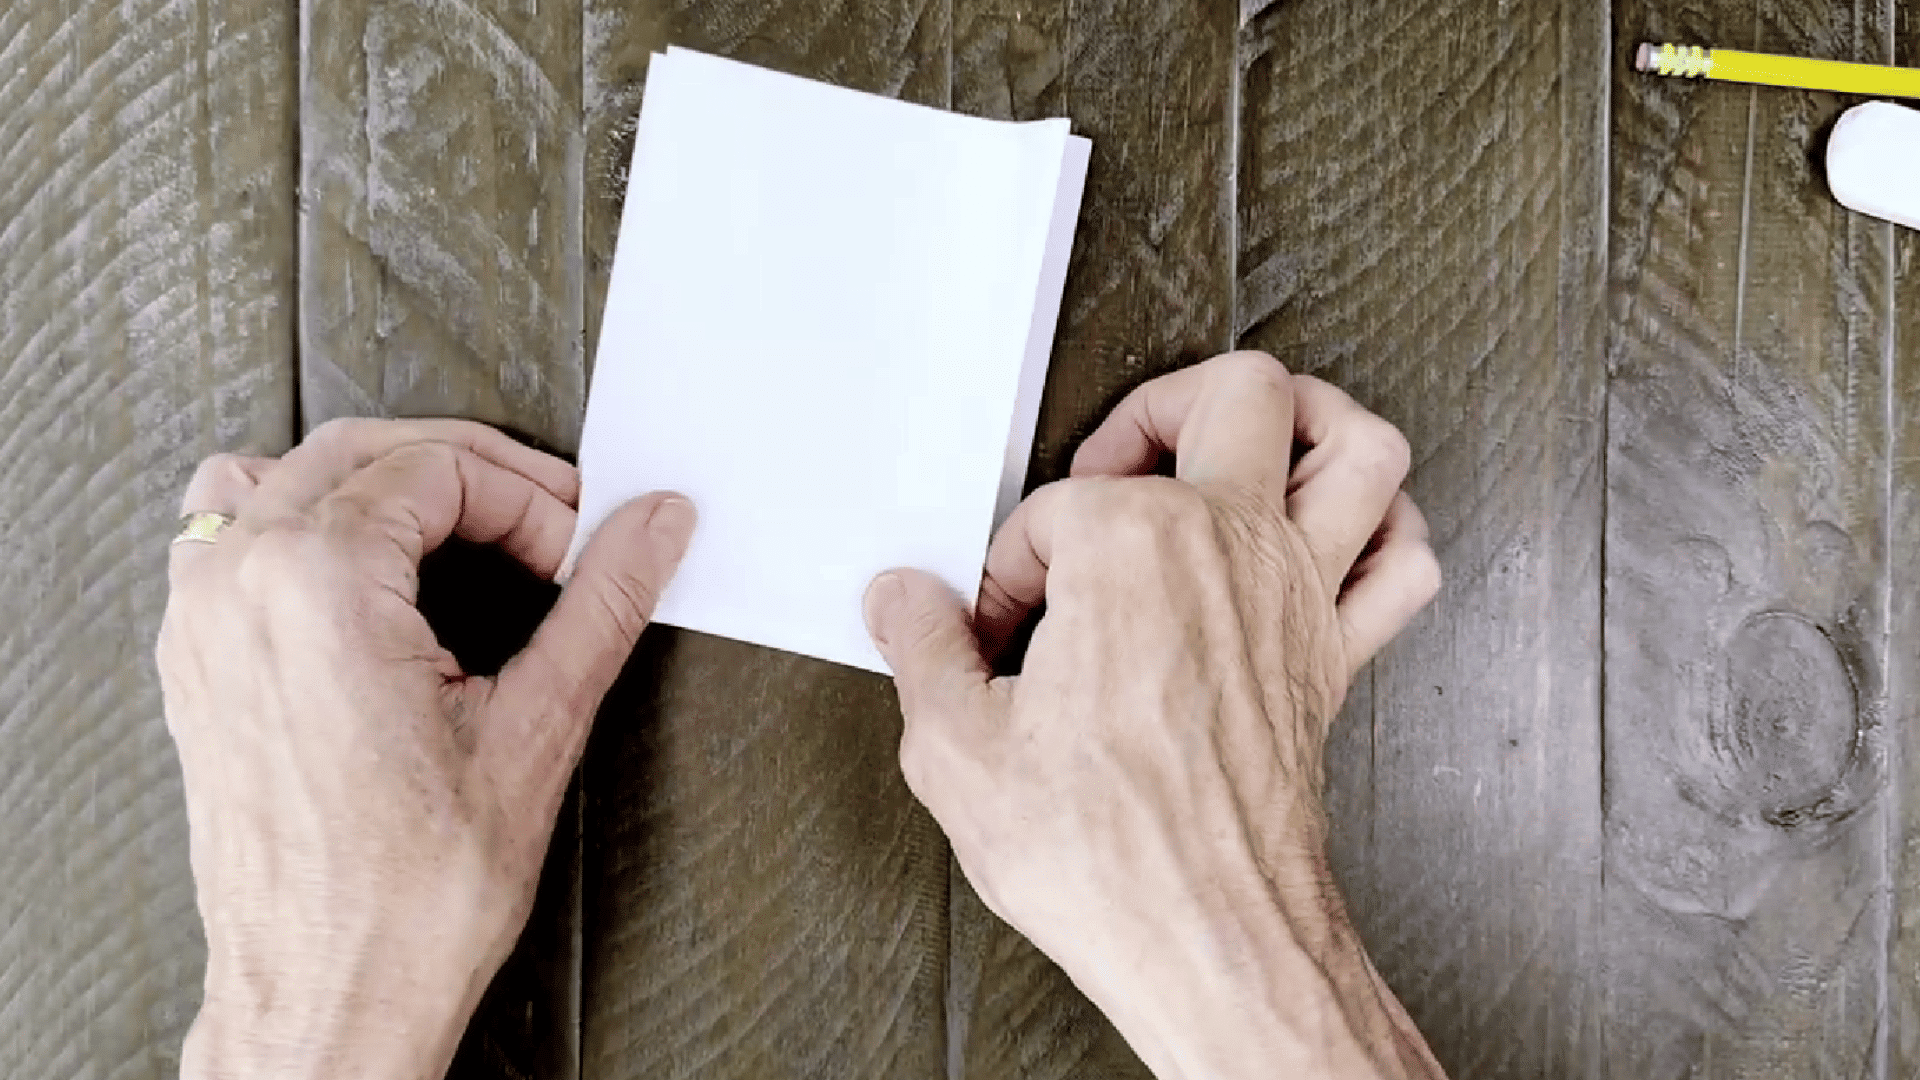
Before you start drawing, it’s helpful to create some guides to help keep your drawing centered. Fold your paper in half both vertically and horizontally. T
his will give you four sections and help you place your drawing in the right spot. These lines will guide you as you begin sketching your face and features.
Step 2: Draw the Face Shape
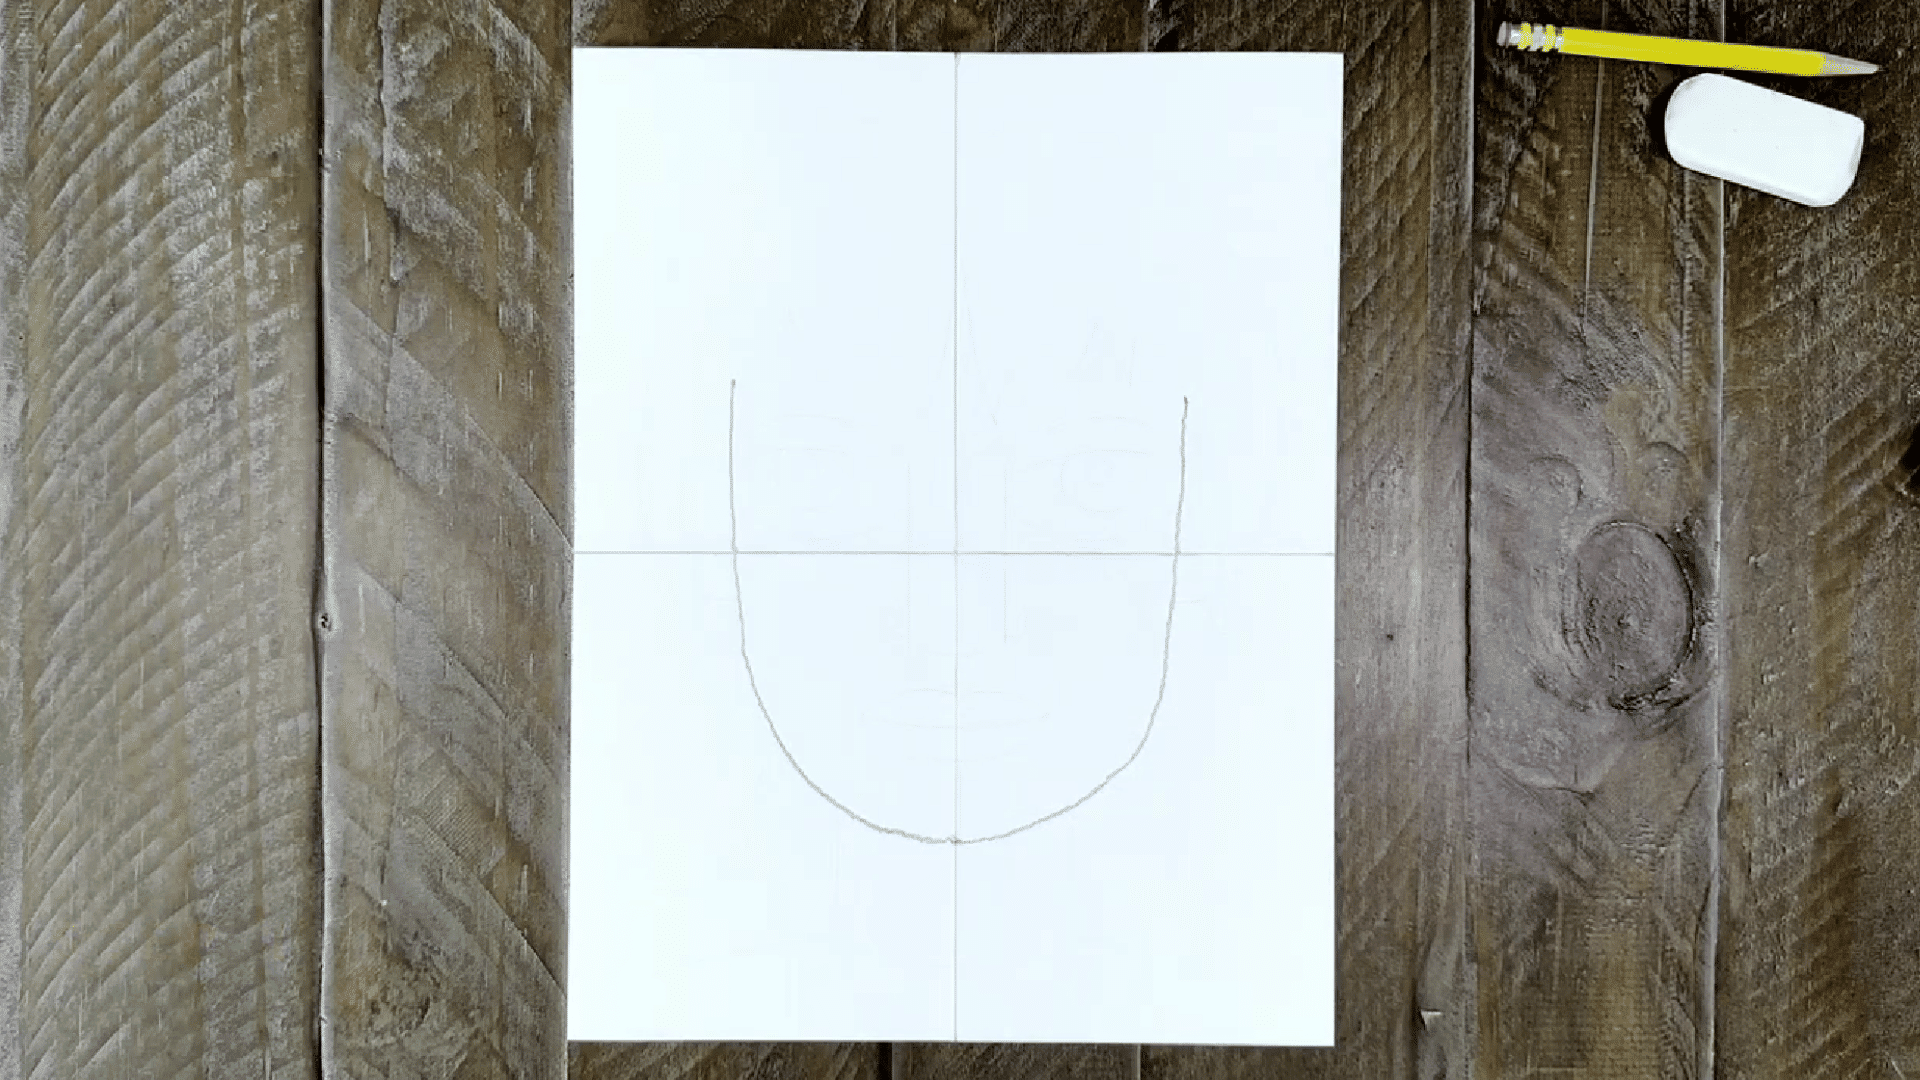
Start by drawing a large U shape in the center of your paper. This will form the basic outline of your face.
You can create this shape using dots as a guide, then connect the dots using your pencil.
Make sure both sides of the U shape match up as you go. This gives you a symmetrical base for your abstract self-portrait.
Step 3: Add the Ears and Neck
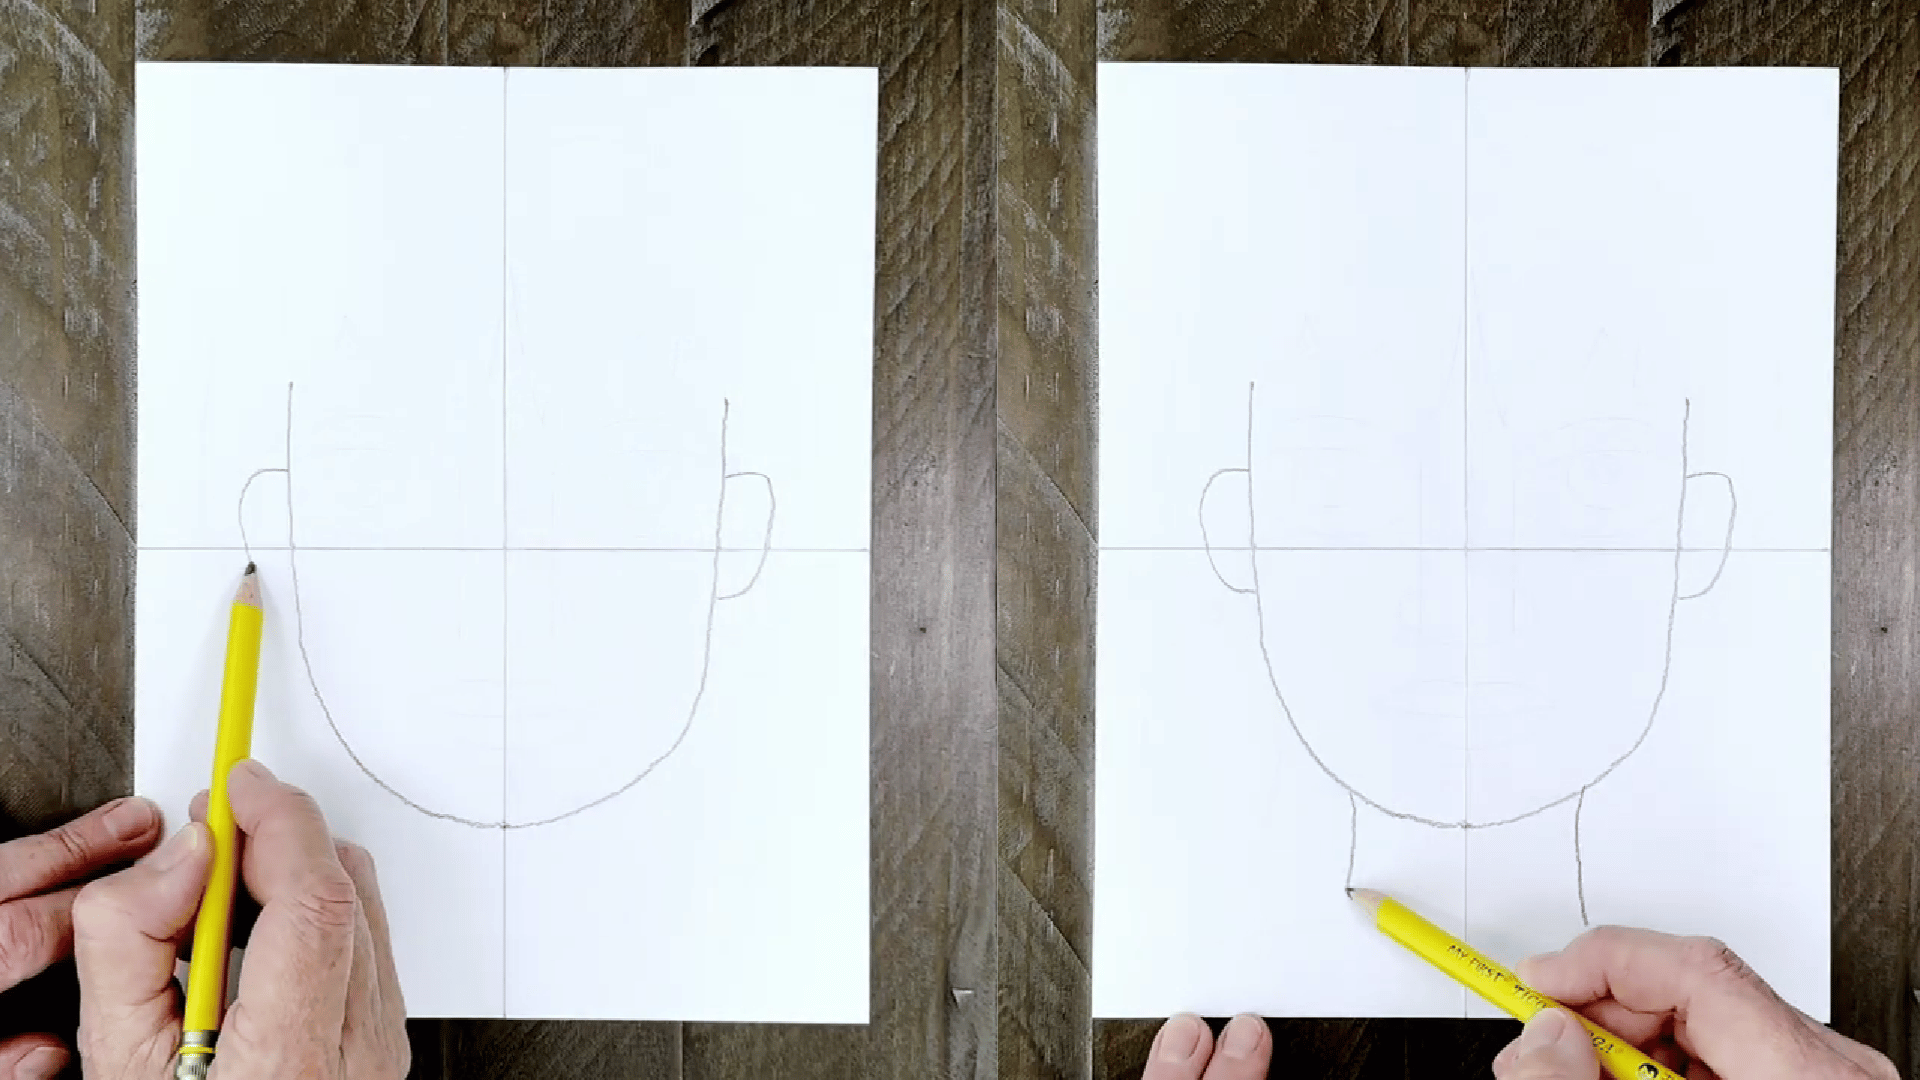
Next, draw the ears. Start by adding one ear on the right side of the face, about the same size as the one on the left. Make sure they align with each other.
Then, add a simple neck below the face. Afterward, draw the neckline of a shirt, either with a rounded or V-shaped collar. Draw a few simple shoulder lines extending from the neck.
Step 4: Draw the Hairline
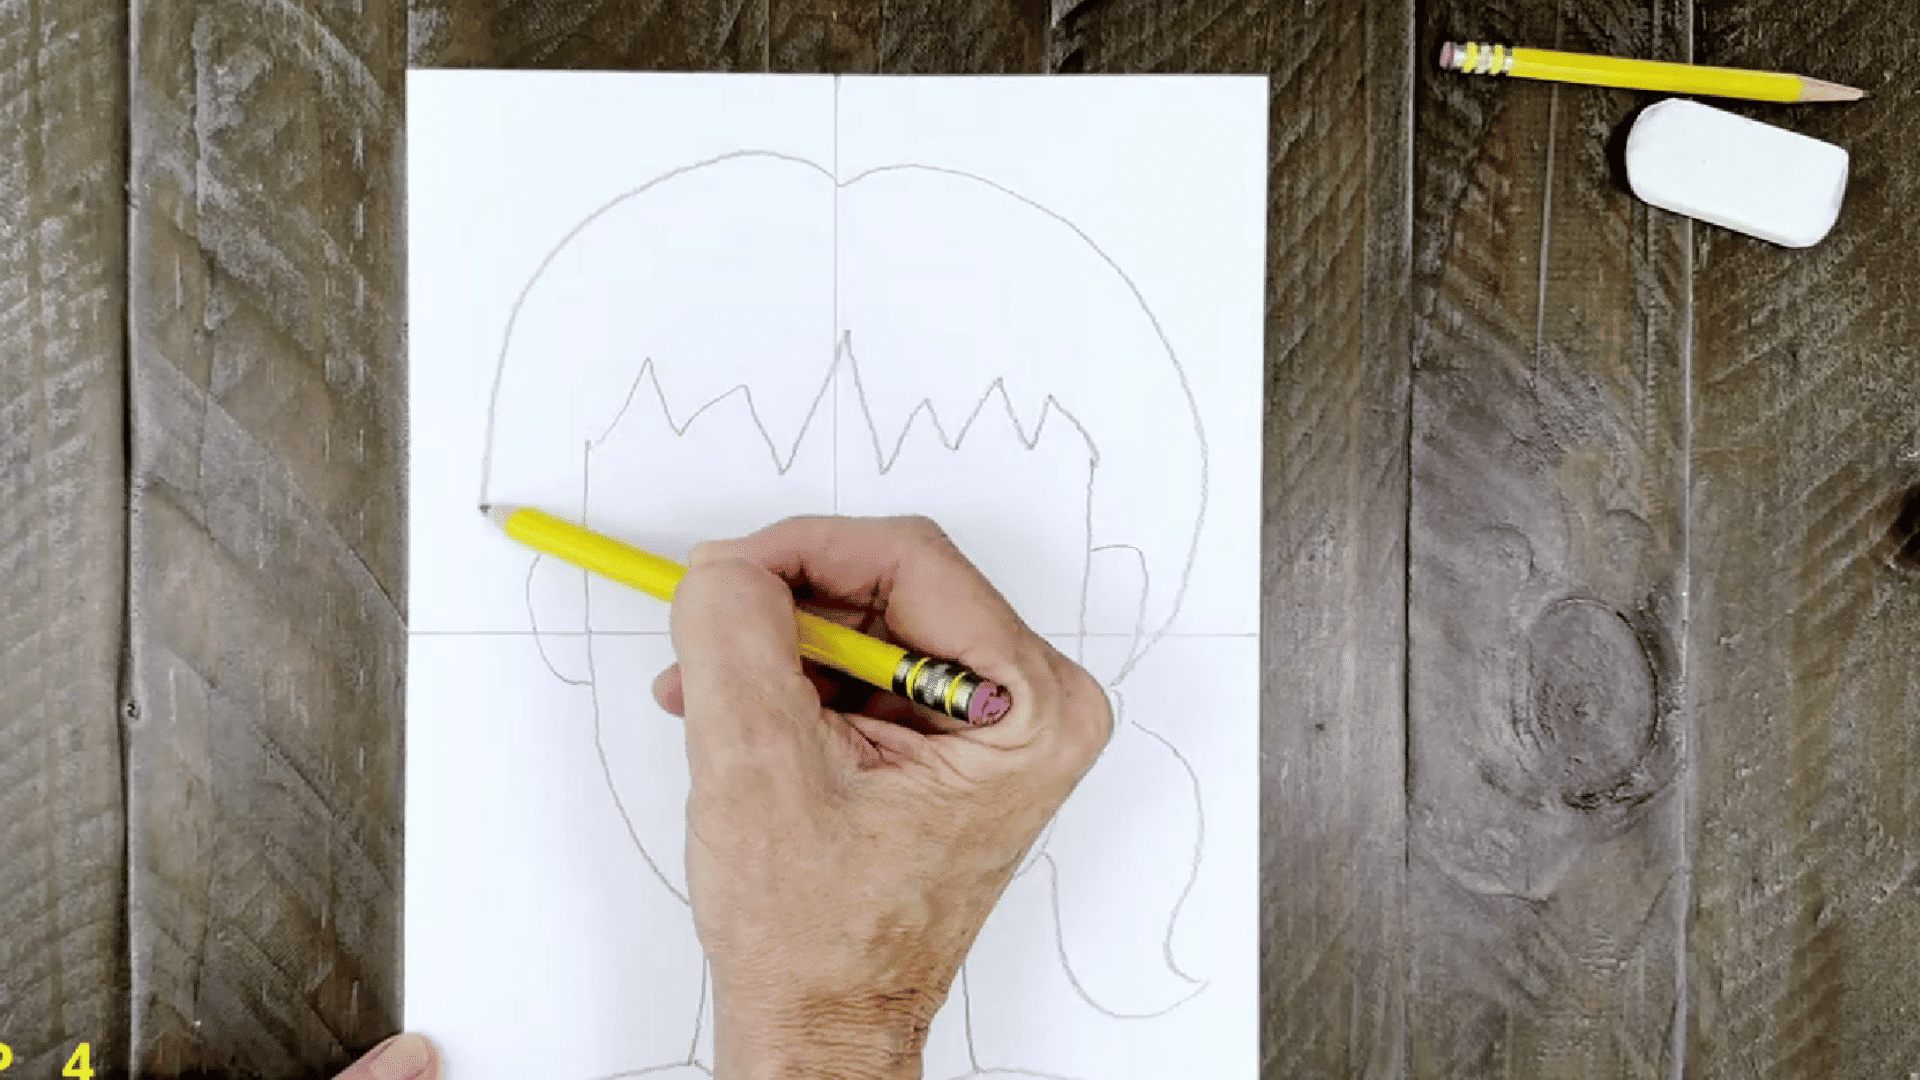
Now it’s time to add the hair. You can decide how to part the hair — a centered part, a side part, or even some fun zigzag lines for bangs. Draw the top of the hair touching or just above the ears.
Then, you can add pigtails or any other style you prefer. The goal is to keep it abstract, so feel free to be playful with the shapes and details.
Step 5: Draw the Nose and Eyes
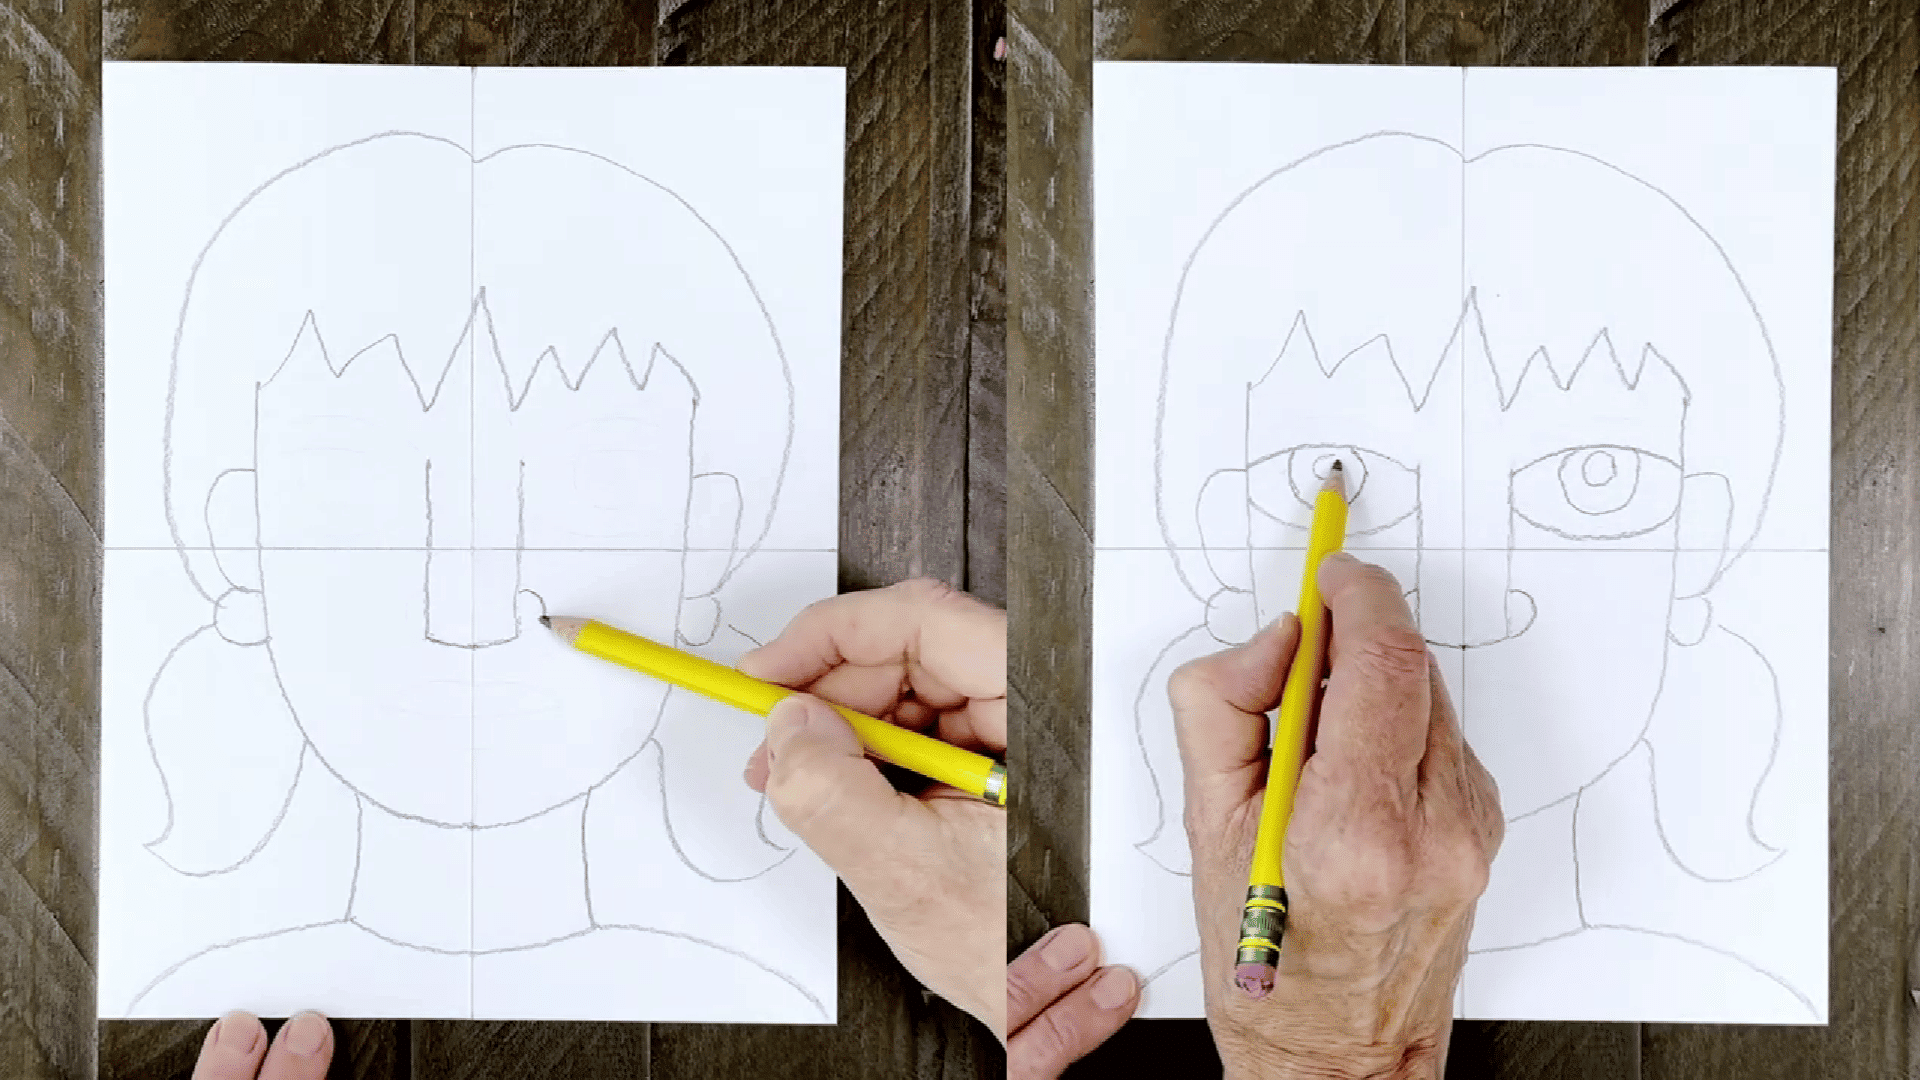
For the nose, draw a tall rectangle with an open top, and then add two small C-shaped lines on the sides to make it look more like a nose.
Next, draw two large eyes. Start by drawing curves that touch the nose and the sides of the face. Add circles for the iris and smaller circles for the pupils inside each eye.
Add a curve on top of each eye to represent the eyelids. The eyes should be large and expressive!
Step 6: Draw the Mouth
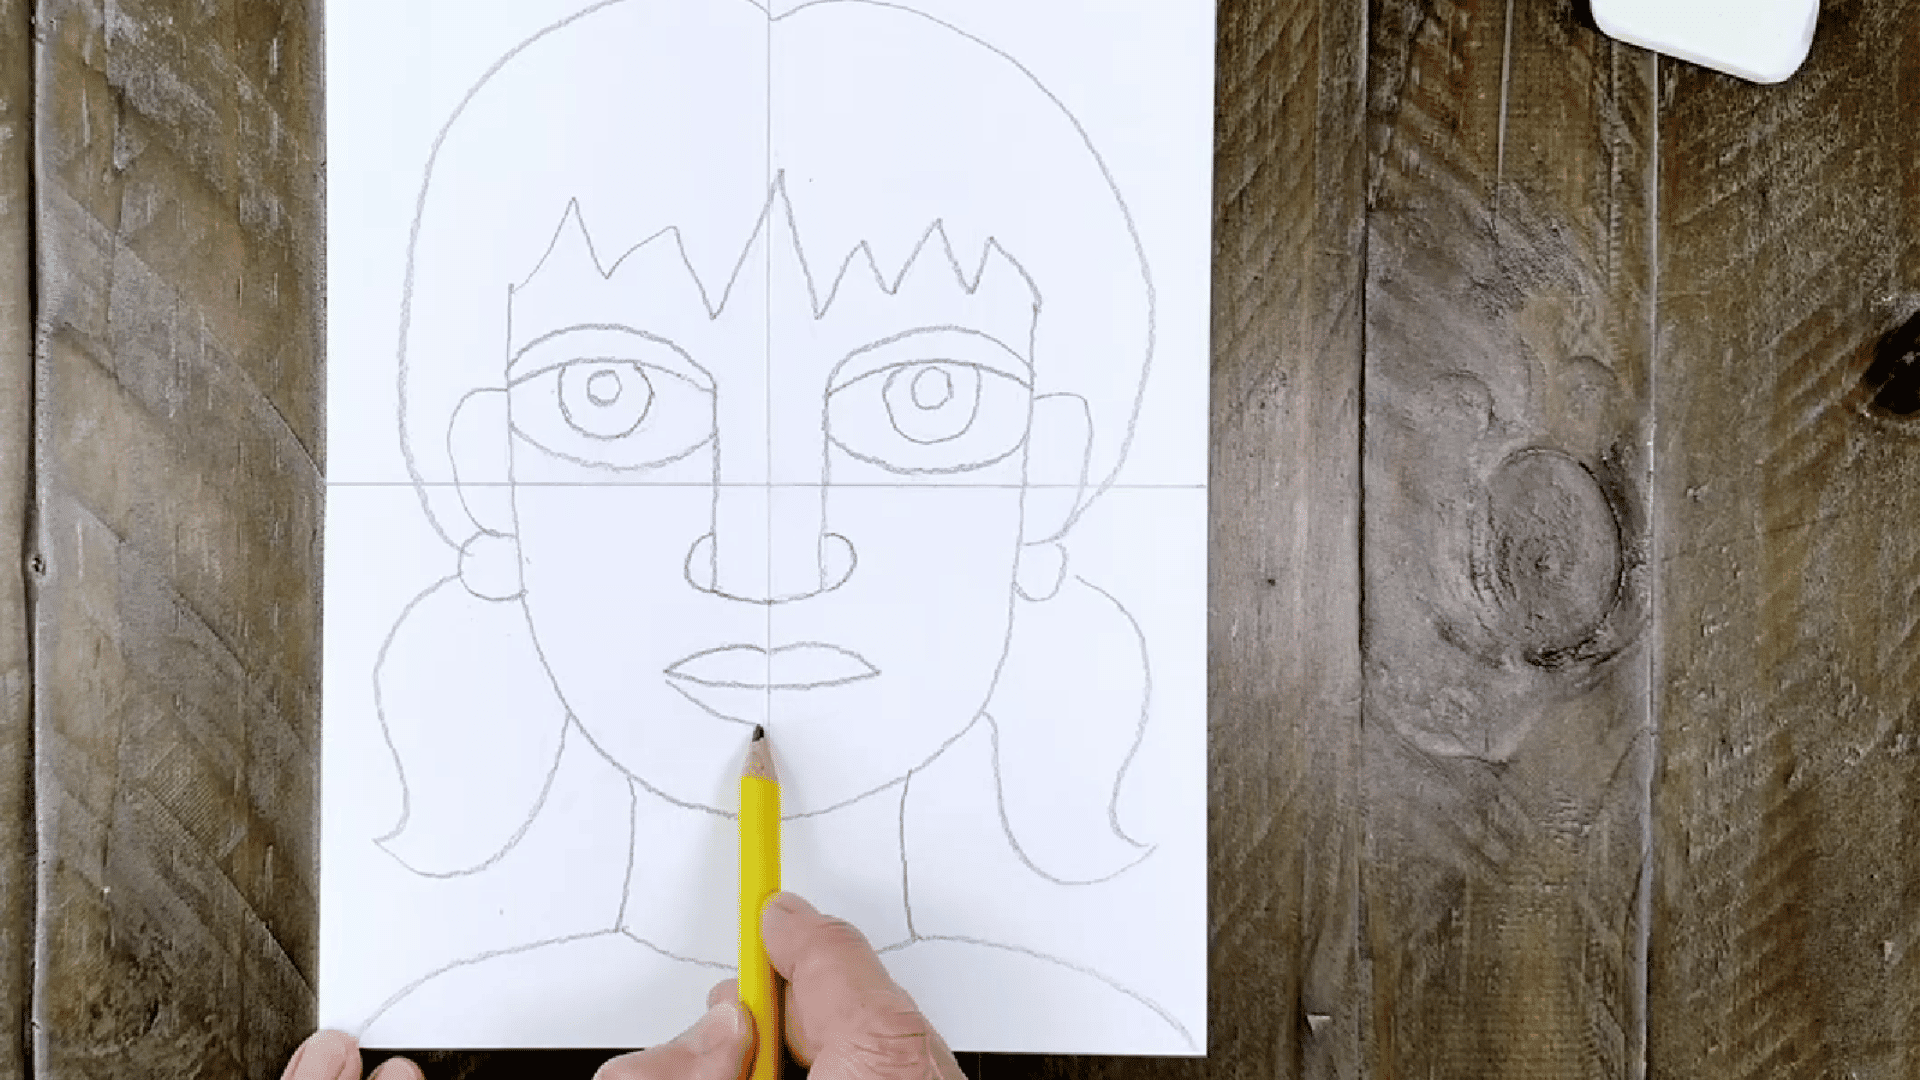
Draw the mouth starting with a line that’s halfway between the nose and the chin. Then, add the lips above and below the line.
A small center line above and below the mouth will help separate the left and right sides of the lips, which can be filled with different colors.
Step 7: Outline and Add Color

Once you’re happy with your pencil drawing, go over all the lines with a black marker. This will help define your abstract self-portrait. After that, erase any remaining pencil marks to keep your drawing neat.
Now comes the fun part — coloring! Use bright, bold colors for the skin, hair, eyes, and background. Don’t be afraid to mix up colors that you wouldn’t typically use for a face, like purple lips or a blue pigtail. The more colors, the better!
Tips and Tricks for Kids Creating Abstract Art
Creating abstract art is all about having fun and experimenting. Here are a few tips to make the process even more enjoyable:
- Be fearless: Don’t worry about mistakes – there are no “wrong” ways to do abstract art. It’s all about self-expression!
- Mix up the media: Try combining markers, paints, crayons, or even fabric and paper for texture.
- Play with patterns: Use repetitive patterns or random doodles to add interest and energy to your portrait.
- Use emotions: Think about how different colors and shapes can express how you feel. This makes your artwork even more meaningful.
Sharing and Discussing Your Abstract Self-Portrait
Once your abstract self-portrait is finished, share it with friends, family, or classmates! Talking about your art can help you reflect on your creative choices and what you’ve expressed through shapes and colors.
Share with others: If you’re in a classroom or art group, you can have discussions about the meaning behind each person’s abstract portrait.
Ask for feedback: Let others share what they see in your portrait. Sometimes, someone else’s perspective can open your eyes to new details in your art.
Conclusion
Creating an abstract self-portrait is a great way for kids to explore their creativity and learn to express themselves through art.
It’s an enjoyable, educational activity that helps build artistic skills, boosts confidence, and encourages emotional expression.
I hope this guide motivates you to create your own abstract self-portrait.
Get creative, try out different colors and shapes, and most importantly – enjoy the process! And if you’ve created your own abstract self-portrait, feel free to share it with your friends!

