

Painting over stained wood sounds simple enough, right up until the paint starts peeling a few weeks later or the old stain quietly bleeds through your new color.
Stained surfaces are trickier than plain wood because the underlying finish can prevent paint from bonding properly, no matter how careful you are with your brushstrokes.
You don’t always need to completely remove the stain. With the right prep steps, most stained wood surfaces, from furniture to trim, can be painted successfully.
This blog shares what to check first, when sanding is enough, and how to avoid the most common painting mistakes.
Can You Paint Over Stained Wood?
Yes, painting over stained wood is possible without stripping it down to bare wood first. The key factor isn’t the stain itself, but whether the surface can hold onto paint.
A properly cleaned and lightly sanded stain layer gives paint enough grip to bond and last. Problems only arise when the finish is glossy, waxy, or heavily built up, which blocks adhesion.
So rather than asking if it’s possible, the better question is, your specific surface needs light prep or a more thorough approach before painting begins.
What to Know Before Painting Stained Wood?
Stained wood isn’t always as paint-ready as it looks, since the surface can behave differently depending on the finish and its age.
Some stains sink deep into the grain, while others form a thin sealed layer that changes how well paint sticks. A smooth, shiny, or slightly waxy feel usually signals that extra prep is needed.
Fresh stain may still be curing and affect drying, while older, worn stain is typically easier to paint after cleaning. Dark stains can also bleed through lighter paint without primer.
Knowing these details upfront helps you avoid peeling and get a longer-lasting finish.
Do You Need to Remove Stain Before Painting?
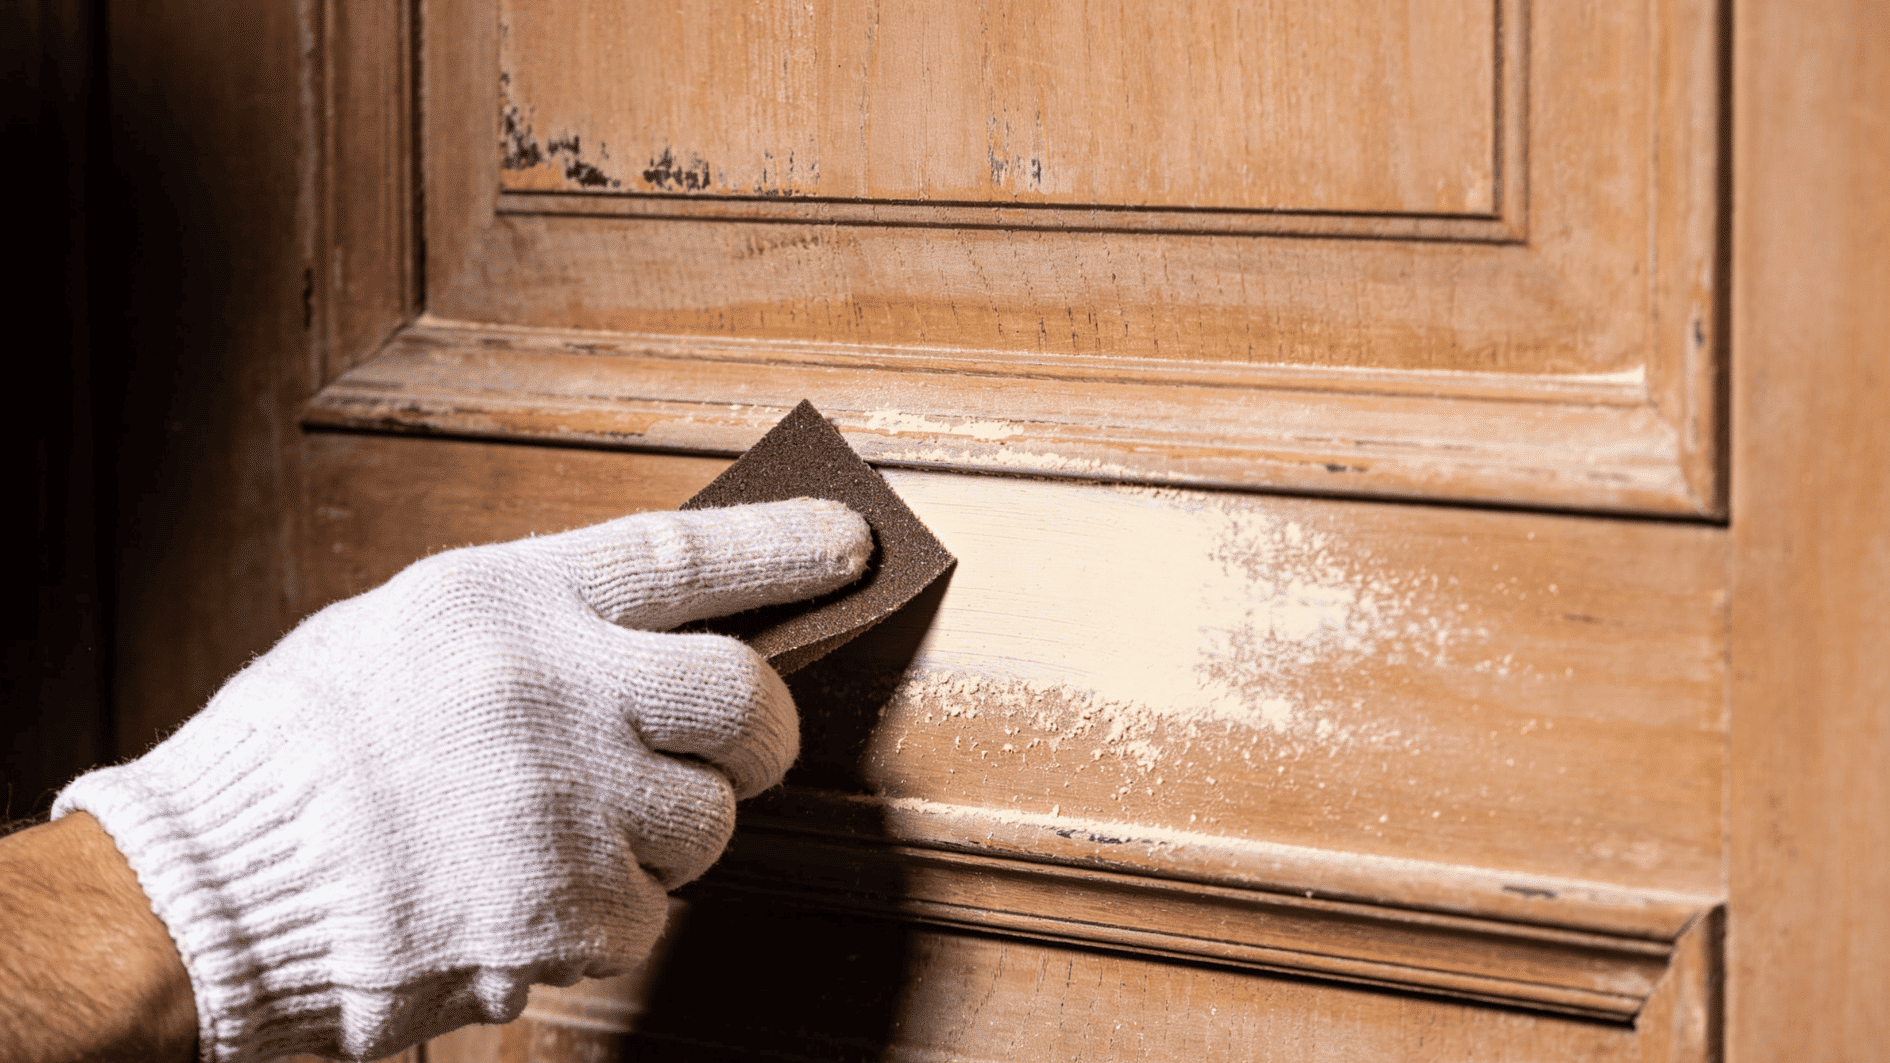
In most cases, not always. The right prep method depends on your surface, and sanding, priming, or full removal each fit different situations.
1. When Sanding is Enough
Light sanding helps remove the smooth top layer of stain so paint and primer can hold better.
This works best when the stain is still in good condition, making it ideal for furniture, cabinets, and trim where you want to keep the wood base intact.
- Removes shine from glossy or sealed stain layers
- Creates texture so primer grips the surface better
- Works well on older stains that are already settled
- Helps avoid full stripping and saves time
2. When Sanding is Not Required
Skipping sanding entirely is possible, but only under the right conditions. If the stained surface is already dull, worn, or not glossy, a strong bonding primer can sometimes replace the need for sanding altogether.
These primers are designed to grip smoother surfaces better than regular ones. However, this shortcut works best on surfaces with light wear, not on wood with thick or waxy stain layers.
Skipping prep entirely on a shiny or sealed surface usually leads to poor adhesion, so while sanding isn’t always mandatory, some form of surface prep is still necessary for lasting results.
3. When You Should Remove Stain Completely
Some surfaces need deeper prep when the existing finish is too strong or unstable for paint. Thick layers of old stain or waxy coating mean sanding alone may not be enough, risking poor bonding and peeling over time.
- Surface feels greasy, waxy, or won’t hold primer
- Dark stain likely to bleed through light paint shades
- Old finish is flaking, uneven, or damaged
- Multiple stain layers have built up over time
In these situations, stripping or heavy sanding may be needed to reach a stable base. It takes more effort, but it helps avoid repainting issues later.
Steps to Prepare Stained Wood for Painting
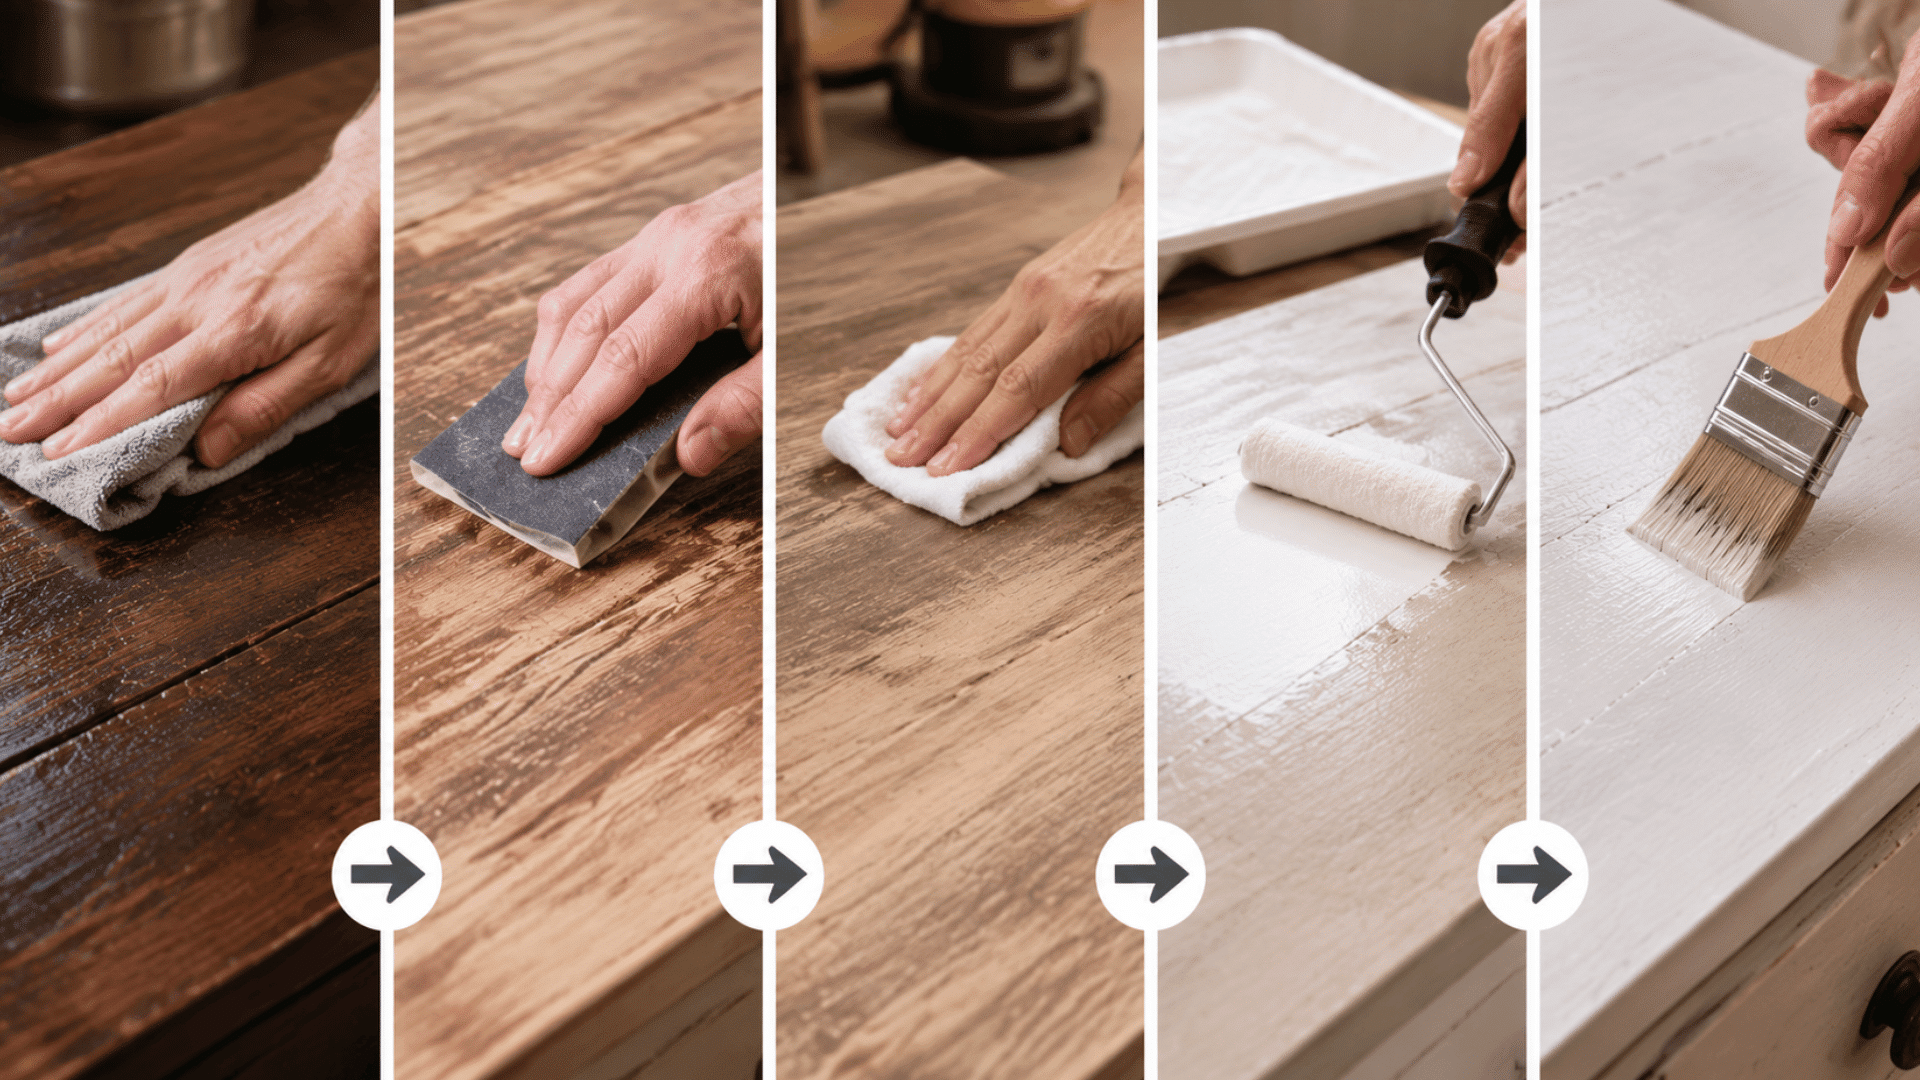
Before you start painting, proper preparation decides how smooth and long-lasting the finish will be. Even stained wood that looks clean can still cause problems if it is not prepped correctly.
- Clean the surface thoroughly: Wipe down the wood to remove dust, grease, and leftover polish, since residue left behind can stop paint from sticking properly and weaken adhesion over time.
- Lightly sand the stained area: Sand along the grain to remove shine and break the sealed top layer of stain, giving primer something to grip onto. Focus on glossy or slick spots that feel smoother than the rest of the surface.
- Wipe away all sanding dust: Use a dry or tack cloth to clear dust before moving ahead, since leftover particles can mix into wet paint and create a rough, gritty texture once it dries.
- Apply a stain-blocking primer: This step matters most on darker wood, where color can bleed through if skipped. A good primer creates a strong, even base and prevents old stain tones from showing through your new color.
- Finish with thin, even paint coats: Apply paint in light layers, letting each one dry fully before adding the next, to reduce streaks and lower the risk of peeling later on.
Painting Different Stained Wood Surfaces
Not all stained wood behaves the same way, since surface type affects how paint settles and holds. Furniture often has multiple coats of stain or sealant, so it usually needs more prep than trim or molding.
Cabinets, especially in kitchens, may carry grease or residue that needs thorough cleaning before sanding, while trim and doors tend to have thinner stain layers, making them easier to prep quickly.
Outdoor wood faces added exposure to moisture and sunlight, so it often needs weather-resistant products. Choosing the right paint and primer for each surface makes a real difference in how well the finish holds up.
- Furniture – Use a bonding primer with a durable satin or semi-gloss paint for daily wear
- Cabinets – Choose a stain-blocking, grease-resistant primer paired with washable enamel paint
- Trim and doors – A quick-drying primer works well with semi-gloss paint for crisp edges
- Outdoor wood – Opt for exterior-grade, weather-resistant primer and paint to handle moisture and sun
When Should You Not Paint Over Stained Wood?
Sometimes it’s better to pause before painting to avoid deeper problems later. Some underlying issues need to be fixed first, or the new paint job won’t last.
- Wood showing soft spots, water damage, or rot needs repair first, since paint won’t fix the underlying issue and may worsen it over time
- Surfaces with active mold or mildew require proper treatment before painting, as sealing them in traps moisture beneath the finish
- Stain that’s extremely fresh and still curing should be given time, since painting too soon can cause poor adhesion and an uneven texture
- Wood that’s excessively oily, waxed, or polished needs deeper cleaning before primer is applied, or the paint may fail to bond properly
Signs Your Stained Wood Was Not Prepped Properly
Before moving forward with painting, it helps to understand what poor prep looks like on stained wood.
| Problem You See | What It Means | Why It Happens |
|---|---|---|
| Peeling or flaking paint | Paint is not bonding to the wood surface | Skipped sanding or primer step |
| Patchy or uneven color | Paint is sitting on top of the stain unevenly | Poor cleaning or a glossy stain layer left behind |
| Dark stain showing through | Stain bleeding into the paint layer | No stain-blocking primer was used |
| Rough or gritty finish | Dust mixed into paint during application | Surface not wiped after sanding |
| Paint chipping easily | Weak adhesion between layers |
Painting over a sealed or oily surface |
These signs usually show up during or after painting and can affect how long the finish lasts.
What Happens if You Paint Over Stained Wood Without Prep?
Painting directly over stained wood without proper preparation often results in poor adhesion and an uneven finish.
The smooth or sealed stain layer prevents paint from adhering properly, resulting in early peeling or flaking. In many cases, paint may look patchy or streaky because it sits on top of the surface rather than bonding with it.
Dark stains can also show through lighter paint colors, especially when no primer is used, leading to a dull or uneven appearance.
Over time, moisture, heat, and regular use can weaken the paint layer and speed up breakdown.
Final Thoughts
Painting stained wood gives the best results when each step is done carefully and in the correct order.
Simple actions like cleaning the surface, lightly sanding to remove shine, and using a suitable primer help the paint grip better and reduce common problems such as peeling, patchy areas, or stains showing through lighter colors.
Consistency during application also plays a big role in the final look. Thin coats of paint, even spreading, and proper drying time between layers help the finish stay strong and uniform.
When the process is followed properly, stained wood can be updated to a clean appearance that holds up well over time and requires fewer touch-ups.
Frequently Asked Questions
Does Wood Grain Show After Painting Stained Surfaces
Yes, in many cases, the natural grain texture can still be slightly visible after painting.
Can You Use Spray Paint on Stained Wood
Yes, spray paint can be used if the surface is properly cleaned and lightly sanded first.
How Do You Know if Sanding is Enough
If the surface loses its shine and feels lightly rough, it is usually ready for painting.