
Summer’s here, and you know what that means: long sunny days, maybe a trip to the beach, and plenty of time for fun! But sometimes, even with all that sunshine, kids can get a little bored.
That’s where crafting comes in! Getting creative isn’t just a great way to beat the “I’m bored” blues; it also helps little hands get stronger, sparks imagination, and makes awesome memories.
This post covers a super collection of easy-to-follow summer craft ideas that are packed with fun.
So, grab your glue sticks and glitter, and let’s make this summer the craftiest one yet.
Fun Summer Crafts for Kids to Try
Summer is the perfect time to spark creativity in kids with fun and easy-to-make crafts. From colorful sun catchers to imaginative paper bag kites, these crafts are sure to keep your little ones entertained while enhancing their creativity and fine motor skills.
1. Paper Plate Sun Catchers
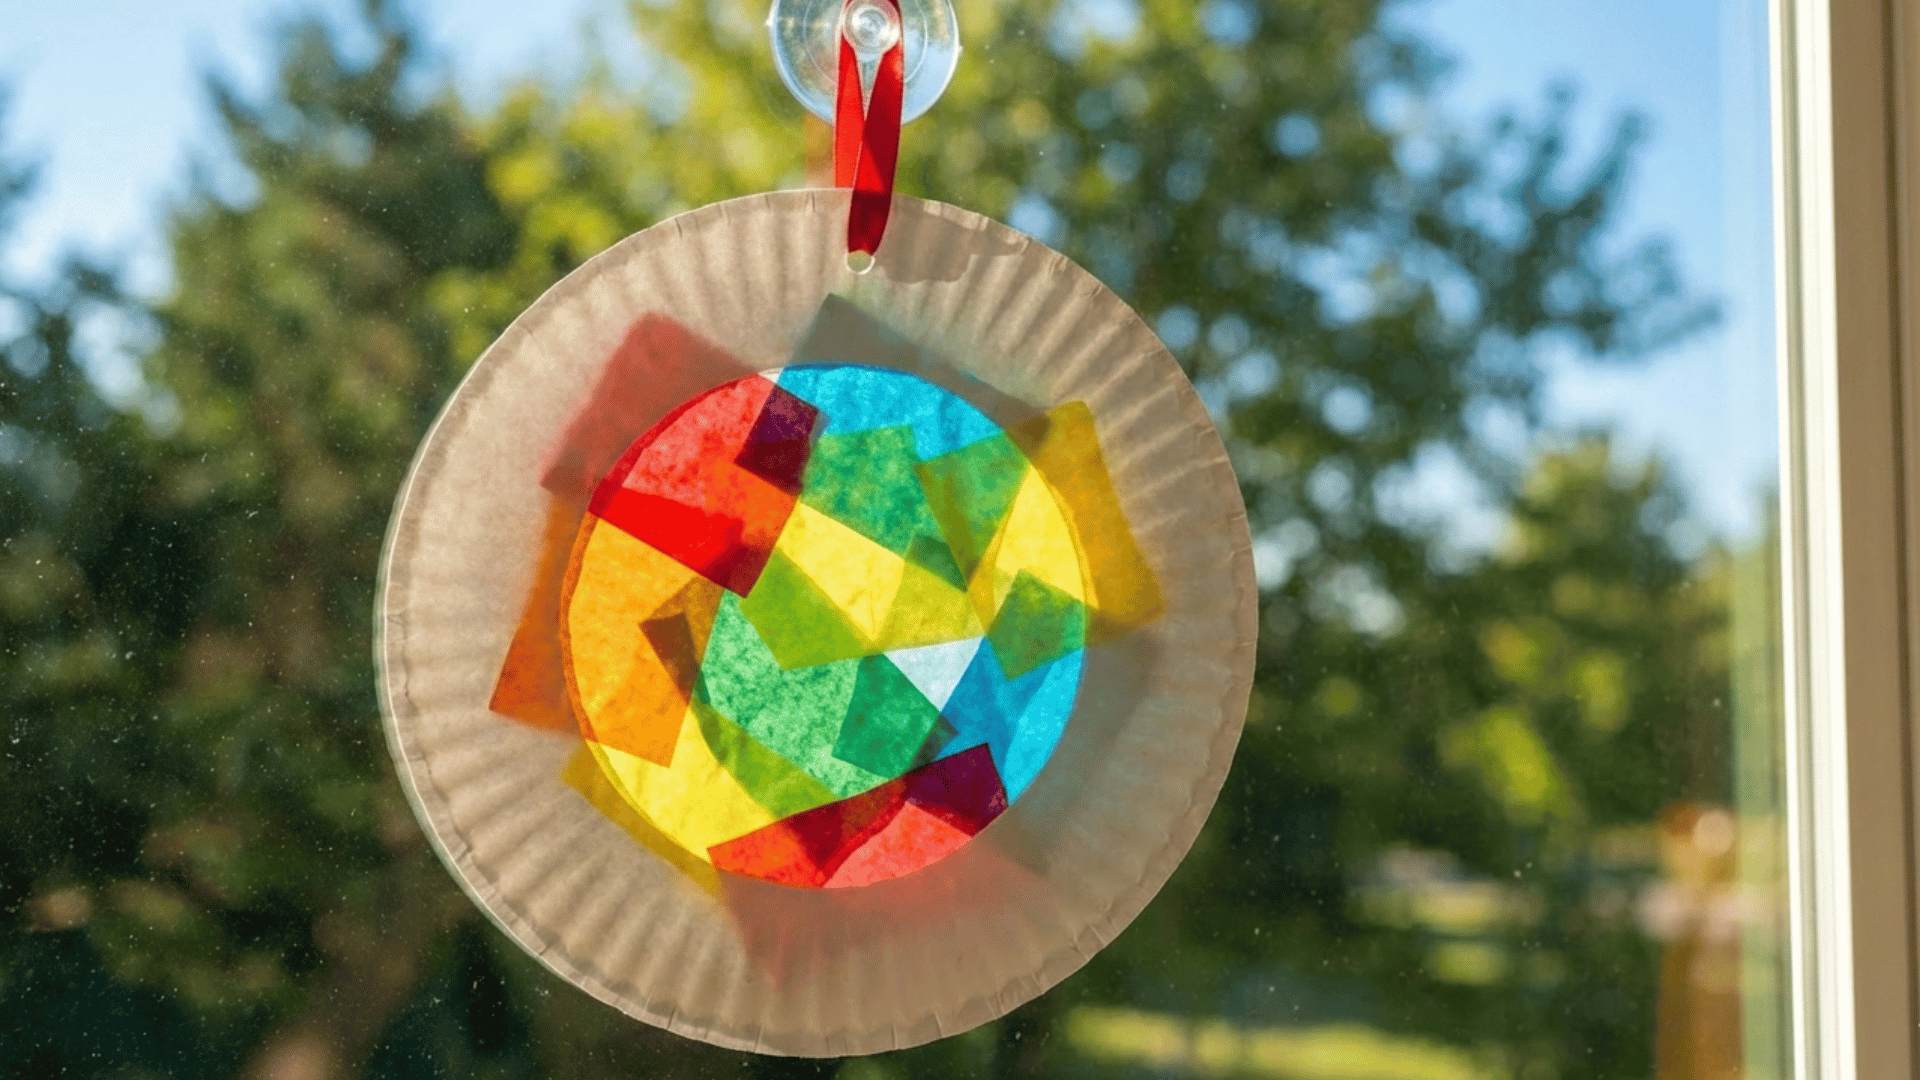
Brighten your windows with these easy stained-glass style sun catchers that beautifully capture the afternoon light.
It’s a fantastic 20–30 minute project for kids aged 3 to 8, perfect for teaching them how overlapping colors create brand-new shades. Since it uses simple household items, it’s a mess-free way to spark creativity without any heavy lifting.
Materials You’ll Need: Paper plates, colorful tissue paper, scissors, glue, and ribbon.
Steps to Follow:
- Prep the Frame: Have an adult help cut out the center of the paper plate so you’re left with a sturdy ring.
- Prep the “Glass”: Tear or cut your colorful tissue paper into small squares, circles, or random confetti shapes.
- Fill the Center: Apply glue around the inner rim of the ring. You can also use clear contact paper across the hole to make sticking the tissue paper even easier!
- Layer the Colors: Start sticking your tissue paper pieces across the opening. Make sure they overlap a bit; this is how you get those cool “rainbow magic” color mixes.
- Add the Hanger: Once the glue is totally dry, punch a small hole at the top of the plate rim.
- Final Touch: Thread your ribbon through the hole, tie a knot, and hang it up in your favorite sunny window.
2. Ice Cream Cone Craft
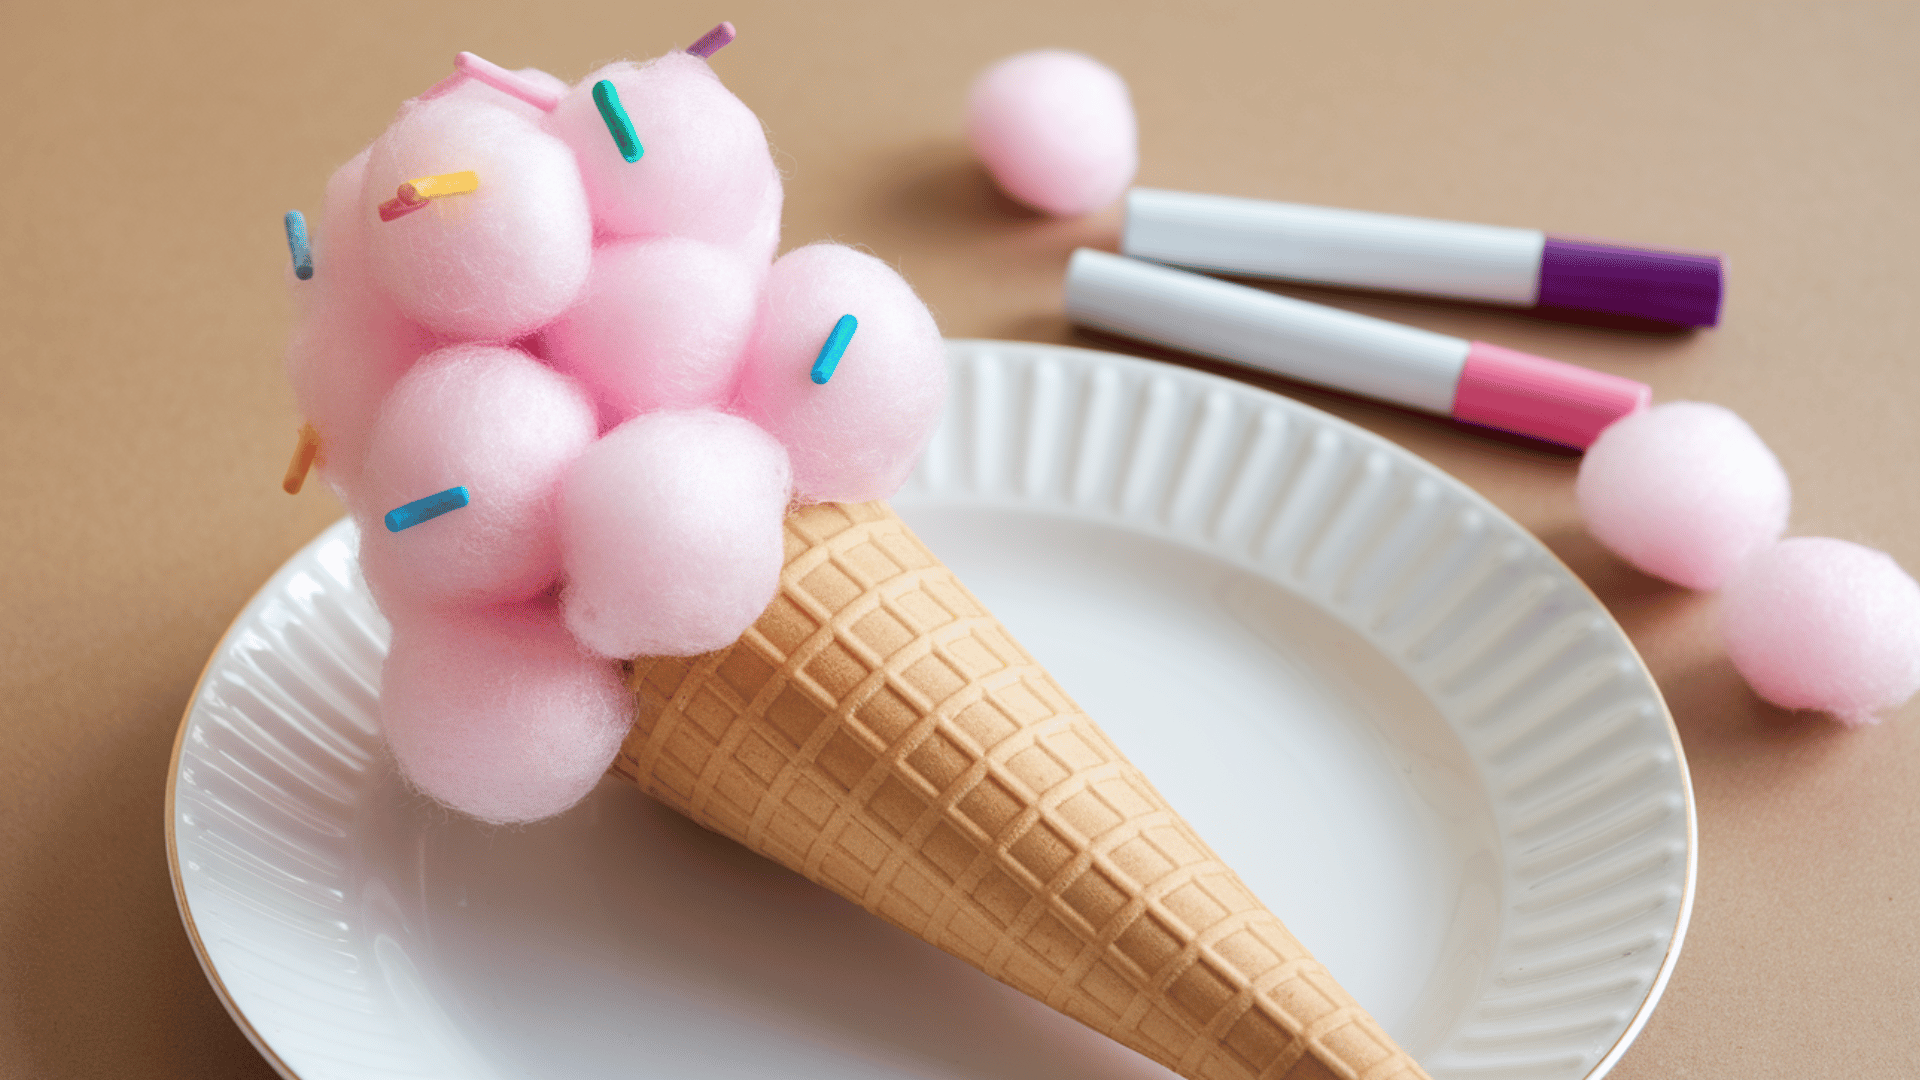
Who doesn’t love a scoop (or three) of ice cream that never melts? This sweet project is best for kids aged 3 to 6, usually taking about 15–20 minutes to assemble.
It’s a great way for little ones to practice their glue-smearing skills while creating a “delicious” piece of art.
Materials You’ll Need: Construction paper, glue, scissors, and cotton balls.
Steps to Follow:
- The Cone: Cut a large triangle out of brown paper; you can even draw a criss-cross pattern on it to look like a waffle cone.
- The Scoops: Decide how many “flavors” you want and grab that many cotton balls.
- Assemble: Glue the cotton balls in a stack or a cluster right on top of your paper cone.
- Decorate: If you have markers, you can “sprinkle” some color onto the cotton balls.
3. Seashell Necklaces
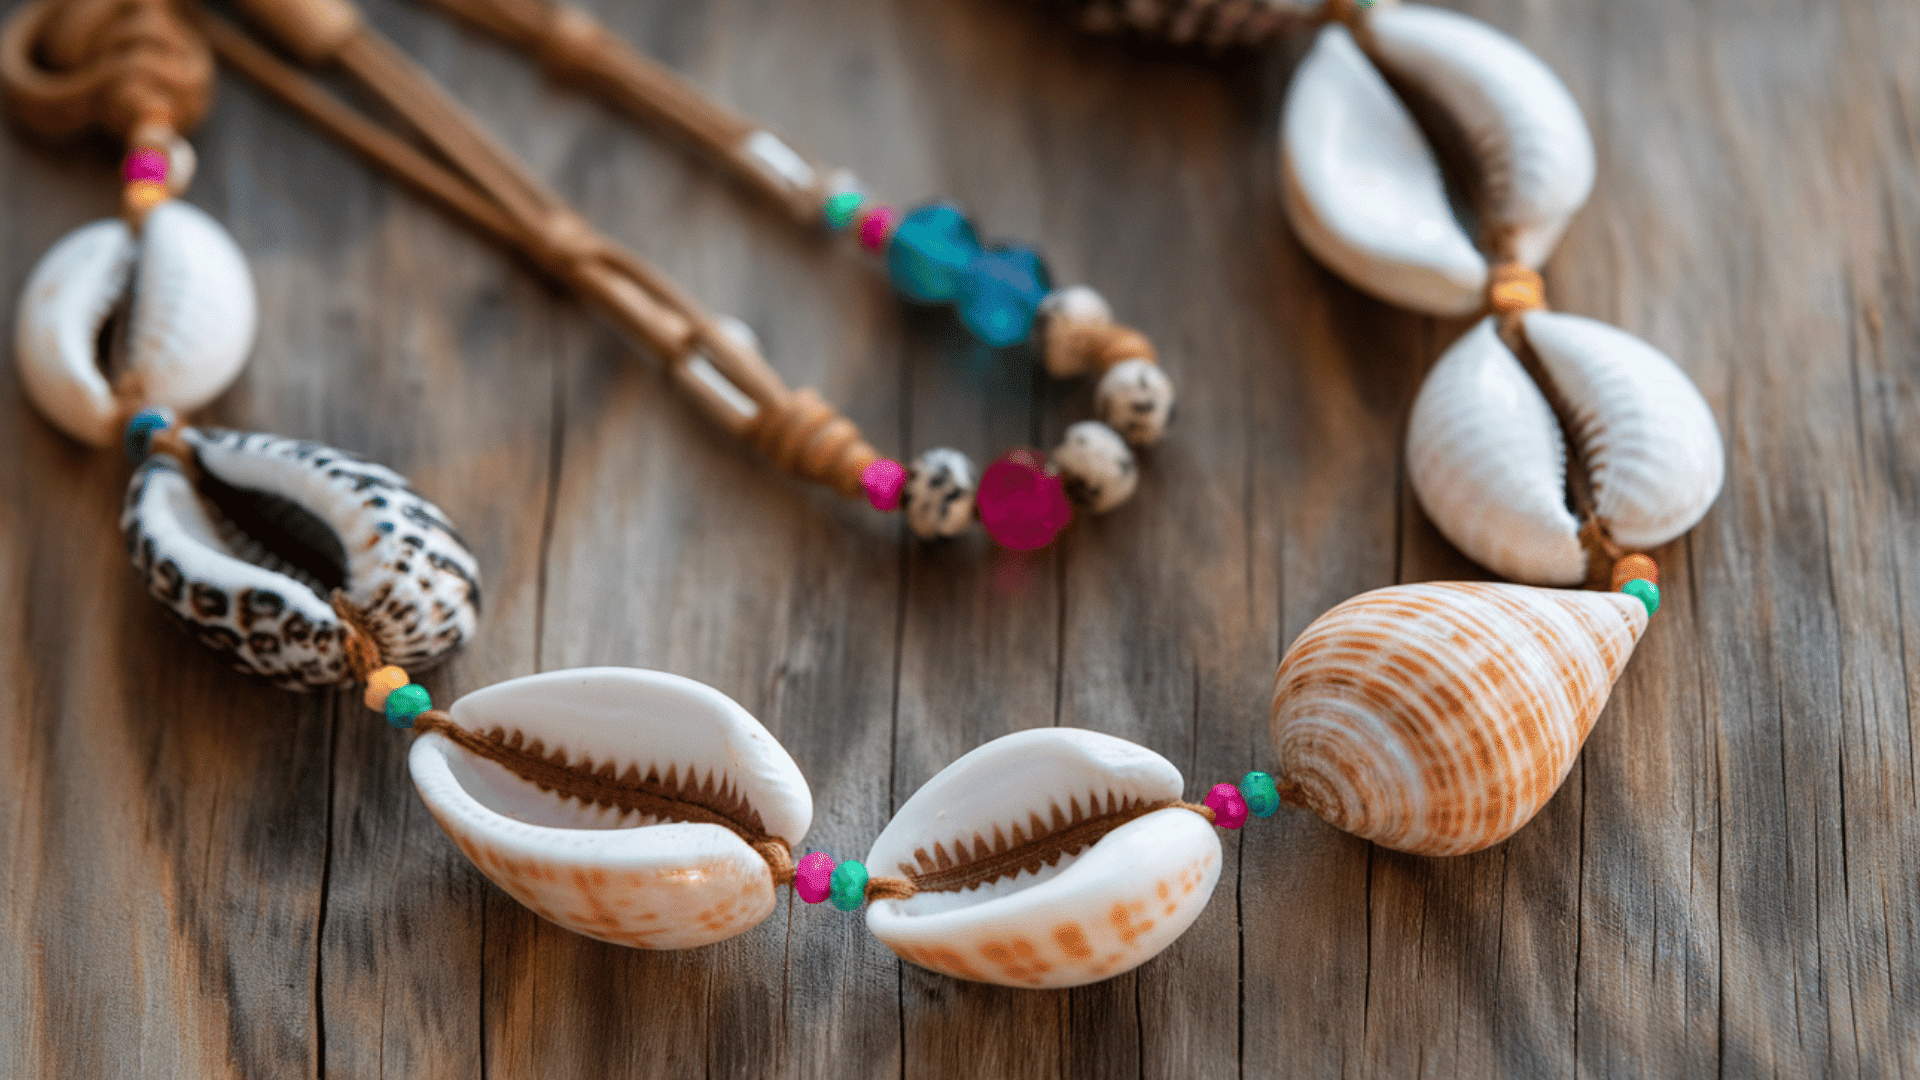
Turn those beach treasures into wearable art with this simple jewelry project. This craft is perfect for kids 5 to 10 years old and takes about 20 minutes once you’ve picked out your favorite shells.
It’s a wonderful way to keep a piece of summer vacation with you all year long.
Materials You’ll Need: Seashells (with holes), string or yarn, glue, and beads.
Steps to Follow:
- Pick the Shell: Find a shell with a natural hole, or have an adult help you carefully make a small one.
- Measure the String: Cut a piece of yarn long enough to fit over your head, leaving extra room for a knot.
- The Pattern: Slide your favorite beads onto the string, then add your “hero” shell right in the middle.
- Finish Up: Tie the ends of the string together with a double knot so it doesn’t slip off.
4. Painted Rock Ladybugs
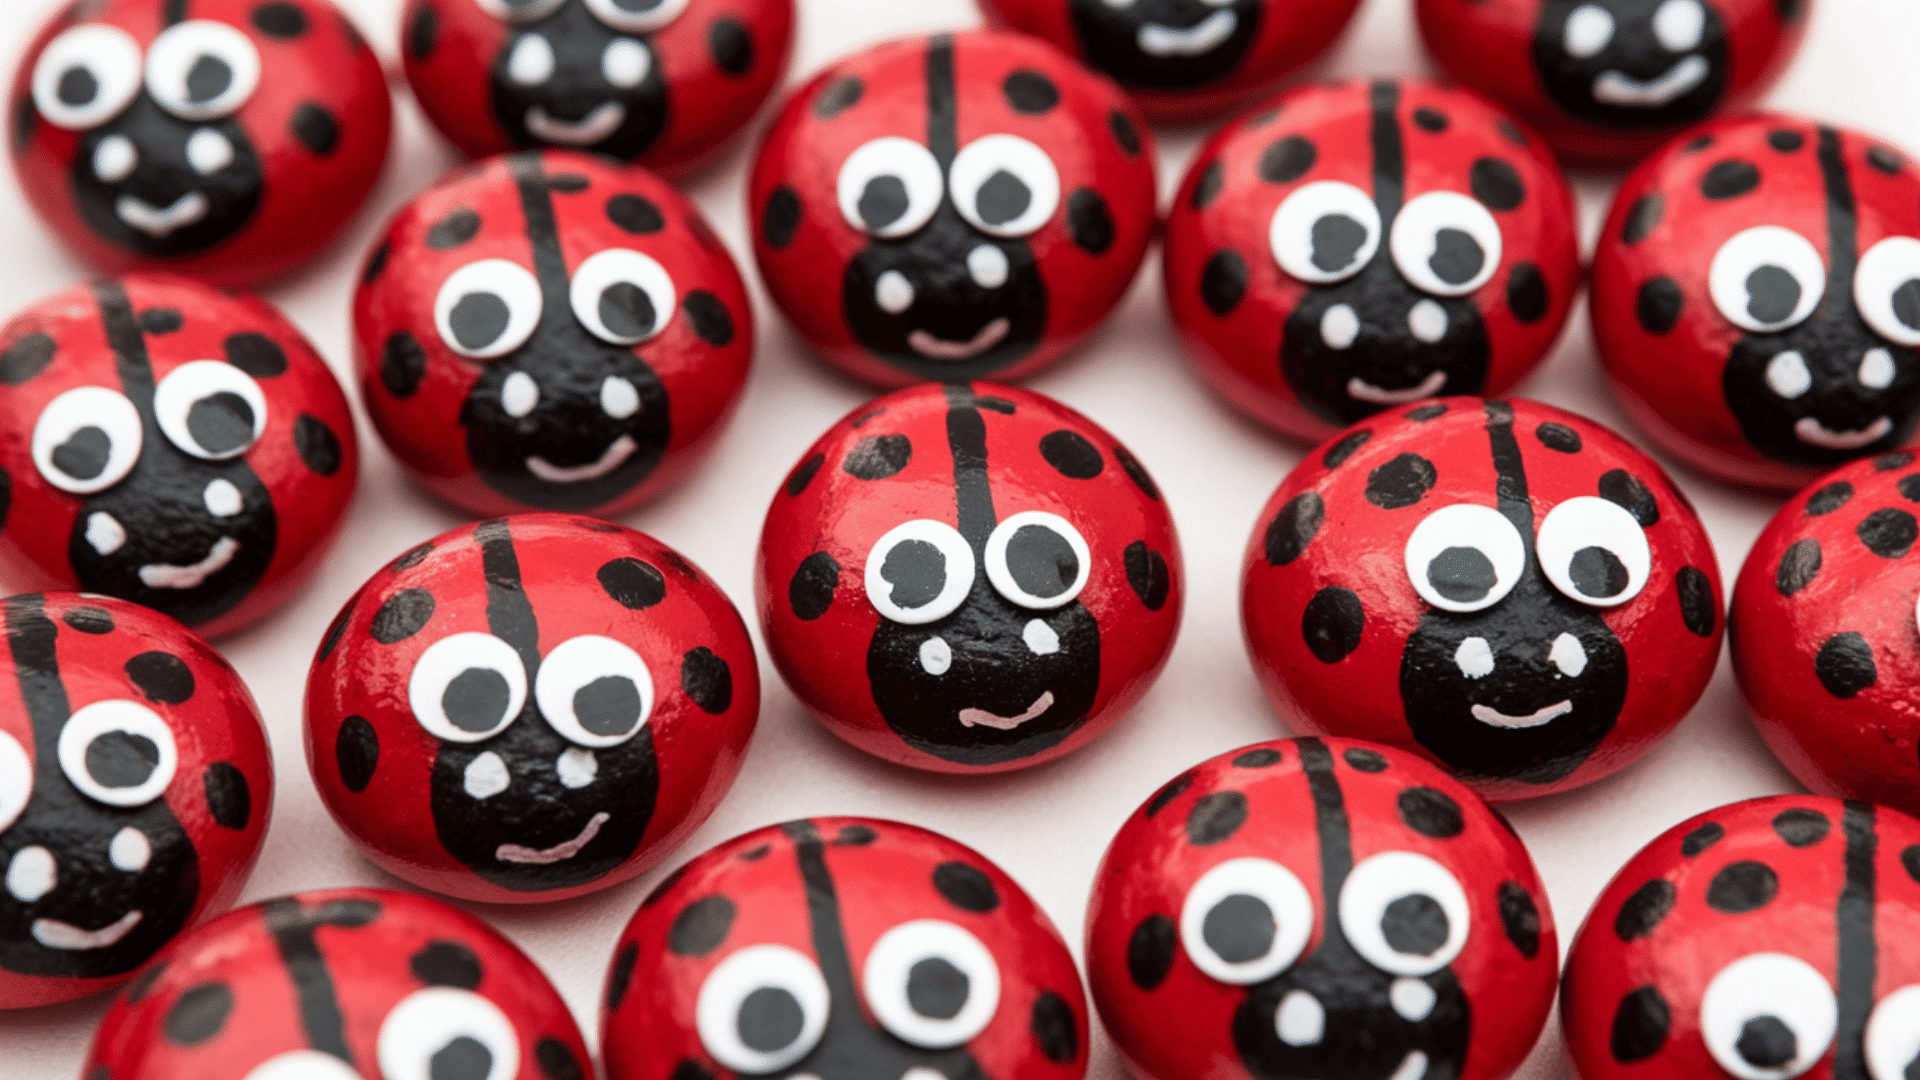
These little guys are a total classic for a reason – they look adorable tucked into a garden! This 30-minute project is a hit with kids aged 4 to 9 and is a great excuse to go on a rock-hunting hike first.
It’s a fun way to bring a little extra life to your porch or flower beds.
Materials You’ll Need: Small smooth rocks, red and black paint, paintbrushes, and googly eyes.
Steps to Follow:
- The Base: Paint your entire rock red and let it dry completely (patience is the hardest part!).
- The Details: Paint a black line down the center for the wings and a solid black semi-circle at the front for the head.
- The Spots: Use the end of your paintbrush to dab on black dots for the ladybug’s wings.
- The Eyes: Glue on two googly eyes to give your bug some personality.
5. DIY Wind Chimes
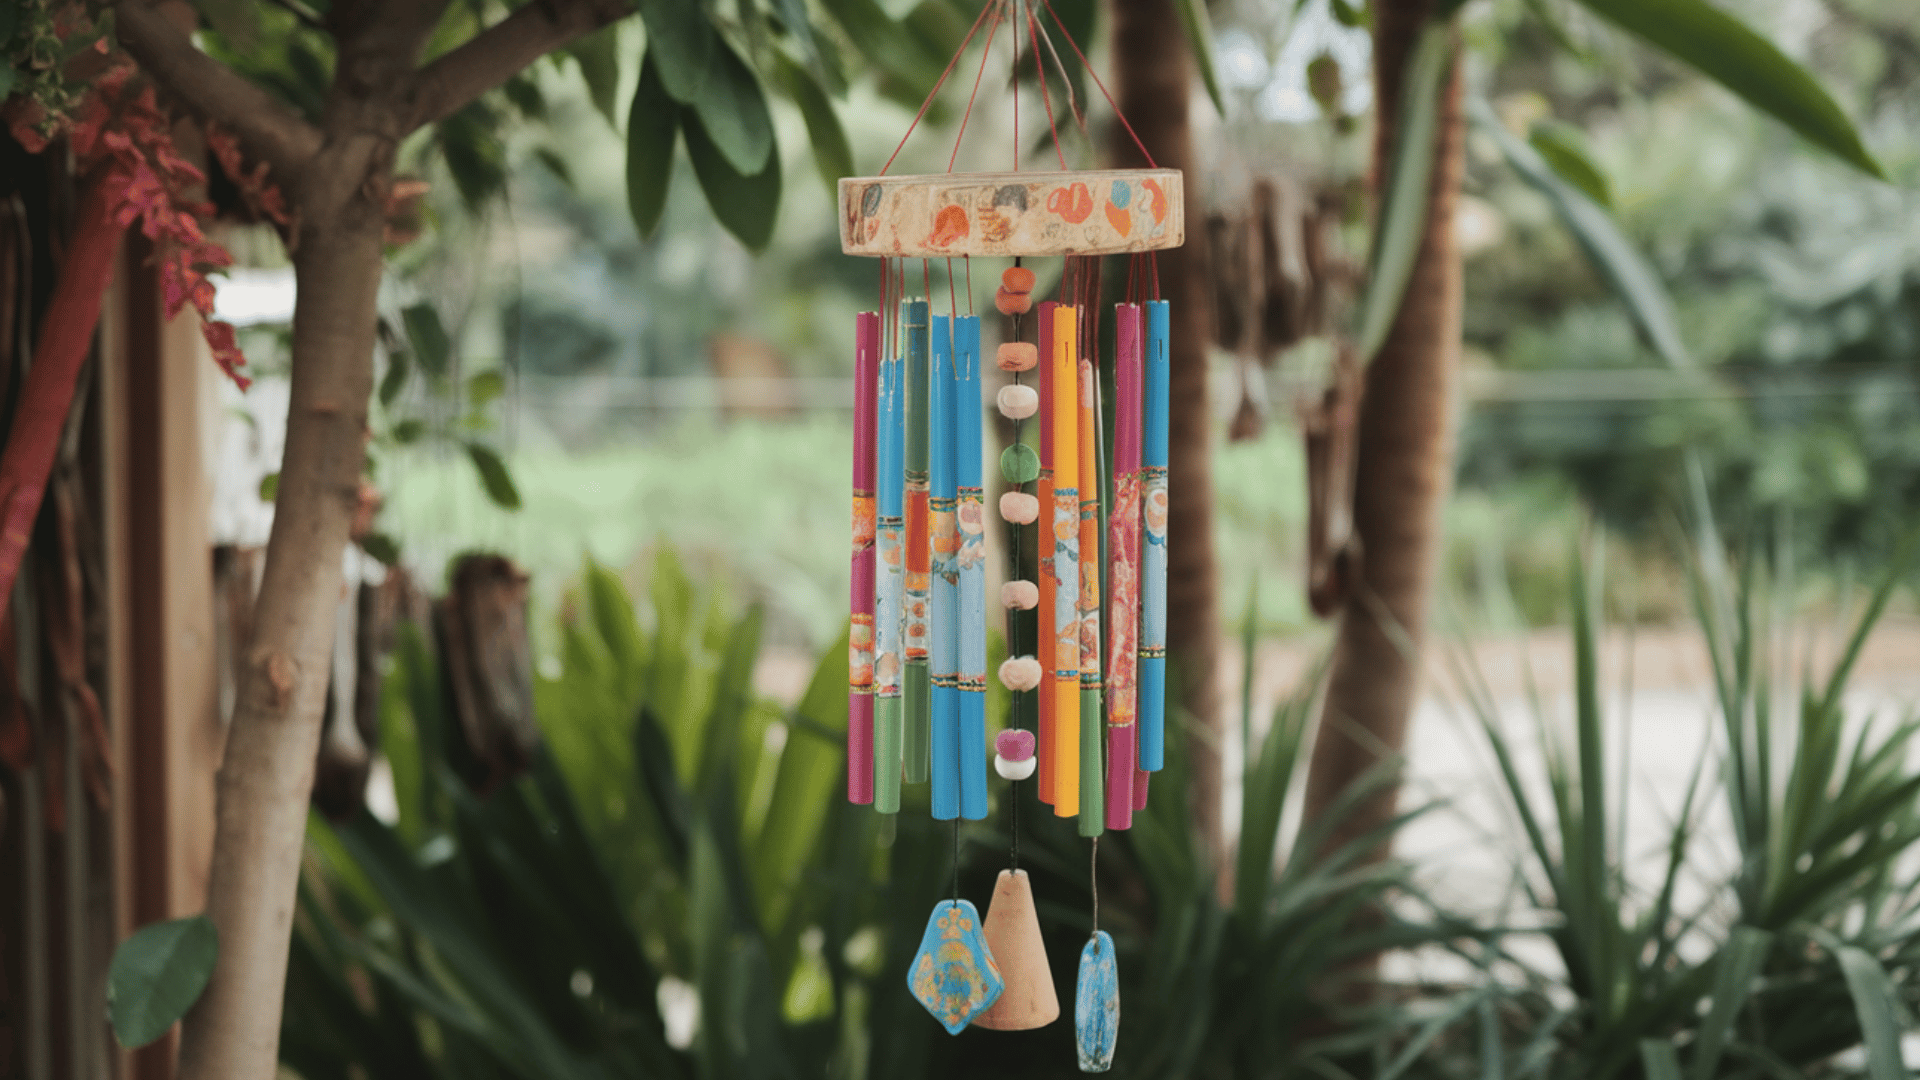
Bring some music to your backyard with a set of colorful, jingly chimes. This craft takes about 40 minutes and is best for kids aged 6 to 11 who have the patience for a bit of stringing.
It’s a great way to recycle fallen branches and turn them into something beautiful.
Materials You’ll Need: Wooden sticks, string, beads, bells, and glue.
Steps to Follow:
- Decorate the Base: Paint your main stick or leave it natural for a rustic look.
- Prep the Strings: Cut 3 to 5 pieces of string in different lengths.
- Add the Noise: Tie a bell to the bottom of each string and slide on some colorful beads.
- Tie it Together: Tie the top of each string to your main stick, spacing them out so the bells can hit each other.
- Hang it Up: Tie one final string to both ends of the stick so you can hang your new chime on a tree or porch.
Moving right along! Here is the next batch of summer fun, kept short and sweet just the way you like them.
6. Butterfly Wings
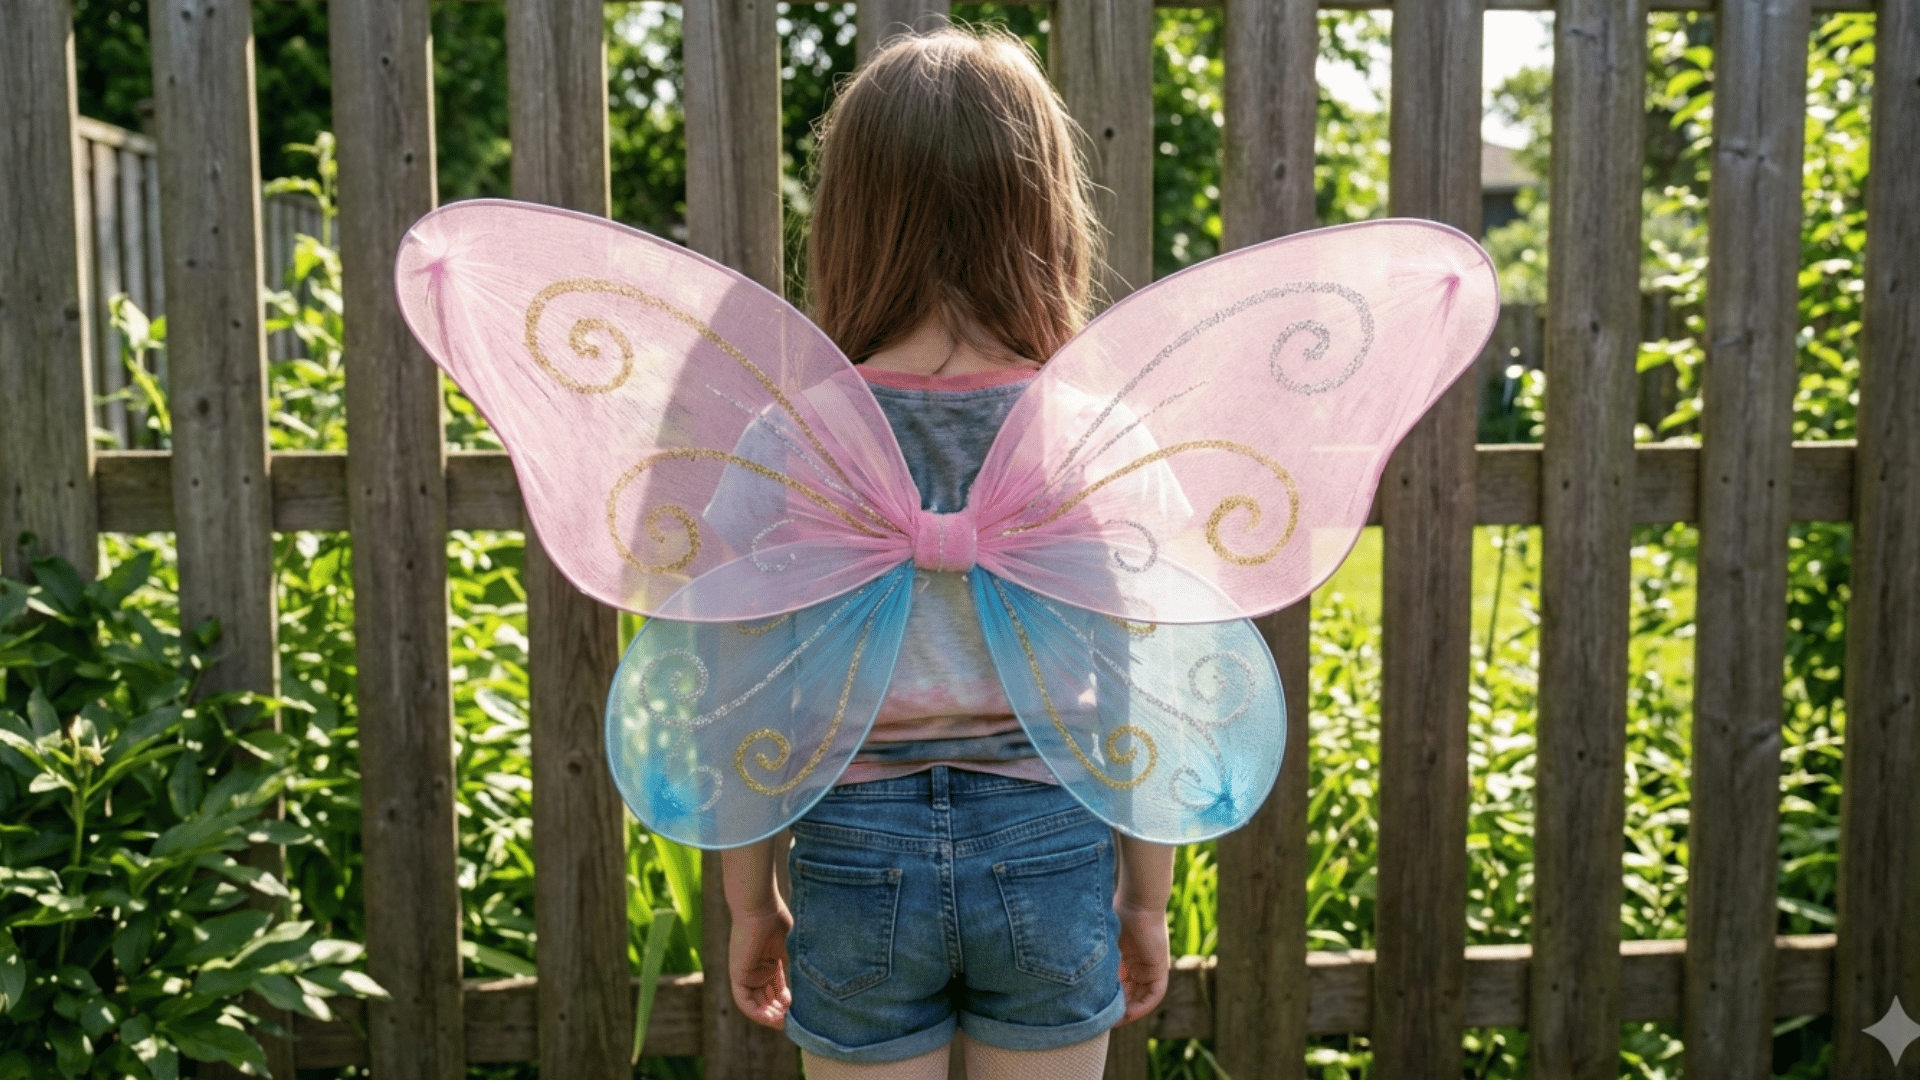
Let your imagination take flight with these DIY wings that are perfect for dress-up play. This project takes about 45–60 minutes and is a total hit for kids aged 5 to 10 who love a bit of sparkle.
It’s a fantastic way to turn old household items into a magical costume for a backyard adventure.
Materials You’ll Need: Wire hangers, old tights or sheer fabric, glue, and glitter.
Steps to Follow:
- Shape the Frame: Have an adult help bend two wire hangers into wing shapes and tape the “hooks” together.
- Add the Fabric: Stretch a leg of the tights over each wing frame and tie them tight at the center.
- Decorate: Draw patterns with glue and shake on plenty of glitter to give them some shimmer.
- Final Setup: Tie some elastic or ribbon loops to the center so you can wear them like a backpack.
Pro Tip: Use fabric markers to draw “veins” on the wings for a more realistic look!
7. Handprint Sunflower Craft
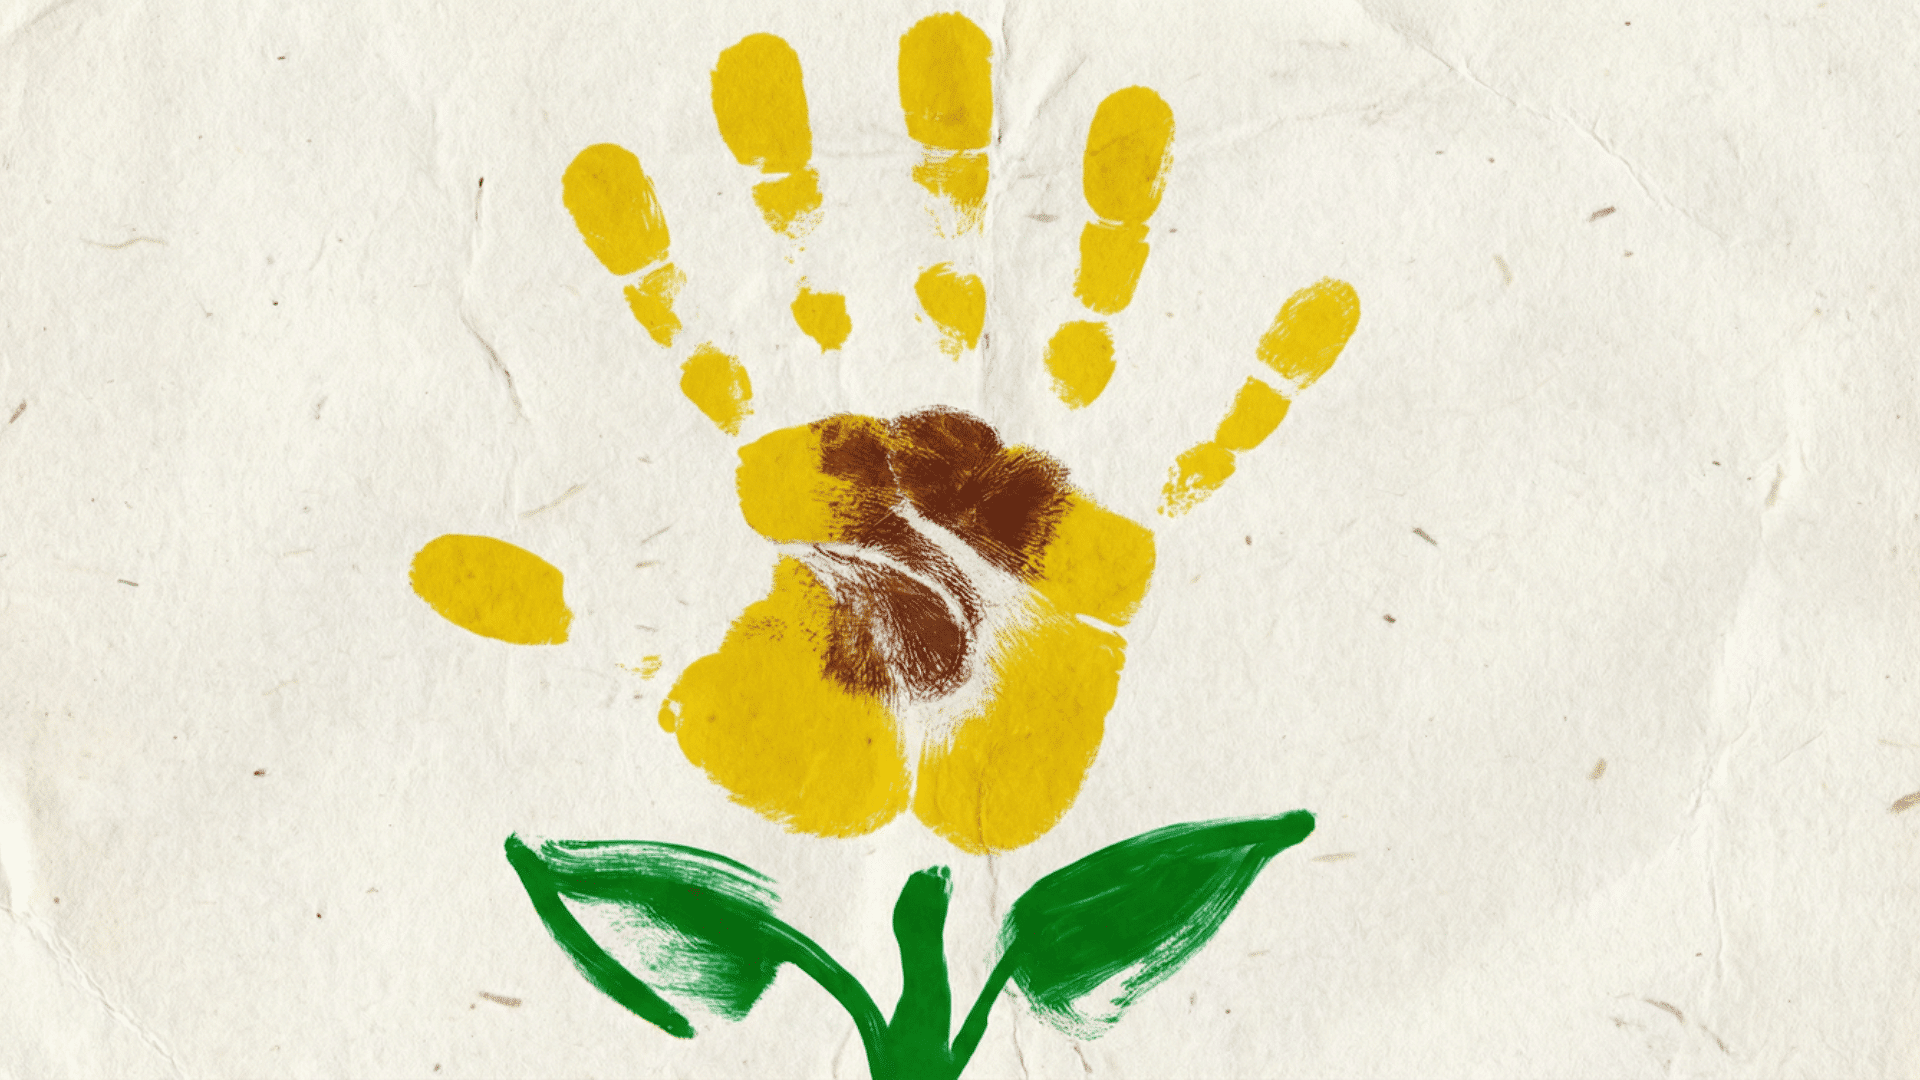
This one is a lovely keepsake that captures how much your little ones have grown. It takes about 20 minutes and is perfect for the 2 to 6 age group, focusing on sensory play and bright colors.
It’s a great way to spend a morning creating a “garden” that never wilts.
Materials You’ll Need: Yellow, brown, and green paint, paper, and brushes.
Steps to Follow:
- The Petals: Paint your hand yellow and press it in a circle on the paper to create the sunflower’s petals.
- The Center: Dip your thumb in brown paint and dab it in the middle of the circle to create “seeds.”
- The Stem: Paint a long green line coming down from the flower for the stem.
- The Leaves: Add two green handprints or painted leaves on the sides of the stem.
Pro Tip: Sprinkle actual sunflower seeds onto the wet brown paint for a cool 3D texture!
8. DIY Beach Ball

Turn a simple afternoon into a “beach day” with this lightweight, customizable ball. It’s a quick 10-minute craft for kids aged 4 to 10 and is perfect for a gentle game of indoor volleyball. It’s a fun, low-cost way to get moving when it’s too hot to play outside.
Materials You’ll Need: Balloons, markers, and colored tape.
Steps to Follow:
- Inflate: Blow up a large balloon and tie it off securely.
- Divide the Sections: Use strips of colored tape to divide the balloon into six vertical sections.
- Add Color: Use permanent markers to color in each section a different bright color.
- Game Time: Toss it in the air and see how long you can keep it from touching the floor!
Pro Tip: Don’t over-inflate the balloon; leaving a little “give” makes it easier to tape and harder to pop!
9. Watermelon Fan Craft
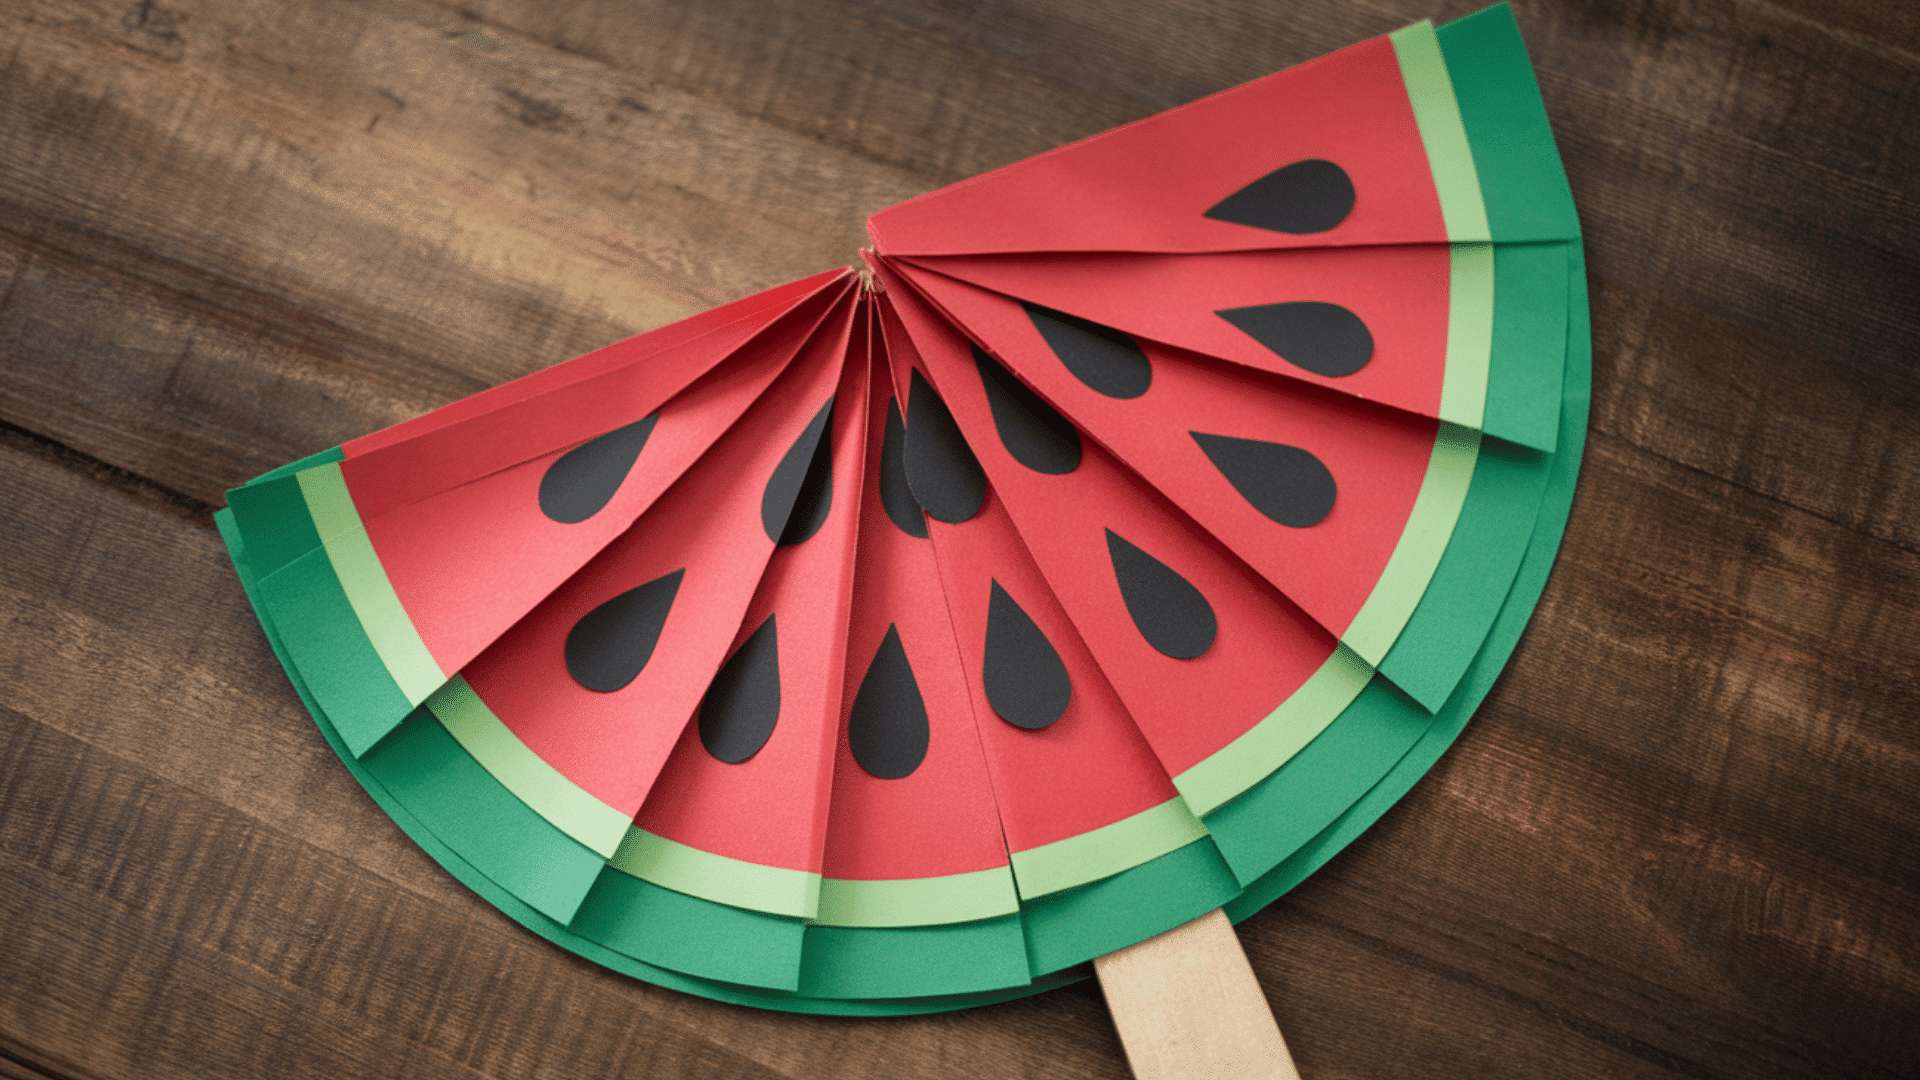
Stay cool during those July heatwaves with a fan that looks good enough to eat. This 20-minute craft is great for kids aged 4 to 8 and teaches them about basic geometry and folding. It’s the perfect accessory for a summer picnic or a trip to the park.
Materials You’ll Need: Red and green construction paper, scissors, glue, and popsicle sticks.
Steps to Follow:
- The Layers: Glue a red paper circle onto a slightly larger green paper circle.
- The Seeds: Draw small black teardrop shapes on the red part to look like watermelon seeds.
- The Fold: Fold the circle back and forth like an accordion (zigzag style).
- The Handle: Glue a popsicle stick to each of the two end folds to act as handles.
Pro Tip: Use black beans or sequins for the seeds to give your fan some extra “pop.”
10. Paper Bag Kites
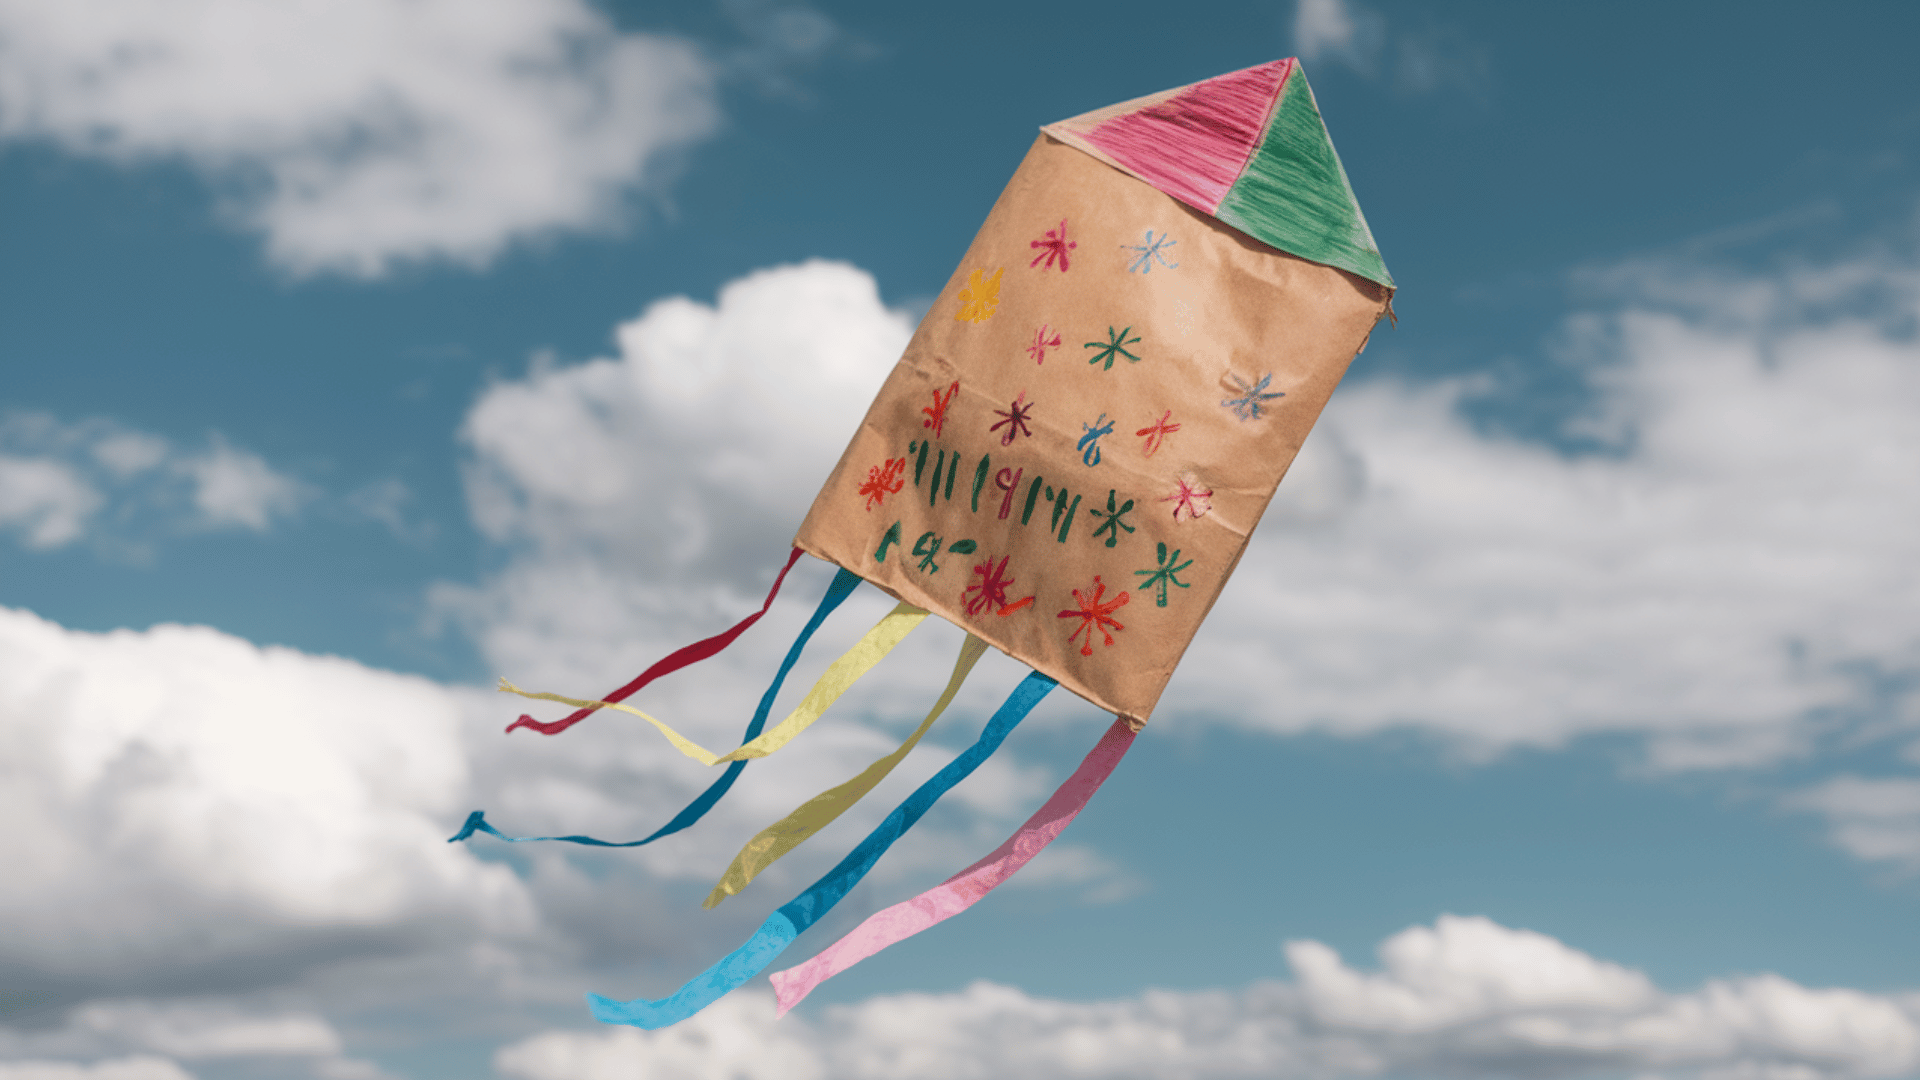
Who knew a grocery bag could fly? This 30-minute project is best for kids aged 5 to 10 and is a great way to look into the science of wind. It’s a classic, eco-friendly craft that gets everyone outside and running around.
Materials You’ll Need: Paper bags, string, scissors, and markers.
Steps to Follow:
- The Opening: Cut the bottom off the paper bag so it becomes a tube.
- The Design: Use markers to draw big, bright designs all over the bag.
- The Tail: Cut long strips of tissue paper and glue them to one end of the bag.
- The Launch: Punch four holes in the other end, tie strings through them, and connect them to one long “flying” string.
Pro Tip: Go to a big open field and run fast, the air will puff the bag up and make it soar
11. Beach-Themed Mason Jar Lanterns
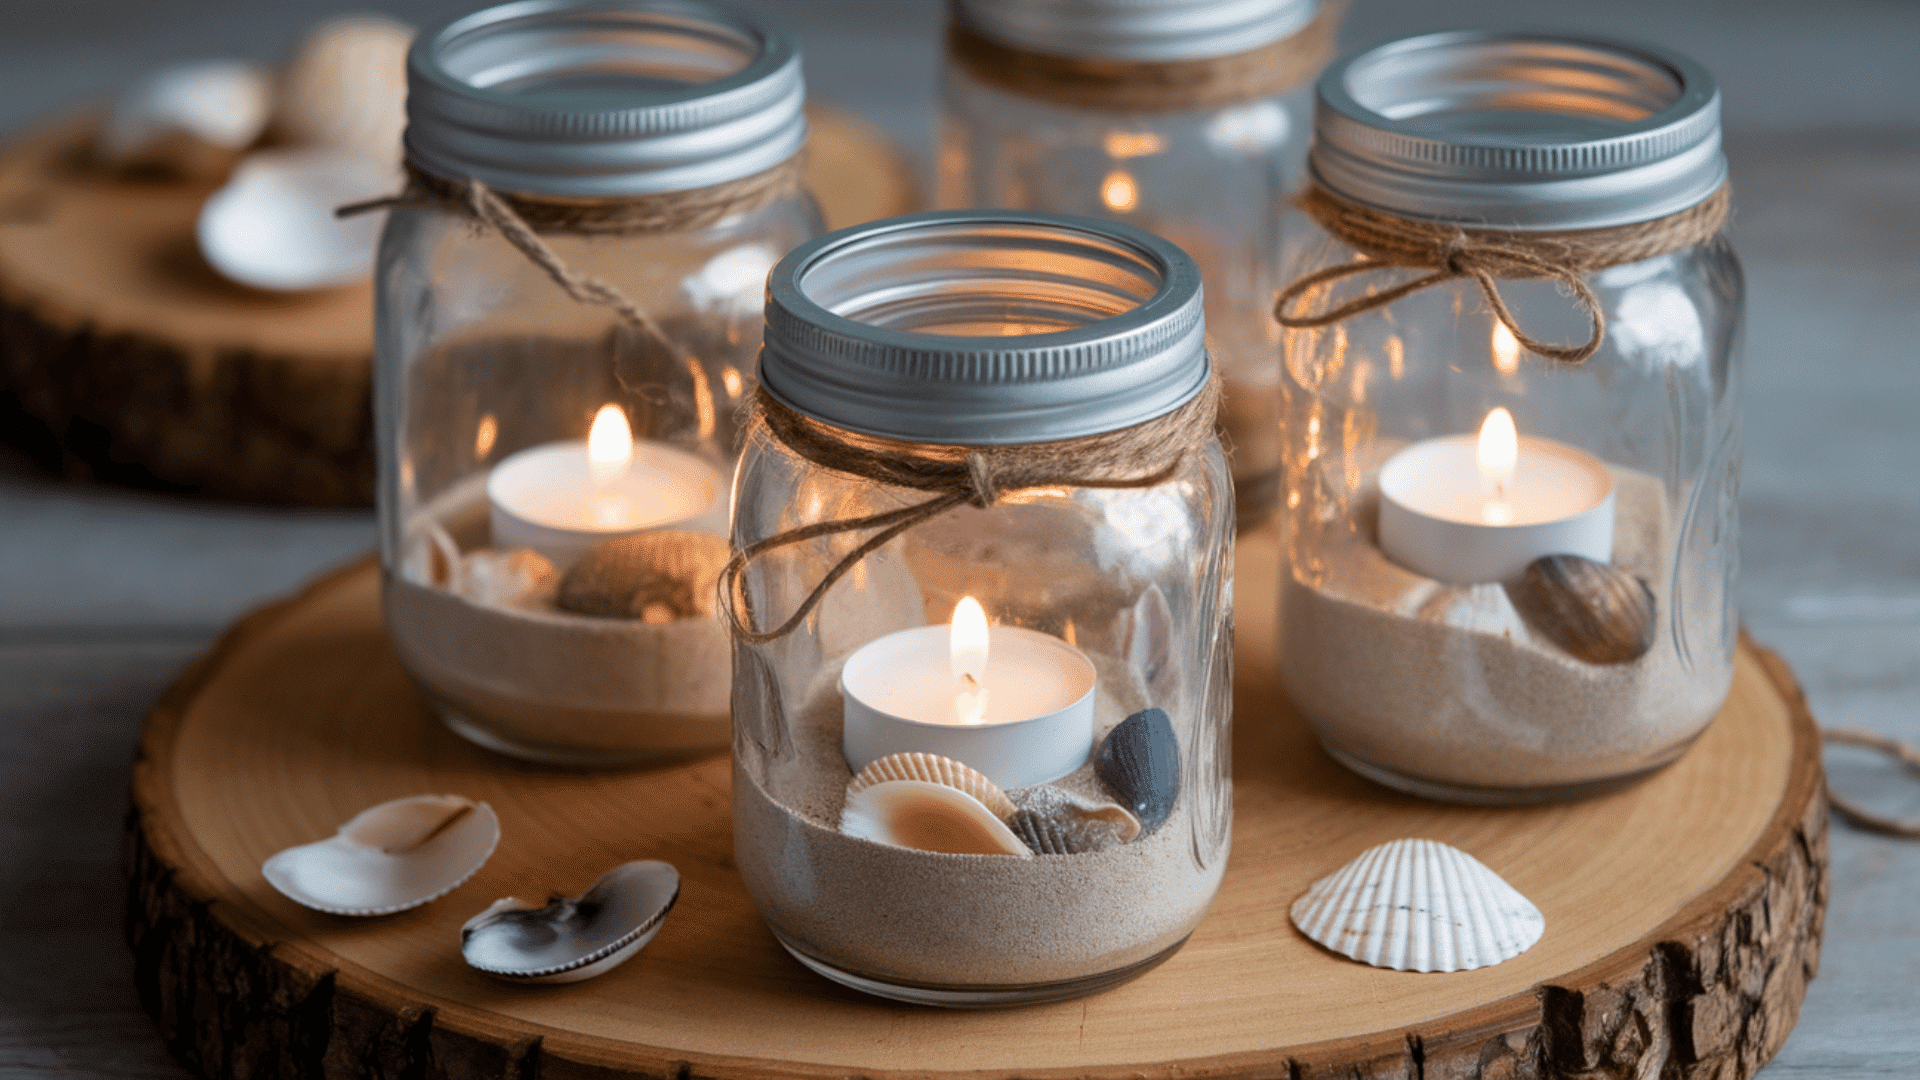
Bring the glow of a summer bonfire inside with these cute, sandy lanterns. This craft takes about 15 minutes to assemble and is perfect for kids aged 5 to 12.
It’s a great way to display those tiny shells you found at the beach while creating a cozy nightlight for your room.
Materials You’ll Need: Mason jars, sand, seashells, and battery-operated tea light candles.
Steps to Follow:
- The Base: Pour about two inches of sand into the bottom of your clean jar.
- The Decor: Carefully drop in a few small seashells or even a piece of sea glass.
- The Light: Nestled the battery candle right in the center of the sand.
- The Finish: Tie a piece of twine around the rim of the jar for that classic nautical look.
Pro Tip: Use colored sand (like blue or pink) to give your lantern a magical, fantasy vibe
12. Popsicle Stick Picture Frames
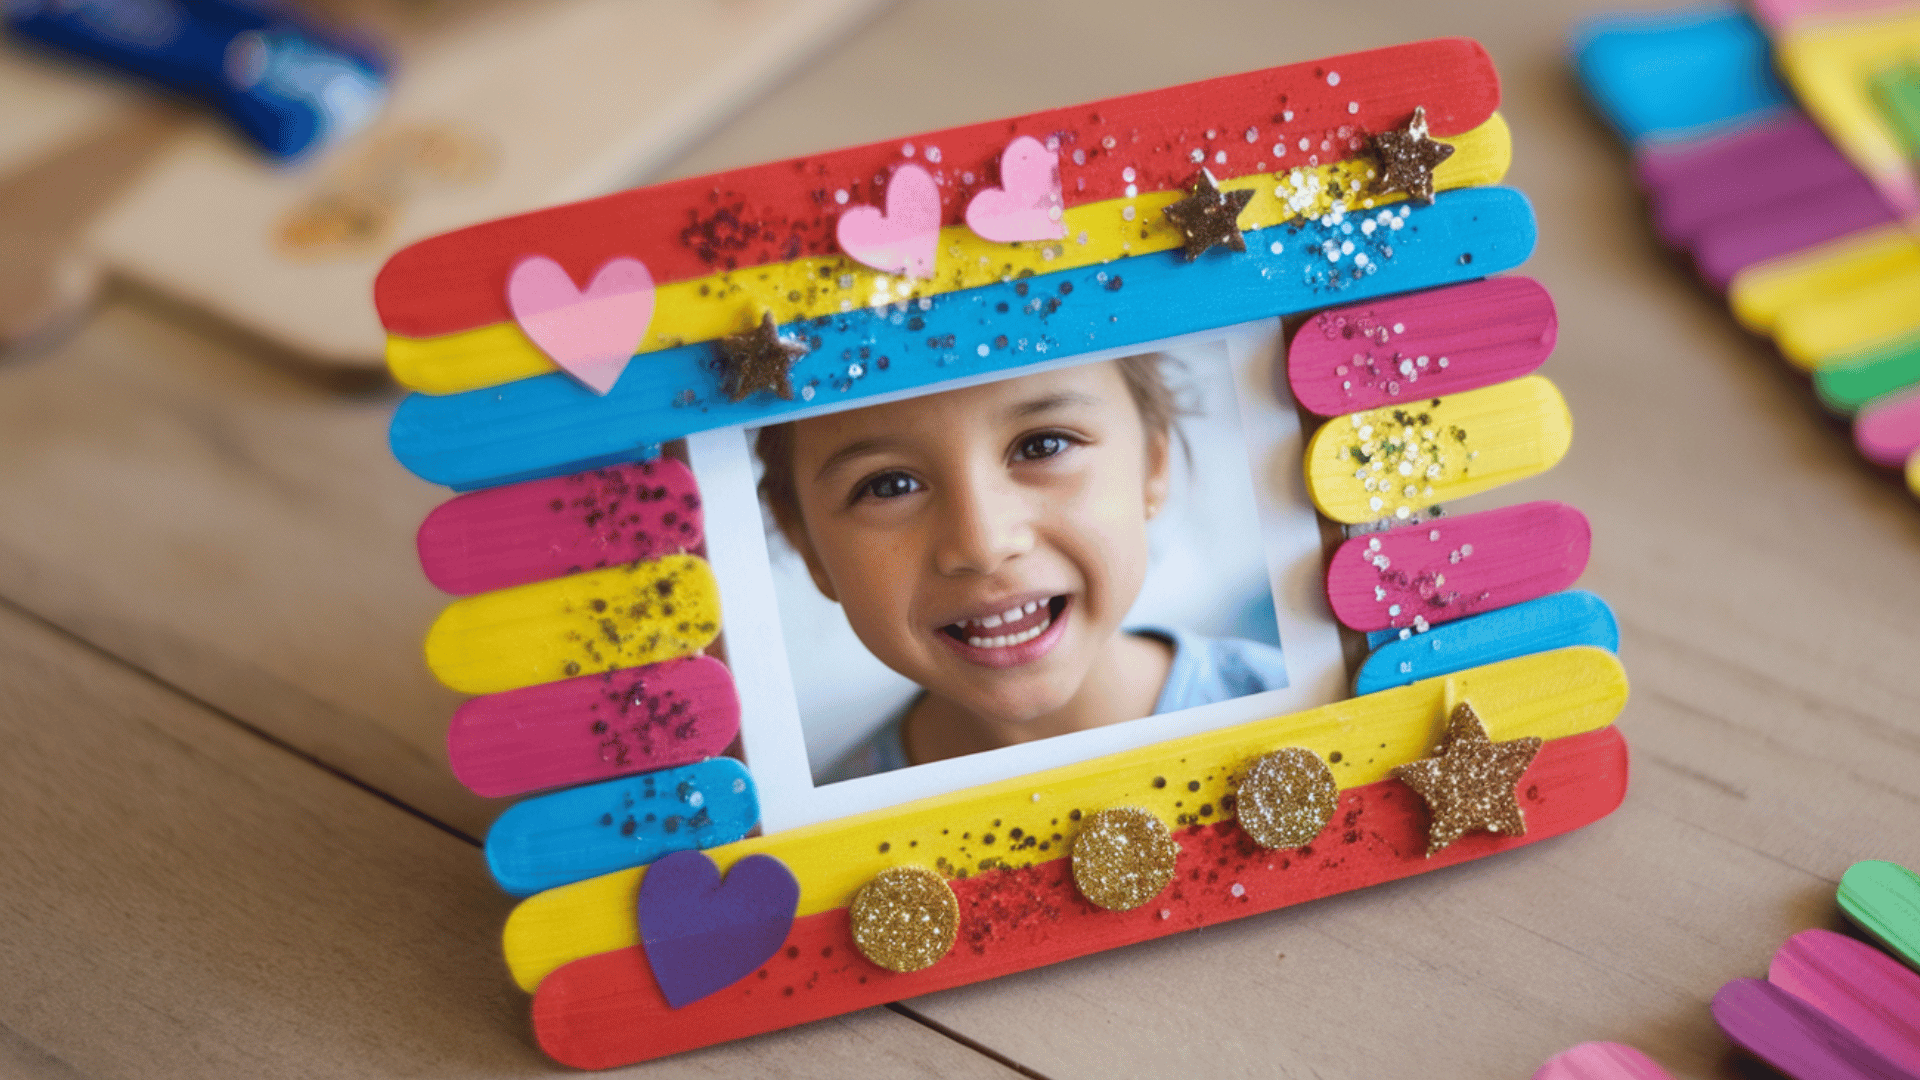
Capture those “best day ever” moments in a frame you built yourself. This 25-minute project is ideal for kids aged 4 to 10 and is a great way to use up leftover craft sticks. It’s a fun, personalized gift for grandparents or a cool way to decorate your own desk.
Materials You’ll Need: Popsicle sticks, glue, paint, and stickers.
Steps to Follow:
- Build the Square: Glue four sticks together at the corners to make a frame; double them up if you want it extra sturdy.
- Paint It: Pick your favorite summer color and give the sticks a fresh coat of paint.
- Jazz It Up: Once dry, add stickers, glitter, or even tiny dried flowers to the corners.
- Frame It: Tape your favorite summer photo to the back so it peeks through the center.
13. Sand Art Bottles
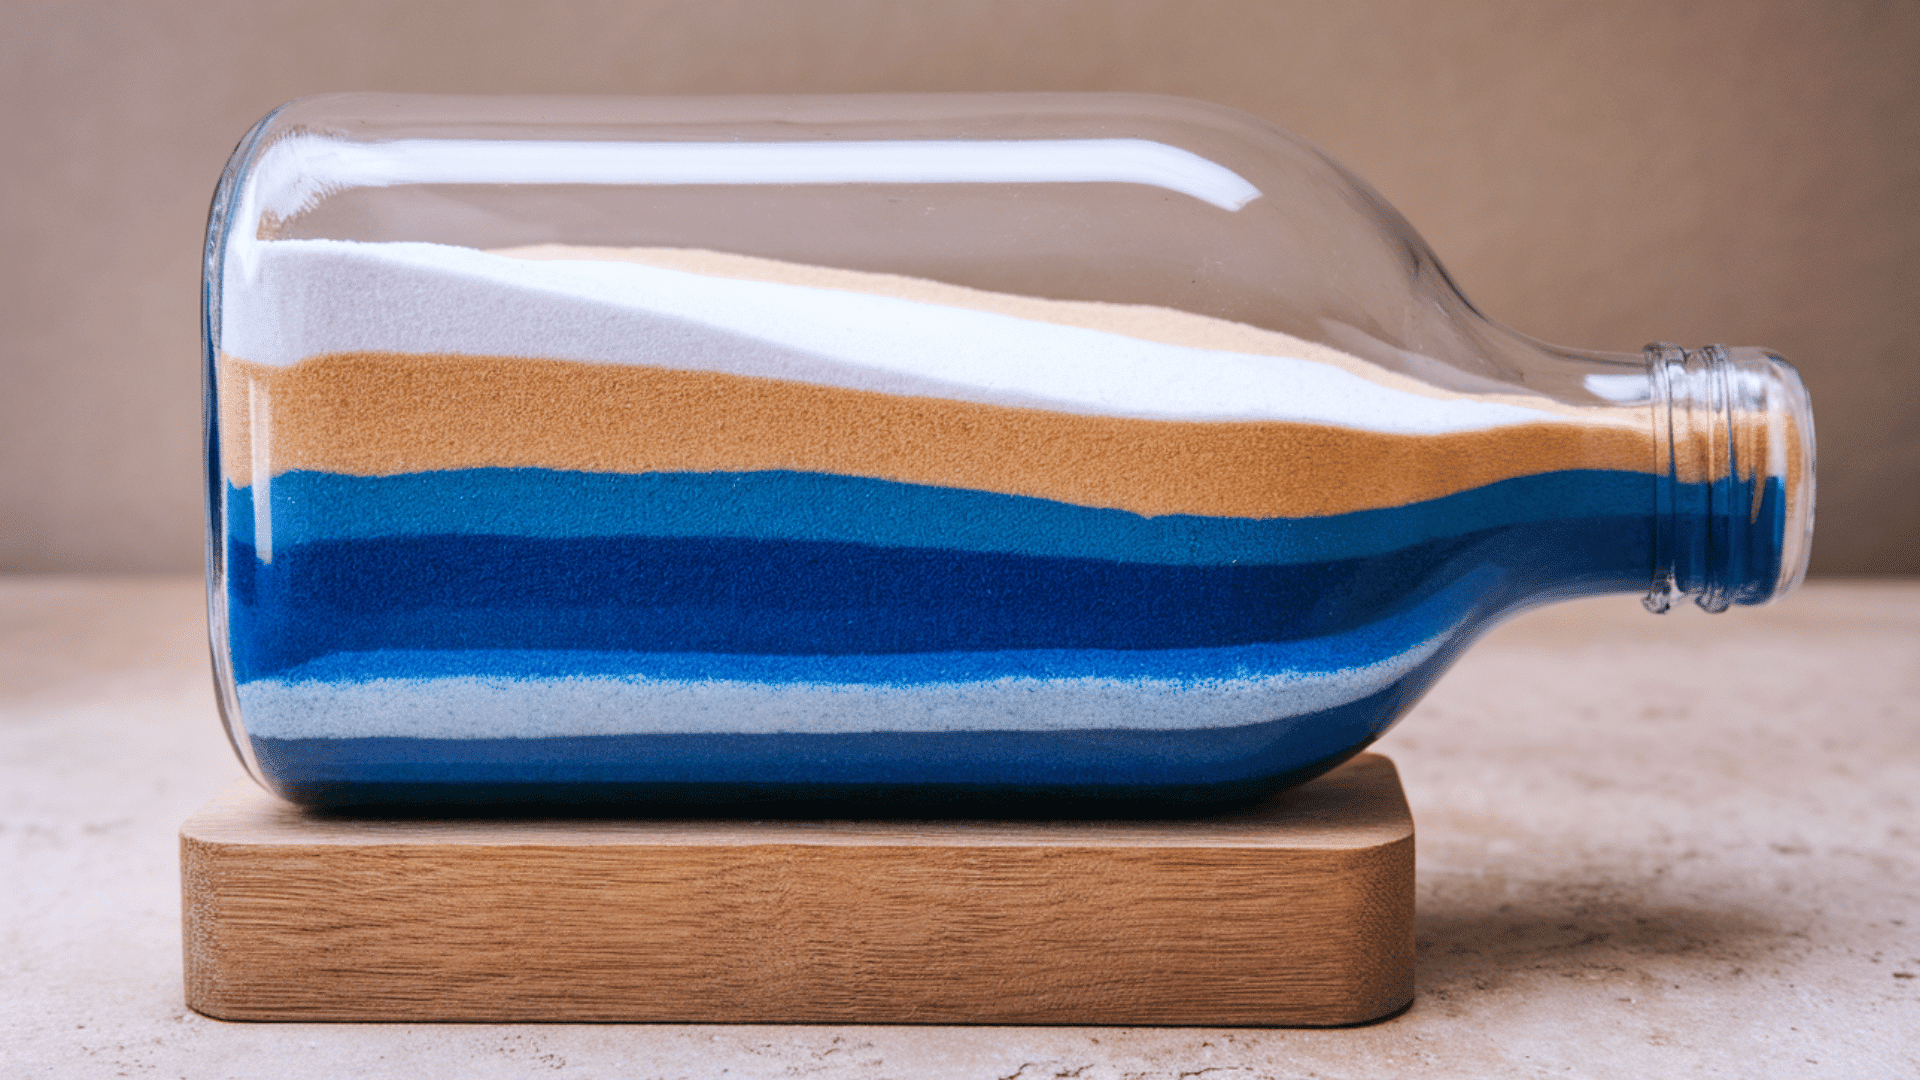
Create a “desert in a bottle” with mesmerizing layers of colorful sand. This project takes about 20 minutes and is a blast for kids aged 5 to 11 who love patterns. It’s a meditative craft that results in a beautiful piece of shelf decor.
Materials You’ll Need: Colored sand, a clear bottle, and a funnel.
Steps to Follow:
- Set the Funnel: Place your funnel in the mouth of the dry, clear bottle.
- Layer One: Pour in a small amount of your first sand color.
- The Tilt: Tilt the bottle slightly before pouring the next color to create cool waves and hills.
- Fill to the Top: Keep layering until the bottle is completely full so the sand doesn’t shift around.
14. Paper Plate Fish
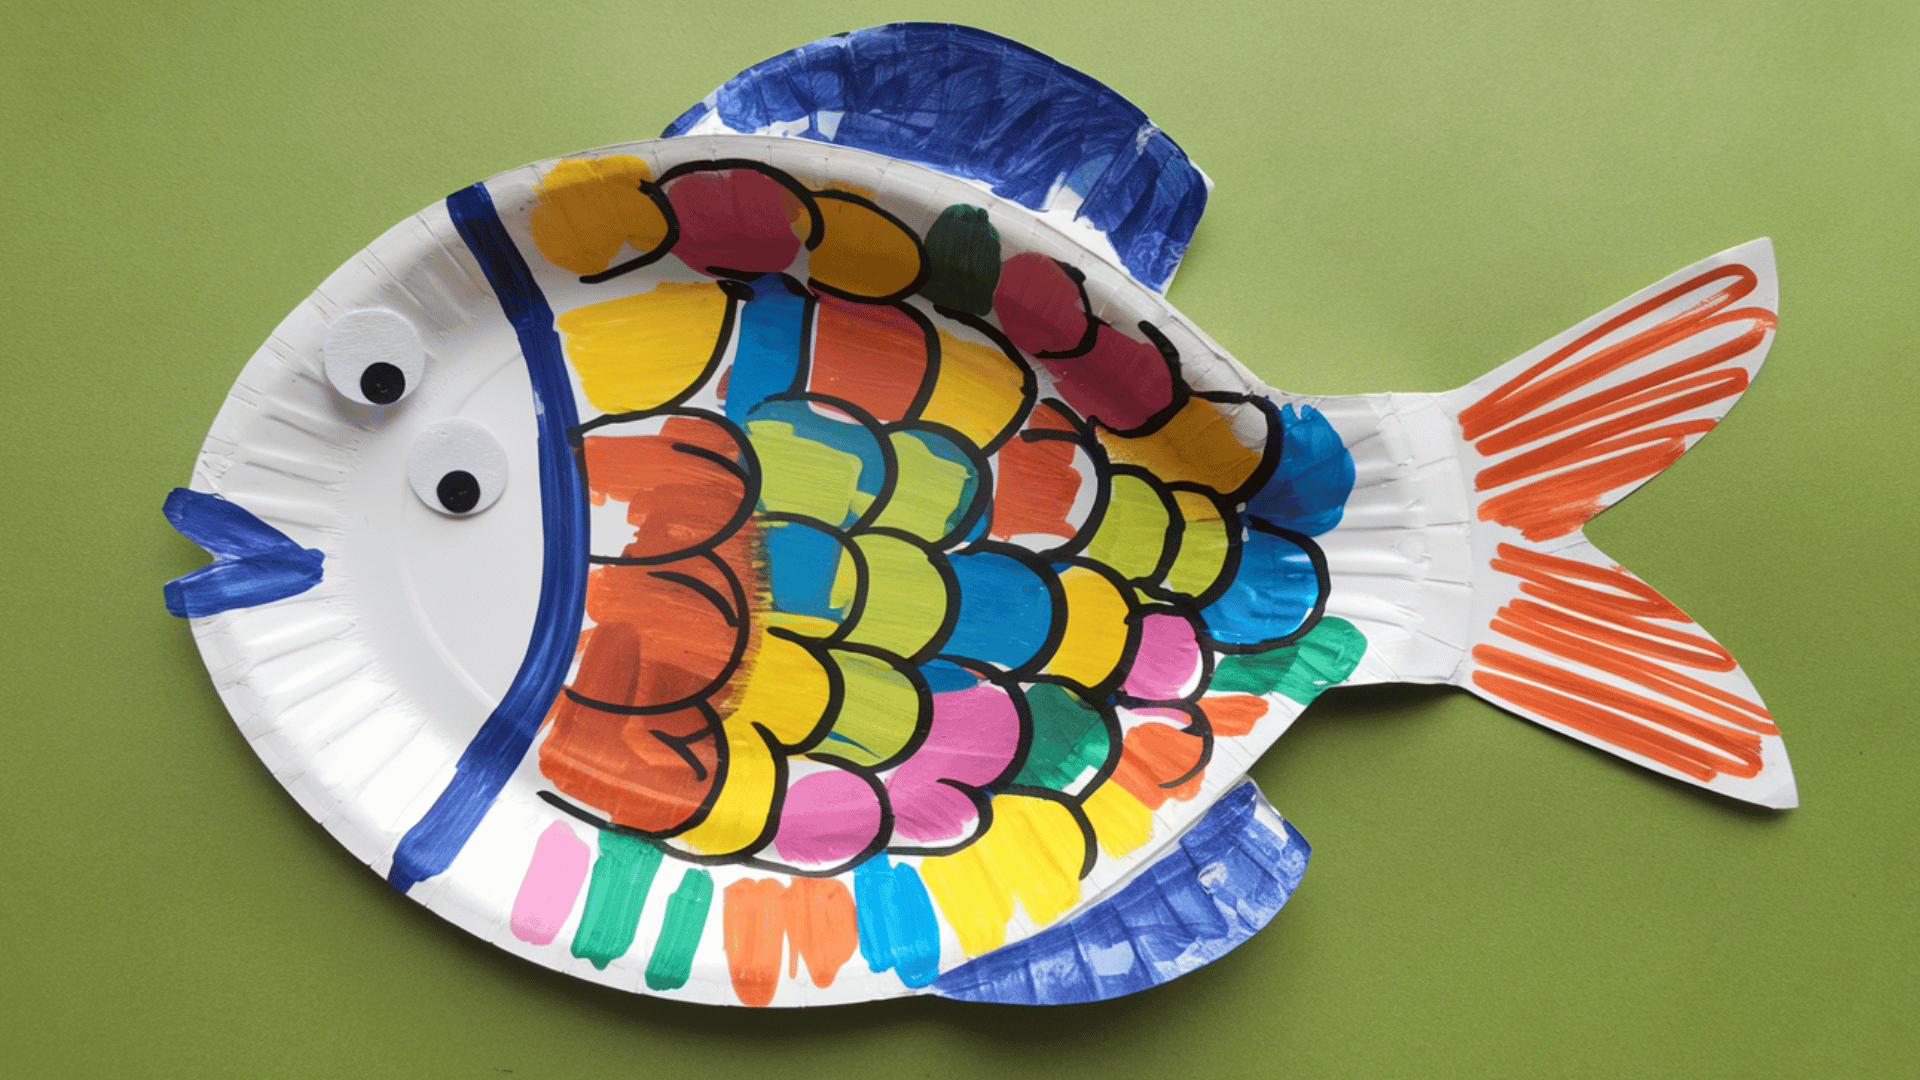
Turn your kitchen into an aquarium with these bright and bubbly fish. This 20-minute craft is a winner for the 3 to 7 age group and uses basic shapes to build a masterpiece.
It’s a perfect rainy-day activity when you’re stuck inside but dreaming of the ocean.
Materials You’ll Need: Paper plates, markers, googly eyes, and scissors.
Steps to Follow:
- The Mouth: Cut a small triangle (a “pizza slice”) out of the side of the paper plate.
- The Tail: Take that same triangle and glue it to the back of the plate to be the fish’s tail.
- The Face: Glue a big googly eye right above the mouth.
- The Scales: Use markers or paint to draw colorful scales and fins all over the body.
15. DIY Snow Globe (Summer Edition)
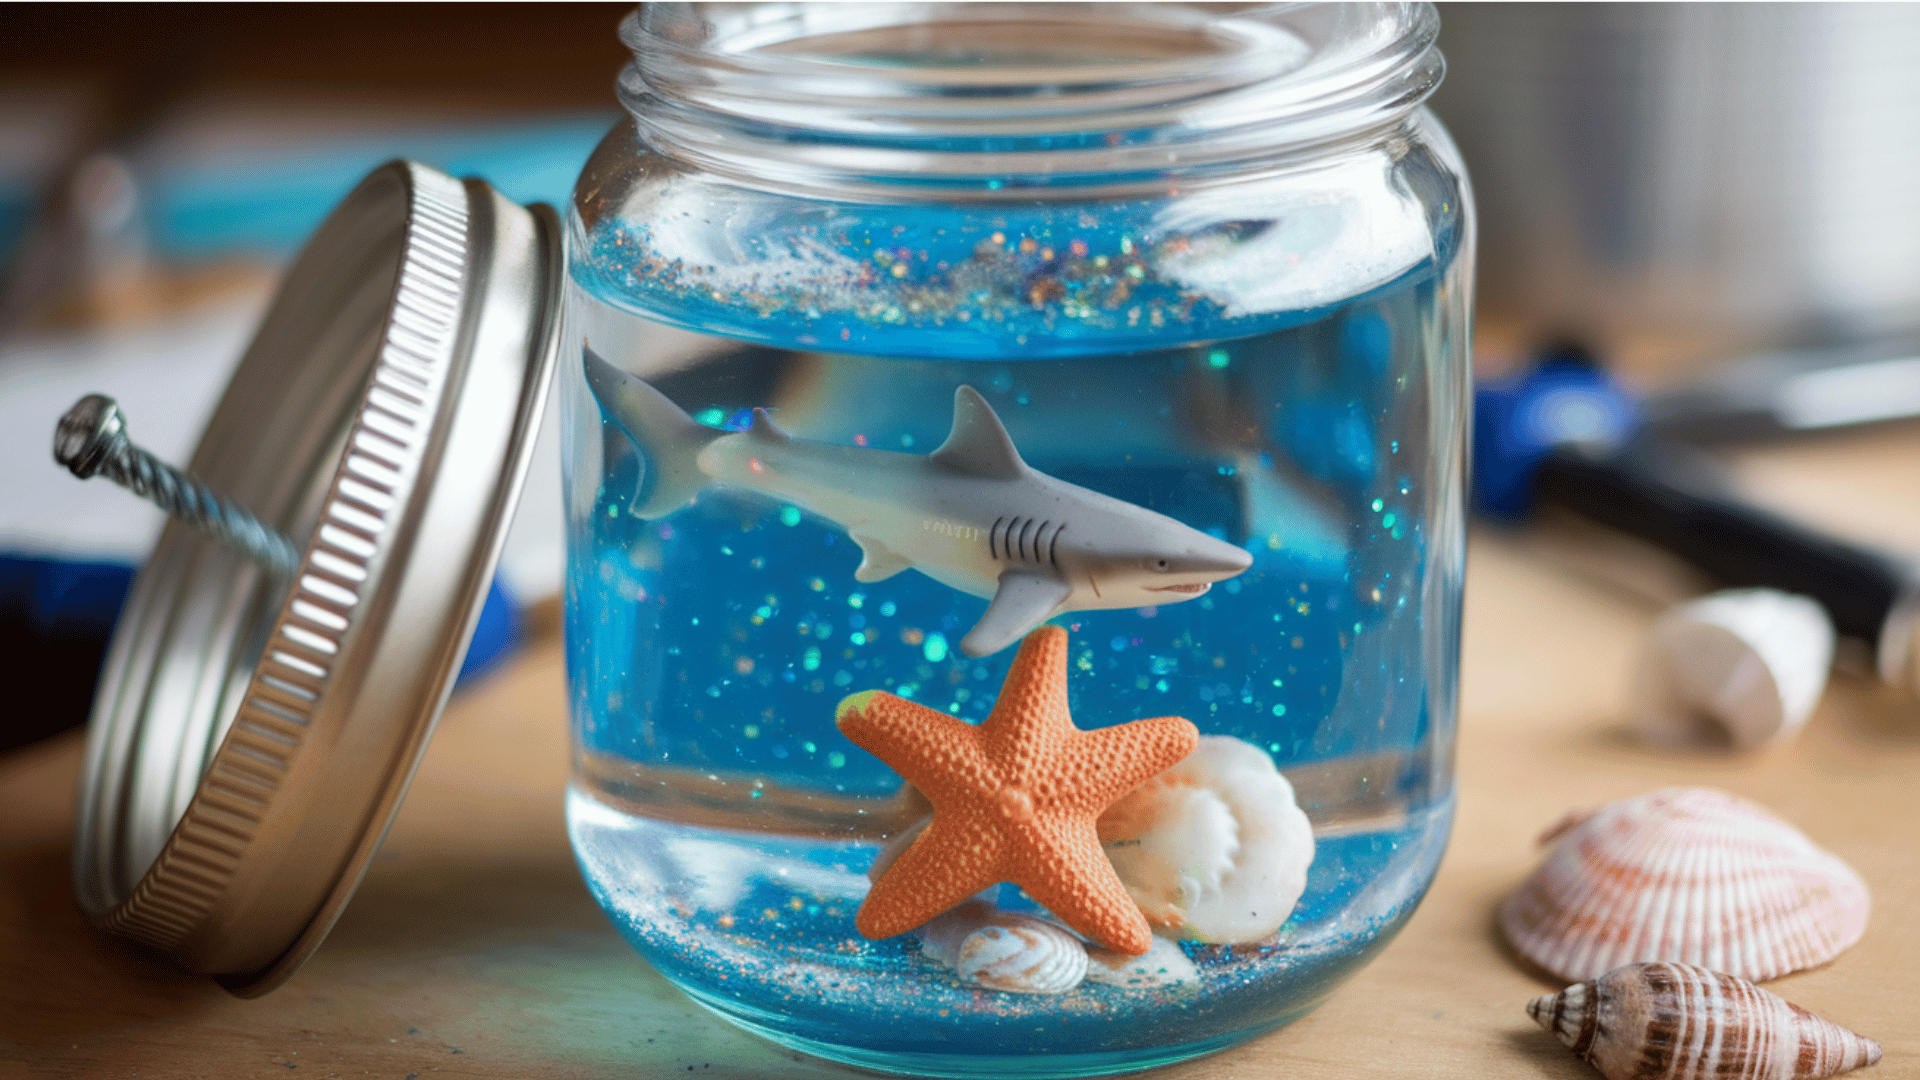
Who says snow is just for winter? Create an underwater “glitter globe” that sparkles in the sun. This 20-minute project is best for kids aged 6 to 12 and is a great way to upcycle old plastic jars. It’s like having a tiny, sparkly piece of the ocean on your nightstand.
Materials You’ll Need: Small plastic jar, glitter, water, and small plastic figurines.
Steps to Follow:
- The Scene: Glue your figurine (like a plastic shark or mermaid) to the inside of the jar lid.
- The Sparkle: Fill the jar almost to the top with water and add a big spoonful of glitter.
- The Seal: Screw the lid on tight – an adult can add a drop of super glue to make sure it never leaks.
- The Shake: Flip it over and give it a shake to watch the “underwater” glitter storm
16. Tissue Paper Flowers
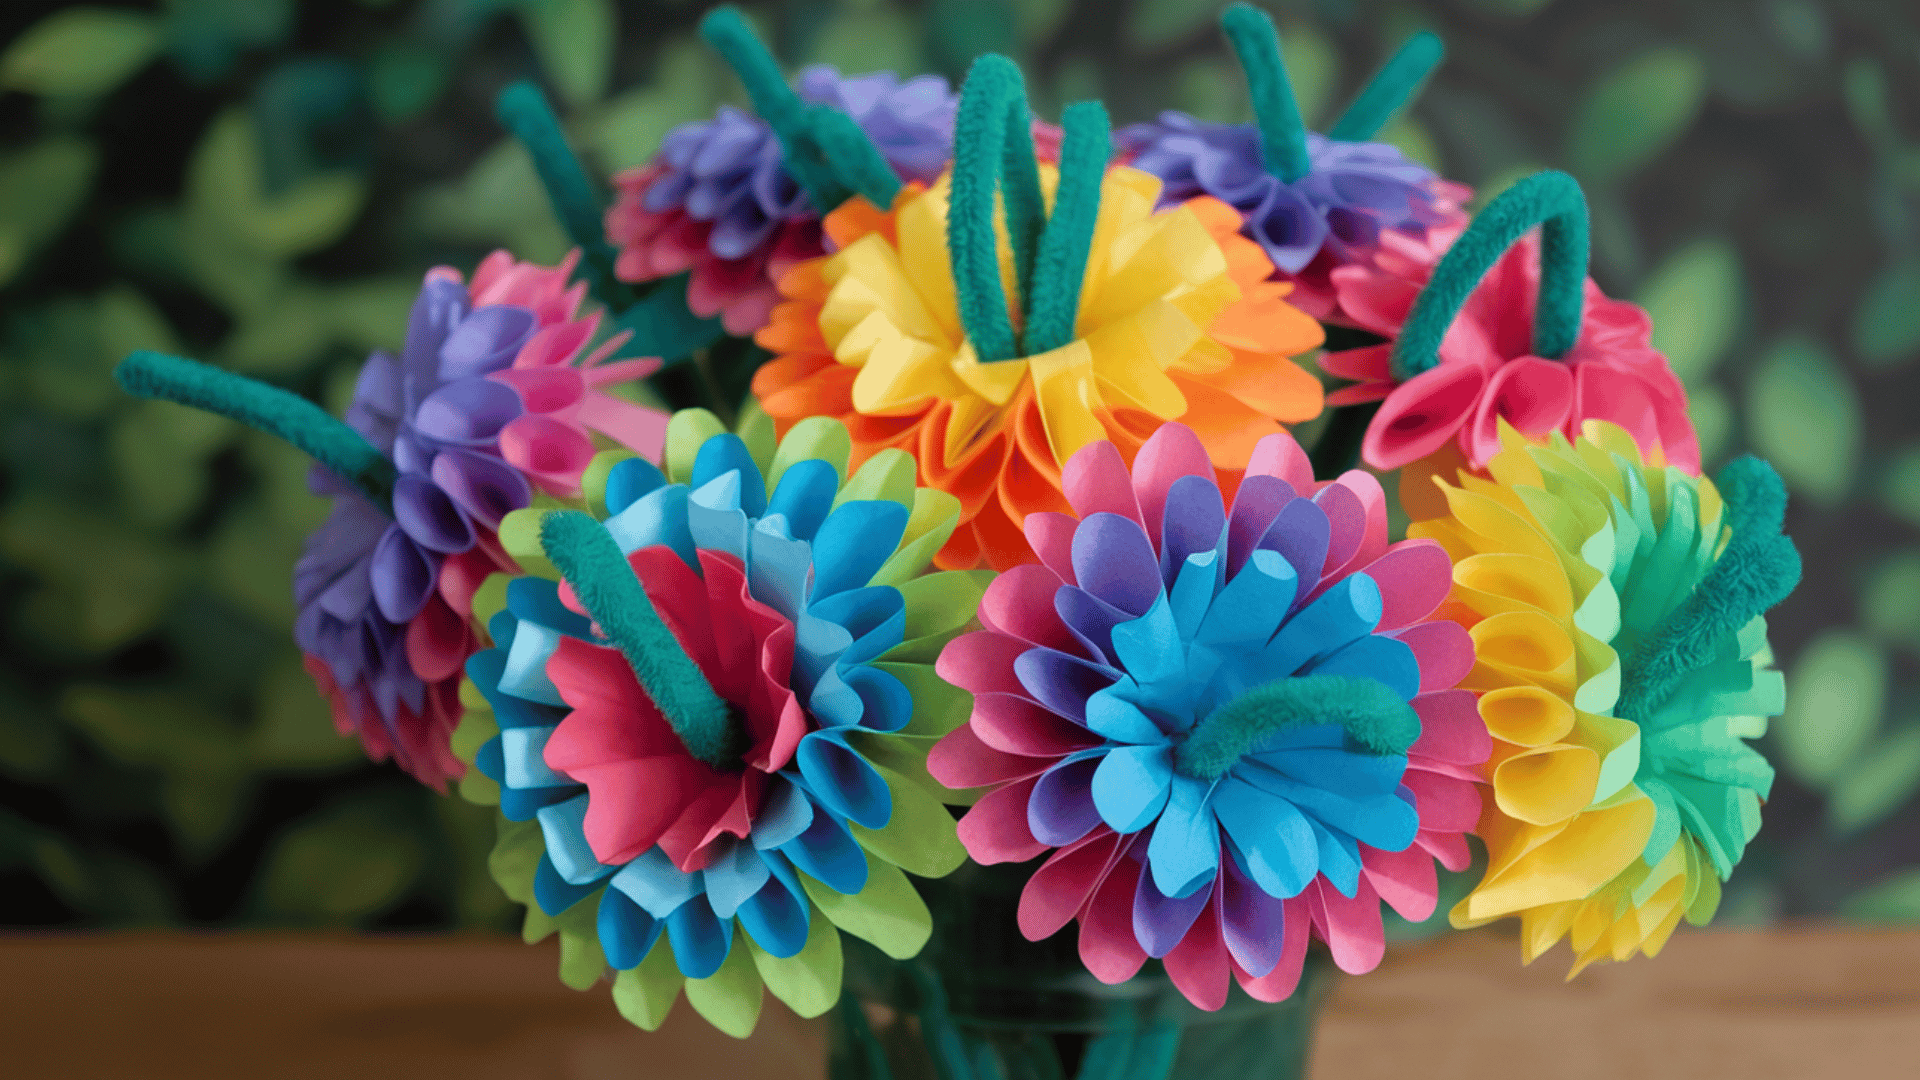
Make a bouquet that will never wilt, even in the summer heat! This 30-minute project is great for kids aged 6 to 11 and helps practice fine motor skills. These look beautiful grouped together in a vase or taped onto a gift box.
Materials You’ll Need: Tissue paper, pipe cleaners, and scissors.
Steps to Follow:
- Stack It: Layer about 5-8 sheets of tissue paper on top of each other.
- Accordion Fold: Fold the whole stack back and forth in 1-inch pleats.
- The Stem: Wrap a pipe cleaner around the very center of your folded paper.
- Bloom: Gently peel the layers of tissue paper toward the center to “open” the flower.
17. Summer Drinks Magnets
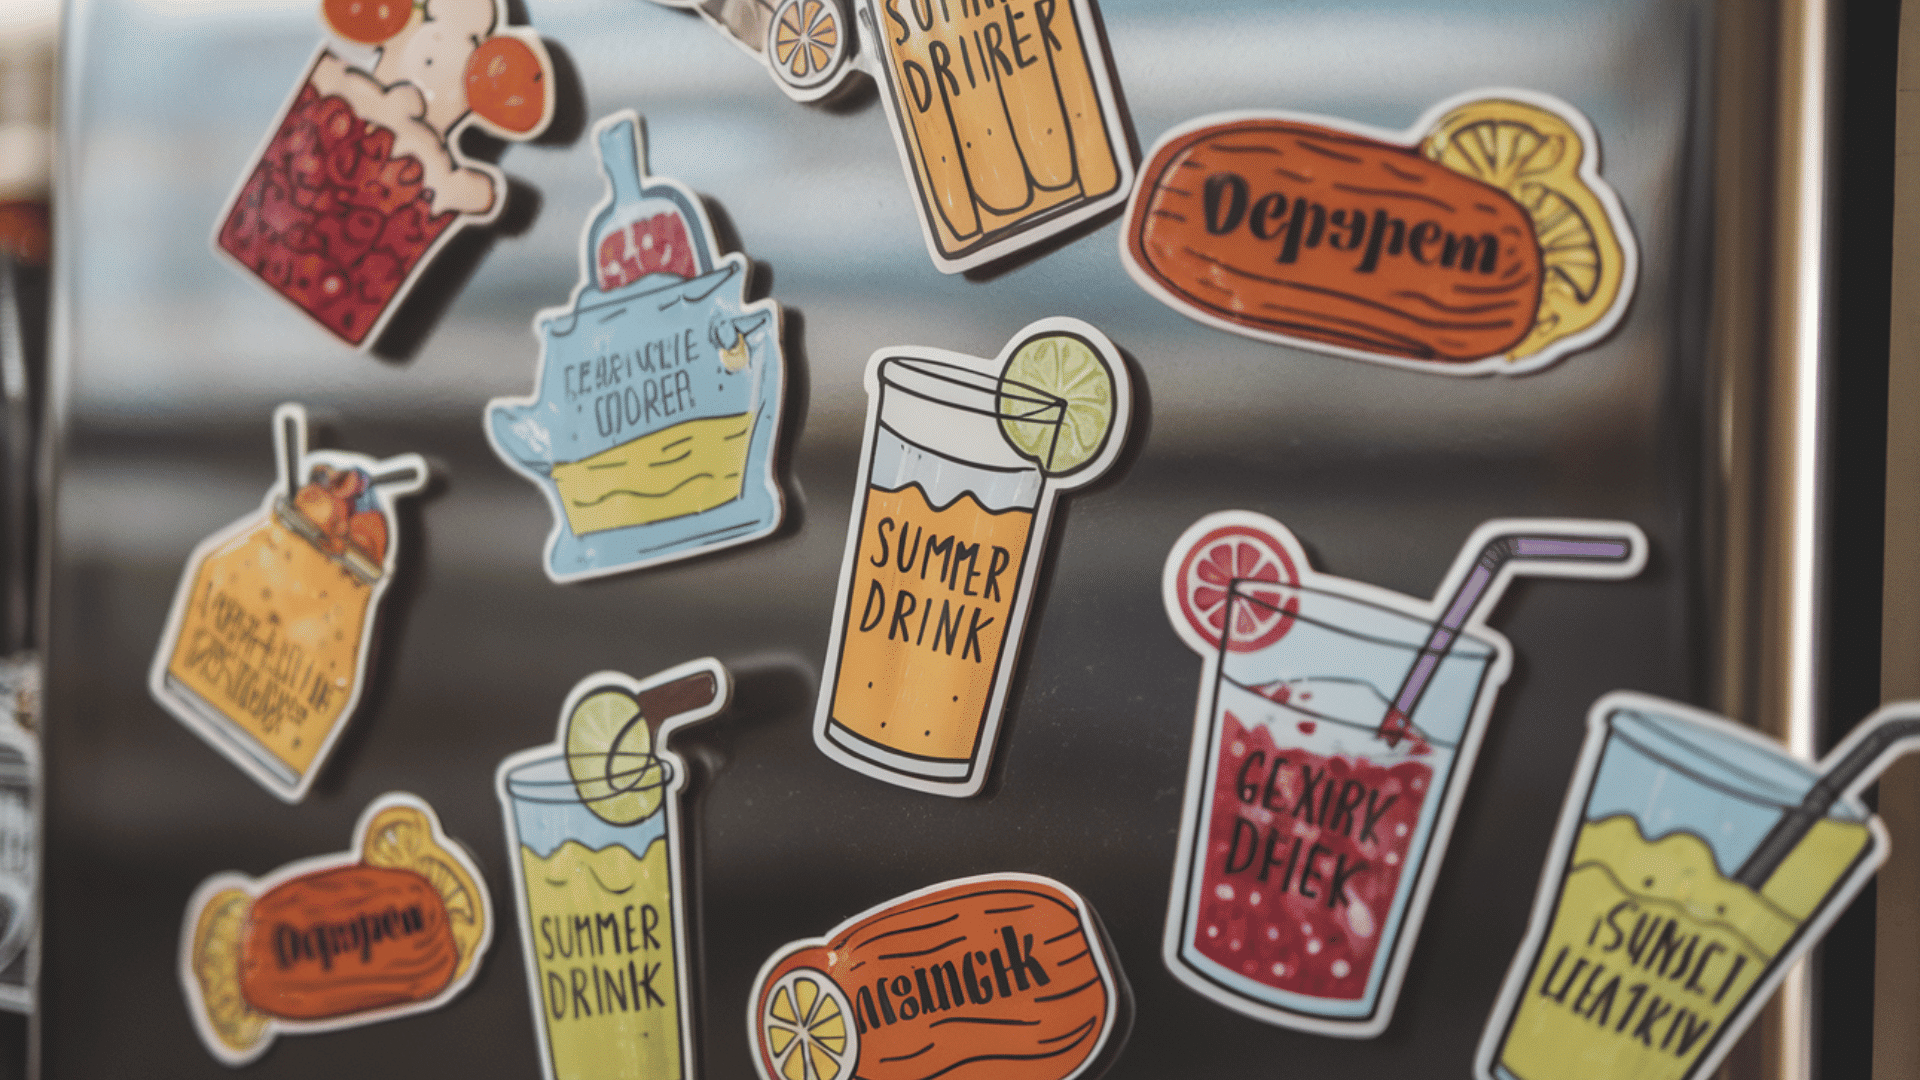
These colorful drink magnets are a fun and creative way to brighten up your fridge with a summer vibe. This 20-minute craft is great for kids ages 5 to 10 and involves drawing and cutting out paper drinks that can be decorated with markers, mimicking fun summer beverages.
Materials You’ll Need: Paper, markers, scissors, glue, small magnets.
Steps to Follow:
- The Drink Base: Draw the shape of a glass, cup, or bottle on a piece of paper.
- The Drink Design: Use markers to add vibrant drink colors and fun details like ice cubes, fruit slices, and straws.
- The Decoration: Add designs such as bubbles, garnishes, or text (like “summer drink”) on your paper drink.
- The Magnet: Cut out the drink shape, then glue a small magnet to the back so it can stick to your fridge.
18. Paper Bag Puppets
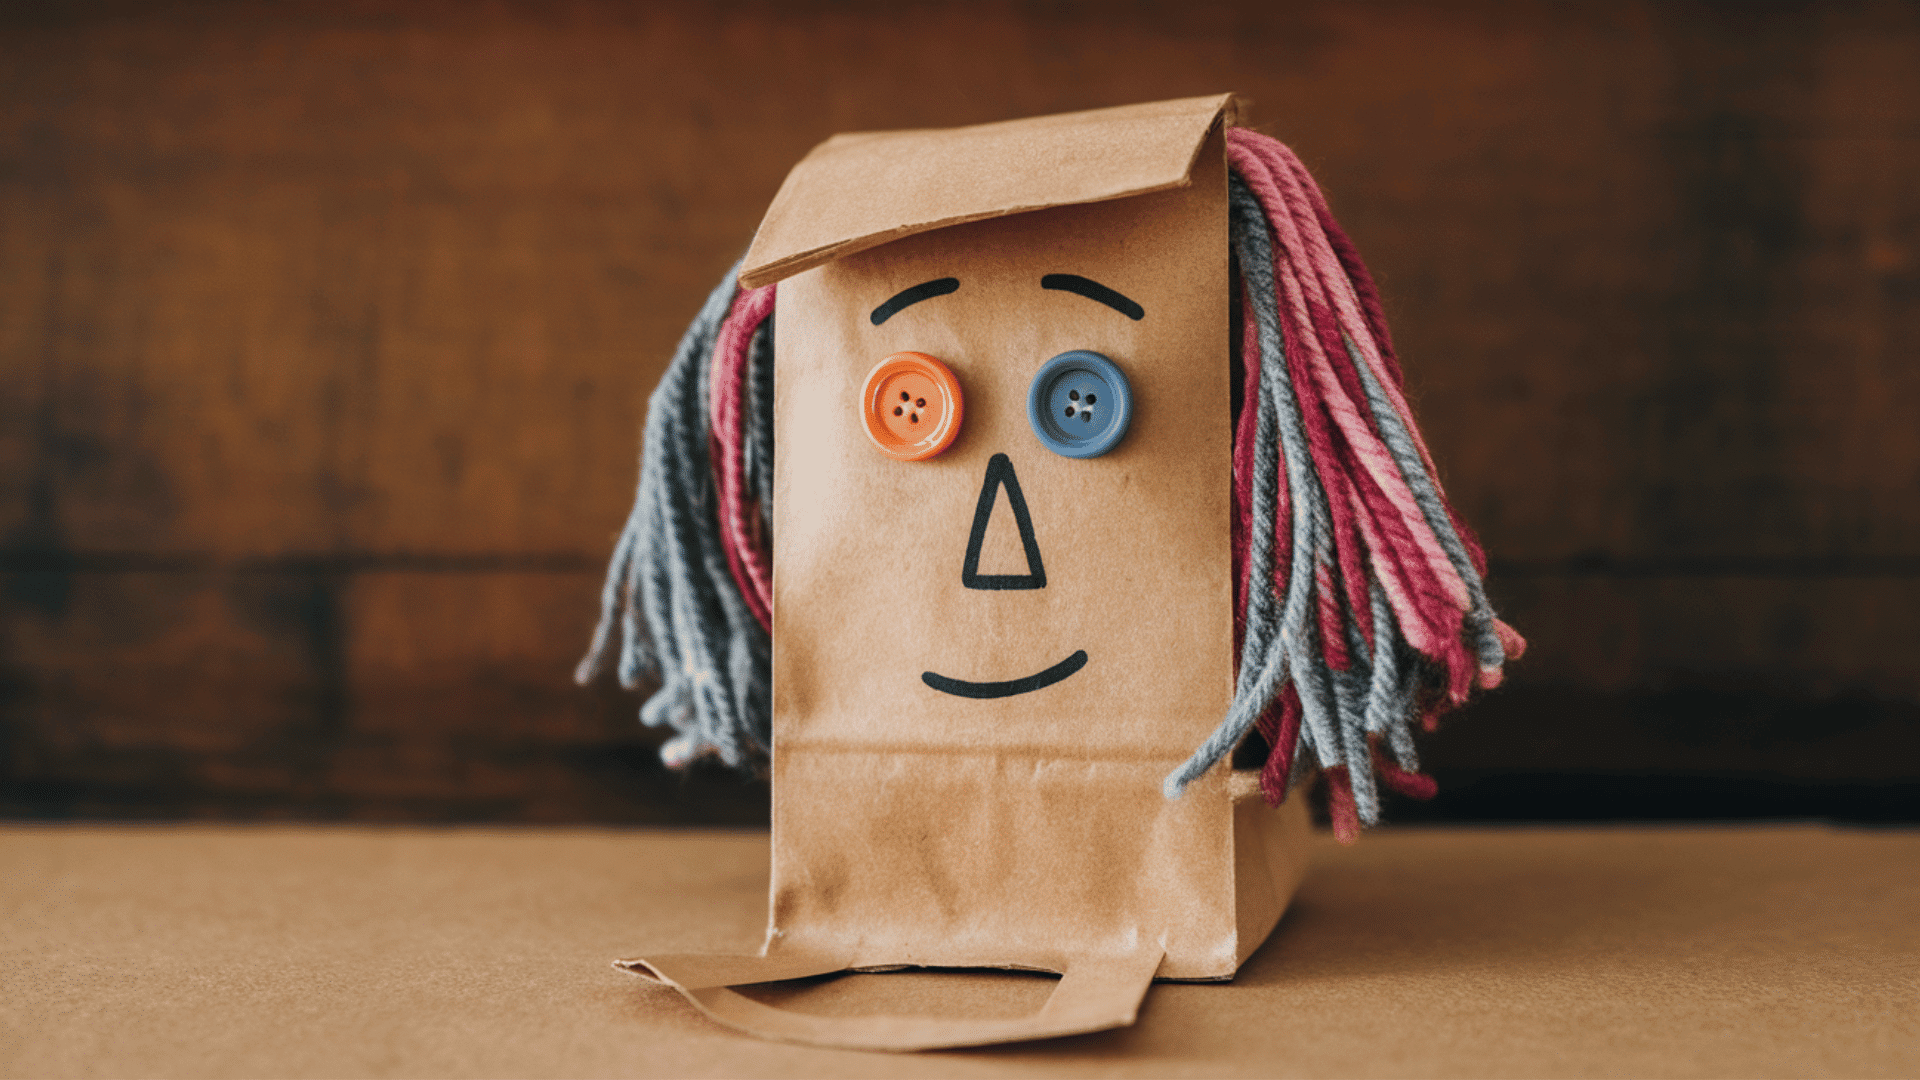
Get ready for a backyard puppet show with these easy-to-make characters. This 20-minute project is great for kids aged 4 to 8 and encourages storytelling. The bottom of the bag makes the perfect “mouth” that actually moves.
Materials You’ll Need: Paper bags, markers, glue, and buttons.
Steps to Follow:
- The Face: Draw the top half of the face on the “bottom” flap of the bag.
- The Mouth: Draw the tongue and bottom of the mouth inside the fold of the flap.
- The Hair: Glue on yarn or paper strips to give your puppet some wild hair.
- Details: Glue on buttons for eyes or a nose to make it look 3D.
19. Foam Sailboats

Test your engineering skills with a boat that actually floats! This 20-minute craft is best for kids aged 5 to 10 and is perfect for “sink or float” experiments in the pool. It’s a simple way to learn about wind and water.
Materials You’ll Need: Foam sheets, wooden sticks, and markers.
Steps to Follow:
- The Hull: Cut a thick piece of foam into a boat shape (a triangle or rectangle).
- The Sail: Cut a smaller triangle out of a different colored foam sheet.
- The Mast: Poke a wooden stick through the sail and then push the bottom of the stick into the foam hull.
- Testing: Put it in a tub of water and blow on the sail to make it move!
Here we go with the 21-30 stretch! These are perfect for getting kids outside and interacting with nature.
20. Butterfly Feeder Craft
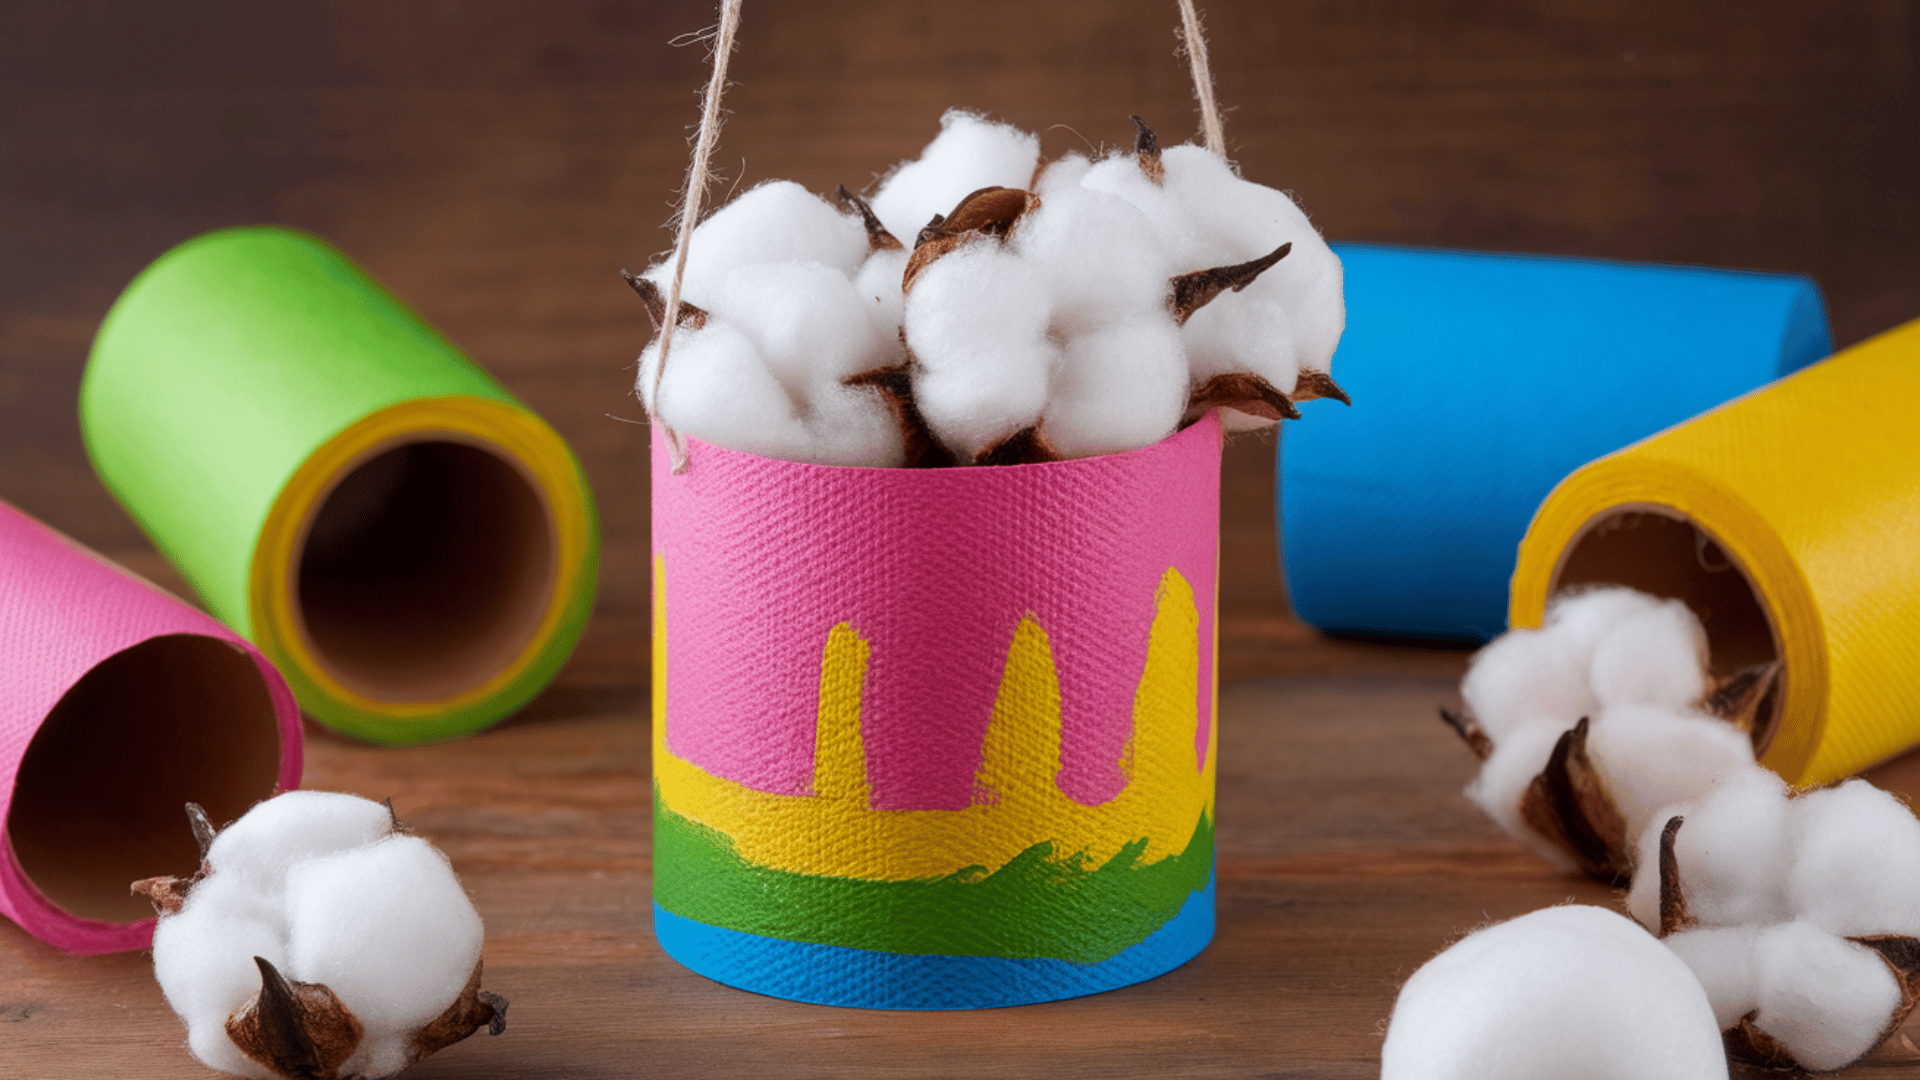
Invite some beautiful winged visitors to your garden with this simple feeding station. This 20-minute project is best for kids aged 5 to 10 and is a great way to learn about local wildlife. It’s a wonderful “set it and forget it” craft that keeps the fun going even after you’re done building.
Materials You’ll Need: Empty toilet paper rolls, string, paint, and sugar water.
Steps to Follow:
- Decorate: Paint your roll with bright colors like red or pink – butterflies love those
- The Hanger: Punch two holes at the top and thread a string through so you can hang it from a branch.
- The Bait: Soak a few cotton balls in a mix of sugar and water (nectar) and tuck them inside the roll.
- Placement: Find a sunny spot in the yard to hang your feeder and wait for your visitors.
21. Clay Pot Turtle Planters
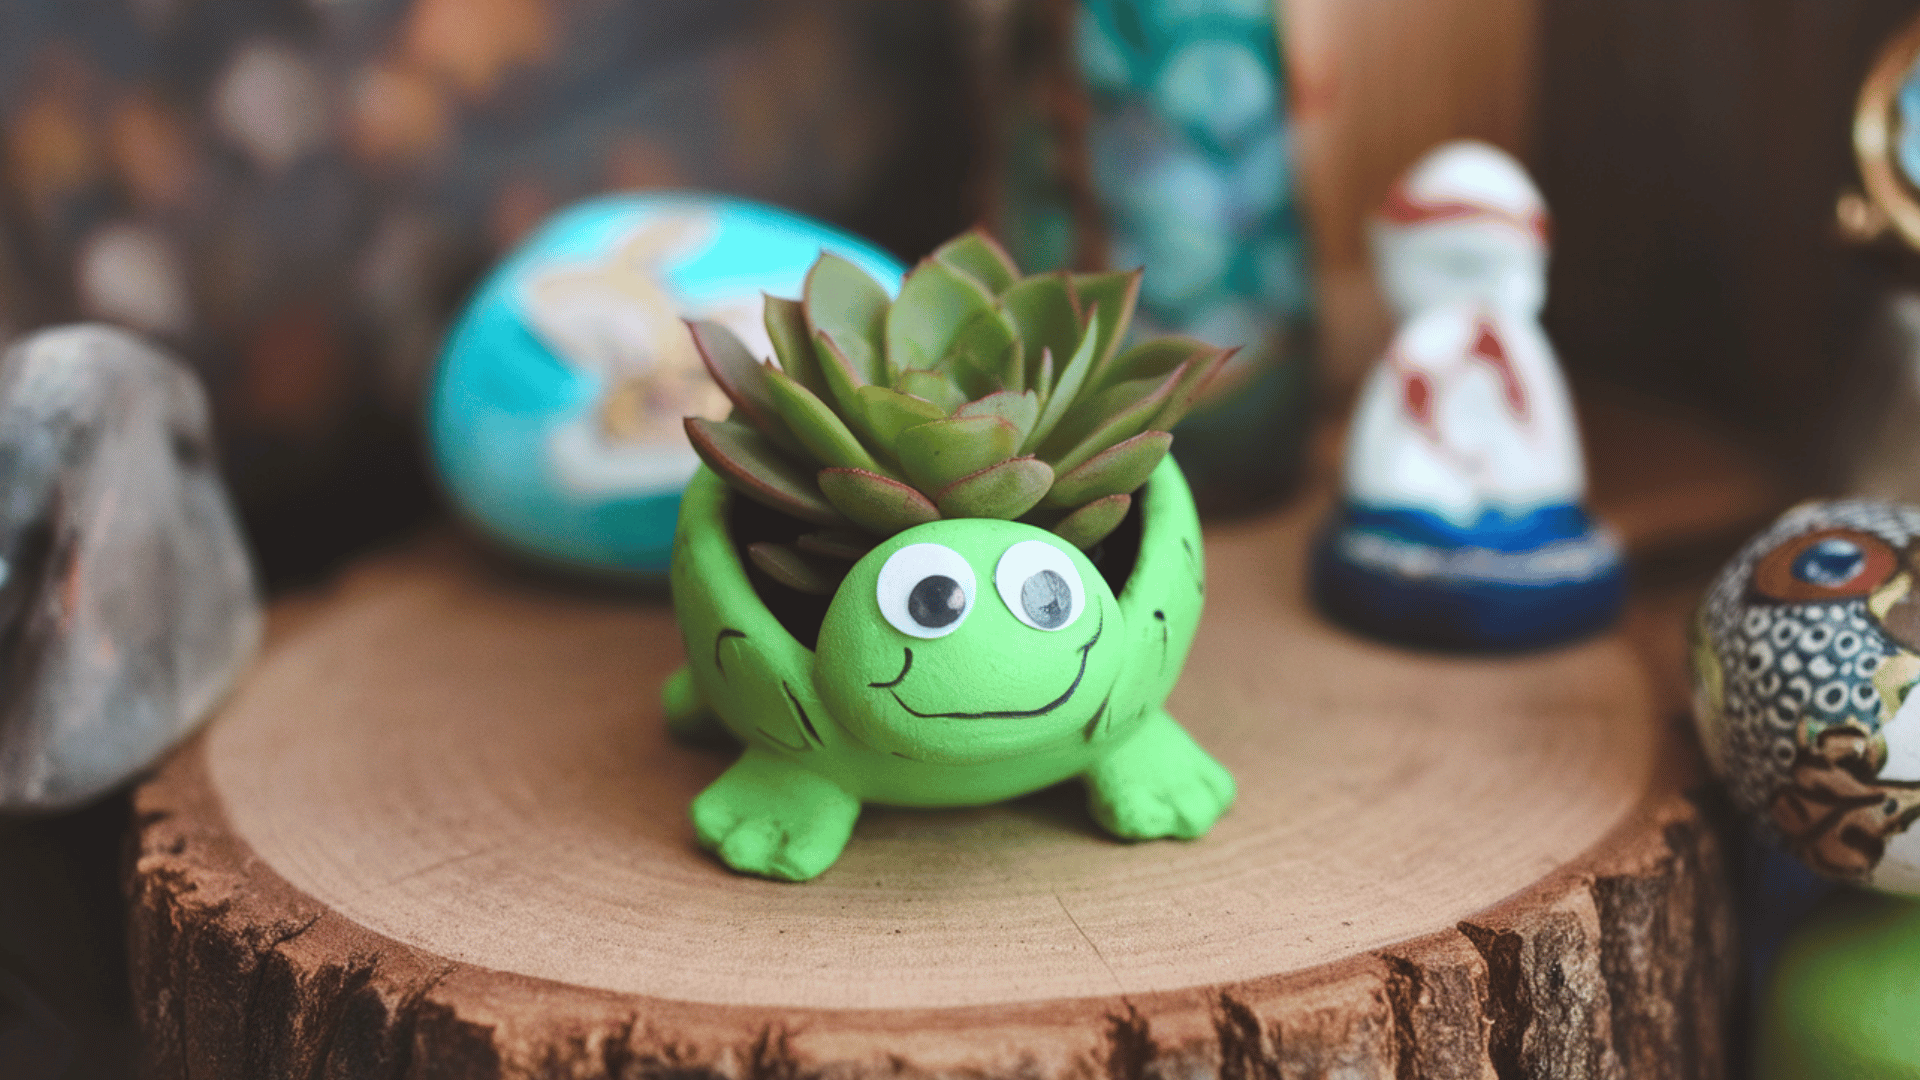
Give your succulents a slow and steady home with these adorable turtle pots. This craft takes about 30 minutes and is perfect for kids aged 6 to 11 who don’t mind getting a little paint on their fingers. It’s a fun way to combine gardening with a cute art project.
Materials You’ll Need: Small clay pots, green paint, googly eyes, and a small plant.
Steps to Follow:
- The Shell: Turn your pot upside down and paint the whole thing green.
- The Pattern: Once dry, use a darker green or black marker to draw hexagons on the “shell.”
- The Face: Glue googly eyes near the bottom rim of the pot.
- The Garden: Flip it over and help an adult tuck a small plant or flower inside.
22. Paper Flower Pots
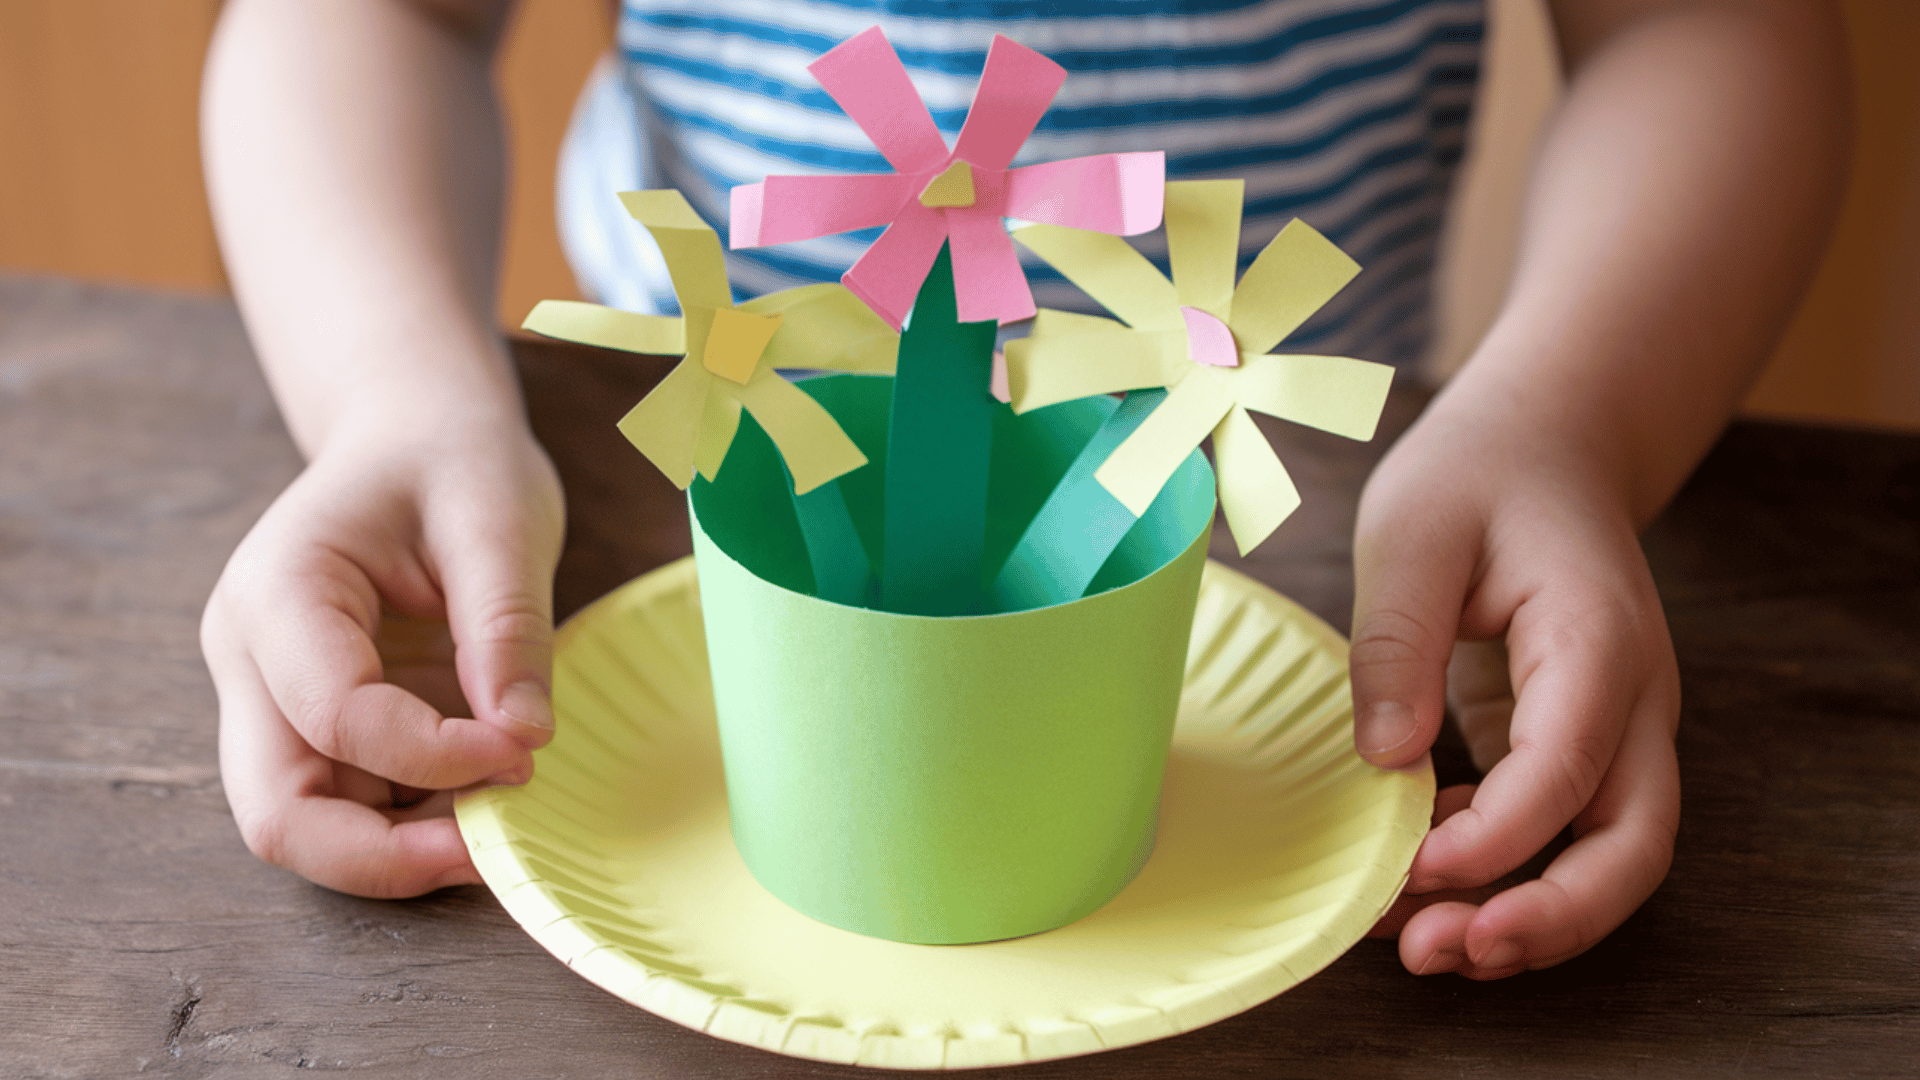
Create a “garden” that stays bright all year long without needing a drop of water. This 25-minute craft is a hit for kids aged 4 to 8 and is great for decorating a bedroom wall. It’s a simple way to play with layers and textures.
Materials You’ll Need: Paper plates, tissue paper, glue, and scissors.
Steps to Follow:
- The Center: Glue a yellow circle or a bunch of yellow paper scrunched up in the middle of the plate.
- The Petals: Cut long strips of colorful tissue paper and glue them around the rim of the plate.
- The Stem: Glue a large green paper strip or a painted popsicle stick to the bottom.
- Display: Tape your flowers to a window or a wall to brighten up the room.
23. Egg Carton Crabs
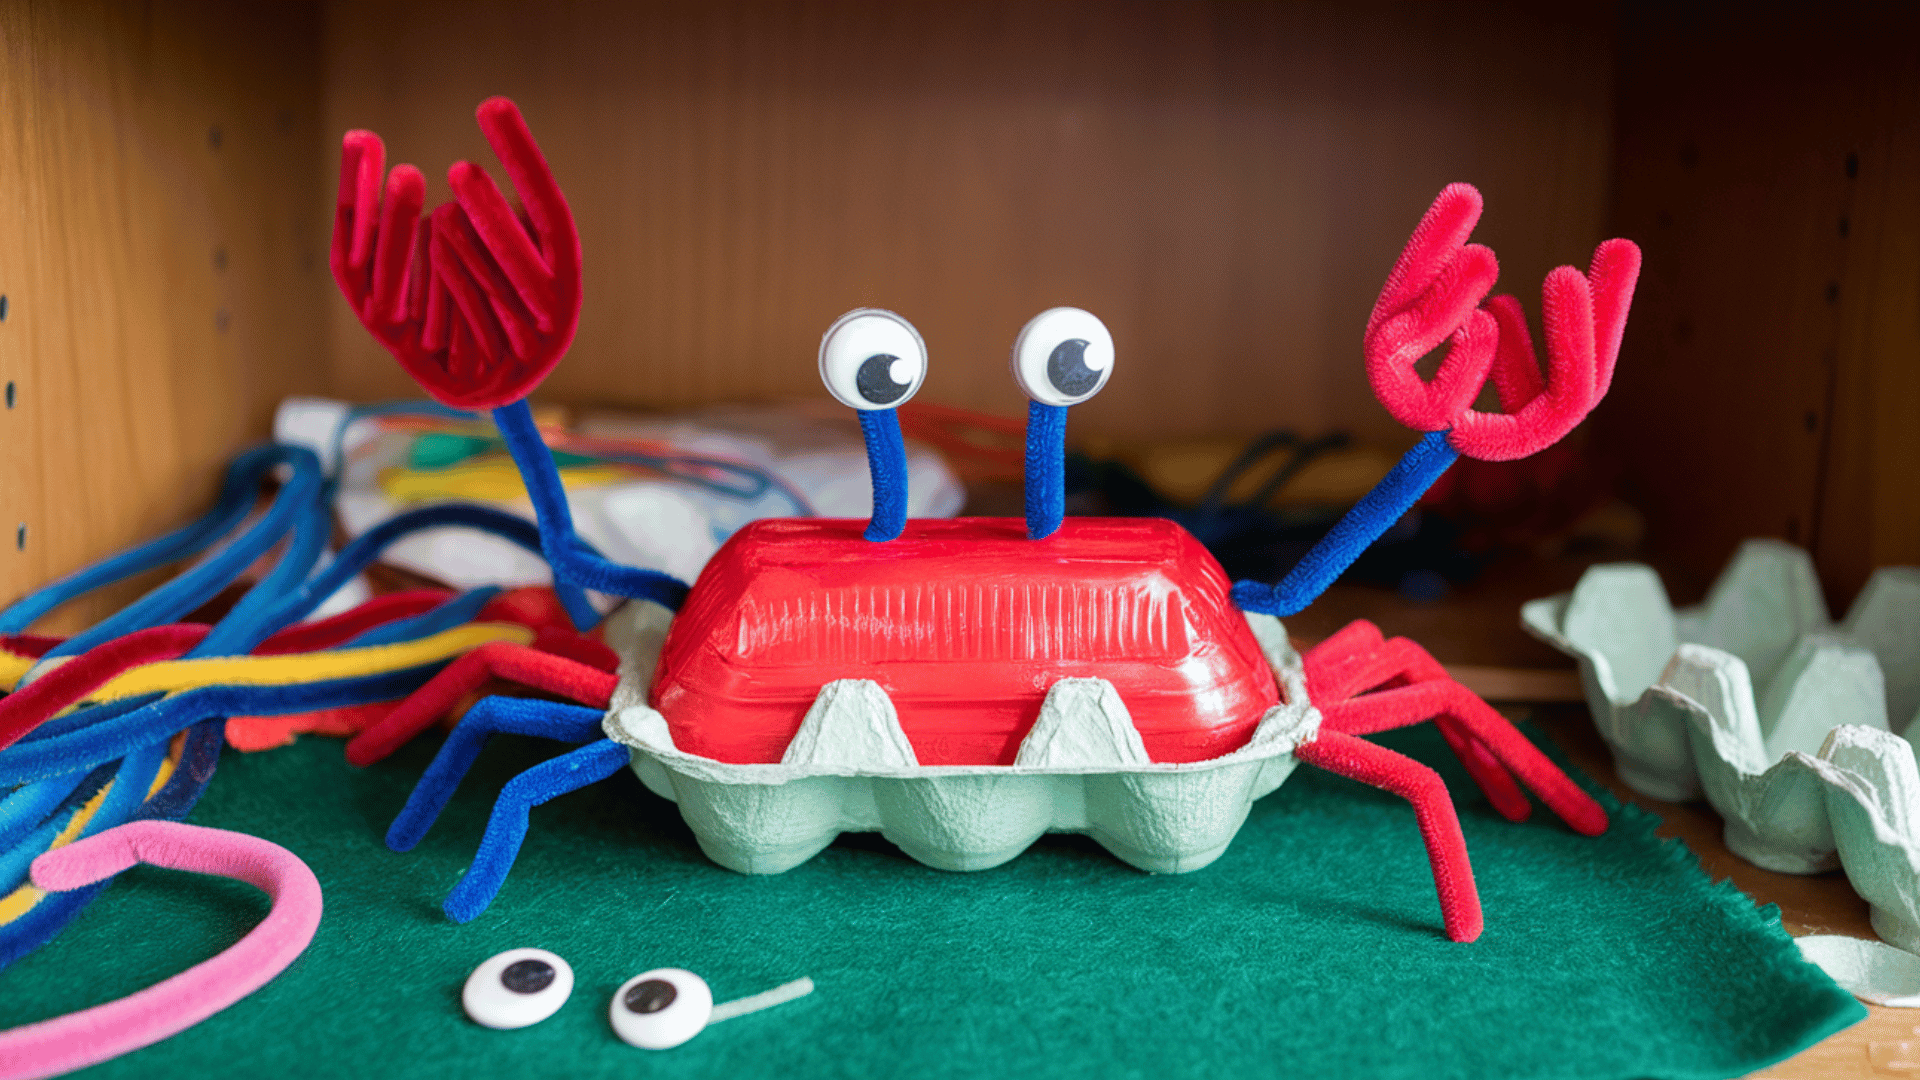
These little pinchers are the perfect sidekick for a beach-themed play day. This 20-minute project is best for the 4 to 9 age group and is a great way to recycle egg cartons. They look super cute sitting on a bookshelf or a windowsill.
Materials You’ll Need: Egg cartons, red paint, pipe cleaners, and googly eyes.
Steps to Follow:
- The Body: Cut out one single cup from your egg carton and paint it bright red.
- The Legs: Poke three small holes on each side and slide in short pieces of red pipe cleaner.
- The Claws: Bend the front two pipe cleaners into a “C” shape to look like pinchers.
- The Eyes: Glue your googly eyes to the very top of the egg carton cup.
24. Straw Rockets
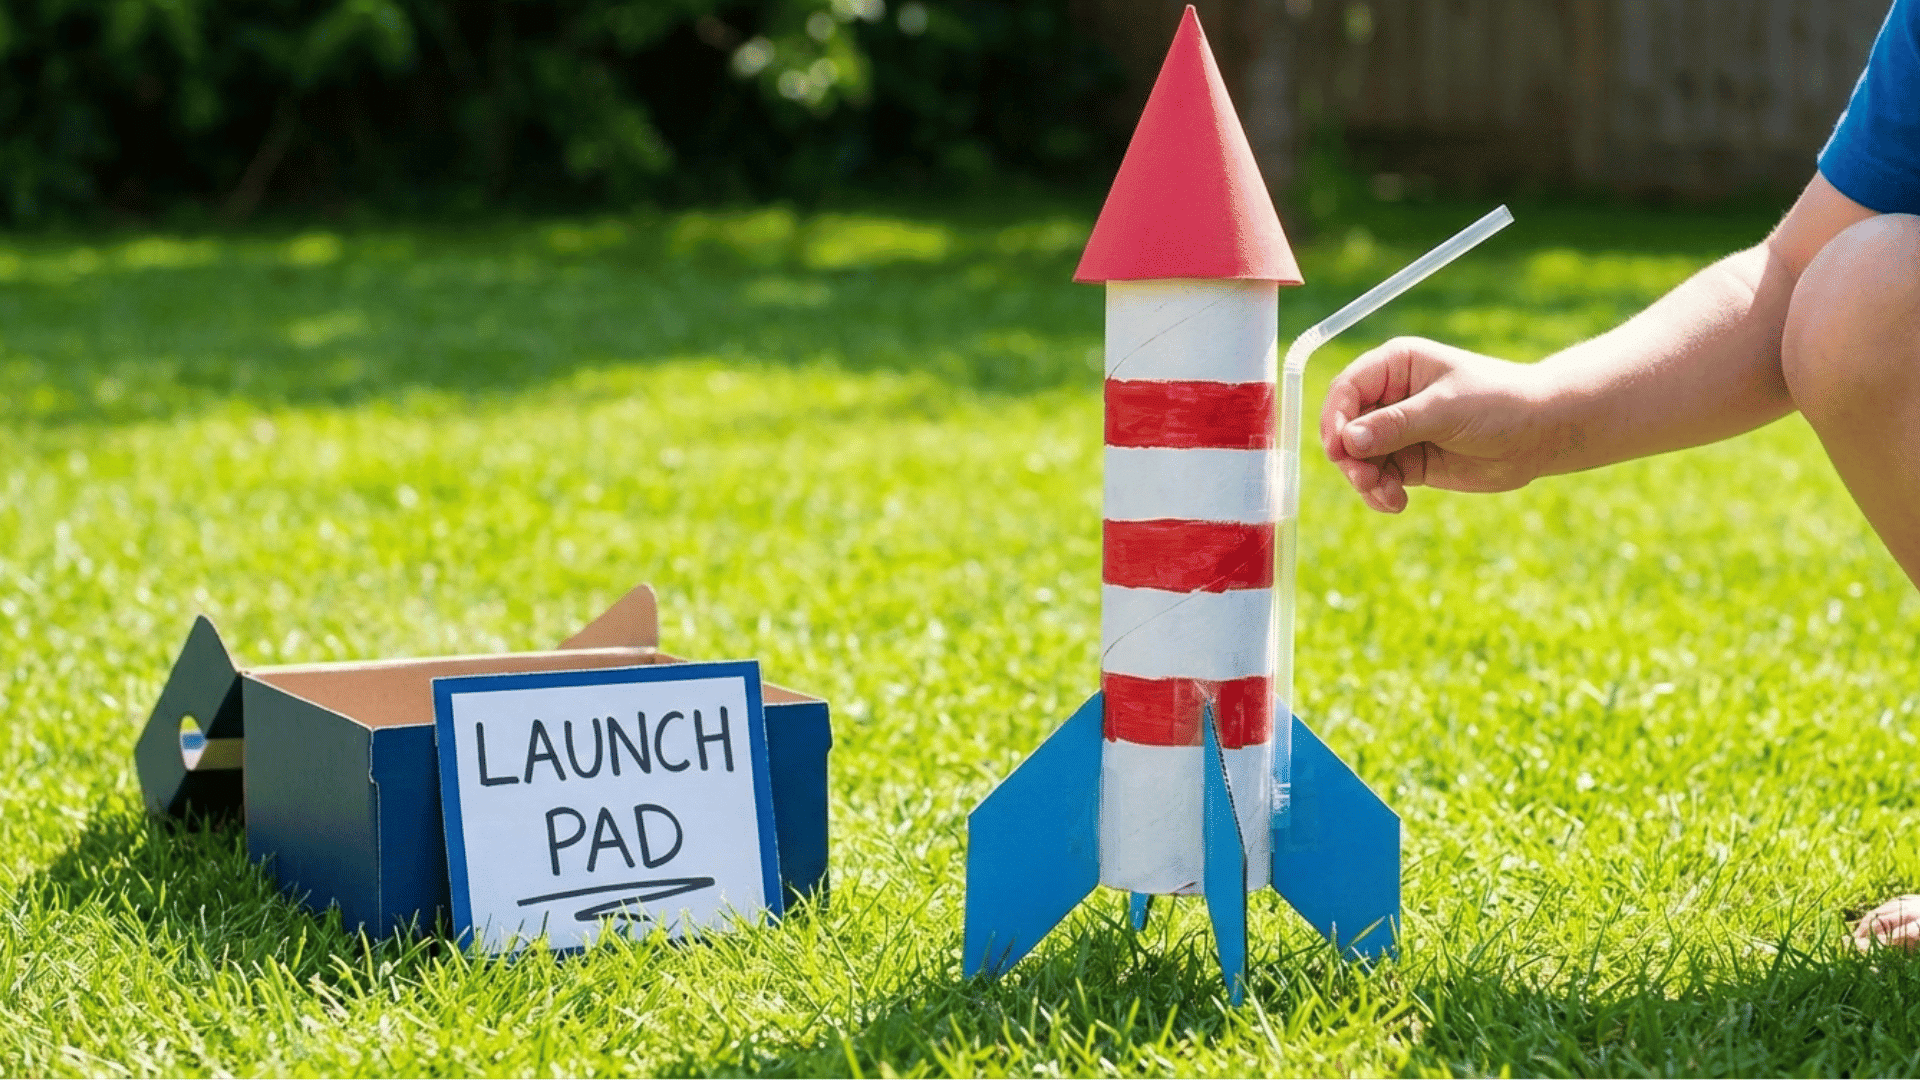
Ready for a countdown? These rockets are a blast to launch and take only 15 minutes to make. They are perfect for kids aged 5 to 12 who want to see how far their “breath power” can take them. It’s a fun way to turn a rainy afternoon into a space race.
Materials You’ll Need: Drinking straws, construction paper, and tape.
Steps to Follow:
- The Rocket: Cut a small rectangle of paper, roll it around your finger (looser than the straw), and tape it into a tube.
- The Nose Cone: Pinch one end of the tube shut and tape it tight so no air can get through.
- The Fins: Tape two small triangles to the bottom of your paper tube to help it fly straight.
- The Launch: Slide the paper rocket onto the straw and blow as hard as you can!
25. Cupcake Liner Flowers
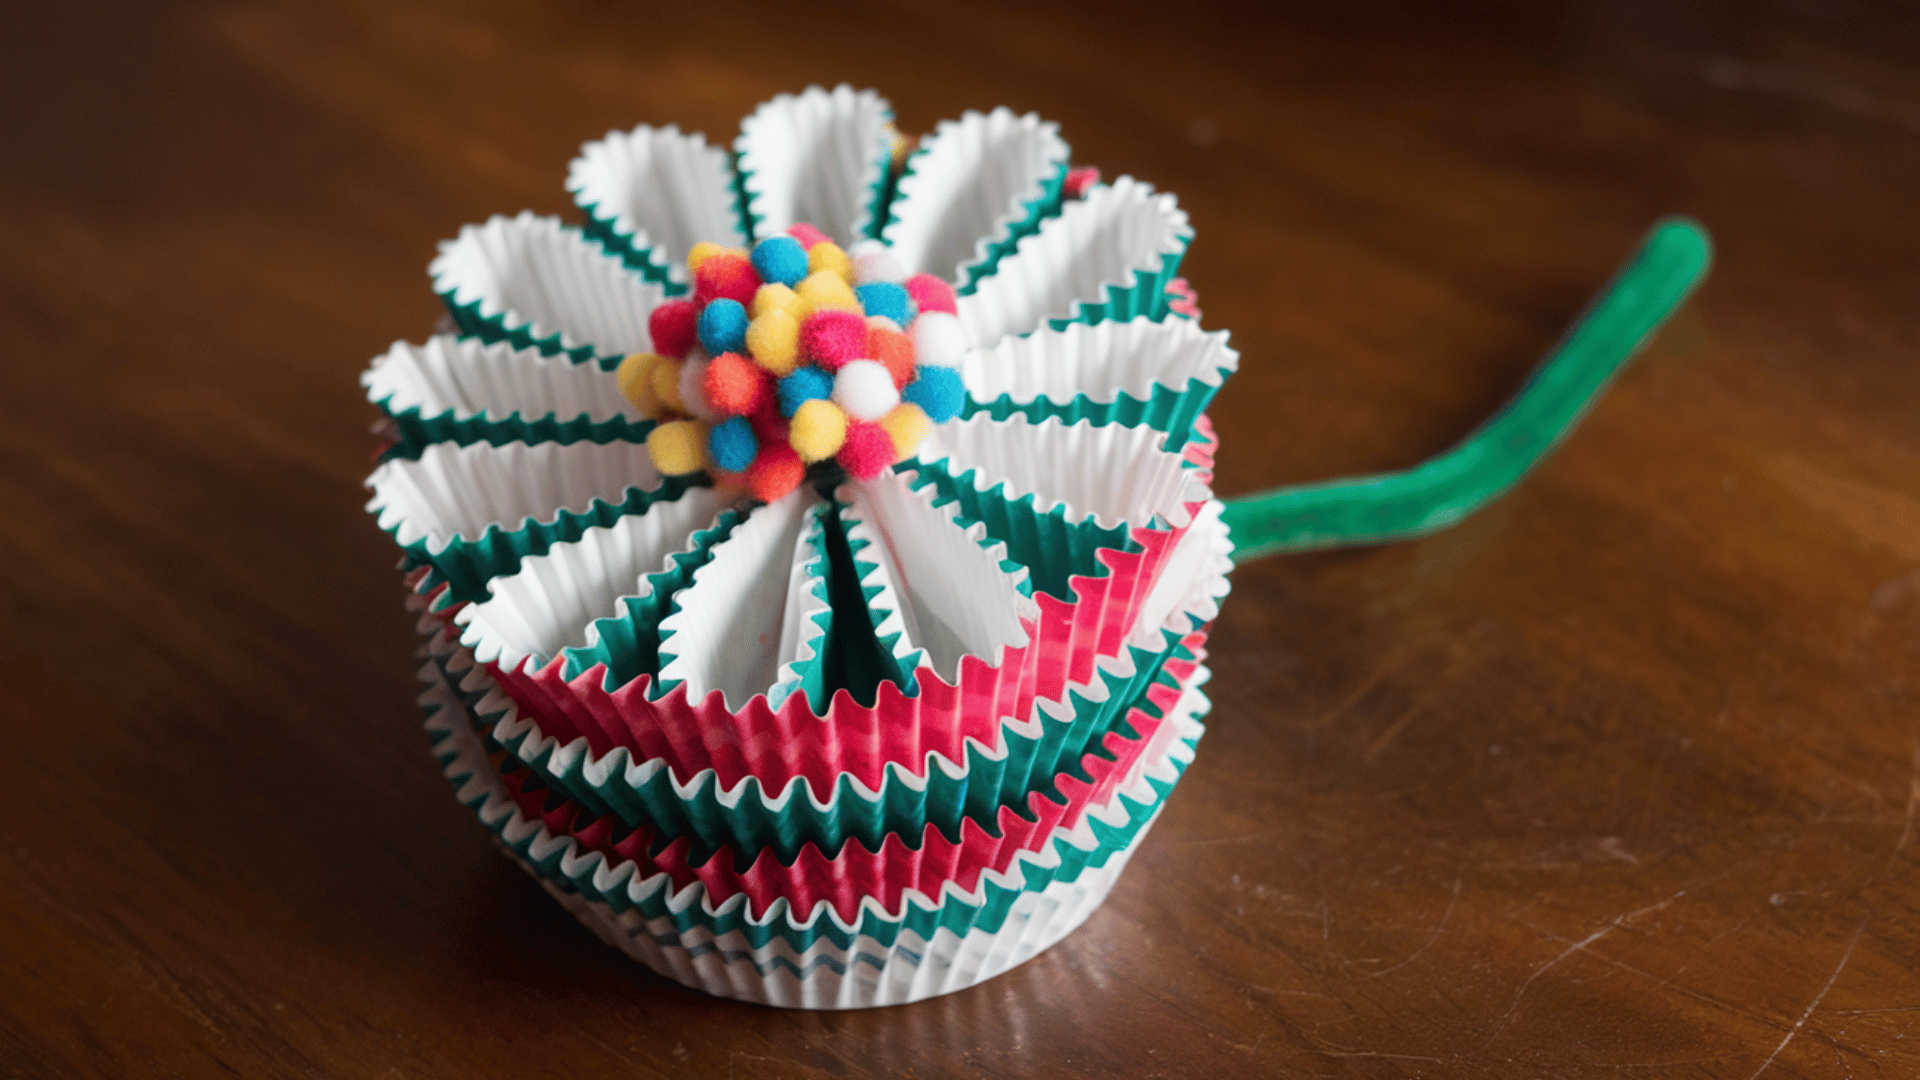
These delicate blooms are perfect for making homemade cards or fancy decorations. This 15-minute project is ideal for kids aged 3 to 7 and helps with layering and pattern making. They are a mess-free way to create a big, colorful bouquet.
Materials You’ll Need: Colorful cupcake liners, glue, and pipe cleaners.
Steps to Follow:
- Flatten: Take two or three different colored liners and flatten them out.
- Layer: Glue the smaller liners inside the larger ones to create a “nested” look.
- The Stem: Tape or glue a green pipe cleaner to the back of the largest liner.
- The Center: Glue a button or a pom-pom in the very middle for a finishing touch.
26. Rainbow T-Shirts
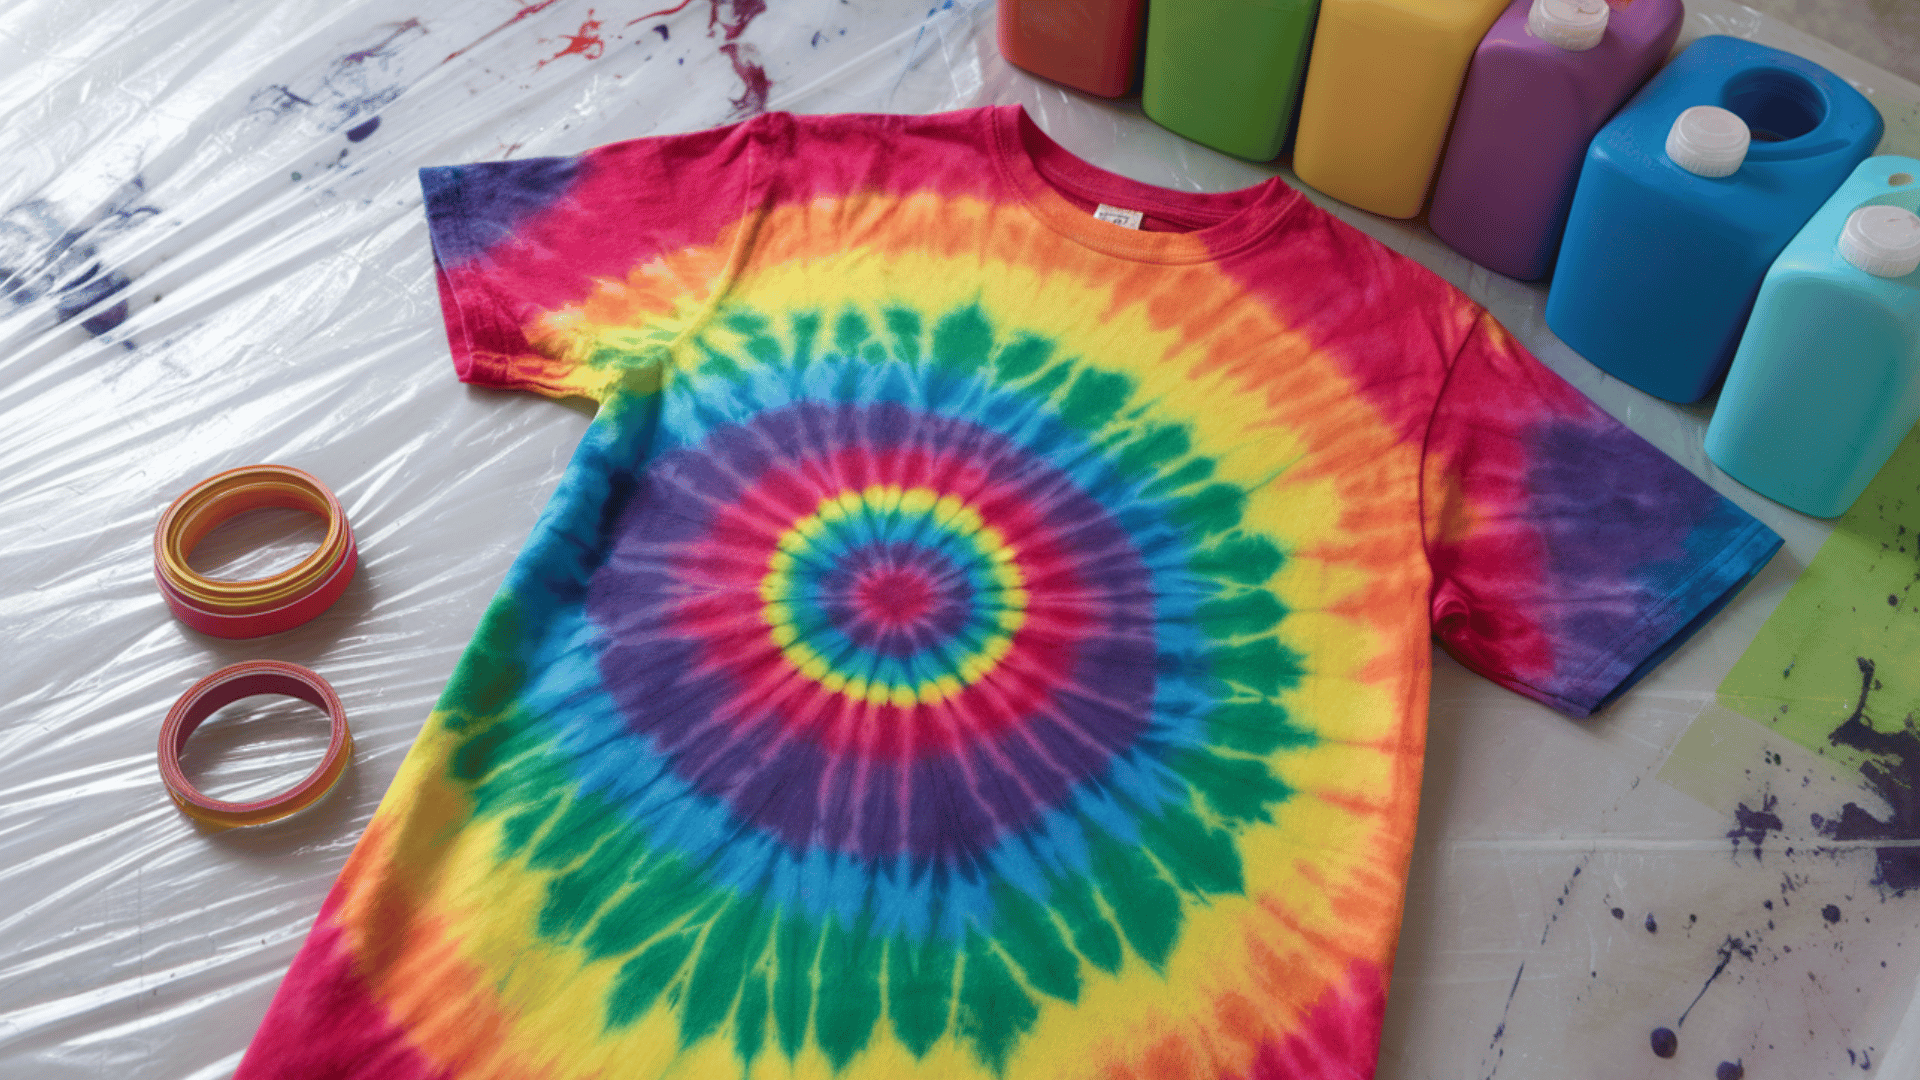
Bring a burst of color to your wardrobe with this fun tie-dye project. Perfect for kids, it’s an easy way to create your own vibrant, rainbow-themed t-shirt
This 30-minute project is great for kids aged 5 to 10 and will get them excited about mixing colors while making their own wearable art.
Materials You’ll Need: White cotton t-shirt, Fabric dye in rainbow colors (red, orange, yellow, green, blue, indigo, violet), Rubber bands, Plastic squeeze bottles, Plastic tablecloth or garbage bags (for mess-free fun), Plastic bags for wrapping
Steps to Follow:
- Prep the Workspace: Cover the surface with a plastic tablecloth or garbage bags. Make sure to wear old clothes or aprons to keep things neat.
- Prep the T-Shirt: Dampen the t-shirt and twist or fold it to create fun, swirly patterns. Secure the folds with rubber bands to keep the design in place.
- Mix the Dye: Pour your fabric dye into plastic squeeze bottles. Follow the dye instructions for mixing water with color. If you have seven colors, get each color in a separate bottle for easy application!
- Apply the Dye: Carefully squeeze the dye onto the shirt in rainbow sections, starting with red at the center and working outward. Let the colors blend slightly at the edges for a smooth transition.
- Wrap and Set: Once the shirt is covered with dye, wrap it in a plastic bag. Allow it to sit for 6-8 hours (or longer if you want brighter colors).
- Rinse and Dry: Rinse the t-shirt in cold water until the water runs clear. Then, hang it to dry, and watch your rainbow come to life
27. Painted Shells with Faces
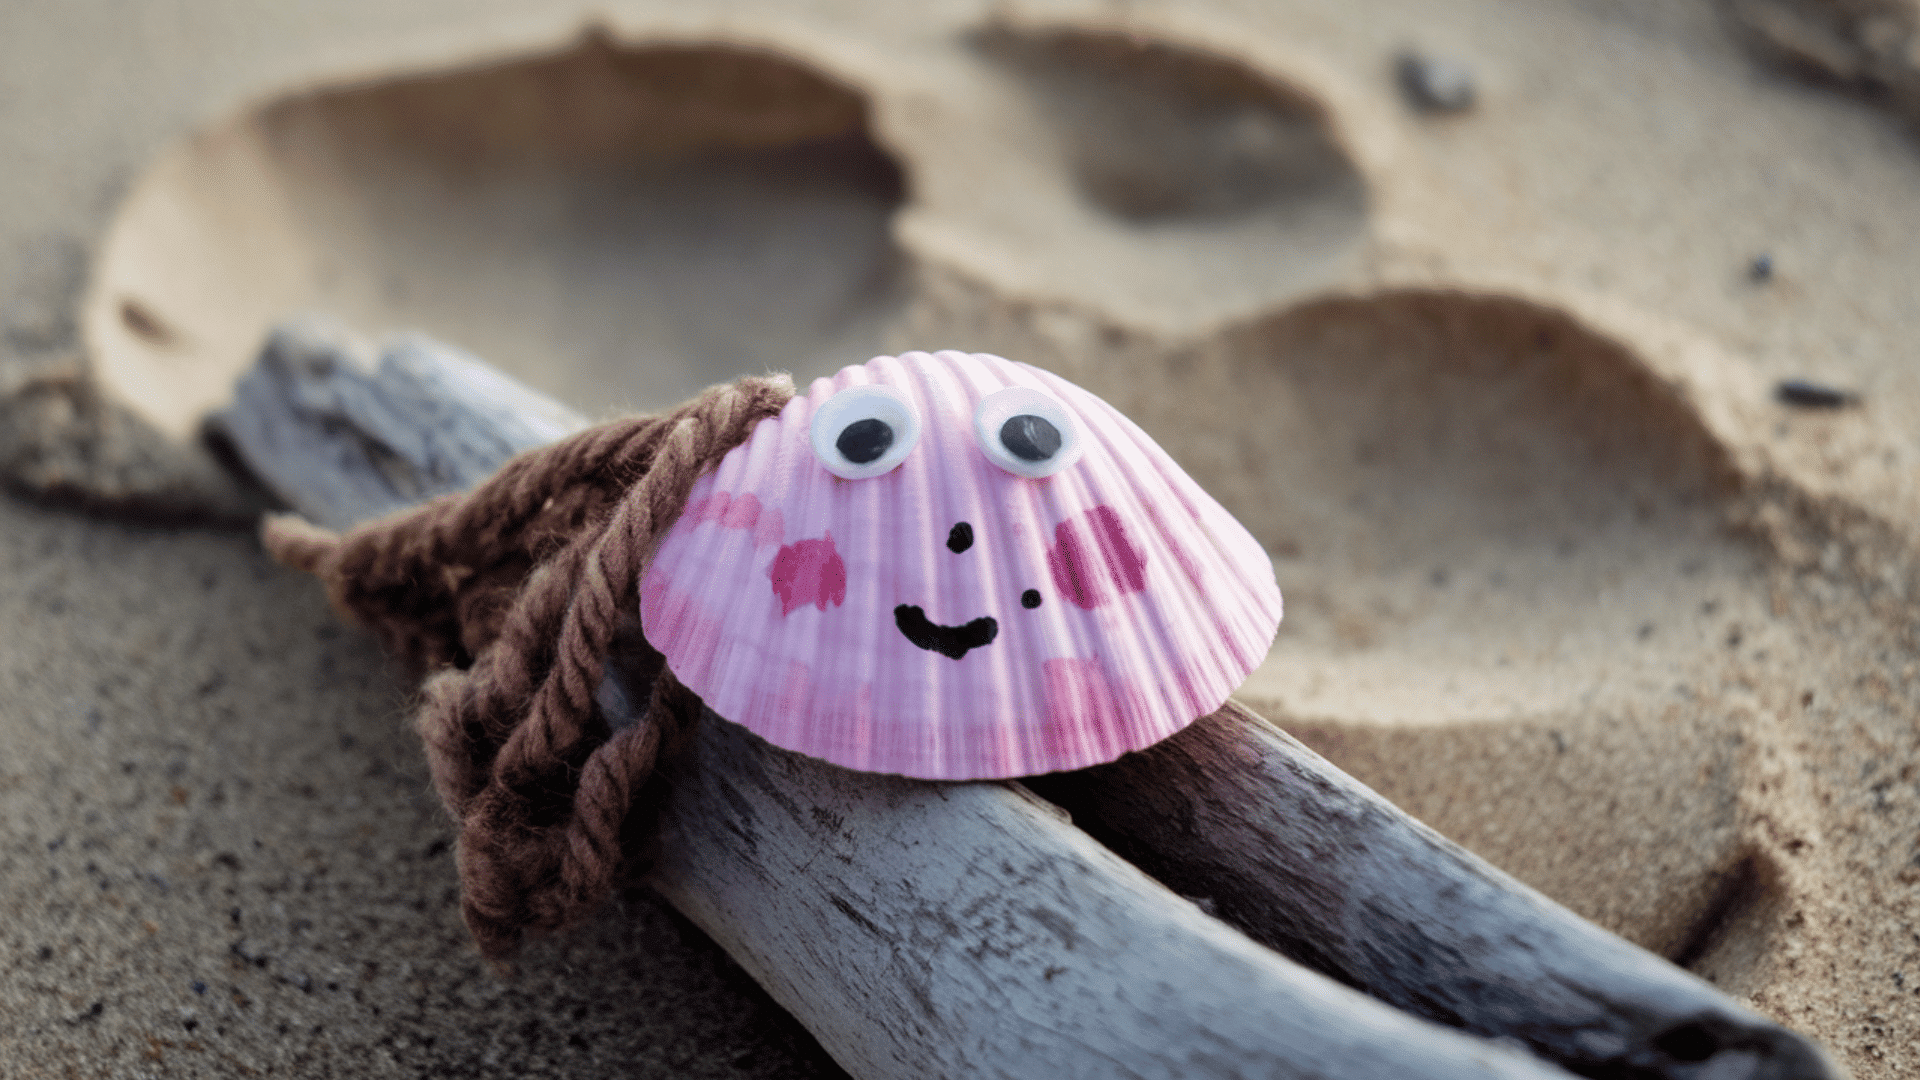
Turn your beach finds into a tiny family of “Shell People.” This 20-minute craft is great for kids of all ages (3 to 10) and is a fun way to remember a trip to the shore. You can make a whole village of them in no time!
Materials You’ll Need: Seashells, paint, googly eyes, and markers.
Steps to Follow:
- The Skin: Paint your seashell a solid color or give it a cool pattern.
- The Eyes: Glue on googly eyes – the bigger and sillier, the better!
- The Mouth: Use a marker to draw a big smile or a funny expression.
- The Hair: You can even glue on a little bit of yarn to give your shell person some hair.
28. Backpack Charms
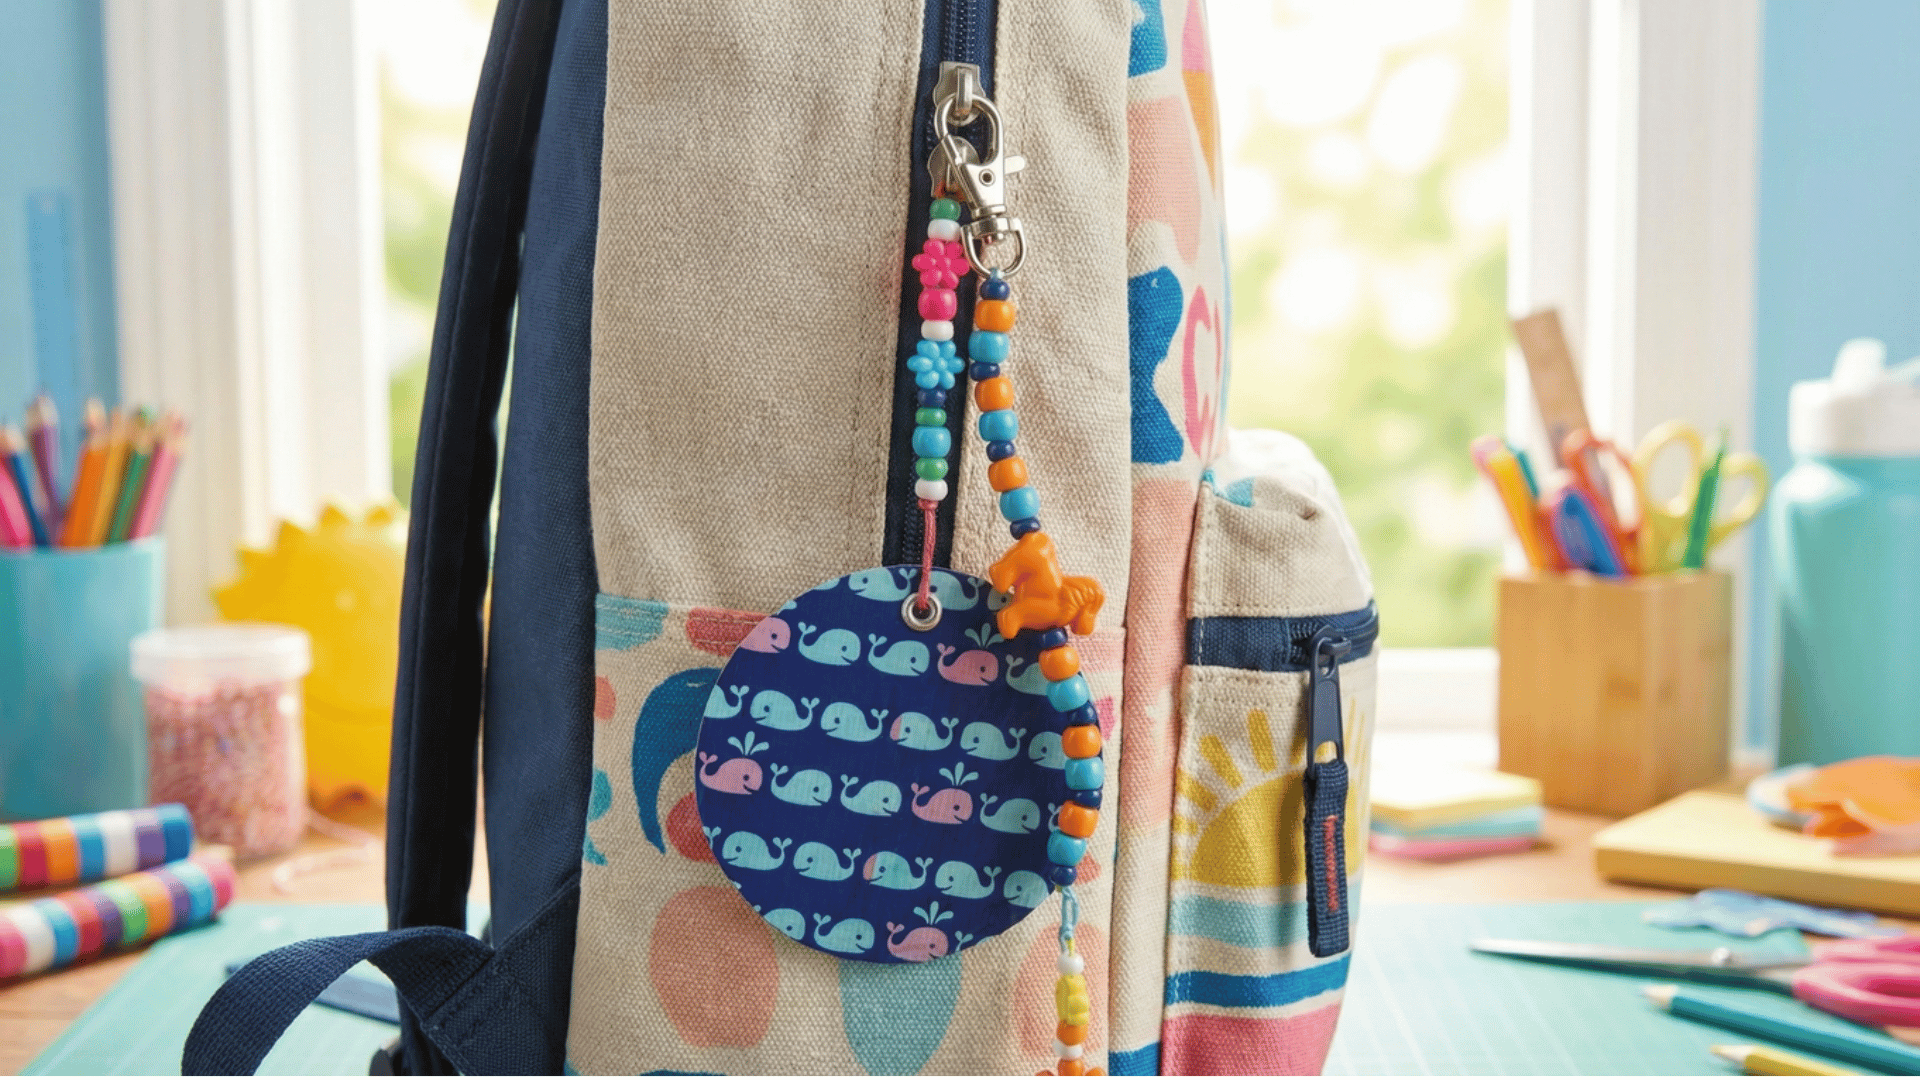
Create personalized, fun, and colorful backpack charms like the ones in the image. This easy and enjoyable craft will let kids design unique accessories to hang from their backpacks.
In just 30 minutes, children aged 6 to 12 can design their own playful charms using simple materials.
Materials You’ll Need: colorful scrapbook paper or patterned paper for charm shapes, scissors, a hole punch, beads in a variety of colors and shapes, string, cord, or elastic thread, keychain clips or lobster clasps, glue (optional for securing beads), and a pencil or pen for drawing charm outlines
Steps to Follow:
- Select Paper and Draw Shapes: Start by selecting some colorful scrapbook or patterned paper. Use a pencil or pen to draw shapes for your charms, like circles, animals, or fun designs like hearts or stars.
- Cut Out Shapes and Punch Holes: Cut out your shapes with scissors, then use a hole punch to make a small hole at the top of each shape for threading.
- Prepare the String and Add Beads: Next, take your string, cord, or elastic thread and cut it to your desired length. Thread beads onto the cord, arranging them in a colorful pattern.
- Attach the Charm: Once the beads are all in place, attach the charm to the string by threading it through the hole at the top.
- Add a Keychain Clip or Lobster Clasp: To finish, add a keychain clip or lobster clasp at the top of the string, making it easy to attach the charm to your backpack.
- Glue Loose Beads (Optional): If needed, you can glue any loose beads in place for extra security.
29. Fruit Slice Coasters
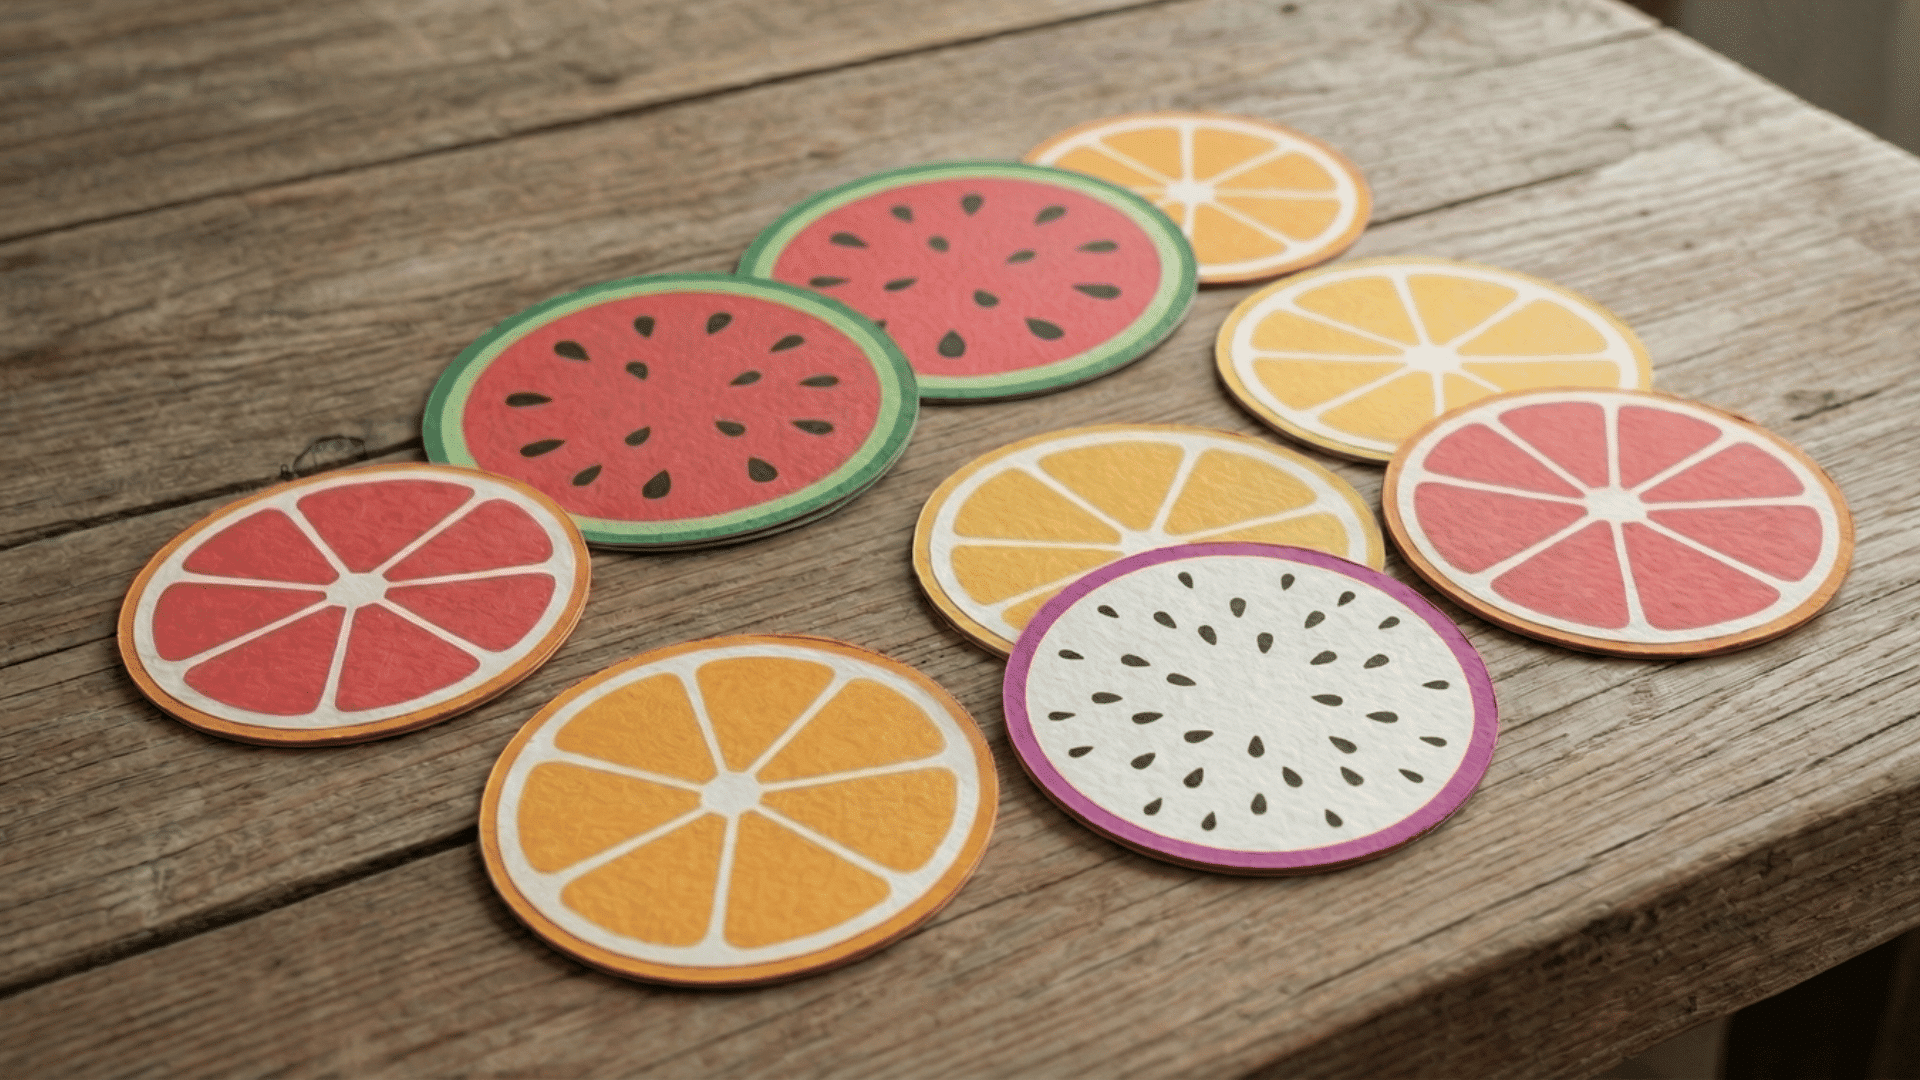
Brighten up the snack table with these juicy-looking coasters that protect your furniture in style. This 20-minute project is perfect for kids aged 5 to 10 and is a great way to practice cutting circles.
They’re super practical and look adorable under a cold glass of lemonade!
Materials You’ll Need: Colorful felt sheets, scissors, and fabric glue.
Steps to Follow:
- The Rind: Cut a large circle out of a “rind” color (like green for watermelon or orange for an orange).
- The Fruit: Cut a slightly smaller circle in the “fruit” color (red or bright orange) and glue it on top.
- The Seeds: Cut tiny black teardrops or white slivers and glue them in the center.
- The Slices: If you want, cut the whole circle into “wedges” or leave it as one big slice
30. Nature Collage Art
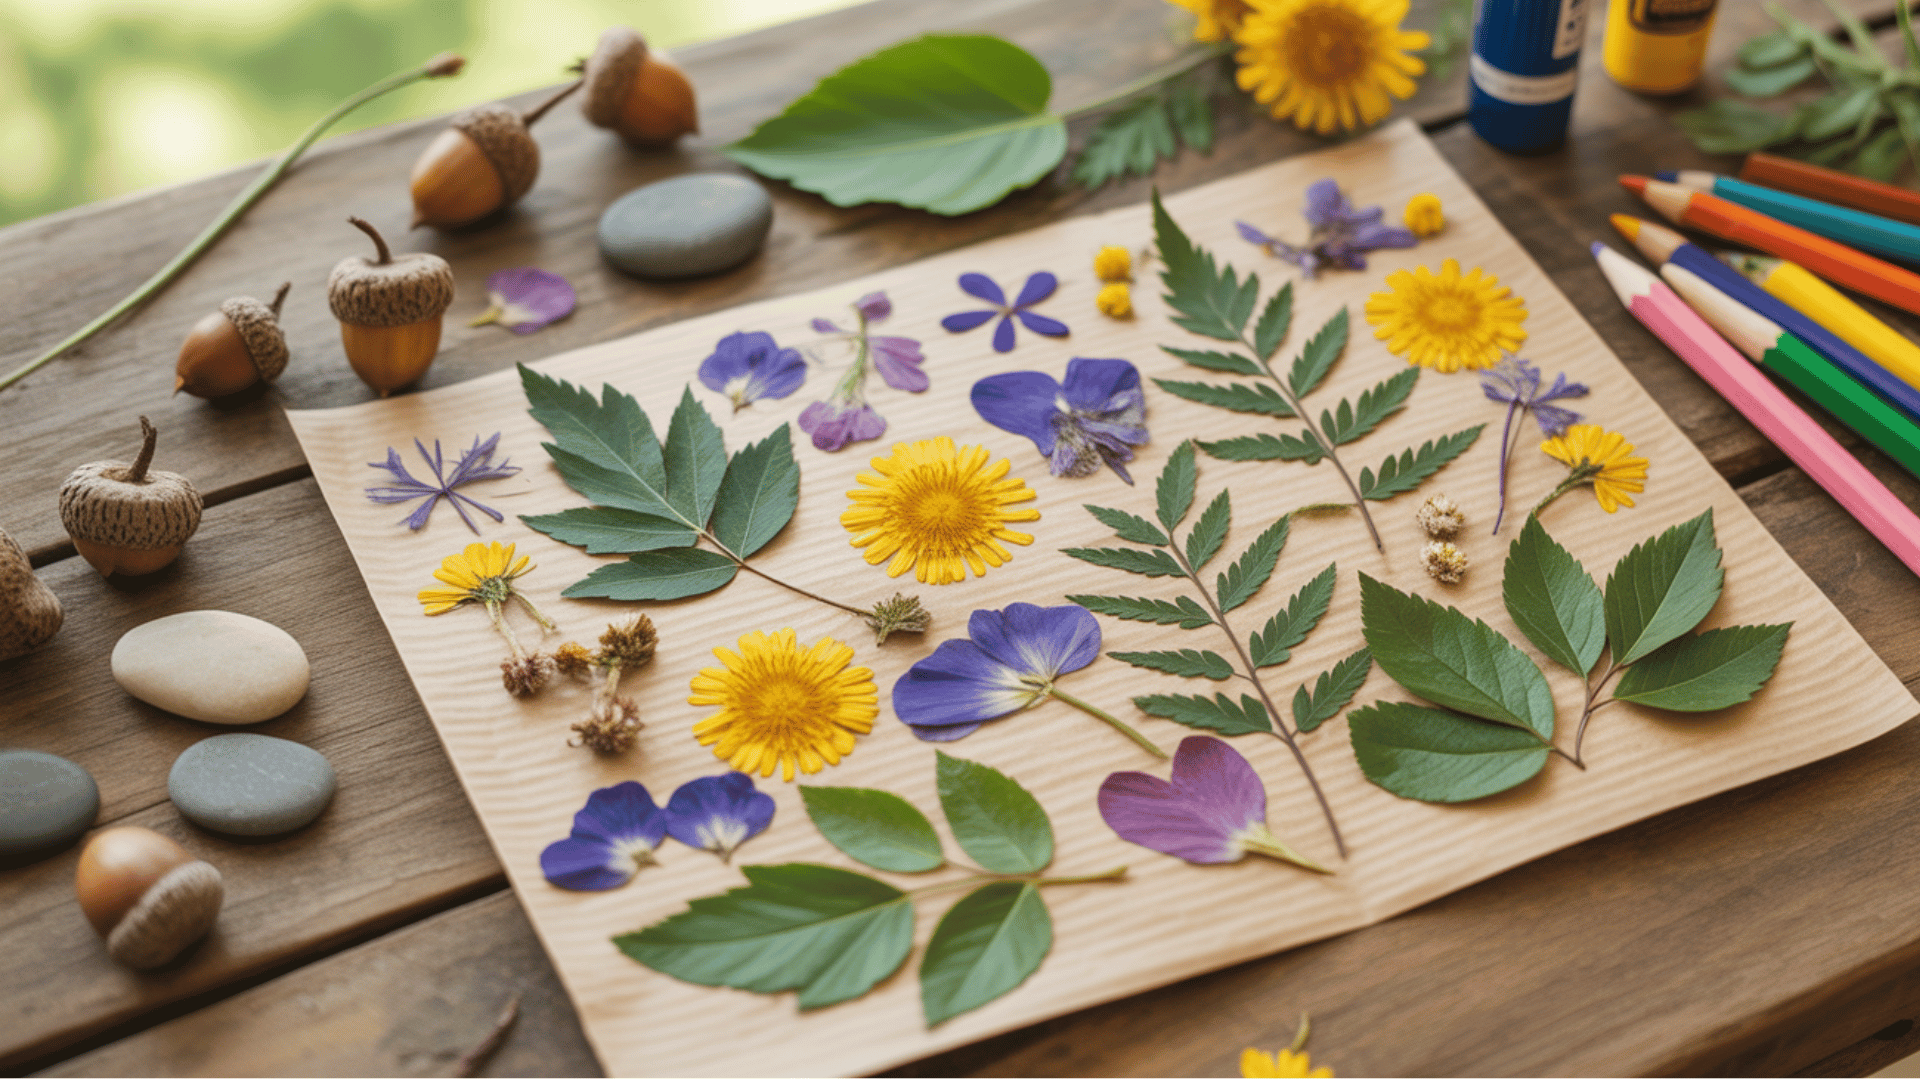
Turn your backyard finds into a gallery-worthy masterpiece. This craft takes about 30 minutes (not counting the fun hike to find your materials!) and is perfect for all ages. It’s a great way to slow down and notice the beautiful shapes and colors found in nature.
Materials You’ll Need: Leaves, flowers, twigs, paper, and glue.
Steps to Follow:
- The Hunt: Head outside and collect interesting fallen leaves, petals, or flat stones.
- The Layout: Before gluing, arrange your items on the paper to create a picture (like a leaf-man or a flower-sun).
- The Stick: Carefully lift each piece and add a dab of glue to secure it to your paper.
- The Details: Use a marker to draw around your nature items to complete the scene.
31. Plastic Bottle Jellyfish
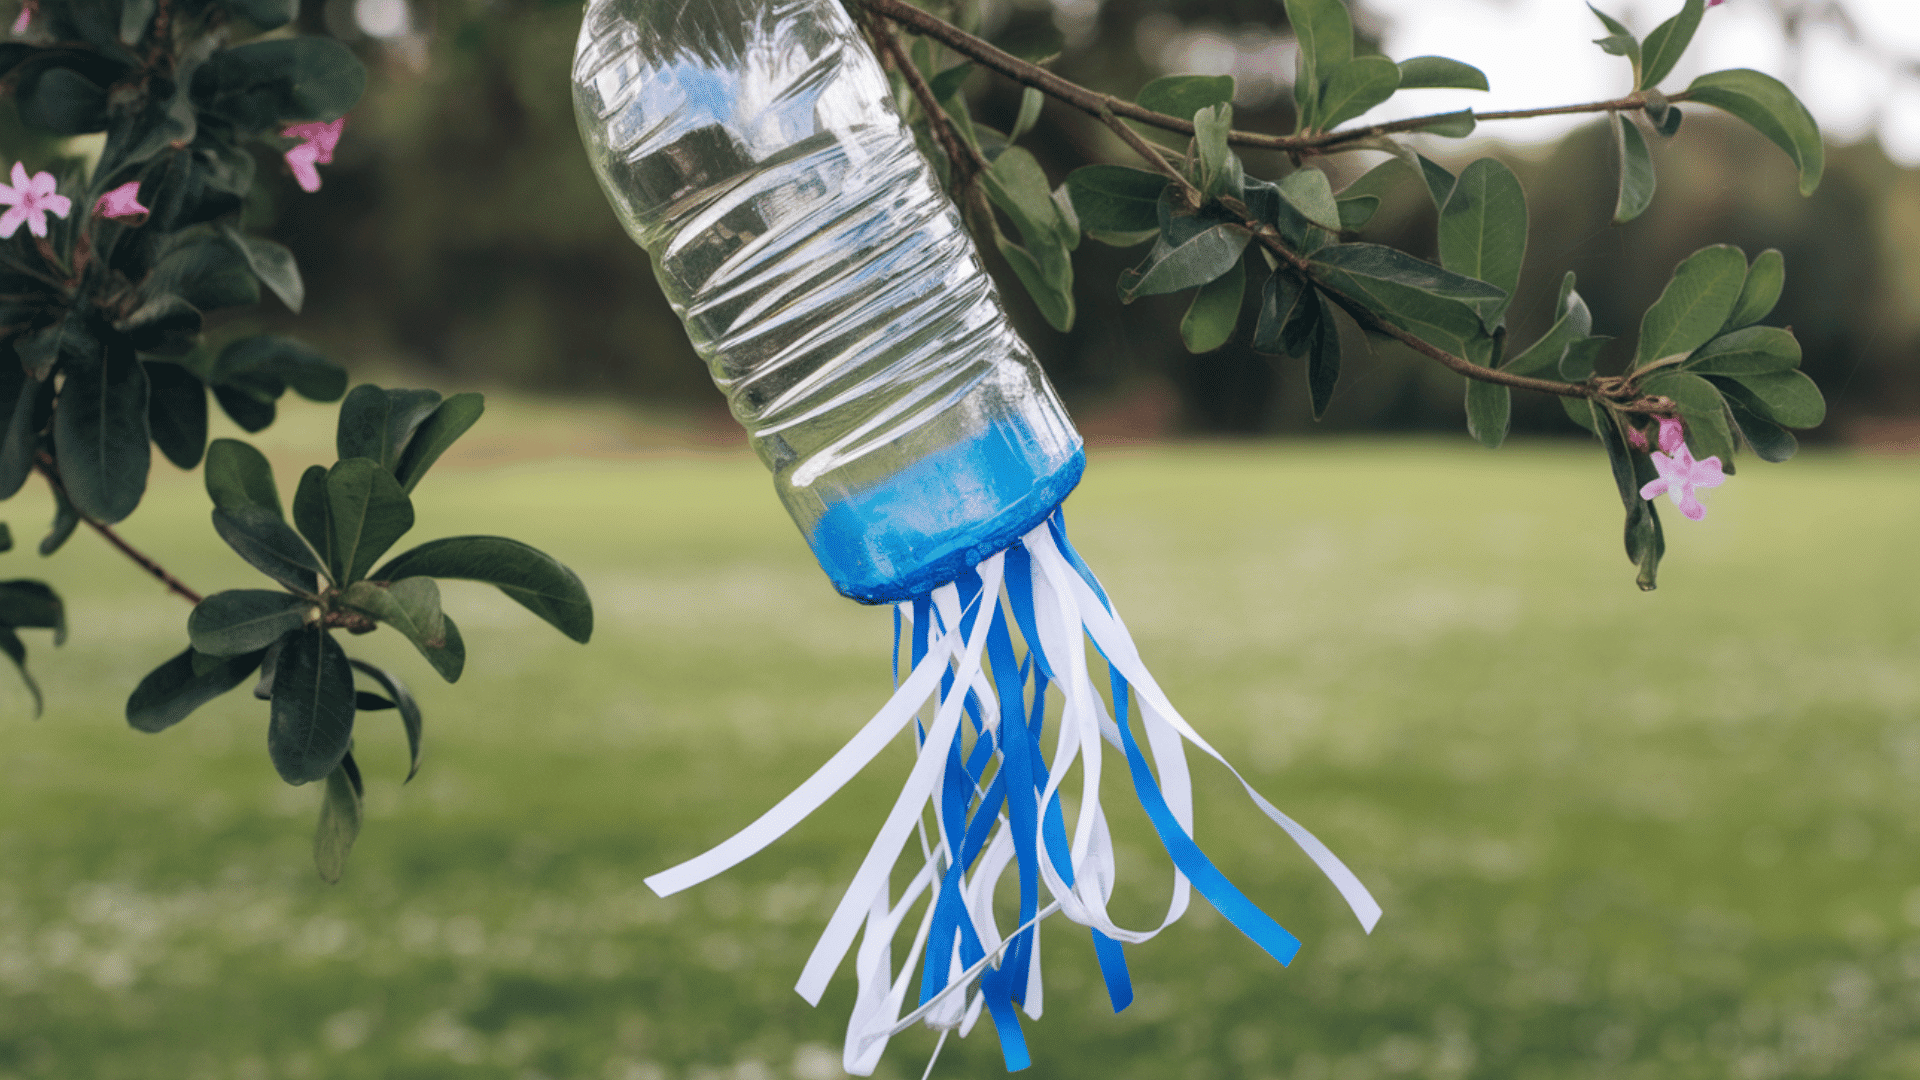
These “swimming” jellyfish are a fantastic way to recycle old water bottles into something magical. This 25-minute craft is a hit with kids aged 5 to 12 and looks amazing hanging from a tree branch. When the wind blows, the ribbons dance just like tentacles in the ocean
Materials You’ll Need: An empty plastic bottle, paint, ribbon, and glue.
Steps to Follow:
- The Head: Have an adult help you cut the bottom half off a plastic bottle; you’ll use the top (the dome) for the jellyfish.
- The Color: Paint the inside of the bottle dome a bright, watery color.
- The Tentacles: Glue long strips of ribbon or yarn to the inside rim of the bottle so they hang down.
- The Hanger: Tie a string around the neck of the bottle so you can hang your new friend up.
32. Custom Sunglasses
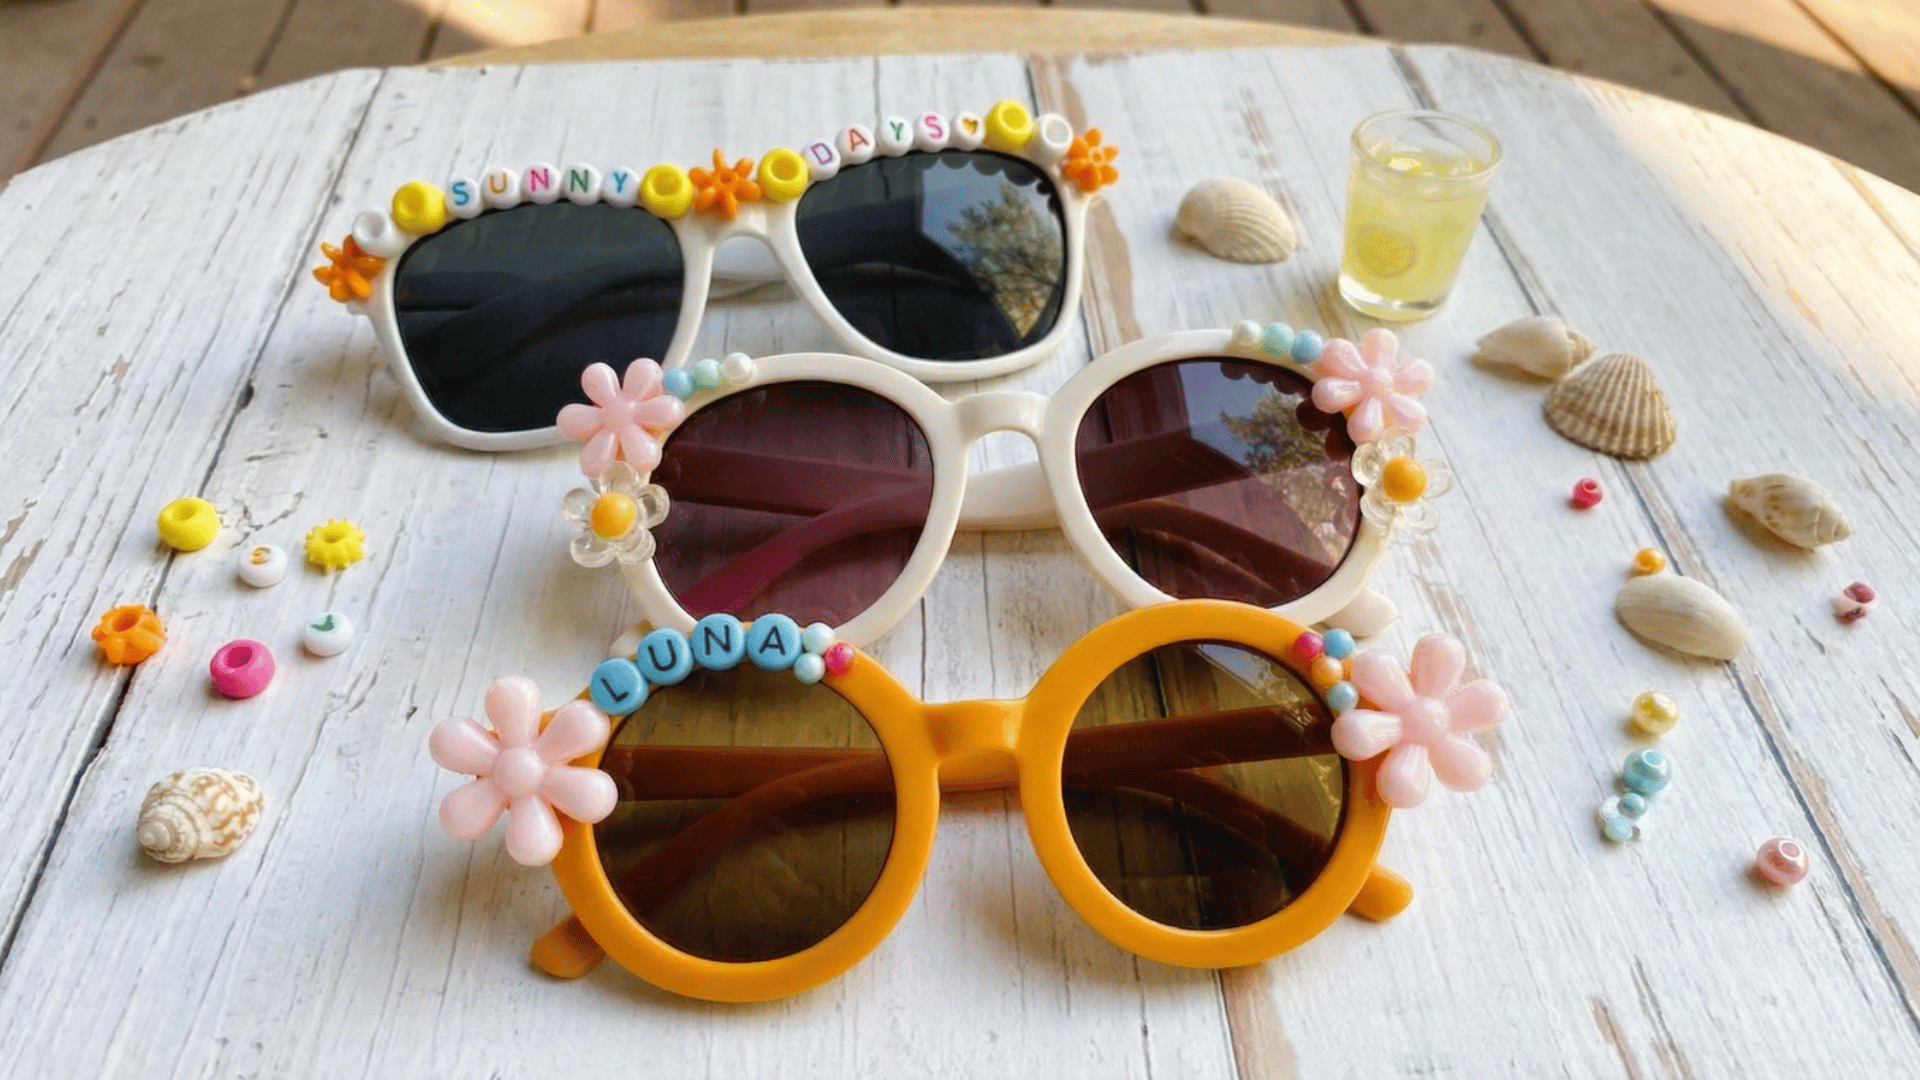
Create a fun, one-of-a-kind pair of sunglasses that showcase your unique style. This simple craft is perfect for kids who want to add a personal touch to their accessories.
Materials You’ll Need: Plain sunglasses (preferably with a smooth surface), Colorful beads (letter beads, flower beads, etc.), Strong glue or hot glue gun, Small decorative items (like rhinestones, sequins, or buttons), String or cord (optional, for adding a charm)
Steps to Follow:
- Pick Your Sunglasses: Start with a plain pair of sunglasses. Pick a style that fits your personality, whether it’s round, square, or cat-eye.
- Decorate the Frame: Choose beads, charms, and other decorative items. Use letter beads to spell out words or phrases like “SUNNY DAYS,” or add colorful flowers for a bright, cheerful look.
- Glue the Decorations: Use glue to securely attach the beads and decorations to the frame. Be sure to leave enough space for the lenses and avoid covering any parts that need to remain clear.
- Add Extra Details: If you want, you can glue small rhinestones, sequins, or tiny buttons around the frames for a sparkly effect. You can also add a charm to the temple arms with string or cord.
- Let It Dry: Allow the glue to fully dry before wearing your new custom sunglasses.
Pro Tip: Mix and match colors and designs to match your style. Don’t be afraid to get creative with different patterns
33. Salt Dough Handprints
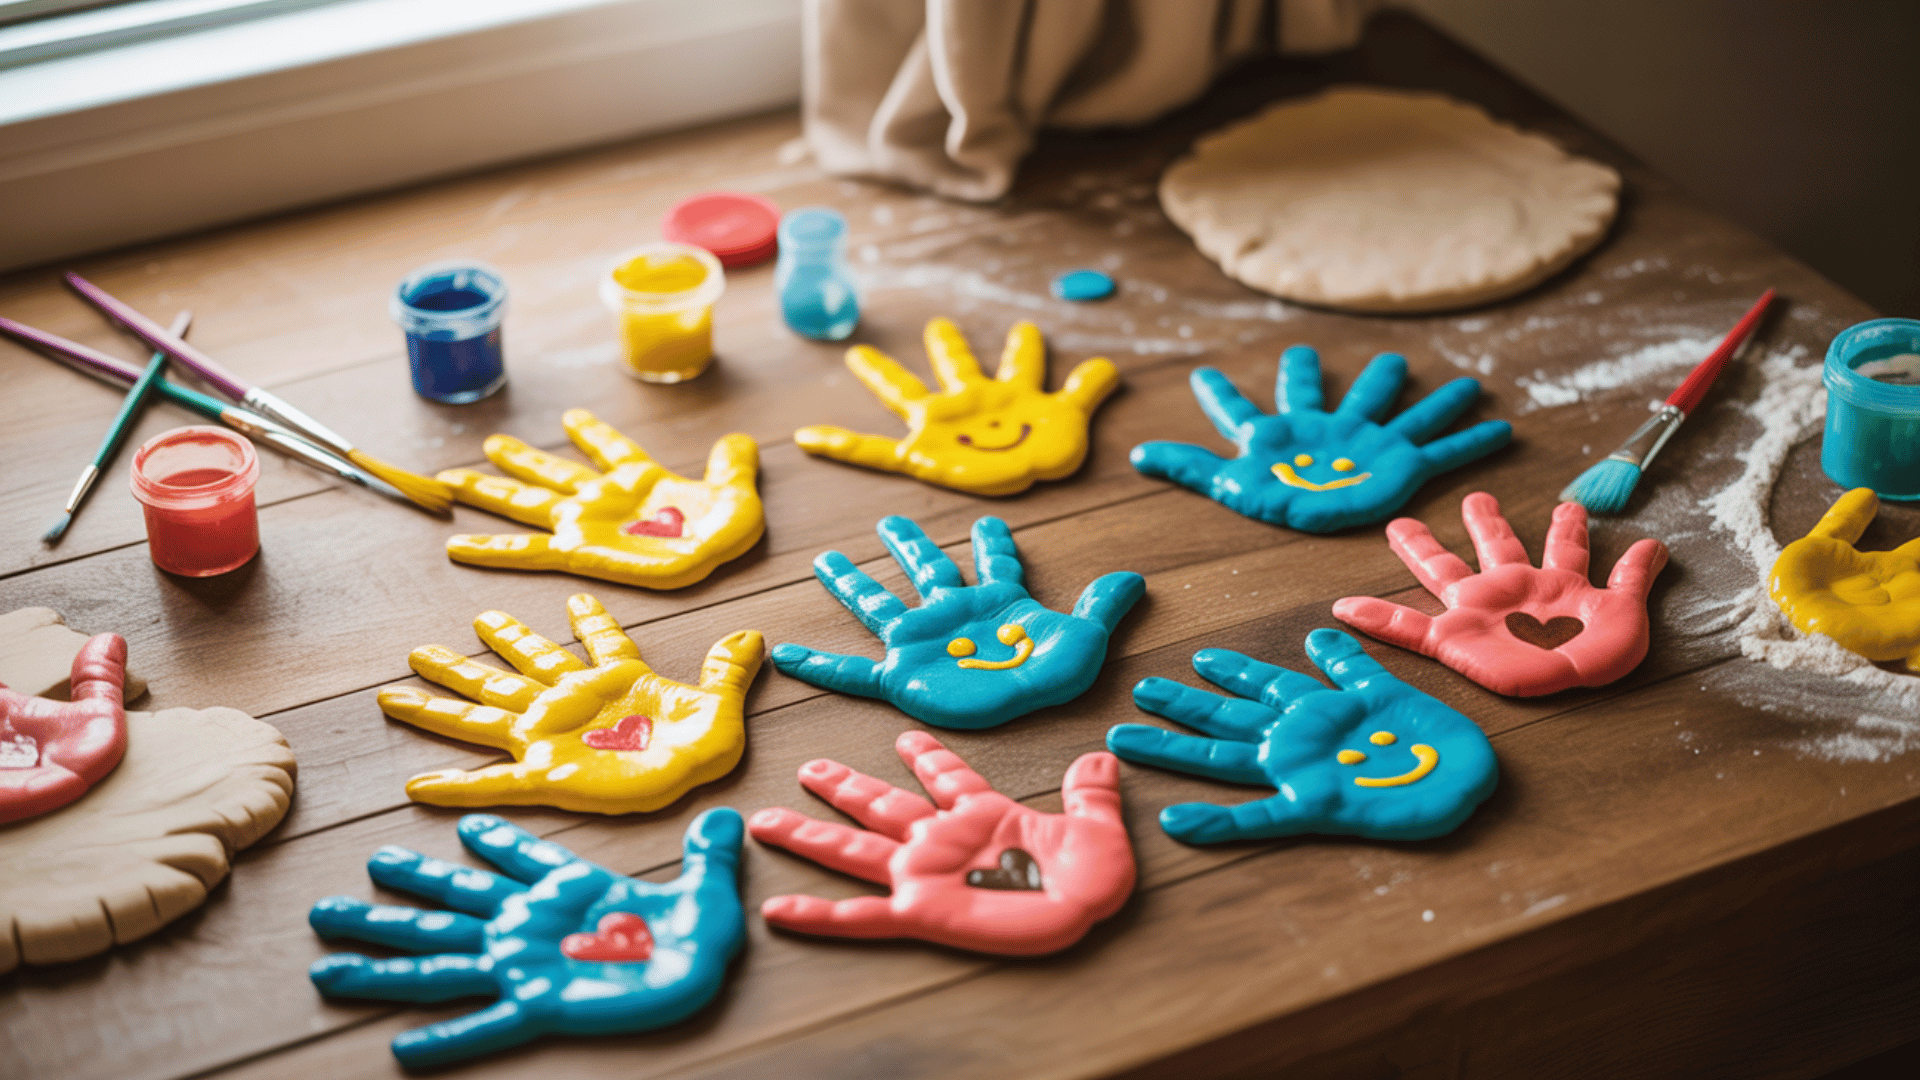
End your summer by making a “frozen in time” keepsake of your handprint. This craft takes about 40 minutes to prep and is a classic for kids of all ages. It’s the ultimate way to remember exactly how small you were during this amazing summer.
Materials You’ll Need: 1 cup flour, 1/2 cup salt, 1/2 cup water, and paint.
Steps to Follow:
- The Dough: Mix the flour, salt, and water in a bowl until it forms a soft dough (like Play-Doh).
- The Press: Roll it into a flat circle and press your hand down hard to leave a deep print.
- The Bake: Have an adult bake it at 250°F (120°C) for about 2–3 hours until it’s rock hard.
- The Decor: Once it’s cool, paint the handprint your favorite color and write the date on the back.
Master the “Mess-Free” Cleanup
Let’s be real: crafting with kids usually looks like a disaster zone by the time the masterpiece is finished. But don’t let the fear of a glitter-covered carpet stop the fun. To keep the cleanup from being a total bummer, a little bit of pre-game strategy goes a long way.
- The “Wipe Station”: Keep a container of baby wipes right on the table. They are a lifesaver for quick hand-cleaning before those blue-painted fingers find their way to your white sofa!
- Glitter Defense: For the glitter-haters out there, a lint roller or even a ball of play-dough is surprisingly great at picking up those tiny sparkly bits from the floor or table.
- Backyard Art : If you’re planning on heavy painting or “splash” art, move the operation outside to the grass. A quick spray from the garden hose can handle any major splats in seconds.
- Contain the Chaos: Use old baking sheets or plastic trays to define each child’s workspace. It keeps the glue and beads from rolling off the table and onto the rug.
- Table Armor: Before the first bottle of glue is opened, toss down an old plastic tablecloth or some flattened cardboard boxes. When you’re done, you can just fold up the mess and shake it out (or toss it!).
Conclusion
That wraps up our massive list of summer projects. From sparkling sun catchers to sandy lanterns and racing straw rockets, there’s no shortage of ways to turn a boring afternoon into a full-blown creative adventure.
No matter if you’re raiding the recycling bin for cardboard or using treasures found on a nature walk, these crafts are all about celebrating the messy, wonderful joy of being a kid.
Remember, the goal isn’t to make a museum-quality masterpiece; it’s about the giggles, the sticky glue fingers, and the pride your kids feel when they shout, “I made this”.
So, grab your supplies, gather the family around the kitchen table, and let the summer crafting begin.