

One rubber band and a twist of fabric can turn a plain shirt into something completely different. My first tie-dye attempt became one big purple blur, so I learned fast that the fold matters just as much as the dye.
The fun part is that tie-dye patterns can look bold, soft, scattered, striped, or like a geode, depending on how you shape the fabric first.
You do not need complicated tools or advanced skills to get started. With a little patience and some color, you can create a design that feels more like you. Here are some patterns to try.
Tie-Dye Patterns for Different Styles and Skills
Some designs come together quickly, while others take a little more control to get the folds and color placement right. I like having a mix of both so there is always something that fits the time and skill level.
1. Spiral Tie-Dye
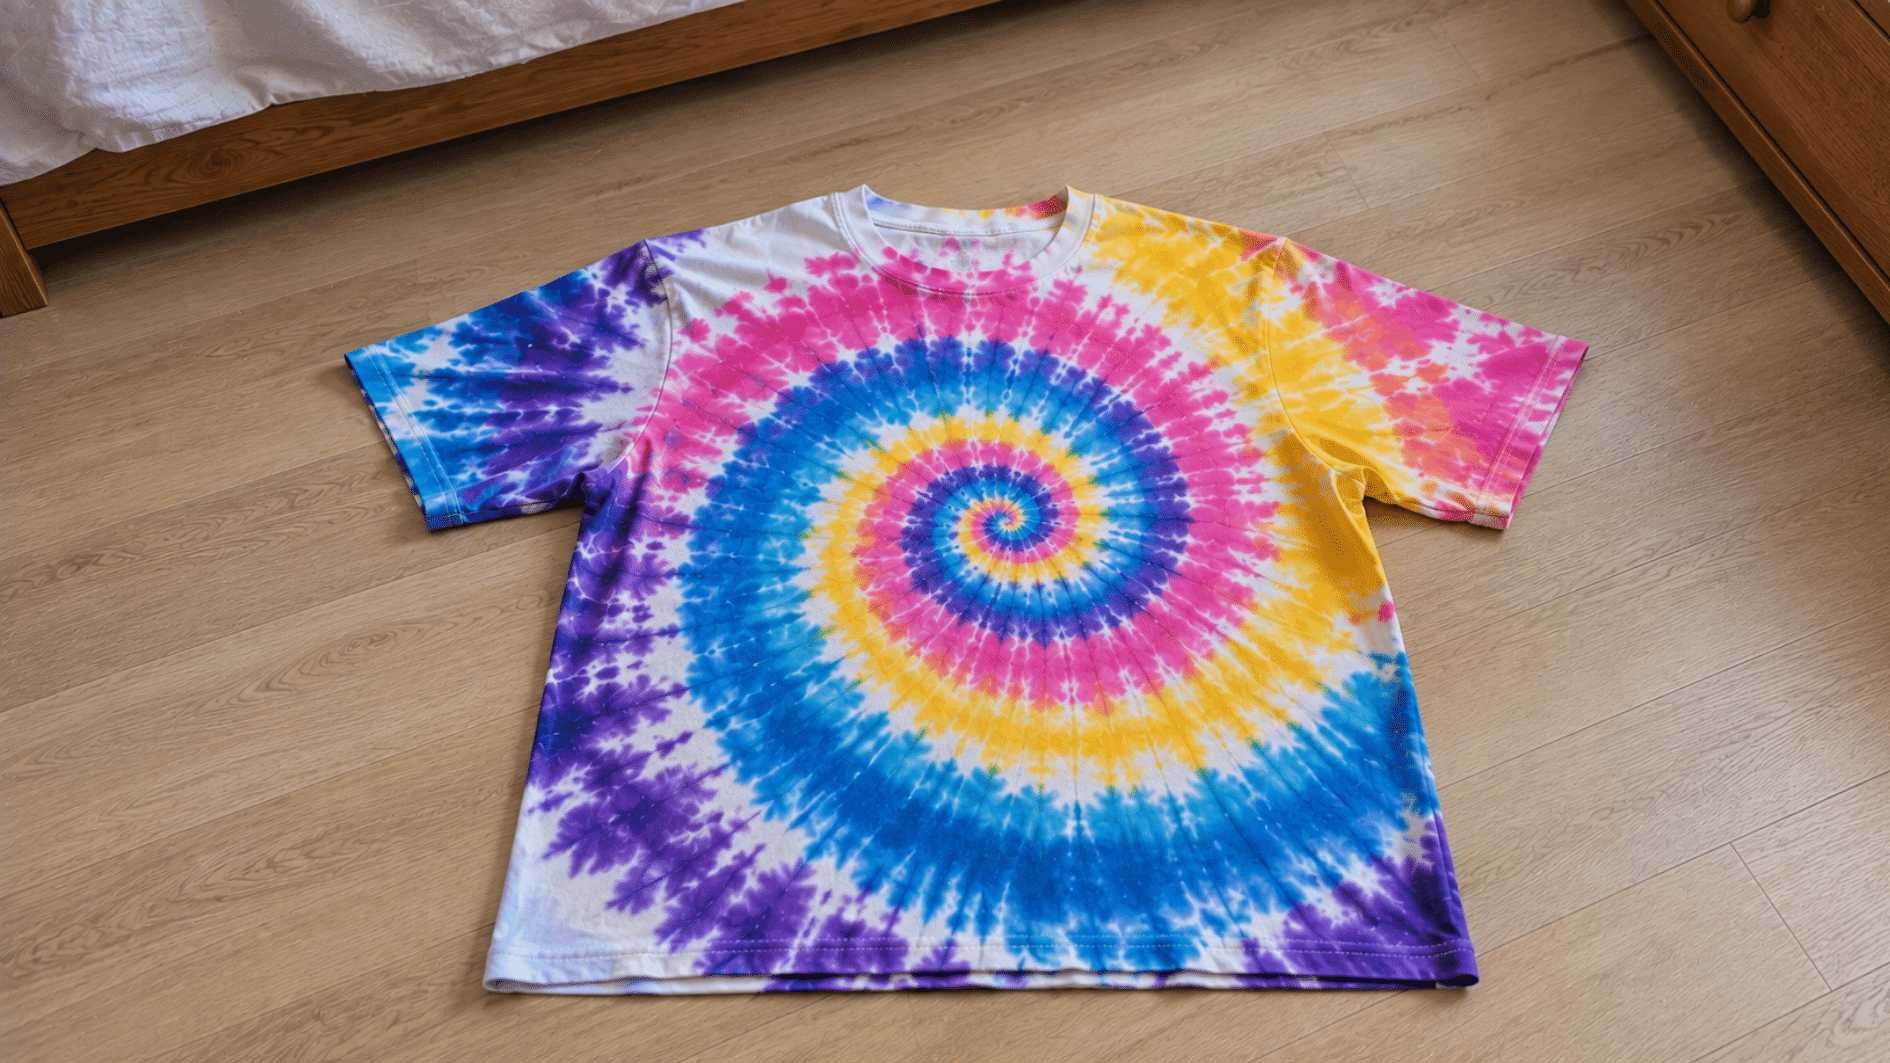
Spiral Tie-Dye creates a bold swirl that spreads outward from one central point. It is made by pinching the shirt at the center, twisting it into a flat coil, and dyeing the secured sections.
- Look: A large circular swirl with curved sections of color.
- Best for: T-shirts, sweatshirts, and larger fabric pieces.
- Difficulty: Easy, making it suitable for first-time projects.
Tip: I like using contrasting colors for spirals because the curved sections stay easier to distinguish once the fabric is opened.
2. Bullseye Tie-Dye
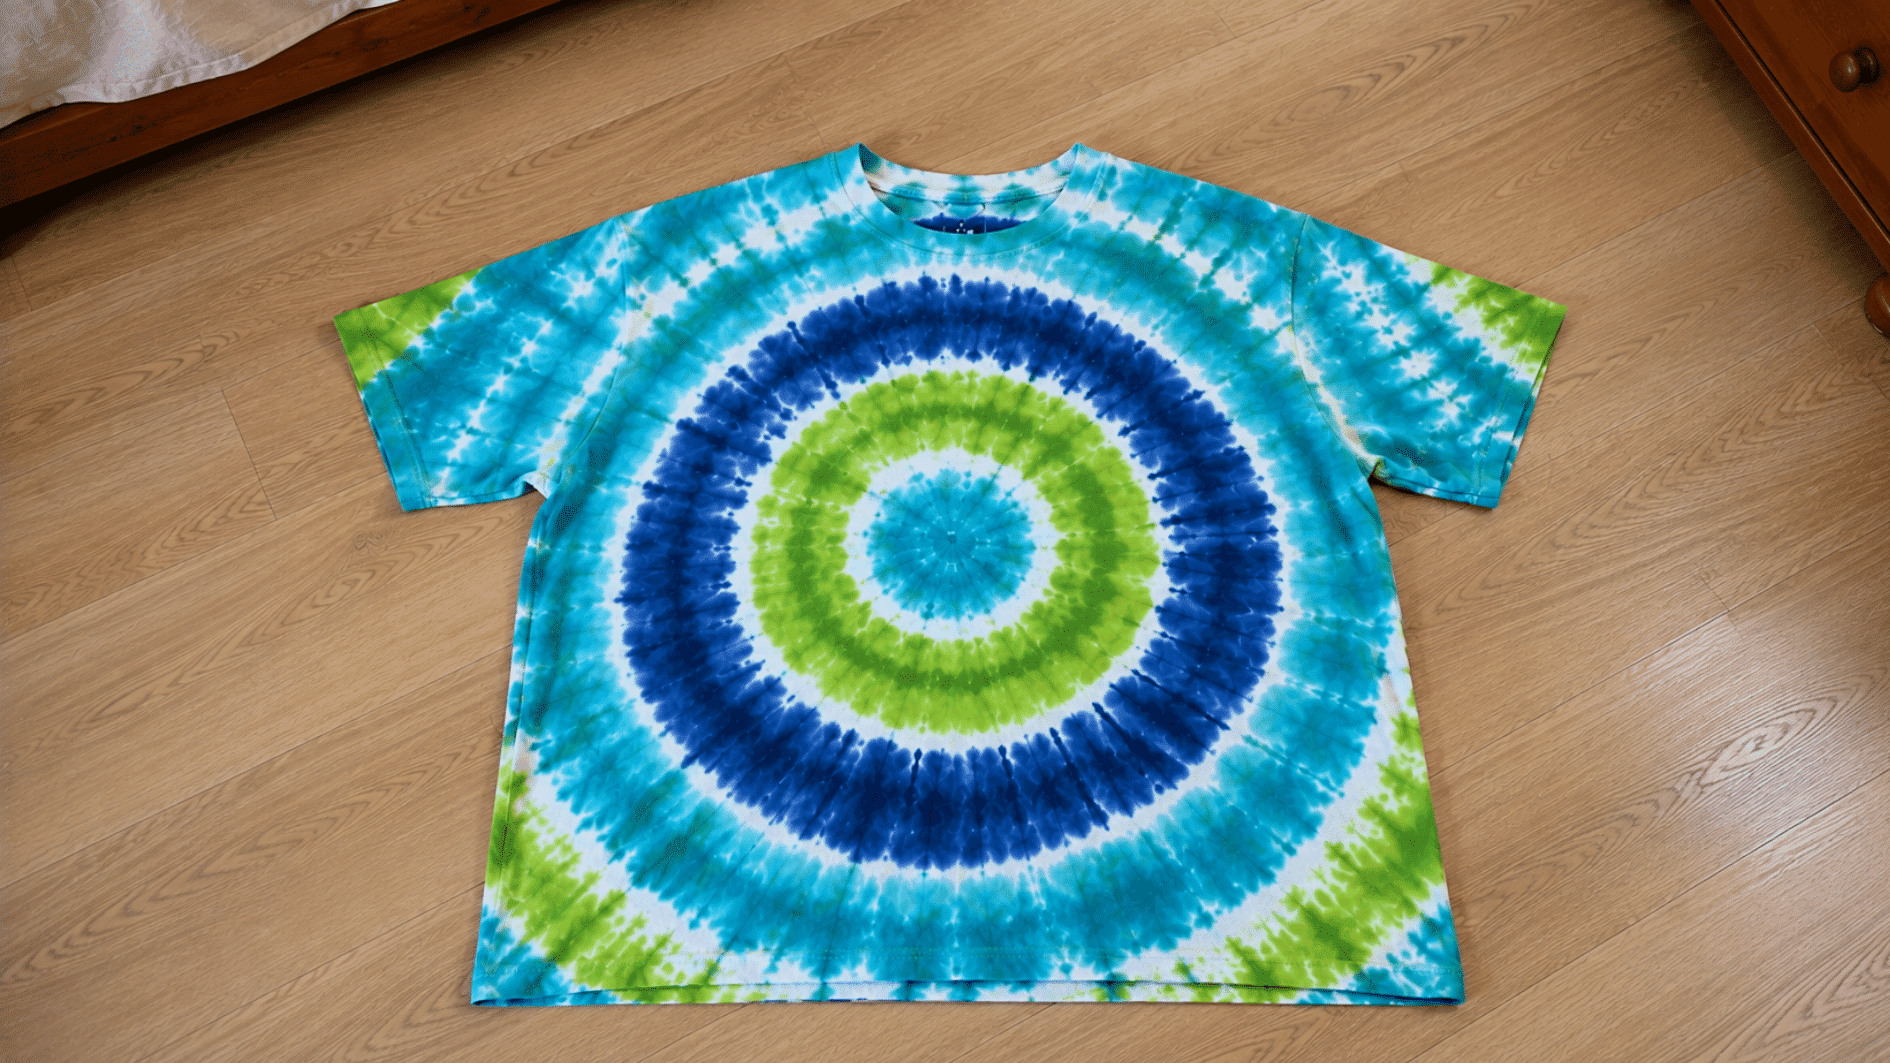
Bullseye tie-dye creates repeated rings around one or more clear center points. It is made by pulling up a section of fabric, securing it with bands at intervals, and dyeing each divided section.
- Look: Repeated circular rings with a clear center.
- Best for: T-shirts, tote bags, and fabric squares.
- Difficulty: Easy to medium, depending on the number of bullseyes.
Tip: Place the starting point carefully before tying the fabric. Its position determines where the center of the finished bullseye will appear.
3. Crumple Tie-Dye
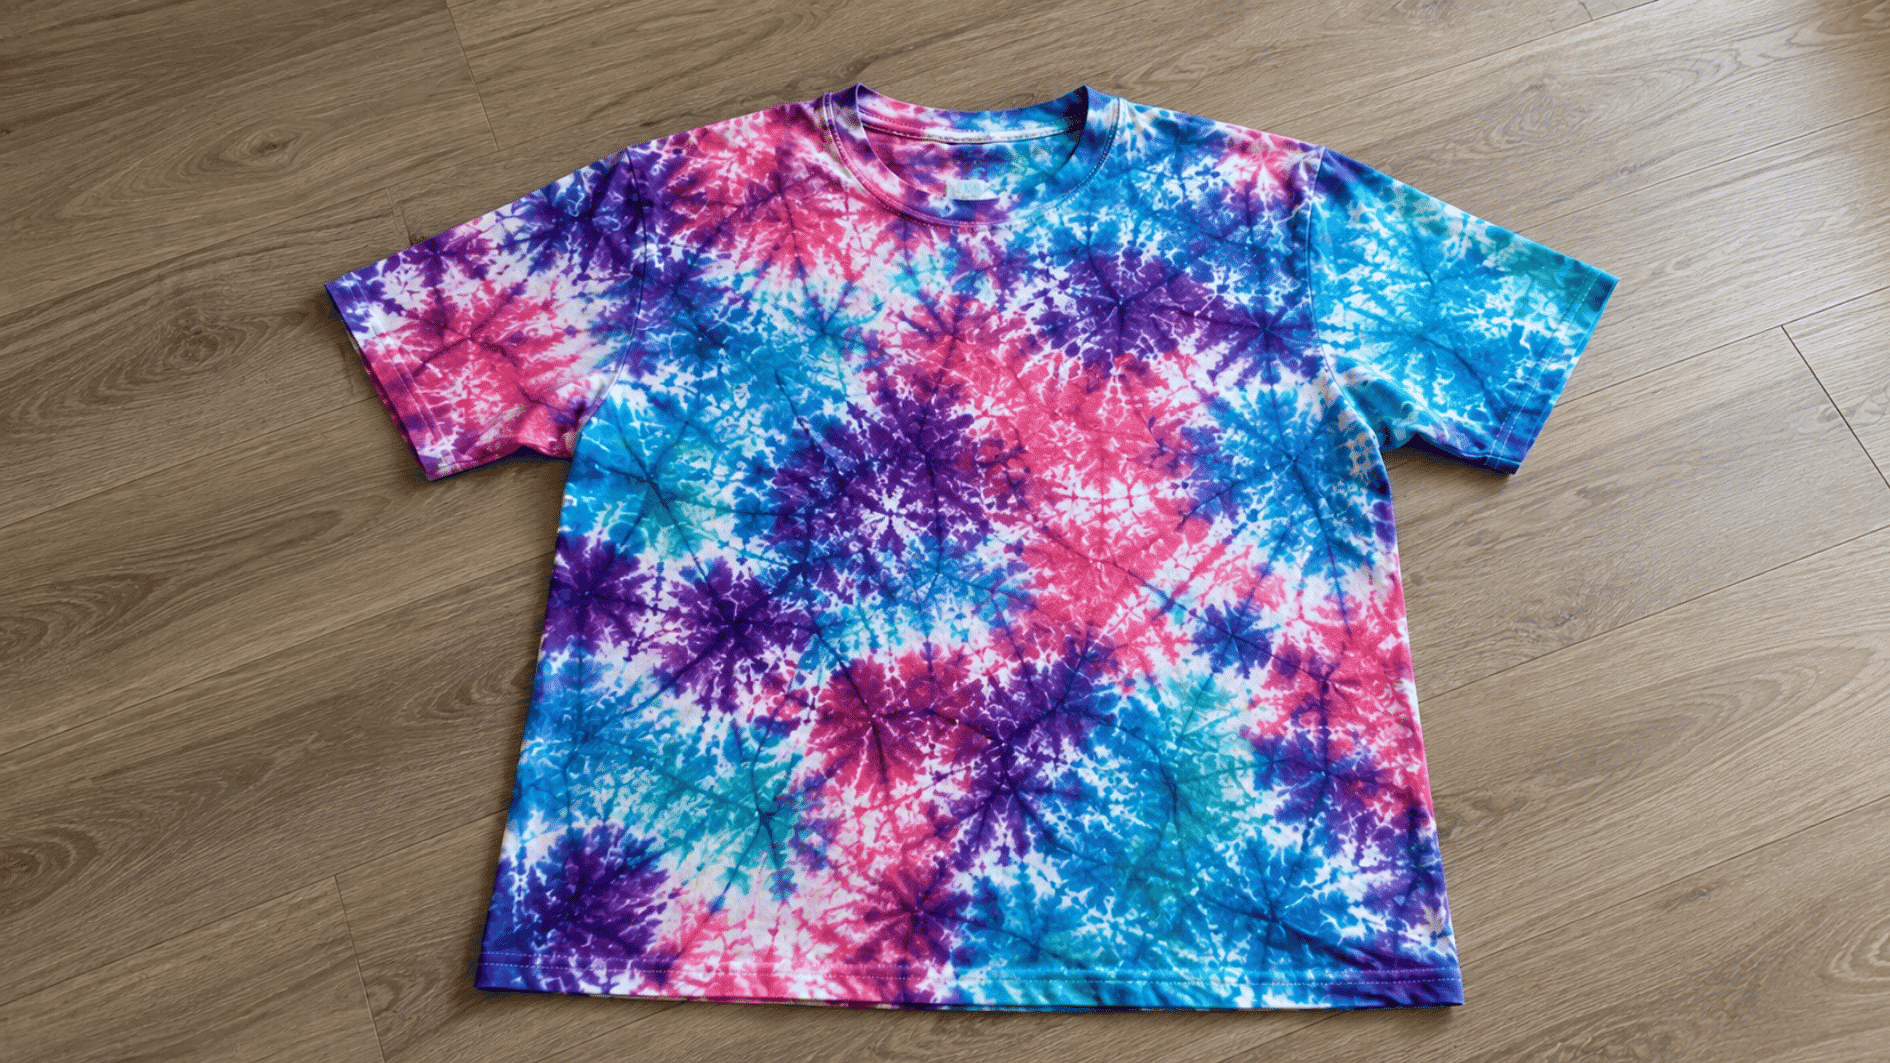
Crumple Tie-Dye creates scattered patches of color with no fixed or repeating shape. It is made by loosely scrunching the shirt into an uneven bundle before securing and applying dye across different areas.
- Look: Scattered patches with uneven edges and natural variation.
- Best for: Shirts, sweatshirts, pillowcases, and larger fabric pieces.
- Difficulty: Easy and forgiving for beginners.
Tip: Avoid packing every section too tightly together. Leaving some variation in the fabric can keep the finished color placement from looking too uniform.
4. Accordion Stripe Tie-Dye
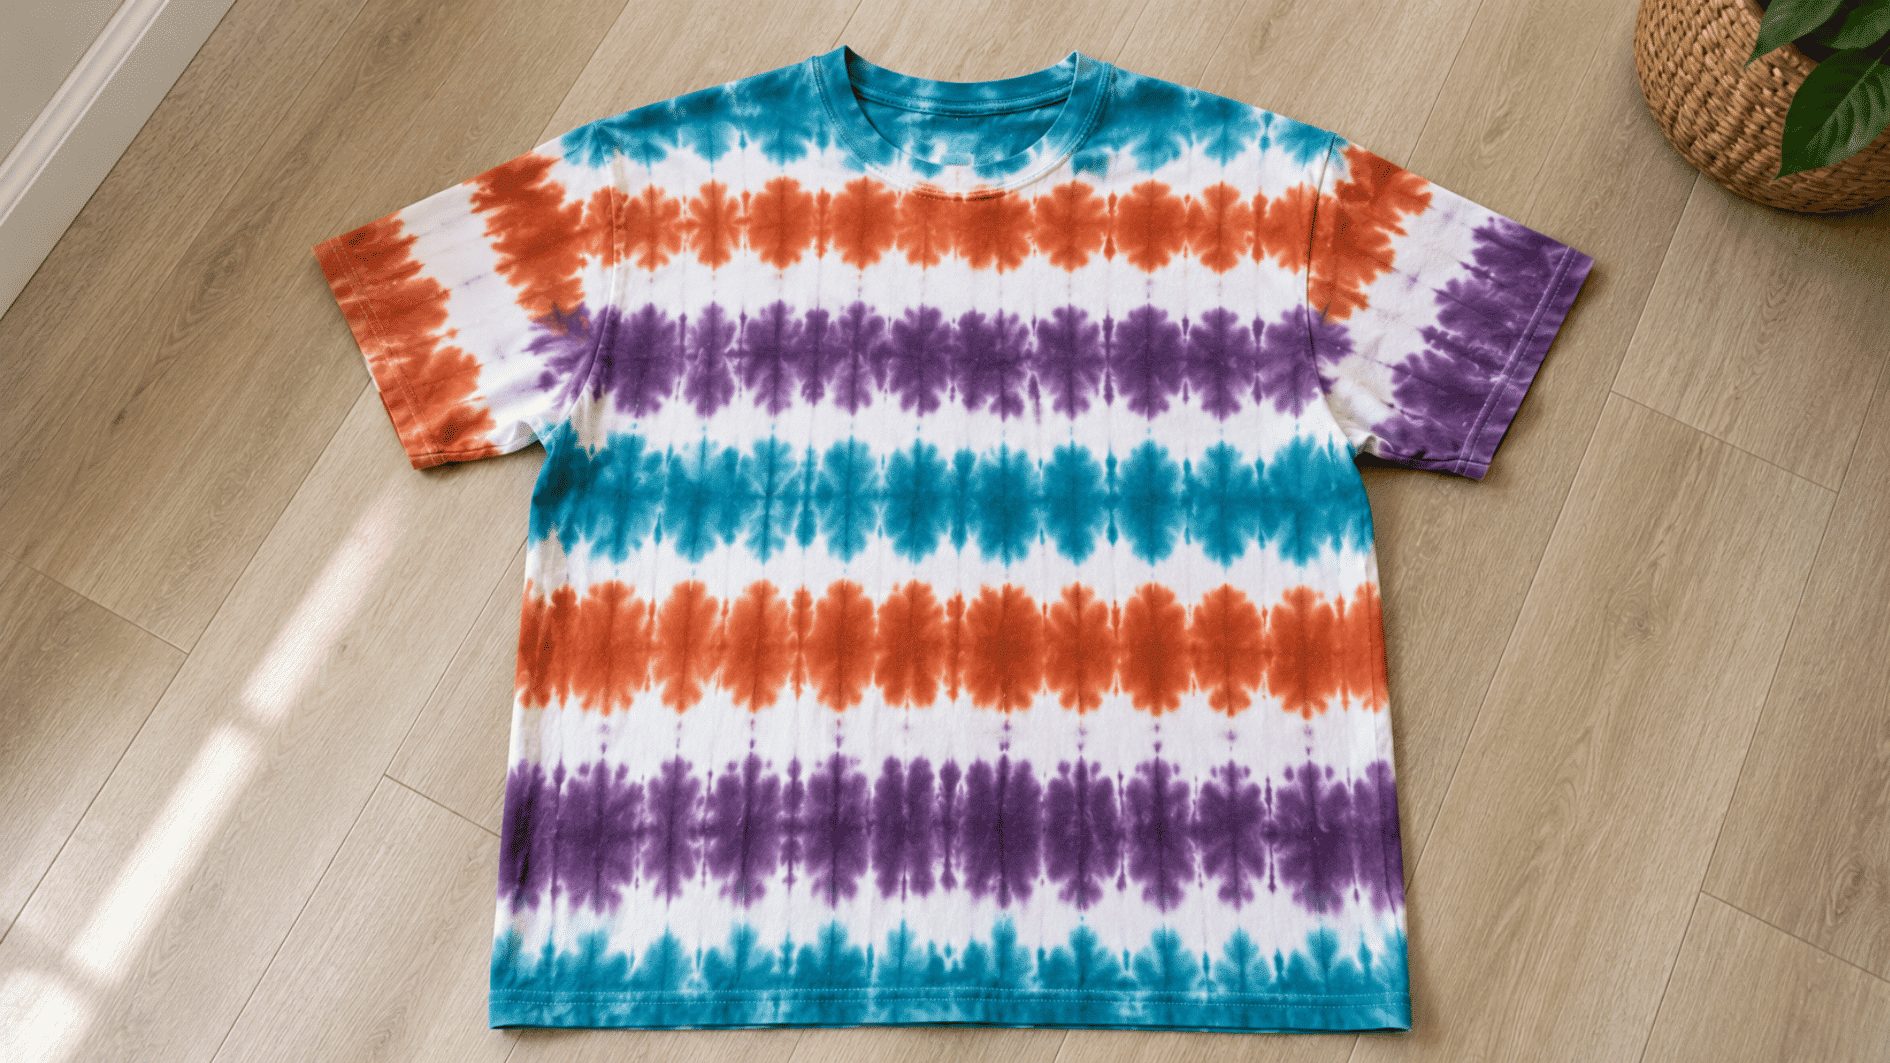
Accordion stripe Tie-Dye creates repeated bands that run across the fabric in one direction. It is made by folding the shirt back and forth like a fan, securing the folded strip, and adding dye between the folds.
- Look: Straight or slightly irregular bands of repeated color.
- Best for: T-shirts, socks, scarves, and tote bags.
- Difficulty: Easy, but even folding helps create cleaner stripes.
Tip: I recommend keeping the folds close to the same width. It helps the stripes appear more balanced without requiring perfect measurements.
5. Sunburst Tie-Dye
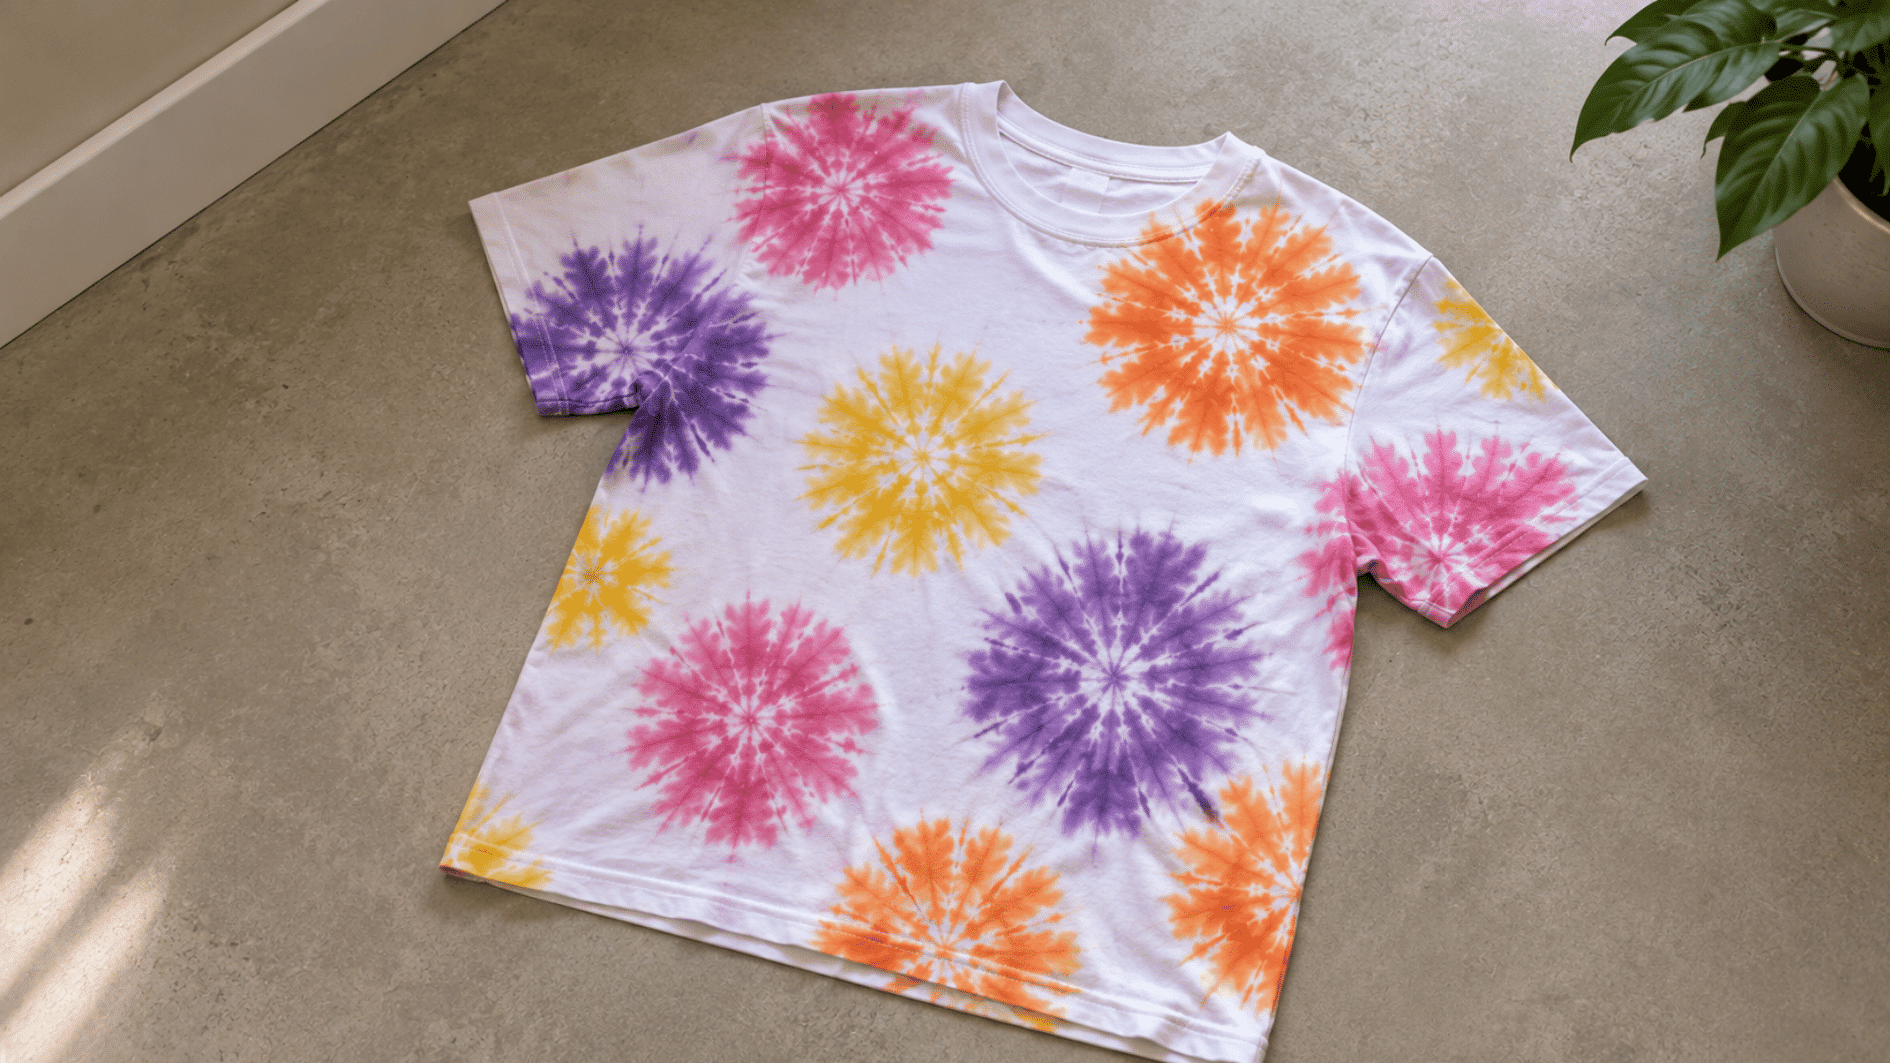
Sunburst Tie-Dye creates several small bursts spread across the shirt instead of one large central design. It is made by pinching up multiple small sections, tying each one separately, and adding dye around them.
- Look: Multiple small shapes with color radiating around them.
- Best for: T-shirts, tank tops, and tote bags.
- Difficulty: Easy to medium, depending on how many bursts you add.
Tip: Space the starting points before securing the fabric. A little distance between them helps individual bursts remain visible in the finished piece.
6. Heart Tie-Dye
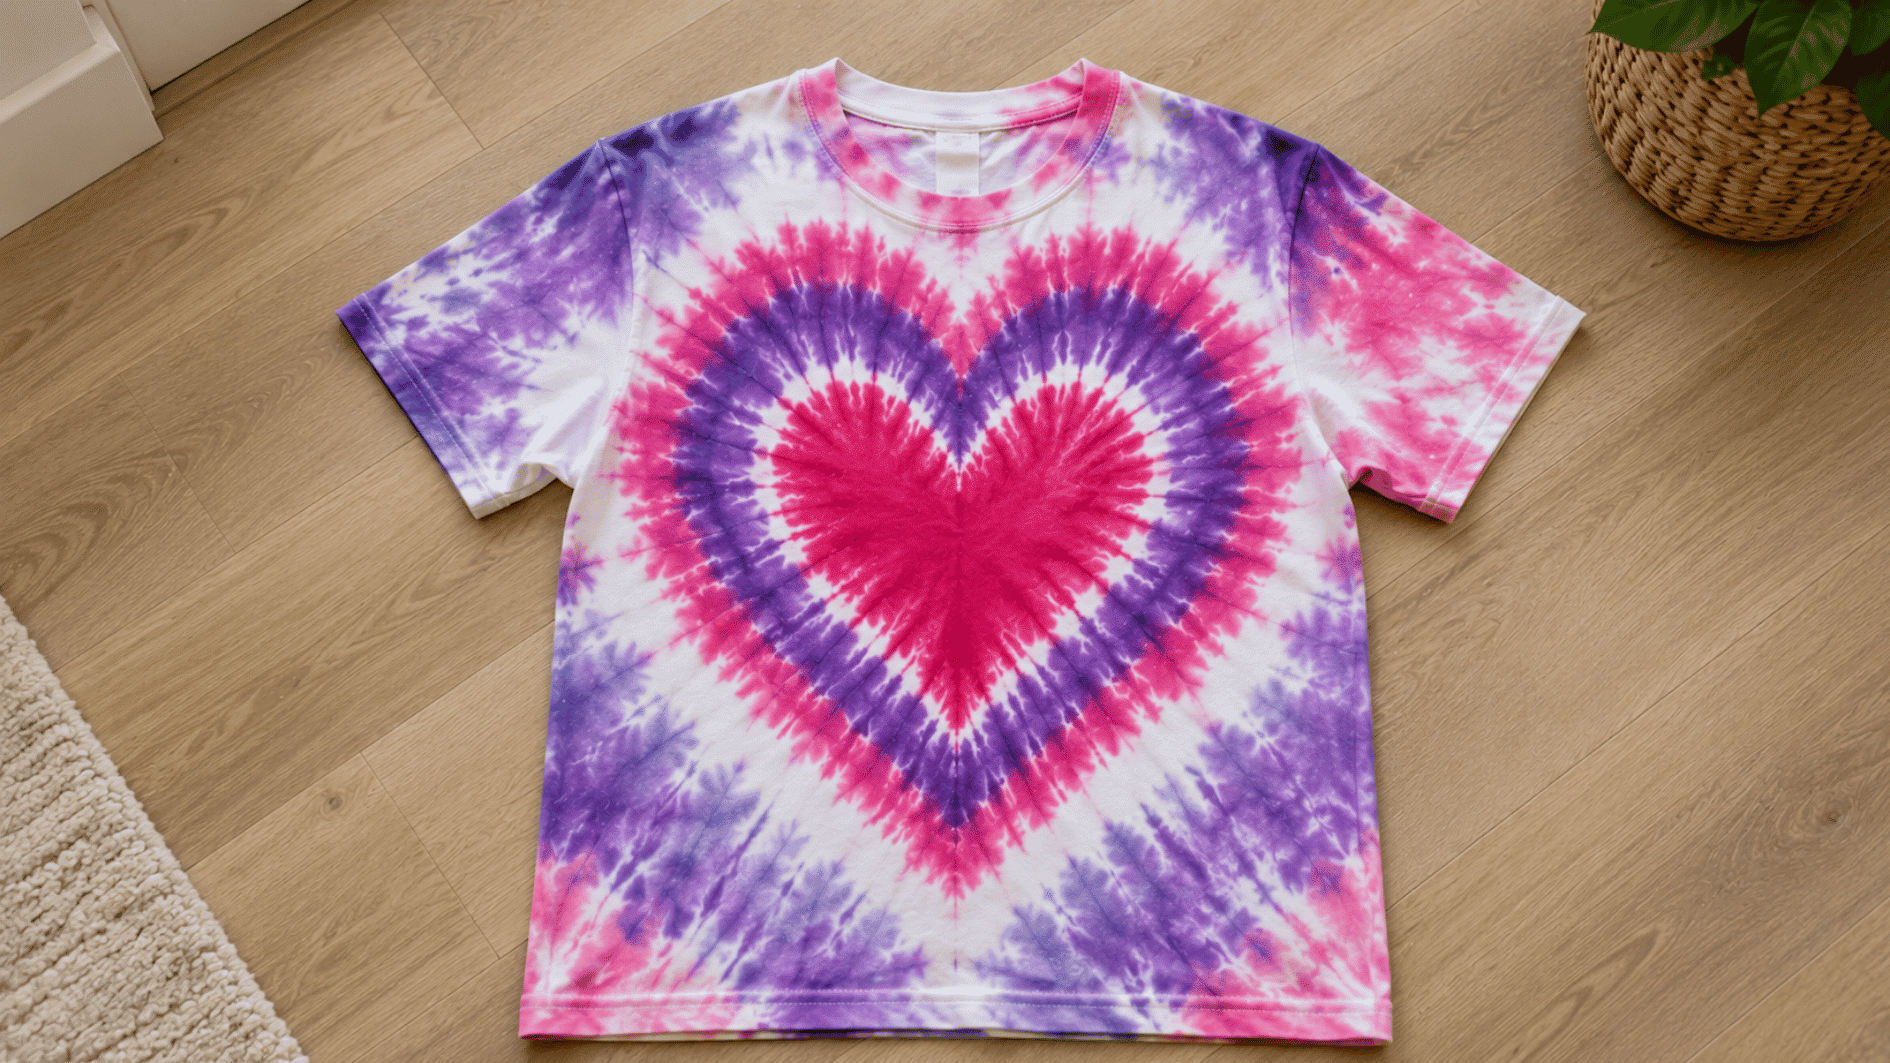
Heart Tie-Dye creates a recognizable heart as the main feature of the shirt. It is made by folding the fabric in half, pleating along a half-heart outline, and securing that curved section before dyeing.
- Look: A heart surrounded by contrasting or complementary color.
- Best for: T-shirts, pillowcases, and fabric gifts.
- Difficulty: Medium because the shape needs careful positioning.
Tip: Marking the intended center before folding can help with placement. Keep the two sides aligned so the heart does not appear noticeably uneven.
7. Chevron Tie-Dye
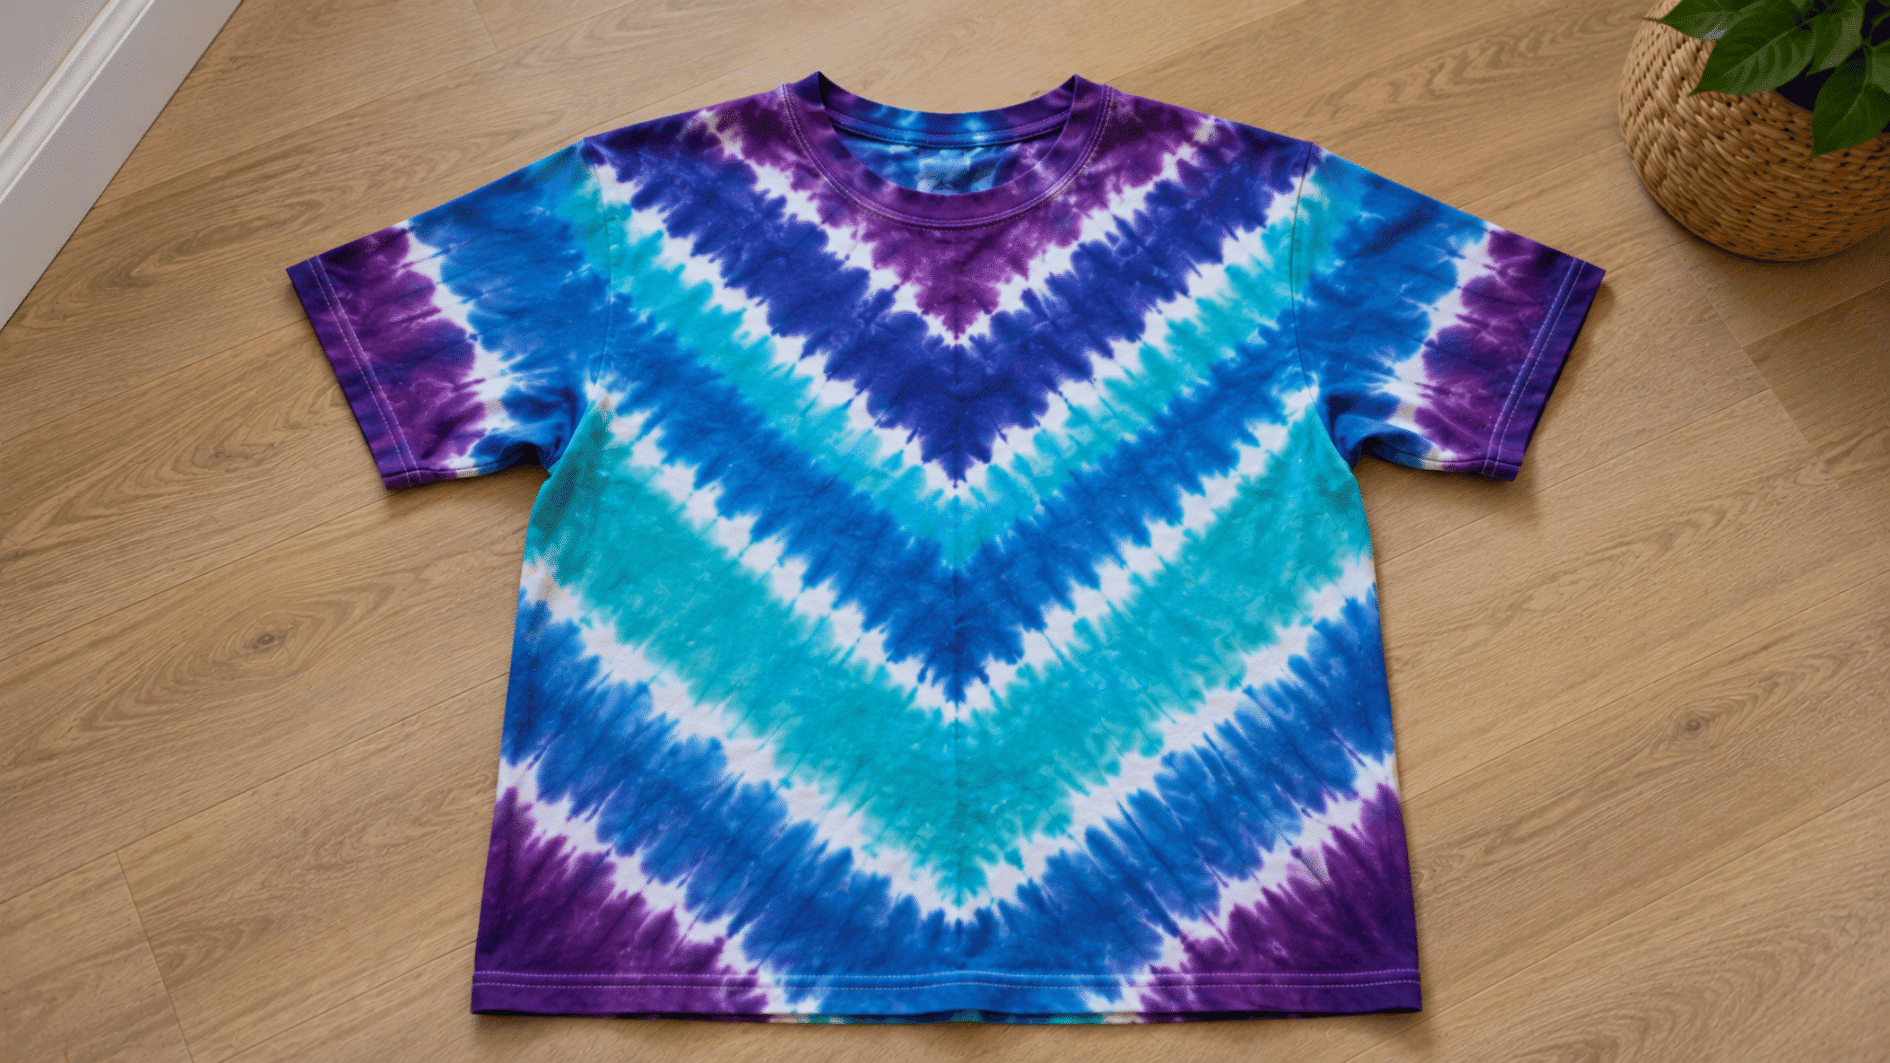
Chevron Tie-Dye creates repeated V-shaped bands that give the shirt a more structured appearance. It is made by accordion-folding the fabric along angled lines so the folds form pointed sections before dye is applied.
- Look: Repeated V-shaped or zigzag bands.
- Best for: T-shirts, scarves, and rectangular fabric pieces.
- Difficulty: Medium because the angles need consistent folding.
Tip: I find it easier to work from the center outward when arranging the folds. This helps keep both sides of the V more even.
8. Mandala Tie-Dye
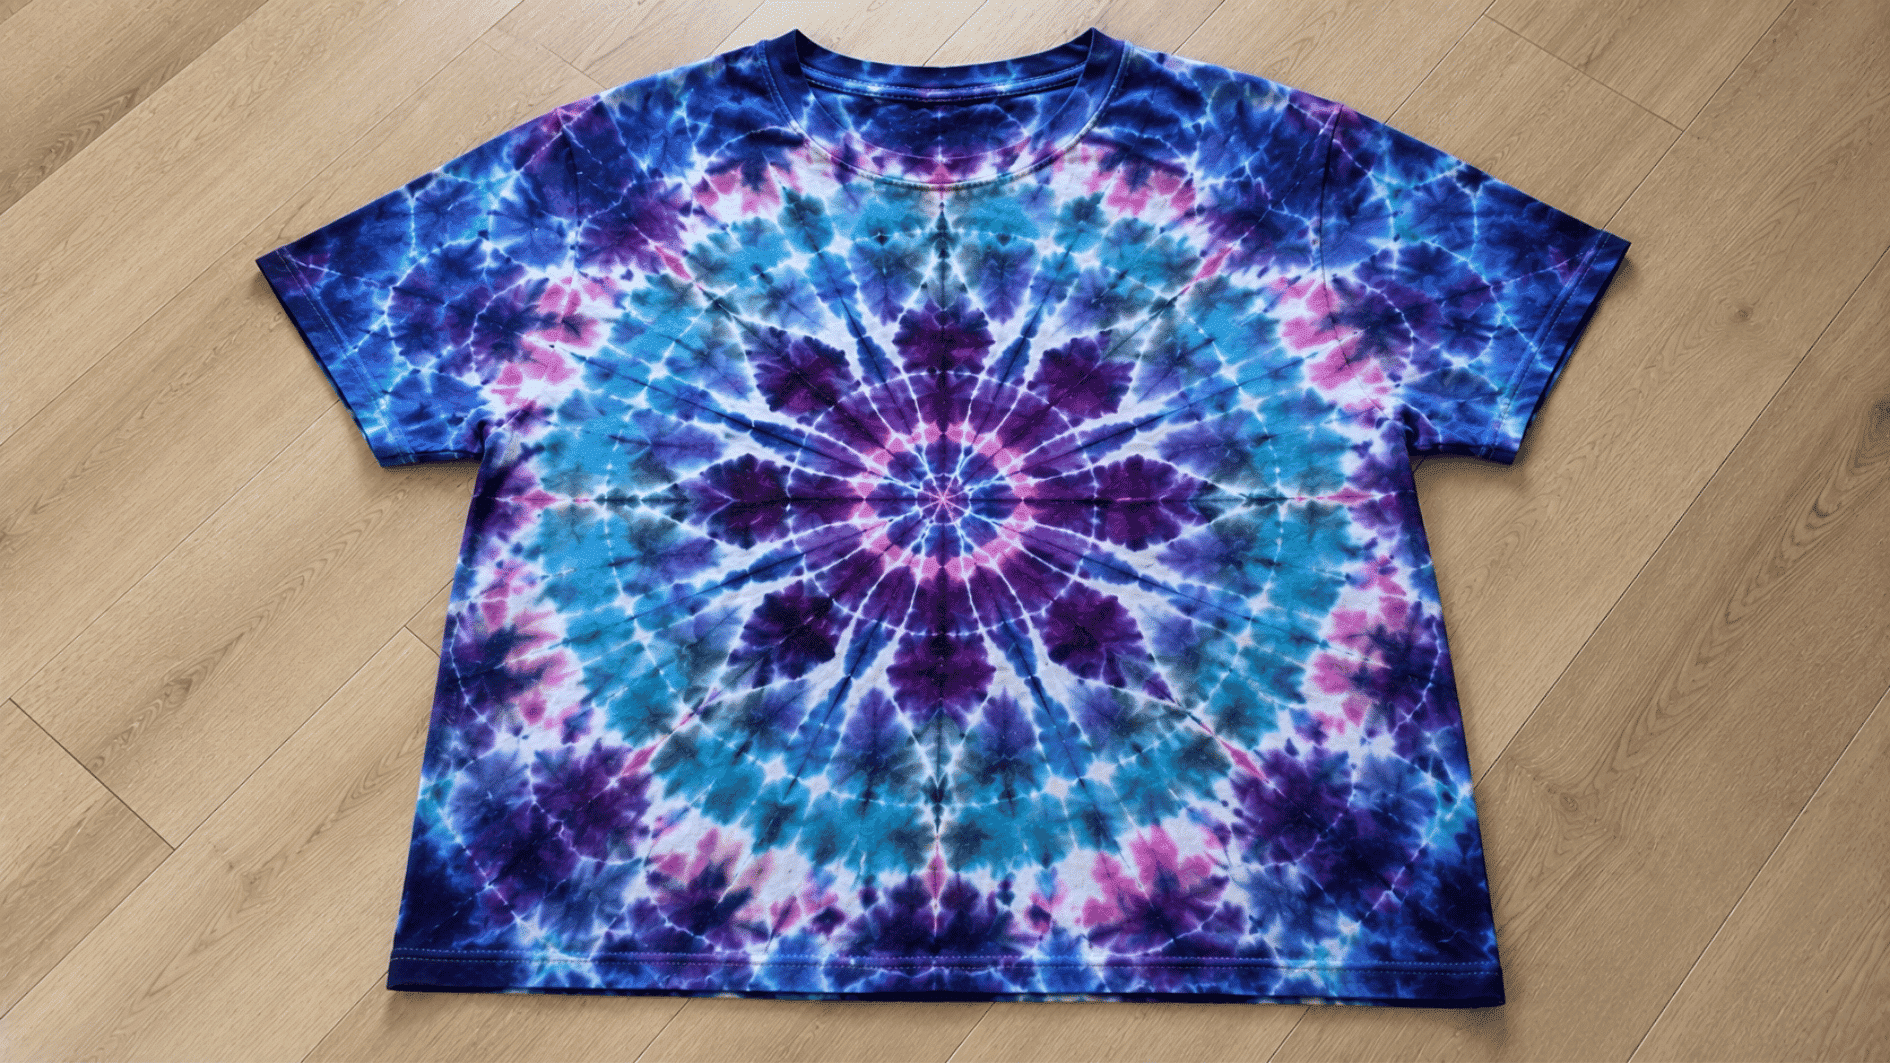
Mandala Tie-Dye creates a detailed, symmetrical design that repeats around a central point. It is made by folding the shirt into several even layered sections and carefully dyeing corresponding areas of the folded bundle.
- Look: Intricate shapes repeating around a central area.
- Best for: T-shirts, wall fabric, and larger square pieces.
- Difficulty: Advanced because precise folding and tying matter more.
Tip: Take extra time securing each folded section before adding dye. Small shifts during application can noticeably change the symmetry of the finished pattern.
9. Diagonal Stripe Tie-Dye
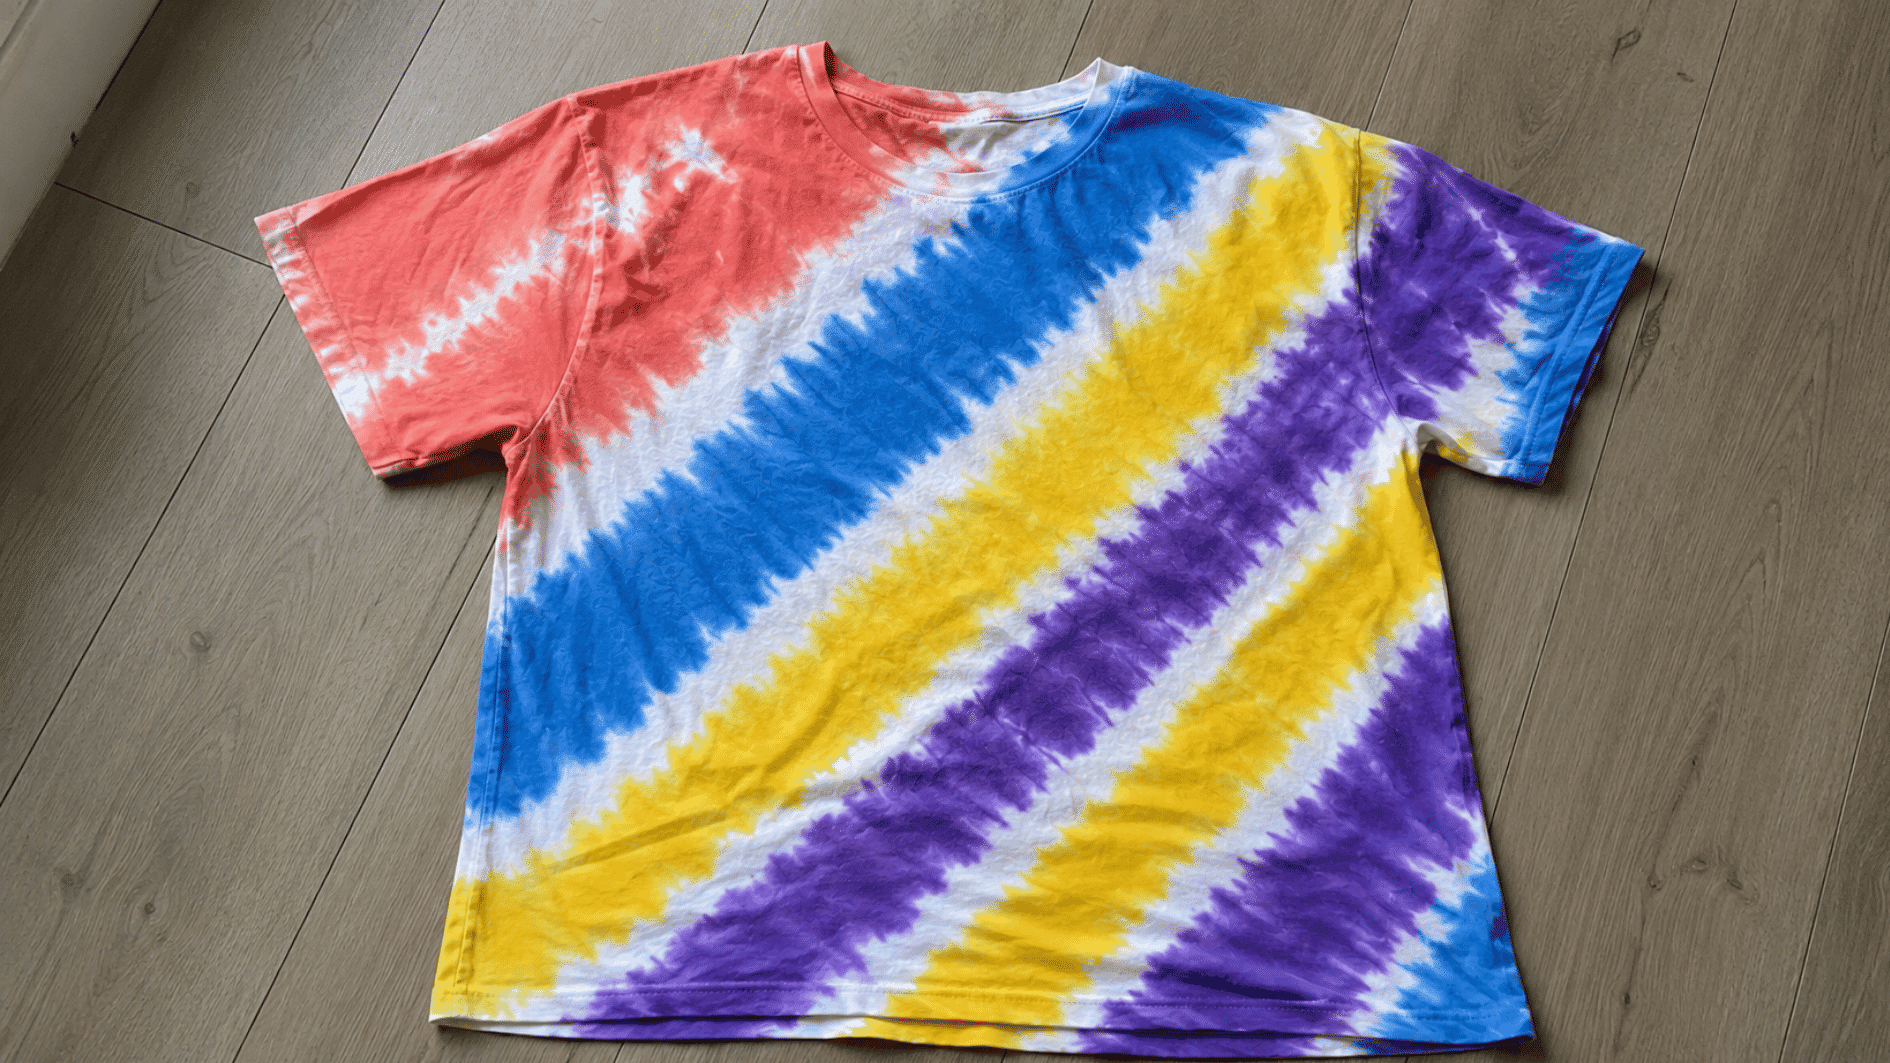
Diagonal stripe Tie-Dye creates bands that cross the shirt at an angle instead of running straight across it. It is made by accordion-folding the fabric diagonally from a corner before securing and dyeing the folded sections.
- Look: Angled bands running from one side to another.
- Best for: T-shirts, tote bags, and pillowcases.
- Difficulty: Easy to medium, depending on stripe spacing.
Tip: I prefer deciding the stripe direction while the item is laid flat. It makes it easier to picture where the bands will sit when finished.
10. Shibori Tie-Dye
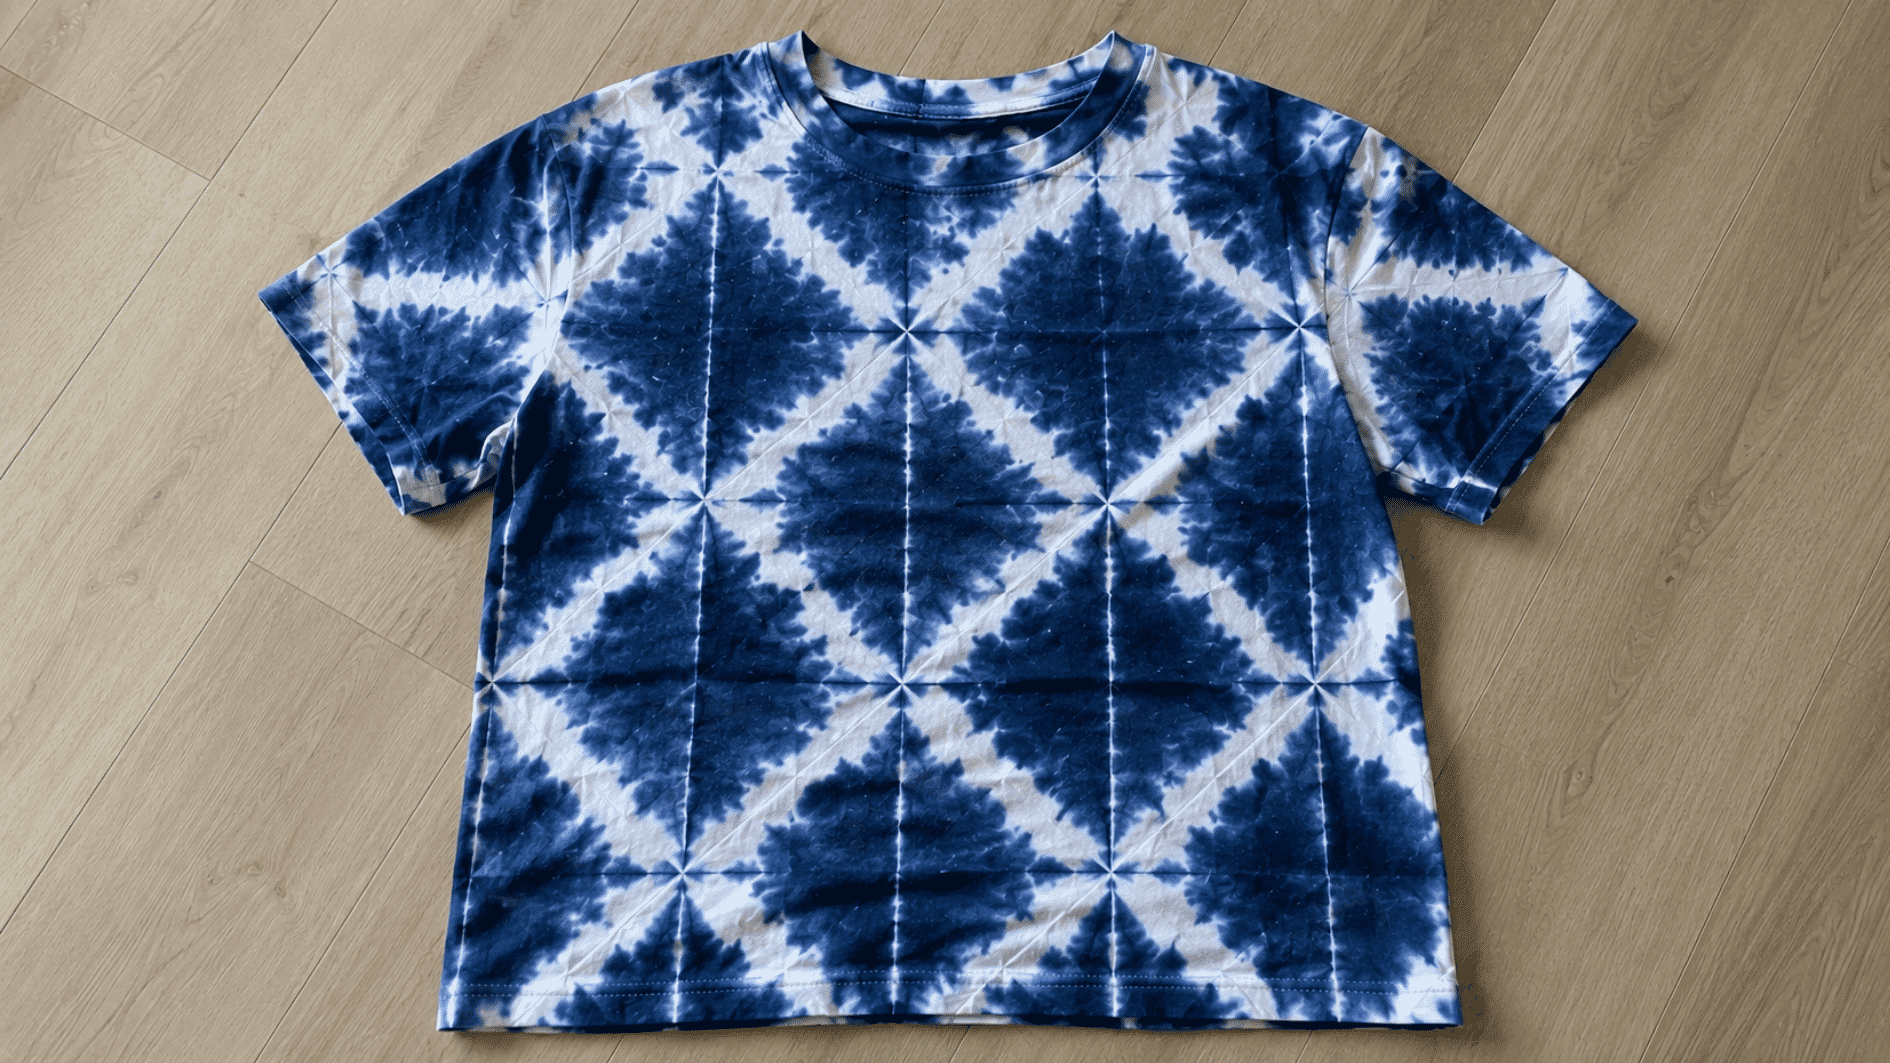
Shibori Tie-Dye creates structured resist patterns such as lines, blocks, and repeated geometric marks. It is made by folding the fabric into compact sections, tightly binding or compressing it, and applying dye to exposed areas.
- Look: Repeated lines, blocks, or geometric markings.
- Best for: Shirts, napkins, scarves, and fabric panels.
- Difficulty: Medium because consistent folds affect the result.
Tip: Keep the fabric compressed securely while applying the dye. Consistent pressure helps maintain clearer separation between dyed and resisted areas.
11. Spider Tie-Dye
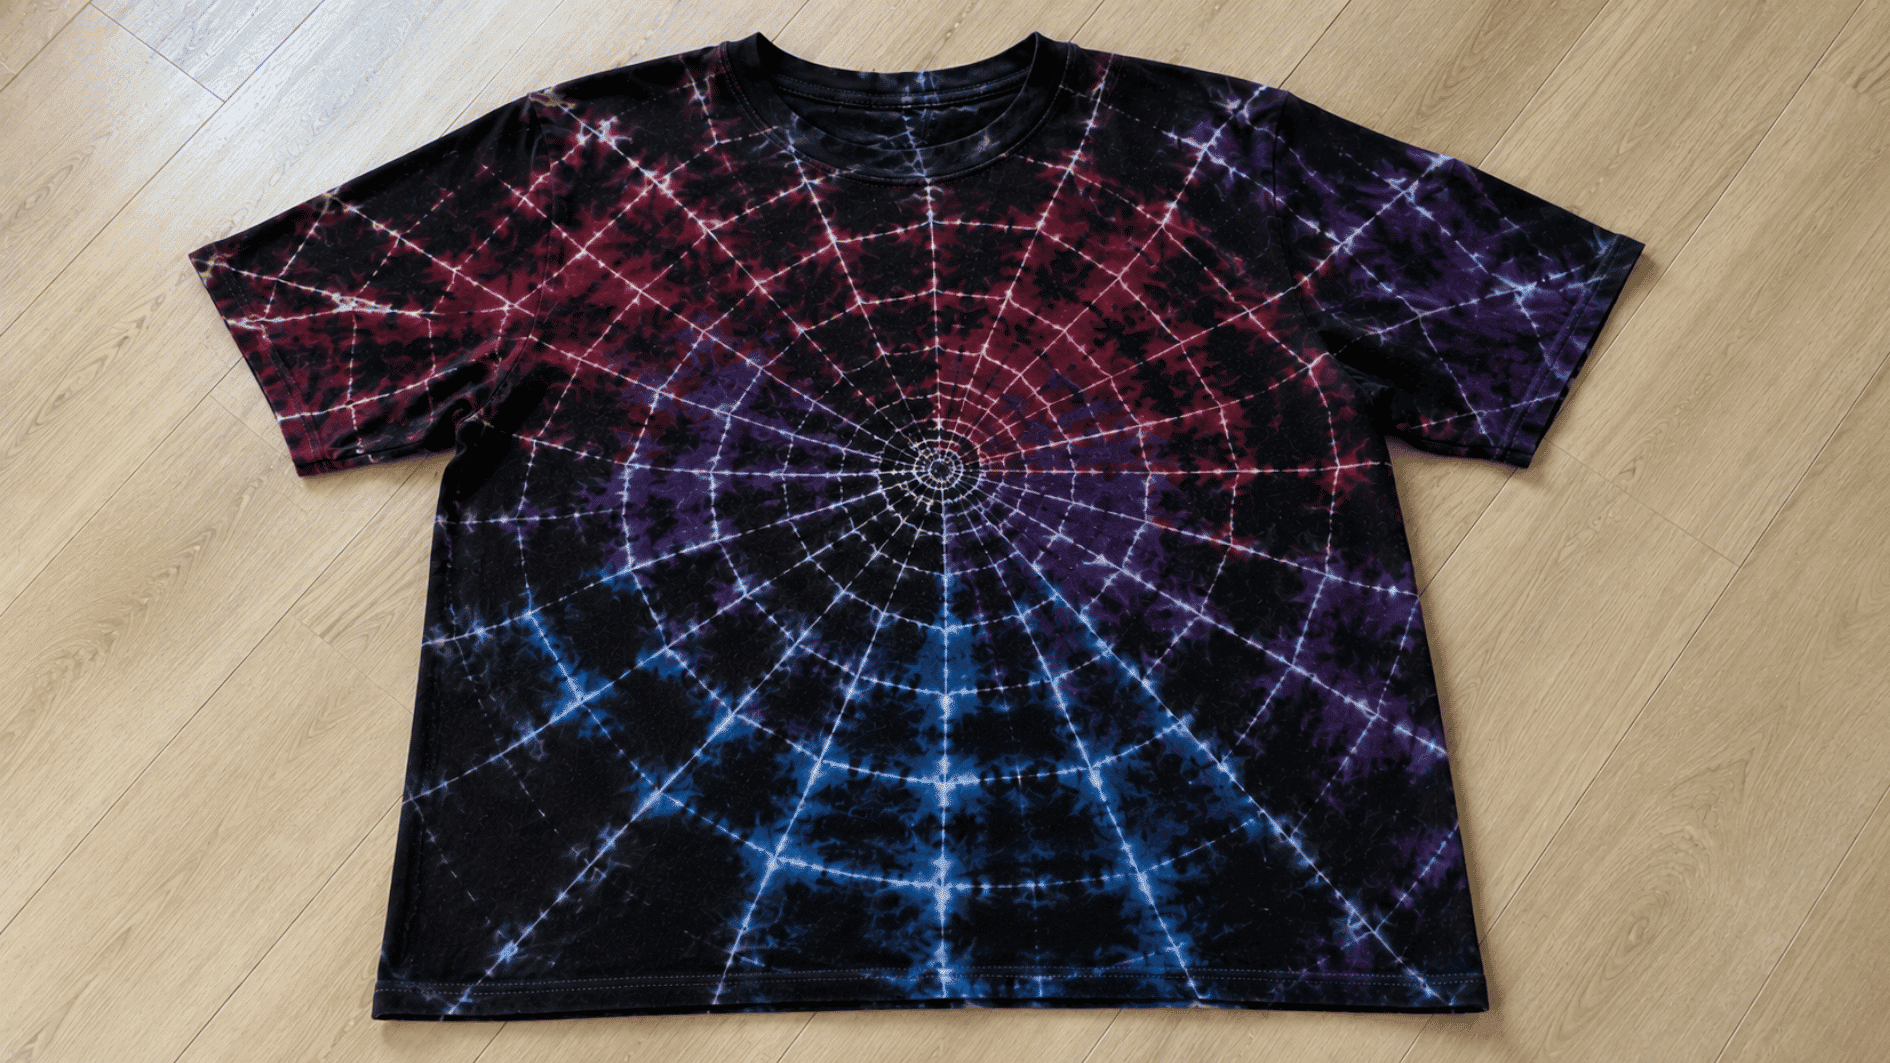
Spider Tie-Dye creates curved color sections crossed by thin lines that resemble a web. It is made by twisting the shirt into a spiral, securing it tightly, and applying darker dye around selected folds to build the web effect.
- Look: Fine radiating lines resembling a spiderweb.
- Best for: T-shirts and larger fabric pieces.
- Difficulty: Medium because tighter sections help form the web effect.
Tip: I would keep the color palette fairly limited here. Too many neighboring shades can make the finer web-like details harder to notice.
12. Geode Tie-Dye
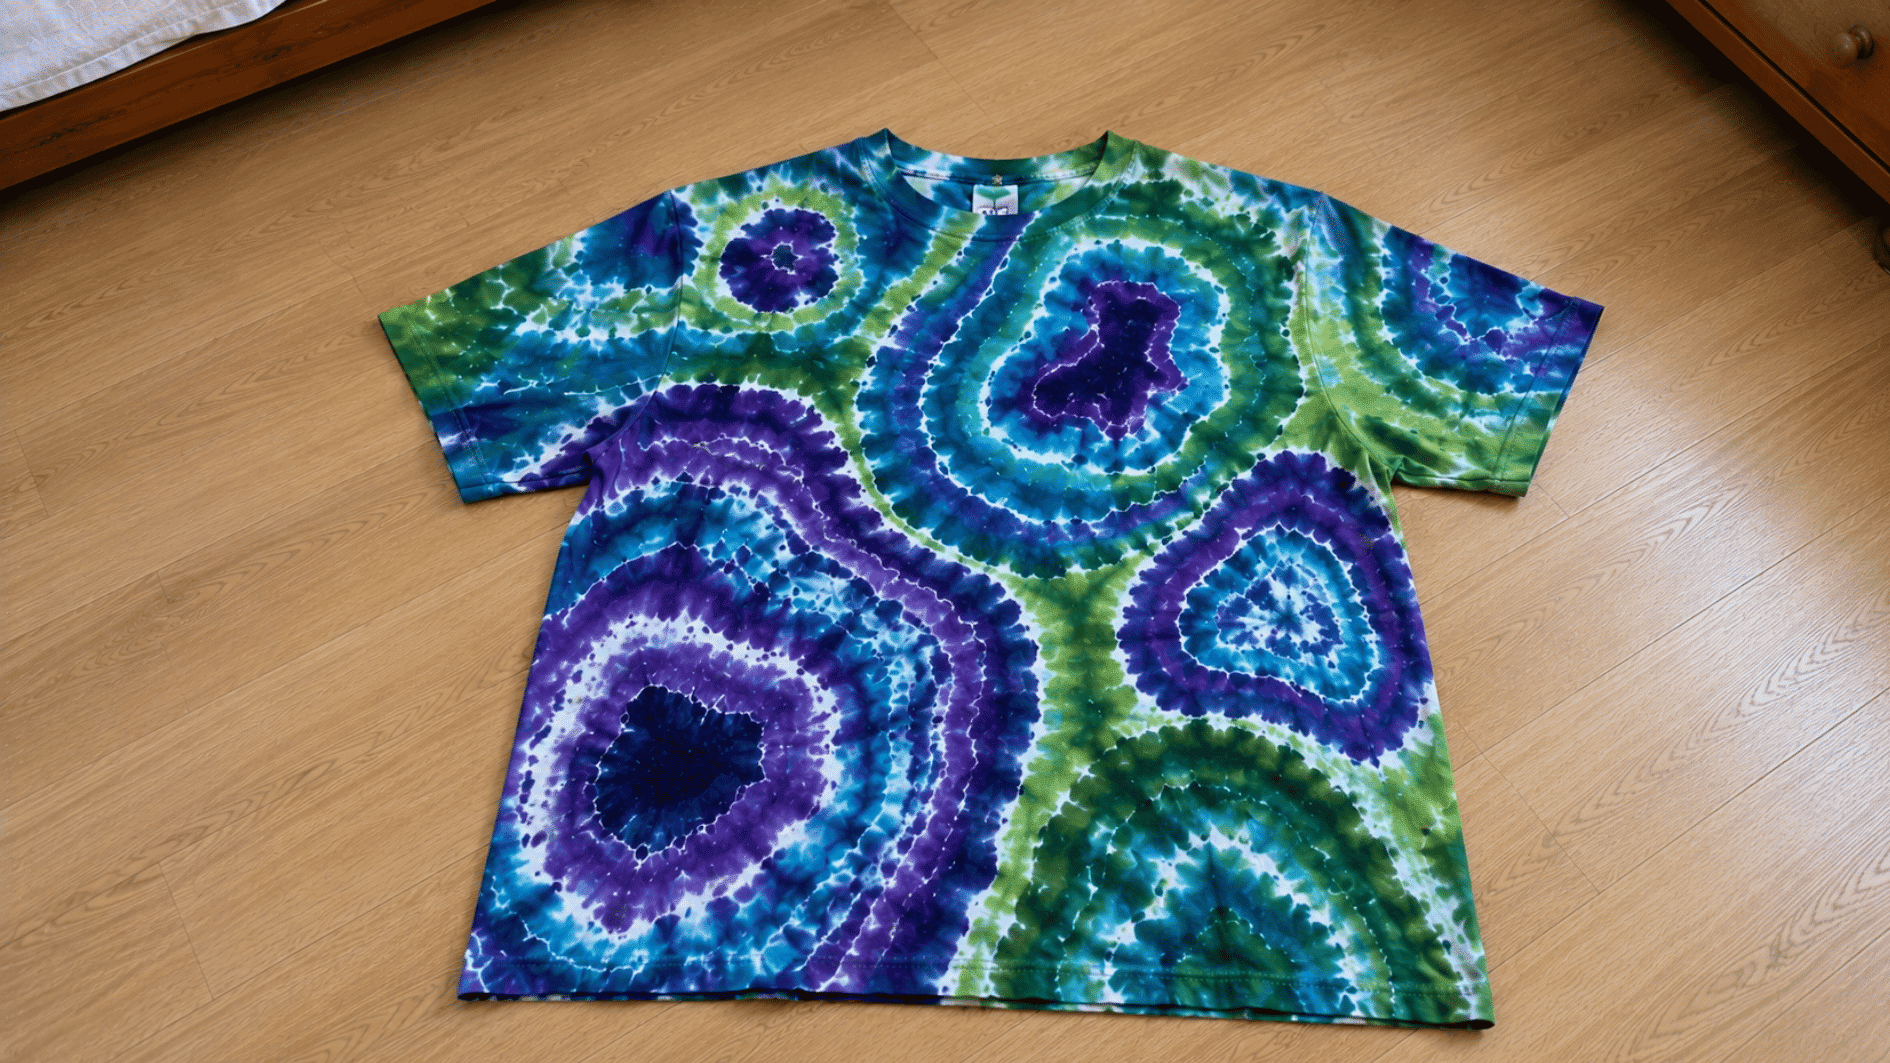
Geode Tie-Dye creates irregular rings that resemble the layered inside of a geode. It is made by pinching several areas of the shirt, wrapping each section tightly at different points, and adding color around the bindings.
- Look: Uneven concentric rings with organic outlines.
- Best for: T-shirts, sweatshirts, tote bags, and fabric panels.
- Difficulty: Medium because several sections may need individual tying.
Tip: I like varying the size of the tied sections instead of making every one identical. The difference can make the finished geode shapes feel more natural.
Creative Tie-Dye Projects to Try Beyond Just T-Shirts
1. Tote Bags
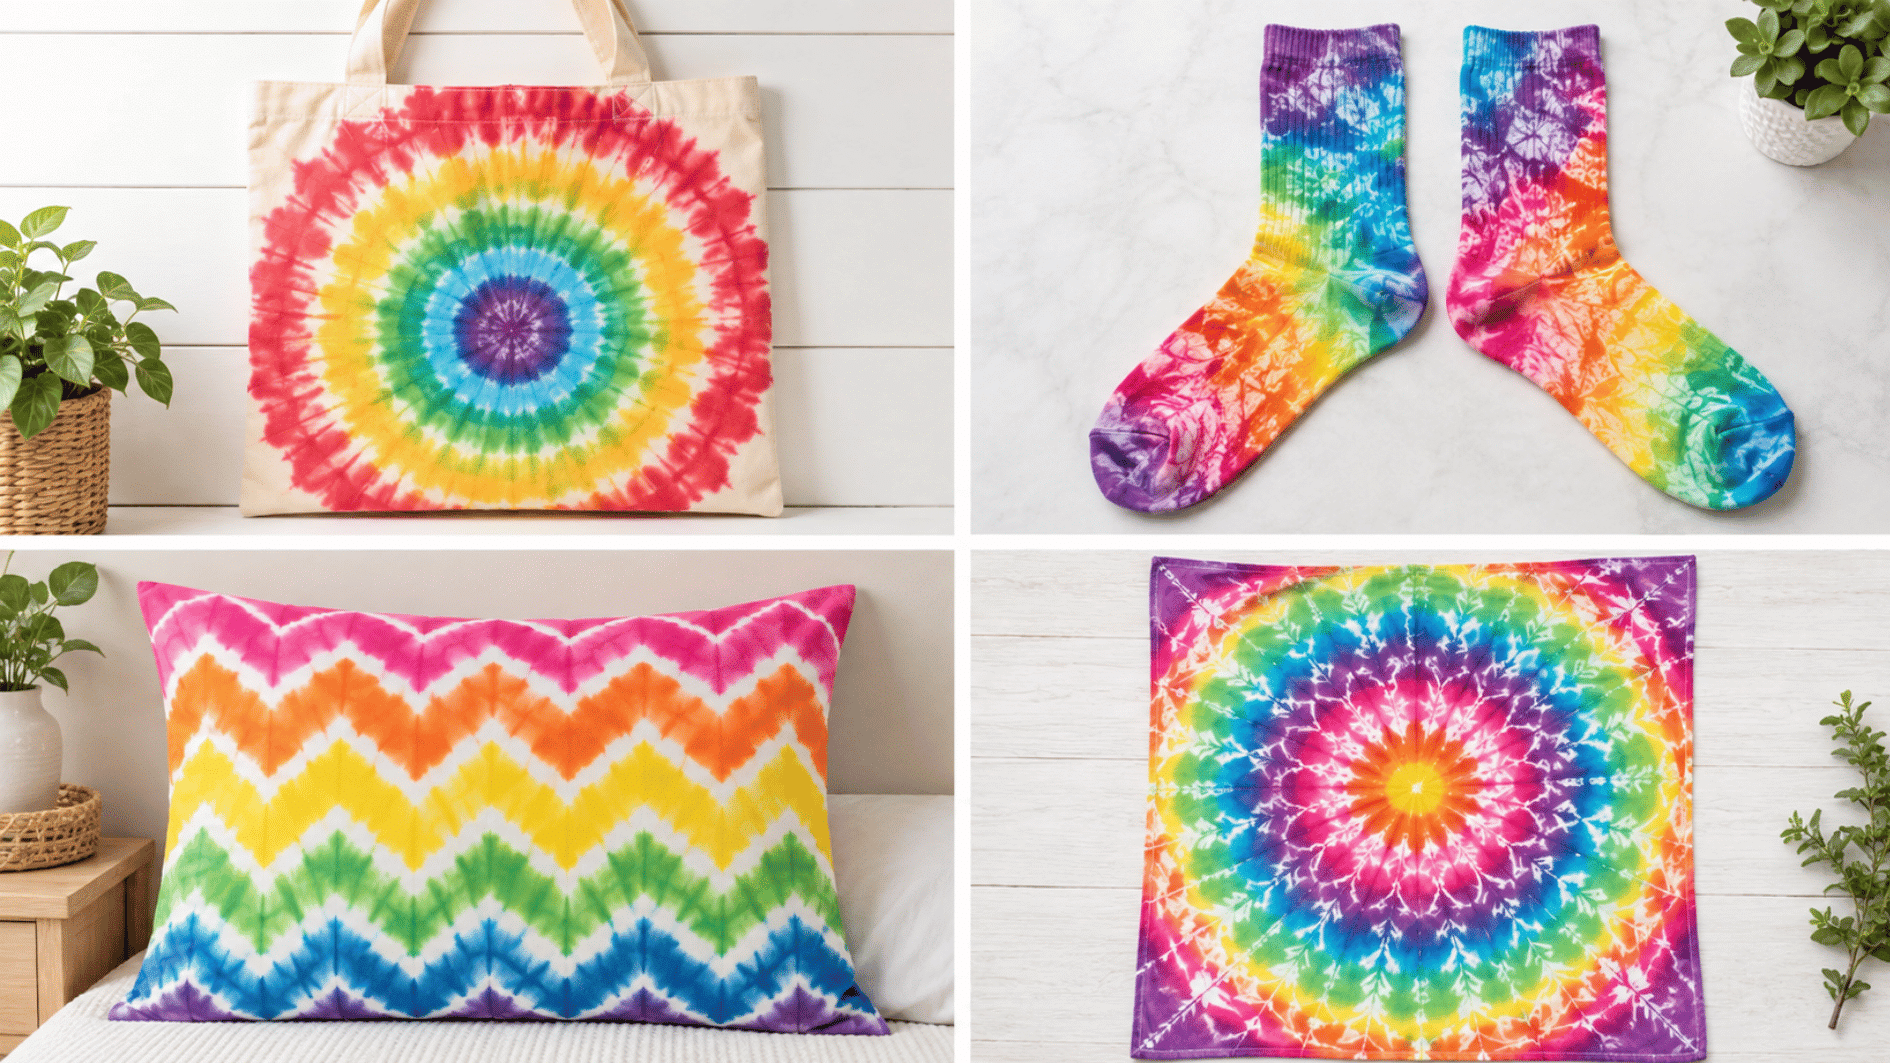
A bullseye pattern works well on a tote because the flat surface gives the rings room to show clearly. Pinch one spot, pull the fabric upward, then add rubber bands at even gaps before adding color. I like starting slightly off-center when I want the finished design to feel less predictable.
2. Socks
The crumple method is one of the easiest ways to dye socks because the small shape does not need precise folding. Scrunch each sock into a loose bundle, secure it, and place color across different folds. Keep some lighter areas between colors if you want the pattern to look more defined.
3. Pillowcases
Chevron patterns suit pillowcases because the wider fabric gives the angled lines space to develop. Fold the material into diagonal accordion pleats, secure each section, then add dye between the ties. Try to keep the folds similar in size so the finished zigzag stays more even.
4. Bandanas
Mandala patterns work nicely on square bandanas because the shape makes symmetrical folding easier. Fold the fabric into layered sections, bind selected points, and apply color in a balanced pattern. I usually keep the folds tight here because loose sections can blur the symmetry.
5. Sweatshirts
A spiral can create a bold result on a sweatshirt, especially across the front or back panel. Pinch the center, twist the fabric into a large coil, secure it well, and add different shades around the sections. Use enough ties to hold thicker fabric in place while dyeing.
6. Canvas Shoes
Crumple-style effects can work on flexible canvas areas of shoes without requiring a full fabric fold. Remove the laces, crease or bunch the material where possible, then dab dye onto selected spots. Apply color carefully so it does not spread onto soles or other areas you want to keep clean.
7. Scarves
Accordion stripes fit scarves well because the long shape naturally supports repeated folds. Fold the scarf back and forth along its length, secure the strip, and apply color between the bands. Wider folds create broader stripes, while tighter folds give a finer pattern.
8. Napkins
Shibori-inspired folds work well for napkins because the small square shape is easy to compress. Fold each one into a compact square or triangle, bind it tightly, then add color along the exposed edges. Changing the fold direction can give each napkin a slightly different result.
Ways to Make Your Tie-Dye Patterns Look More Striking
- Leave some open space: Lighter areas keep the design from looking too busy.
- Plan the placement: Keep the main pattern visible when the item is worn or used.
- Balance the dye: Avoid concentrating too much color in one section.
- Use the base color wisely: White gives brighter results, while colored fabric shifts the final shades.
- Check both sides: Add enough dye to the back for a more even all-over finish.
- Avoid overcrowding details: Give bold shapes and color sections enough room to stand out.
Final Thoughts
With so many tie-dye patterns to try, choosing a favorite can be part of the fun. Each option brings its own character, giving you plenty of inspiration for your next project.
I’d start with the design that catches your eye rather than overthinking the choice. Pick one of the ideas above, gather what you need, and get started on your next tie-dye project.
Frequently Asked Questions
Can You Tie-Dye Fabric That Has Already Been Dyed?
Yes, but the existing fabric color can affect the new shades. Lighter base colors generally show added dye more clearly.
Why Did My Tie-Dye Turn Out Too Pale?
Pale results can happen when the dye is too diluted, the fabric is unsuitable, or the color does not have enough time to set.
Can You Tie-Dye More Than Just Cotton?
Yes. Rayon and other cellulose-based fabrics can take fiber-reactive dye well, while polyester and many synthetic fabrics require different dyes.
Should Fabric Be Wet or Dry Before Tie-Dyeing?
Either can work. Damp fabric generally lets color travel more easily, while dry fabric can give you greater control over where dye spreads.
How Long Should Tie-Dye Sit Before Rinsing?
Follow the dye manufacturer’s directions. Many fiber-reactive dyes are left for several hours before rinsing so the color has time to bond with the fabric.