



Think a retaining wall is just a row of blocks holding back dirt? A diy retaining wall can look simple, but small mistakes can turn into leaning, cracking, or shifting after heavy rain.
You may think stacking blocks tightly is enough. It is not. Soil pushes with more force than it seems, and water can make that pressure much worse.
If the ground is not prepared the right way, the wall may start moving sooner than expected.
That can waste your time, money, and effort. A good result starts with understanding why these walls fail before you begin building one.
How Does a Retaining Wall Work?
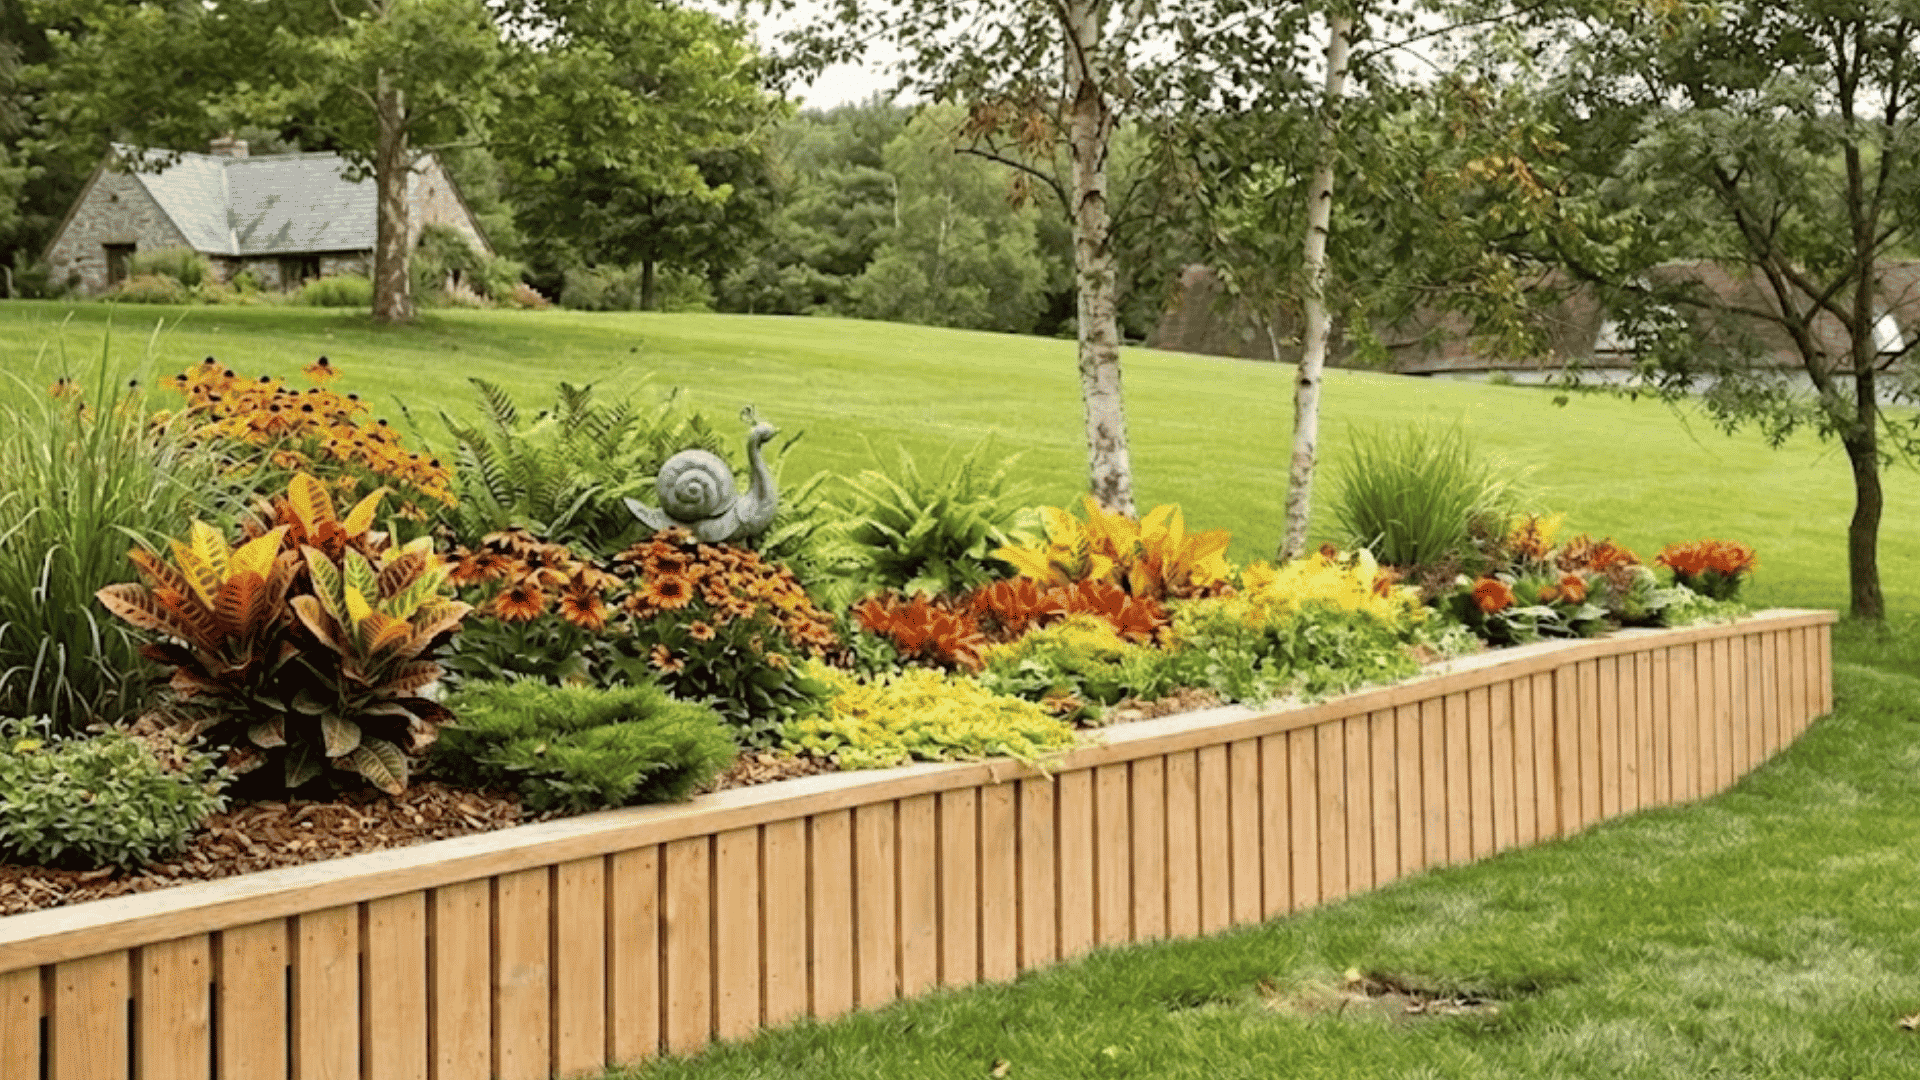
A retaining wall is a structure built to hold soil in place when ground levels are uneven. It supports the soil behind it and helps stop the earth from sliding or washing away.
These walls are often used along sloped yards, garden beds, driveways, patios, and raised areas.
If your patio project is still on the drawing board, it’s worth furnishing that patio at the same time you’re planning the wall, so the two spaces feel designed together rather than bolted on later.
Small garden walls are usually low and mainly help shape planting areas or manage gentle slopes. Larger retaining walls handle much more soil pressure and may support roads, buildings, or steep land.
Because of the extra load, taller walls often need stronger materials, deeper foundations, proper drainage, and professional planning.
Materials and Tools Needed
The right materials and tools make the work easier, keep each stage organized, and help the finished wall stay firm and neat.
| Materials | Tools |
|---|---|
| Retaining wall blocks, concrete blocks, timber, or natural stone | Shovel and spade |
| Crushed stone or gravel | Wheelbarrow |
| Drainage gravel | Hand tamper or plate compactor |
| Landscape fabric | Level |
| Drain pipe | Tape measure |
| Construction adhesive | String line and stakes |
| Backfill soil | Rubber mallet |
| Cap blocks or finishing pieces | Rake |
How to Build a DIY Retaining Wall: Step-by-Step
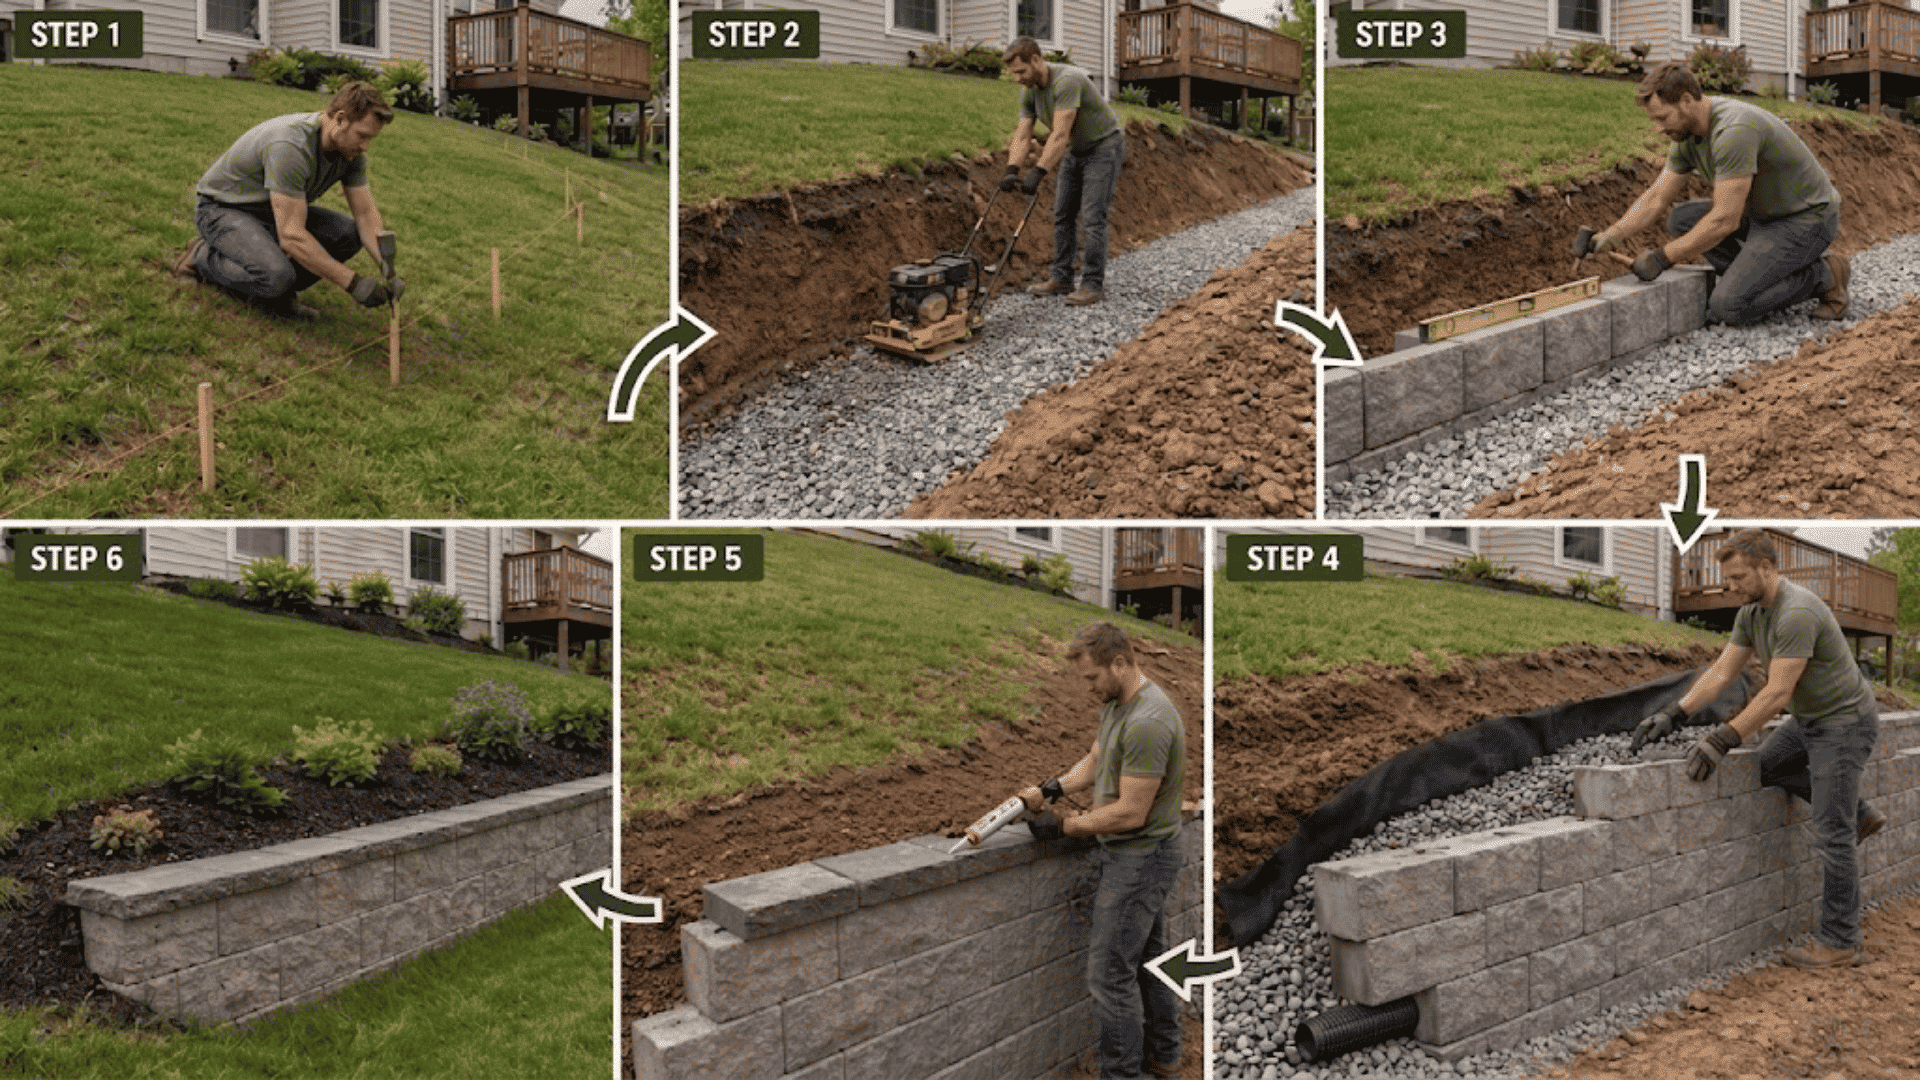
A strong retaining wall starts with careful groundwork and steady placement. Each stage affects how well the finished wall handles soil pressure.
Step 1. Mark the Wall Layout
Set stakes at both ends of the planned wall and run a tight string between them. The string creates a clear line for digging and block placement.
For curved walls, place extra stakes along the planned shape. Check the full layout from several angles before removing soil or bringing materials into the work area.
Step 2. Dig the Trench and Prepare the Base
Dig the trench slightly wider than the wall blocks to allow room for placement and adjustment.
Make it deep enough for the gravel base and part of the first block course. Remove roots, loose soil, and raised spots.
Spread crushed stone in thin layers, compact each layer firmly, and use a level to keep the base flat.
Step 3. Install the First Row of Blocks
Place the first course directly on the compacted gravel base. Check every block from side to side and front to back with a level.
Use a rubber mallet to make small adjustments without damaging the blocks. Keep the row straight and evenly spaced. Taking extra care here prevents higher courses from leaning or forming uneven gaps.
Step 4. Add Drainage and Build the Next Courses
Place drainage gravel behind the first row and install a perforated drain pipe near the base when required. Landscape fabric can help keep soil away from the gravel.
Continue stacking the blocks with staggered joints. Check the level and alignment after every few blocks. Cut blocks carefully when you need smaller pieces.
Step 5. Backfill and Install the Wall Caps
Add drainage stone behind the wall as each course goes up. Fill the remaining space with suitable backfill in small layers and compact it regularly.
Once the final course is in place, check the wall for straight lines.
Add cap blocks across the top and secure them with construction adhesive when recommended by the block maker.
Step 6. Finish the Ground Around the Wall
Replace topsoil around the completed wall and shape the ground so rainwater moves away from the structure. Fill low spots where water could collect.
Add grass, mulch, or plants to finish the surrounding area. Keep drainage outlets clear of loose soil, leaves, and garden material so water can continue flowing freely.
How Much Does a DIY Retaining Wall Cost?
Budget roughly $6-9 per square foot if you’re buying materials and doing the work yourself – about half of what a contractor would charge for the same wall.
| Material | Cost Range (per sq ft) | Notes |
|---|---|---|
| Concrete block | $6-9 | Easiest for most DIYers, no mortar needed |
| Timber | $4-7 | Cheapest option, best for shorter walls |
| Natural stone | $10-15+ | Costs more, but looks more finished |
| Gravel and base material | Adds to total | Bigger walls use more than expected |
| Drainage supplies (fabric, pipe) | Low cost | Skipping these leads to early wall failure |
| Tool rental (compactor, etc.) | Small added cost | Only needed if you don’t already own one |
If you’re tackling this alongside other budget-friendly curb appeal projects, a retaining wall is usually one of the better dollar-for-dollar upgrades since it fixes a drainage or erosion problem while also reshaping the yard.
Why Drainage Matters Behind a Retaining Wall
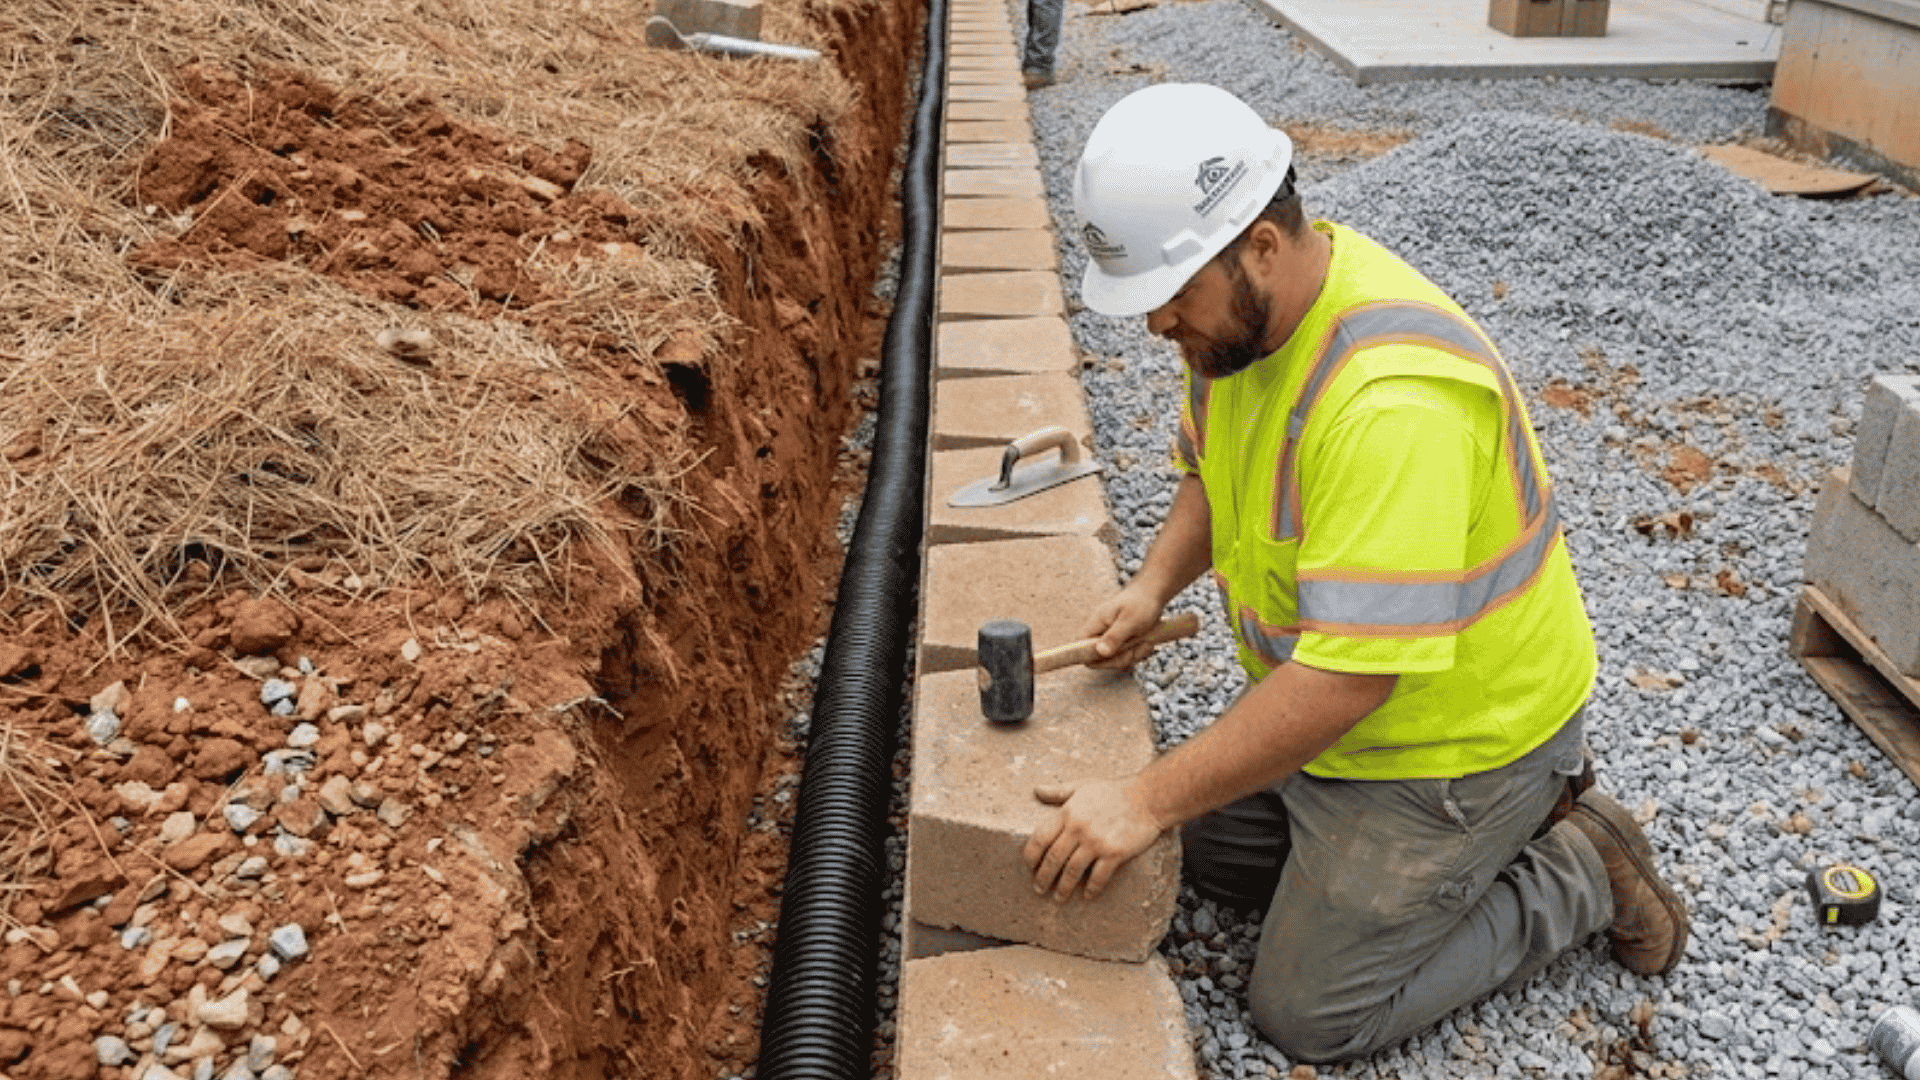
Water trapped behind a retaining wall increases pressure on the blocks and can cause leaning, shifting, or cracking over time. Drainage gravel helps water move down instead of collecting in the soil.
A perforated drain pipe placed near the base carries that water away. The pipe should lead to a safe outlet where water can drain without washing soil away or forming puddles.
Common mistakes include using too little gravel, covering the pipe with soil, blocking the outlet, or skipping landscape fabric.
Proper drainage reduces pressure behind the wall and helps it stay stable for many years.
Common Retaining Wall Installation Mistakes
Small building errors can weaken a retaining wall over time. Avoiding these common mistakes helps the wall stay level, stable, and better protected.
- Uneven Base: Starting on an uneven base makes the first row difficult to level and can cause higher courses to lean, shift, or develop gaps later.
- Skipping Compaction: Loose gravel or soil can settle after construction. Compacting the base and backfill in small layers helps reduce movement and keeps the wall supported.
- Poor Backfill and Drainage: Using heavy soil directly behind the wall or leaving out drainage gravel can trap water, increase pressure, and slowly push blocks forward.
- First Course Not Buried: Leaving the first row fully above ground gives the wall less support. Burying part of it helps hold the lower section firmly in place.
- Building Too High: A tall wall carries much more soil pressure than a low garden wall. Without proper support or engineering, it may lean, crack, or fail.
Wrapping It Up
A retaining wall can make an outdoor space feel more finished and easier to manage when the work is done with care. Taking time to plan before starting can also save effort later.
A diy retaining wall can be a satisfying home project when the size and site are suitable for hands-on work. The main goal is to build something that fits the space and holds up well over time.
Once the project is complete, regular checks can help catch small changes early and keep the area looking clean, useful, and well cared for.
Frequently Asked Questions
How Long Does It Take to Build a Retaining Wall?
A small retaining wall may take a weekend to complete. Larger projects can take several days, depending on the wall size, ground conditions, and amount of digging required.
Do You Need a Permit to Build a Retaining Wall?
Permit rules depend on the wall height and local building codes. Some areas allow low walls without approval, while taller walls may require a permit or structural plans.
What is the Best Time of Year to Build a Retaining Wall?
Spring, summer, and early fall usually work well because the soil is easier to dig and compact. Avoid building when the ground is frozen, soaked, or extremely muddy.