


Raise your hand if you’ve paid too much for a wine rack that wobbles, holds eight bottles max, and matches absolutely nothing in your home. Yeah. Never again.
Building your own DIY wine rack is cheaper, better looking, and weirdly fun once you get started. Some of these take a weekend. Some take an afternoon.
A few cost less than the wine they contain. Ready to actually like your storage? Scroll down.
Is Building a Diy Wine Rack Better than Buying One?
Absolutely, because building your own wine rack gives you more freedom than buying a ready-made one. You can choose the size, style, and materials that fit your space perfectly.
A DIY wine rack can also cost less, especially if you use reclaimed wood or leftover materials from other projects. Plus, many store-bought racks are designed for general use, whereas a custom rack can be tailored to your wine collection and storage needs.
There’s also the satisfaction of creating something with your own hands. In the end, you get a wine rack that feels more personal, practical, and unique to your home.
DIY Wine Rack Ideas for Every Space and Style
There’s something deeply satisfying about building your own wine storage. From rustic wooden builds to sleek metal frames, these ideas cover every skill level, budget, and space:
1. Freestanding Wooden Floor Rack
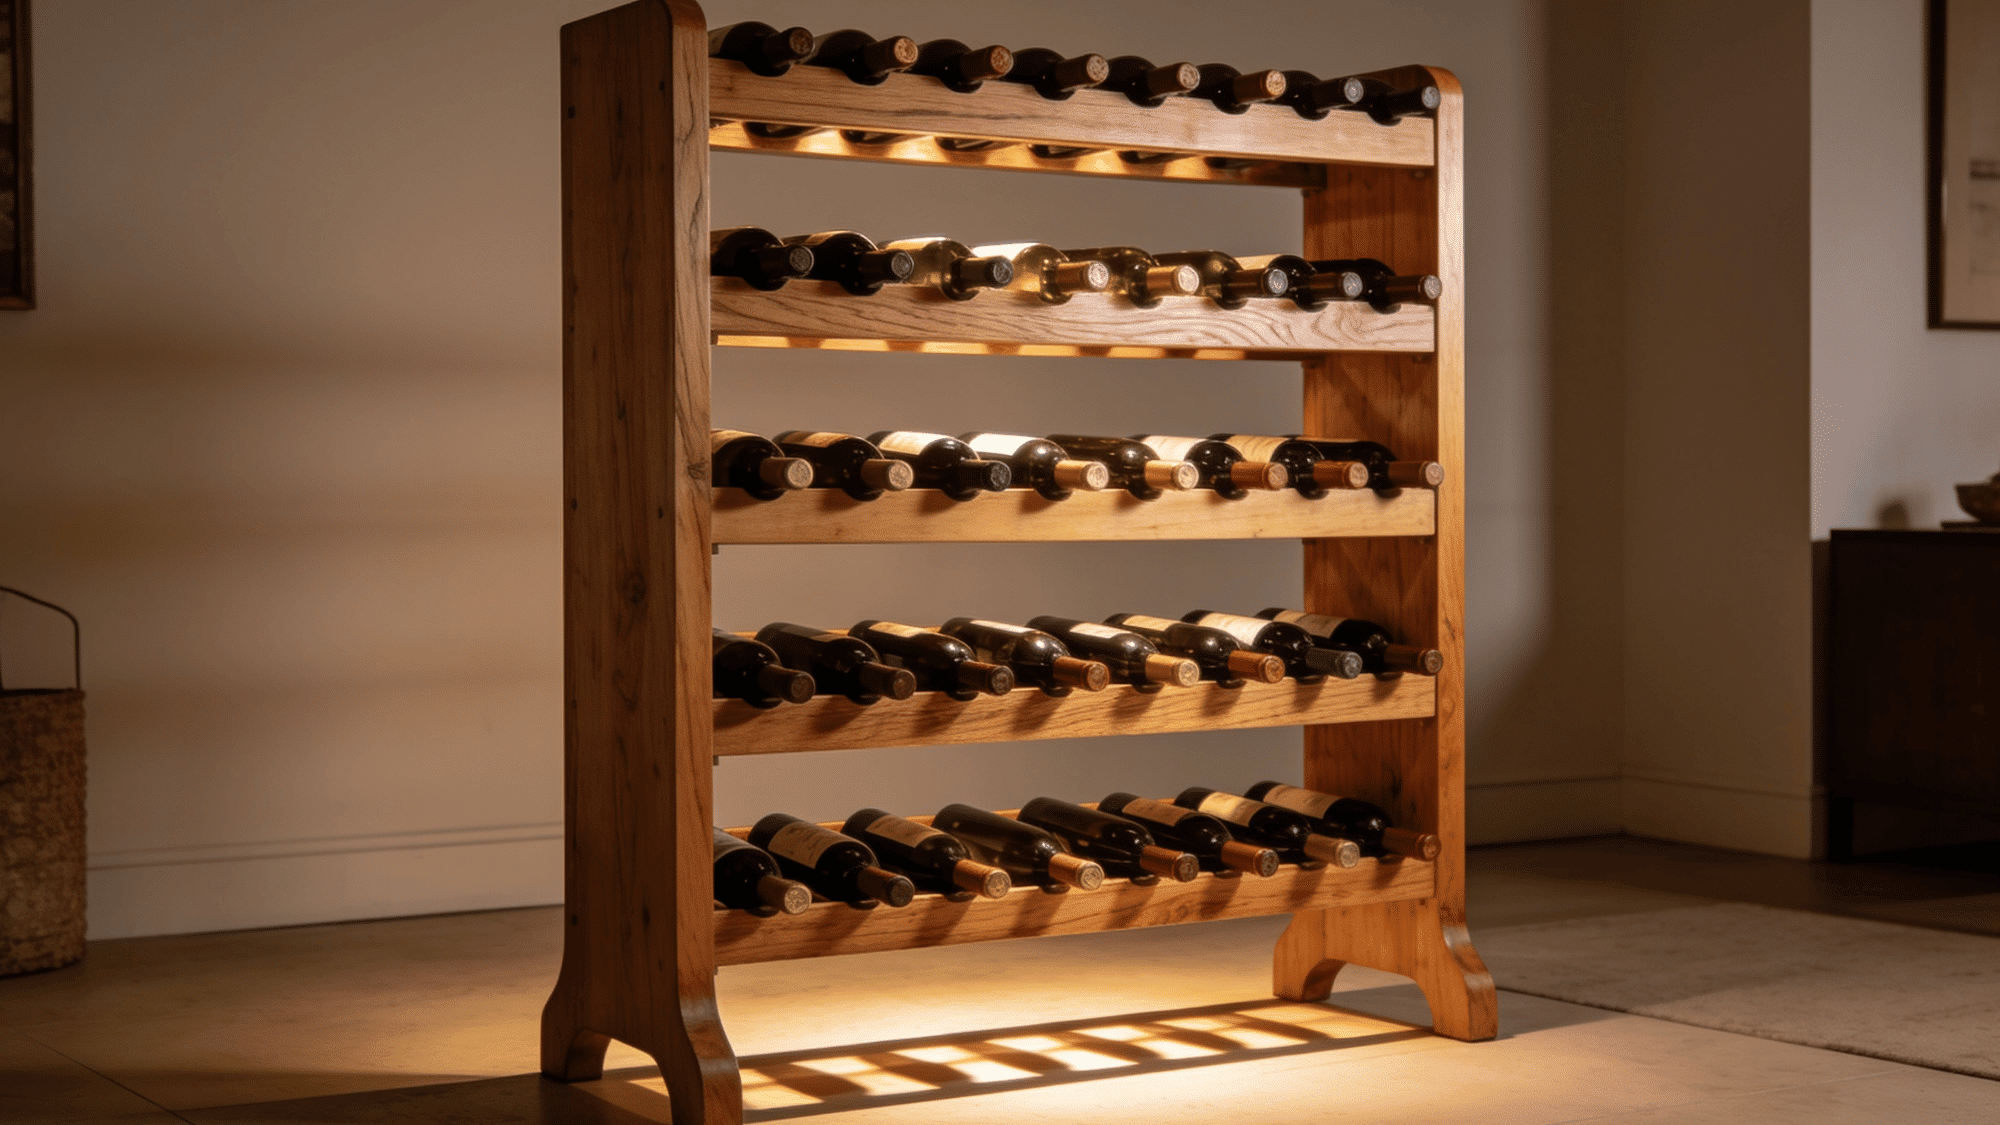
A classic tall frame built from pine or oak, with horizontal rails that cradle bottles neck-forward. It stands independently, looks polished in any room, and holds 12 to 50+ bottles, depending on height.
| Material | Quantity | Purpose |
|---|---|---|
| Pine or Oak Boards | 2 large panels | Side frames |
| Wooden Dowels (1.5 inch) | 10–20 dowels | Bottle cradles |
| Drill & Drill Bits | 1 set | Boring holes |
| Sandpaper (80 & 120 grit) | 2 sheets each | Surface smoothing |
| Wood Stain or Sealant | 1 can | Wood protection |
| Wood Screws | 1 box | Base assembly |
Build the Frame Step by Step:
- Cut two tall vertical side panels to your desired height
- Drill evenly spaced horizontal holes on both panels
- Slide wooden dowels through each pair of holes
- Sand all surfaces and apply wood stain or sealant
- Set upright and test stability before loading
Tip: Use 1.5-inch diameter dowels , thinner ones can flex under the weight of full bottles.
2. Wall-Mounted Diamond Rack
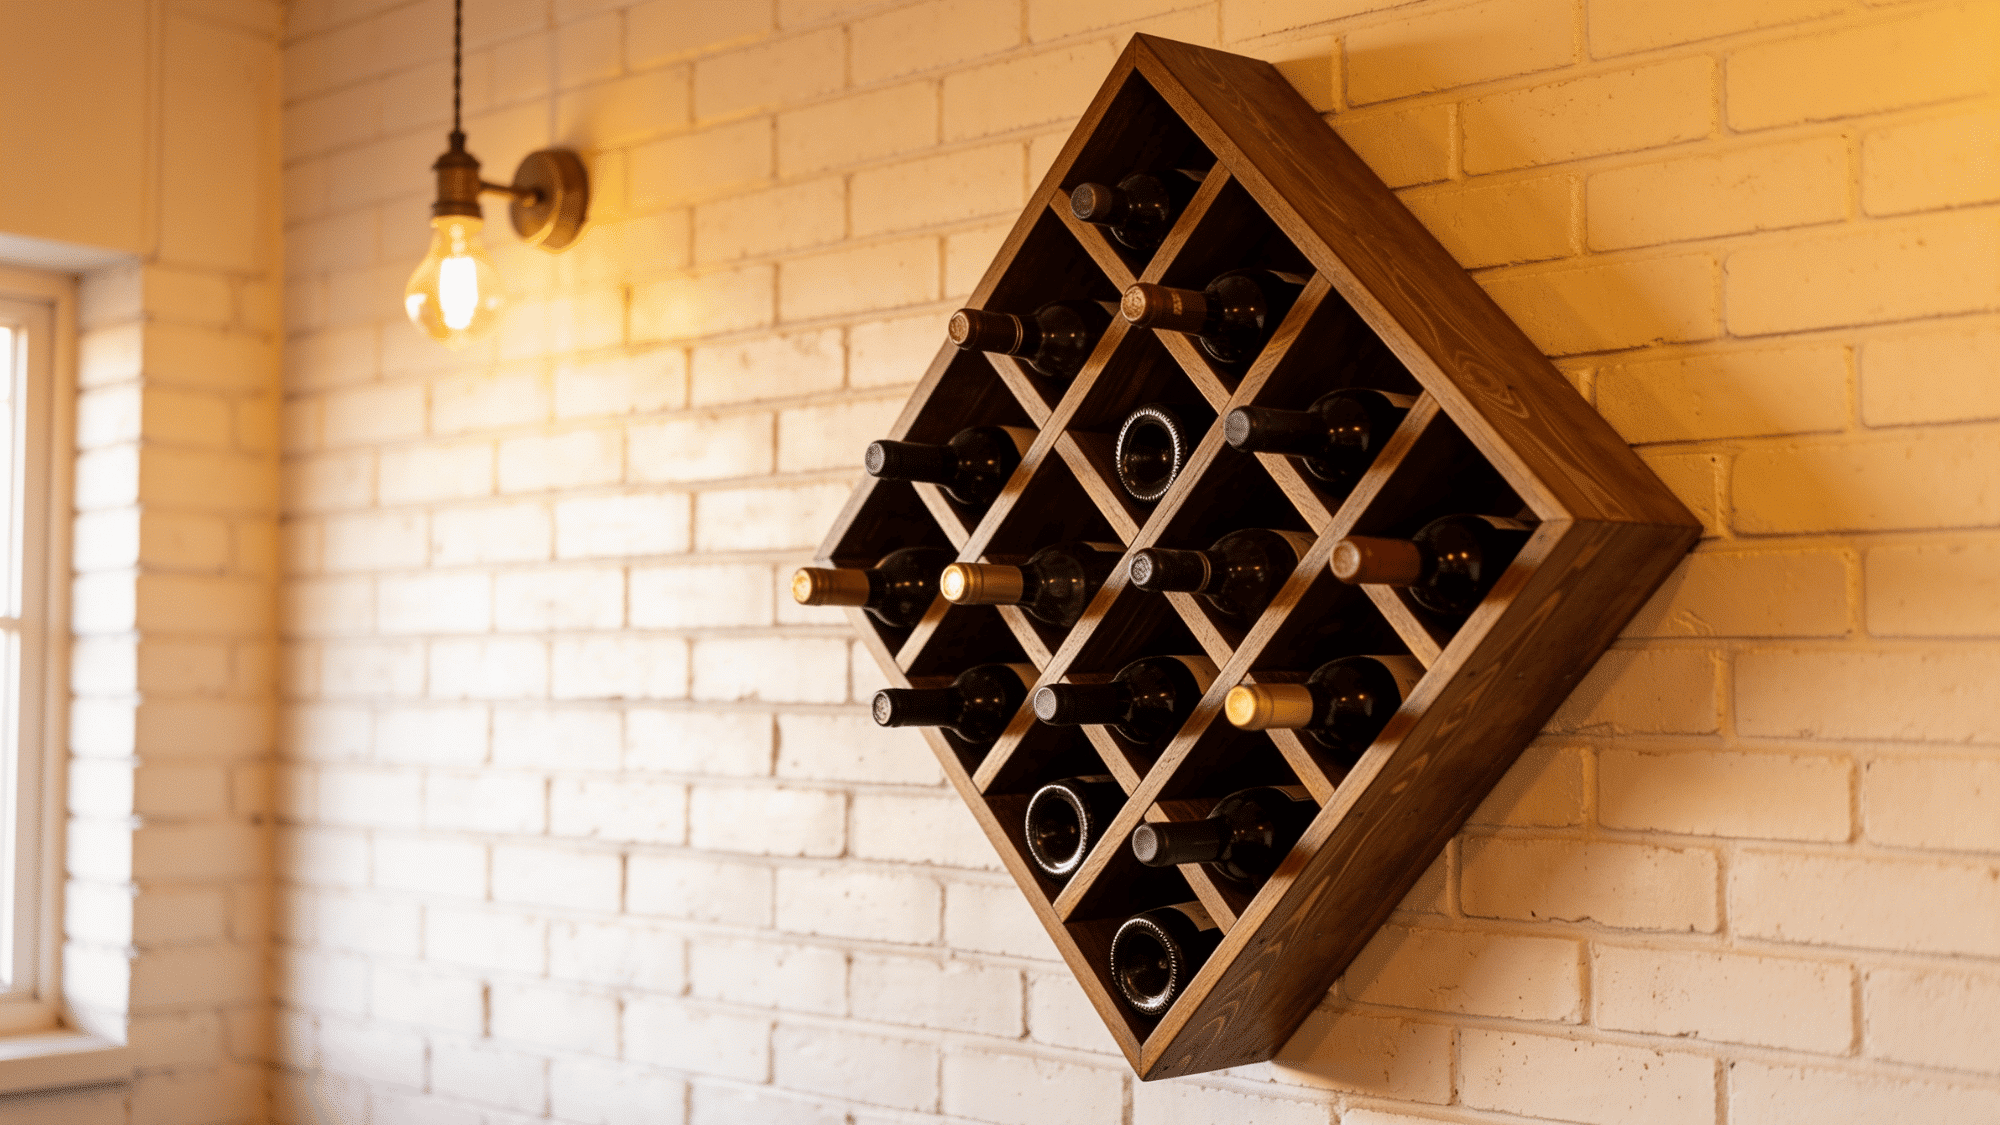
Interlocking diamond-shaped cubbies mounted flush against a wall are a true showpiece, turning your collection into wall art.
| Material | Quantity | Purpose |
|---|---|---|
| 1×4 Wood Boards | As per rack size | Diamond frame pieces |
| Wood Glue | 1 bottle | Corner bonding |
| Brad Nails | 1 pack | Joint reinforcement |
| Sandpaper (120 grit) | 2–3 sheets | Edge smoothing |
| Wood Stain or Paint | 1 can | Surface protection |
| Heavy-Duty Wall Screws | 1 pack | Stud mounting |
| Drill & Pilot Bit | 1 set | Pre-drilling holes |
How to Set It Up:
- Build individual diamond frames from 1×4 wood boards
- Join frames together with wood glue and brad nails
- Sand edges smooth and stain or paint to match your decor
- Locate wall studs and mark mounting points
- Secure with heavy-duty screws rated for the total bottle weight
Tip: Pre-drill pilot holes before mounting; it prevents the wood from splitting at the edges.
3. Copper Pipe Countertop Rack
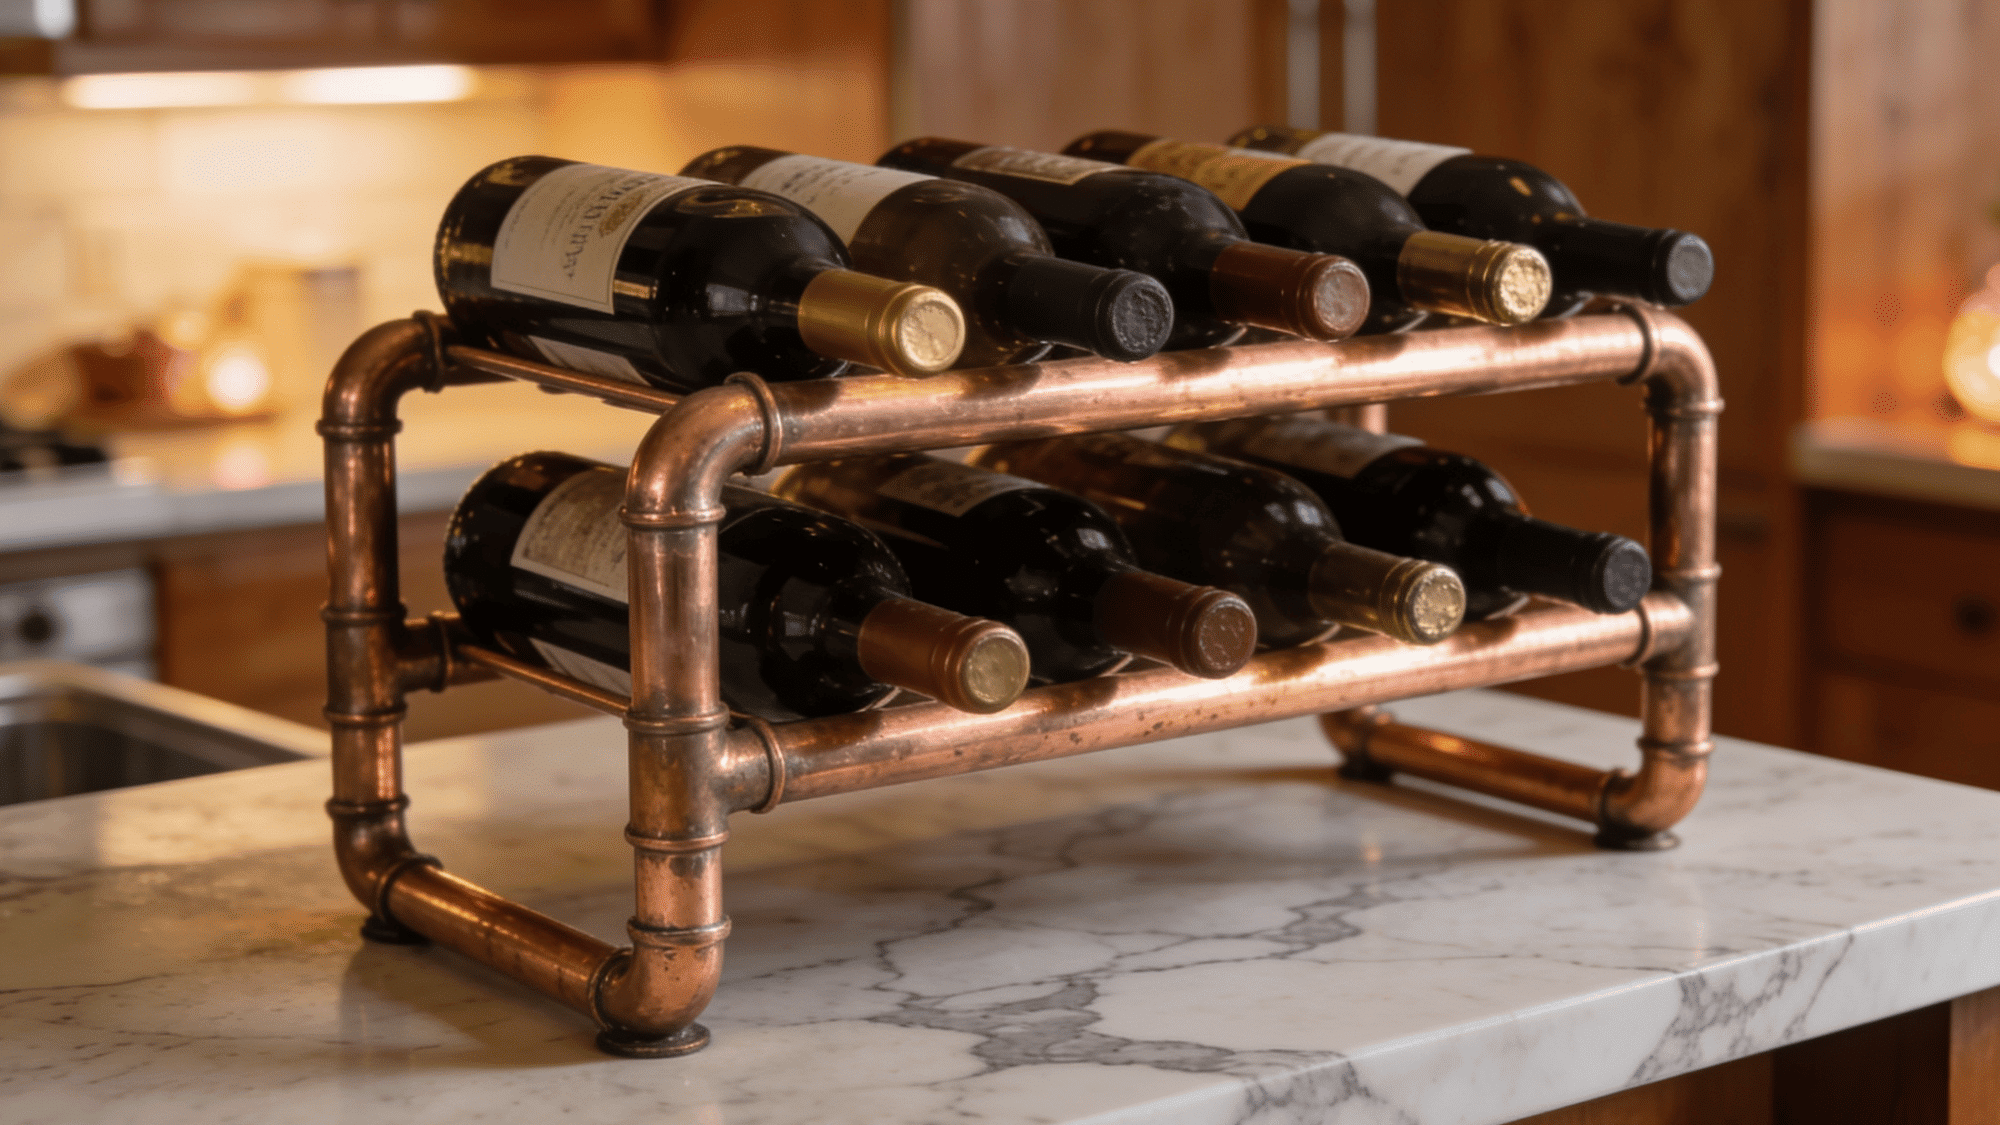
A minimal, modern build using copper pipes as bottle cradles, it sits right on your kitchen counter and holds 6–12 bottles. Industrial but warm, it pairs well with both modern and farmhouse kitchens.
| Material | Quantity | Purpose |
|---|---|---|
| Copper Pipes | 6–12 lengths | Bottle cradles |
| Pipe Cutter | 1 | Clean cuts |
| T-Joints & Elbow Fittings | As per the layout | Pipe connecting |
| Press-Fit Copper Fittings | As needed | No-solder joining |
| Flat Wooden or Metal Base | 1 piece | Frame stability |
| Soft Polishing Cloth | 1 | Copper finishing |
How to Build It:
- Cut copper pipes into equal lengths using a pipe cutter
- Connect pipe sections with T-joints and elbow fittings
- Solder or use press-fit connectors for a secure hold
- Attach a flat wooden or metal base for stability
- Polish copper with a soft cloth for a finished look
Tip: Skip solder if you’re a beginner; quality press-fit copper fittings hold just as well and require no heat.
4. Pallet Wood Wine Wall
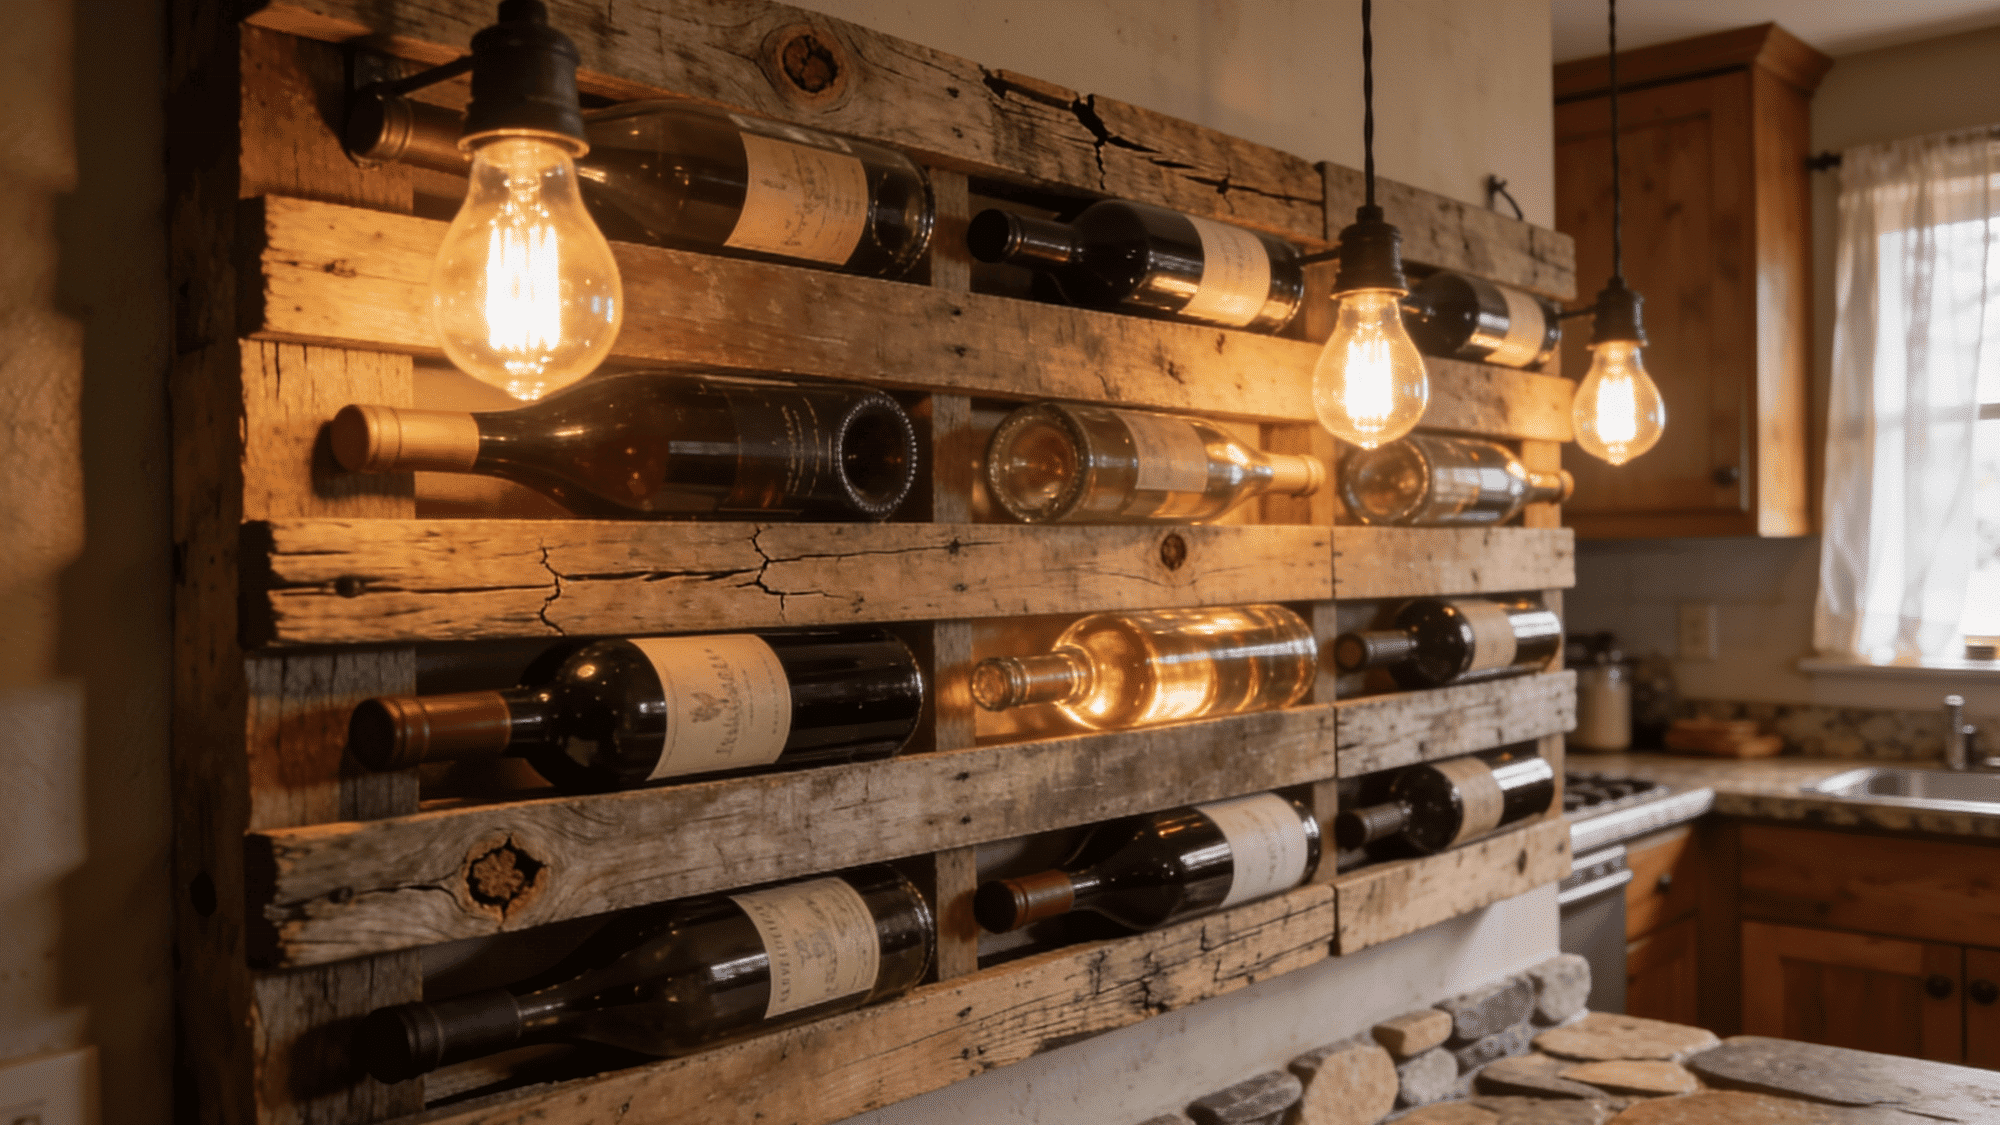
Salvaged pallet boards stacked and staggered to create a rustic, textured wine wall. It looks like it belongs in a countryside tasting room, and a DIY wine rack like this costs almost nothing to build.
| Material | Quantity | Purpose |
|---|---|---|
| Heat-Treated Pallets (HT) | 2–4 pallets | Main structure |
| Hammer & Pry Bar | 1 each | Safe disassembly |
| Sandpaper (80 grit) | 4–5 sheets | Splinter removal |
| Circular Saw | 1 | Board trimming |
| Wood Screws | 1 box | Row securing |
| Food-Safe Wood Finish | 1 can | Moisture protection |
How to Put It Together:
- Disassemble pallets carefully and remove all nails
- Sand boards to remove splinters and rough patches
- Cut boards to a uniform width for clean alignment
- Stack and stagger rows, securing each layer with screws
- Seal with food-safe wood finish to prevent moisture damage
Tip: Heat-treated pallets (stamped HT) are safe to use indoors; avoid chemically treated ones.
5. Under-Stair Wine Cellar
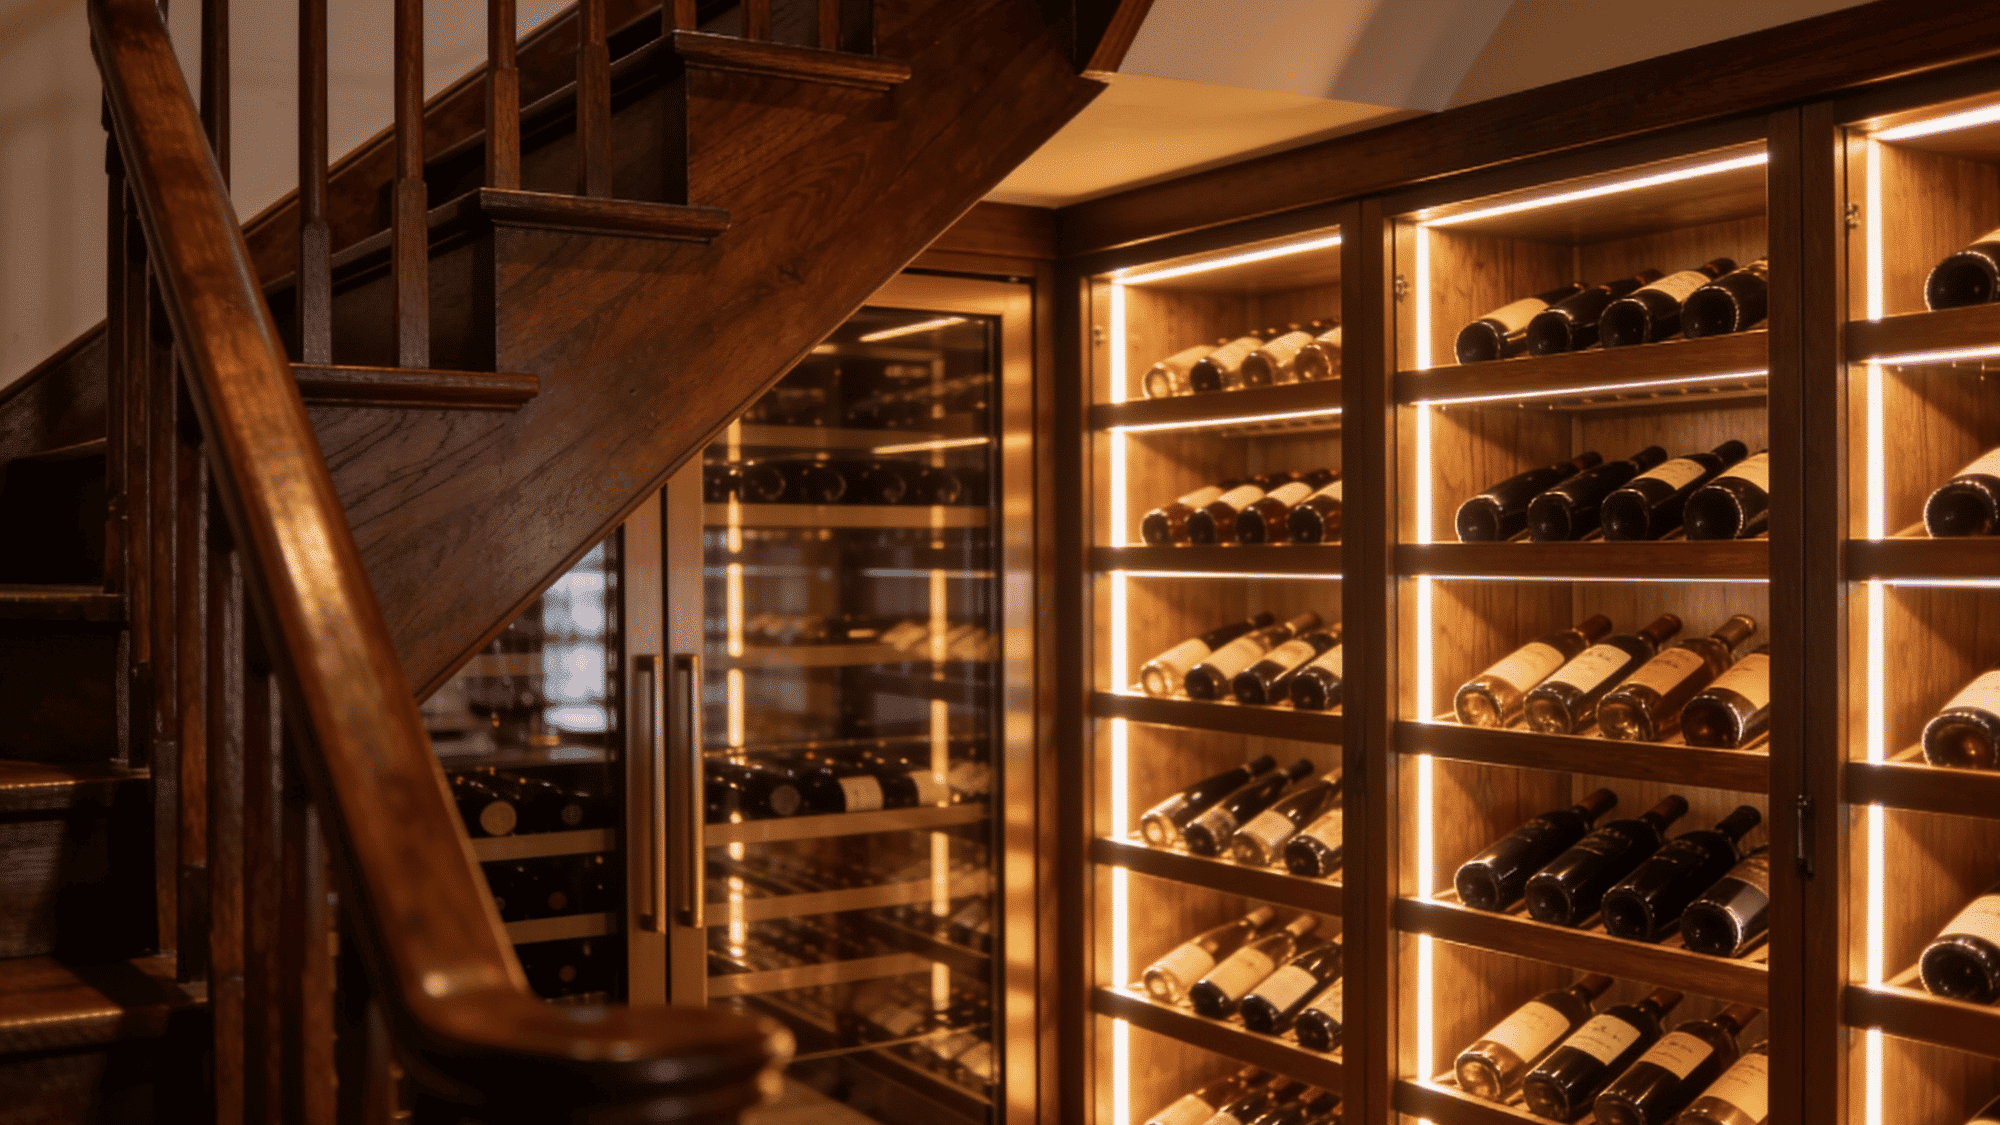
The dead space beneath a staircase transformed into a dedicated mini wine room, with shelved walls, optional climate control, and a door for a fully enclosed cellar feel.
| Material | Quantity | Purpose |
|---|---|---|
| 2×4 Lumber | As per the cavity | Wall framing |
| Insulation Boards | As per the wall area | Temperature control |
| Plywood Shelving | As per the layout | Bottle storage |
| Door with Weather Seal | 1 | Space enclosure |
| LED Strip Lights | 1–2 rolls | Shelf lighting |
| Wood Screws & Wall Anchors | 1 box each | Frame securing |
How to Build It:
- Measure the full interior dimensions of the under-stair cavity
- Frame interior walls with 2×4 studs and add insulation if needed
- Build fixed shelving along the angled wall following the stair pitch
- Install a door with a seal to maintain temperature
- Add LED strip lighting along shelf edges for visibility
Tip: Even without climate control, the under-stair area stays naturally cool, ideal for short- to mid-term storage.
6. Countertop Honeycomb Rack
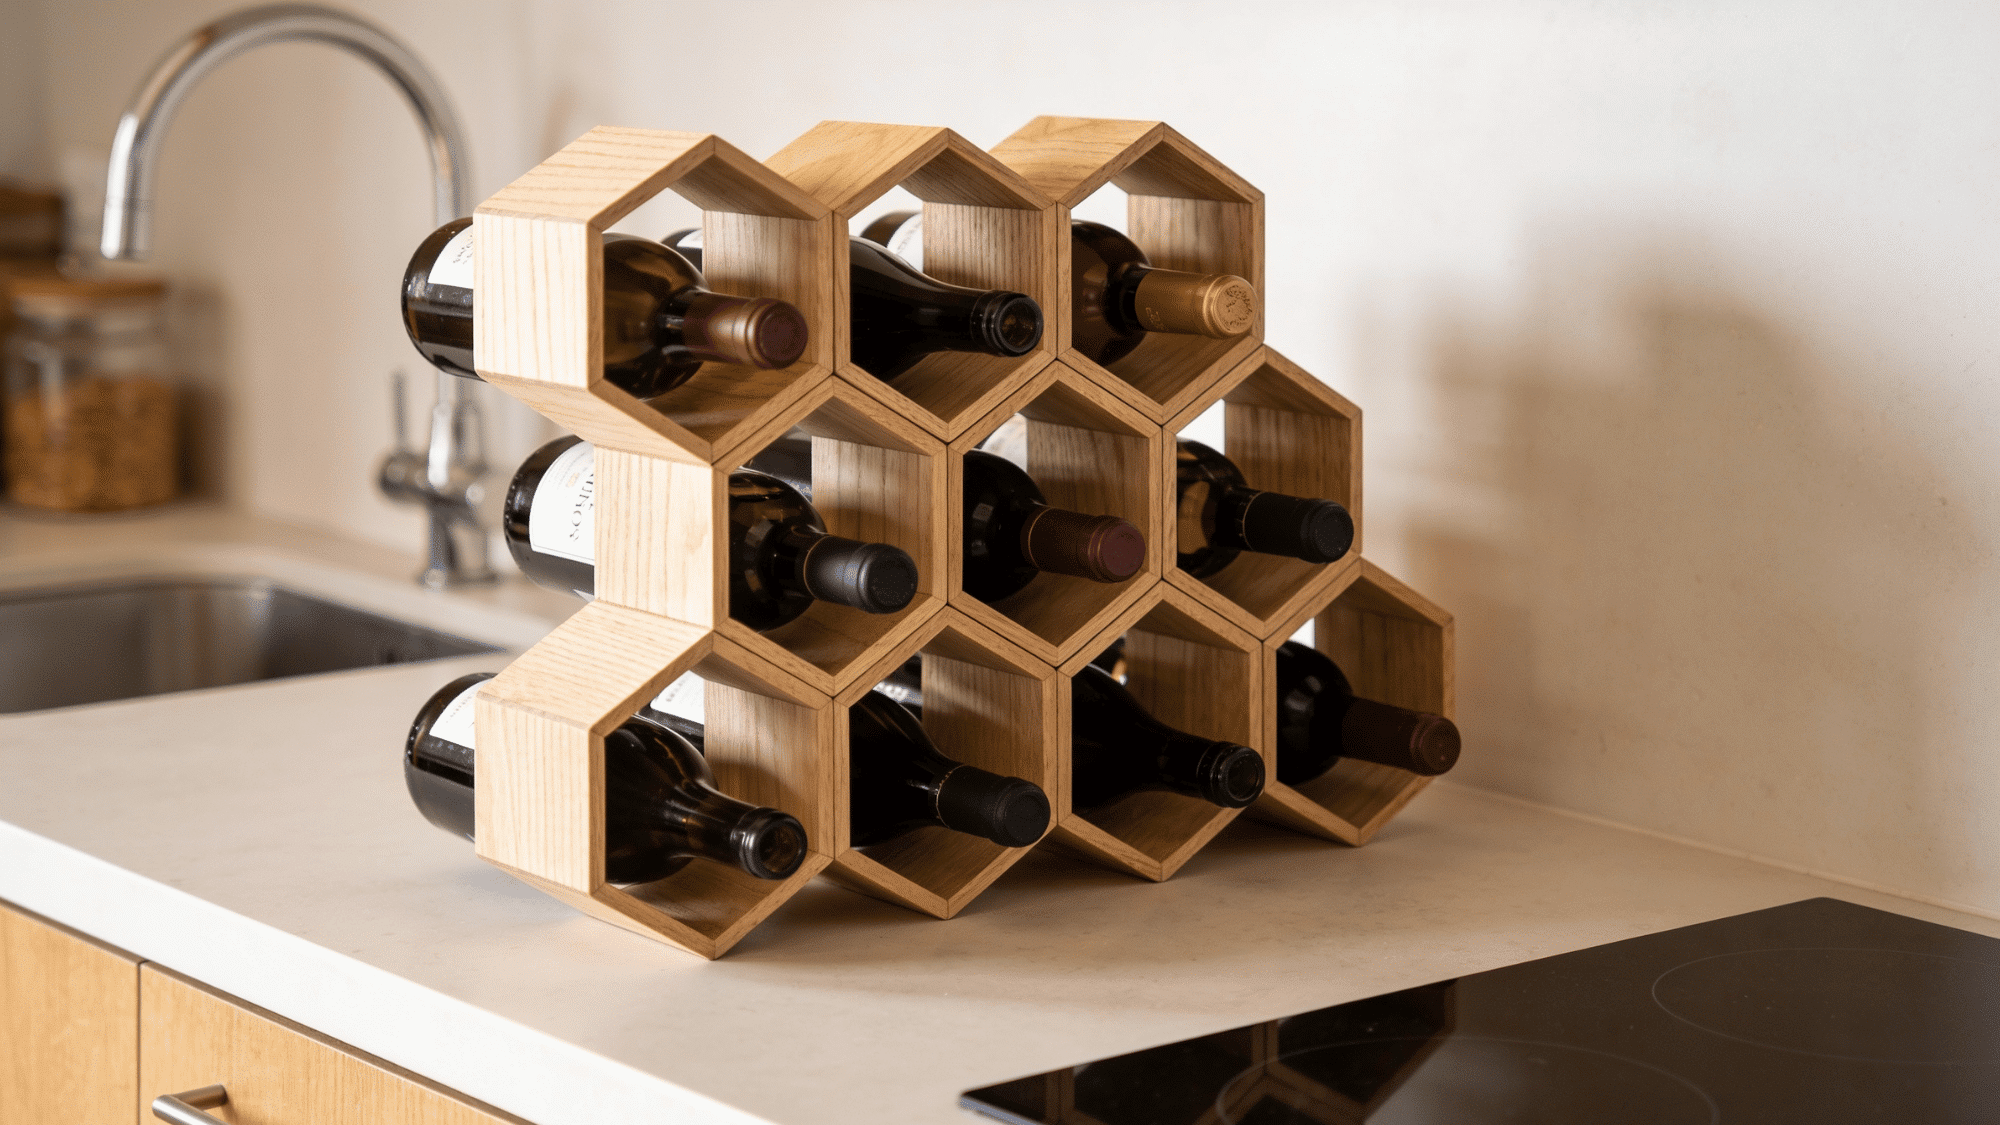
Hexagonal cells made from thin wood or PVC pipe, stacked into a honeycomb grid that sits on your counter. Compact, geometric, and surprisingly sturdy for its size.
| Material | Quantity | Purpose |
|---|---|---|
| 1/4-inch Plywood | 1–2 sheets | Hex cell cutting |
| Jigsaw | 1 | Shape cutting |
| Hex Template | 1 | Consistent sizing |
| Wood Glue | 1 bottle | Cell bonding |
| Clamps | 4–6 | Cure holding |
| Wood Stain or Paint | 1 can | Surface finishing |
| Rubber Feet | 4 | Countertop grip |
How to Make It:
- Cut hex shapes from 1/4-inch plywood using a jigsaw
- Sand each piece and dry-fit before gluing
- Glue cells together in a honeycomb pattern and clamp overnight
- Apply stain or paint once fully cured
- Add rubber feet to the base to prevent sliding
Tip: Trace a hex template onto your plywood before cutting , freehand hex cuts rarely come out even.
7. Built-In Wall Niche Rack
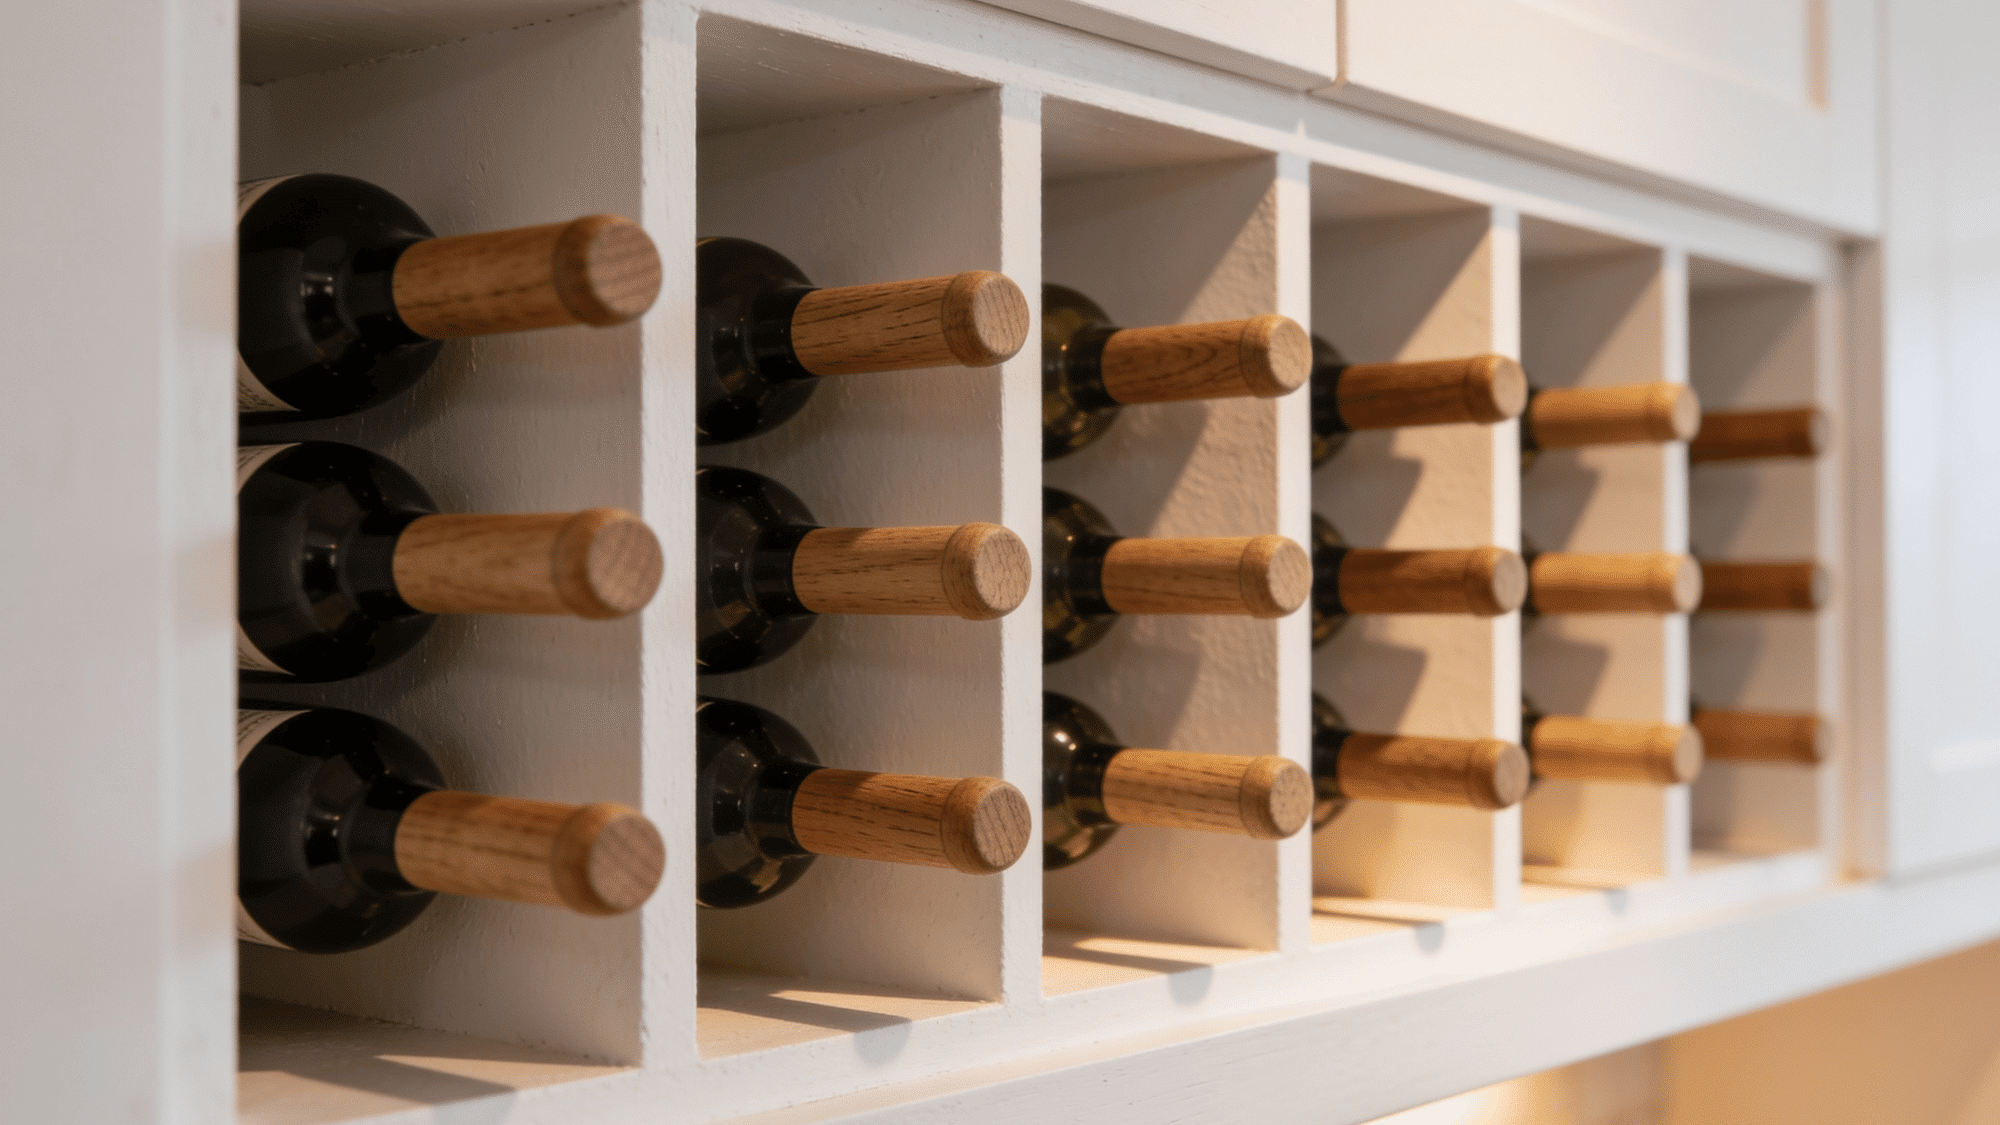
A recessed rack set directly into an interior wall cavity, framed flush, plastered around the edges, and finished to look like it was always there.
| Material | Quantity | Purpose |
|---|---|---|
| Stud Finder | 1 | Safe zone locating |
| Drywall Saw | 1 | Clean wall cutting |
| 2×4 Lumber | As per niche | Niche framing |
| Plywood or Dowels | As per design | Interior shelving |
| Drywall Patch & Joint Compound | 1 kit | Edge finishing |
| Paint or Tile | As needed | Interior decorating |
Build It Step by Step:
- Identify a non-load-bearing interior wall for the cutout
- Cut drywall and frame the niche opening with 2×4 lumber
- Build a simple shelf or dowel system inside the cavity
- Patch and finish the drywall around the frame cleanly
- Paint or tile the interior for a polished built-in look
Tip: Always confirm there are no electrical lines or pipes behind the wall before cutting.
8. Metal Pipe Industrial Rack
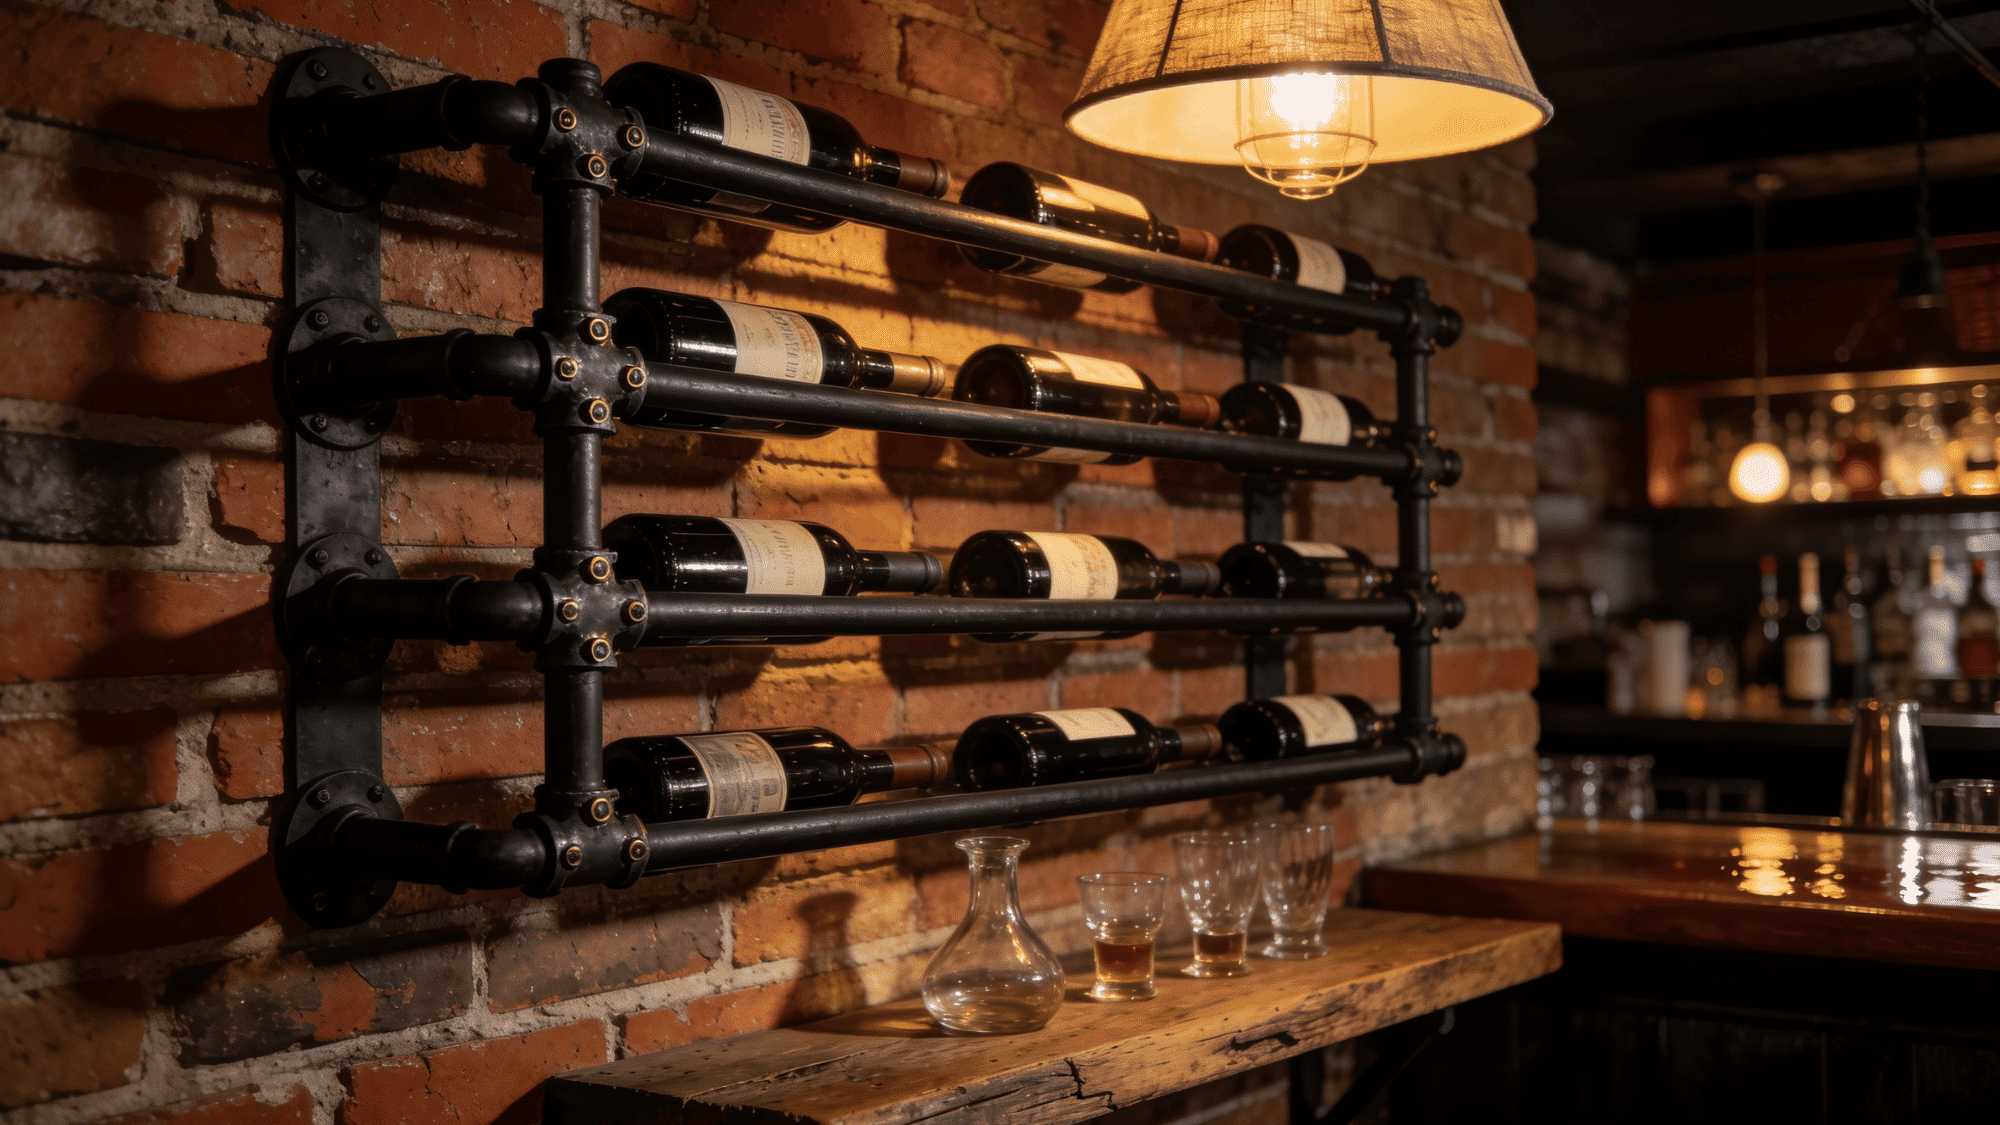
Black iron pipes and flanges assembled into a bold, open-frame rack, great for basements, garages, or industrial-style kitchens. One of the most scalable DIY wine rack builds you can do.
| Material | Quantity | Purpose |
|---|---|---|
| Black Iron Pipe (pre-threaded) | As per the layout | Bottle rails |
| Pipe Flanges | As per the pipe ends | Wall mounting |
| Lag Screws | 1 pack | Stud anchoring |
| Wrench | 1 | Pipe tightening |
| Matte Black Spray Paint | 1–2 cans | Uniform finishing |
| Drill & Bits | 1 set | Mount hole drilling |
How to Make It:
- Plan your layout and purchase cut-to-length black iron pipe
- Thread flanges onto pipe ends and tighten with a wrench
- Mount wall flanges into studs with lag screws
- Attach horizontal pipes to create bottle-resting rails
- Spray coat with matte black paint for a uniform finish
Tip: Black iron pipe comes pre-threaded at hardware stores , no special tools needed for assembly.
9. Crate Stack Wine Storage
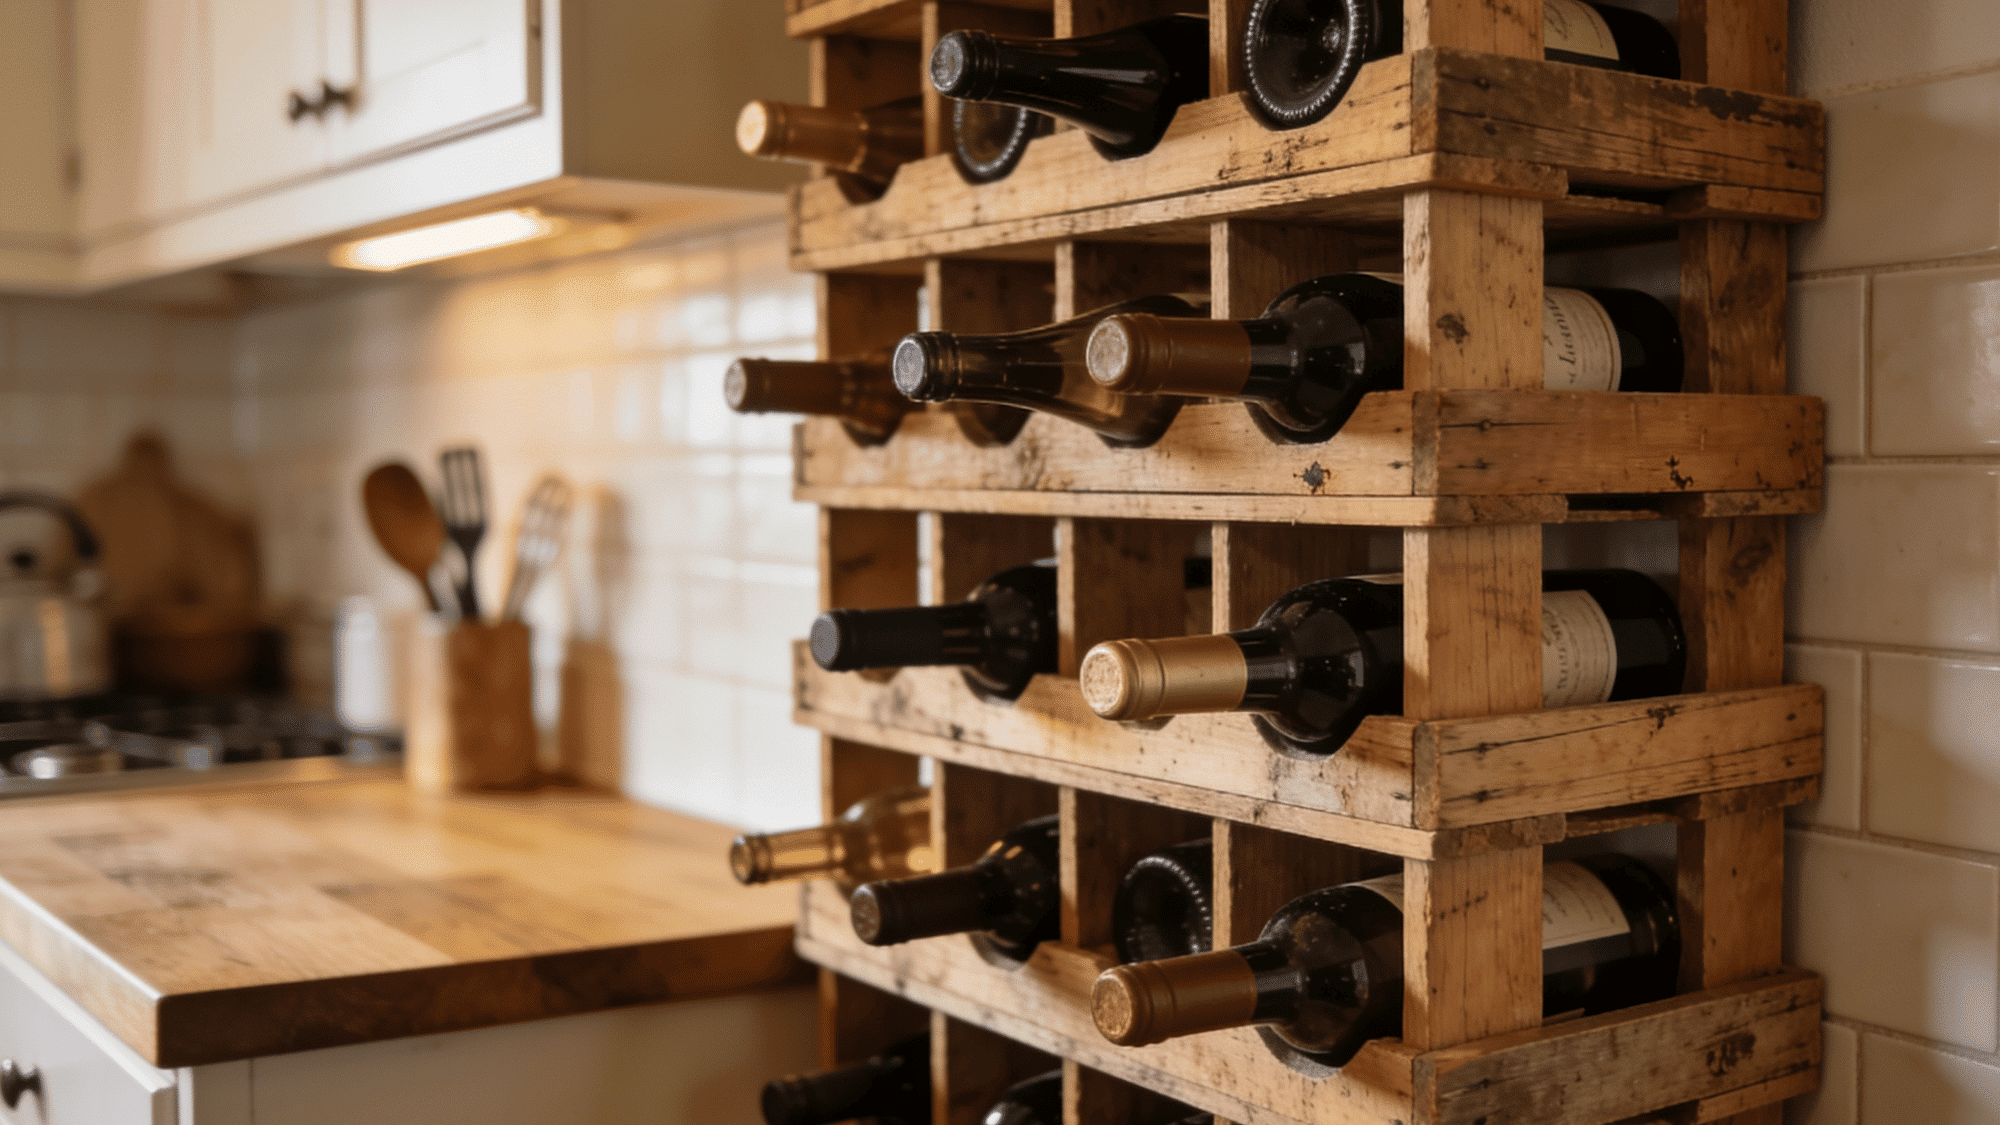
Wooden wine crates are stacked and secured in a staggered pattern; each crate holds 6–12 bottles, and the whole thing can be rearranged as your collection grows.
| Material | Quantity | Purpose |
|---|---|---|
| Solid Wood Wine Crates | 4–10 crates | Storage units |
| Sandpaper (80 grit) | 3–4 sheets | Surface smoothing |
| Wood Stain or Paint | 1 can | Consistent finishing |
| L-Brackets | 1 pack | Crate connecting |
| Wall Anchors & Screws | 1 pack | Top row securing |
| Drill | 1 | Bracket driving |
How to Make It:
- Sand the exterior of each crate to remove rough spots
- Stain or paint crates to a consistent finish
- Arrange crates in a staggered brick-like pattern
- Connect adjacent crates with L-brackets on the back
- Anchor the top row to the wall for safety
Tip: Offset alternating rows by half a crate width, it locks the stack together and prevents tipping.
10. Wine Barrel Rack
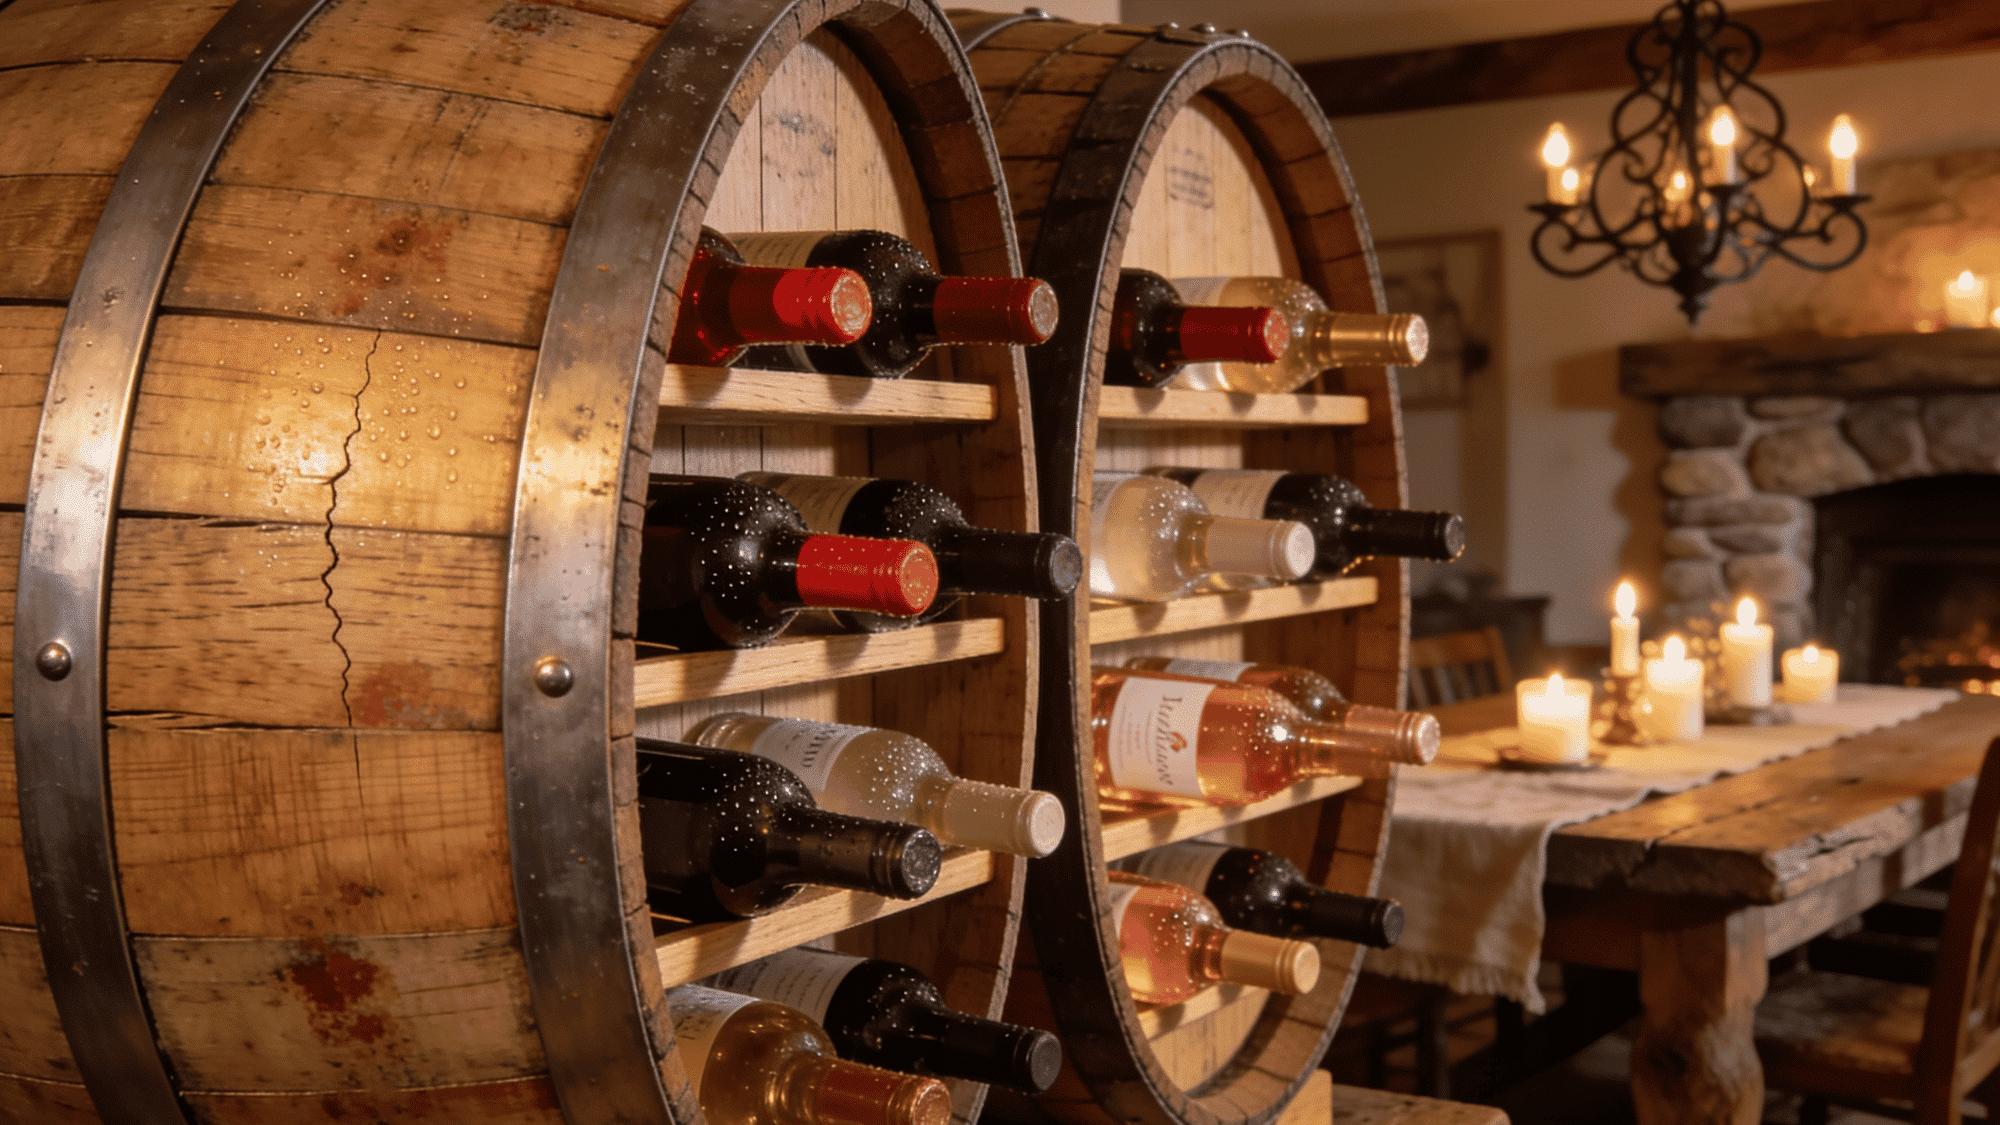
A repurposed oak wine barrel cut in half lengthwise and outfitted with interior rails, rustic, fragrant, and a genuine conversation piece. The barrel’s natural curve cradles bottles beautifully.
| Material | Quantity | Purpose |
|---|---|---|
| Used Oak Wine Barrel | 1 | Main structure |
| Circular Saw or Band Saw | 1 | Barrel splitting |
| Sandpaper (80 & 120 grit) | 3–4 sheets | Edge smoothing |
| Wooden Dowels or Rails | 4–6 | Bottle cradling |
| Outdoor Wood Finish | 1 can | Stave protection |
How to Set It Up:
- Source a used oak wine barrel from a winery or homebrew supplier
- Cut the barrel lengthwise with a circular saw or band saw
- Sand interior edges smooth and remove any loose stave splinters
- Mount wooden dowels or rails across the interior curve
- Seal the exterior with an outdoor wood finish to protect the staves
Tip: Ask local wineries for spent barrels; they often sell or give them away once they’ve been used.
11. Tabletop Lazy Susan Rotating Rack
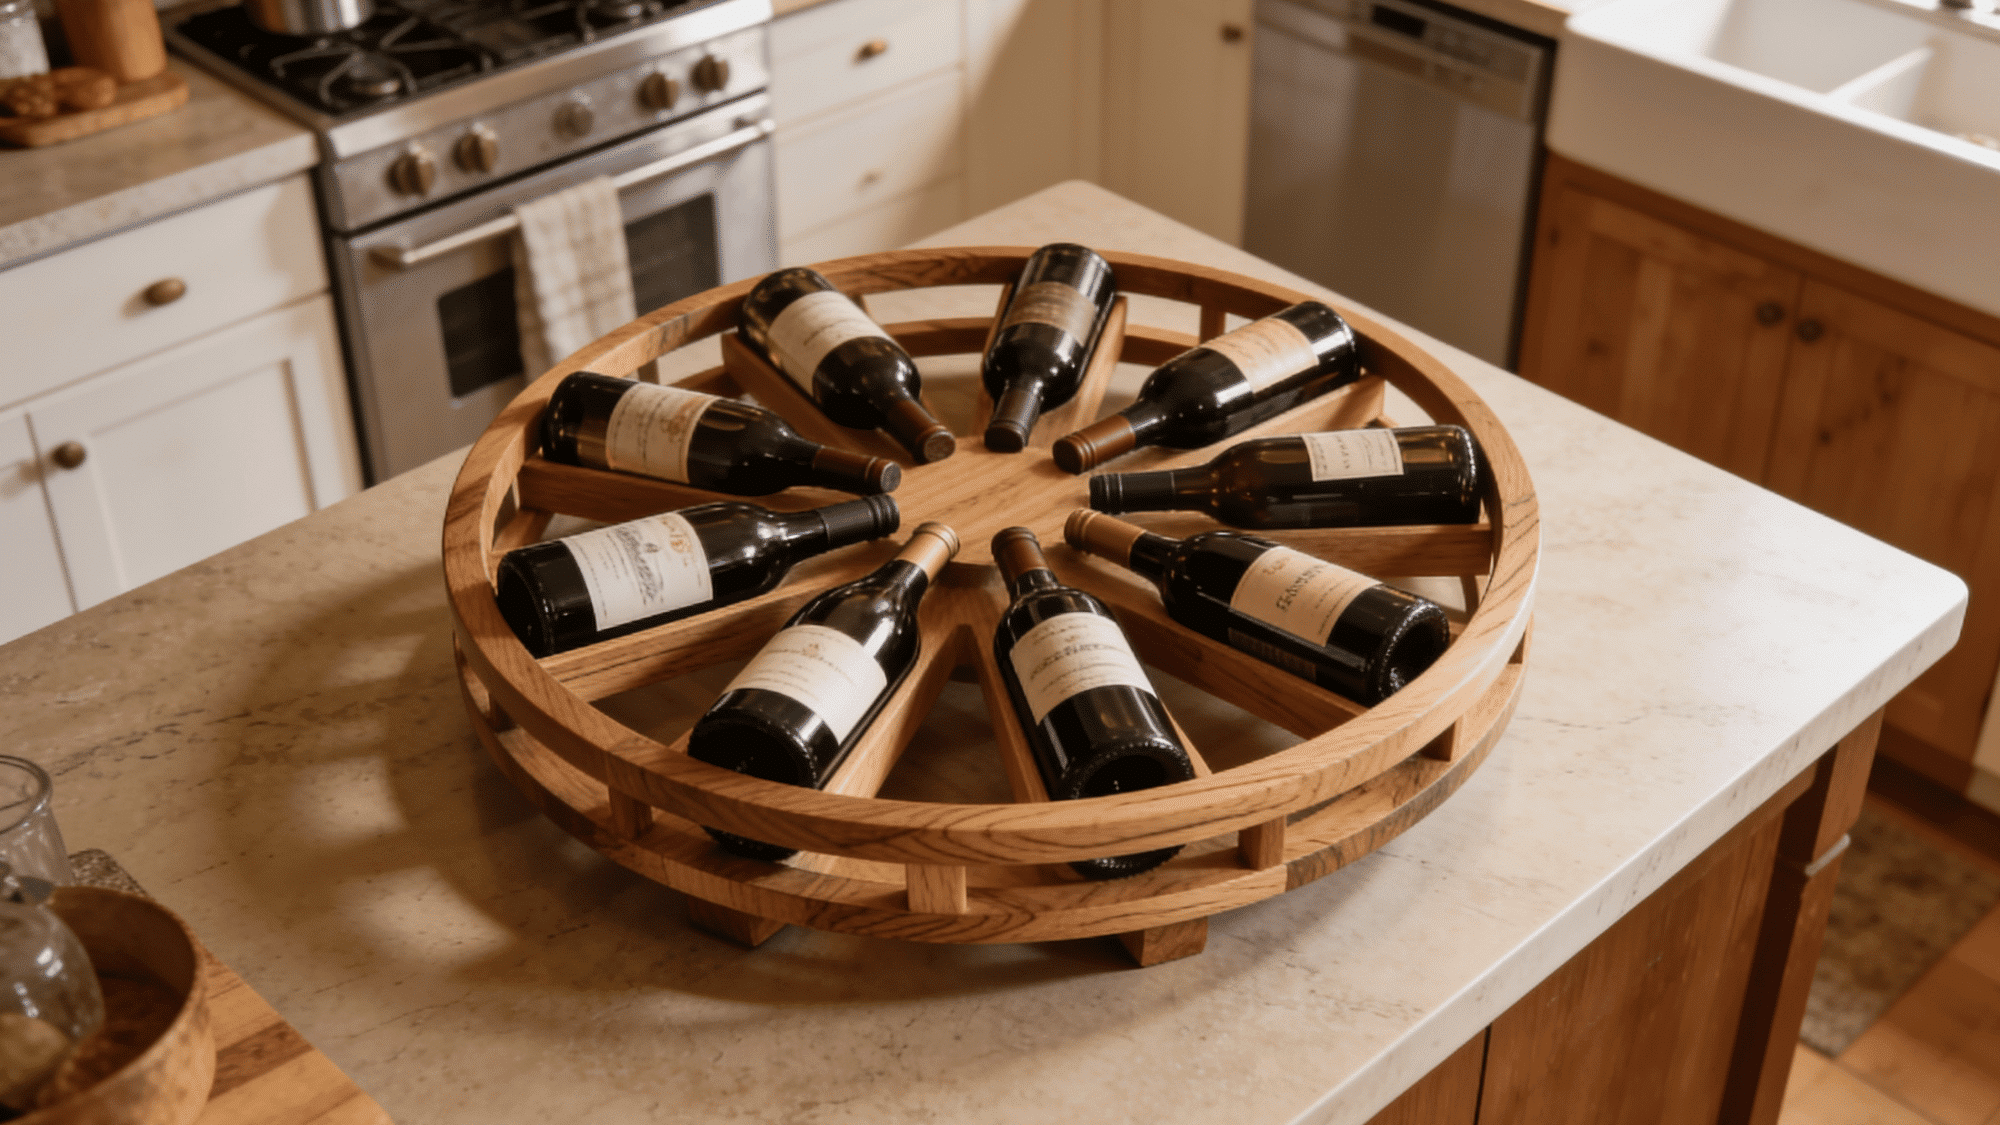
A rotating base fitted with a circular rack that spins to give you easy access to every bottle. Perfect for a kitchen island or a small bar cart, compact and functional.
| Material | Quantity | Purpose |
|---|---|---|
| Plywood (3/4 inch) | 2 circular discs | Top and base |
| Lazy Susan Bearing (100 lb+) | 1 | Smooth rotation |
| Thin Wood Strips | As per slots | Bottle dividers |
| Wood Glue & Brad Nails | As needed | Divider fixing |
| Sandpaper (120 grit) | 2 sheets | Surface smoothing |
| Wood Stain or Sealant | 1 can | Wood finishing |
How to Build It:
- Cut a circular plywood top and base disc at your desired diameter
- Attach a lazy Susan bearing between both discs
- Build vertical bottle slots from thin wood strips on the top disc
- Sand, stain, and seal all surfaces before assembly
- Test spin action and adjust bearing tightness if needed
Tip: Use a bearing rated for at least 100 lbs, a loaded wine rack spins heavier than it looks.
12. Pegboard Wine Wall Organizer
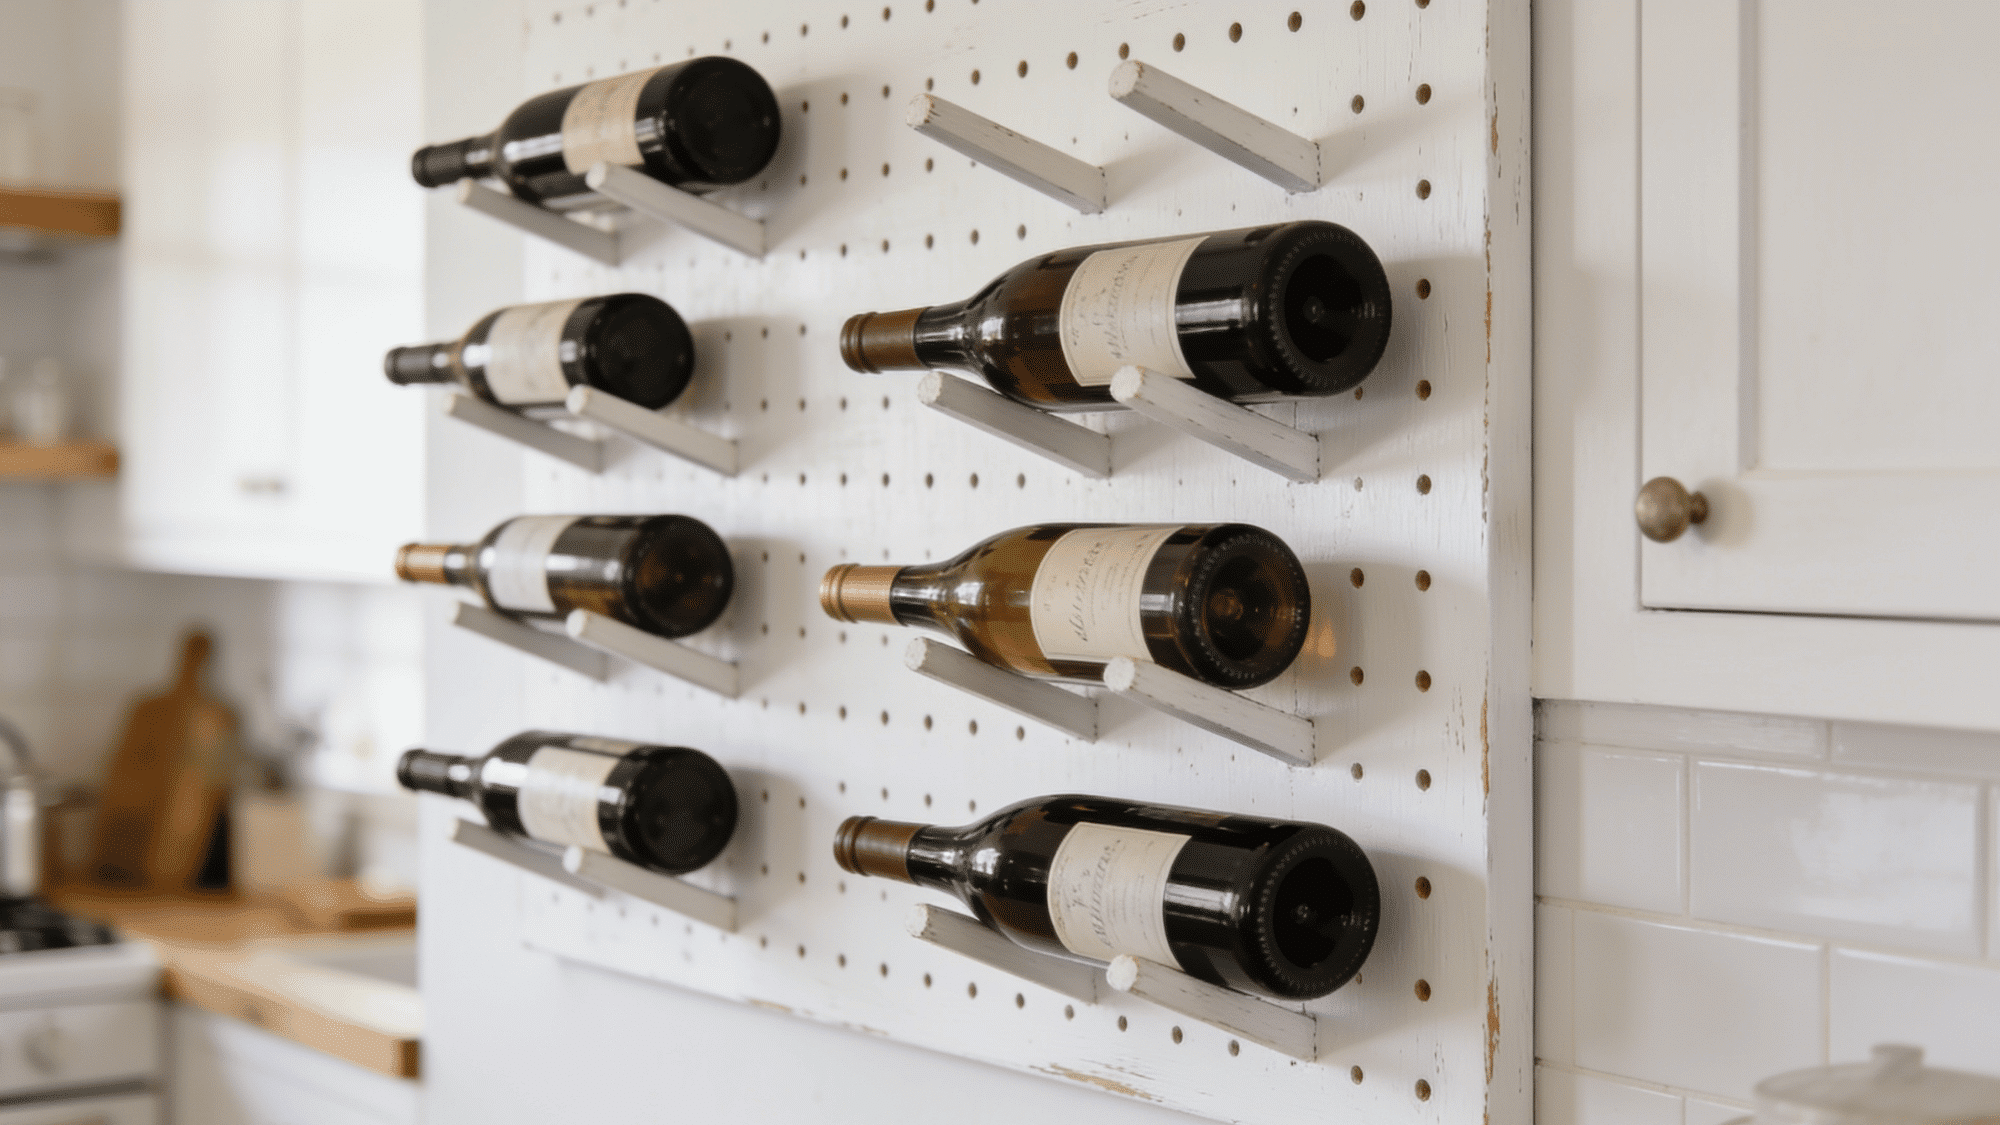
A pegboard panel mounted on the wall with custom peg arrangements to hold bottles horizontally at multiple heights. Modular, adjustable, and one of the most budget-friendly DIY wine rack options out there.
| Material | Quantity | Purpose |
|---|---|---|
| Hardboard Pegboard (1/4 inch) | 1 panel | Main display board |
| Standoff Screws | 1 pack | Wall clearance gap |
| Angled Pegs | 12–20 pegs | Bottle holding |
| Wall Anchors & Screws | 1 pack | Board mounting |
| Paint | 1 can | Board finishing |
| Level | 1 | Straight hanging |
How to Set It Up:
- Mount the pegboard panel on the wall using standoff screws for clearance
- Insert angled pegs at regular spacing across the board
- Test each peg with a bottle before committing the layout
- Add a second row of pegs at a lower level for a second tier
- Paint the pegboard a contrasting color for a clean look
Tip: Use 1/4-inch hardboard pegboard, not the thin craft-store version; it holds weight far better.
13. Floating Shelf Wine Display
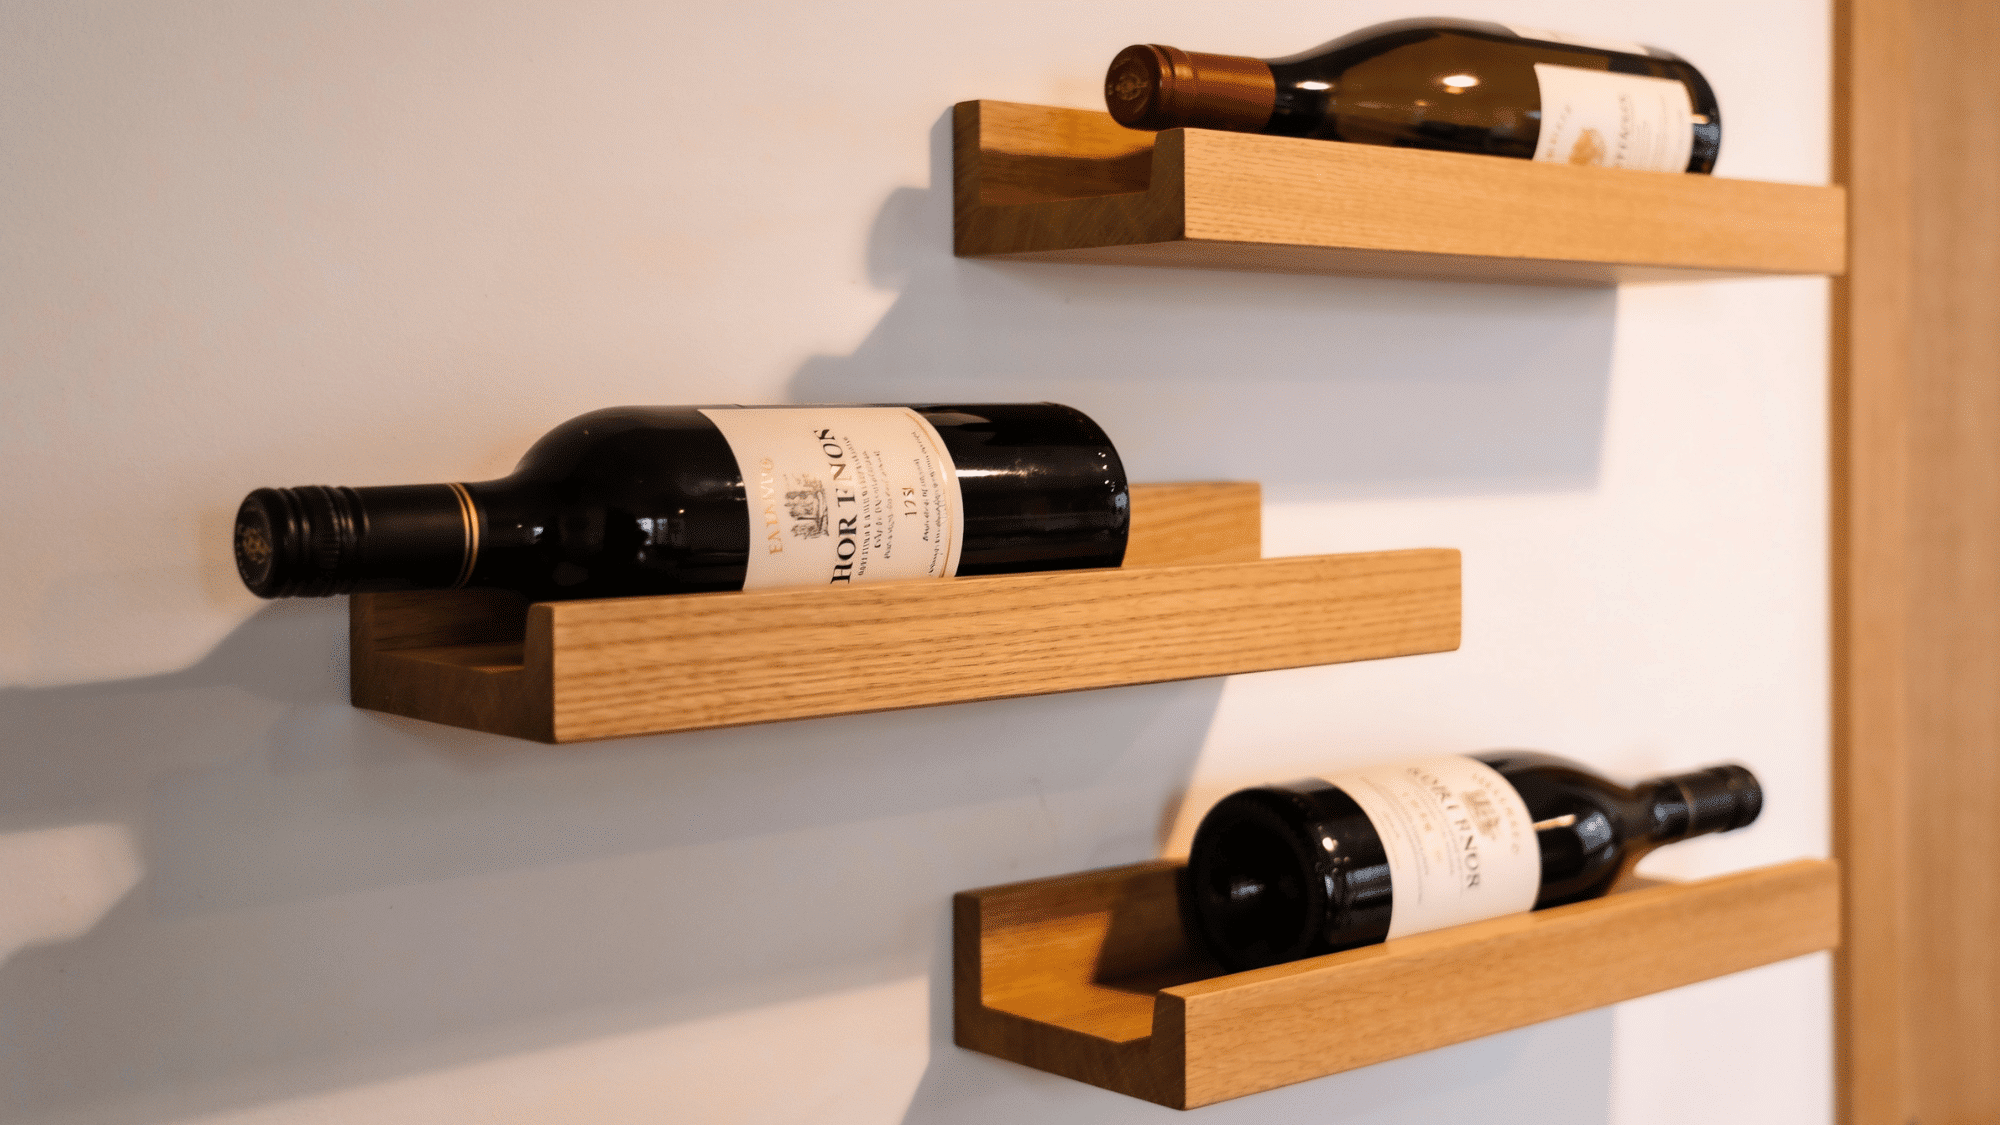
A series of minimal floating shelves with front lips that hold wine bottles horizontally on the wall, sleek, modern, and that doubles as a gallery wall when arranged thoughtfully.
| Material | Quantity | Purpose |
|---|---|---|
| Shelf Boards (3/4 inch) | As per shelves | Bottle surfaces |
| Router & Straight Bit | 1 | Lip groove cutting |
| Thin Wood Strip (lip) | 1 per shelf | Bottle stopping |
| Hidden Shelf Brackets | 2 per shelf | Flush wall mounting |
| Wall Anchors & Screws | 1 pack | Bracket securing |
| Level | 1 | Straight alignment |
| Wood Stain or Paint | 1 can | Decor matching |
How to Install It:
- Cut shelf boards to desired lengths and rout a groove near the front edge
- Insert a thin wooden lip into the routed groove as a bottle stop
- Mount hidden shelf brackets into wall studs
- Hang shelves level, spacing rows at least 5 inches apart
- Load bottles and adjust spacing visually before fixing permanently
Tip: Keep shelves away from direct sunlight and heat sources; both degrade wine over time.
14. Full Cellar Lattice Rack System
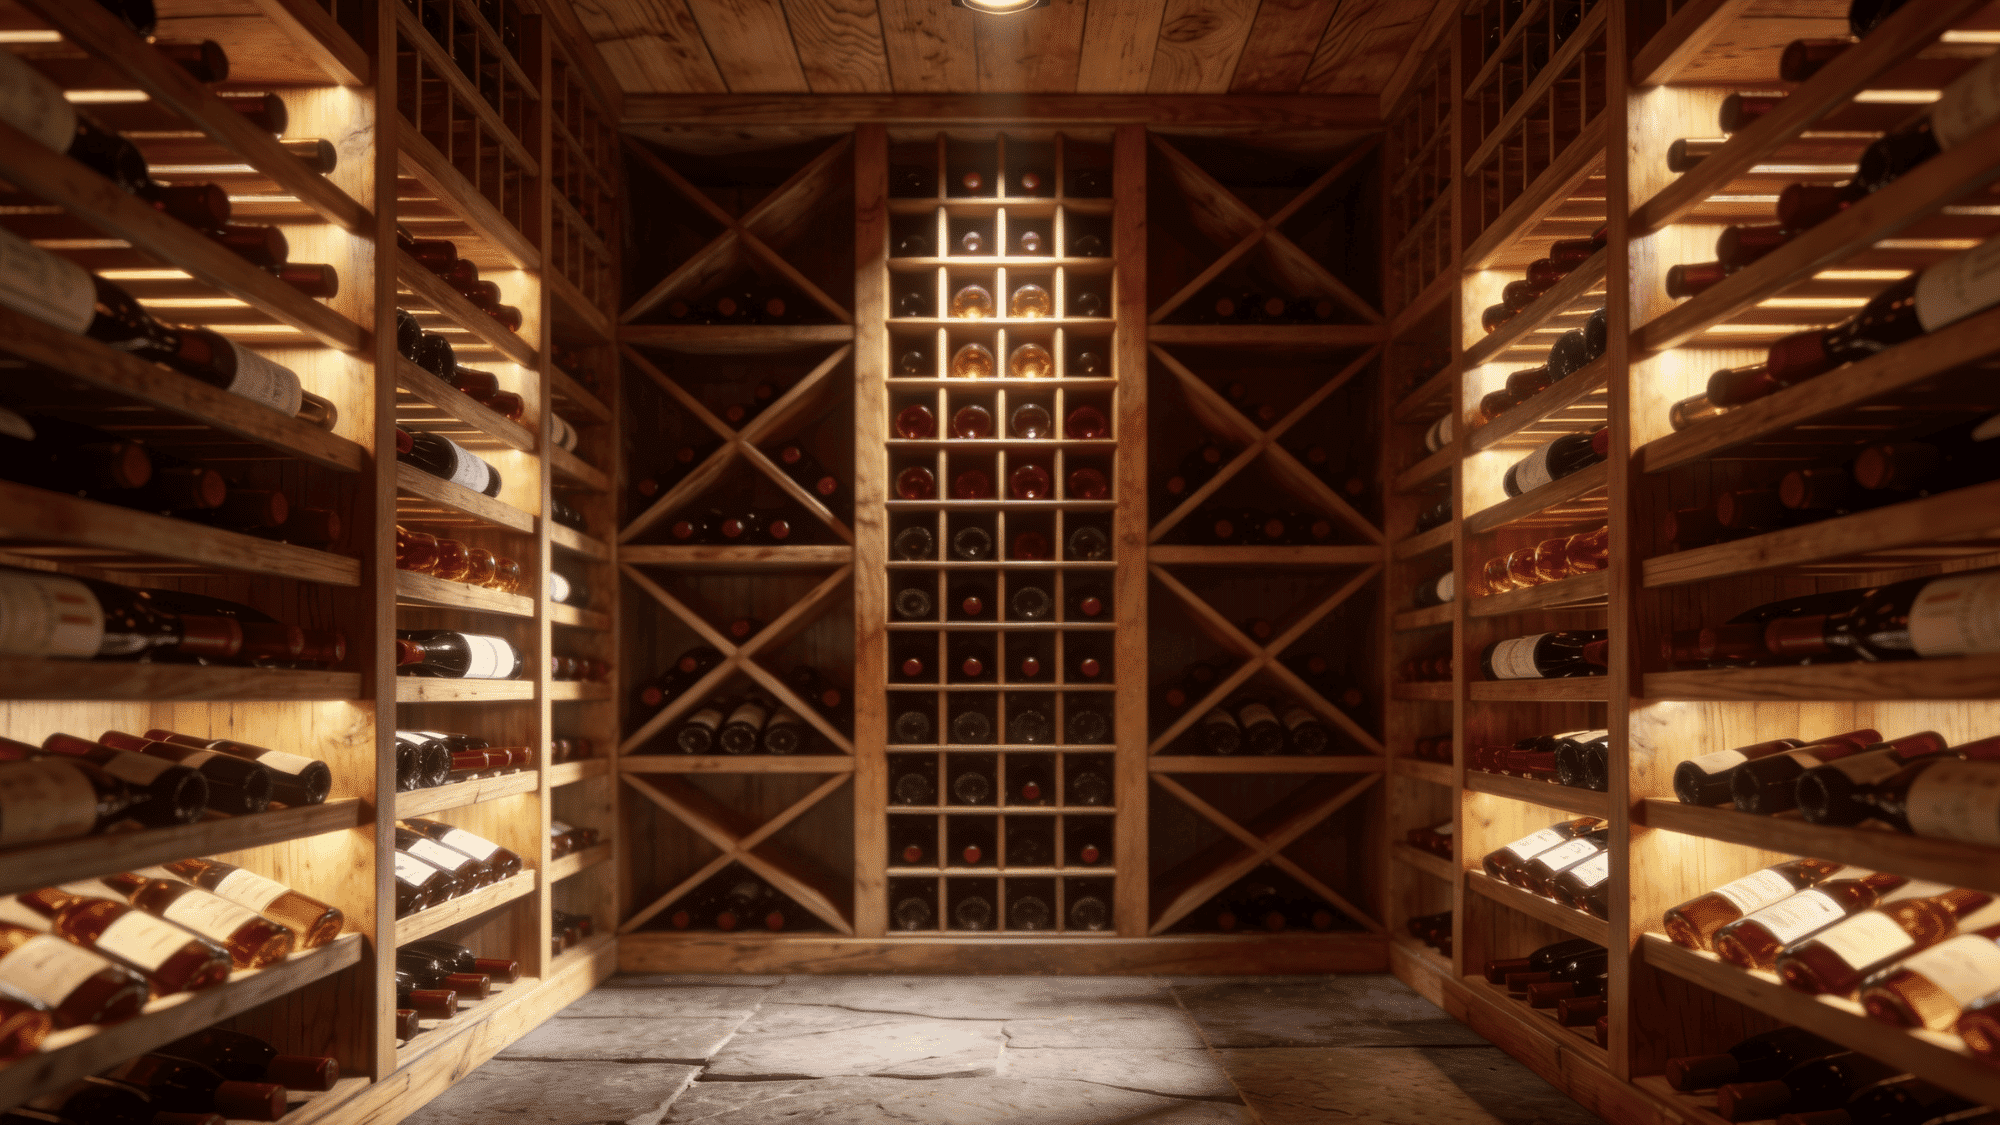
Floor-to-ceiling wooden lattice framing that fills an entire room wall, the classic look of a serious wine cellar. This is the flagship DIY wine rack project for anyone building a dedicated storage space.
| Material | Quantity | Purpose |
|---|---|---|
| 2×4 or 2×6 Lumber | Large quantity | Frame members |
| Circular Saw | 1 | Lumber cutting |
| Wood Screws (3 inch) | 2–3 boxes | Frame joining |
| Wall Anchors & Lag Screws | 1 pack | Wall anchoring |
| Moisture-Resistant Sealant | 2–3 cans | Cellar protection |
| Measuring Tape & Level | 1 each | Grid alignment |
How to Build It:
- Design your layout in a grid with consistent cell sizing
- Cut vertical and horizontal members from 2×4 or 2×6 lumber
- Assemble frames in sections on the floor before raising
- Secure frame sections to each other and anchor to wall studs
- Finish wood with a moisture-resistant sealant suited for cellar conditions
Tip: Build in modular sections of 2–3 feet wide; it makes installation easier and allows future expansion.
15. Repurposed Drawer Wine Rack
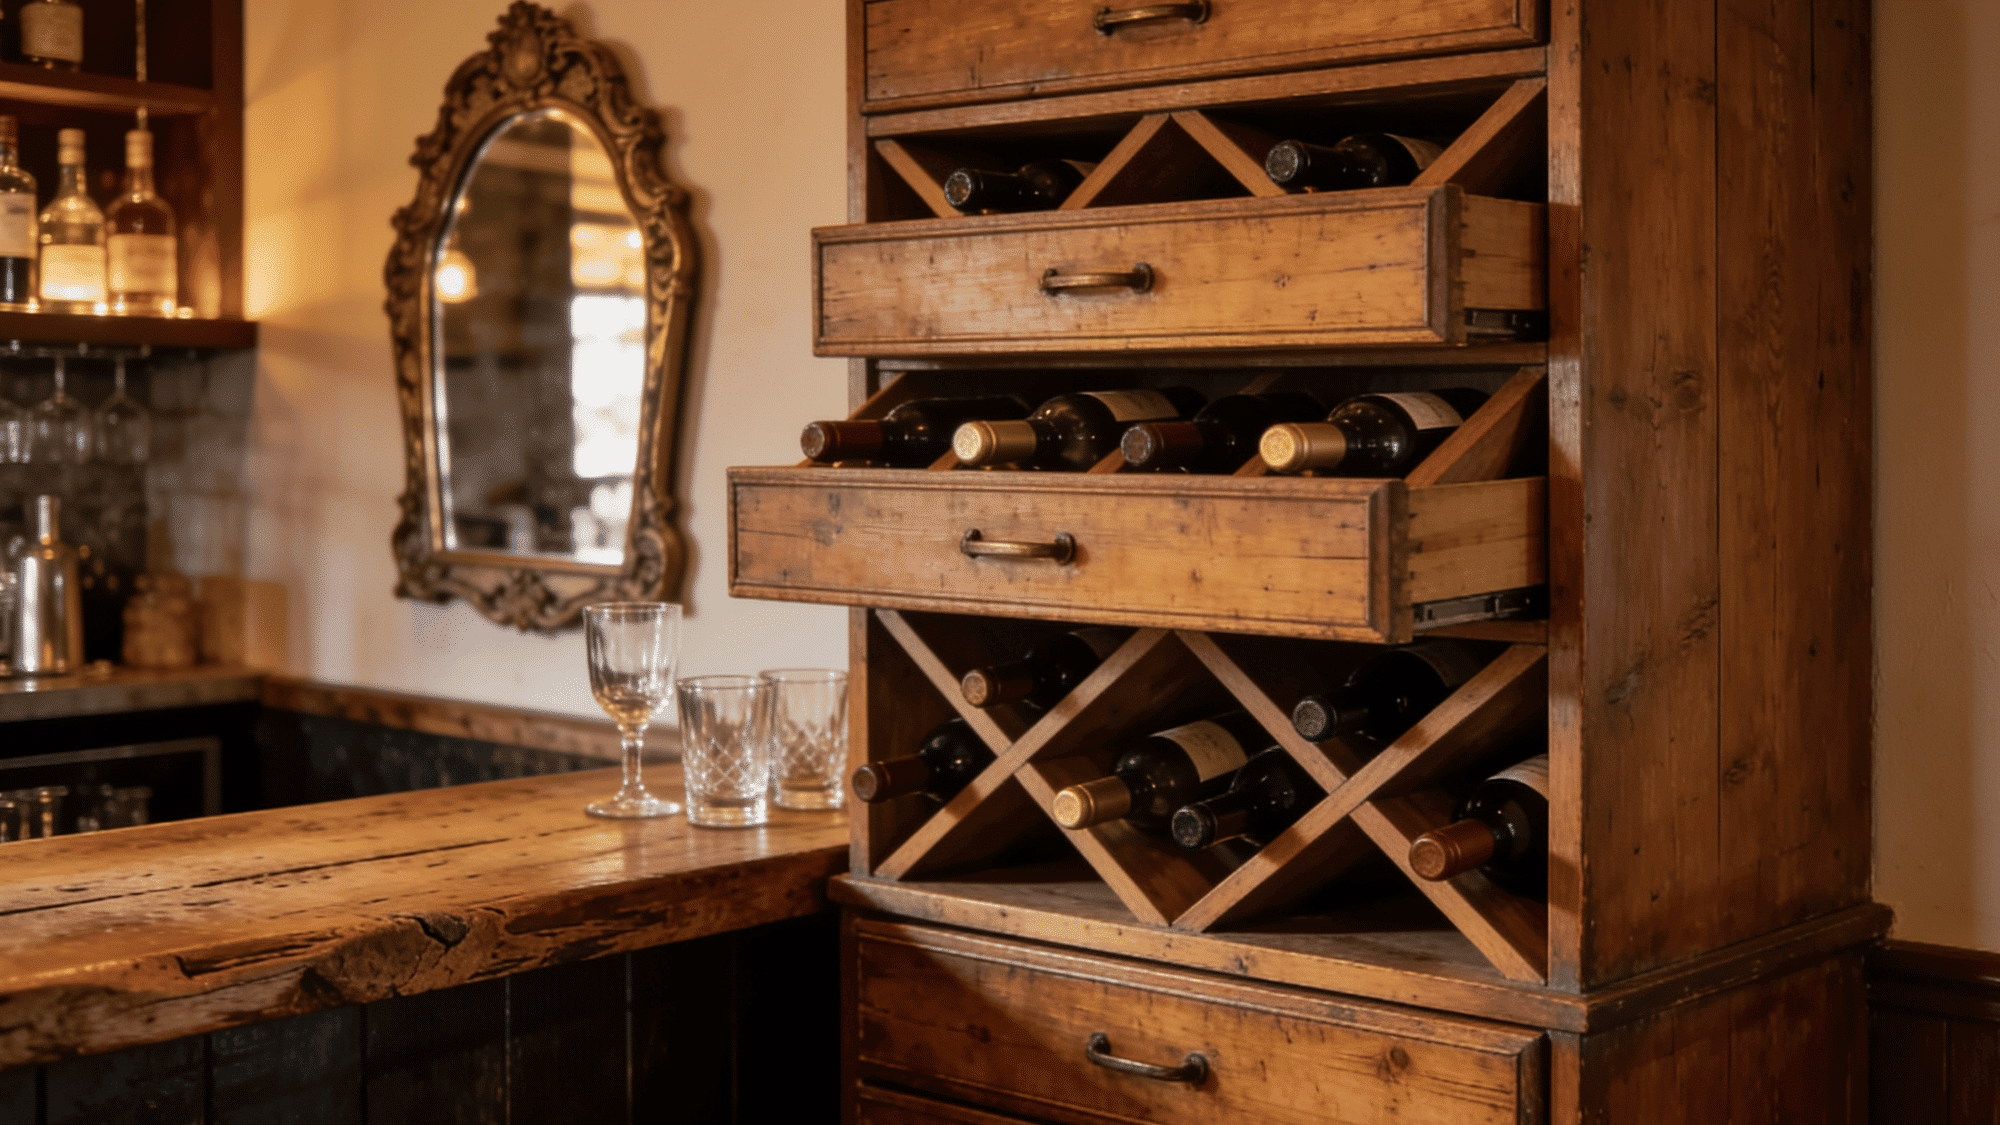
Old dresser drawers, stacked on their backs and fitted with diagonal dividers, each become its own compartment for 4–8 bottles. A DIY wine rack that gives old furniture a second life.
| Material | Quantity | Purpose |
|---|---|---|
| Solid Wood Dresser Drawers | 4–8 drawers | Storage compartments |
| Sandpaper (80 & 120 grit) | 3–4 sheets | Interior smoothing |
| Thin Plywood (1/4 inch) | As per drawers | Bottle dividers |
| Wood Glue & Brad Nails | As needed | Divider fixing |
| L-Brackets or Screws | 1 pack | Drawer connecting |
| Polyurethane Finish | 1 can | Surface sealing |
How to Convert It:
- Remove all hardware and sand drawer interiors smooth
- Cut diagonal dividers from thin plywood to fit each drawer
- Glue and pin dividers in place in a grid or diamond pattern
- Stack drawers and connect with screws or brackets
- Paint or stain for a cohesive finish and seal with polyurethane
Tip: Thrift stores and estate sales are gold mines for solid wood drawers, avoid particle board, it won’t hold the weight.
It’s a Wrap
So there you have it, 15 ways to stop settling for whatever the furniture store had on sale.
A DIY wine rack isn’t just about storing bottles. It’s about building something that actually fits your space, your style, and your collection.
Once you’ve built one, you’ll wonder why you ever bought anything flat-packed in the first place. Pick one, grab your drill, and get started. Your wine deserves better storage, and honestly, so do you.
Frequently Asked Questions
How Many Bottles Should My First Diy Wine Rack Hold?
Start with a 12 to 24-bottle build; it’s manageable, quick to complete, and easy to expand later.
Do Wine Bottles Need to Be Stored Horizontally or Vertically?
Horizontally, as it keeps the cork moist and prevents it from drying out and letting air in.
What is the Best Wood Type for Outdoor or Garage Wine Storage?
Cedar or redwood, both are naturally moisture-resistant and hold up well in uncontrolled environments.