


Sketching people can be both challenging and rewarding for artists of all skill levels.
If you’re just starting out or looking to improve your technique, understanding the basics of human anatomy and experimenting with different poses is essential.
With the right approach and tools, you can capture the human form with accuracy and expression.
In this blog, I’ll go into creative ideas for poses, helpful sketching techniques, and methods like the Loomis method to guide you in drawing people more confidently.
Understanding the Basics of Sketching People
Before jumping into complex poses and advanced techniques, it’s important to understand the basics of sketching people. Learning how to break down the human figure into simple shapes and proportions will give you a solid foundation.
Key Concepts for Sketching People:
- Proportions: Understanding the basic proportions of the human body is essential. For example, an average human figure is about 7.5-8 heads tall.
- Anatomy: Knowing the basic structure of bones and muscles will help make your sketches more realistic.
- Gesture Drawing: Focus on the flow and movement of the figure rather than getting bogged down with details.
Step-by-Step Guide to Sketching People
Learn the essential steps to sketching people – from gathering the right tools to mastering poses, shading, and refining your work. This guide will help you create realistic, dynamic figure drawings.
Step 1: Gather Your Tools and Materials

Before you start sketching people, gather the tools you’ll need for your sketches:
- Pencils: Use a range of pencils (e.g., 2B, 4B, and 6B) for different line qualities and shading.
- Eraser: A kneaded eraser is excellent for lifting graphite without damaging the paper.
- Paper: Choose smooth, medium-weight paper to ensure your pencil strokes are easily blended and erased.
- Reference Images: Having reference photos or models will help you understand human anatomy and poses better.
Step 2: Understand Basic Proportions and Anatomy
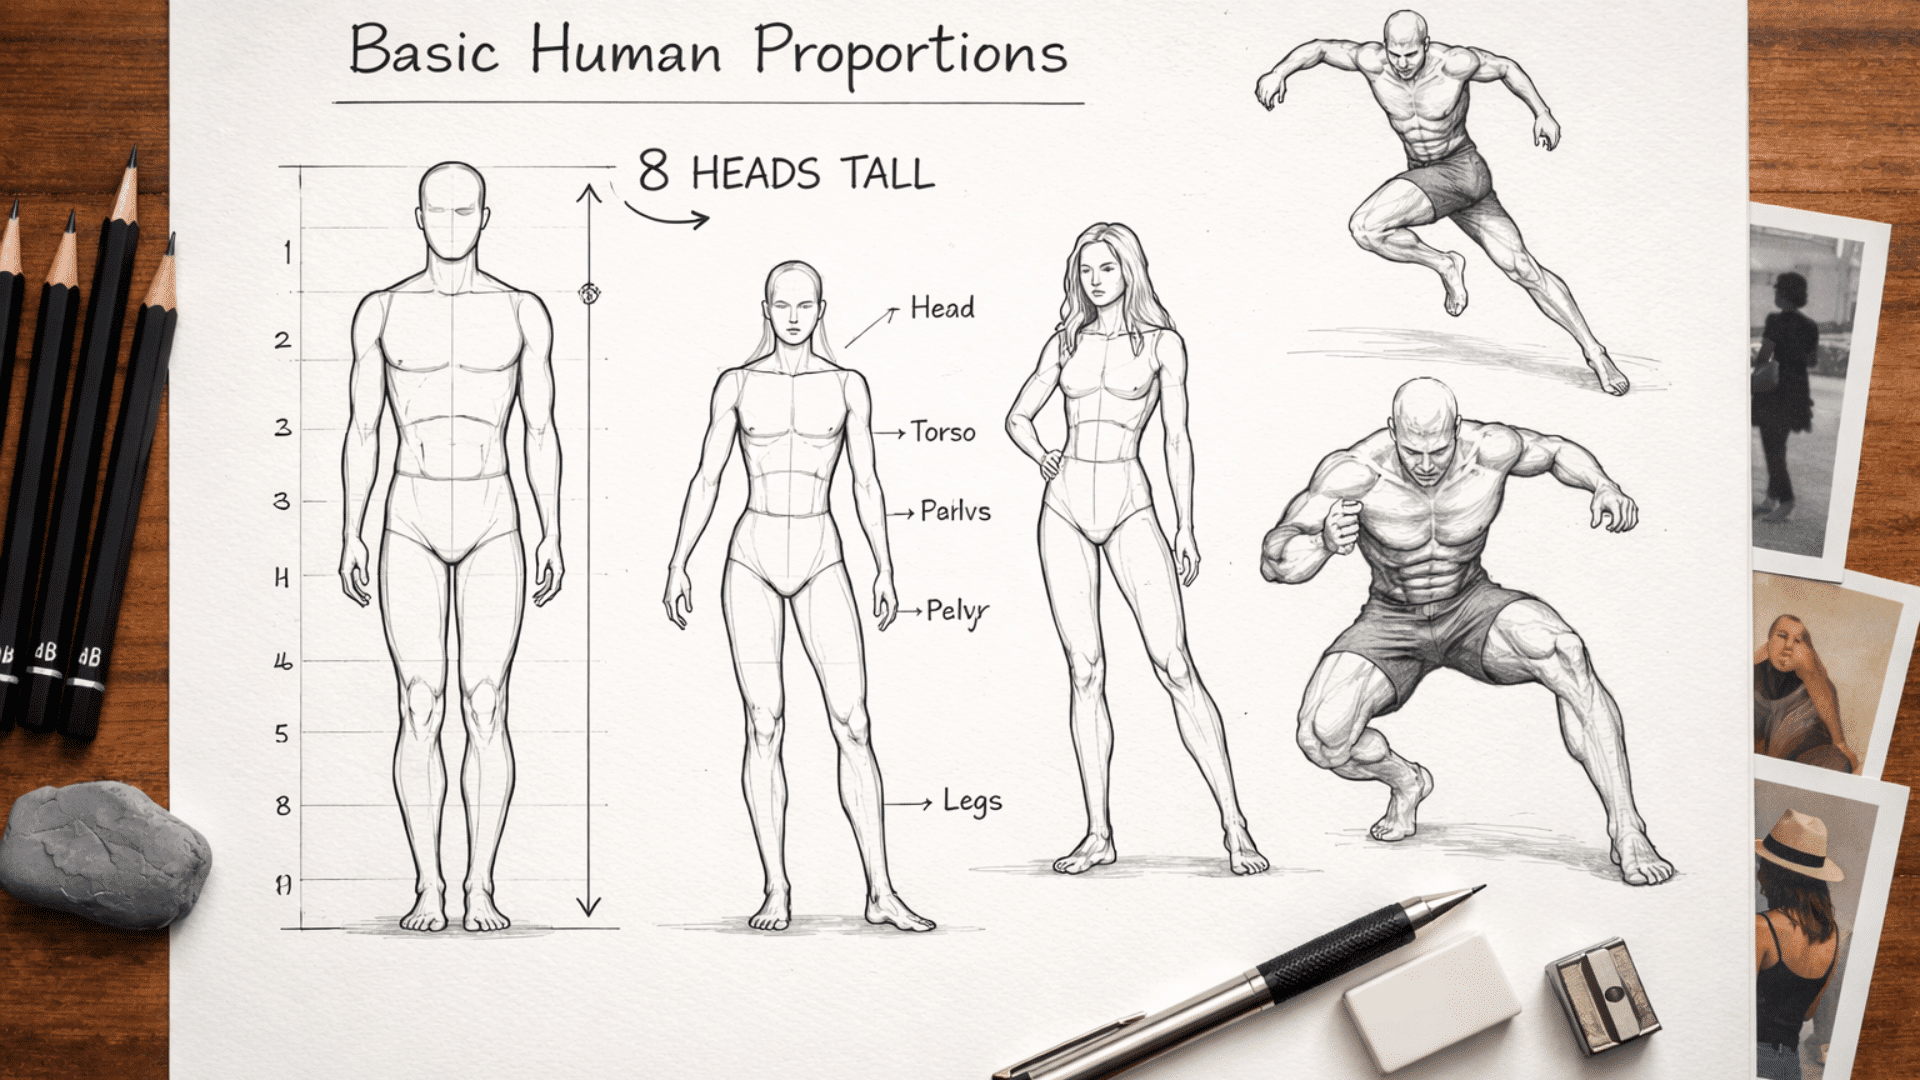
Start with understanding the basic proportions of the human body. Every artist should grasp these basics to create realistic sketches.
- Head Proportions: The human body is about 8 heads tall. This gives you a good framework to measure the body from head to toe.
- Body Parts: Start by sketching the torso, legs, arms, and head. Focus on the basic shapes, like circles for joints and lines for limbs, to outline the figure.
- Posture: Understanding how the body naturally moves will help with creating fluid poses.
Step 3: Learn the Loomis Method for Drawing Heads
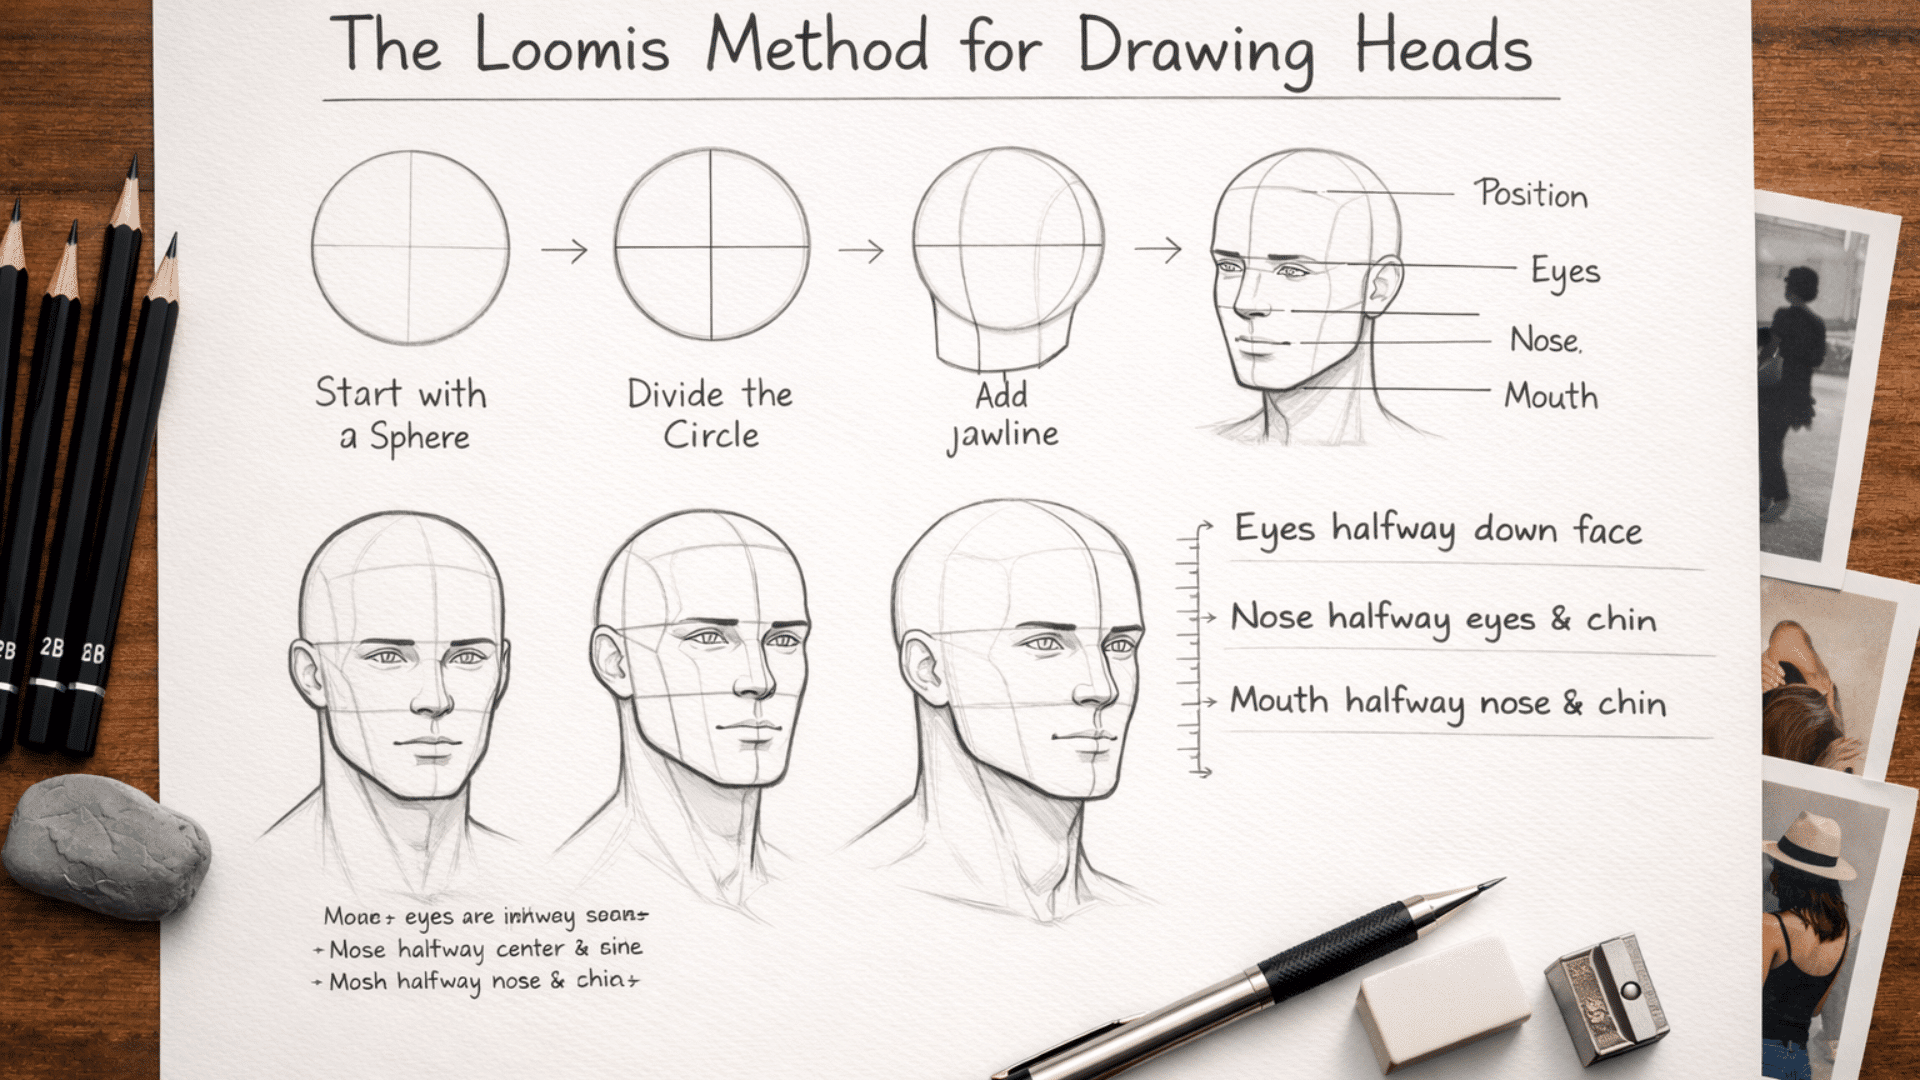
The Loomis method is an excellent way to draw accurate human heads. It involves creating a simple structure that guides you in drawing the face with proper proportions. By practicing this method, you’ll build a solid foundation for drawing realistic heads from various angles.
How to Use the Loomis Method:
- Start with a Sphere: Begin by drawing a circle to represent the skull.
- Divide the Circle: Use horizontal and vertical lines to split the circle in half, helping you position the facial features correctly.
- Add the Jawline: Create a box-like shape at the bottom of the sphere to form the jaw.
- Position the Eyes, Nose, and Mouth: The eyes sit about halfway down the face, the nose is halfway between the eyes and chin, and the mouth is halfway between the nose and chin.
Step 4: Experiment with Different Poses
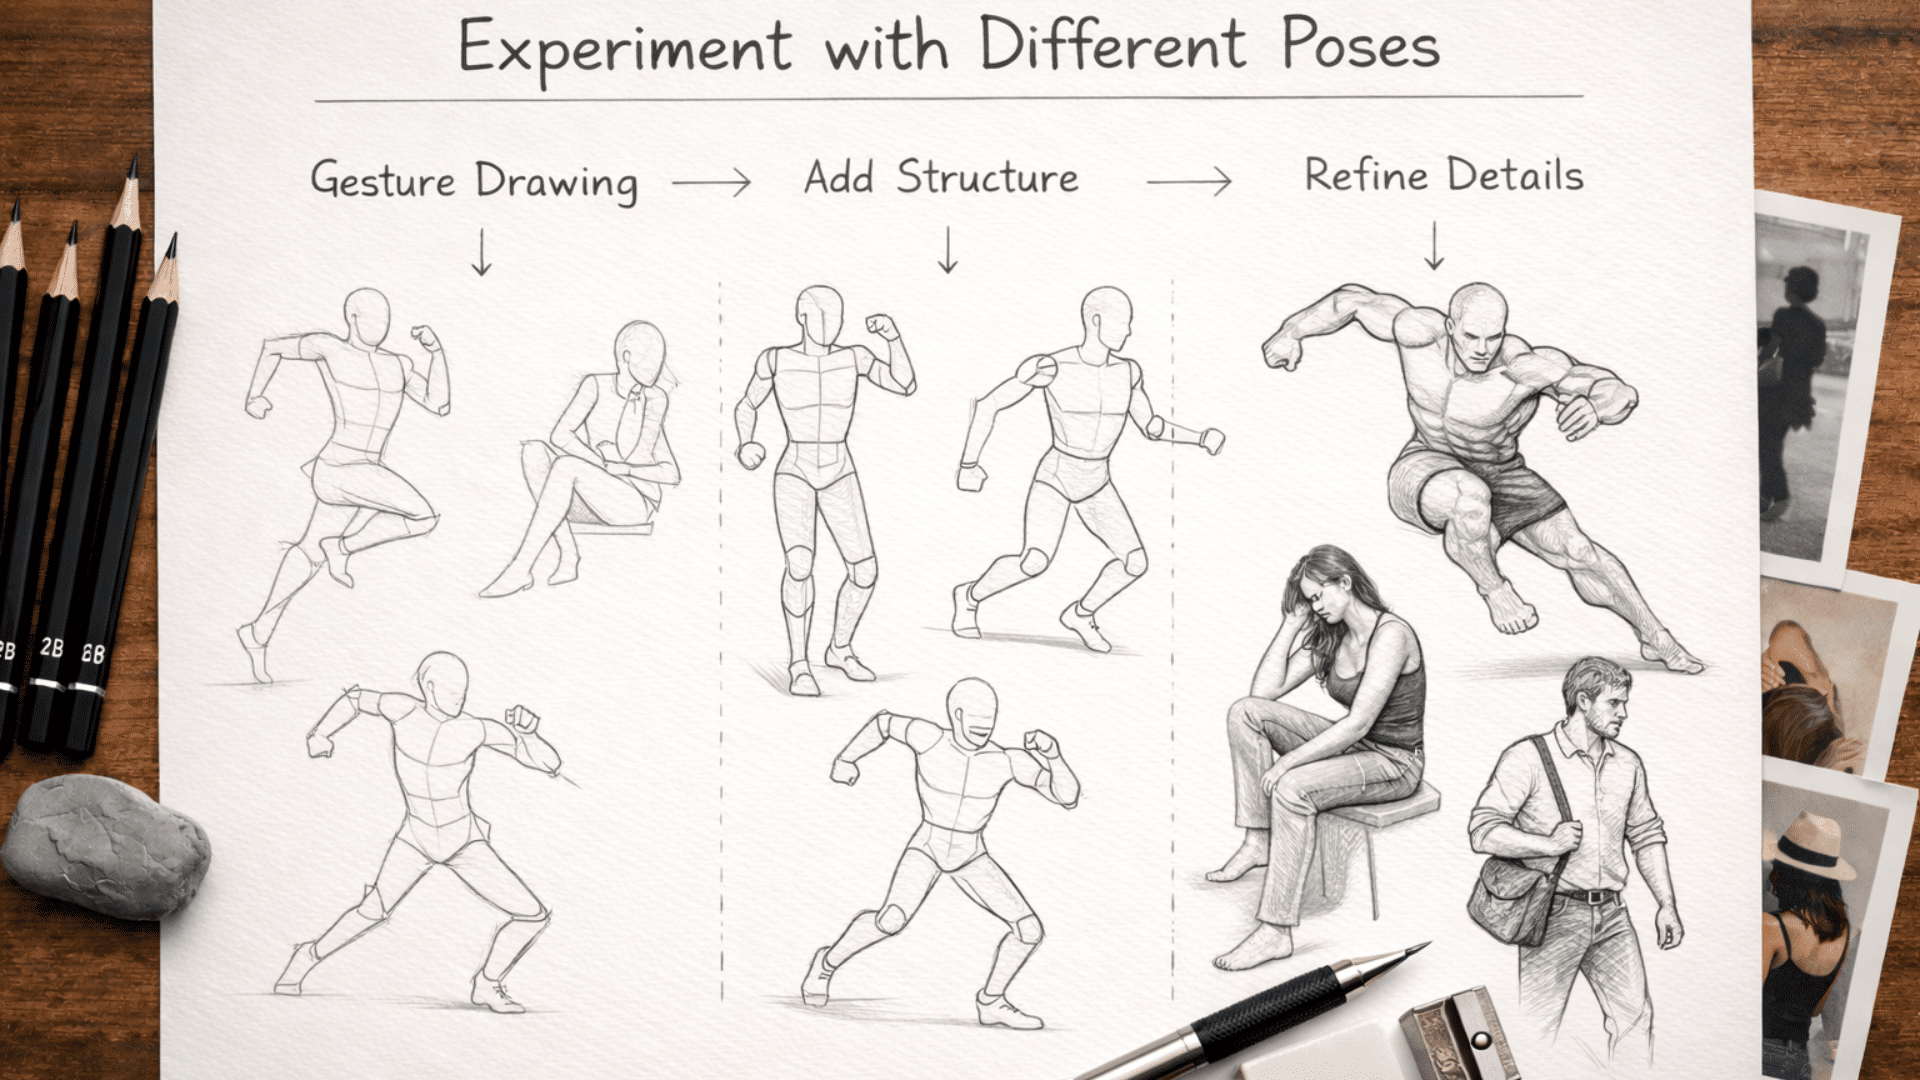
Once you have the basics down, it’s time to experiment with poses. Dynamic poses add energy to your sketches, making your characters come to life. Try sketching people in various positions – whether they’re standing, sitting, or moving.
- Start with a Gesture Drawing: Quickly sketch a rough outline of the pose to capture the movement. Focus on the flow and energy rather than details.
- Add Structure: Once you’ve got the gesture down, start adding basic shapes for the torso, arms, and legs to build the body structure.
- Refine the Details: Begin adding more details like the hands, feet, and facial features.
Step 5: Add Shading and Texture
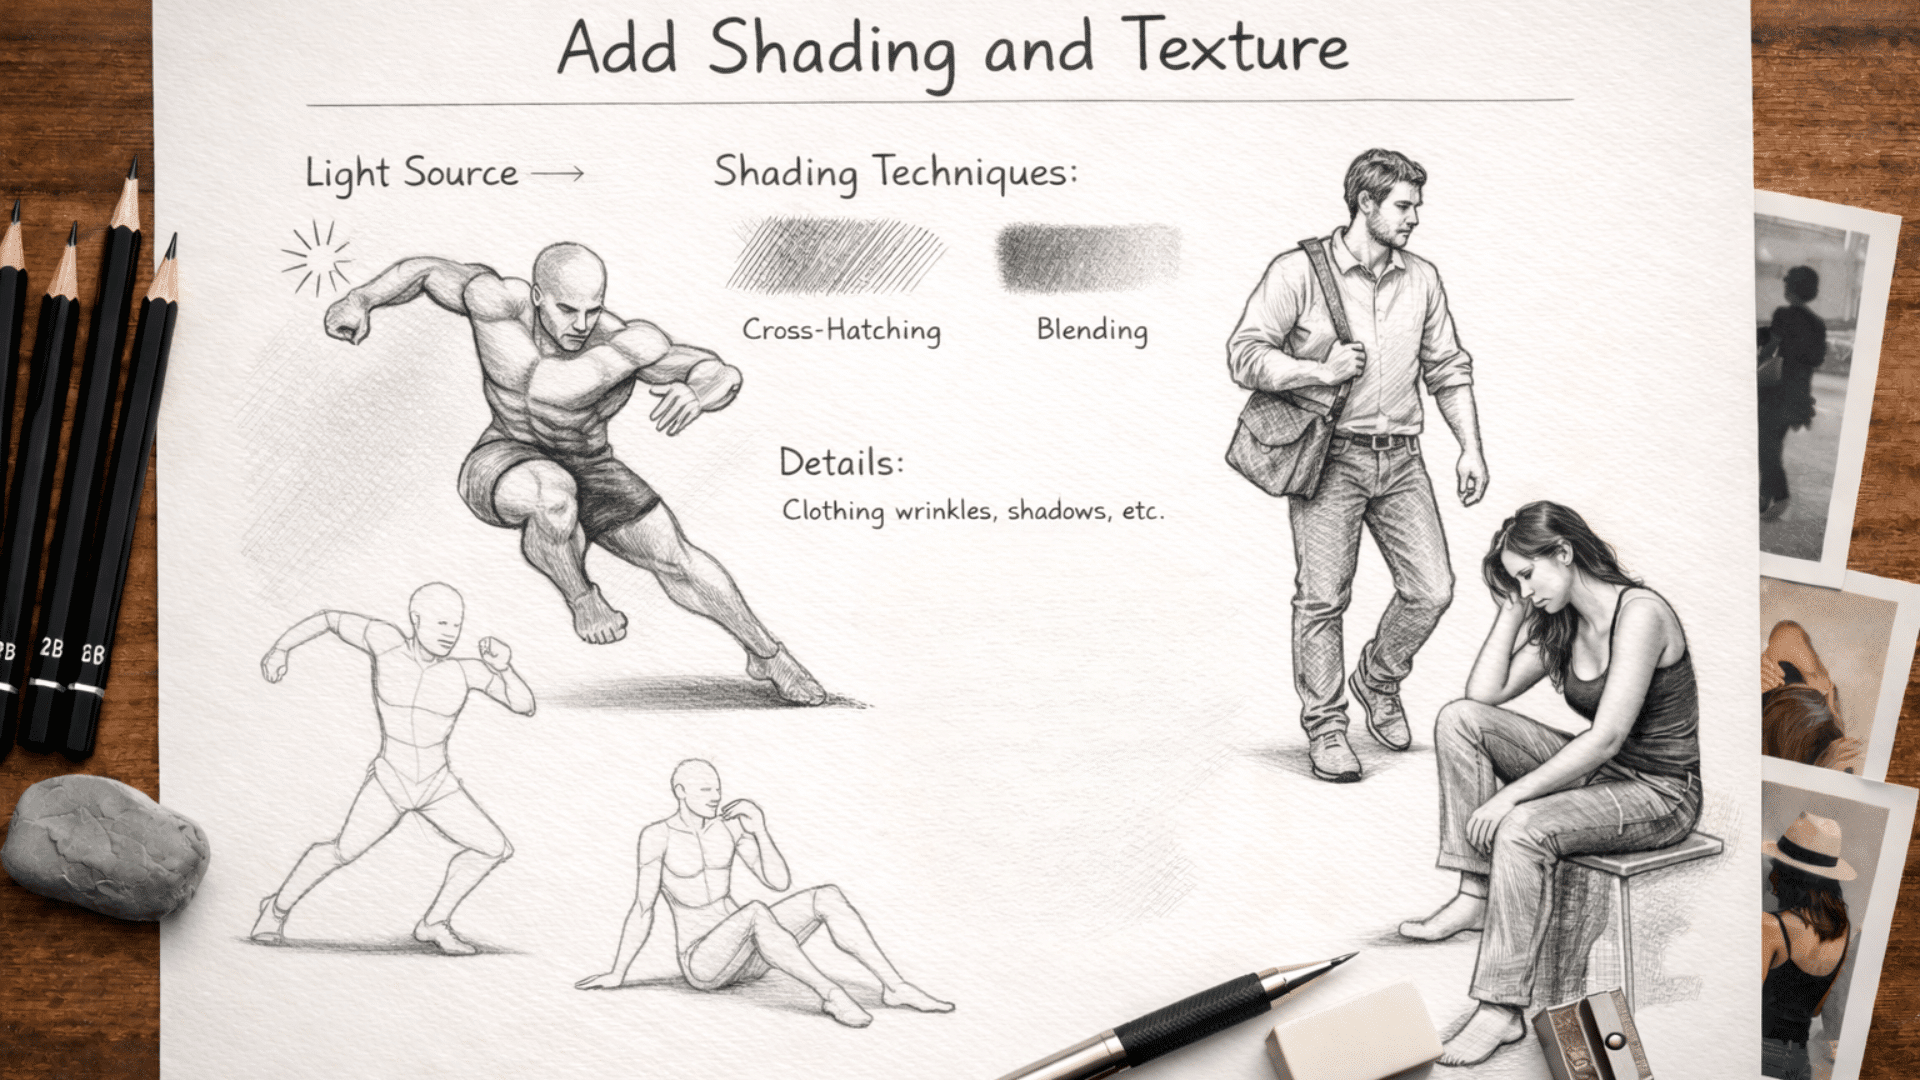
Shading helps bring depth to your figure sketches, making them appear more three-dimensional. Here’s how to get started:
- Light Source: Determine where your light is coming from to guide where to add shading. The side opposite the light will have darker areas.
- Shading Techniques: Use cross-hatching for smooth shading. You can also use blending tools like a stump or tissue for softer gradients.
- Details: Don’t forget smaller details like clothing wrinkles and shadows to add texture and realism to your sketches.
Step 6: Review and Refine Your Sketch
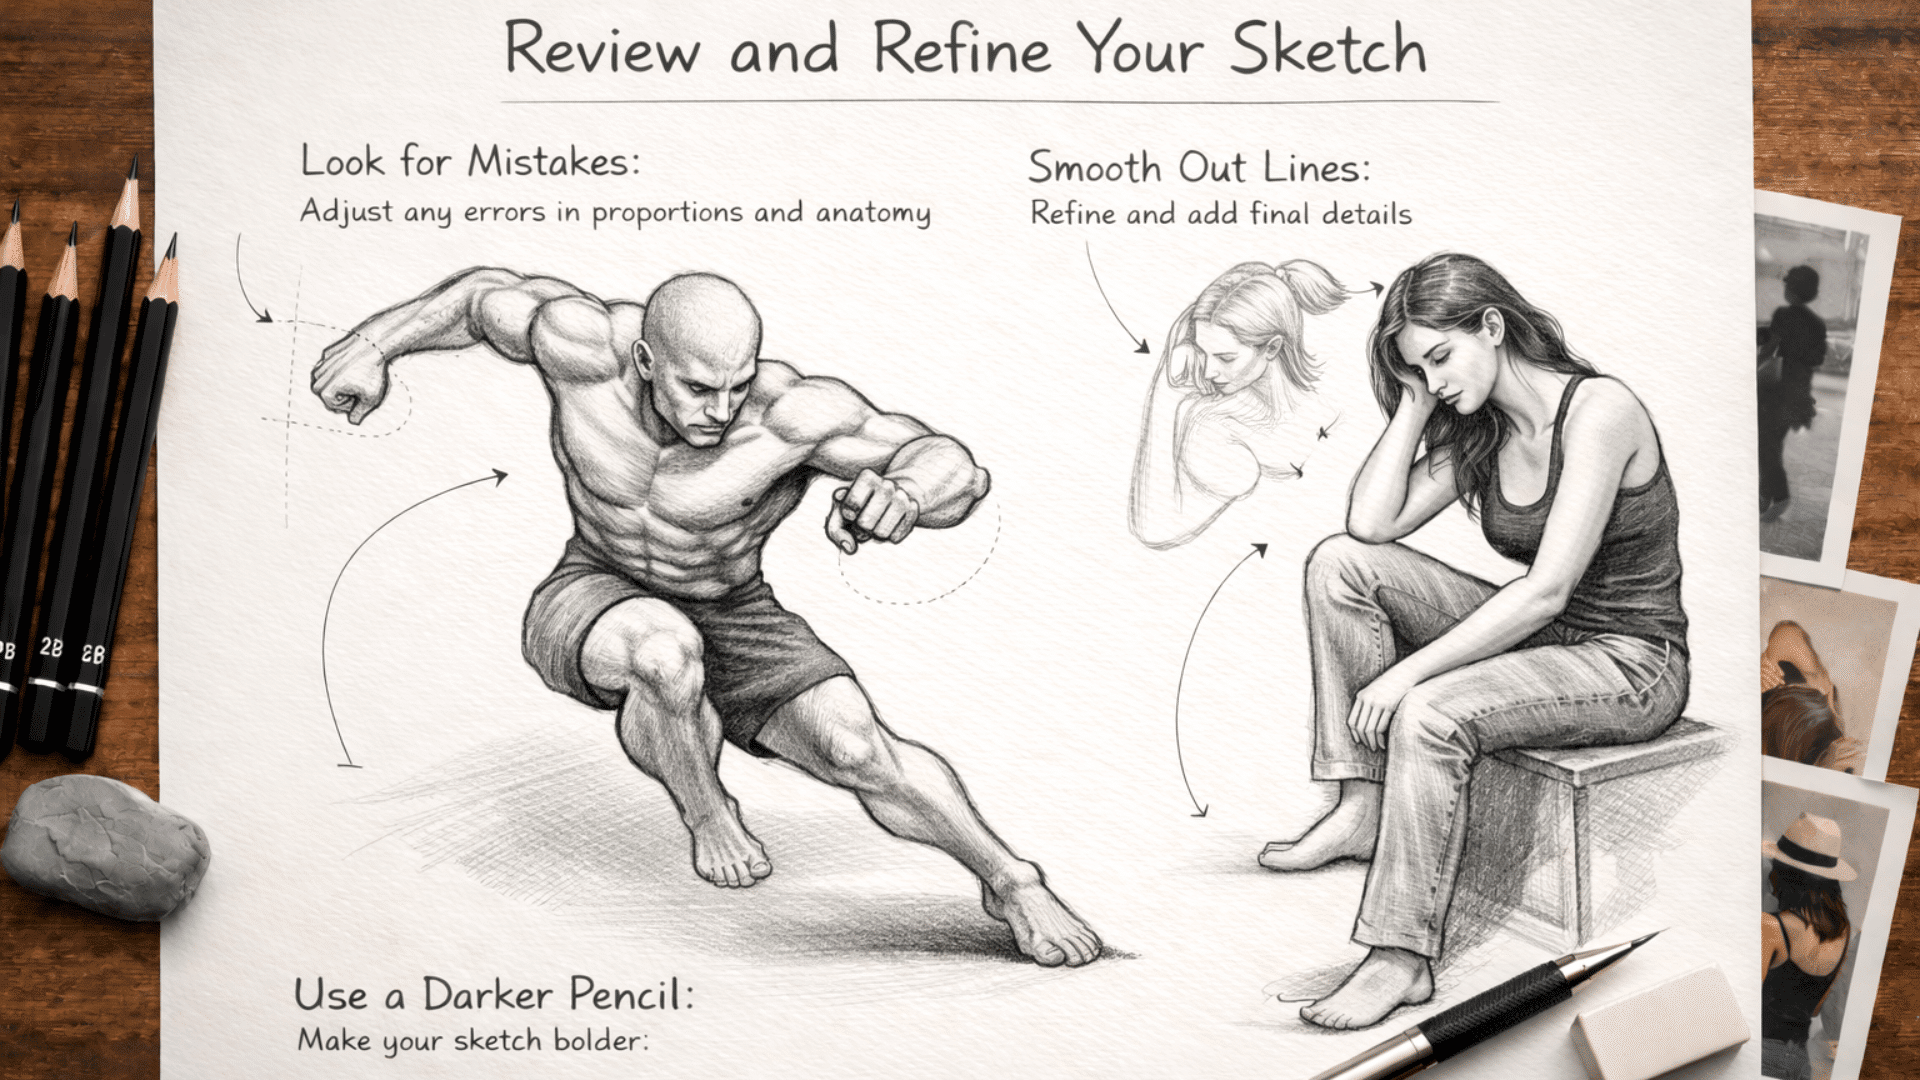
After completing your figure sketch, take a step back and review your work. Check if the proportions look right, and if the pose feels natural. Here are some tips for refining:
- Look for Mistakes: Examine the body structure and facial proportions. If something feels off, erase and adjust.
- Smooth Out Lines: Refine rough lines and add final touches like hair, clothing details, and subtle shading.
- Use a Darker Pencil: Go over the final lines with a darker pencil to make your sketch stand out.
Creative Ideas for Poses and Styles
When it comes to sketching people, creativity is key. The more dynamic and interesting your poses, the more engaging your sketches will be. Below are some ideas for different types of poses and styles:
1. Dynamic Poses
Dynamic poses focus on movement and energy, making your sketches feel active and full of life. These include actions like running, jumping, or dancing, where the body is in motion.
Pay attention to balance and direction, as these help show how the body moves through space. Practicing these poses improves your ability to capture motion naturally and makes your drawings more engaging.
2. Casual Poses
Casual poses show the body in relaxed, everyday positions like sitting, standing, or leaning. These poses are great for beginners because they are easier to observe and draw.
Focus on posture, weight distribution, and natural body alignment. Practicing casual poses helps build a strong understanding of proportions and makes your figures look more natural and comfortable.
3. Expressive Poses
Expressive poses use body language to show emotions and personality. These poses often exaggerate movement to highlight feelings like happiness, sadness, or anger.
Pay attention to how different parts of the body, such as the arms, shoulders, and posture, reflect emotions. This approach adds depth to your sketches and helps bring more character and storytelling into your drawings.
Different Sketching Techniques for People
Now that you have a solid understanding of proportions and poses, it’s time to see different sketching techniques that will help bring your people sketches to life.
| Technique | What It Focuses On | How to Practice | Key Benefit |
|---|---|---|---|
| Line Drawing | Precise, clean lines and proportions | Keep lines smooth and controlled | Improves accuracy and structure |
| Gestural Drawing | Movement, energy, and flow of the pose | Use quick, loose sketches | Builds rhythm and natural motion |
| Shading & Texturing | Depth, light, and surface detail | Use cross-hatching, stippling, blending | Adds dimension and realism |
Tips for Improving Your People Sketching Skills
To keep improving your people sketching skills, regular practice is key. Here are some tips to help you grow as an artist:
- Practice Regularly: Try to sketch people every day. The more you draw, the better you’ll get.
- Use References: Study real-life anatomy or use online reference tools to improve accuracy.
- Experiment with Styles: Try different sketching techniques, from realistic to more abstract styles.
- Seek Feedback: Share your work with others and ask for constructive feedback.
Conclusion
Mastering the art of sketching people requires patience, practice, and the right techniques. By focusing on proportions, anatomy, and experimenting with dynamic poses, you’ll create more accurate and expressive sketches.
Utilizing methods like the Loomis approach, practicing shading, and refining details are all essential steps in improving your people sketching skills.
Don’t forget to experiment with different styles and seek feedback to continue growing as an artist.
Remember, consistent practice is key – so keep sketching and trying new creative ideas. With time, you’ll develop your unique approach and capture the human figure more confidently and skillfully.

