

There is something deeply satisfying about turning a blank sheet of paper into something beautiful, functional, or personal.
Paper crafts for adults are more than a nostalgic hobby. They offer a creative escape from busy, screen-filled days while remaining one of the most accessible and affordable creative outlets.
No matter if you are a beginner or a seasoned maker, paper crafting delivers both stress relief and design inspiration with endless possibilities.
In this blog, I have rounded up stunning paper craft ideas for adults, ranging from relaxing weekend projects to impressive handmade gifts.
Why Paper Crafts are Perfect for Adults
Paper crafts are not just for kids in classrooms. Adults are rediscovering the joy of working with their hands, and paper is the perfect medium for it.
- Affordable: All you need is cardstock, glue, and scissors. No expensive tools required.
- Therapeutic: The focused, repetitive motions help reduce stress.
- Versatile: From origami to quilling to decoupage, there is a style for every skill level.
- Great for Gifting: Handmade paper creations feel more personal and thoughtful.
- Side Income Potential: Skilled paper crafters can sell their work on Etsy, at craft fairs, etc.
Paper Craft Ideas for Adults
From simple DIY projects to more detailed artistic designs, this list of 19 ideas offers something for every skill level.
Whether you are a beginner or an experienced crafter, there is a project to match your skill level. From easy DIY designs to intricate paper art, these ideas will inspire your next handmade creation.
1. Paper Quilling Art
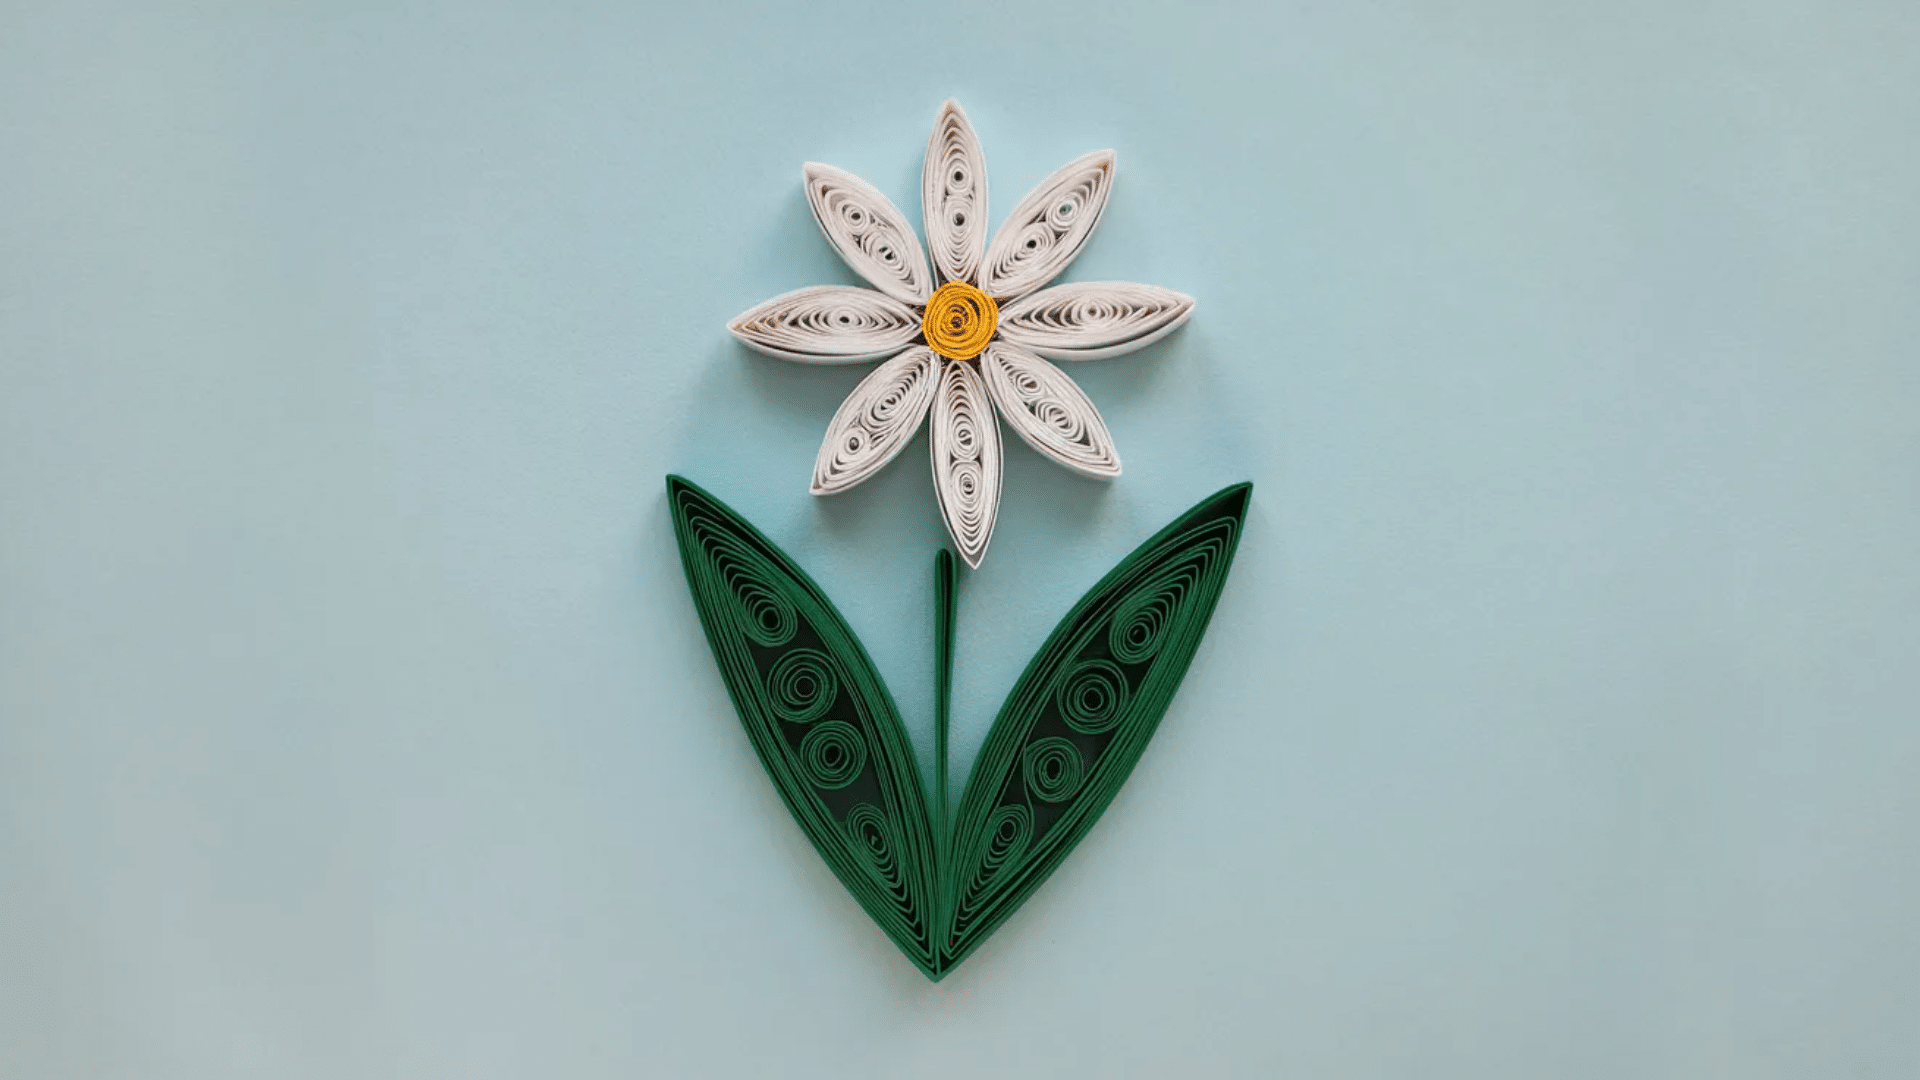
Paper quilling is the art of rolling, shaping, and arranging thin strips of paper into intricate designs. It is one of the most detailed and visually impressive paper crafts you can learn.
The finished pieces often look like miniature sculptures and are perfect for framing or gifting.
Skill Level: Beginner
Materials Used: Quilling strips, quilling tool, white glue, cardstock, tweezers, and corkboard.
How to Make:
- Use a quilling tool to roll strips tightly, then pinch them into shapes like teardrops or coils.
- Arrange and glue the shapes onto a cardstock base to form flowers, mandalas, or portraits.
- Build layers for a near-three-dimensional effect.
2. Paper Flower Bouquet
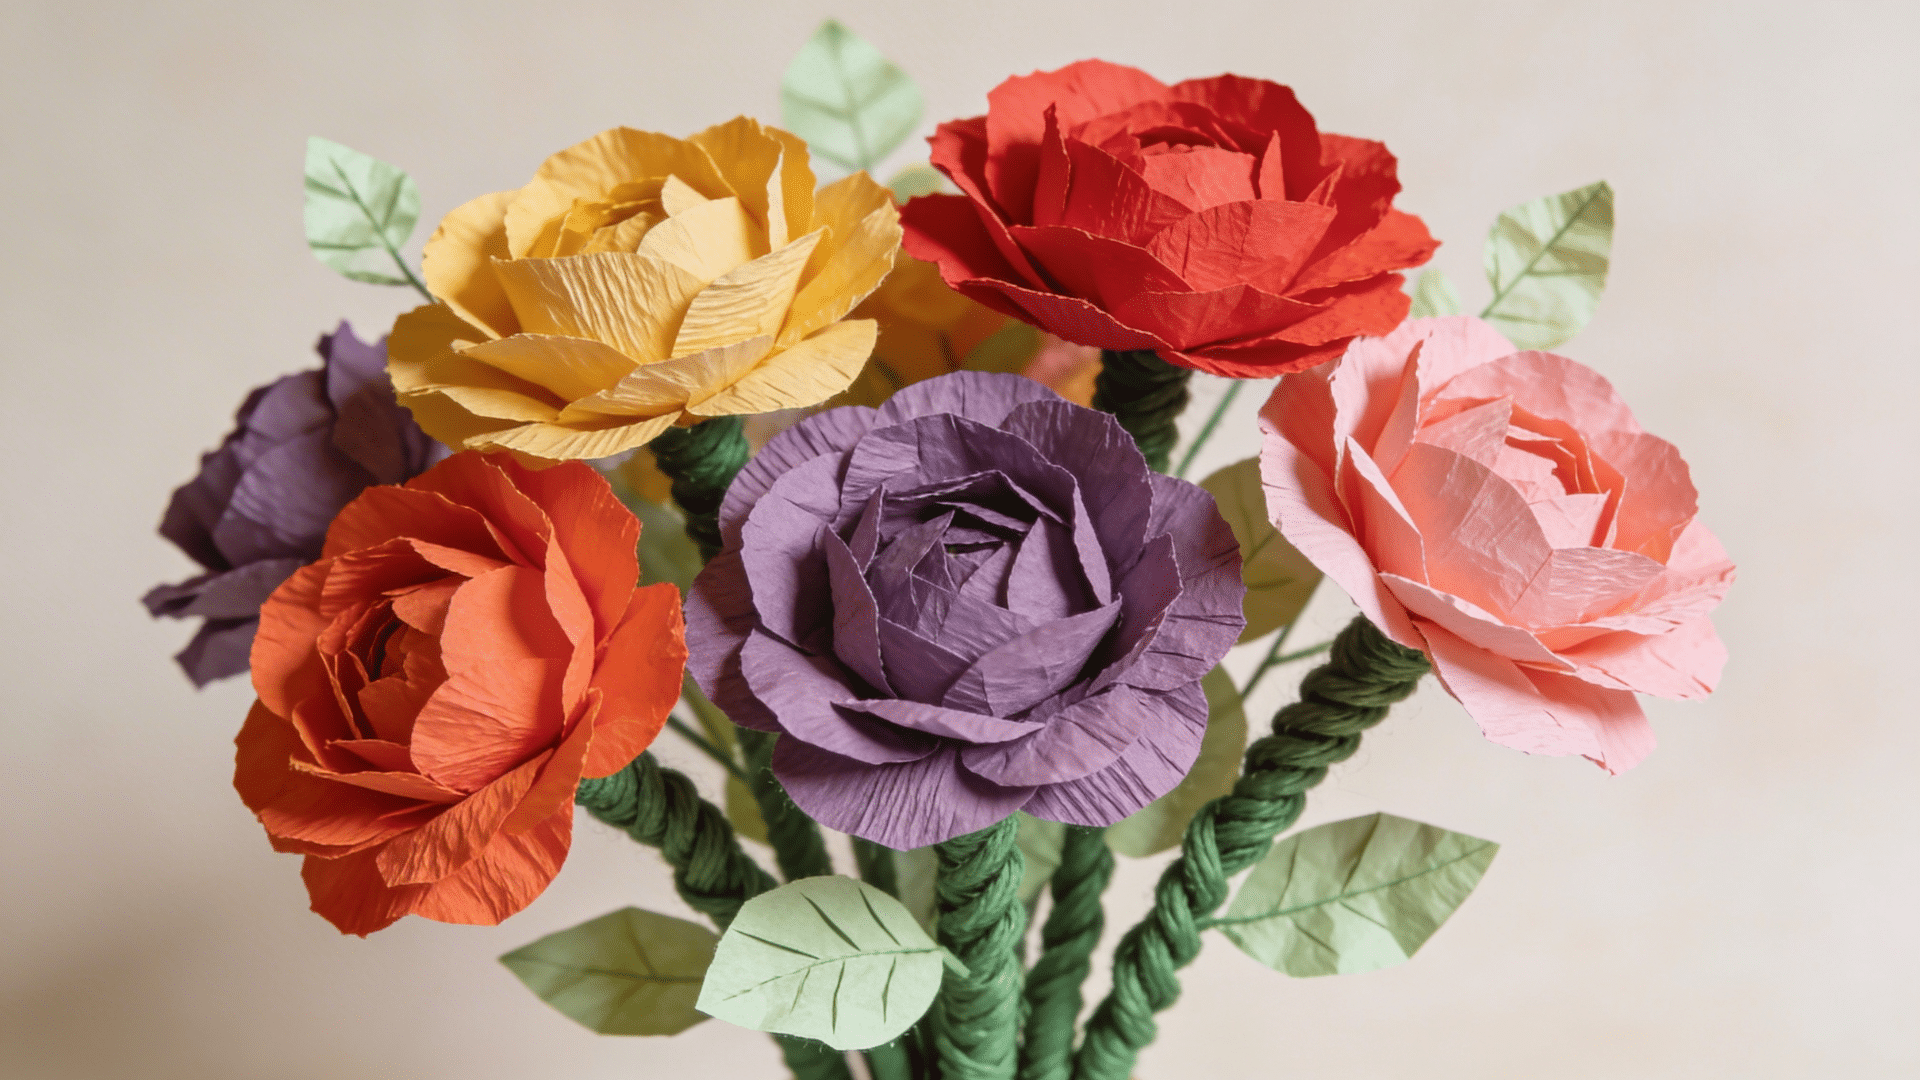
Paper flower bouquets are stunning, long-lasting alternatives to fresh flowers that never wilt or wither. They can be made in any color or style to match any décor or occasion. Crepe paper in particular gives petals a remarkably lifelike texture and curl.
Skill Level: Intermediate
Materials Used: Crepe paper, floral wire, floral tape, scissors, ribbon or twine.
How to Make:
- Cut petal shapes from crepe paper and stretch the center of each to create a natural curve.
- Wrap petals one by one around a floral wire stem, securing with green floral tape as you go.
- Bundle finished flowers together and wrap the stems with ribbon or twine.
3. Paper Lanterns
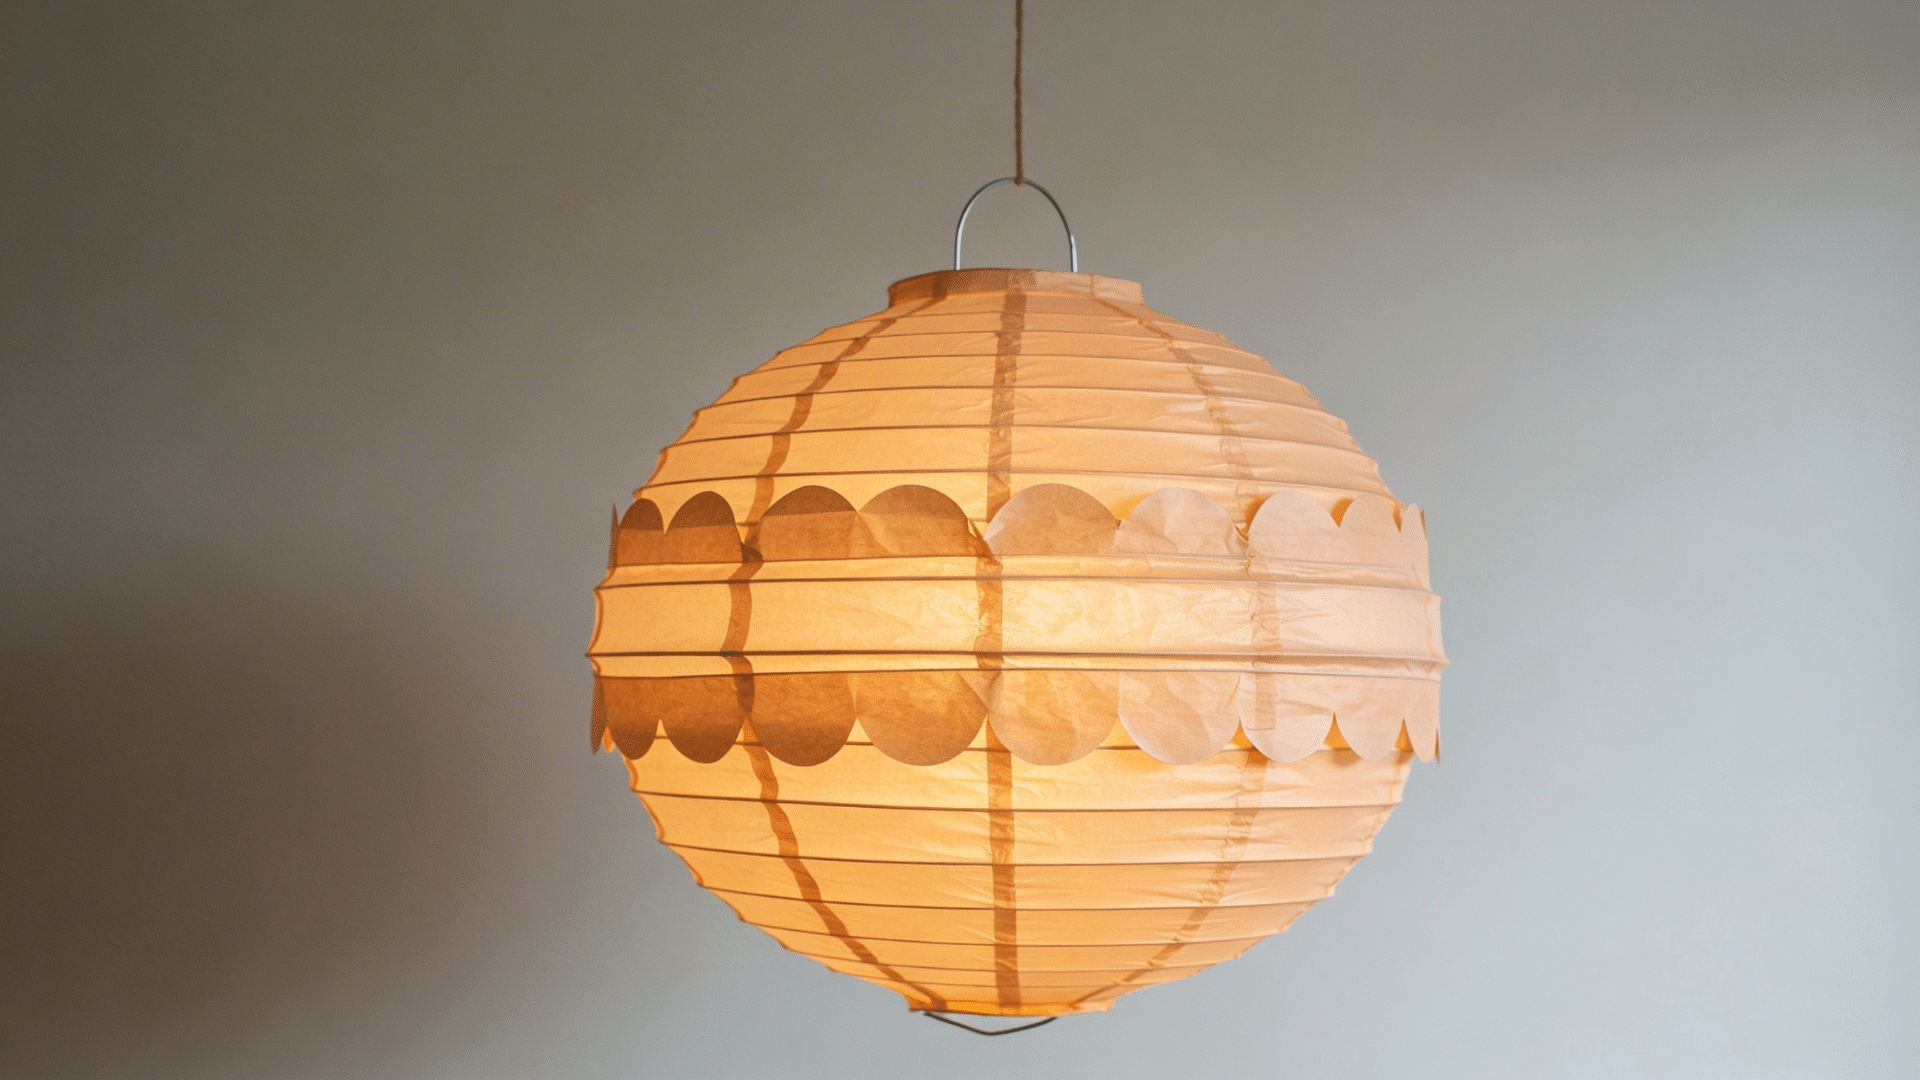
Paper lanterns are one of the simplest yet most magical paper crafts you can make at home. They create a warm, cozy ambiance and can be customized with any paper, color, or pattern. Made in batches, they make beautiful decorations for parties, weddings, or everyday home styling.
Skill Level: Beginner
Materials Used: Cardstock, scissors, ruler, glue stick or double-sided tape, battery-operated light.
How to Make:
- Fold a cardstock rectangle in half lengthwise and make evenly spaced cuts from the fold, stopping an inch from the open edge.
- Unfold, roll into a cylinder, and glue the short ends together.
- Attach a paper handle on top and place a battery-operated tea light inside.
4. Pop-Up Greeting Cards
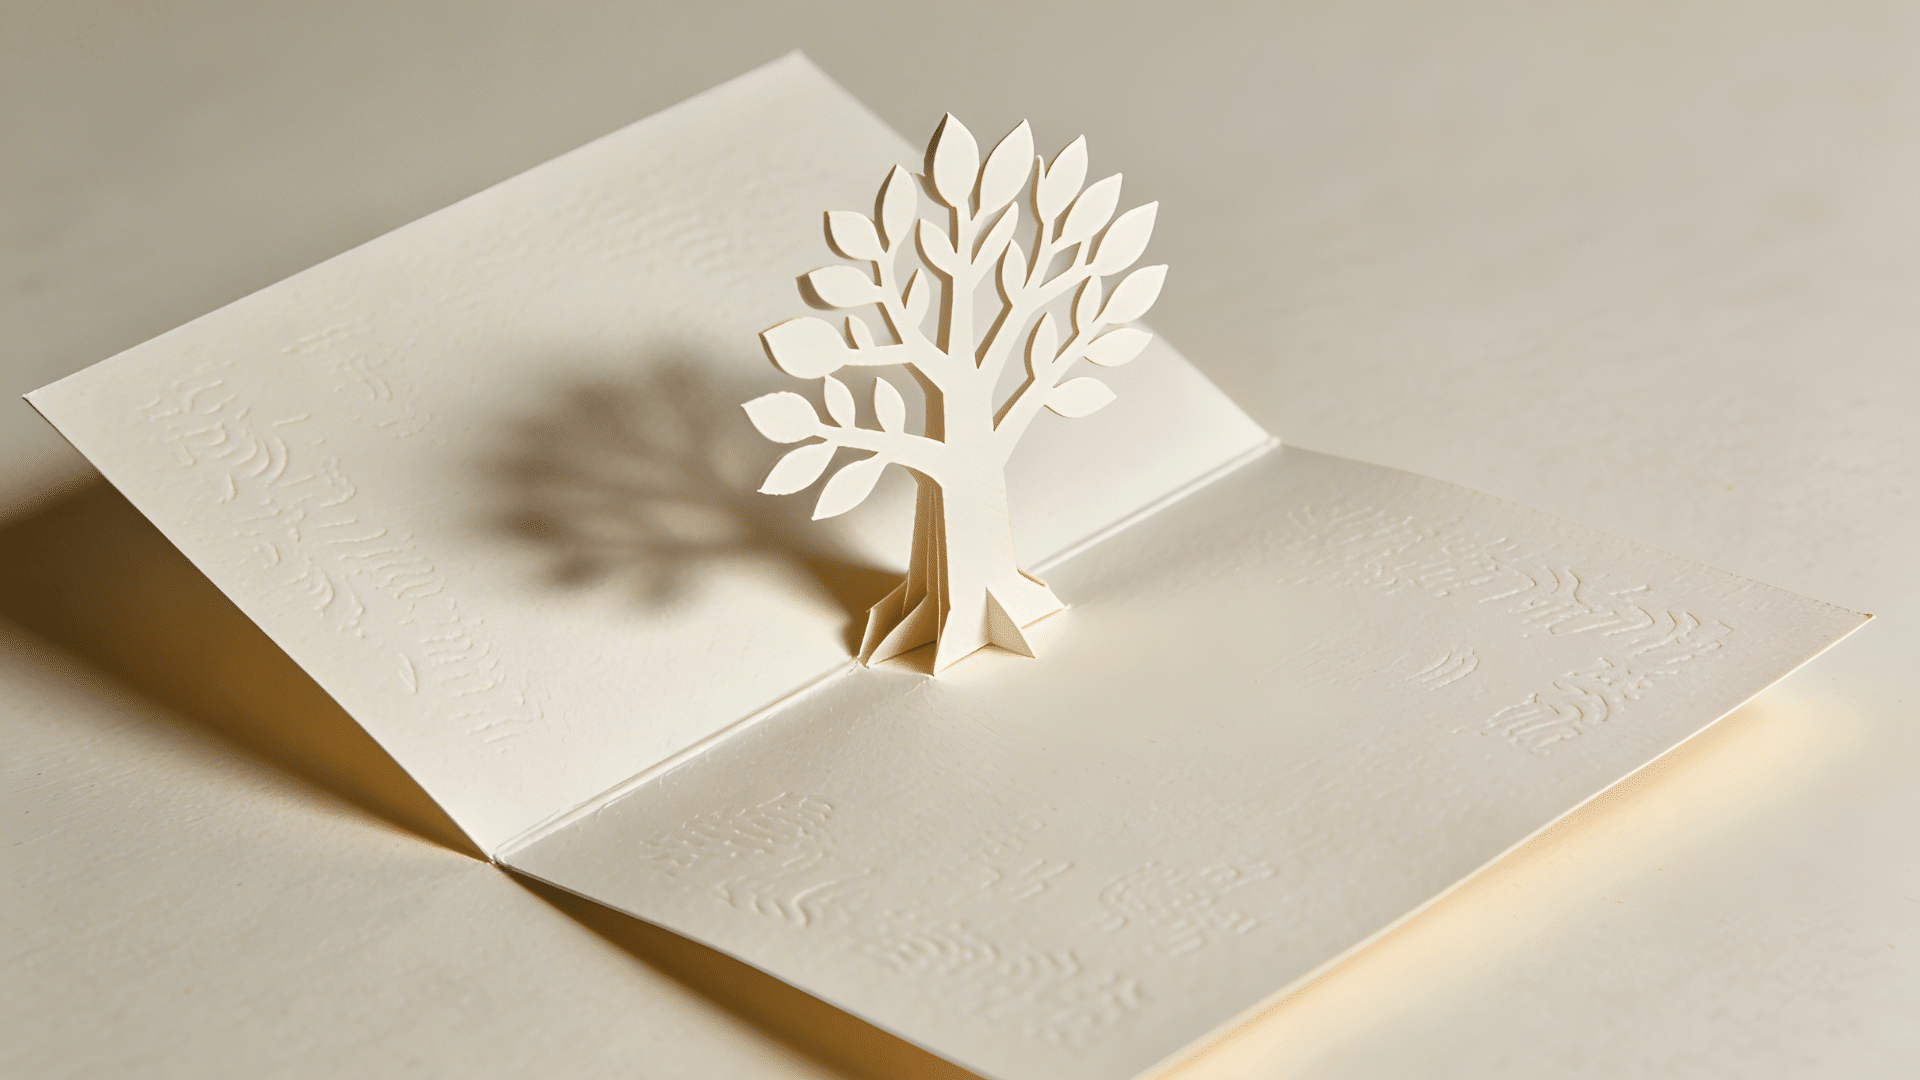
Handmade pop-up cards are showstoppers. The mechanism is simpler than it looks, and even a basic single-layer pop-up creates a dramatic, memorable effect. They are perfect for birthdays, anniversaries, or any occasion.
Skill Level: Beginner
Materials Used: Cardstock, craft knife, cutting mat, scissors, bone folder, ruler, markers or stamps.
How to Make:
- Fold a piece of cardstock in half, make two parallel cuts of equal length from the fold, then push the cut tab forward and crease it sharply.
- Attach a paper shape like a heart, flower, or birthday cake to the tab so it springs forward when the card opens.
- Decorate the card’s exterior with stamps, colored pencils, or layered paper cutouts.
5. Paper Kite
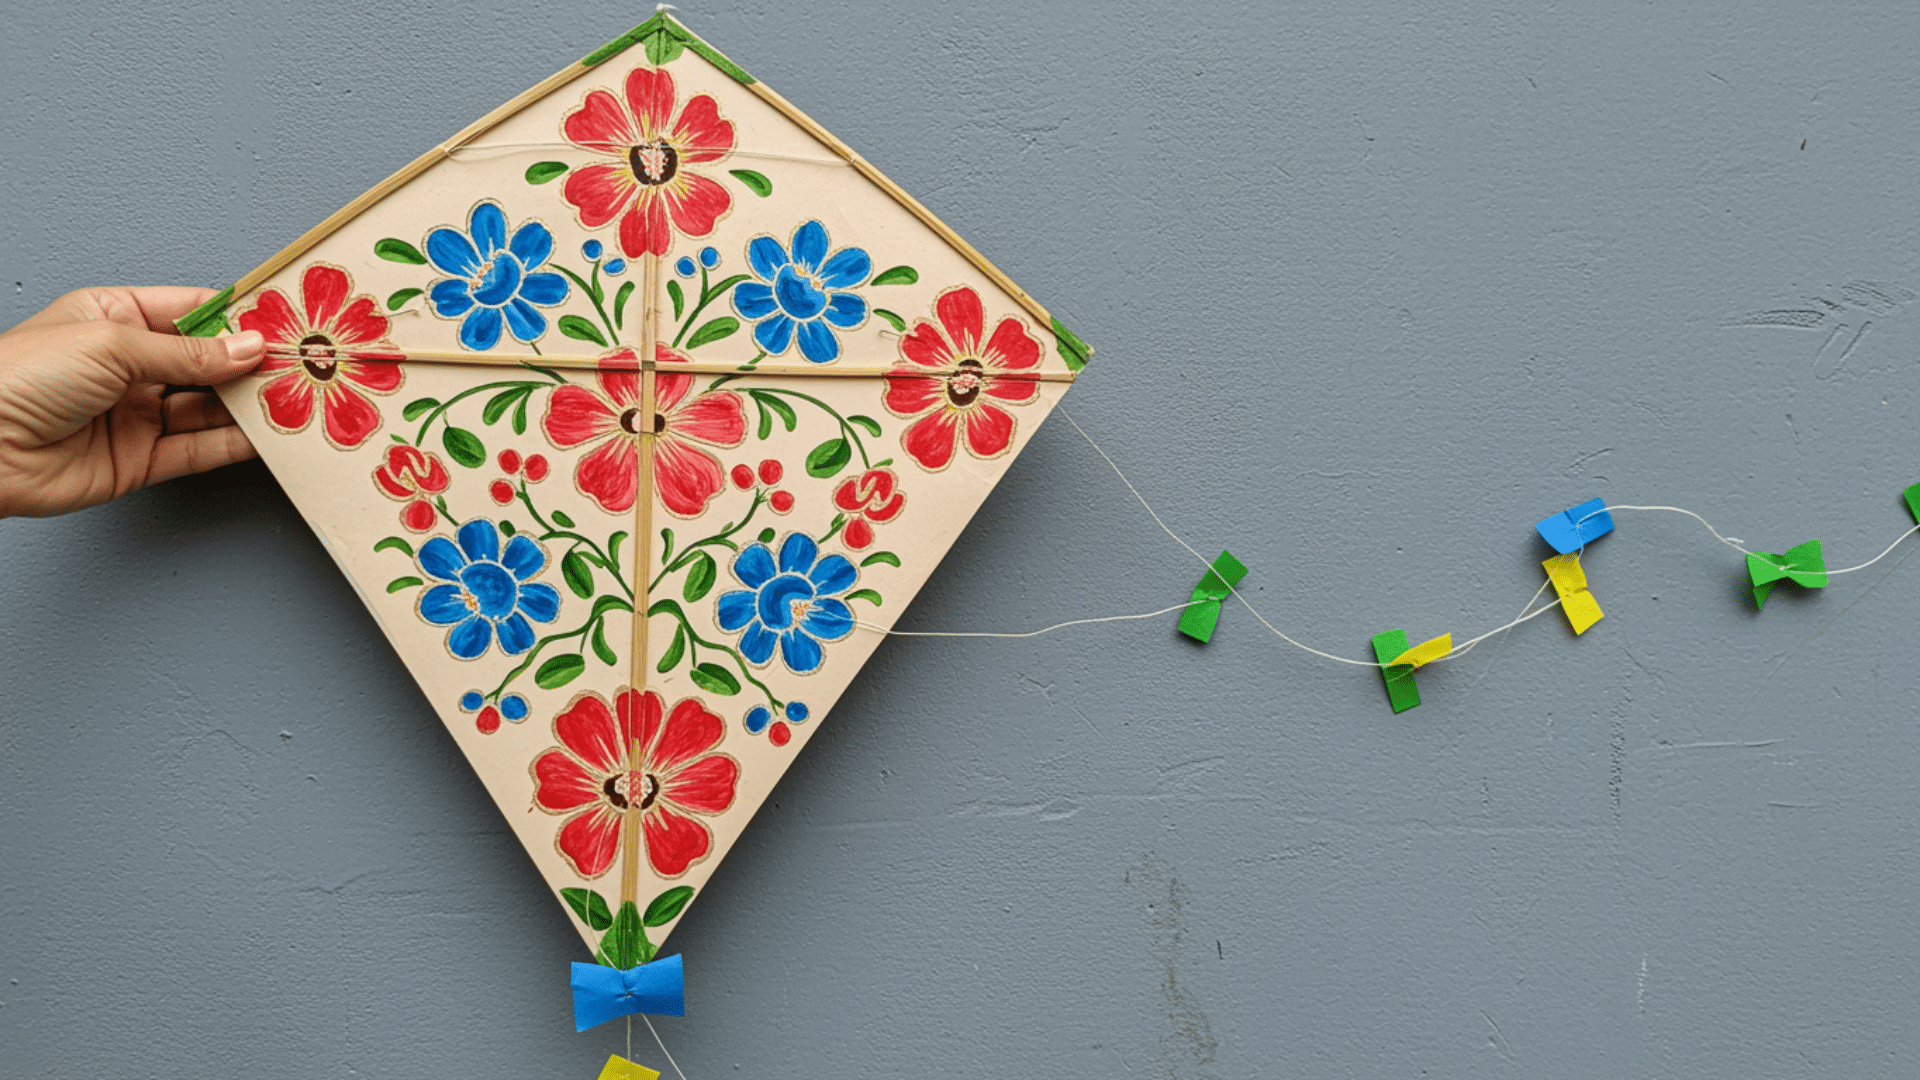
A handmade paper kite is a wonderfully nostalgic craft that combines creativity with outdoor fun. It is one of the few paper crafts that you actually get to play with once it is finished. Making your own kite from scratch gives you full control over the size, design, and decoration.
Skill Level: Beginner
Materials Used: Craft paper or tissue paper, two wooden dowels, string, scissors, PVA glue, ribbon or paper strips for tail.
How to Make:
- Cut two wooden dowels, one longer than the other, and tie them in a cross shape with string.
- Lay the frame on a sheet of strong craft paper, trace around it leaving a small border, and cut it out.
- Fold the border over the frame edges and glue it down, then attach a flying line and a tail made from paper strips or ribbon.
6. Paper Animal Masks
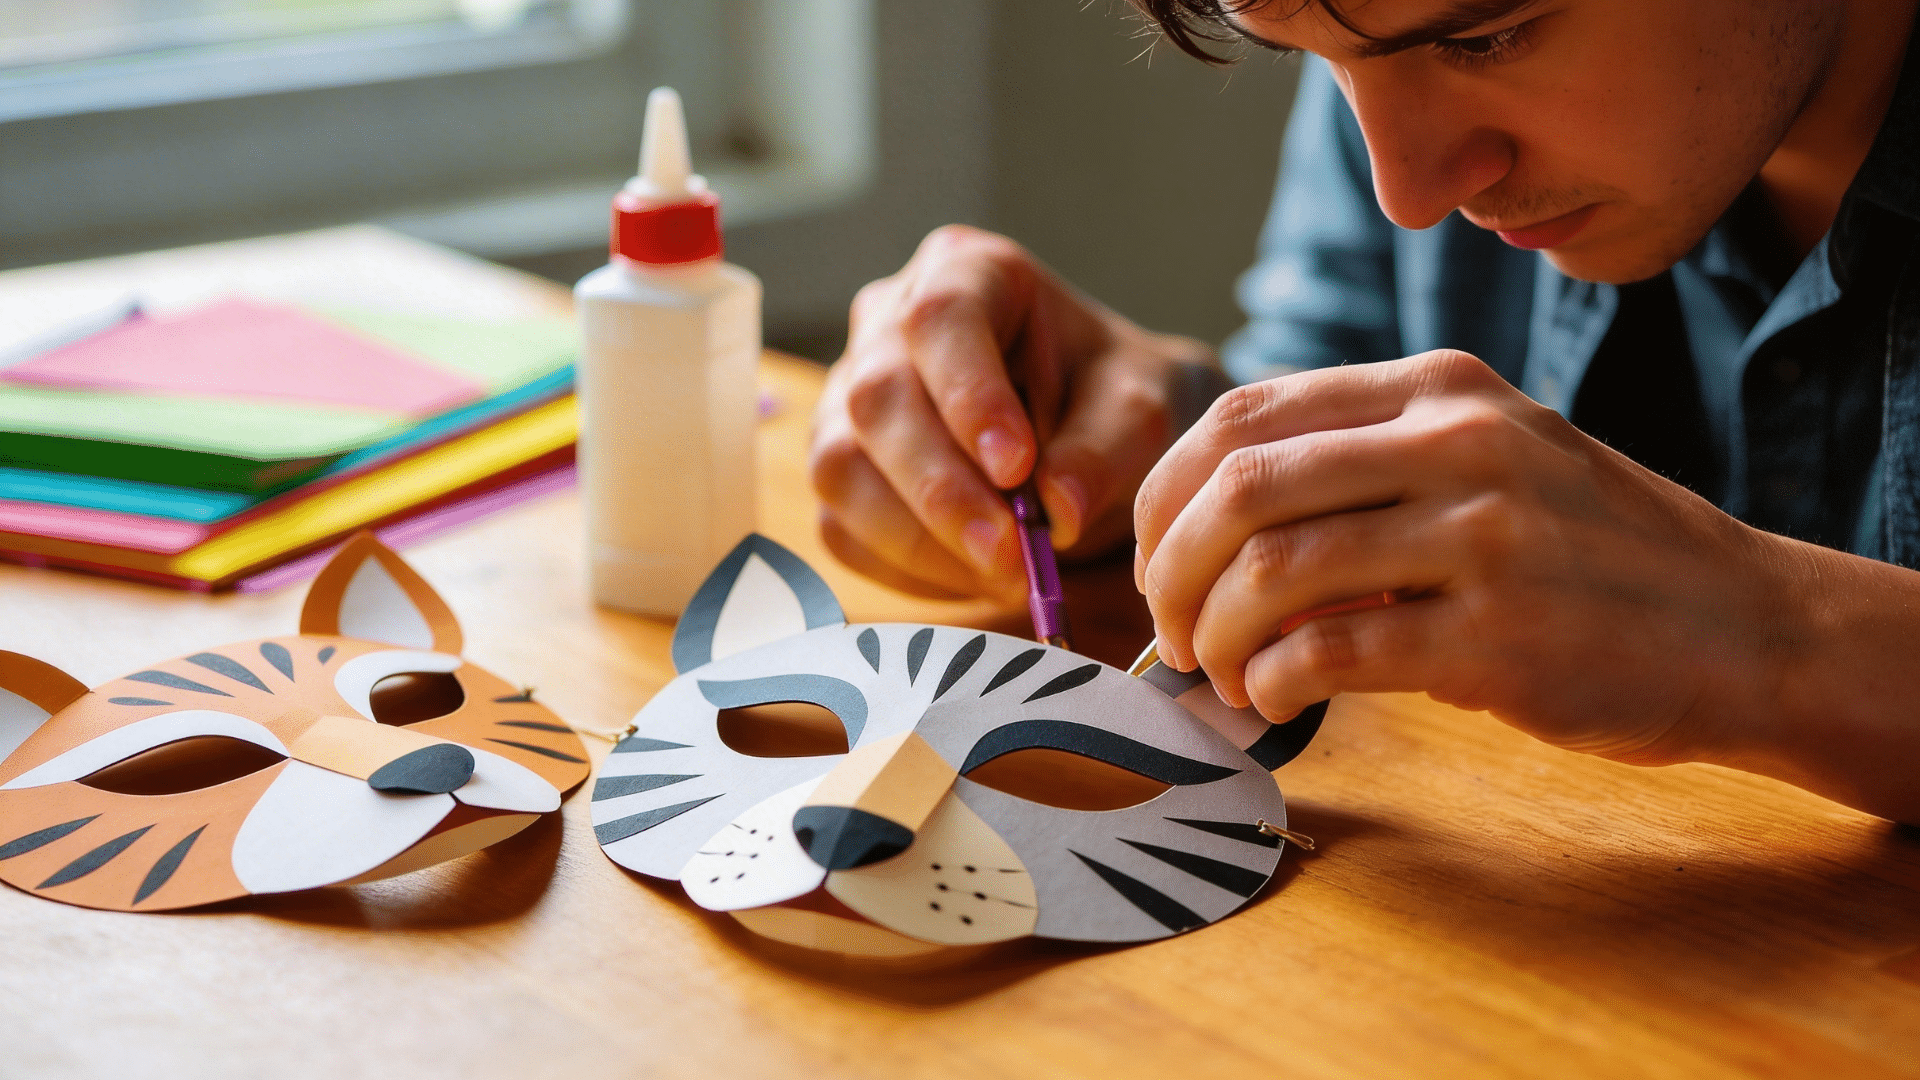
Paper animal masks are a creative and expressive craft that adults can enjoy, especially for costume events, photo shoots, or theatrical projects. They can be as simple or as detailed as you like, from a basic fox silhouette to an elaborately painted peacock.
Skill Level: Intermediate
Materials Used: Cardstock, scissors, craft knife, foam adhesive squares, acrylic paint or markers, elastic band or wooden stick, glue.
How to Make:
- Draw or print an animal face template onto thick cardstock and cut out the basic shape, including eye holes.
- Add layers of cut paper for ears, feathers, snouts, or horns, building up dimension with foam adhesive squares.
- Paint or decorate with markers, glitter, and washi tape, then attach an elastic band or wooden stick to the back.
7. 3D Hot Air Balloon Paper Decorations
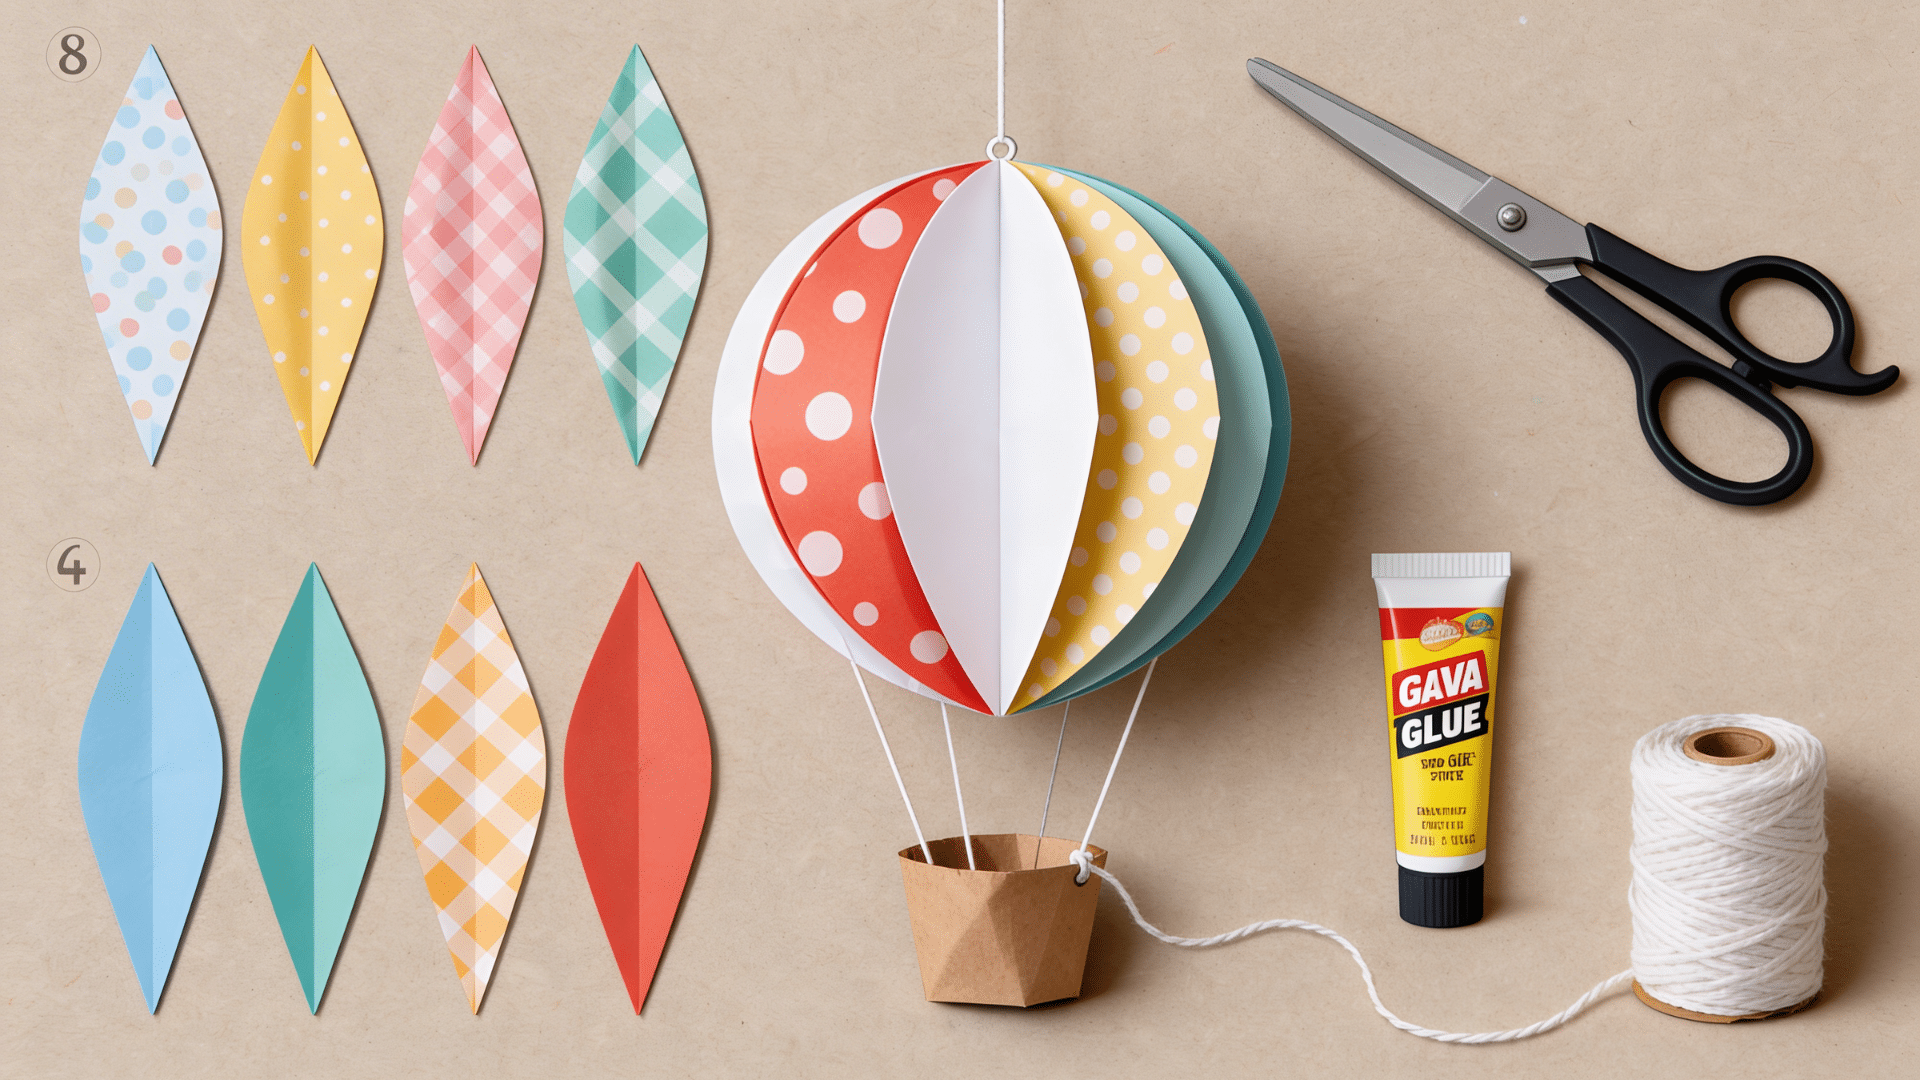
3D paper hot-air balloon decorations are charming hanging ornaments that add a whimsical, festive touch to any room or event. Hung in clusters at different heights, they create a stunning visual display for parties and celebrations.
Skill Level: Intermediate
Materials Used: Colored or patterned cardstock, scissors, PVA glue or glue stick, kraft paper for basket, and thread or string.
How to Make:
- Cut 8 to 10 identical teardrop shapes from colored or patterned cardstock.
- Fold each piece in half lengthwise and glue the halves of adjacent pieces together one by one until all panels form a round balloon shape.
- Attach a small paper basket to the bottom with thread, and hang the finished balloon from a length of string.
8. Paper Star
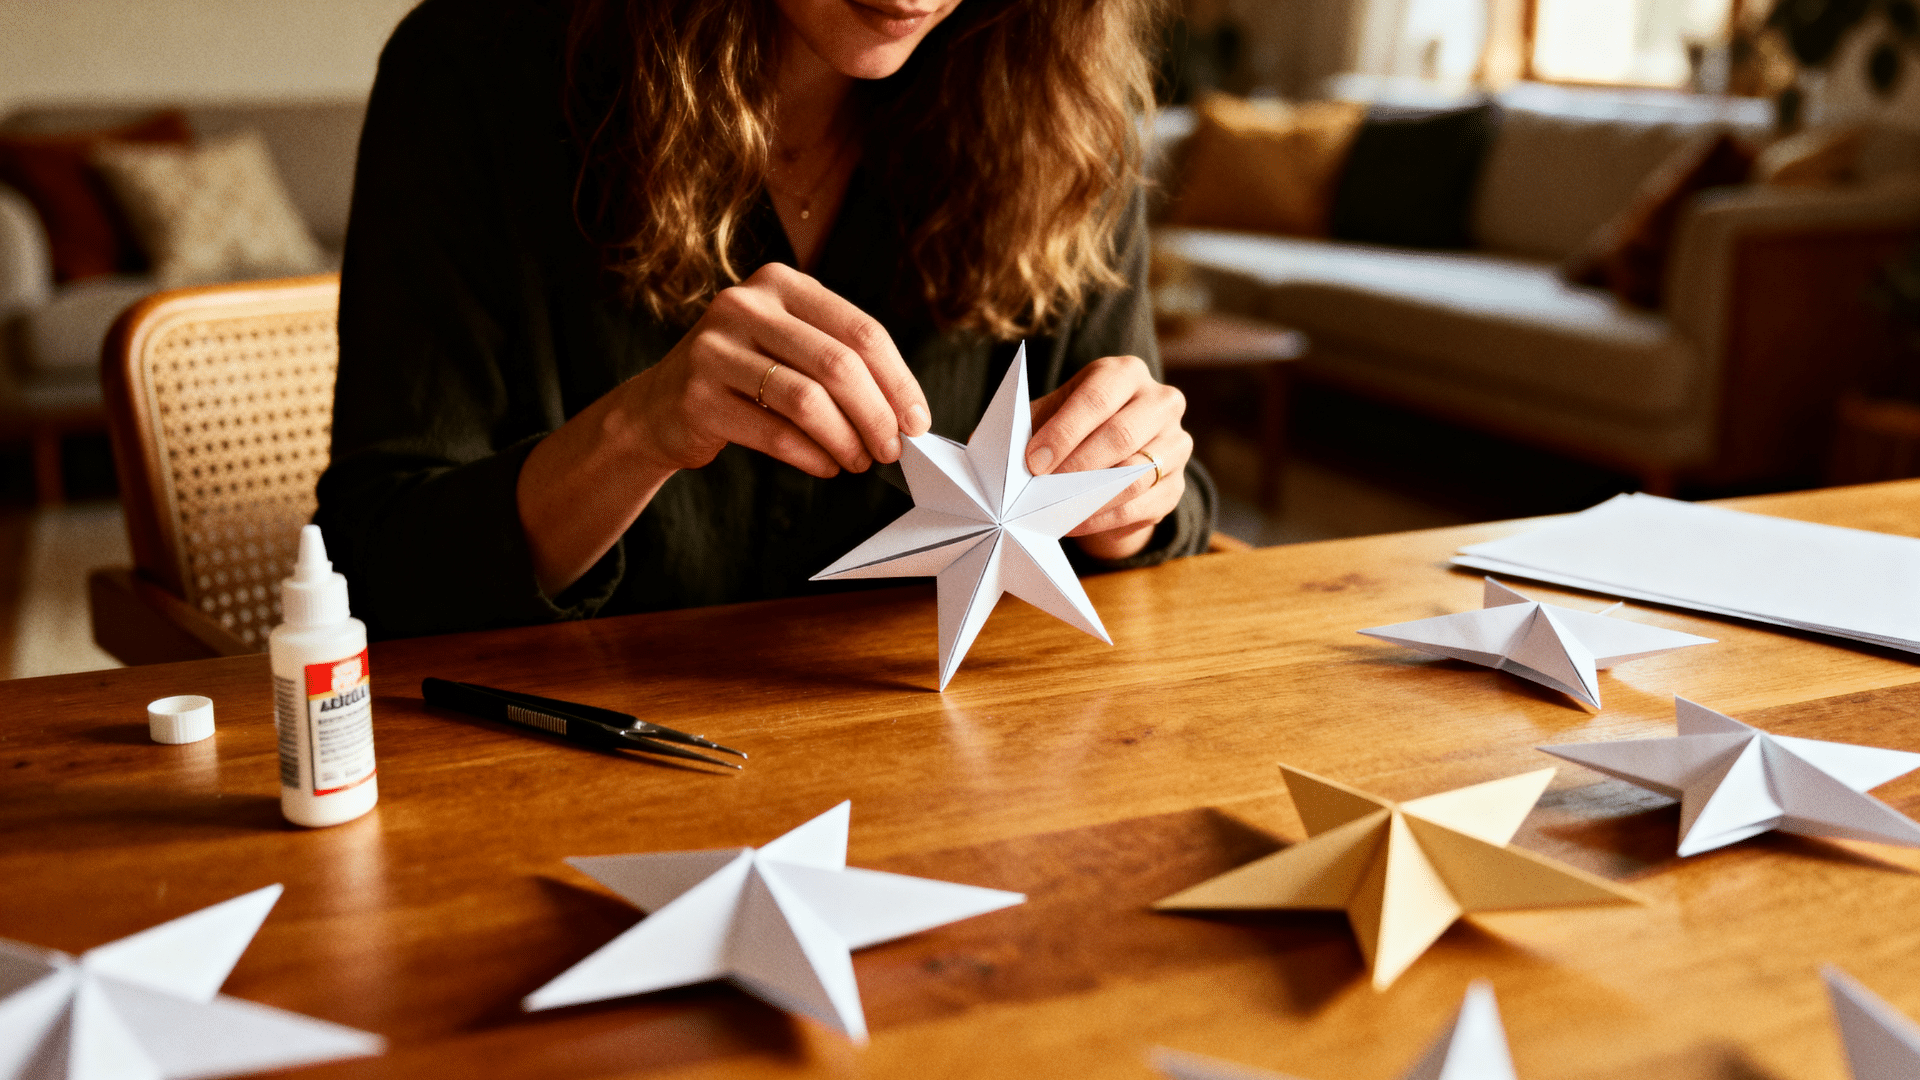
Paper stars are elegant, versatile decorations that can be hung as ornaments, used as gift toppers, or displayed as wall art. The classic 3D Froebel star is woven from paper strips and looks incredibly intricate despite being made from just four. You can make them in any size and color.
Skill Level: Advanced
Materials Used: Paper strips, cardstock or quilling paper, scissors, ruler.
How to Make:
- Cut four equal strips of paper and weave them together at right angles to form a tight square at the center.
- Fold each strip up and over in sequence, tucking ends under adjacent strips to build the star points on one side.
- Flip the star over and repeat the process on the back to create a fully three-dimensional, double-sided paper star.
9. Paper Wall Art Silhouette Frames
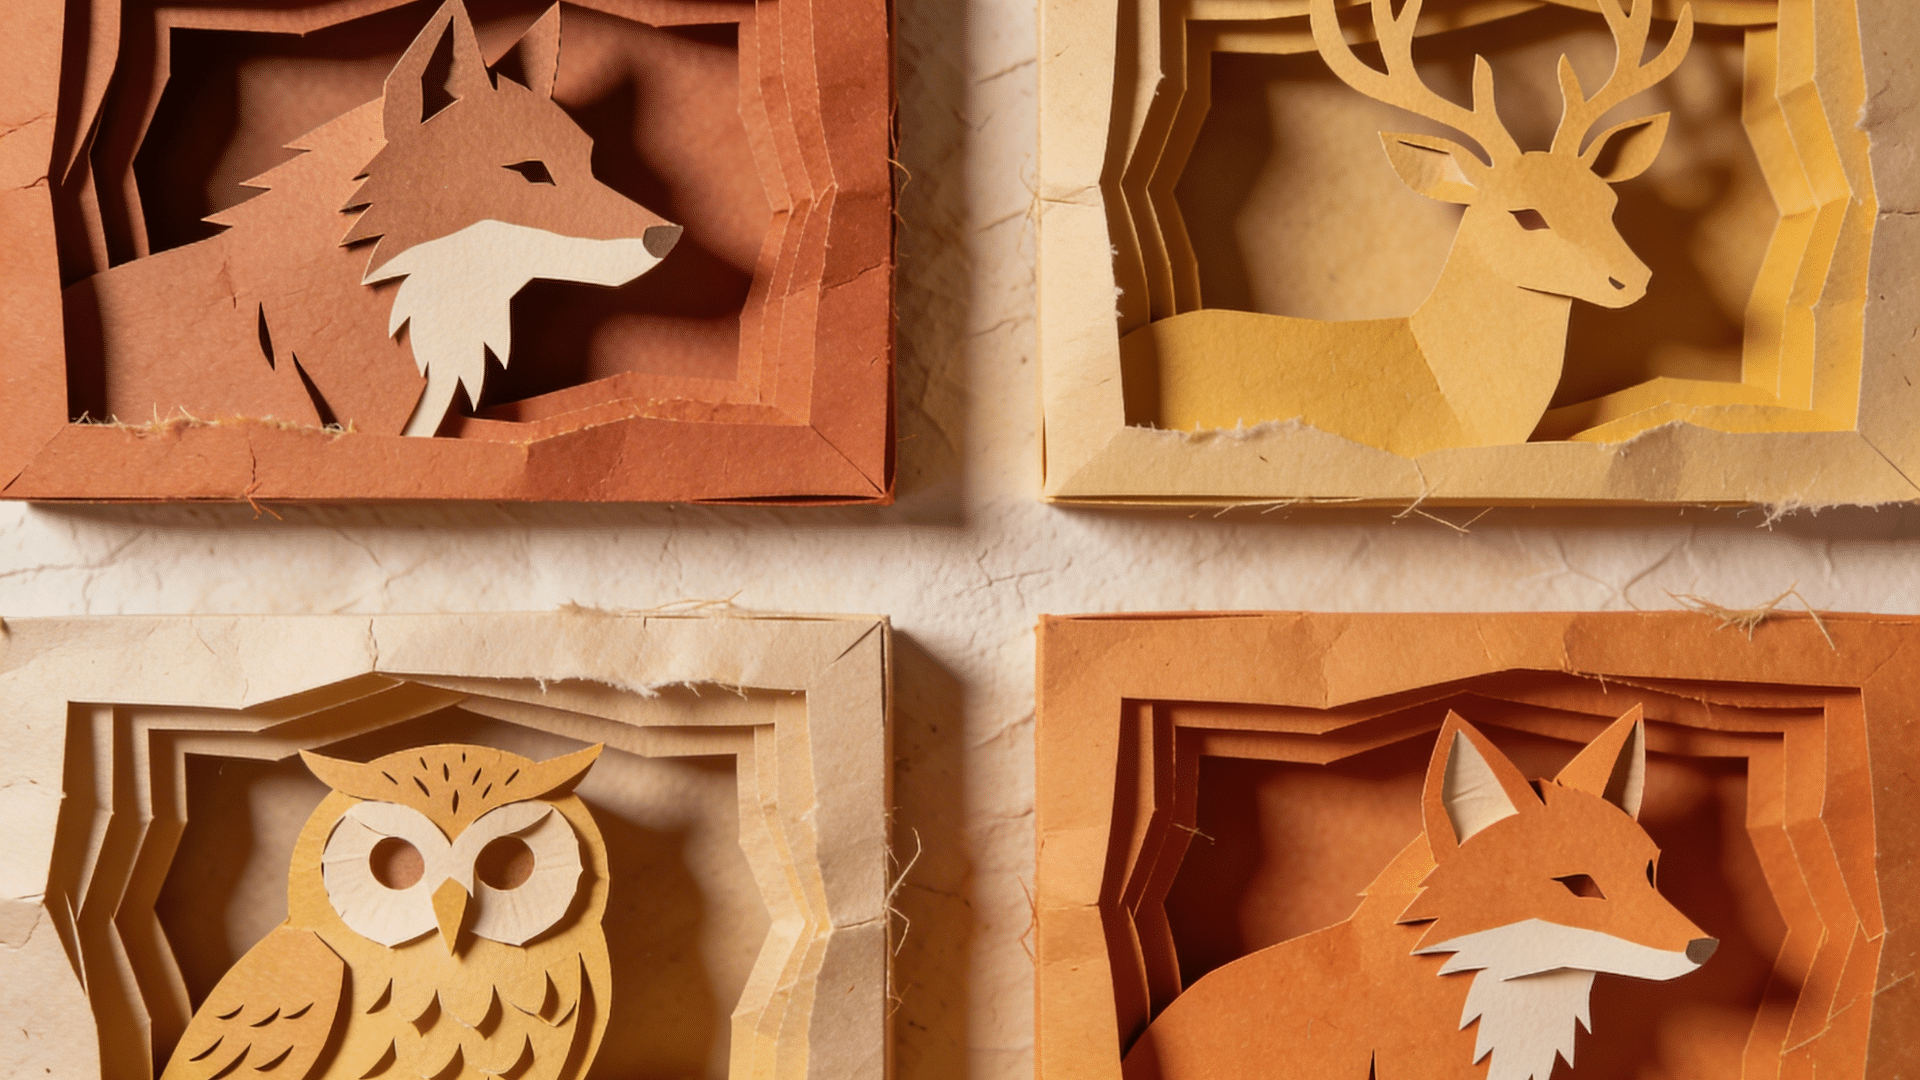
Paper silhouette art is a sophisticated, minimalist craft that transforms layered paper into striking wall décor. Whether you create botanical scenes, city skylines, abstract shapes, or personalized name art, the layered effect adds depth and elegance to any space.
Skill Level: Intermediate
Materials Used: Cardstock in multiple colors, craft knife, cutting mat, pencil, ruler, glue, shadow box frame, or standard frame.
How to Make:
- Sketch or print a simple layered design,n such as mountains, leaves, birds, or a skyline.
- Cut each layer carefully from different colored cardstock using a craft knife.
- Stack or foam-mount each layer slightly to create depth and dimension.
- Glue layers in place and insert into a shadow box frame for a clean, professional finish.
10. Junk Journaling & Mixed Media
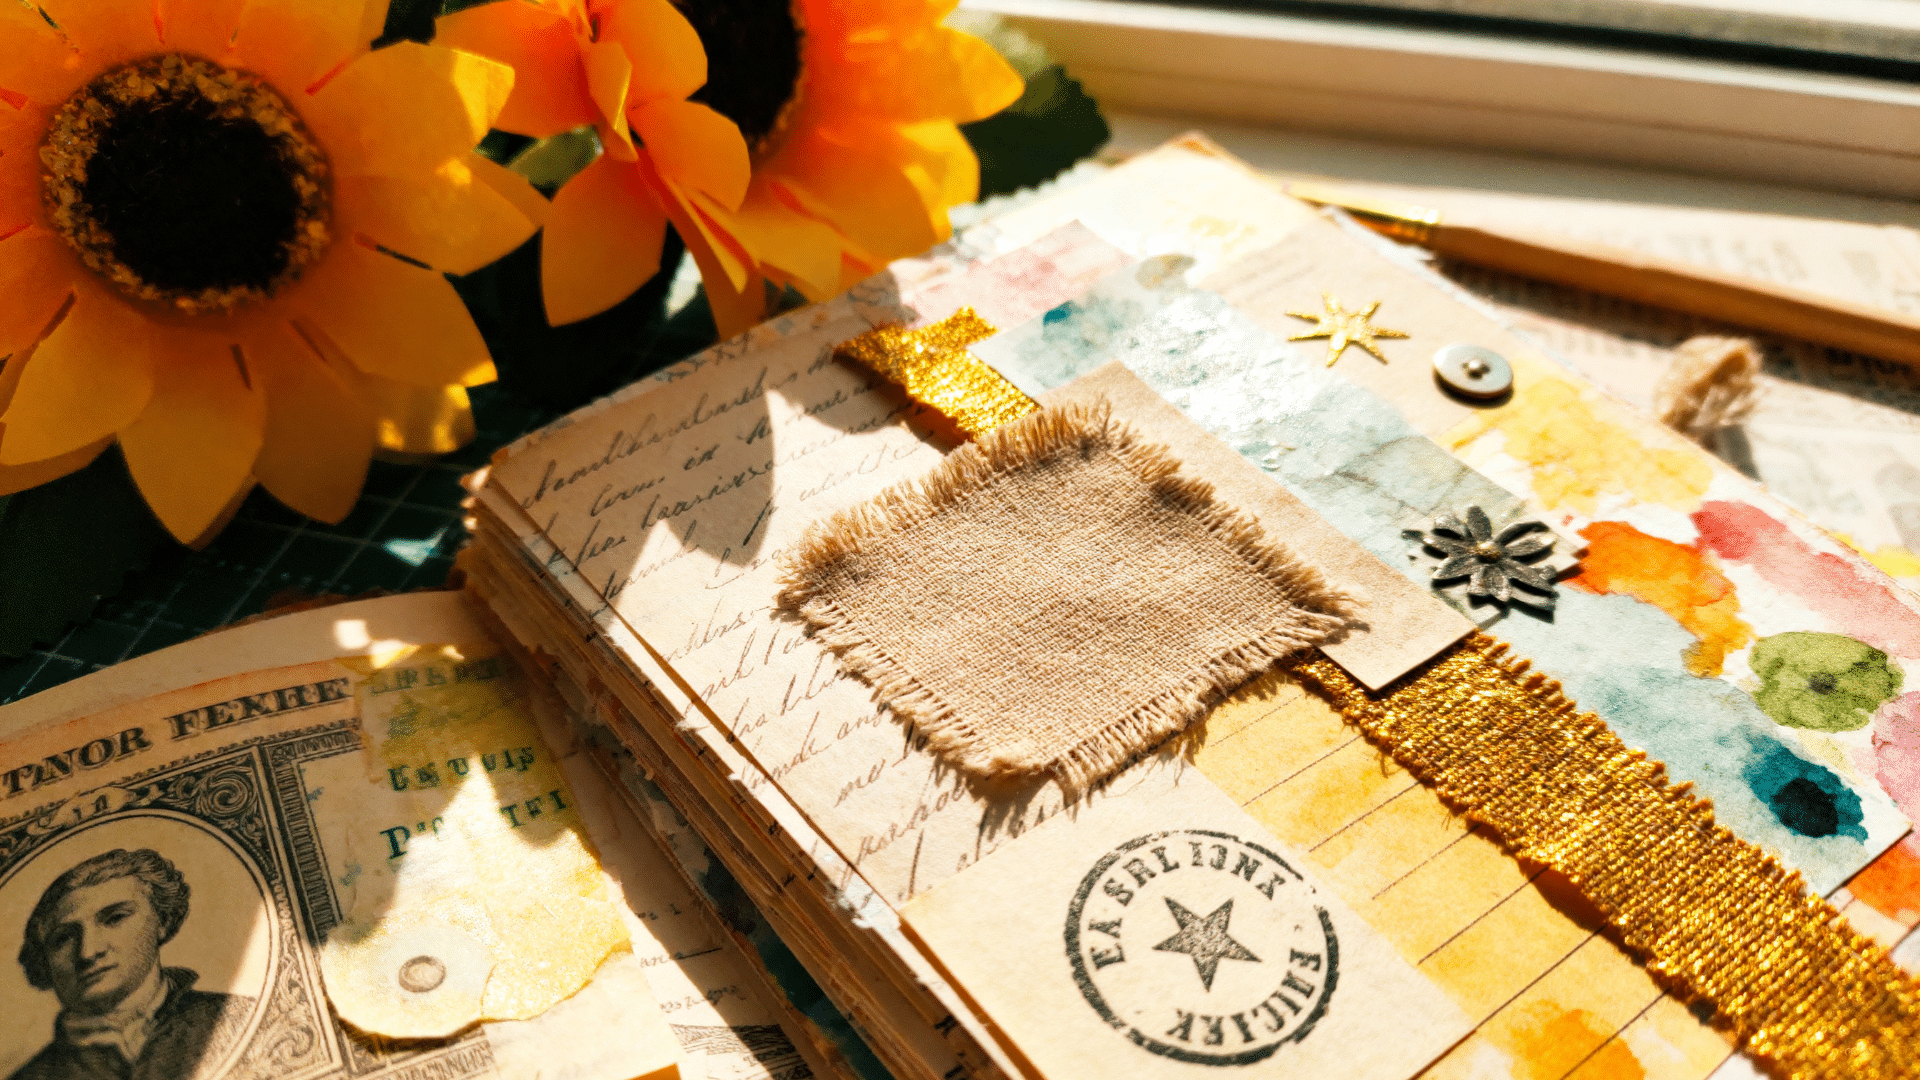
Junk journaling is the art of creating deeply personal, tactile journals from found and recycled materials, including tea-dyed pages, vintage maps, old book pages, and stamps, all layered together. It is the perfect outlet for adults who love nostalgia, storytelling, and mixed media art.
Skill Level: Beginner
Materials Used: Tea-dyed paper, vintage maps, old book pages, cardboard or old book cover, washi tape, stamps, thread, needle, and glue stick.
How to Make:
- Gather a mix of papers, including tea-dyed pages, old book pages, vintage maps, kraft paper, and magazine clippings.
- Fold and stitch them together into signatures using a basic pamphlet stitch, then bind them into a decorated cardboard cover.
- Fill the pages with layered collage, handwriting, washi tape, rubber stamps, and found paper ephemera.
11. DIY Paper Pie-Slice Boxes
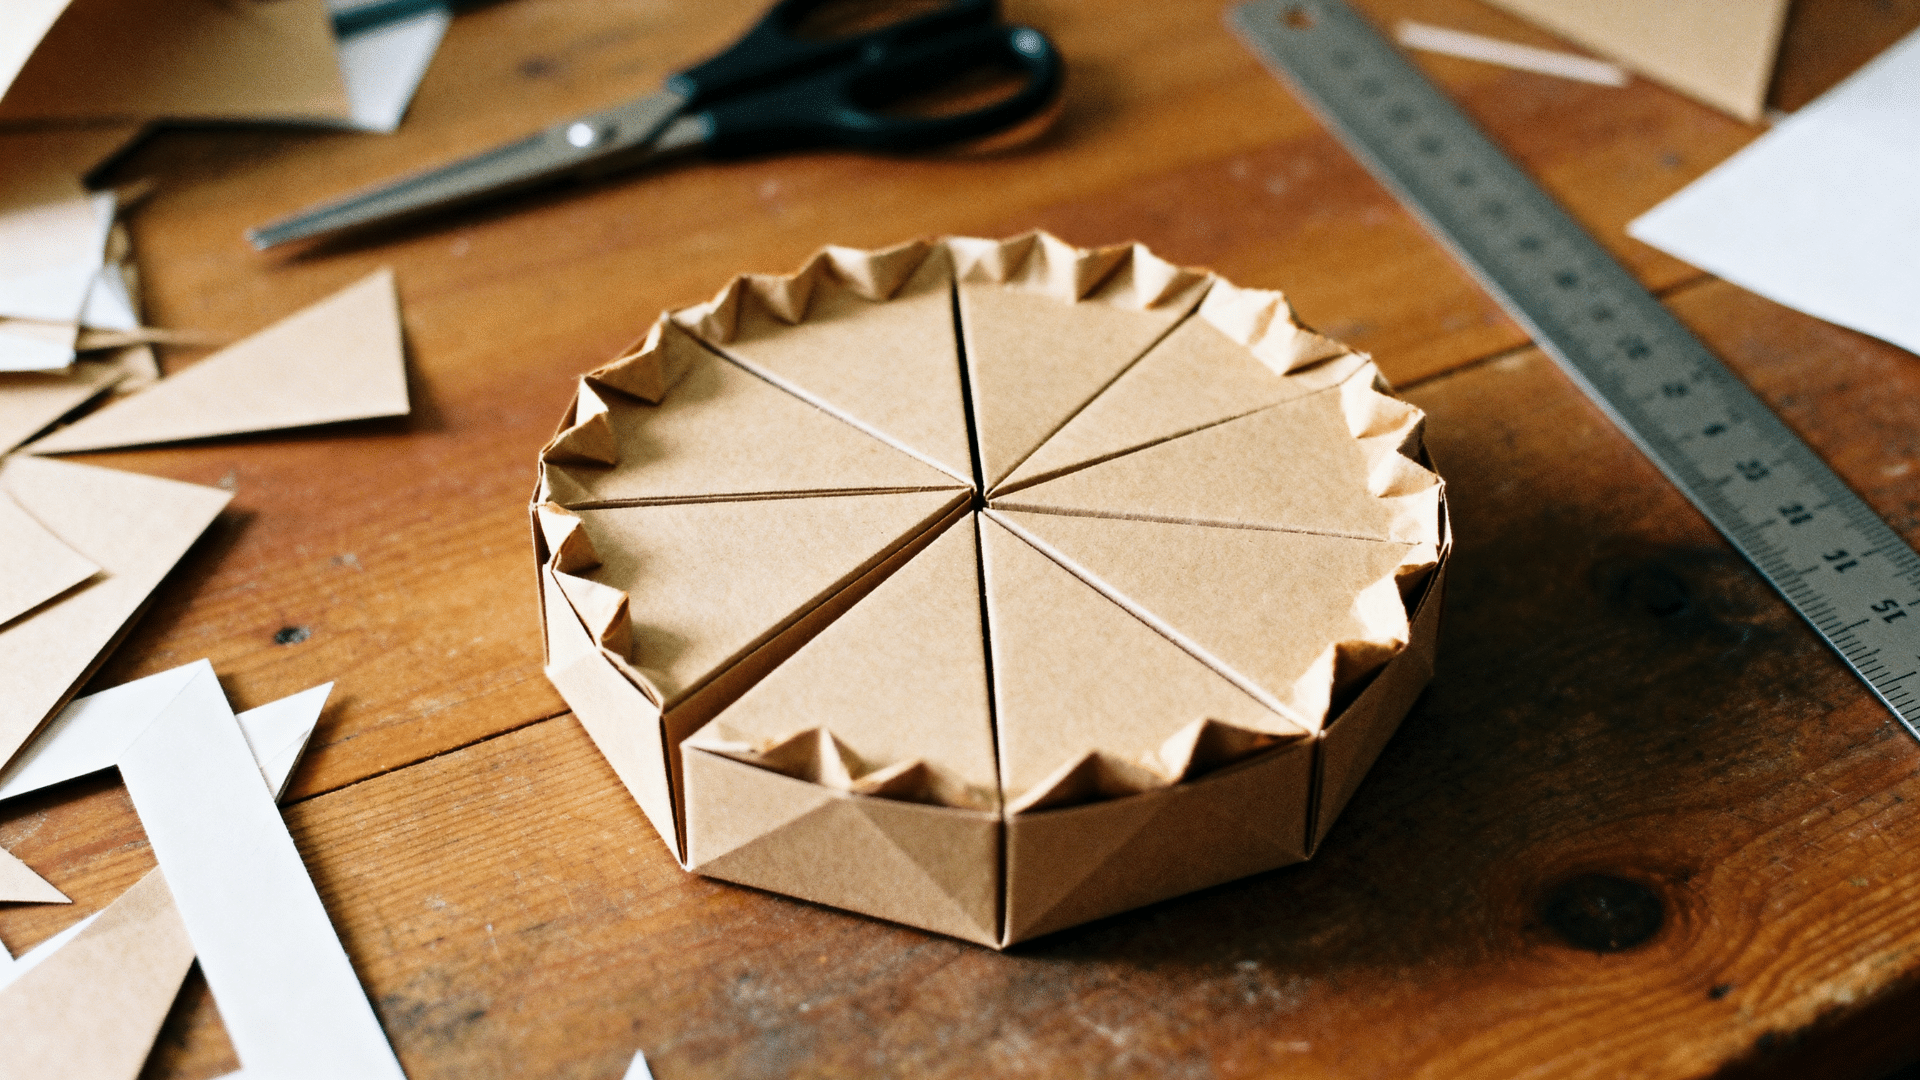
Paper pie-slice boxes are adorable triangular gift boxes perfect for packaging individual cake slices, small treats, or tiny gifts. They look impressive but are made from a single flat template that folds into shape without any complicated cuts.
Once assembled, they can be decorated with stamps, washi tape, or ribbon to suit any occasion.
Skill Level: Beginner
Materials Used: Cardstock, scissors or craft knife, cutting mat, bone folder, ruler, glue stick or double-sided tape, decorative elements.
How to Make:
- Draw or download a pie-slice box template onto cardstock and cut it out cleanly with scissors or a craft knife.
- Score all fold lines firmly with a bone folder and ruler for crisp, clean edges.
- Fold along the score lines, apply glue to the tabs, press the box together until it holds its shape, and decorate as desired.
12. Decorative Gift Boxes
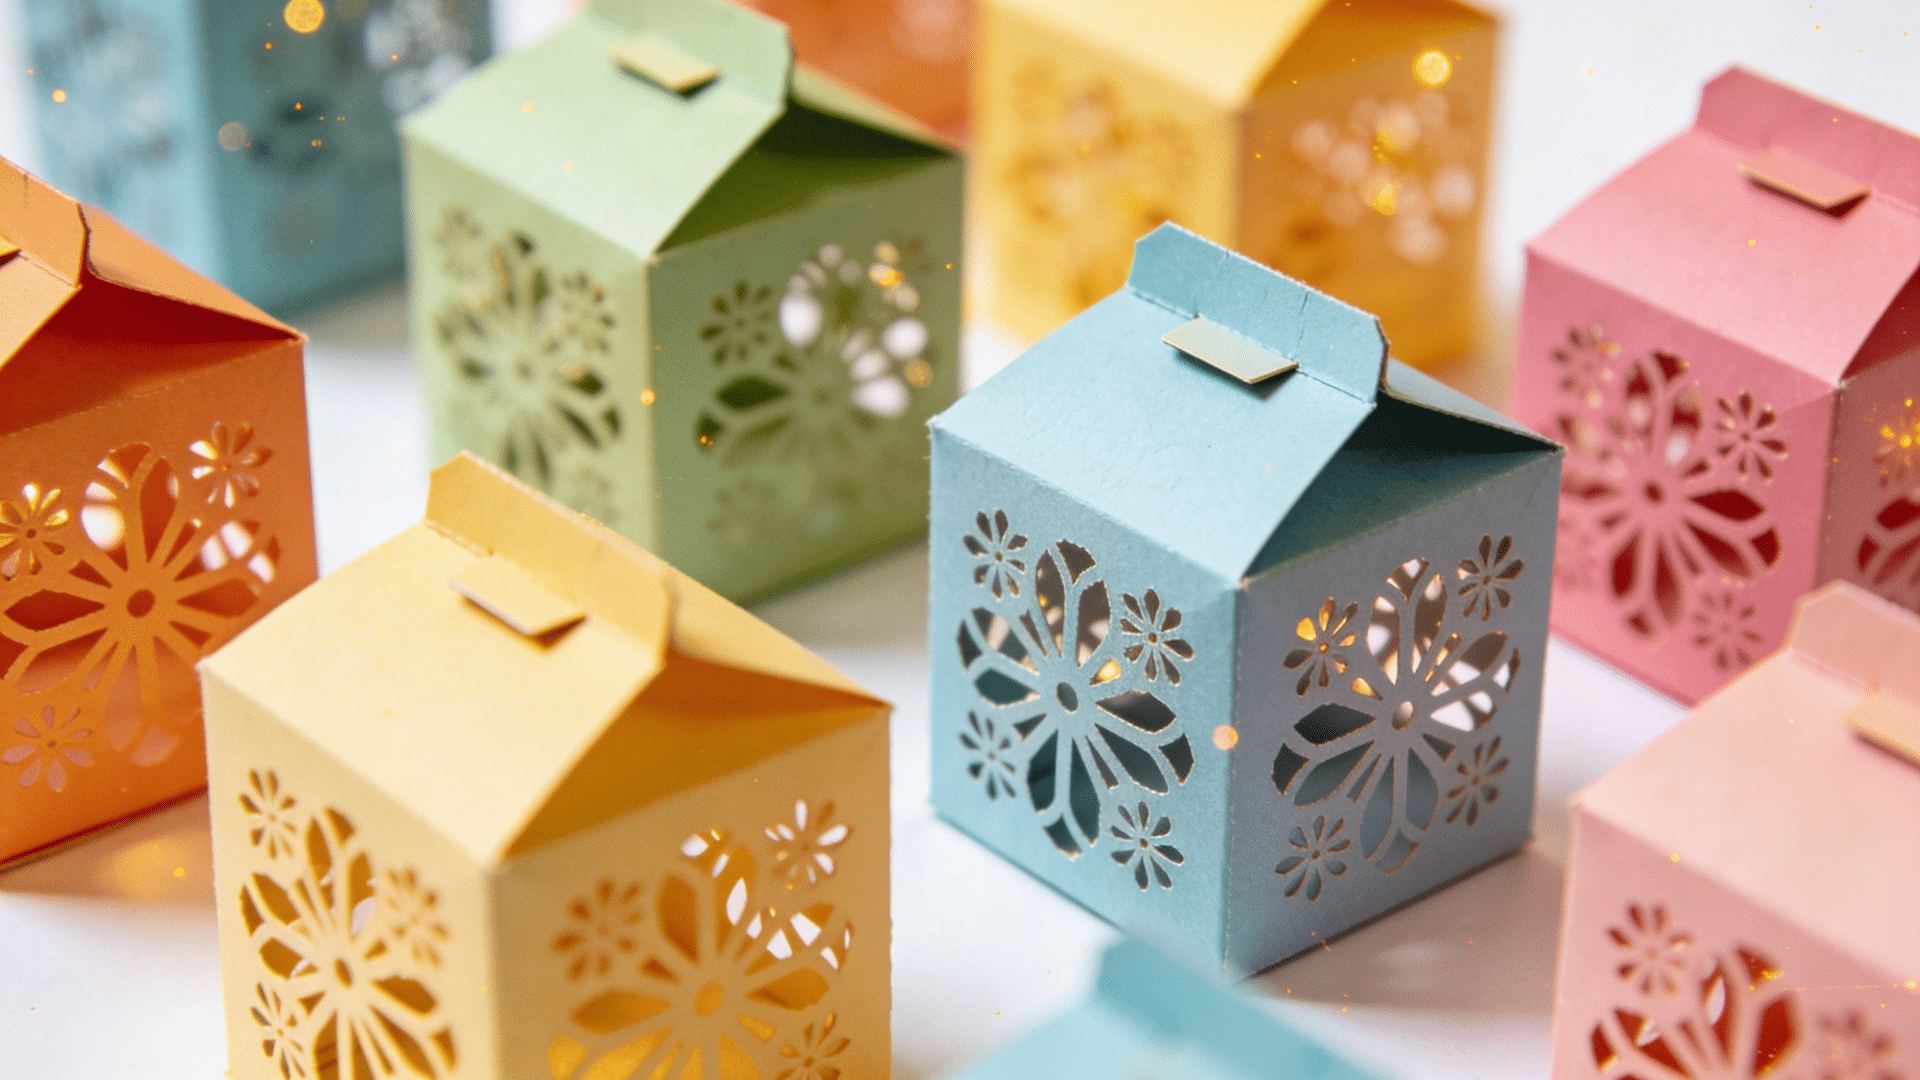
Designing your own custom gift boxes is a creative experience where the packaging becomes part of the gift itself. Paper gift boxes can be made in any shape, size, or style and decorated to match the recipient’s personality or the occasion. They are far more thoughtful and memorable.
Skill Level: Beginner
Materials Used: Decorative or plain cardstock, scissors or craft knife, bone folder, ruler, double-sided tape or glue, and embellishments of choice.
How to Make:
- Choose a box template, such as a square, rectangular, or hexagonal one, and trace it onto decorative or plain cardstock.
- Cut out the template, score all fold lines with a bone folder, and fold into shape, securing the tabs with glue or double-sided tape.
- Embellish the outside with stamps, quilling, paper flowers, washi tape, or handwritten calligraphy before adding your gift inside.
13. Paper Bead Jewelry
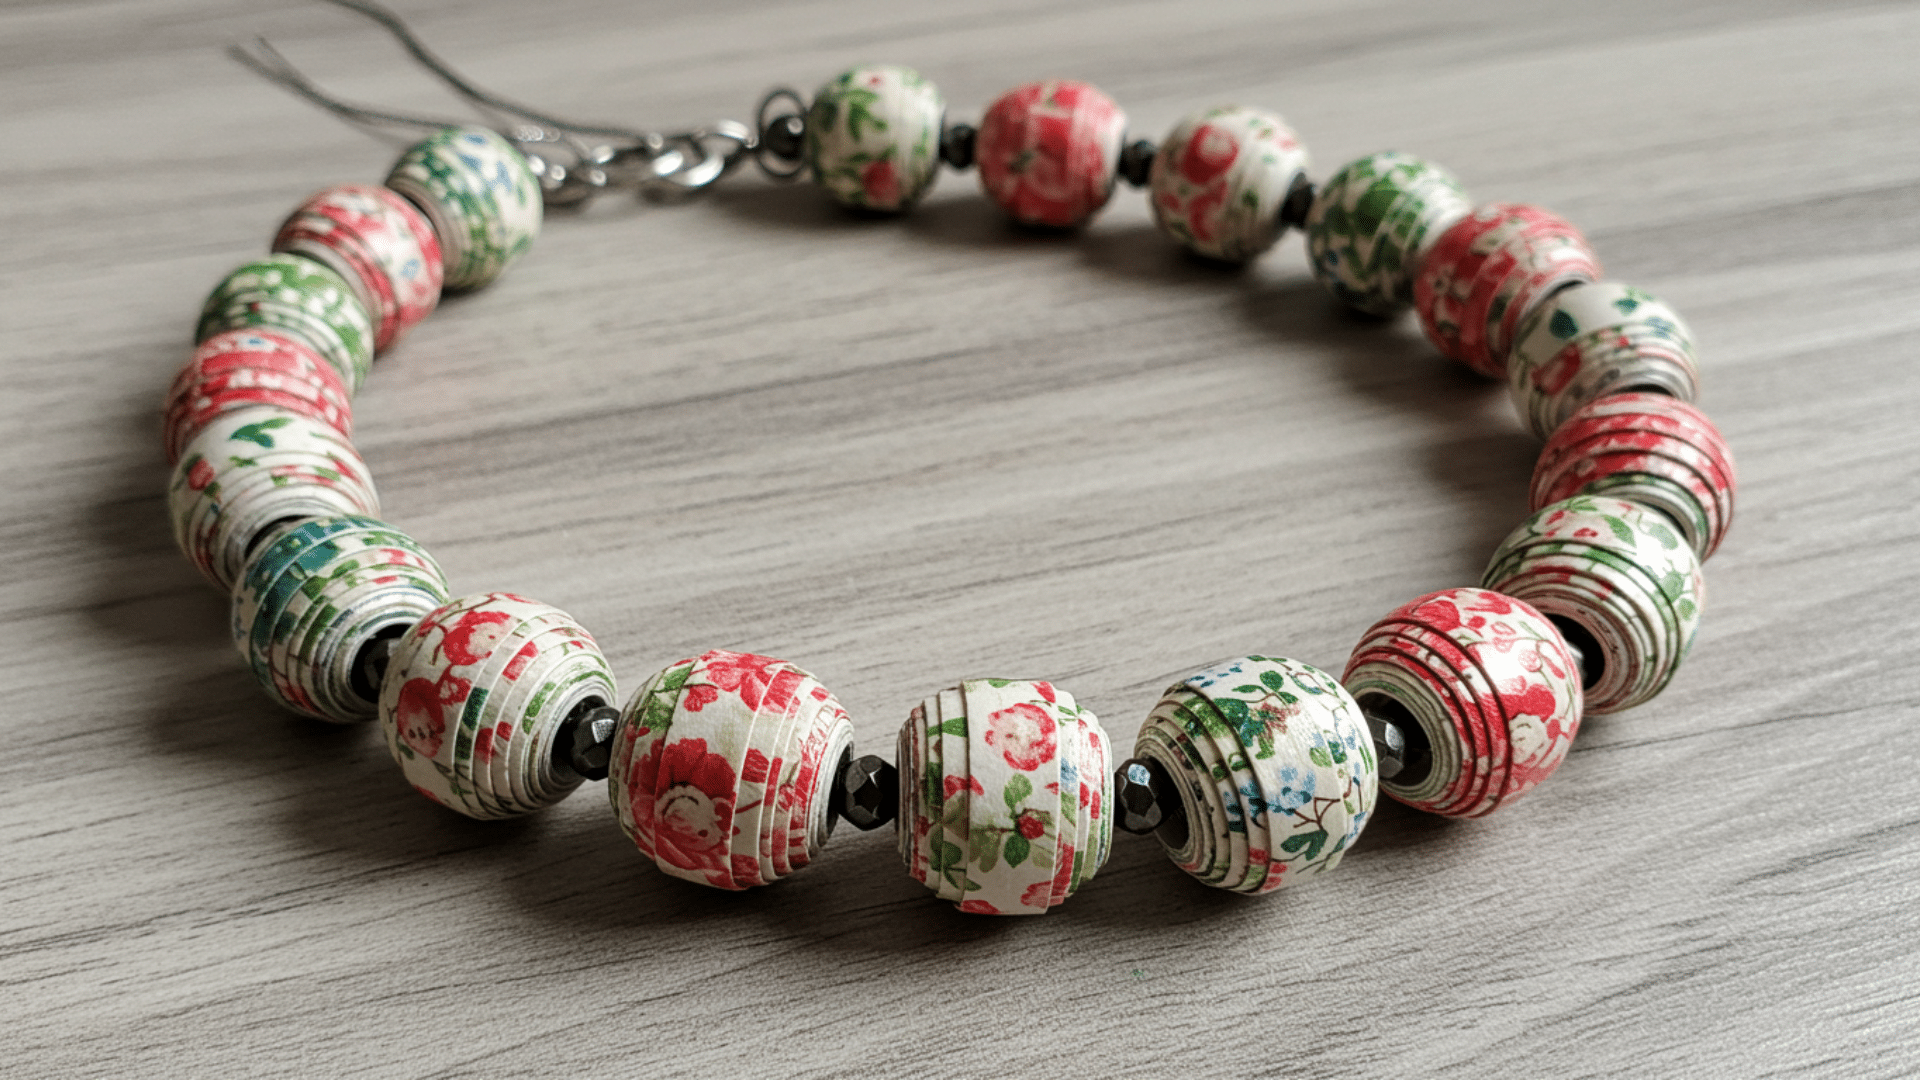
Paper bead jewelry is a sustainable, creative craft that turns scrapbook paper or magazine pages into beautiful wearable accessories. The rolling process is simple but meditative, and the finished beads carry the unique patterns of whatever paper you use.
Sealed and strung together, the beads look polished, colorful, and completely unlike paper.
Skill Level: Beginner
Materials Used: Scrapbook paper or magazine pages, scissors, white glue, toothpicks, Mod Podge or clear nail polish, and elastic cord or jewelry wire.
How to Make:
- Cut long triangular strips from scrapbook paper or magazine pages and roll each one tightly from the wide end around a toothpick, sealing the tip with a dab of glue.
- Once dry, slide the bead off and coat with Mod Podge or clear nail polish for shine and strength.
- String finished beads onto elastic cord or jewelry wire to create necklaces, bracelets, or earrings.
14. Paper Ship
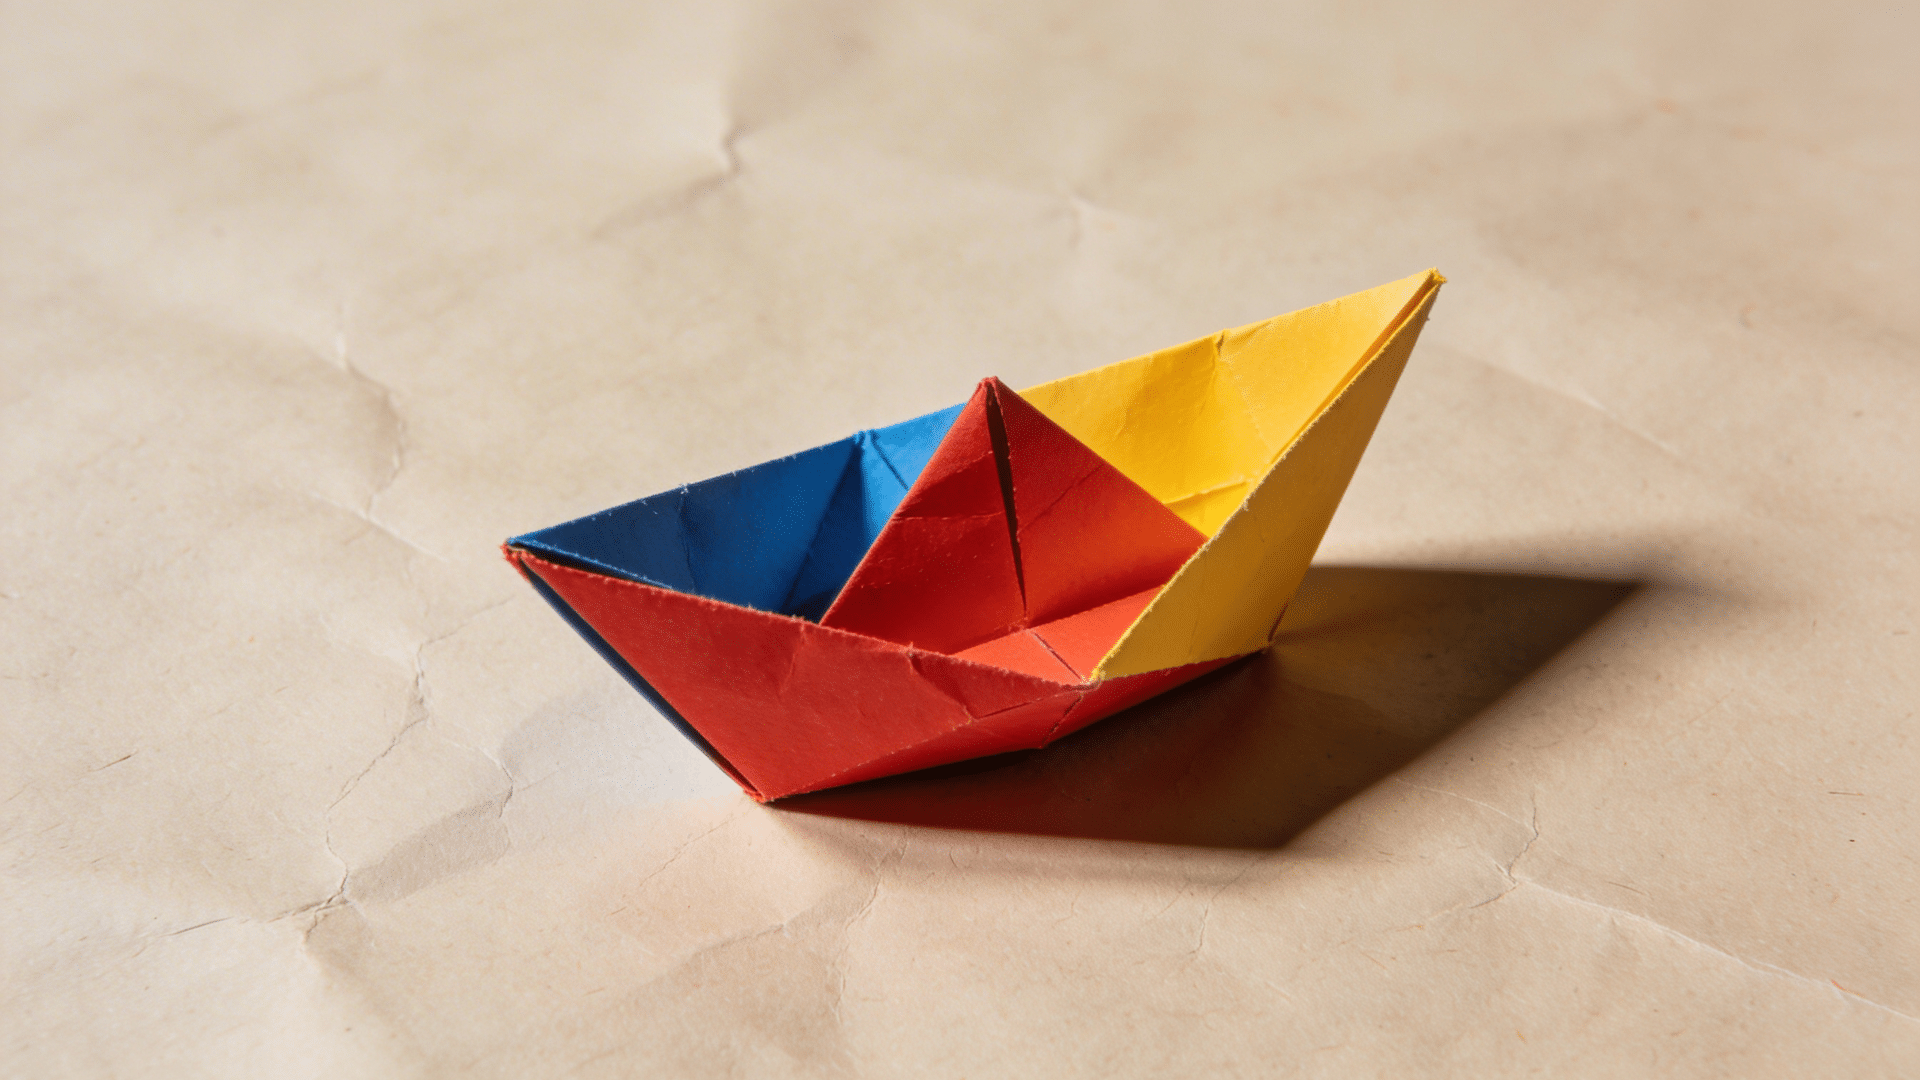
Building a paper ship goes far beyond the simple childhood sailboat. Detailed paper vessels can be stunning decorative objects that showcase real patience and precision. From classic origami boats to multi-layered model ships built from cardstock, this craft appeals to adults who love nautical themes and intricate handiwork.
Skill Level: Intermediate
Materials Used: Cardstock, craft knife, cutting mat, bone folder, PVA glue, thin thread or string, ruler, pencil.
How to Make:
- Sketch or download a template for the hull, sails, and mast onto cardstock and cut each piece out carefully.
- Score and fold the hull into shape, gluing tabs firmly and allowing each section to dry fully before adding the next.
- Attach the mast with strong glue, add paper sails curved for realism, and finish with thin thread for rigging.
15. Decoupage Decor
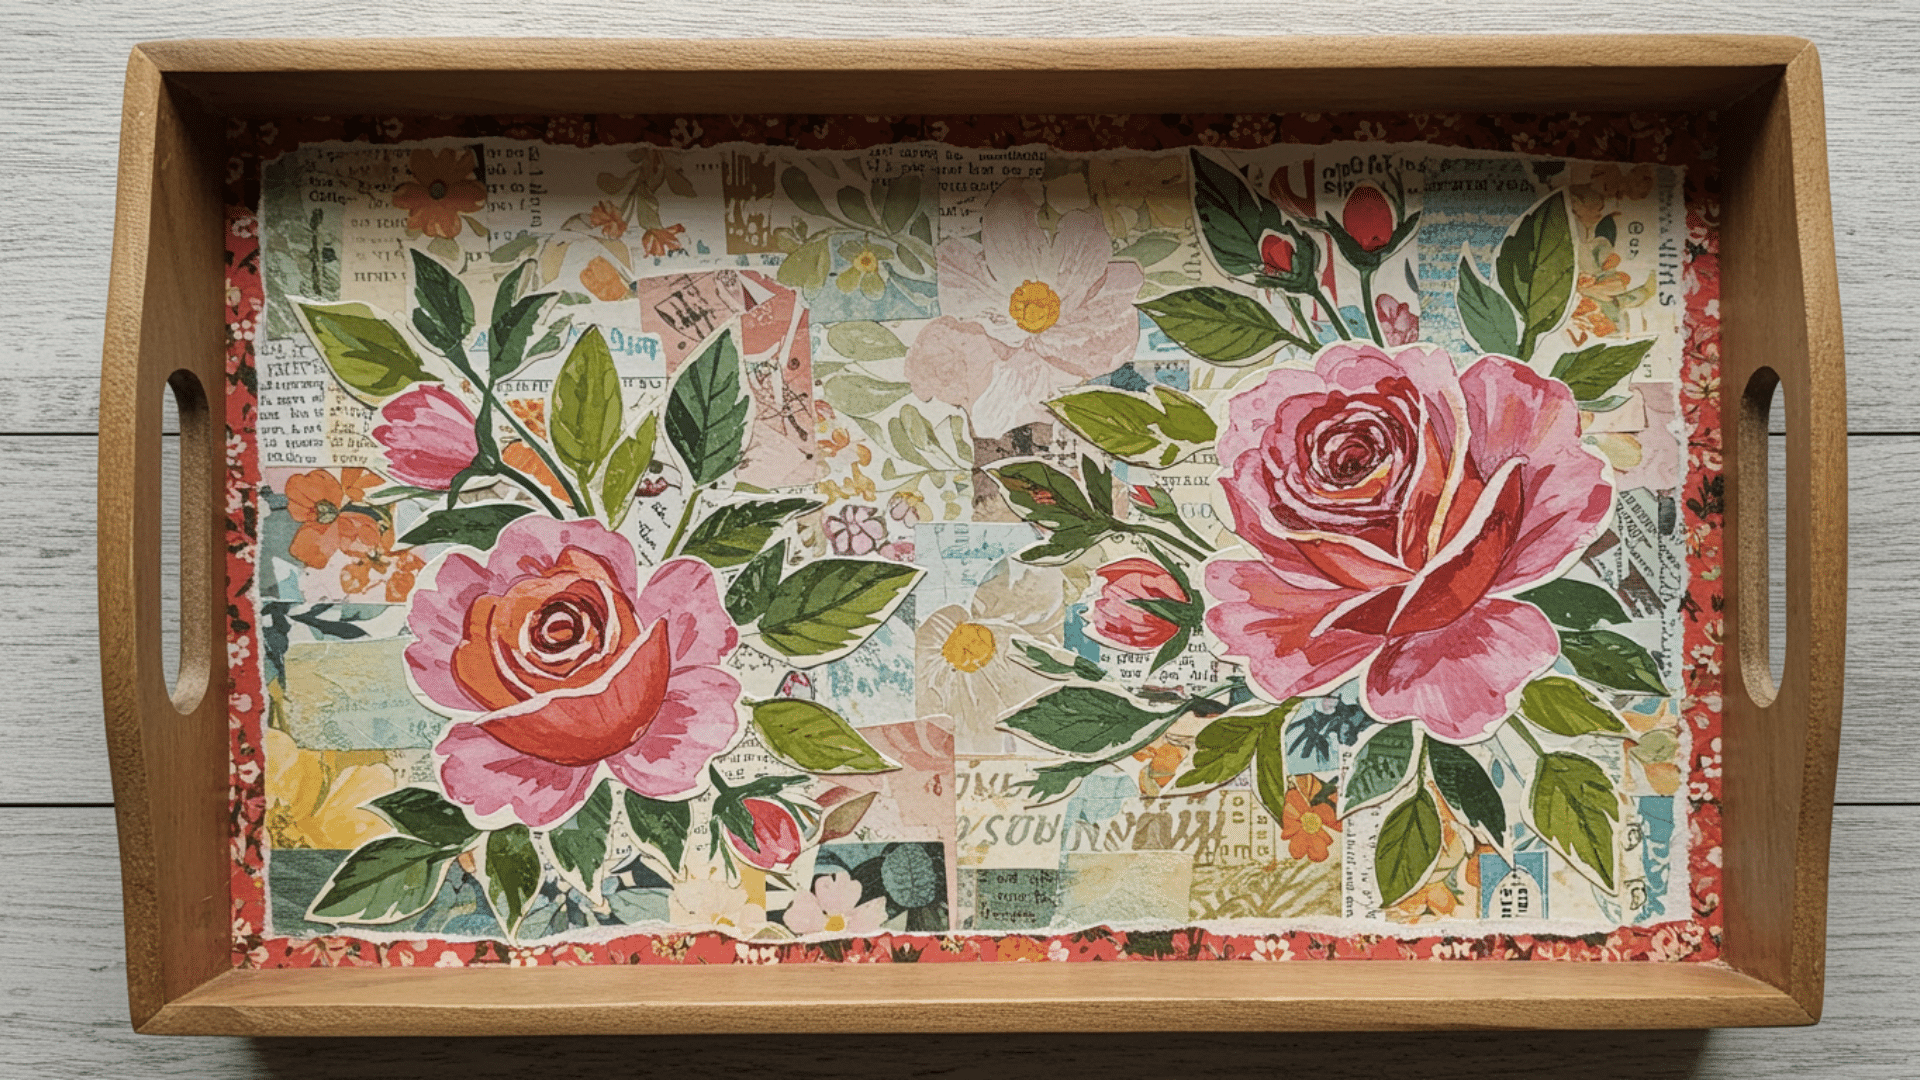
Decoupage décor takes the classic technique of layering paper and applies it to everyday household objects like trays, glass jars, or small furniture pieces, completely transforming them. It is one of the most versatile paper crafts because the base object and paper choices are entirely up to you.
Skill Level: Intermediate
Materials Used: Wooden tray, glass jar or furniture piece, decorative paper or napkins, Mod Podge, foam brush, sandpaper, scissors.
How to Make:
- Choose your object, such as a wooden tray, glass jar, or small drawer, and lightly sand or clean the surface.
- Brush a layer of Mod Podge onto the surface, press cut or torn paper pieces down overlapping slightly, and smooth out any bubbles.
- Apply 2 to 3 sealing coats of Mod Podge on top, allowing each coat to dry completely before the next.
16. Handmade Envelopes
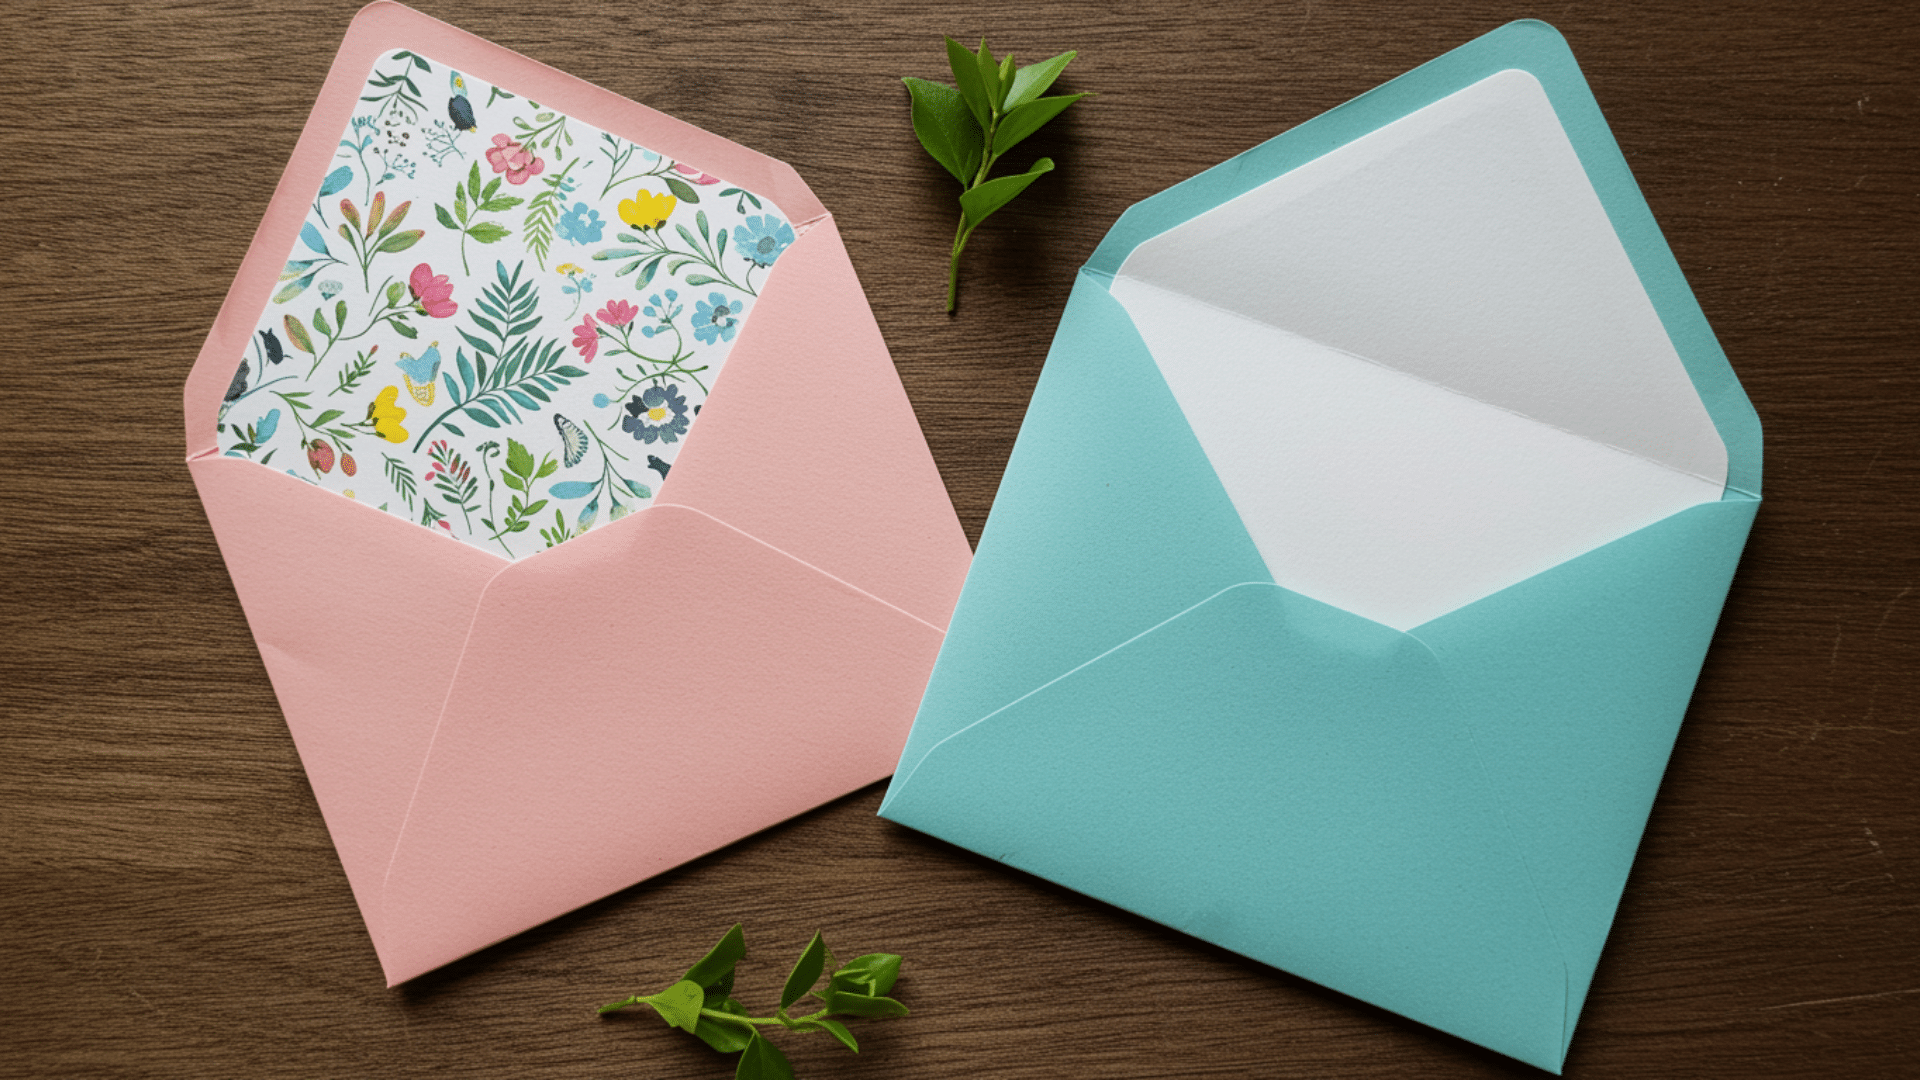
Handmade envelopes are a beautiful, thoughtful touch that elevates any handwritten letter or greeting card into something truly special. They can be made from virtually any paper, including old book pages, sheet music, maps, or wrapping paper, giving each one a unique character.
Skill Level: Beginner
Materials Used: Decorative paper, old book pages or wrapping paper, scissors, bone folder, ruler, glue stick, store-bought envelope as template.
How to Make:
- Place a store-bought envelope on your chosen paper, trace around it as a template, and cut it out.
- Score and fold along the same lines as the original envelope using a bone folder for crisp edges.
- Fold up the bottom flap, then fold in and glue the side flaps, leaving the top flap free for sealing.
17. Kirigami Snowflake Art
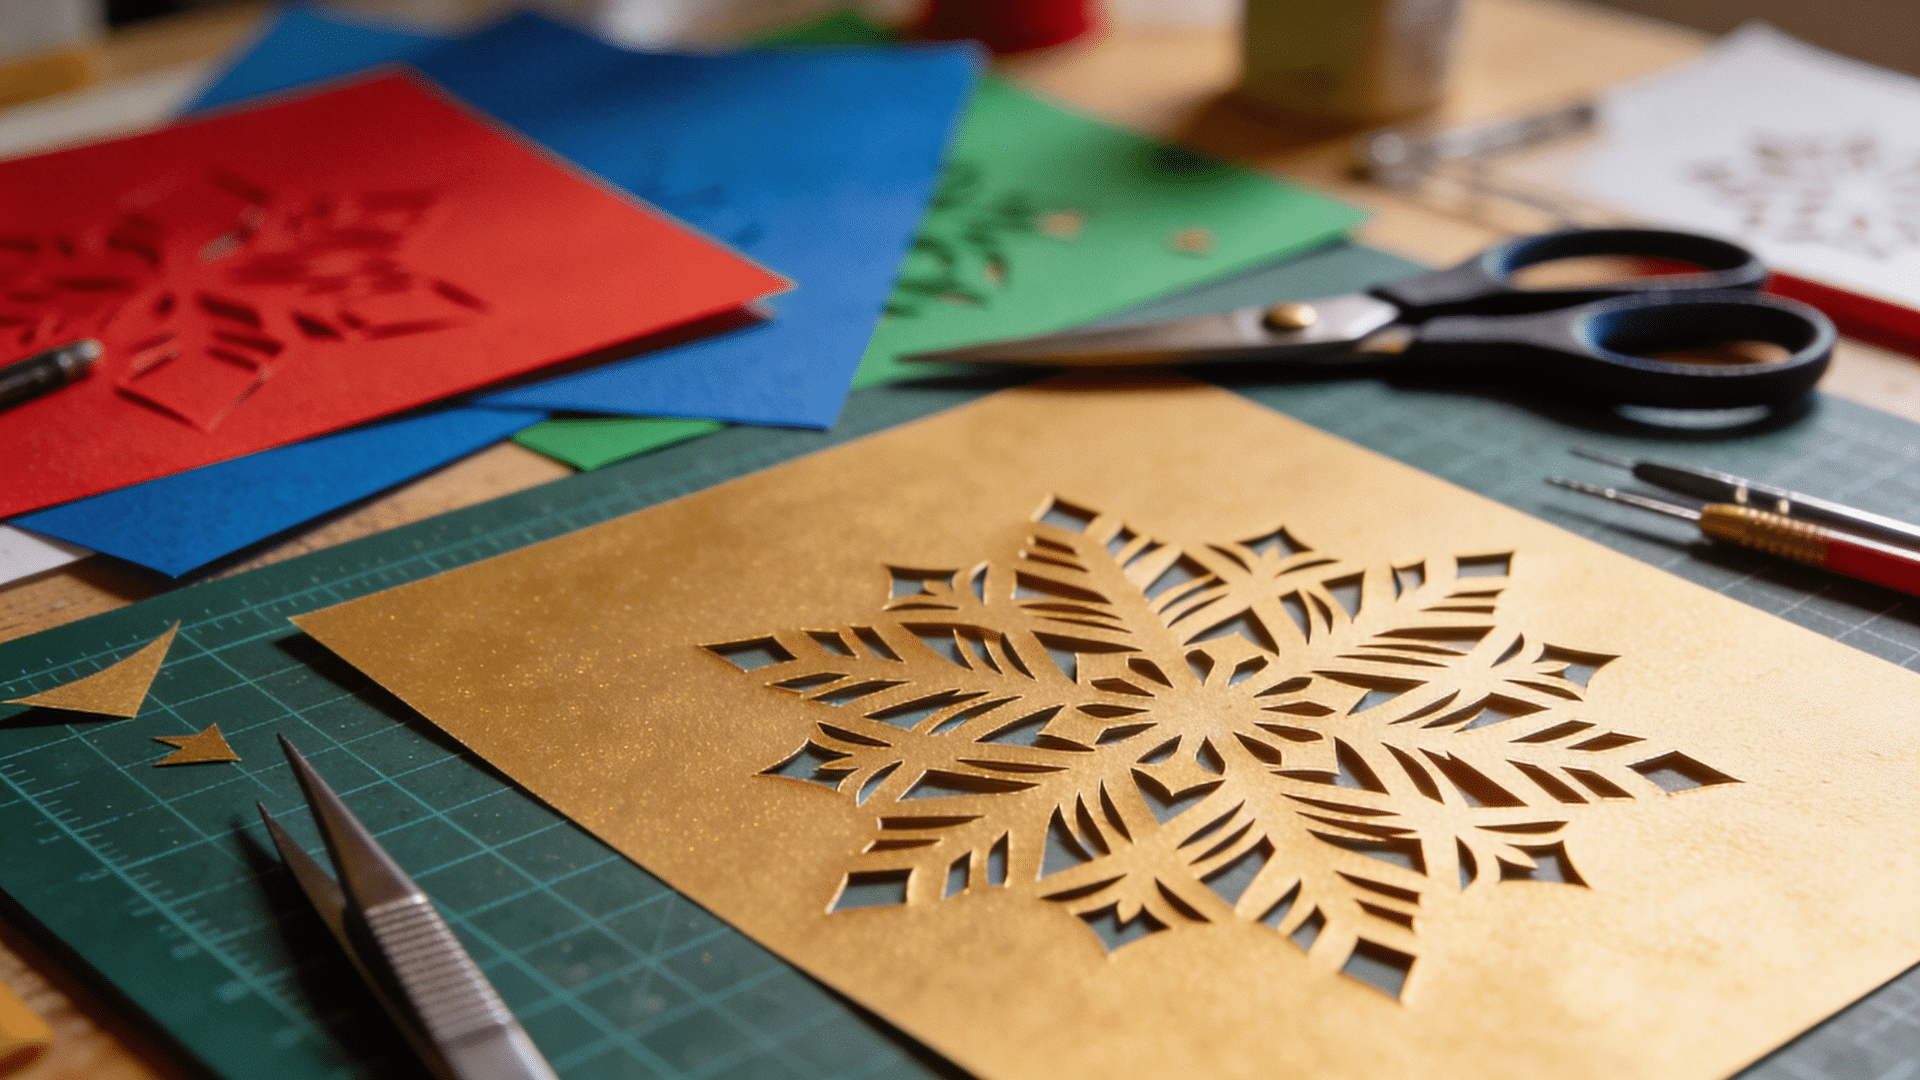
Kirigami snowflakes are an evolution of the classic paper snowflake, combining careful folding and precise cutting to create intricate, lace-like designs that look like delicate crystal formations. Framed or hung in a window, they catch the light, creating a magical wintry atmosphere.
Skill Level: Beginner
Materials Used: White or translucent paper, small, sharp scissors or craft knife, cutting mat, pencil, frame, or thread for display.
How to Make:
- Fold a square of white or translucent paper in half diagonally, then fold again twice more to create a small wedge shape.
- Draw half-shapes along the edges, such as triangles, curves, or diamonds, and carefully cut them out with scissors or a fine craft knife.
- Unfold the paper slowly to reveal the full snowflake, press flat under a heavy book, then frame or hang for display.
18. 3D Paper Sculptures
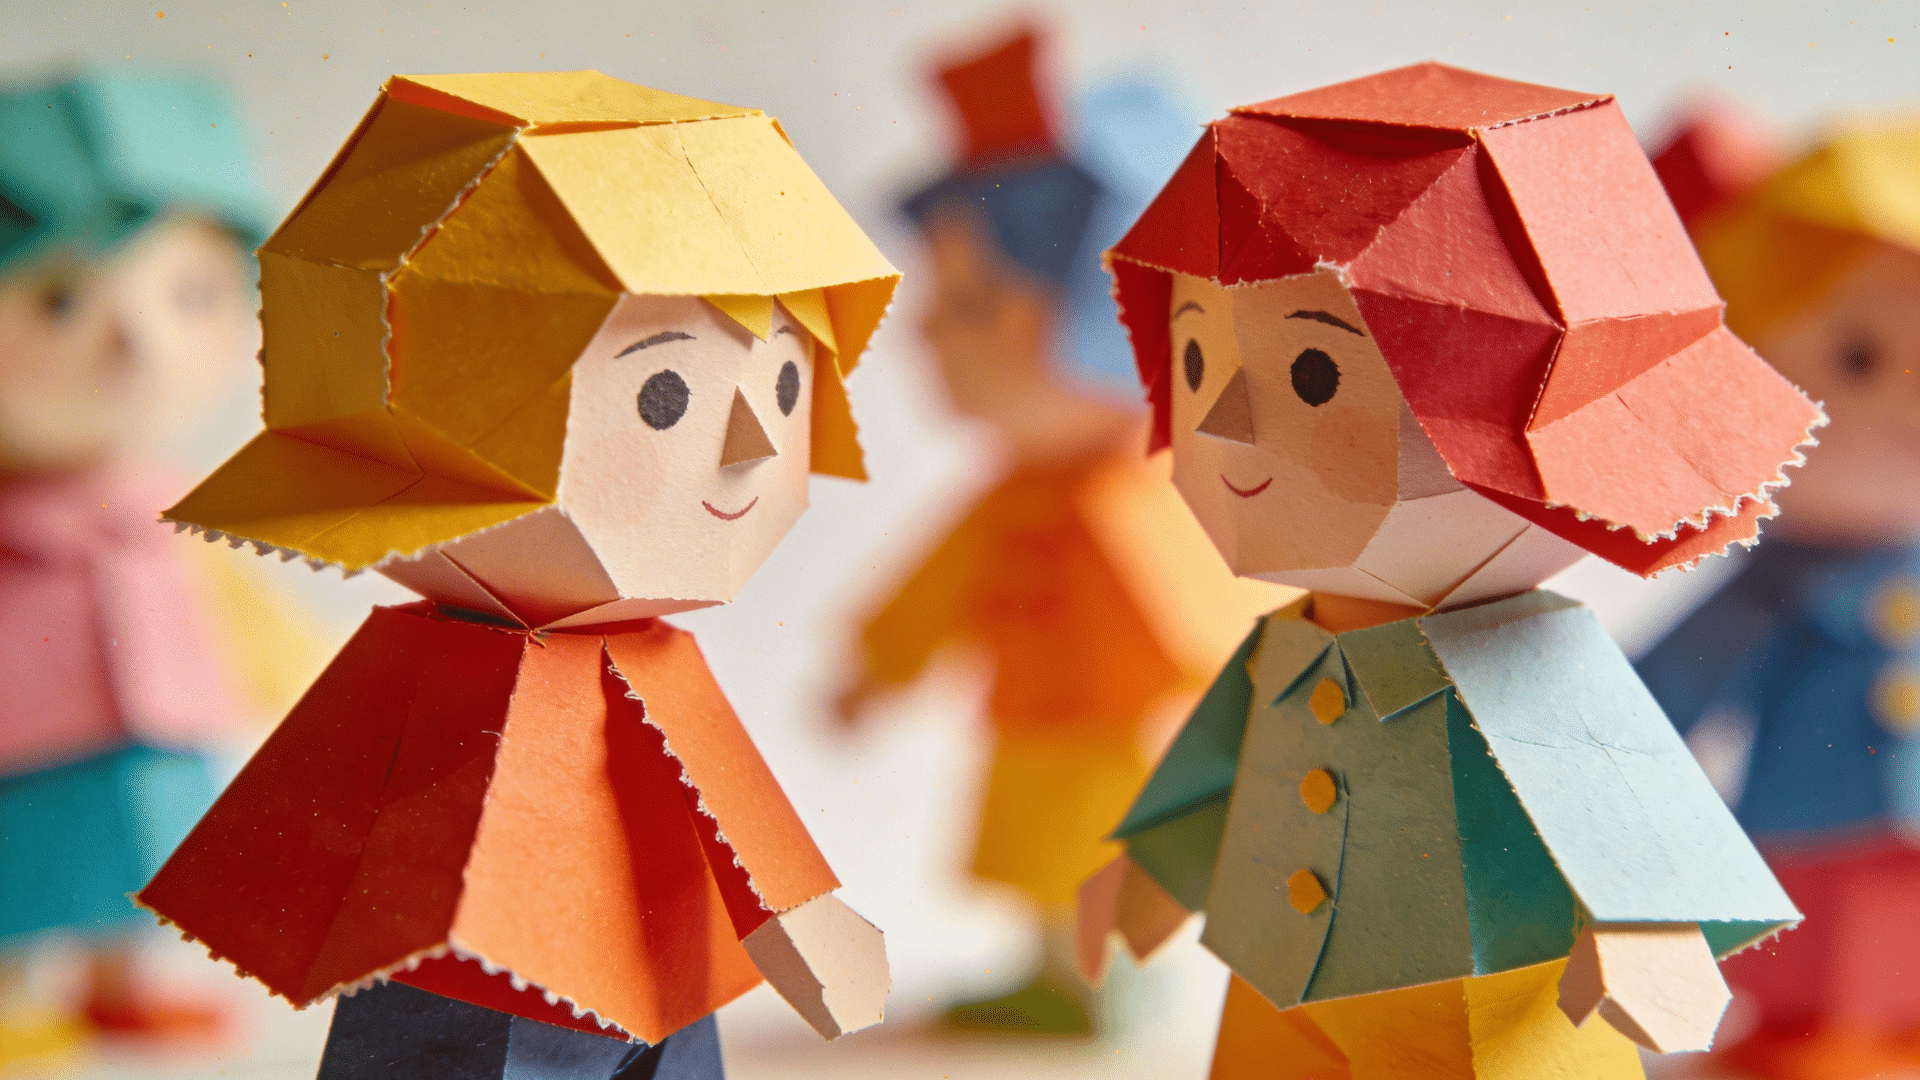
3D paper sculptures push the boundaries of what paper can become, allowing you to build high-detail miniature worlds, realistic animal models, or even famous landmarks like Himeji Castle using precision-cut cardstock. The craft demands patience and accuracy.
Skill Level: Advanced
Materials Used: Cardstock, craft knife, cutting mat, bone folder, PVA glue, fine-tip glue applicator, metal ruler, pencil, printed or hand-drawn templates.
How to Make:
- Download or draw detailed templates for each component of your sculpture, then carefully transfer them onto cardstock.
- Cut every piece out precisely with a craft knife, score all fold lines with a bone folder, and fold each section into its three-dimensional shape.
- Assemble the sculpture piece by piece using PVA glue applied with a fine-tip applicator, allowing each section to dry fully before joining the next.
19. Paper Medallion Decorations
Paper medallions are stunning, rosette-style decorations that look like giant blooming flowers and make an instant statement on any wall, ceiling, or event backdrop. They are made by folding and fanning out sheets of paper into a circular, layered form that radiates outward from the center.
Skill Level: Beginner
Materials Used: Cardstock in assorted colors, scissors, bone folder, ruler, stapler or hot glue gun, brad fastener or decorative button for center, string or ribbon for hanging.
How to Make:
- Cut two equal-length strips of cardstock or crepe paper, and accordion-fold each tightly from end to end using a bone folder for crisp, even folds.
- Staple or glue the two folded strips together at each end to form one large circular fan shape, pressing the center flat to create the full medallion form.
- Secure a brad fastener or decorative button at the center to finish the look, then attach a loop of ribbon or string to the back for hanging.
20. Tissue Paper Butterflies

Tissue paper butterflies are delicate, colorful decorations that add a whimsical touch to walls, gift wrapping, or party displays. They are incredibly simple to make and can be customized in any color combination. Their light, airy look makes them perfect for spring or garden-themed events.
Skill Level: Beginner
Materials Used: Tissue paper in assorted colors, pipe cleaners, scissors, and string.
How to Make:
- Stack two to three sheets of tissue paper together and accordion-fold them tightly from one short end to the other to create an even fan shape.
- Pinch the folded paper in the center and wrap a pipe cleaner tightly around the middle, twisting the ends upward to form the antennae.
- Gently pull apart and fluff each layer of tissue paper outward on both sides to shape the wings into a full, rounded butterfly form.
21. Paper Bookmarks
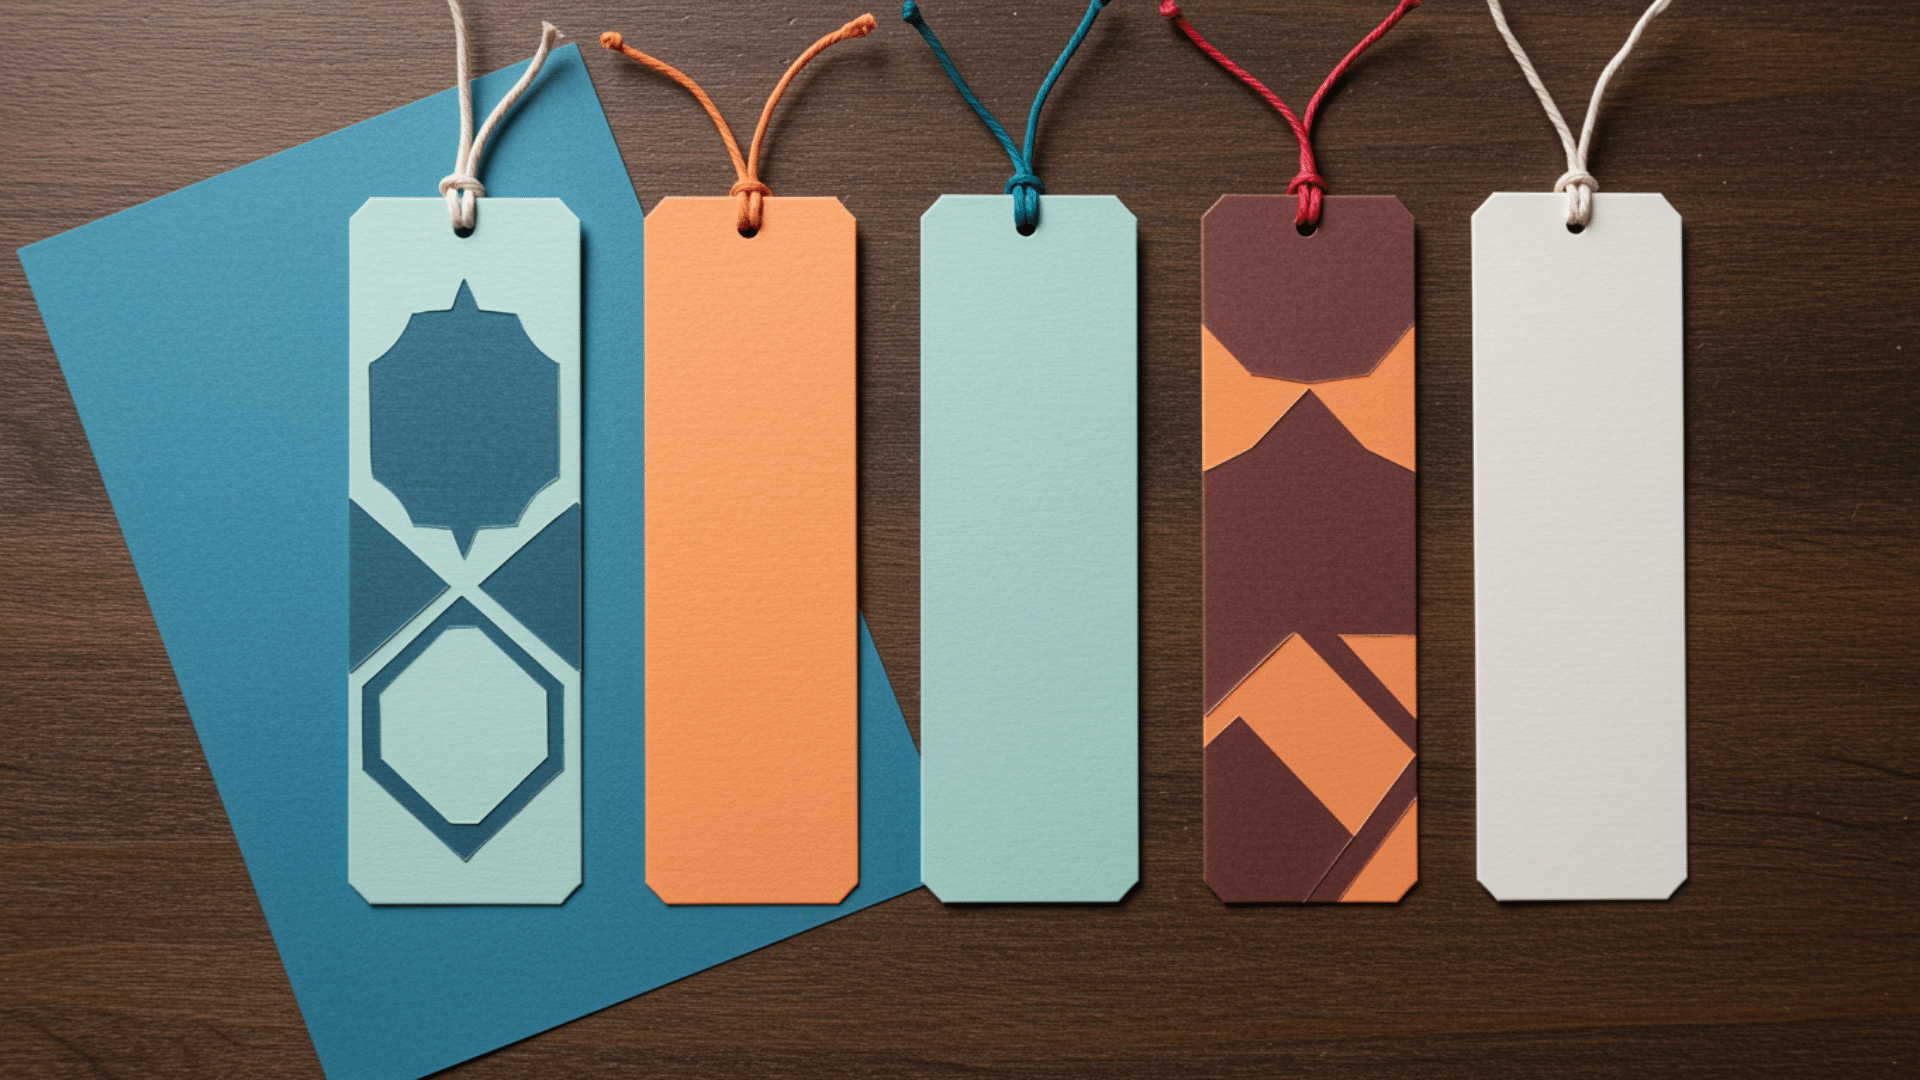
Paper bookmarks are fun and functional little crafts that keep your place in style. They can be shaped into animals, characters, or geometric corners and decorated with markers, stickers, or washi tape. A perfect beginner project that makes a great personalized gift.
Skill Level: Beginner
Materials Used: Cardstock, scissors, ruler, markers or colored pencils, washi tape, and glue stick.
How to Make:
- Cut a rectangular strip of cardstock to your desired bookmark size and fold or shape it into a corner pocket or flat strip design.
- Decorate the front with markers, washi tape, or stickers to add patterns, characters, or colorful designs.
- Laminate or cover with clear tape for durability, then trim any rough edges for a clean, finished look.
22. Colorful Paper Rainbow
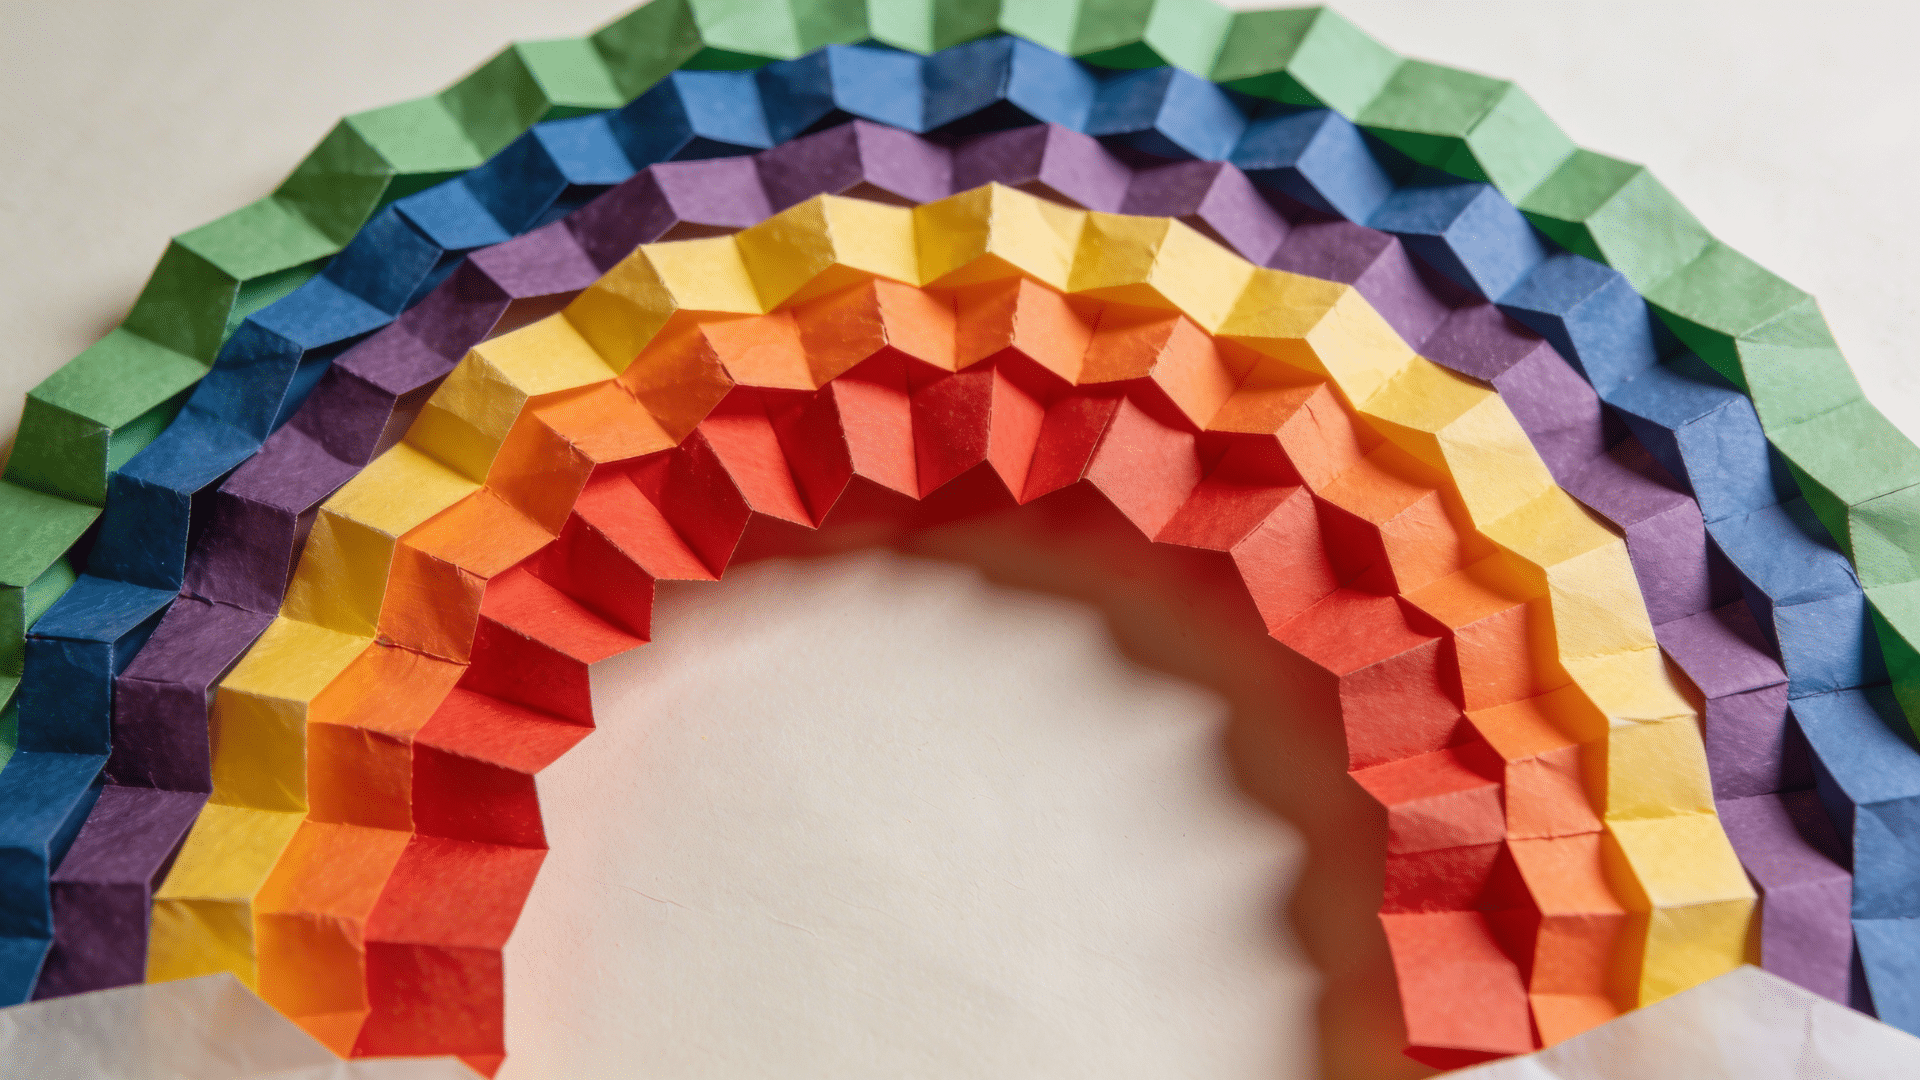
A colorful paper rainbow is a cheerful wall decoration made from layered strips of paper, curved into a classic arch. It brings instant brightness to any room, nursery, or classroom display. You can scale it up or down to suit any space.
Skill Level: Beginner
Materials Used: Cardstock or construction paper in rainbow colors, scissors, glue stick or tape, pencil.
How to Make:
- Cut long strips of cardstock in each rainbow color: red, orange, yellow, green, blue, and violet, varying the width slightly for each layer.
- Curve each strip into an arch and glue or tape the ends down on a flat backing sheet, layering from the largest outer arch inward by color.
- Add small white paper clouds at both ends of the rainbow base to finish the look and secure everything neatly in place.
23. Confetti Coaster
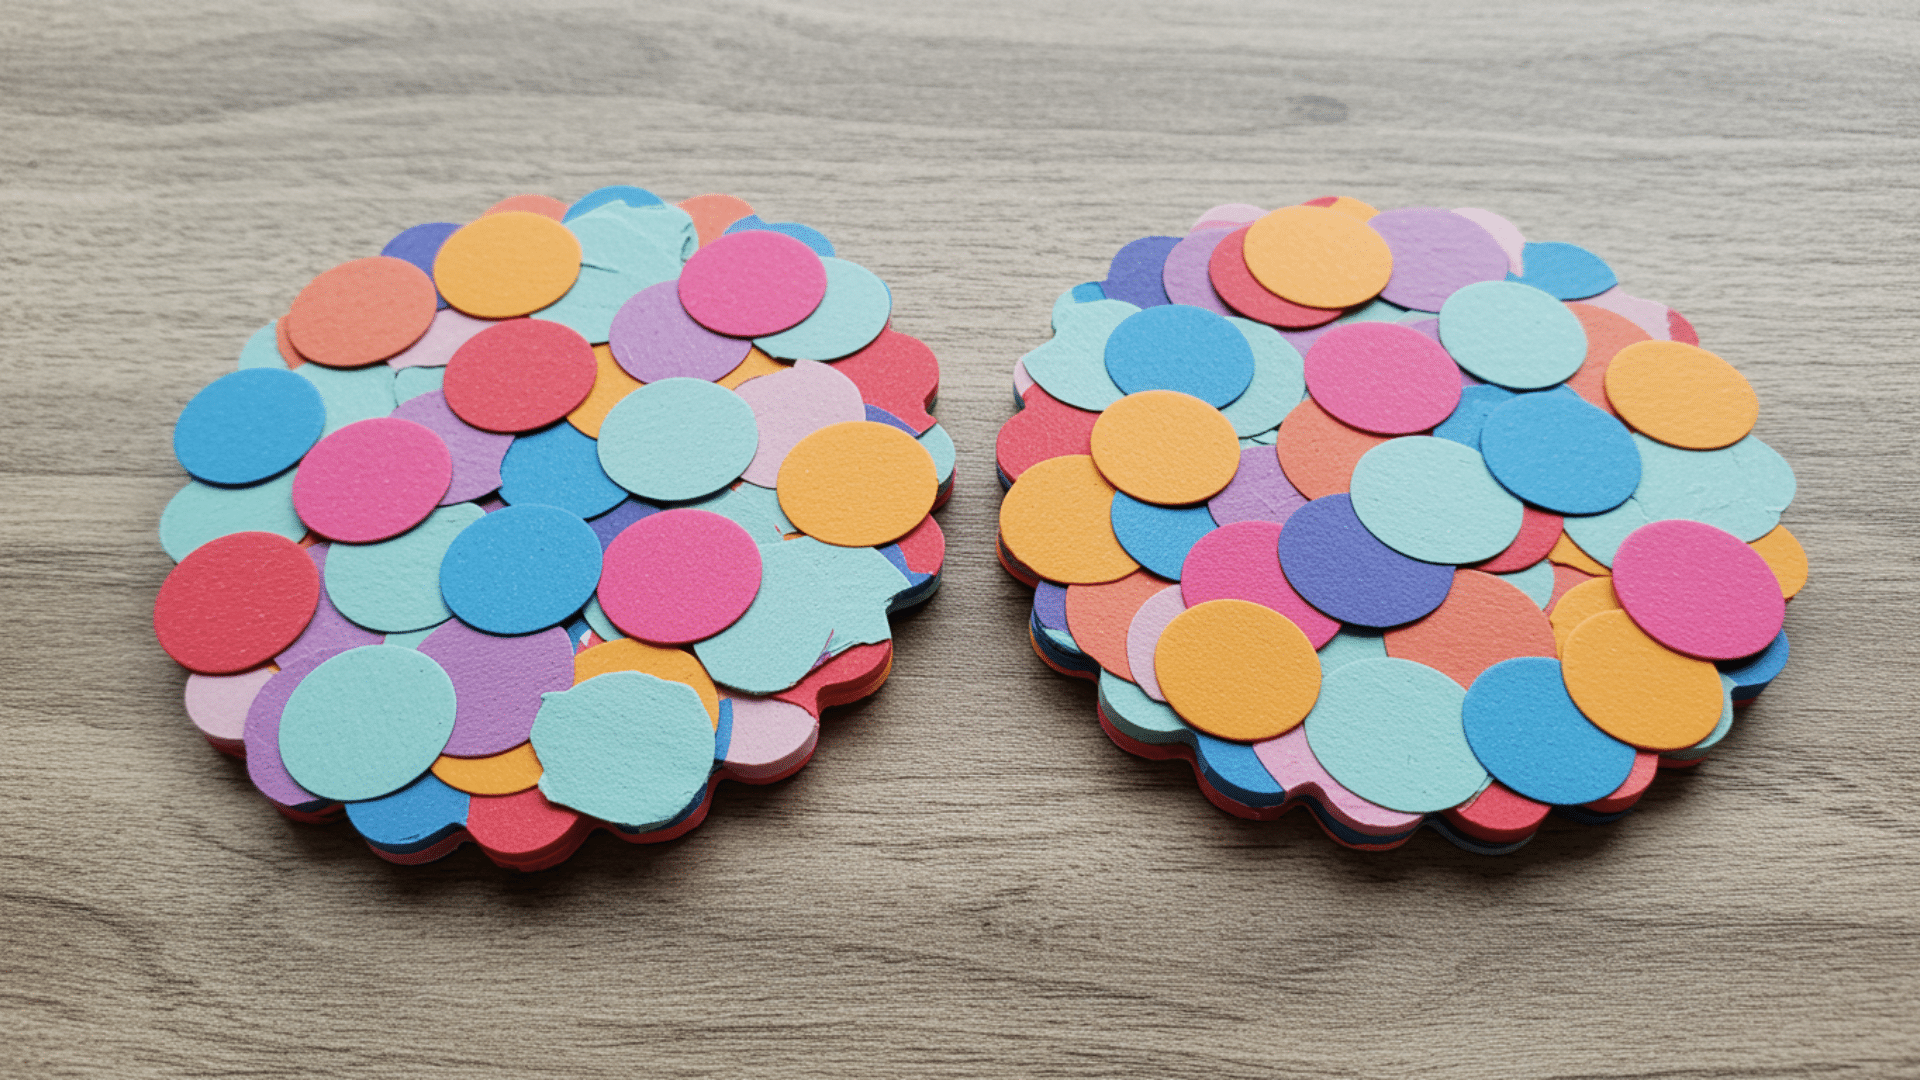
Confetti coasters are bright, resin-style coasters made with paper confetti sealed between layers for a fun, decorative finish.
They are easy to customize for any theme or color palette and make great handmade gifts. A coat of sealant gives them a polished, durable surface.
Skill Level: Beginner
Materials Used: Cardstock, hole punch or scissors, clear contact paper or Mod Podge, circular template, brush.
How to Make:
- Cut or punch colorful cardstock scraps into small confetti shapes and arrange them in a circular pattern on a sheet of contact paper or a stiff base.
- Apply a generous coat of Mod Podge over the entire surface, spreading it evenly to seal all the confetti pieces flat and in place.
- Allow to dry completely, then apply one to two more sealing coats, letting each dry fully before trimming to a clean circular shape.
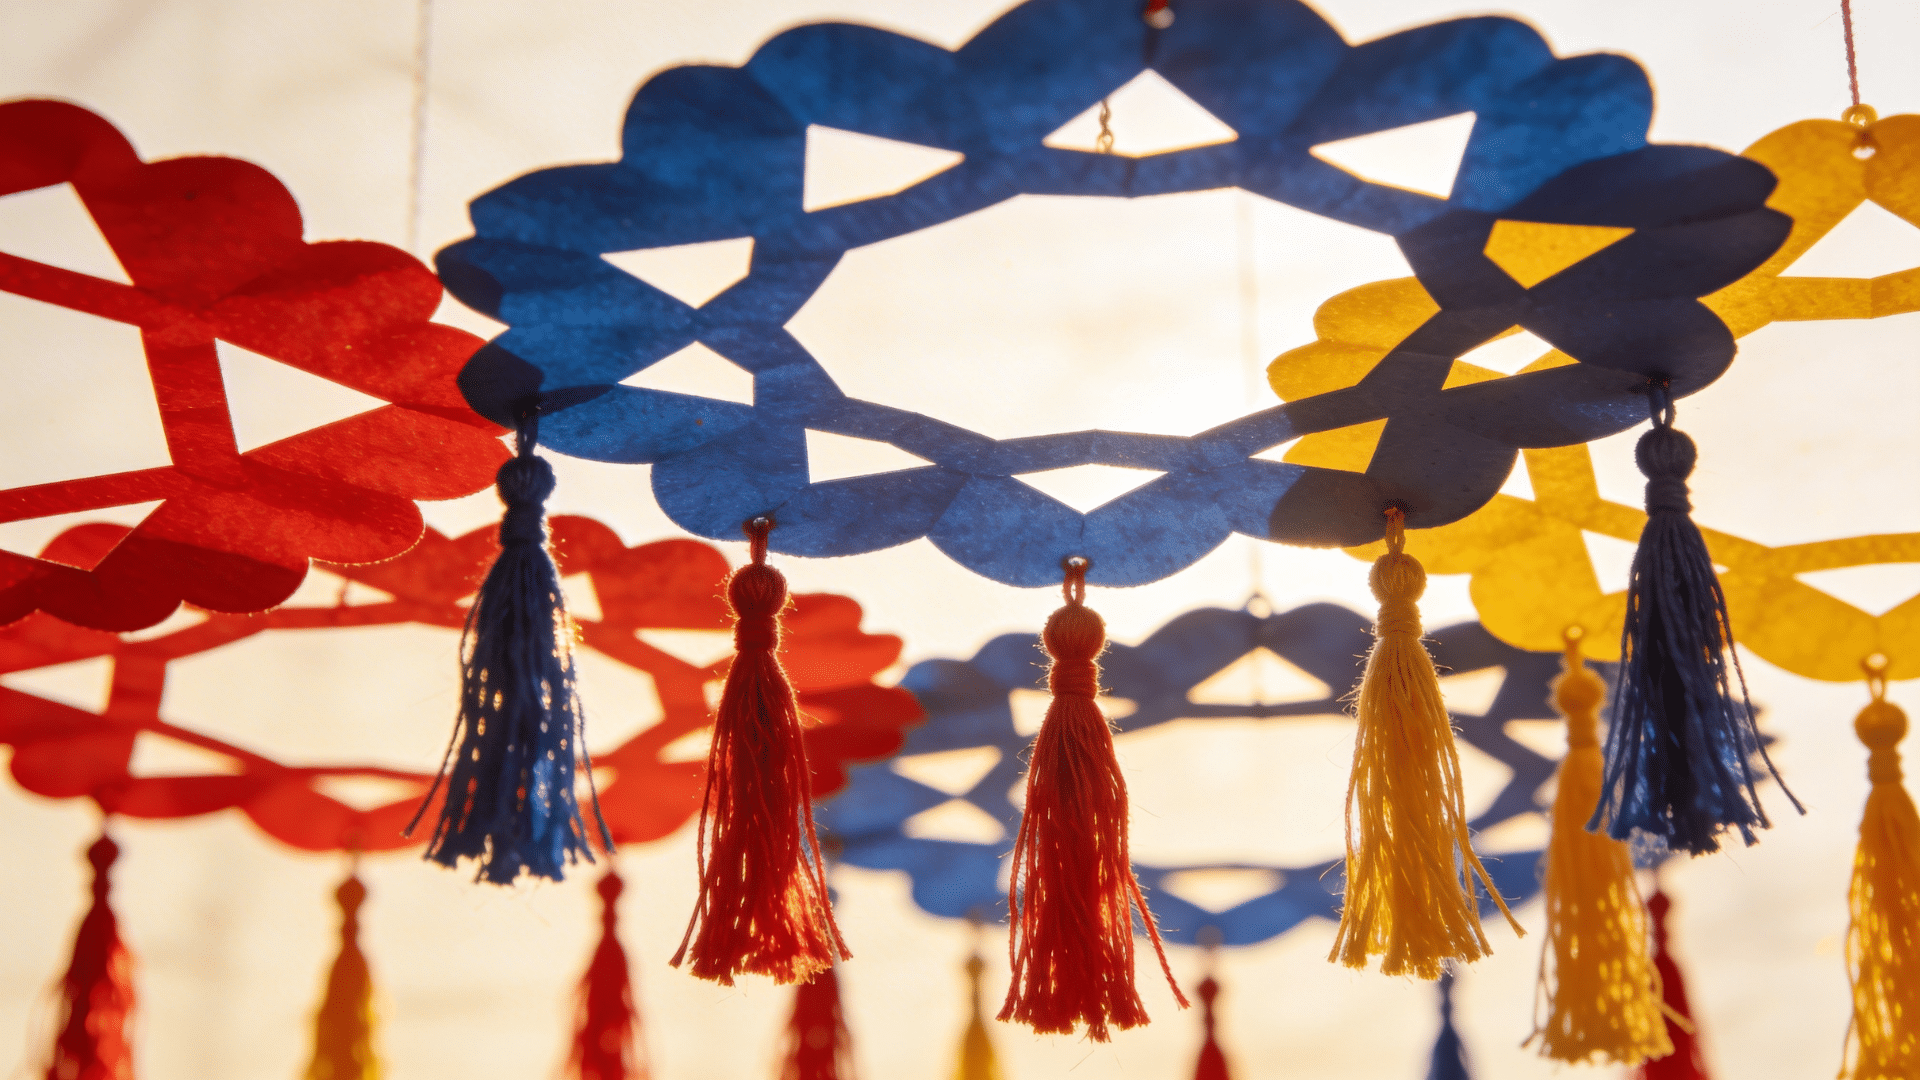
24. Tissue Paper Tassel Garland
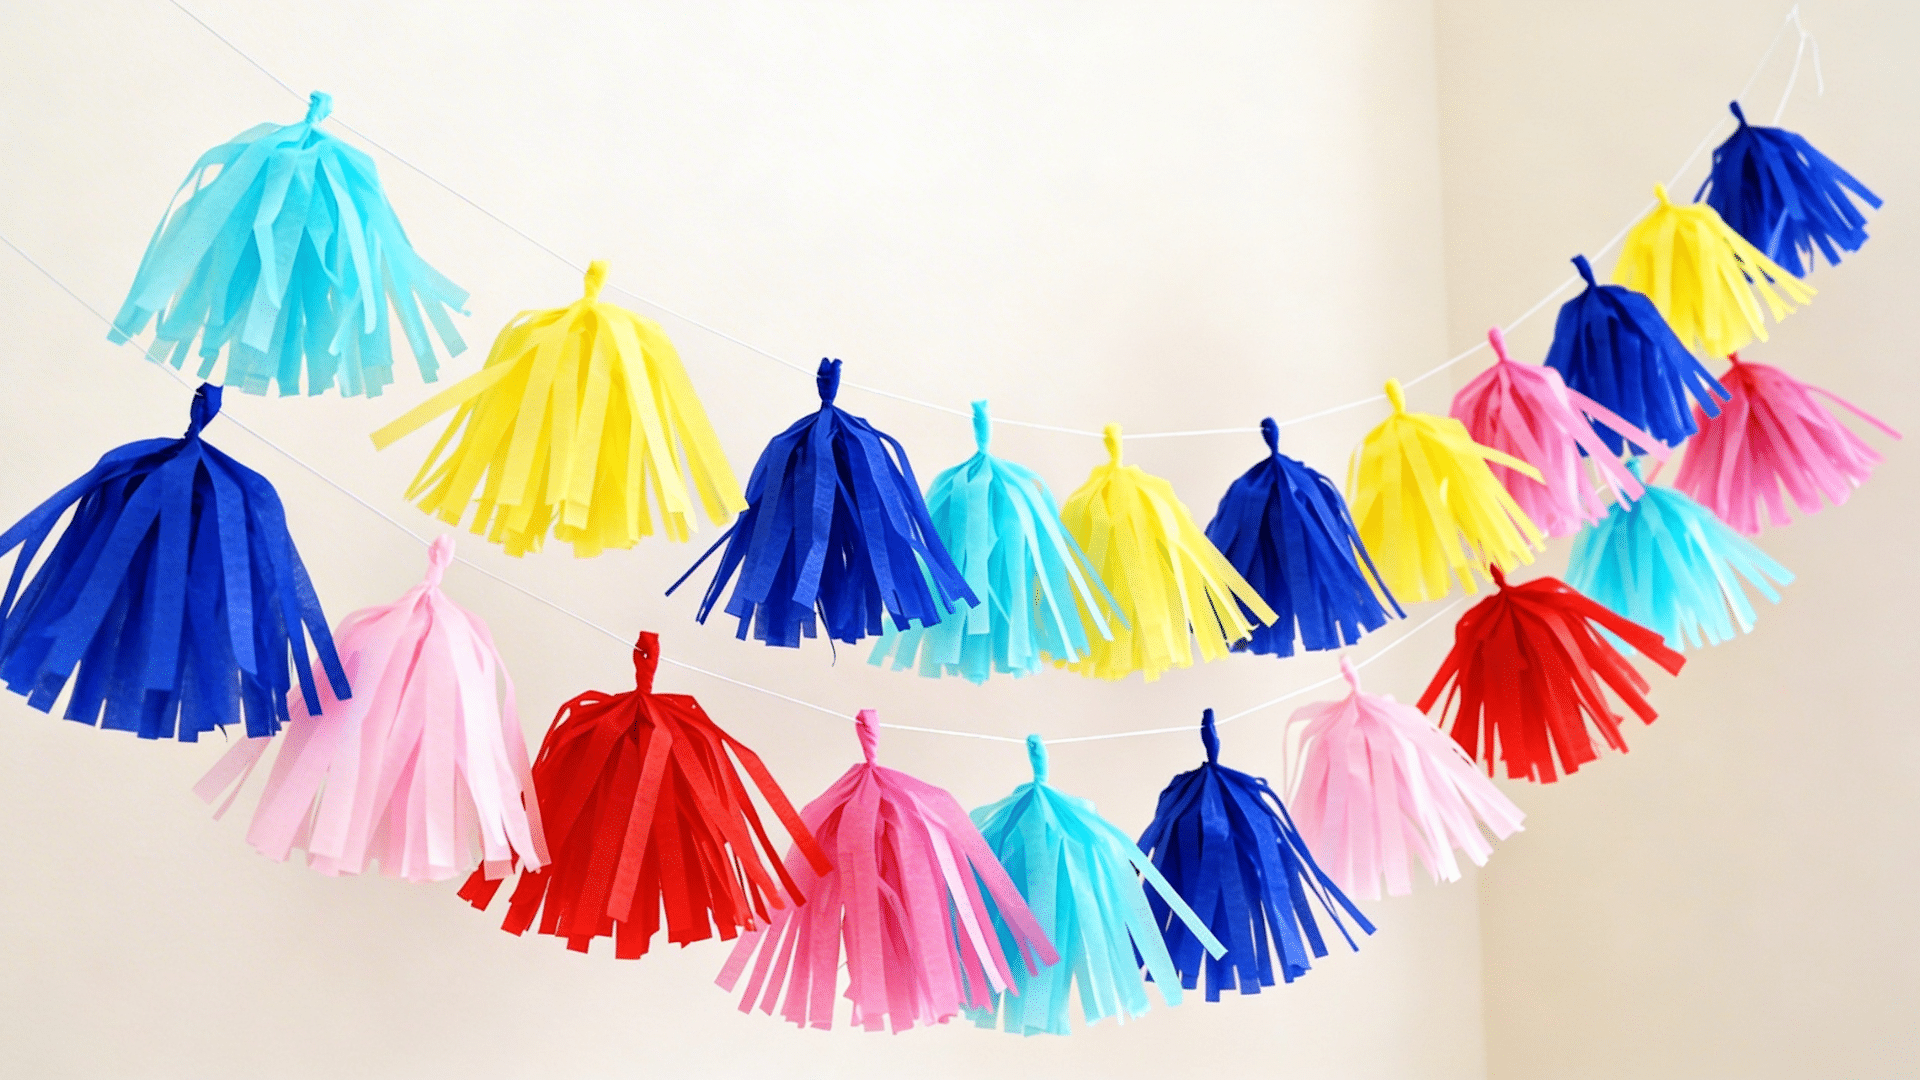
Tissue paper tassel garlands are festive, flowing decorations that instantly liven up any party, bedroom, or celebration backdrop.
They are incredibly affordable to make and can be styled in any color combination to match your theme. Hung in a row, they create a full, eye-catching fringe effect.
Skill Level: Beginner
Materials Used: Tissue paper in assorted colors, scissors, string or twine, tape.
How to Make:
- Fold a sheet of tissue paper in half lengthwise and cut fringe along the folded edge, stopping about 1 inch from the top.
- Unfold the sheet, roll it tightly from one end to the other, then twist the uncut center section to form a loop at the top.
- Attach each tassel to a long piece of string or twine, spacing evenly to create a full garland.
25. Paper Roll Mini Piñatas
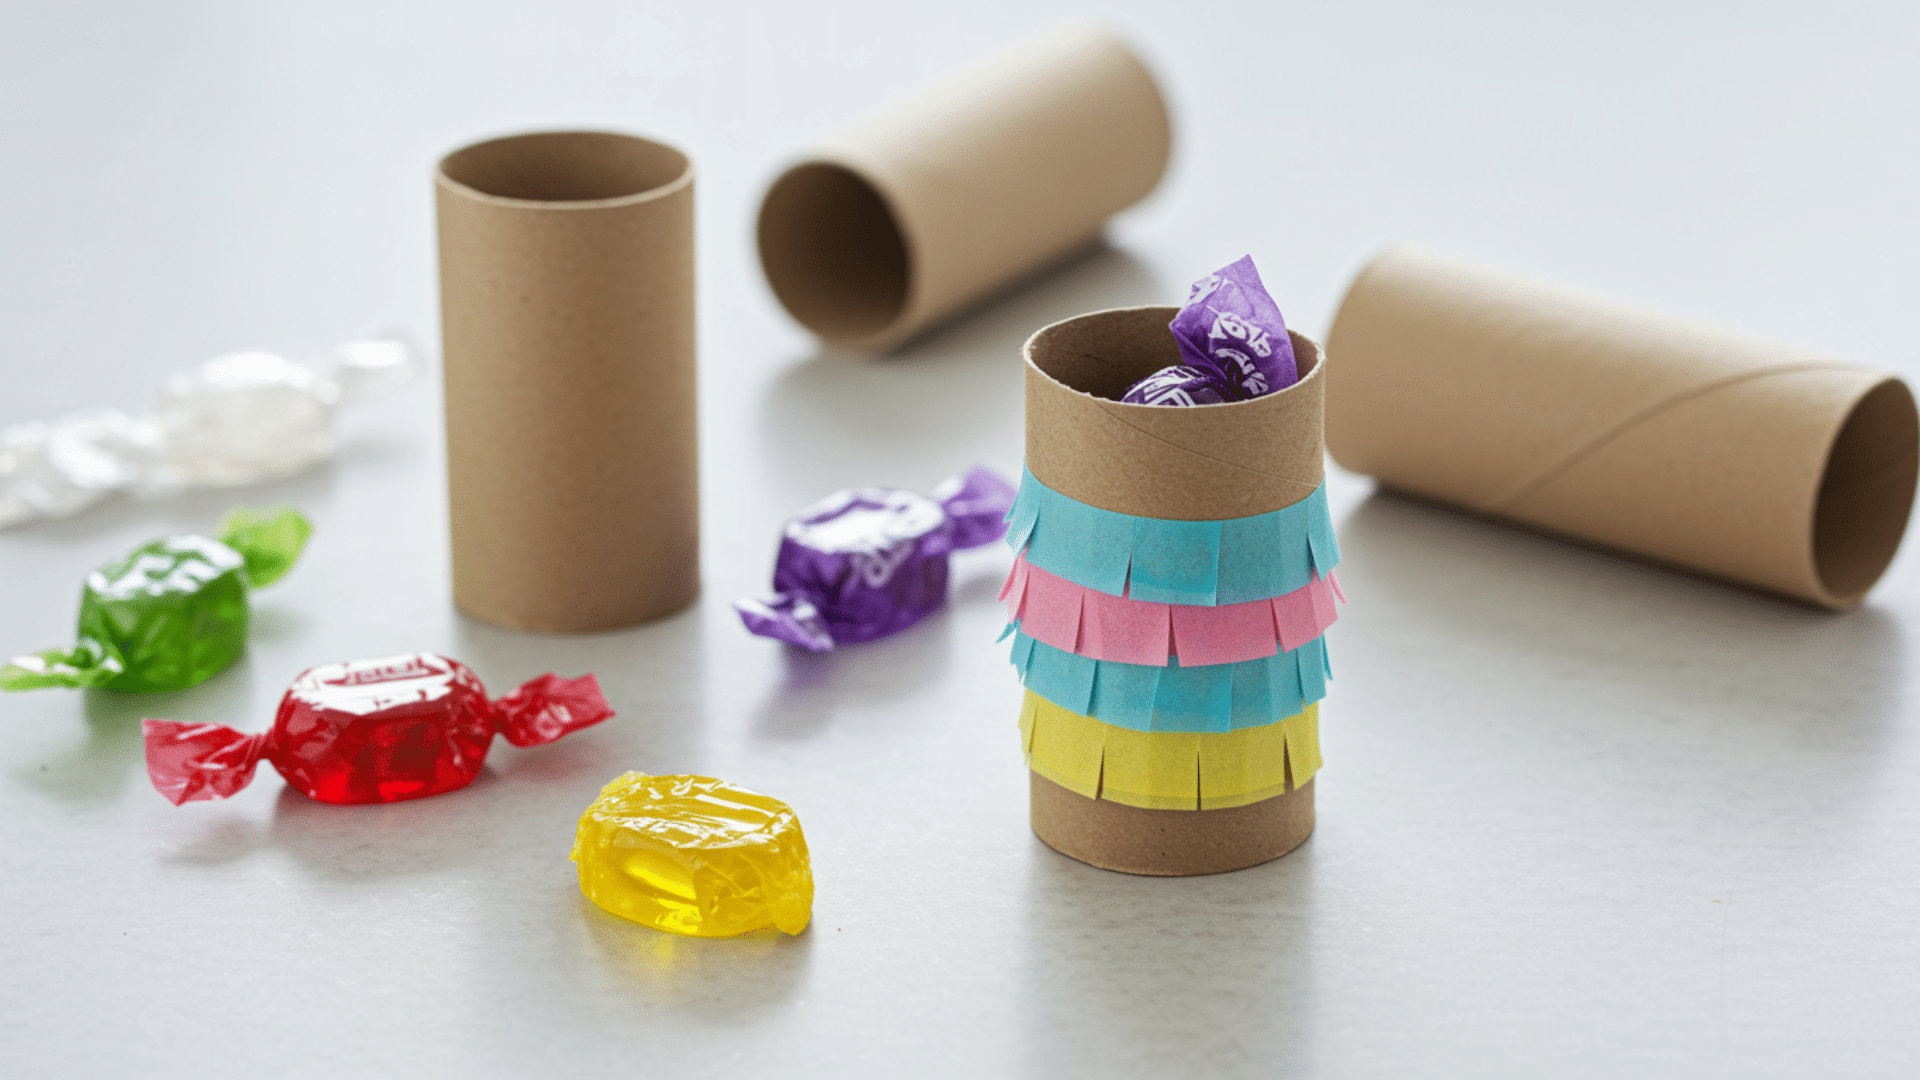
Paper Roll Mini Piñatas are small, festive treat holders made from cardboard tubes and decorated with colorful fringe. They are perfect for party favors or holiday crafts.
Skill Level: Beginner
Materials Used: Empty paper towel or toilet paper rolls, tissue paper, scissors, glue, string, candy or small treats, and tape.
How to Make:
- Cut a paper roll in half if needed, then seal one end by folding and taping it closed.
- Fill the tube with candy or small treats, then fold and tape the other end shut.
- Cover the outside with fringed tissue paper strips glued in overlapping layers, then attach a small string for hanging if desired
Final Thoughts
Paper crafts are proof that creativity does not require expensive materials or formal training. Just curiosity, a willingness to learn, and a few sheets of paper.
Paper crafts are also a wonderful way to connect, with genuine meaning, to teach a skill to someone you love, or to quietly build a small creative business around something that brings you joy.
As your skills grow, you can combine these techniques into creations that are uniquely yours.
So pick up a sheet of paper, choose one project that excites you, and start creating. Your next favorite hobby or side hustle might just be one fold away.


One Response
testingg