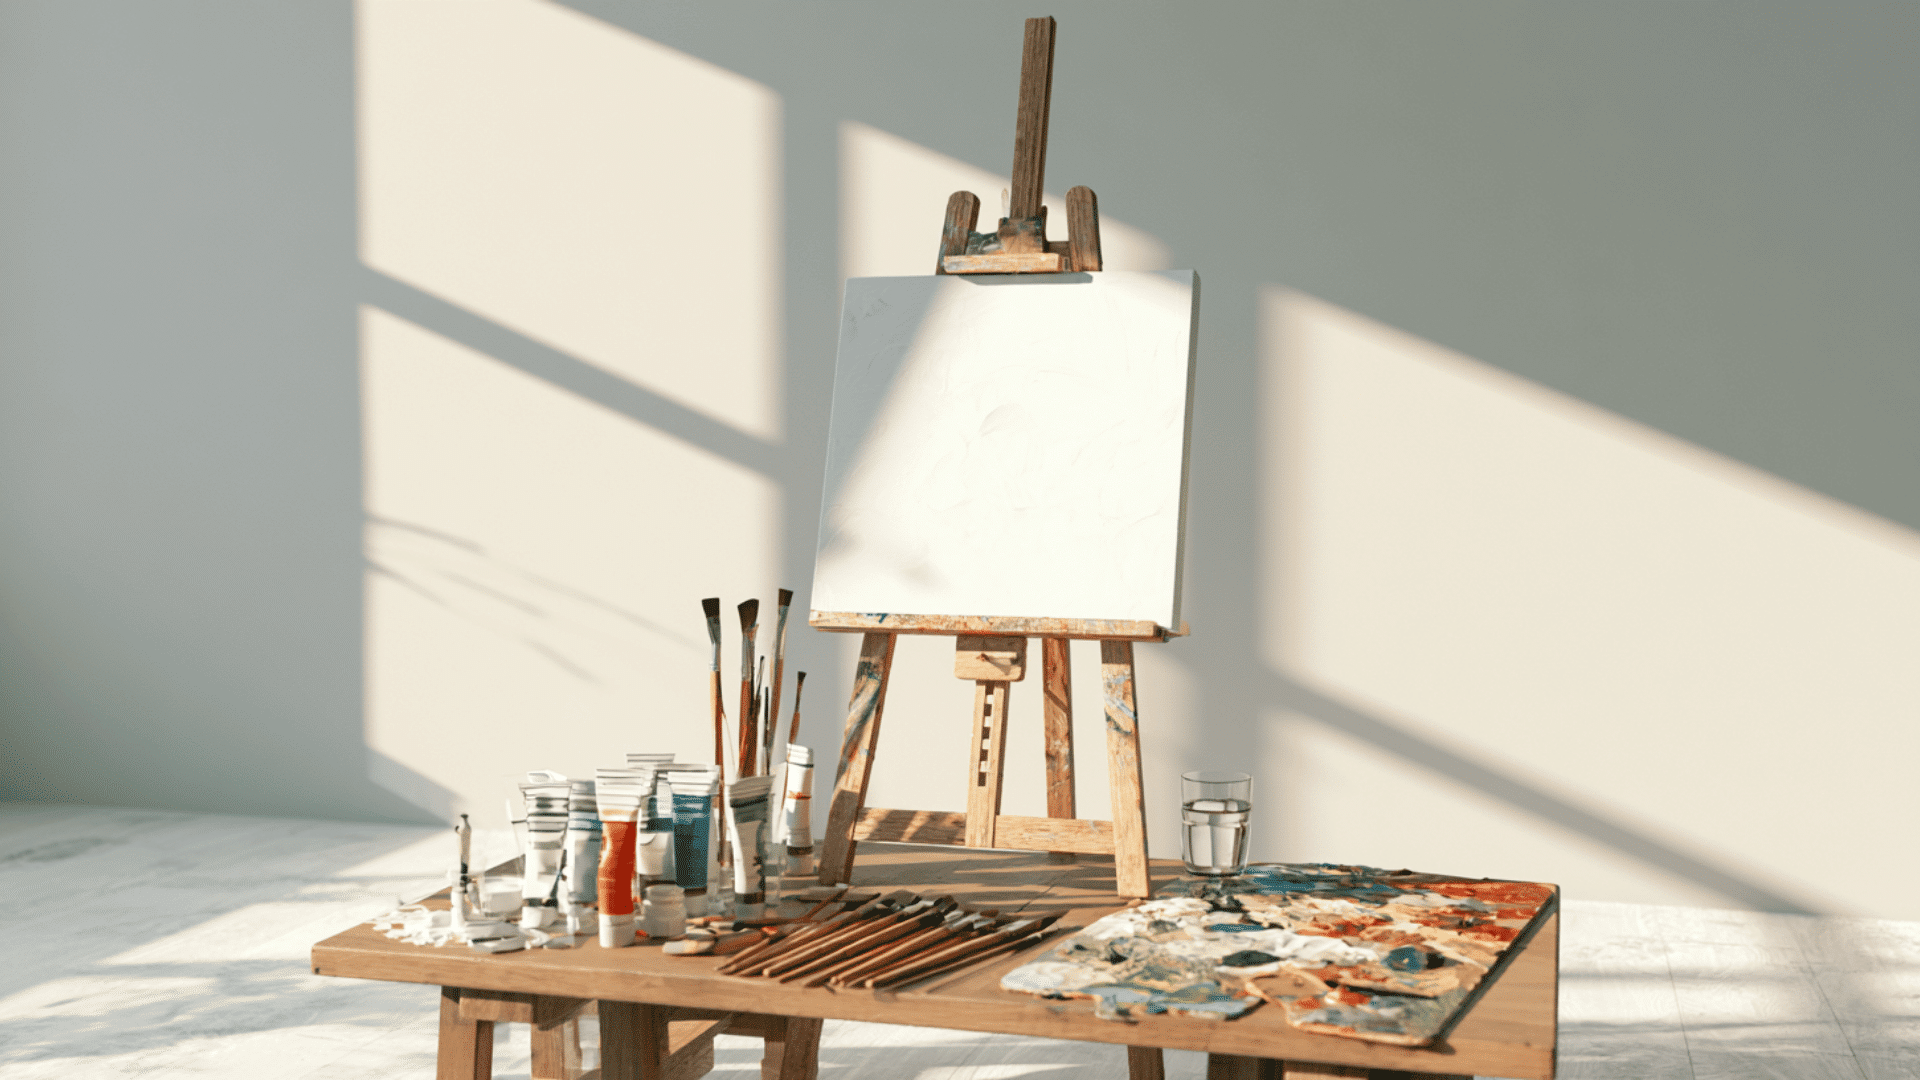

Spring brings fresh energy and warmer days, making it the perfect time to try new creative projects. Crafting is not just for kids. Adults can enjoy relaxing activities that brighten up their homes.
From flower arrangements to painted pots, spring crafts offer simple ways to celebrate the season. You can use basic materials found at craft stores or around your house.
Taking time for hands-on creativity helps reduce stress. Plus, homemade decorations add a personal touch.
Let’s look at some information and easy ideas that bring color to your home this spring.
Why Spring Inspires Creative Craft Ideas for Adults
Spring’s warmer weather, longer days, and natural beauty make it the perfect time for creative projects. Flowers and colorful blooms found on walks can be turned into simple, charming decorations.
Better natural light and mild temperatures make crafting more enjoyable, especially when working with materials like paint, glue, and clay. You can even craft outdoors on a porch or patio.
When choosing spring crafts for adults, look for projects that balance creativity and practicality. Here are some tips:
- Use local supplies: No need for expensive materials.
- Minimal prep time: Stick to simple projects with basic materials.
- Decorate your space: Enhance your home with fresh, seasonal crafts.
- Focus on functionality: Make practical items like painted pots.
- Relaxing processes: Choose repetitive tasks that calm your mind.
- Forgiving projects: Pick crafts where small mistakes don’t matter.
- Flexible timing: Work on projects when it’s convenient.
- Clear instructions: Ensure the process is easy to follow.
Spring crafting is a great way to unwind, refresh your space, and get creative.
Fun Spring Craft Ideas for Adults
Below are simple spring craft projects you can try at home. Each idea uses basic materials and is suitable for different skill levels.
1. Mason Jar Flower Vases
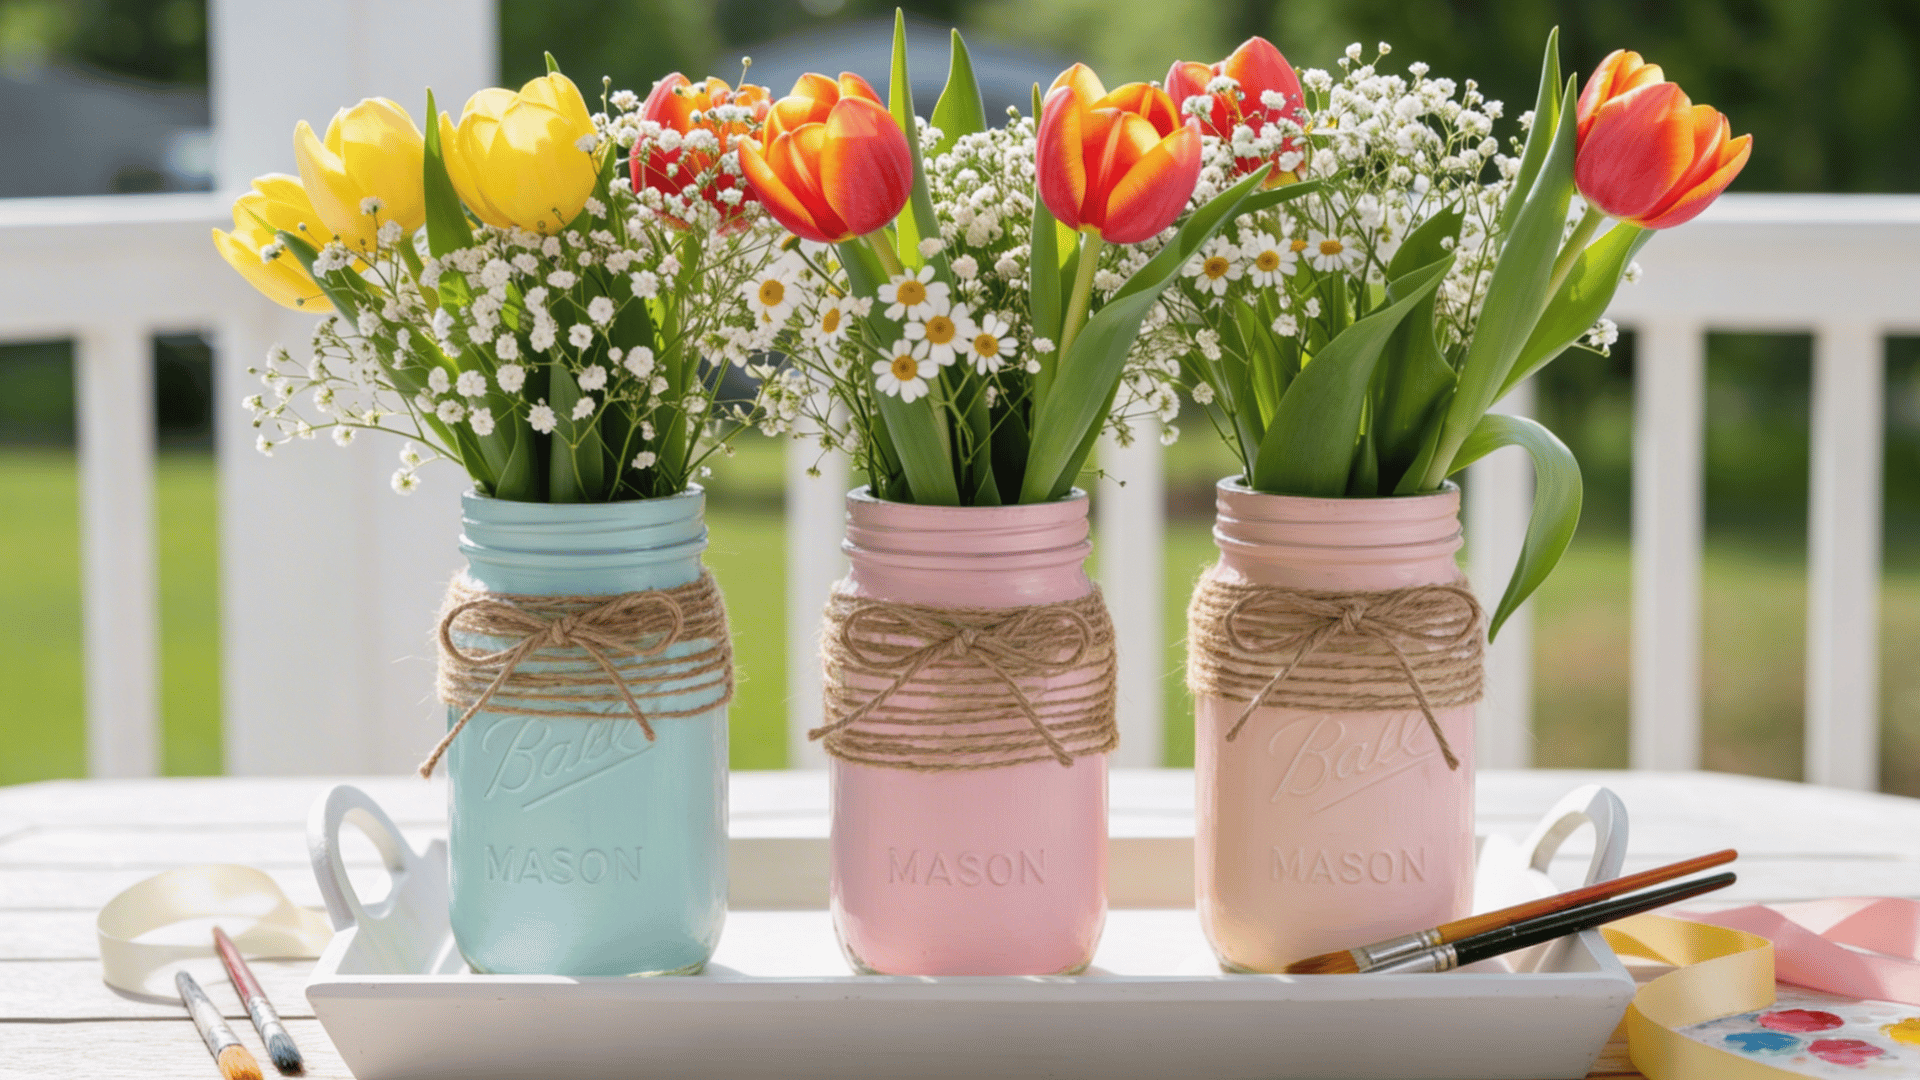
Start by cleaning your mason jars and letting them dry completely. Apply your first coat of acrylic paint using smooth strokes, then wait about 30 minutes for it to dry.
Add a second coat for better coverage and let it dry again. Once the paint is fully dry, wrap ribbon or twine around the jar’s neck, tie it in a bow, then fill it with water and fresh flowers.
- Materials Required: Mason jars, acrylic paint, brushes, ribbon or twine, flowers
- DIY Level: Easy
- Time Required: 1-2 hours, including drying time
2. Painted Terracotta Pots
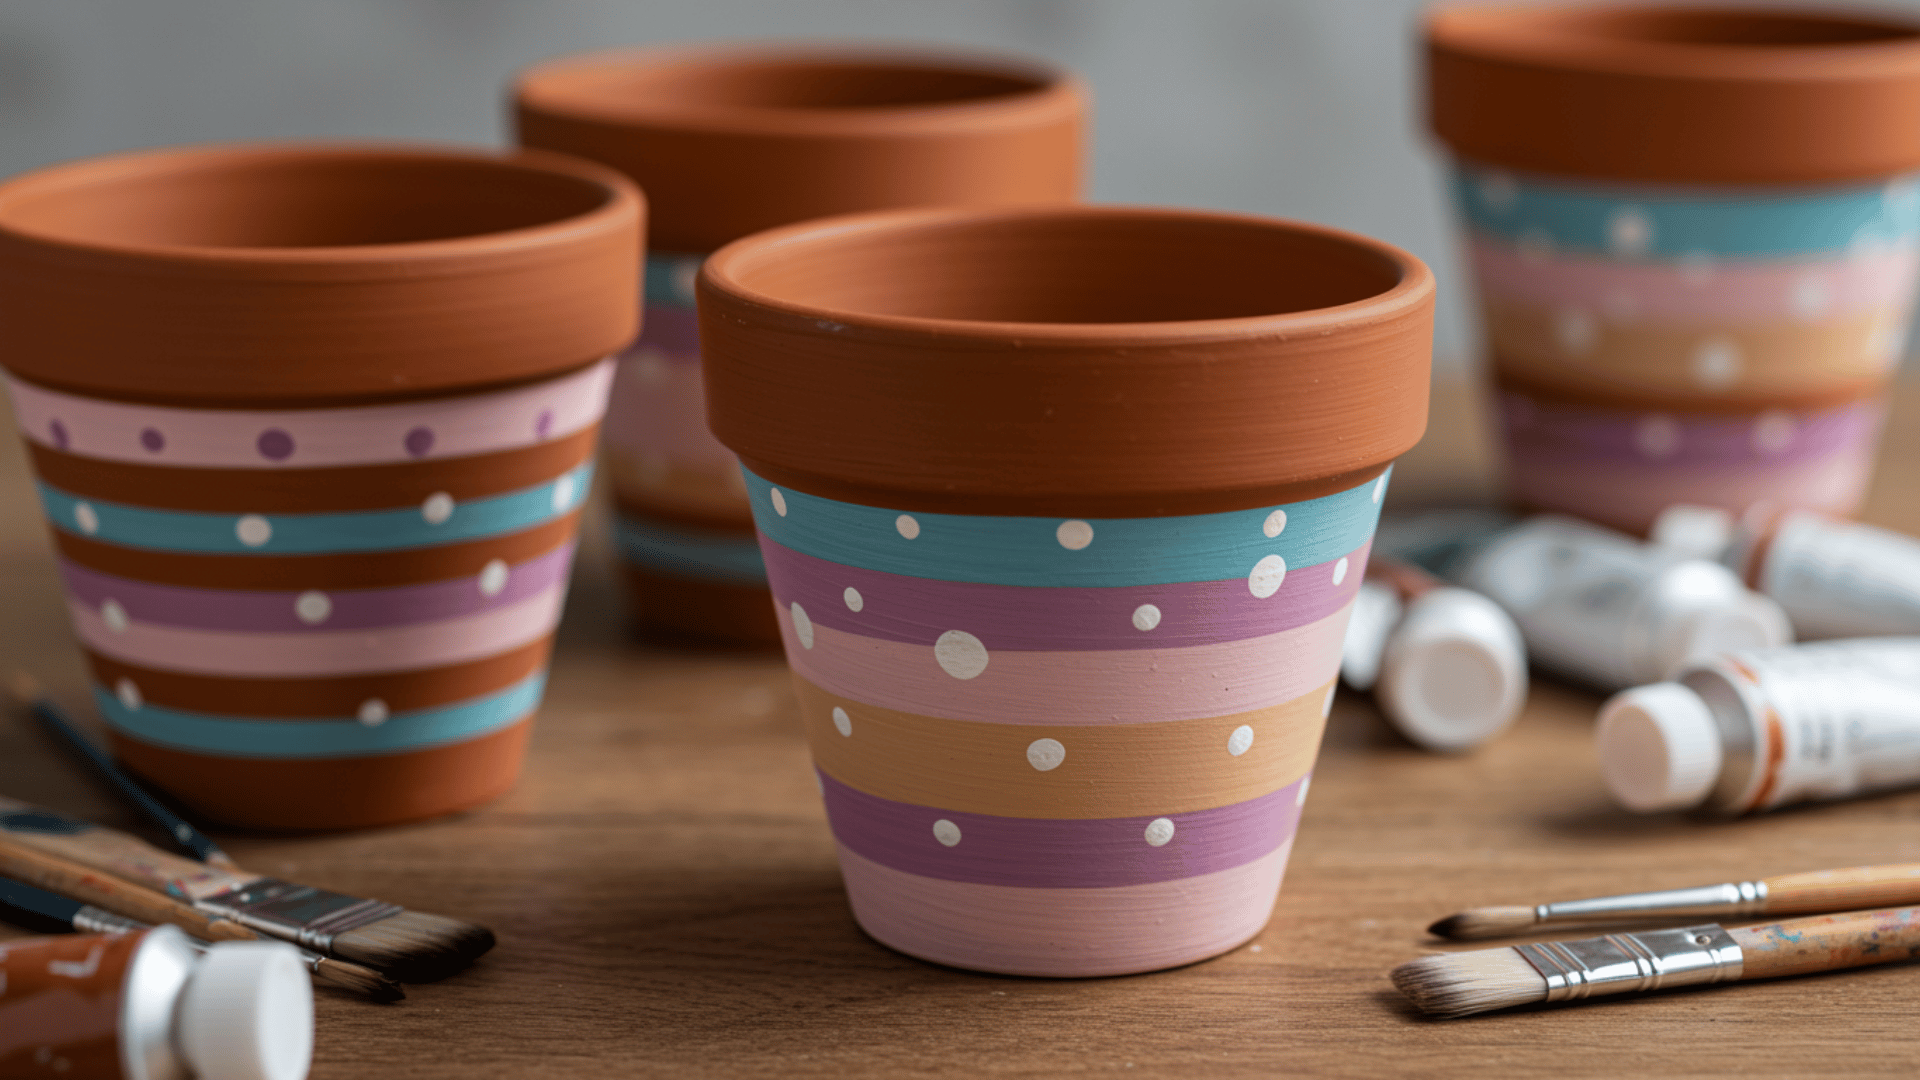
Clean your terra cotta pots with a damp cloth and let them dry. Sketch your design lightly with a pencil if needed, then paint your base color first.
Add patterns such as stripes, dots, or shapes with a smaller brush once the base is dry. Finish with a sealer spray to protect your design from water damage.
- Materials Required: Terra cotta pots, acrylic paint, brushes, sealer spray
- DIY Level: Easy
- Time Required: 45 minutes to 1 hour
3. DIY Floral Hoop Wreath
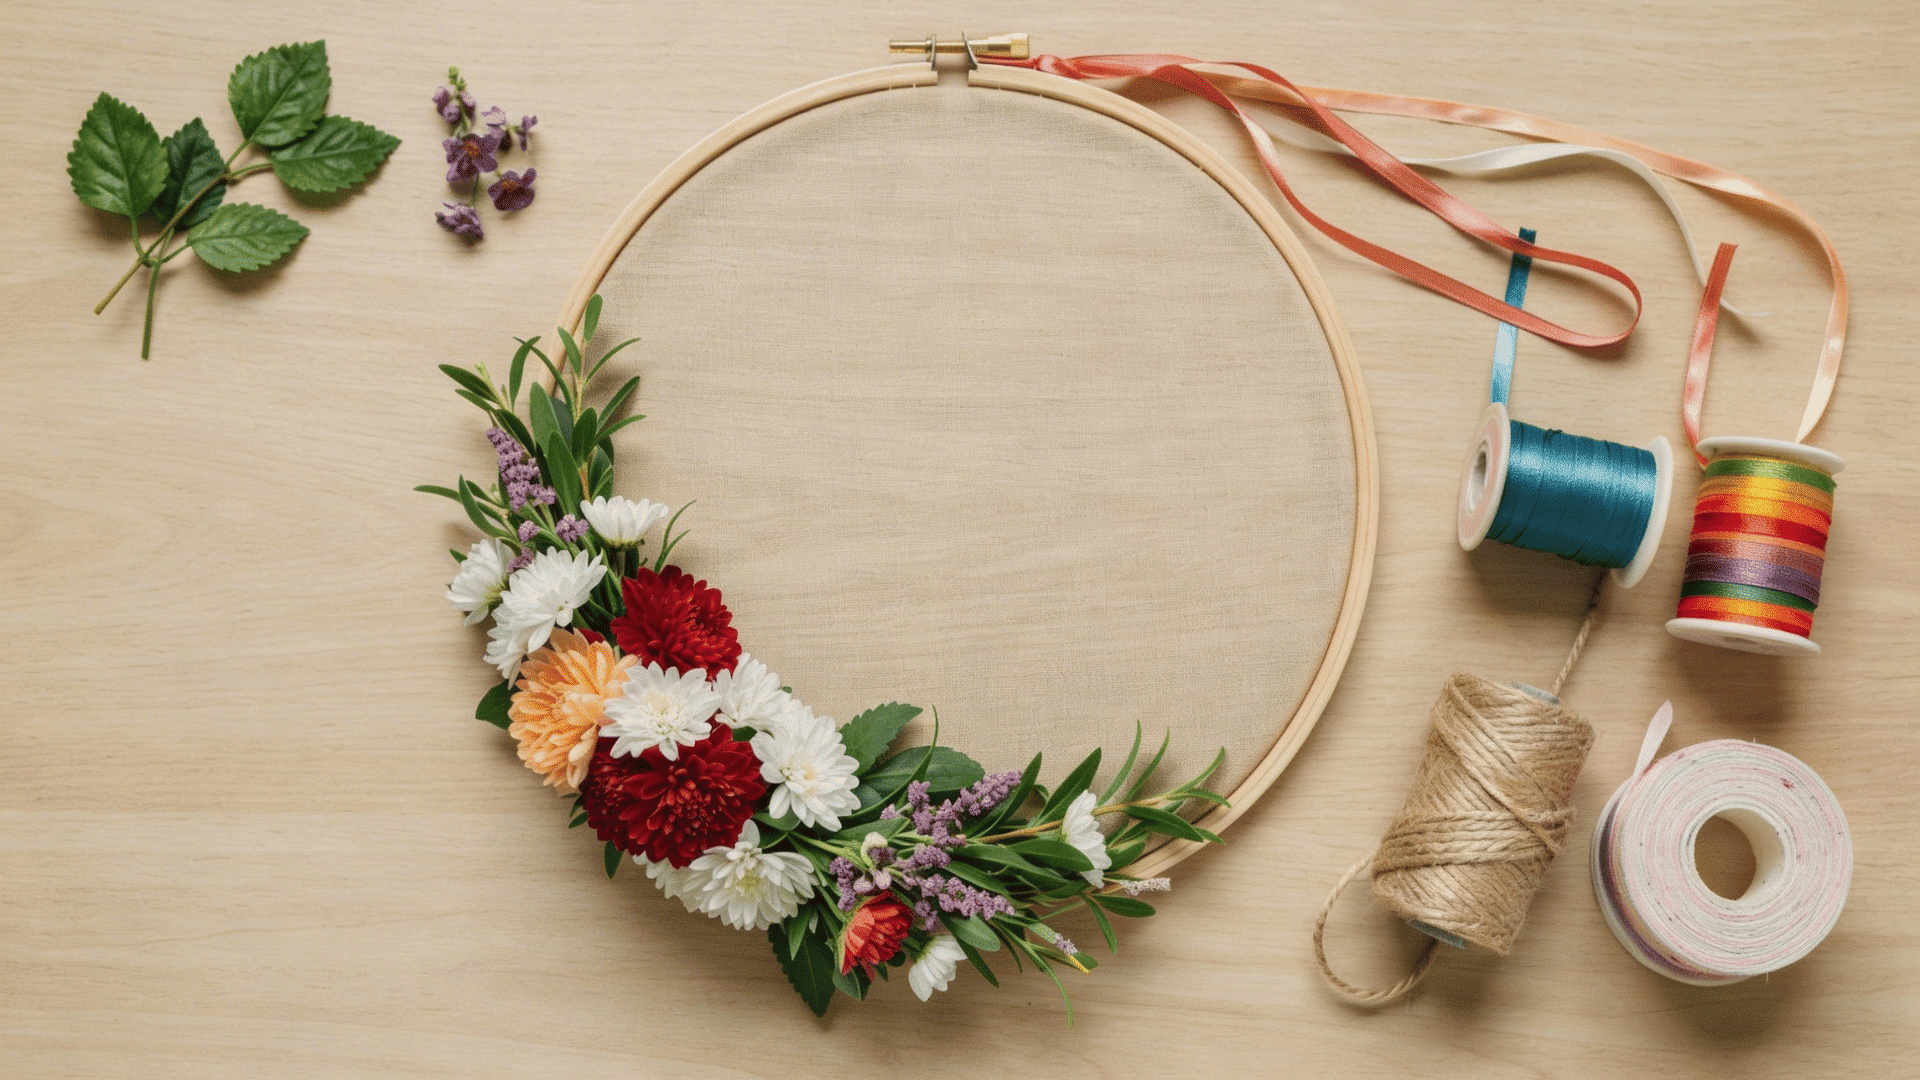
Take your embroidery hoop and separate the two rings. Cut flower stems to about 4-5 inches long and arrange them along the hoop to plan your design.
Use floral wire to attach each stem securely to the hoop, overlapping them slightly. Add a ribbon loop at the top for hanging once all flowers are in place.
- Materials Required: Embroidery hoop, floral wire, flowers, greenery, ribbon
- DIY Level: Easy
- Time Required: 30-45 minutes
4. DIY Spring Greeting Cards
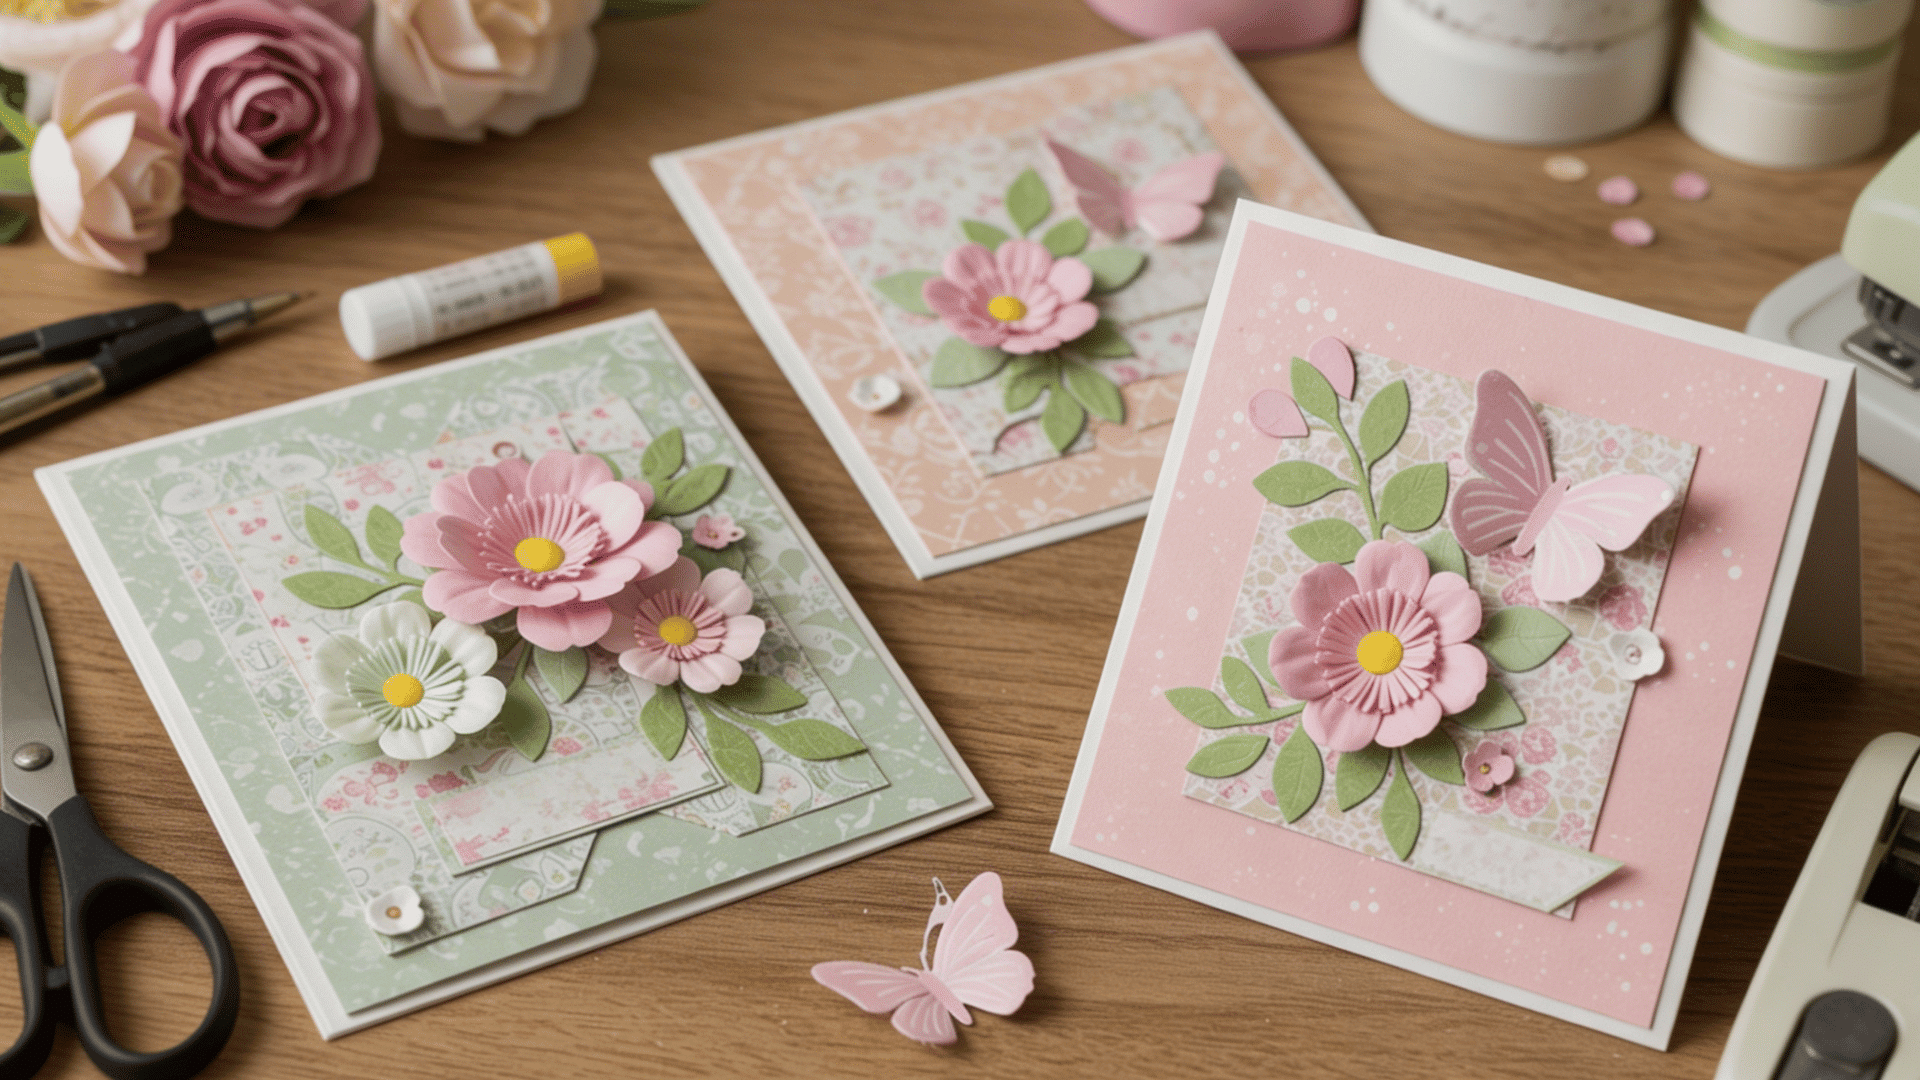
Fold your cardstock in half to create the card base. Cut out shapes like flowers or butterflies from colored paper and arrange them on the front before gluing.
Add details with markers or stamps to complete your design. Write your personal message inside, and your card is ready to give.
- Materials Required: Cardstock, colored paper, stamps, markers, glue stick
- DIY Level: Easy
- Time Required: 20-30 minutes per card
5. Painted Rocks for Garden Decor
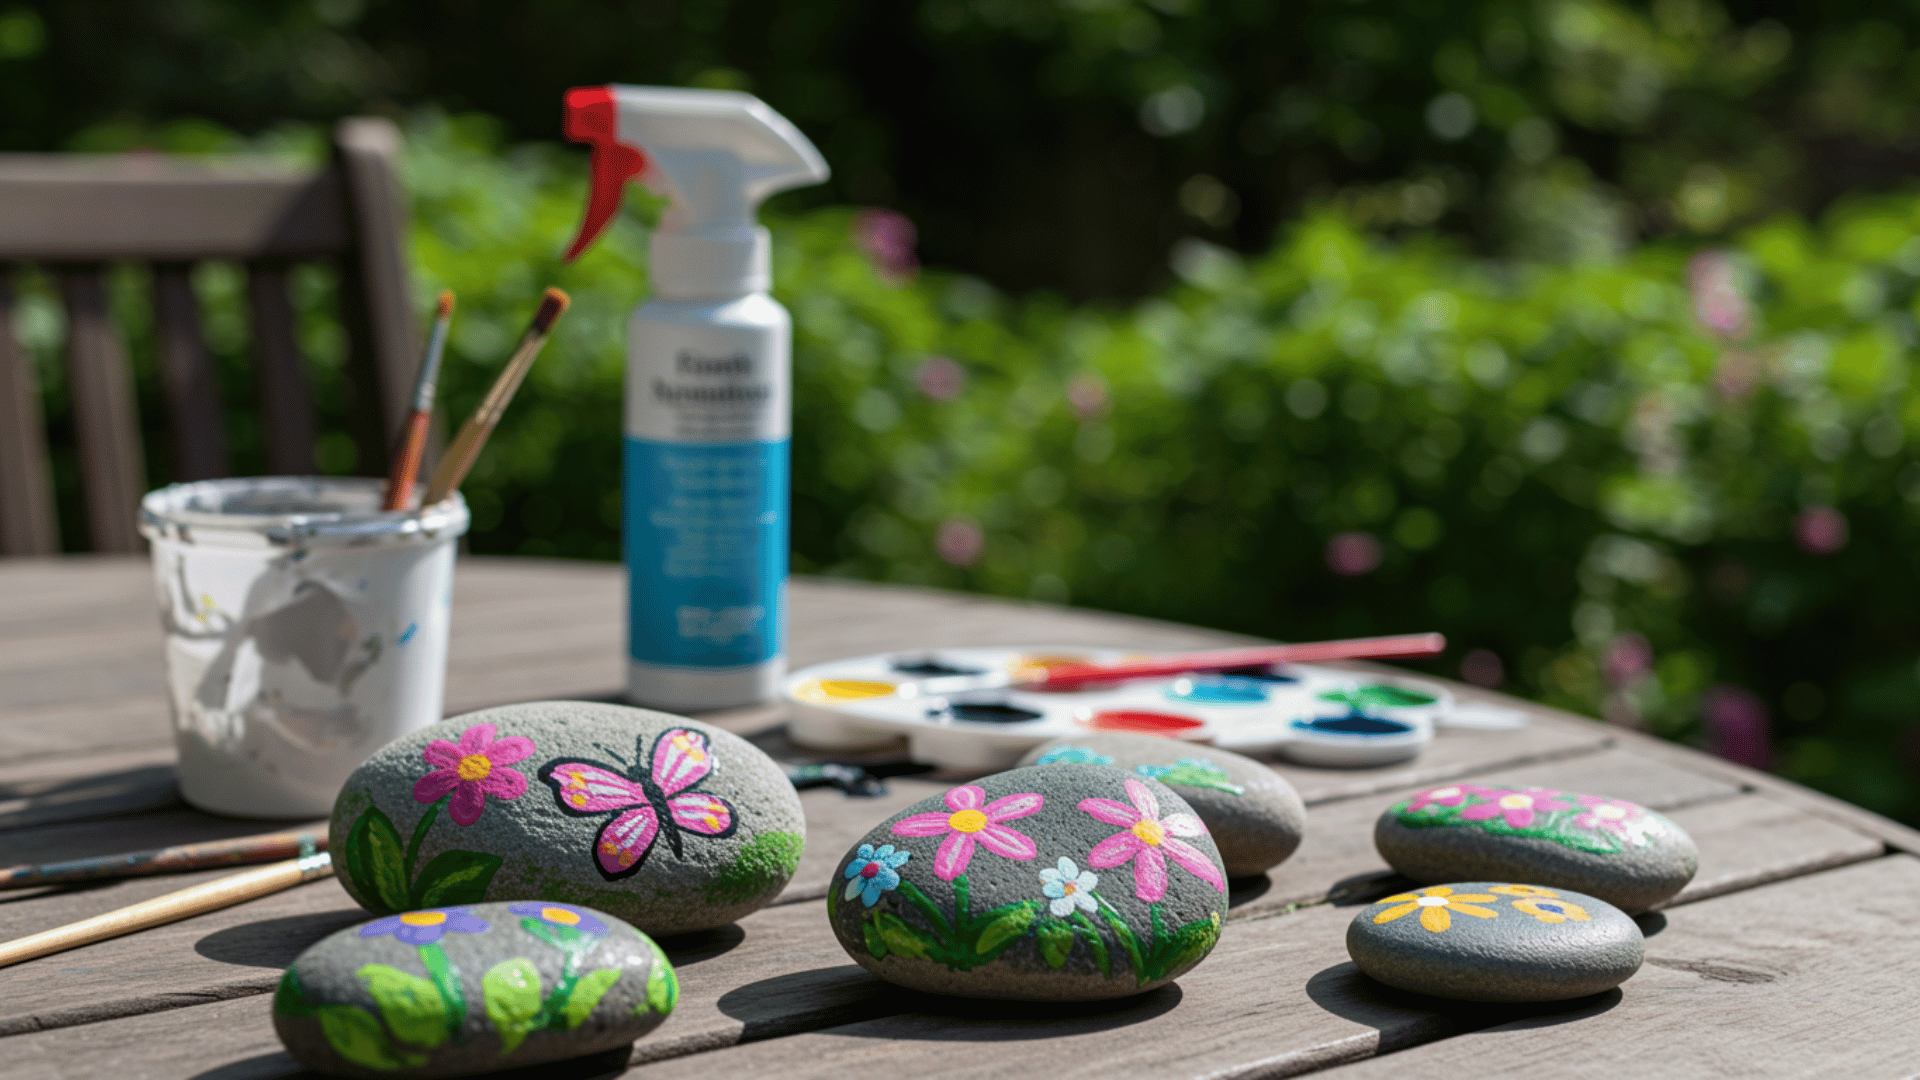
Wash and dry your rocks completely before starting. Paint a light base coat and let it dry for 15-20 minutes. Add your design using darker colors and fine brushes for details.
Spray with outdoor sealer once everything is dry to protect your artwork from the weather.
- Materials Required: Smooth rocks, acrylic paint, fine brushes, outdoor sealer
- DIY Level: Easy
- Time Required: 1 hour plus sealing time
6. Upcycled Spring Planters (Tin Cans, Jars)
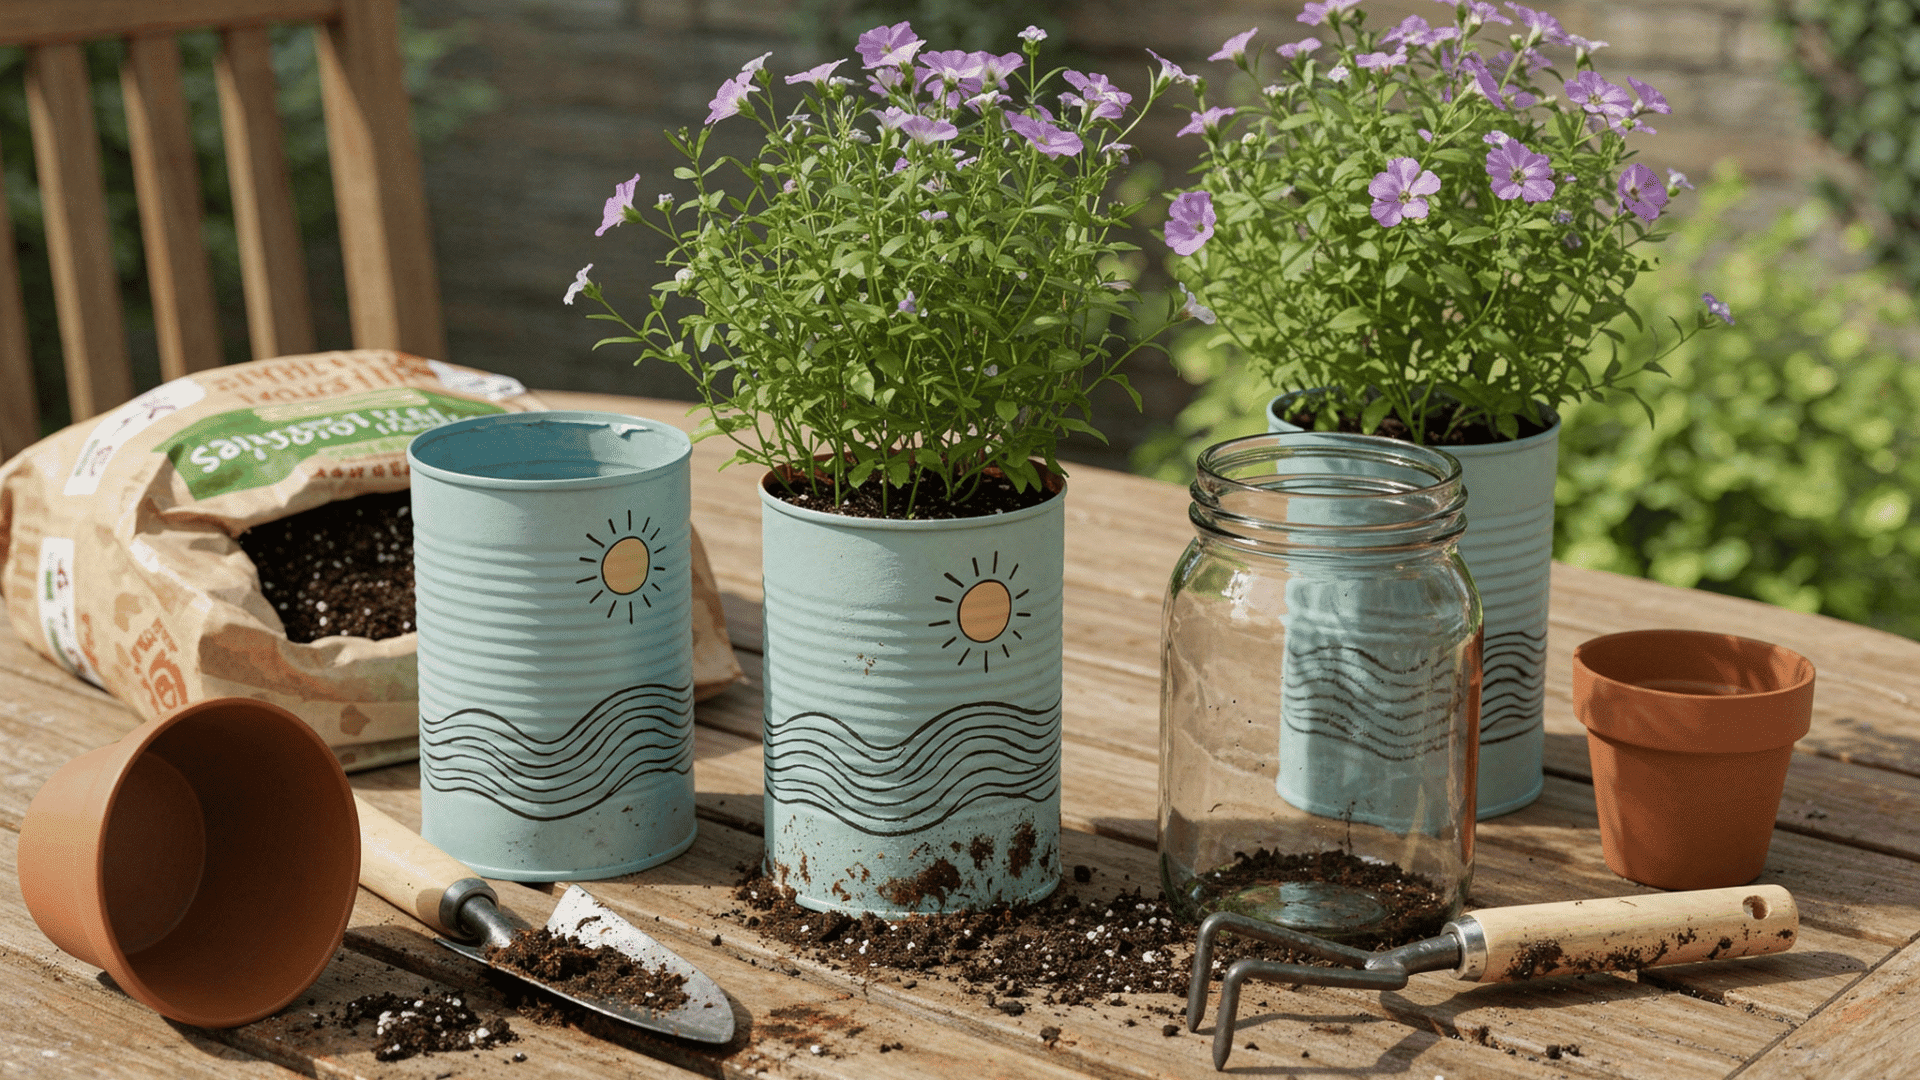
Clean your containers thoroughly and remove any labels. Carefully drill 2-3 small holes in the bottom for water drainage.
Paint or decorate the outside as desired and let it dry completely. Fill with soil, add your plants, and place them in a sunny spot.
- Materials Required: Clean tin cans or jars, drill, paint, soil, plants
- DIY Level: Medium
- Time Required: 30-40 minutes per planter
7. Pressed Flower Frame Art
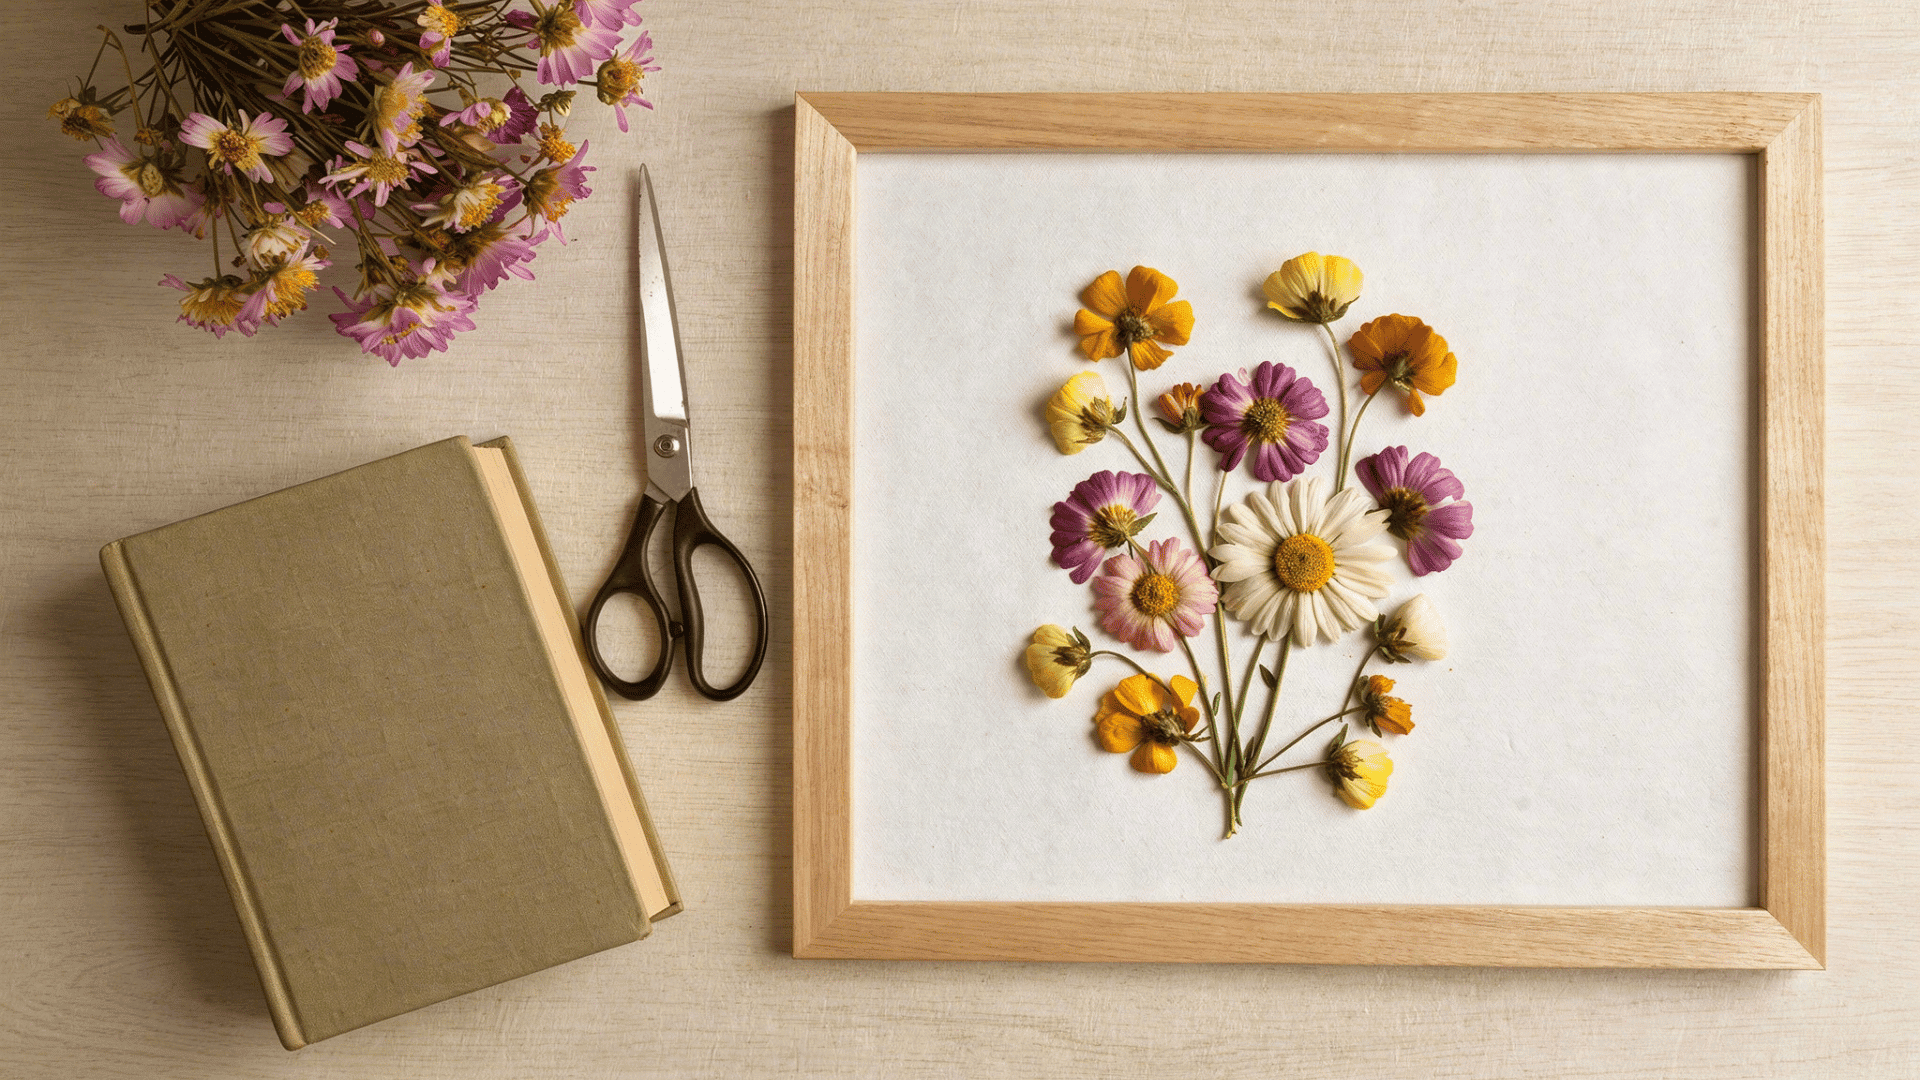
Pick fresh flowers on a dry day and remove excess moisture with a paper towel. Place them between parchment paper inside heavy books, spacing them apart.
Wait 1-2 weeks for complete drying, then carefully arrange dried flowers on the backing paper inside your frame and seal it closed.
- Materials Required: Fresh flowers, heavy books, parchment paper, frame, glue
- DIY Level: Easy
- Time Required: 10 minutes prep, 1-2 weeks pressing, 20 minutes assembly
8. DIY Flower Garland for Mantels
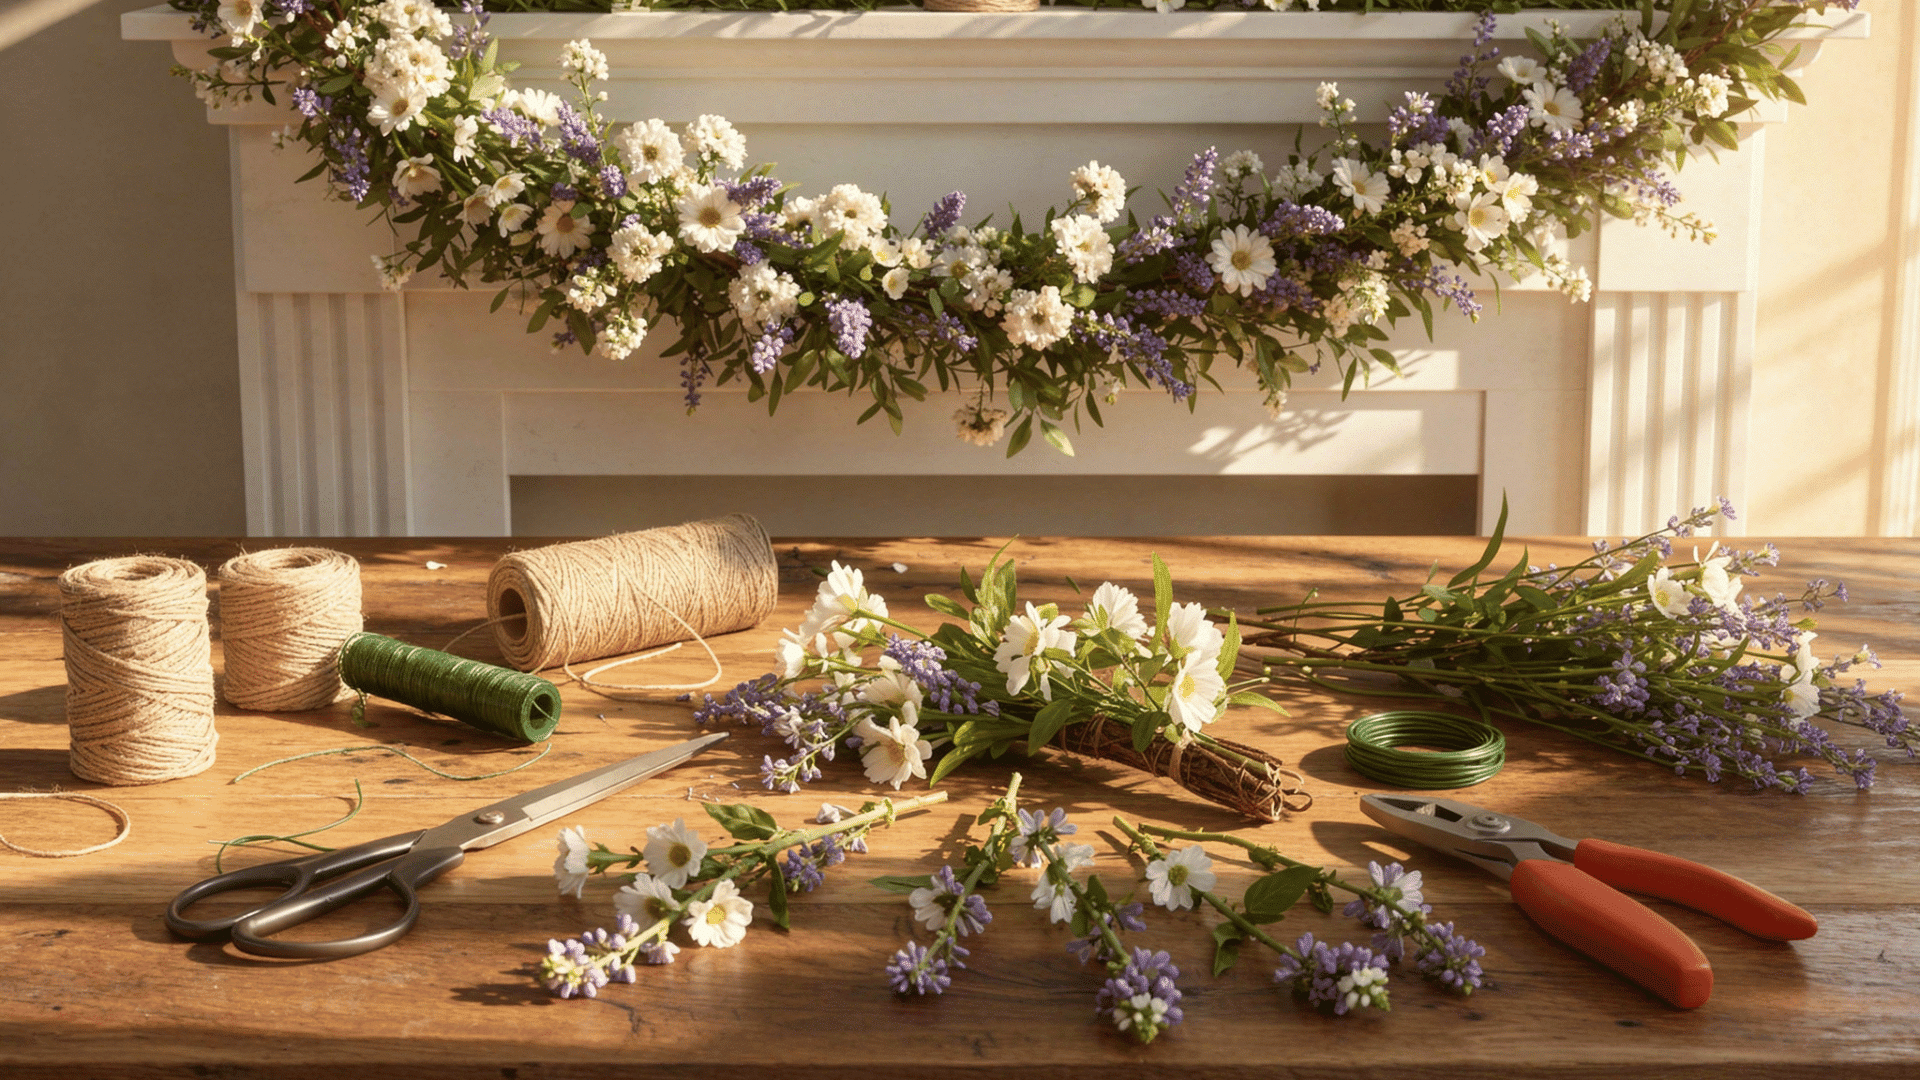
Cut a piece of twine or ribbon to your desired length. Trim flower stems to 3-4 inches and start wrapping them onto the base cord using floral wire.
Work in sections, overlapping each bundle slightly to hide the stems. Continue until the entire length is covered with blooms.
- Materials Required: Flowers, greenery, floral wire, twine or ribbon
- DIY Level: Easy
- Time Required: 45 minutes to 1 hour
9. DIY Bath Salt Jars
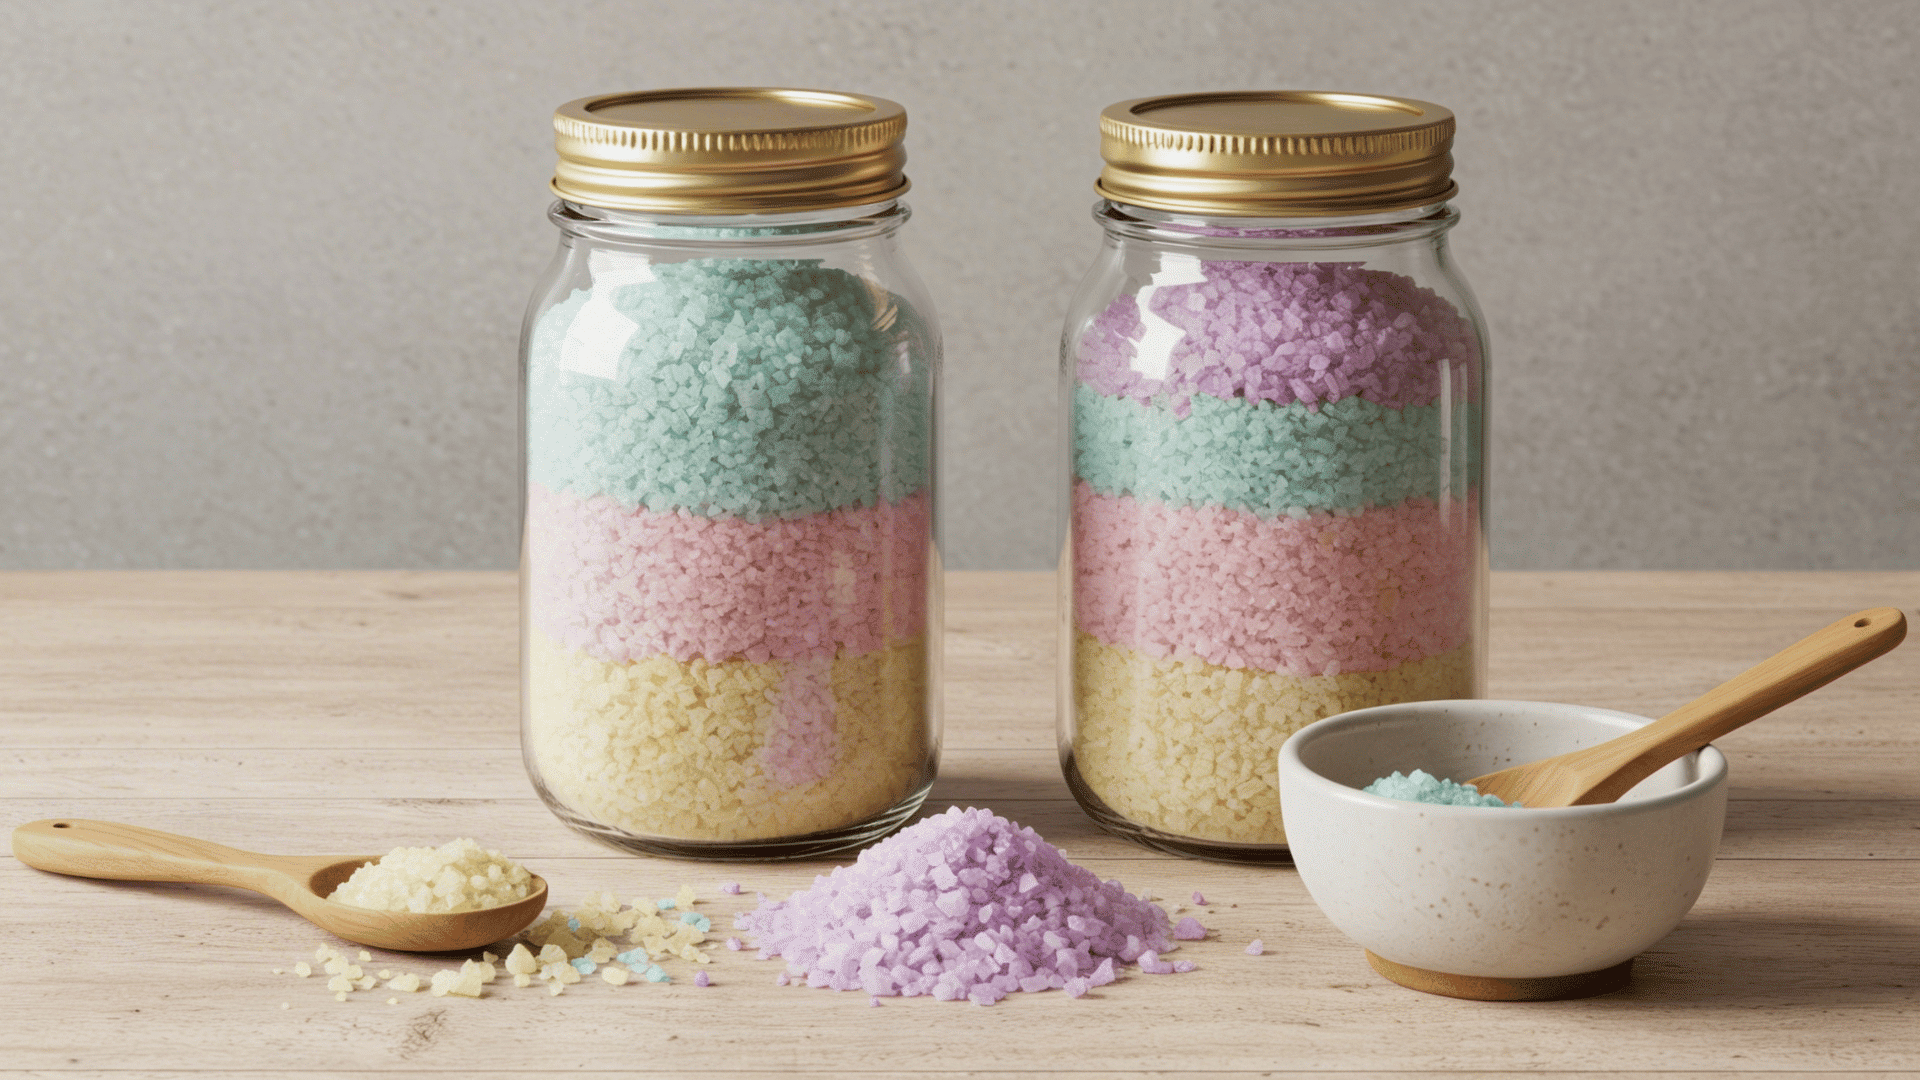
Pour Epsom salt into a bowl and add a few drops of essential oil, mixing well to distribute the scent. Add food coloring if desired and mix until the color is even.
Layer different colored salts in your jar for a pretty effect. Seal the jar tightly and add a decorative label.
- Materials Required: Epsom salt, essential oils, dried flowers, food coloring, jars
- DIY Level: Easy
- Time Required: 15-20 minutes
10. Spring-Themed Candle Jars
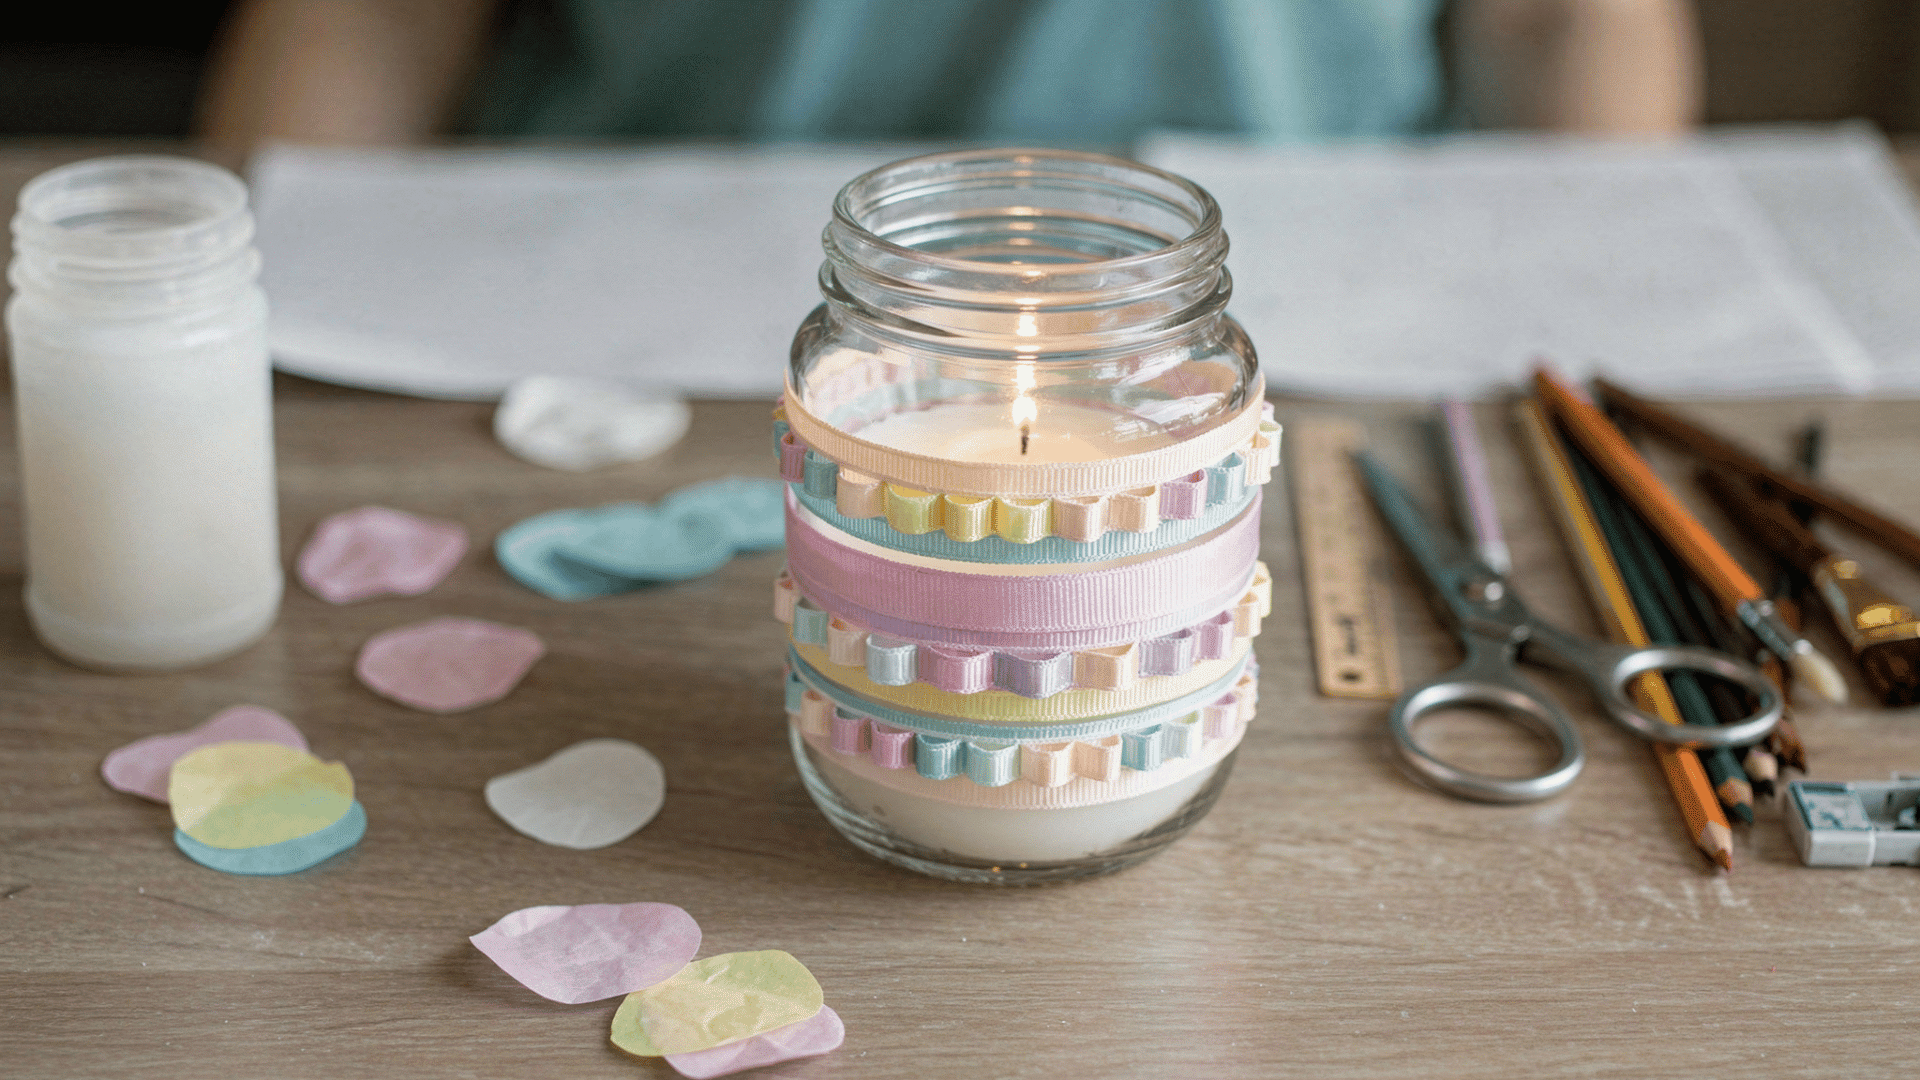
Clean the outside of your candle jar with rubbing alcohol. Cut tissue paper or napkins into small pieces with your desired design.
Brush a thin layer of Mod Podge on the jar, apply the paper, then brush another layer on top. Add dried flowers if desired, and let everything dry completely.
- Materials Required: Plain candles in jars, tissue paper, Mod Podge, dried flowers
- DIY Level: Easy
- Time Required: 30-45 minutes
11. Flower-Stamped Tote Bags
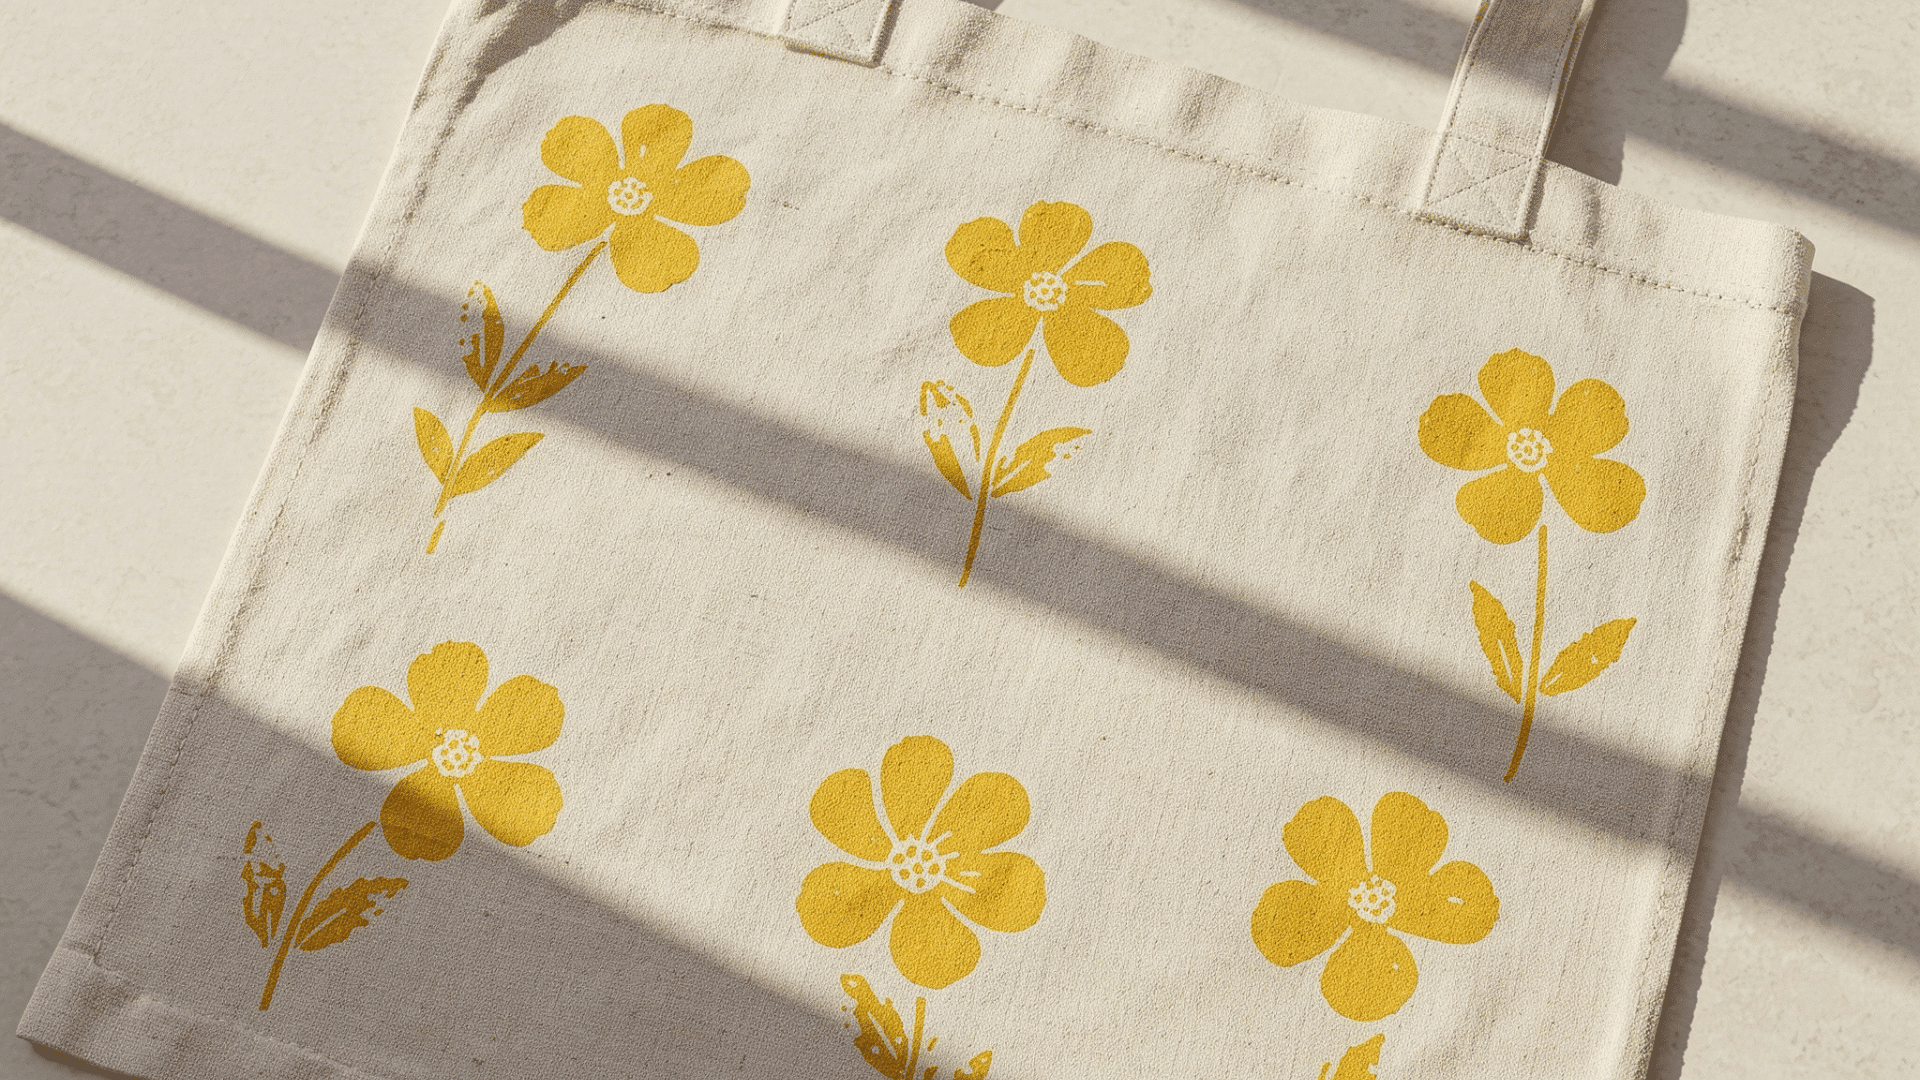
Stamp flowers onto a plain cotton tote bag to create a fun, colorful design. Dip your flower stamps into fabric paint and press them onto the bag in patterns you like.
Use different colors for variety. Let the paint dry completely, and heat-set it with an iron if the paint instructions say so, so the design stays after washing.
- Materials Required: Plain cotton tote bag, flower stamps, fabric paint, sponge or stamp pad.
- DIY Level: Easy
- Time Required: 30-40 minutes
12. Floral Bookmark Craft
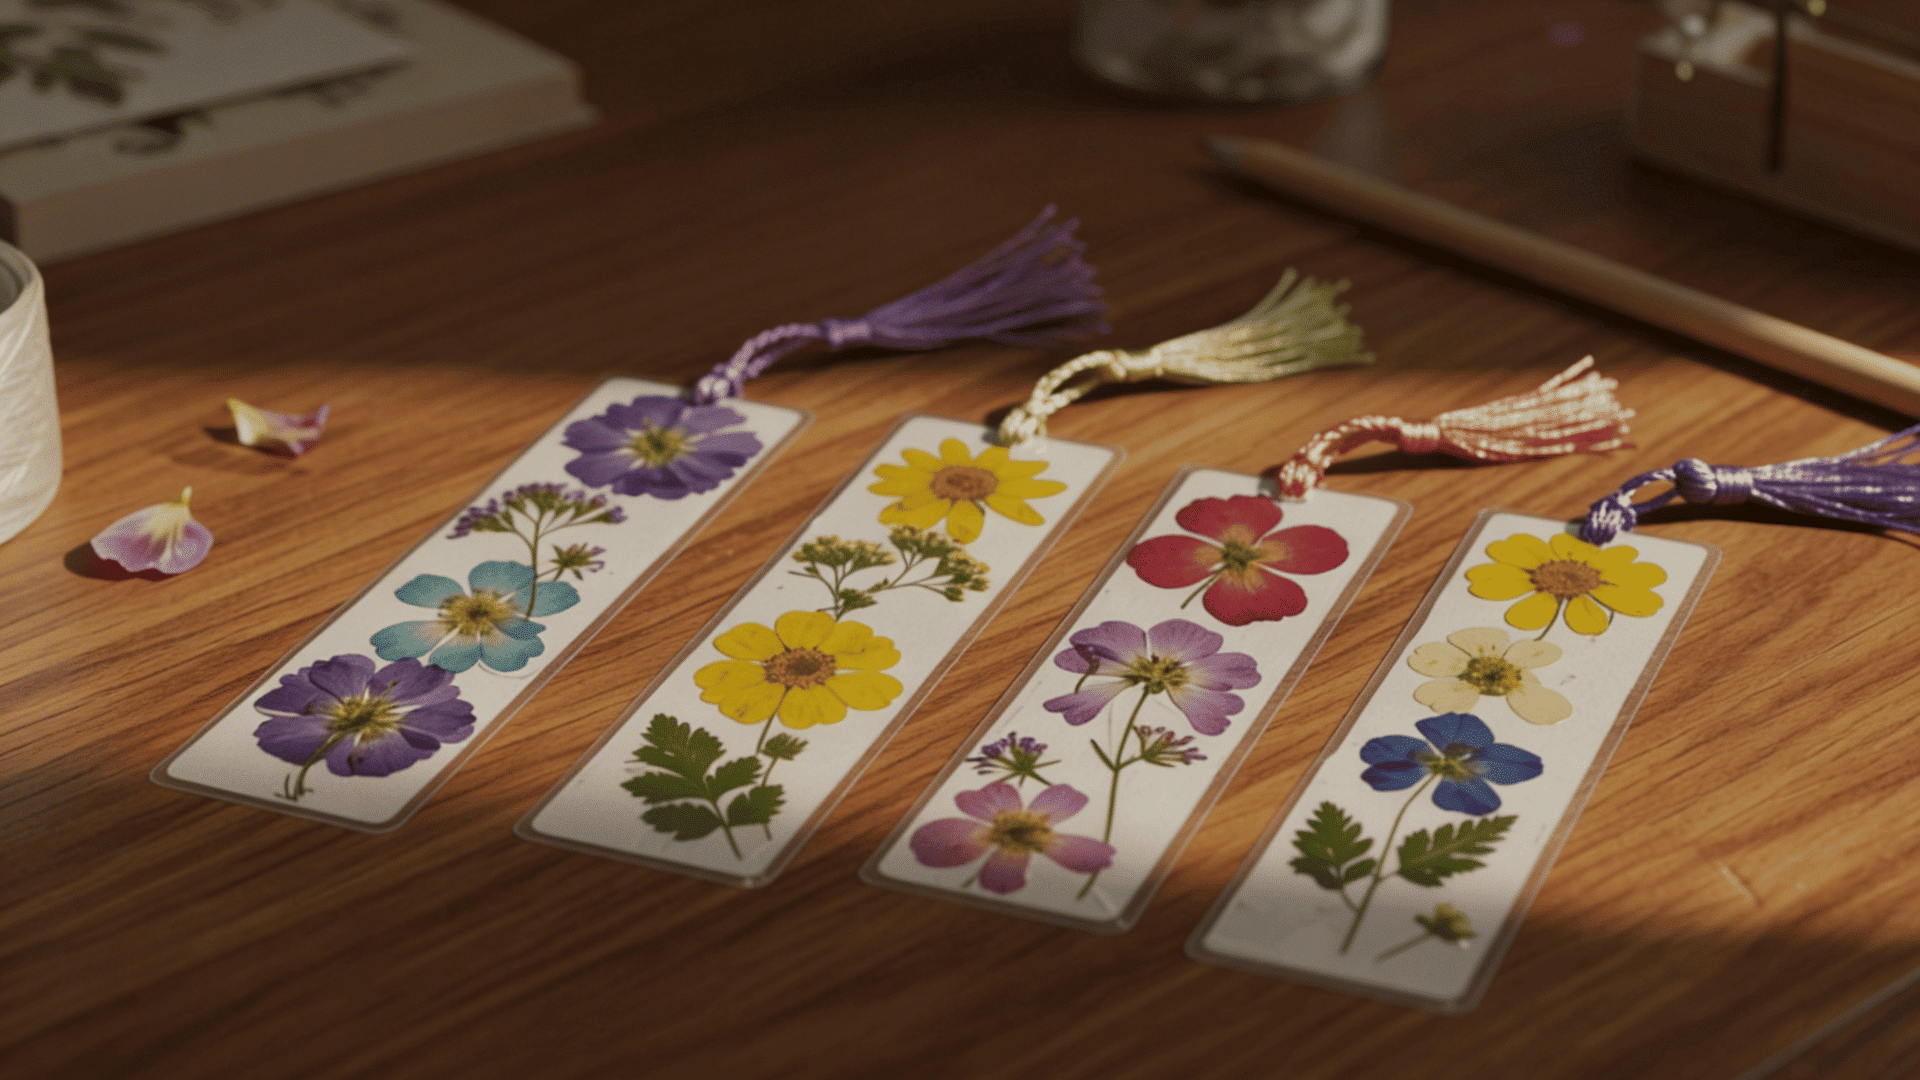
Cut cardstock into bookmark-sized rectangles. Arrange pressed flowers or paper cutouts on one side in your preferred design.
Place the bookmark between two laminating sheets and press out any air bubbles as you seal. Trim the edges, punch a hole at the top, and add ribbon.
- Materials Required: Cardstock, pressed flowers or cutouts, laminating sheets, ribbon
- DIY Level: Easy
- Time Required: 15-20 minutes per bookmark
13. DIY Spring Quote Wall Printables

Open a free design tool on your computer and select your canvas size. Choose a spring quote and pick fonts that match your style.
Add colors and simple graphics if desired, then save and print on cardstock. Frame your finished print and hang it on your wall.
- Materials Required: Computer, printer, cardstock paper, frame
- DIY Level: Easy
- Time Required: 30 minutes designing, 5 minutes printing
14. Mini Spring Centerpieces
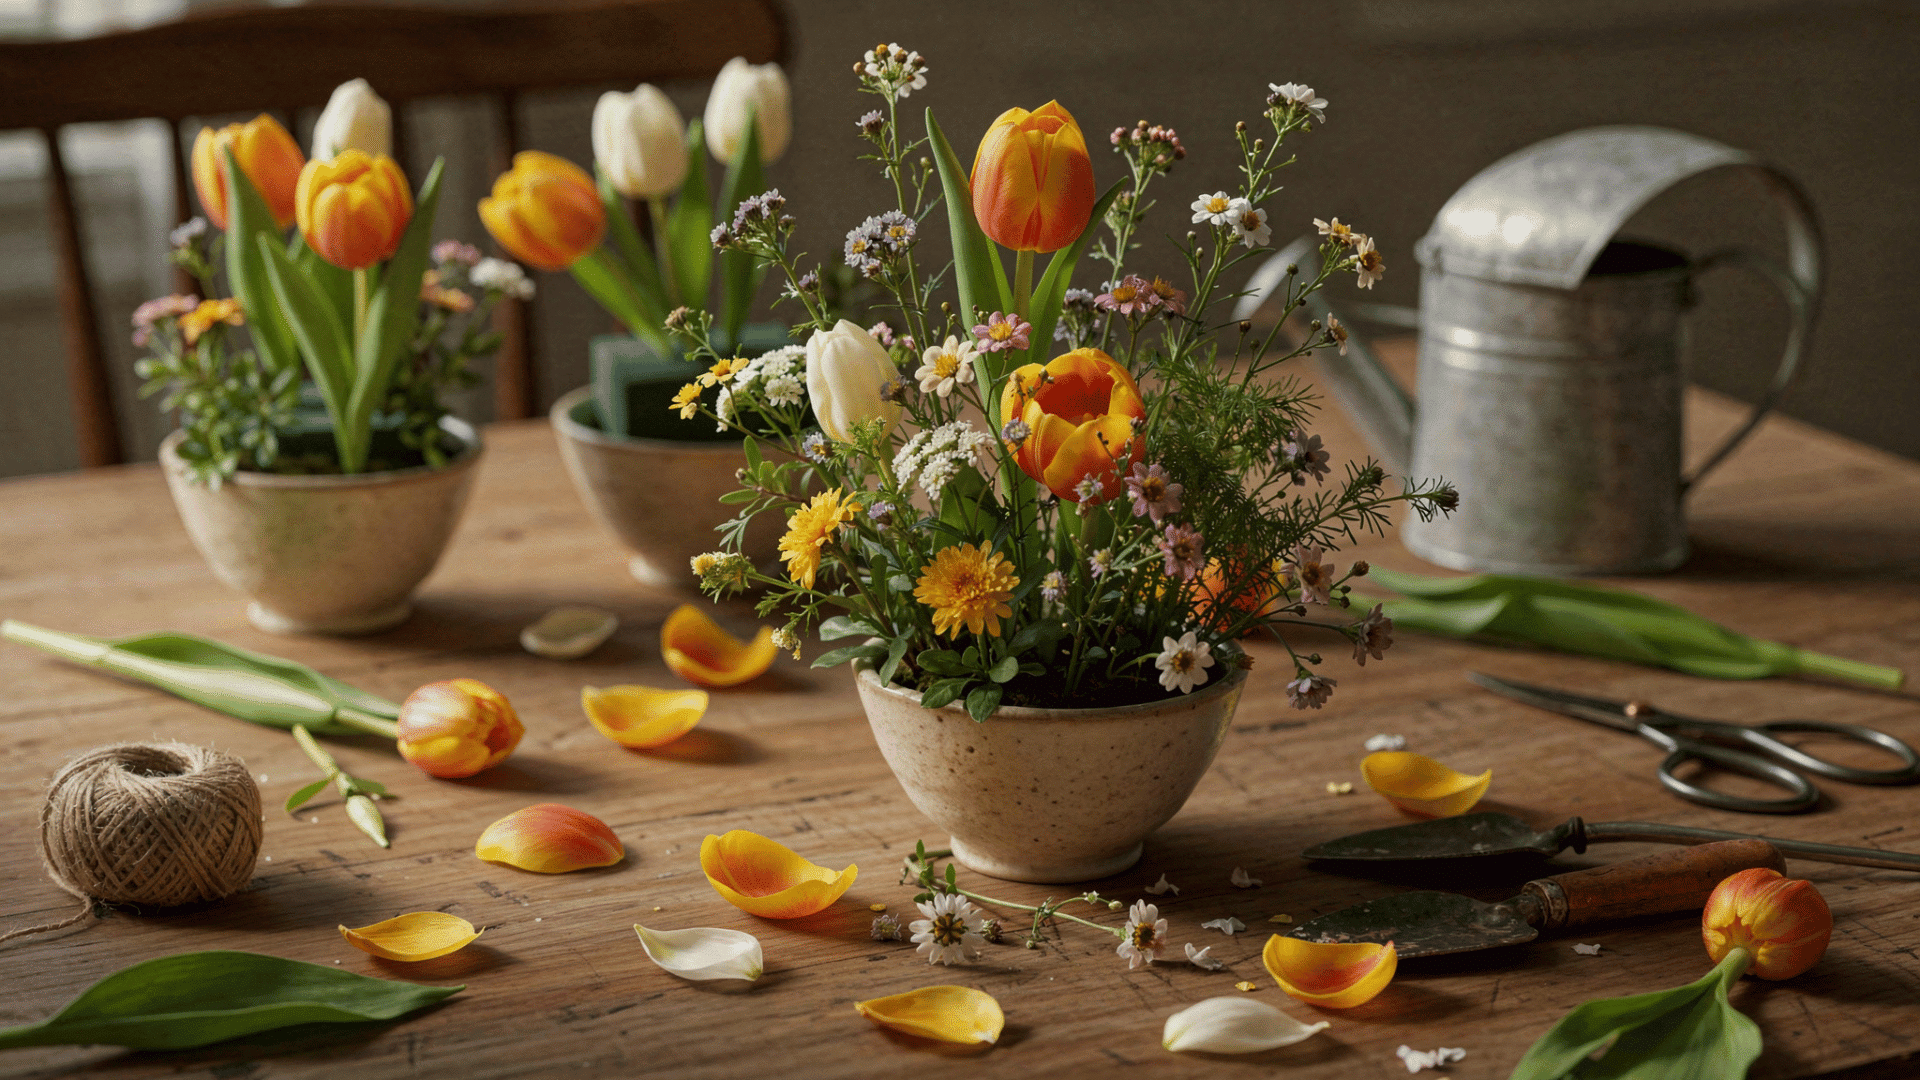
Soak the floral foam in water and cut it to fit inside your small container. Insert flower stems at different angles, starting from the center and working outward.
Fill gaps with greenery and shorter blooms for fullness. Add water to keep fresh flowers hydrated.
- Materials Required: Small containers, floral foam, flowers, greenery, water
- DIY Level: Easy
- Time Required: 20-30 minutes
15. DIY Birdhouse Makeover
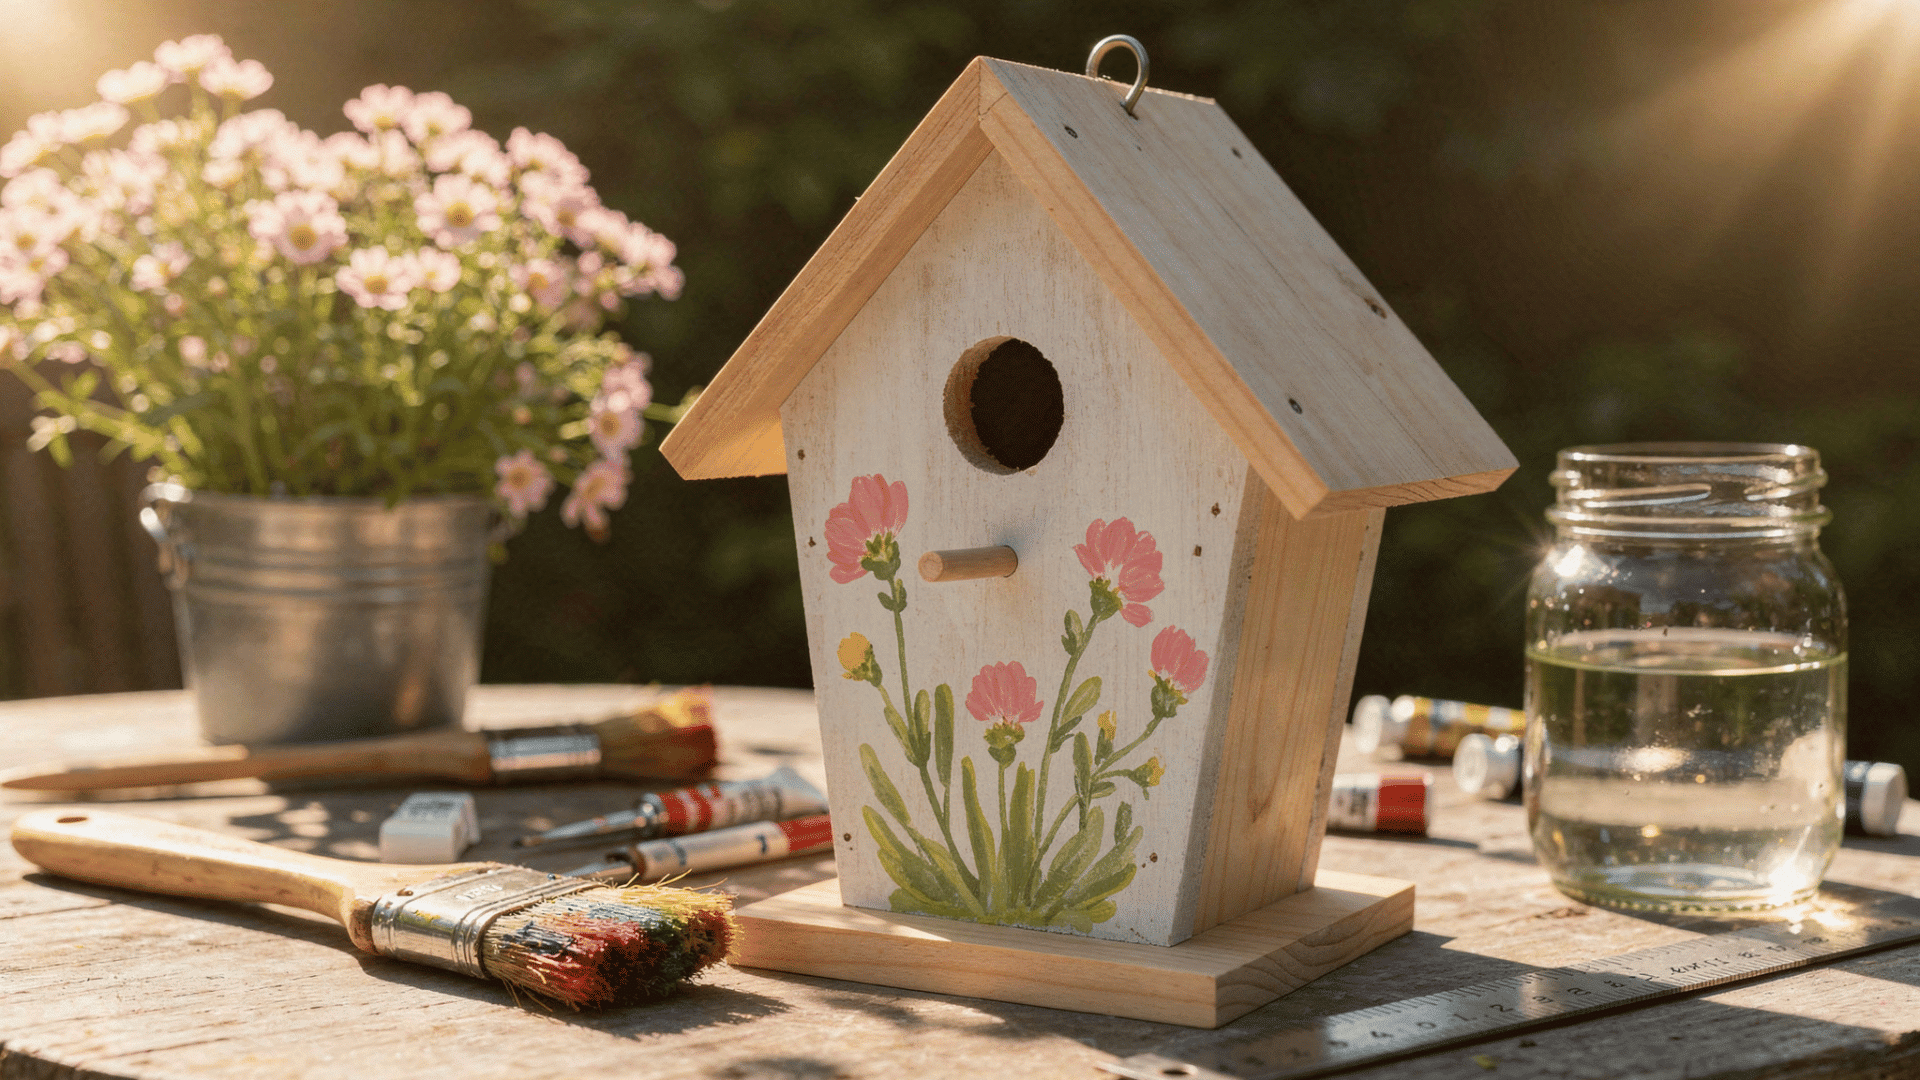
Sand any rough spots on your wooden birdhouse with fine sandpaper. Wipe away dust and apply your base coat of outdoor paint.
Let it dry, then add details or patterns using different colors. Apply sealer to the dried paint, then add any decorative trim you want.
- Materials Required: Wooden birdhouse, outdoor paint, brushes, sealer, decorative trim
- DIY Level: Easy
- Time Required: 1-2 hours, including drying
16. Butterfly Wall Art Collage
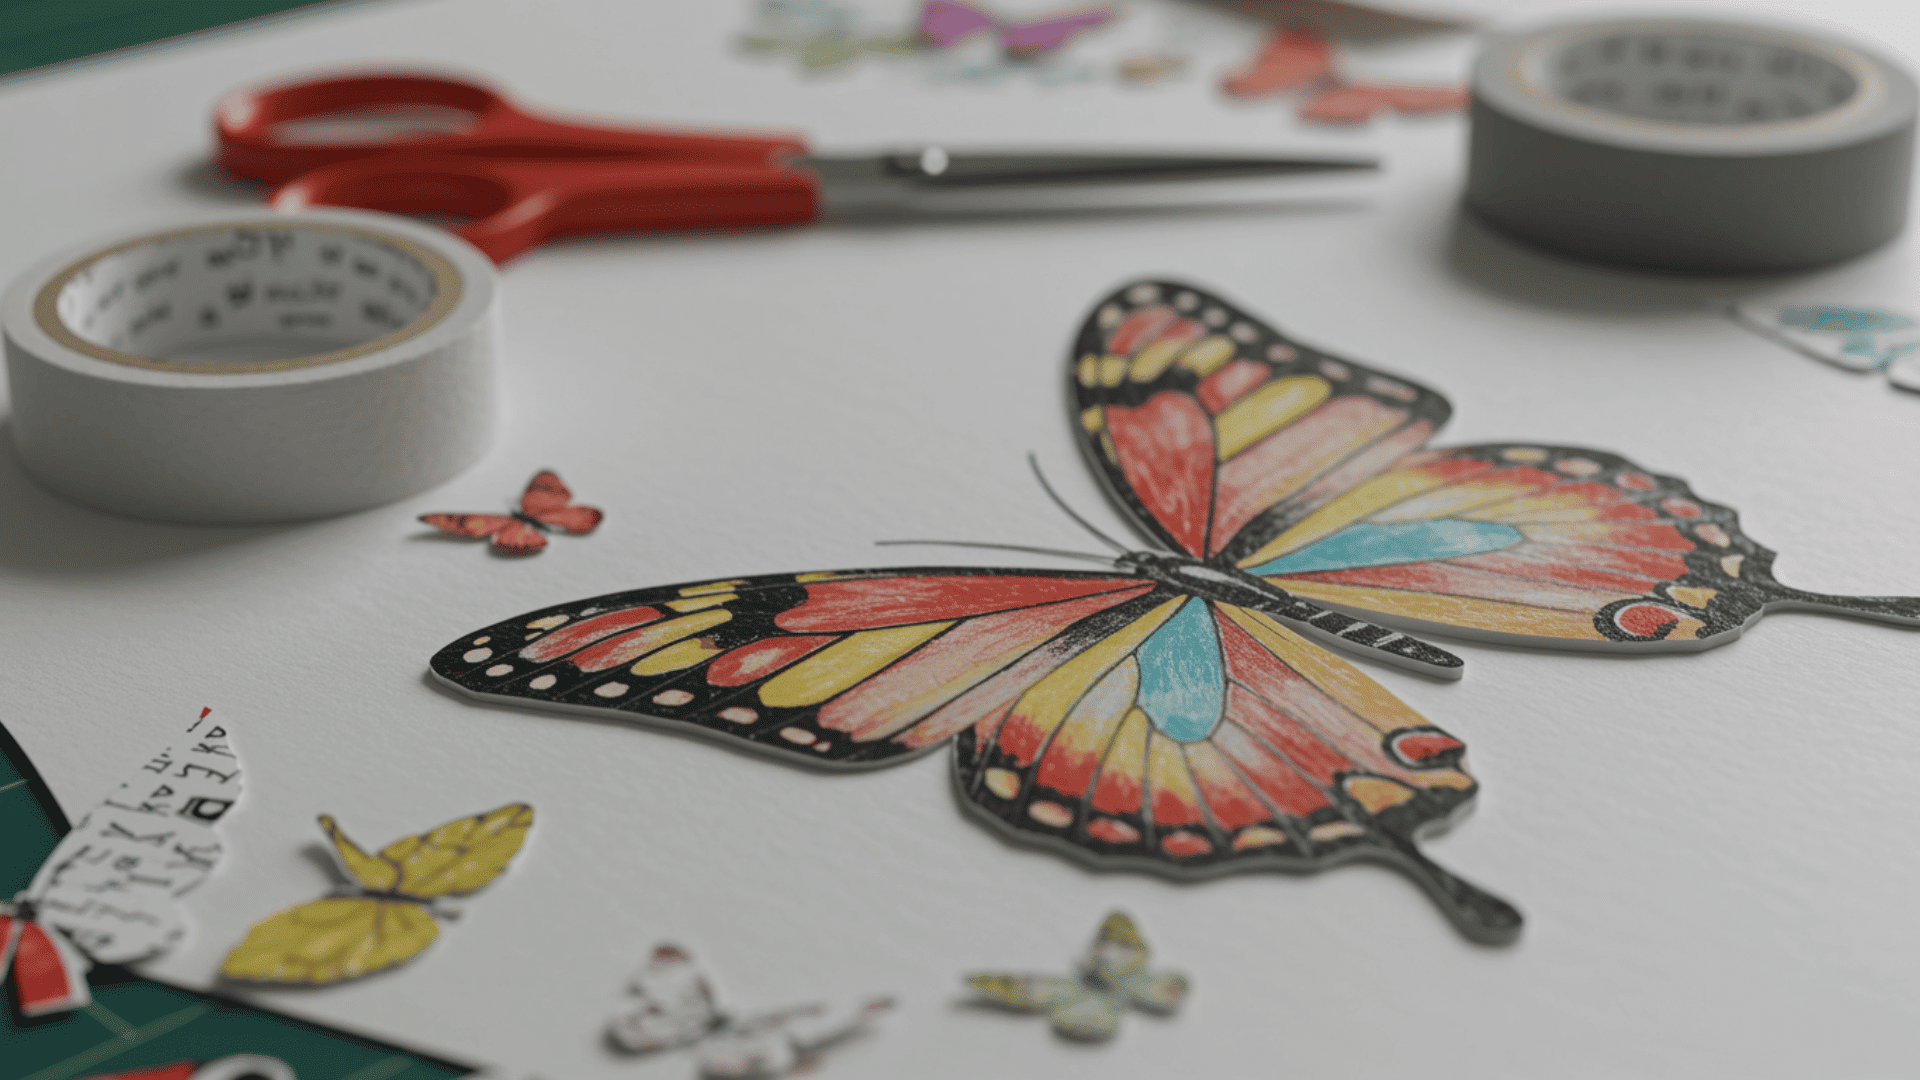
Trace or draw butterfly shapes onto patterned paper, then carefully cut them out. Fold each butterfly slightly down the middle to create dimension.
Use foam tape on the body to mount them on your backing at different angles. Arrange several butterflies to create a flying pattern across your canvas.
- Materials Required: Scrapbook paper, scissors, foam tape, canvas or cardboard backing
- DIY Level: Easy
- Time Required: 45 minutes to 1 hour
17. No-Sew Fabric Flower Pins

Cut fabric into strips about 1-2 inches wide and 8-10 inches long. Apply hot glue along one edge and roll the fabric to form petals, gathering as you go.
Glue a button in the center to hide the raw edges. Attach a pin back with hot glue and let it cool completely before wearing.
- Materials Required: Fabric scraps, hot glue gun, pin backs, buttons for centers
- DIY Level: Easy
- Time Required: 15-20 minutes per pin
18. DIY Tulip Bouquet (Paper Craft)

Cut colored paper into tulip petal shapes using a template. Fold each petal slightly to add dimension and curve the edges for a natural look.
Wrap the petals around the floral wire stems and secure with glue. Make several flowers and group them together in a vase for display.
- Materials Required: Colored craft paper, green floral wire, scissors, glue
- DIY Level: Easy
- Time Required: 10-15 minutes per flower
19. Easter-Inspired Table Decor (Adult Style)
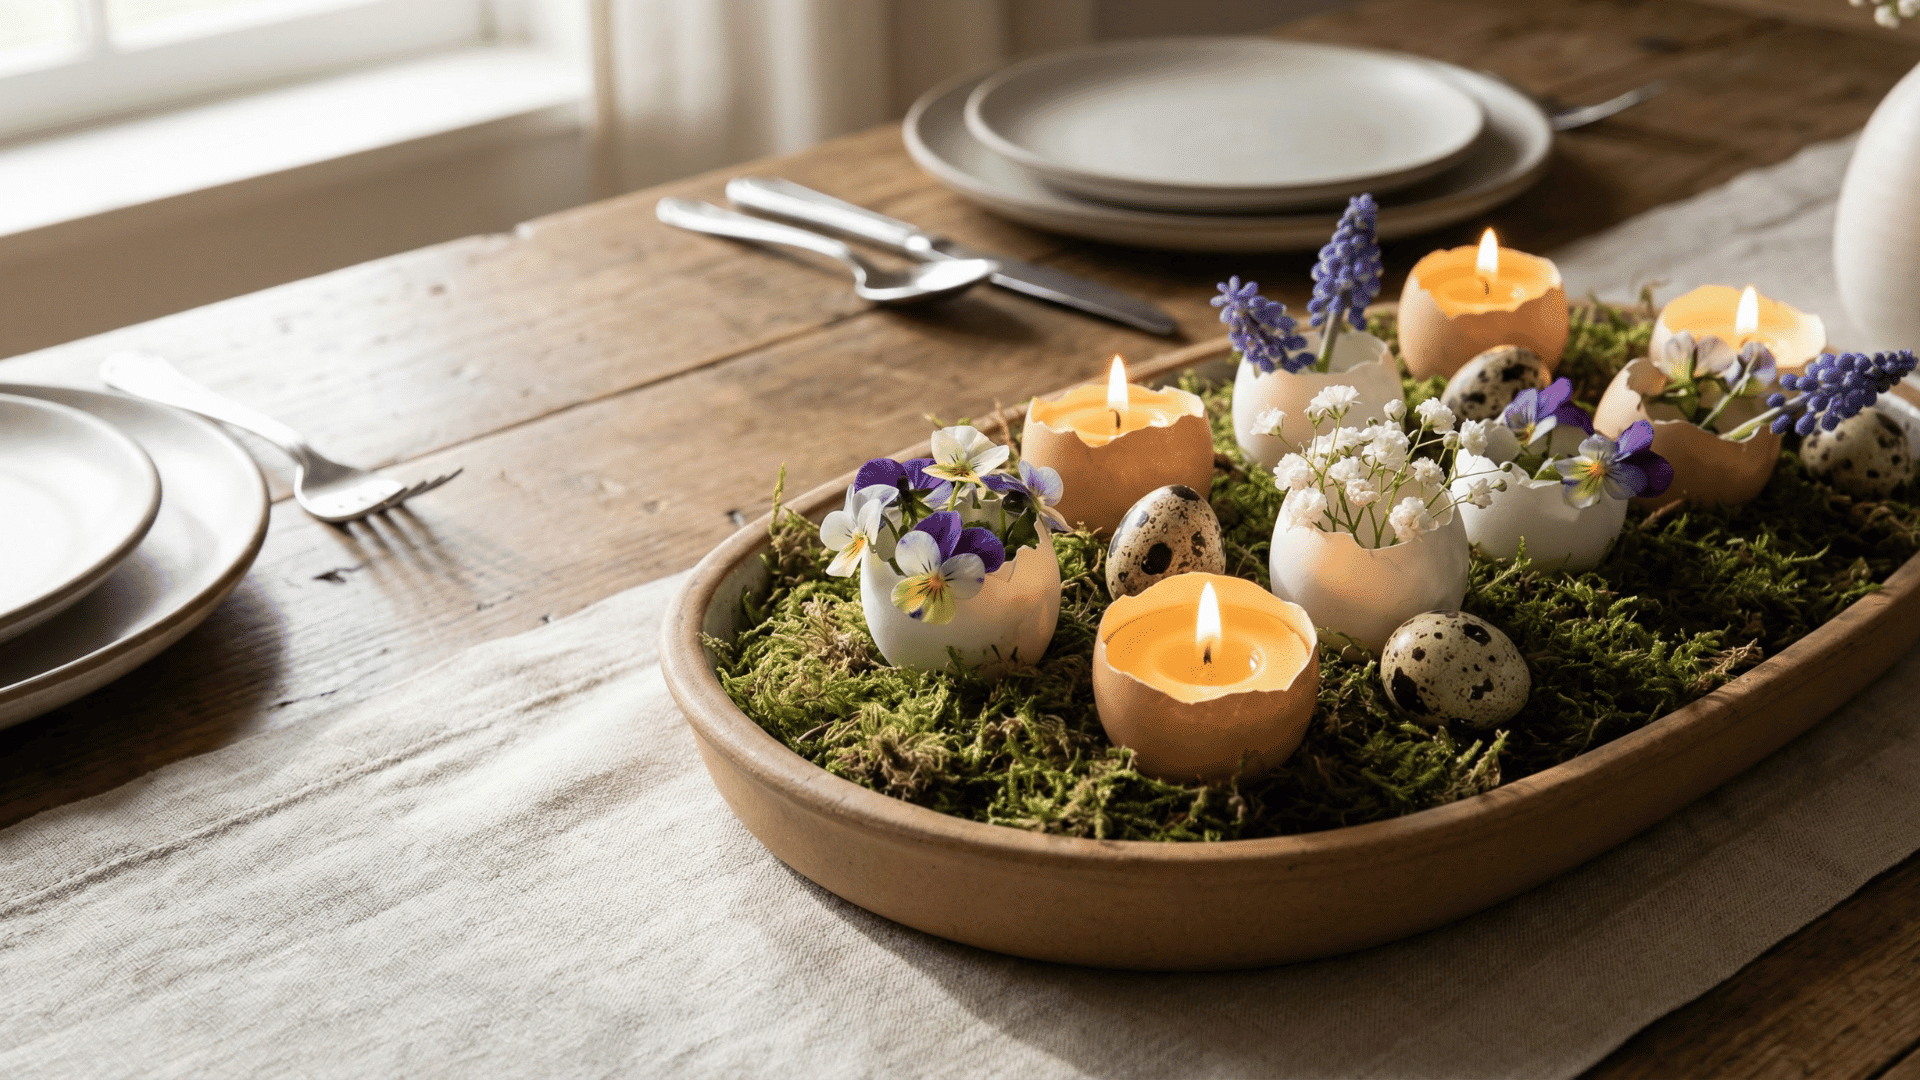
Carefully crack the tops off eggs and pour out the contents, then rinse shells gently. Let eggshells dry completely before handling.
Fill shells with small flowers and water, or place tiny candles inside. Arrange them on a tray with moss for a refined spring table setting.
- Materials Required: Eggshells, small flowers or candles, moss, tray or plate
- DIY Level: Easy
- Time Required: 30-40 minutes
20. Floral Sachets for Drawers
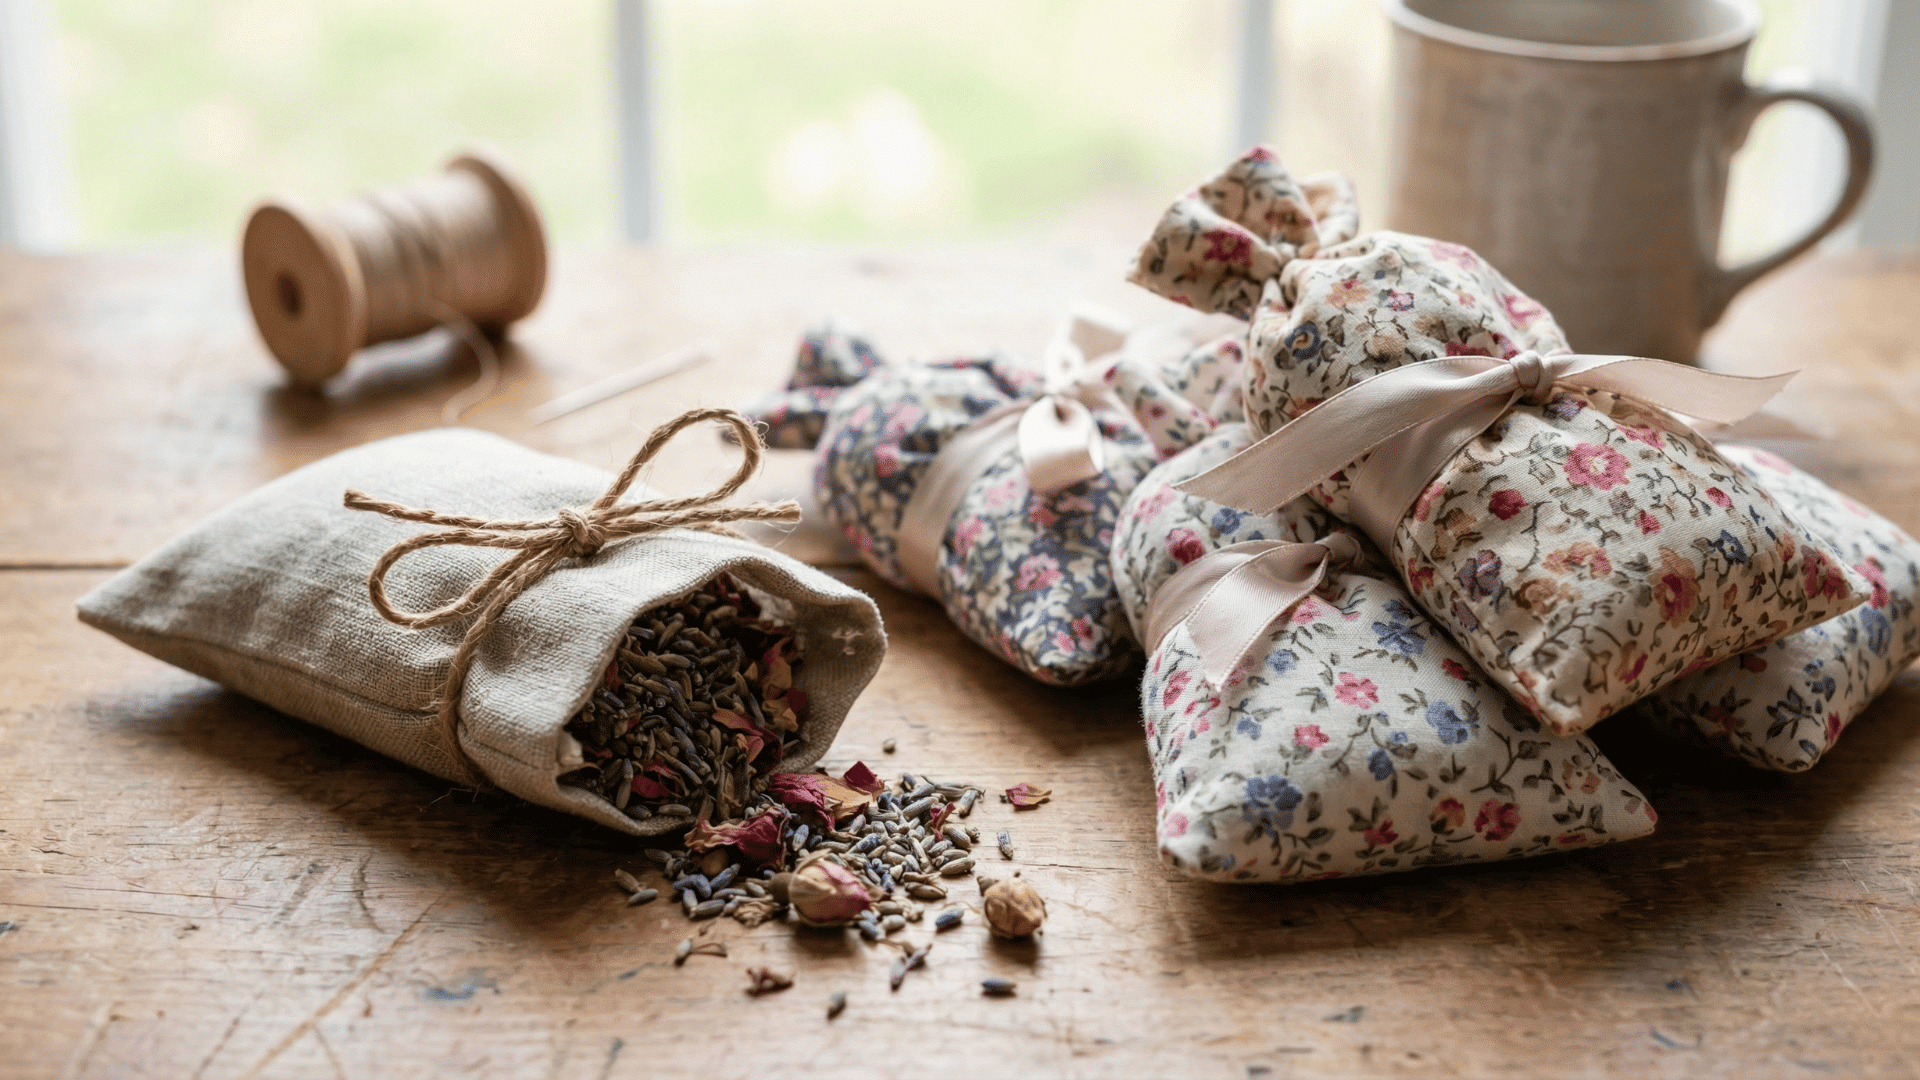
Cut two fabric squares about 4×4 inches in the same size. Place them together and sew or glue three sides closed, leaving one open.
Fill with dried lavender or rose petals, then seal the final side. Tie a ribbon around the sachet for decoration and place it in your drawer.
- Materials Required: Fabric squares, dried flowers or herbs, ribbon, needle, and thread
- DIY Level: Easy
- Time Required: 10-15 minutes per sachet
21. Tie-Dye Tea Towels (Pastel Style)
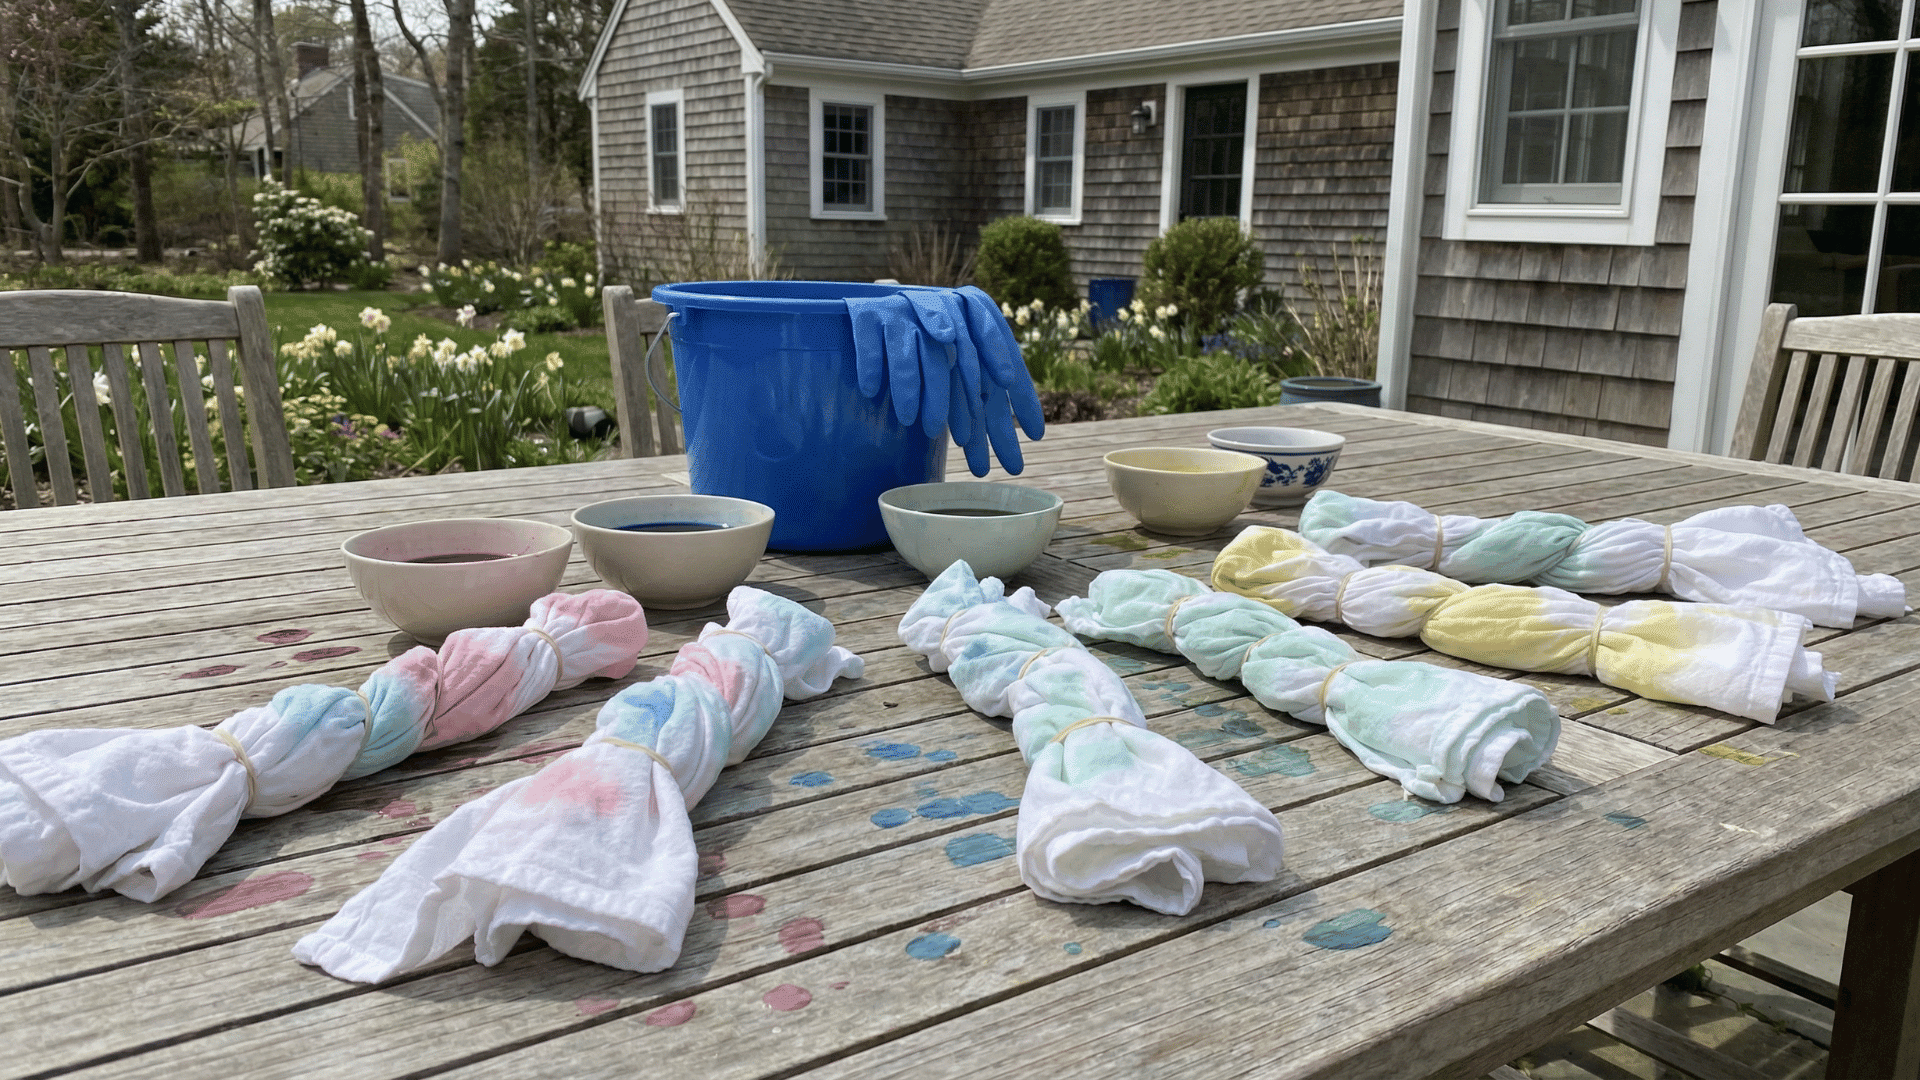
Dampen your white towels with water and wring them out. Twist and bind sections with rubber bands to create patterns.
Mix the diluted fabric dye according to the package instructions, then apply it to different sections. Let it sit for the recommended time, then rinse, remove bands, and wash separately.
- Materials Required: White cotton towels, fabric dye, rubber bands, bucket, gloves
- DIY Level: Easy
- Time Required: 1 hour plus drying overnight
22. DIY Spring Gift Tags
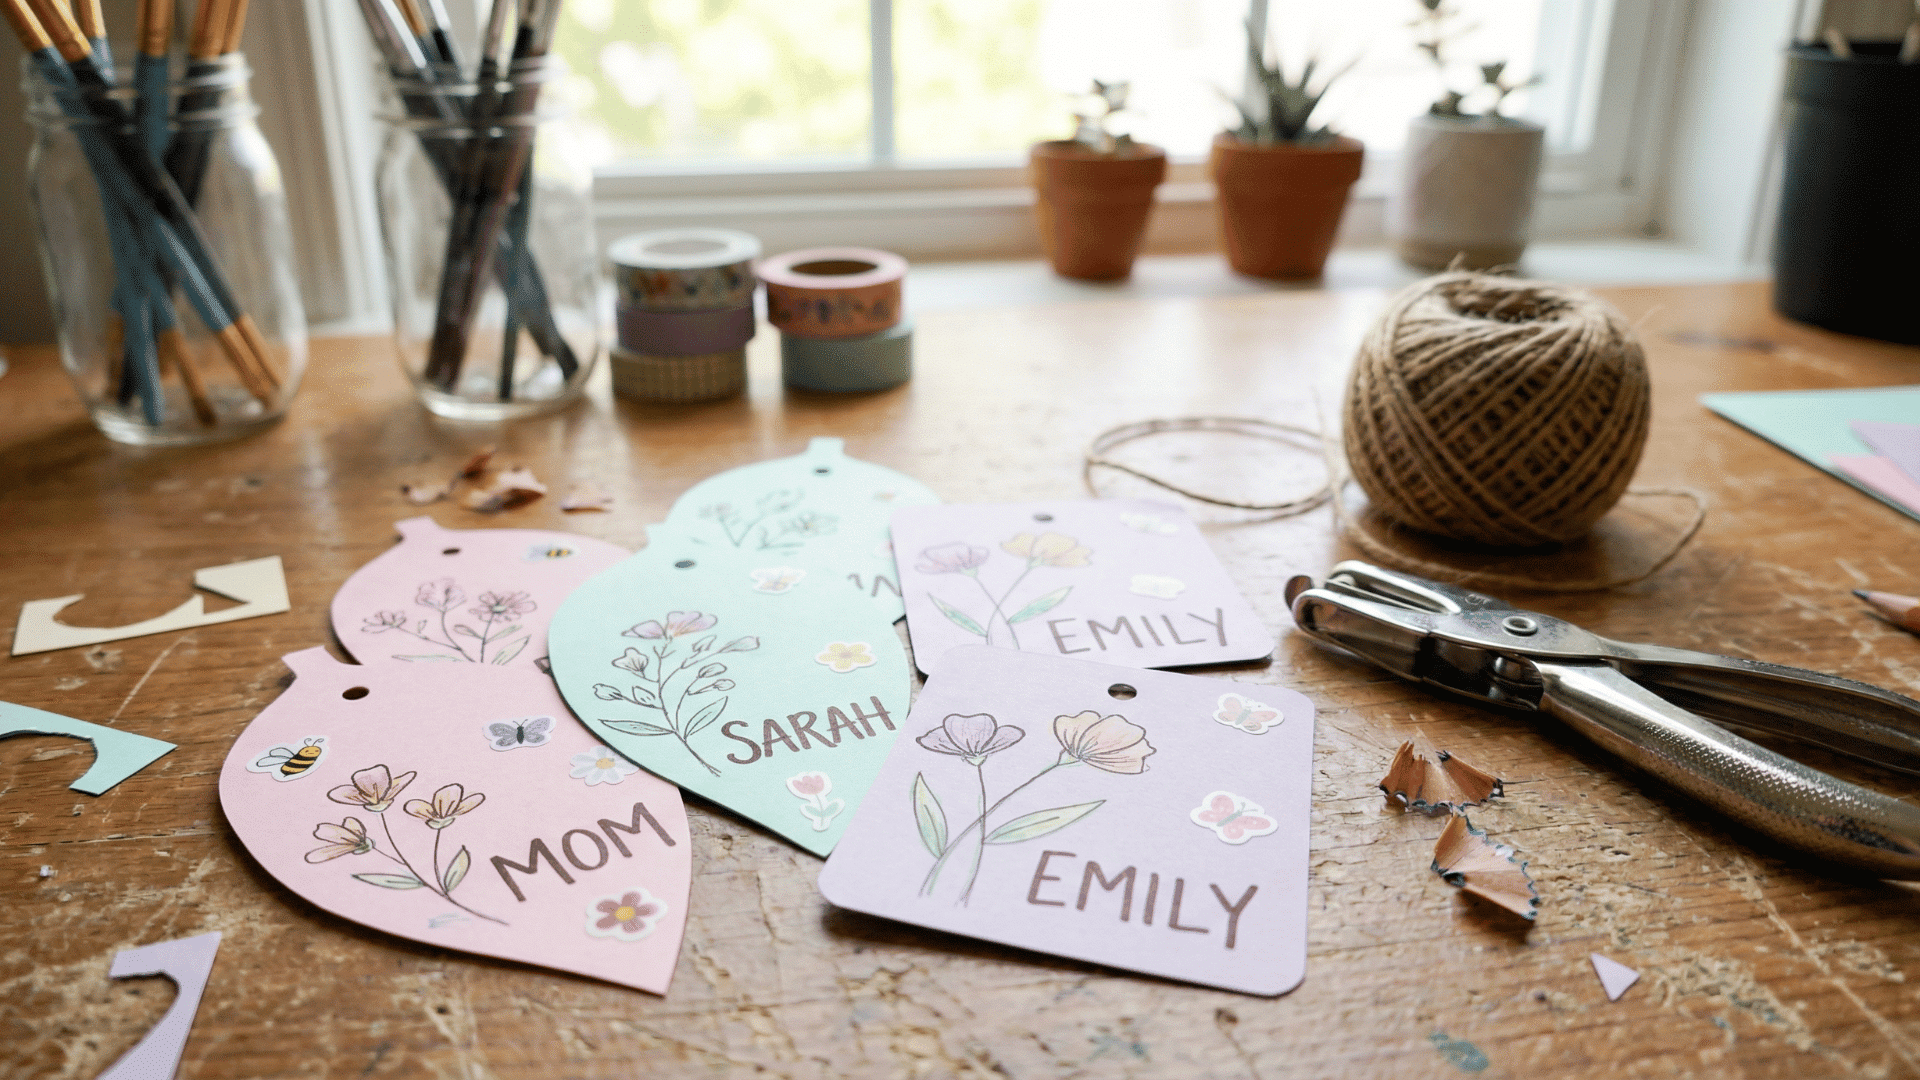
Cut cardstock into tag shapes using scissors or a punch tool. Decorate each tag with stamps, stickers, or hand-drawn spring designs.
Add the recipient’s name if desired, then punch a hole at the top. Thread the string through the hole, and your tags are ready to attach to gifts.
- Materials Required: Cardstock, hole punch, string, markers or stamps, stickers
- DIY Level: Easy
- Time Required: 20-30 minutes for multiple tags
23. DIY Terrarium in a Glass Bowl
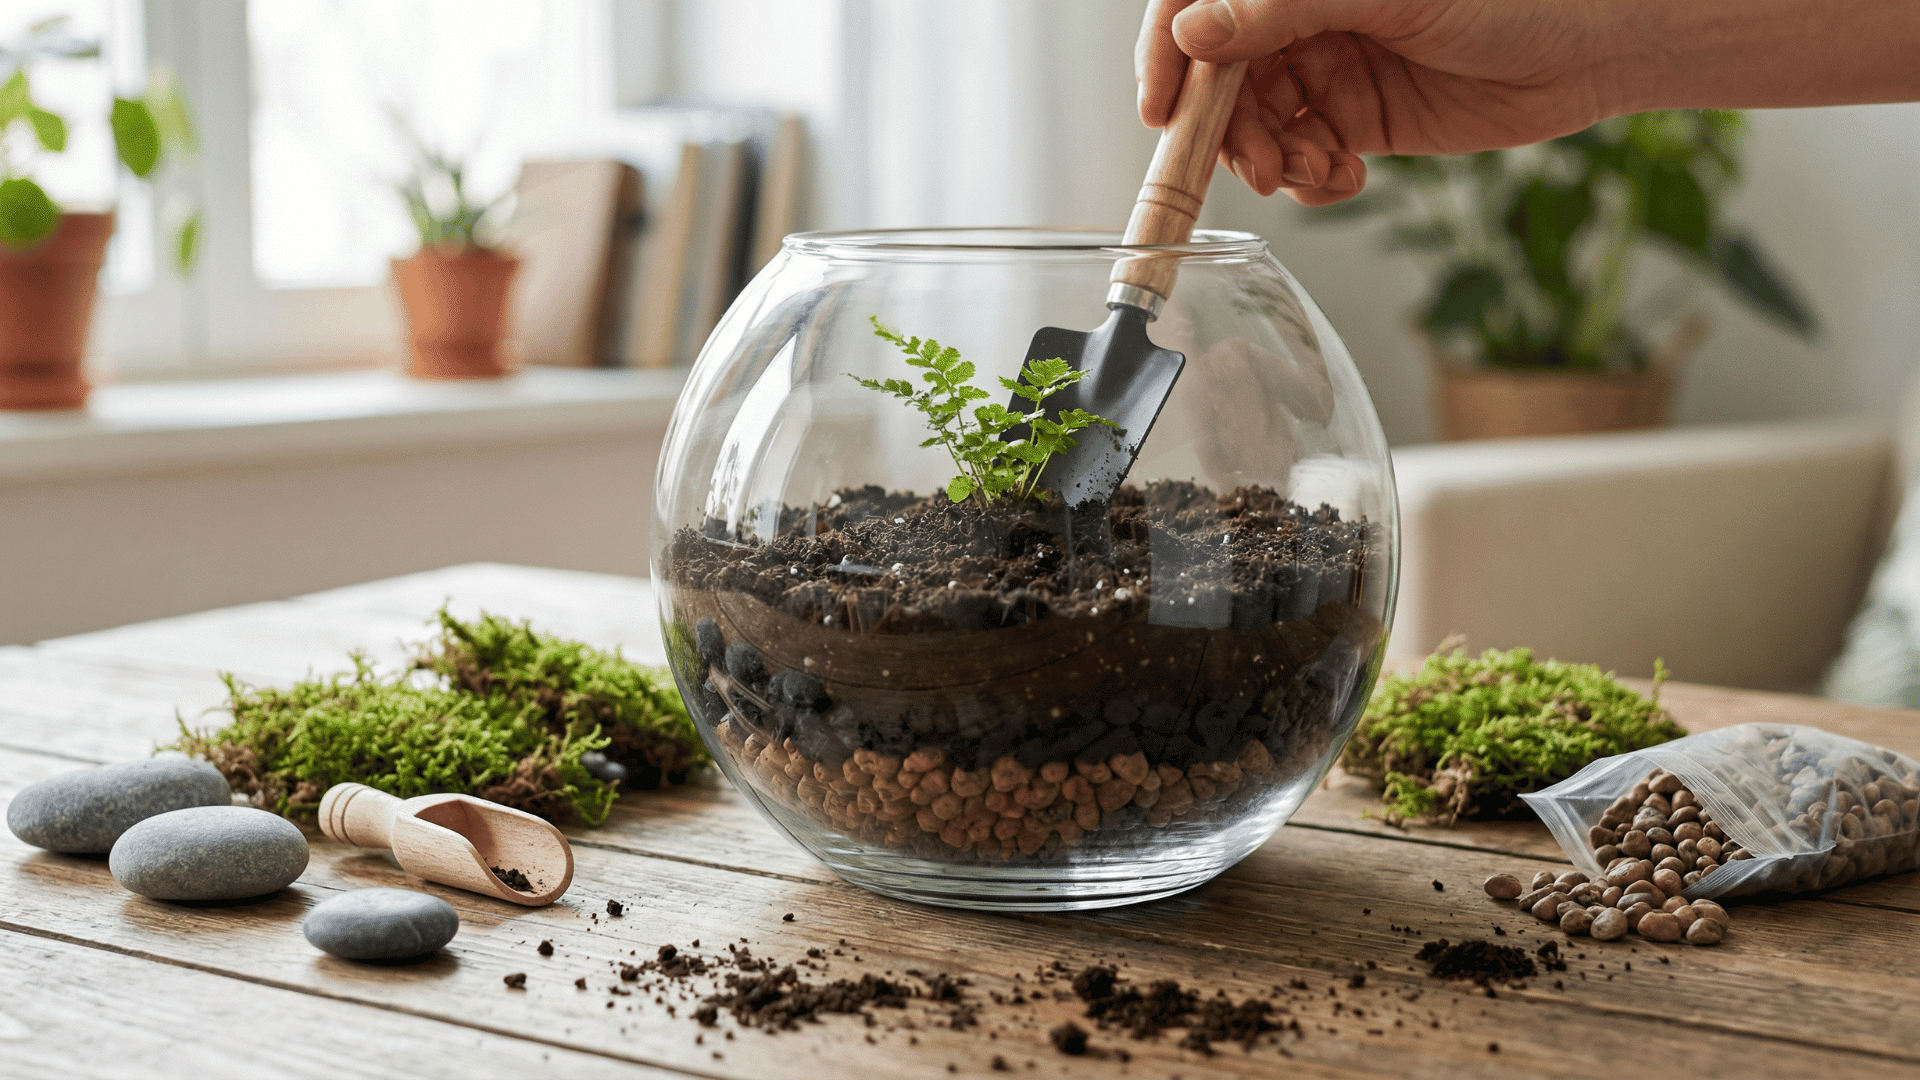
Add a layer of pebbles to the bottom of your glass bowl for drainage. Sprinkle activated charcoal over the pebbles to keep the soil fresh.
Add potting soil and create small holes for your plants, then gently place them in and press soil around the roots. Top with moss and decorative stones.
- Materials Required: Glass bowl, pebbles, charcoal, potting soil, small plants, moss
- DIY Level: Easy
- Time Required: 30-45 minutes
24. Hanging Macrame Plant Holder
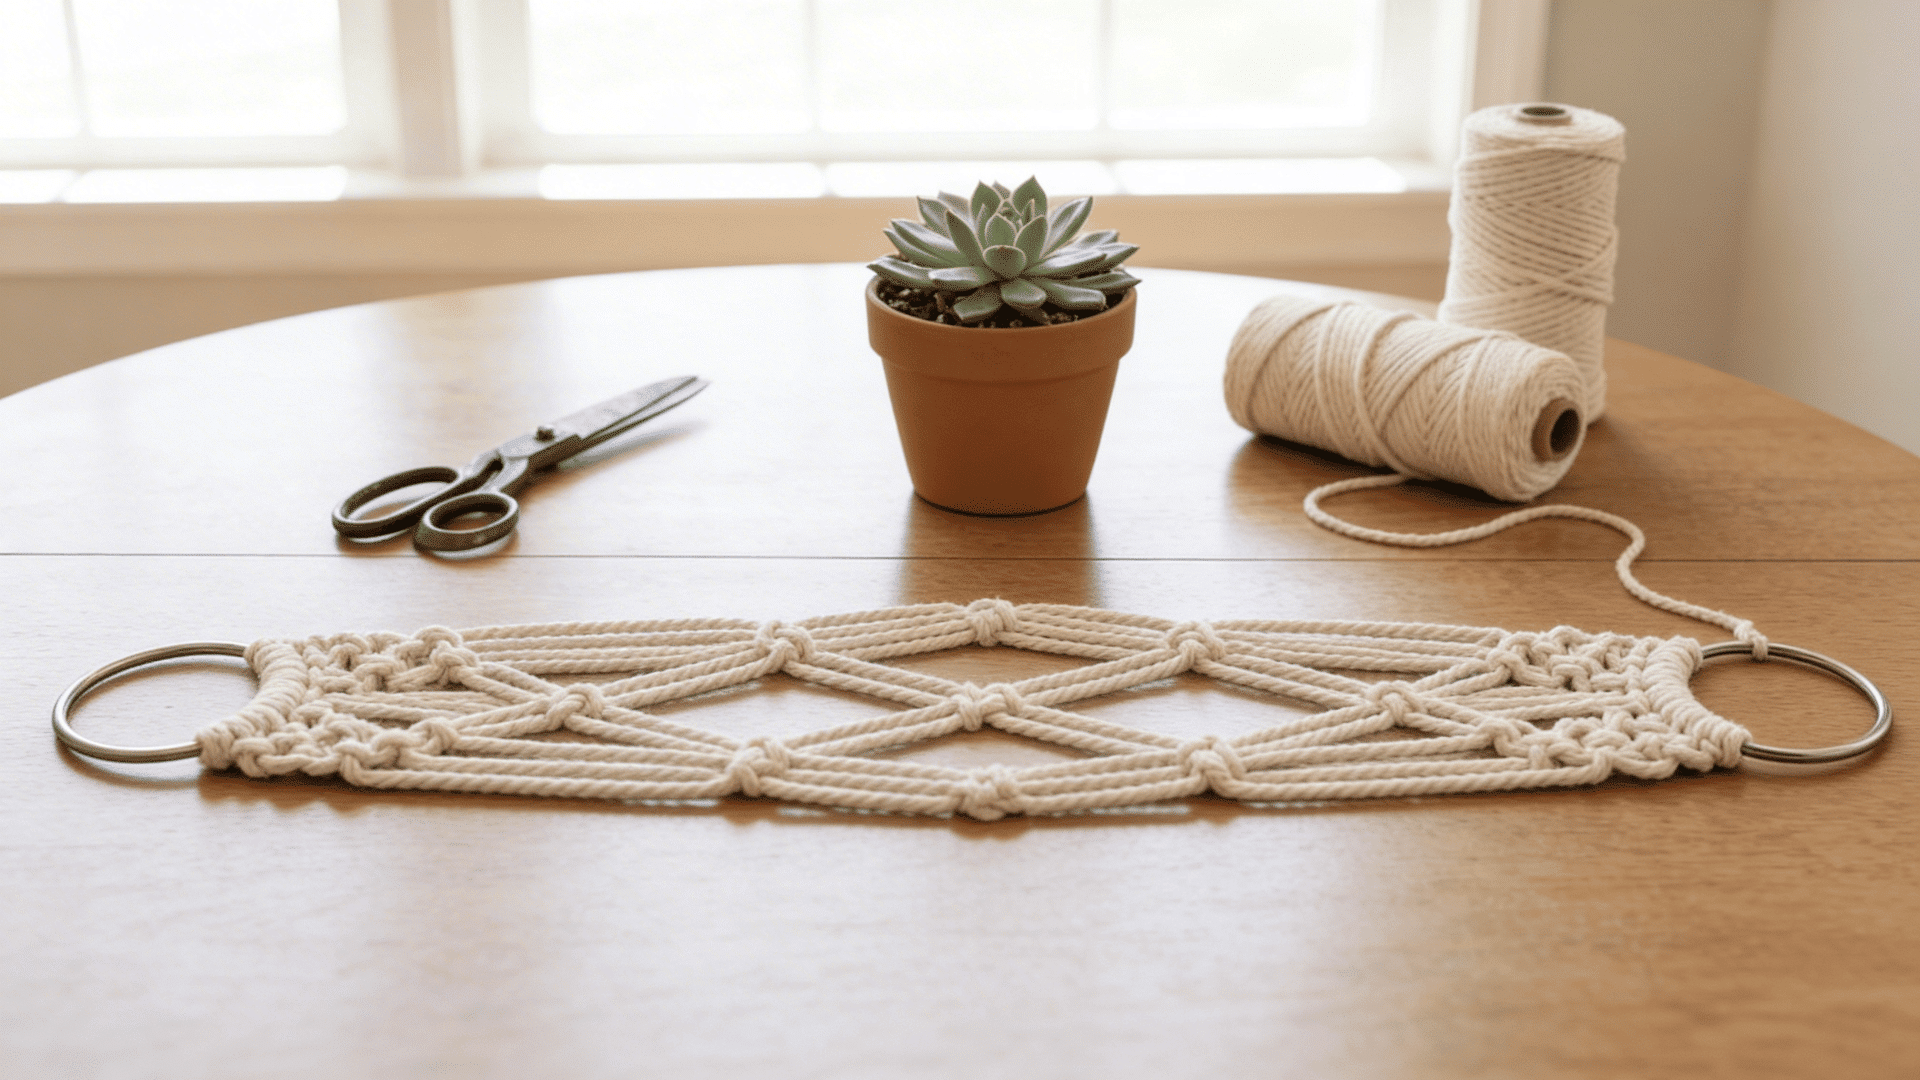
Cut several long pieces of cord and fold them in half over a metal ring. Separate the cords into groups and tie square knots at regular intervals along their length.
Continue knotting in a pattern that creates a cradle shape for the pot. Gather all cords at the bottom, tie them together, and place your potted plant inside.
- Materials Required: Cotton macrame cord, metal rings, scissors, a pot with a plant
- DIY Level: Medium
- Time Required: 1-2 hours for beginners
25. Spring Crochet Coasters
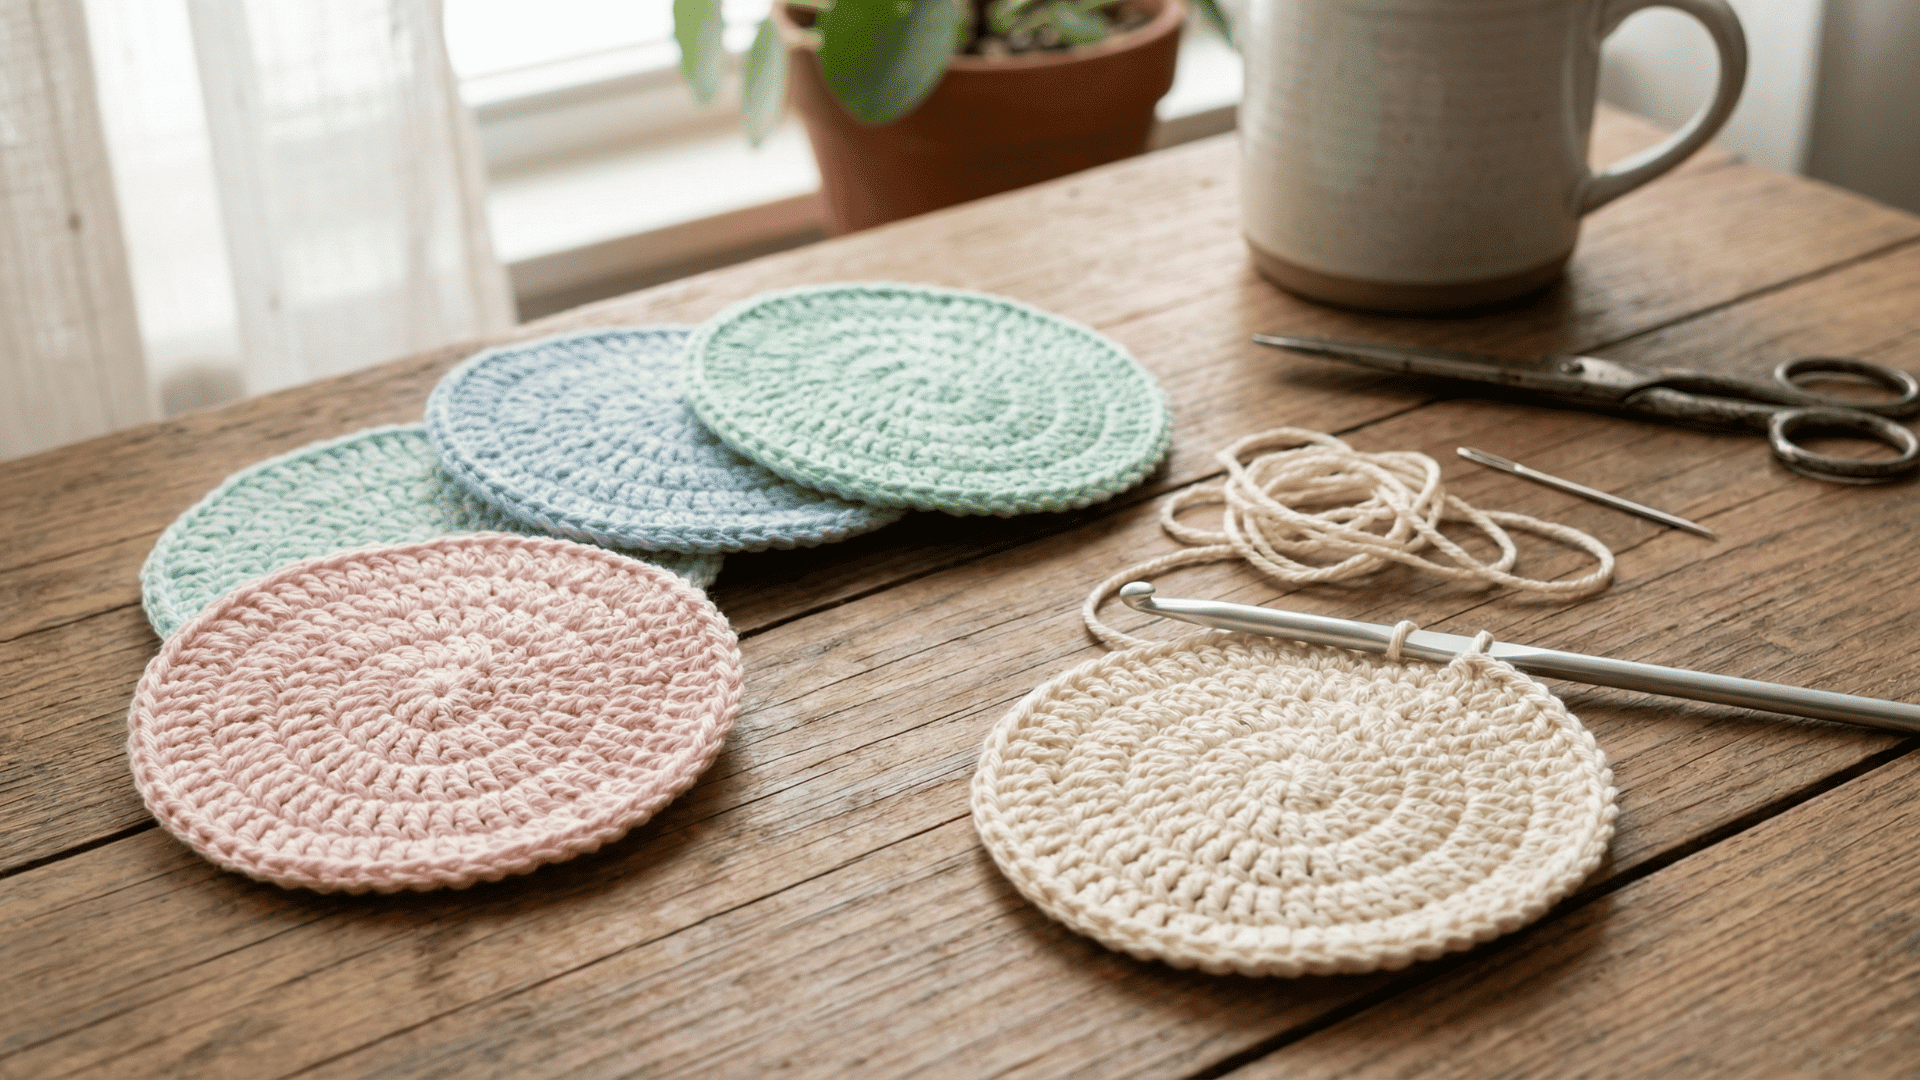
Start with a slip knot and chain four stitches, then join to form a ring. Crochet in rounds, increasing stitches evenly to keep your work flat.
Continue until the coaster reaches your desired size, usually 4-5 inches across. Fasten off and weave in loose ends with a yarn needle.
- Materials Required: Cotton yarn in spring colors, crochet hook, scissors
- DIY Level: Medium
- Time Required: 30-45 minutes per coaster
26. DIY Embroidery: Simple Floral Patterns
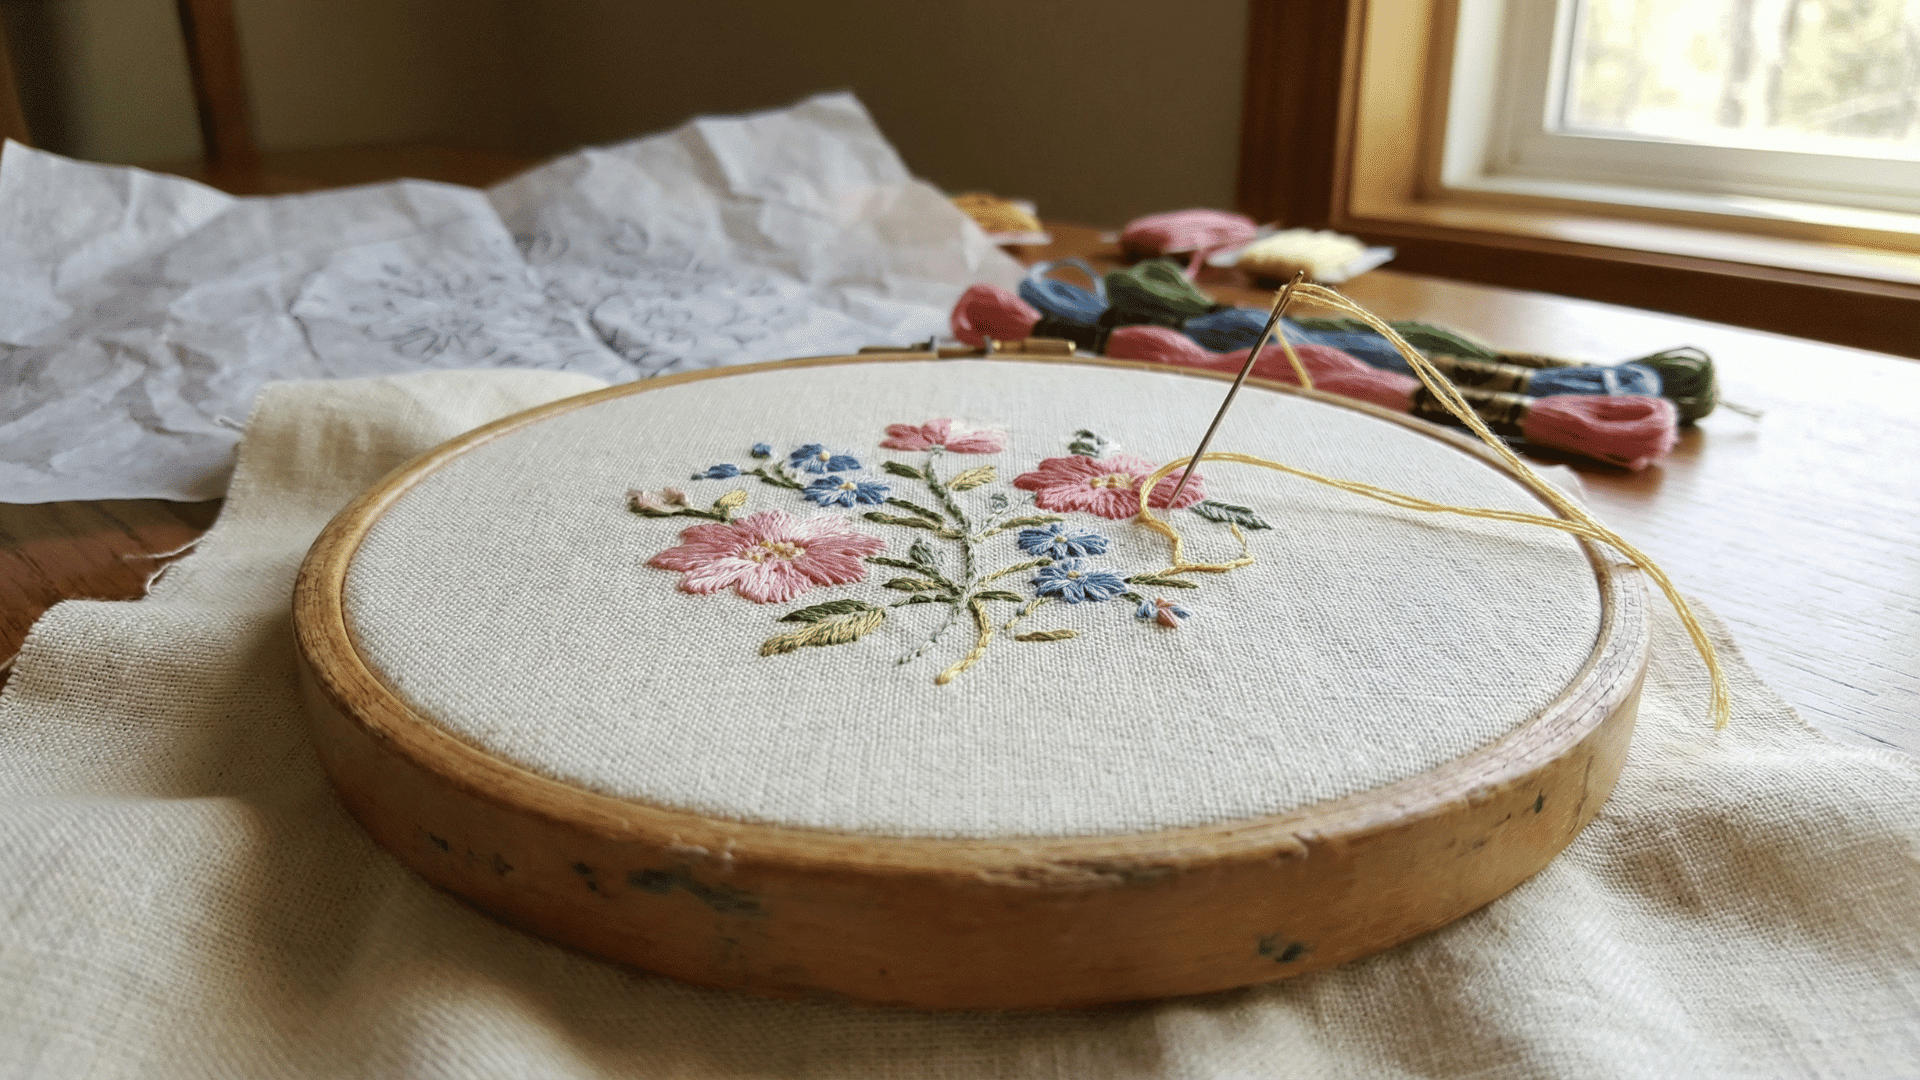
Place fabric in your embroidery hoop and pull it tight. Transfer your chosen pattern onto the fabric using transfer paper and pencil.
Thread your needle and start stitching along the lines using backstitch for outlines. Fill in petals and leaves with satin stitch for a fuller look.
- Materials Required: Embroidery hoop, fabric, floss, needle, transfer paper, pattern
- DIY Level: Medium
- Time Required: 2-3 hours, depending on the detail
27. Decoupage Wooden Signs

Sand your wood plaque smooth and wipe away dust. Brush a thin layer of Mod Podge on the area where you’ll place the paper.
Press decorative paper or napkins onto the wet surface, smoothing out wrinkles and bubbles. Apply another coat of Mod Podge over the top and let it dry, then seal the entire piece.
- Materials Required: Wood plaque, decorative napkins or paper, Mod Podge, brush, sealer
- DIY Level: Easy
- Time Required: 1 hour plus drying time
28. Spring Soap Bars (Melt & Pour)
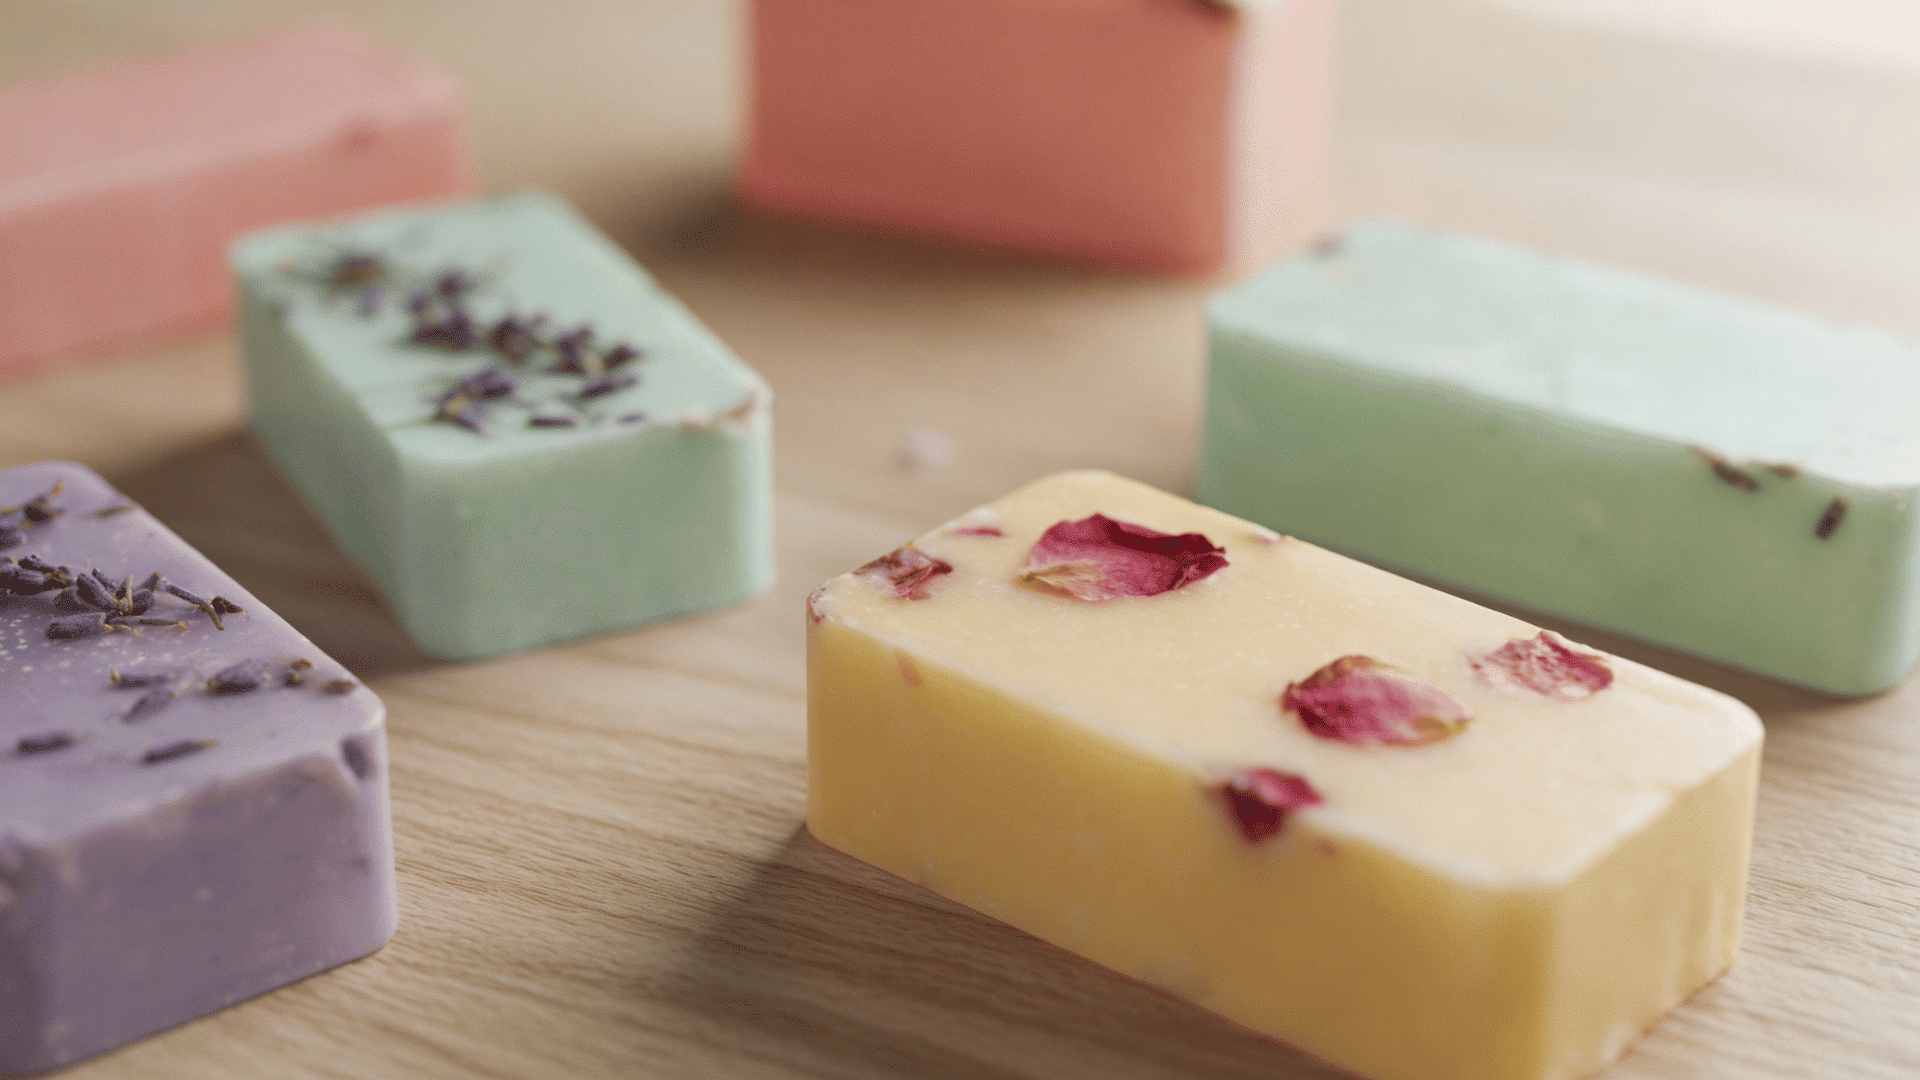
Cut the soap base into small cubes and place in a microwave-safe bowl. Melt in short bursts, stirring between each interval.
Add essential oils, colorant, and dried flowers to the melted base and stir gently. Pour into molds and let cool completely before removing.
- Materials Required: Soap base, essential oils, soap colorant, dried botanicals, molds
- DIY Level: Easy
- Time Required: 30 minutes plus cooling time
29. Spring Table Runner Stencil Craft
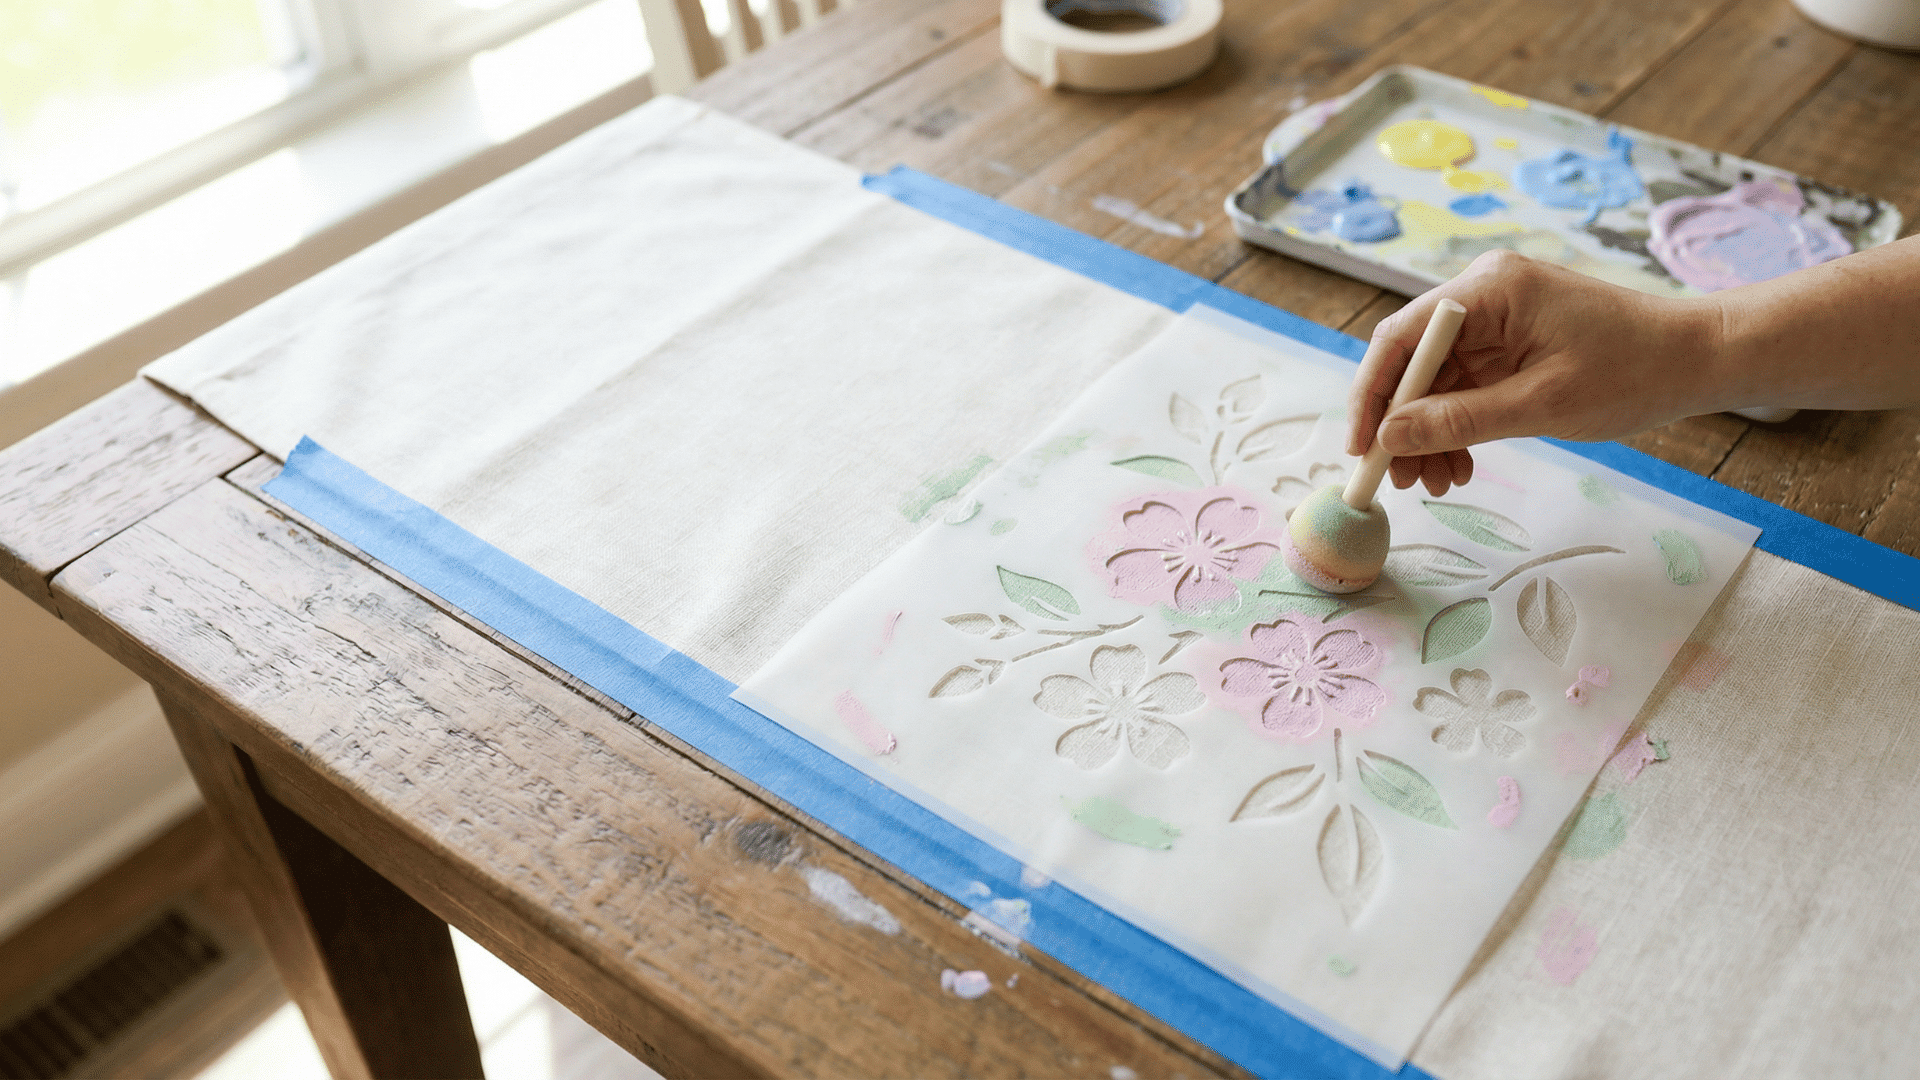
Lay your fabric runner flat and tape the stencil firmly in position. Dip your sponge brush lightly in fabric paint and dab off excess.
Apply paint through the stencil using gentle dabbing motions. Carefully lift the stencil and move to the next section, repeating until your design is complete.
- Materials Required: Plain fabric runner, stencils, fabric paint, sponge brush, tape
- DIY Level: Easy
- Time Required: 45 minutes to 1 hour
30. DIY Lip Balm with Spring Scents
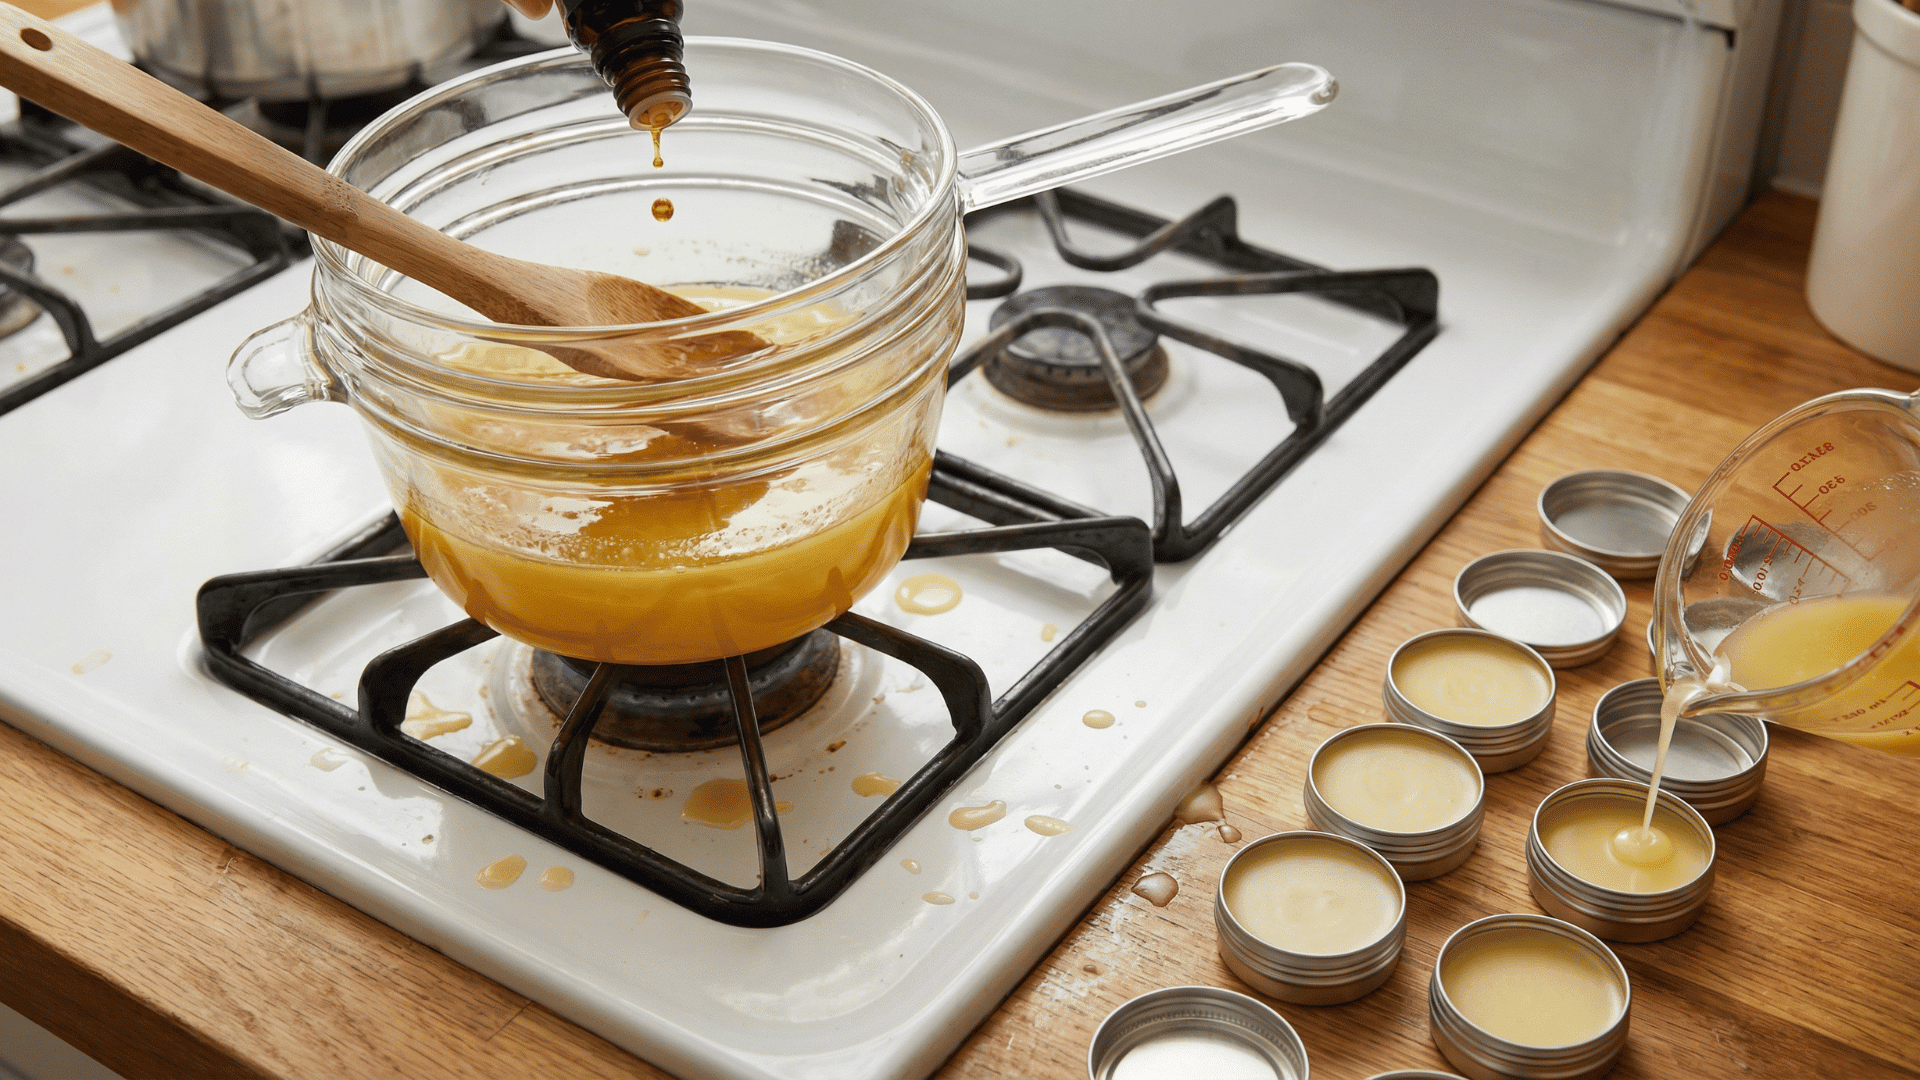
Set up a double boiler and melt beeswax and coconut oil together over low heat. Once melted, remove from heat and add essential oils, stirring well.
Pour the mixture into small containers or tubes quickly before it hardens. Let cool completely before capping and using.
- Materials Required: Beeswax, coconut oil, essential oils, small containers, double boiler
- DIY Level: Easy
- Time Required: 20-30 minutes plus cooling
31. Spring Reed Diffuser Bottles
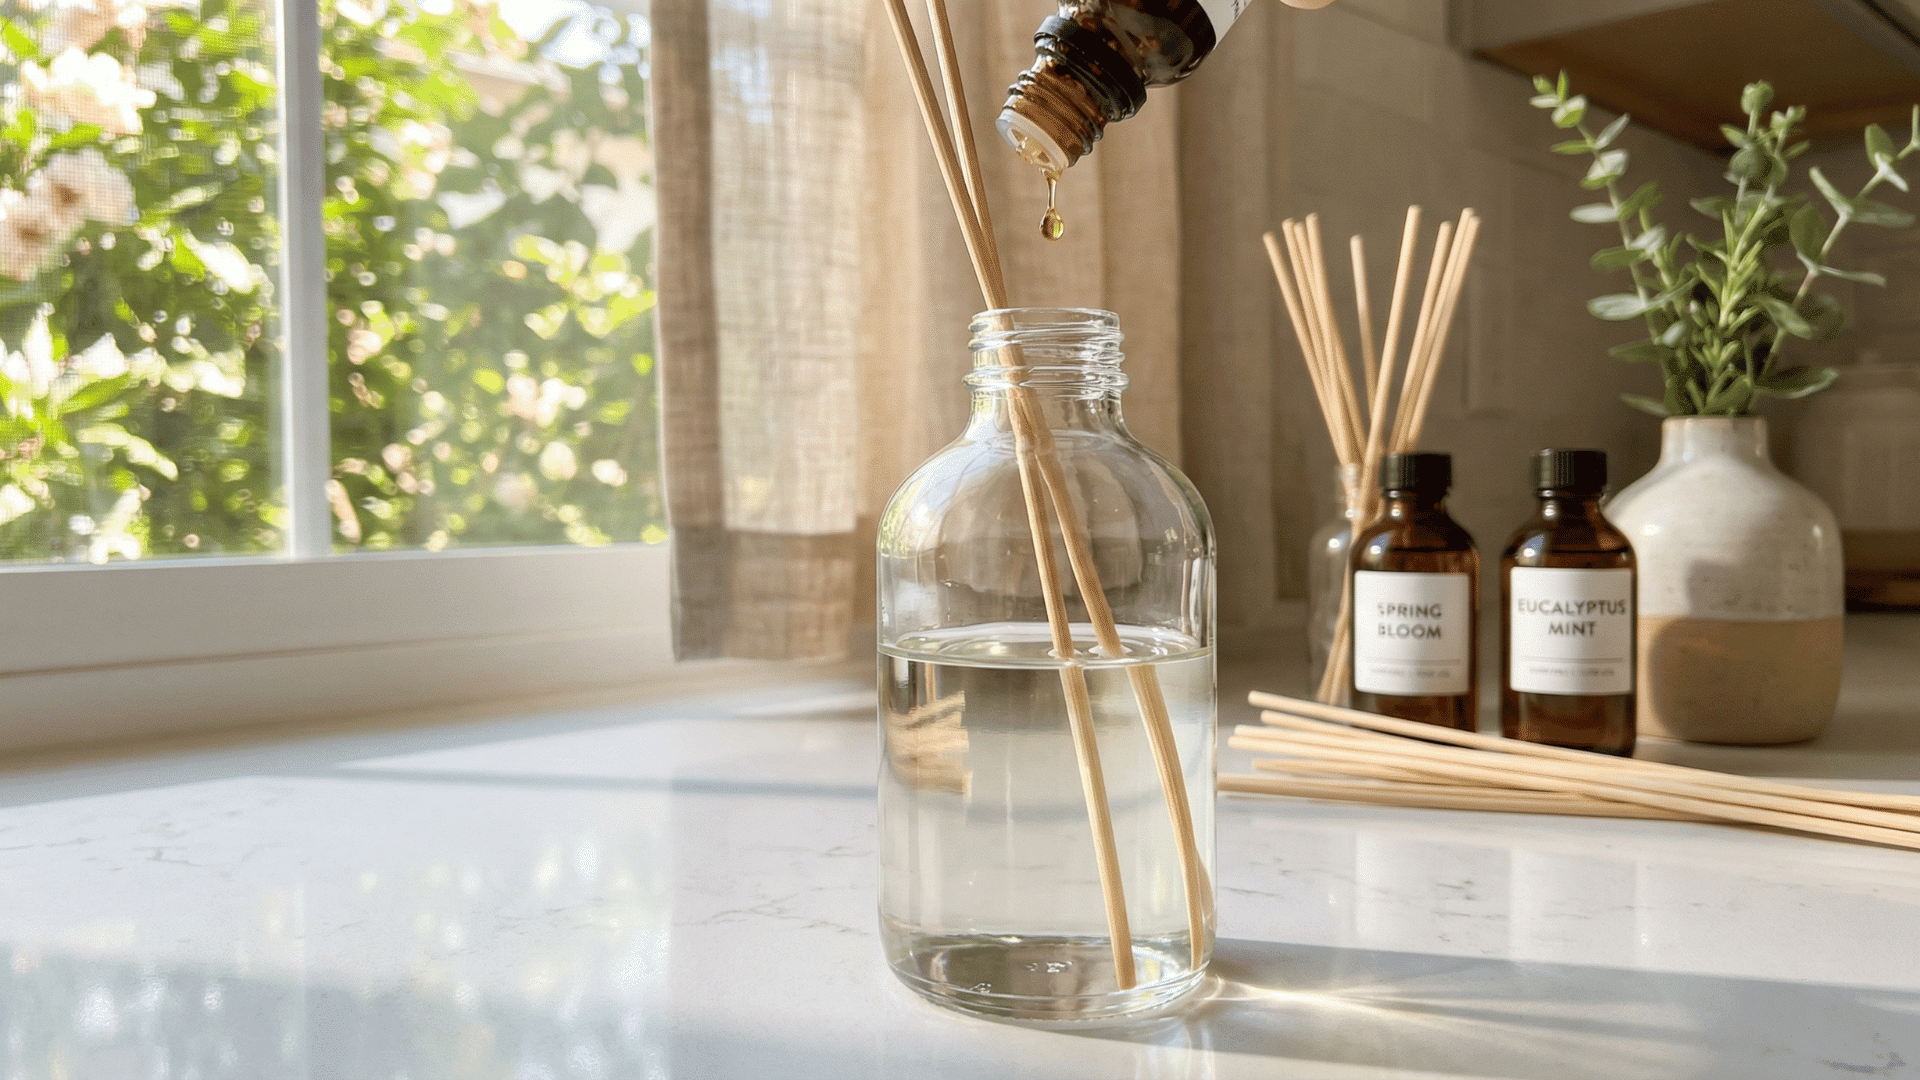
Pour carrier oil into your decorative bottle, filling it about three-quarters full. Add 15-20 drops of your chosen essential oils and swirl gently to mix.
Insert the reed sticks into the oil and let them soak for an hour. Flip the reeds every few days to refresh the scent.
- Materials Required: Glass bottle, carrier oil, essential oils, reed diffuser sticks
- DIY Level: Easy
- Time Required: 10-15 minutes to assemble
32. Floral Resin Coasters
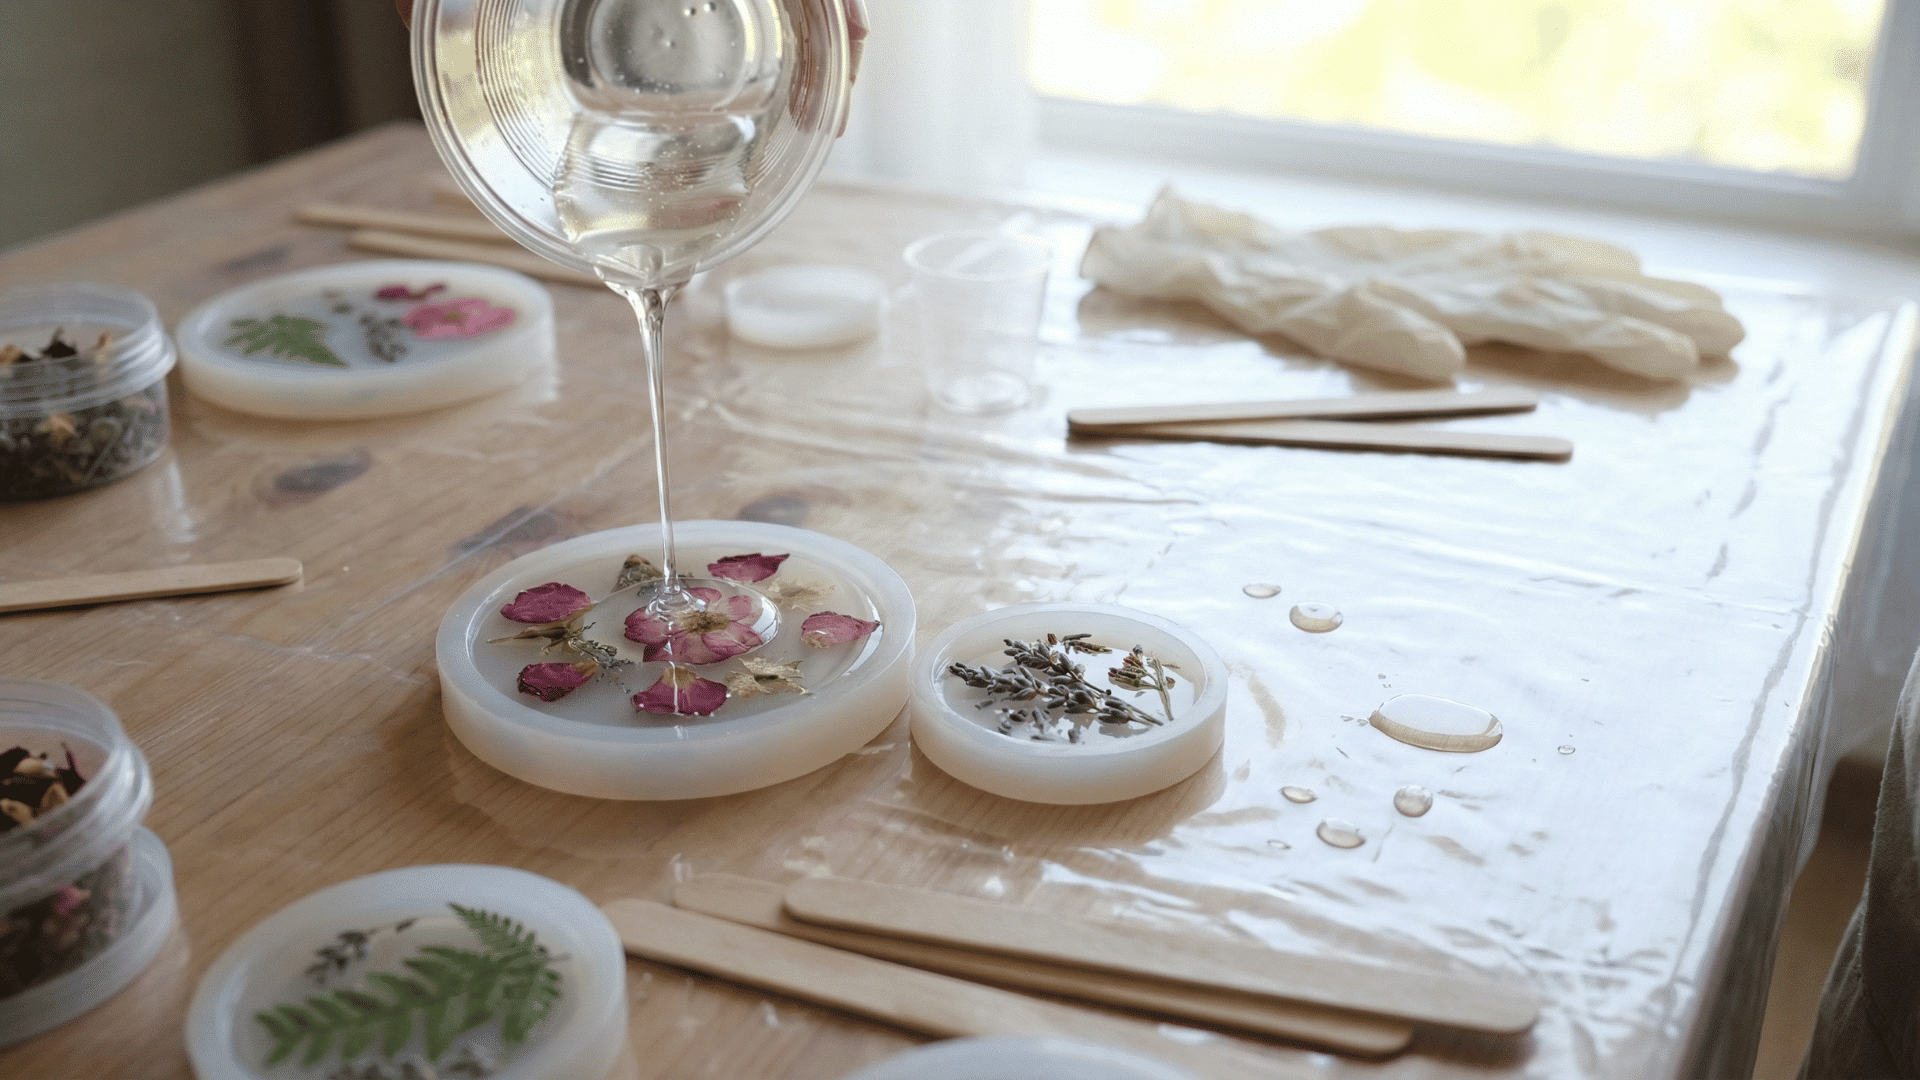
Mix resin according to package instructions in a well-ventilated space. Pour a thin layer into silicone molds and let it set slightly.
Place dried flowers on the partially set resin, then pour another layer to completely cover them. Let cure for 24 hours, then pop out of molds.
- Materials Required: Resin kit, silicone molds, dried flowers, mixing cups, stir sticks
- DIY Level: Medium
- Time Required: 30 minutes of work, 24 hours curing
33. Painted Wine Glasses (Spring Motifs)
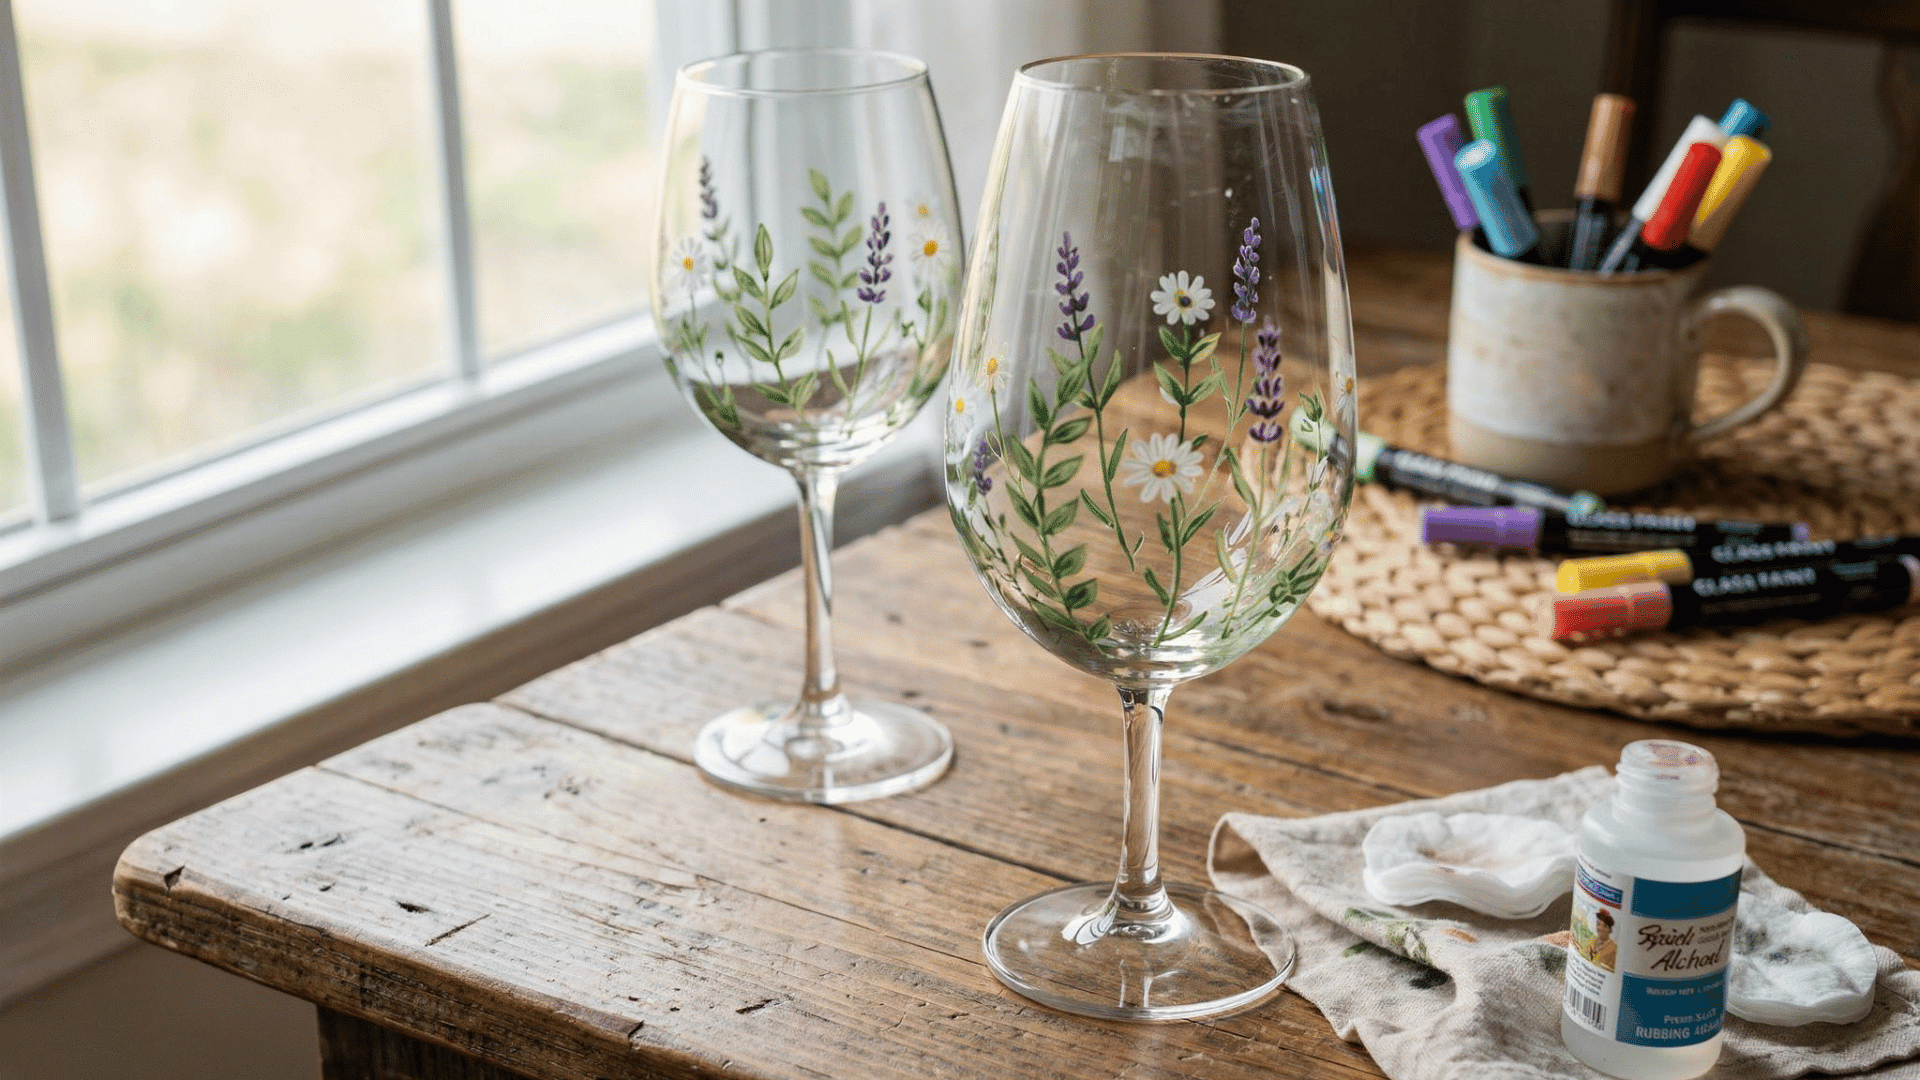
Clean glasses with rubbing alcohol and let them dry completely. Sketch your design lightly with a pencil if needed.
Apply glass paint in thin, even coats using special brushes or paint pens. Let each coat dry before adding details, then cure according to the paint instructions, for hand washing only.
- Materials Required: Wine glasses, glass paint pens or brushes, rubbing alcohol
- DIY Level: Easy
- Time Required: 30-45 minutes plus 24-hour cure time
34. Scrapbook-Style Spring Memory Page
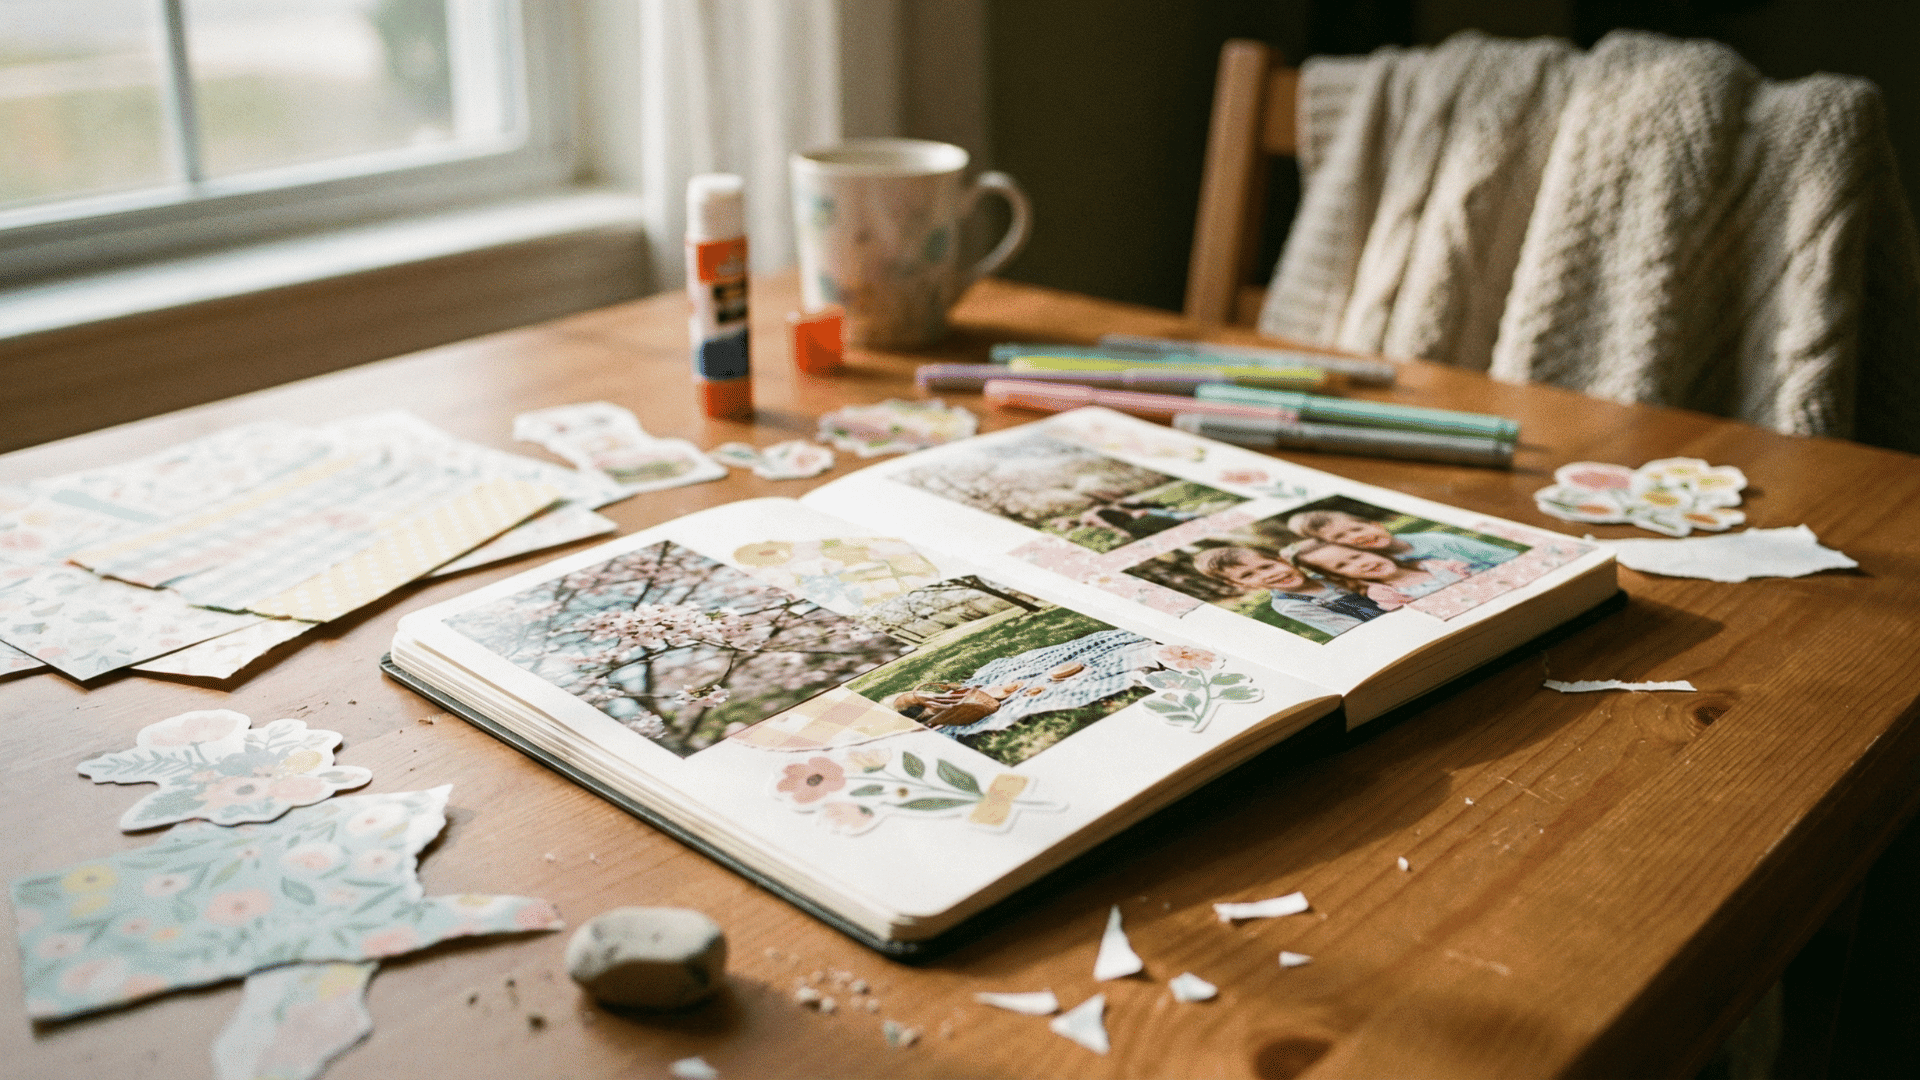
Choose photos from your spring activities and print them in various sizes. Arrange photos, decorative paper, and embellishments on the page without gluing first.
Once you’re satisfied with the layout, glue everything down permanently. Add journaling with pens to record dates and memories.
- Materials Required: Scrapbook, photos, decorative paper, stickers, glue, pens
- DIY Level: Easy
- Time Required: 1-2 hours per page
35. DIY Spring-Themed Vision Board
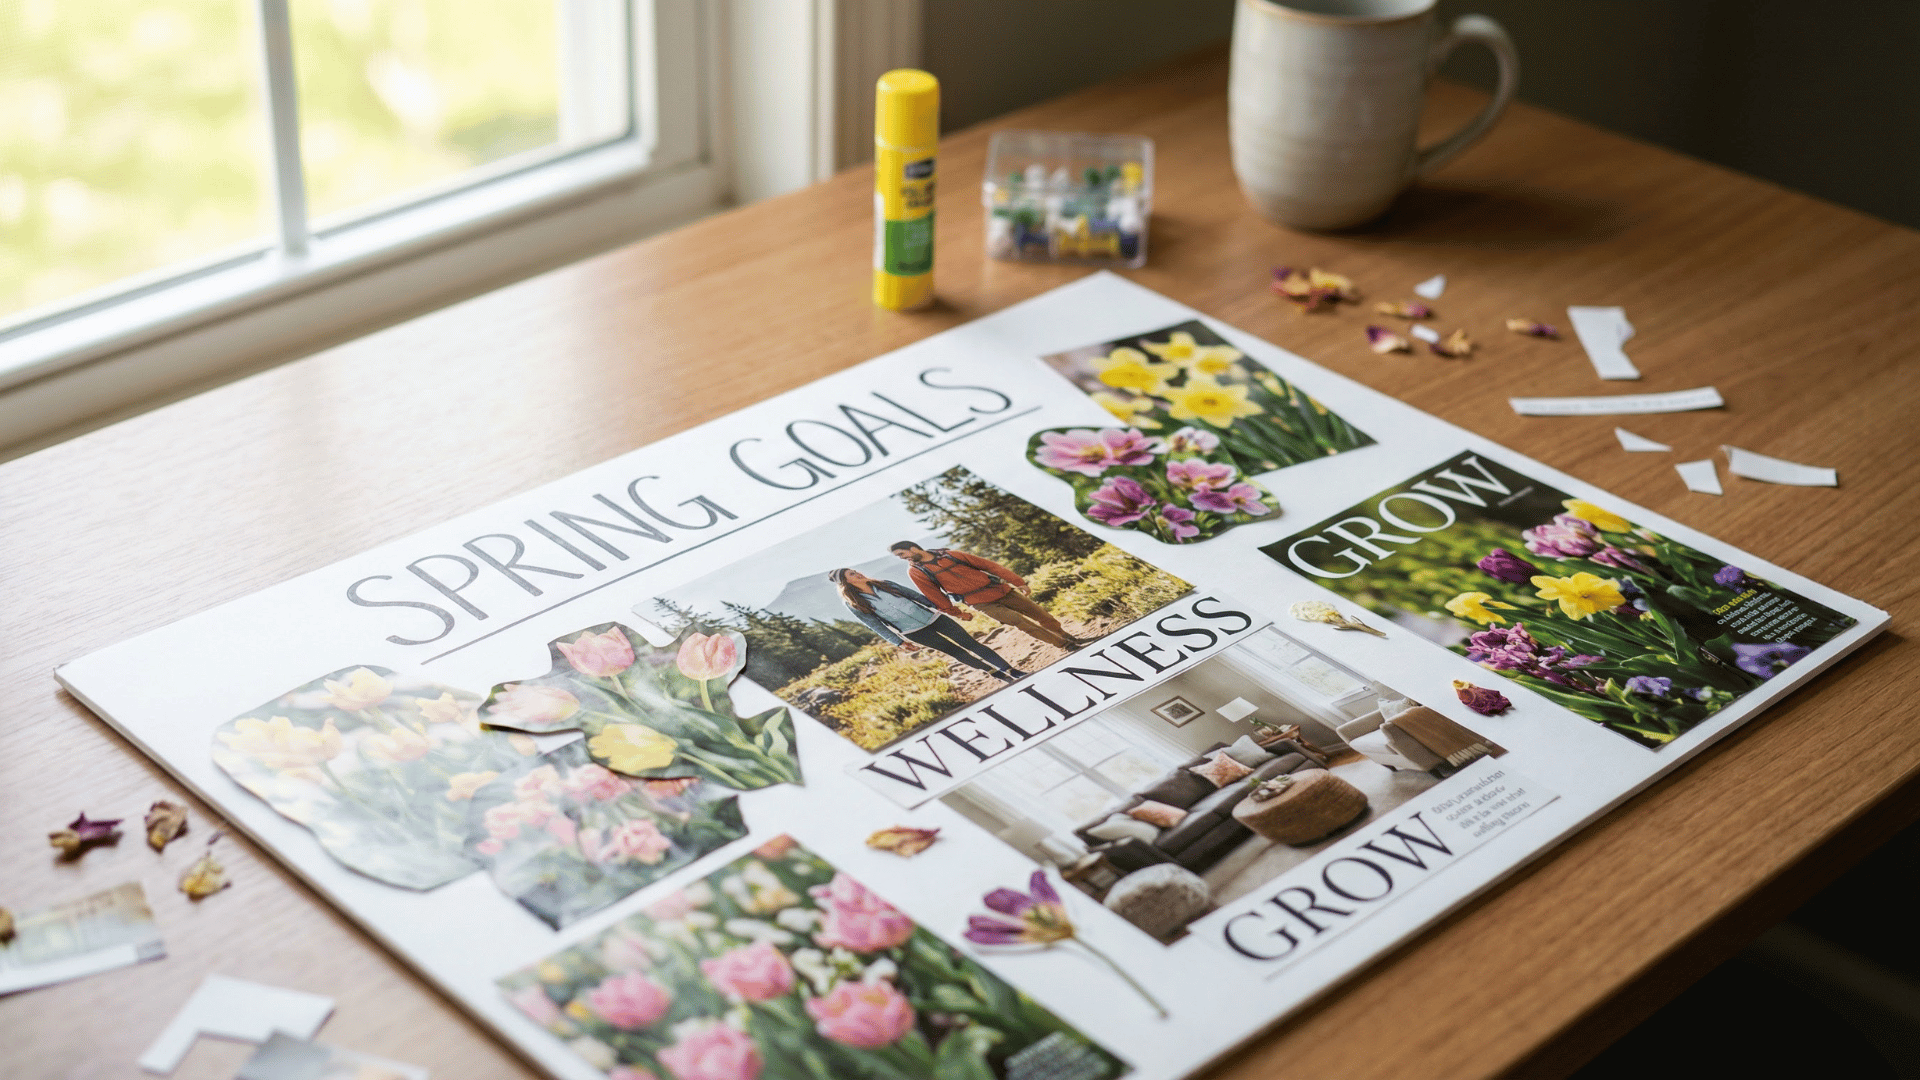
Flip through magazines and cut out images, words, and phrases that inspire your spring goals. Gather photos and quotes from online sources if needed.
Arrange everything on your board without attaching first to find the best layout. Glue or pin items in place and hang where you’ll see them daily.
- Materials Required: Poster board or cork board, magazines, printed images, pins or glue
- DIY Level: Easy
- Time Required: 1-2 hours
Simple Crafting Tips for Beginners
Starting your first spring craft can feel Stressful. These practical tips help you avoid common problems and enjoy the creative process.
- Set aside enough time so you don’t feel rushed or have to stop halfway through your project
- Keep all your supplies in one basket or box so everything stays organized and easy to find
- Choose projects that match your current skill level instead of jumping into complex designs right away
- Watch tutorial videos once or twice before starting if you learn better by seeing someone demonstrate
- Use supplies you already have at home first, before buying new materials from the store
- Join online craft groups or forums where beginners can ask questions and share their finished work
- Give yourself permission to make changes to patterns if something doesn’t work for your space or style
Final Thoughts
Spring crafting brings joy, relaxation, and beautiful homemade pieces to your space. You don’t need fancy skills or expensive supplies to begin. Just pick something that excites you.
Try painted rocks or mason jar vases as your first project. Both use simple materials and forgive mistakes easily. Set aside an afternoon this weekend and see what you create.
Your home deserves that personal touch, and you deserve time to unwind.
What spring craft are you most excited to try first? Drop your questions or ideas in the comments below!

